Create a Calculated column in Dataverse
In this exercise, we will learn how to create a Calculated column in dataverse table. Calculated columns are ones’ which are based on some calculation, the calculation may refer the columns of the table in which the calculated columns are created. Please note that the Calculated columns are read-only, we cannot directly write in the calculated columns, their values are automatically calculated and populated in the dataverse table according to the formula specified for the calculated column.
Step 1: Sign in to Power Apps with the organizational account.
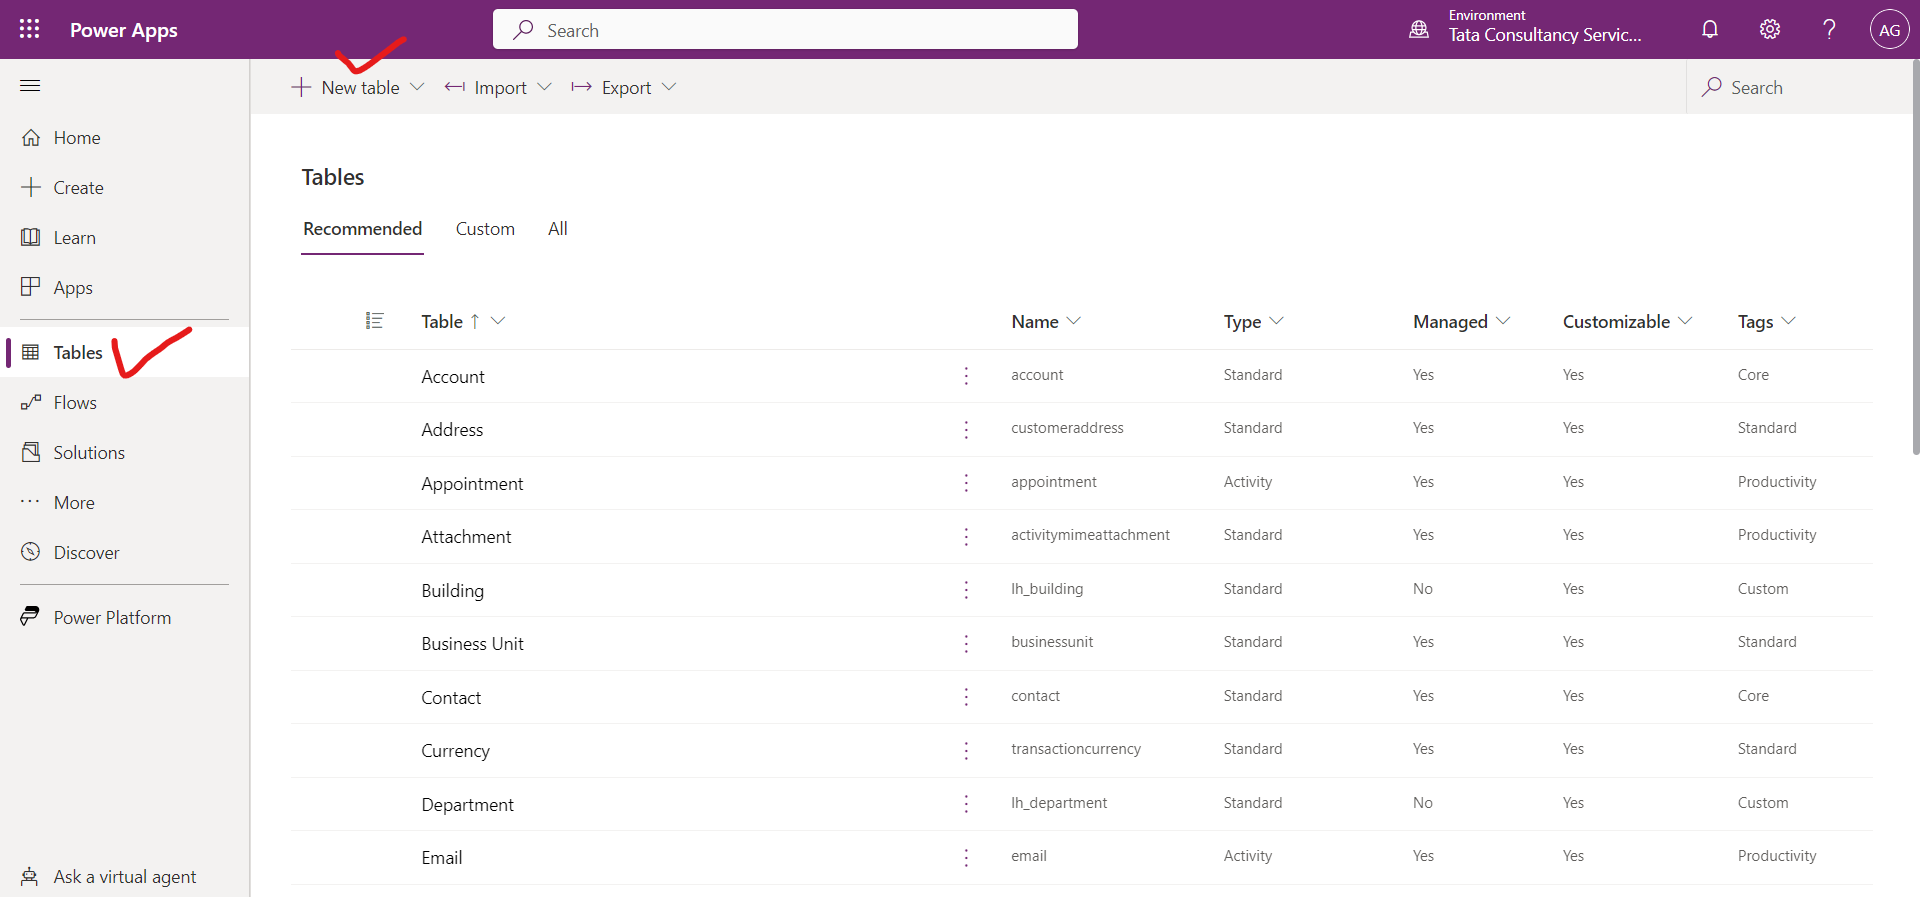
Step 2: Select Tables from the left navigation menu.
Step 3: We will see a list of tables, from that we can select any one, or we can create a new table by clicking on + New table.
Step 4: Give table a name called Gas Cylinder.
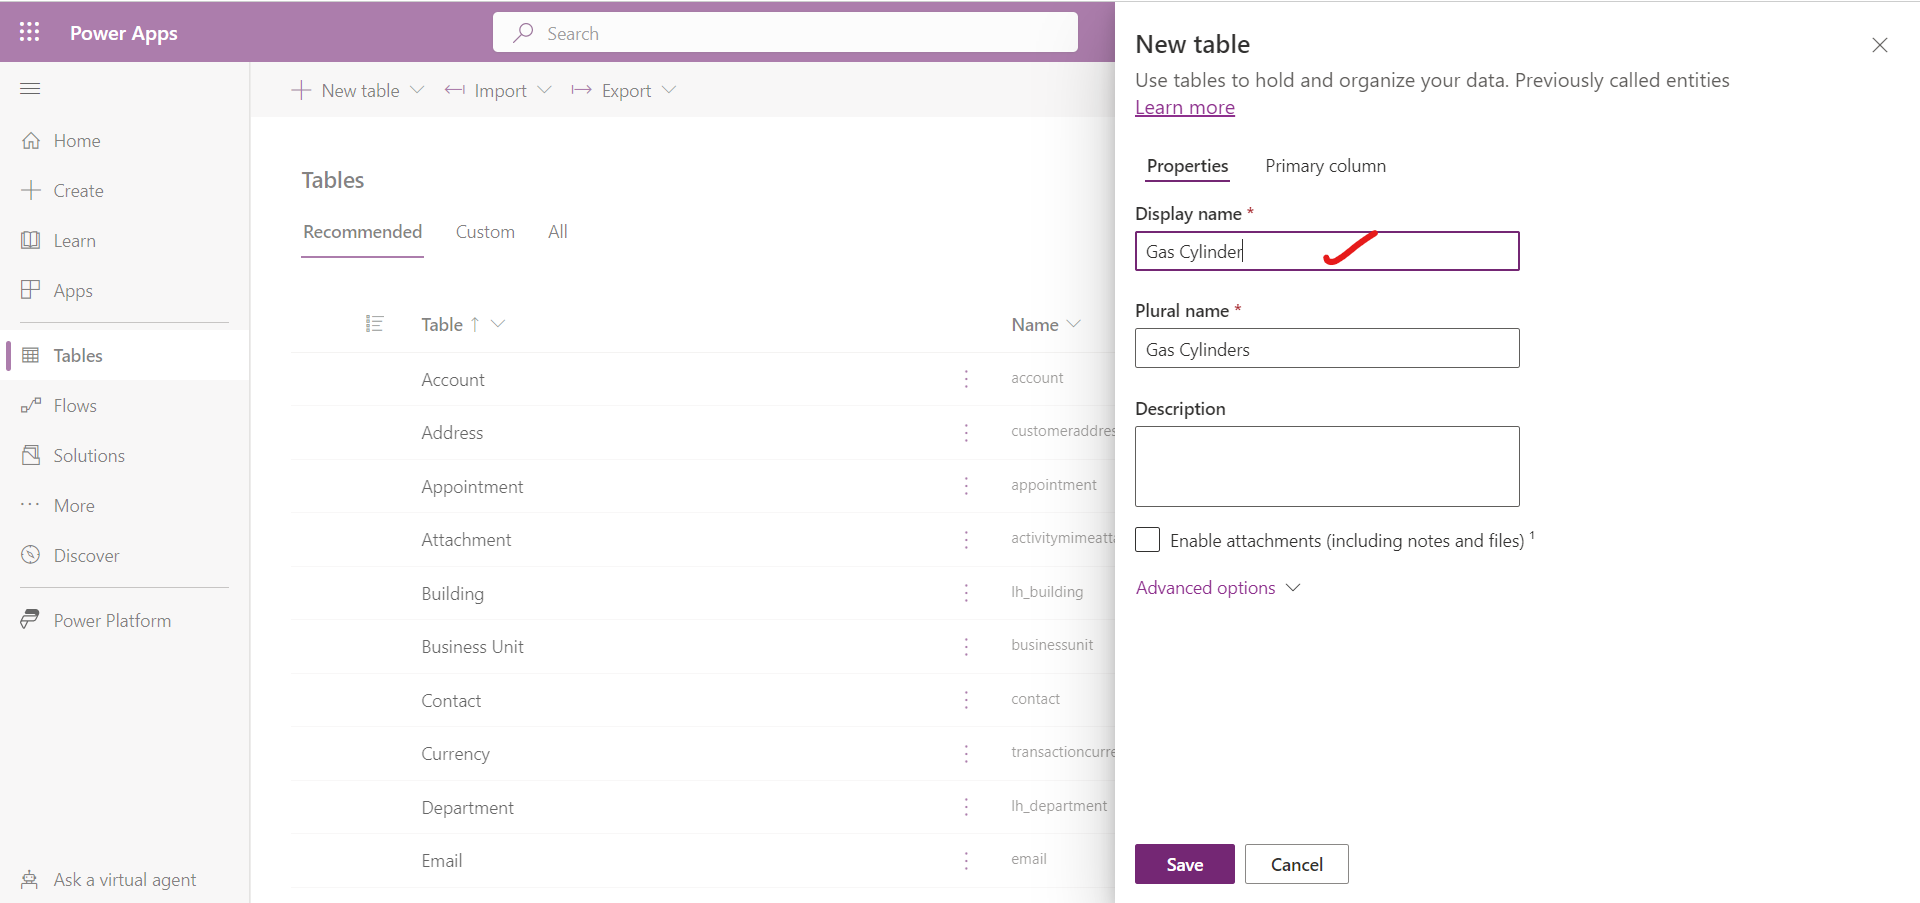
Step 5: Select Save at the bottom. After saving we can see our table in the list of tables.
Step 6: Select the Gas Cylinder table, we can see the following screen.
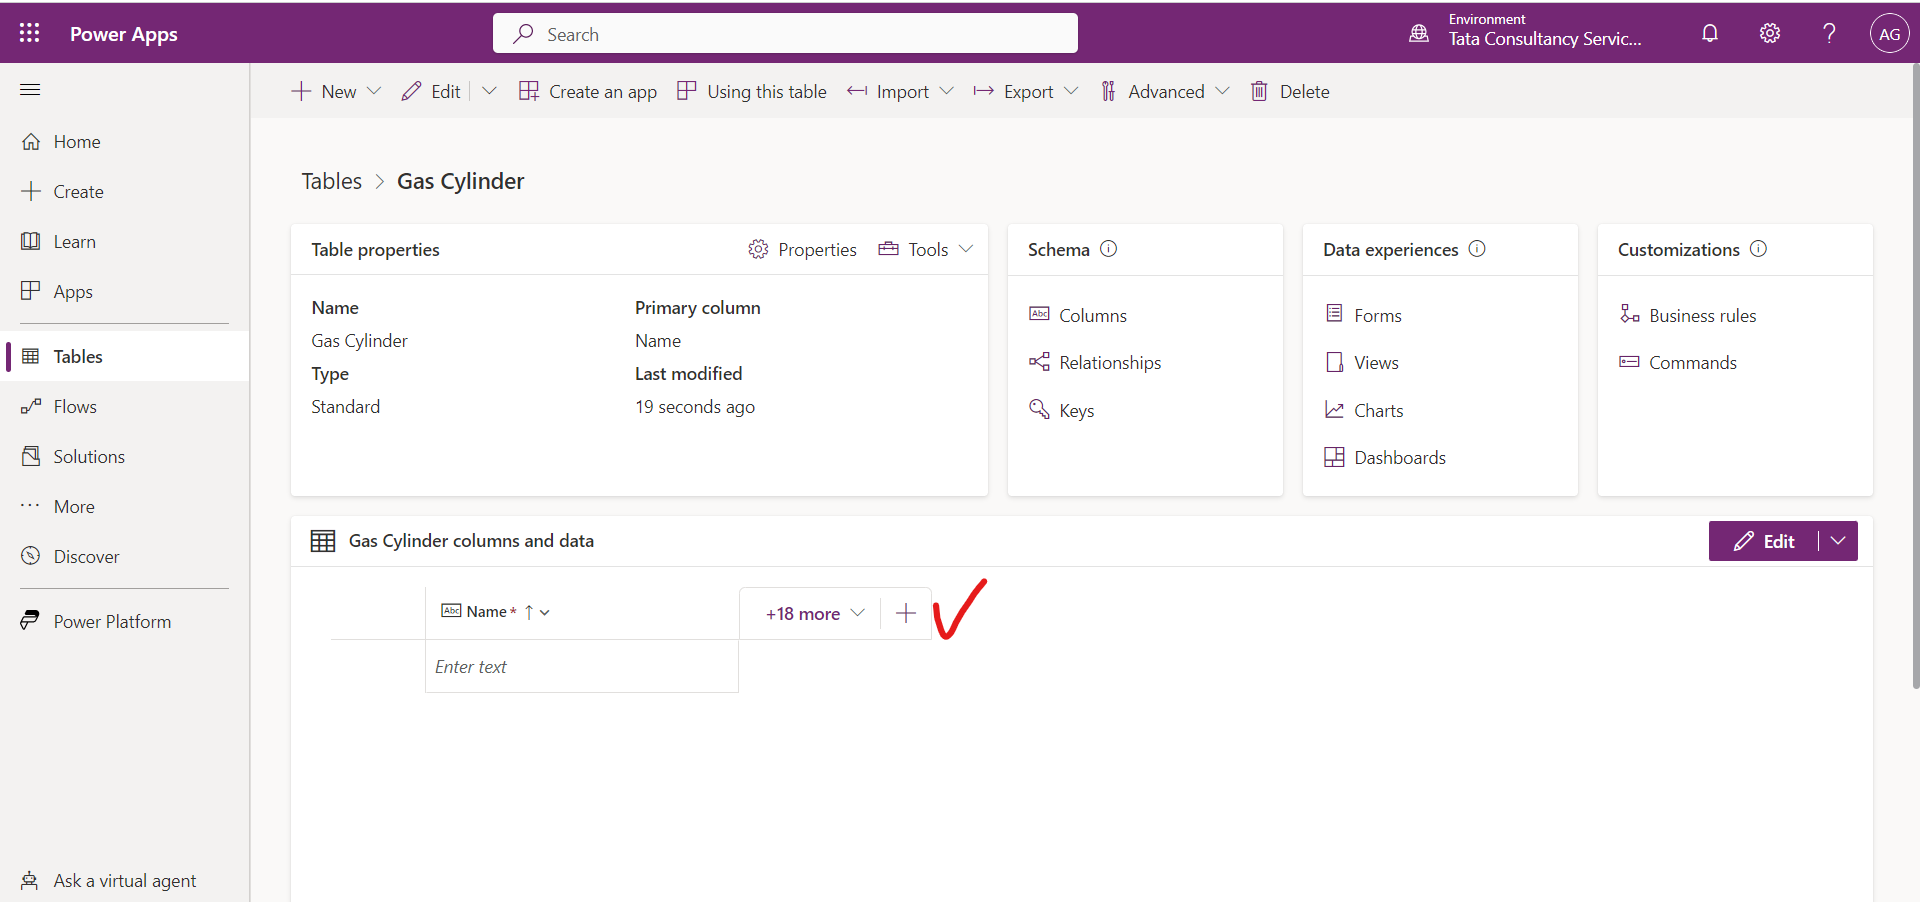
Step 7: Click on the + icon to add a column, and enter the following information.
| New Column | Entry Value |
|---|---|
| Display Name | Price |
| Data Type | Currency |
| Behaviour | Simple |
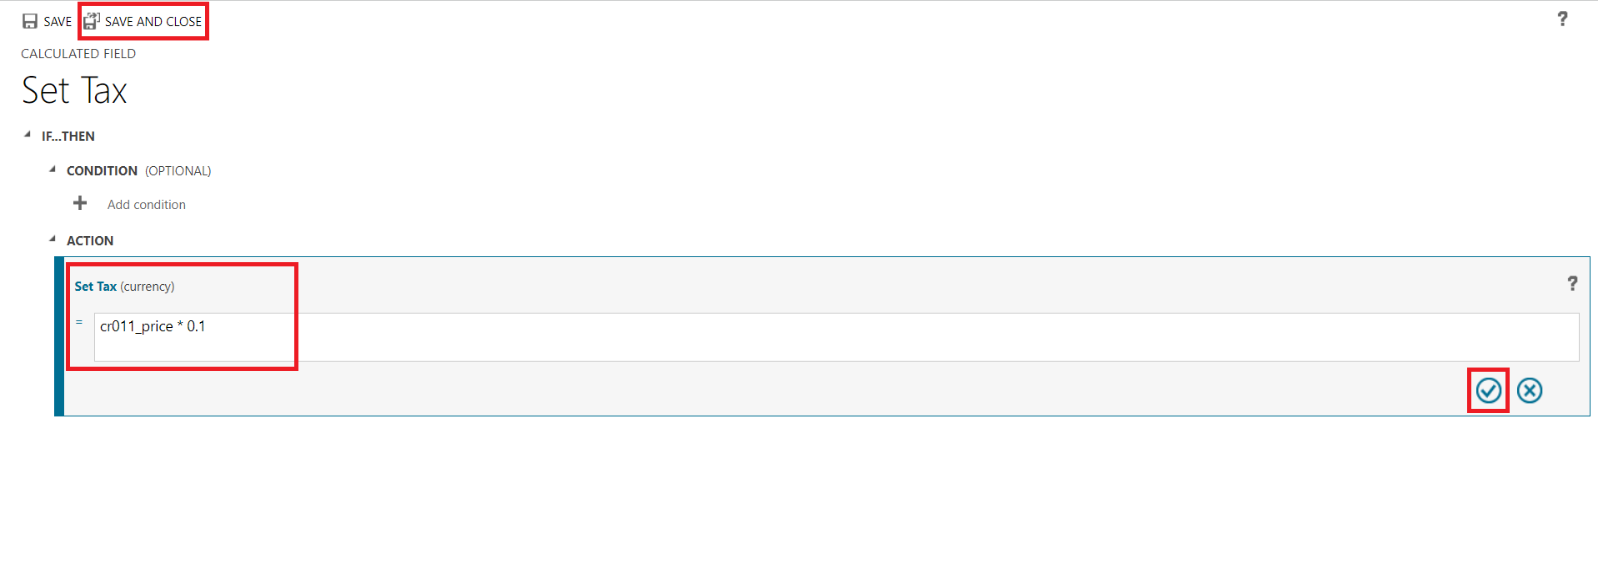
Step 11: In the Action section, provide the formula for the calculated column.
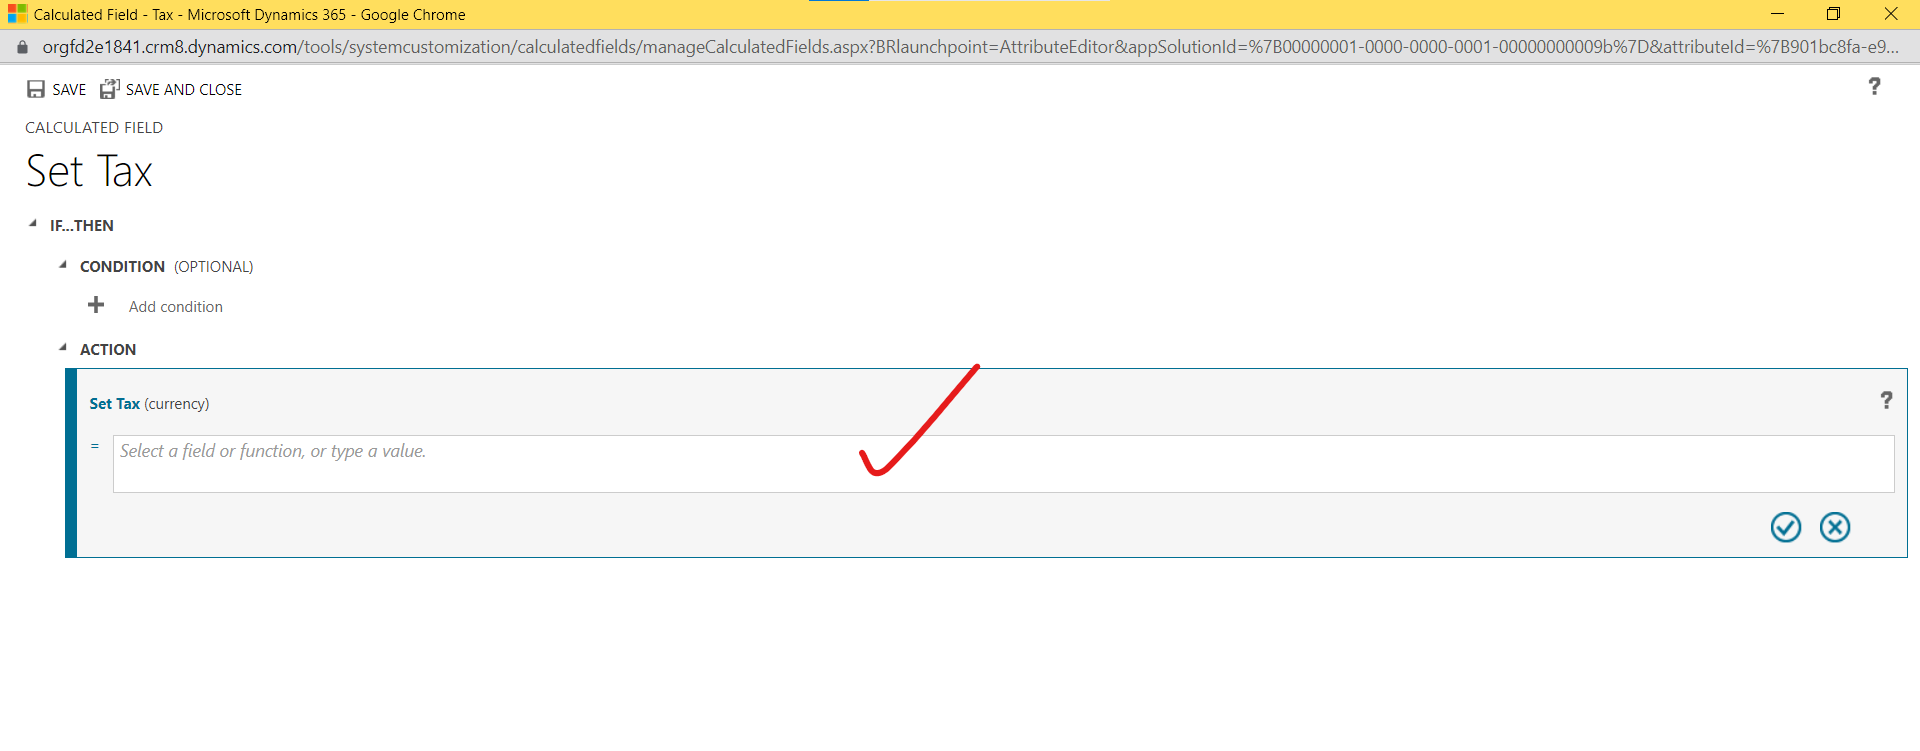
In the Set Tax action formula field, next to the equal sign, search for the price field by entering "price" in the formula field. Select the price data column that appears below the formula entry field.
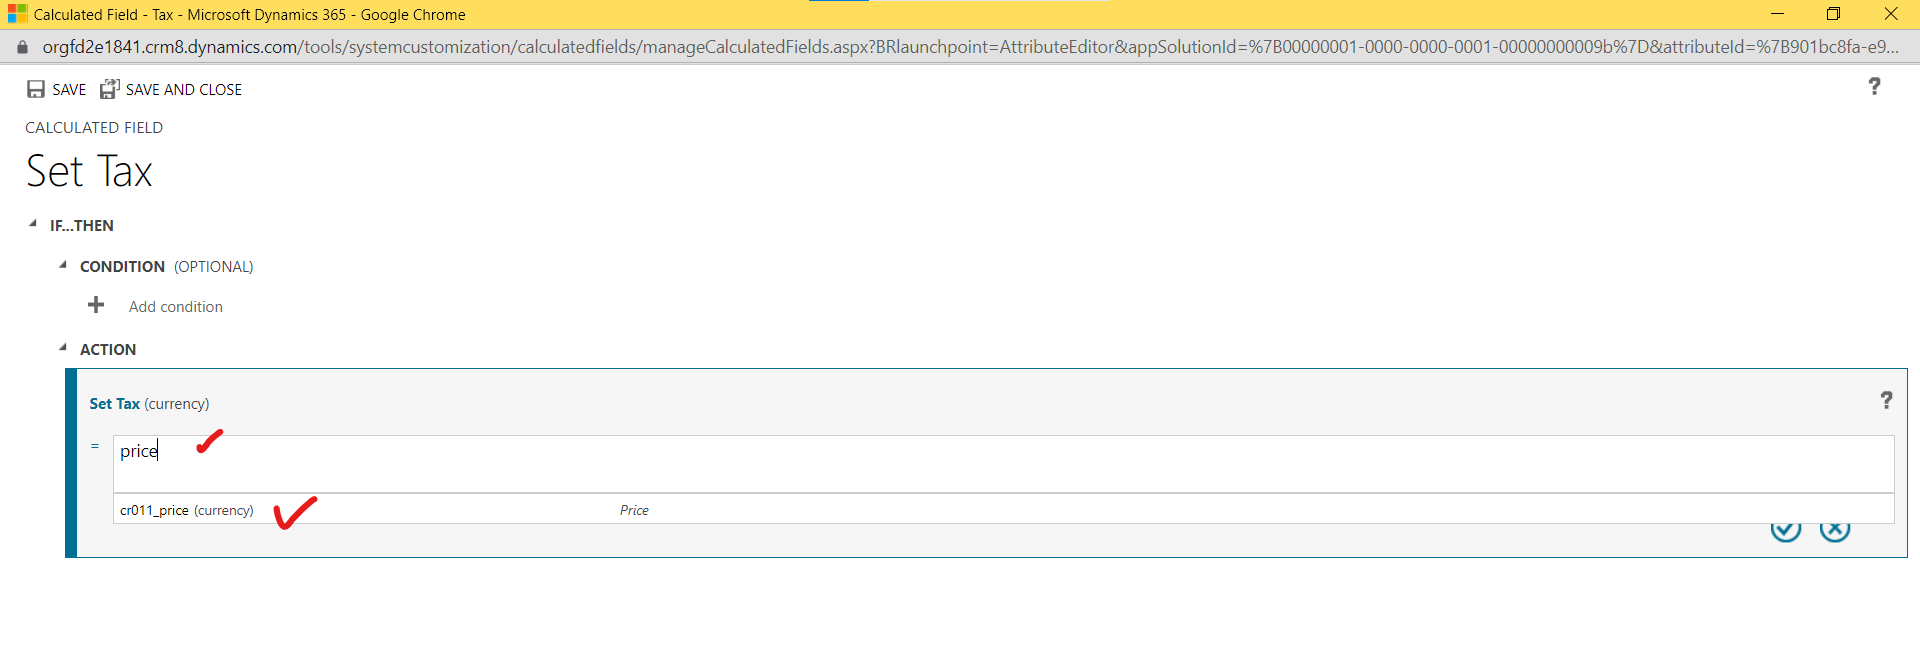
Note in the formula the columns logical name is written. The crXXX_ will be specific numbers and letters that define our environment. The formula entry will auto-suggest options as we start to type the column names.
Step 12: Complete the tax calculation by multiplying .05, as shown in the following screenshot, and then select the check mark button to finish creating the calculation.

Step 13: Select Save to save the work and Save and Close button at the top of the window to process the calculated field, and we come back to our New column pane.

Step 14: Select the +[n] more button in our columns and data pane (where [n] is represented by an integer describing how many other columns are in our table). A Show existing column popup appears where you can see a list of all the columns in our table, with a checkmark next to the ones that are currently displayed.
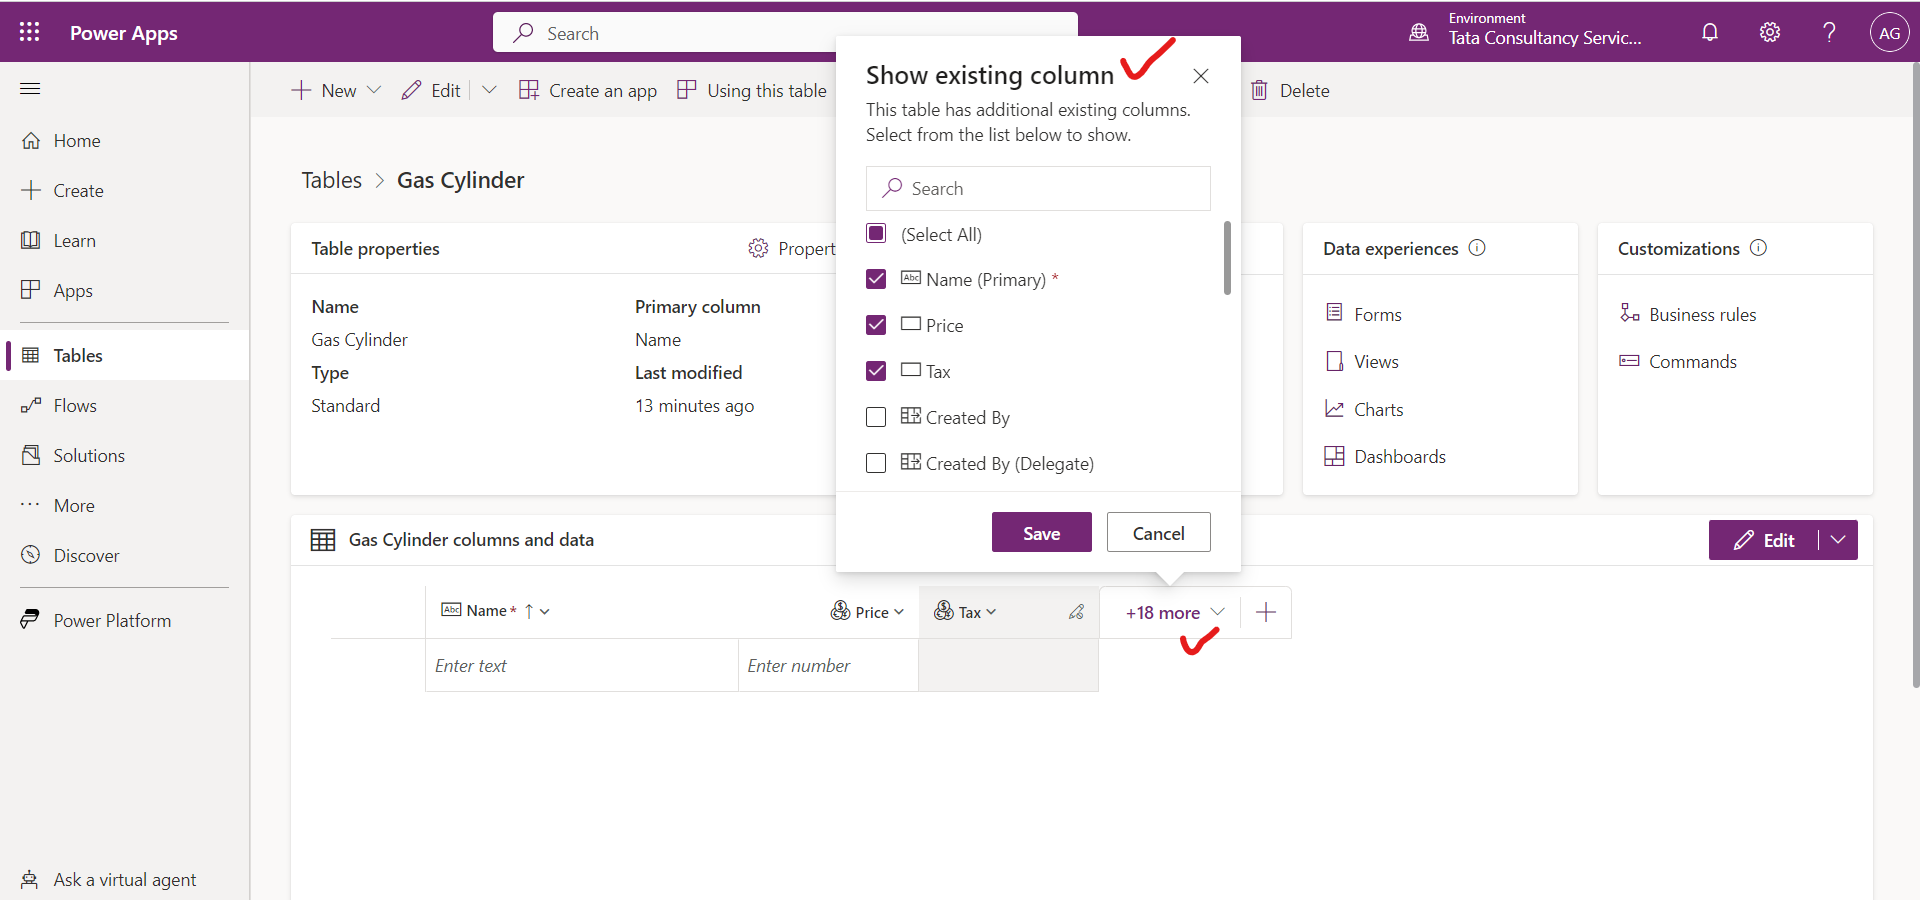
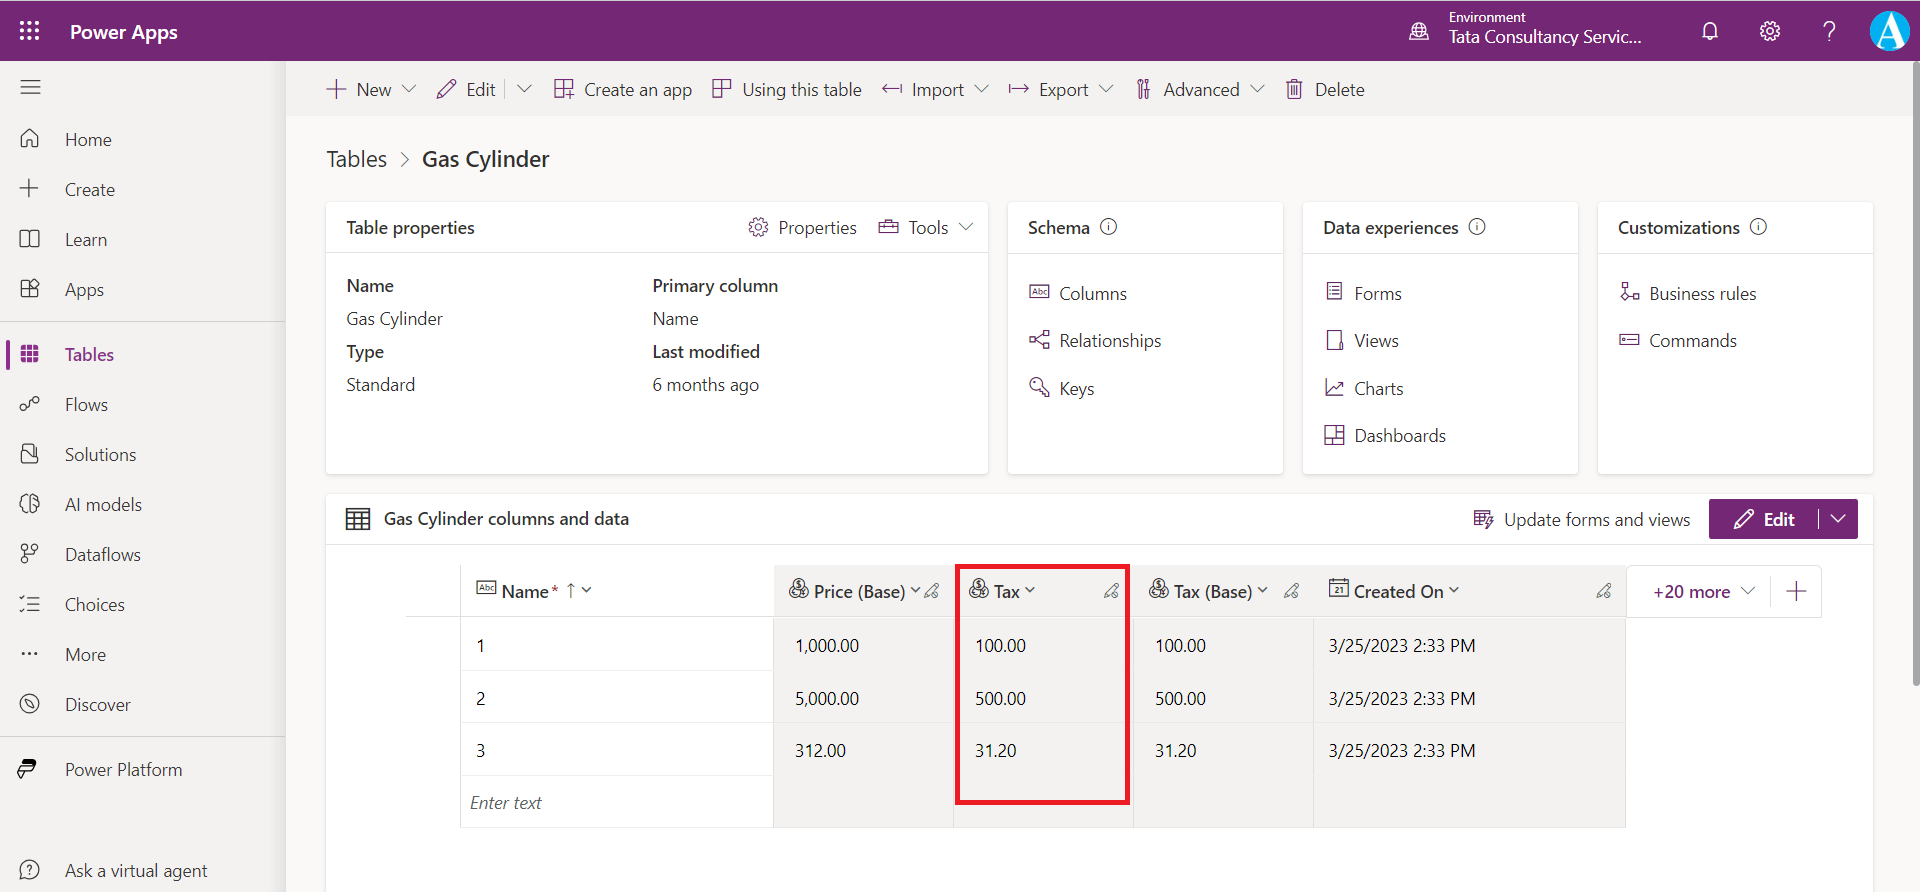
Step 15: New Price and Tax columns are shown in the Gas Cylinder columns and data table.
Add the two more columns in the view Price (Base) and Tax (Base).
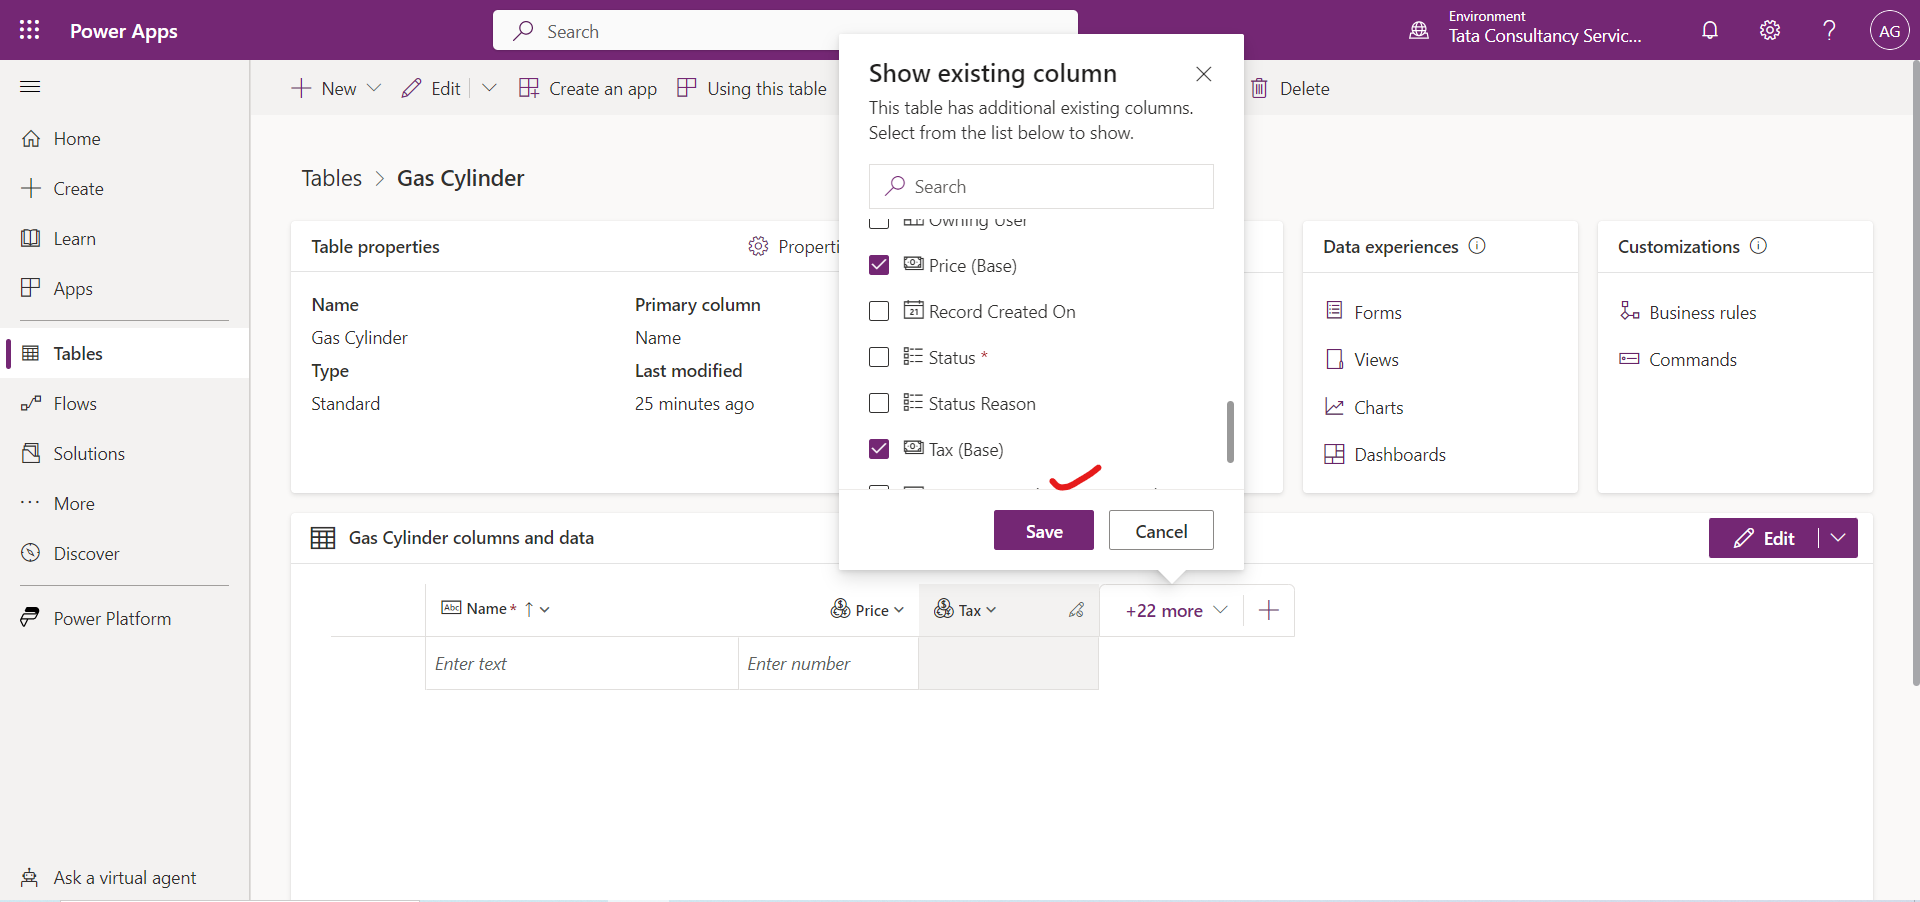
Step 16: Let’s add some data into the table to test out the calculations for our Tax column. We can do it directly in our columns and data pane. When we enter a value, notice how our Tax value and our Price (Base) columns automatically populate.
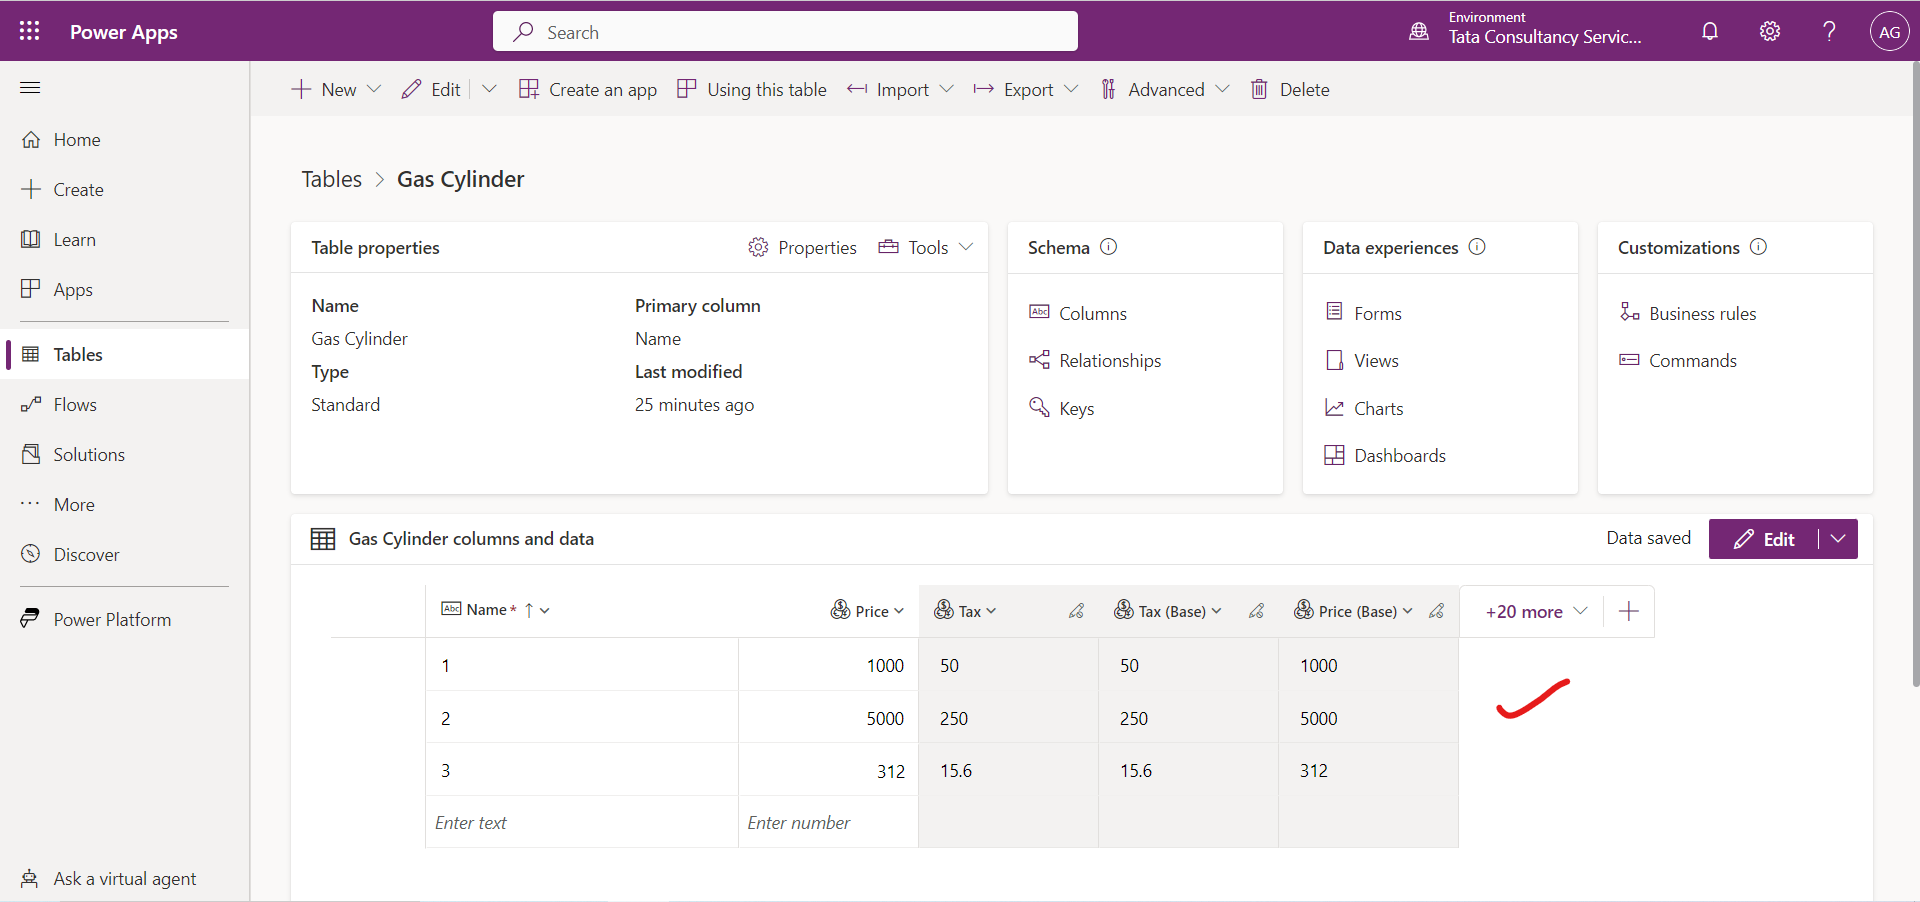
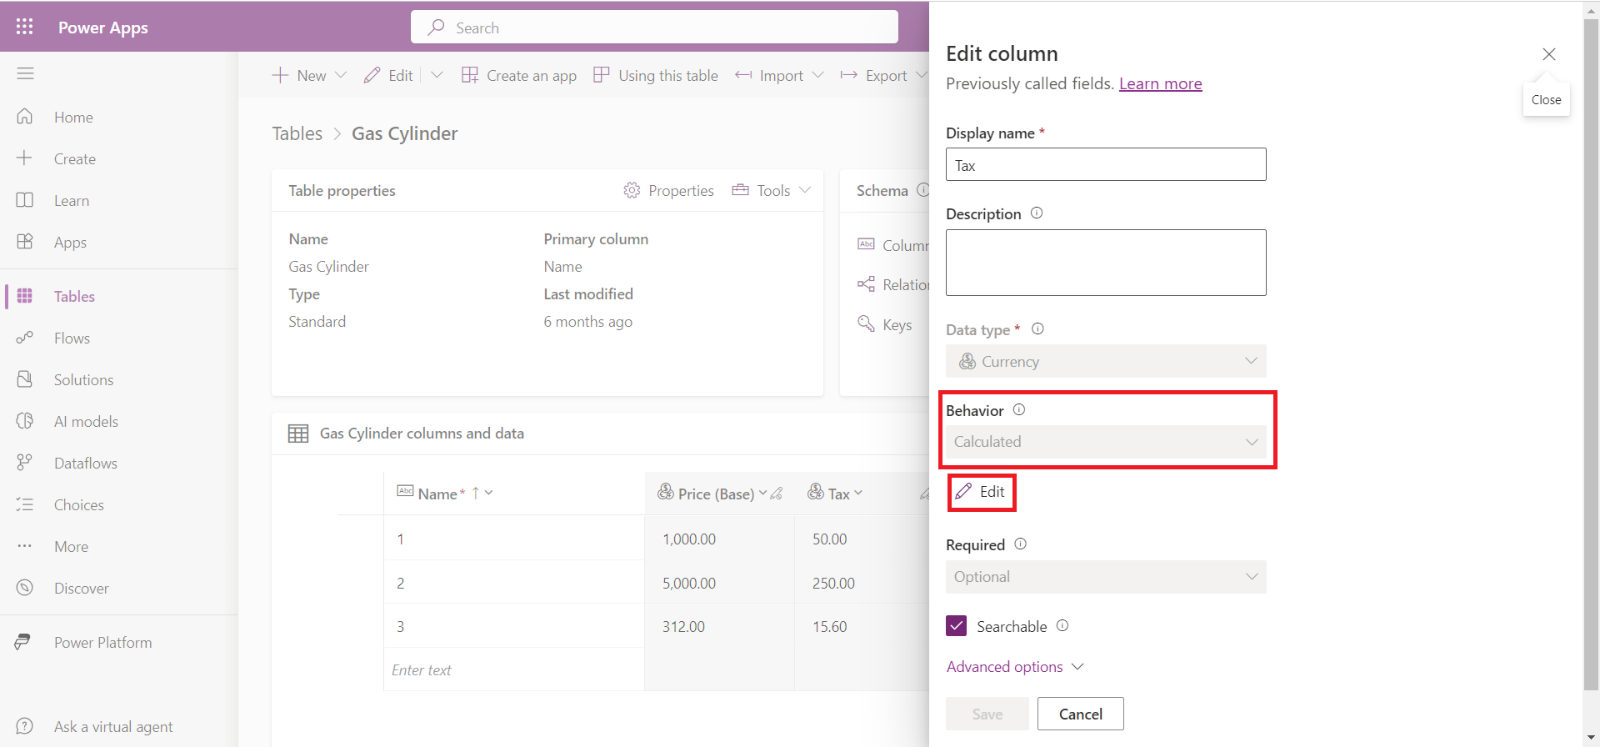
Step 17: We can change the formula for the calculated column even later also, by editing the column.
Click on Edit in the Edit column pane.
Edit the formula and click on SAVE AND CLOSE the changes.
We can see that the change is reflected in the existing values also.
