Data table control in Power Apps
The Data table control in Power Apps is a powerful tool for displaying tabular data from a data source, such as a SharePoint list, Excel workbook, or SQL Server database.
To add a Data table control to our app, follow these steps:
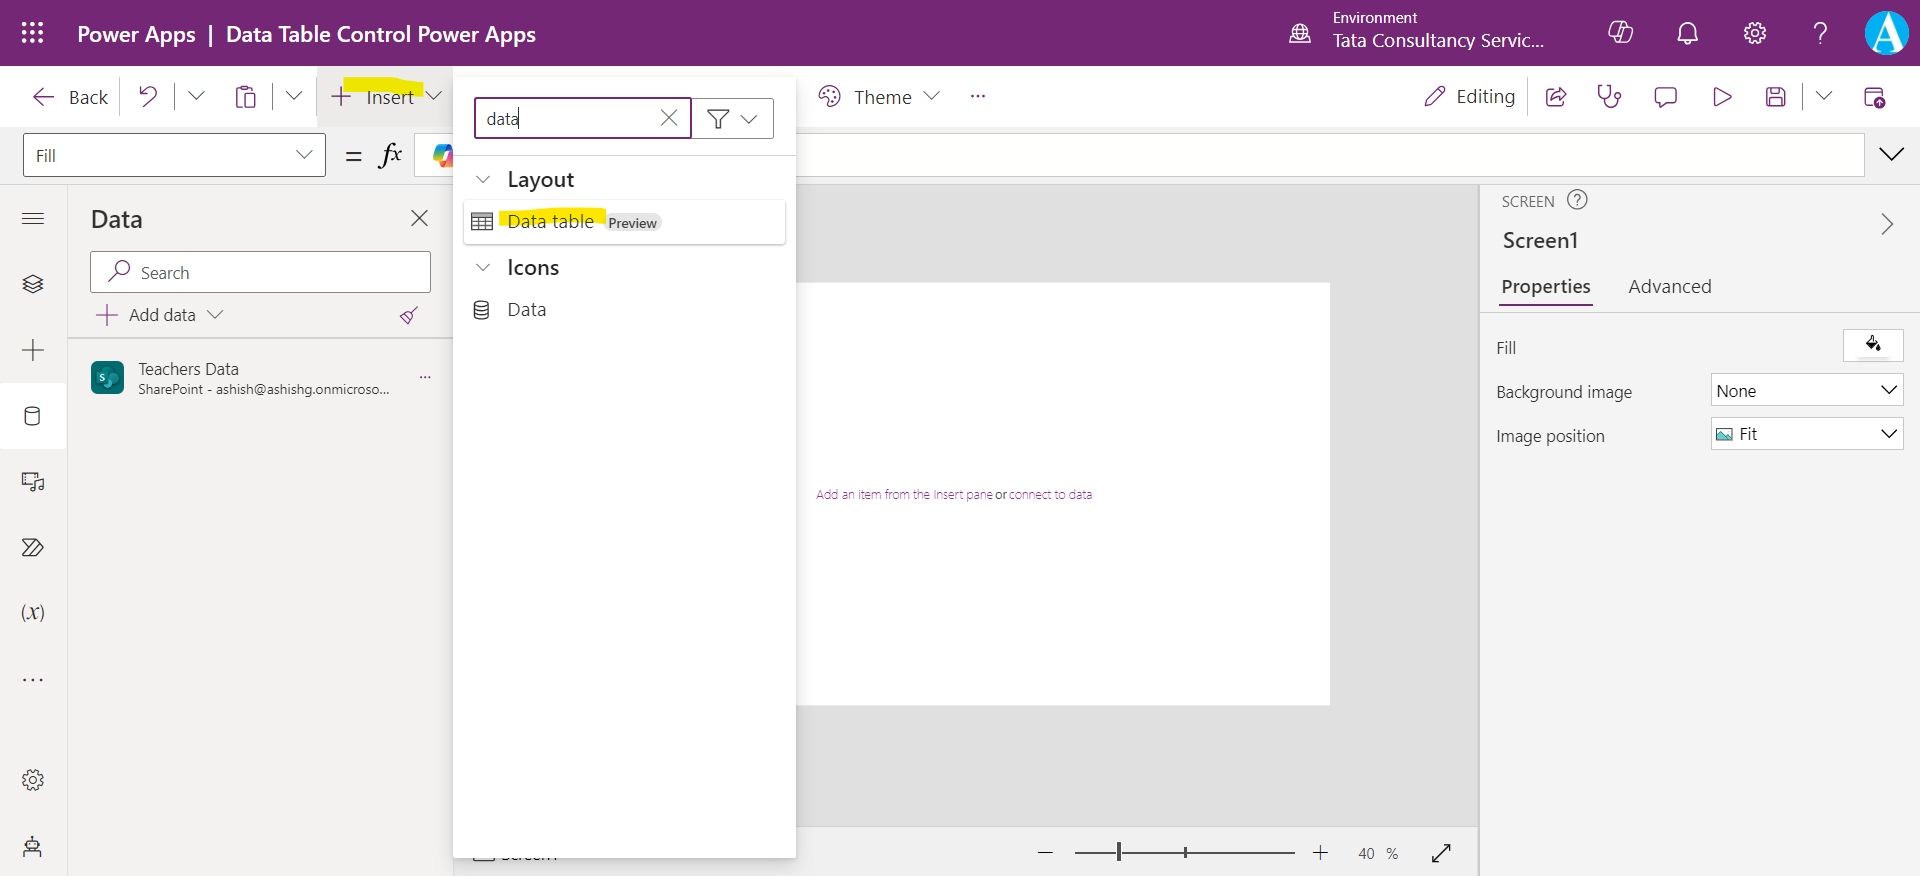
Step 1: In the Power Apps Studio, go to the + Insert tab in the ribbon and select the Data Table control.
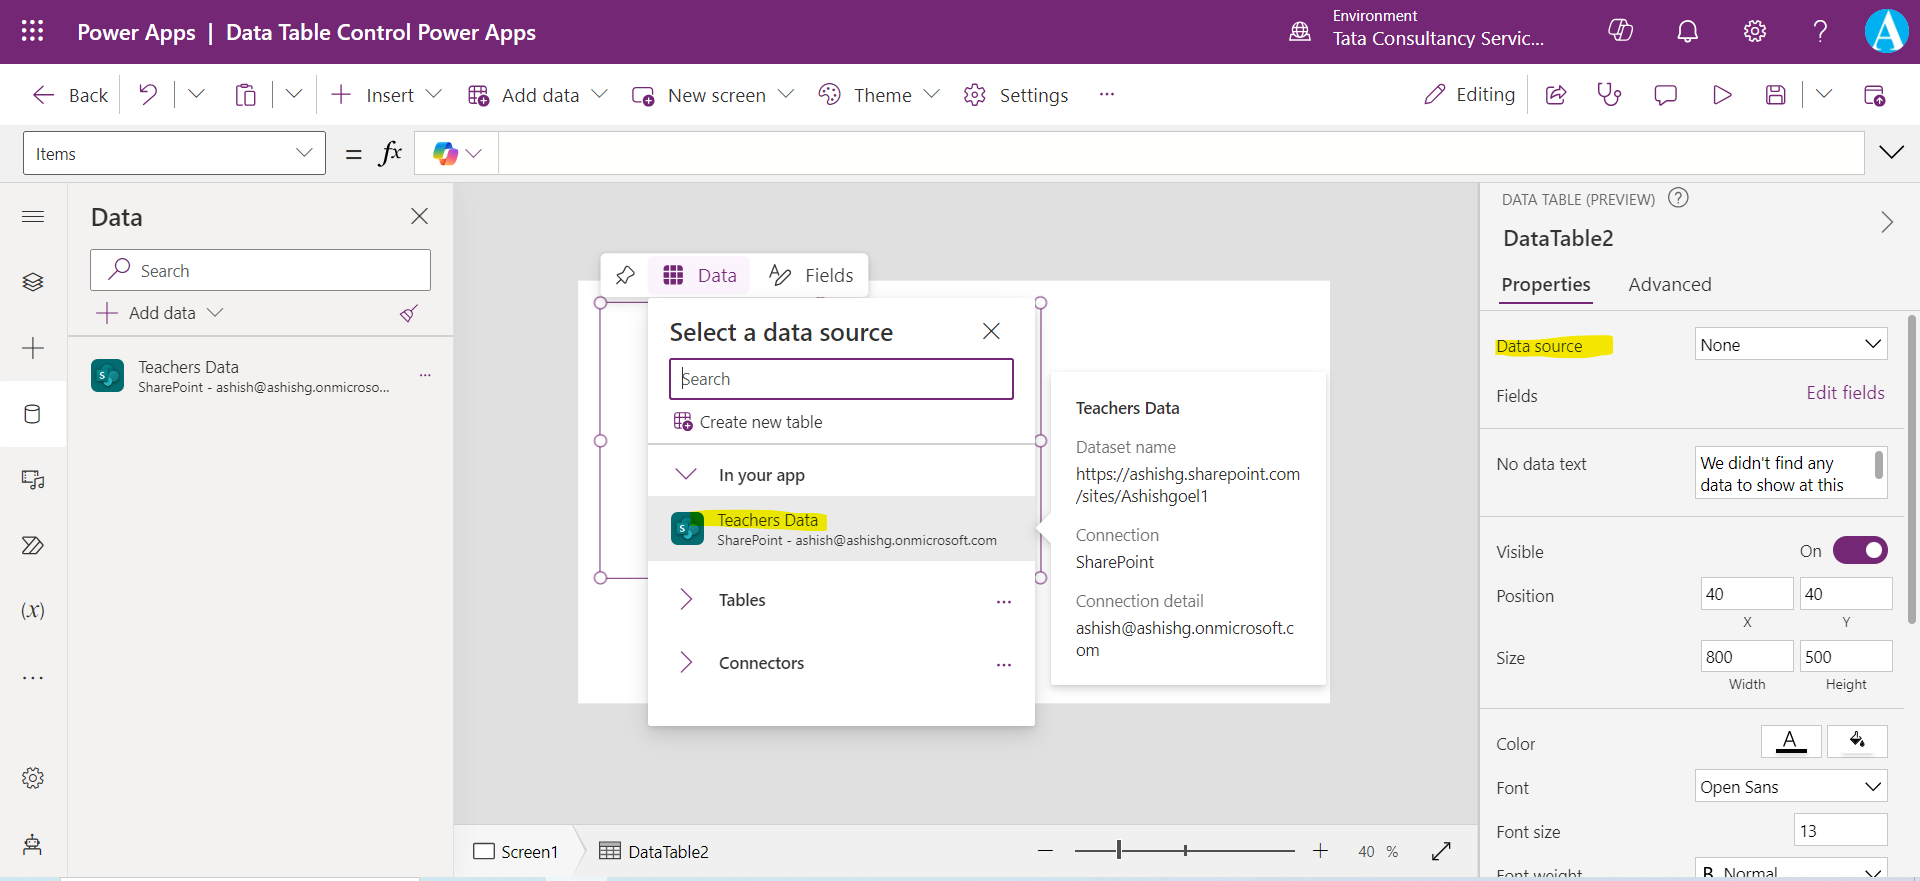
Step 2: Connect the Data table control to our data source by selecting the appropriate table or list from the Data source pane. We are specifying the datasource in the Items property of the control.
Step 3: We can customize the appearance and behavior of the Data table control using the Properties pane.
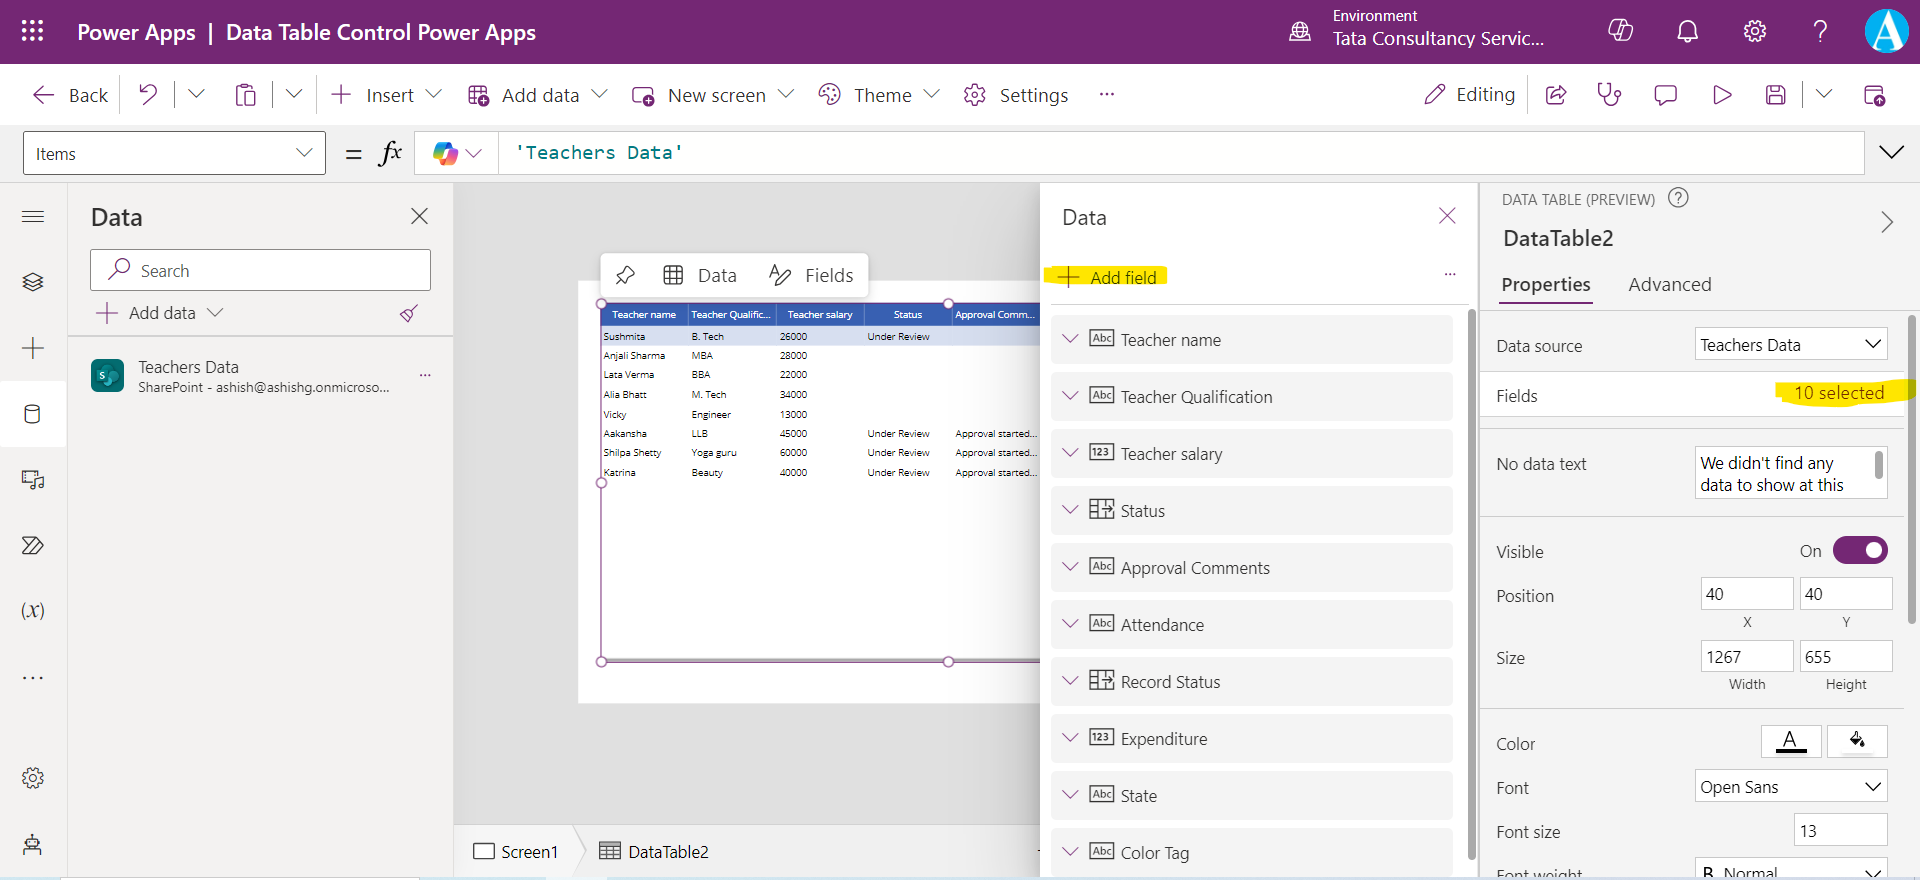
The Data table control shows a dataset in a format that includes column headers for each field that the control shows. As an app maker we have full control over which fields appear and in what order. From the Fields we can add, remove or change the order of fields.
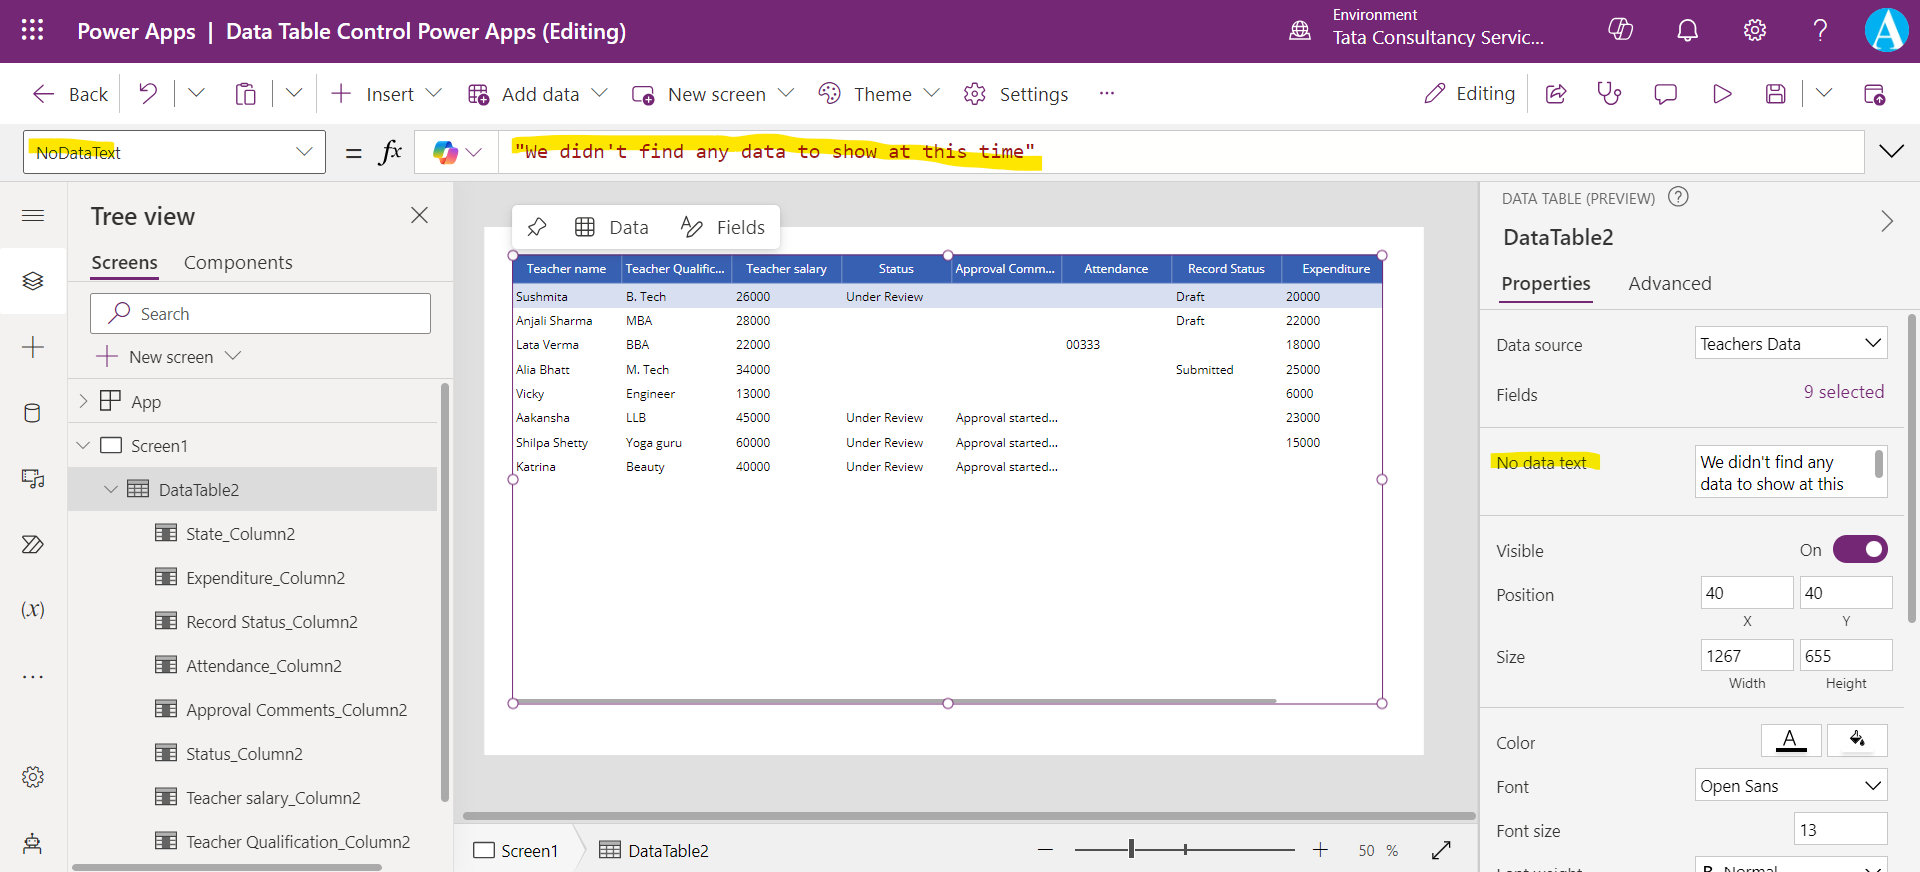
Step 4: There is one property NoDataText which specifies the message that the user receives when there are no records to show in the Data table control.
Step 5: The FieldDisplayName property of a column inside a data table, defines the display name for the selected column. We can change it according to our need.
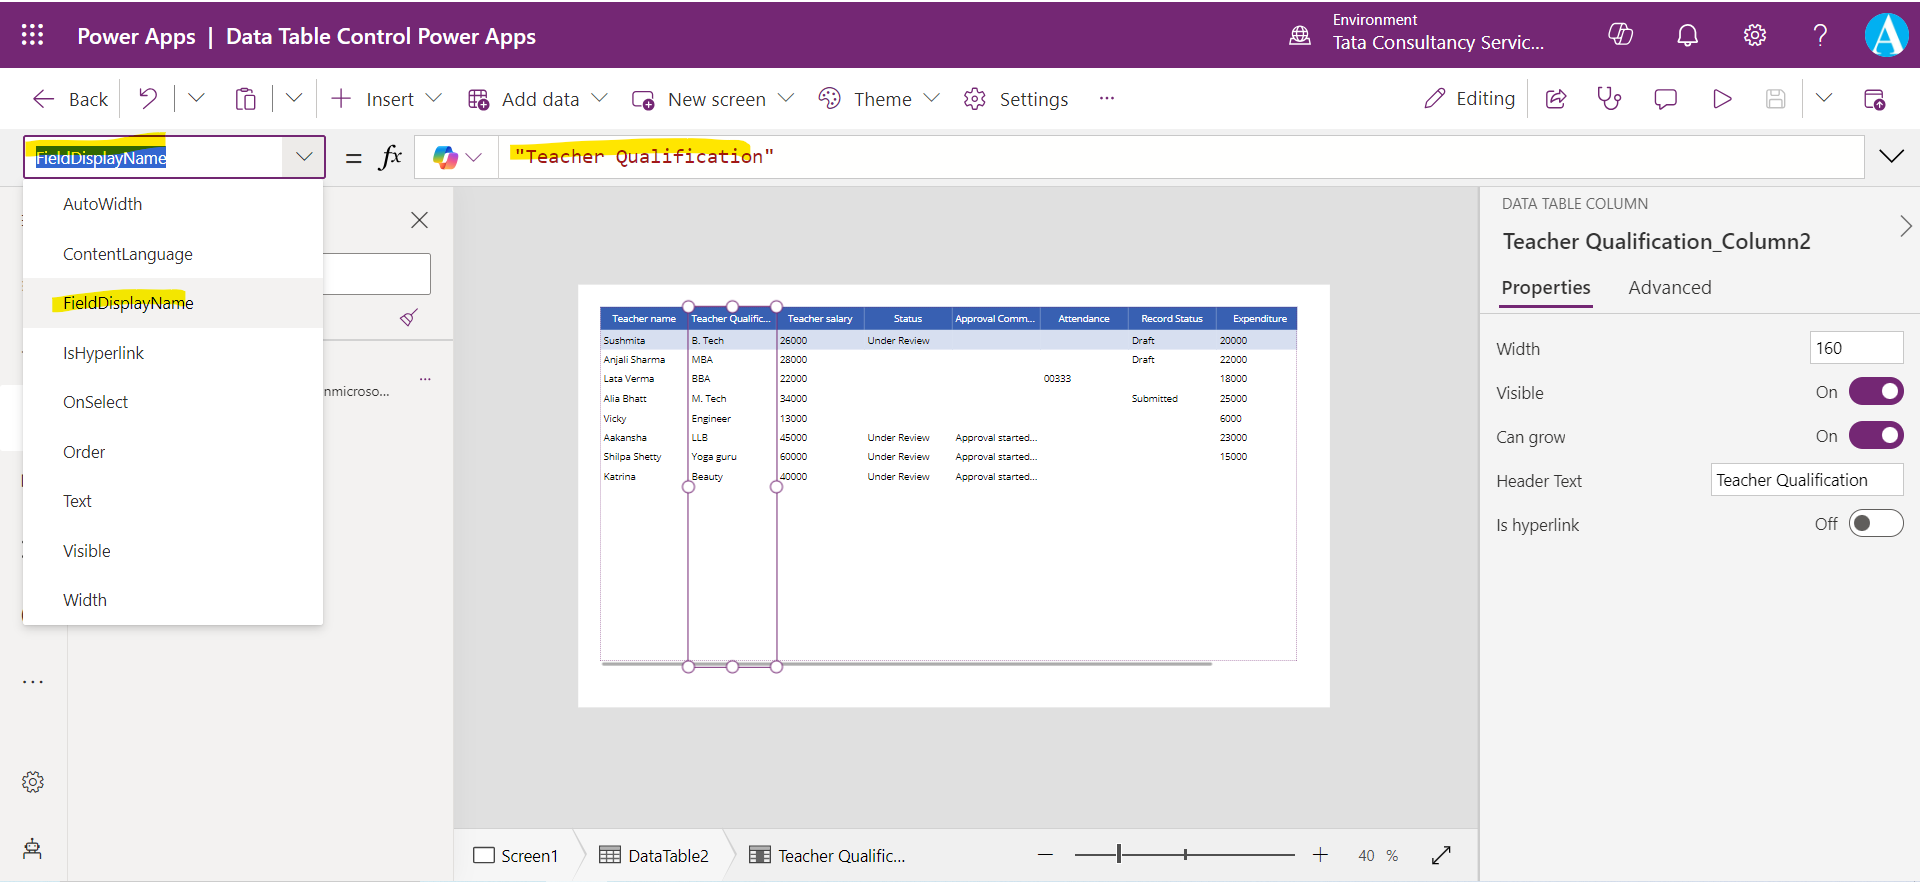
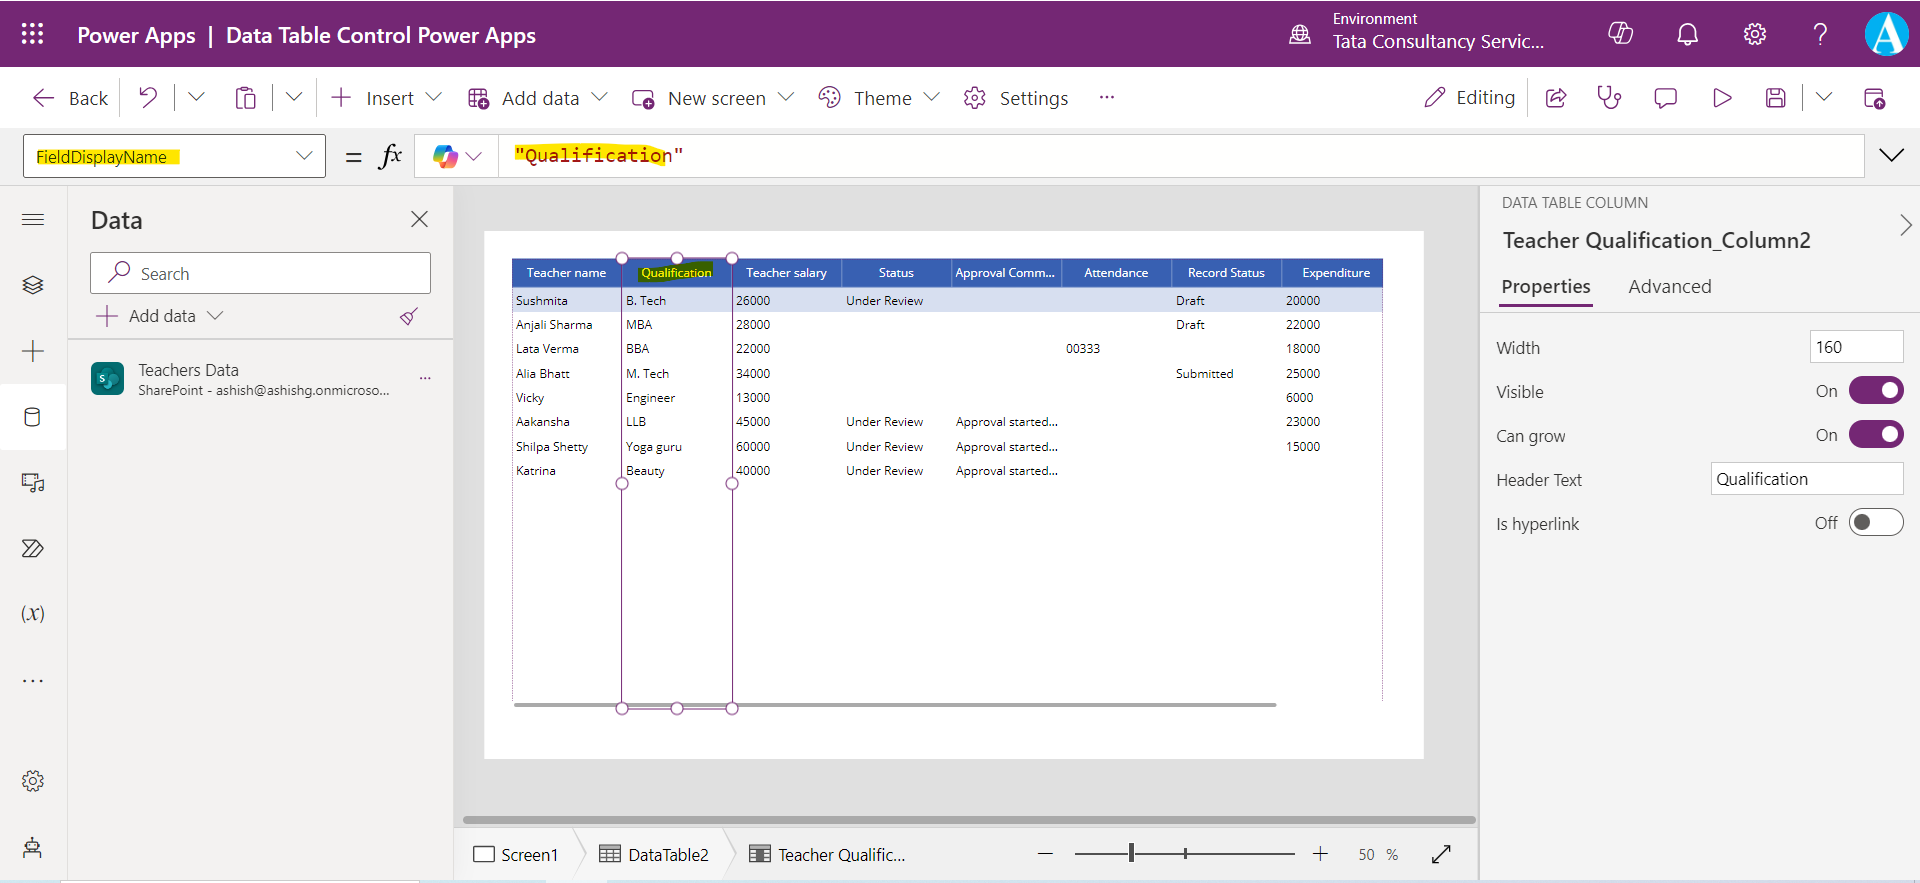
For example, we have changed "Teacher Qualification" to "Qualification".
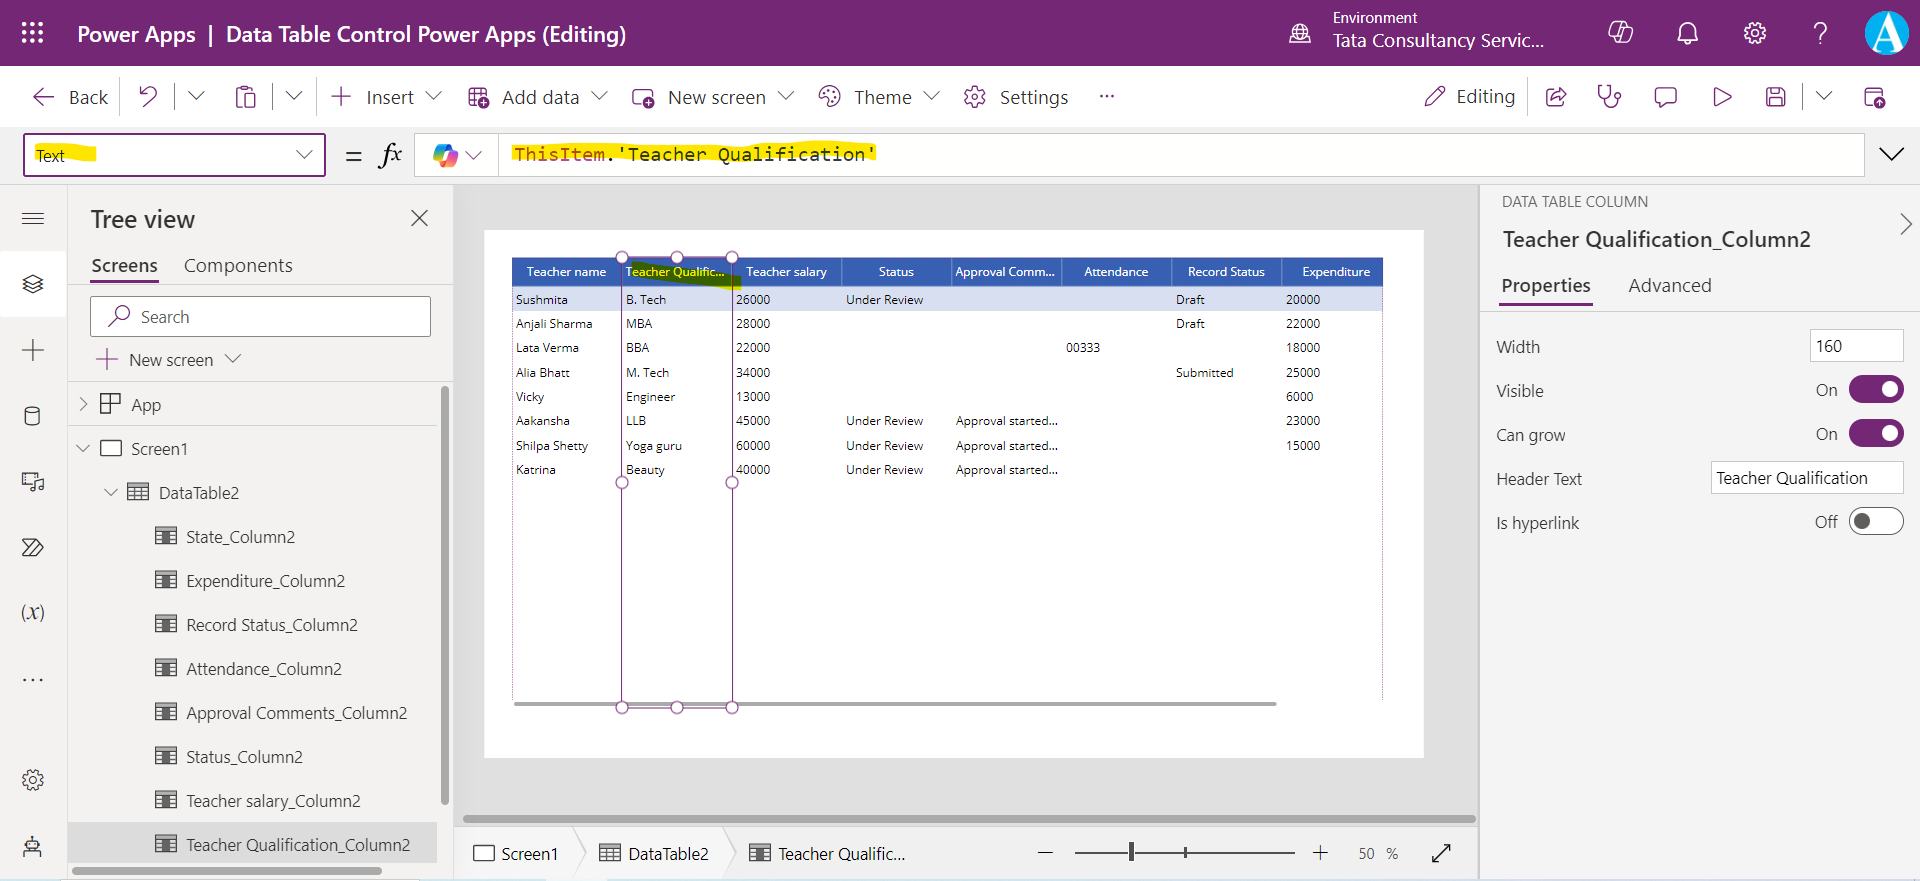
Step 6: There is a property of the columns inside a data table control named, Text which defines text value of the data to be displayed inside the selected column.
Step 7: There is a property of a column inside a data table, named IsHyperlink, which defines whether the selected column should be in hyperlink format or not.
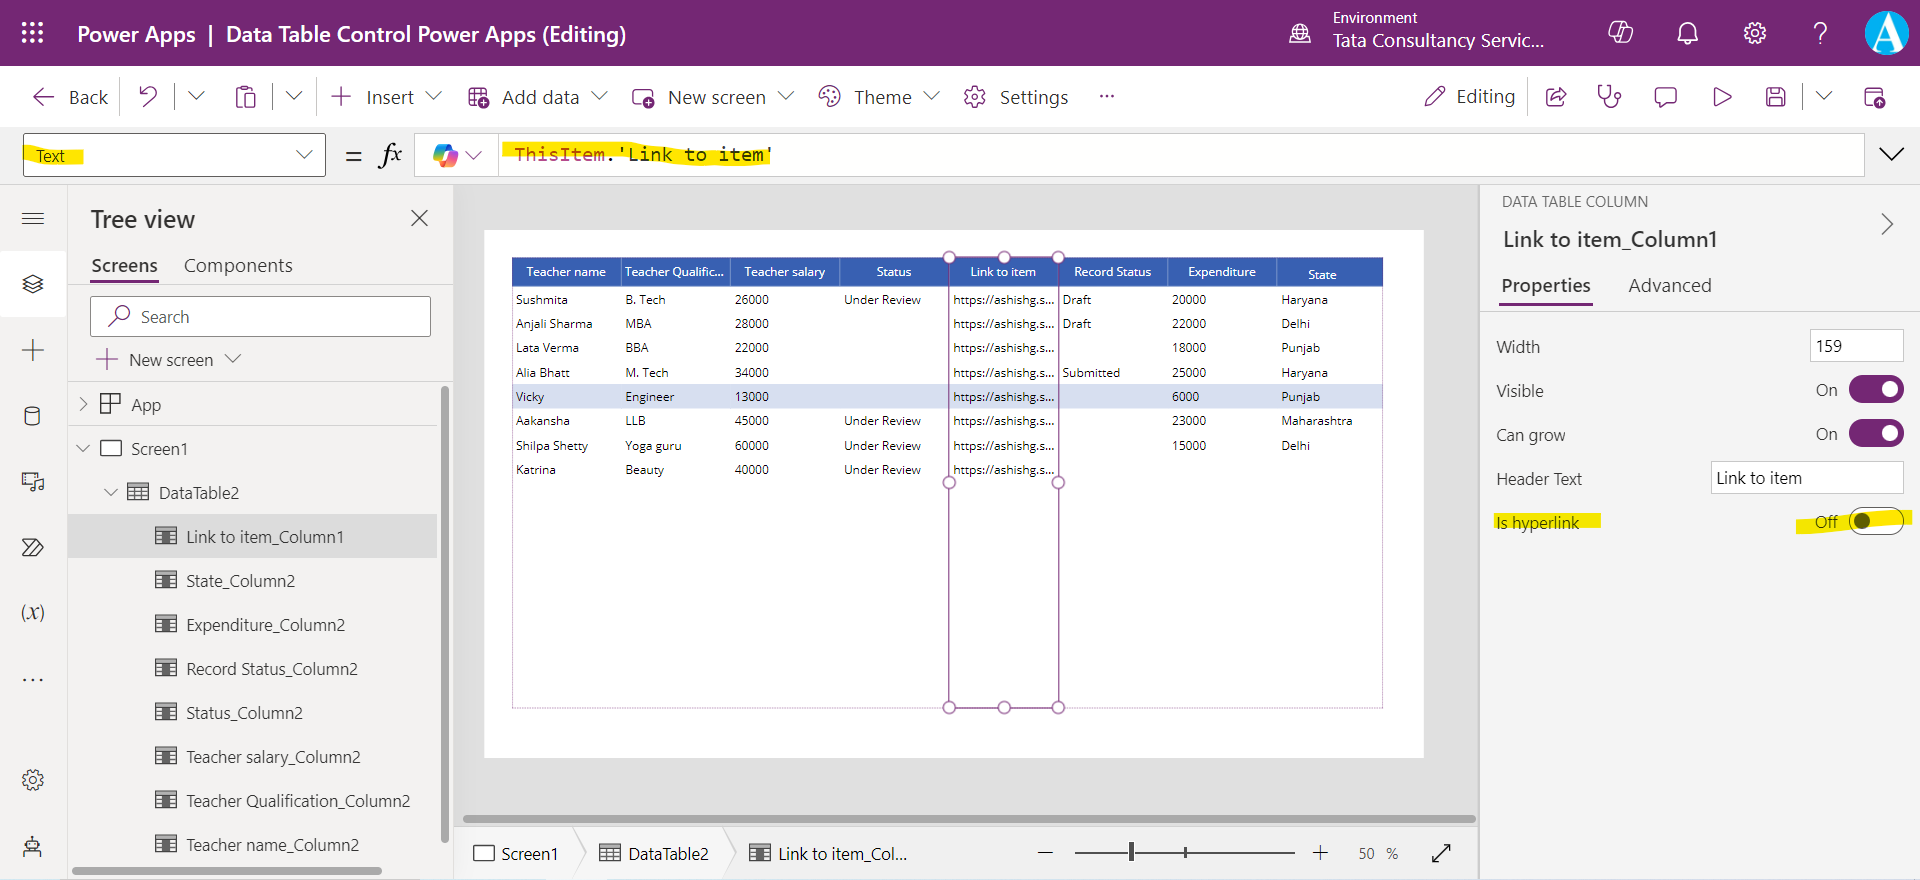
When we switch the toggle “Is hyperlink” to on then it displays the values as a hyperlink, but please note nothing happened when we click on these links. To make it effective, we can set the OnSelect property also of the column.
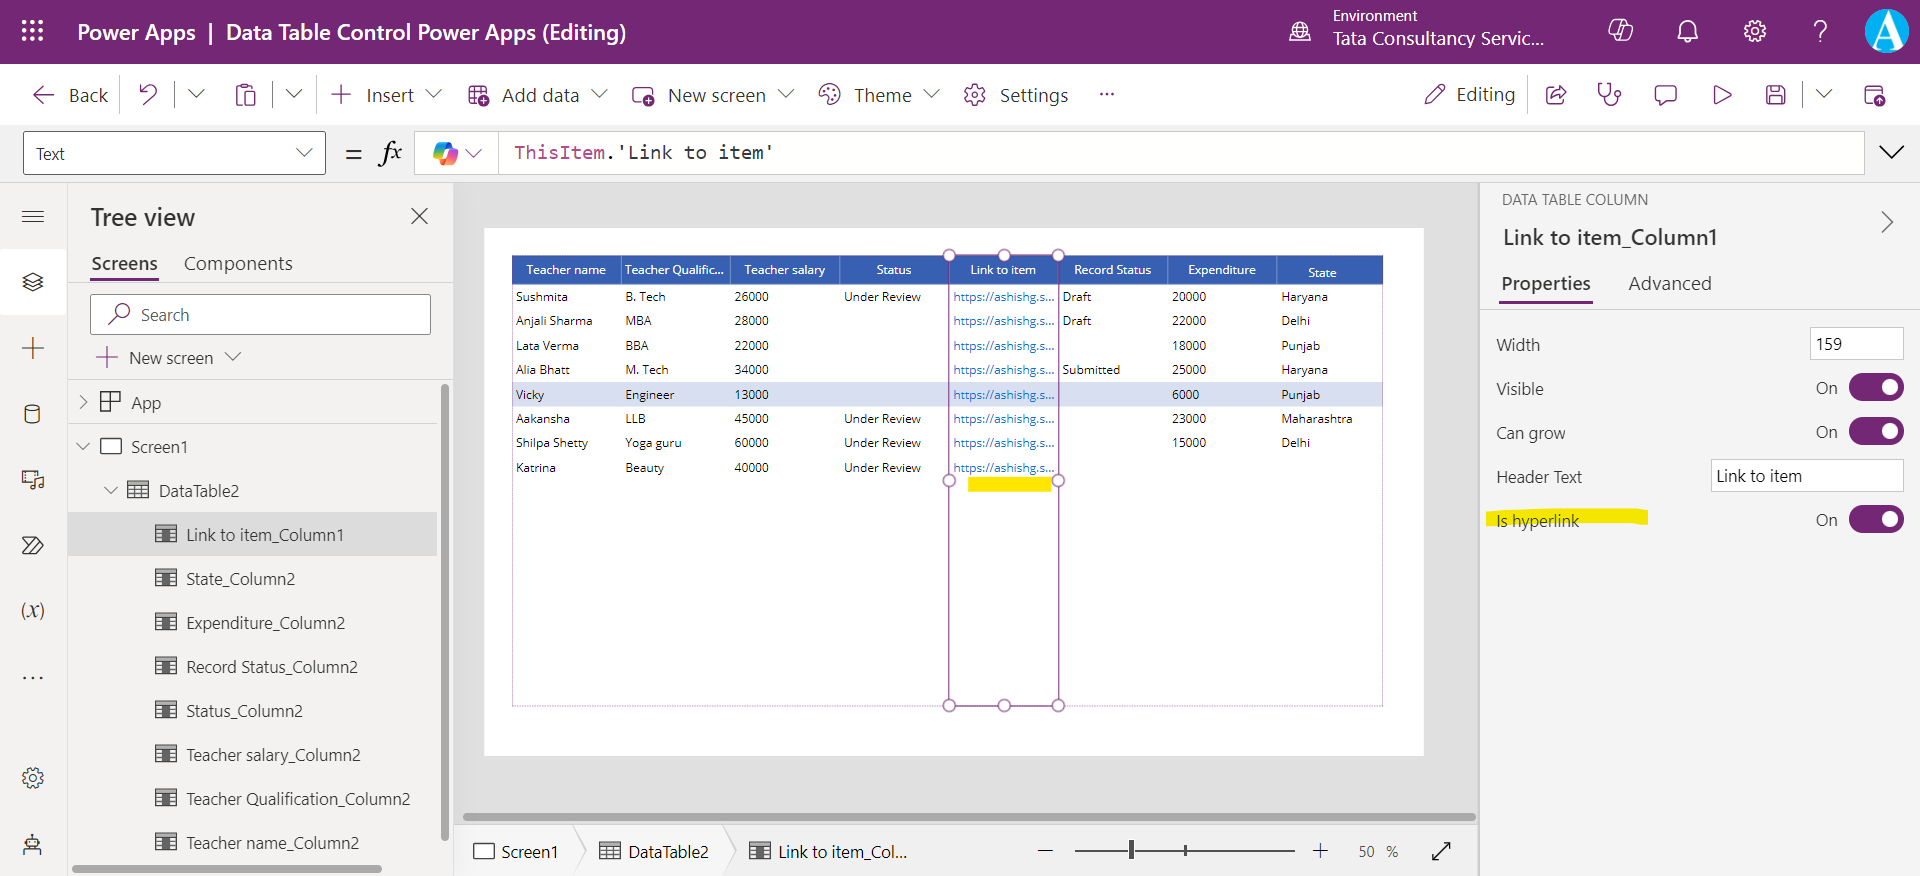
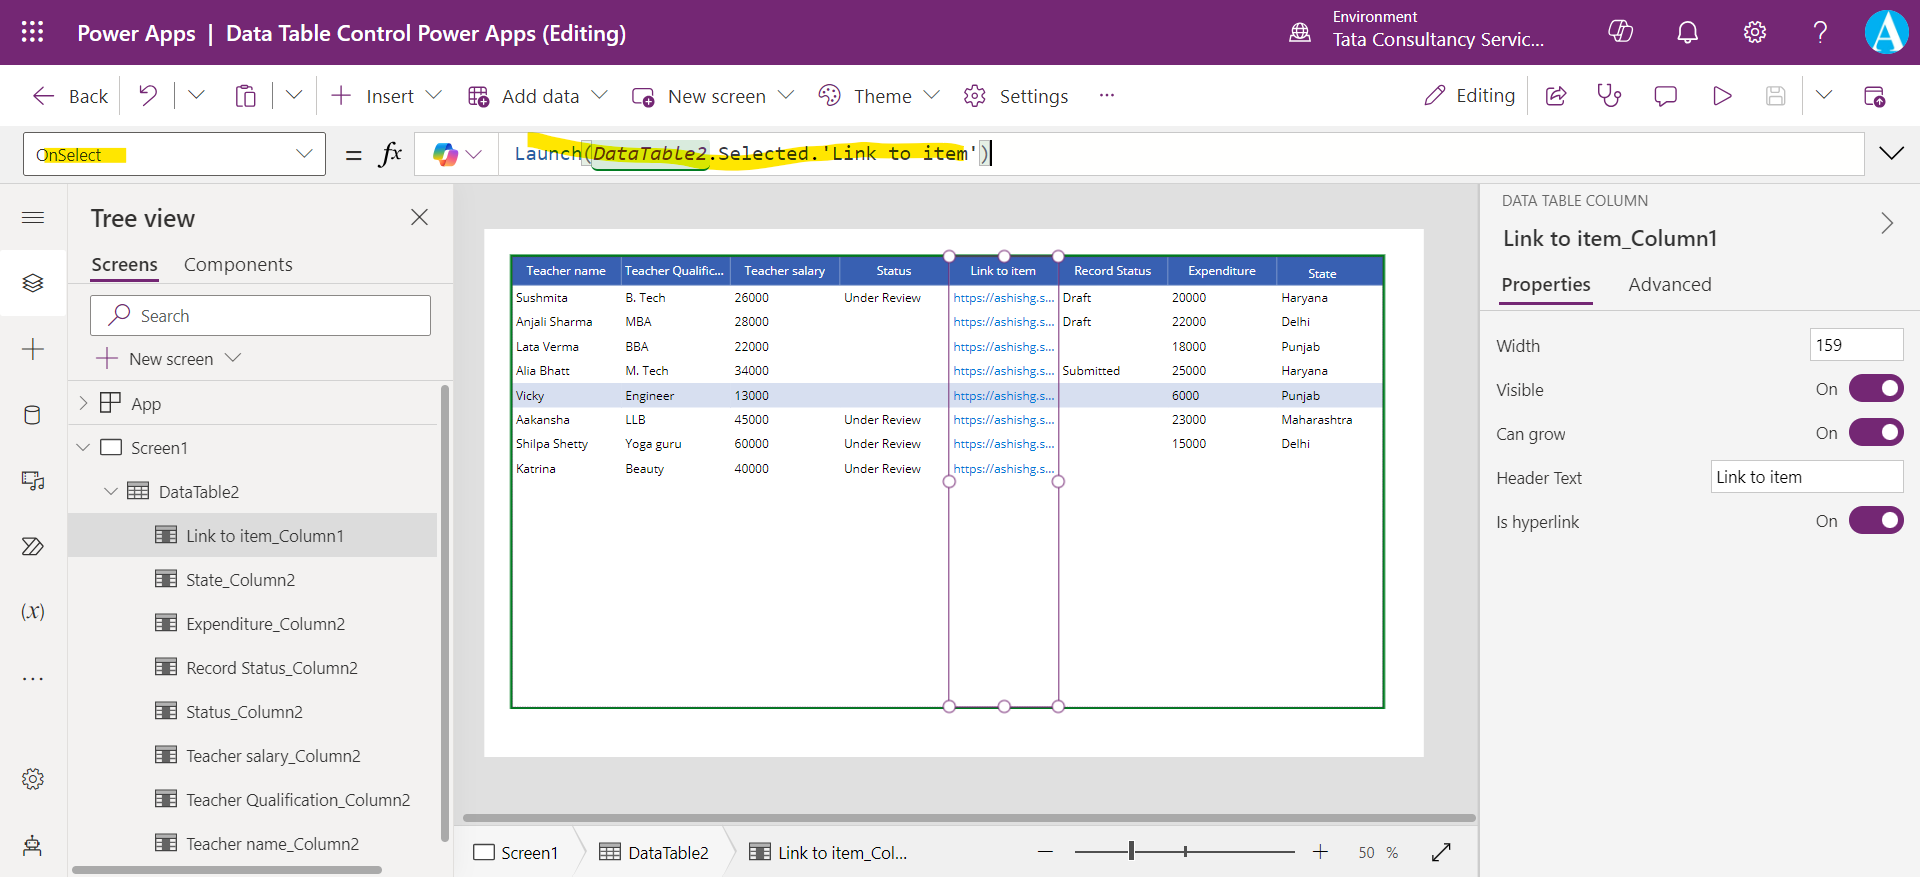
We can set the following formula on the OnSelect property of the column in the data table control.
Power Apps Formula
Here, DataTable2 is the name of the data table control and Link to item is the name of the column.
The above formula opens the link to item of the selected record in the data table control.
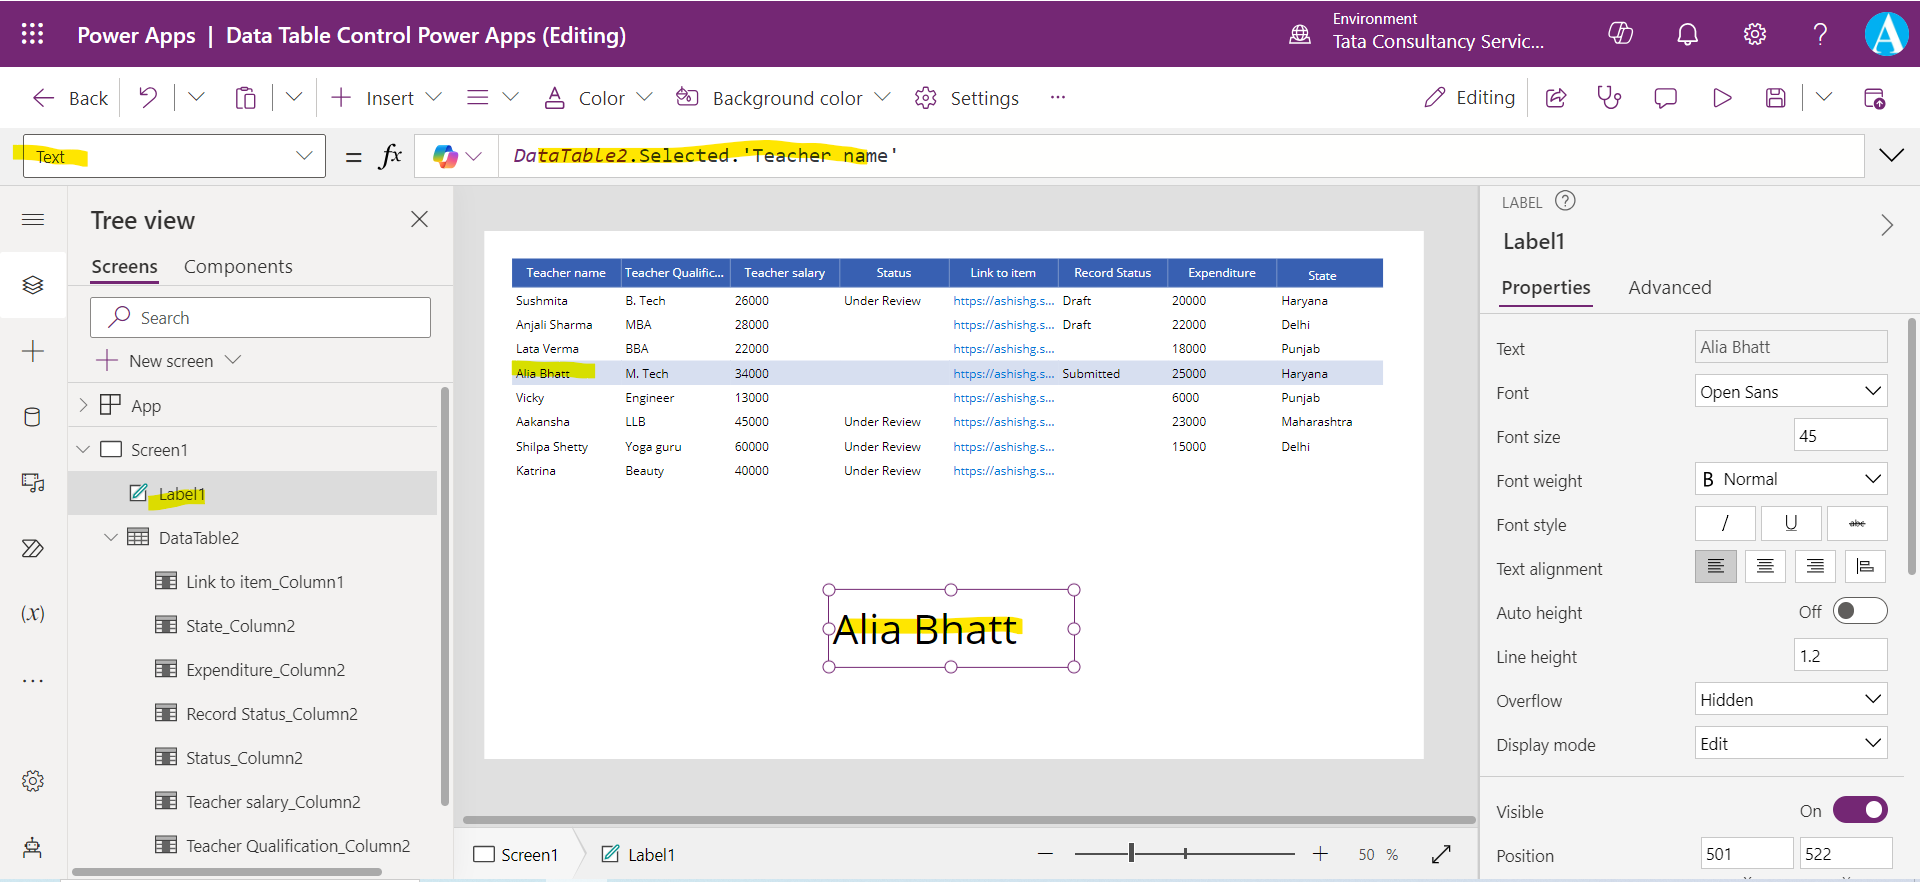
Step 8: Like the Gallery control, the Data table control maintains a Selected property that points to the selected row. Therefore, we can link the Data table control to other controls.
To test this, we add a Label control and then place the following power apps formula on the Text property of the label control as shown in the image below.
Power Apps Formula
Here, DataTable2 is the name of the data table control and Teacher name is the name of the column.
