Forms in Model Driven Apps
By default, all tables in Dataverse have standard forms, which we can use and implement into our solution. However, for many organizations, the standard out-of-the-box forms will still need to be customized and modified to meet business needs.
In this exercise, we will customize the forms in model-driven apps to create a row in the Microsoft dataverse table.
There are different types of forms available in model-driven apps.
• Main form,
• Quick Create form,
• Quick View form, and
• Card forms
Each data table can have any or all these form types associated with it. Remember, forms provide the way our users interact with the data, so they're built on top of the data.
Step 1: Go to the Power Apps and sign in with the organizational account.
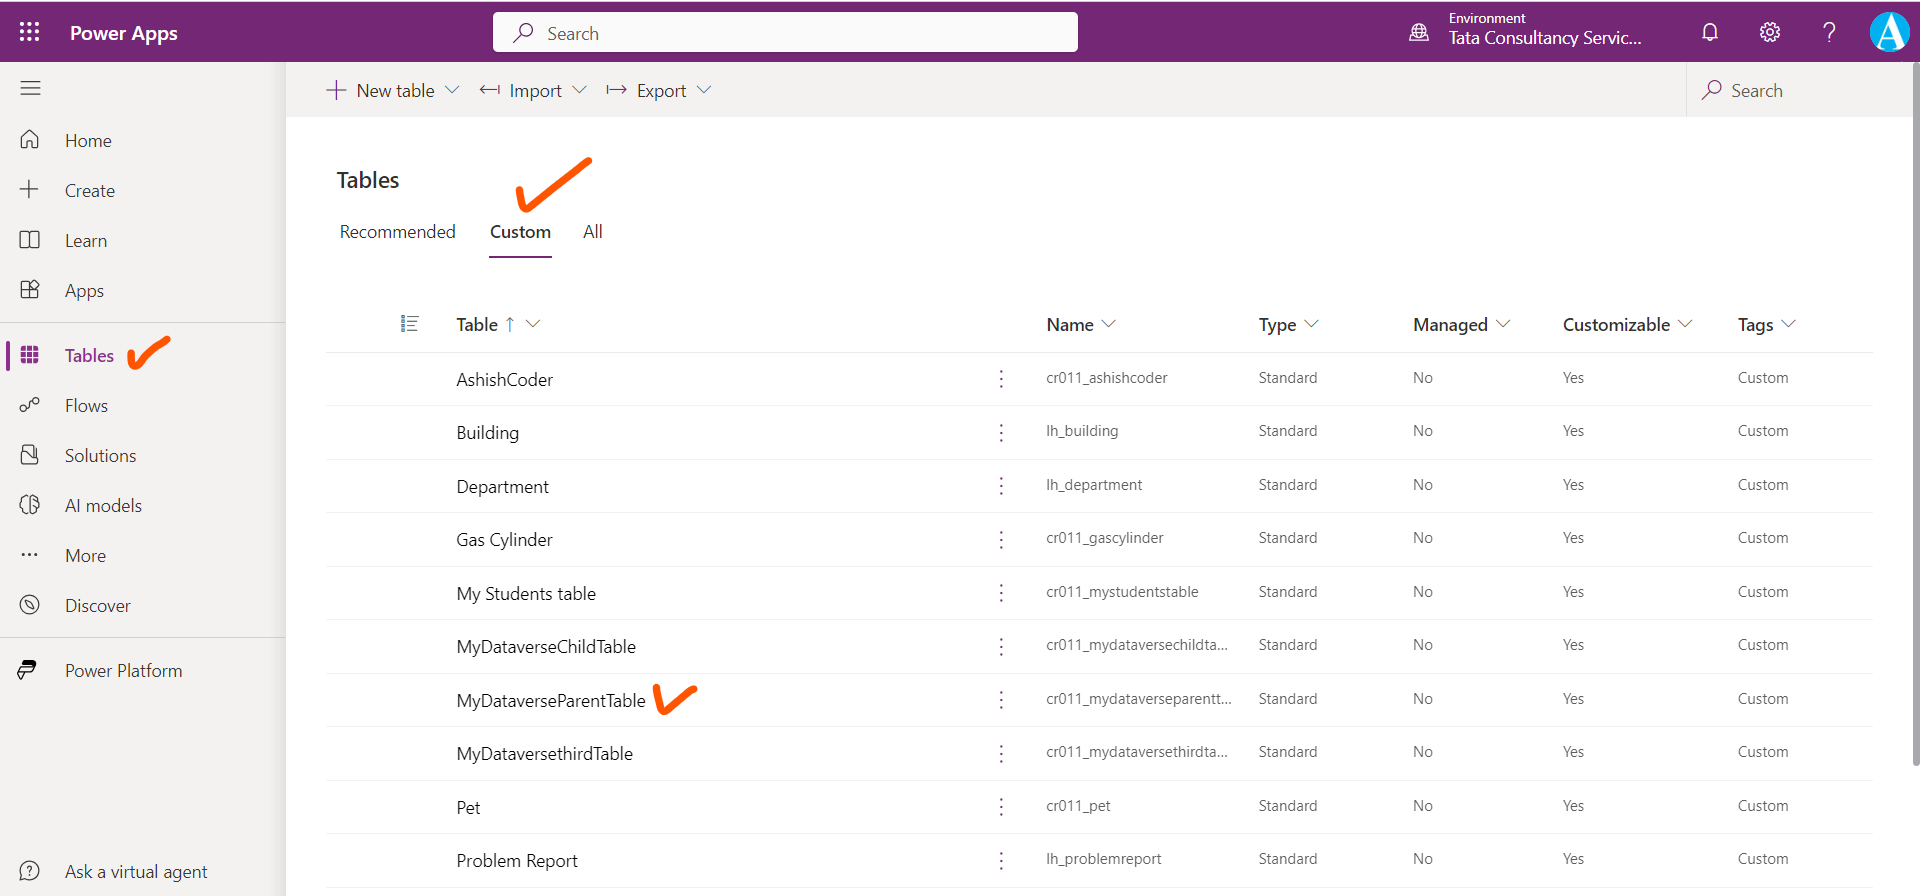
Step 2: Select Tables and then select the MyDataverseParentTable table or type the name of the table in the search field to find the table.
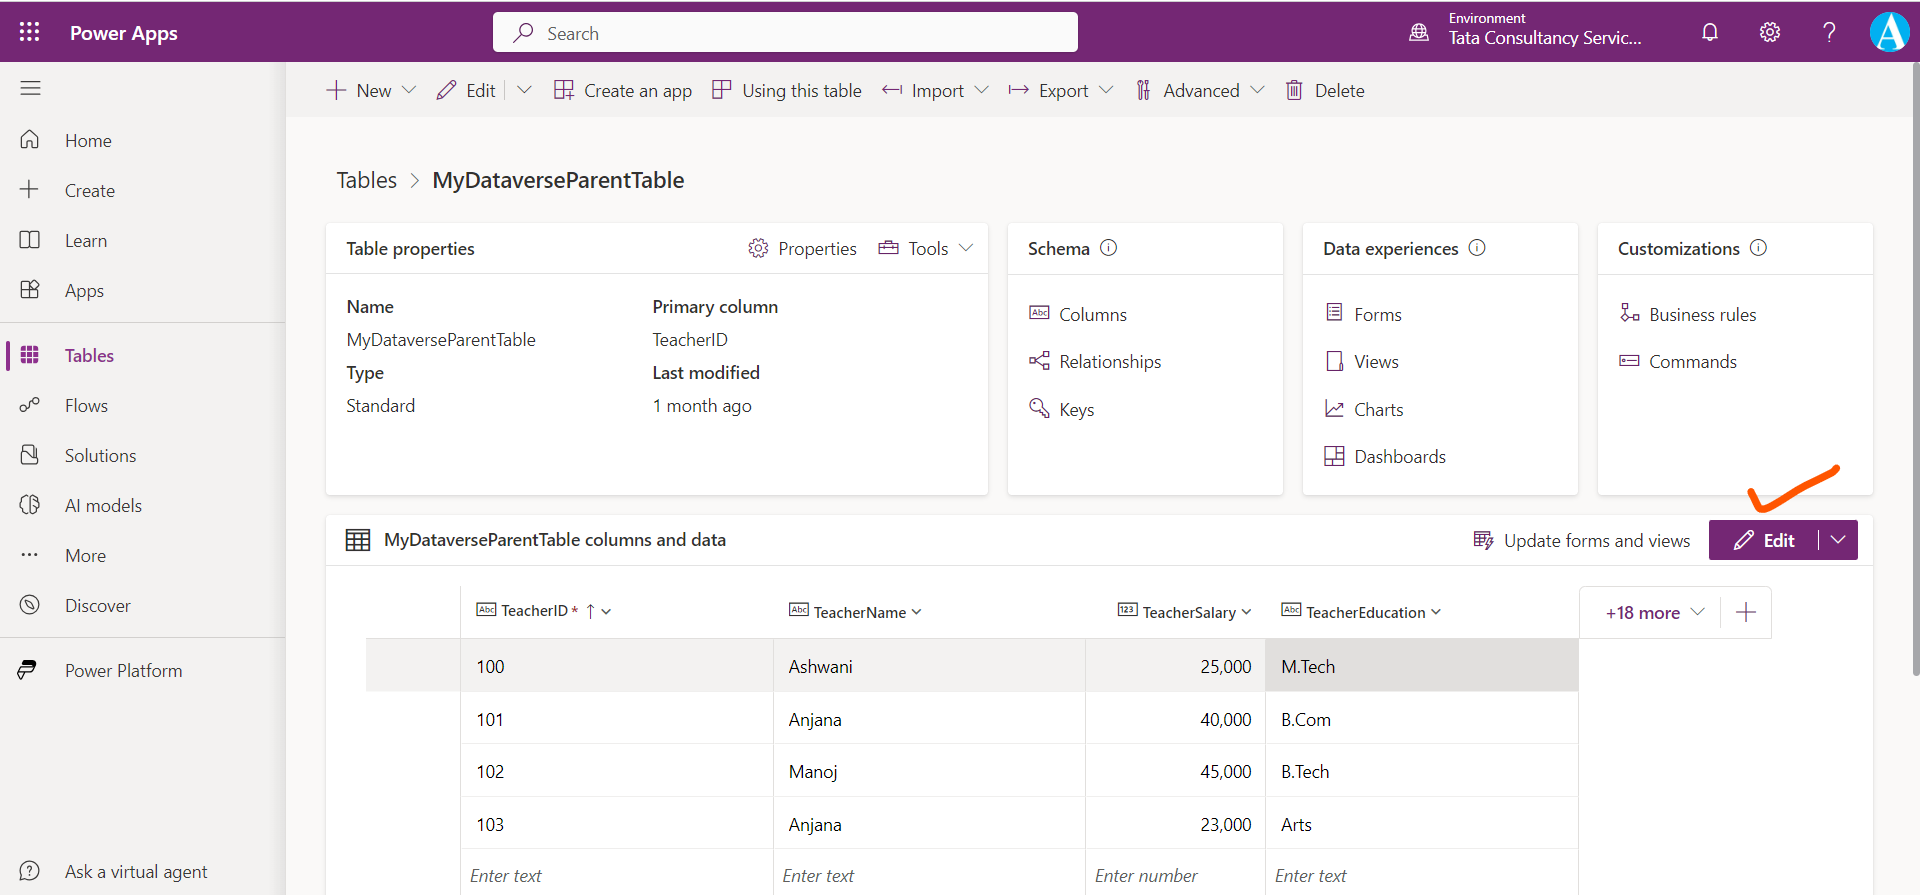
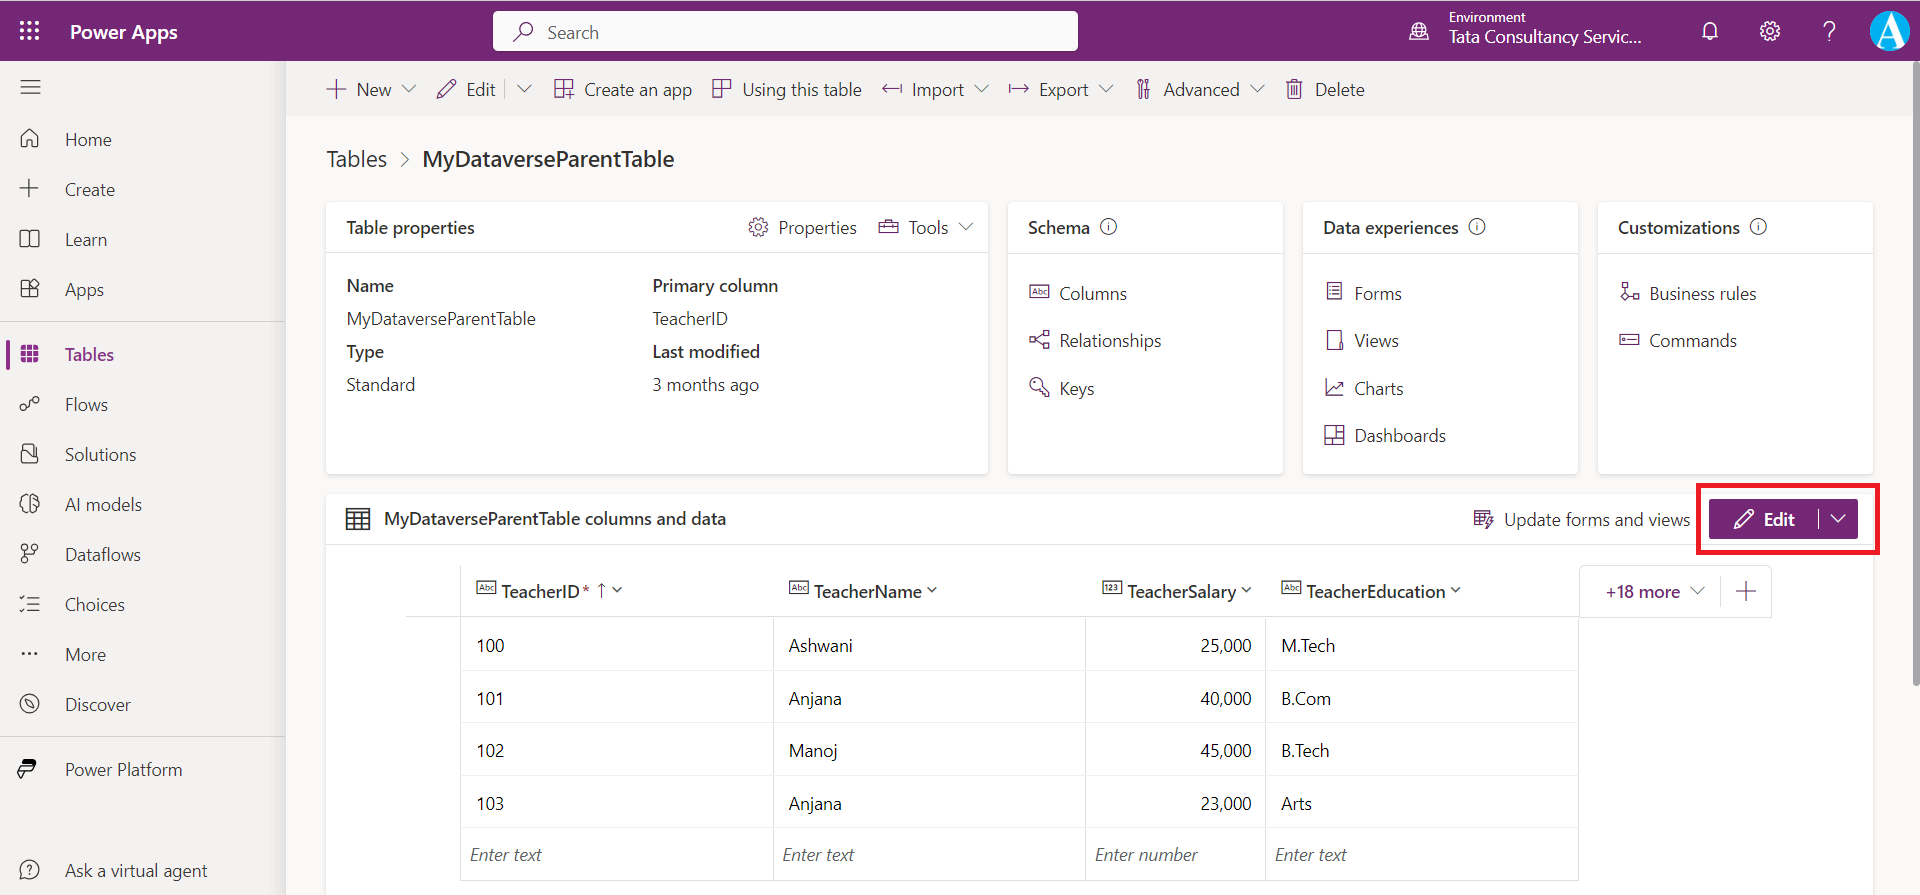
Step 3: In the columns and data section, click on Edit.
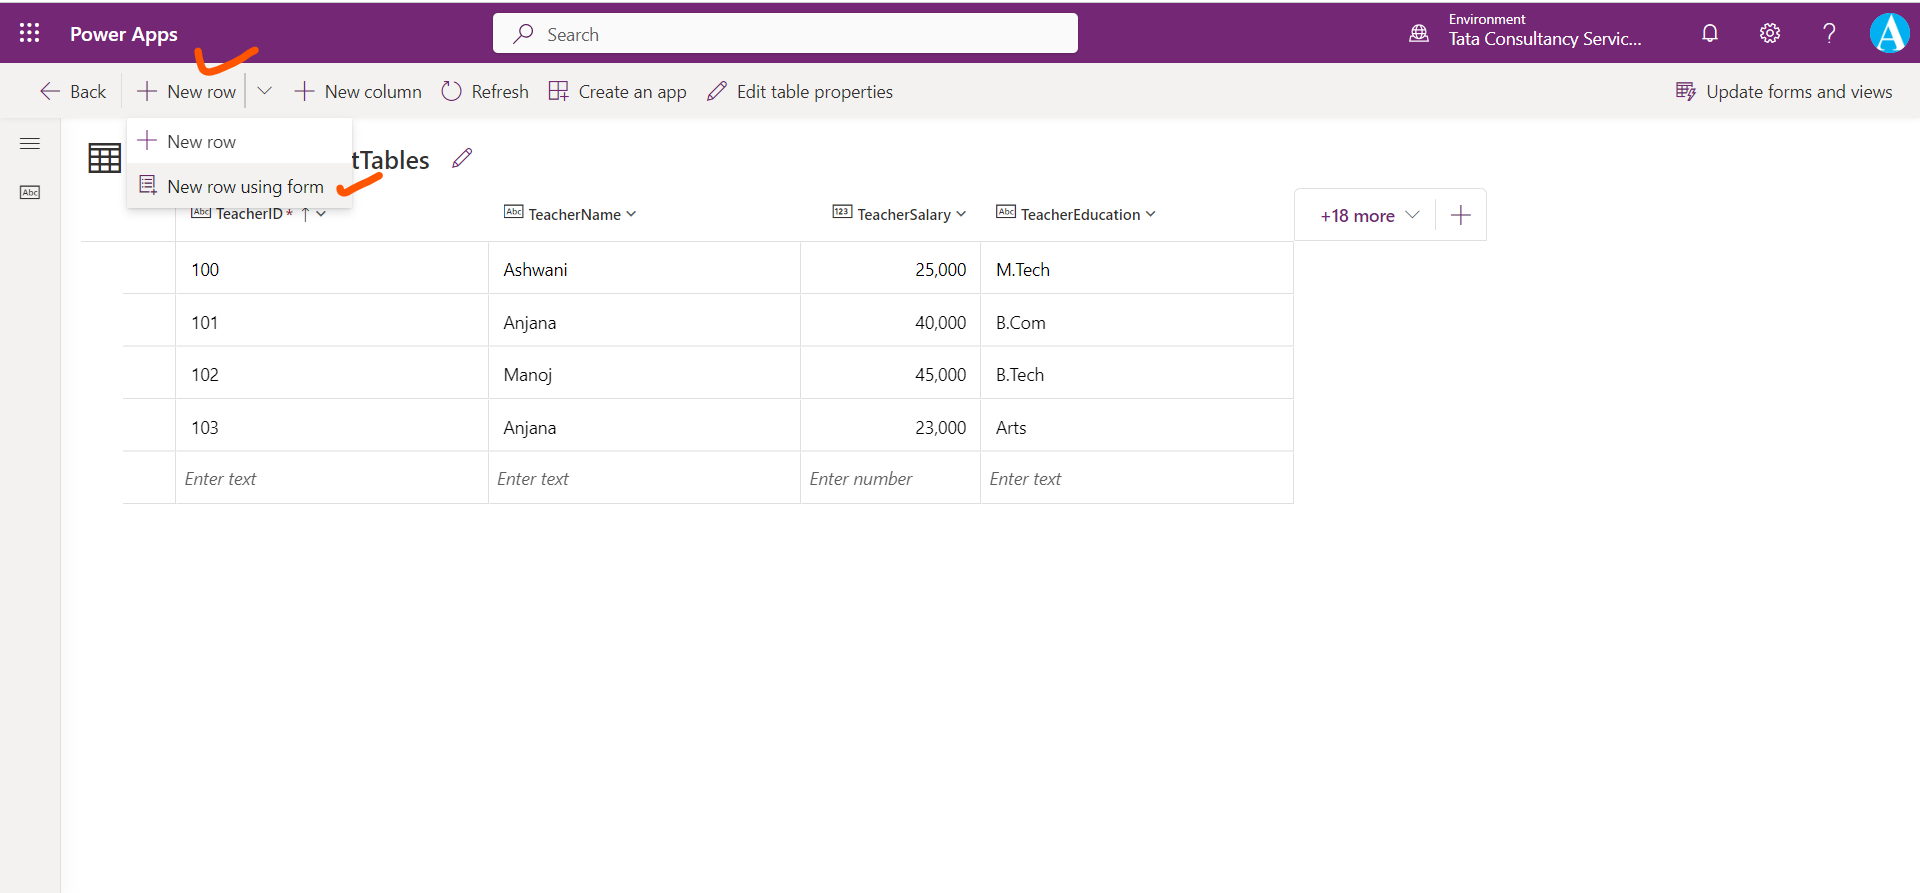
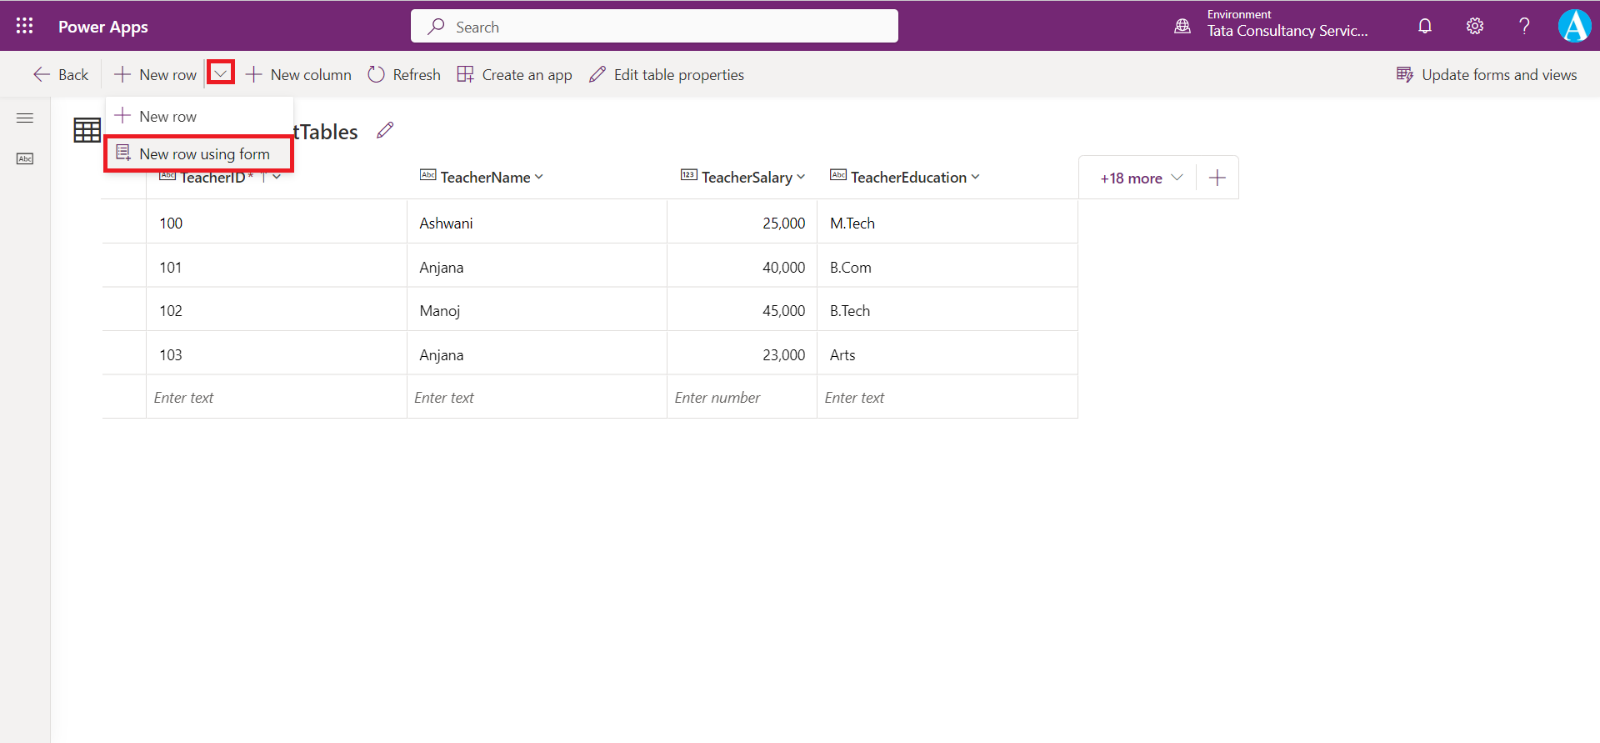
We can add a new row in the dataverse table using the form.
The form which displays is the main form of the table.
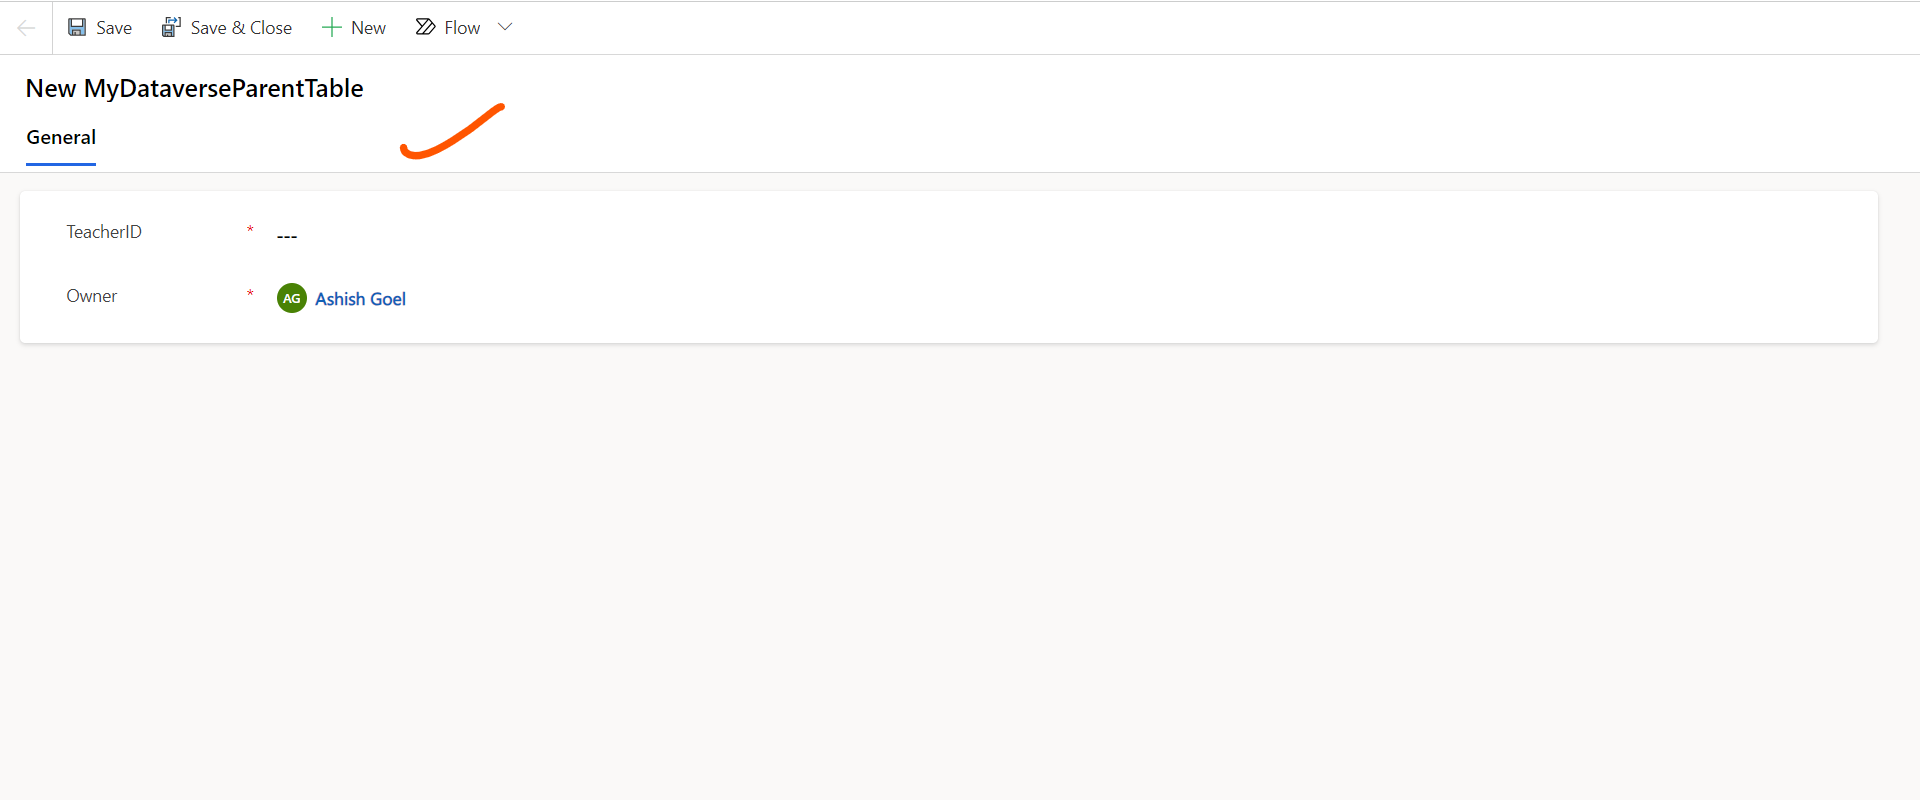
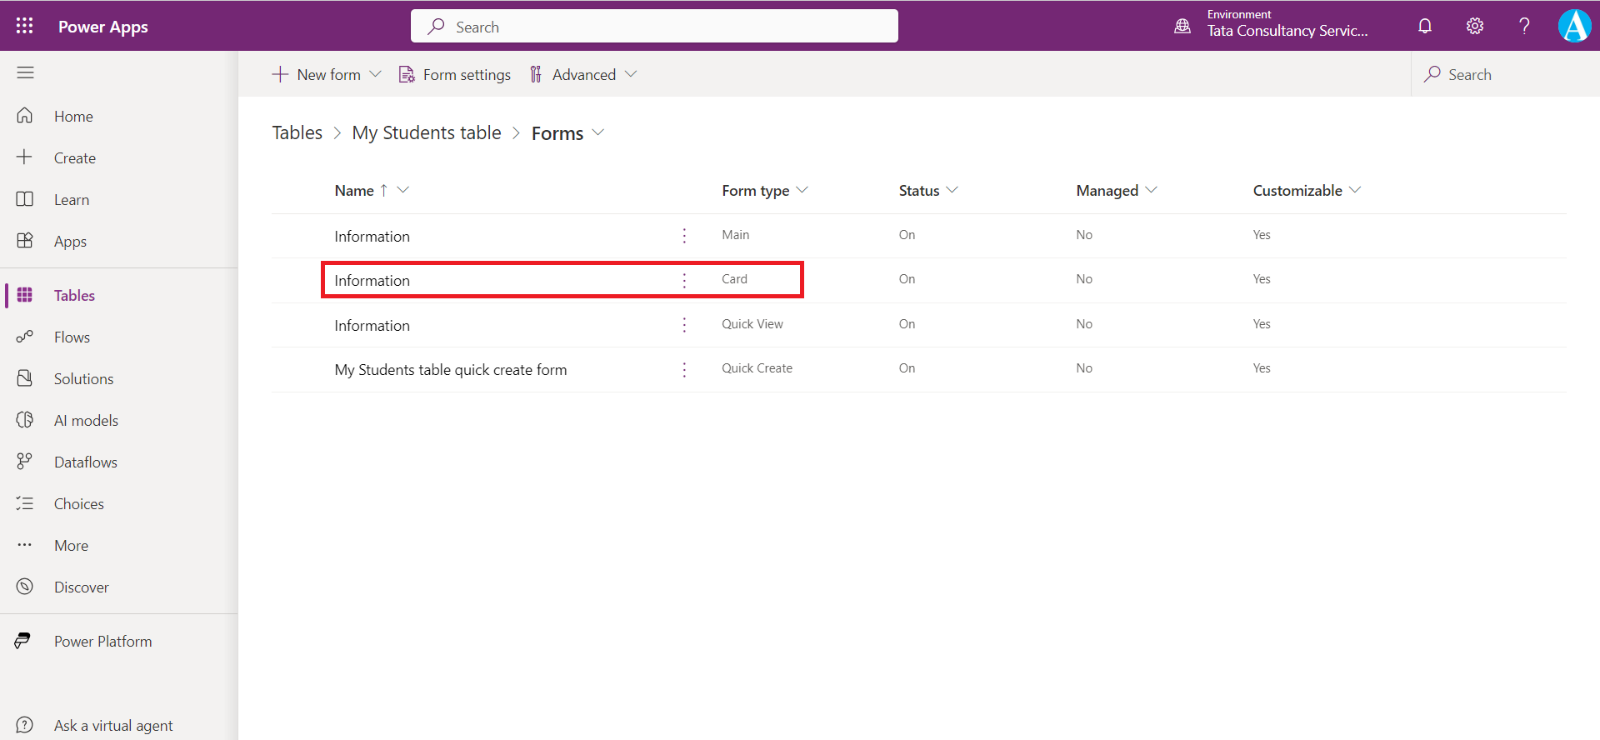
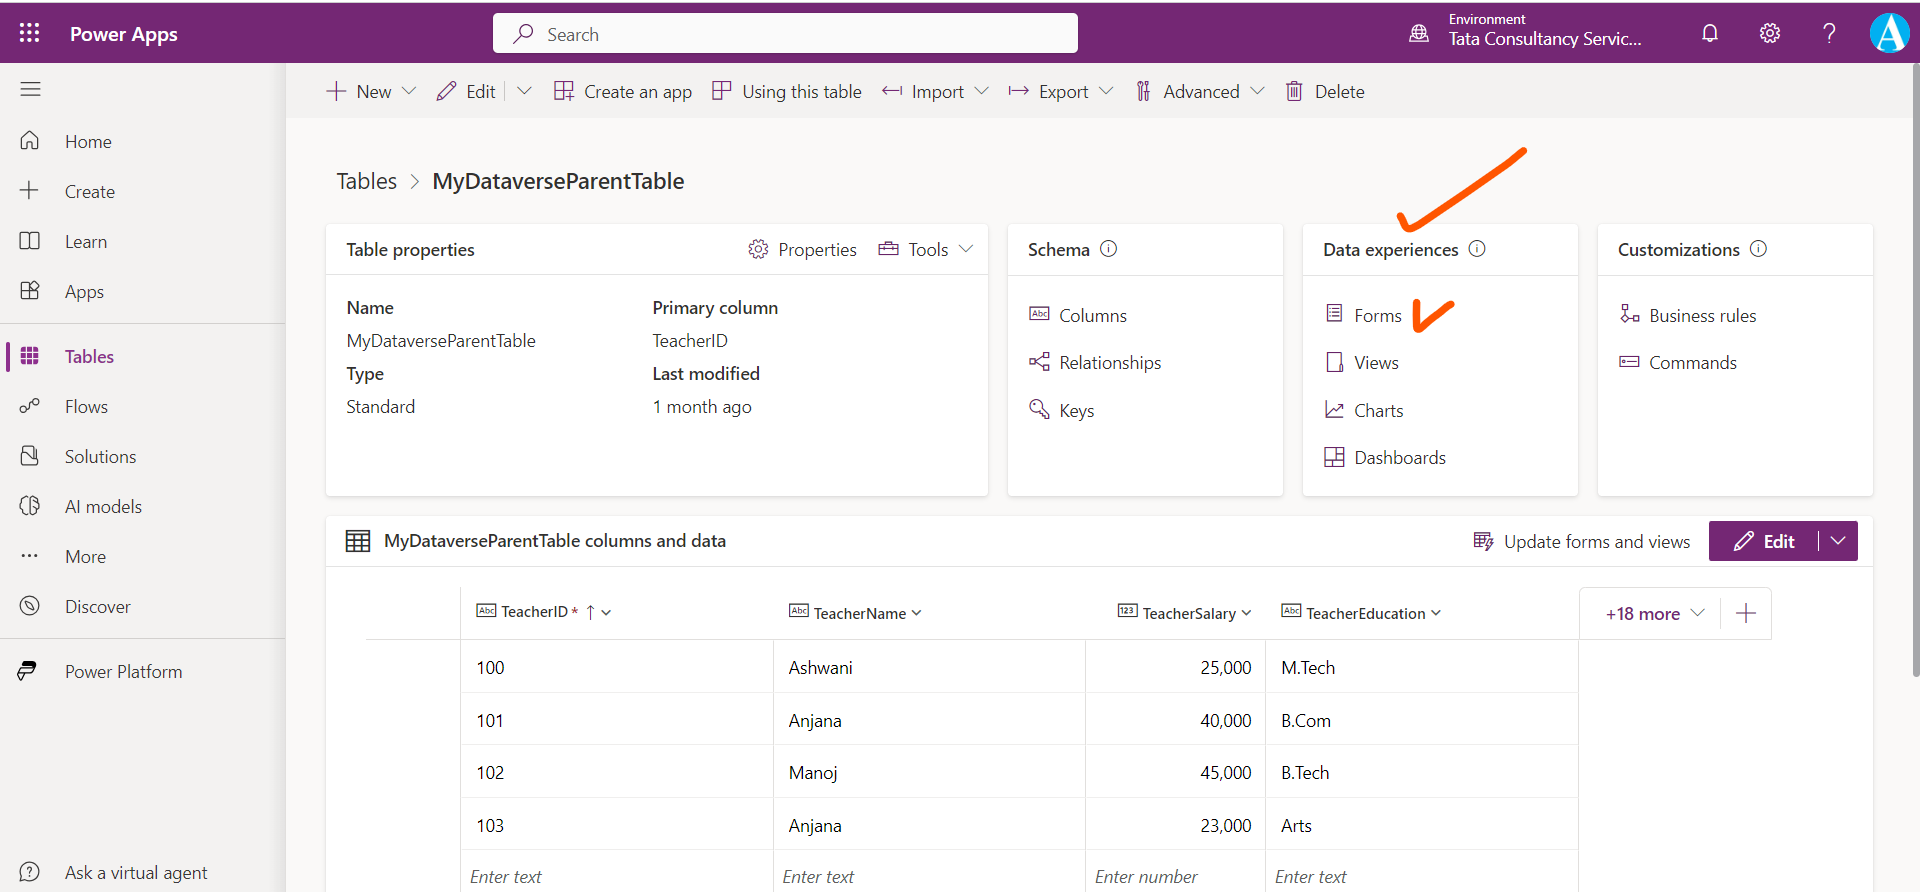
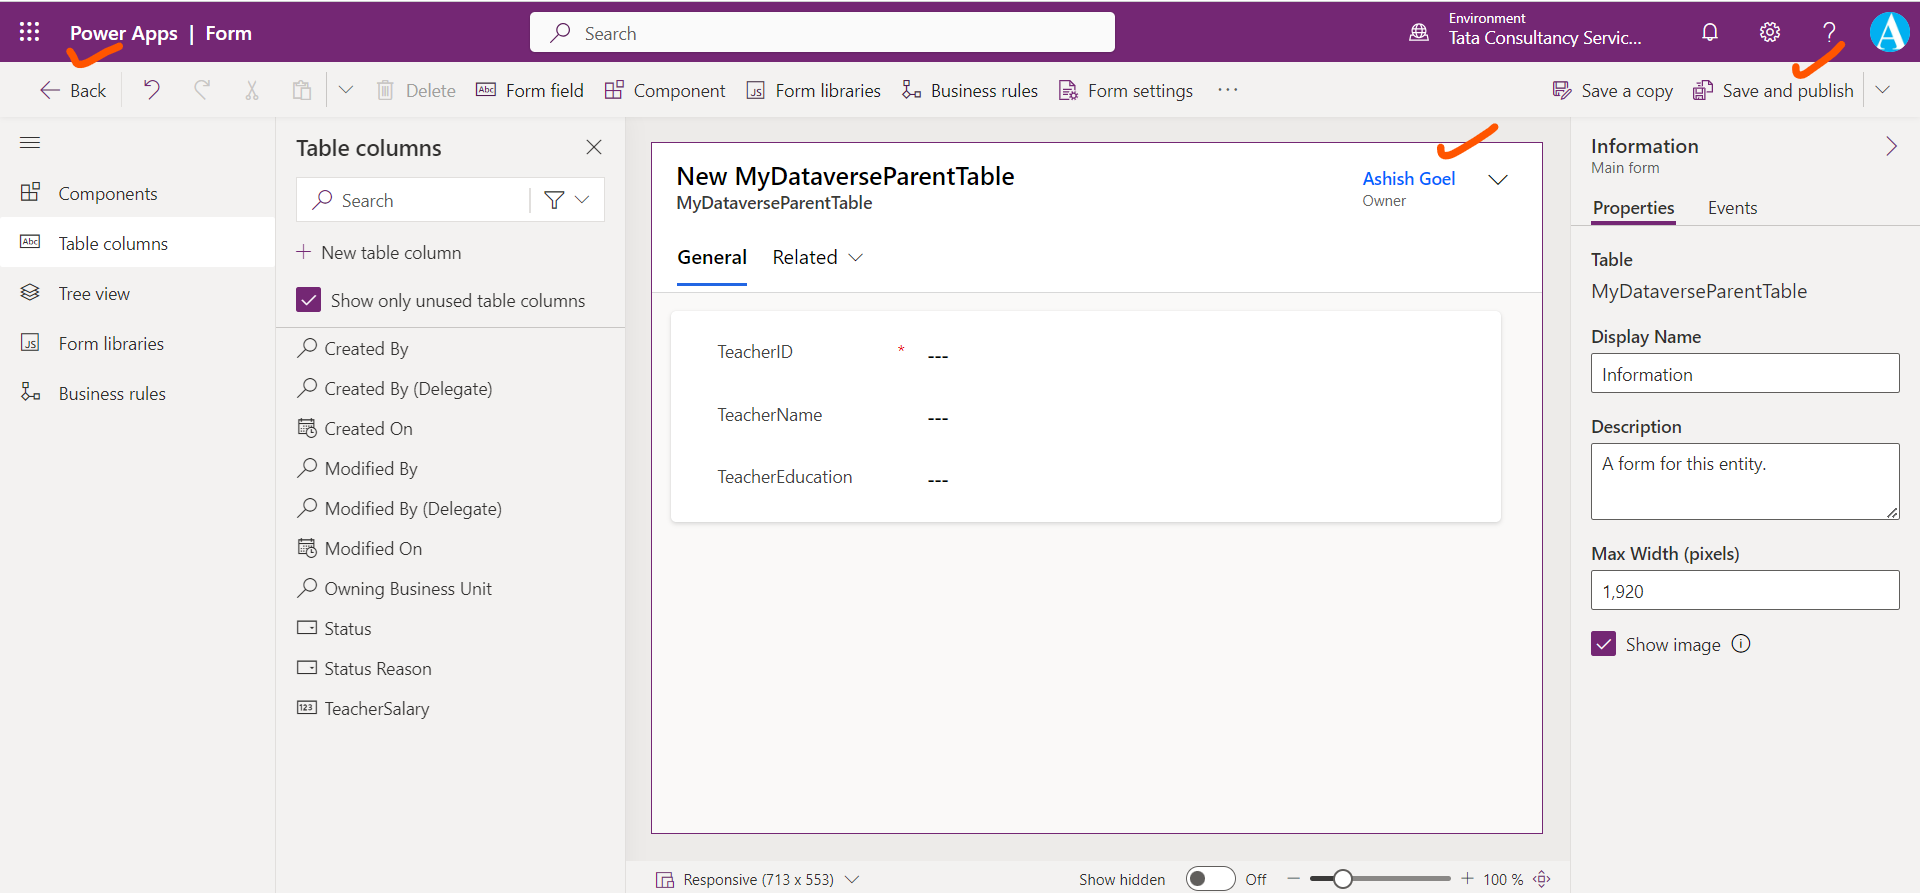
We can customize this main form, click on the back arrow and in the Data experiences section, select Forms.
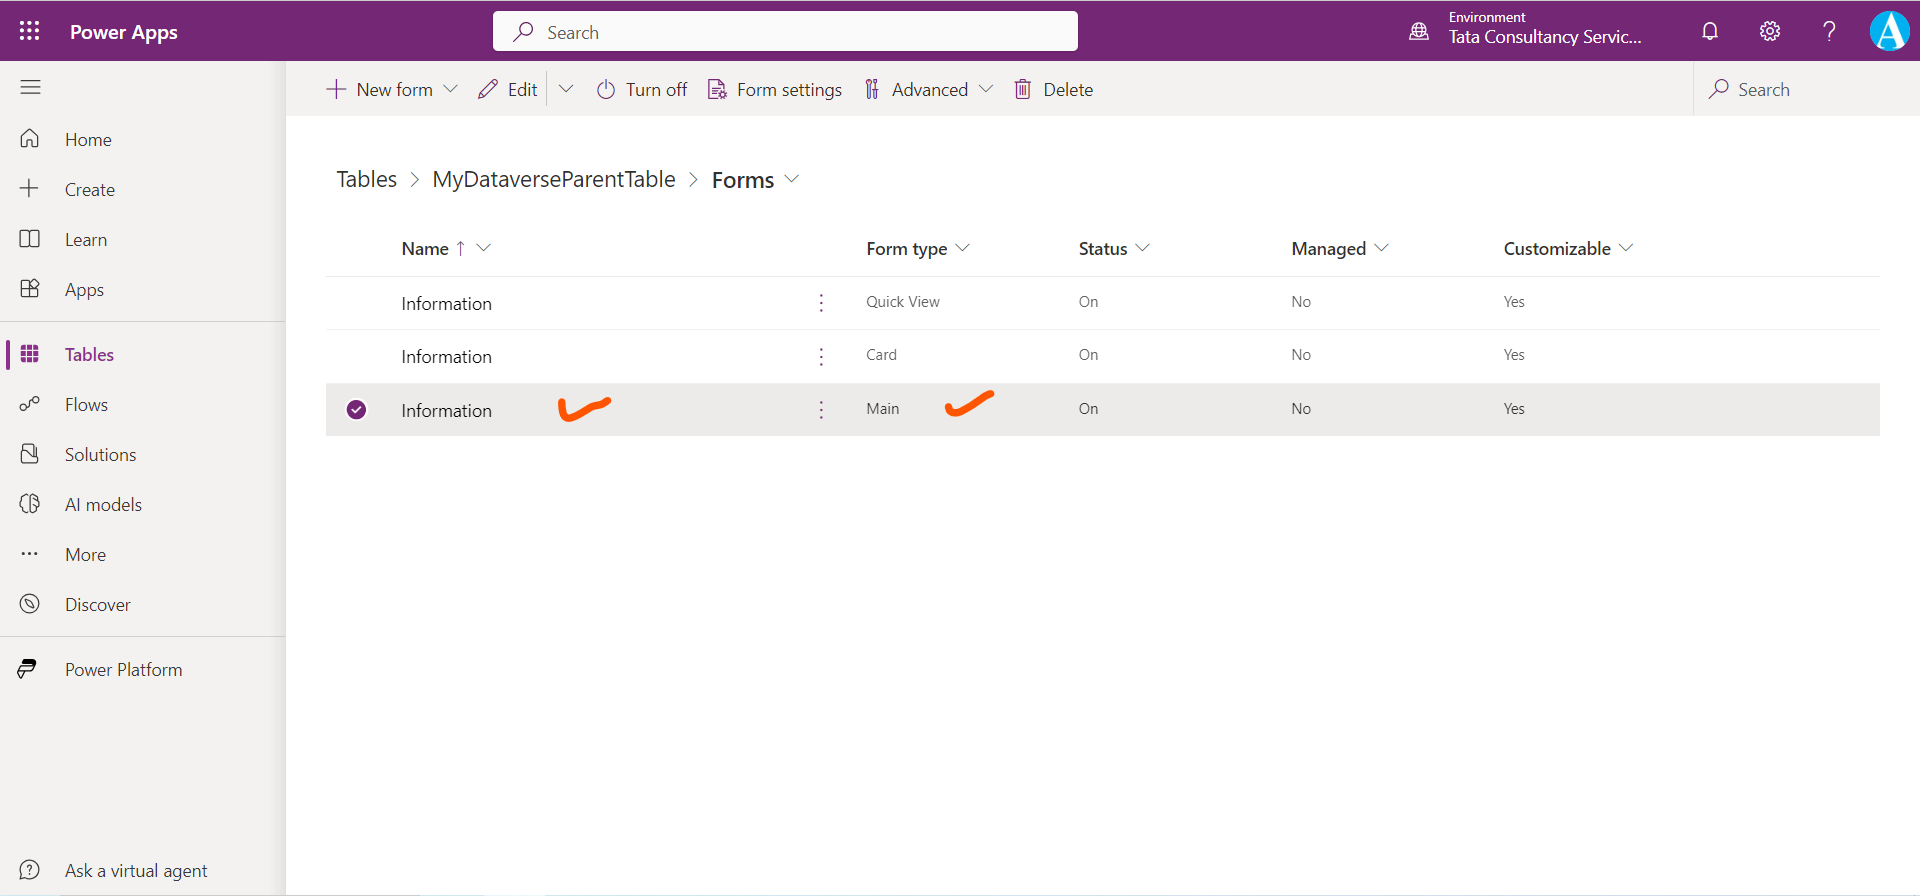
Step 4: Select Information form of the Main form type to open the form editor.
Step 5: We can adjust Form Settings, Add components, fields, business rules, event handlers, custom form libraries, edit table columns and more.
In the form editor, when we click on Table columns from left hand navigation or Form Field at the top of the command bar then the Table columns section appeared in which all the columns of our Dataverse table are shown to add it to the form.
In the Table columns list, we can choose to show only the columns we haven't used in our form, or we can display all of them. Also, we can create a new table column, by clicking on the + New table column.
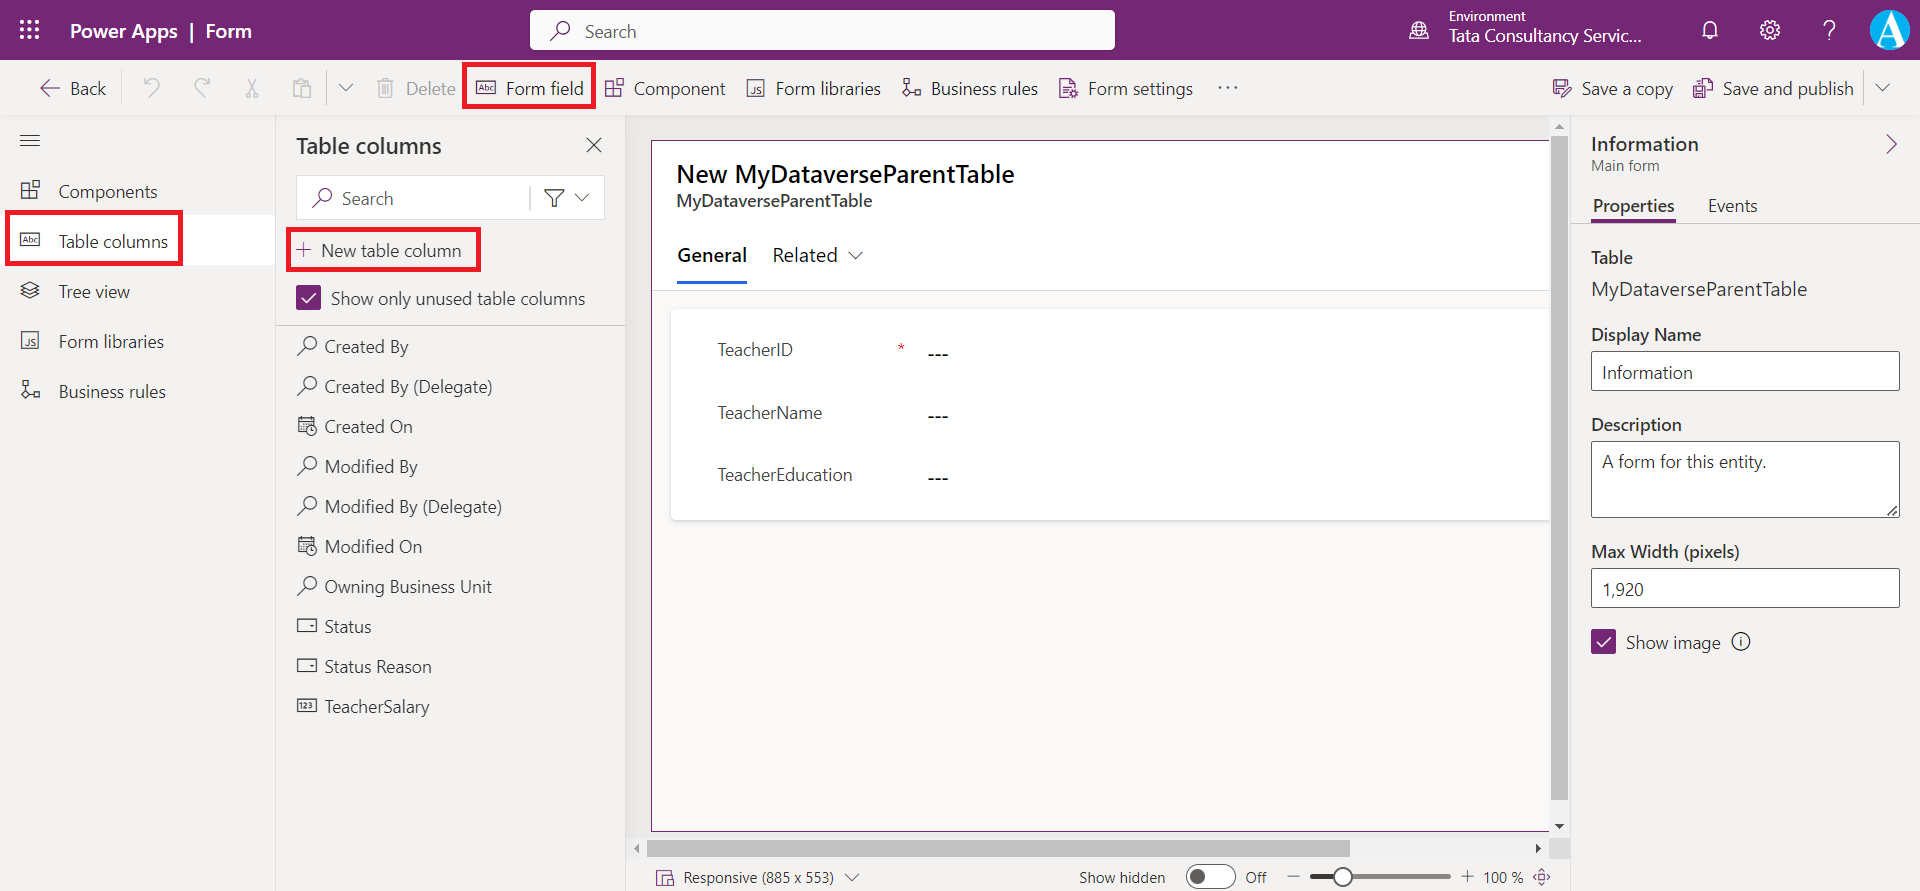
From the Table columns section, we can add the columns to the form by drag and drop. Add some columns in the General tab of the form canvas, so the user will enter to create a record.
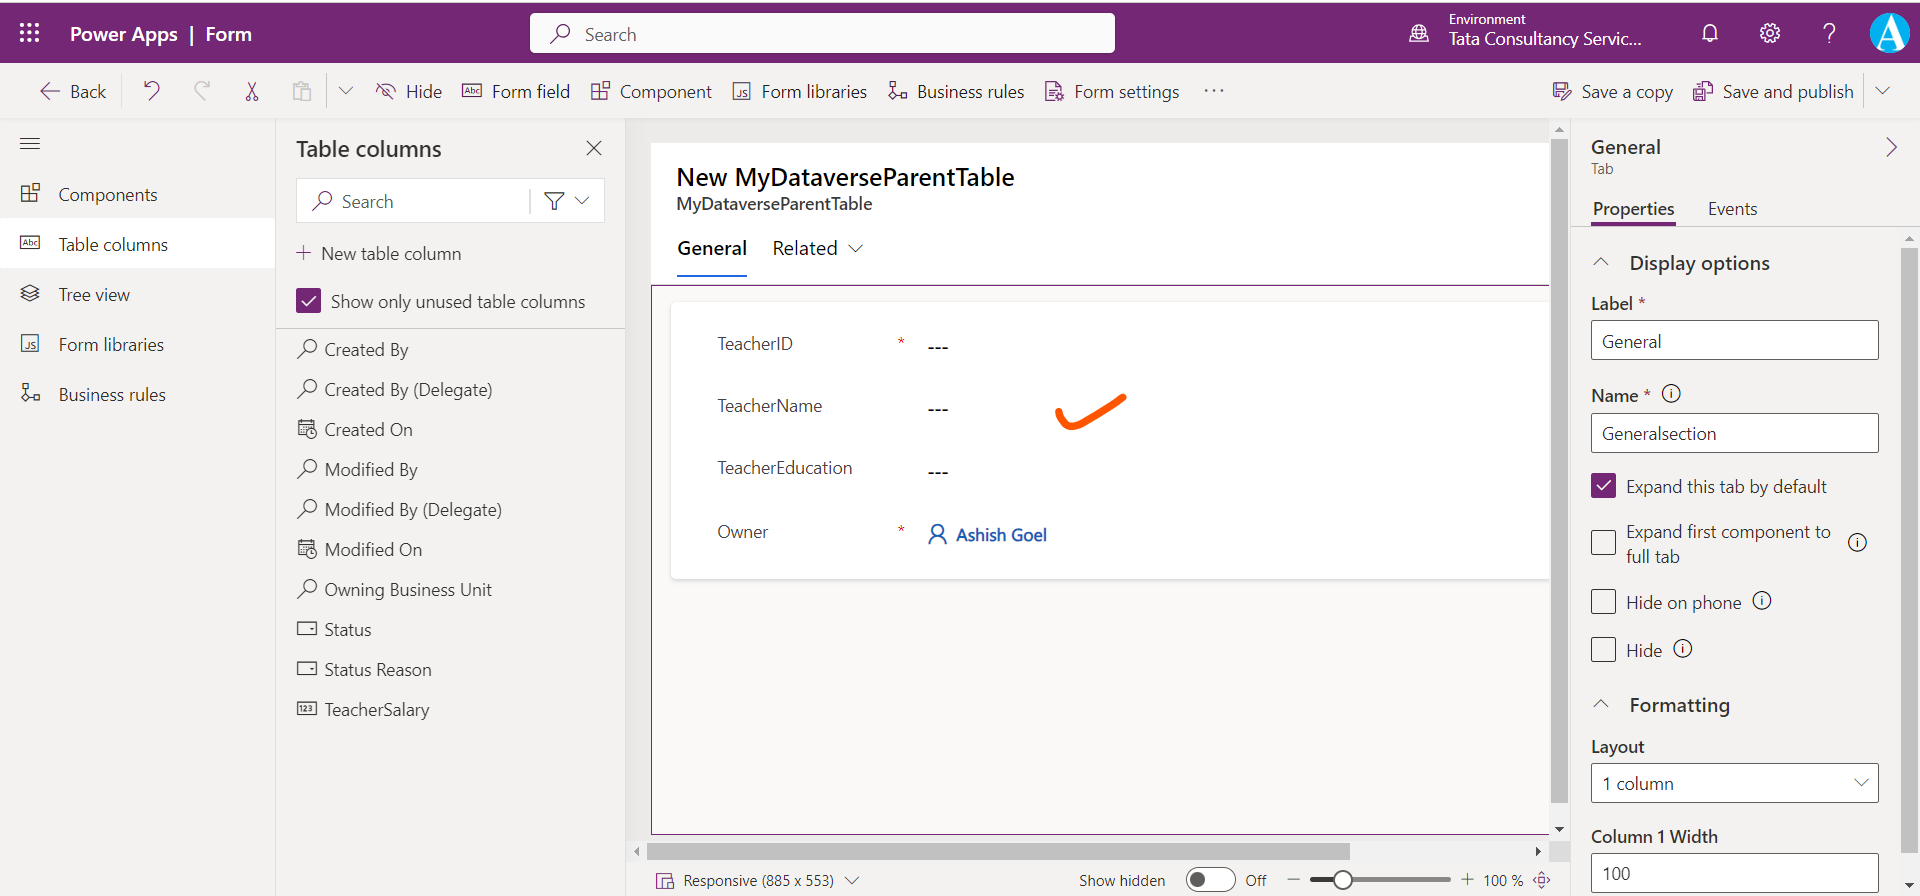
Step 6: On the right side of the screen, a panel contains the Properties of any selected part of our form. When we select a field from the form, we have the options to:
• Hide label hides the label name of the field
• Change the field Label name
• Make the field Ready-only
• Hide option hides the field from the form
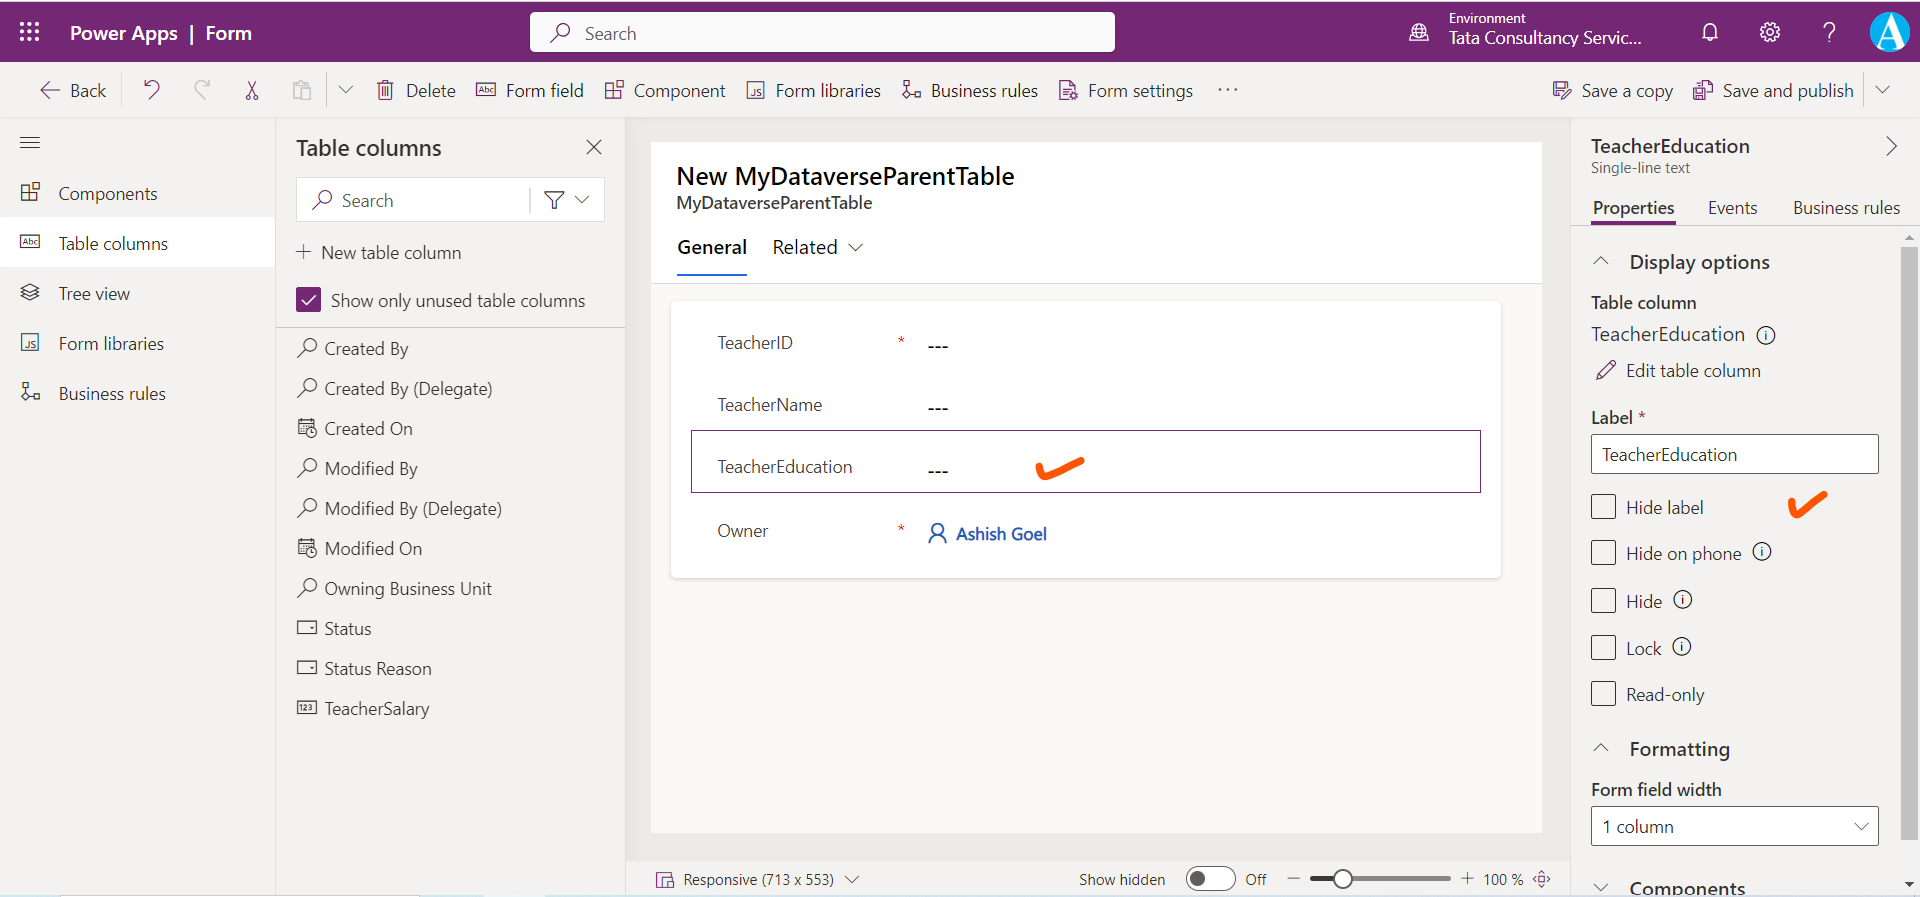
In the right-panel, we can see the Events and the Business rules also.
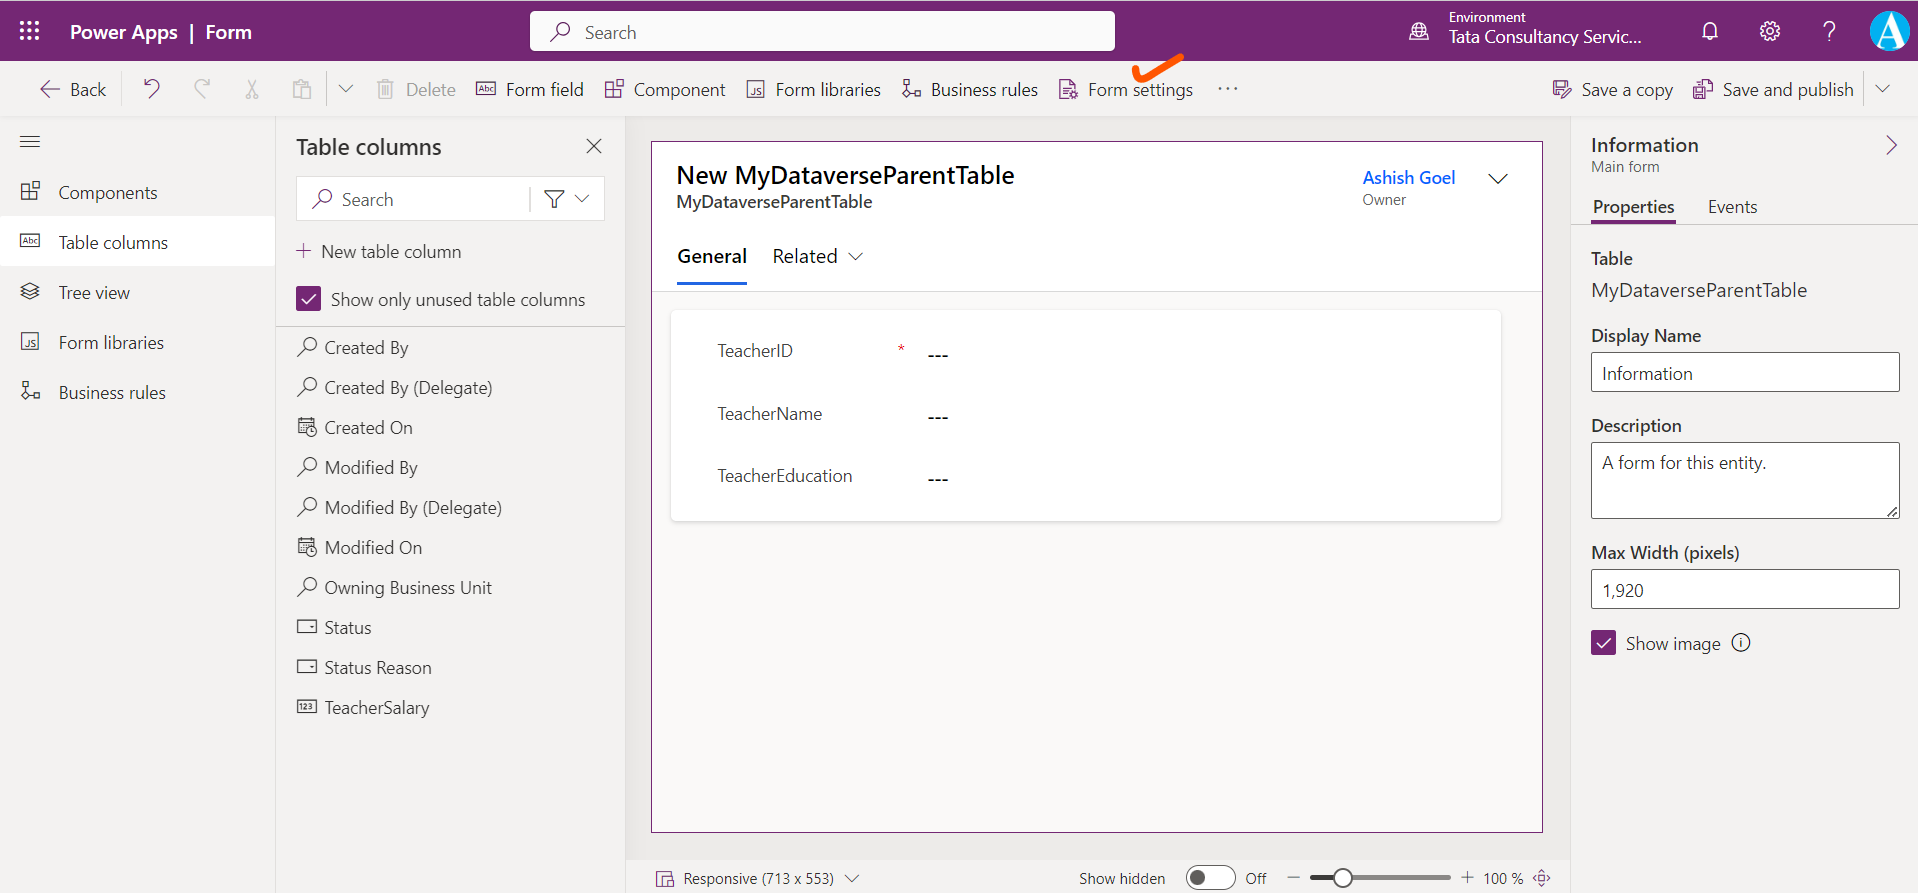
Step 7: Add the Owner (a Dataverse standard field that identifies the user who created the record in the table) to the Header section of the table by dragging the Owner field and then dropping it to the upper right of the header.
Step 8: Click on Form settings in the command bar.
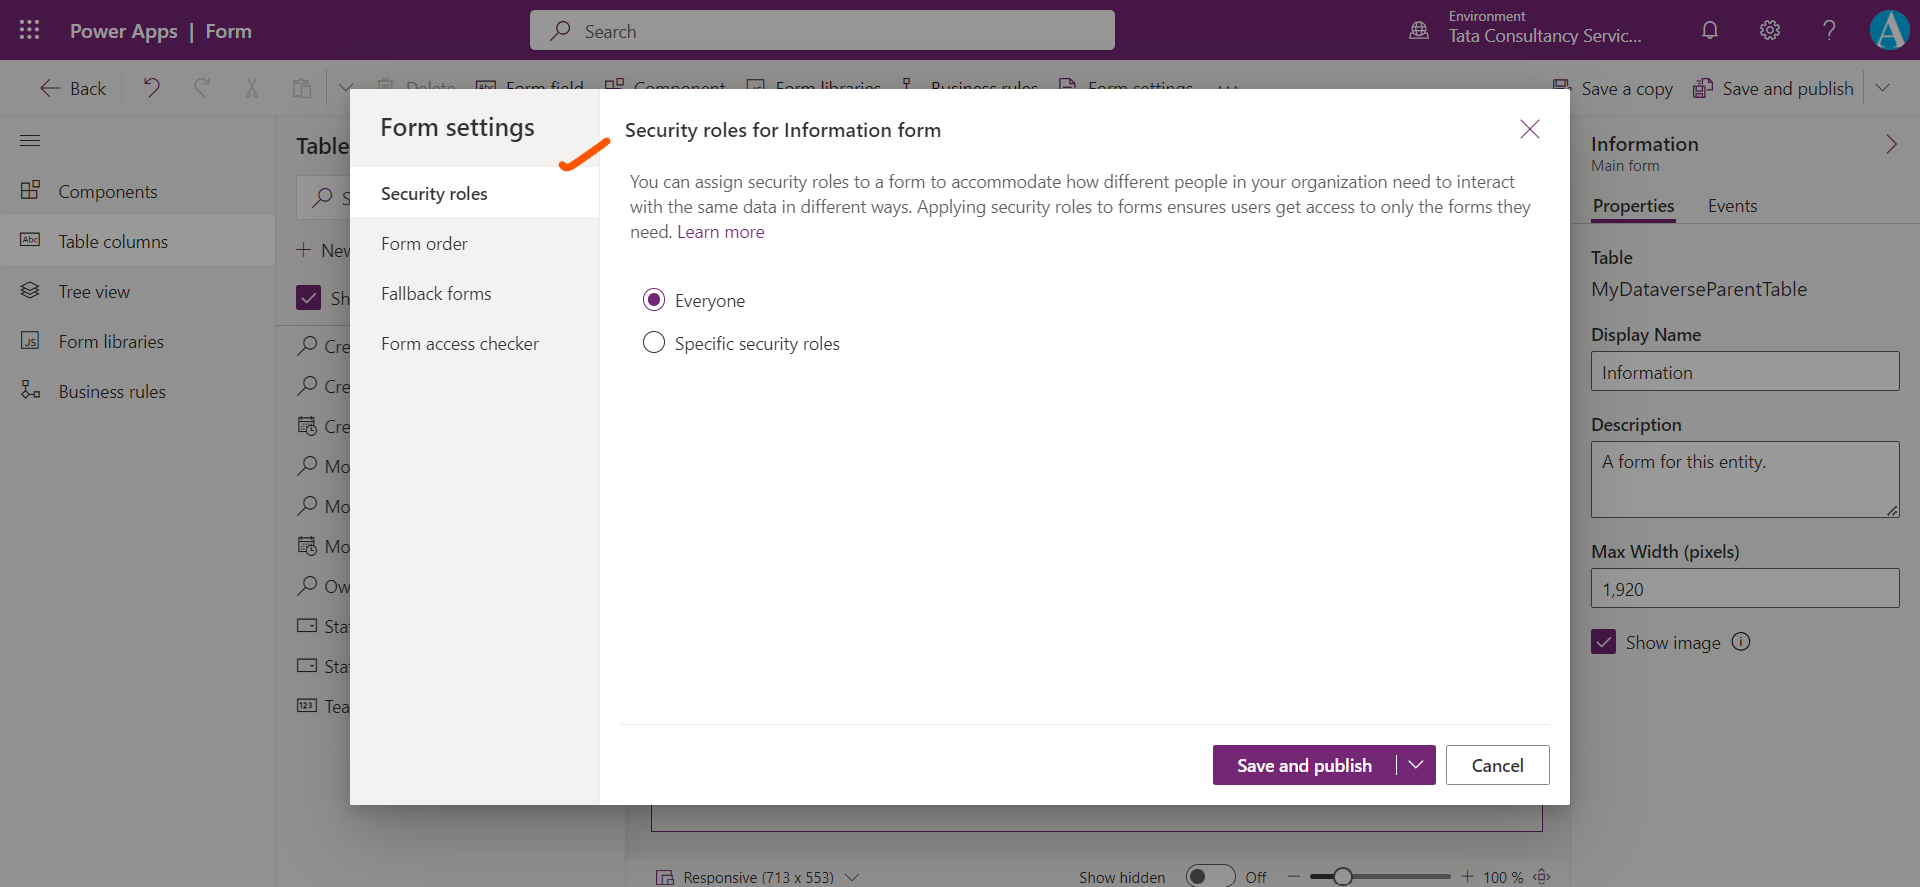
In the Form settings, we can define security roles to the form to control access to it, the form order, and fallback forms. Additionally, Form settings provide us the ability to check a particular security group's access to the form.
We can set form order when using multiple forms. Form order defines the order in which a user sees the available forms, within the allowed forms for their security roles. It enables us to have different forms appear for different users.
Step 9: Select Save and publish to complete the changes. Select the Back arrow in our browser to close the form designer.
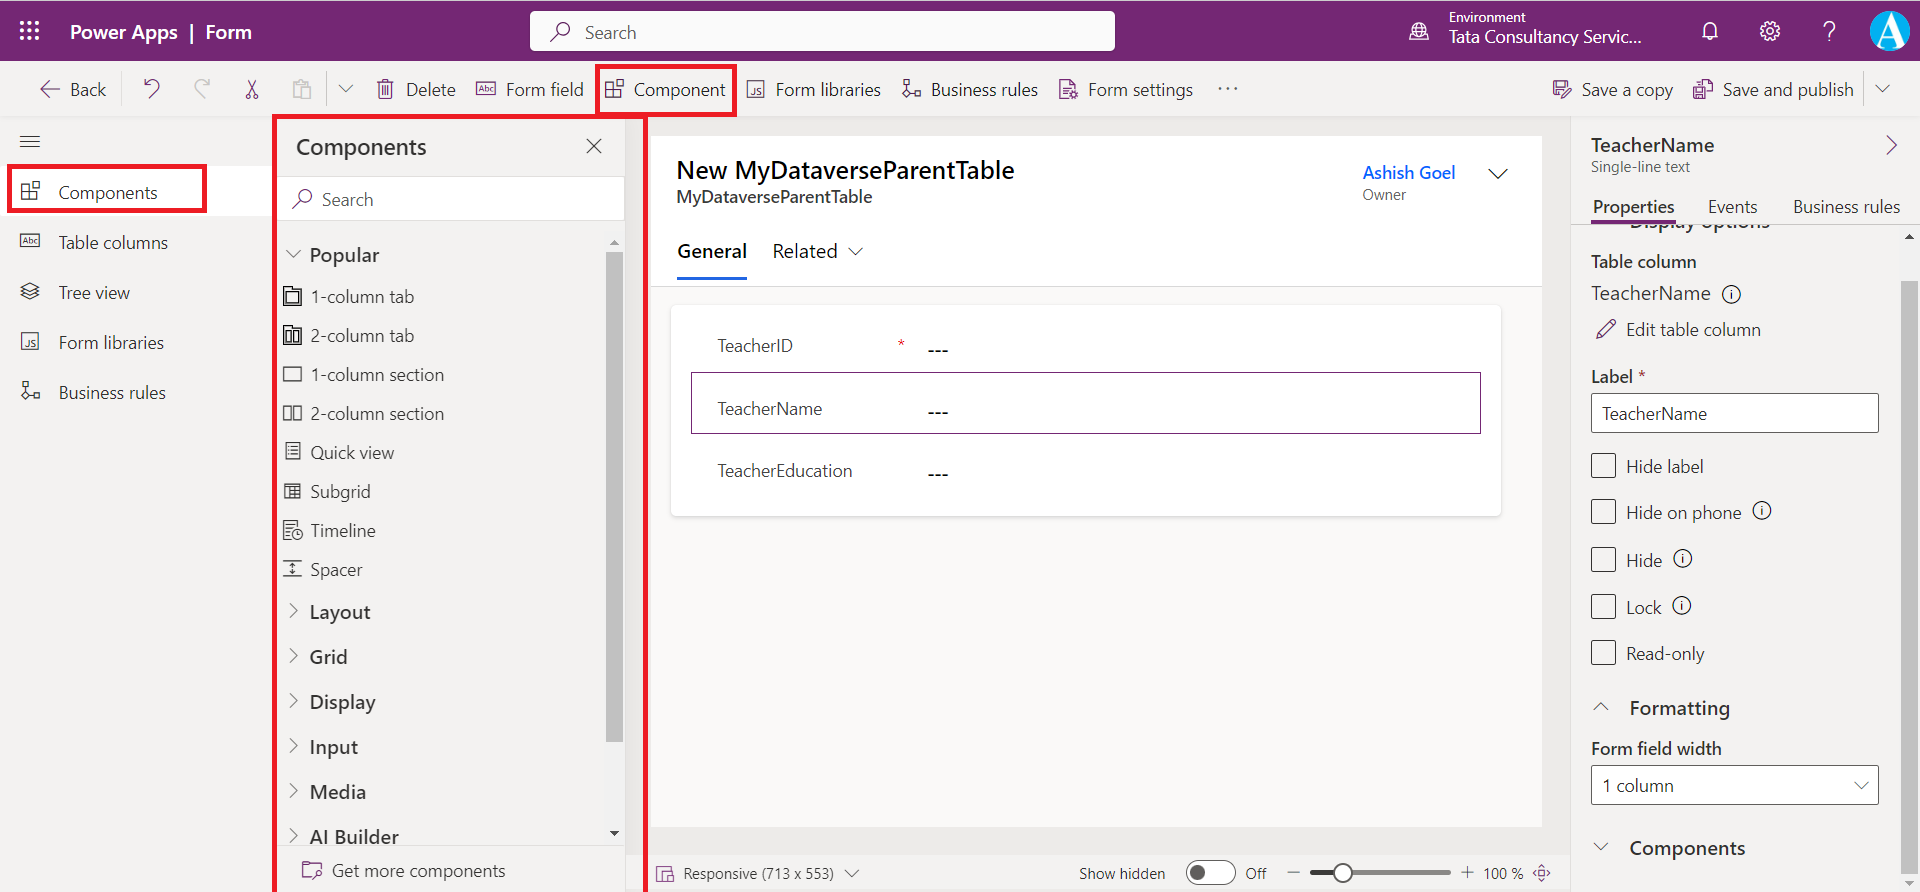
Step 10: If we select the Components field from the side rail or the Component option from the command bar, we can see the Components menu displayed in the left-side panel. Components allow us the ability to further customize our form.
• The Layout choices provide us with ways to organize the physical structure of our form.
• Grid components enable us to allow data entry via a grid.
• Display components allow us to insert calendars, external websites, Canvas apps and other items into the form experience.
• Input components provide our user with other means for data entry, such as checkboxes, option sets, toggles, and pen inputs.
• The list of available components continues to expand including options like Power BI reports.
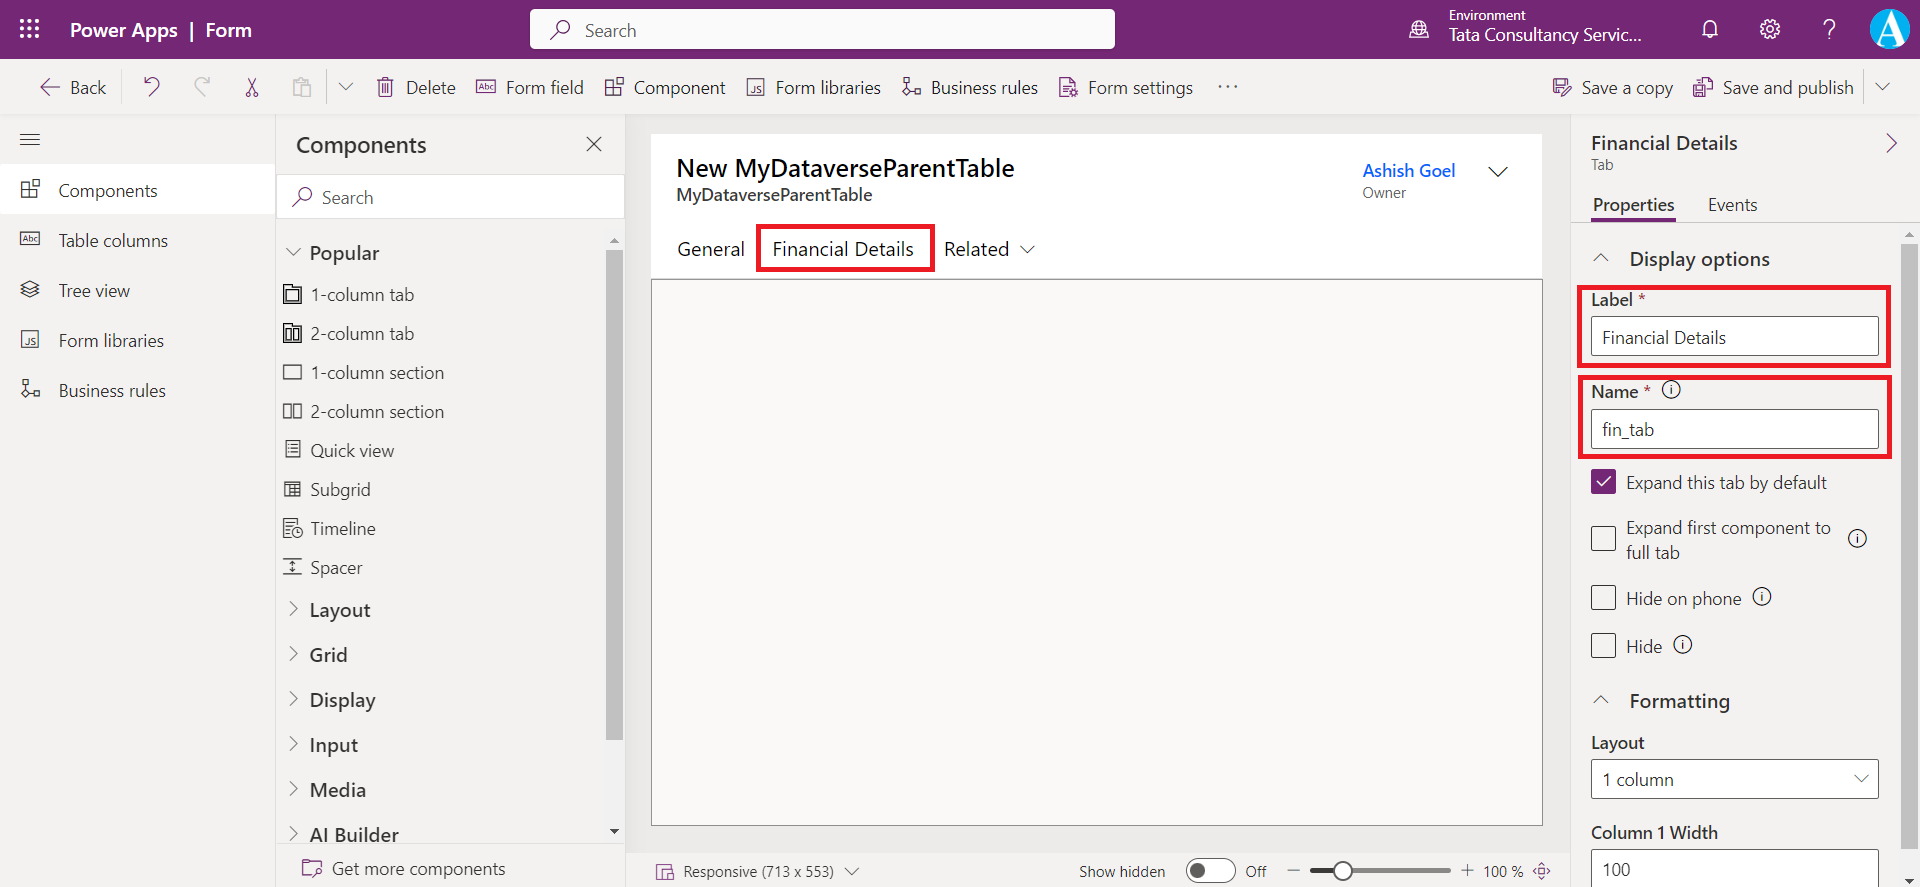
Step 11: Select the Components section from the side navigation panel and then select the 1-column tab option to add a new tab right to the General tab.
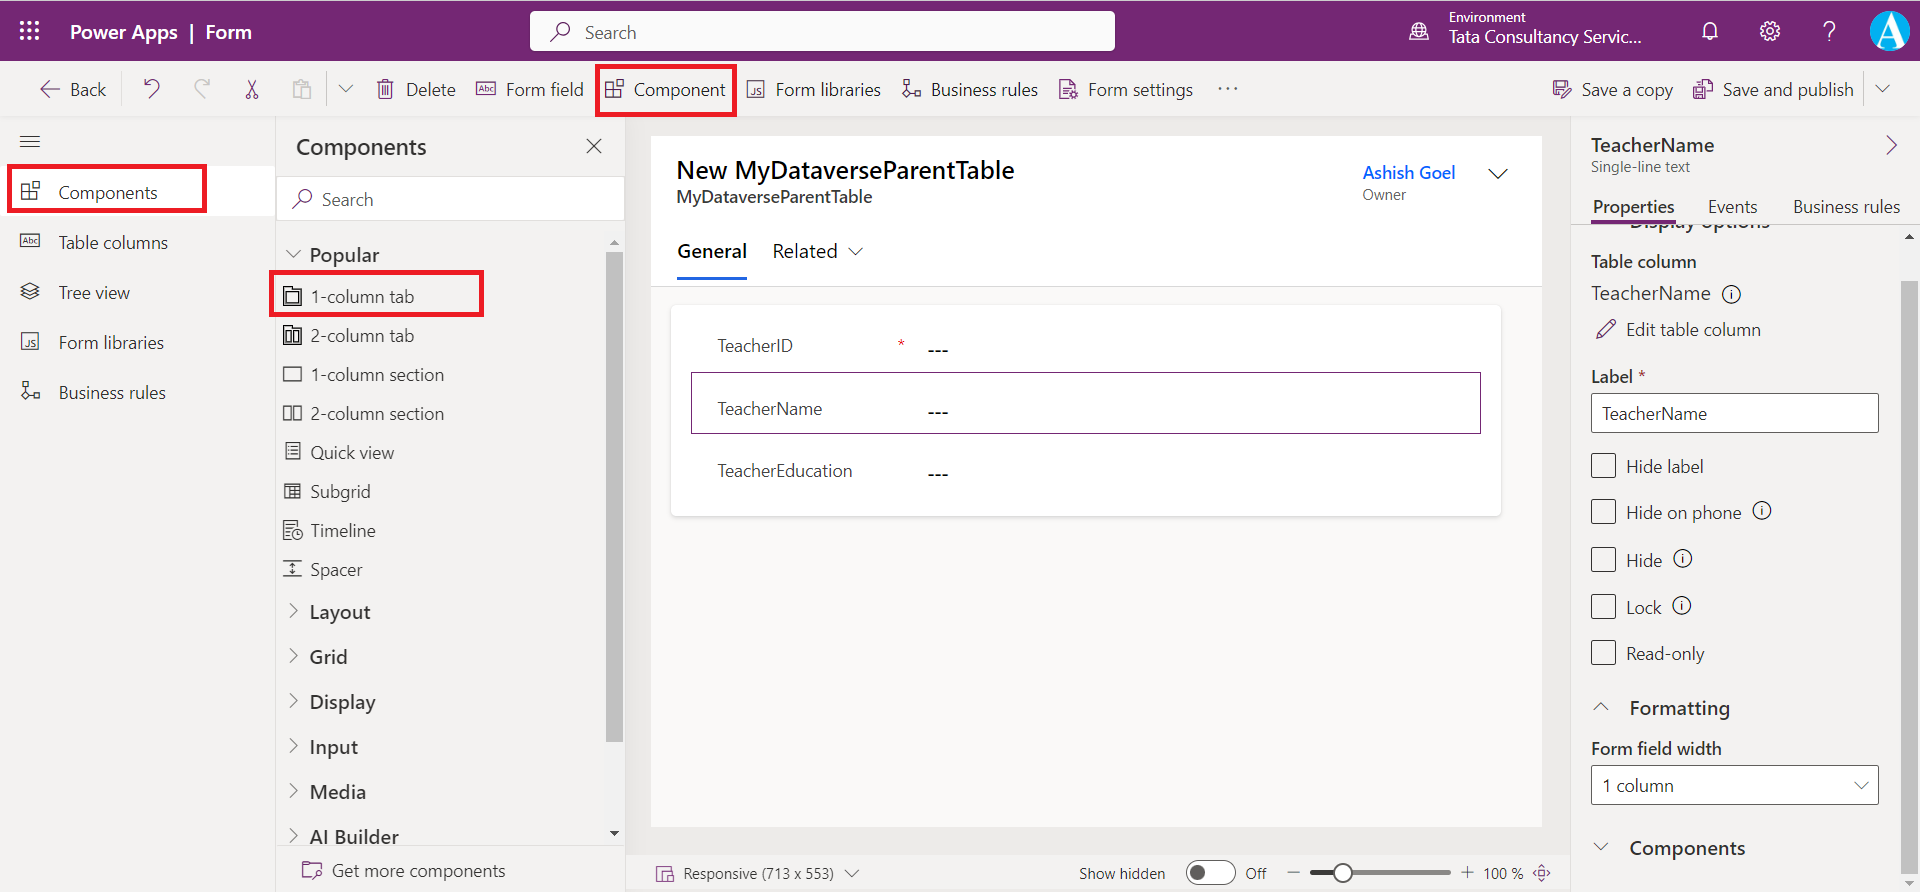
We can see the Properties in the right side of the screen.
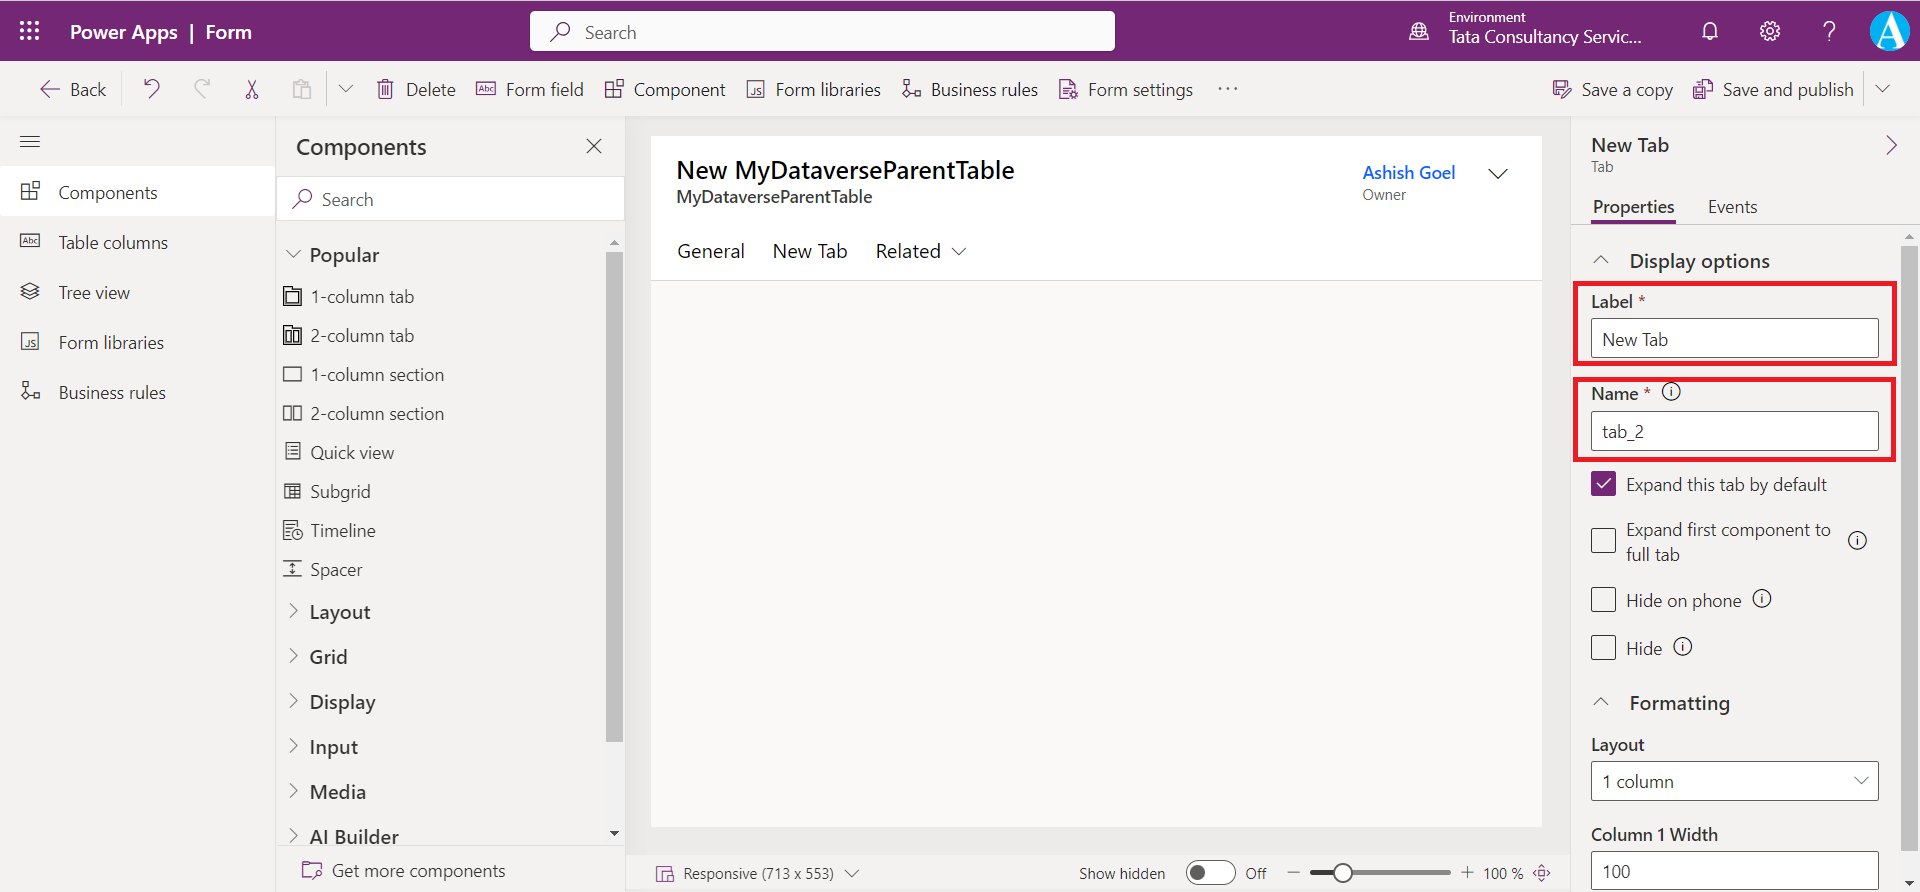
Step 12: In the Properties pane, for the Label, enter Financial Details. For the Name, enter fin_tab.
Step 13: Add the TeacherSalary column on the Financial Details tab.
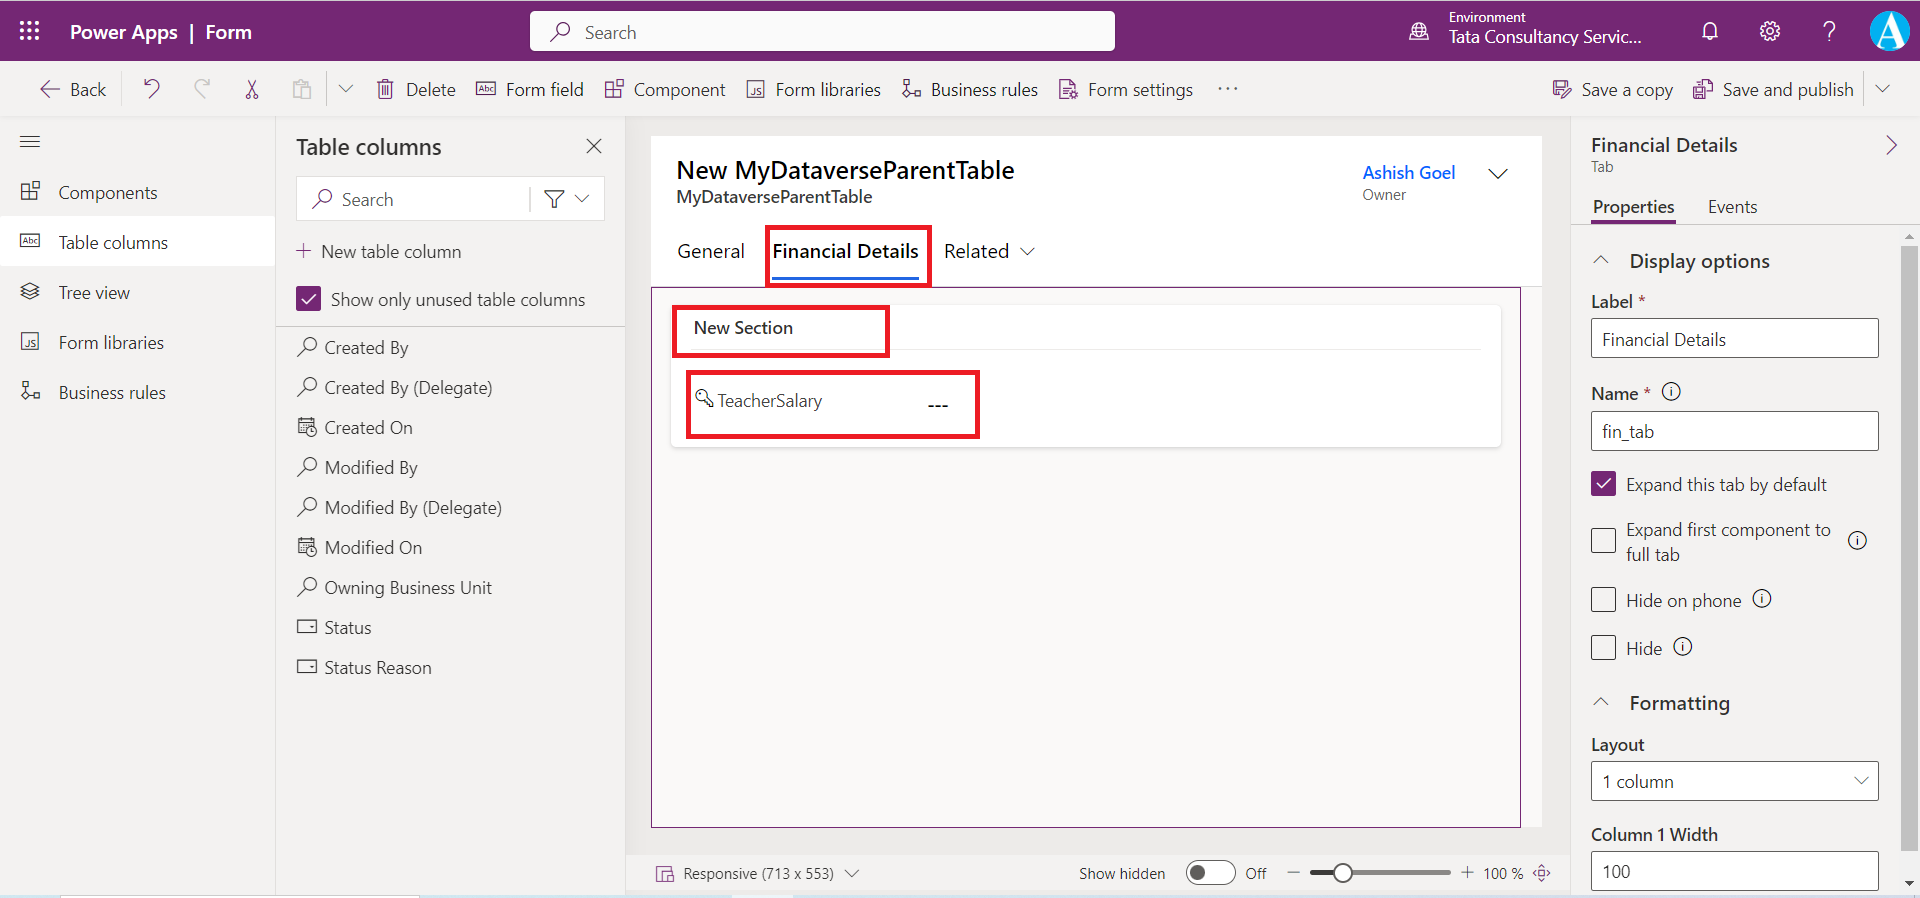
Step 14: We can also change the name of the section, by selecting the section. We can see the Properties at the right side of the screen.
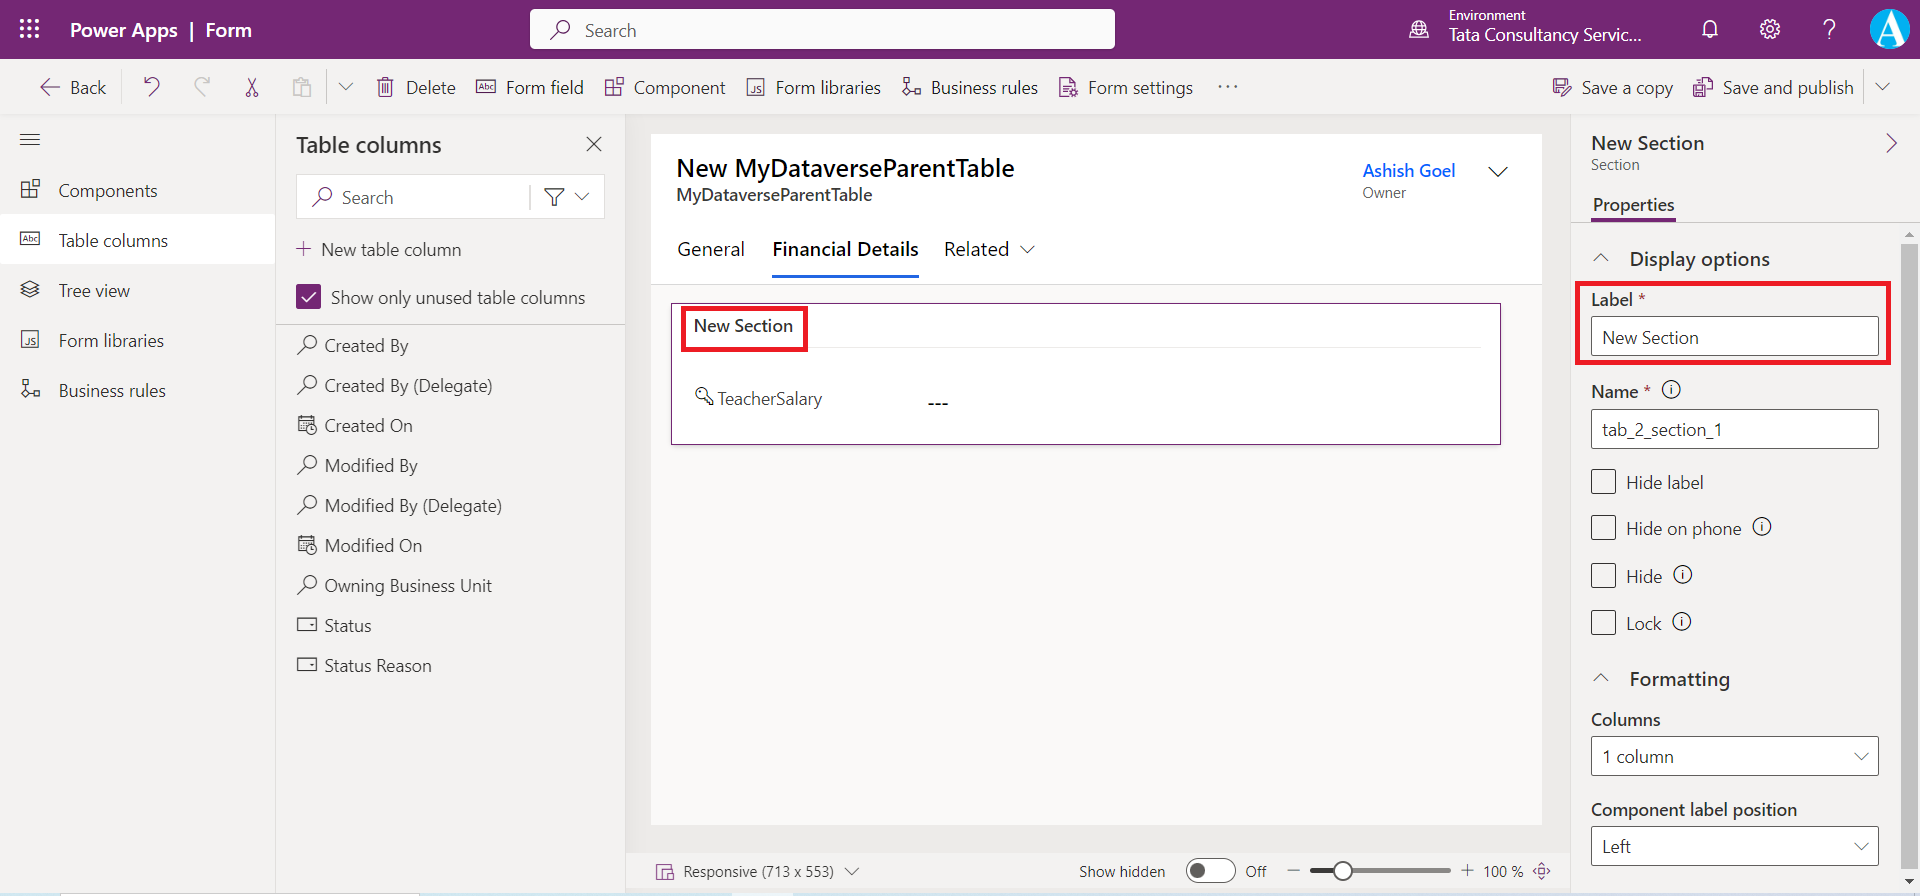
Let me change it to Teacher Financial Data in the Label name.
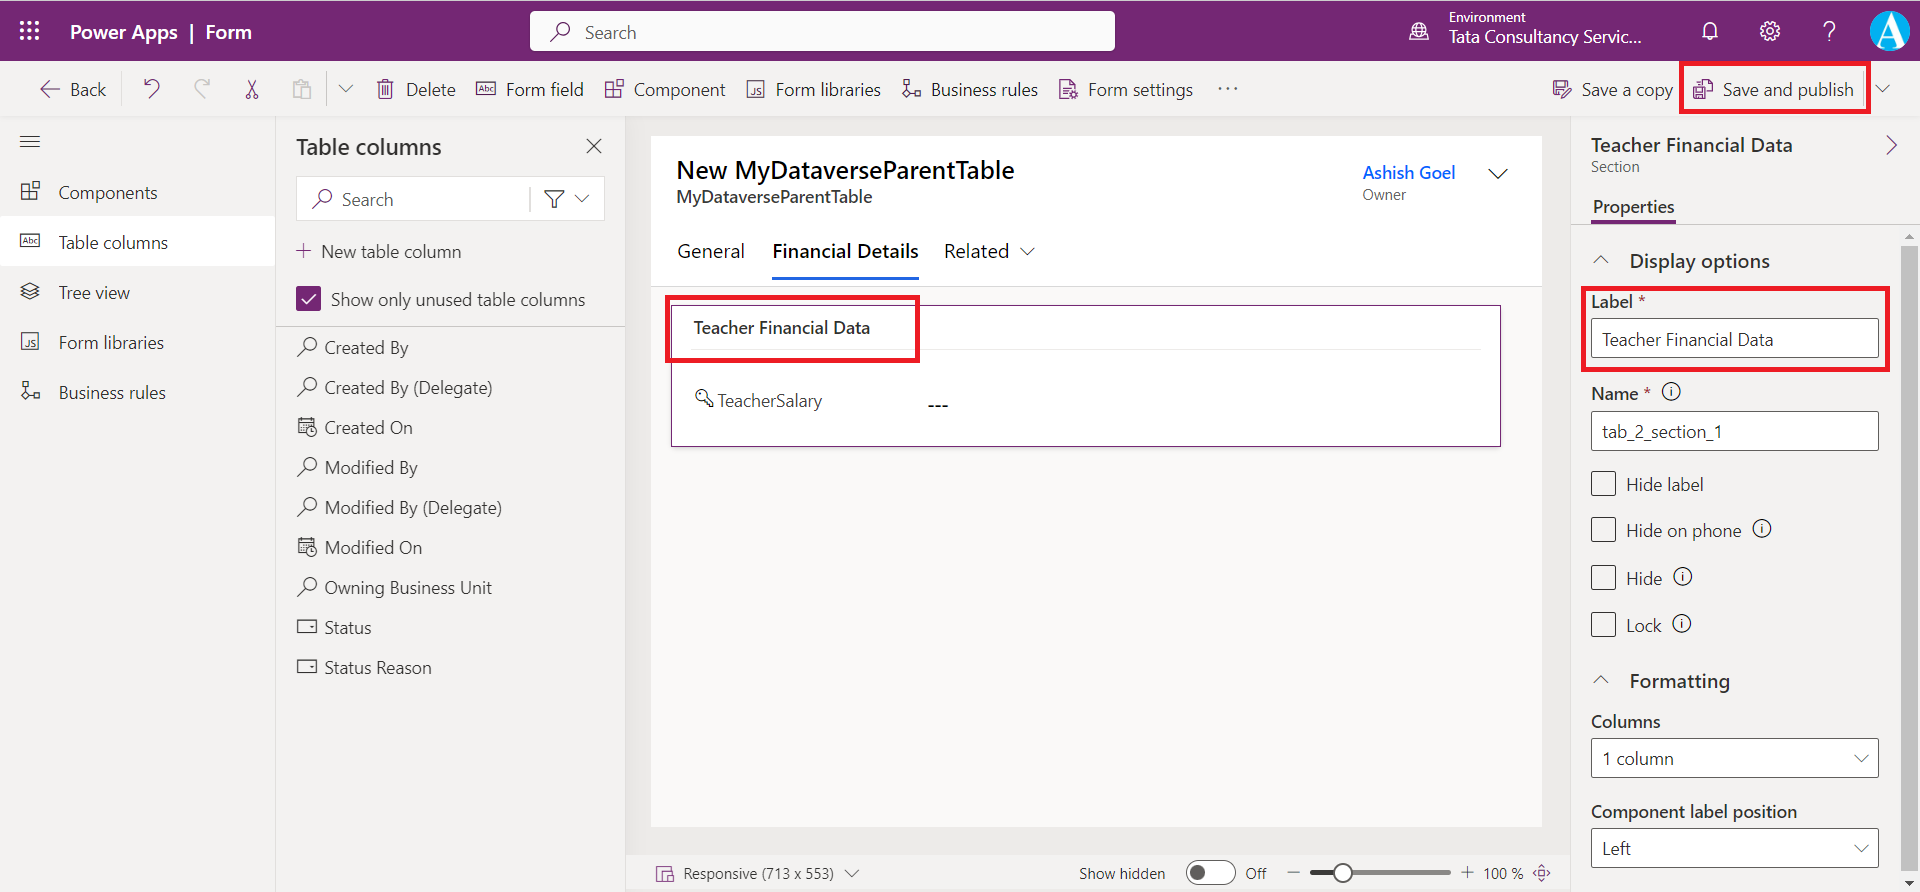
Step 15: Select Save and publish to save the form and render the changes.
Step 16: Open the table for which we have created the form. Click on Edit.
Click on the chevron icon next to “New row using form”.
We can see our form as shown in the following image, which we have created.

When we click on the Financial Details tab.

Step 17: Ener the details and click on Save & close to save the record in the table.
Note: If there is any Auto number it is better to put in Read-only mode in the form because its entry is automatically saved in the dataverse.
Quick create Form
With quick create forms, an app can have a streamlined data entry experience with full support for logic defined by form scripts and business rules.
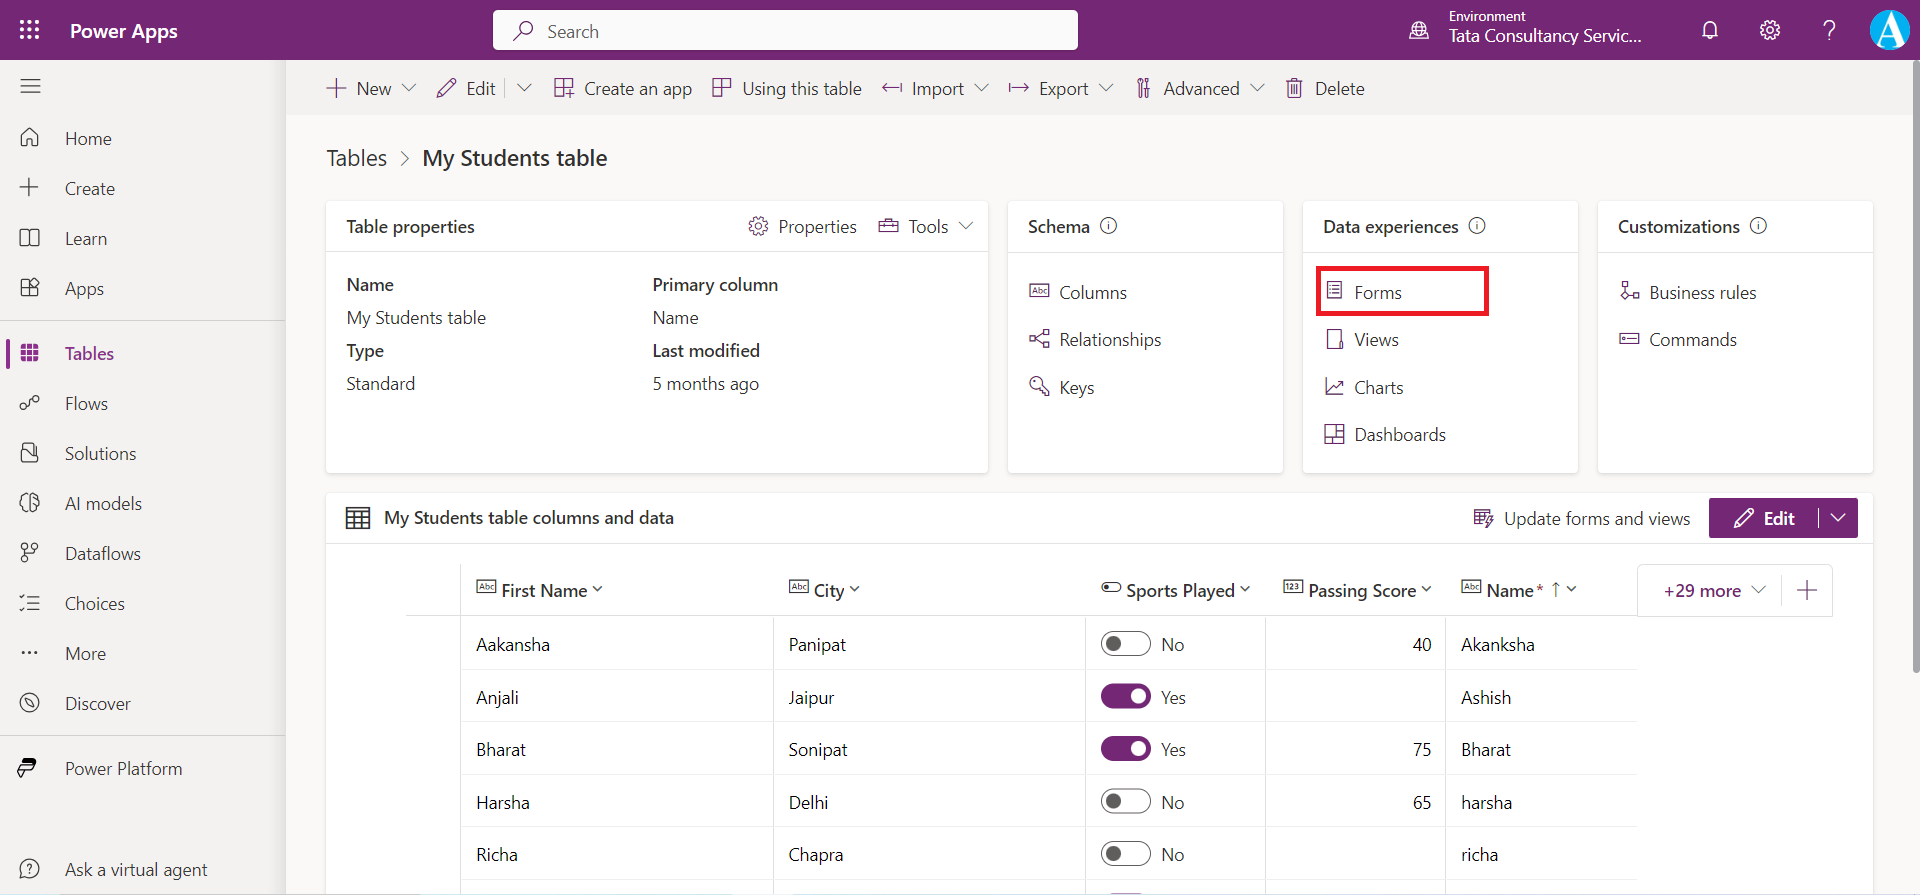
Step 1: Click on Forms from the Data experiences pane.
Step 2: Click on the chevron icon, we can see that the + Quick Create Form is disabled.
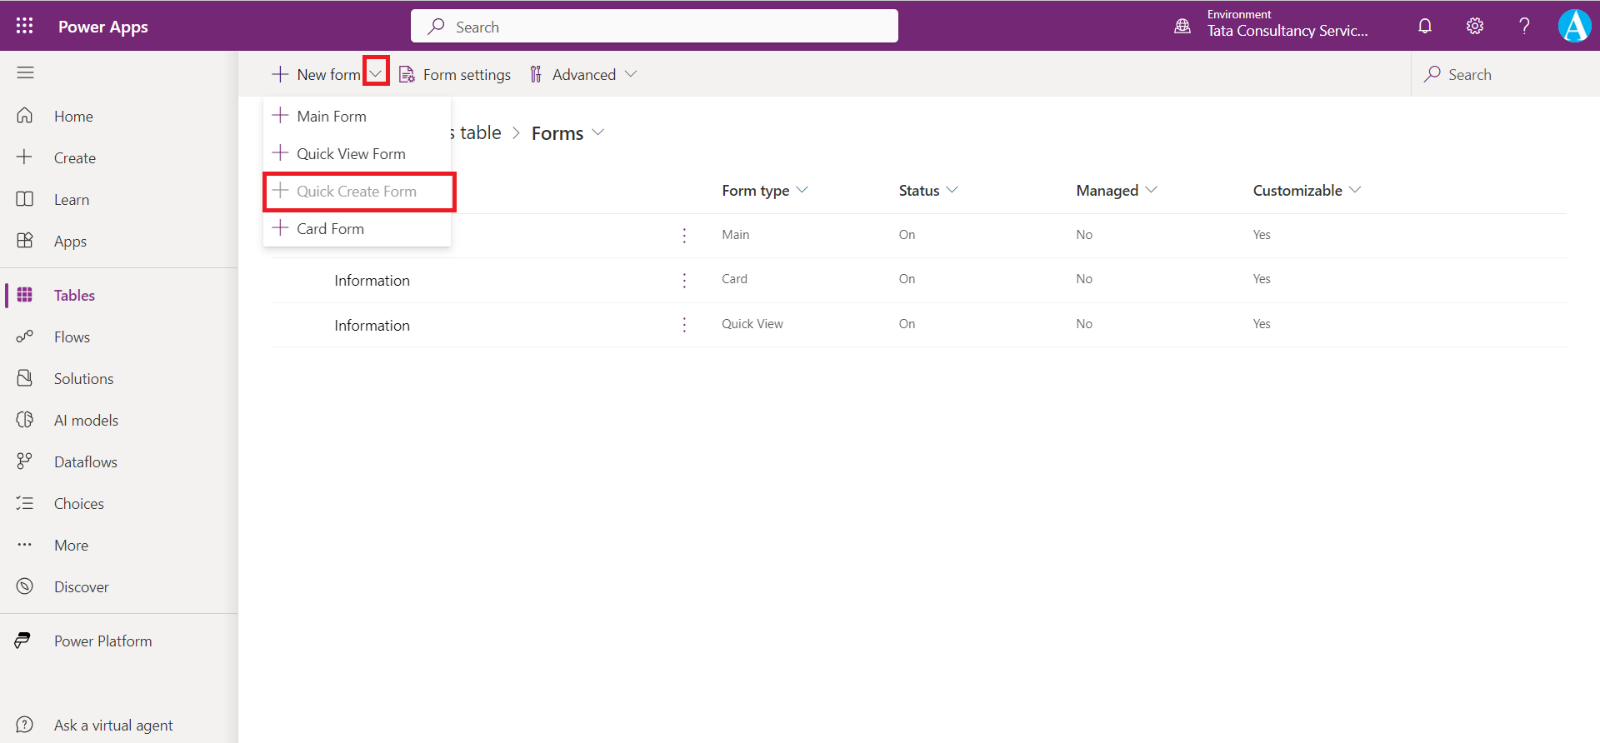
Because the table must have the Enable quick create forms option enabled for the quick create form to be displayed.
Step 3: To enable the quick create form, click on Properties as shown in the following image, scroll down from the Edit table pane.
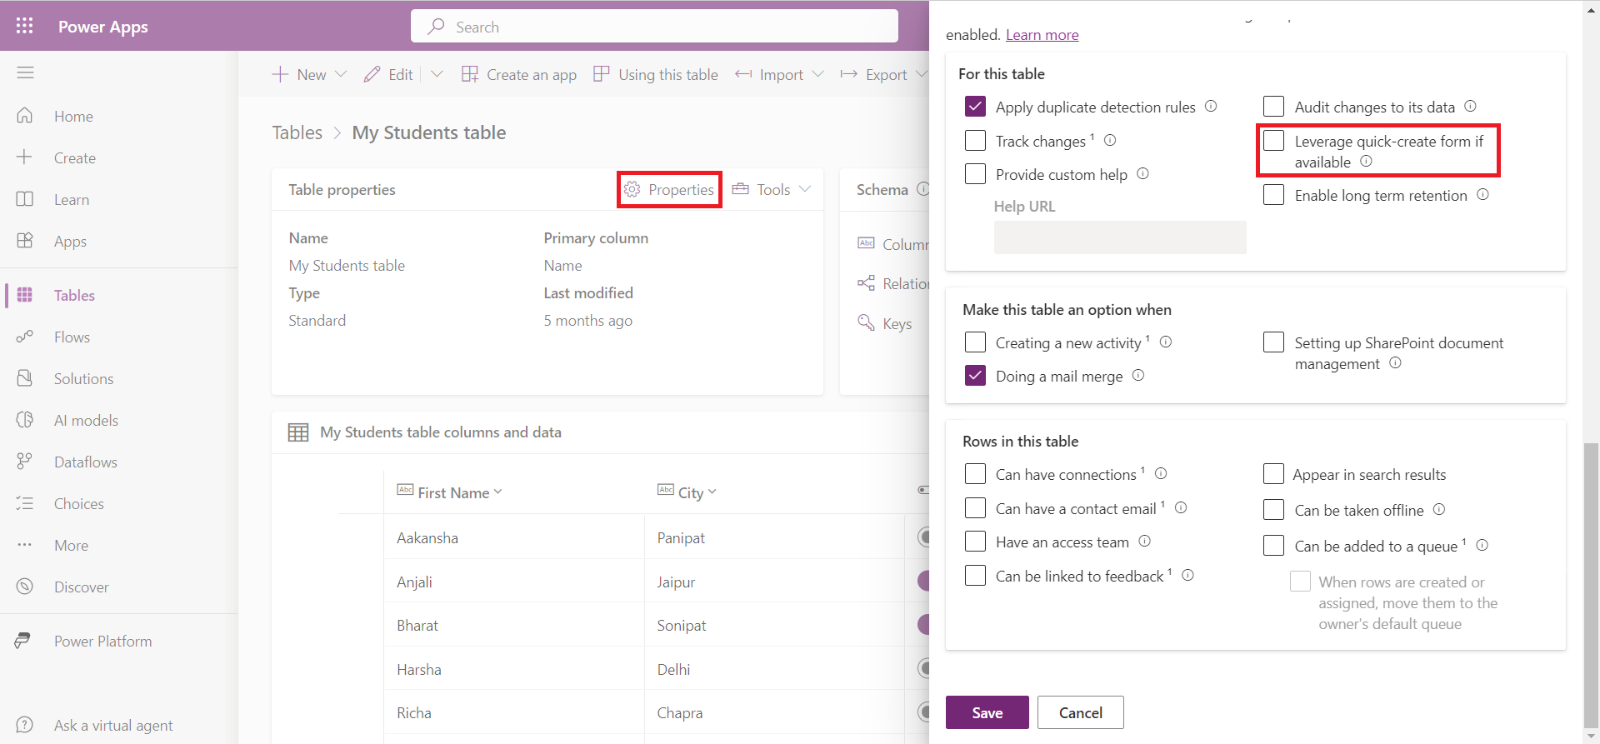
Then check the checkbox Leverage quick-create form if available and click on Save to save the changes.
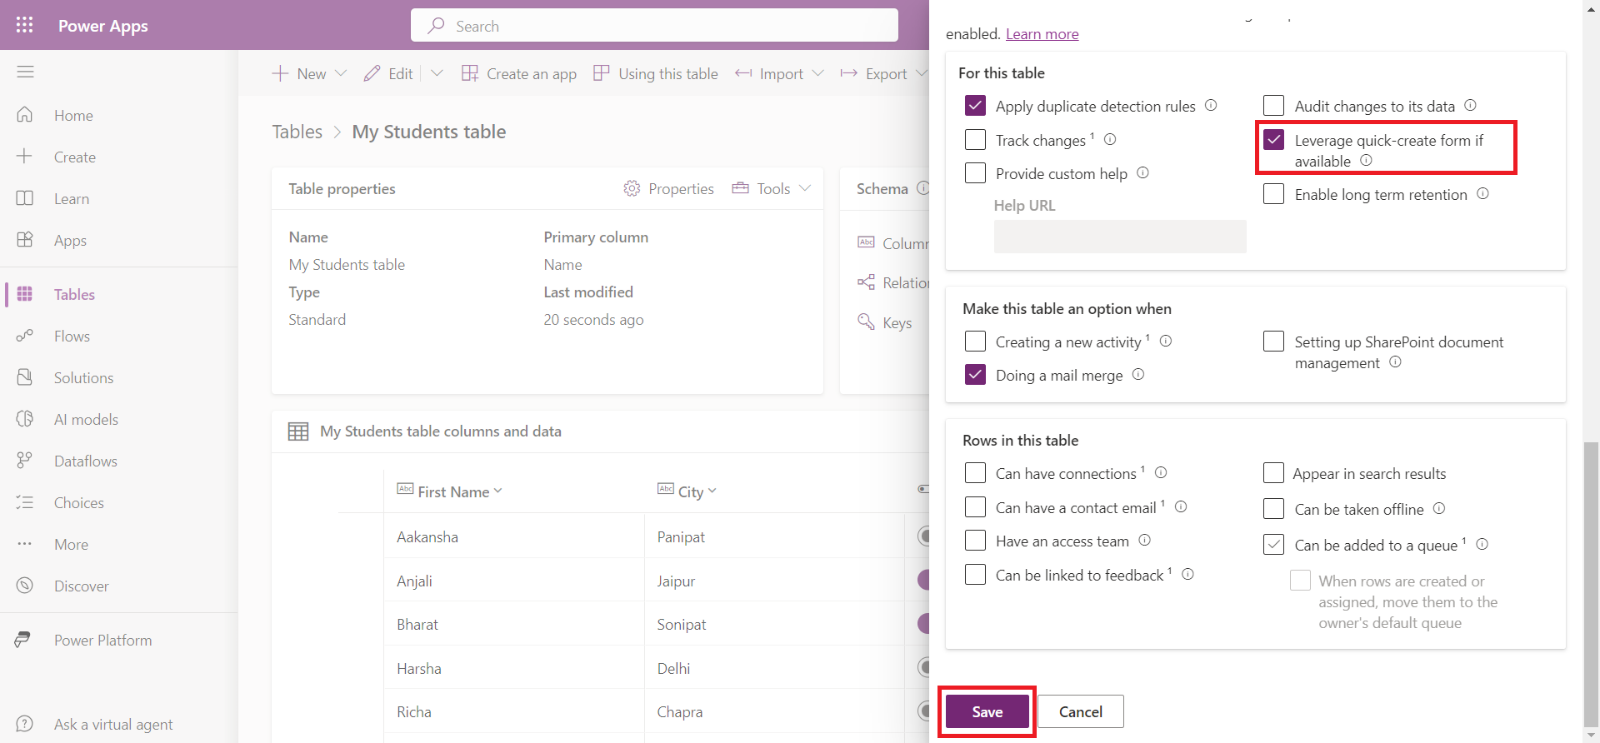
Step 4: Now we can see that the + Quick Create Form is enabled.
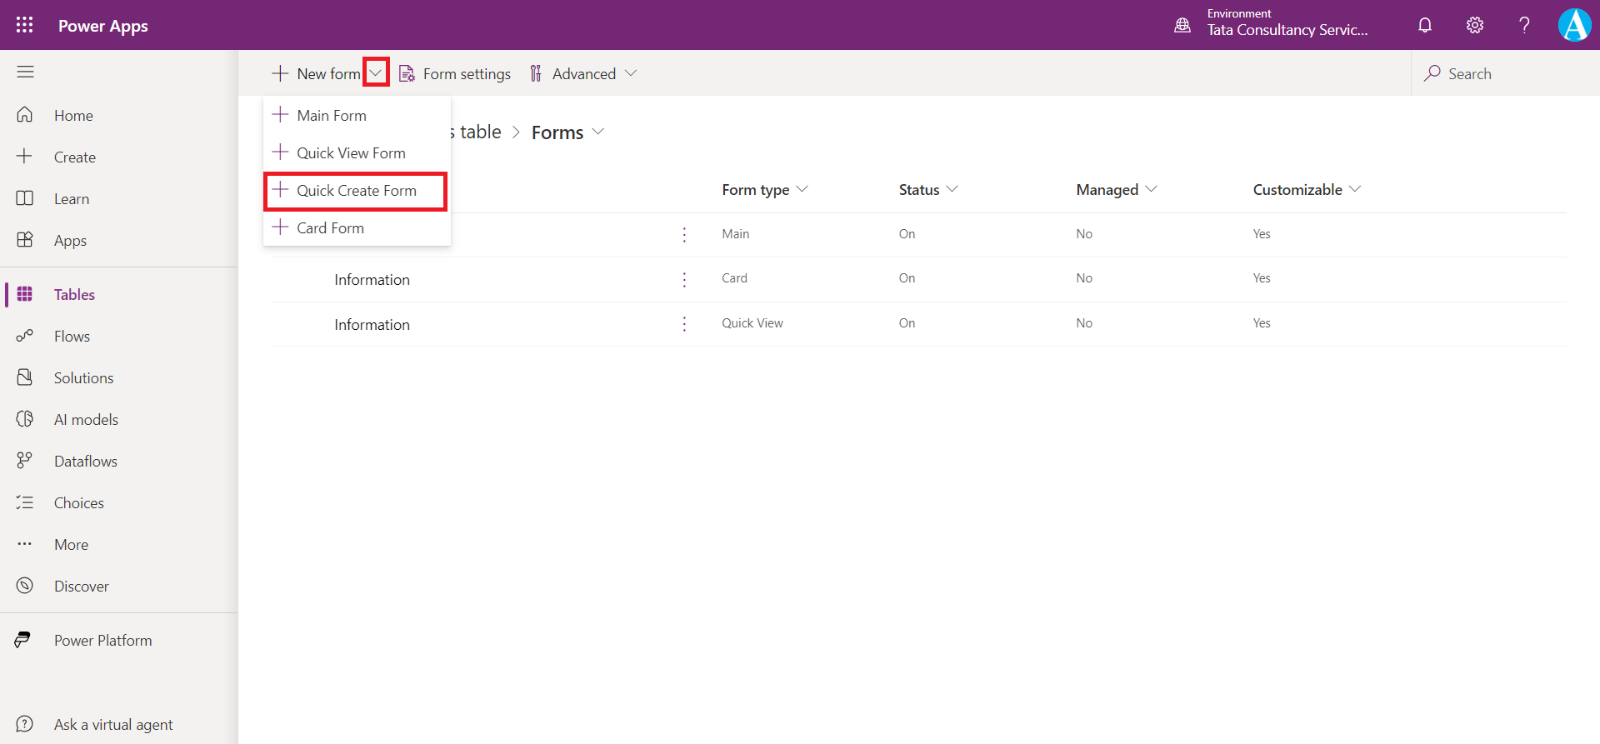
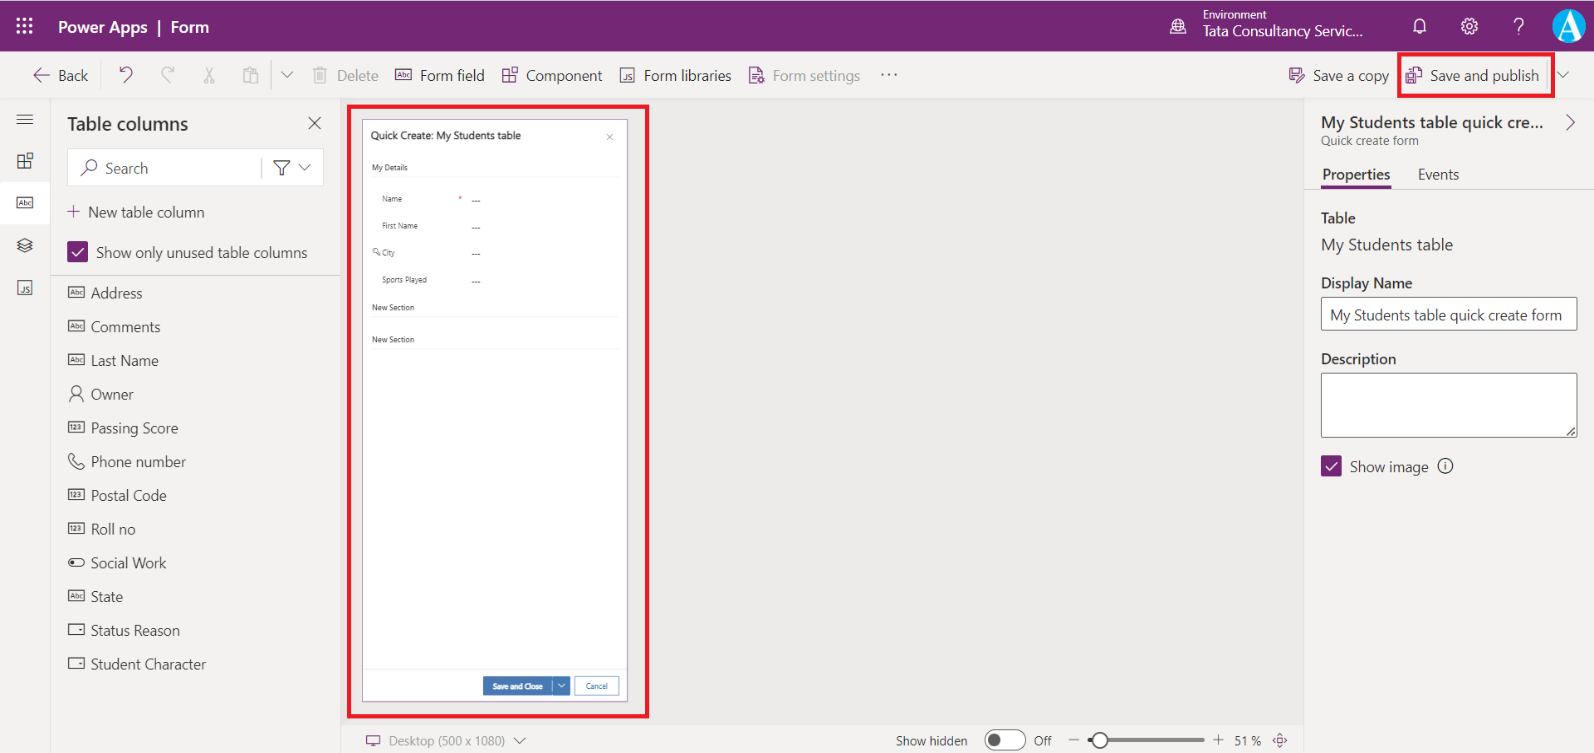
It opens a form designer which is very much similar to the main form designer.
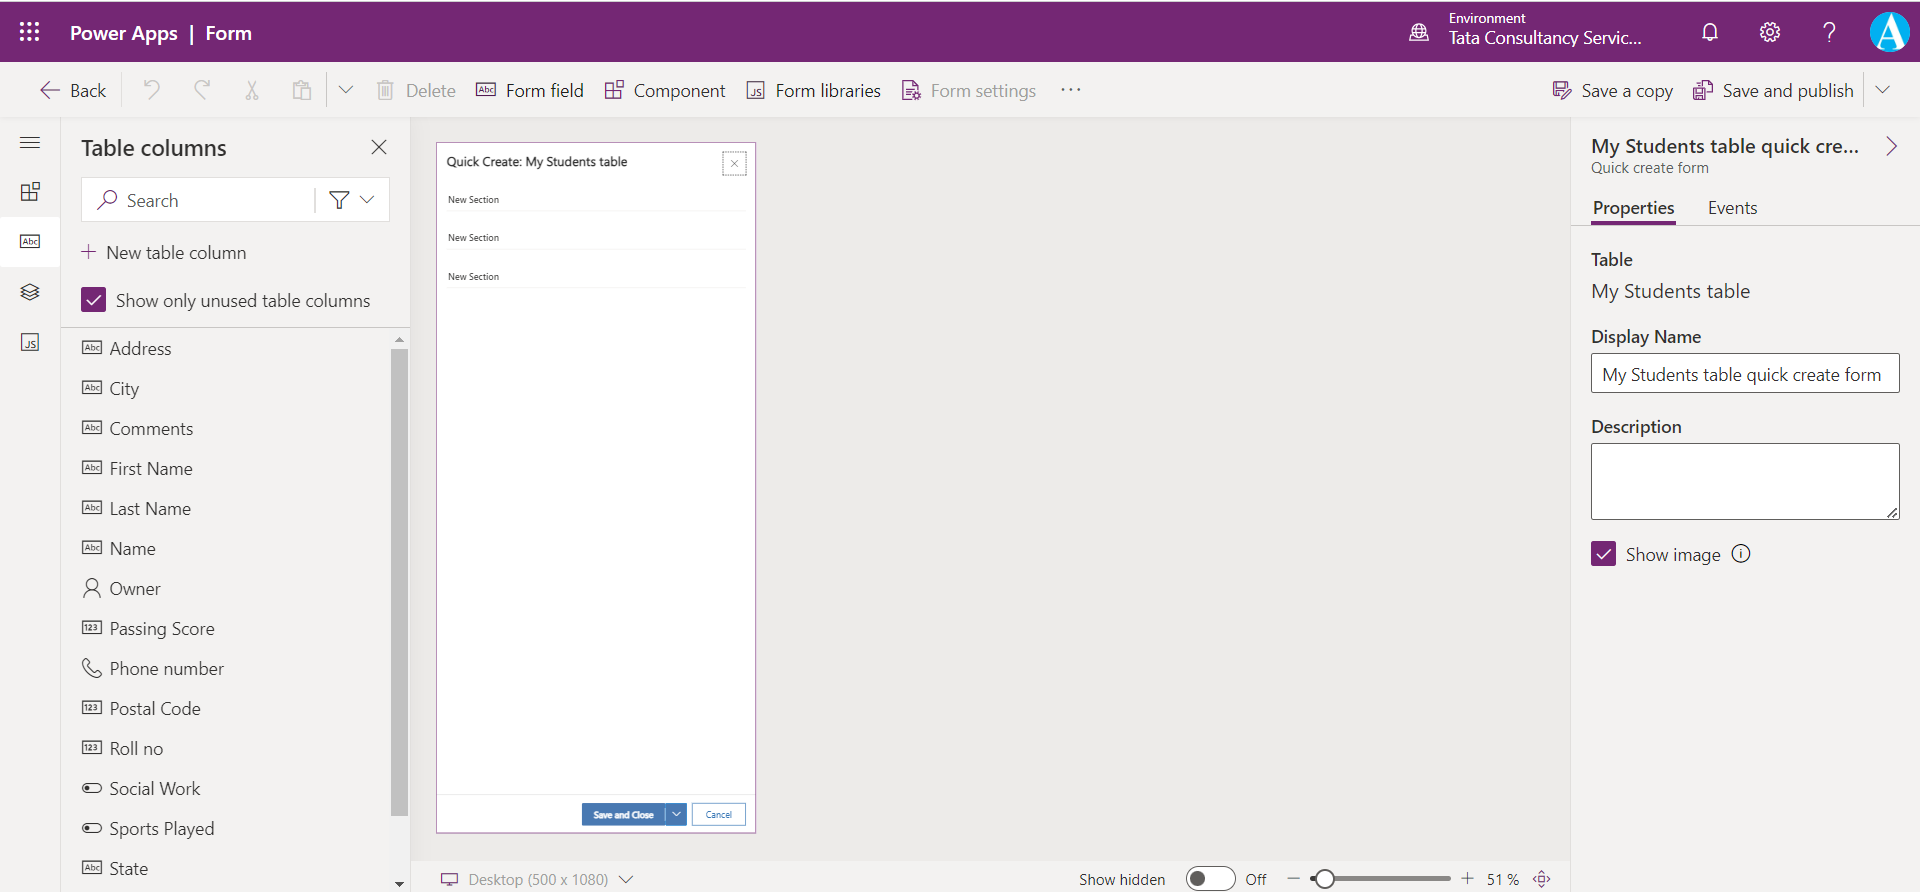
The Quick create form is created.
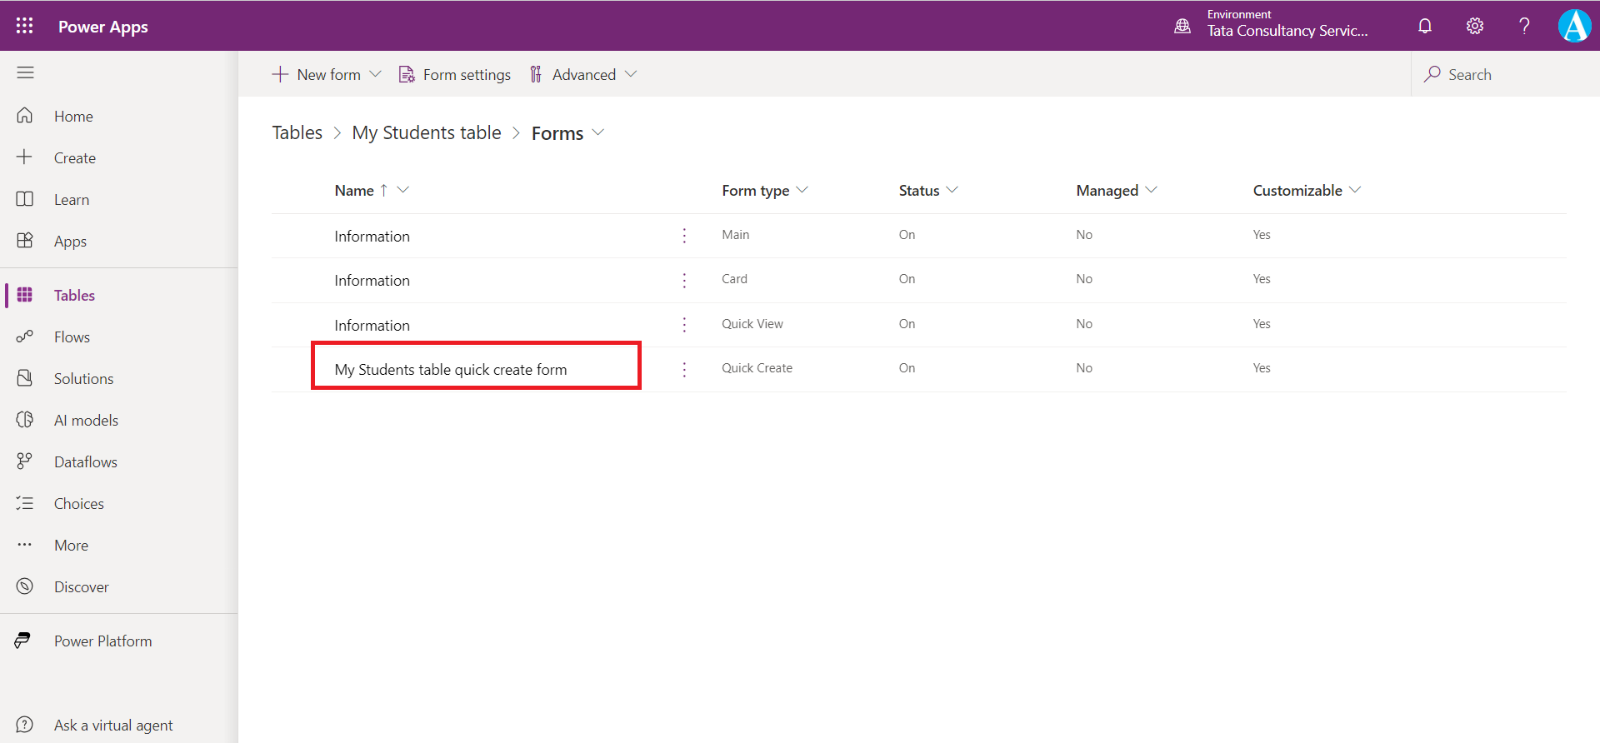
We can see our newly created quick create form in the list of forms.
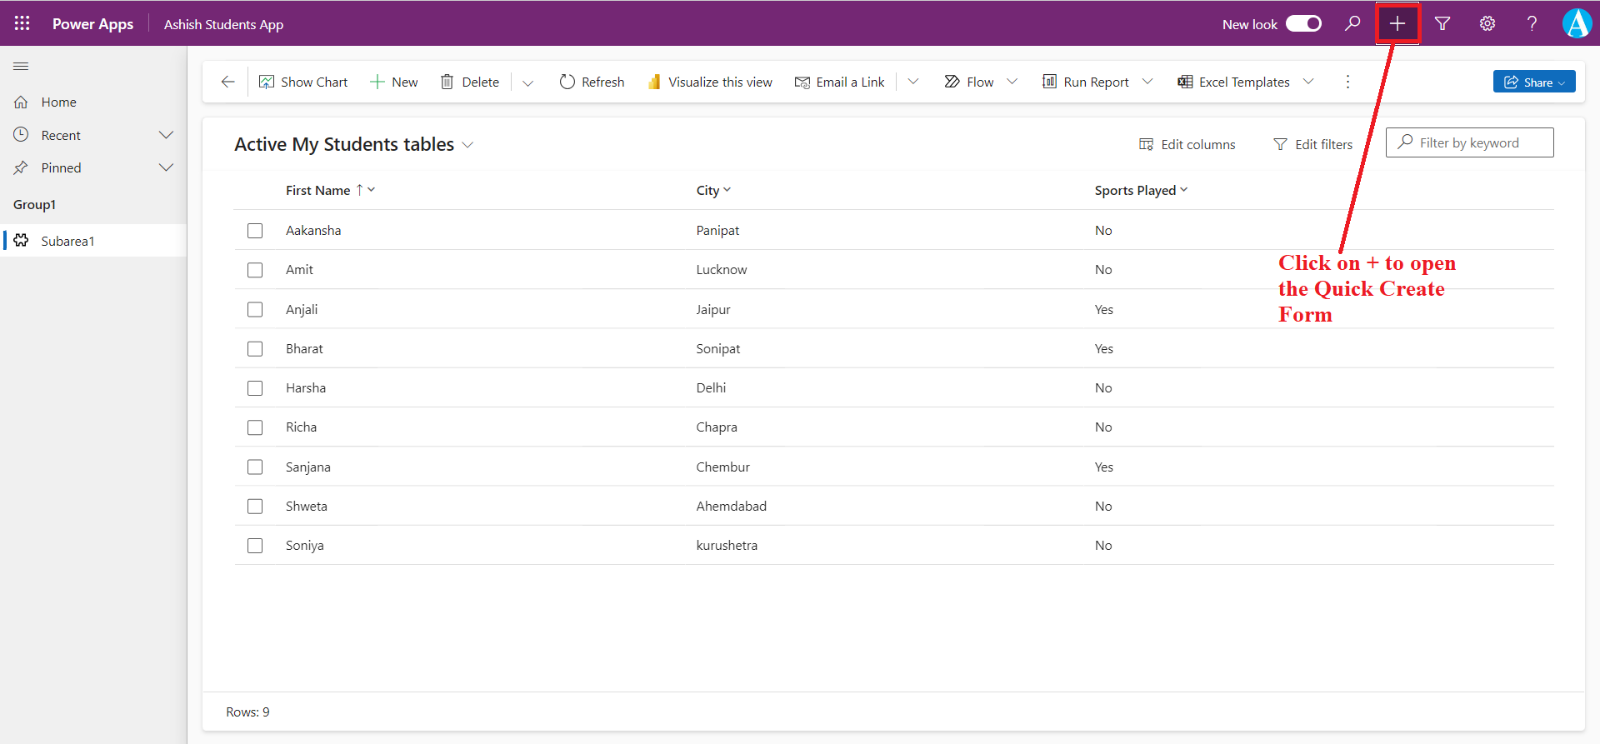
Step 5: Also launch the application, click on + to open the quick create form. Please note it may take some time to show our quick create form here.
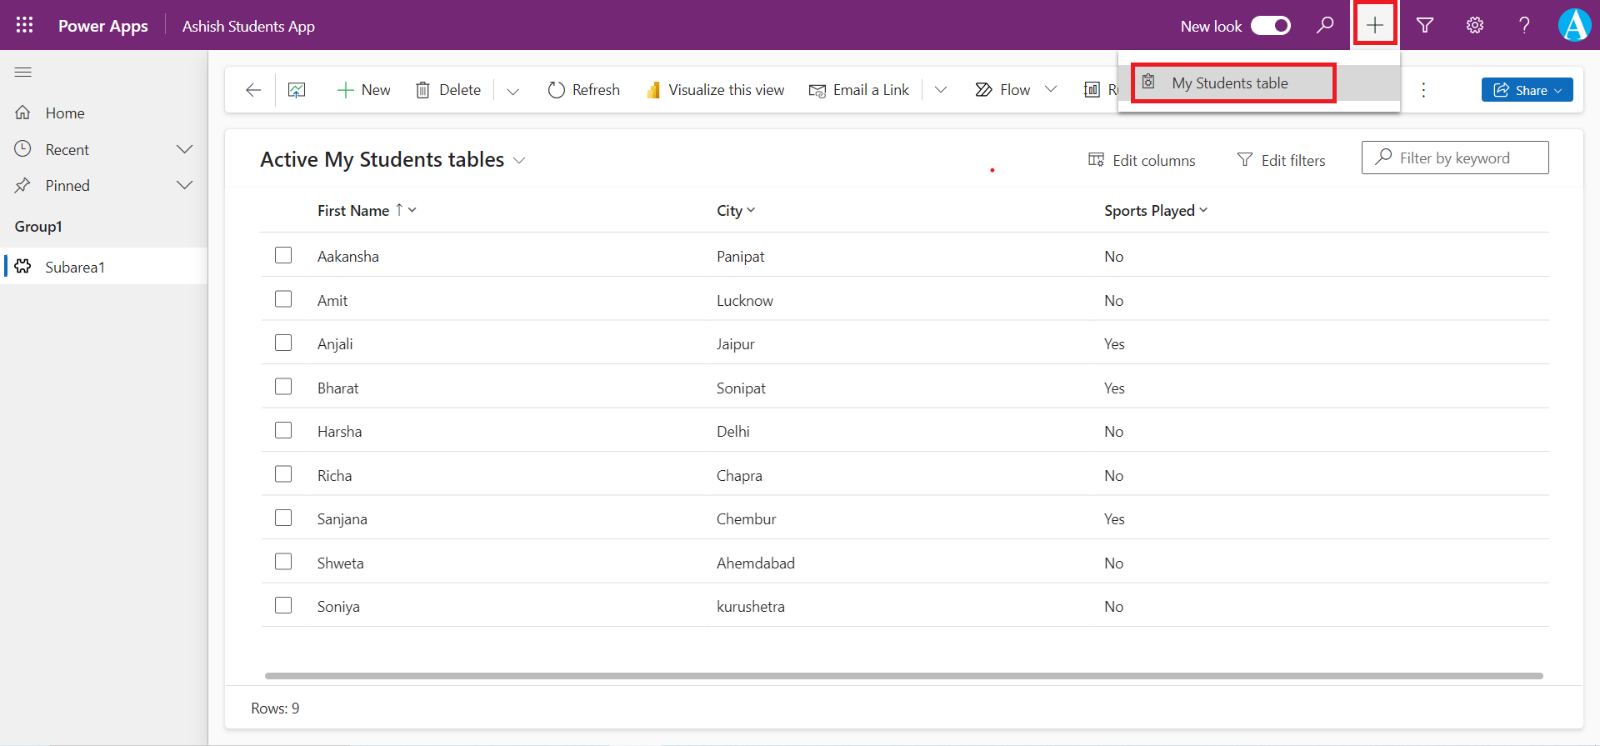
We can see our name of the table.
We can see our form. After adding the details, click on Save and Close.
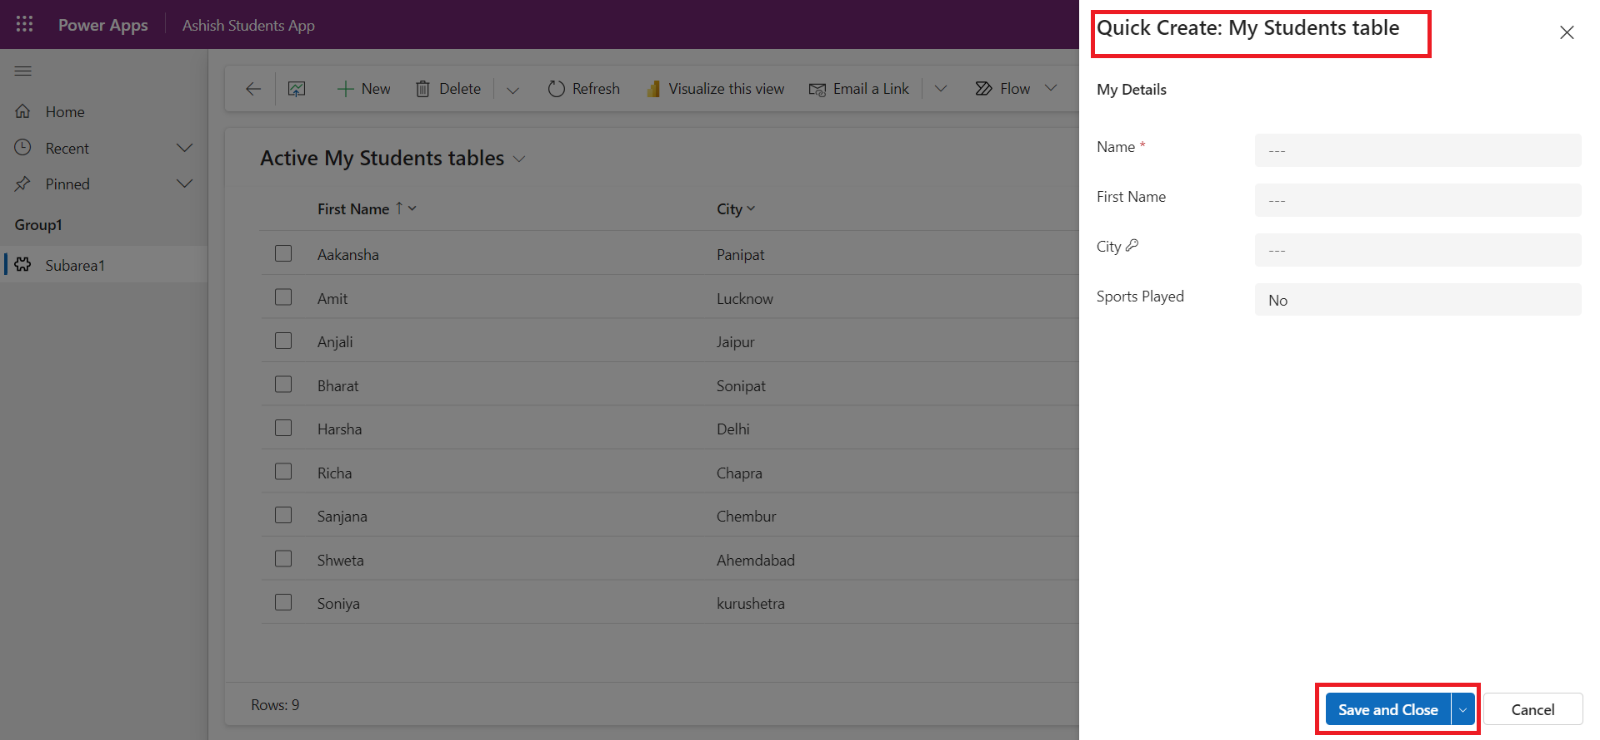
Step 6: Let’s add the following details as shown in the following image.
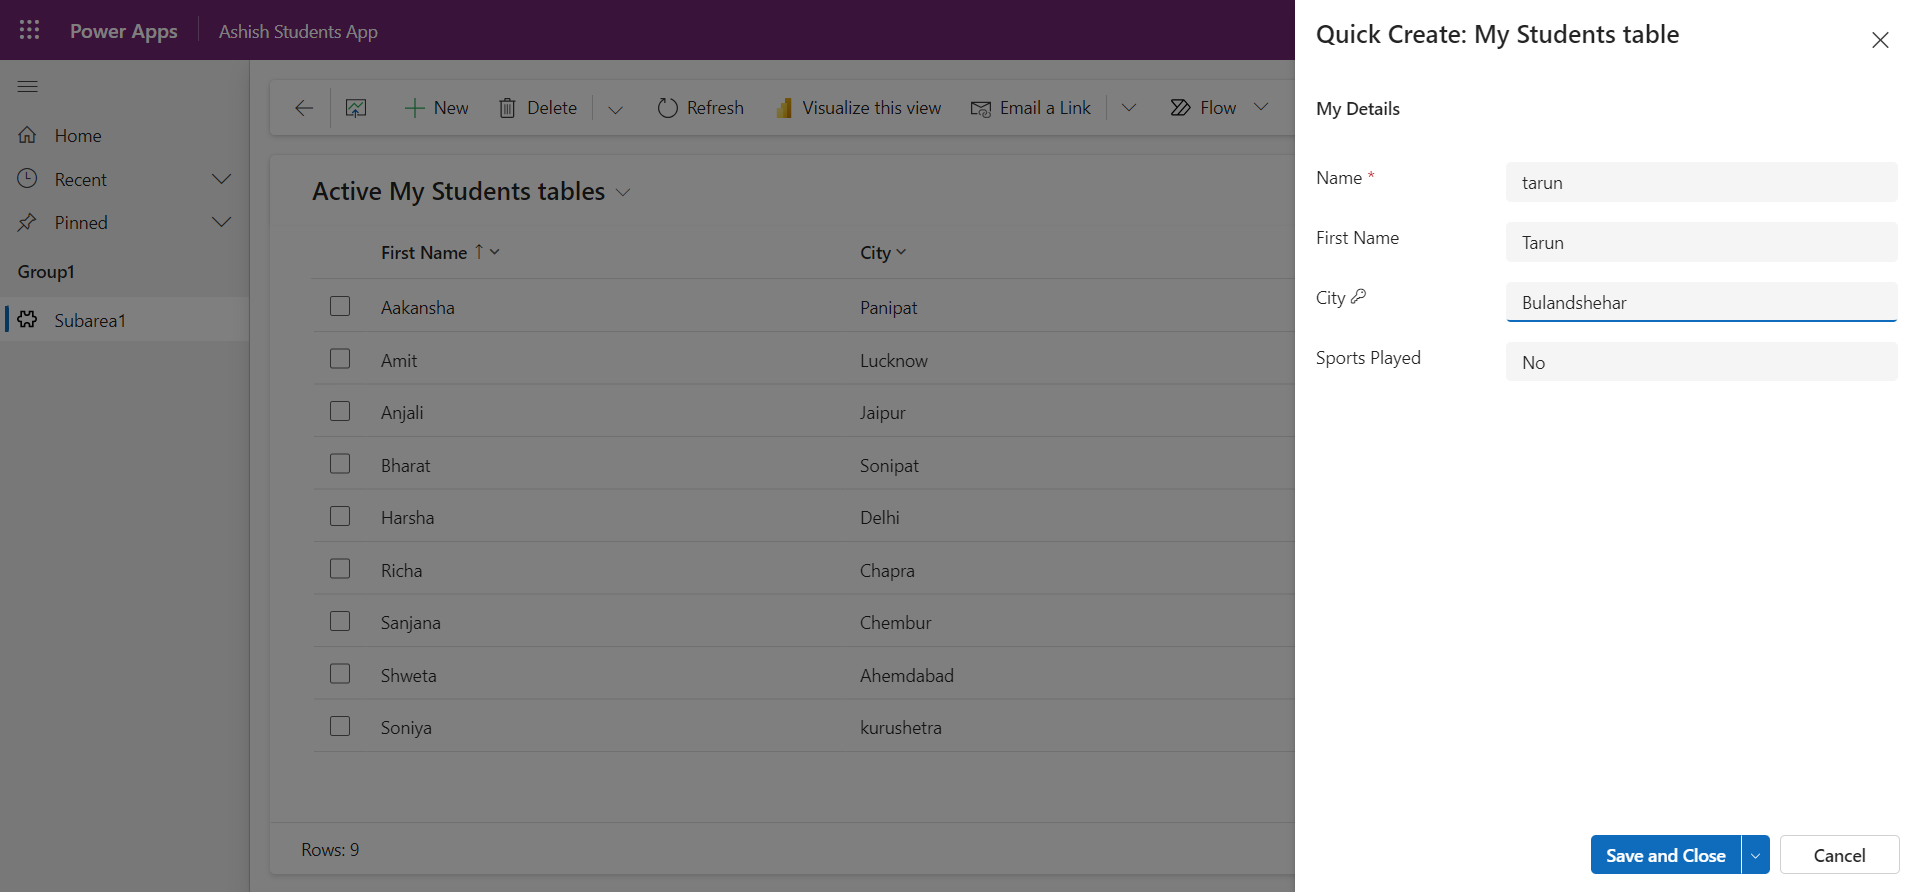
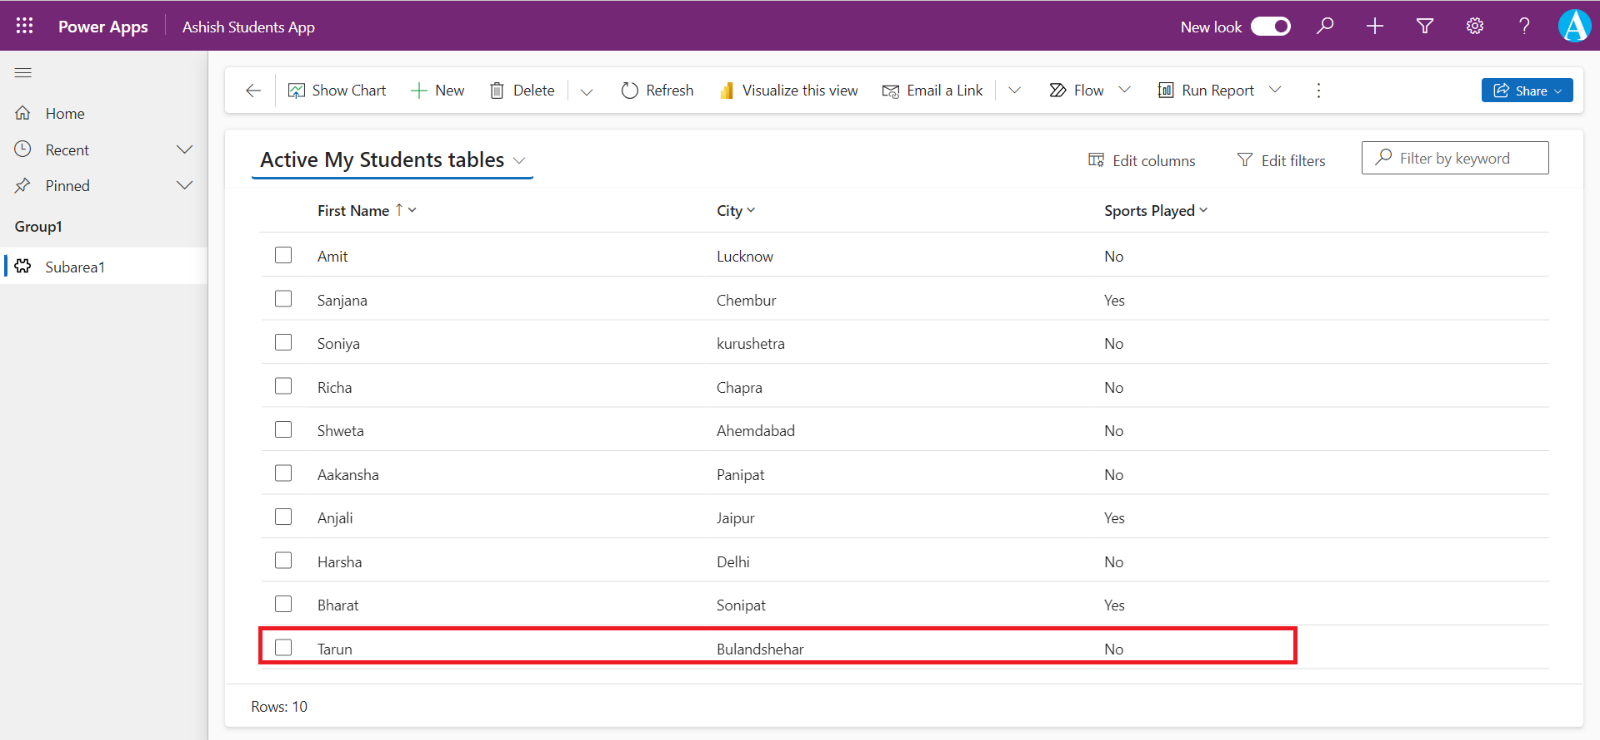
We can see our record, in the table.
Quick View Form
A quick view form can be added to another form (e.g., Main form) as a quick view control. It provides a template to view information about a related table row within a form for another table row. This means our app users don't need to navigate to a different row to see the information needed to do their work. Quick view controls are associated with a lookup column that is included in a form. If the lookup column value isn't set, the quick view control won't be visible. Data in quick view controls can’t be edited and quick view forms don't support form scripts.
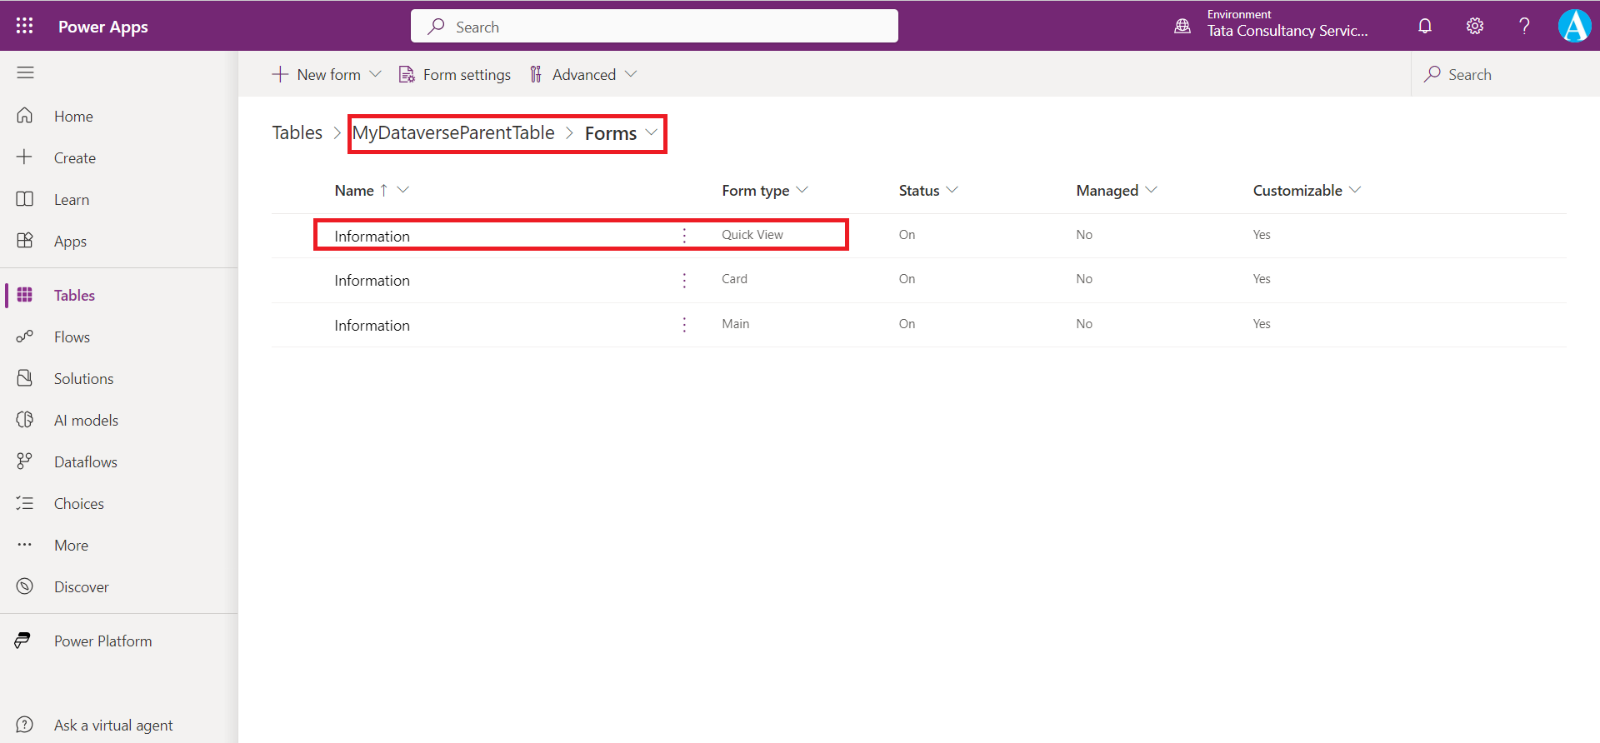
Step 1: Go to the Parent table and then select Forms.
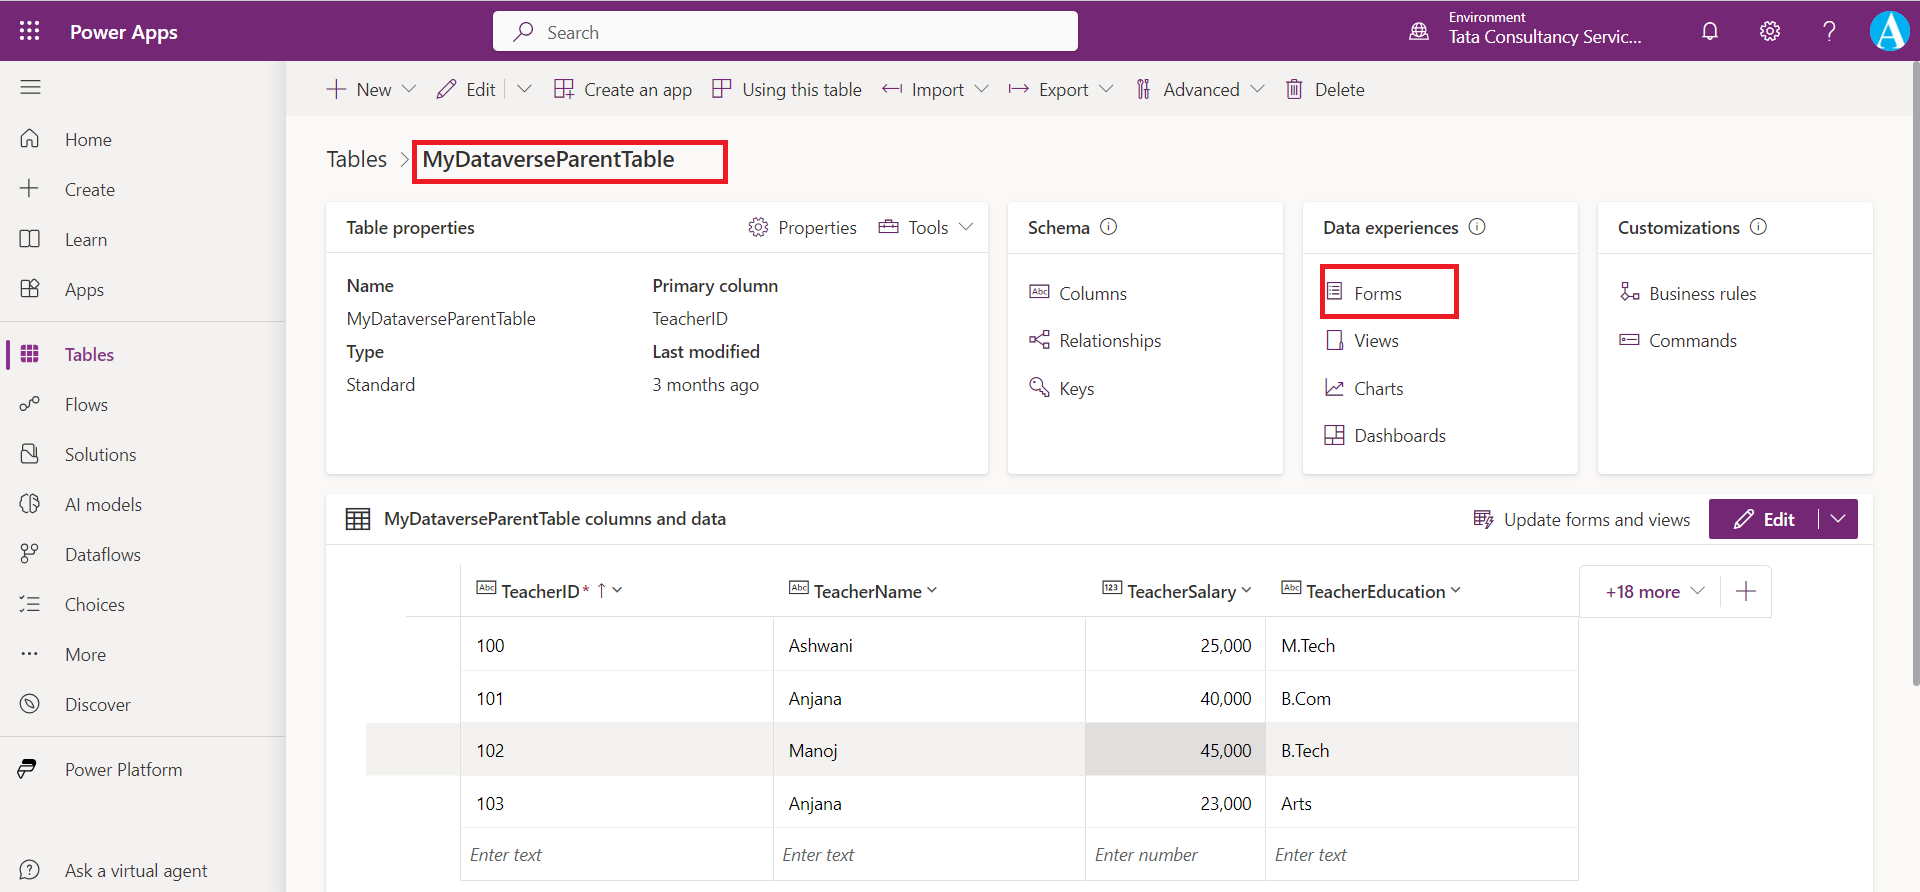
Step 2: Select the Information form of Form type column value is Quick view to edit it.
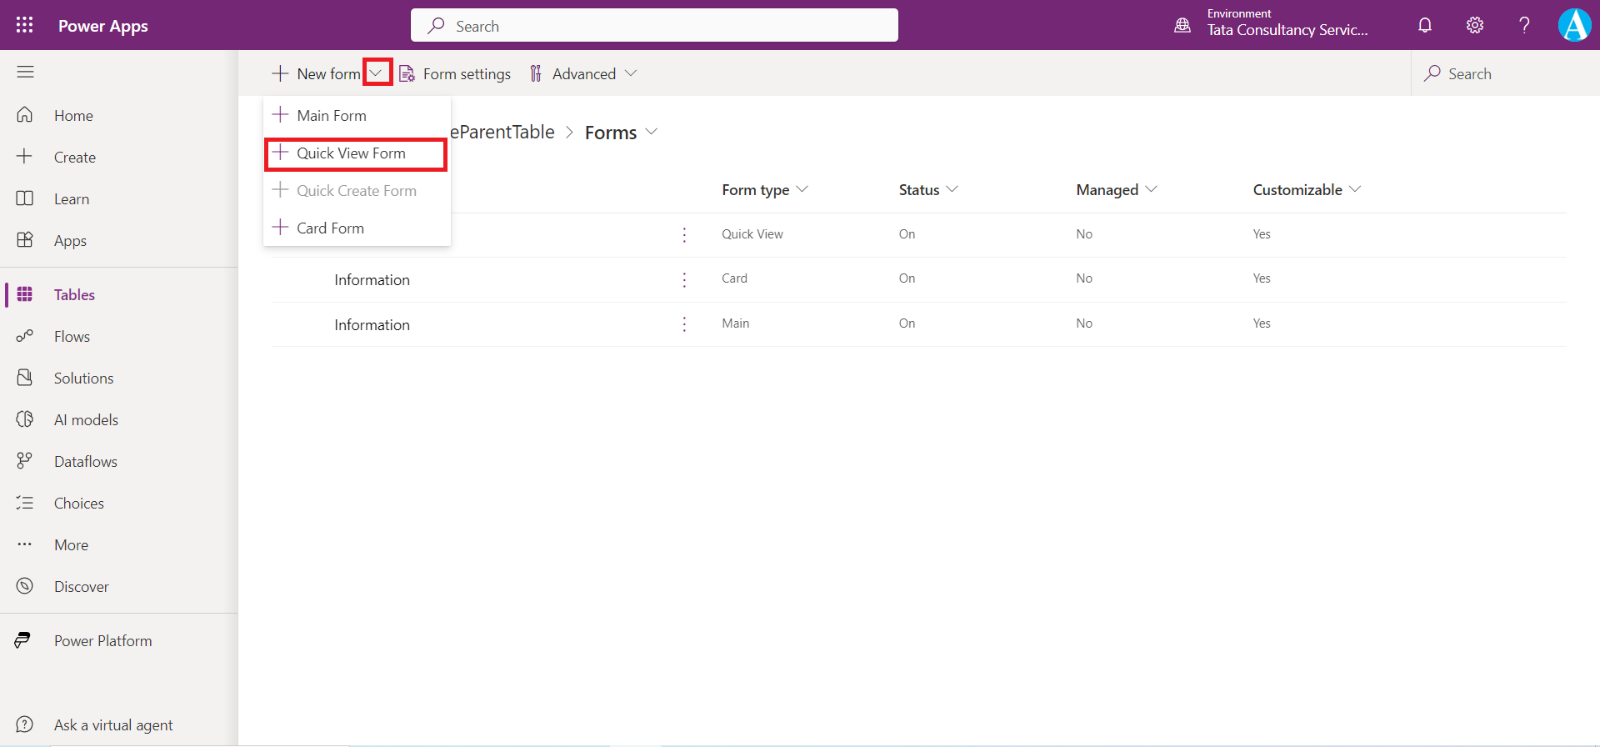
We can also have the option to create a new quick view form, by clicking on the chevron icon and then select + Quick View Form.
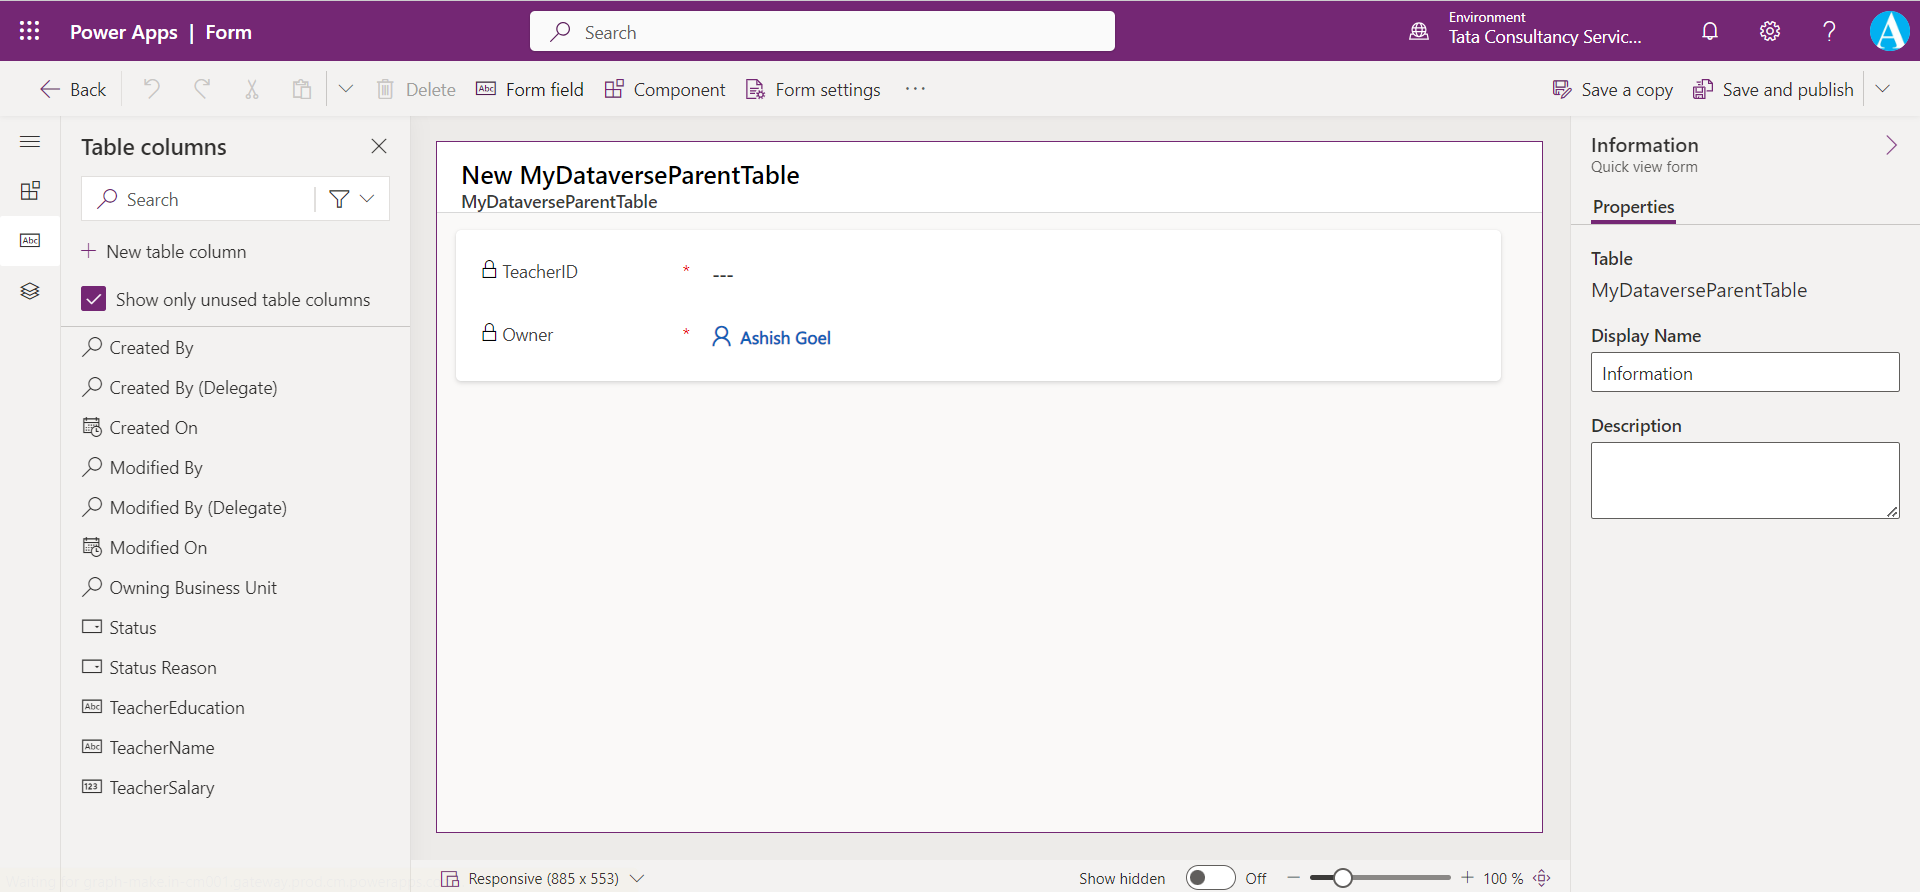
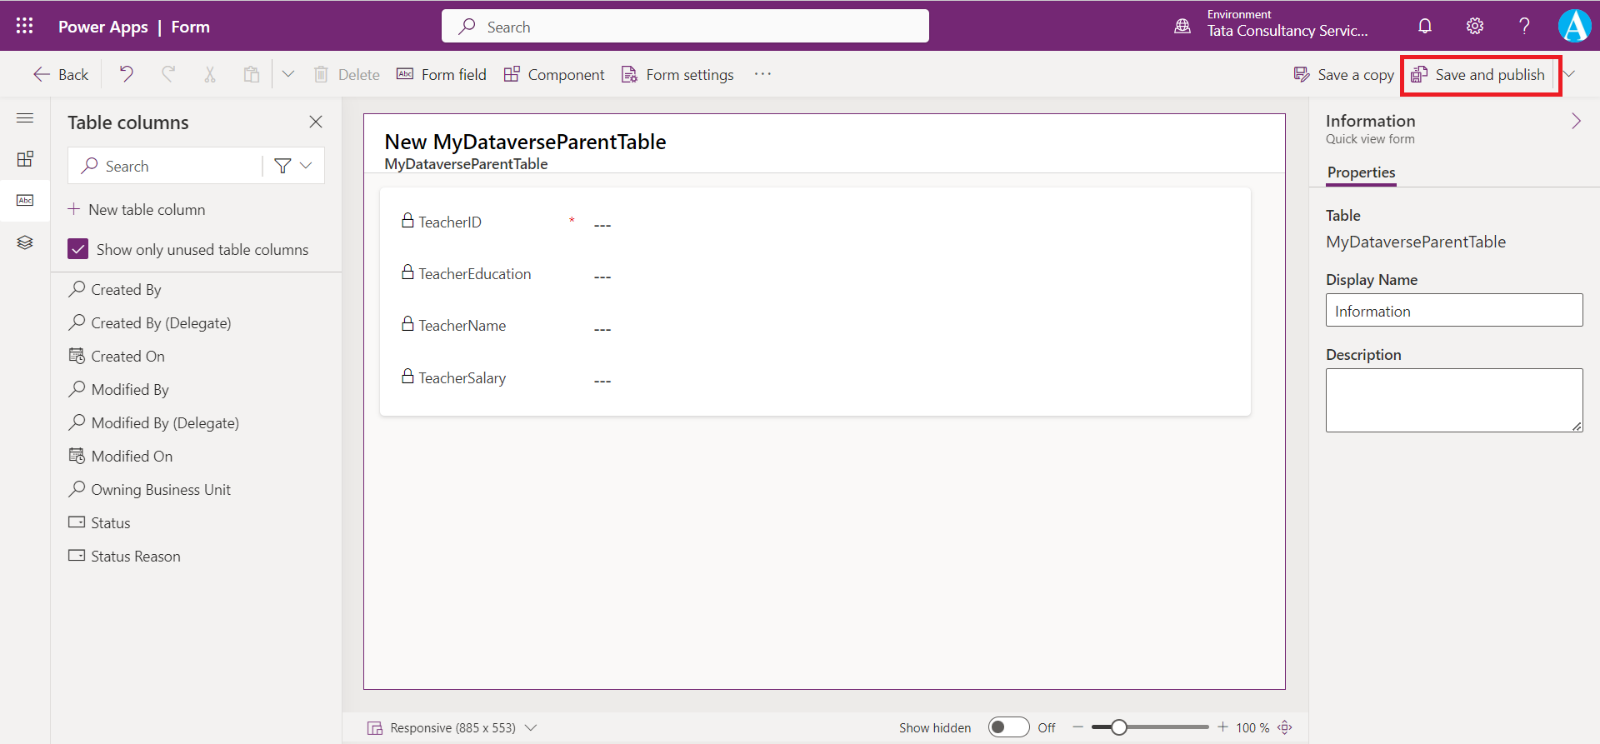
This opens the form designer. Select the desired columns from the Table columns pane, and then click on Save and publish, our form is ready to use.
The following is image of our form when it is ready.
Add a quick view control to a main form
Quick view forms can only be added to a main form where a lookup field exists that targets the entity of the quick view form.
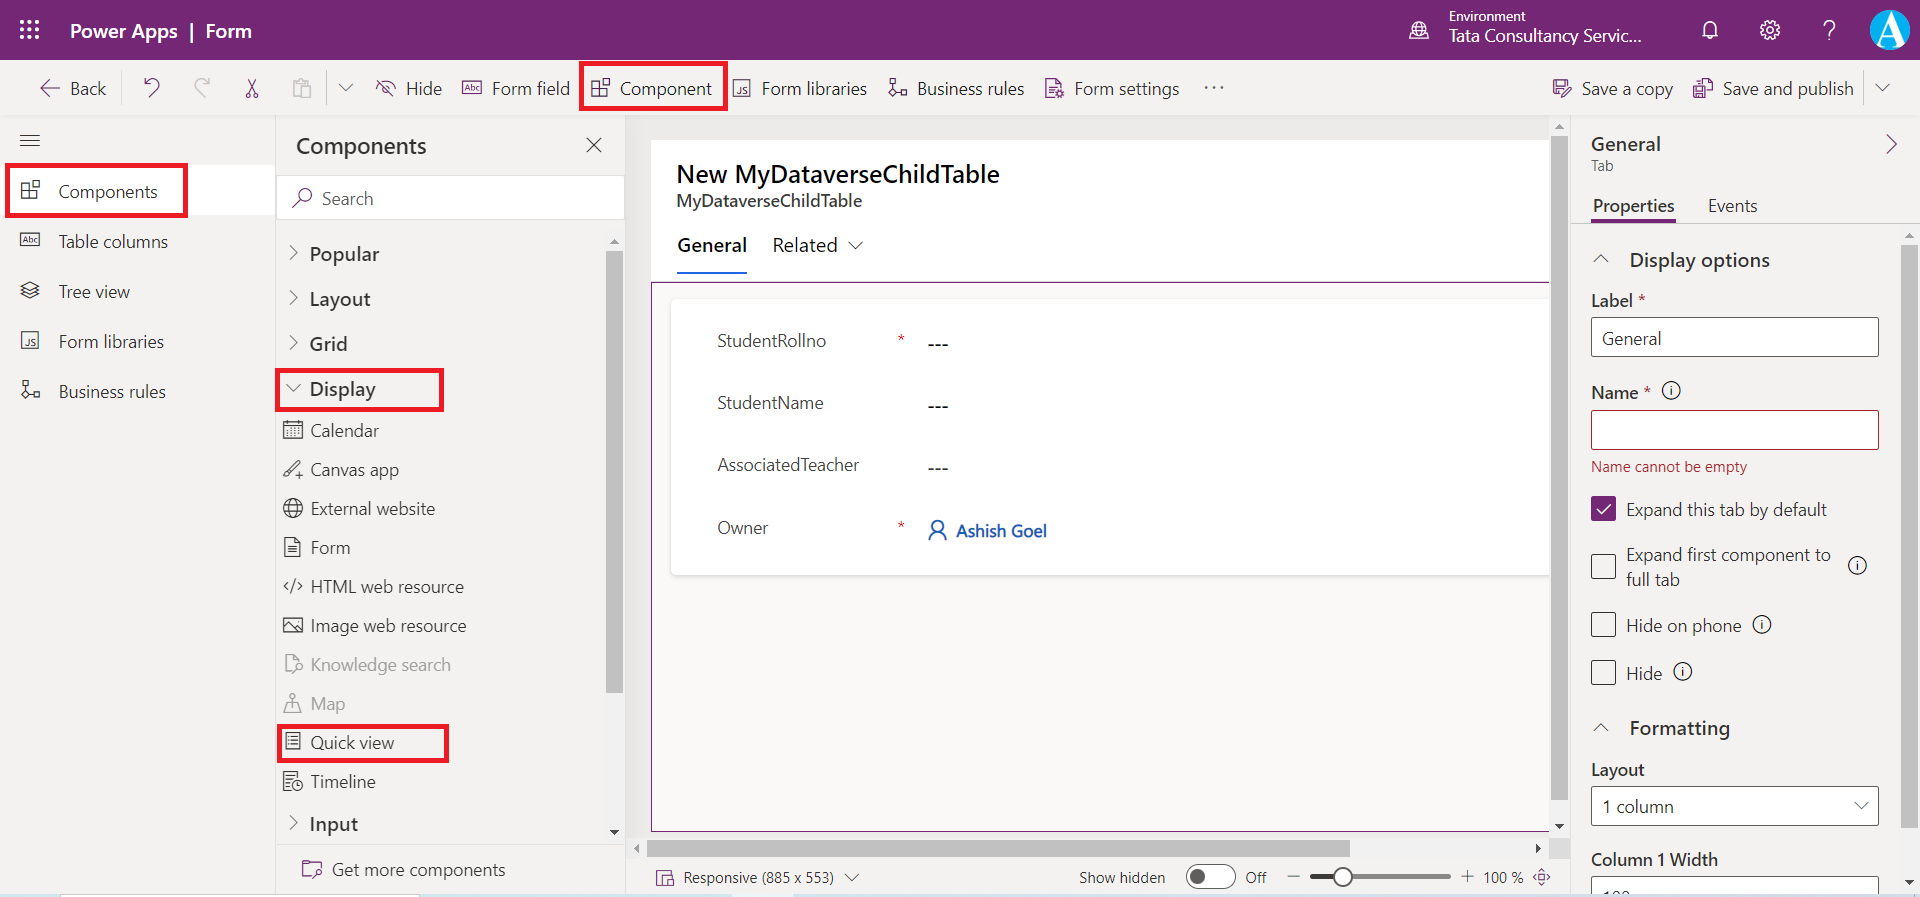
Step 1: In an entity main form, click on Components, and then choose Quick view from the Display group.
Step 2: In the Select quick view forms dialog box, select the Lookup column, and select the Parent table’s Quick view form from the dropdown.
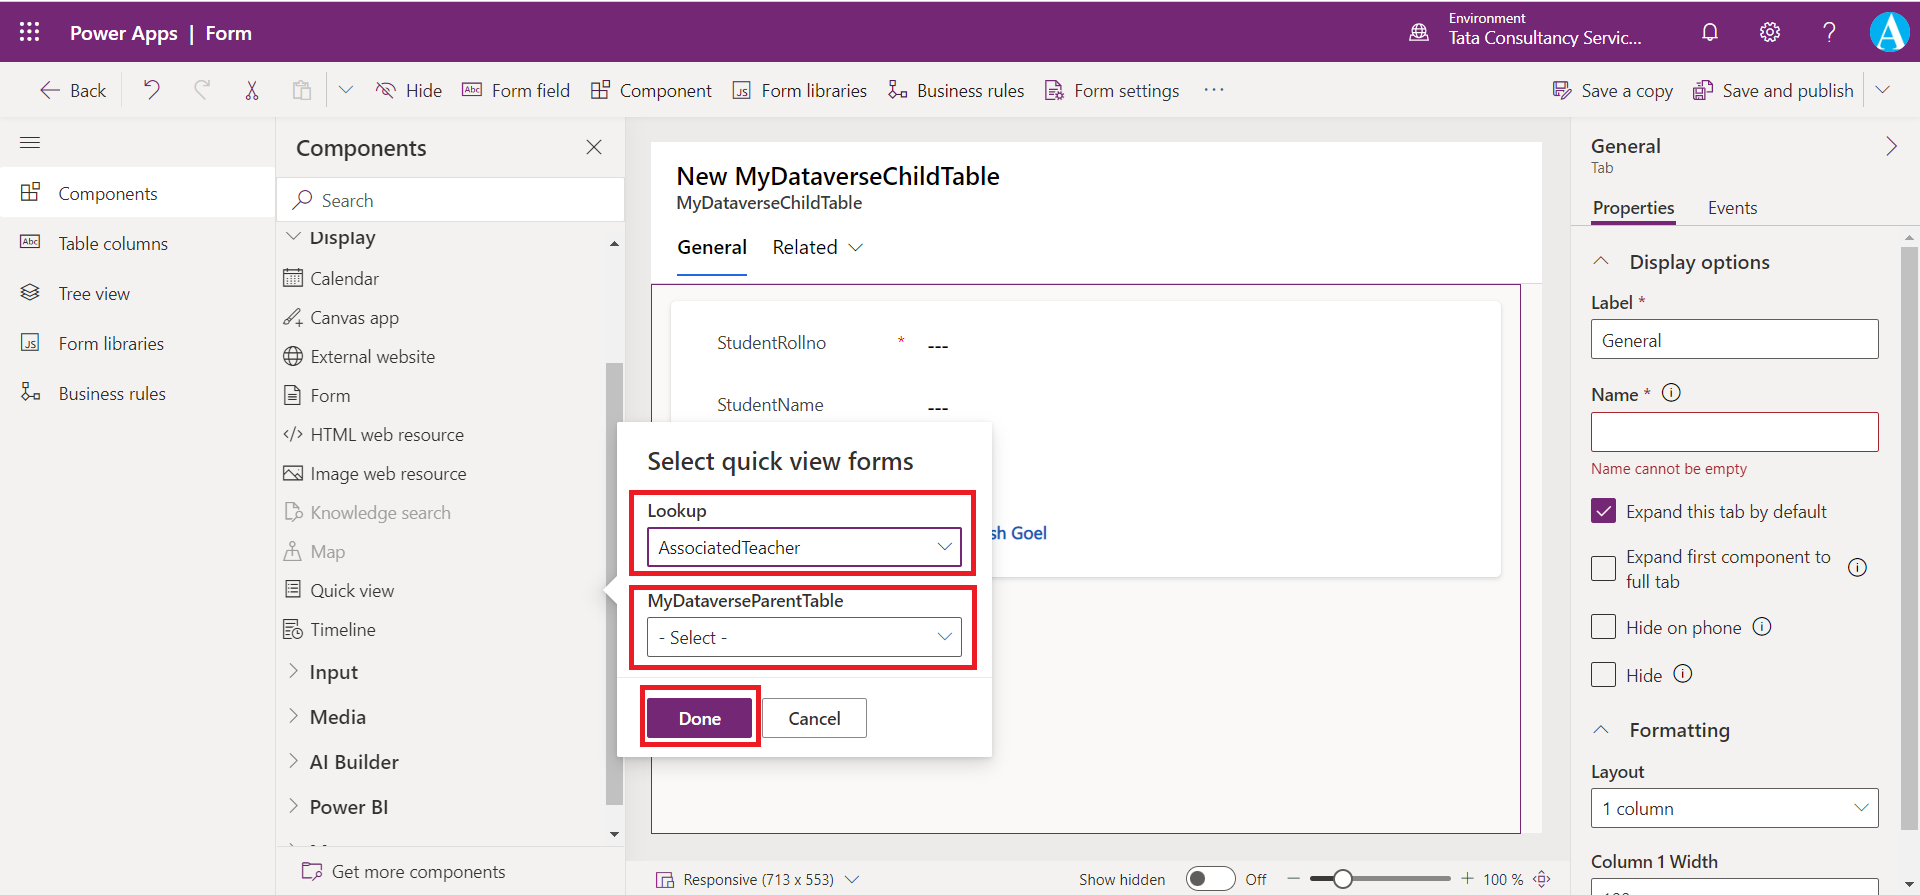
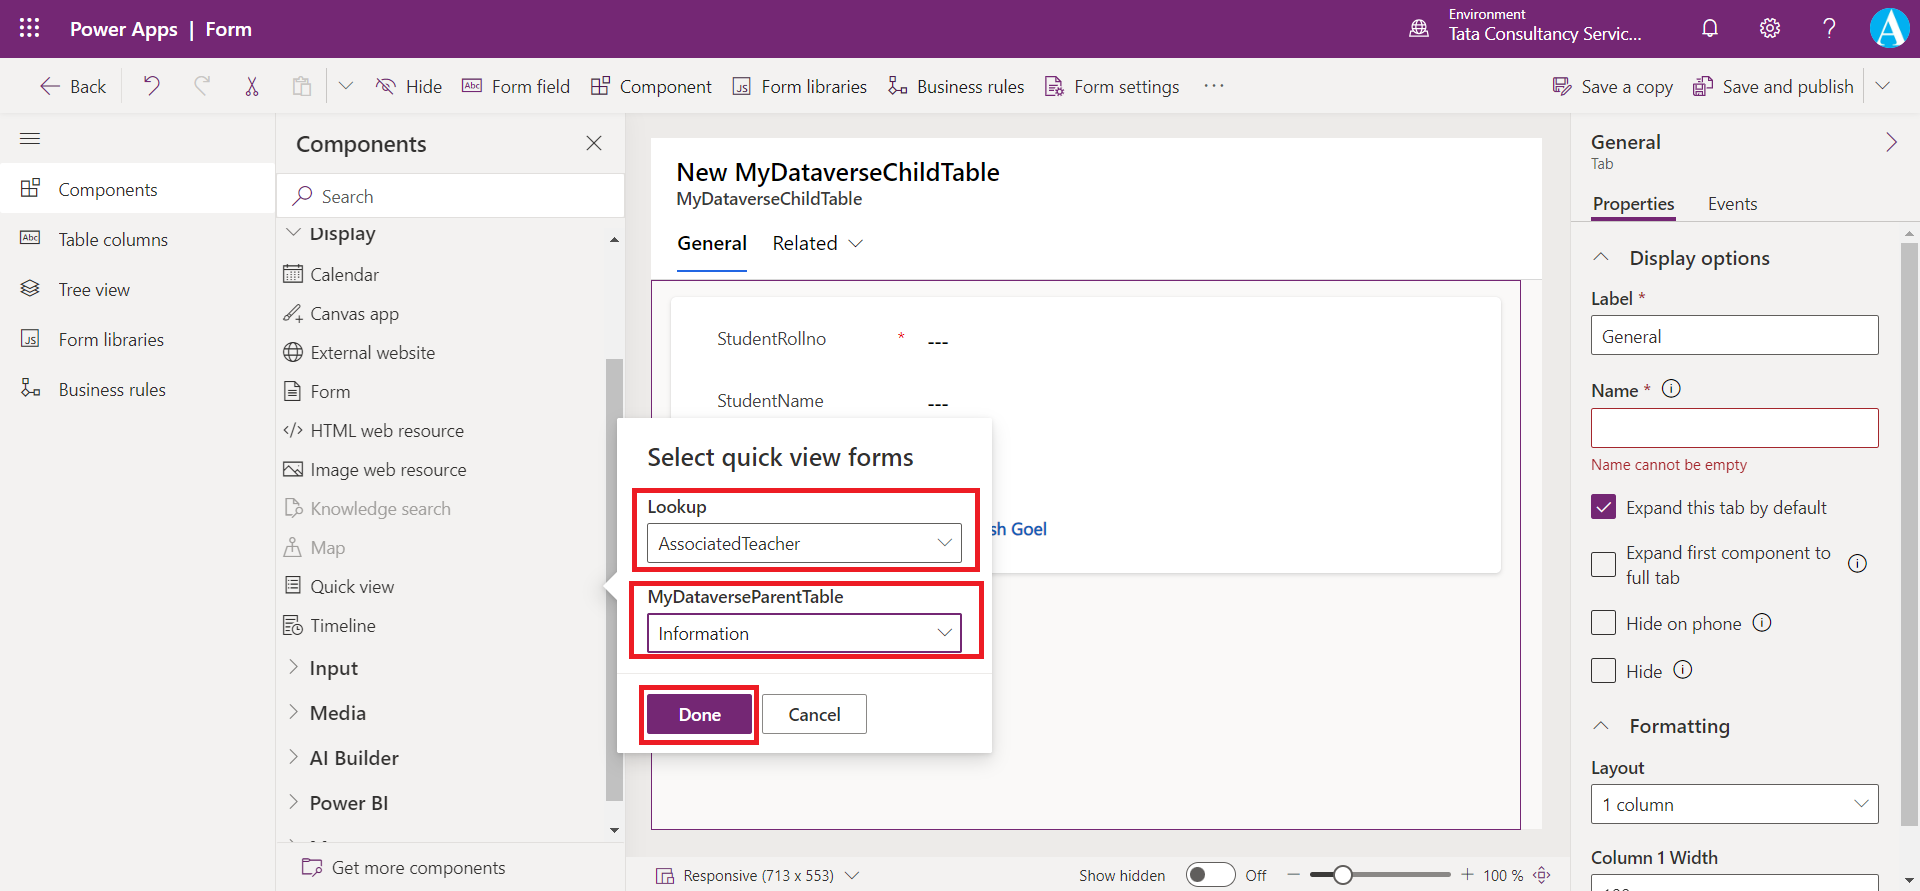
Select the lookup column AssociatedTeacher, and select the Information form which is our Quick view form.
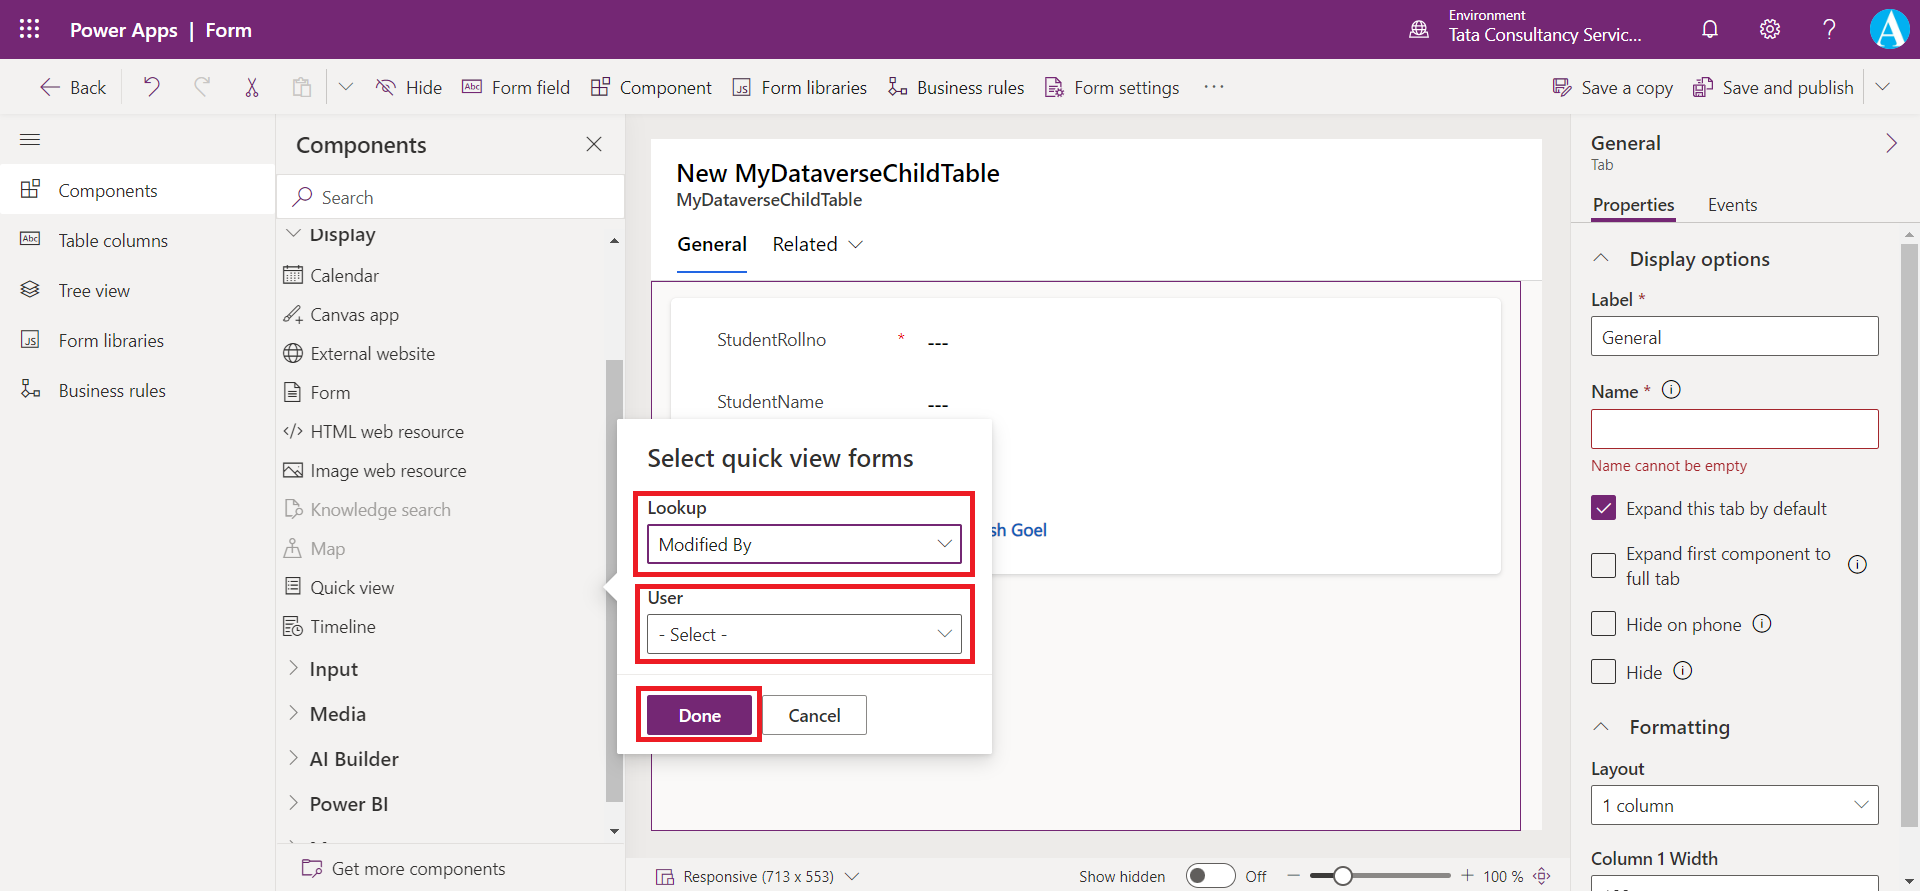
Note: Once we change the Lookup column from the dropdown, the corresponding parent table is shown.
For example, if we select Modified By lookup column then the User table is shown.
Step 3: Choose Done to save the changes and close the quick view forms component dialog box.
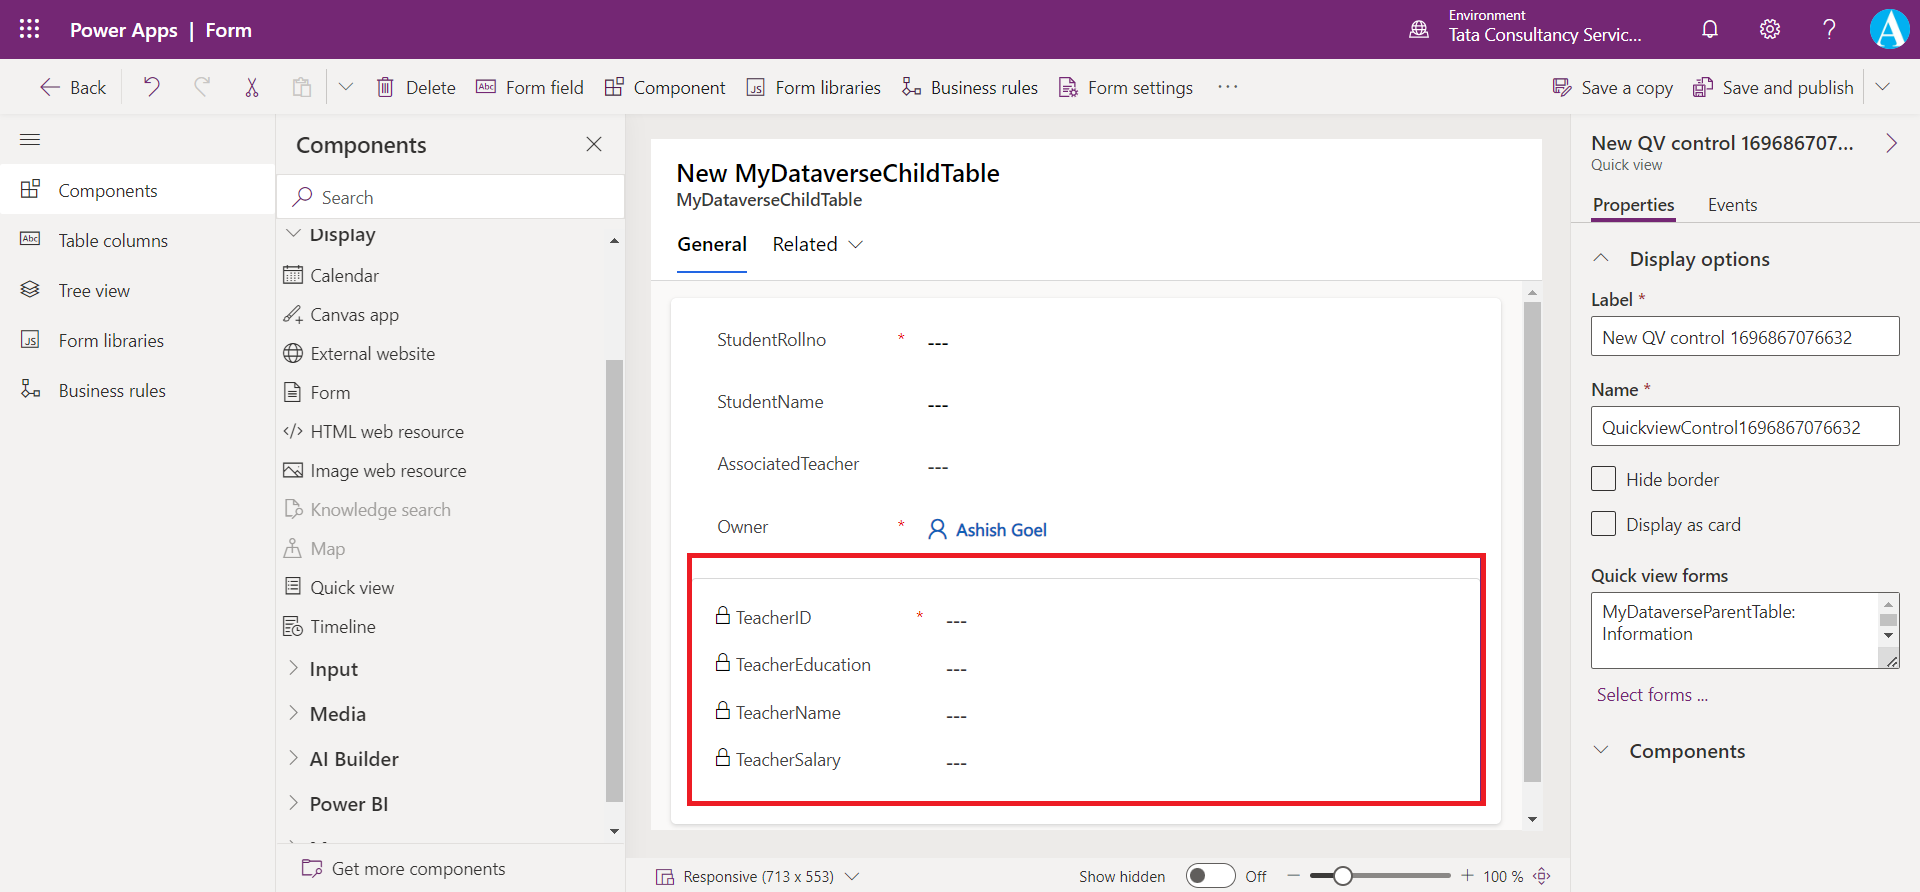
Step 4: Click on Save and publish to save the changes.
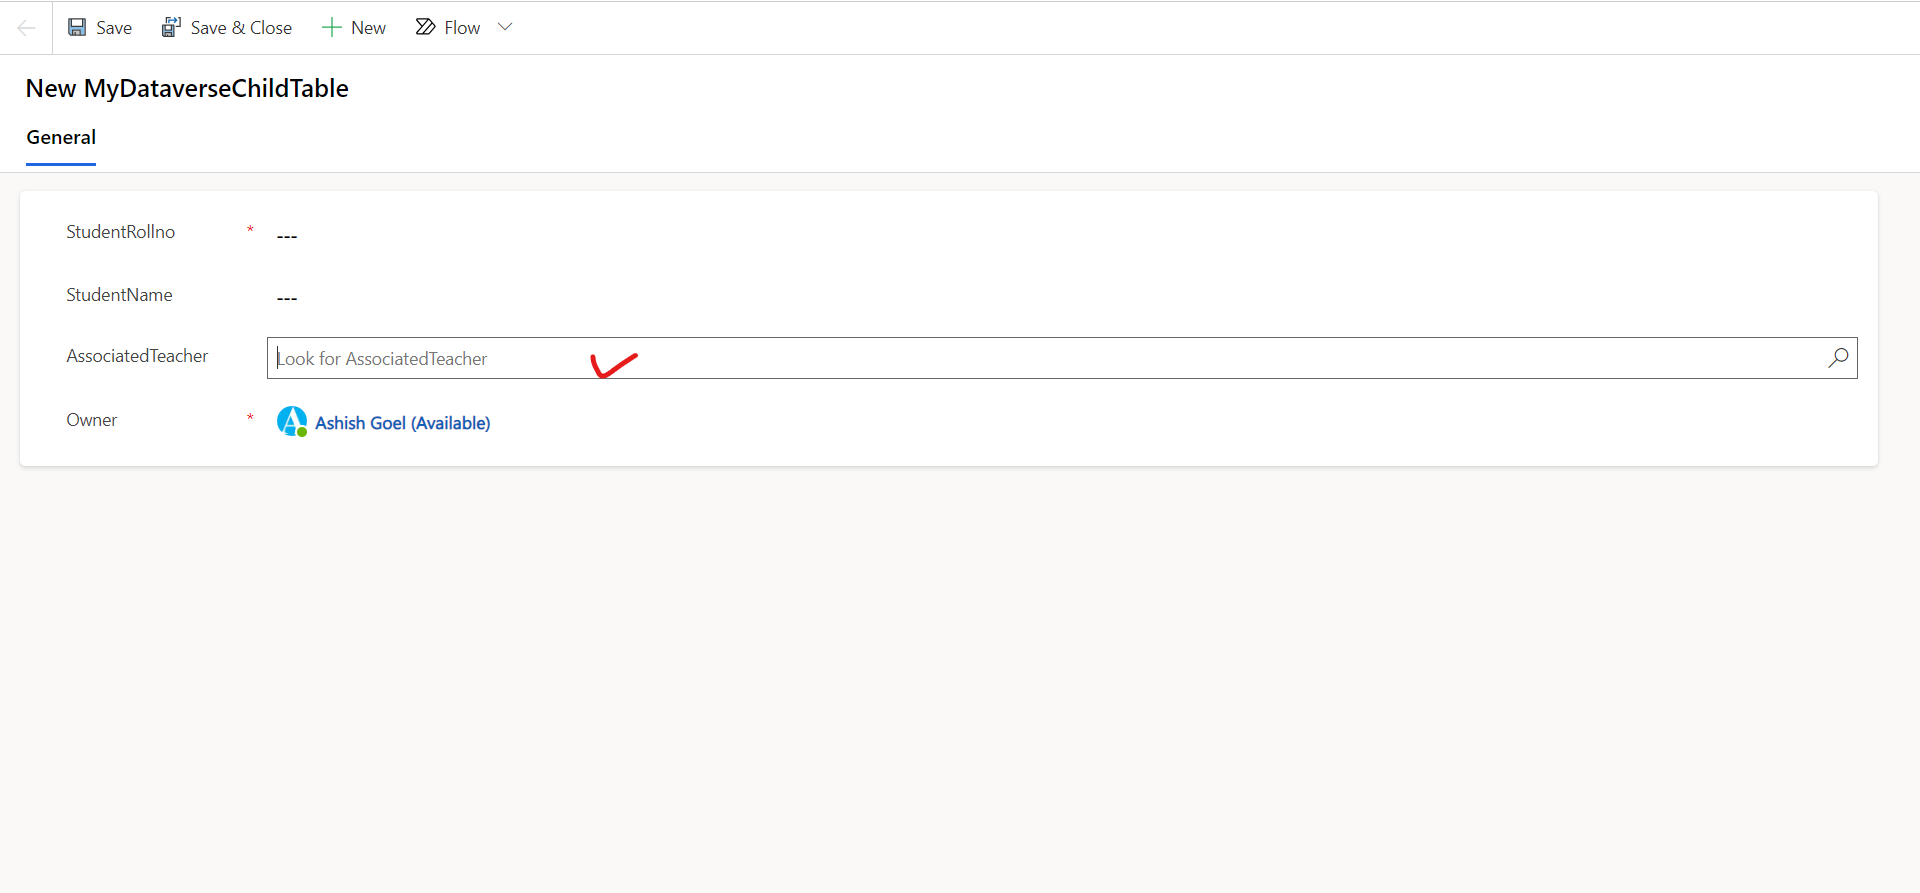
Step 5: When the lookup column value is blank the quick view form is not visible.
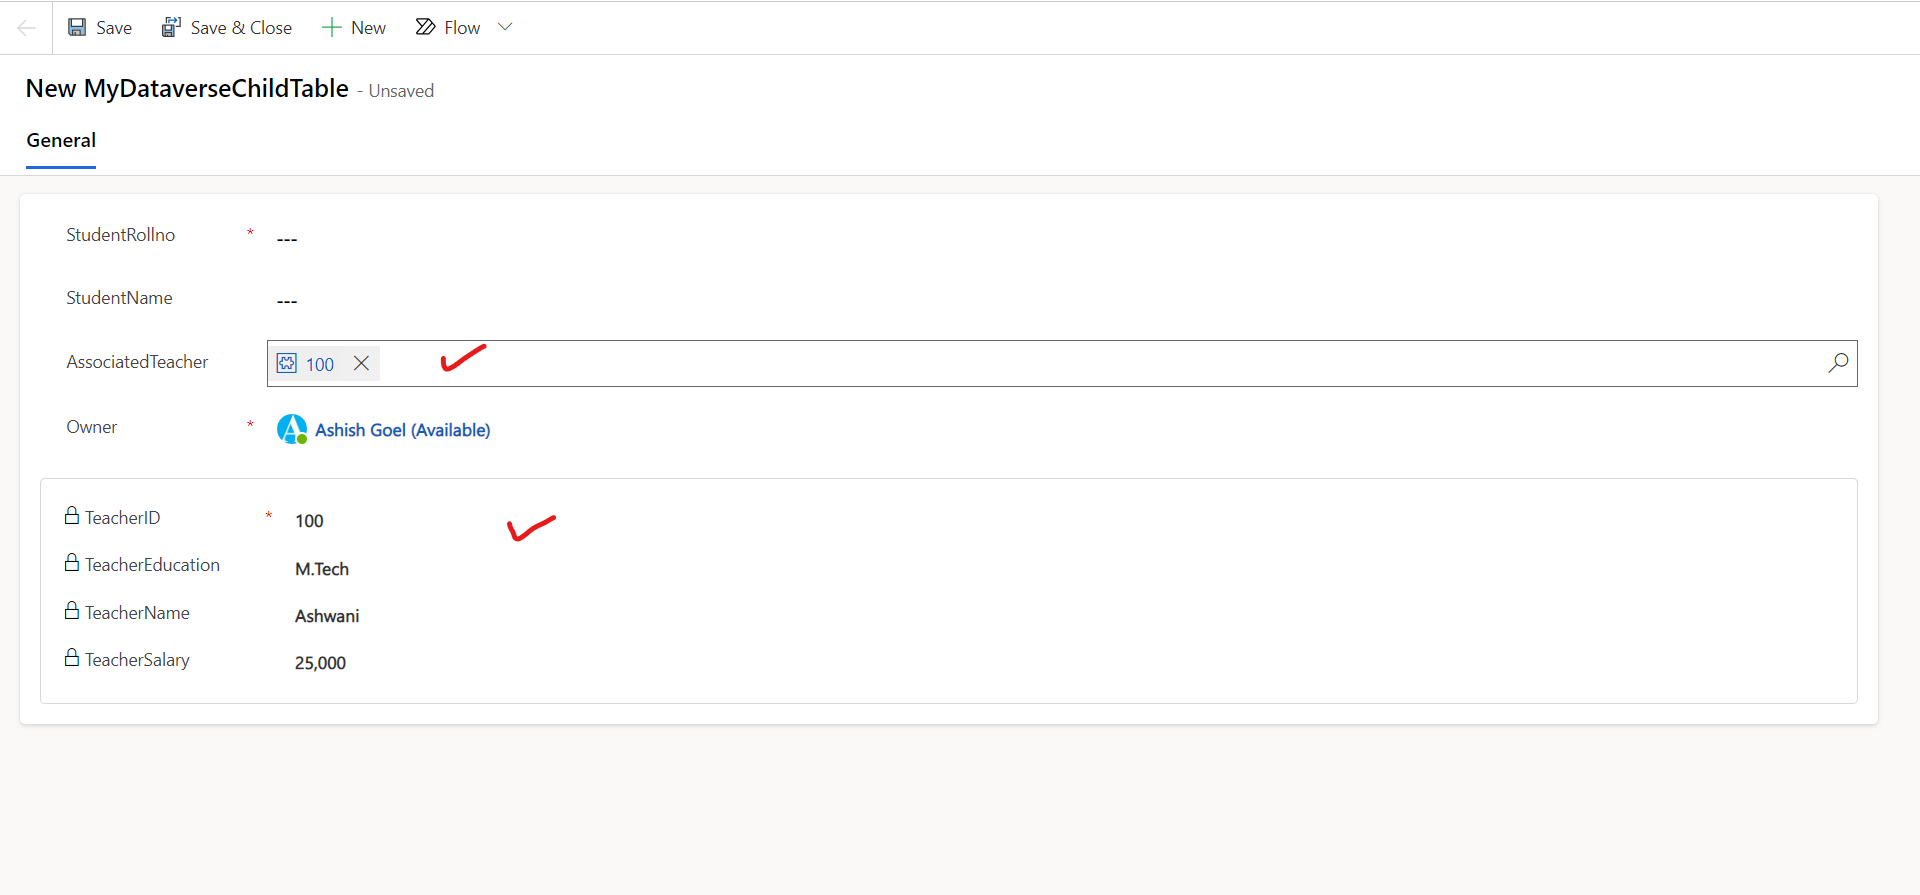
Once we select the lookup column value, the corresponding record is shown in the quick view form.
Card forms in Model-driven apps
Step 1: Select Tables from the left navigation.
Step 2: Select the table we want, and then select the Forms from the Data experiences.
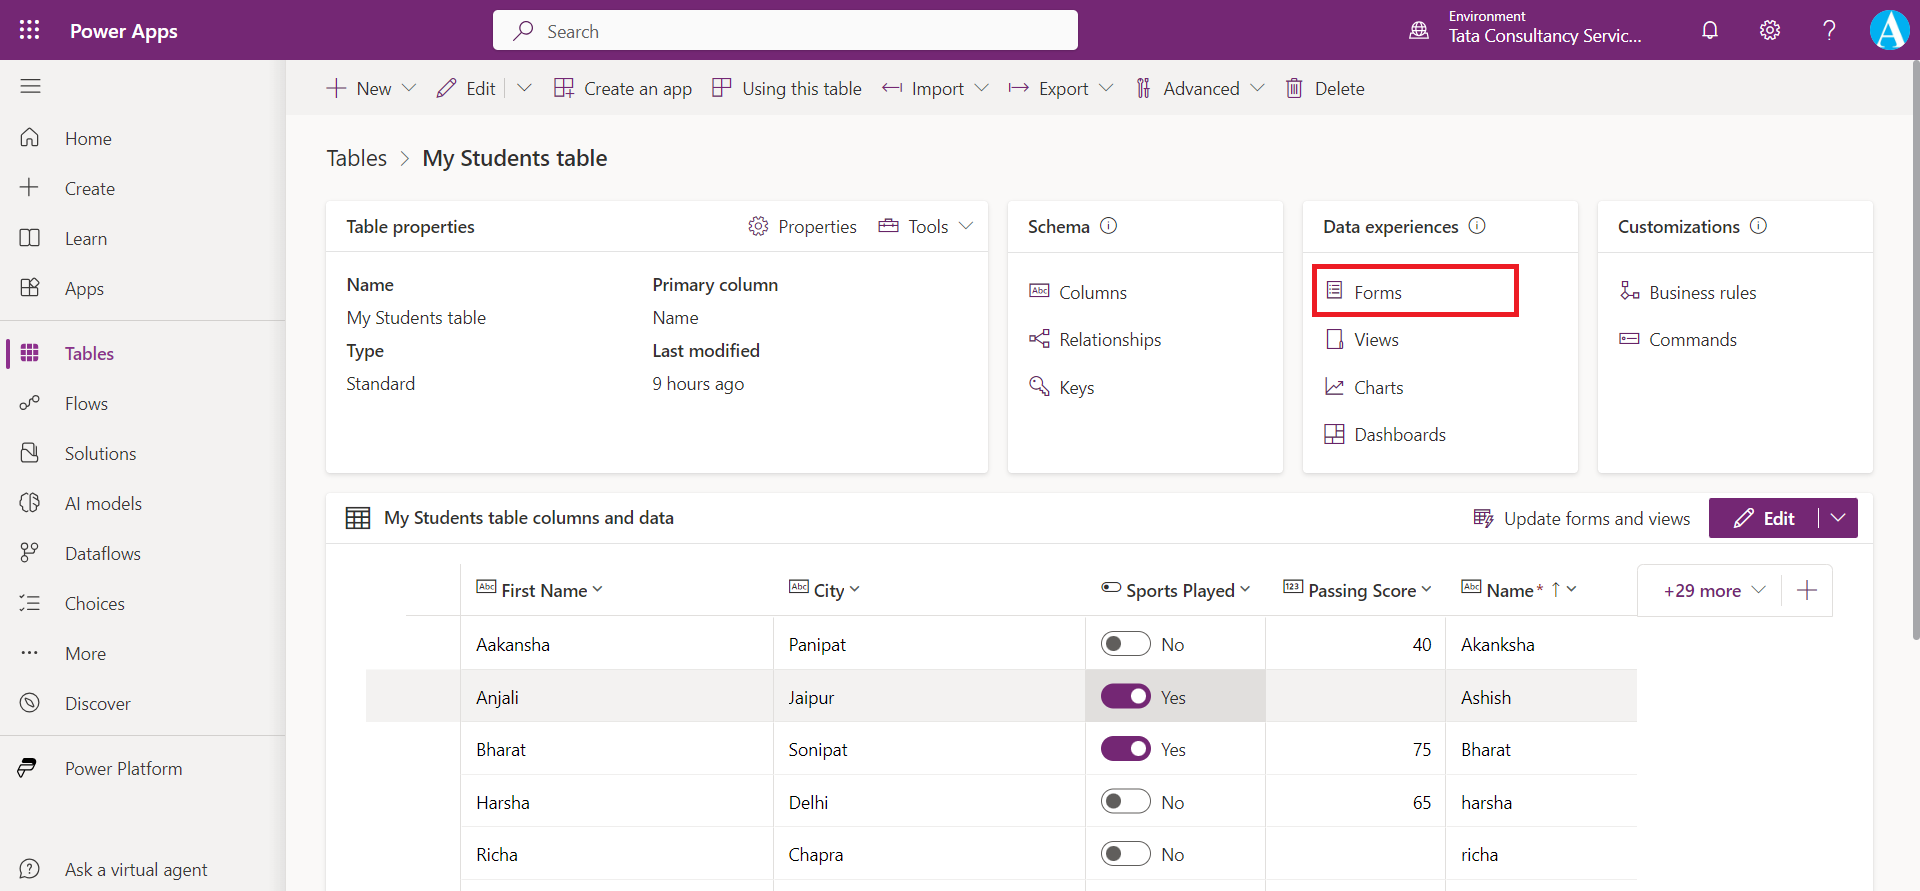
Step 3: Select the + Card Form to create a card form in Model-driven apps.
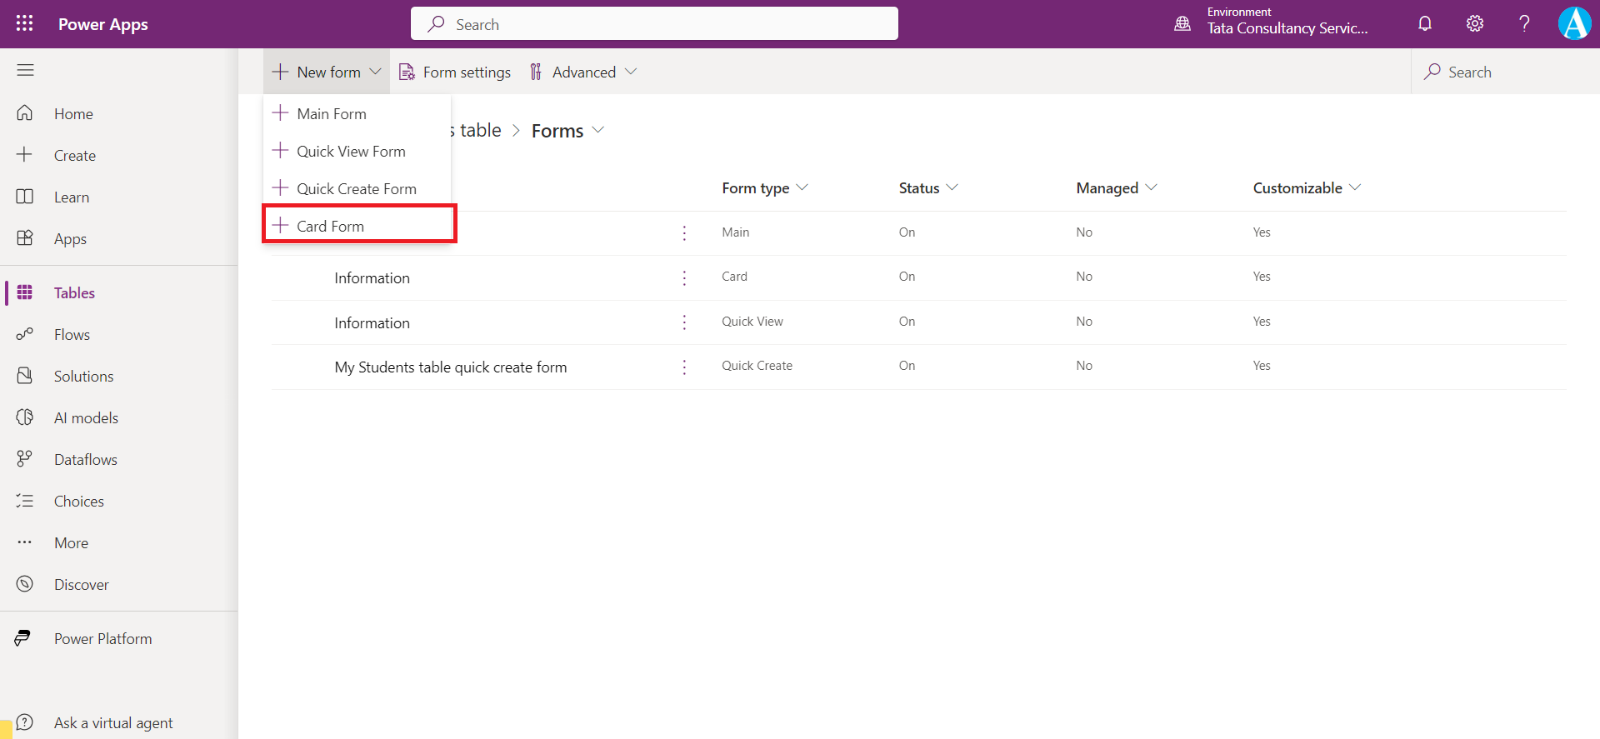
Or else we have automatically one Card form is created once when we have created our table, we can use that.
