Filter function in Power apps
The Filter function finds records in a table that satisfies one or more conditions and returns that, and discard all others.
Power Apps Syntax
Example:Step 1: Select the + Insert tab in the Canvas app and add a Button control, and set its OnSelect property to the following powerapps formula.
Power Apps Formula
ClearCollect(
    MyNewCollection,

    { Name: "Ashish", Country: "India",    Profession: "Engineer" },
    { Name: "Deepak", Country: "America",  Profession: "Engineer" },
    { Name: "Anjali", Country: "India",    Profession: "Doctor" },
    { Name: "Ayushman", Country: "America", Profession: "Lawyer" }
)
Step 2: Add a Vertical gallery control, select MyNewCollection as the data source.
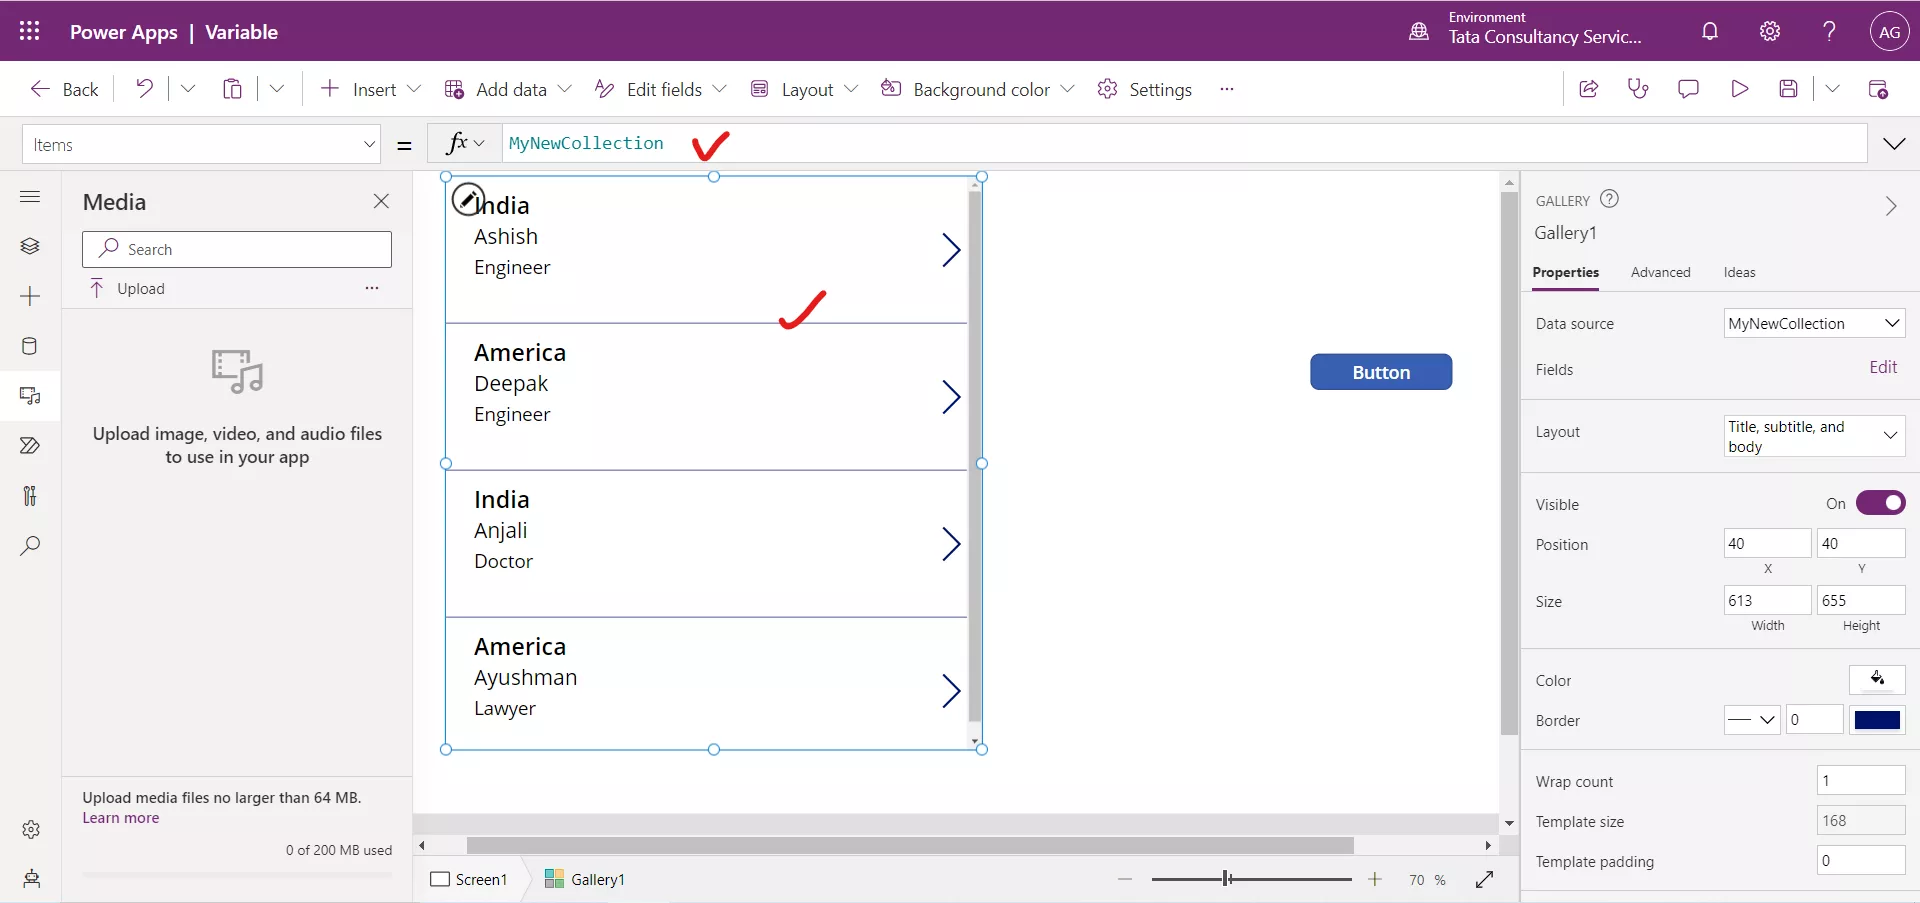
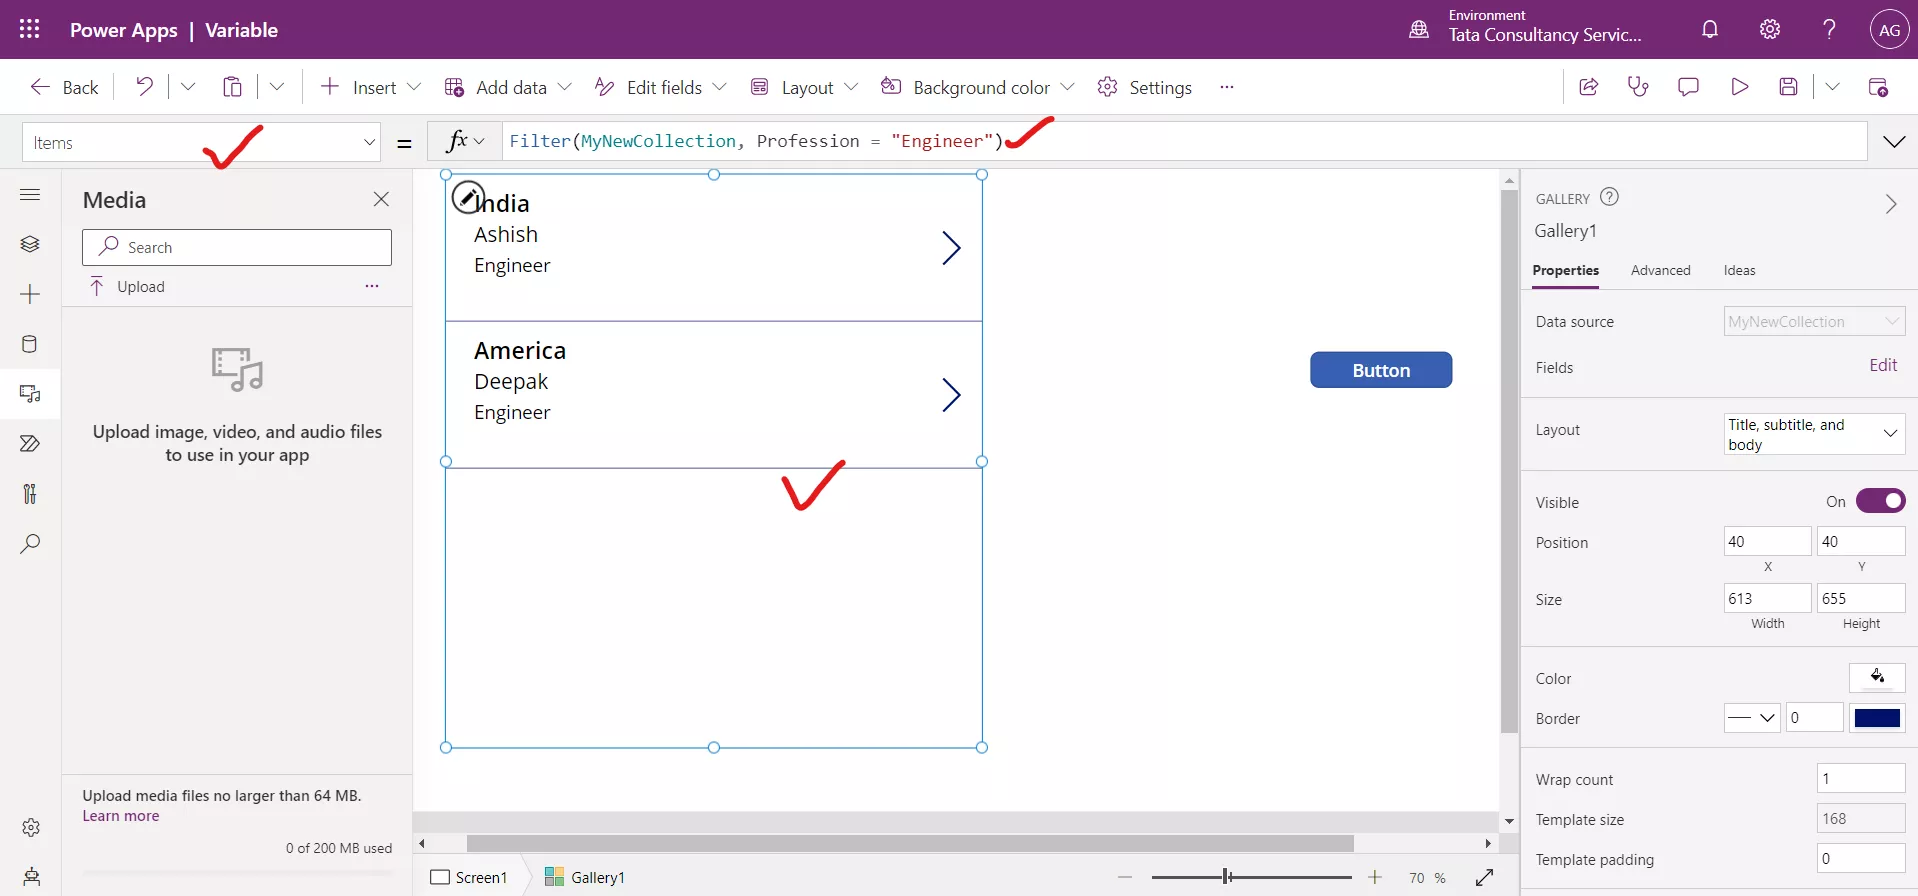
Step 3: If we want to filter the data in a gallery by the Profession column and want only the data where profession is Engineer , we could filter our data by using the following formula in the Items property of our gallery.
Power Apps Formula
Now the gallery will display only the rows where the profession is Engineer.
Use of Operator with Filter Function
We can use the operators to make a more complex filter.
a) And or && operator With the And, all conditions must be true. The And in the formula must be capitalized.
Power Apps Formula
We can write the above formula as:
Power Apps Formula
This formula will return all of the rows where the Profession is Engineer, and the Country is India .
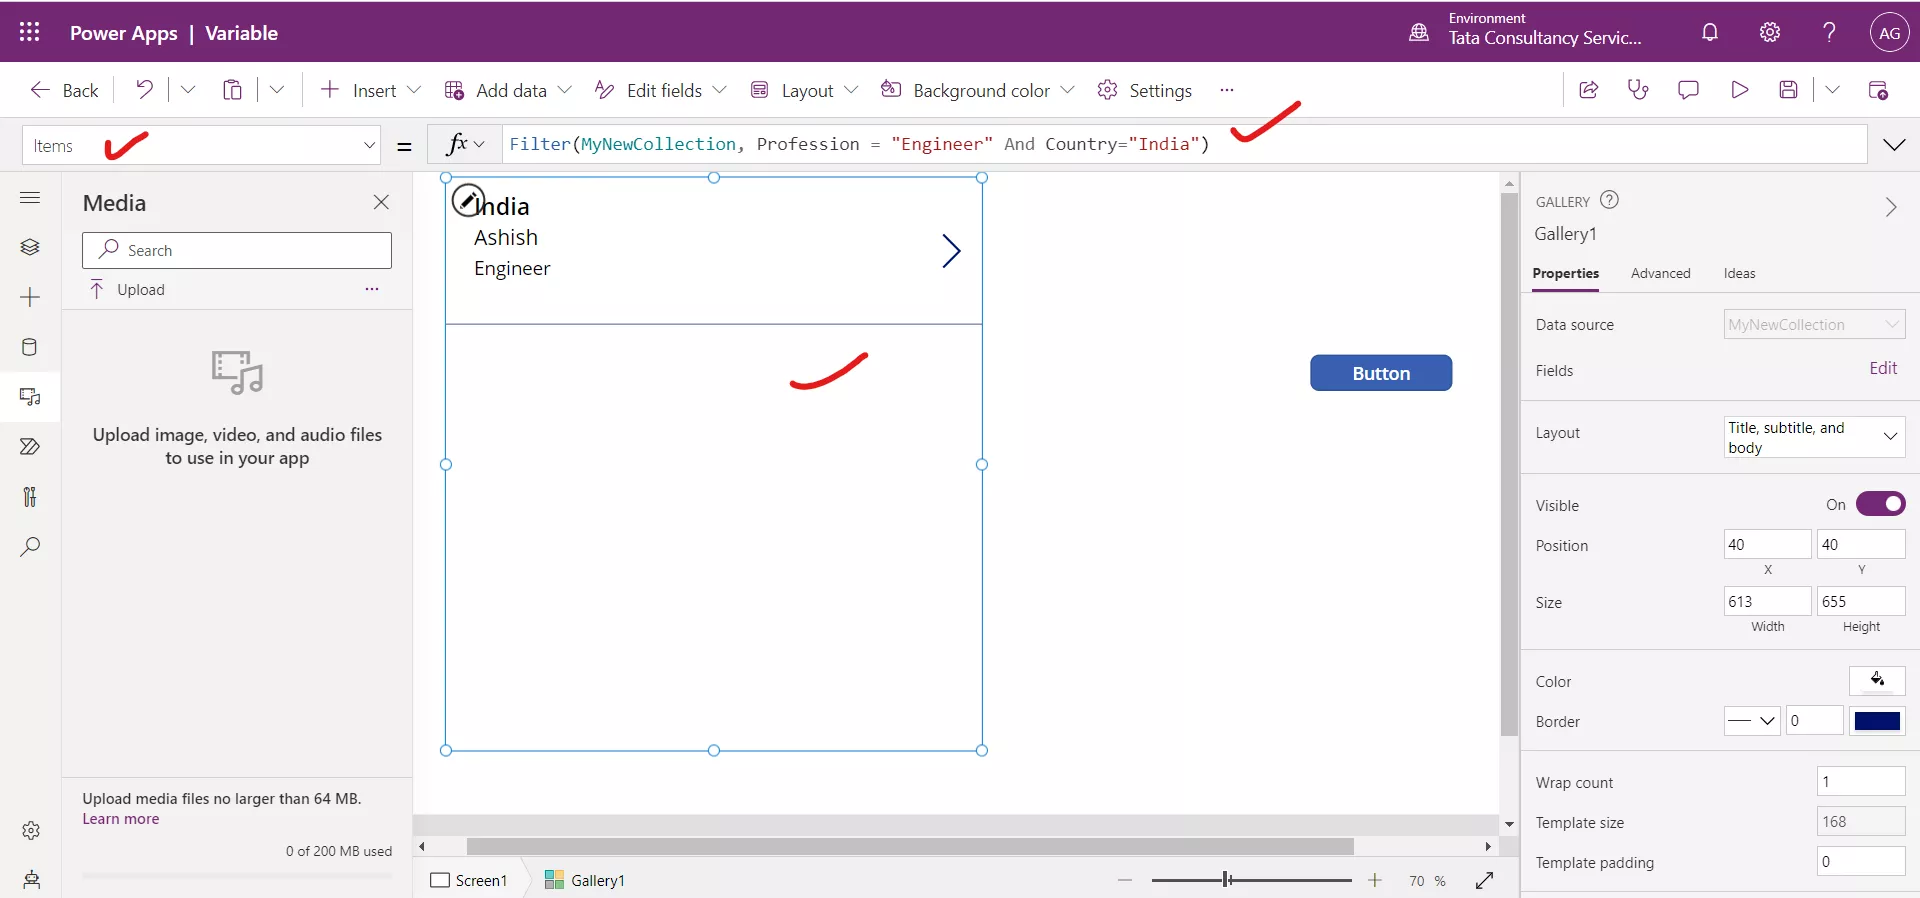
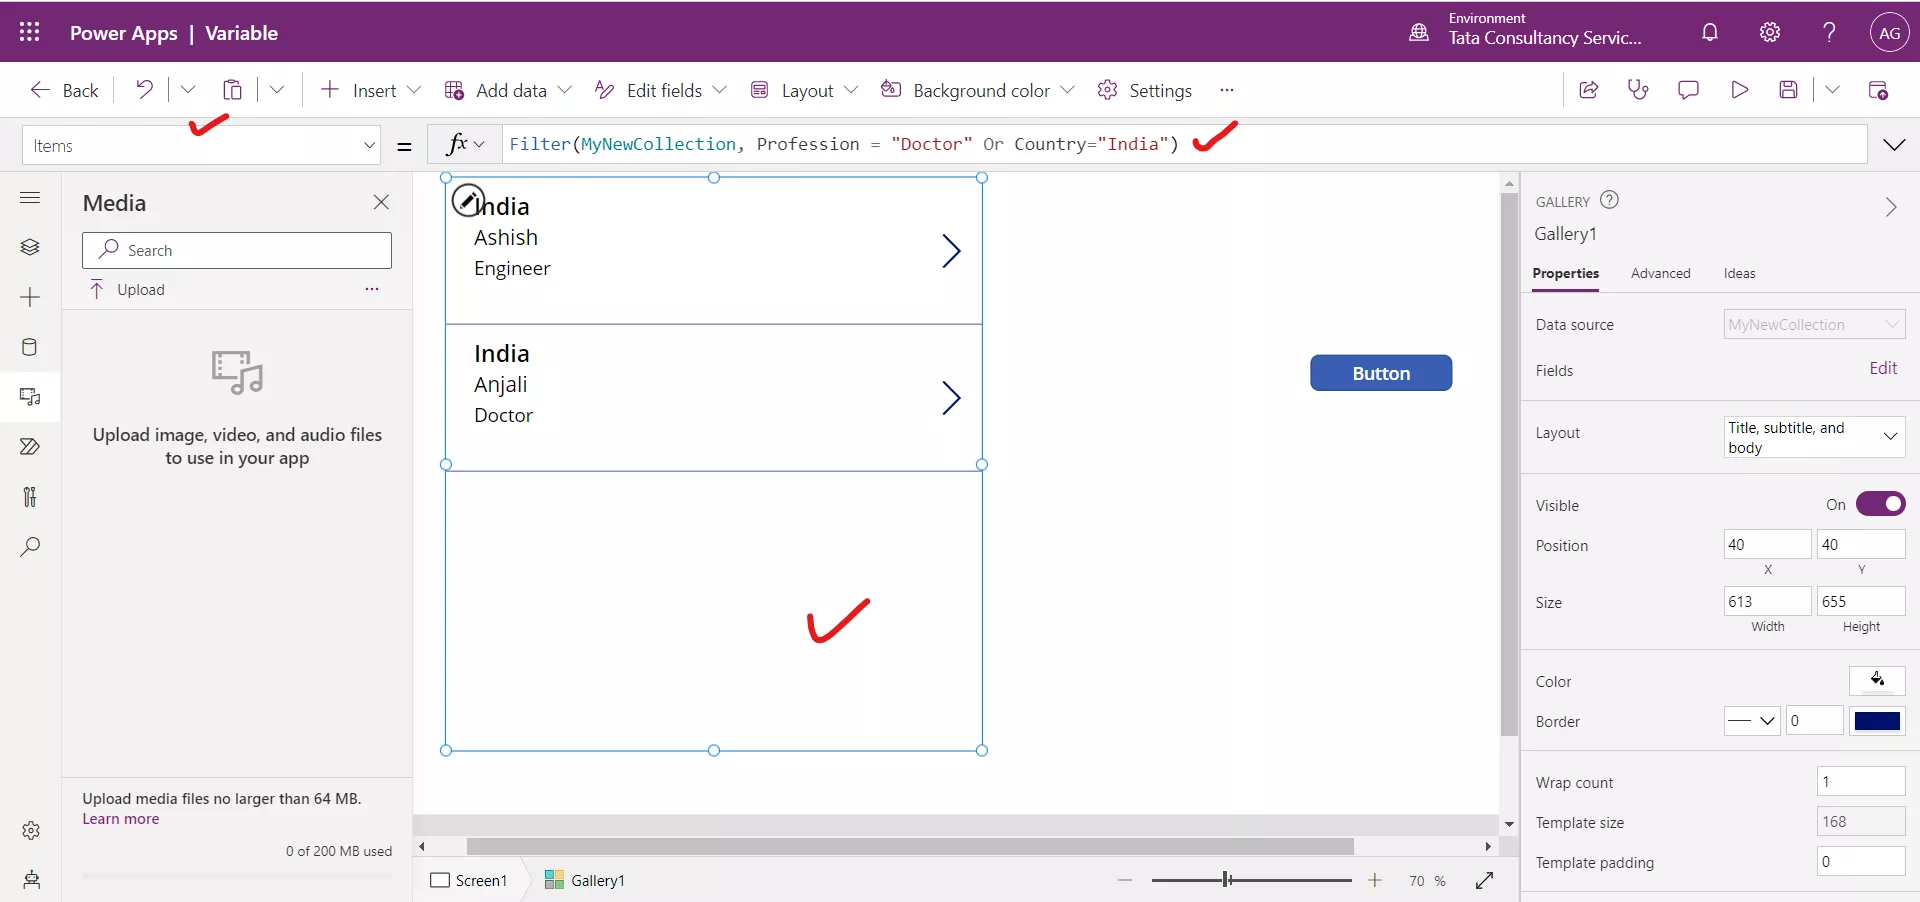
b) Or or || operator With the Or operator, if one condition is true the function returns the row. Like the And operator, the Or operator must also be capitalized.
PowerApps Formula
This formula will return all of the rows where the profession is equal to Doctor Or the Country value is equal to India. If either condition satisfied that row is returned.
We can write the above formula as:
Power Apps Formula
Filter(
    MyFirstCollection,
    Profession = "Doctor" || Country = "India"
) 
Note: If we need to compare the two Country column values then we nee to follow the following syntax.
PowerApps Formula
c) <> Not equal to operator Suppose we have to design a functionality in which we have two combo box controls, both have the same data and we need to hide the selected item in first combo box in the second combo box.
Place the following formula on the Items property of the second combo box.
PowerApps Formula
Here, ComboBox1 is the name of the first combo box control, and colset is the name of any tabular data source.
Suppose at the OnStart property of the power Apps, we can set the following formula.
PowerApps Formula
On the Items property of the first combo box, the following formula is written:
Power Apps Formula
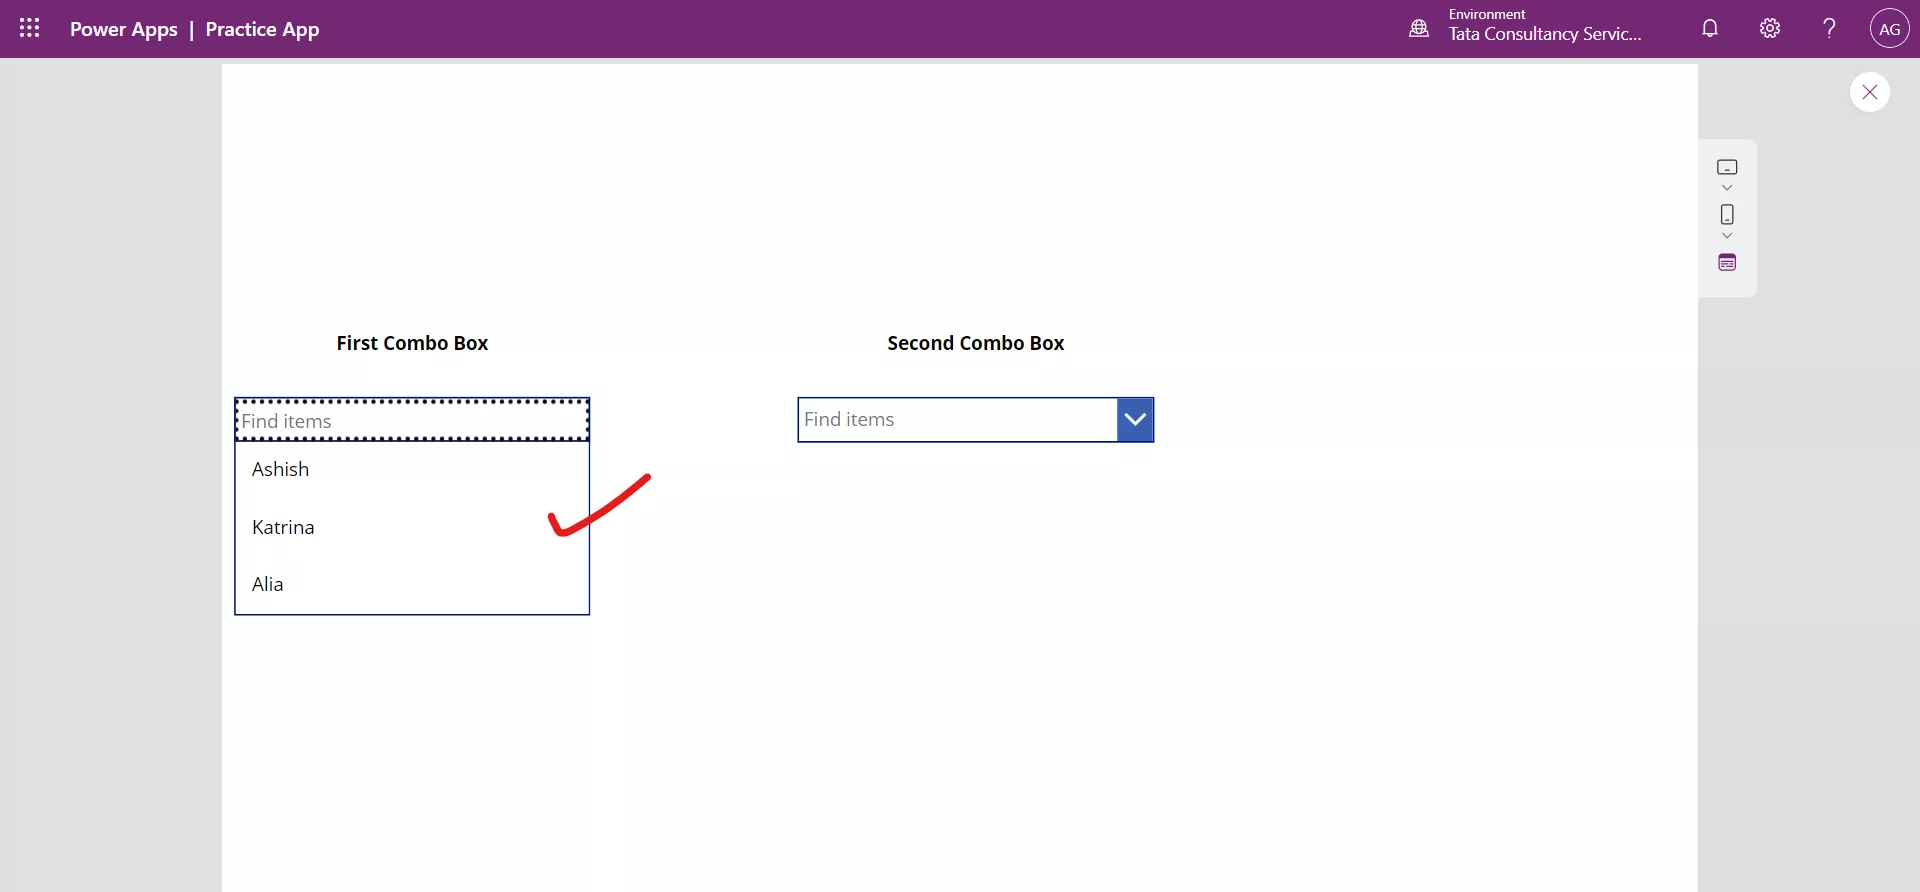
On the first combo box, all the Items are shown like this, no item is selected.
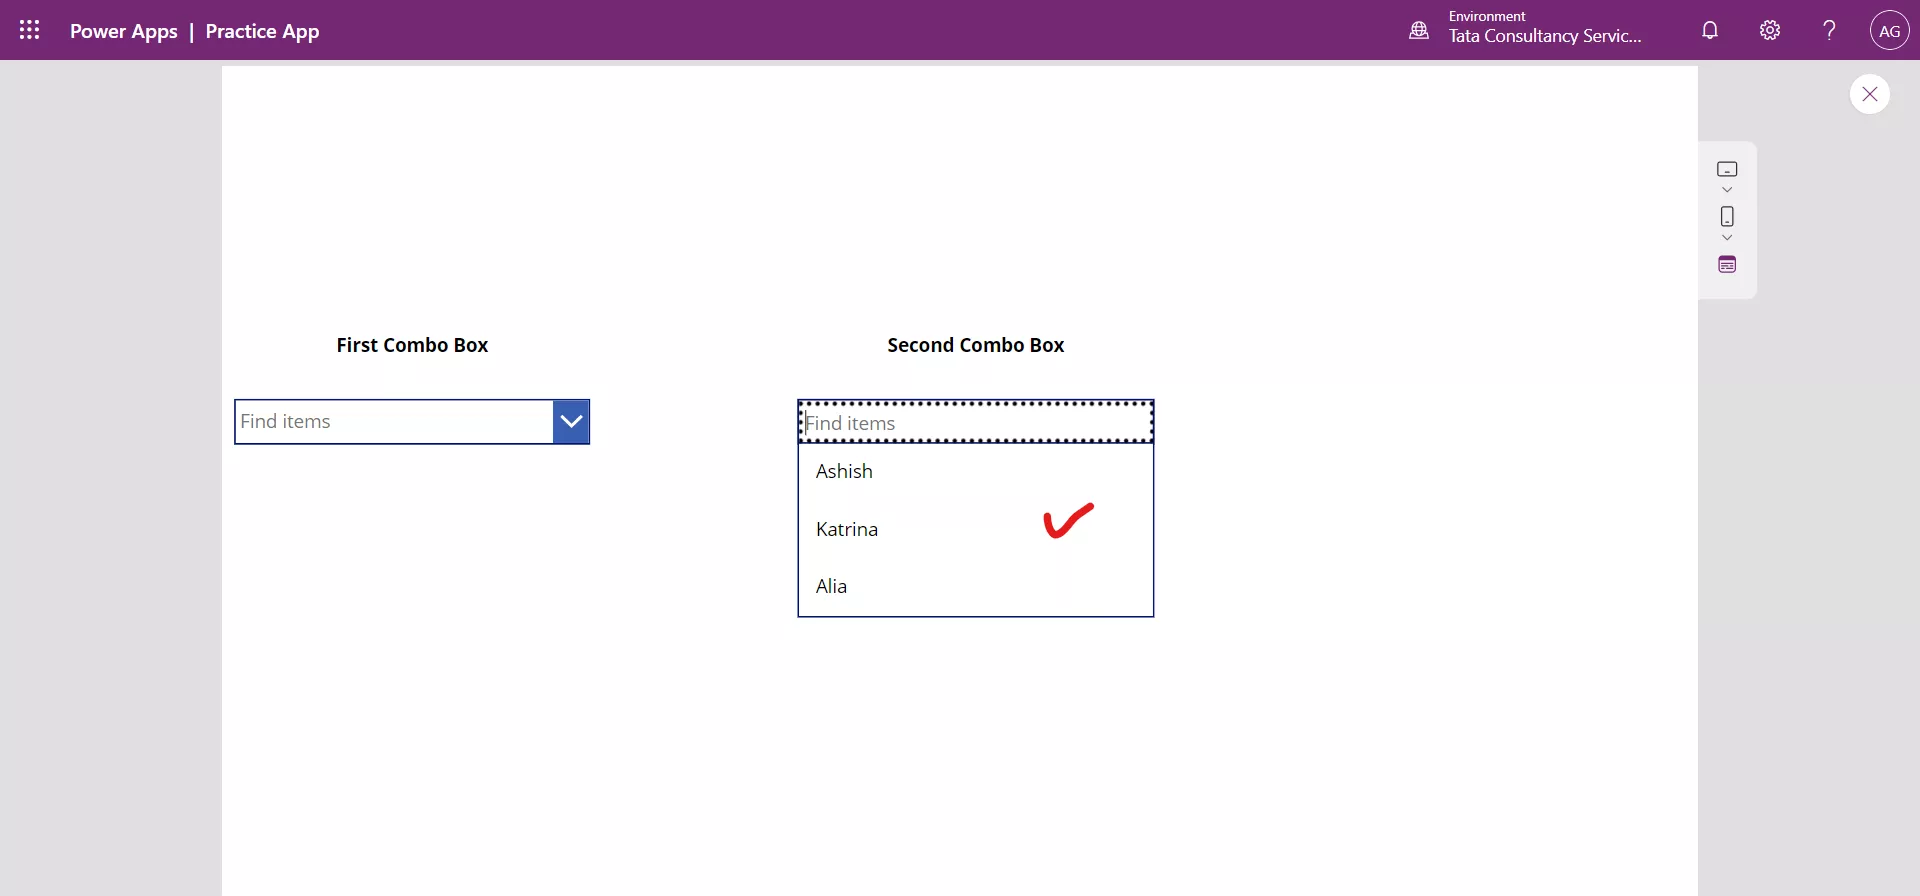
On the second combo box, we can see all the Items, when we do not select any value in the first combo box.
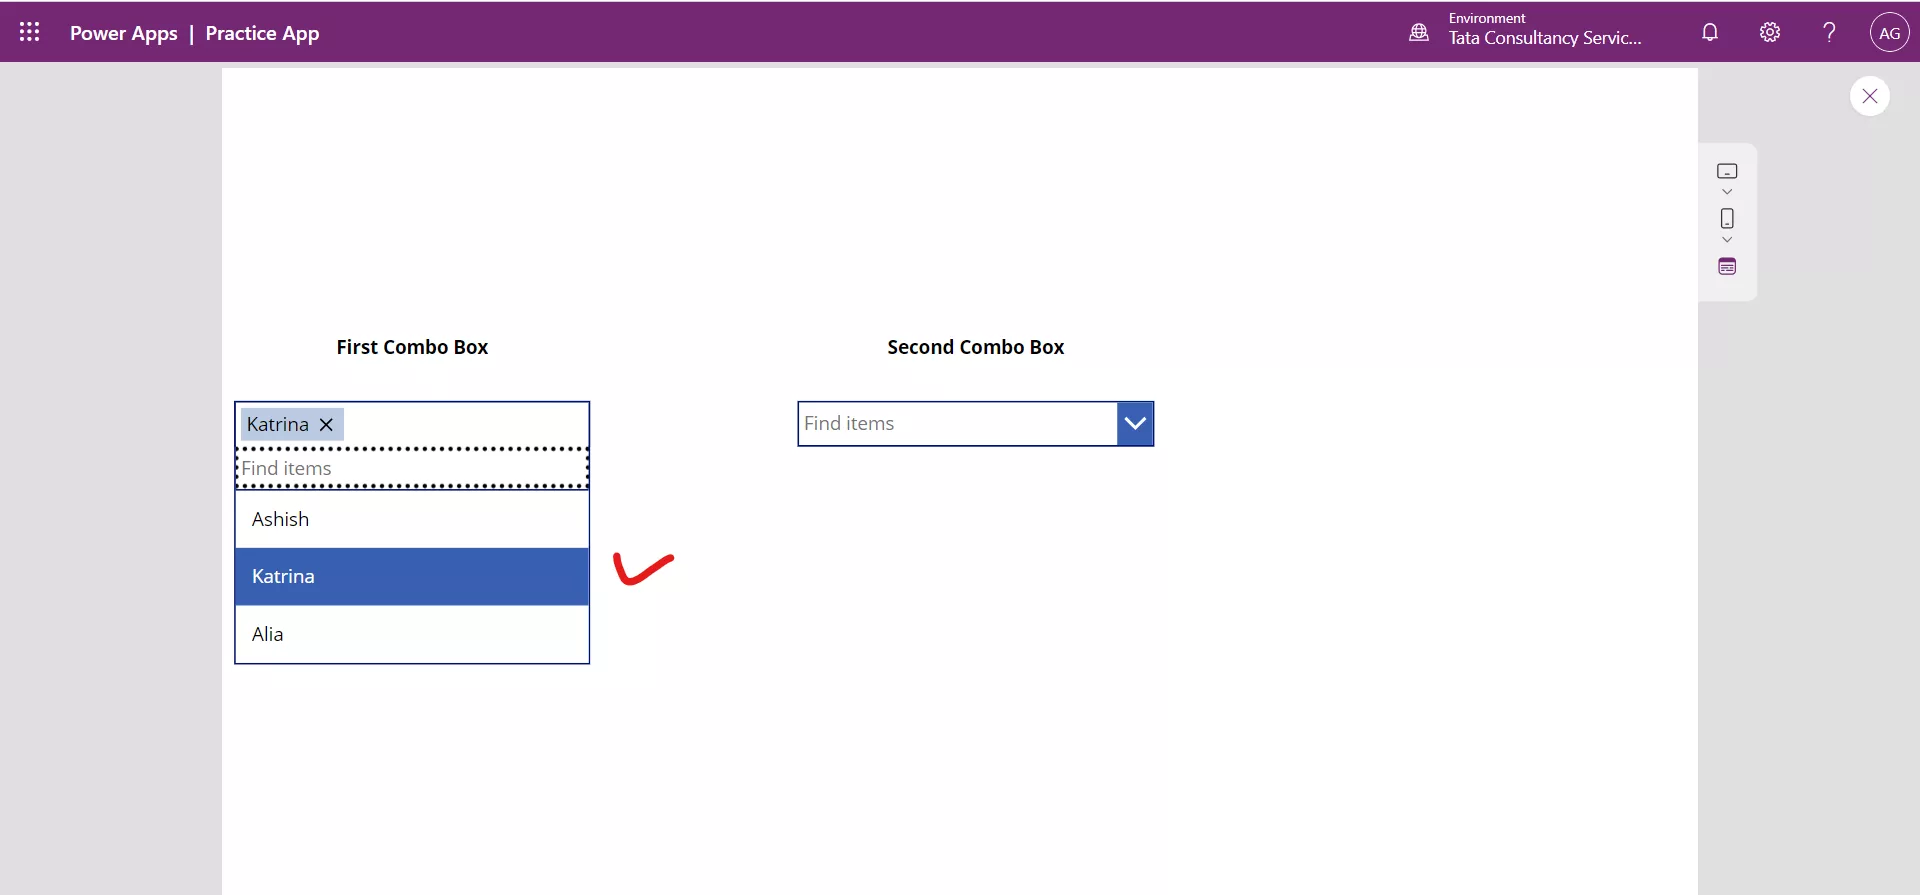
Let us select any item in the first combo box. Suppose I select katrina.
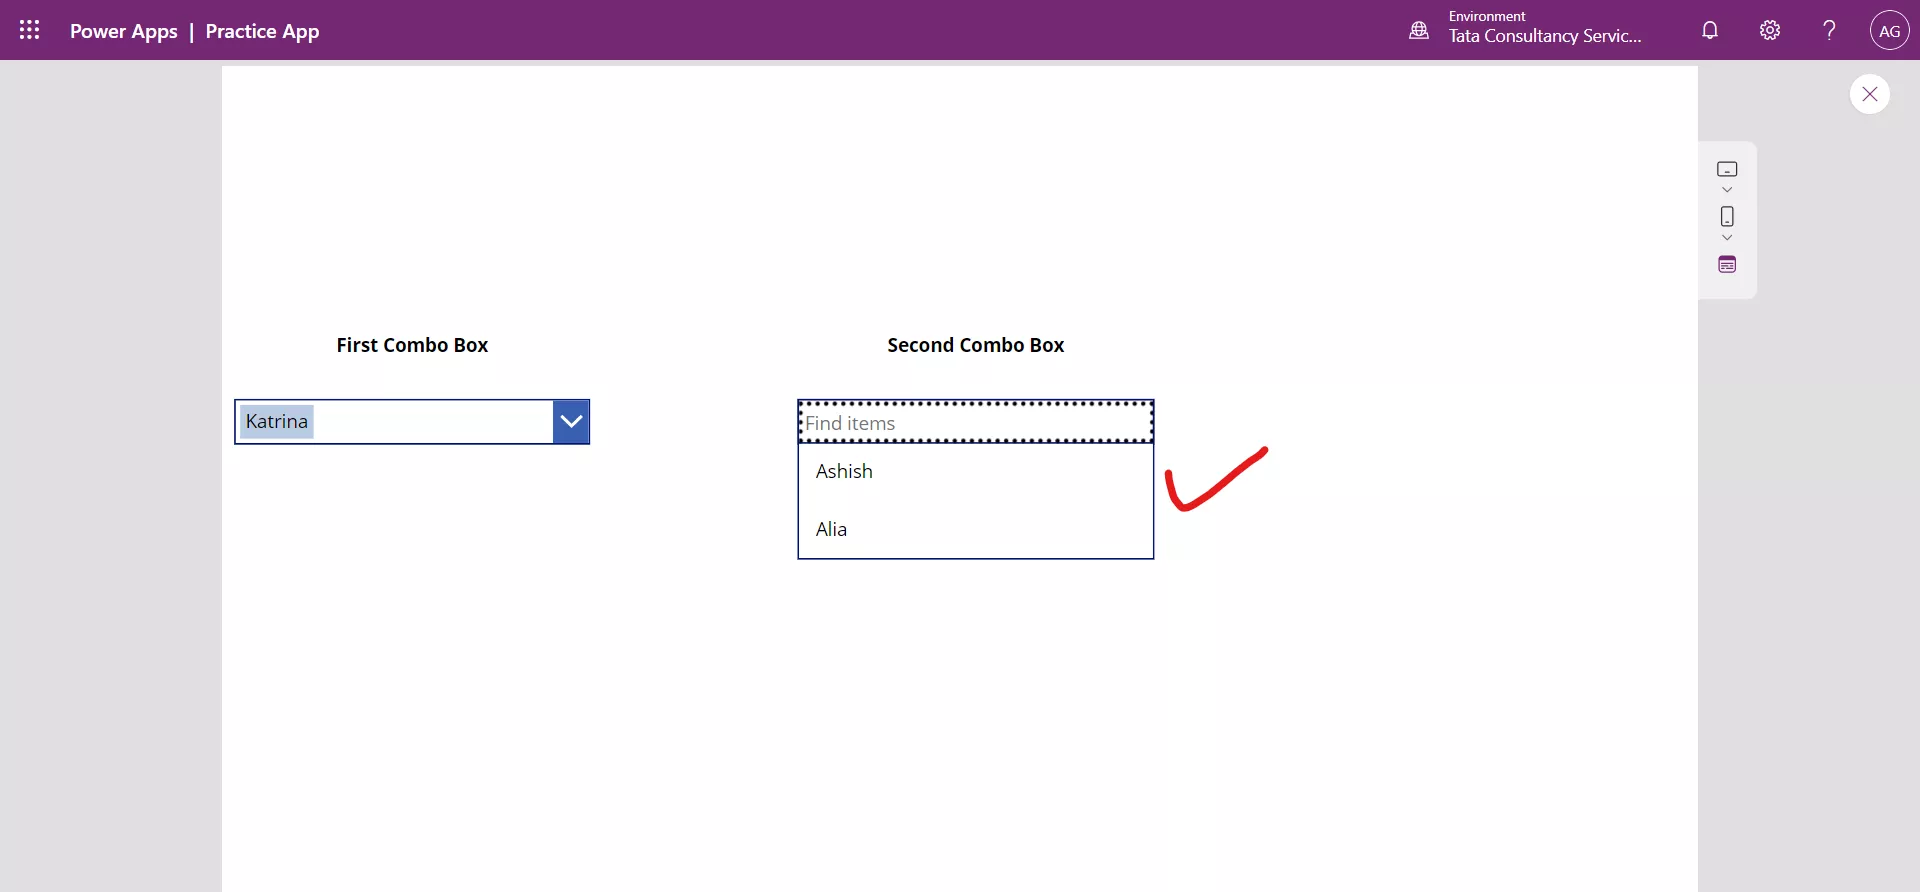
We can see that the “Katrina” item is not available in the second combo box. You can try it on your own by using different values.
Combining operators We can combine more than one operator in a formula and build more advanced logic.
For example, we want all the rows where the Country is India and the Profession is either Doctor or Engineer. To do this we can include parentheses in our formula. Our formula would be the following.
PowerApps Formula
Filter(
    MyNewCollection,
    Country = "India" And (Profession = "Doctor" Or Profession = "Engineer")
) 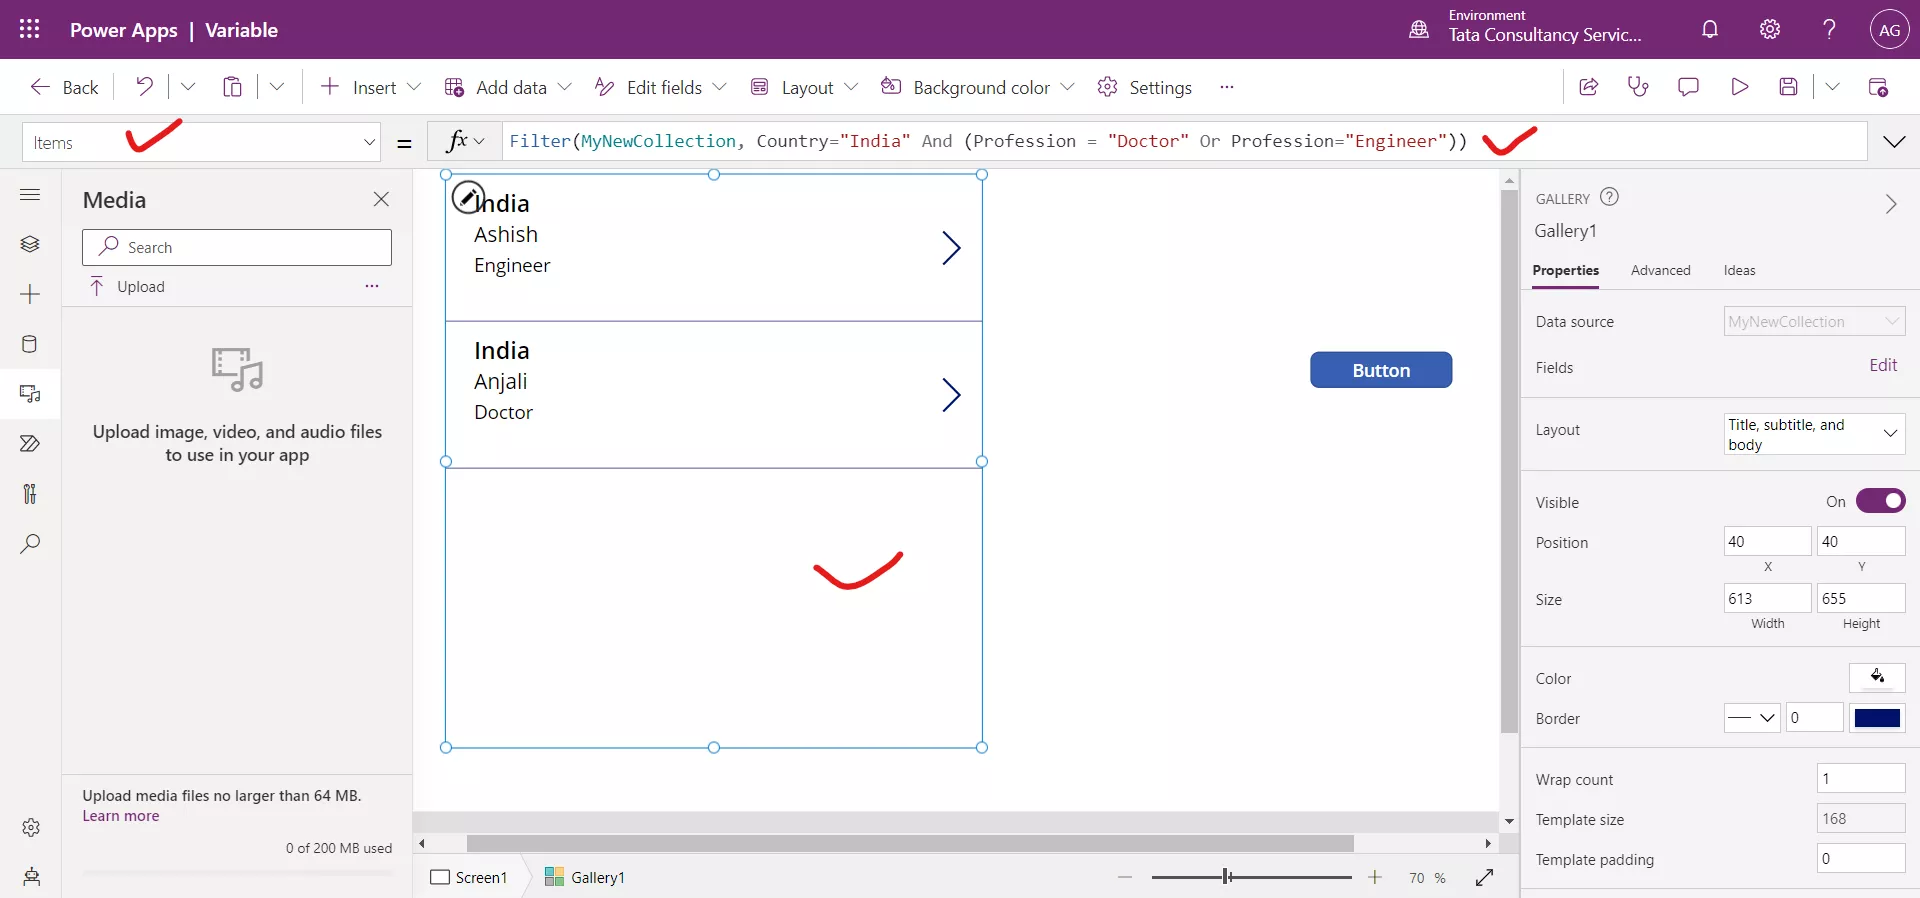
The formula will evaluate the parentheses first. In this formula, it will first determine if the Profession is Doctor or Engineer . If either of those evaluations is true, then the right side will be true. Next, the formula will check the value of the Country column. If that equals "India", then the row is a match and will be returned by the Filter function. Microsoft Power Apps supports a wide range of operators and the nesting of them to shape our data.