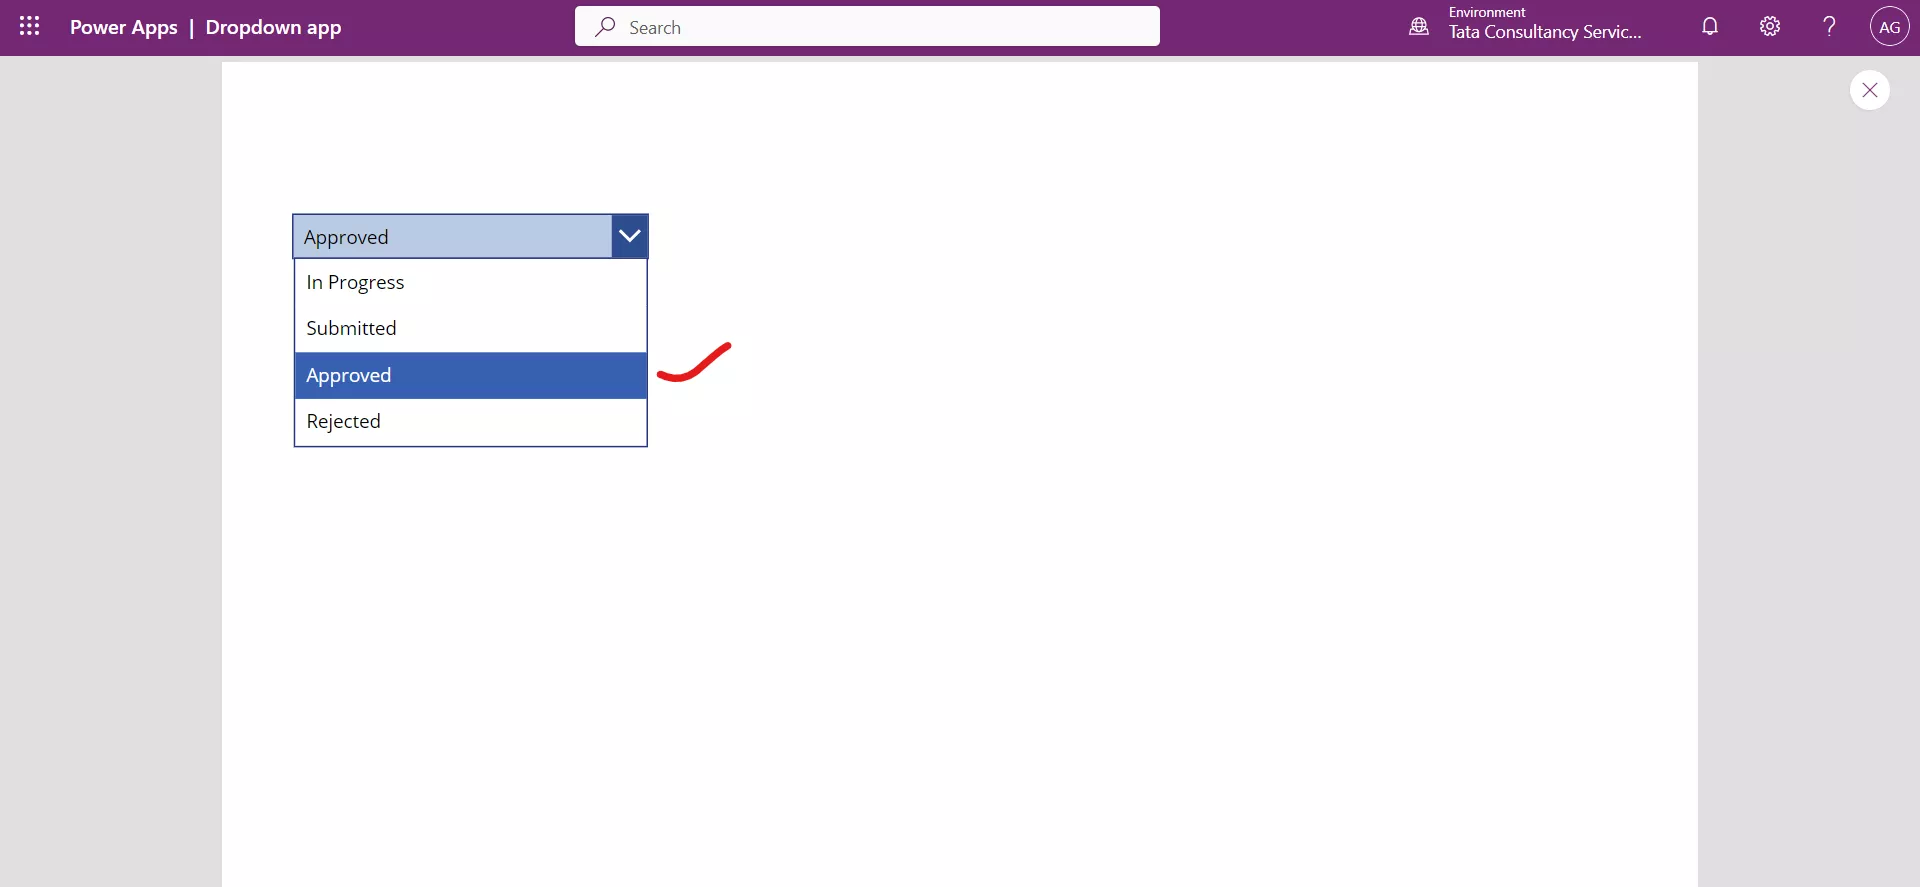
Drop down control in Power Apps
In Power Apps, a dropdown control allows users to select an option from a list of pre-defined values. The control shows only one value, unless user click on it see more choices. This control will show a maximum of 500 items.
The drop down control has the following properties: 1. Default The Default property specifies the default value of a control before the user specifies a different value.
Power Apps Formula
2. Items The Items property specifies the source of data that contains the items that appear in the control. 3. Selected The Selected property specifies the data record that represents the selected item. 4. AllowEmptySelection The "AllowEmptySelection" property of a dropdown control in Power Apps determines whether the user can select a blank option (i.e., no option selected) in the dropdown. When this property is set to "true", the user is allowed to select a blank option by clicking or tapping on an empty space within the dropdown control. When the property is set to "false" (the default value), the user must select one of the available options in the dropdown.
Note: Select the already select value the dropdown will deselect it.
5. SelectionColor The text color of a selected item or items in a list or the color of the selection tool in a pen control. 6. SelectionFill The background color of a selected item or items in a list or a selected area of a pen control. 7. Size The Size property of a control specifies the font size of the text that appears on a control.
Add a control to the canvas
To add a dropdown control to your app, follow these steps:
Step 1: Open the app in Power Apps Studio and go to the screen where we want to add the dropdown control.
Step 2: Click on the + Insert tab in the top menu and select Drop down control from the list of controls.
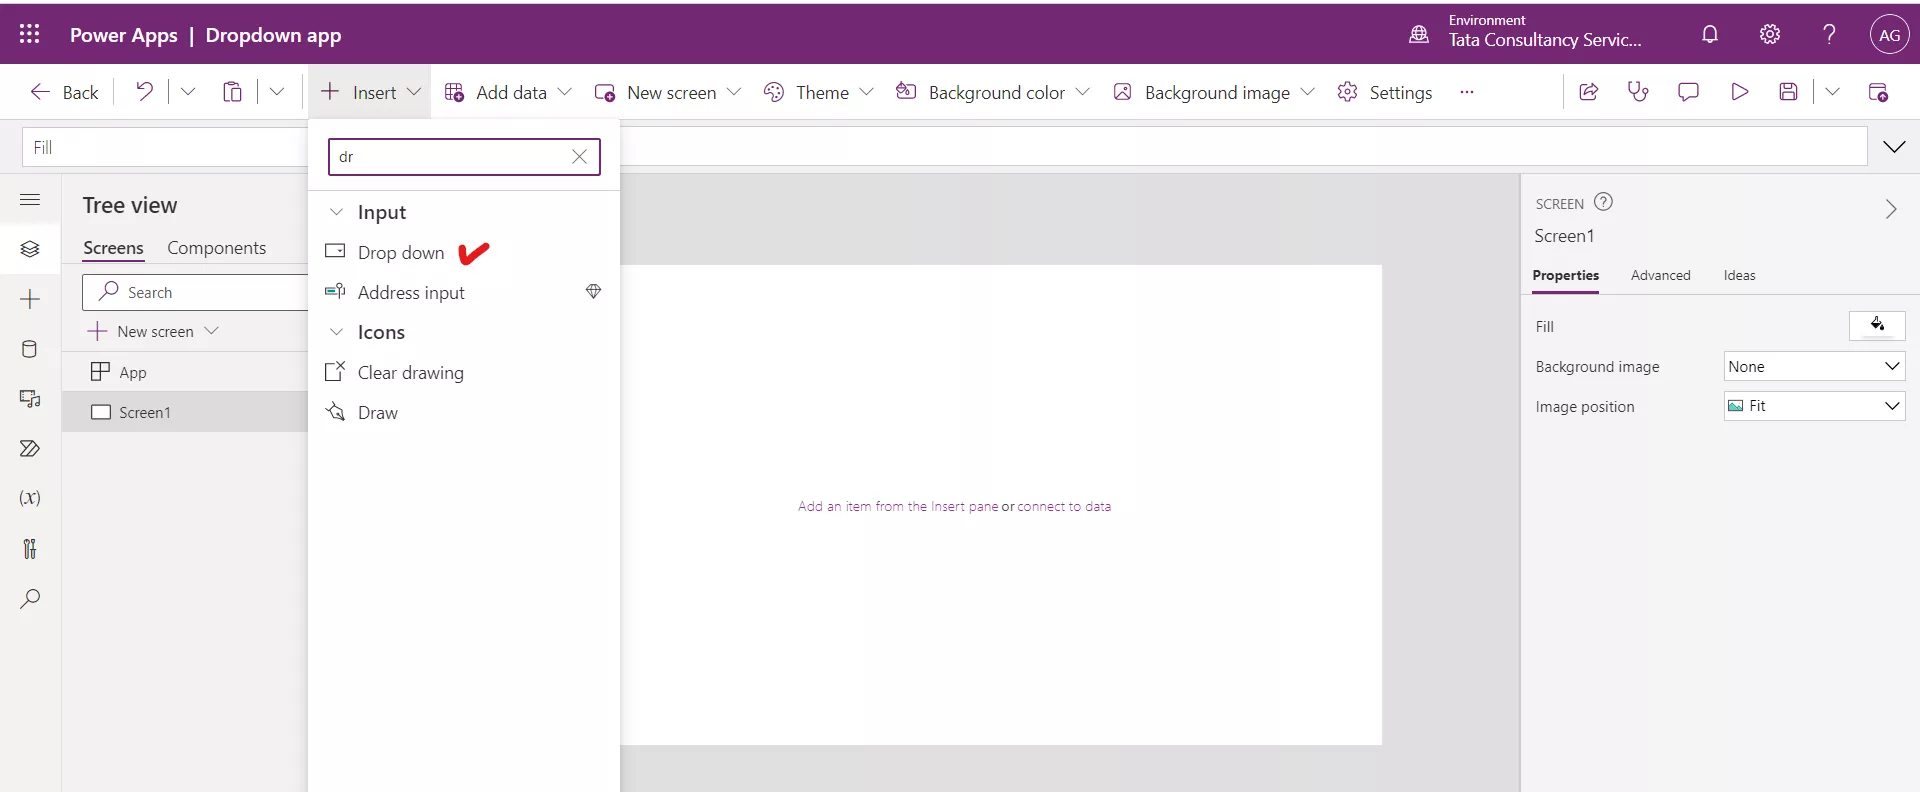
Step 3: Position the dropdown control on the screen and resize it as needed.
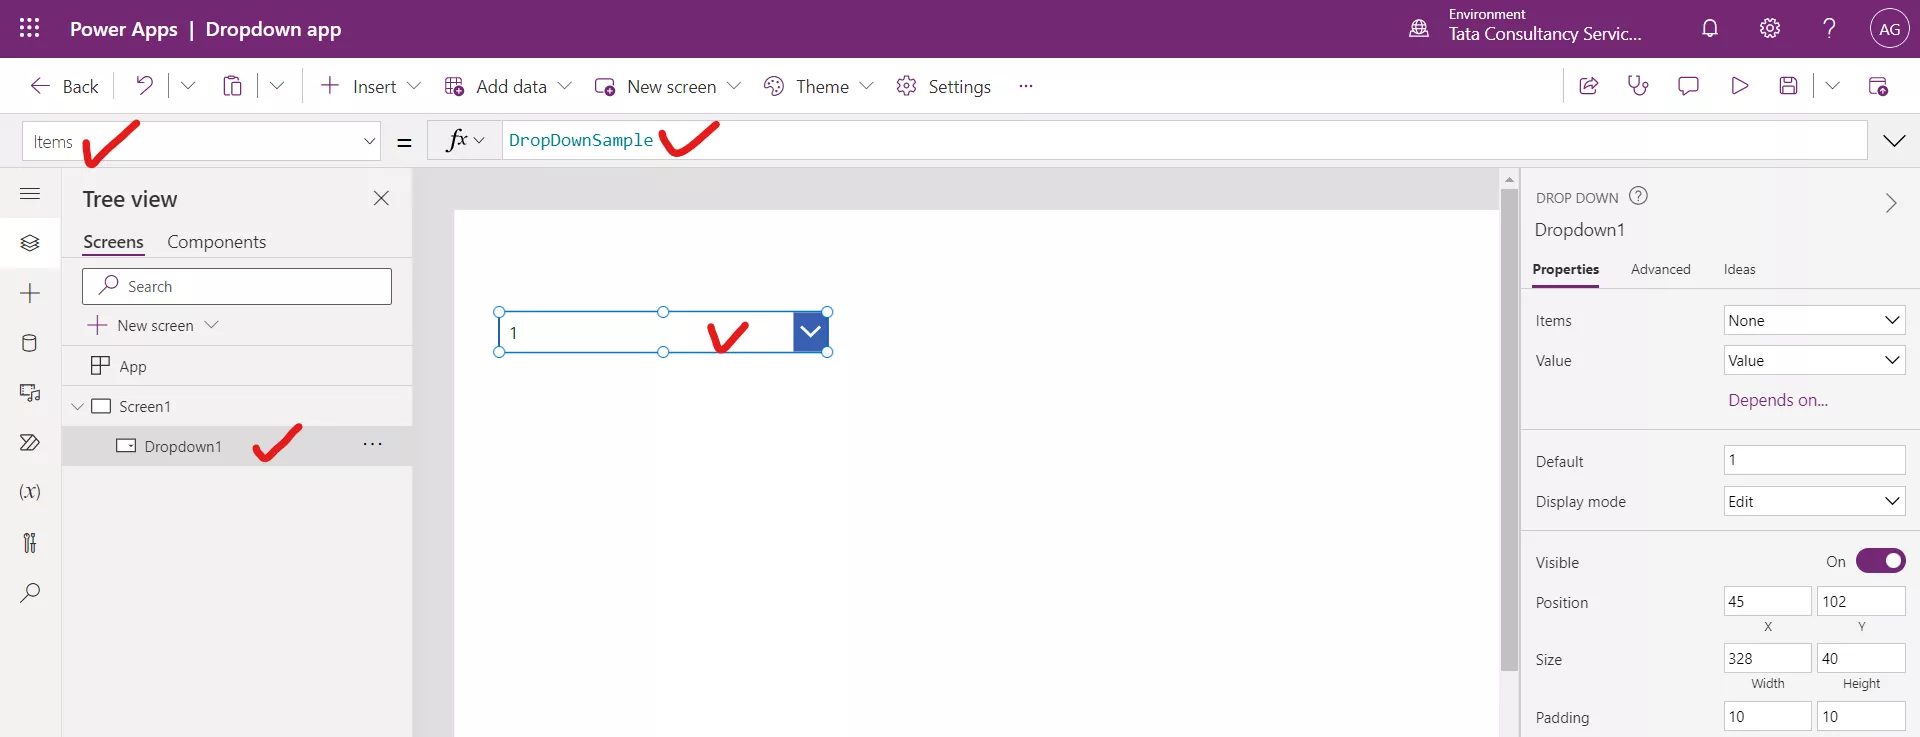
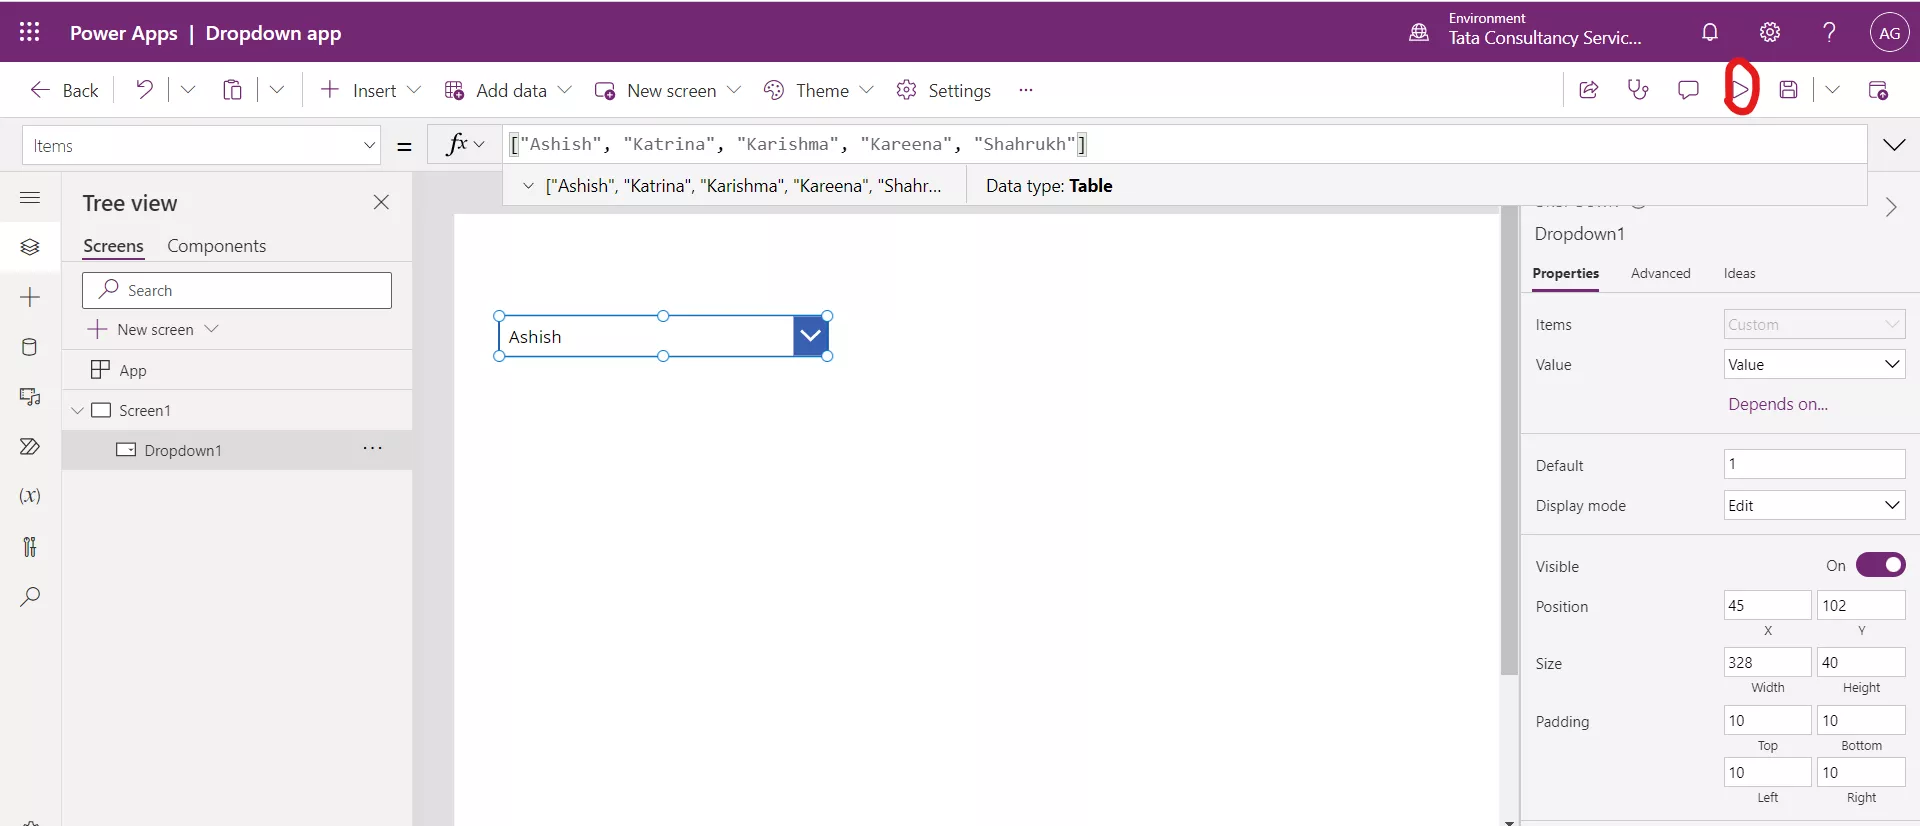
Step 4: Click on the Items property of the dropdown control and enter the list of values that we want to display in the dropdown.
Power Apps Formula
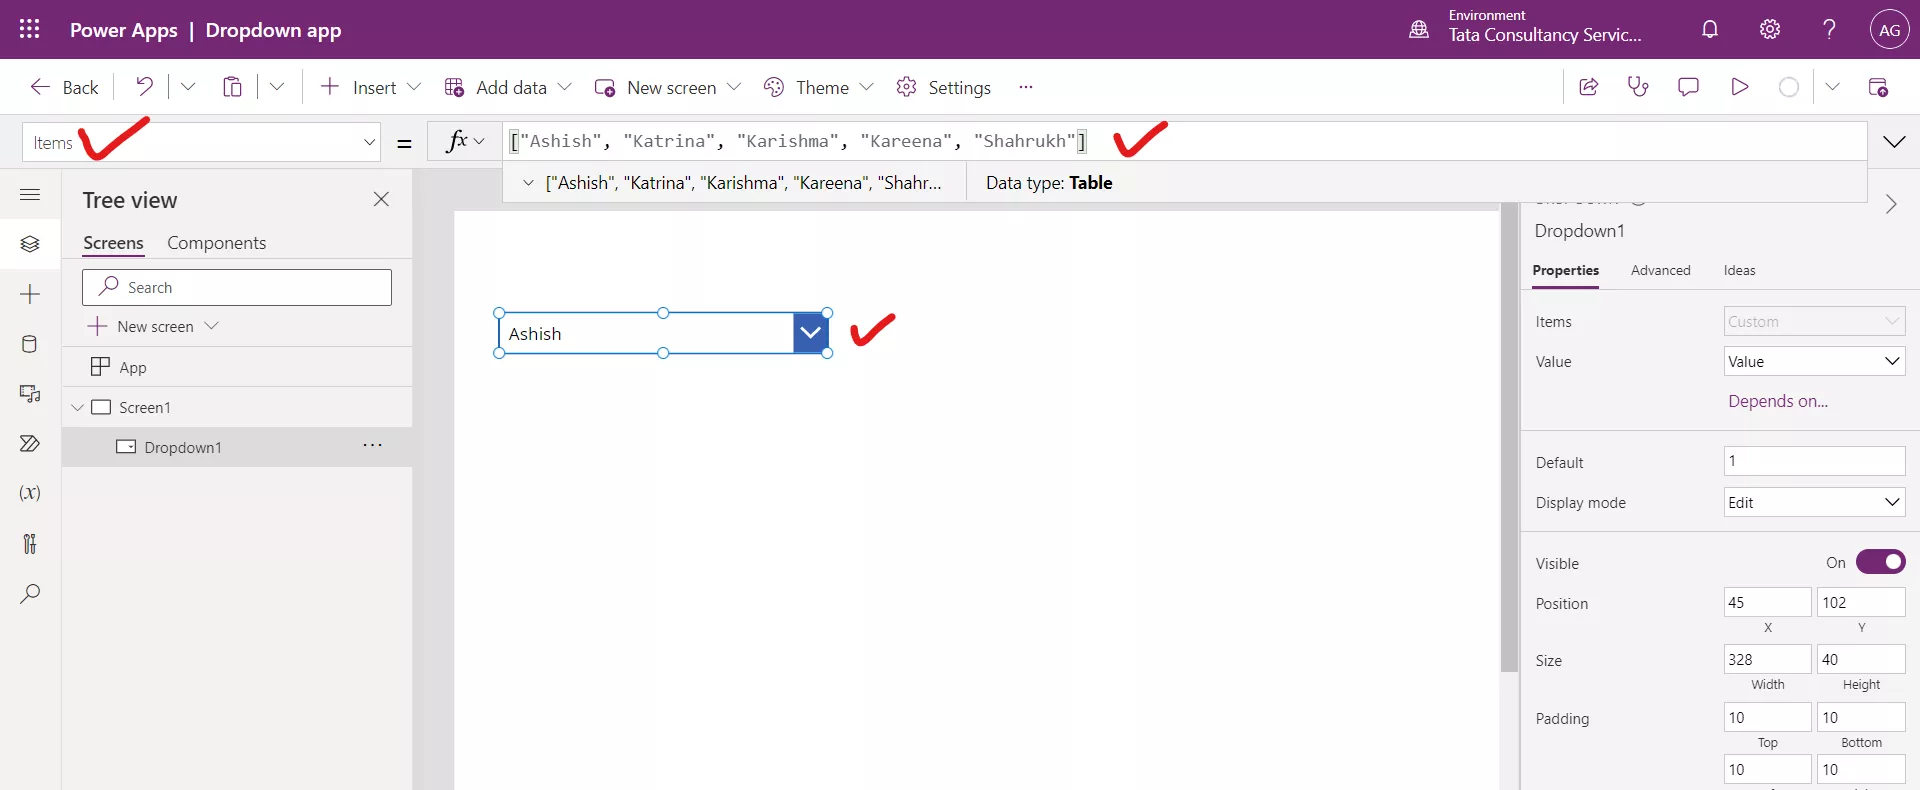
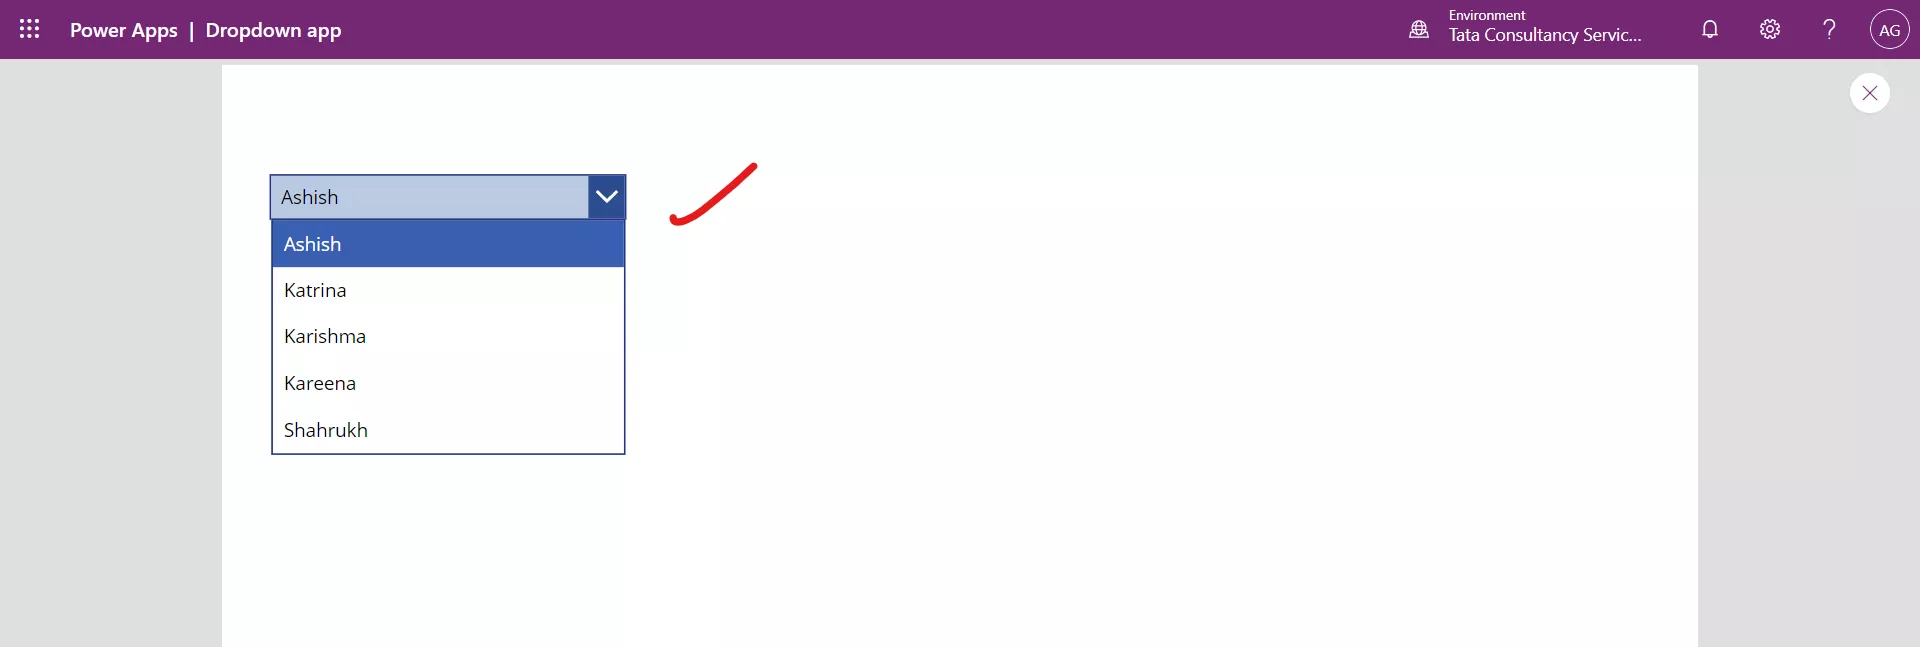
Step 5: Show the items in the list by selecting the control's down arrow while pressing the Alt key. Or play the app by clicking on the “play” button.
Example: To create a collection, we can follow the following steps:
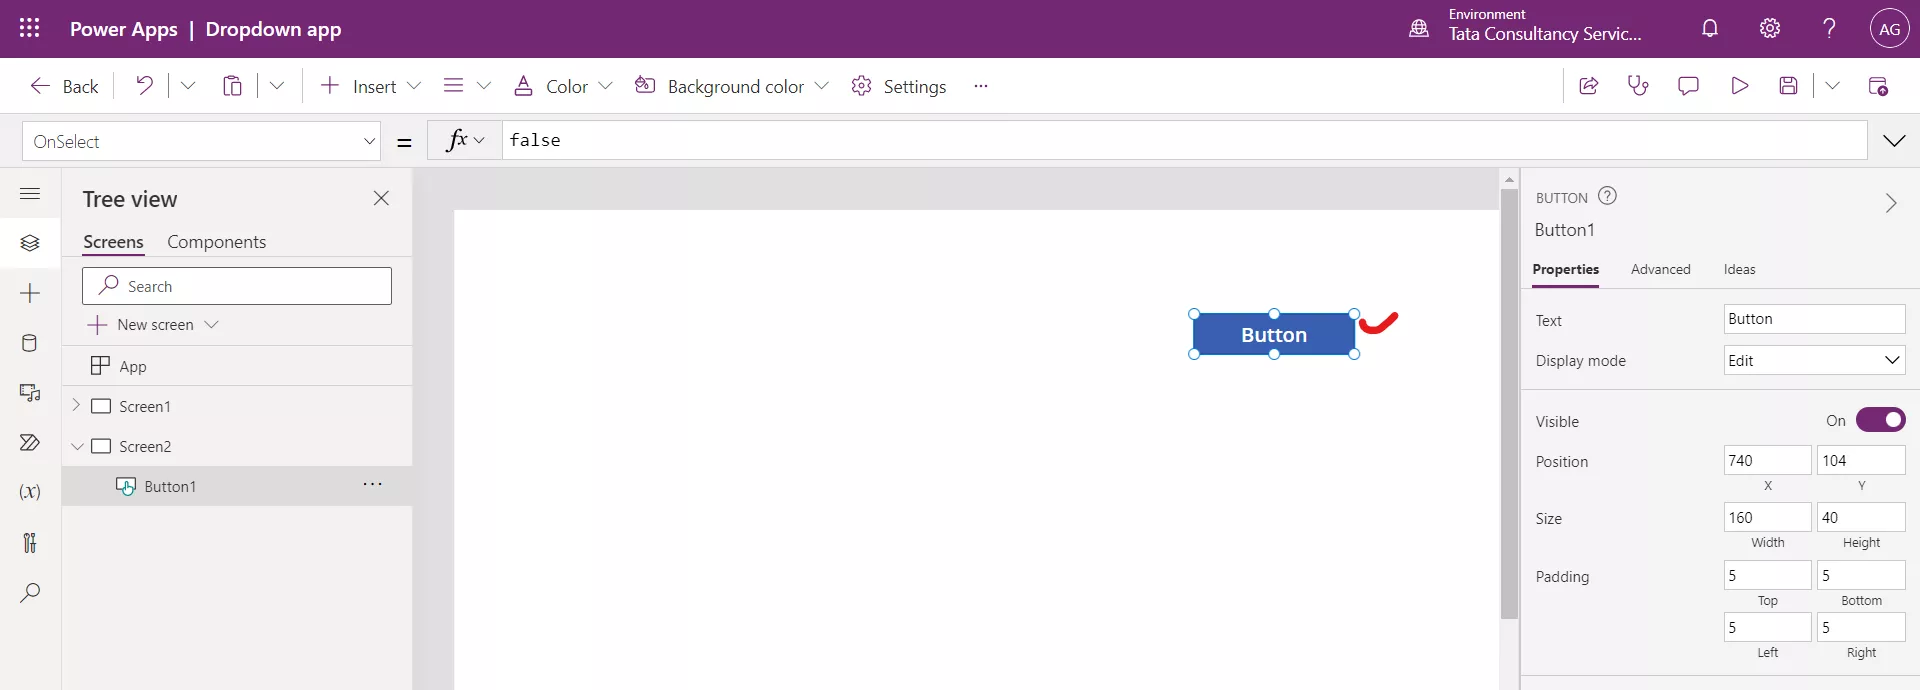
Step 1: Insert a Button control in the Power Apps studio.
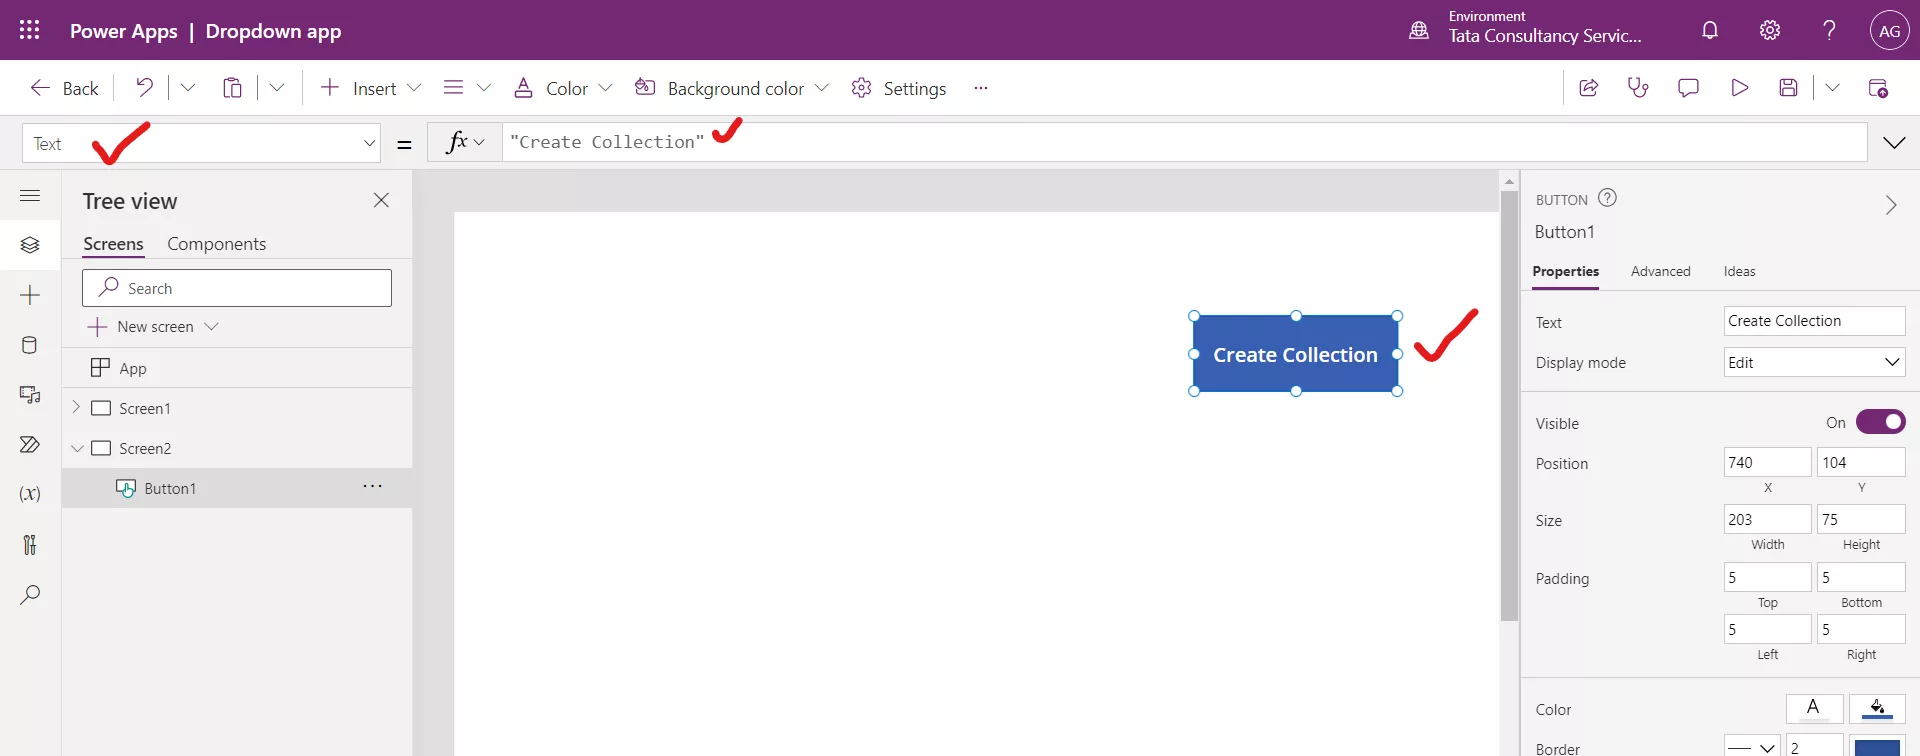
Step 2: Set the Text property of button to the Create Collection.
Step 3: Set button control's OnSelect property to the below formula:
Power Apps Formula
{Name: "Ashish", Country: "India", Profession: "Engineer"},
{Name: "Deepak", Country: "America", Profession: "Engineer"},
{Name: "Anjali", Country: "India", Profession: "Doctor"},
{Name: "Ayushman", Country: "America", Profession: "Lawyer"}
)
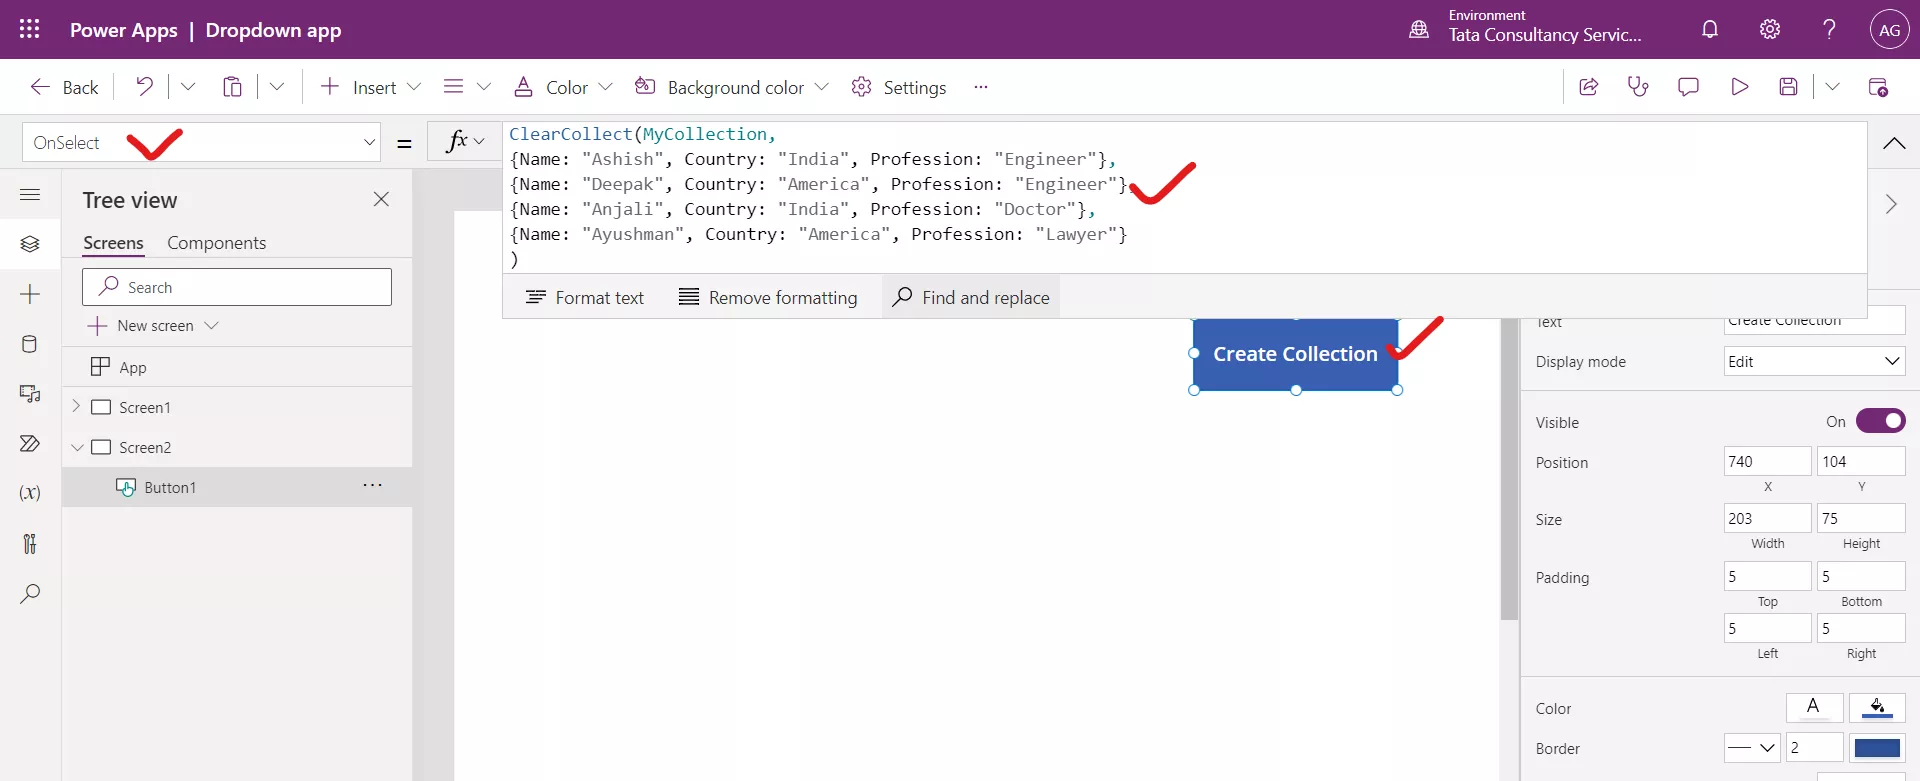
Step 4: Select the button while holding down the Alt key. We can see the collection variable created in power Apps.
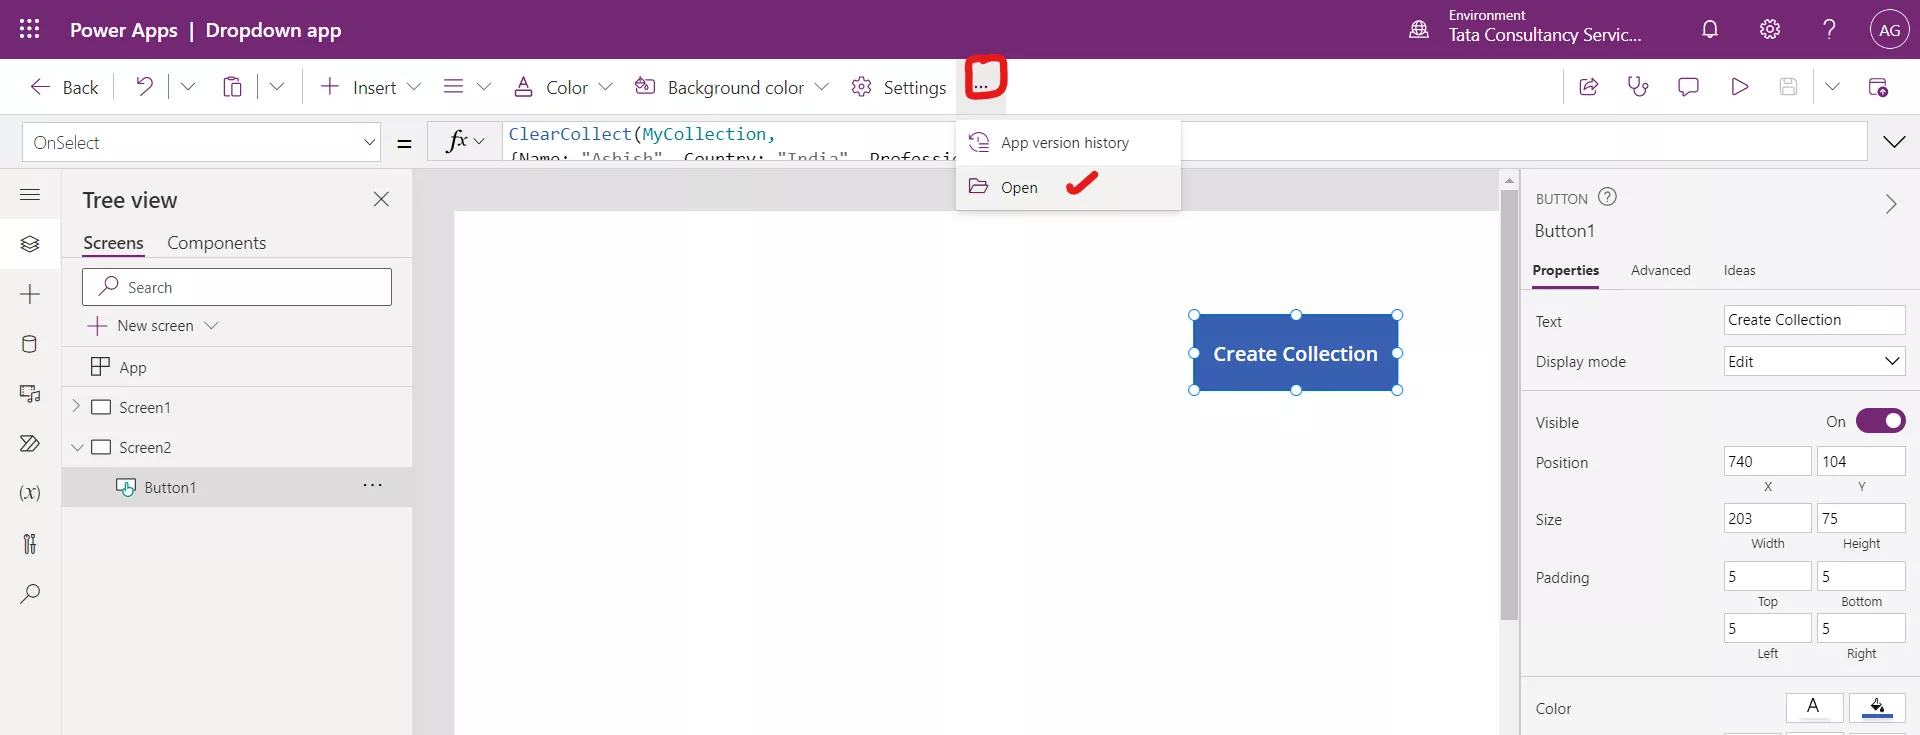
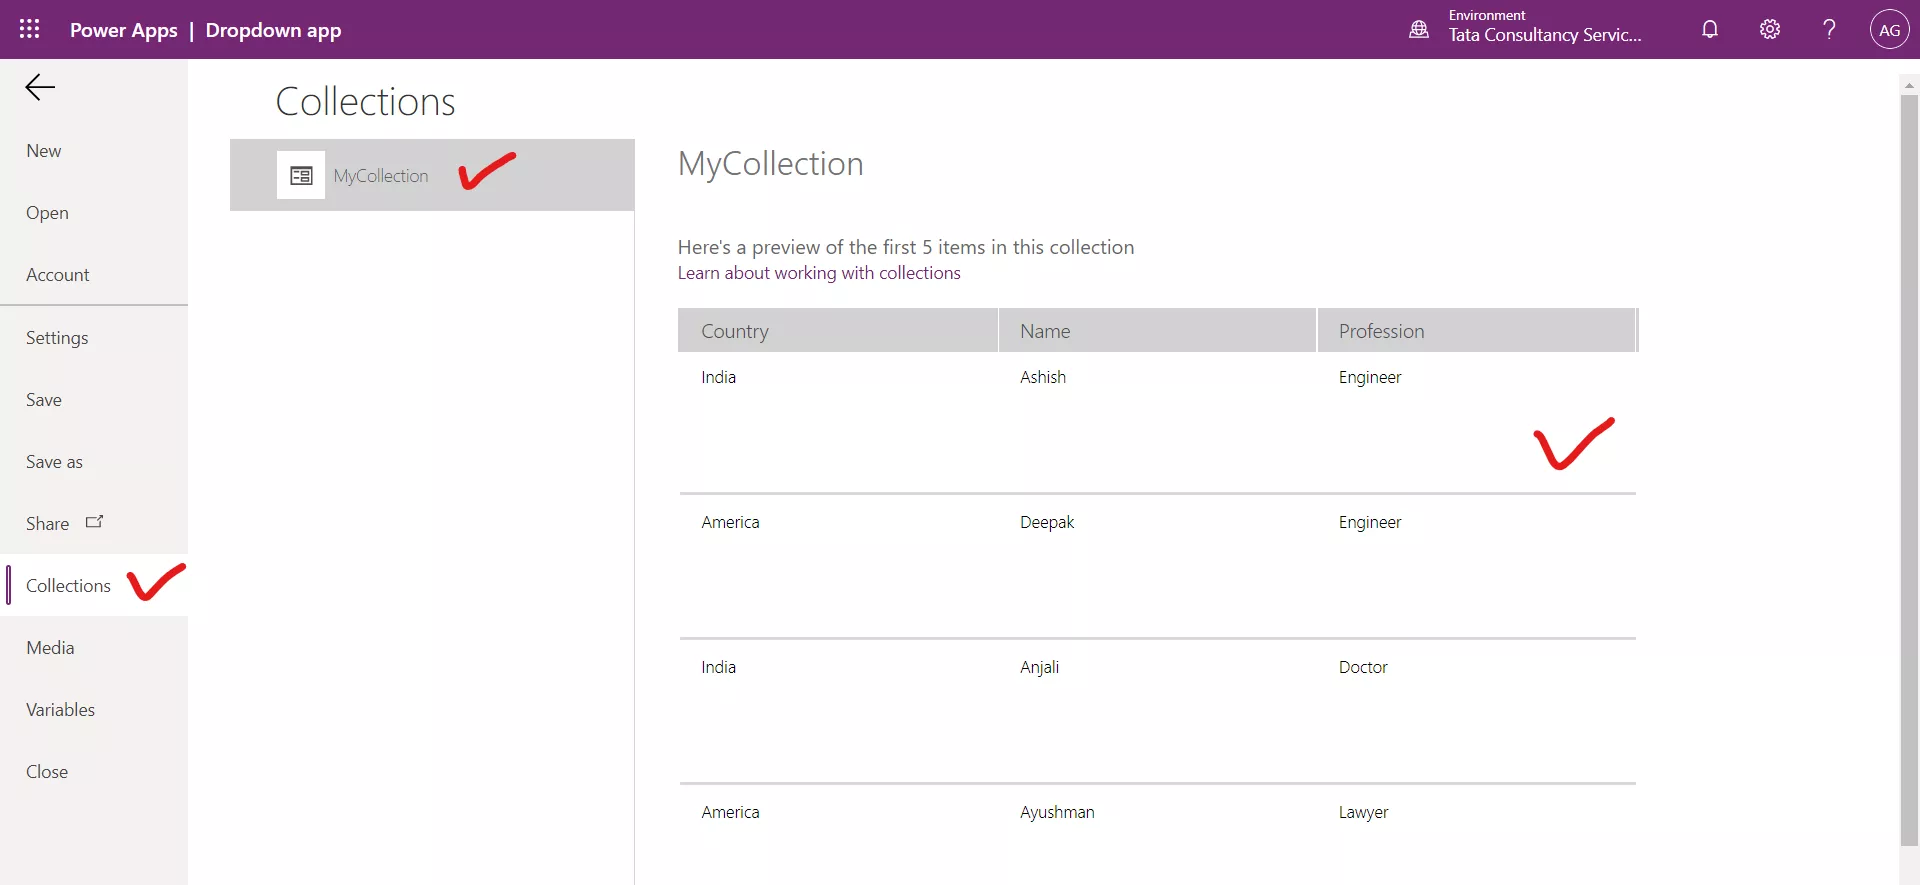
We can also see the collection which is created by clicking on the MyCollection in the formula bar.
Step 5: Add a Drop down control to the power apps. And set the Items property of the Drop down control to the following formula:
Power Apps Formula
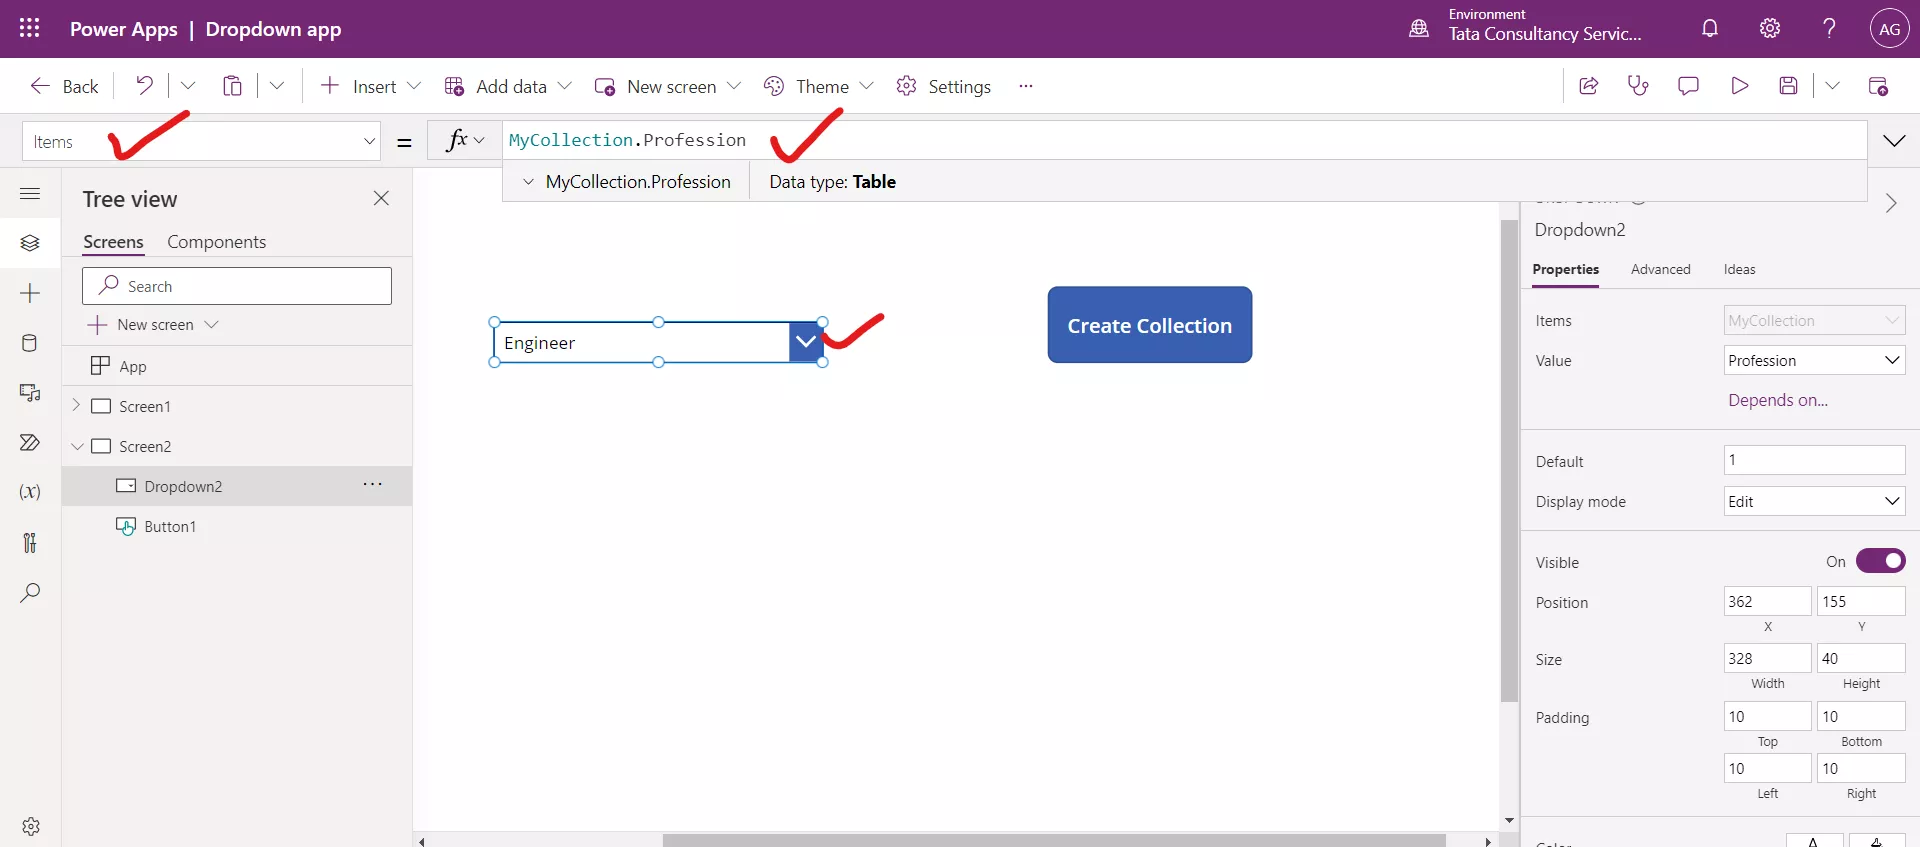
The formula returns all the column values in the drop down.
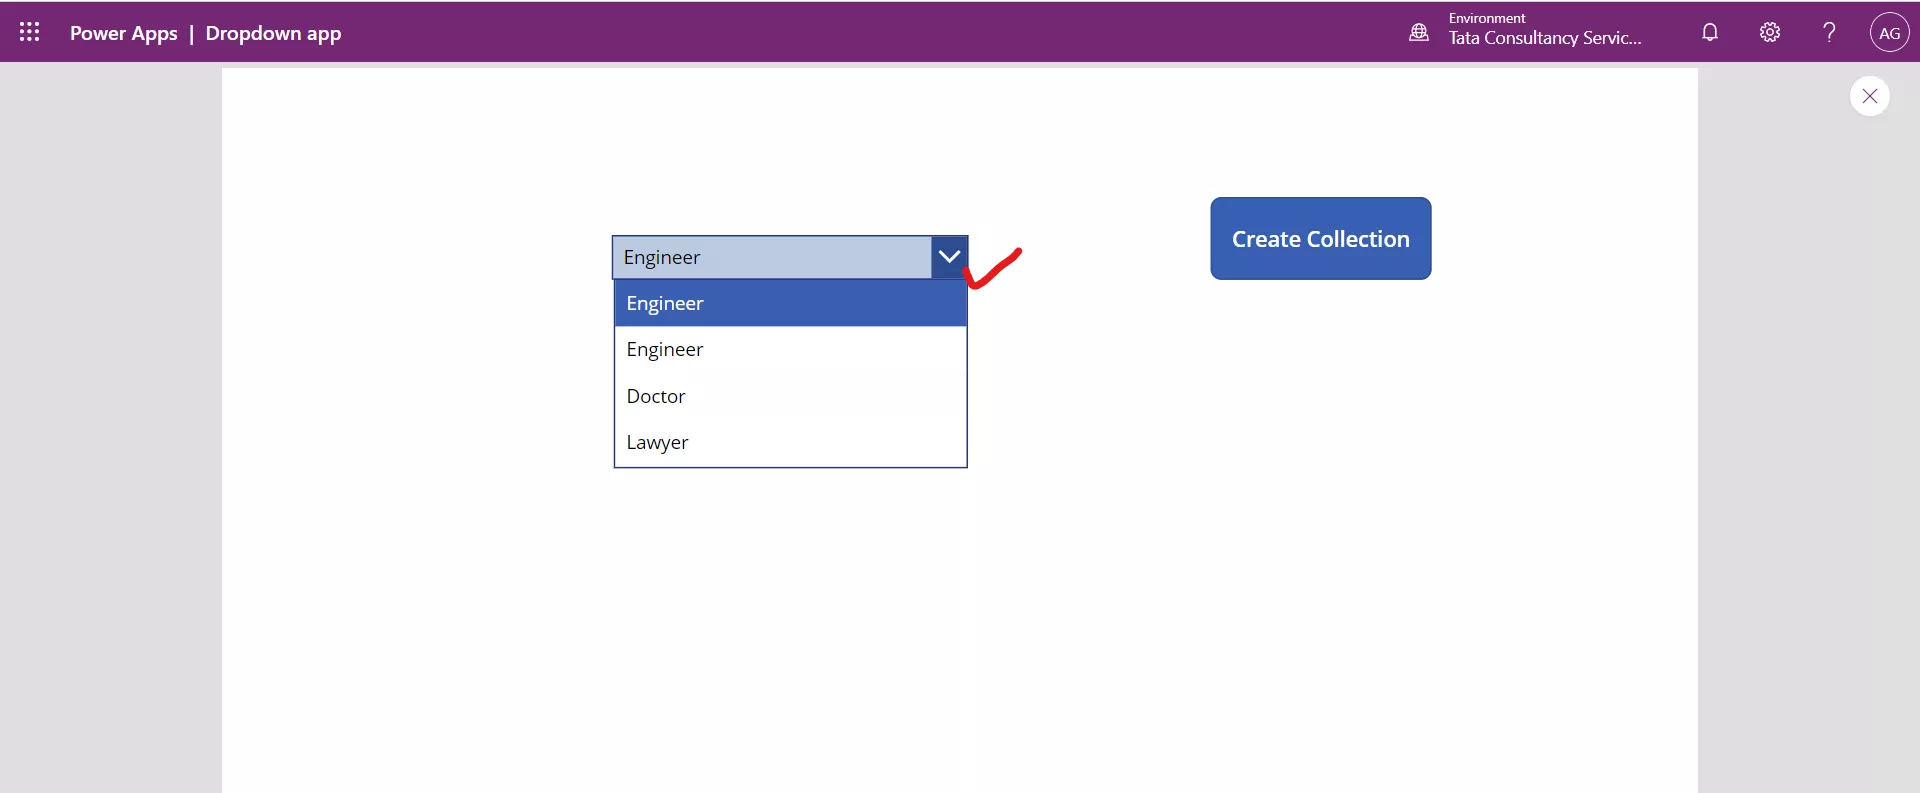
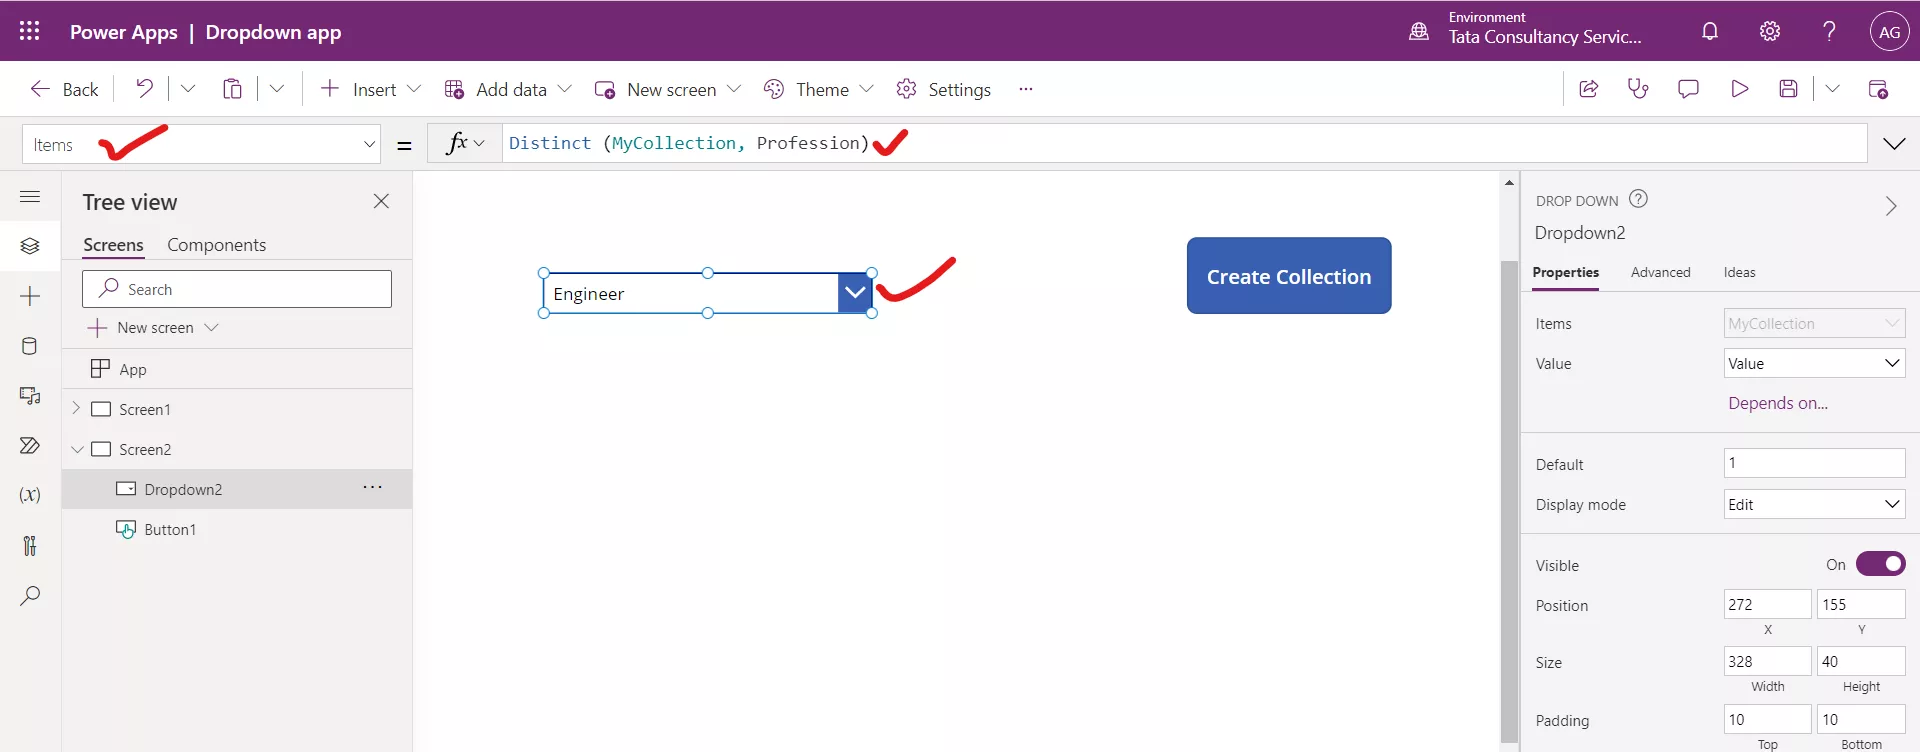
Here, the “Engineer” value is repeated, if we want the values only at one time. We can use the Distinct function. Set the Items property of the Drop down control to the following formula:
Power Apps Formula
Filter the results according to the Drop down Control Value
Step 1: Add a vertical gallery control to the canvas.
Step 2: Set its Items property to the MyCollection.
Step 3: Add three Text label controls and set their Text property to the corresponding column values.
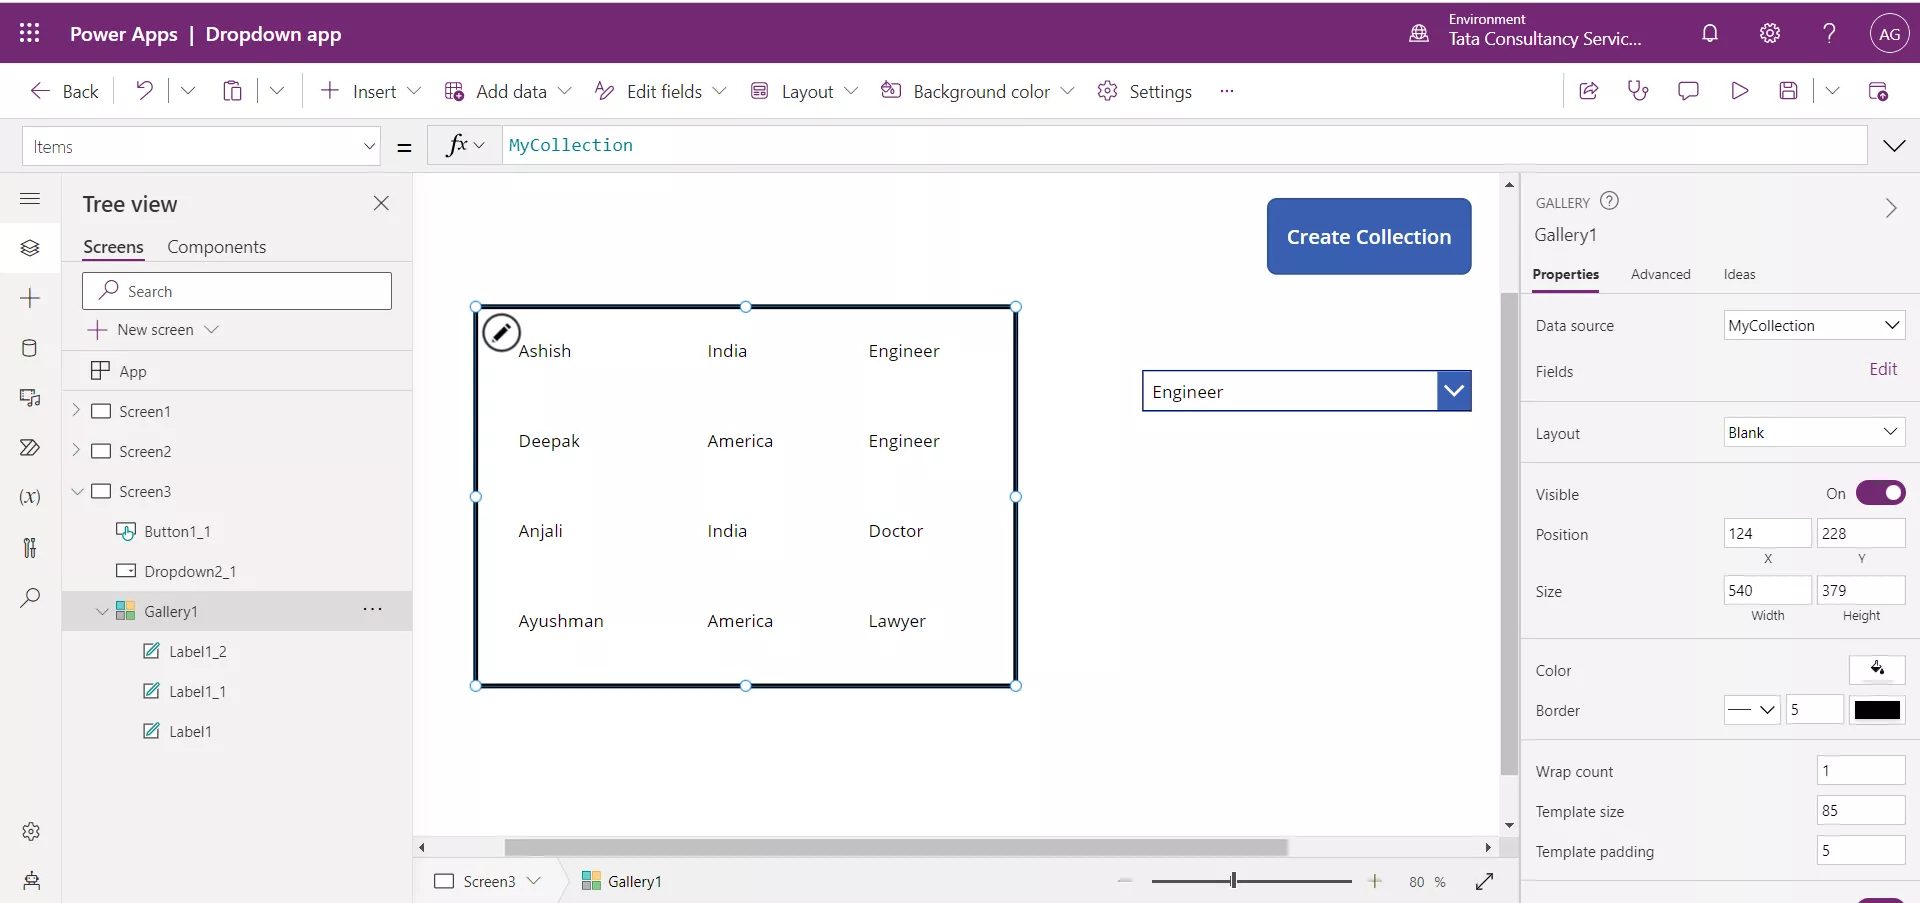
Step 4: Rename the Drop down control to myDropdown. To edit the control name double click on the control name.
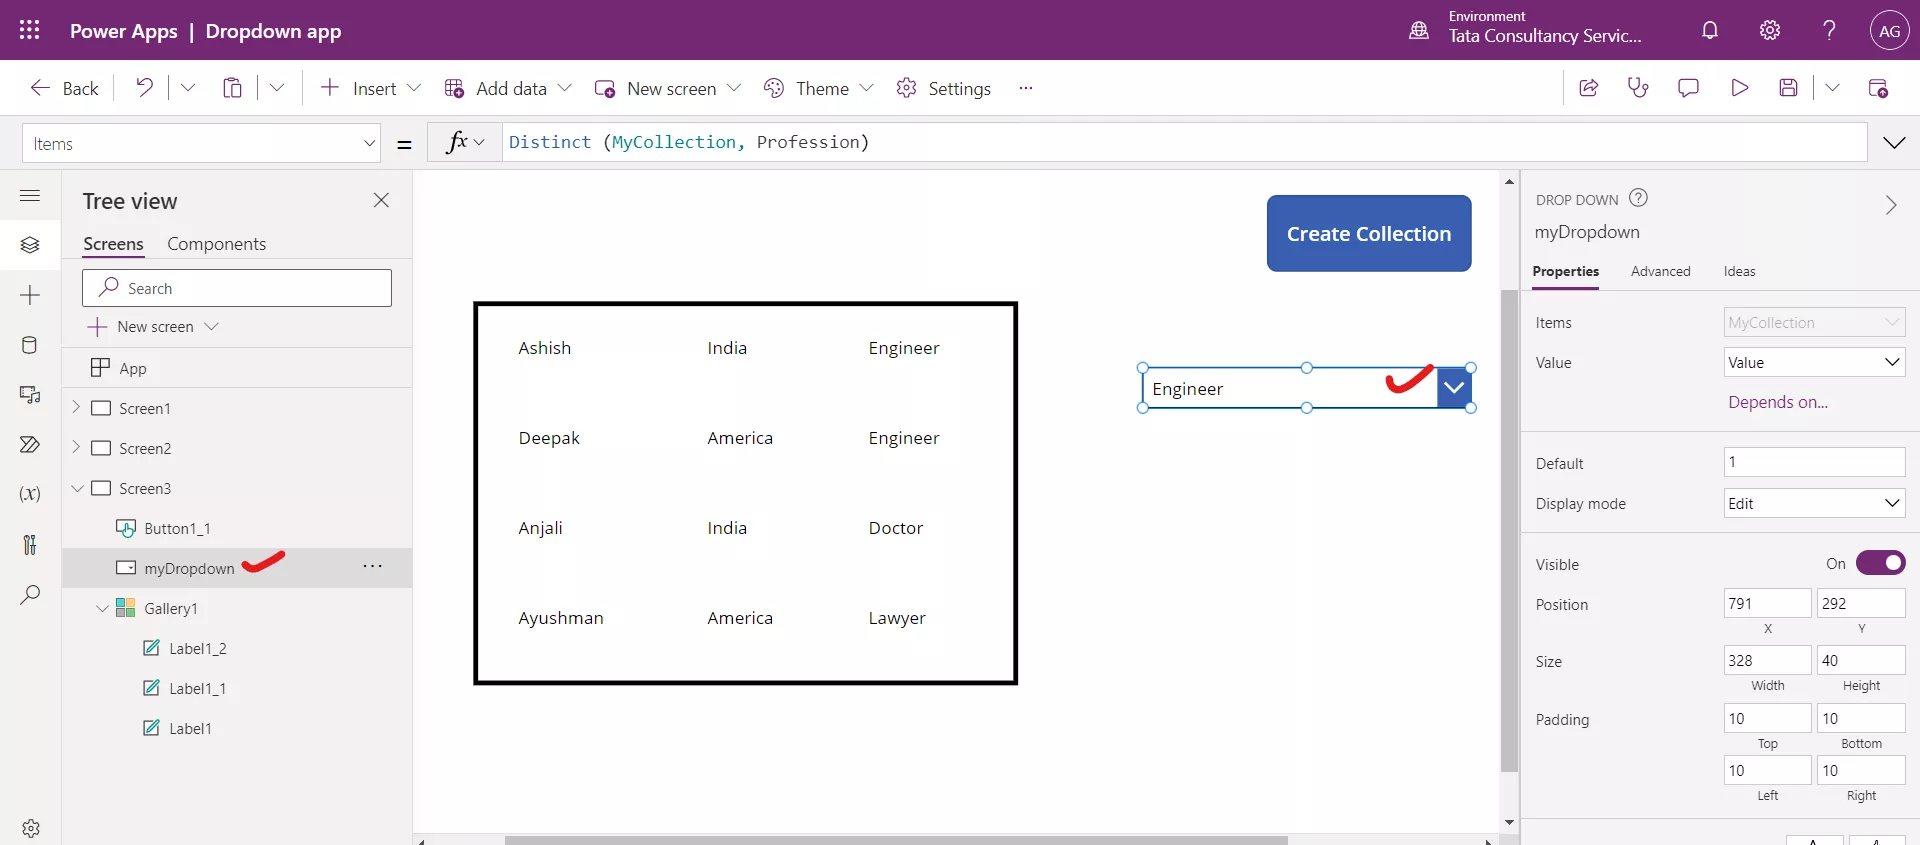
Step 5: Set the gallery's Items property to the following formula:
Power Apps Formula
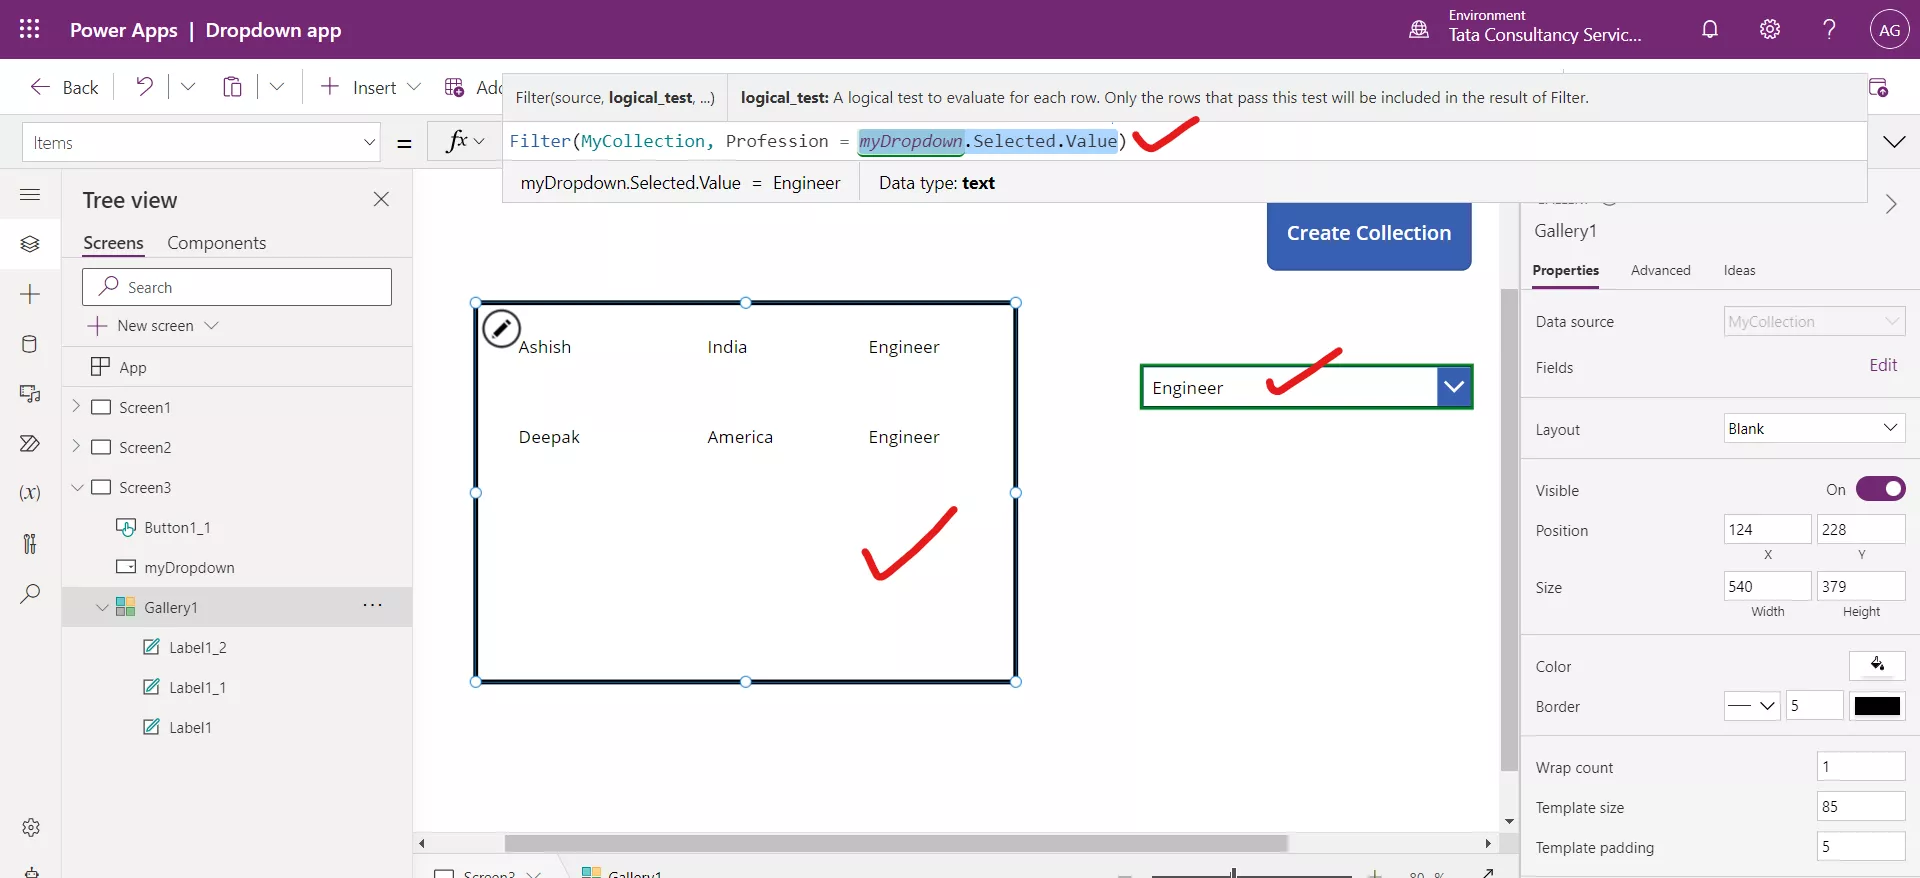
This Filter function shows only those records in the MyCollection collection for which the Profession matches the selected value in the myDropdown control.
Explanation: The formula "Filter(MyCollection, Profession = myDropdown.Selected.Value)" is used to filter the items in a collection based on the selected value in a dropdown control. Here's a breakdown of how the formula works:
• "MyCollection" is the name of the collection that you want to filter.
• "Profession" is the name of a column in the collection that contains the profession of each item.
• "myDropdown" is the name of the dropdown control that the user selects a value from.
• ".Selected.Value" is a property of the dropdown control that returns the value of the currently selected item.
Here, Value is the name of the column. Because Distinct function returns one column table with the column name Value.
The formula essentially says "filter the items in MyCollection where the Profession column equals the value of the currently selected item in myDropdown control". So, if the user selects "Engineer" from the dropdown, the formula would return all items in MyCollection where the Profession column is "Engineer".
Drop down from Sharepoint in the canvas app
In this exercise, we learn how to get the values of a choice column in SharePoint to the drop down control in the canvas apps.
The “Timesheet Details” is the SharePoint list or data source and “Approval Status” is the name of the Choice column with the Default value “In Progress”, in the Sharepoint list.
Set the Items property of the drop down control in the Power Apps to the following formula:
Power Apps Formula
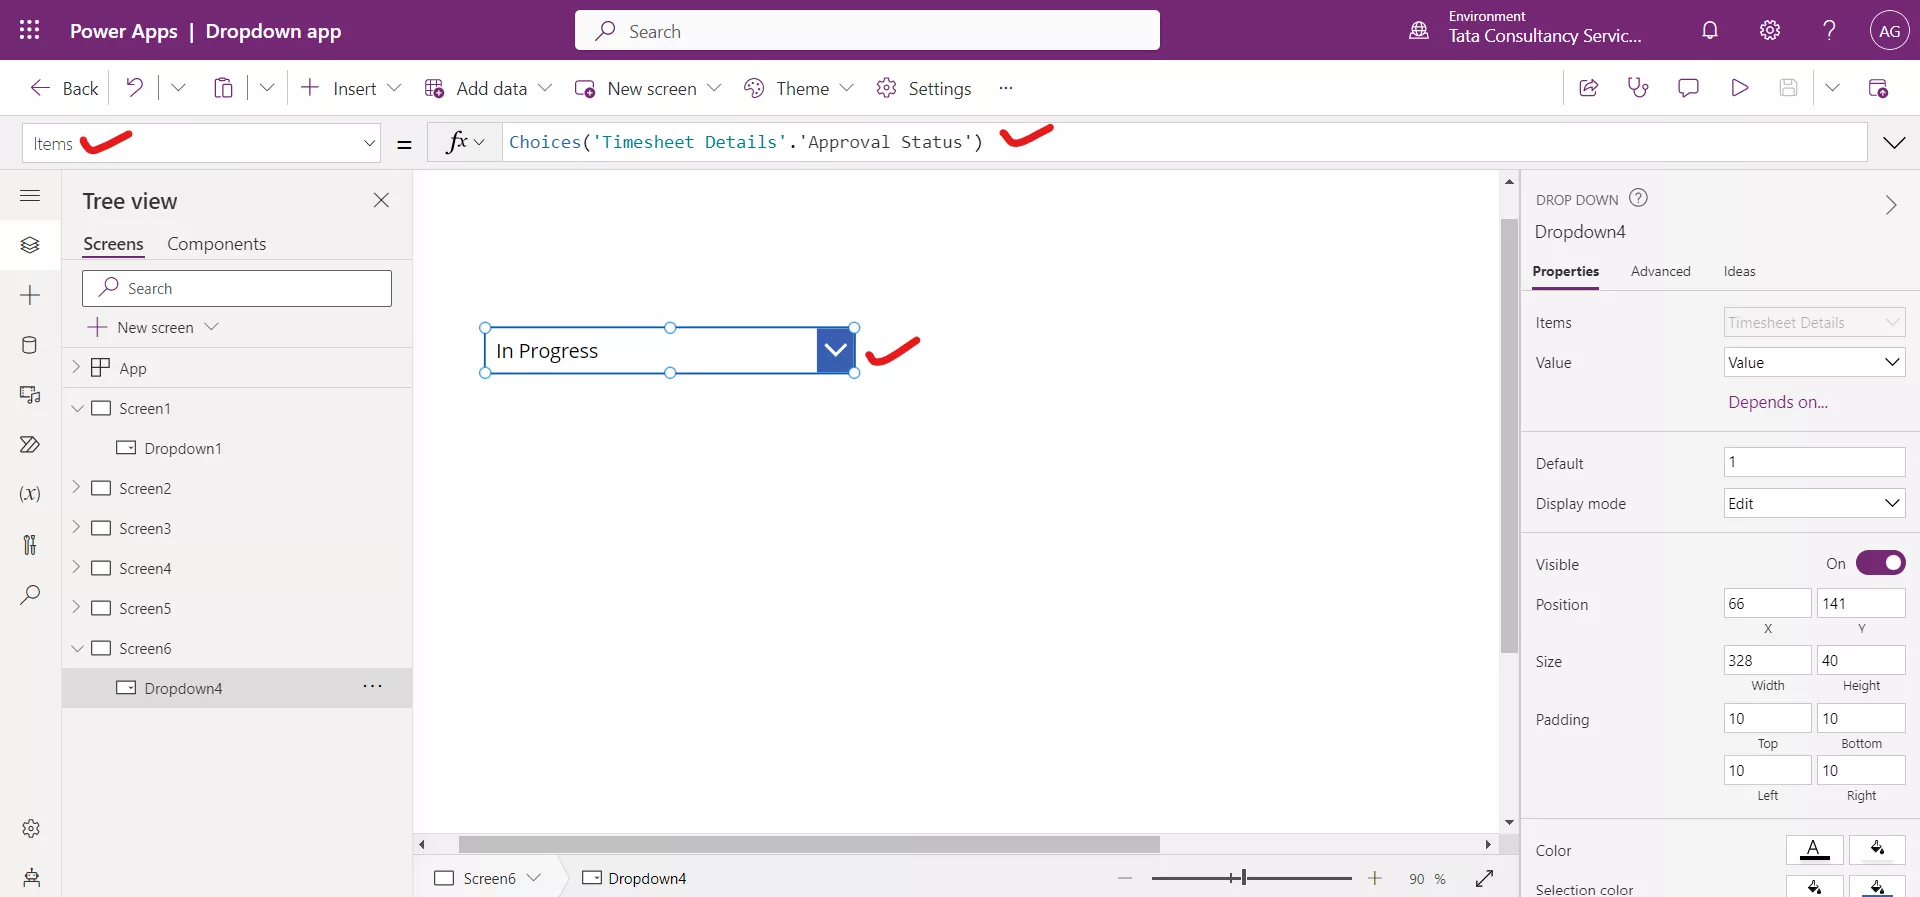
Preview the app by clicking on the play icon on the top-right command bar, and click on the control, here we can see all the values.
