Business rules in Dataverse
In Microsoft Dataverse we can define business rules. Business rules allow us to apply and maintain business logic at the data layer instead of the app layer. This can ensure our business logic is followed whether it is being accessed directly from Power Apps, Power Automate, or even via an API. The rule is tied to the data, not the app.
Business rules can be used by canvas apps or model-driven apps to do the following:
- Set column values.
- Clear column values.
- Validate data and show error messages.
- Show or hide columns (model-driven apps only).
- Enable (Unlock) or disable (Lock) columns (model-driven apps only).
- Create business recommendations based on business intelligence (model-driven apps only).
Column type support with business rules
Business rules work with most column types including text, number, choice, date, lookup, owner, and image. However, business rules don't work with the following column types:
• Choices (multi-select)
• File
• Language
Note: With Choice (Yes or No) type column we can implement the business rule.
Define the components of a business rule
Business rules encapsulate logic in a predefined set of steps. The steps run each time data is entered or modified and the data meets certain criteria to trigger the business rule. The business rule will run whatever way that data was added or edited in the table. Additionally, business rules are server-side, meaning that the logic runs on the servers that manage Microsoft Dataverse.
Business rules have the following components:
1. Condition
All business rules have a condition. It's a trigger and is used to determine if the business rule is run based on the values that are added or edited in a table. A condition always runs as true or false, and you can have more than one condition in a business rule.
2. Action
An action is some logic, like setting a column to a certain value, that runs on either the true or false branch of a condition.
a) Set Business Required
In this action we must select the field and set that field status to Business Required or Not Required.
b) Set Field Value
In this action we must select the field of the table and its value.
c) Set Visibility
In this action, we set the visibility means hide or show the columns.
d) Lock/Unlock
In this action component, we set the column to enable or disable for editing.
e) Set Default Value
In this action component we set the default value of the column.
3. Scope
Business rules can have a scope. The following table outlines the available scope options for a business rule.
| Scope of a business rule | Applies to |
|---|---|
| Entity: It triggers the business rule to the selected table at the client side and at the server side also. | It applies to all Model-driven forms, canvas app forms, and excel. A business rule that is used by a canvas app always has the scope set to Entity. |
| All forms: It triggers the business rule at the client side only. | It applies to Model-driven forms, but no with the canvas apps. |
| Specific form (Account form, for example) | Just that model-driven form |
Setting the business rule scope to Information will affect only a model-driven app, not a canvas app.
Create a business rule Business rules are flexible and can be used for many purposes, so they vary considerably in complexity and scope. Follow these steps to build any business rules and adjust for our specific needs:
Step 1: Sign in to Power Apps and sign in with the organizational account.
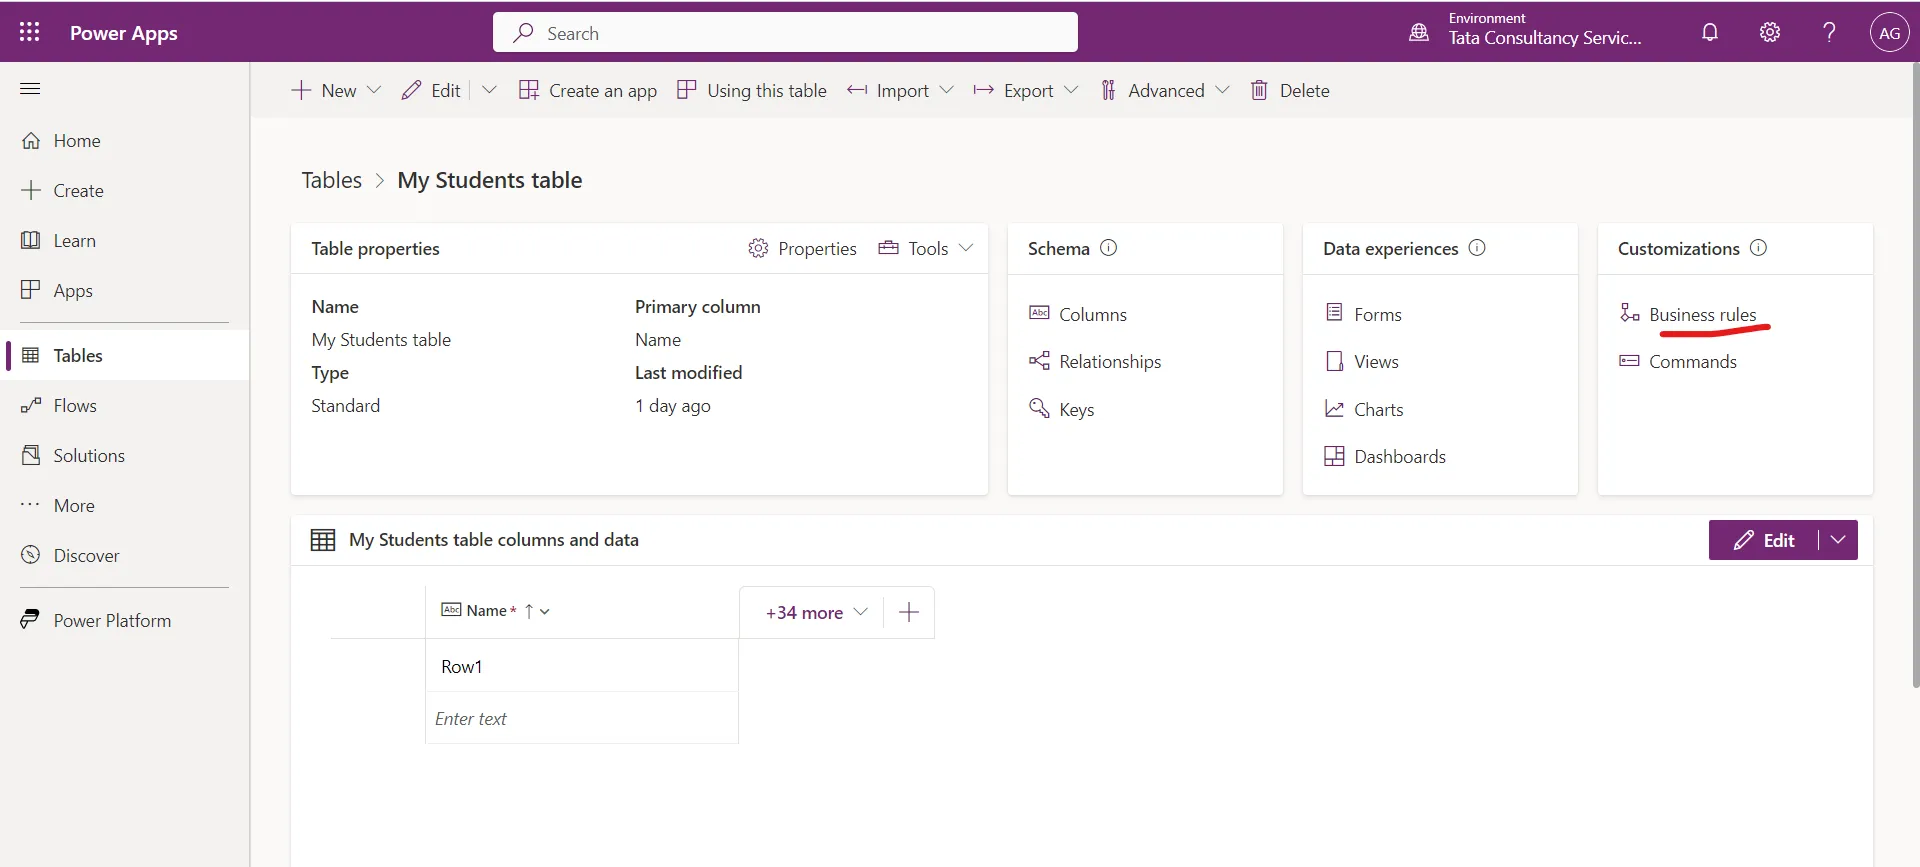
Step 2: Select Tables and then open the table we want to create the business rule for.
Step 3: Select the Business Rules in the Customizations section.
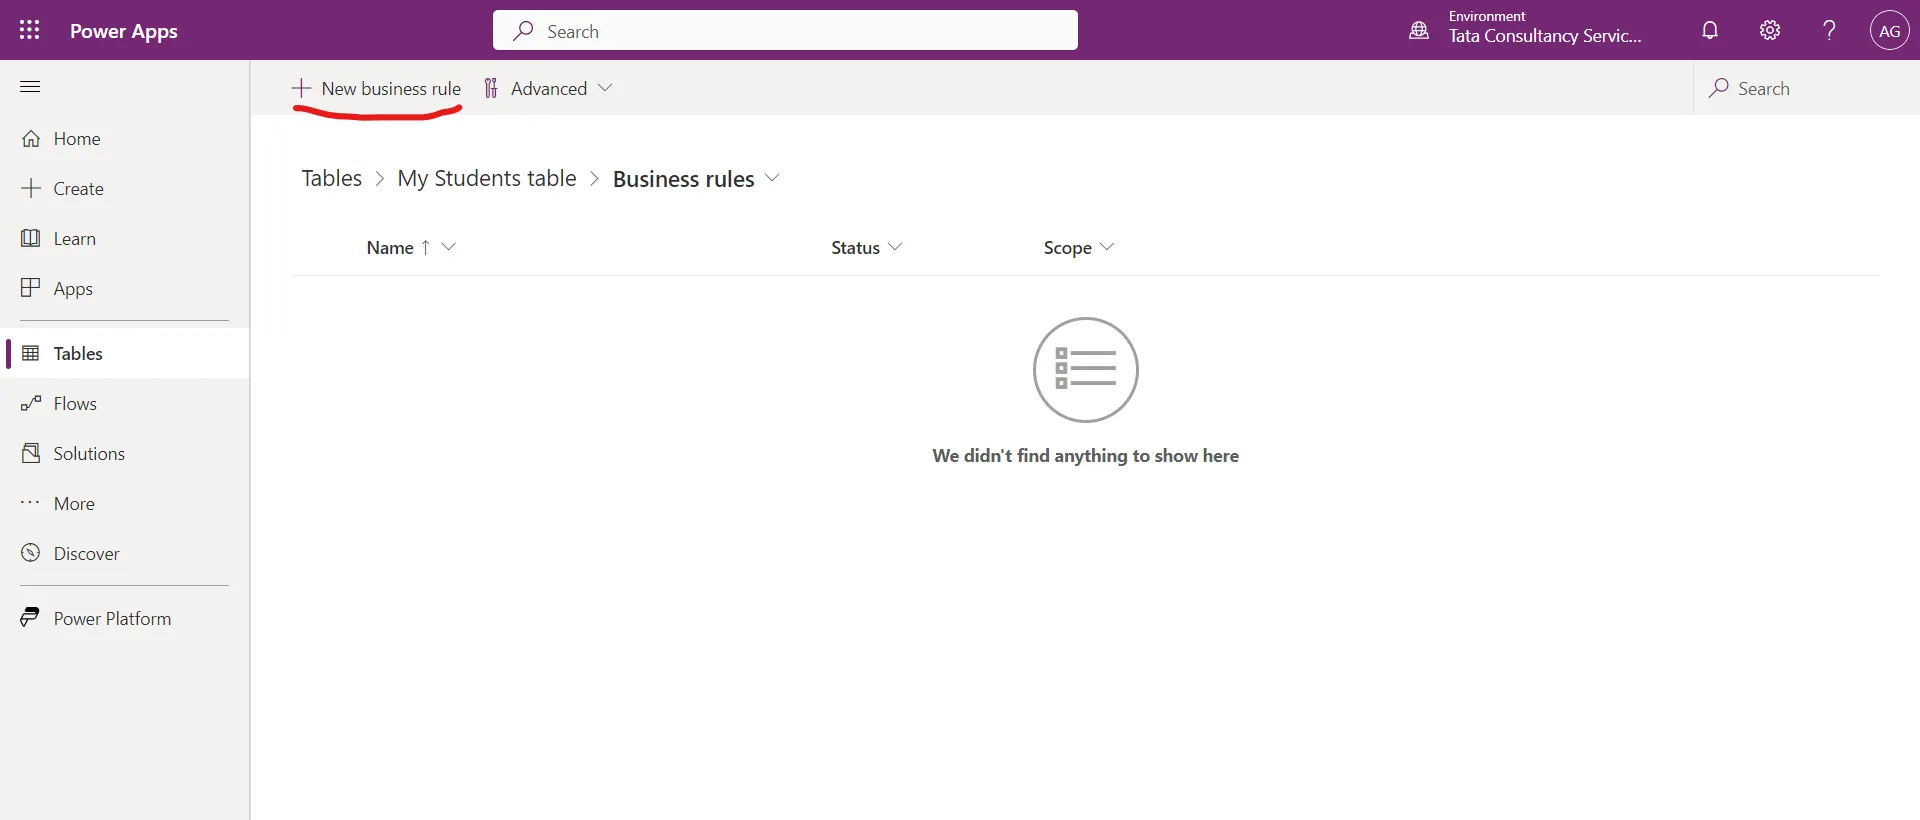
And then select + New business rule at the top of the screen; a new browser tab will open.
Step 4: In the top right, we can see Scope. The default value should be Entity.
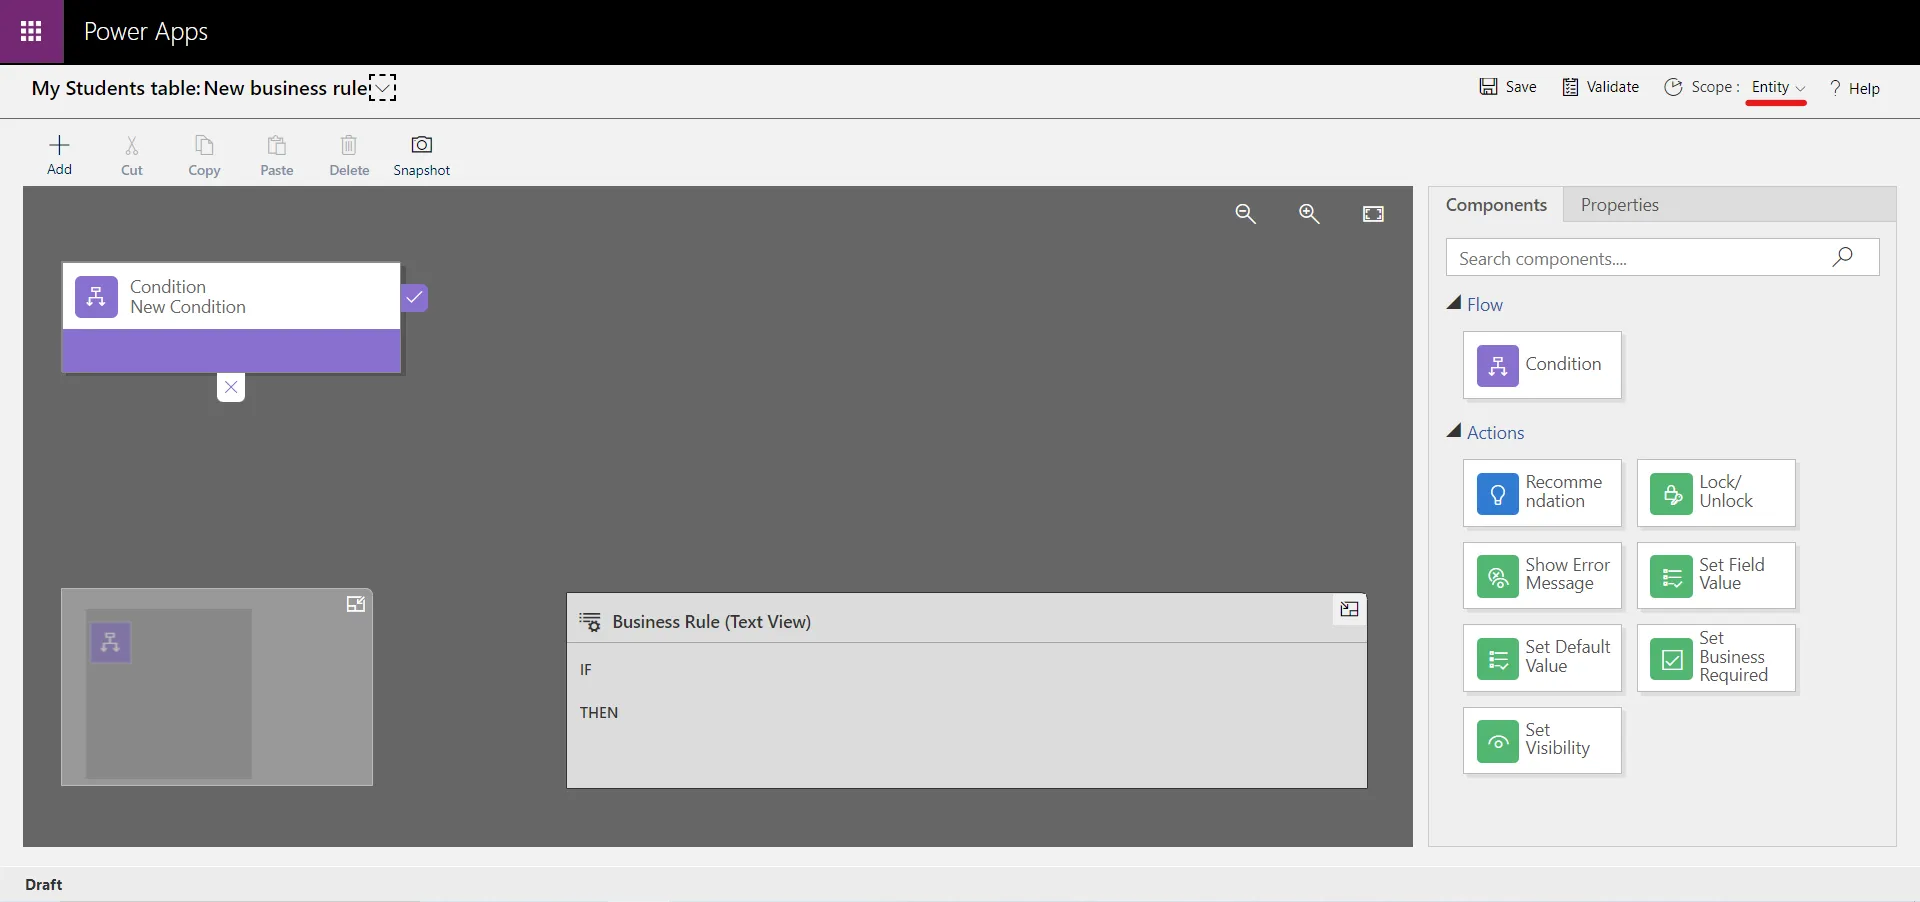
Step 5: A Condition should already be added to the rule. The checkmark on the right of the condition will be the path if the condition returns True, and the X will be the path if the condition returns False.
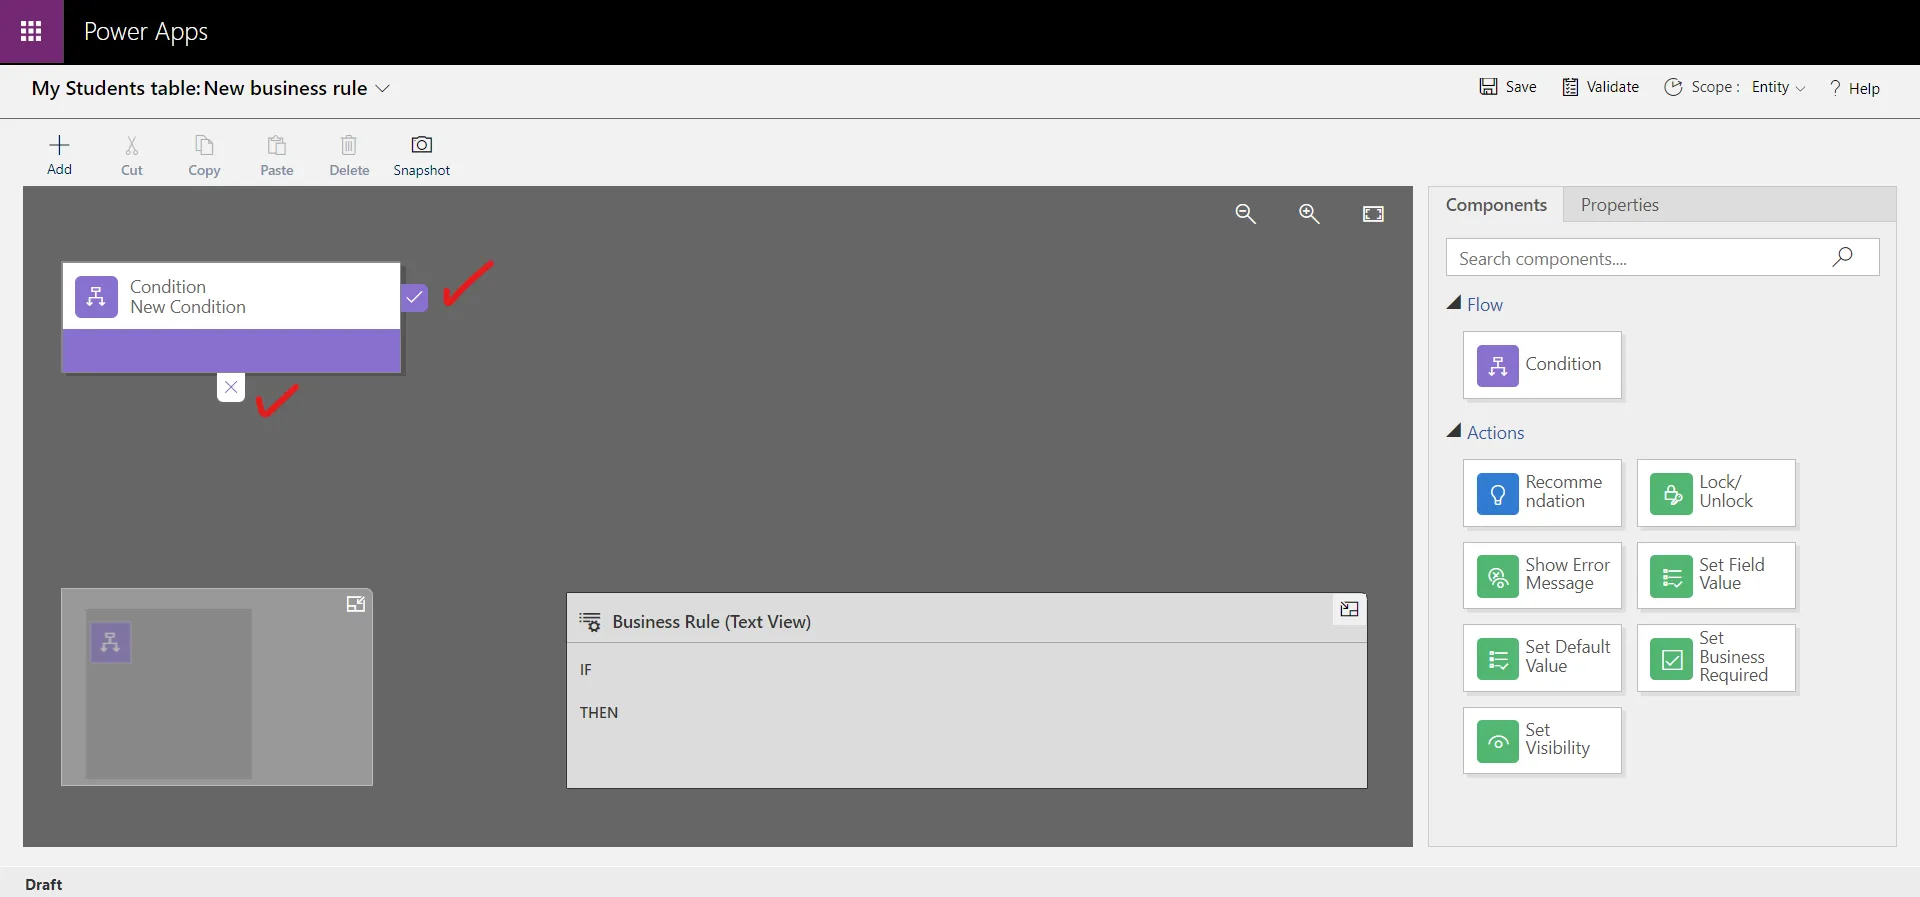
Tip To add more conditions to the business rule, drag the Condition component from the Components tab to a plus sign (+) in the designer.
Step 6: To set properties for the condition, select the Condition component in the designer window, and then set the properties on the Properties tab on the right side of the screen.
Add the following information into the fields on the Condition panel.
| Condition panel field | Value |
|---|---|
| Entity | My Students table |
| Source | Entity |
| Field | Passing Score |
| Type | Value |
| Value | 33 |
As we set properties, Microsoft Dataverse creates an expression at the bottom of the Properties tab. For this example, we're going to set our condition to (Passing Score Is less than [33]).
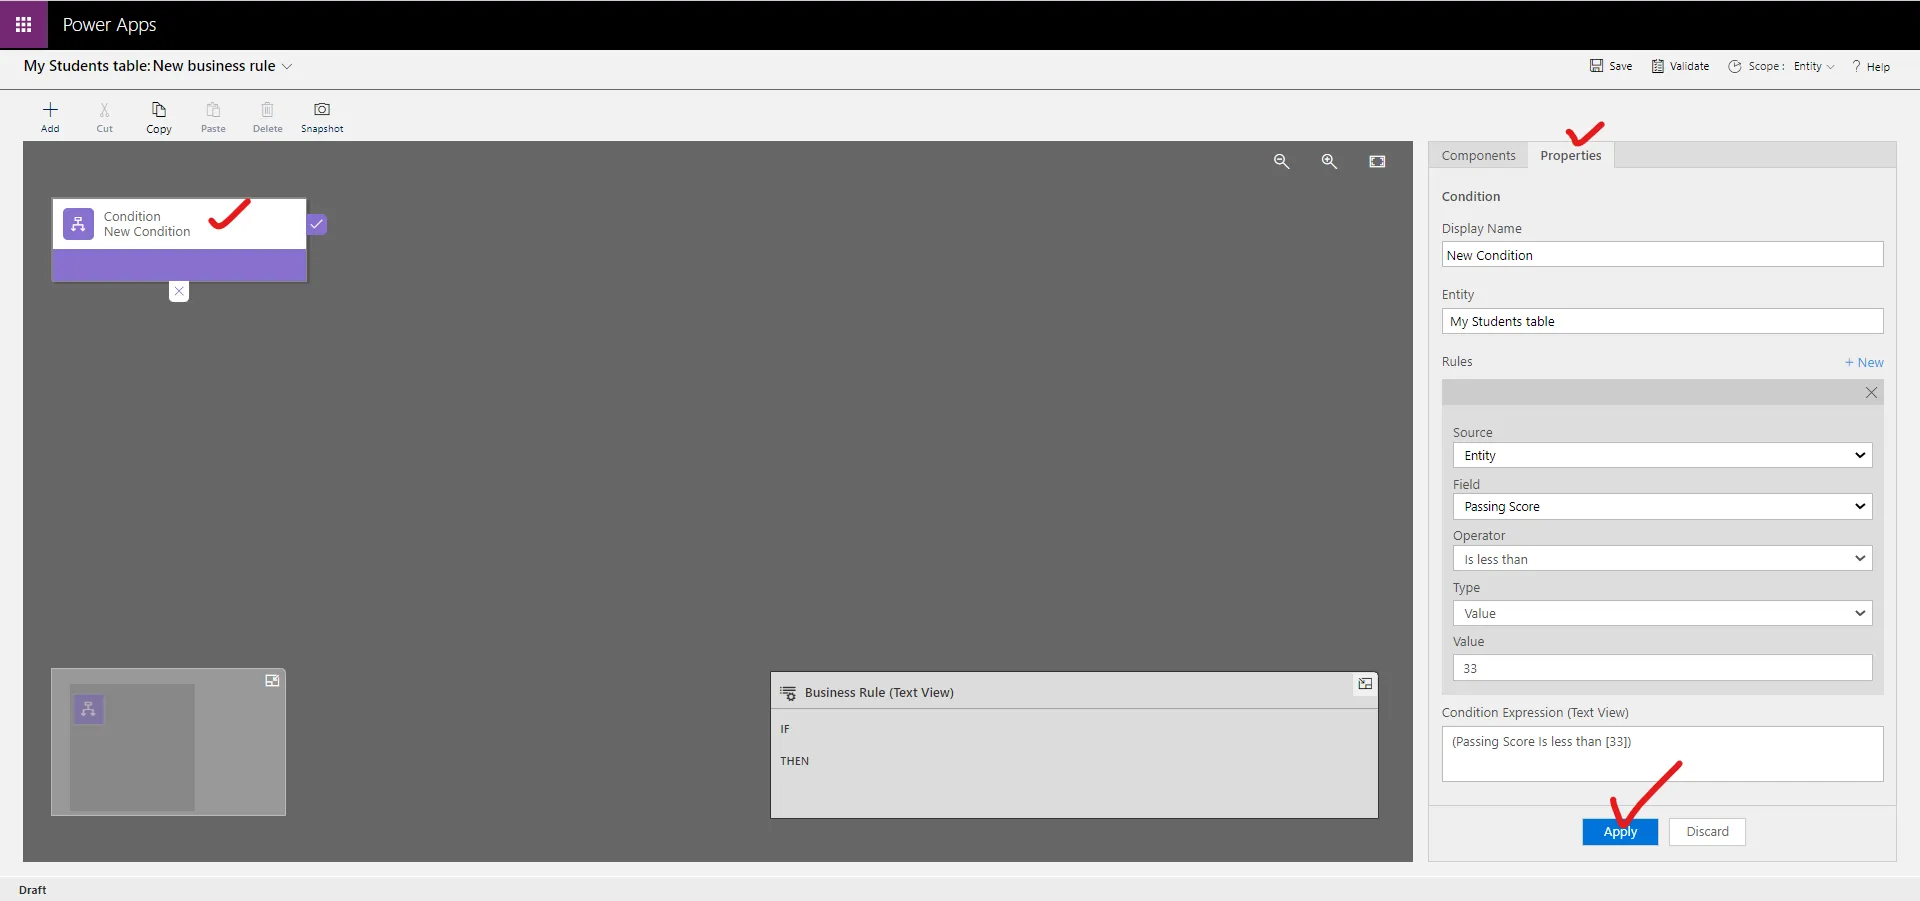
Click on the Apply Button.
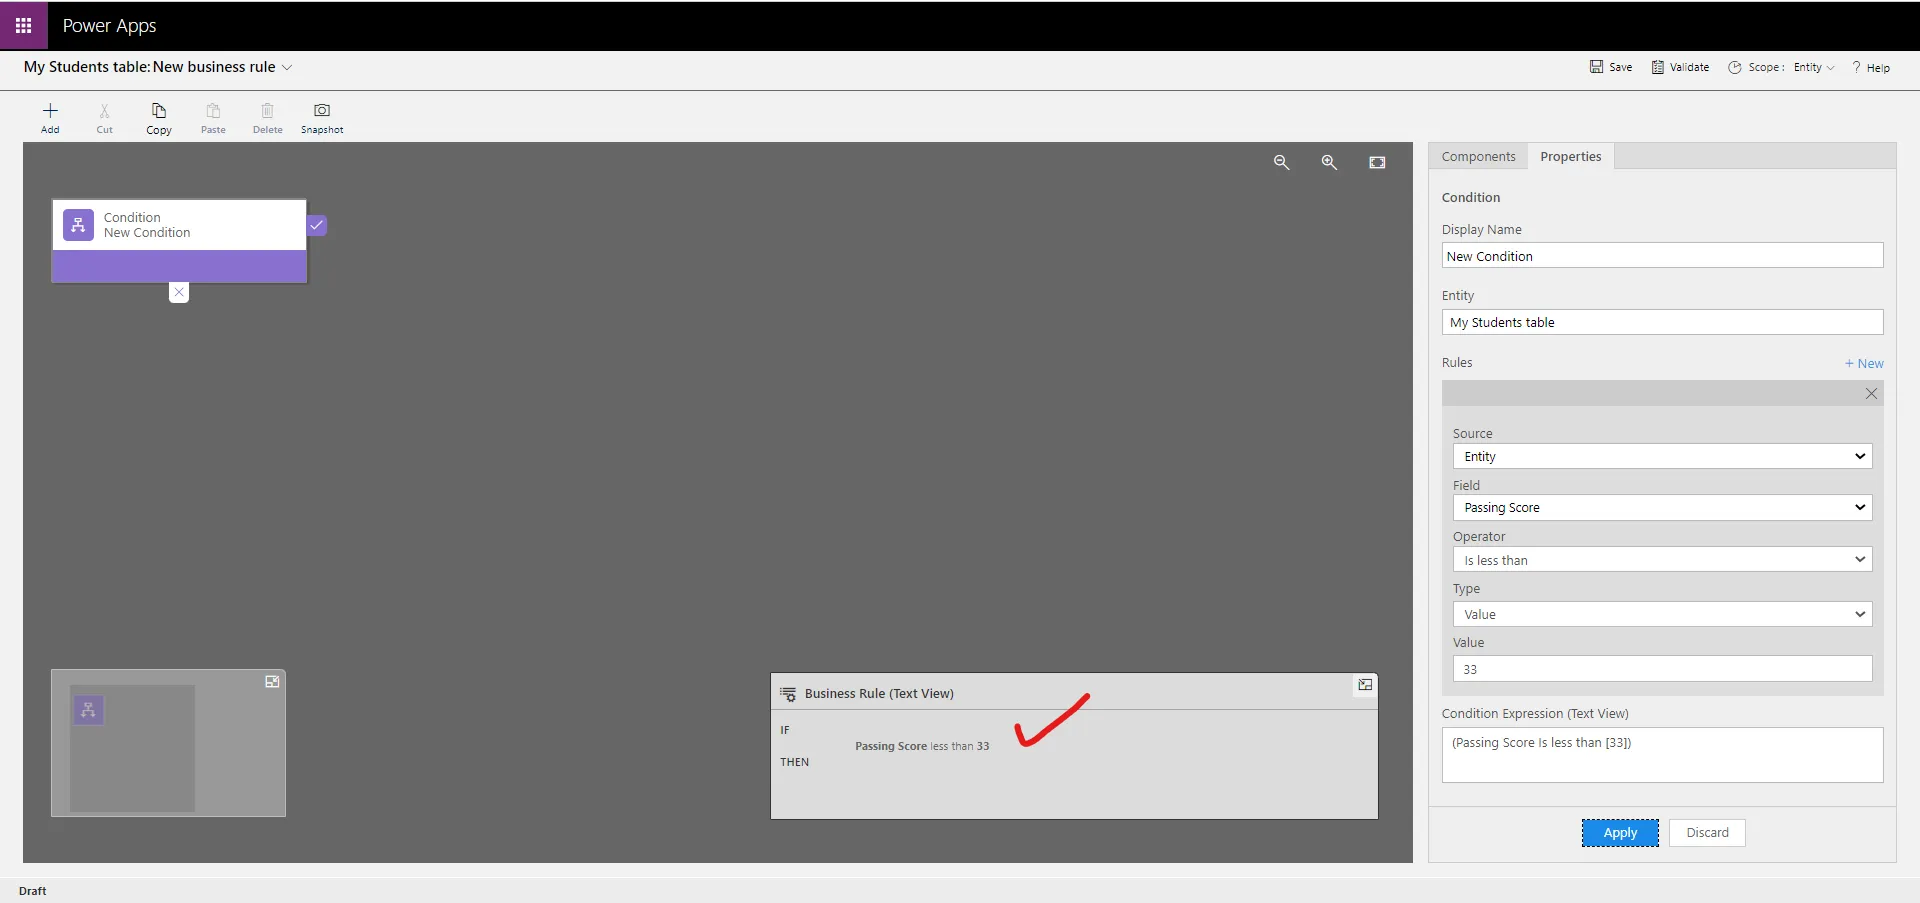
Tip To add another clause (an AND or an OR) to the condition, select New on the Properties tab to create a new rule, and then set the properties for that rule. In the Rule Logic column, we can specify whether to add the new rule as an AND or an OR clause.
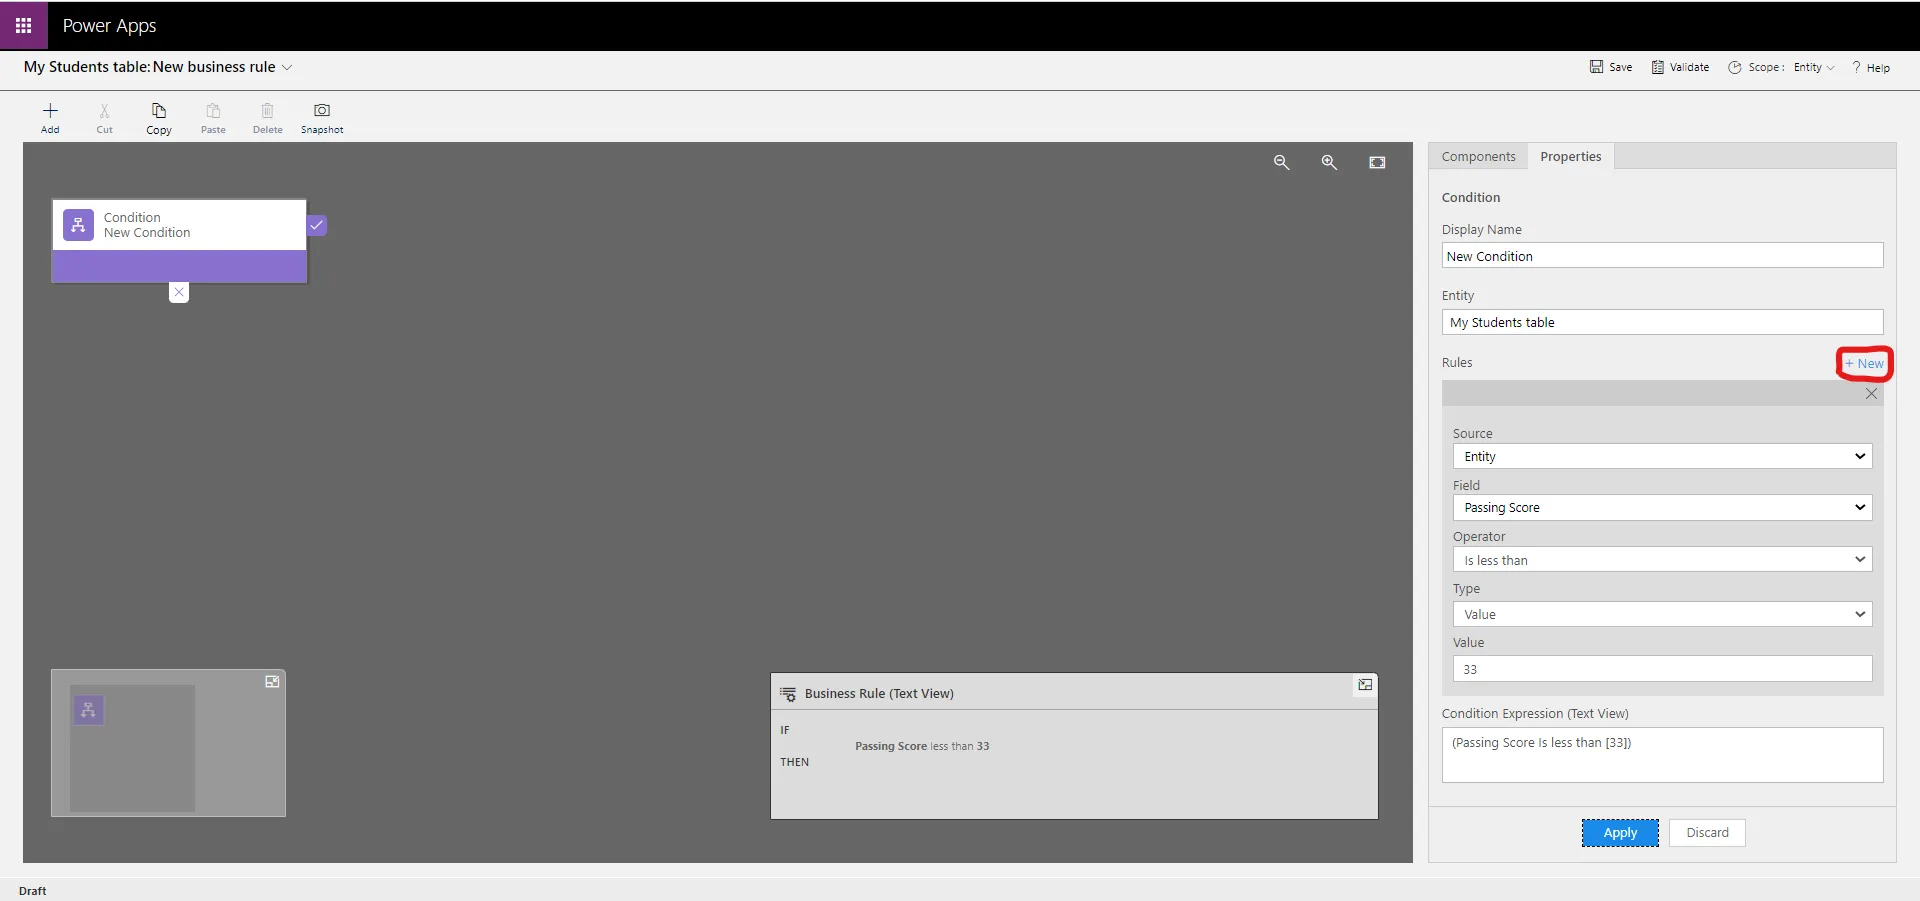
Step 7: Add action(s) from the Action component with the following procedure:
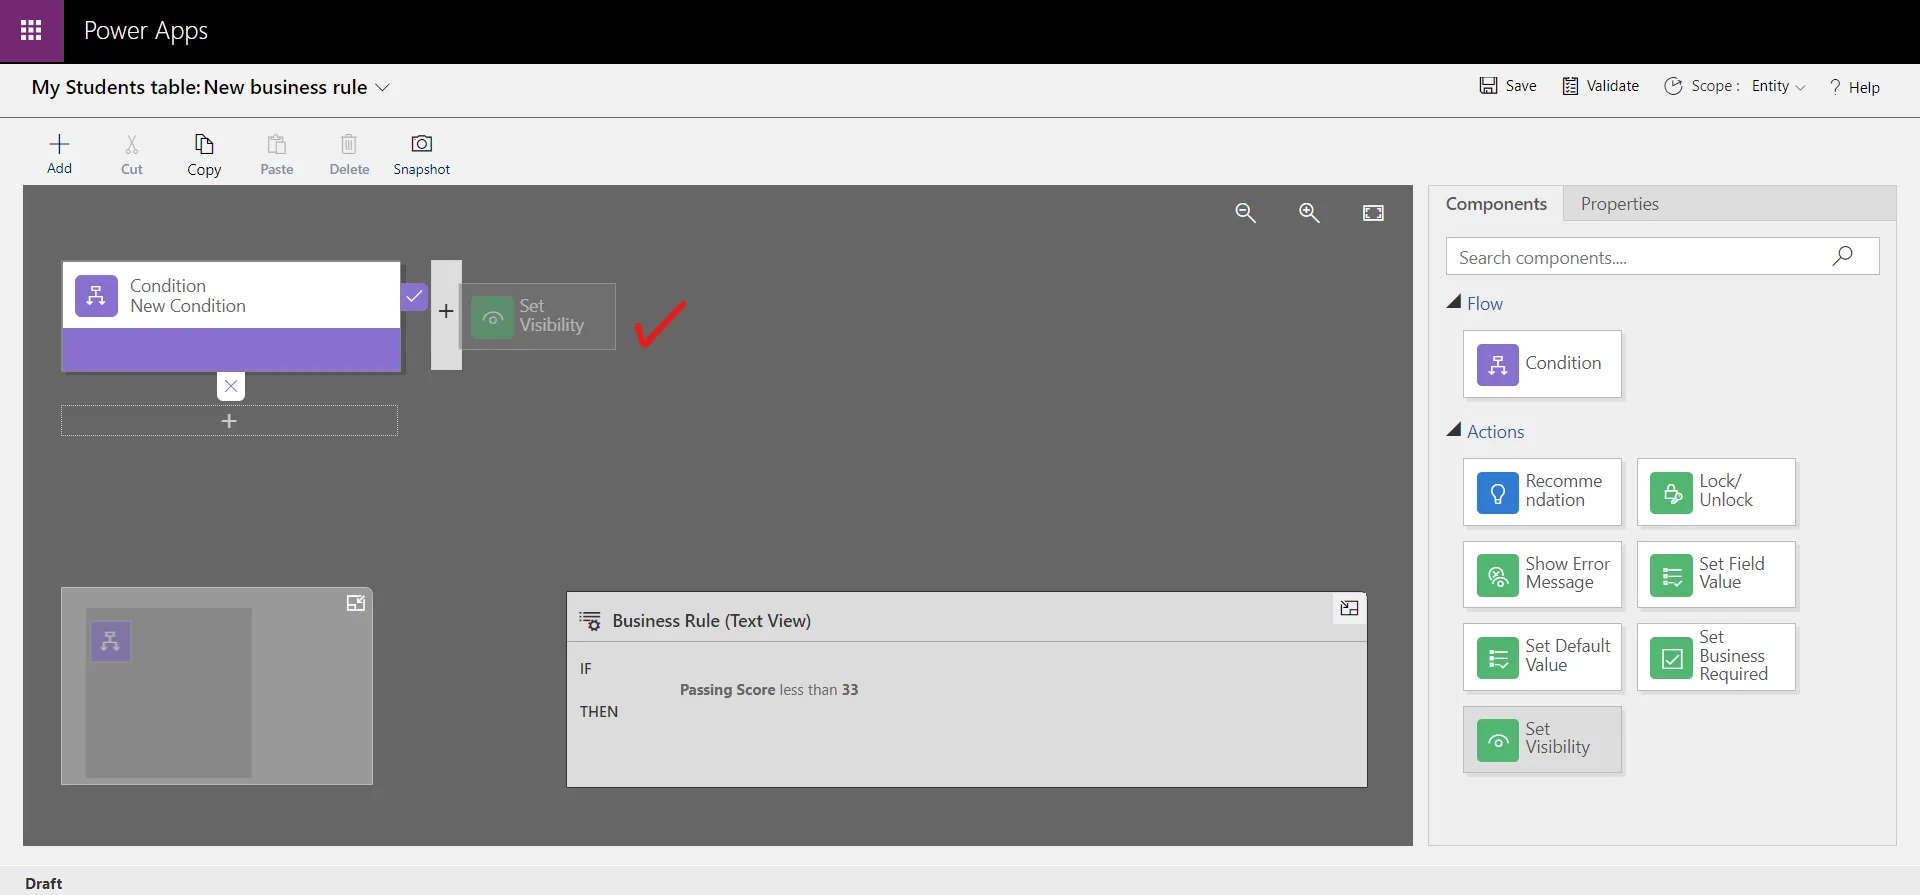
Drag one of the action components from the Components tab to a plus sign (+) next to the Condition component. Drag the action to a plus sign (+) next to a check mark if we want the business rule to take that action when the condition is met, or drag the action to a plus sign (+) next to an X if we want the business rule to take that action if the condition isn't met. We're going to add the Set Visibility action if the condition is met.
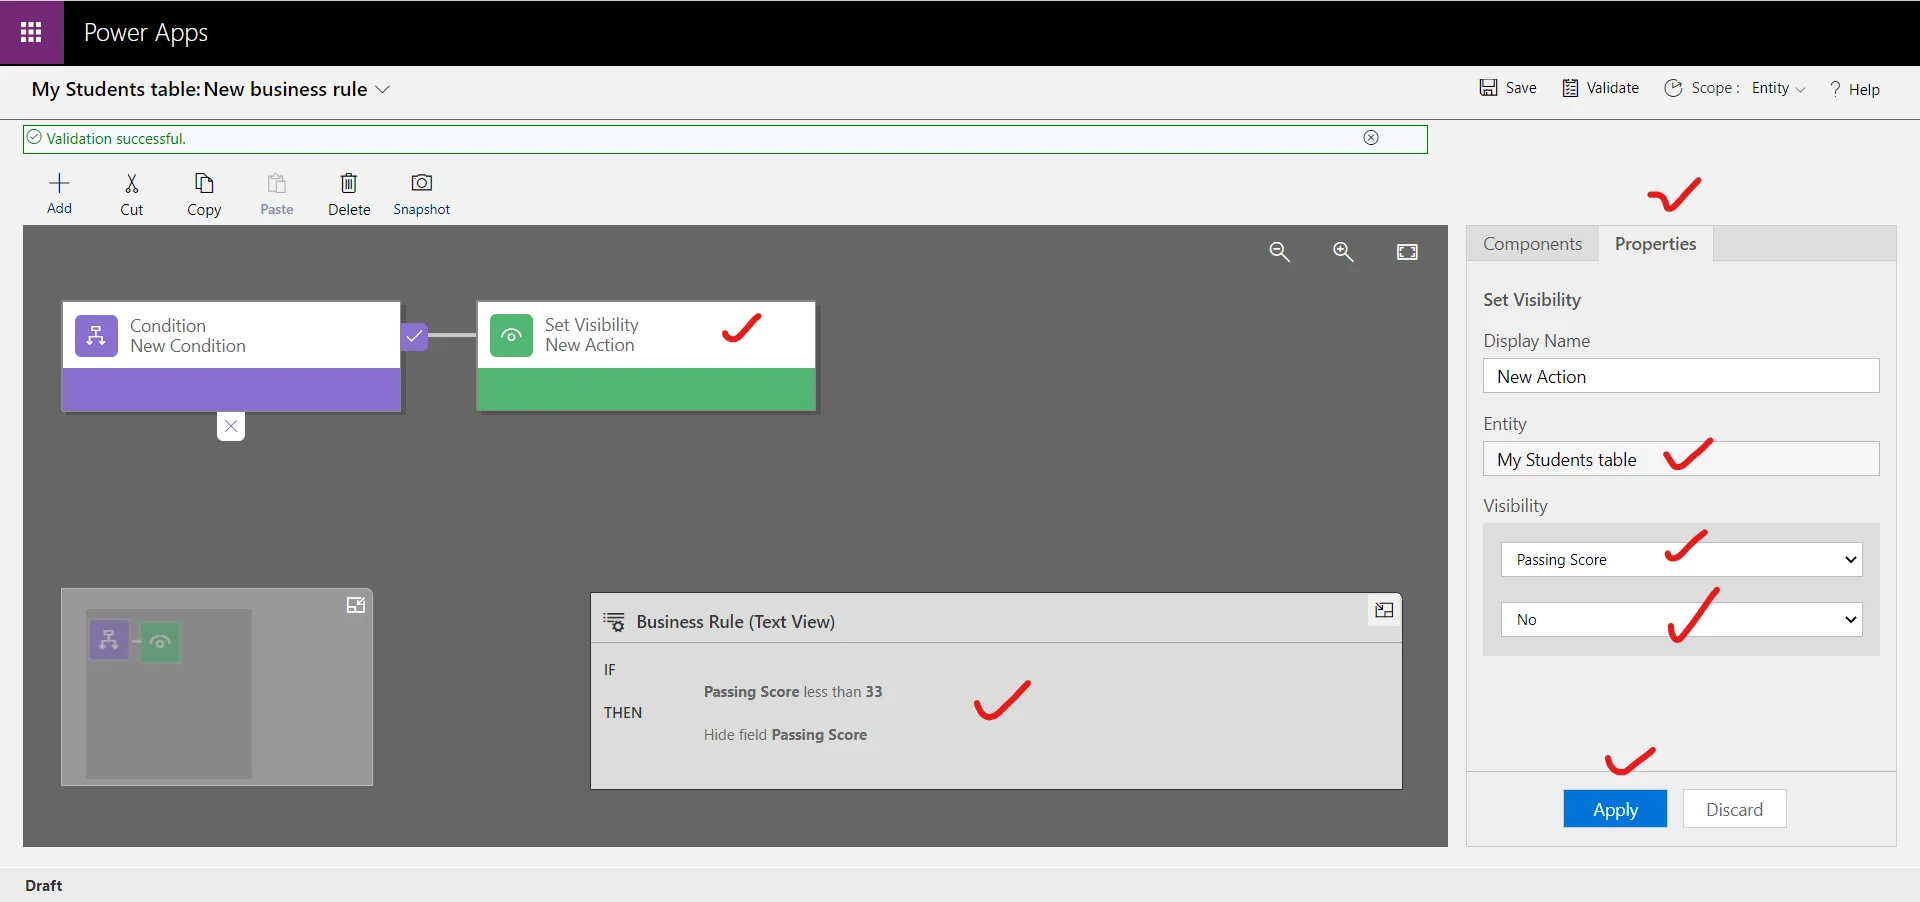
Step 8: Set the property for each step. To set properties for the action, select the Action component in the designer window, and then set the properties on the Properties tab. In the Display Name we can set the display name for the component. It is good to give descriptive name of the display name. We're going to hide the Passing Score field in this action. Select the field and select No.
When we are done setting properties, select Apply.
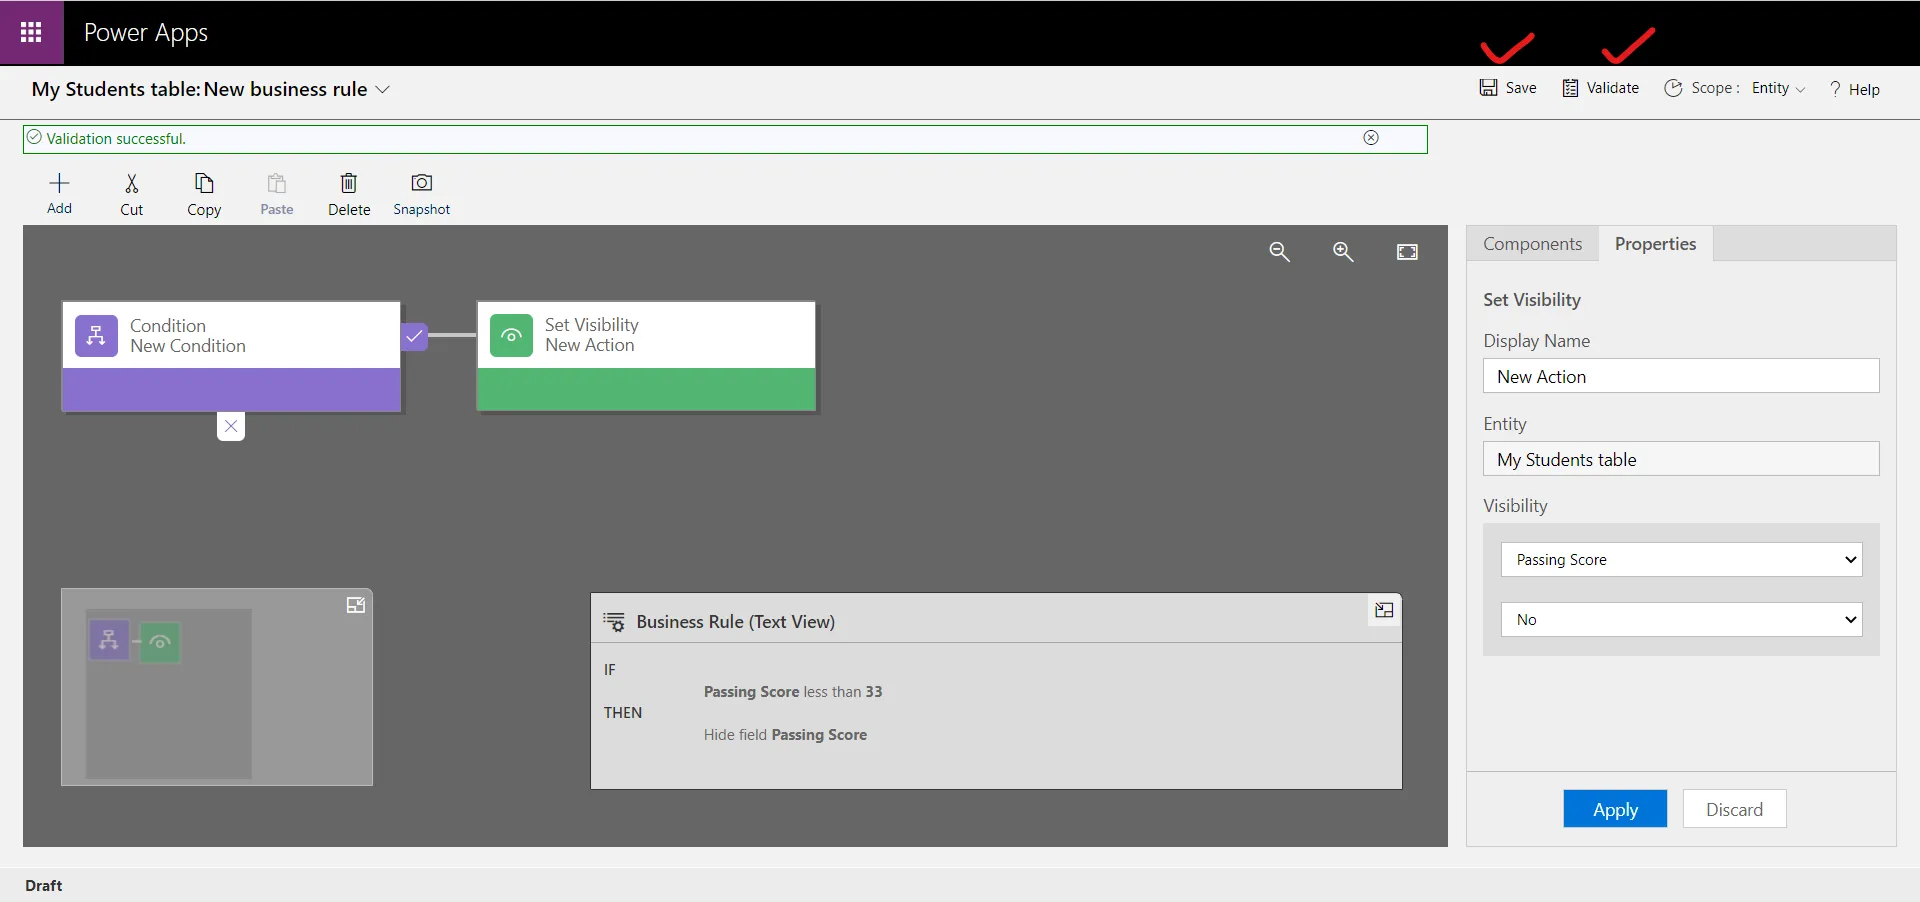
Step 9: Select Validate to validate the business rule in the action bar. Select Save to save the business rule.
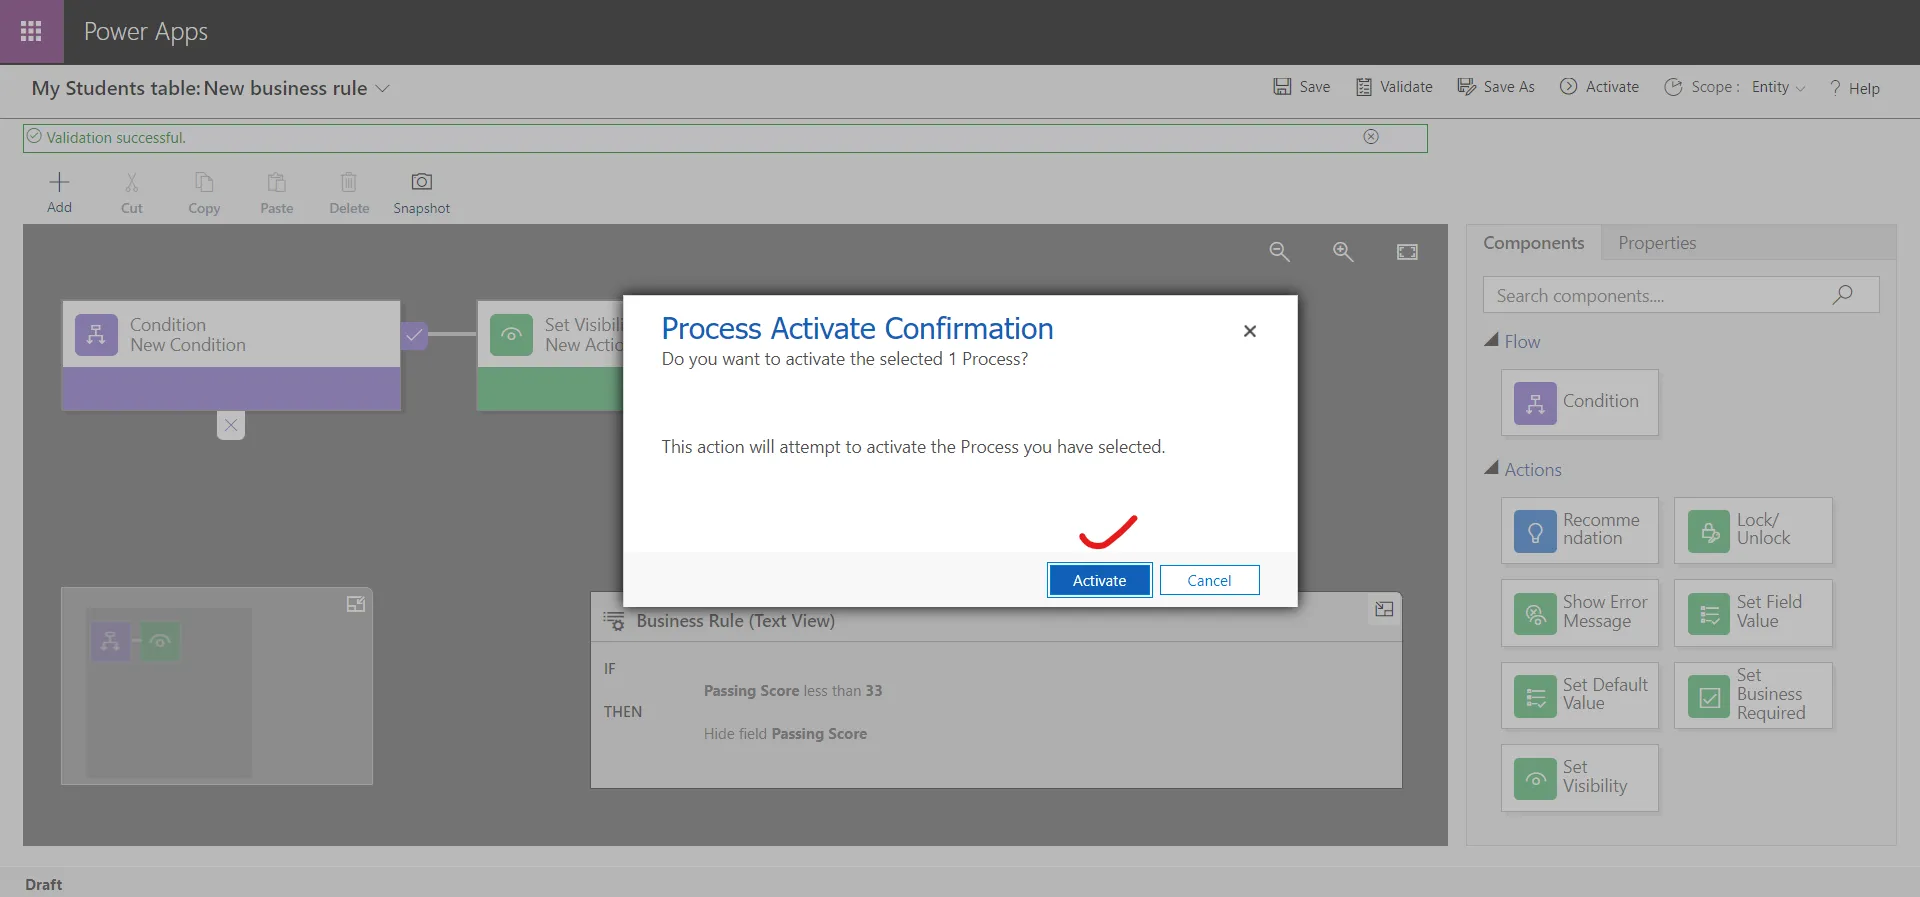
Step 10: The Activate option is visible in the command bar. Select Activate in the Solution Explorer window to activate the business rule and start its running process.
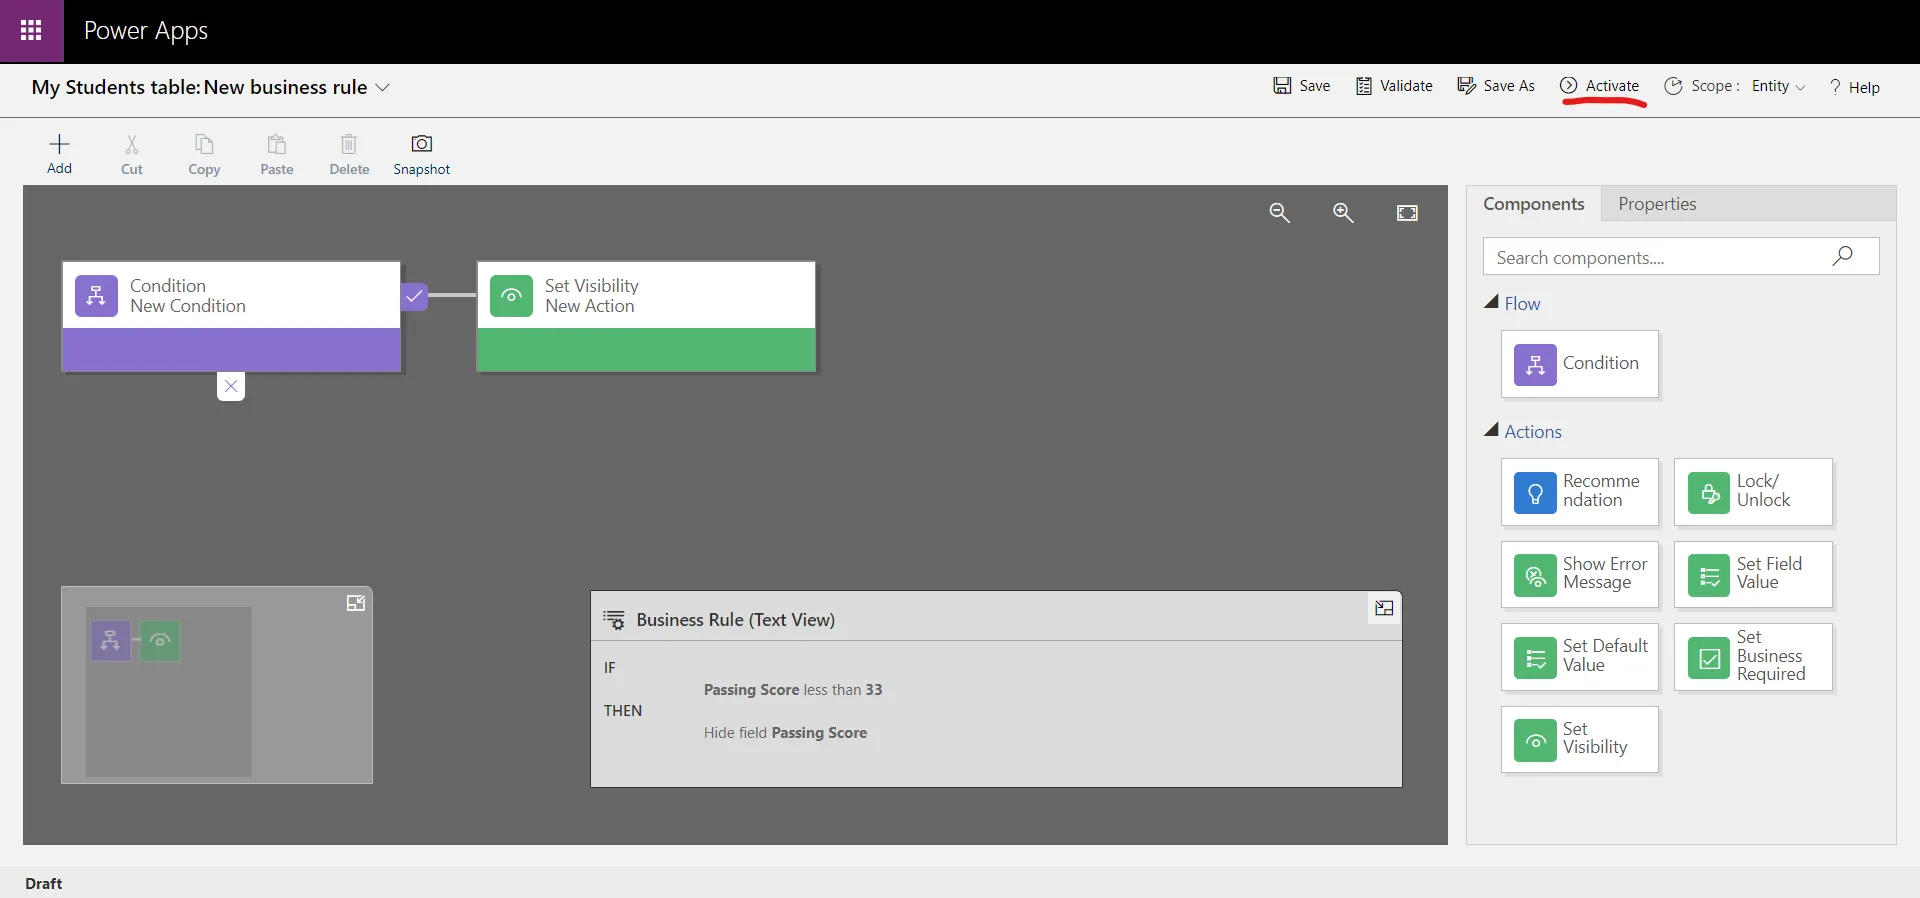
Select Activate in the Process Activate Confirmation pop-up to confirm activation. Confirm activation by selecting the Activate button at the bottom of the dialog box.
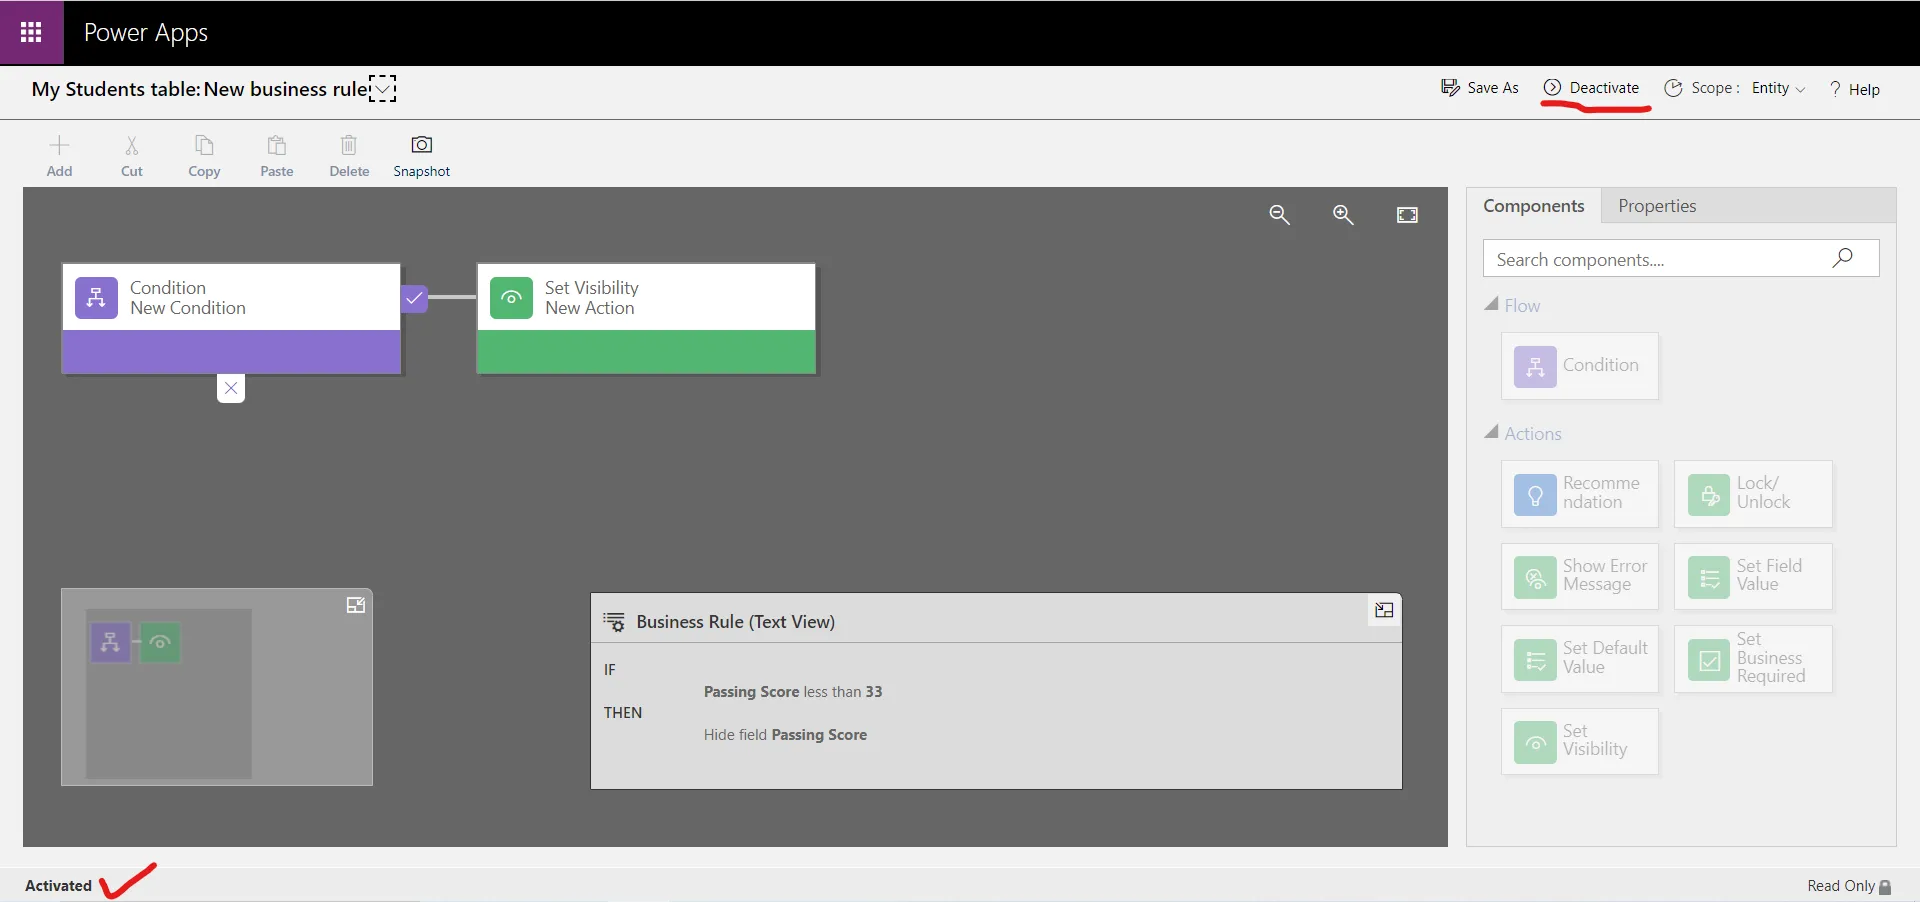
Now it shows us Activated at the below of the screen.
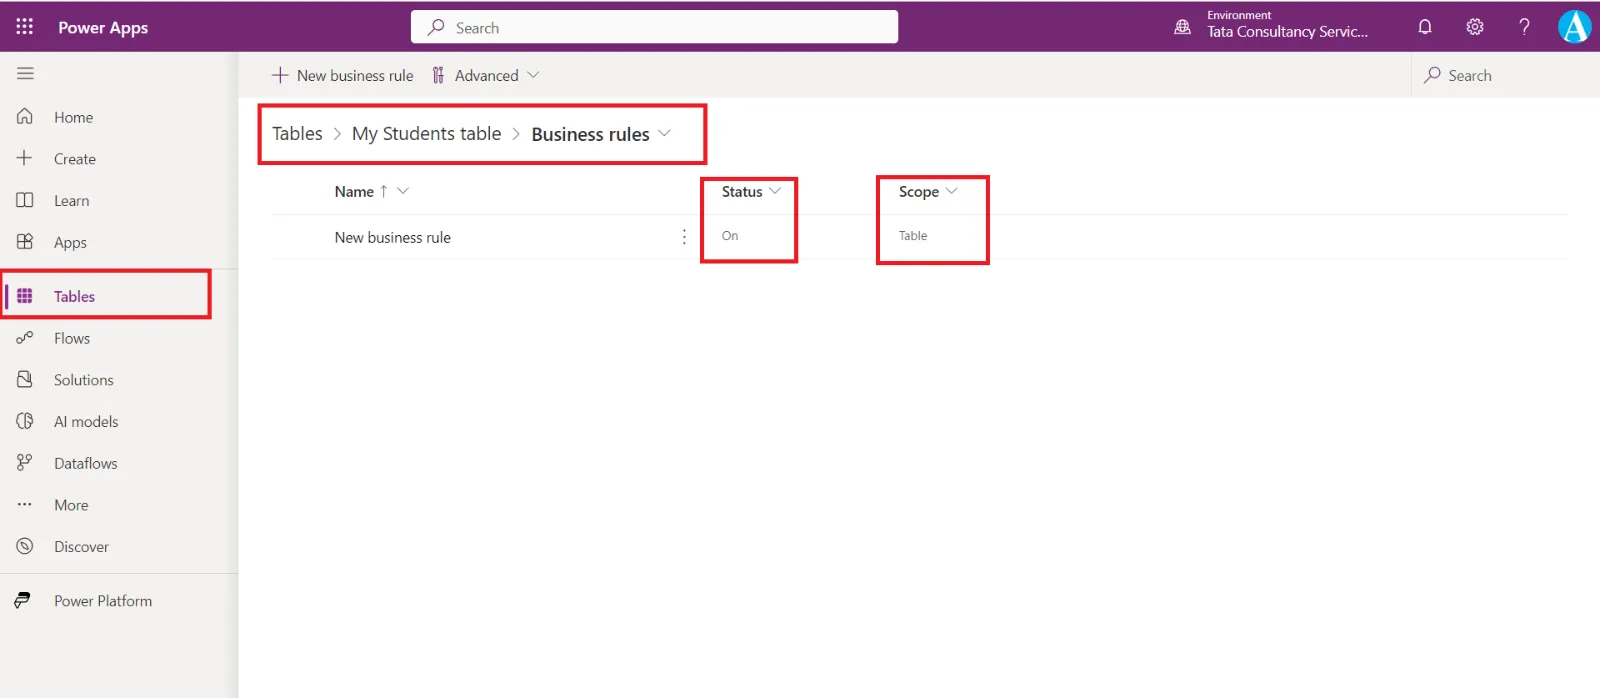
Close the Browser tab and select Tables > Name of the Dataverse table > Business rules tab, which shows that the business rule that we created now has the status of On means Activated, also we can see the Scope here.
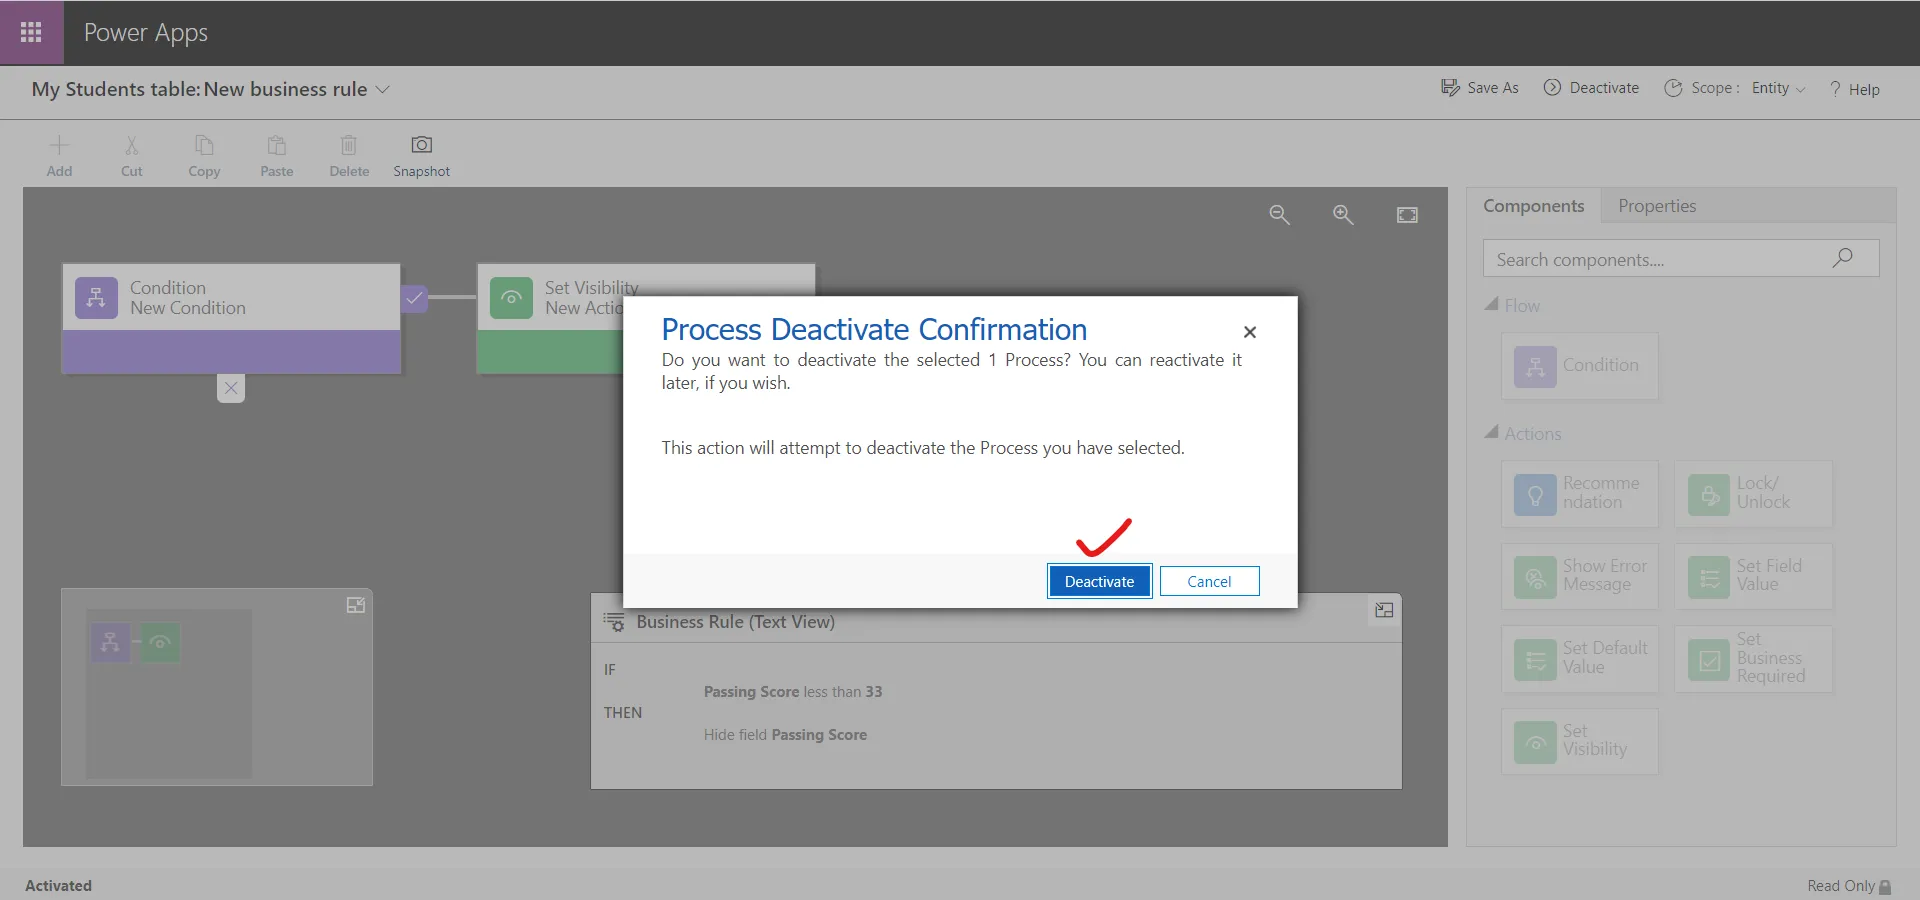
Note: If we want to modify an existing business rule, we must deactivate it before we can modify it.
Click on Deactivate on the Process Deactivate Confirmation pop-up.
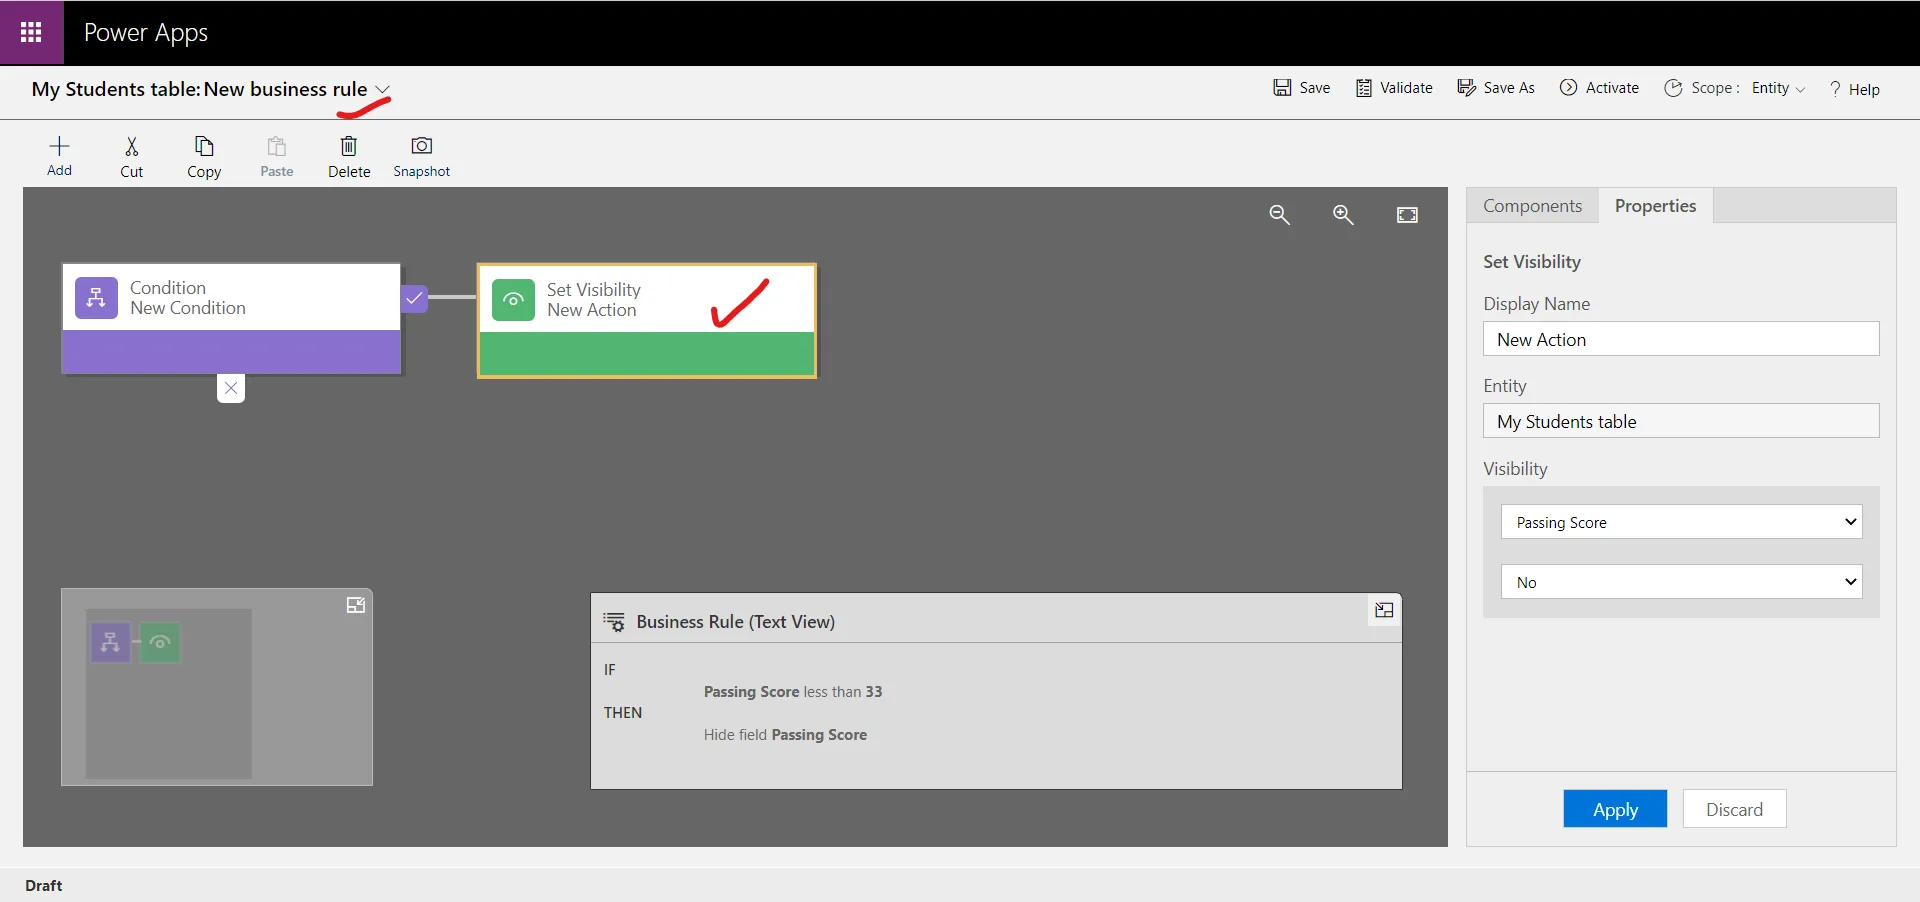
We can also delete the action component by selecting the component and then select the delete icon to delete the component.
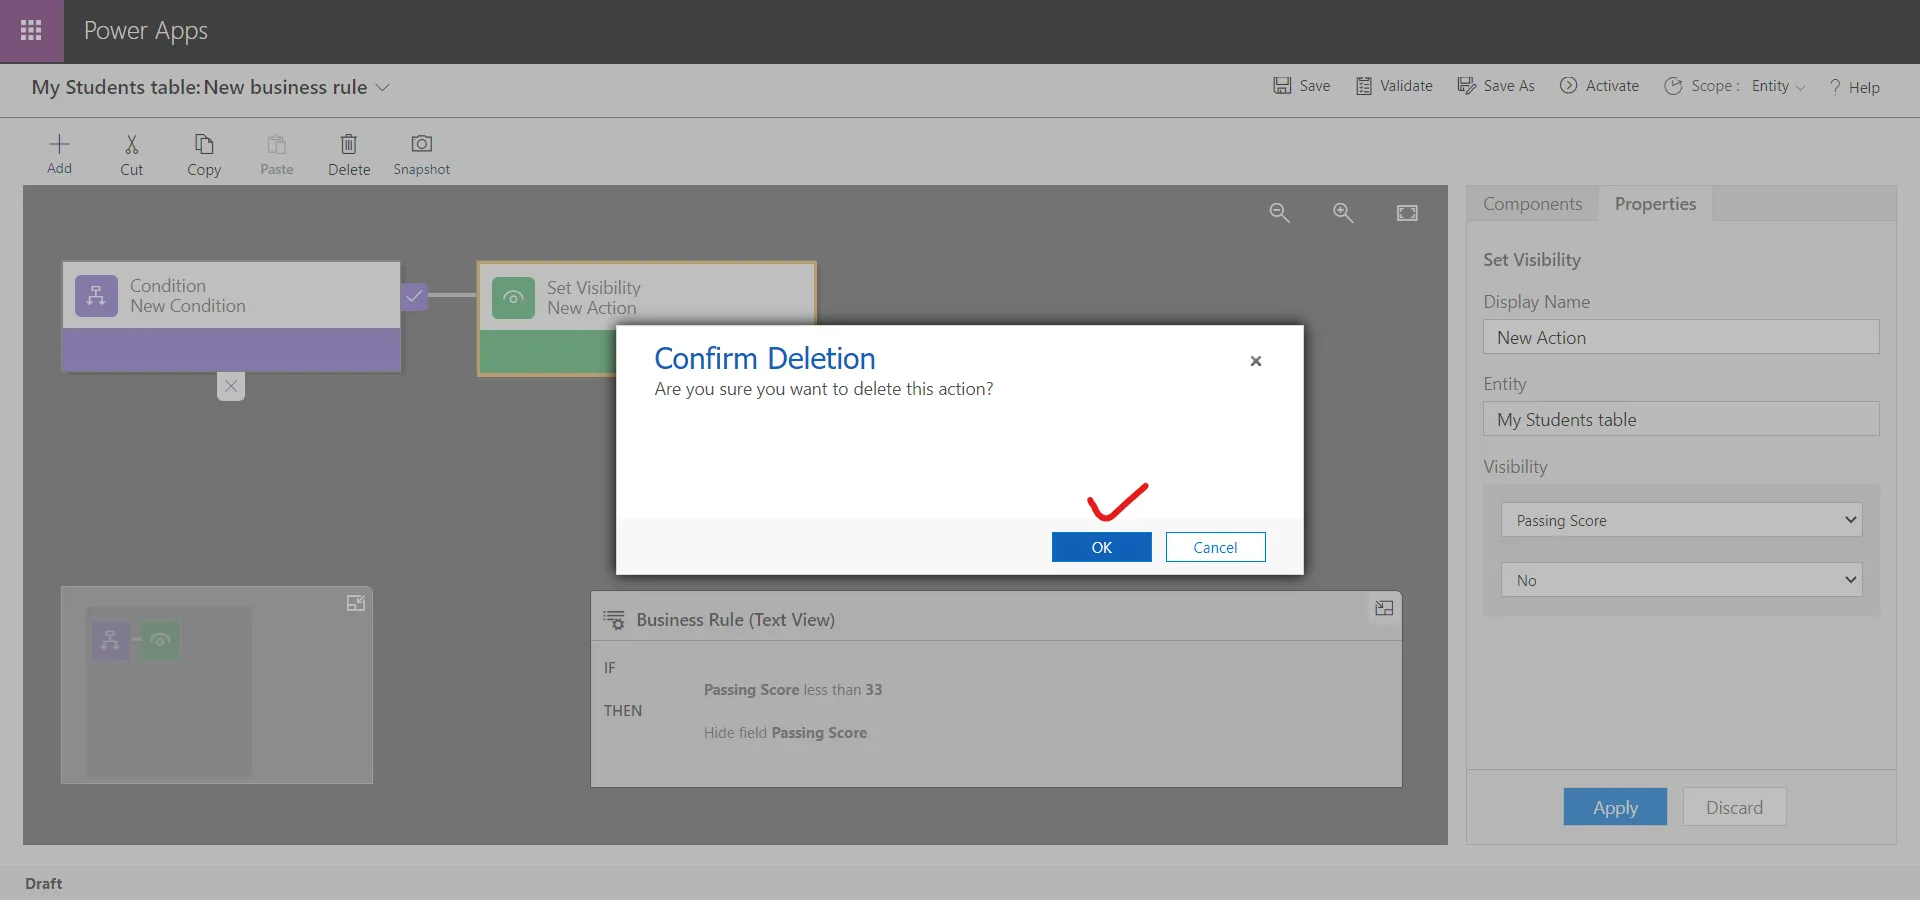
Select Ok in order to confirm the deletion.
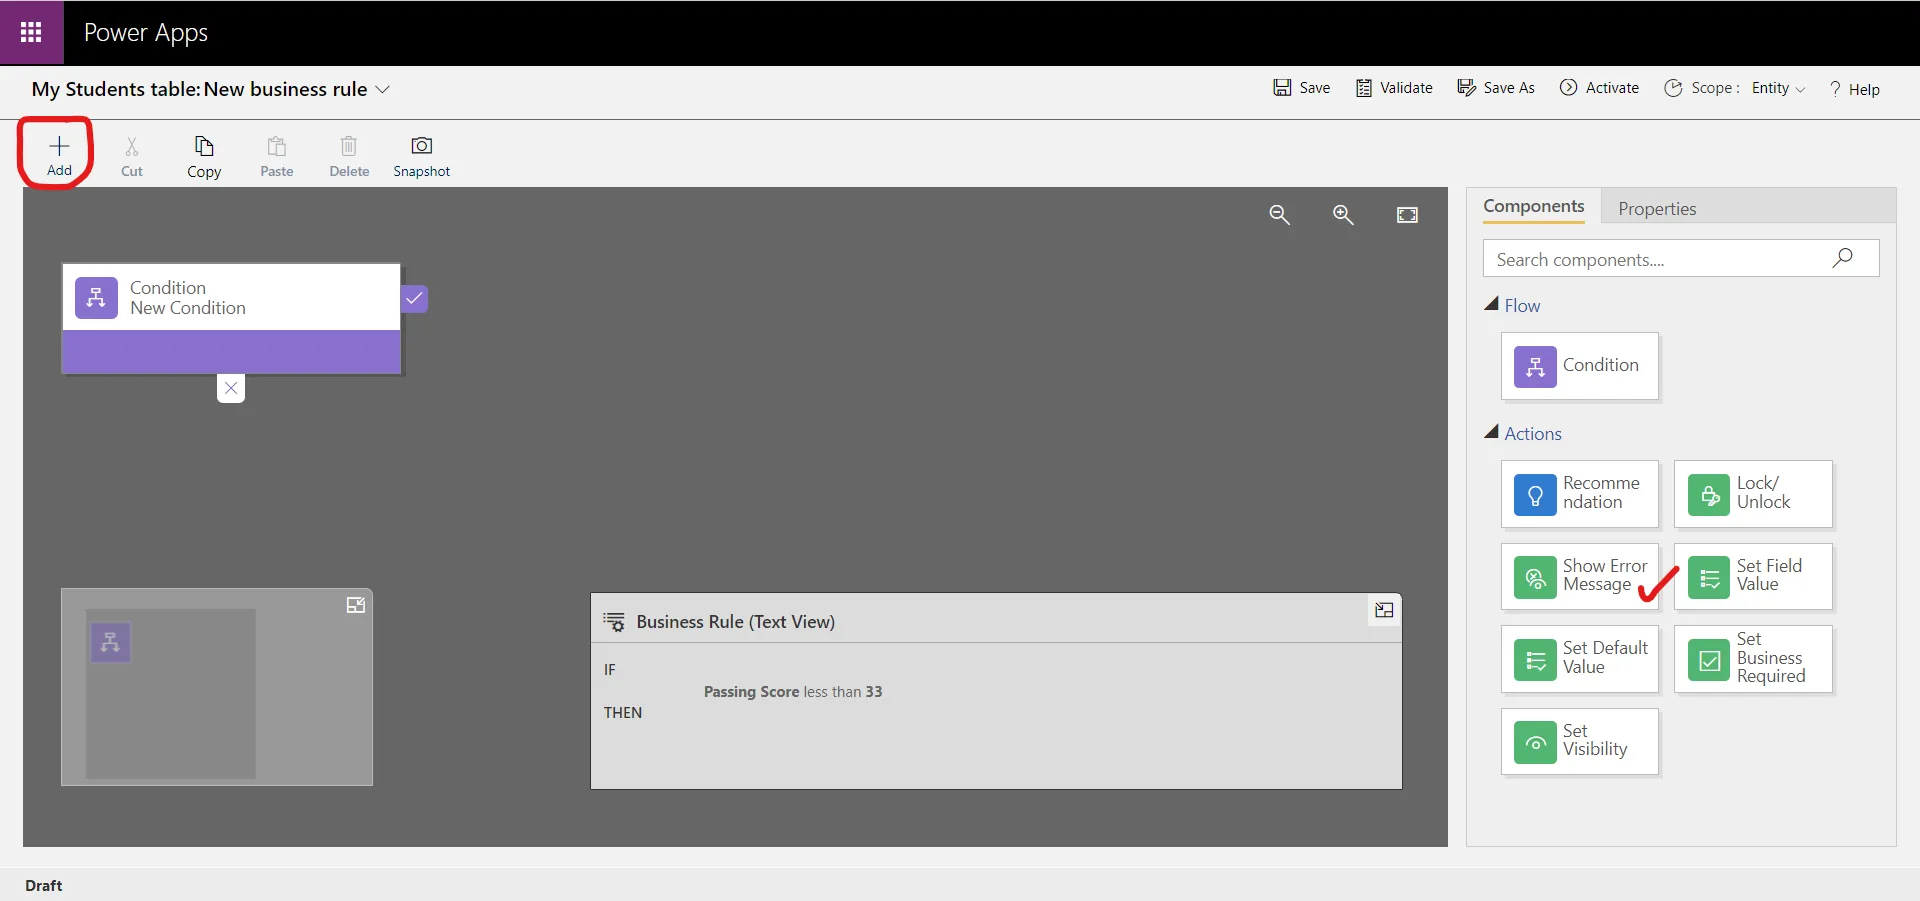
Add an action by clicking on +Add or drag and drop from the Components tab from the right.
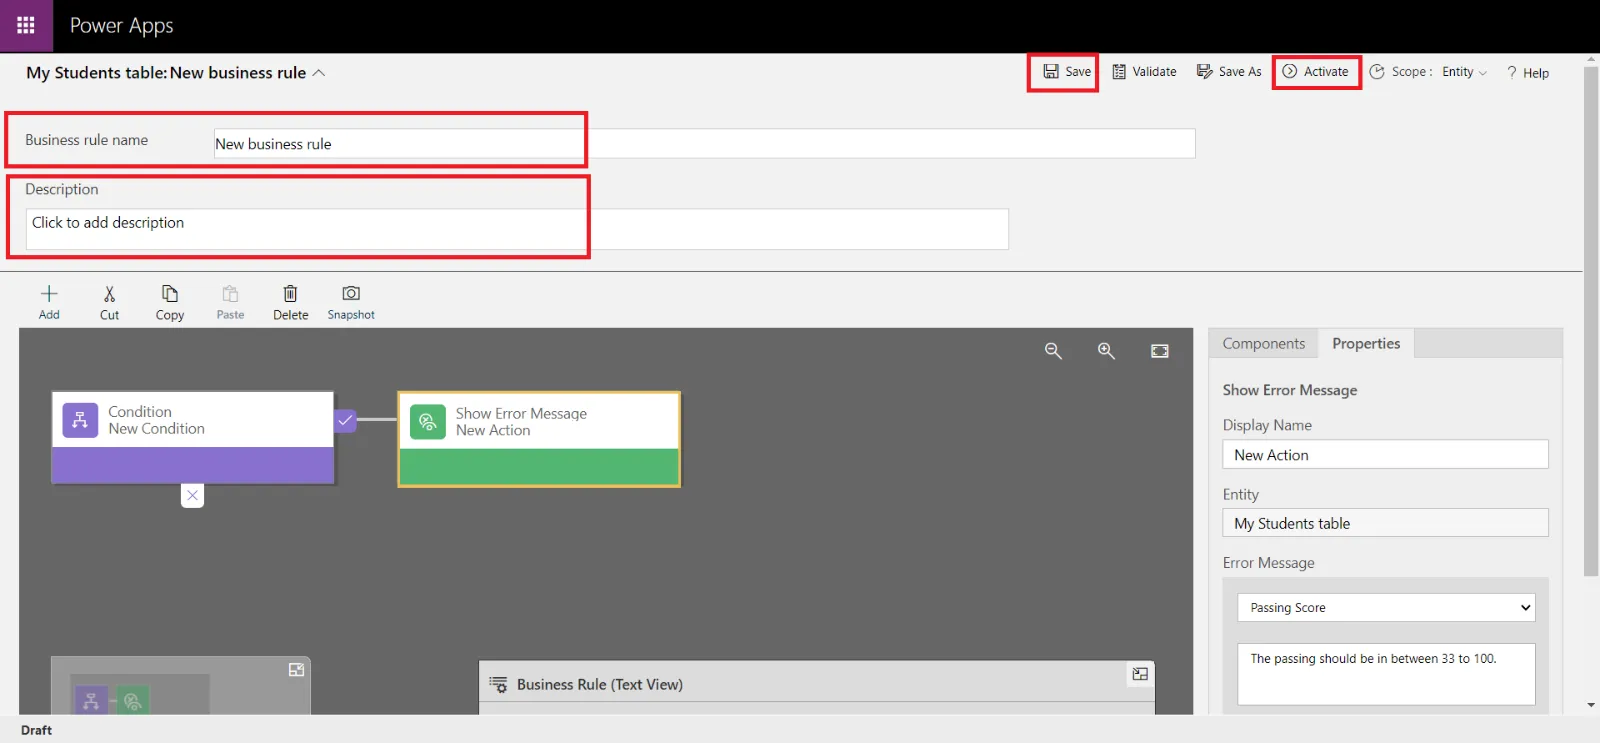
Select the action component from the designer, and from the Properties tab, select the field (column) and write the error message.
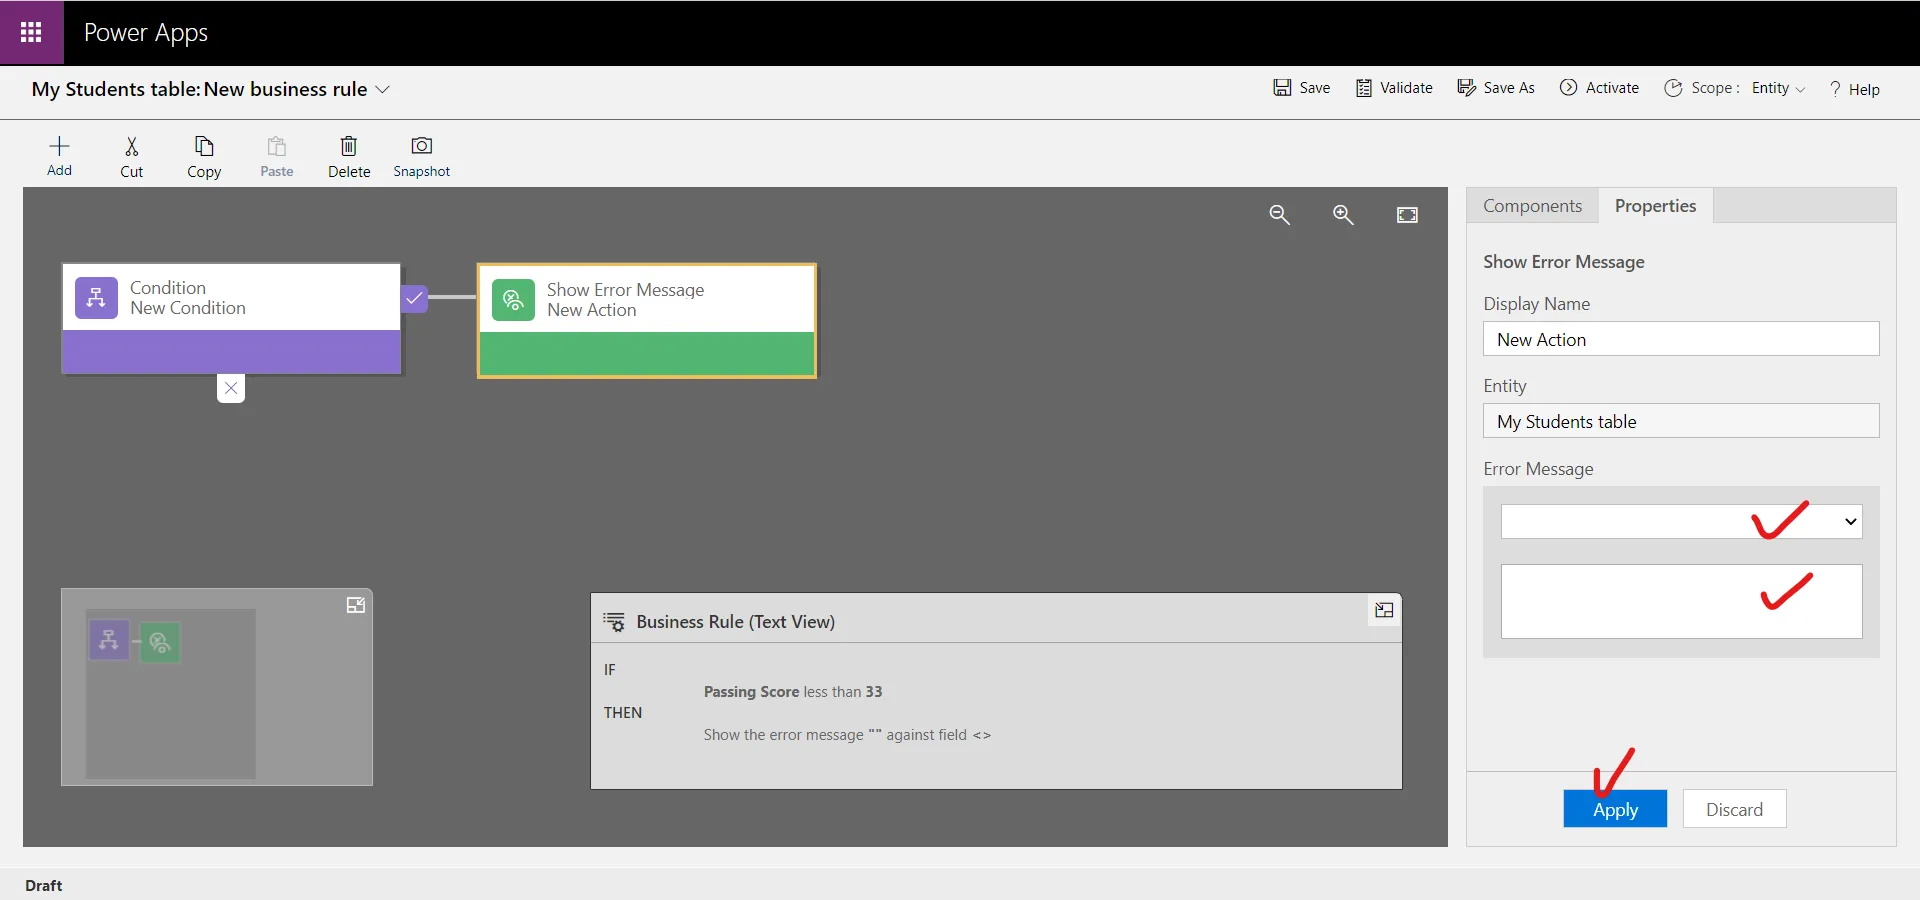
We can also give the Display Name of the component. Click on Apply, once we done the customization in the component to save it.
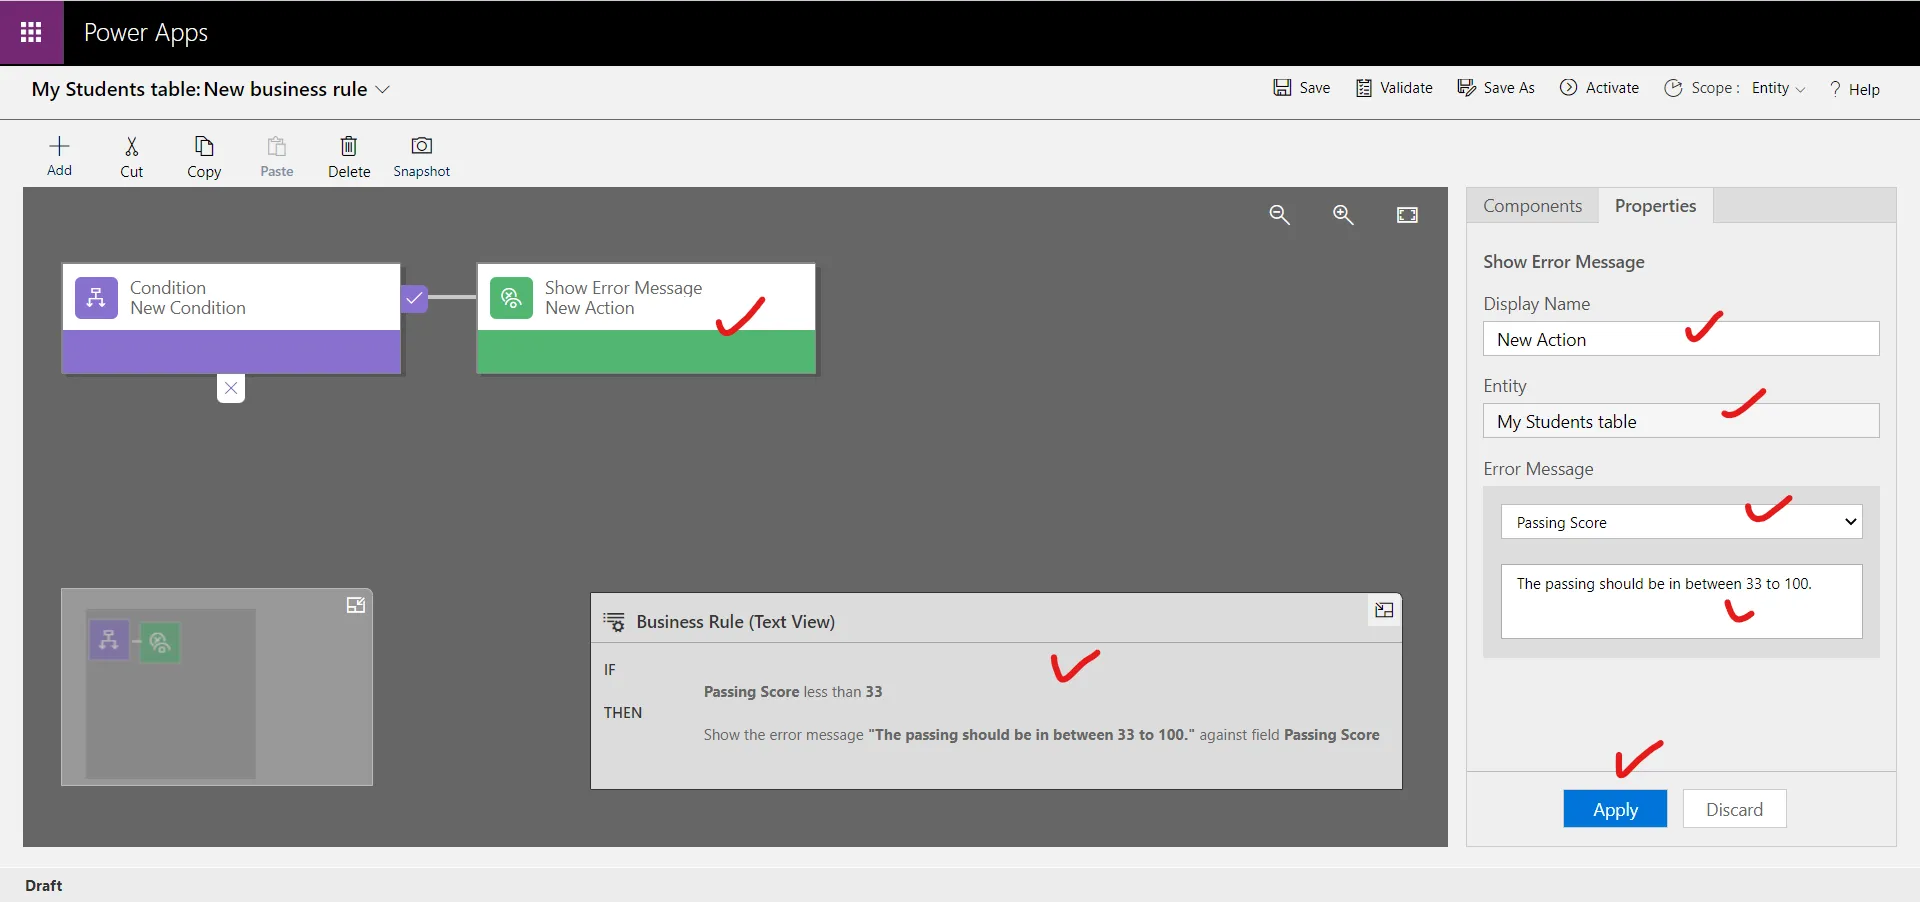
Now that the rule is set, notice that the business rule formula is shown in the window.
Click on Save, Validate and then on Activate.
Tip Consider the following tips as we work on business rules in the designer window:
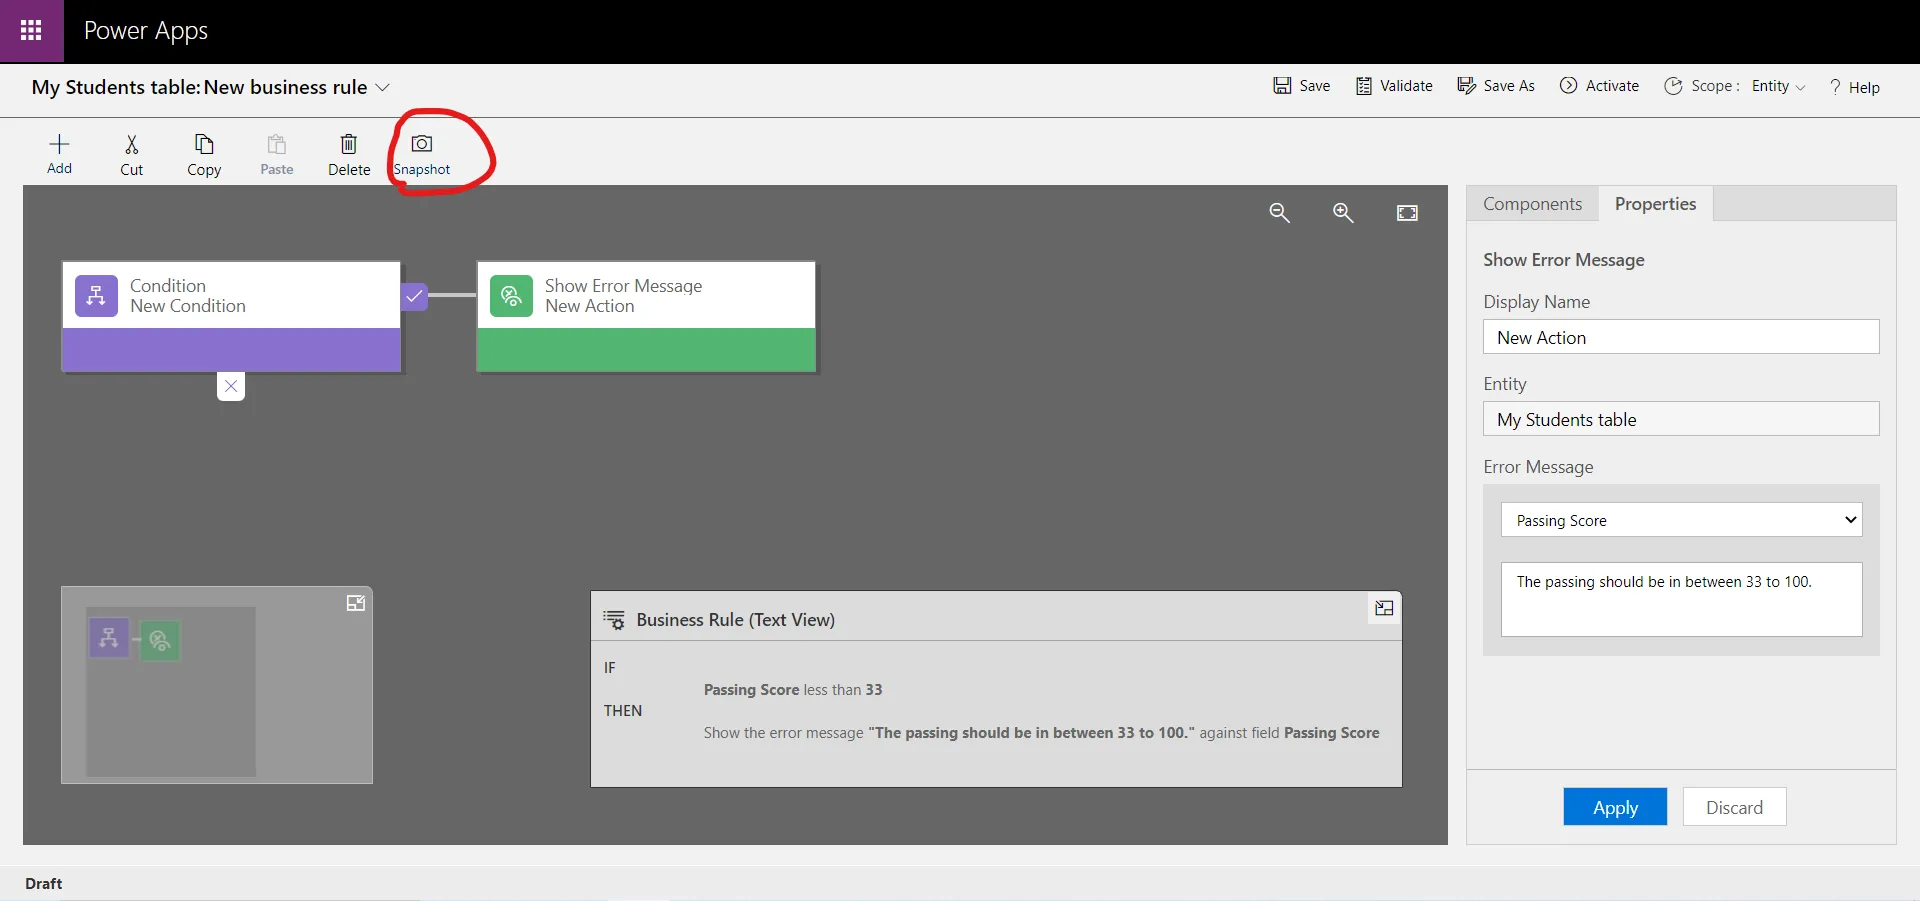
Snapshot - To take a snapshot of everything in the Business Rule window, select Snapshot on the action bar. This is useful, for example, if we want to share and get comments on the business rule from a team member.
Use the mini-map to quickly browse through different parts of the process. The mini-map is useful when you have a complicated process that scrolls off the screen.
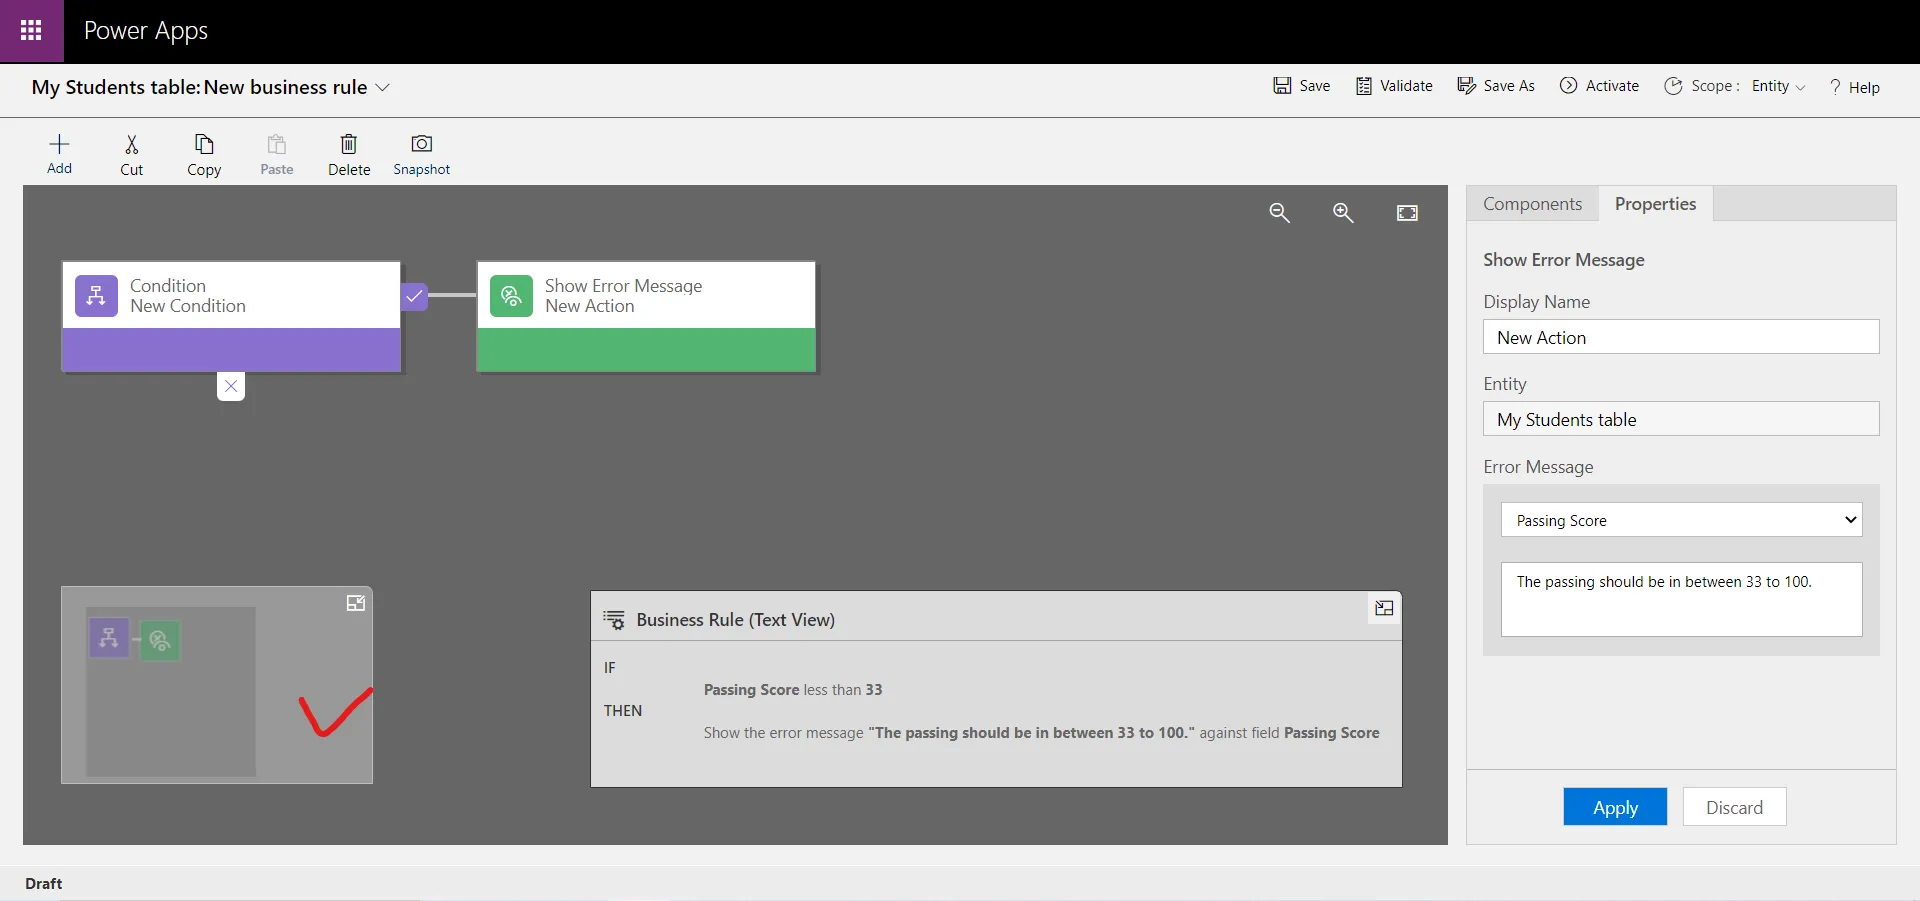
As we add conditions, actions, and business recommendations to your business rule, code for the business rule is built and appears at the bottom of the designer window. This code is read-only.
Select the arrow next to My Students table: New business rule in the top left of the screen. Enter a name in the Business rule name field and a description for the business rule in the Description field. Select Save, and Activate.
