Save as Draft in Powerapps
We can build the save as draft functionality in Power apps, if the users don’t have all the required columns data in the form control or they do not want to submit the record, besides they want to keep it in a draft mode and once they are satisfied, they will submit it.
Follow the following steps to create this functionality.
Step 1: Add an Edit Form control and add it to a Data Source.
Step 2: Add one button control and set its Text property to “Draft”. Also, set the following formula to the OnSelect property of the Draft button on Screen 1.
Power Apps Formula
The above Power Apps formula includes three statements:
- UpdateContext({locIsSubmit: false}): This line updates the context variable locIsSubmit to false. Context variables are used to store and manage temporary data within a canvas app. In this case, it sets locIsSubmit to false.
- SubmitForm(Form1): This line submits the data to the datasource entered in Form1. Here Form1 is the name of our Form control.
- NewForm(Form1): This line resets Form1 to its initial state, clearing any previously entered data. The NewForm function is used to reset a form to its default state, making it ready for a new entry.
Step 3: Add another button control and set its Text property to “Submit”. Set the following formula to the OnSelect property of the Submit button on Screen 1.
Power Apps Formula
Here, we are setting the context variable locIsSubmit to true.
Step 4: Set the OnSuccess property of the Form control on Screen 1 to the following powerapps formula.
Power Apps Formula
- If the locIsSubmit context variable is true, the formula executes the first branch of the If function. It uses the Notify function with the message "Your record is submitted successfully." and the notification type set to Success. This will display a success notification to the user indicating that their record has been submitted successfully.
- If the locIsSubmit context variable is false, the formula executes the second branch of the If function. It uses the Notify function with the message "Your record is saved in draft mode successfully." and the notification type set to Information. This will display an information notification to the user indicating that their record has been saved in draft mode successfully.
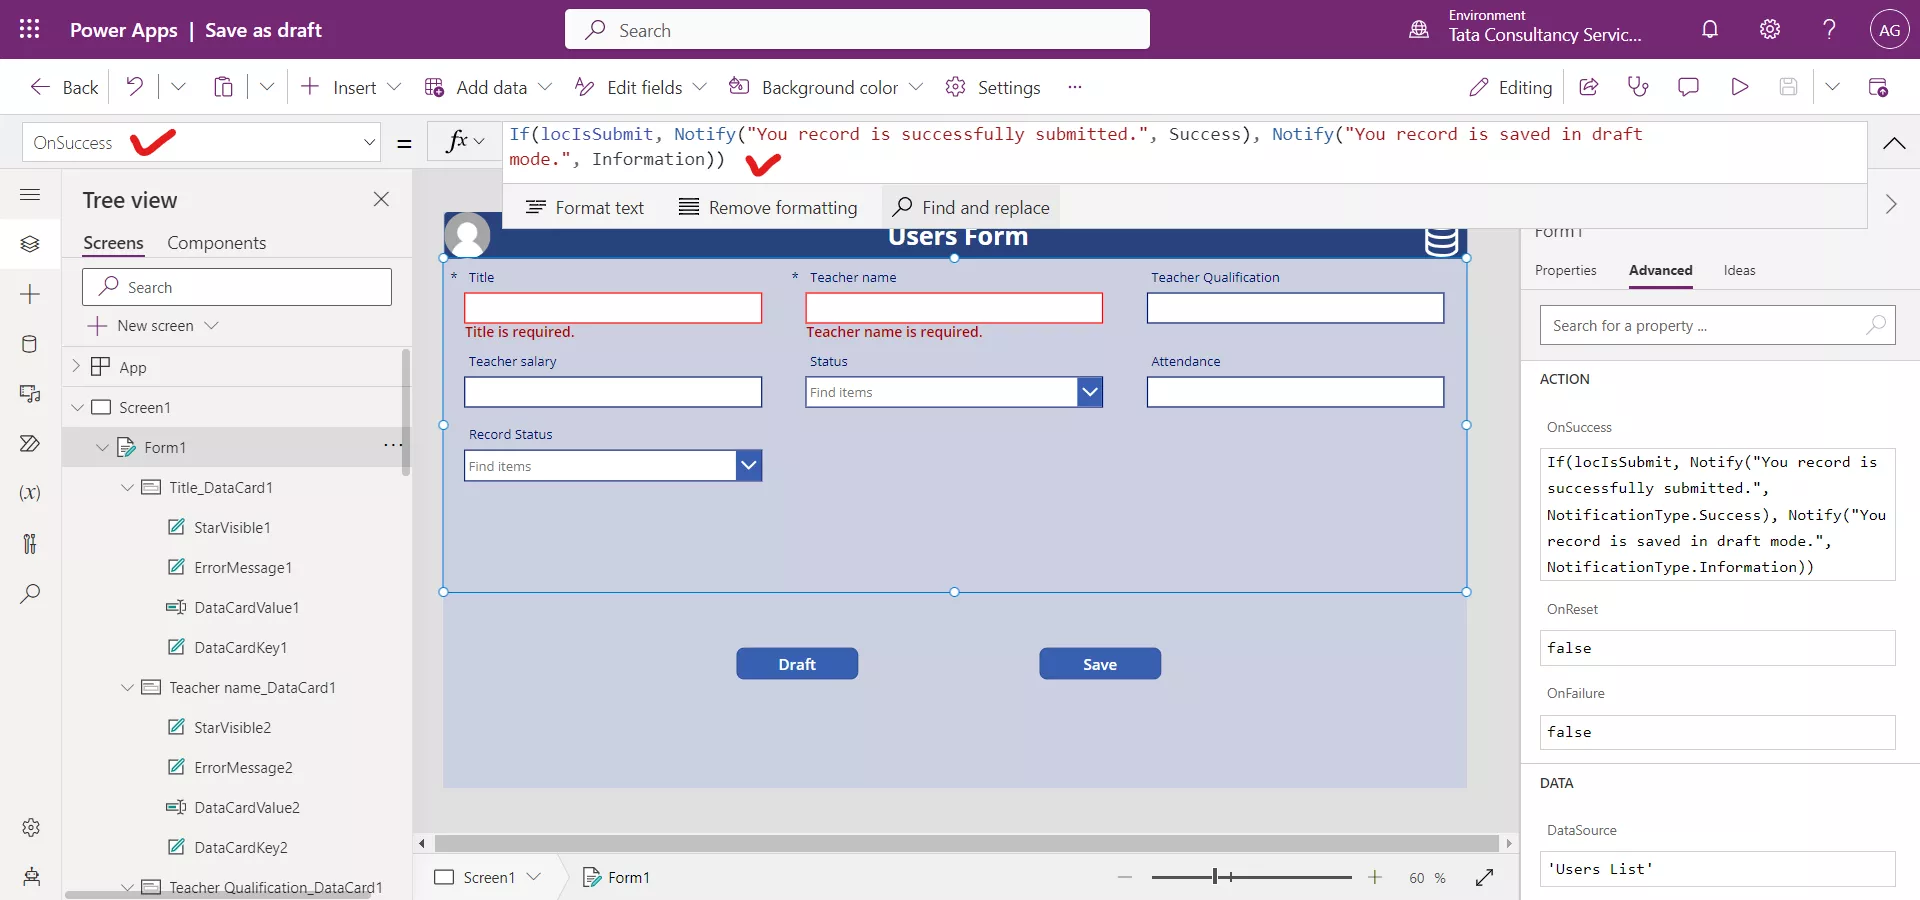
After the form is submitted, either in draft mode or in Submit mode we can see the notification on the top of the Power Apps to confirm that our record is Submitted or in the Draft mode.
Step 5: Note the “Record Status” column value need to be updated when the form is submitted when clicked on Draft or Submit button.
First Select the Record status card control and edit its Update property to the following formula, by unlocking the card control.
Power Apps Formula
The formula evaluates the condition locIsSubmit and returns the appropriate value based on the result. If locIsSubmit is true, it means that the form has been submitted, so the formula returns {Value: "Submitted"}. If locIsSubmit is false, it means that the form is still in draft mode or has not been submitted yet, so the formula returns {Value: "Draft"}.
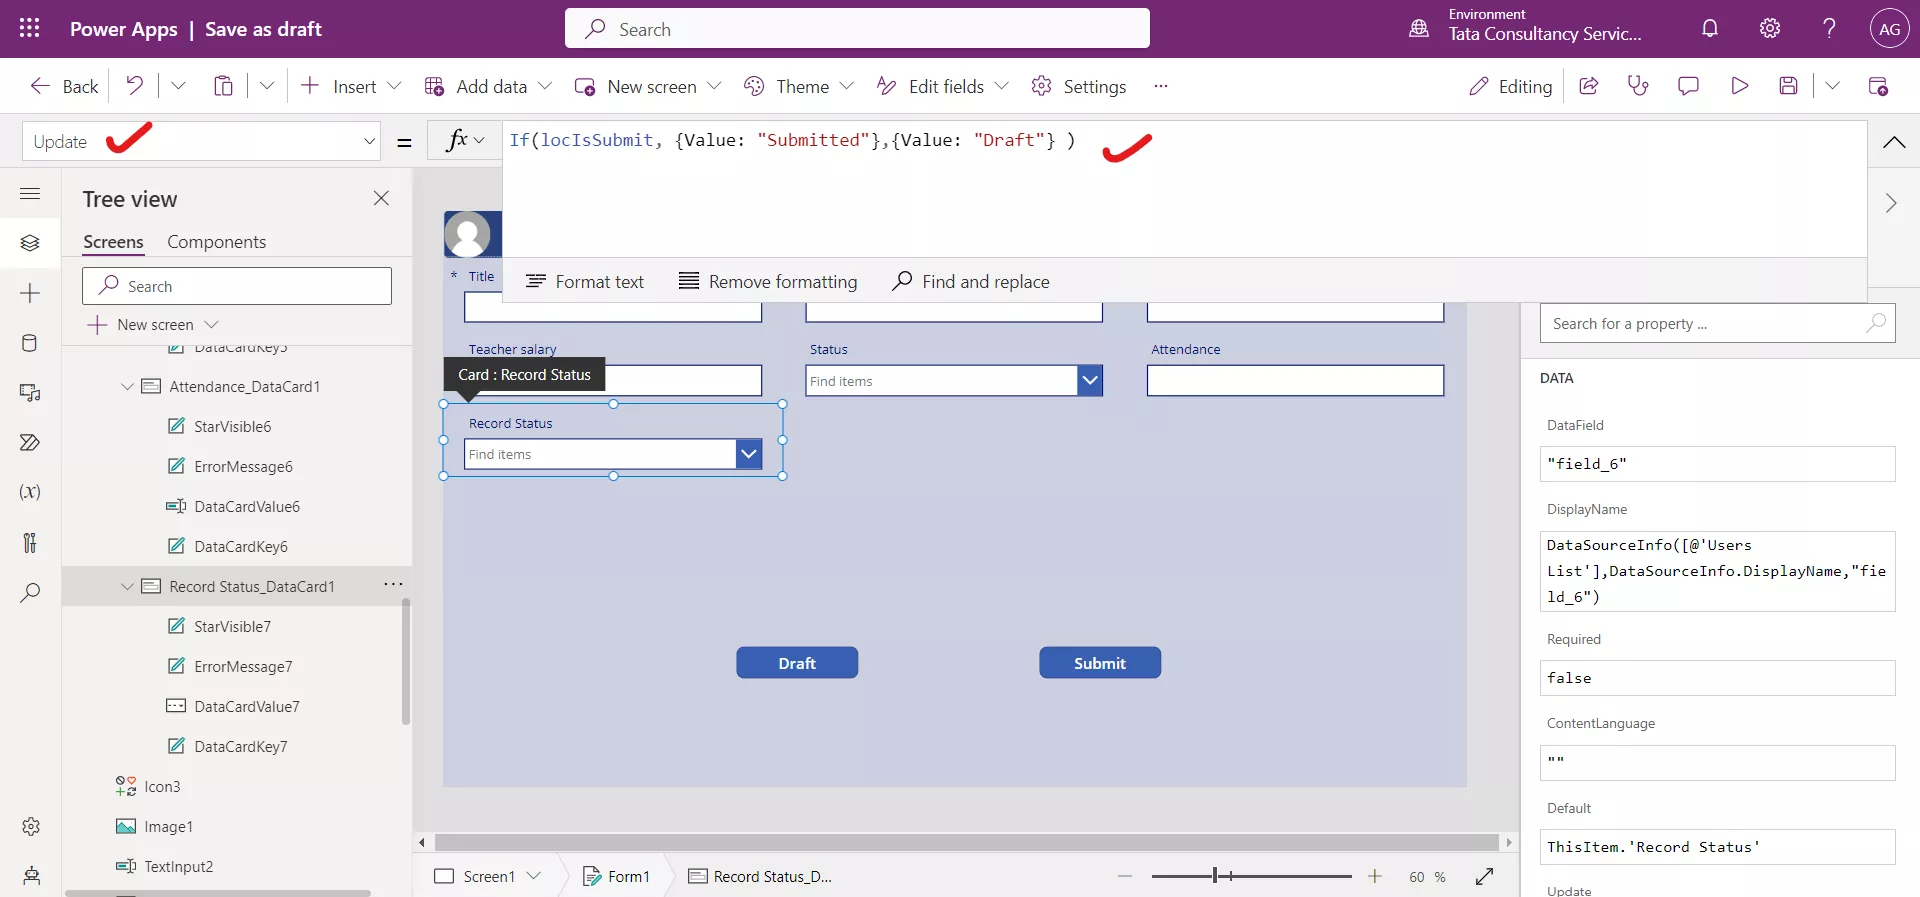
And set the Visible property of this card control to the value false. It means the control is hidden but its value is updated once the user clicks on the Draft or the Submit button.
Step 6: How to handle required fields in sharepoint or Power Apps in Draft mode? Always remember, we can make the power apps form more restrictive not the less restrictive in case of required fields, it means if any fields is required in the datasource we cannot make that field not required in case of powerapps. If we do so, at the time of form submission, it throws an error.
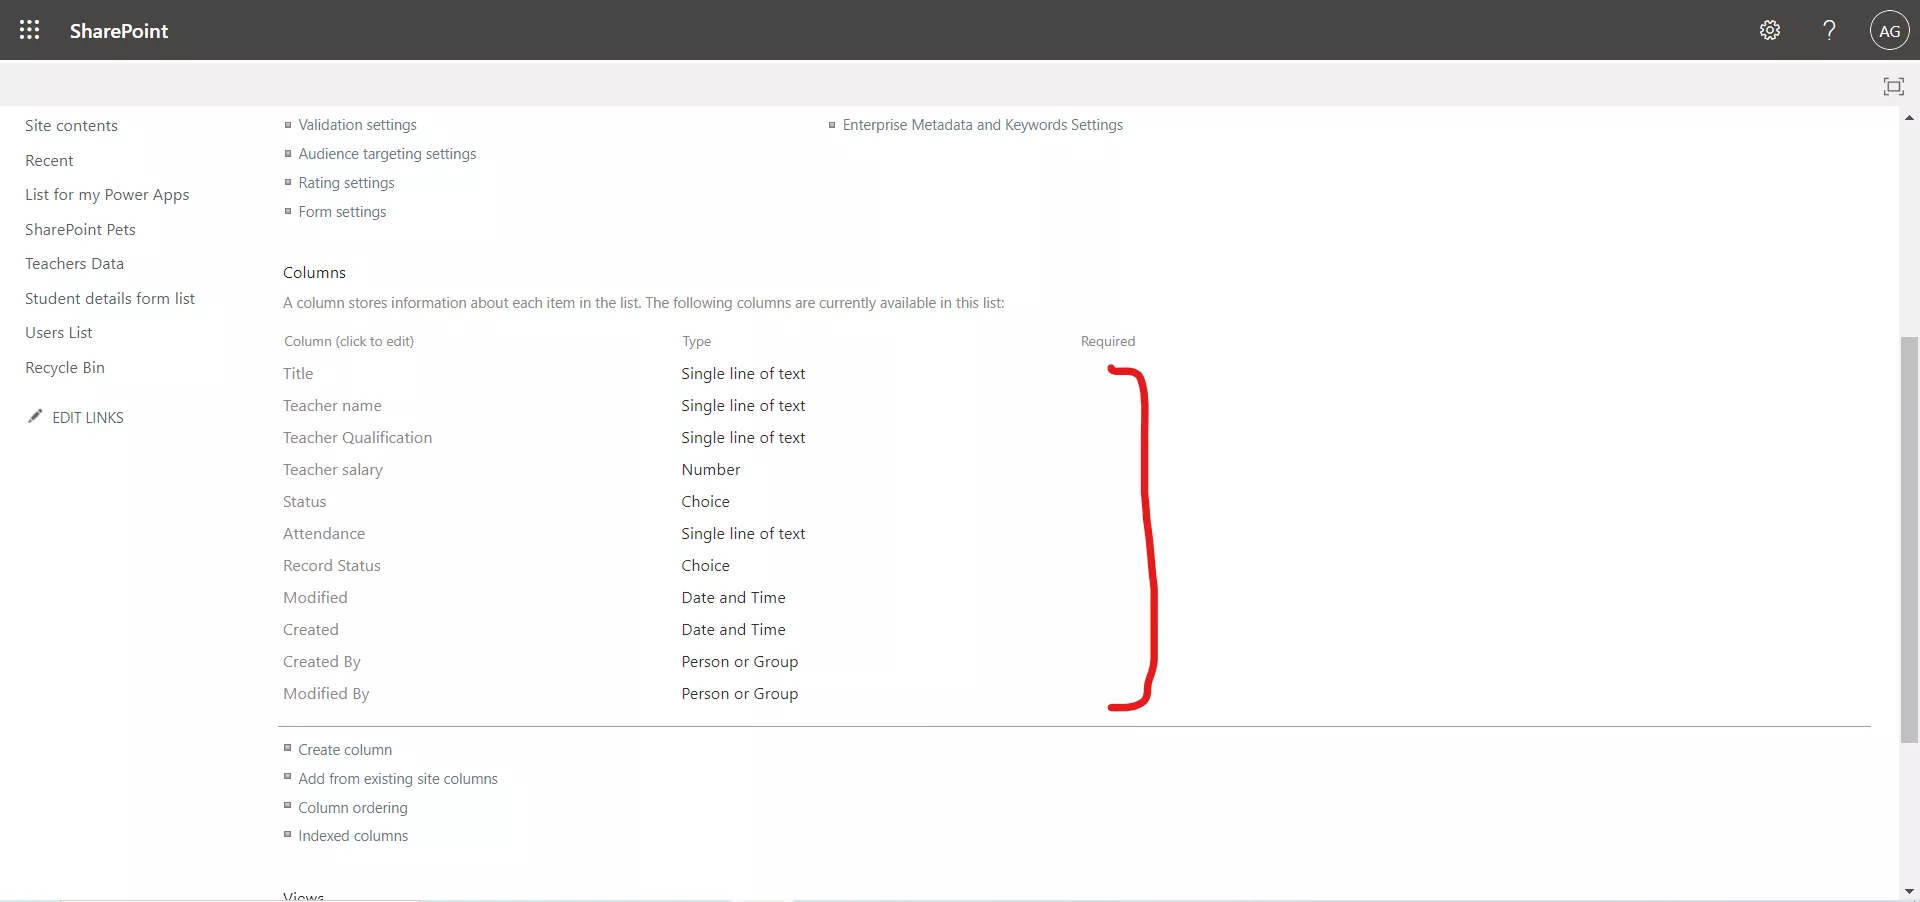
So, to handle the required fields in case of Draft mode, first, we remove “Required” parameter from all the fields in the sharepoint. Those fields which are required, make them required in the card control in the Power Apps. So, it means we are handling the required parameters from the power apps.
We can see, we remove the Required from all the fields in the list.
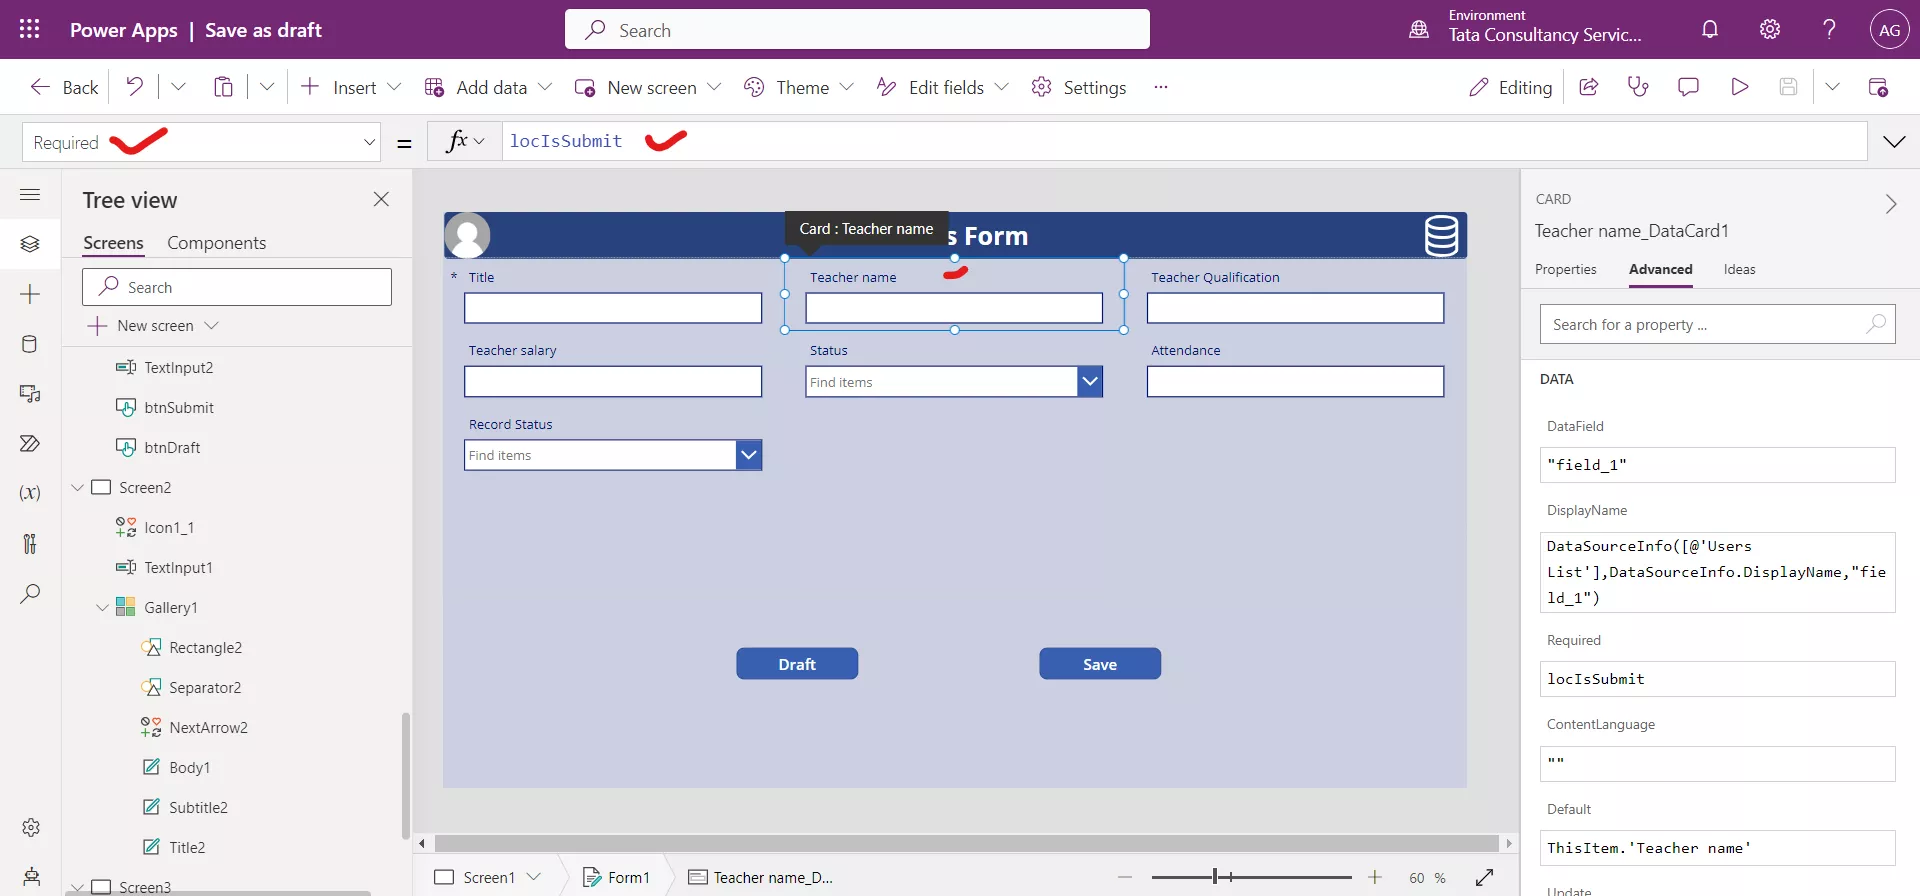
Suppose we want “Title” and “Teacher name” field required, then select the card controls of these in Power Apps and set it to true. Suppose the Title field is required no matter the user clicked on Draft or Submit button. So, select the Title card control and set its Required property to true. However, the “Teacher name” field is required when the user is clicked on the Submit button, otherwise it is not required. It means when a user clicks on the Draft button the field is no more required.
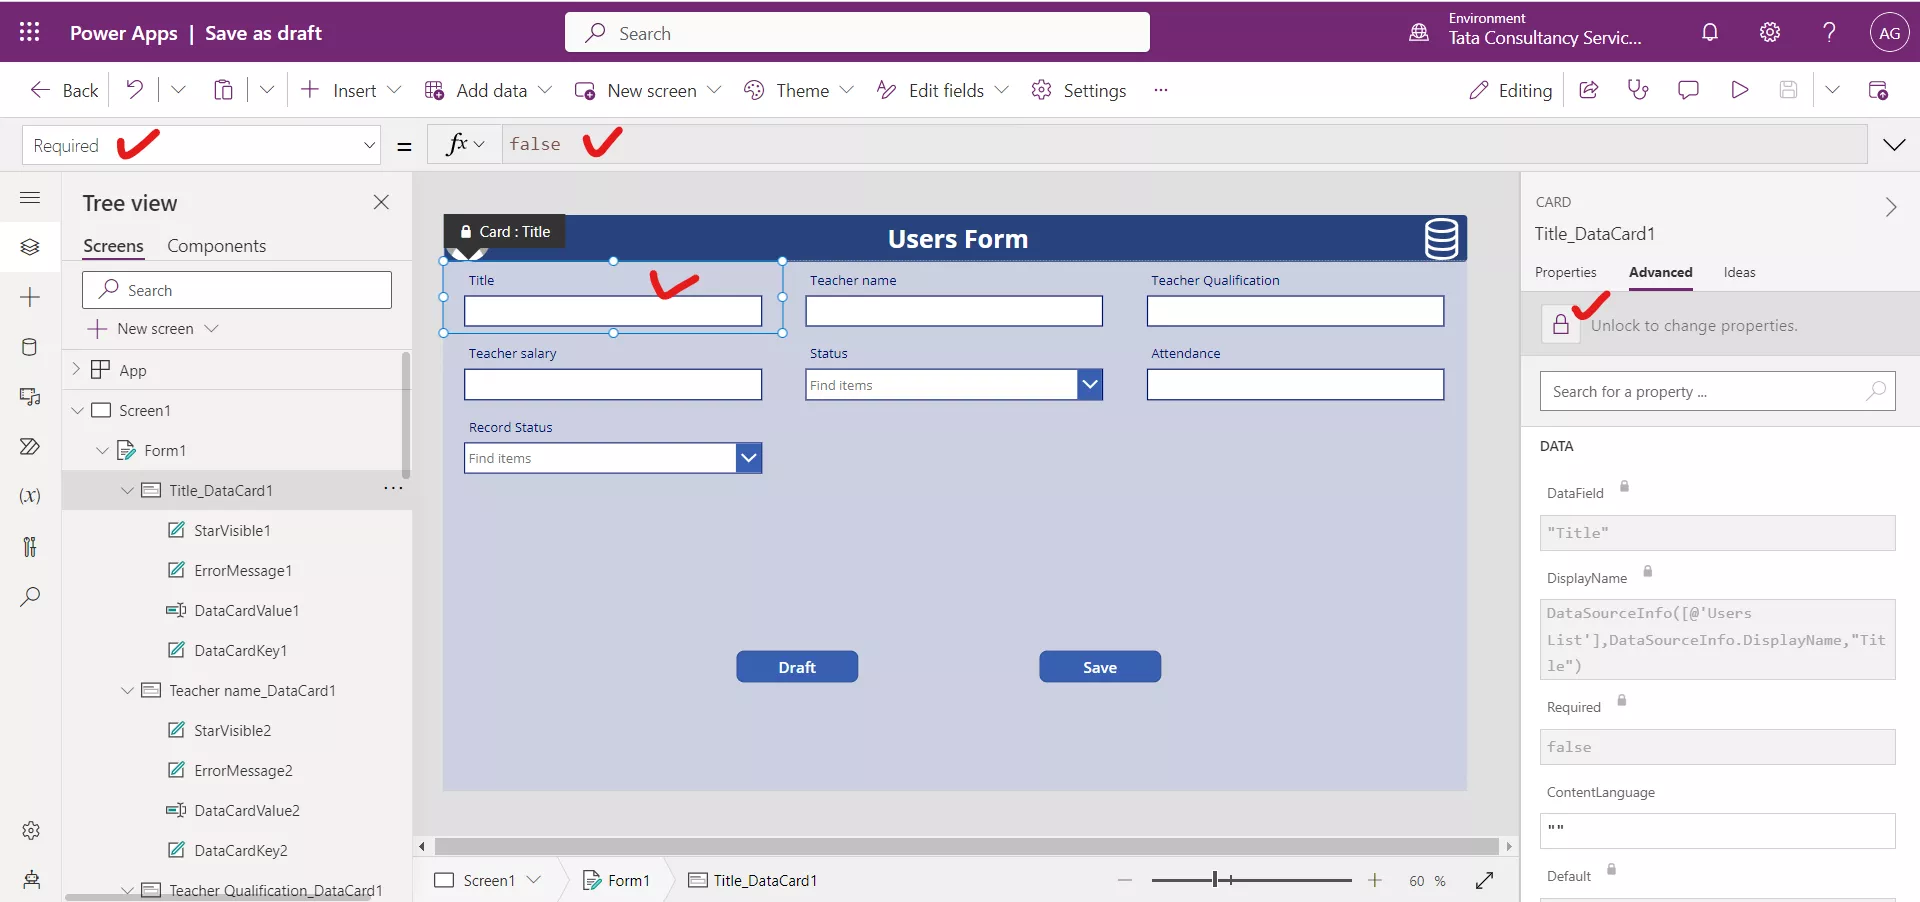
Now the field Required property is false it obeys the sharepoint list required properties, we can make it more restrictive but not less restrictive.
To change the Required property value first we click on the lock sign to unlock the data card.
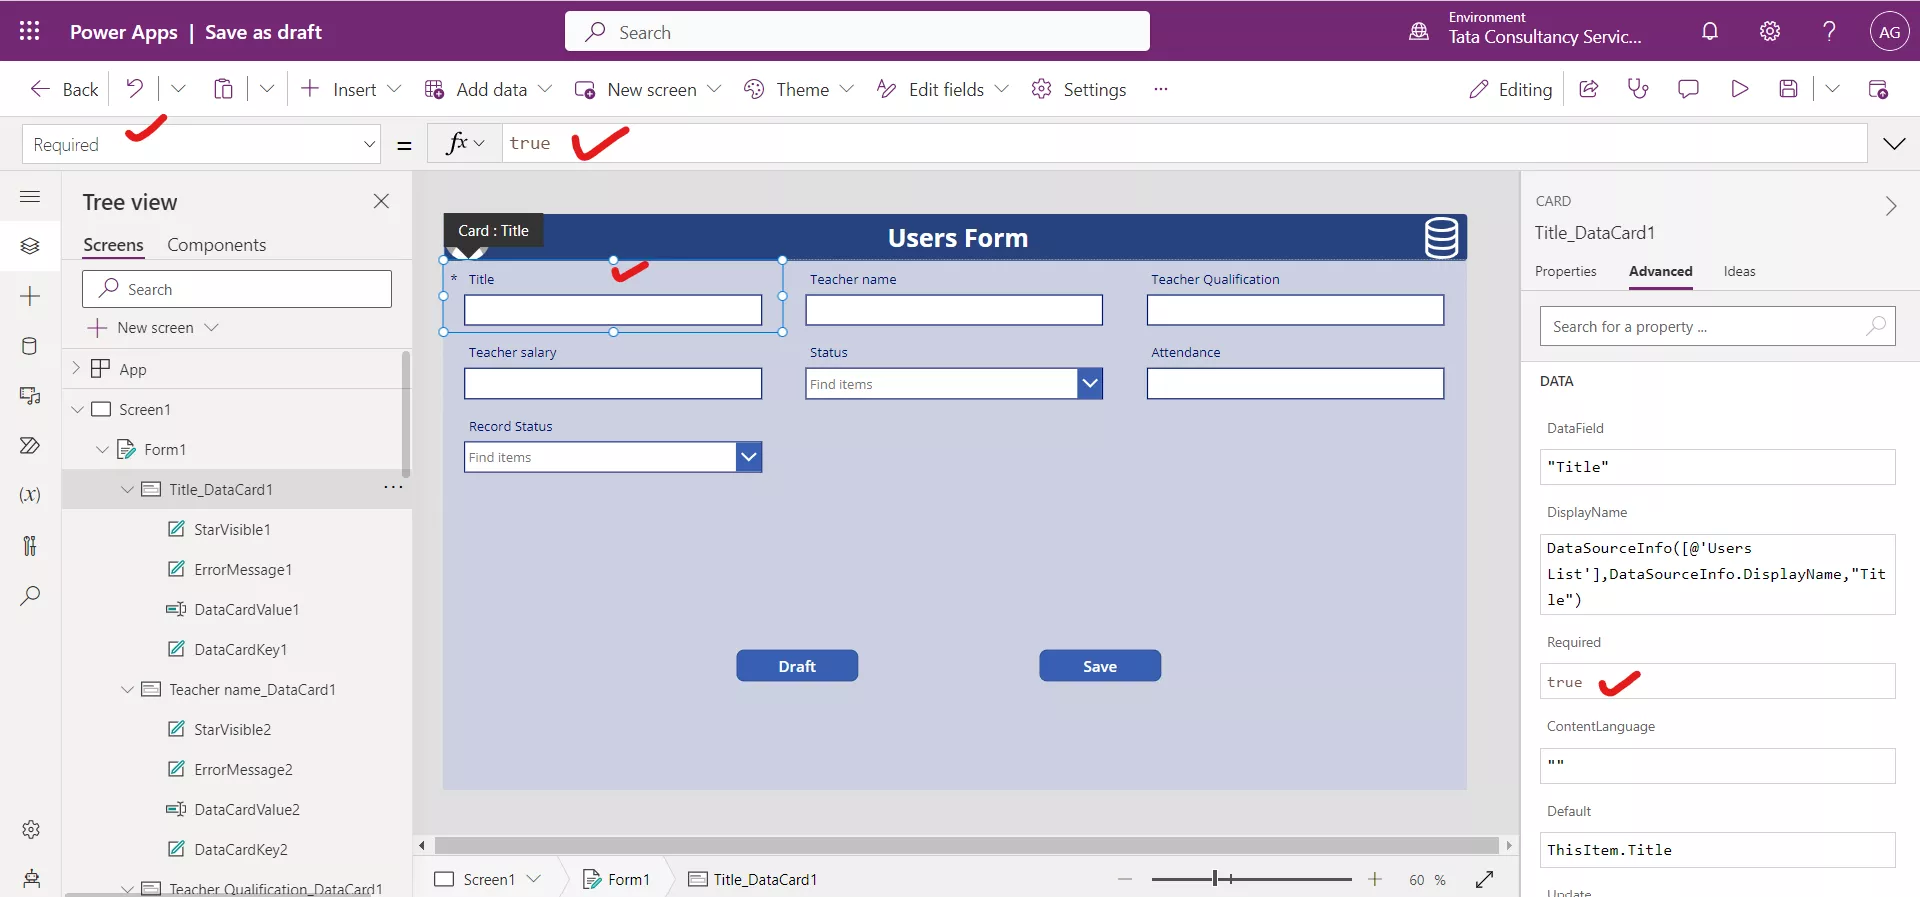
Similarly, select the “Teacher name” field and make it required when the user clicked on Submit button, but not when the user clicked on the Draft button. Set the Required property of the control to the following formula.
Power Apps Formula
Step 7: Our Save as Draft functionality is ready, we can make it more complex according to the need. Put the app is preview mode and fill the data in the form and Click on the Draft or Submit button.