Import data into the Microsoft Dataverse Table
We can import data into our Microsoft Dataverse database in bulk from various sources including Excel, Access, SharePoint, SQL, and many others. 1. Import Data from SharePoint list Before importing data in the dataverse, create an import data. To do this follow the following steps:
Step 1: Go to office.com and sign in.
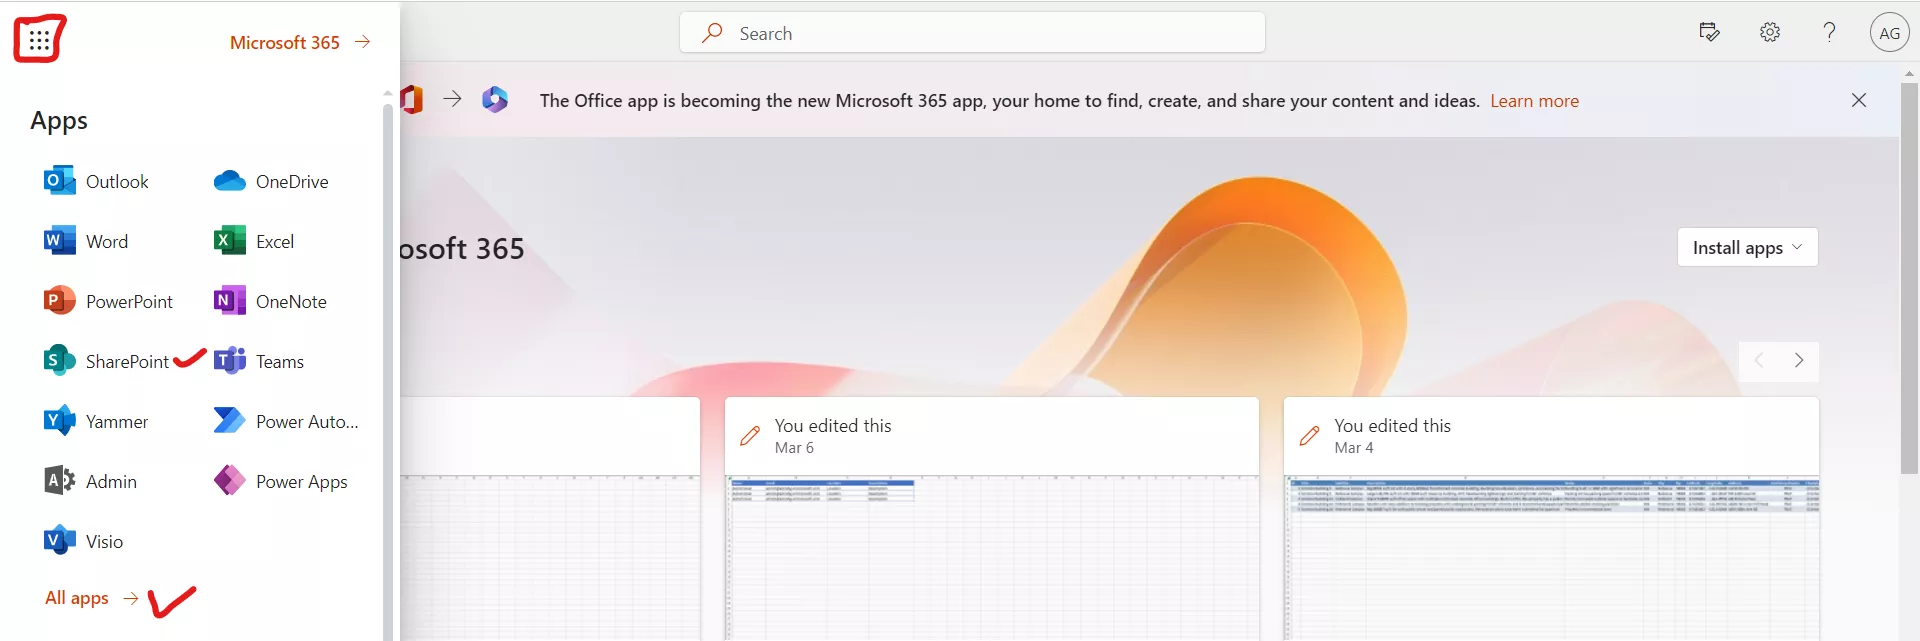
Step 2: Click on app launcher icon, in the upper left corner of the window, and select SharePoint.
Step 3: The SharePoint site is opened in new tab. Open any Site.
Step 4: Select New > List in the command bar of the SharePoint site.

Step 5: Select Blank list from the Create a list popup.

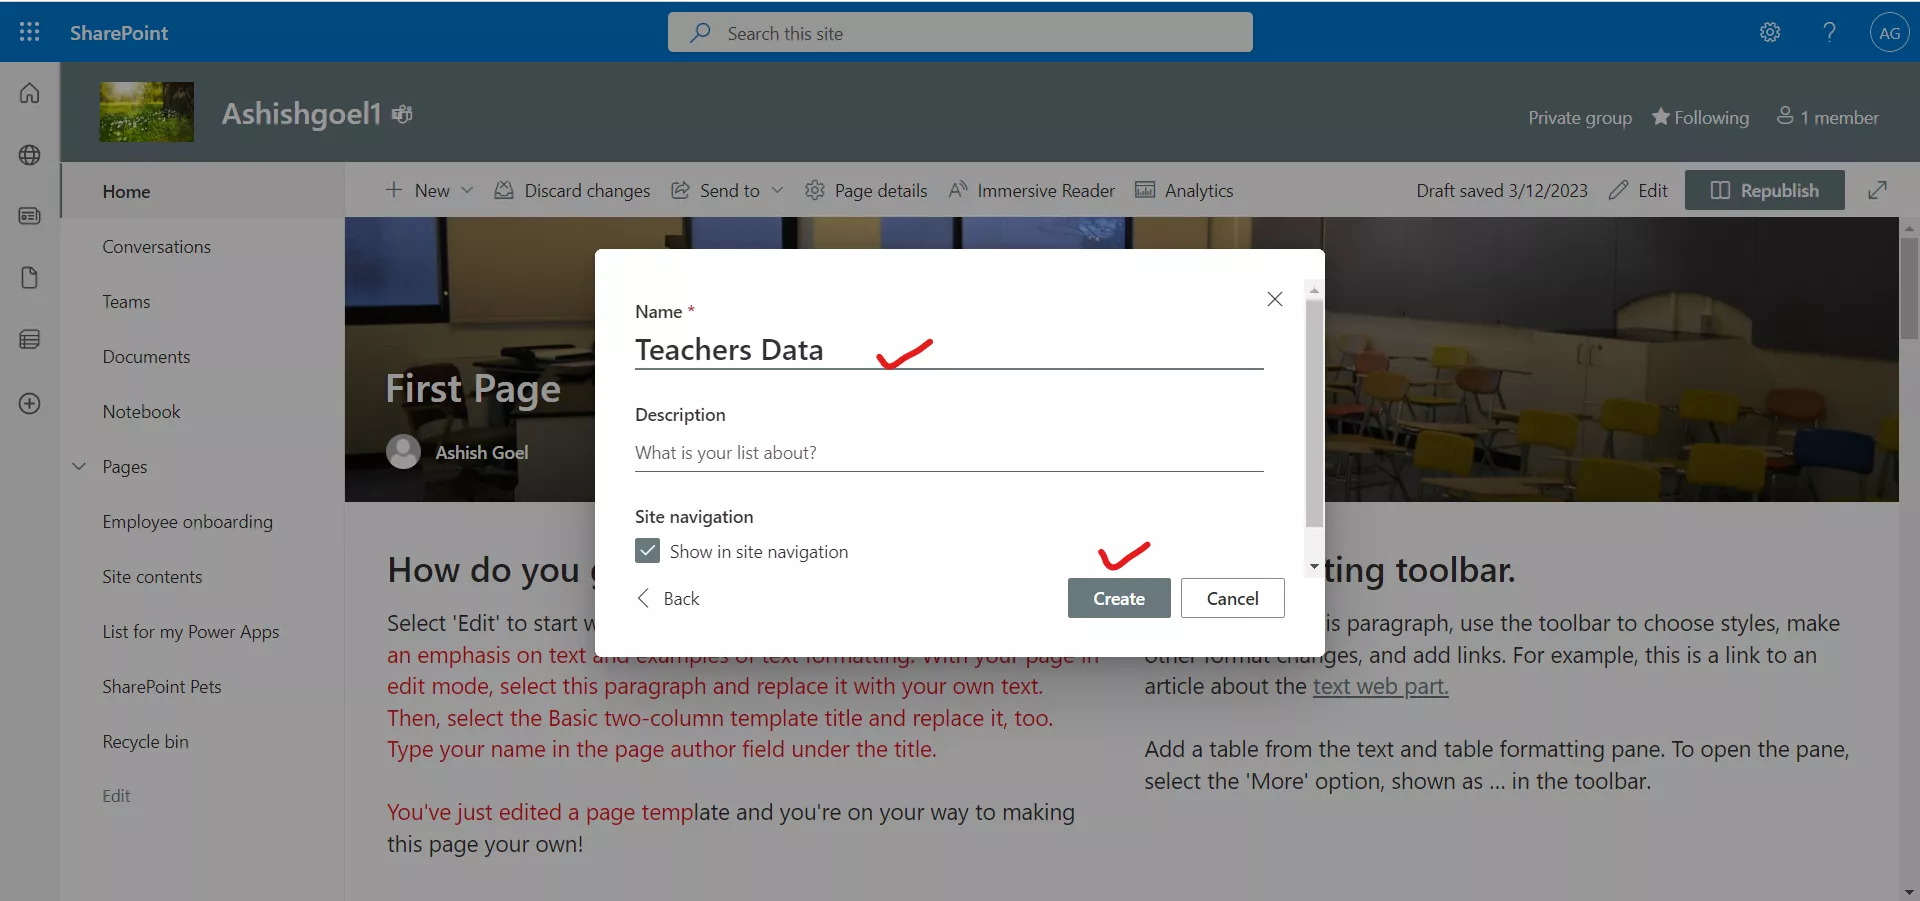
Step 6: Give Name and Description to the list, we give "Teachers Data" as the name, and select Create.
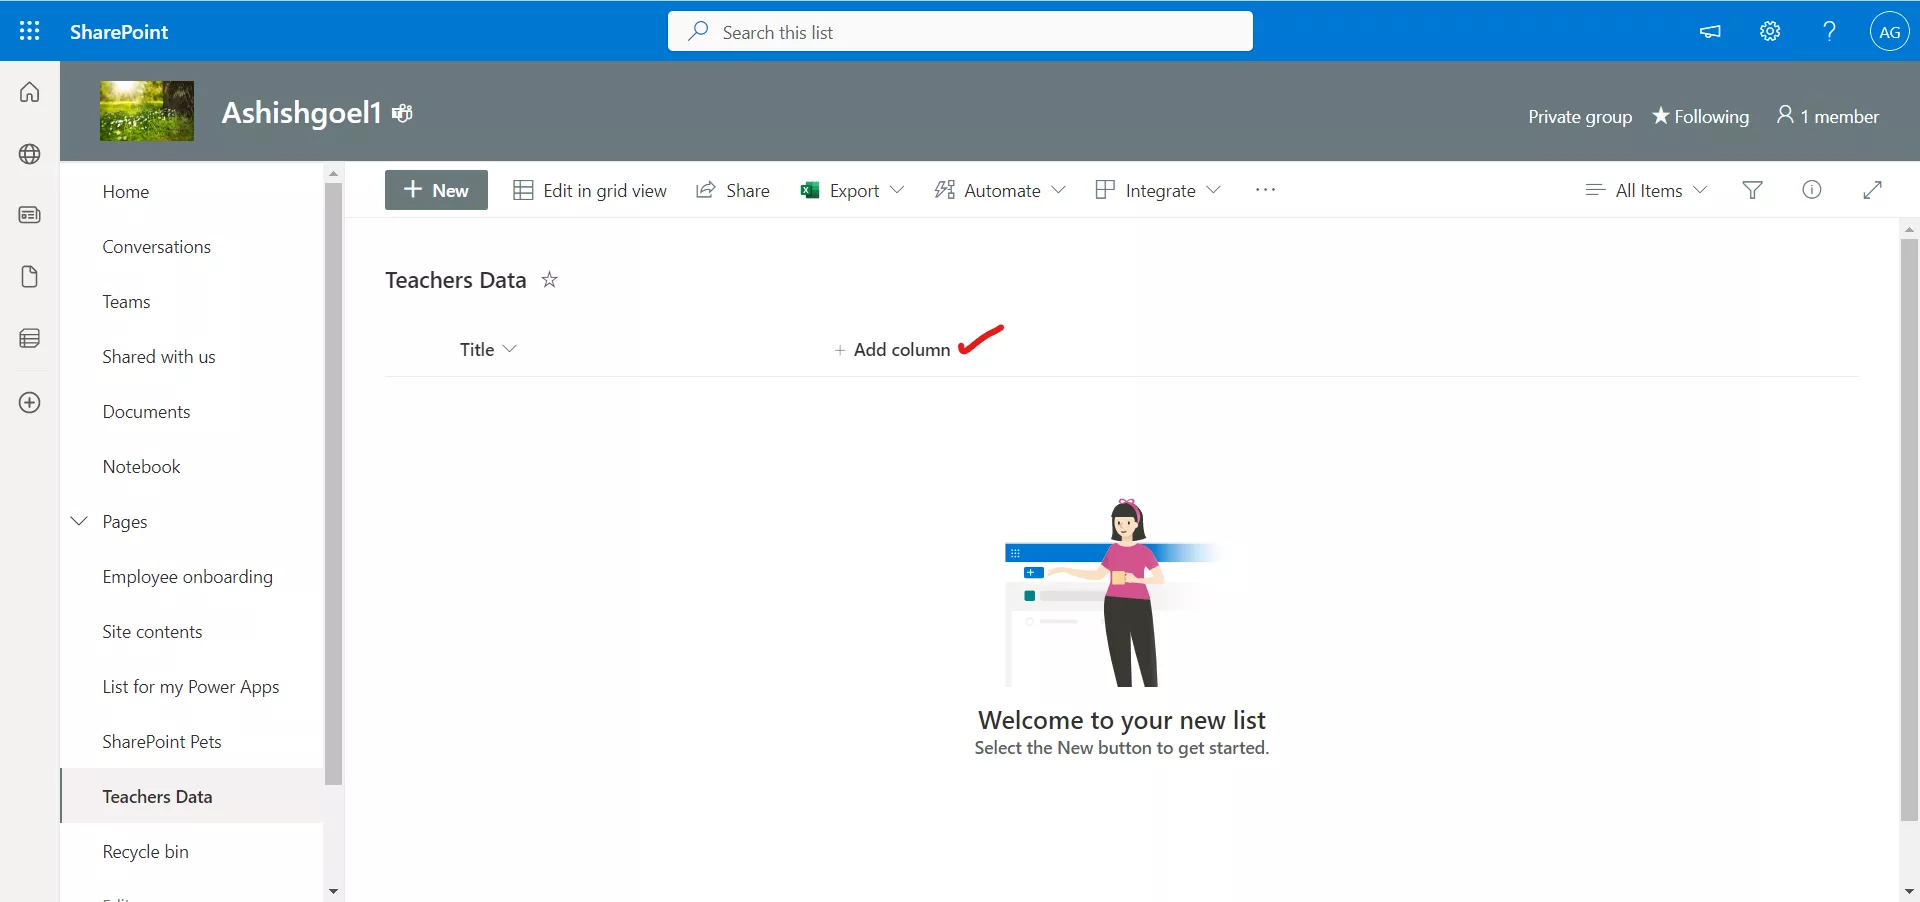
Step 7: Our newly created list appears on the window, let's create some columns to upload in the dataverse.
Step 8: Select Add column next to the Title field.
Add the following column given below with their data types:
| Name | Datatype |
|---|---|
| Teacher name | Single line of text |
| Teacher Qualification | Single line of text |
| Teacher Salary | Number |
Give the Name and Description to the column. Give the data type and click on Save button.
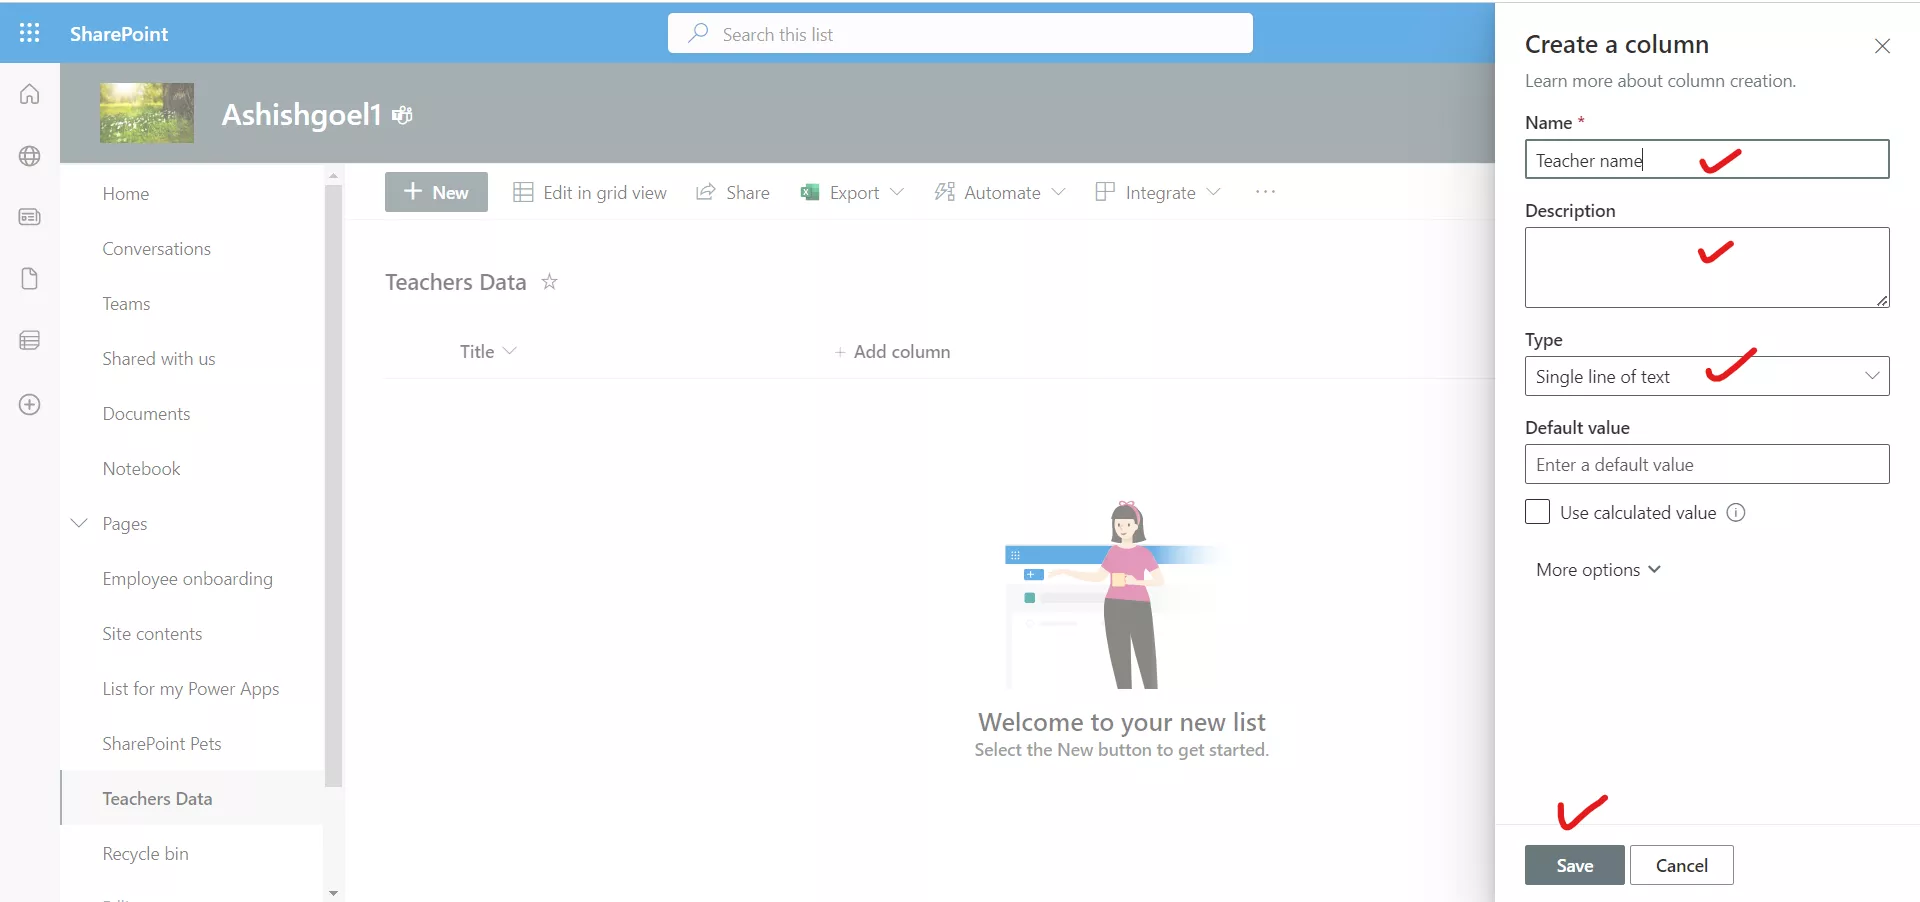
Step 9: Next, we want to add data so that we have some data to import. To add records to the list, click on + New.
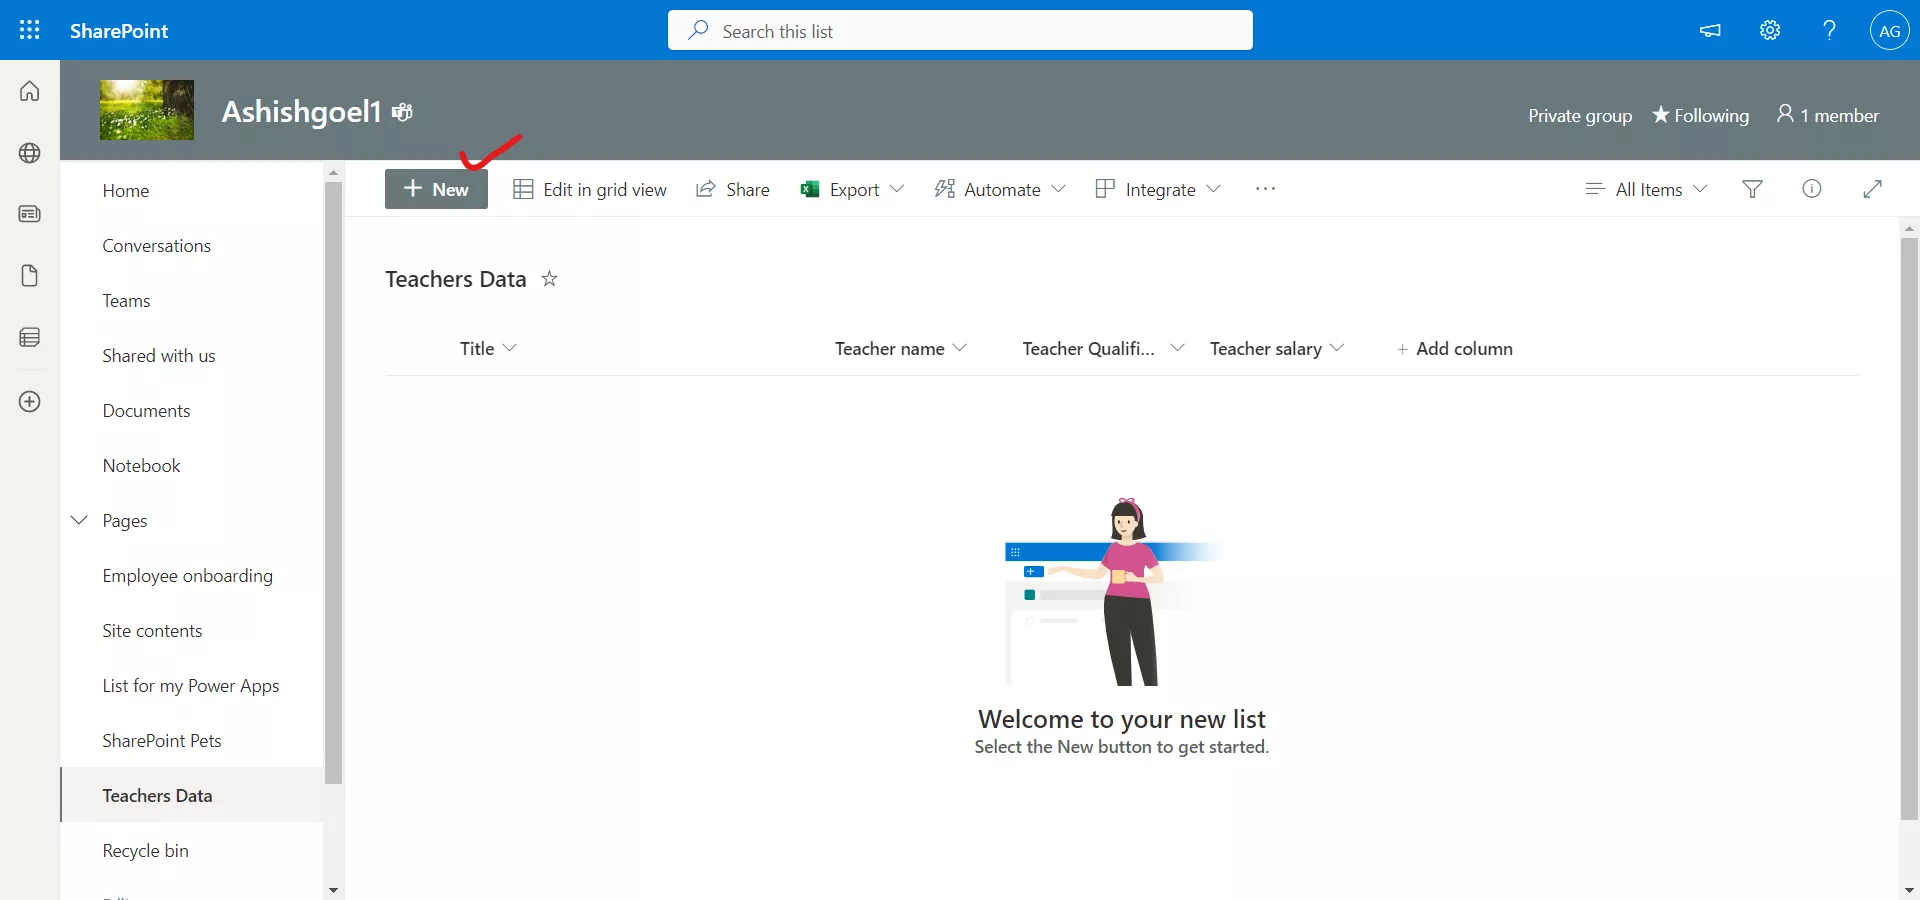
Add the record and click on save.
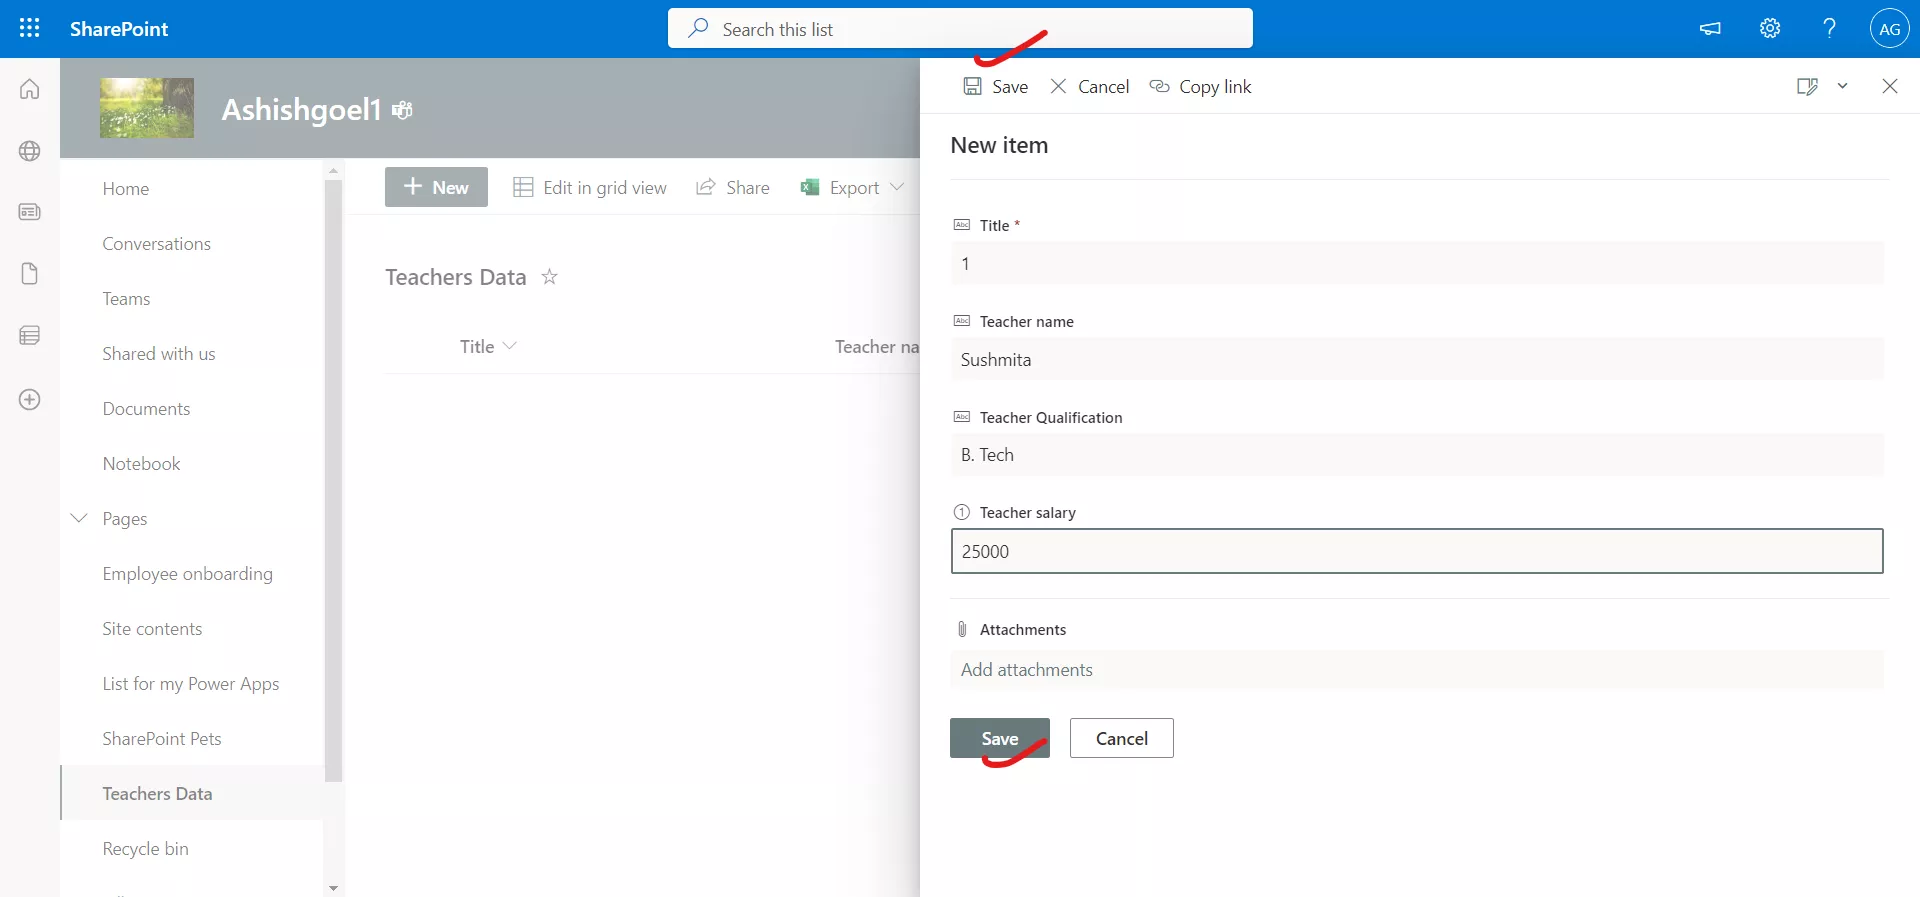
Add some more records. The list is looking like the image below:
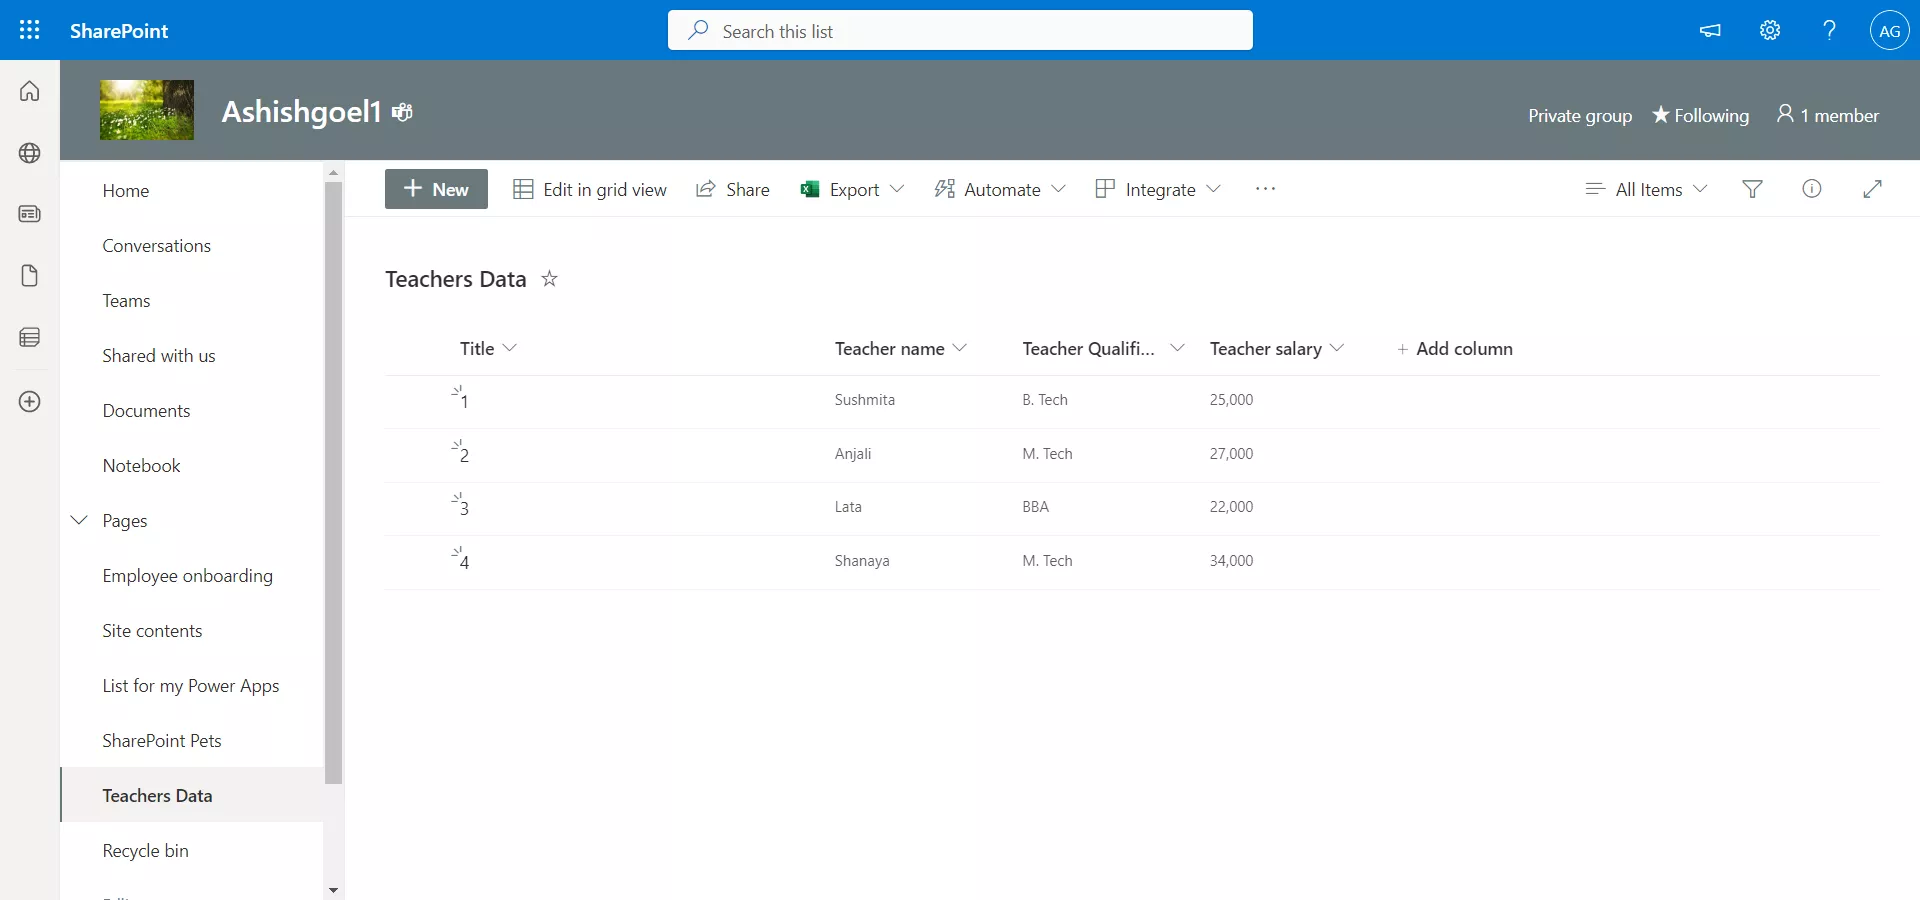
Step 10: Return to your SharePoint site's Home page and copy the URL from the browser. Now we're ready to import some data into our Dataverse table. Keep this browser tab open.
Import data into our Dataverse table Step 1: In a separate browser tab, go to powerapps.com, and in the left navigation pane, select Tables.
Step 2: Select the Teacher table, or create a new one.
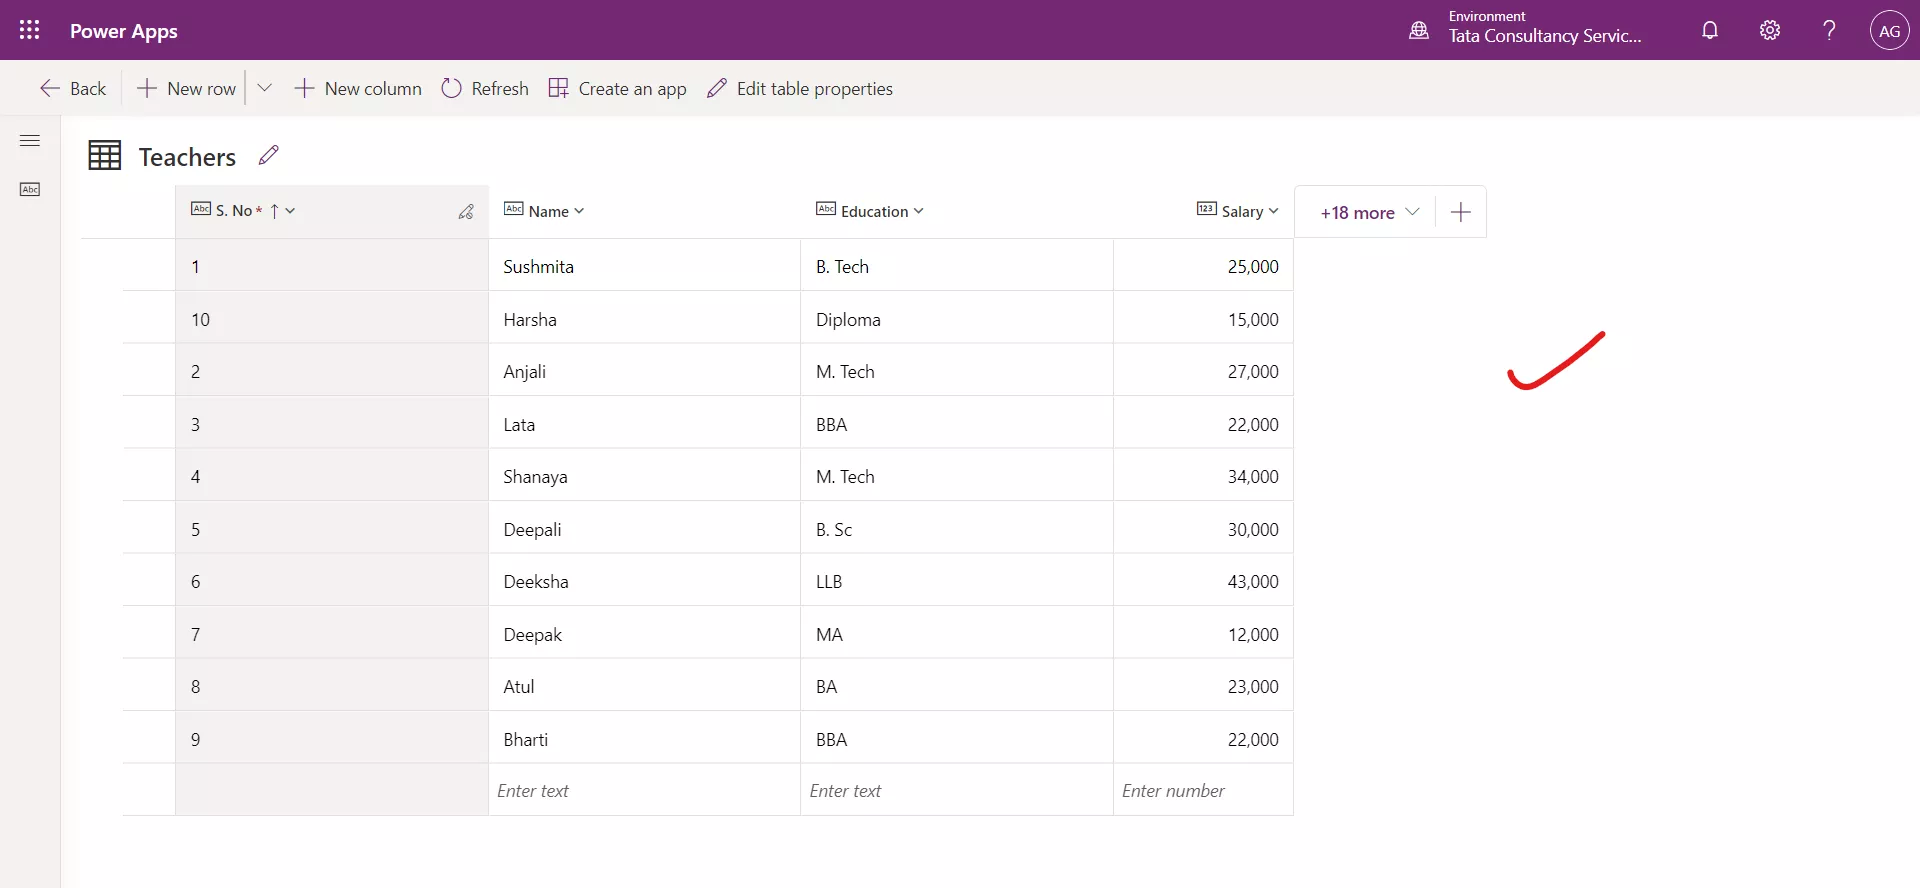
In the teacher table, we have the following columns:
| Column | Data type |
|---|---|
| S. No (Primary Name Column) | Autonumber |
| Name | Single line of text |
| Education | Single line of text |
| Salary | Whole number |
The table contains the other standard columns.
Step 3: And then select Import and then Import data from the menu at the top of the screen.
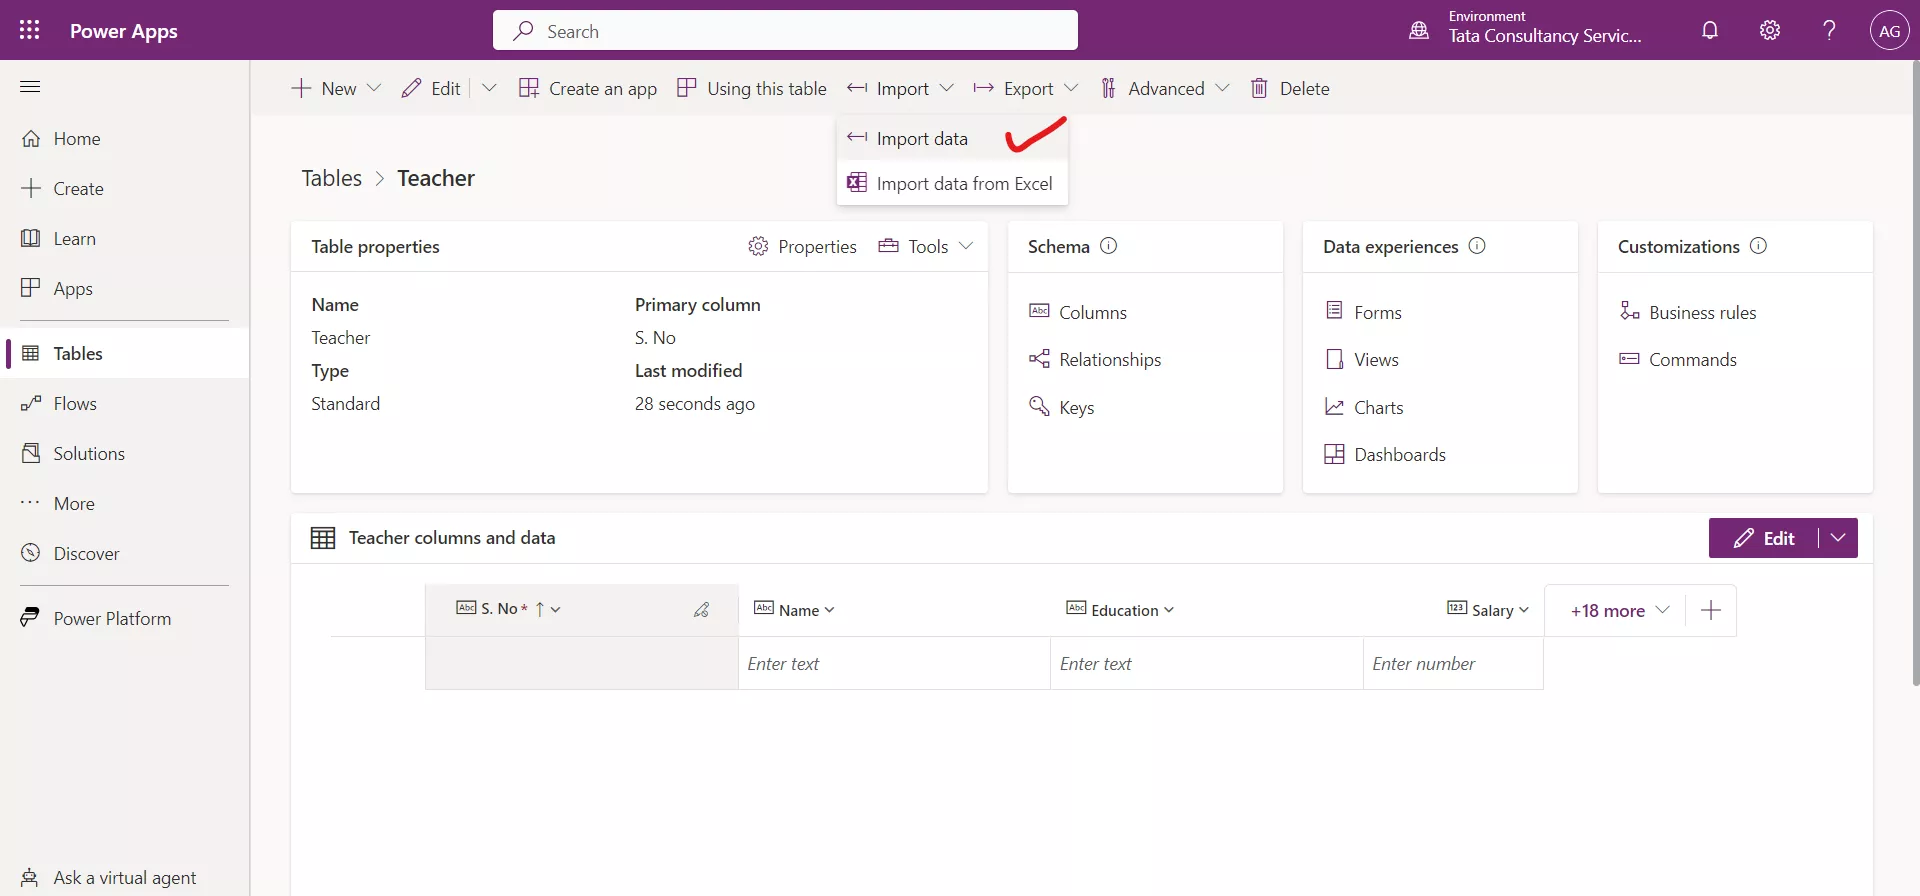
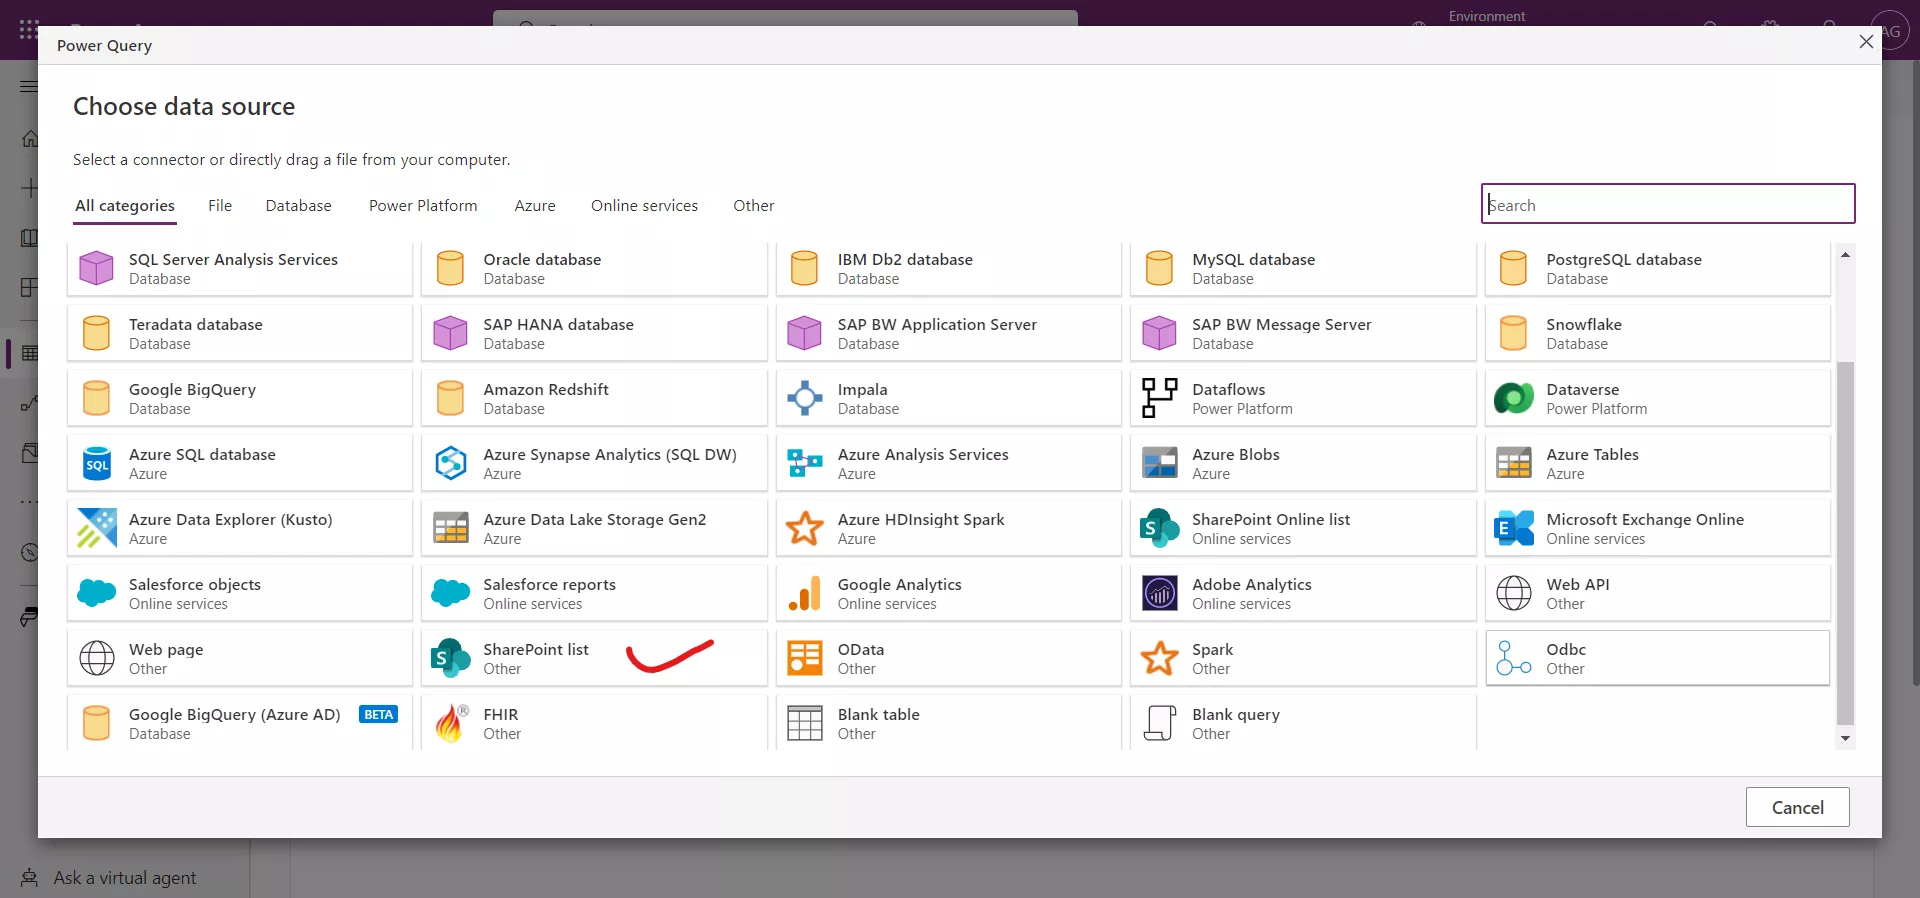
Step 4: On the Choose data source window note that there are more than 40 options to choose from. In this example, we're going to select SharePoint list where we have data to import into our Teacher table.
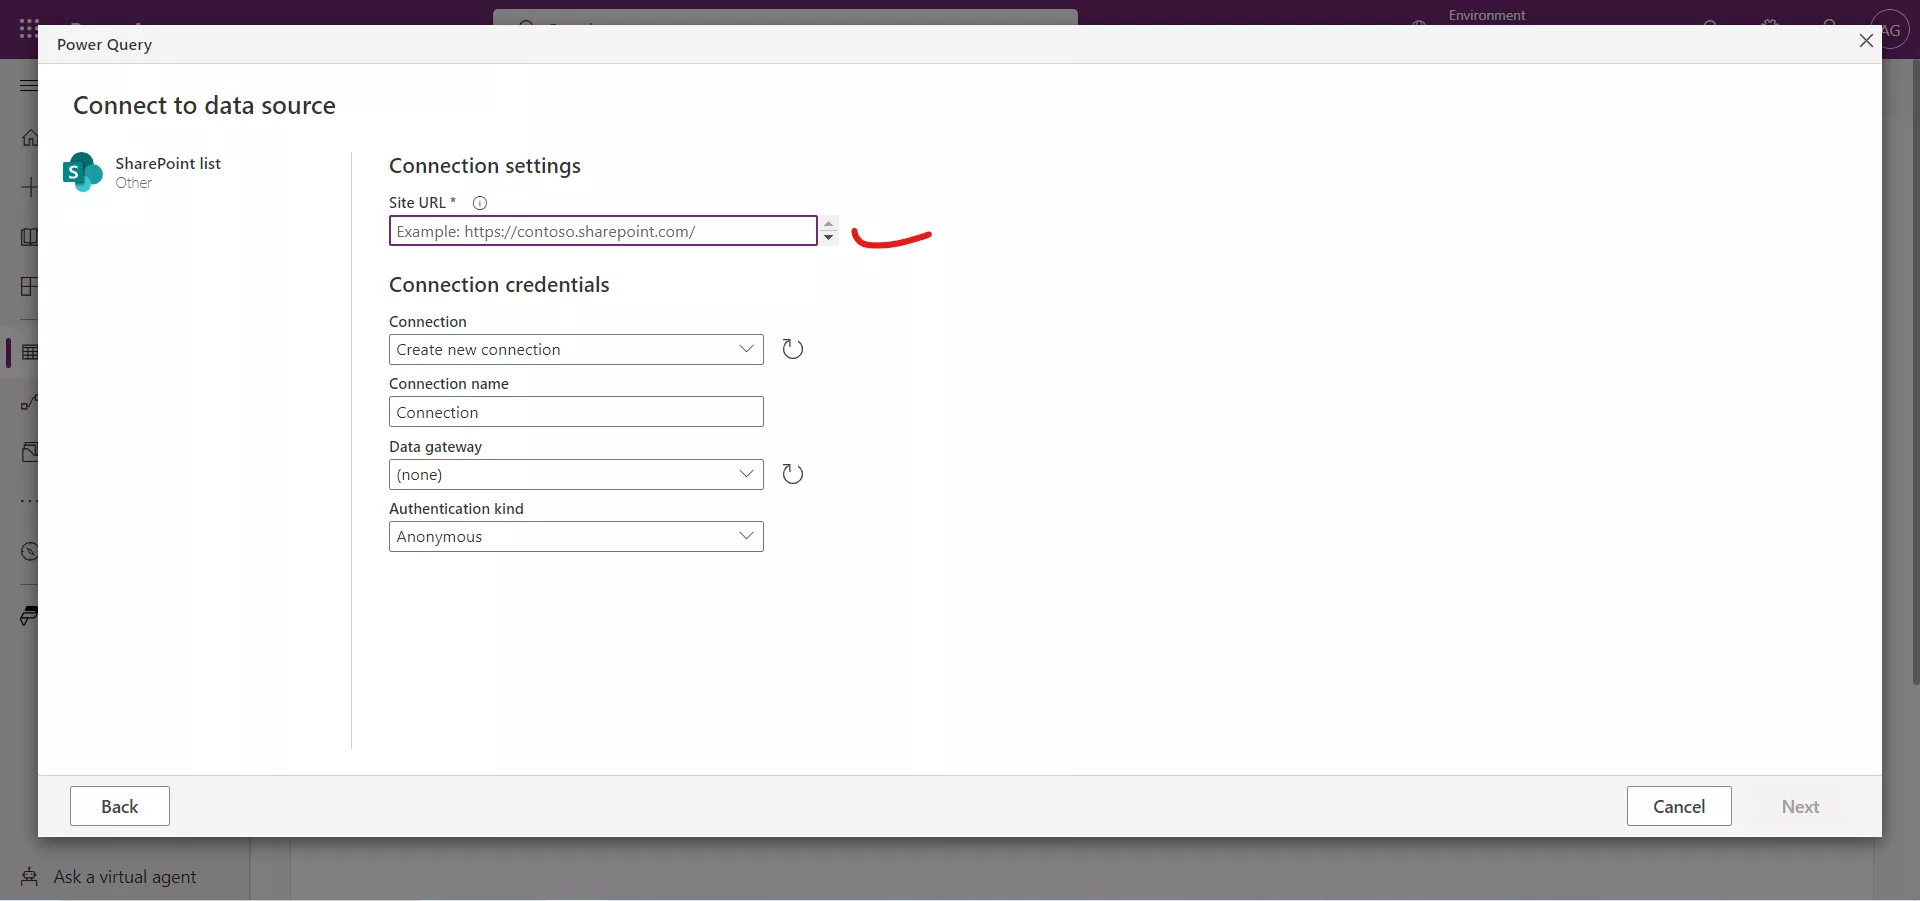
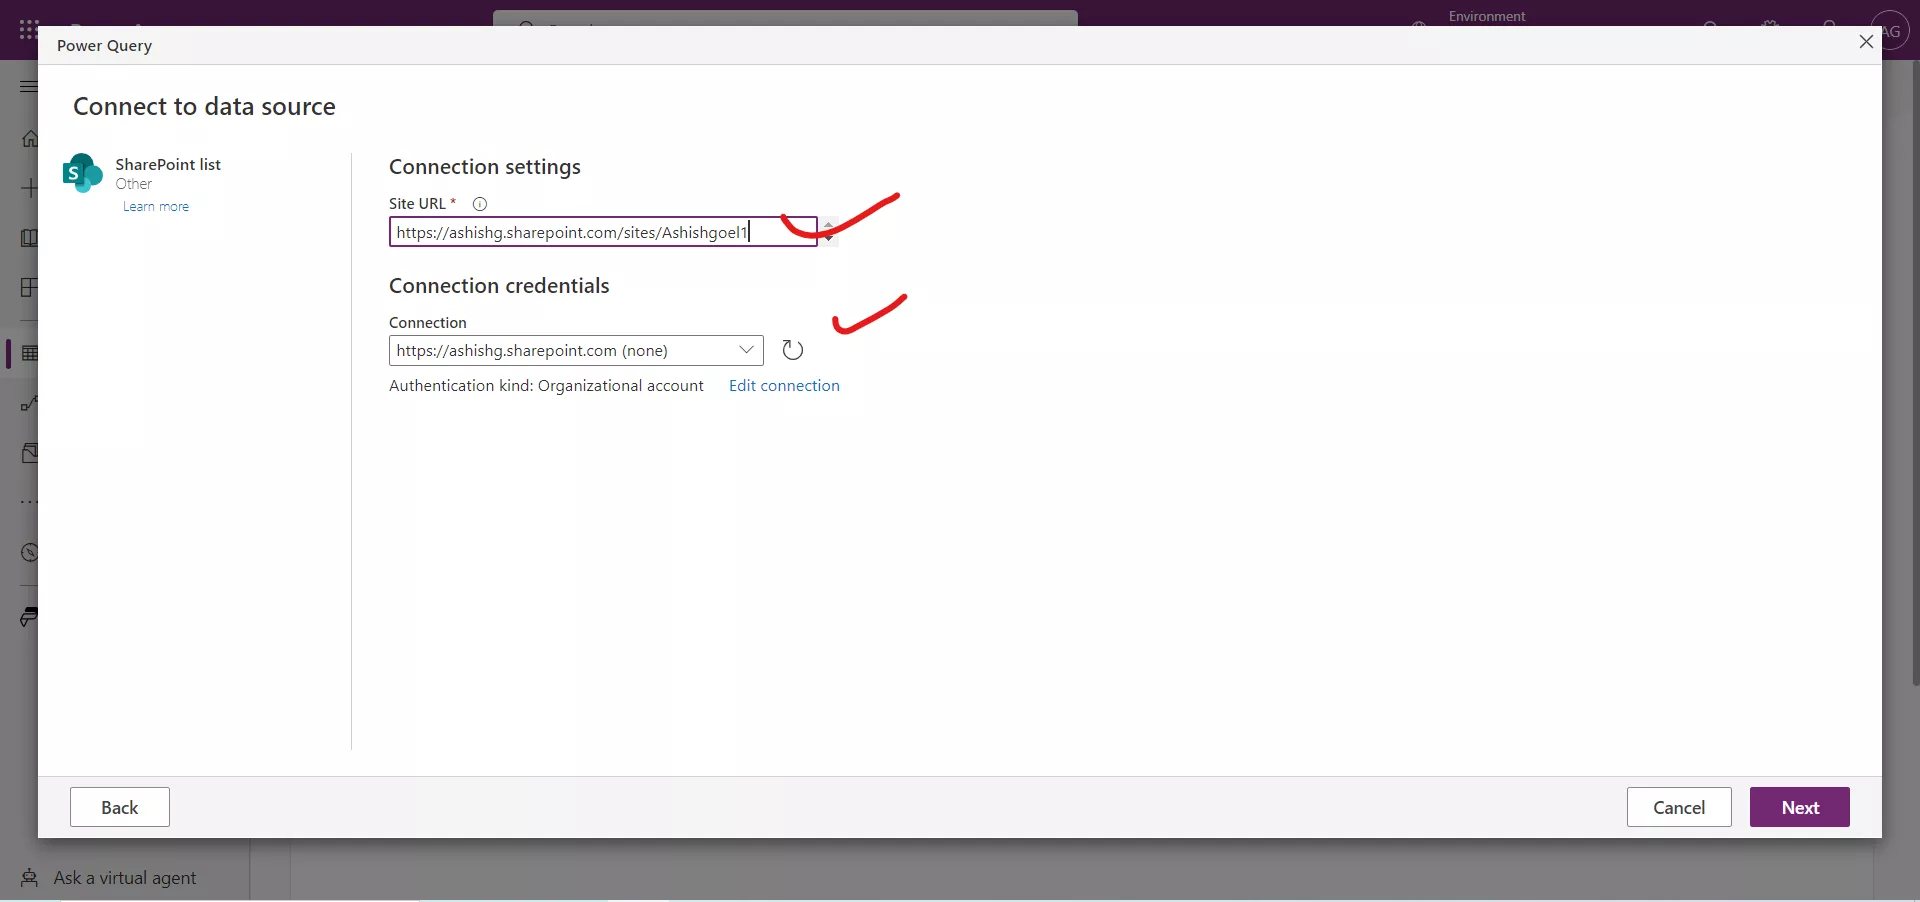
Step 5: On the Connect to data source page, we need to enter the SharePoint page URL, which we have copied previously in the Site URL entry field. (After entering the URL, it may be necessary to put in the connection credentials.)
Choose the Authentication kind organizational.
Step 6: Then we select Next at the bottom right of the window.
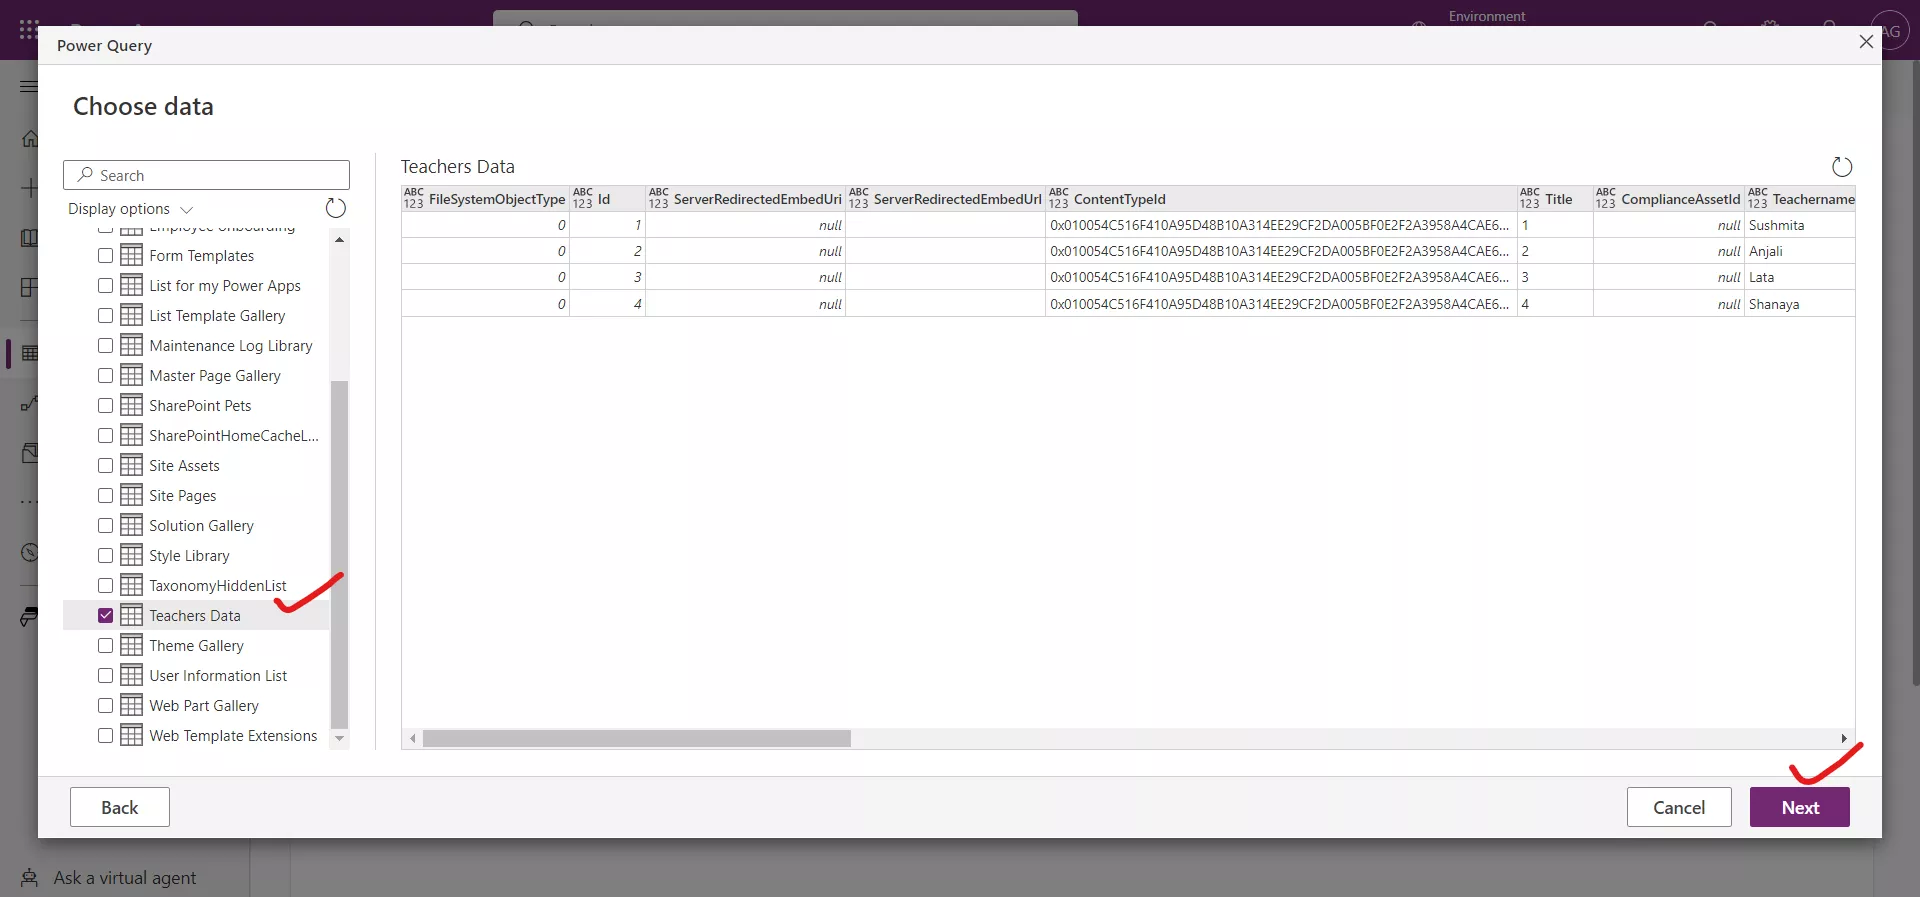
Step 7: On the Choose data window that appears, we can now select one or more lists or document libraries that we want to import. Selecting from the list on the left shows all available columns of data available in the data source. Selecting Next takes us to the Queries screen where we can shape the data before importing. Look for the list we just created called Teachers Data and select it.
Step 8: By using the power query editor window, we can remove any of the columns that we don't wish to import, by using the Remove columns button at the top of the window. It's possible to select multiple columns at once by selecting columns while holding the Shift or Ctrl key and then selecting Remove columns. If we make a mistake, the Applied steps on the right side of the window keeps track of the changes, and we can cancel that step to undo the last action.
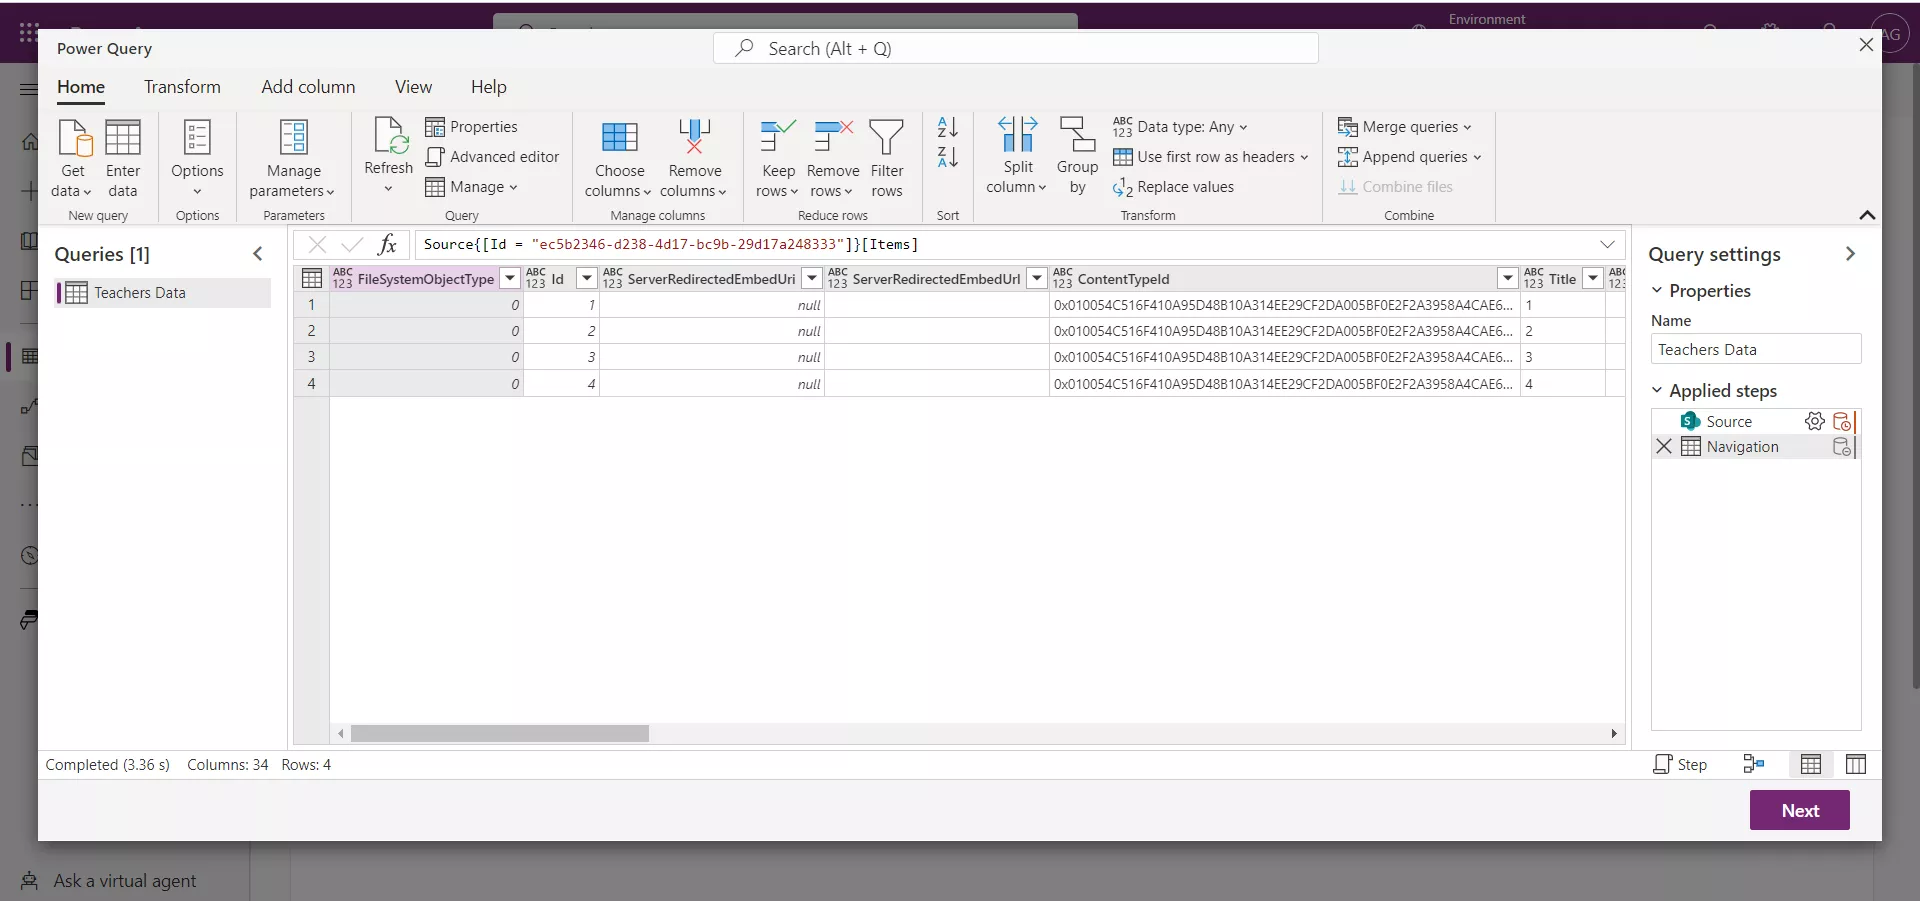
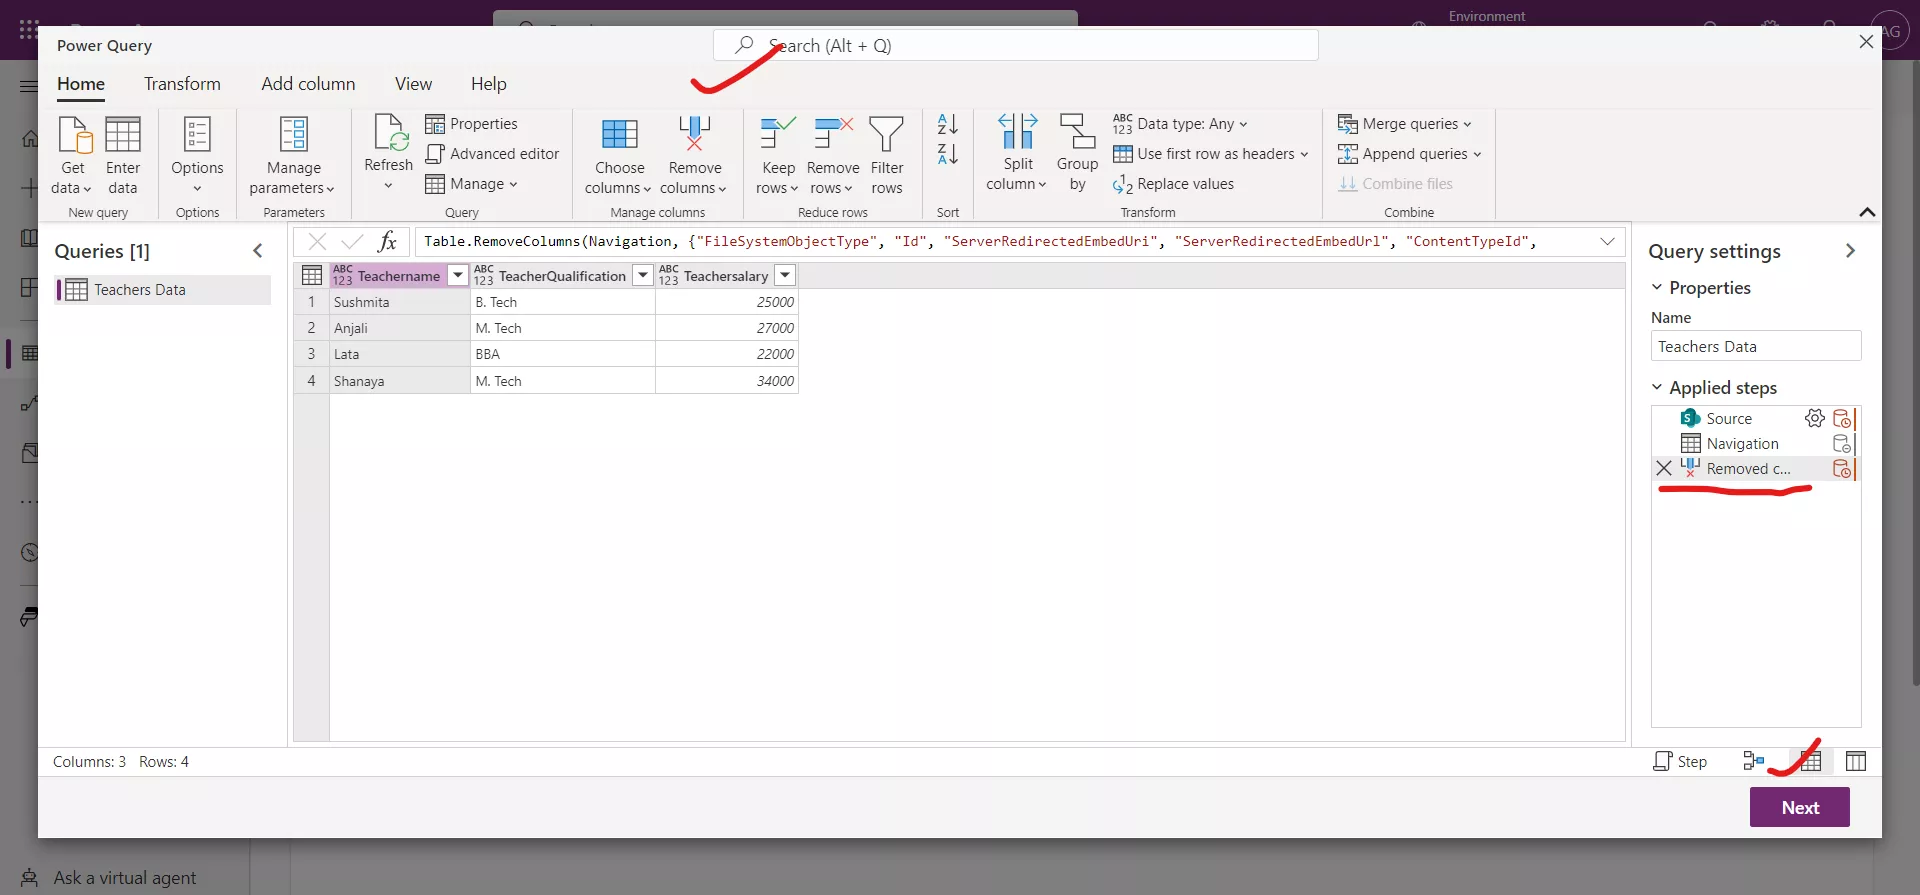
Step 9: With the remaining columns, select the Next button to move to the next step.
Step 10: At the Map tables window now appearing, we want to select Load to existing table.
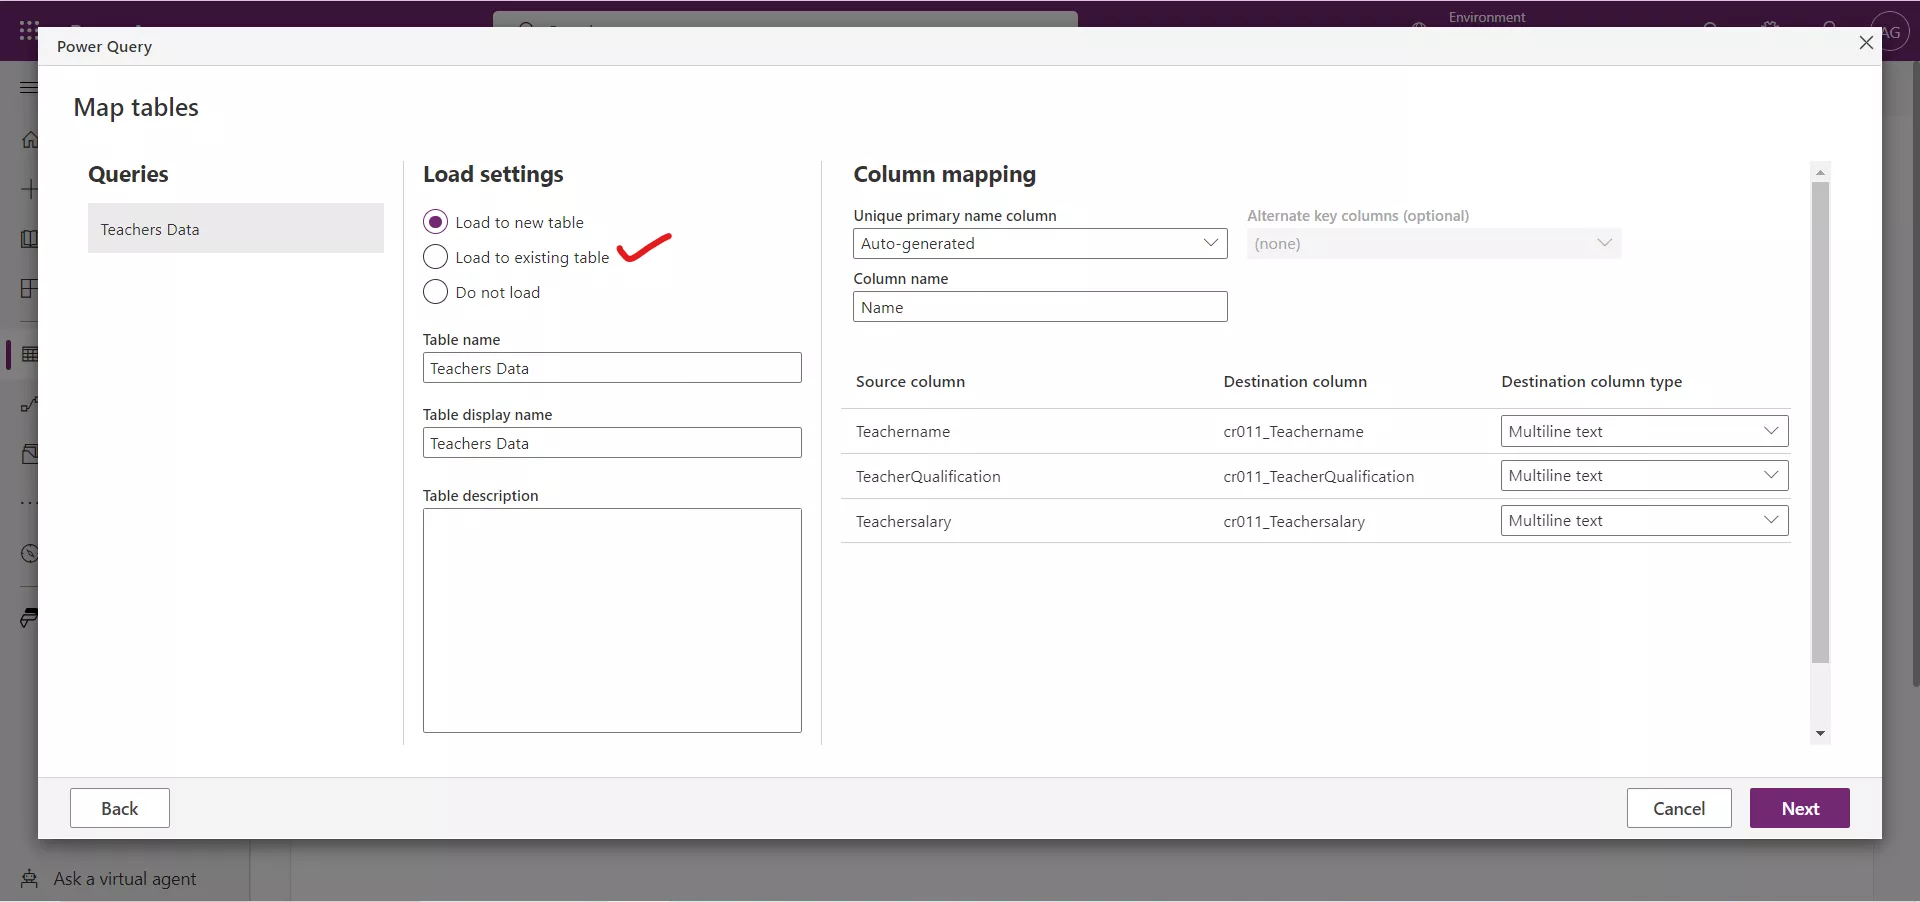
Step 11: Select the Destination table from the dropdown. The table name has prefix in front of it with an underscore. The prefix depends on the environment.
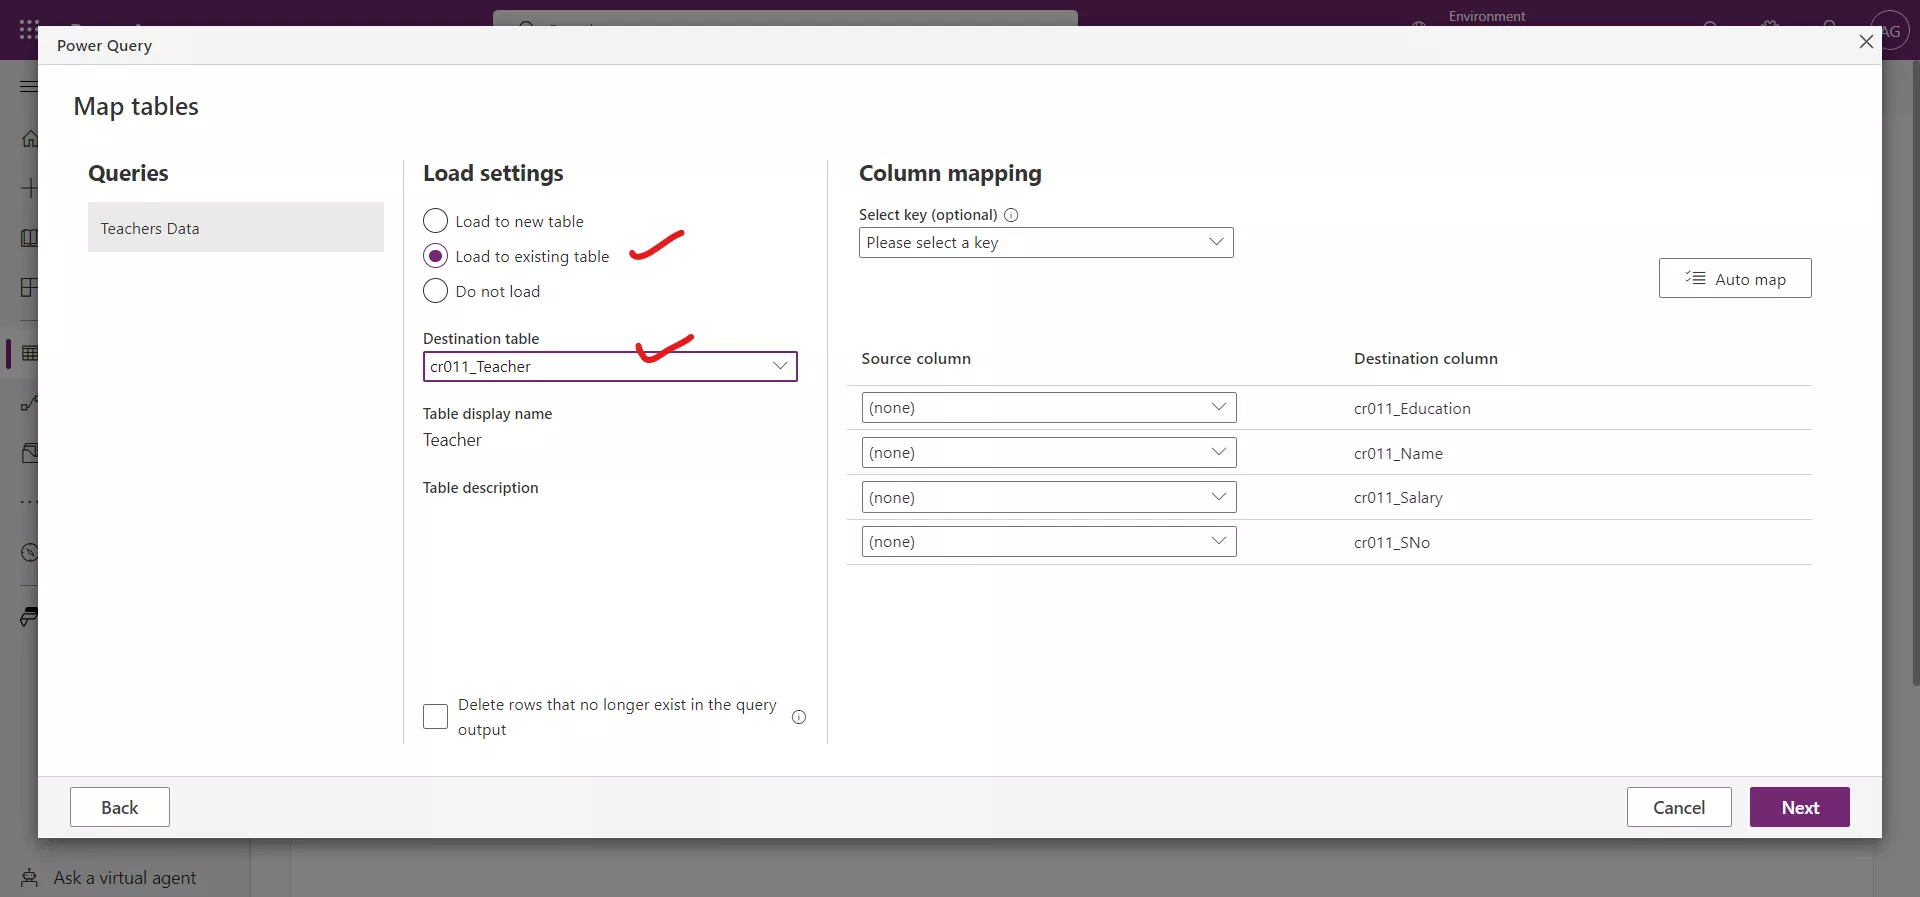
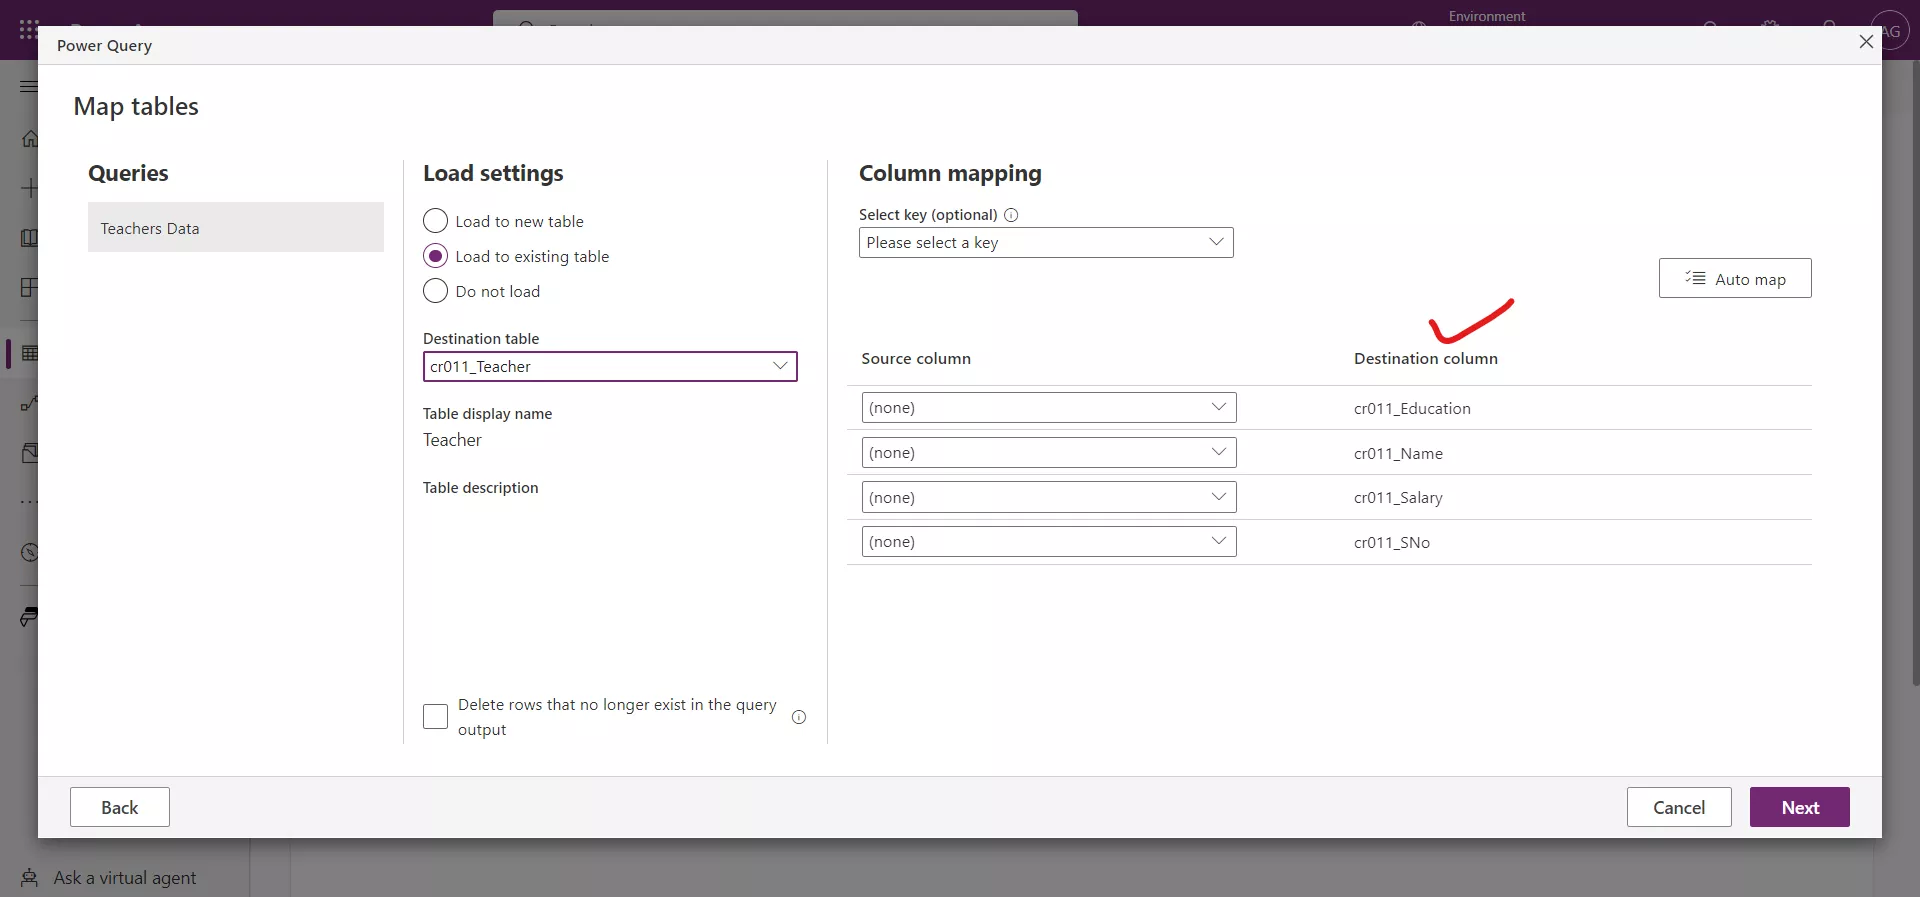
Step 12: Notice how the Column mapping has the destination columns from our Teacher table.
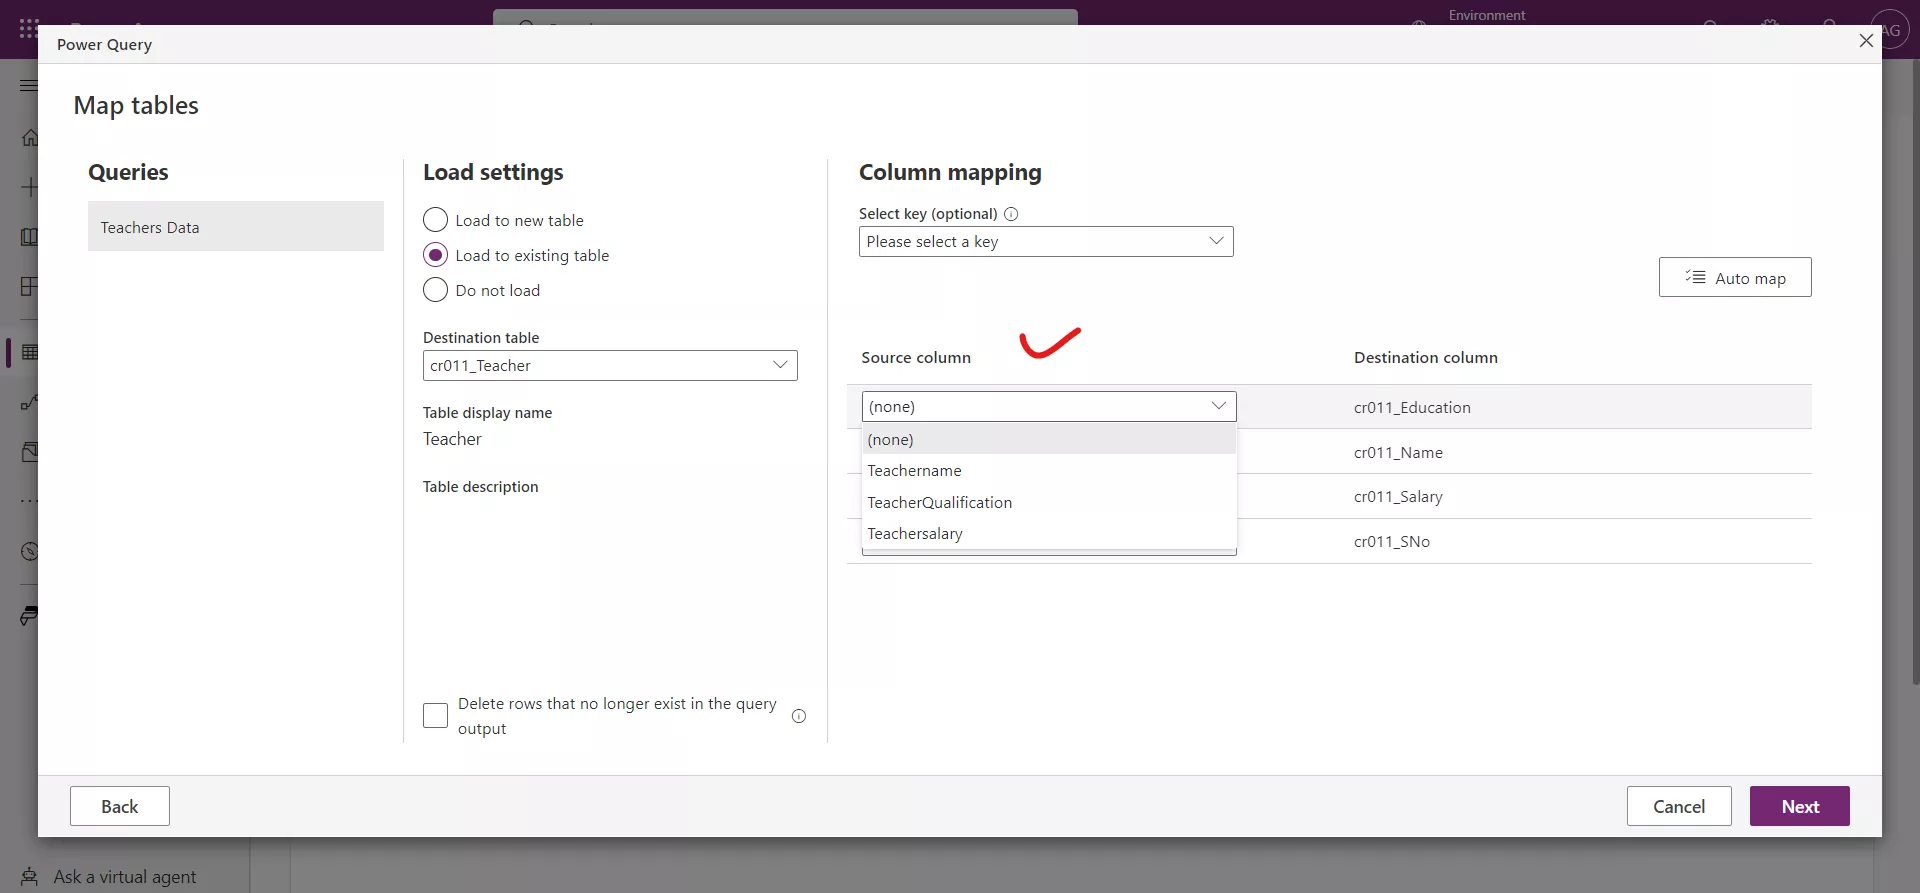
Step 13: Next, we select the source columns that we want to import into our destination columns. That's why it's helpful to have similar names to make mapping easier. Each dropdown has a list of all available columns, so it's fairly easy to match if our names are close. Once all of our source columns are matched with the destination columns, select Next in the bottom right of the window.
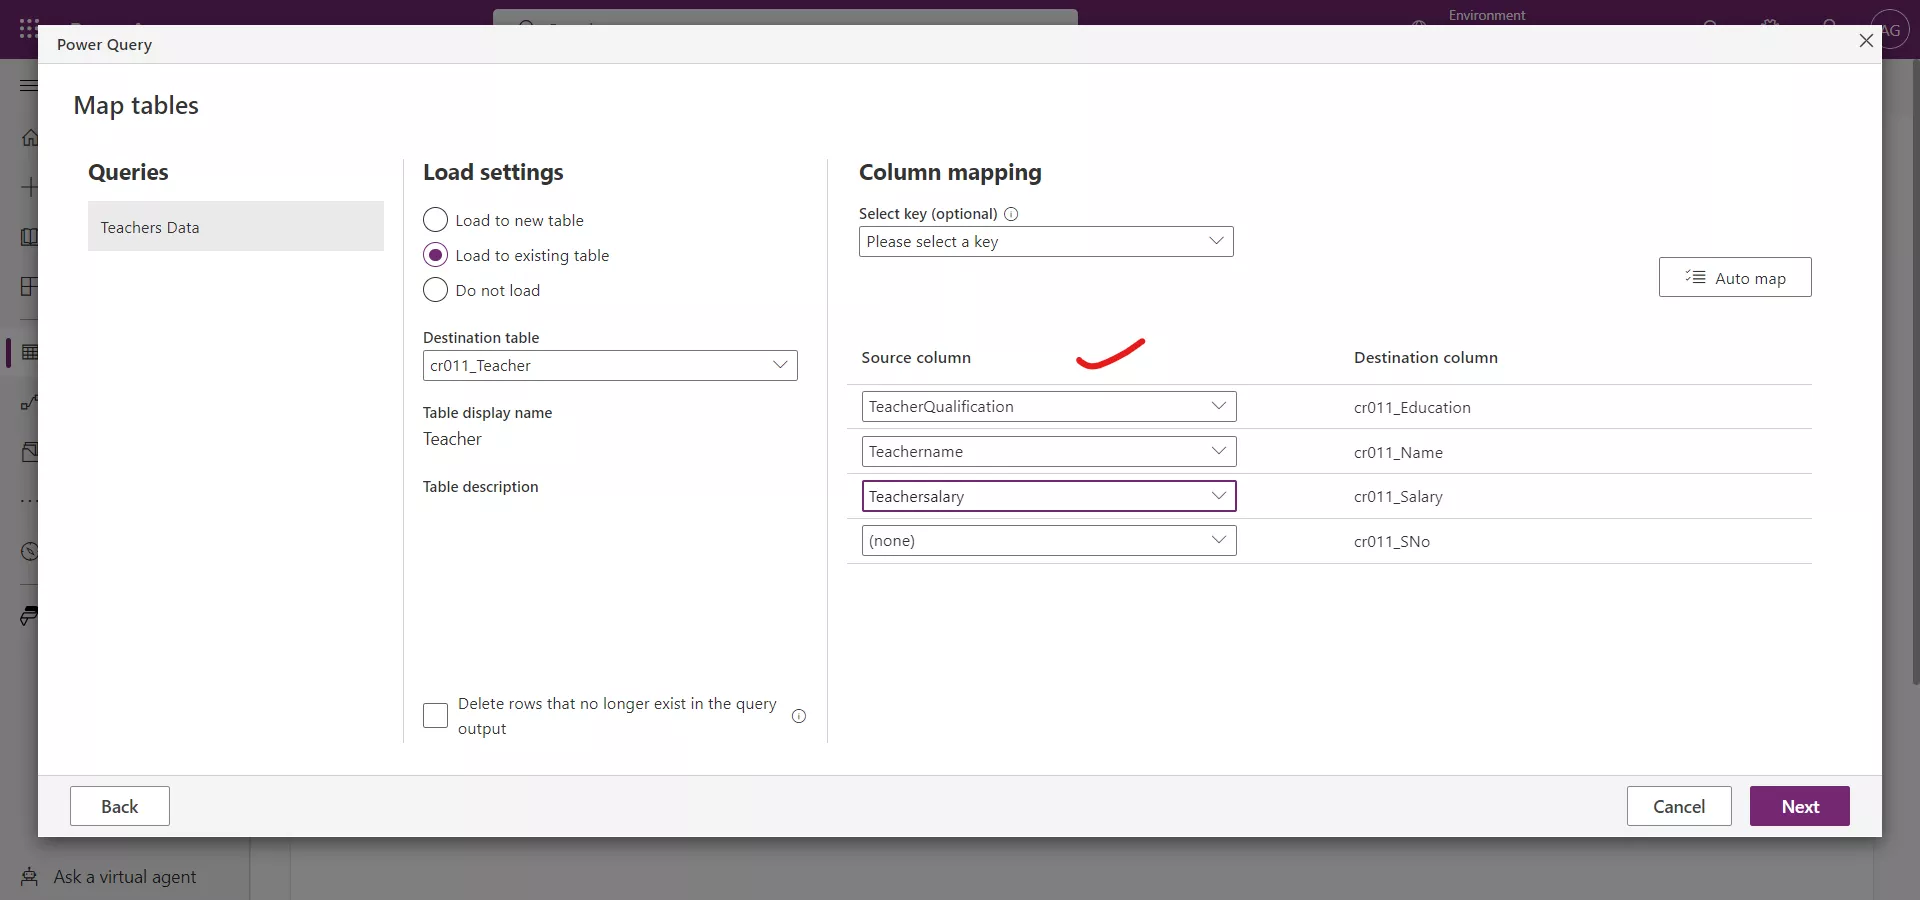
Note: We do not map any source column to the autonumber column cr011_Sno.
Step 14: The Refresh settings provides us the ability to set up a refresh schedule if we want our data to regularly update. In this case, we'll leave it set to Refresh manually and select Publish at the bottom right of the window.
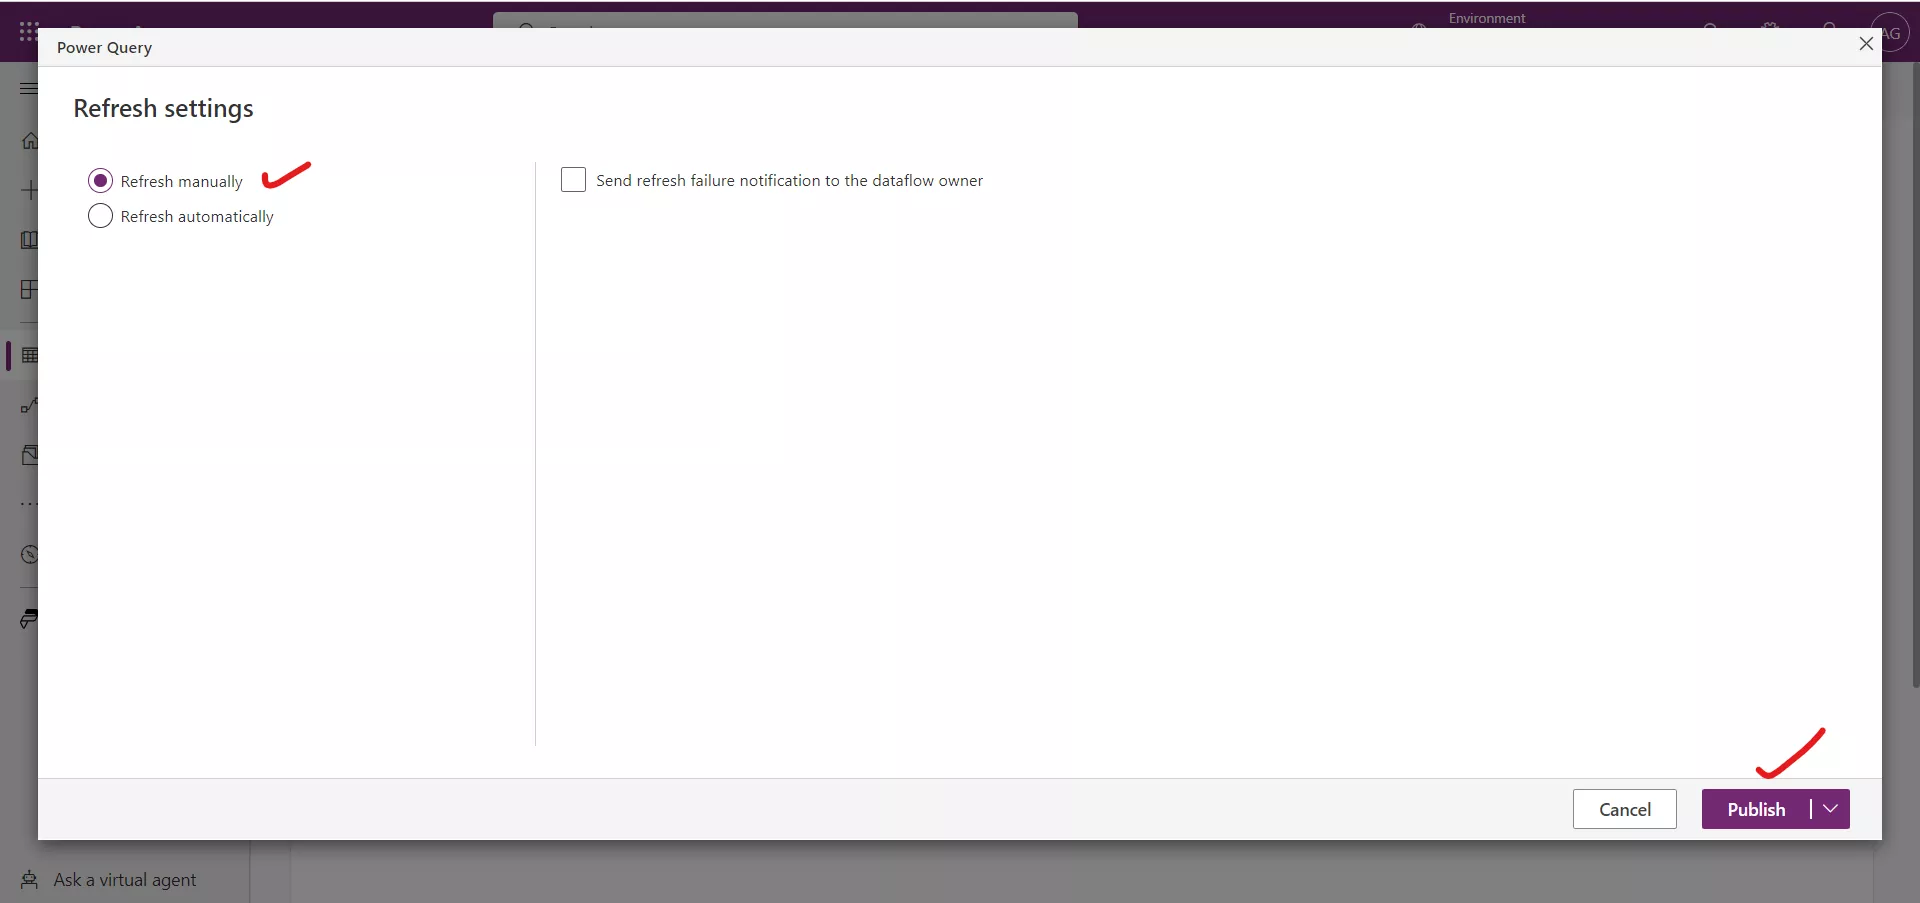
If we receive any warnings, pay attention to the messages, and go back to your query edit screen to shape the data.
Step 15: If we published and received no warnings, and the table screen refreshes, we should be able to see that the data was imported into the table.
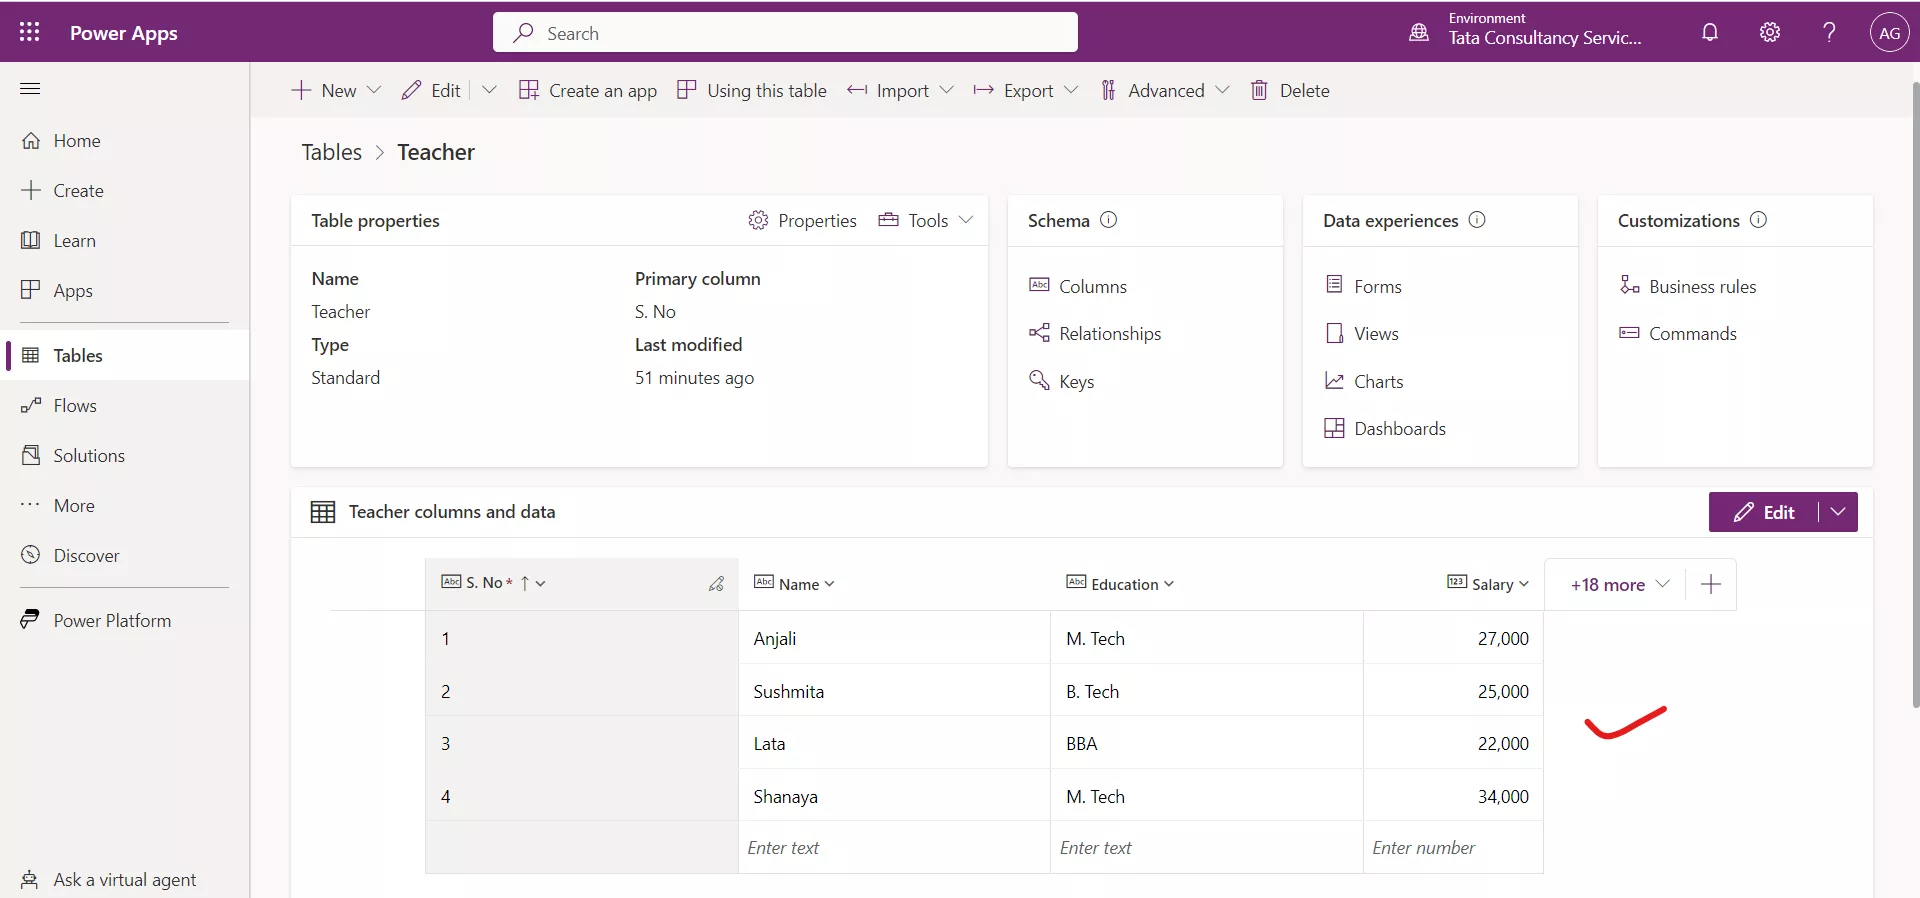
Though this example used SharePoint as a source for importing data, the steps are similar with any data source we wish to import into our list.
2. Import data from an Excel file
We can also import data from the excel file (.xlsx) that is locally saved.
Step 1: Select the Import button at the top of the screen and select Import data from Excel.
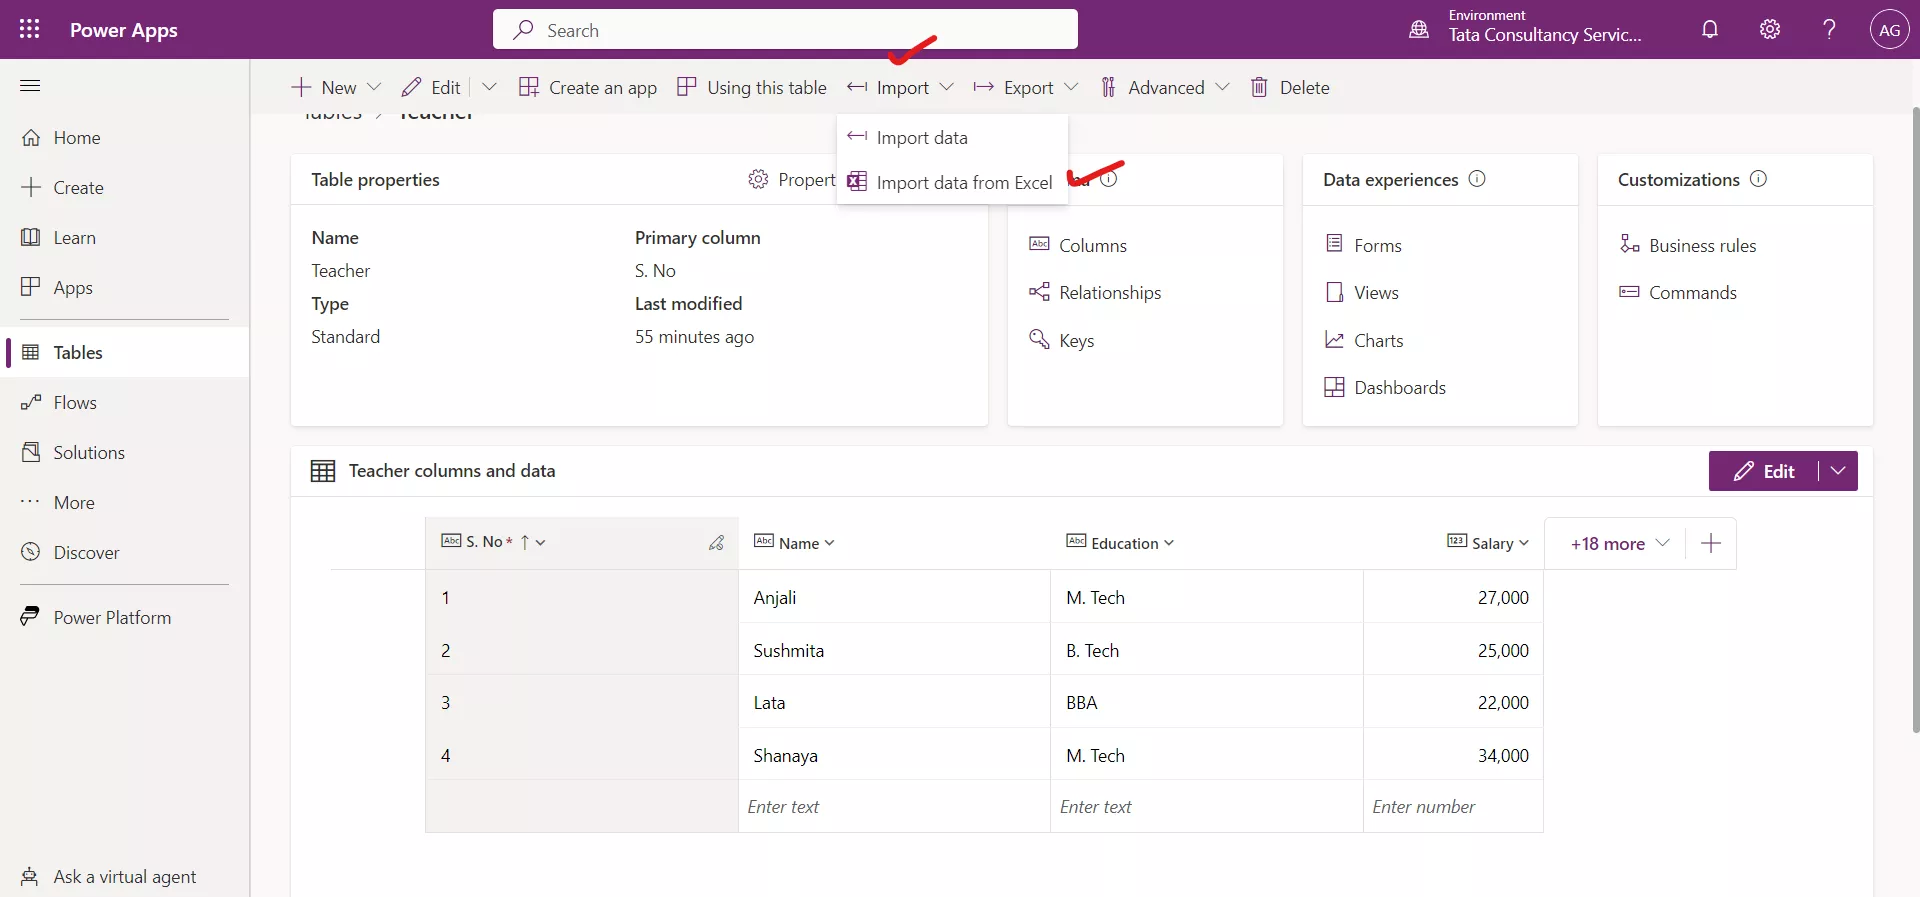
Step 2: In the Import data pane that pops up, select Upload under the File entry field, locate the Excel workbook, and select Open.
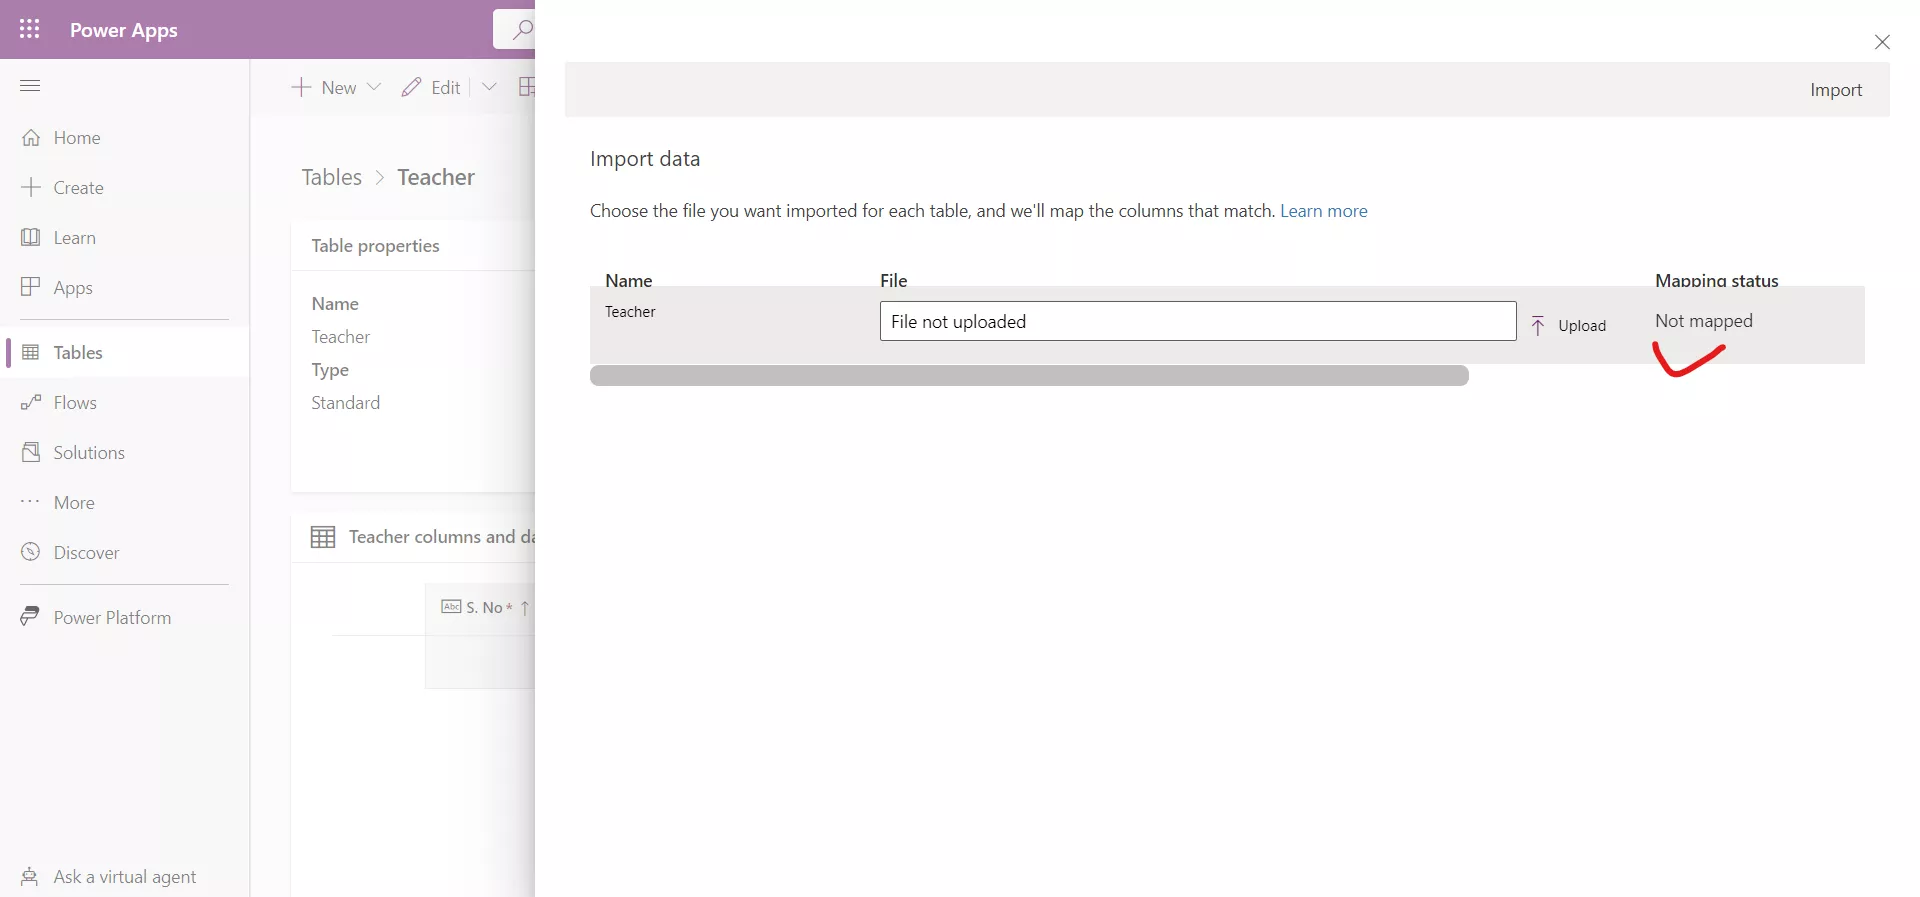
Step 3: Wait a few moments as the file uploads. Next, we will see an error notification under the column Mapping Status saying "Mapping errors exist".
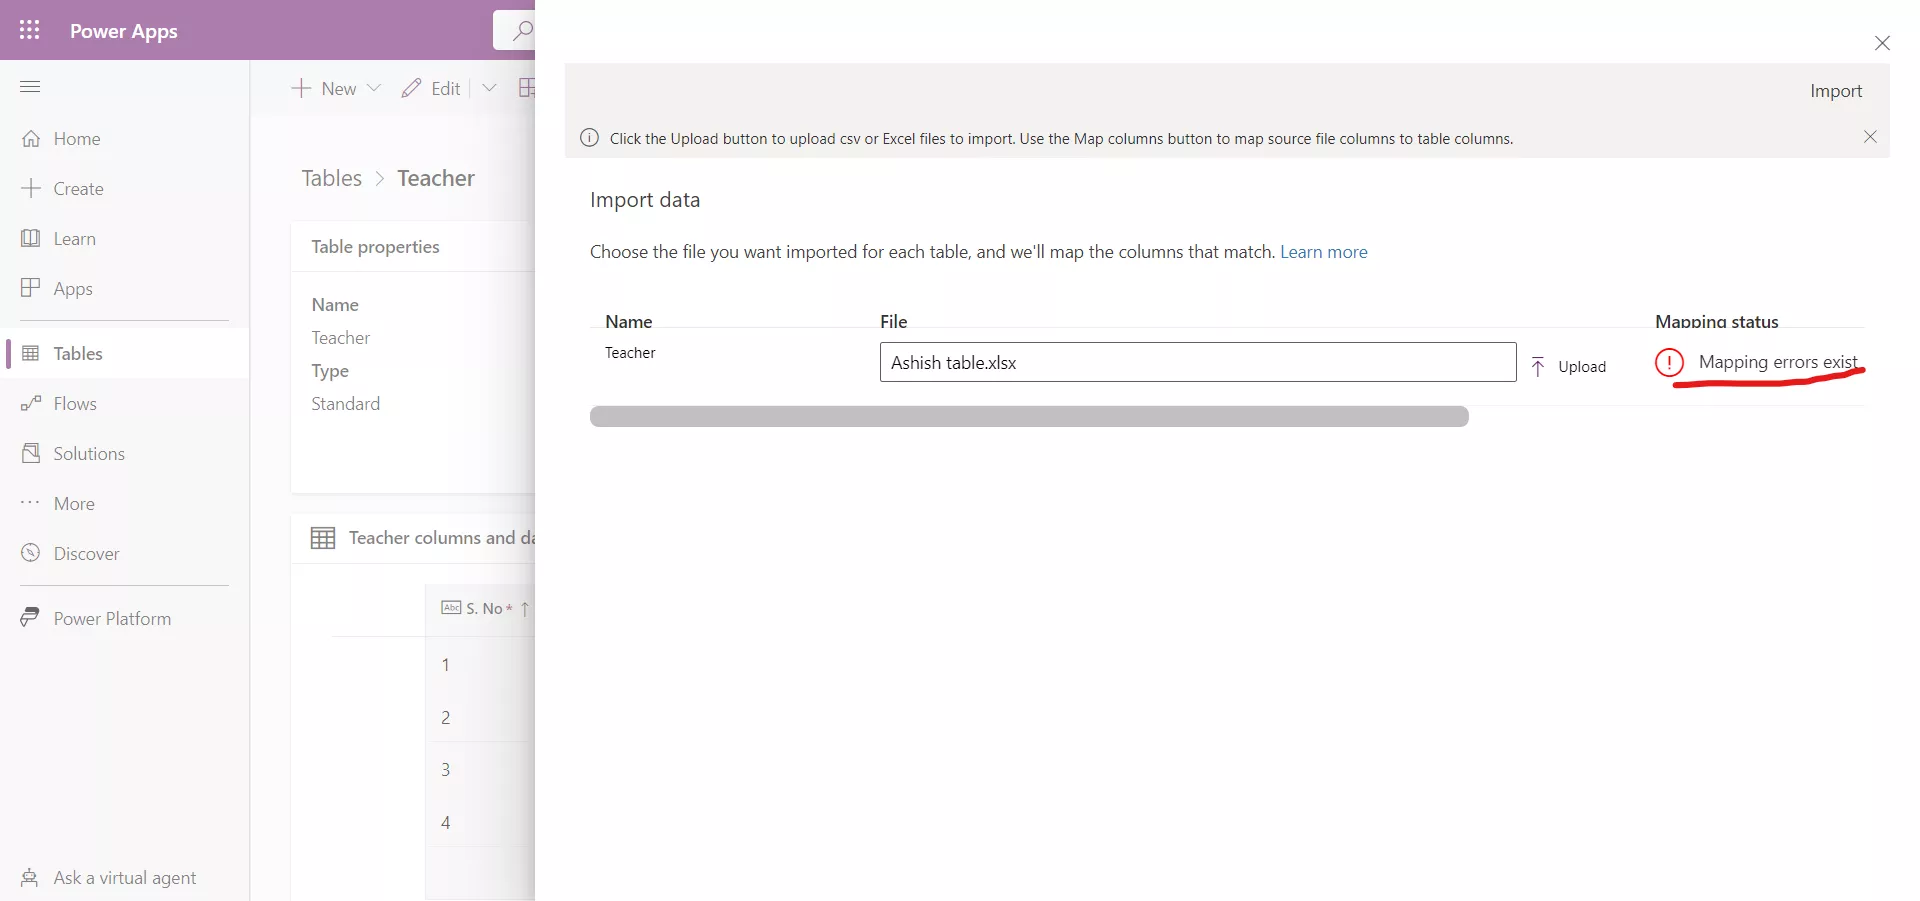
Step 4: Scroll to the right and Select Map columns.
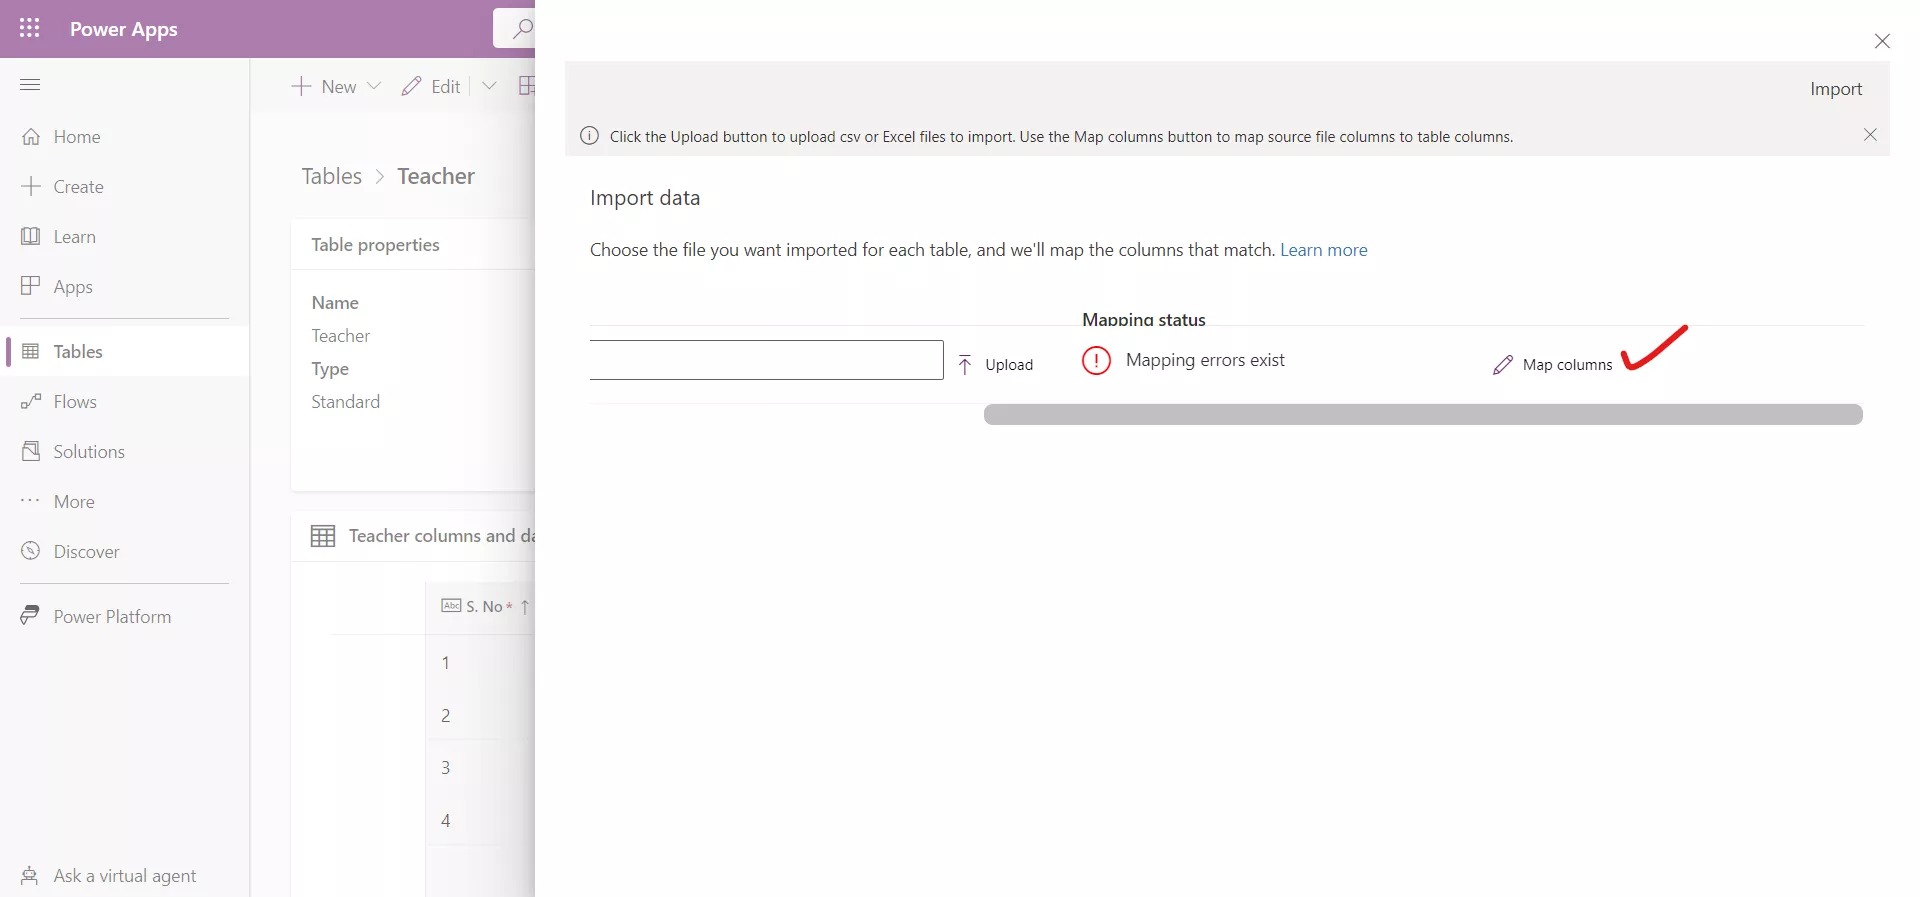
The following window appears:
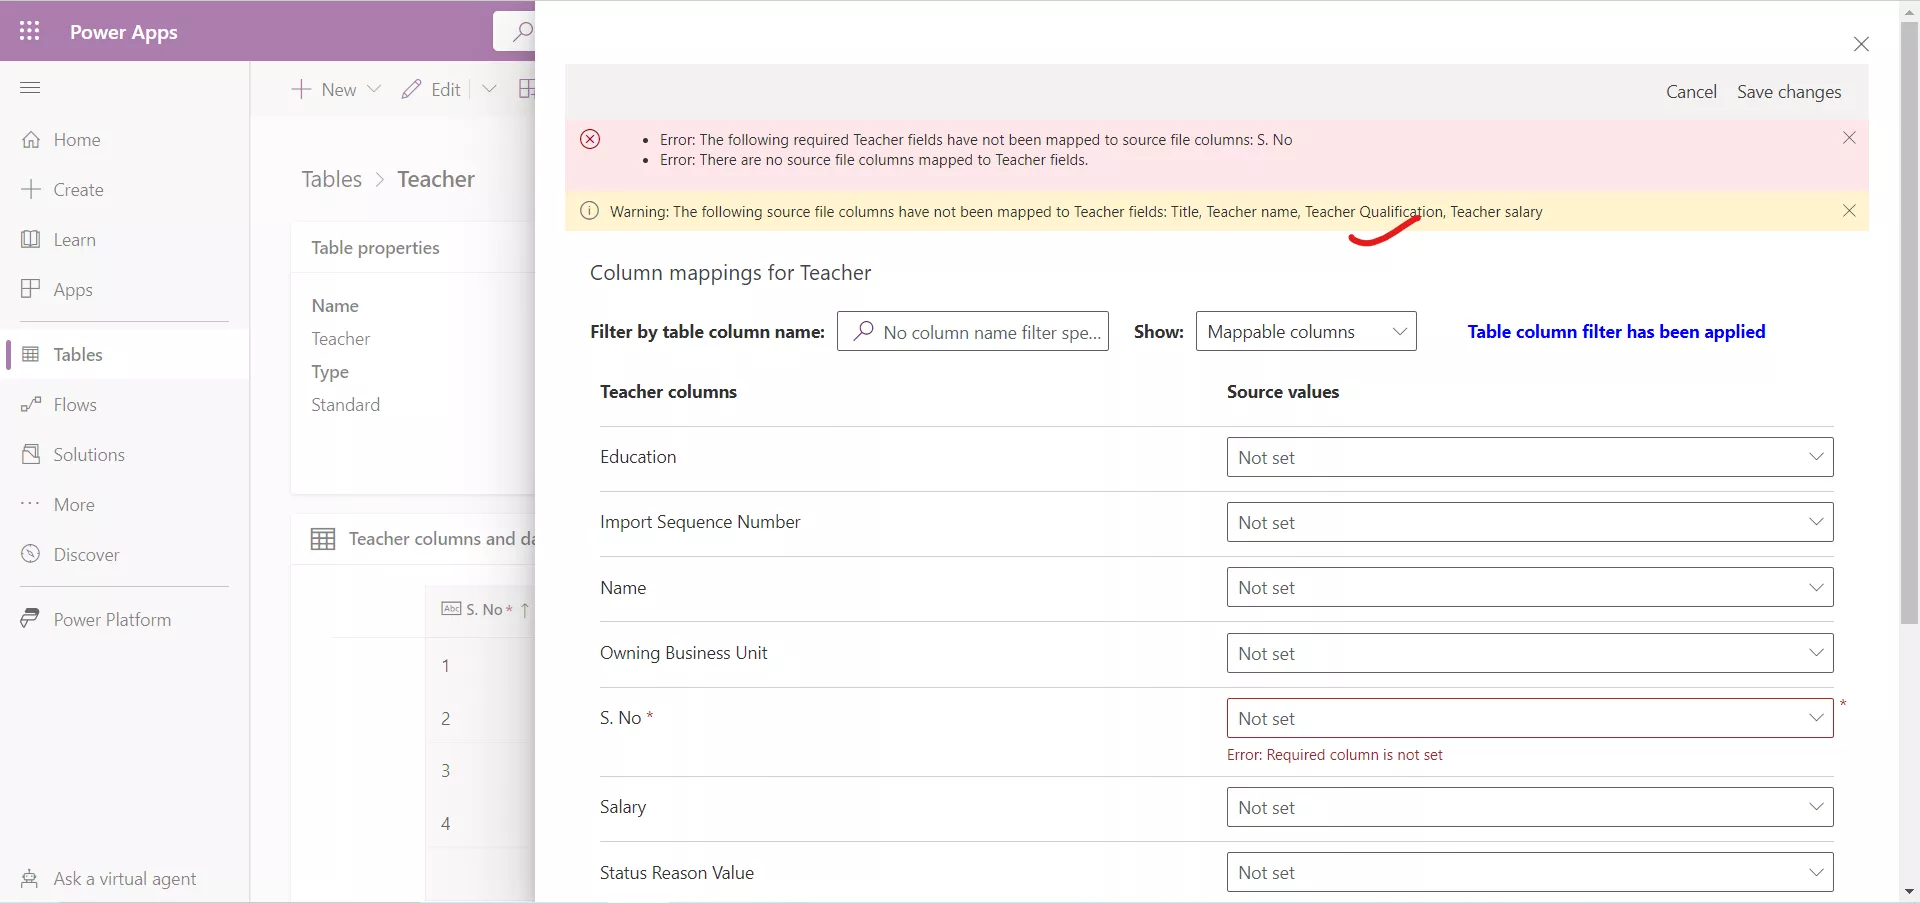
Step 5: Map the following Teacher columns to the associated Source values:
- Education: Teacher Qualification
- S. No: Title
- Salary: Teacher salary
- Name: Teacher name
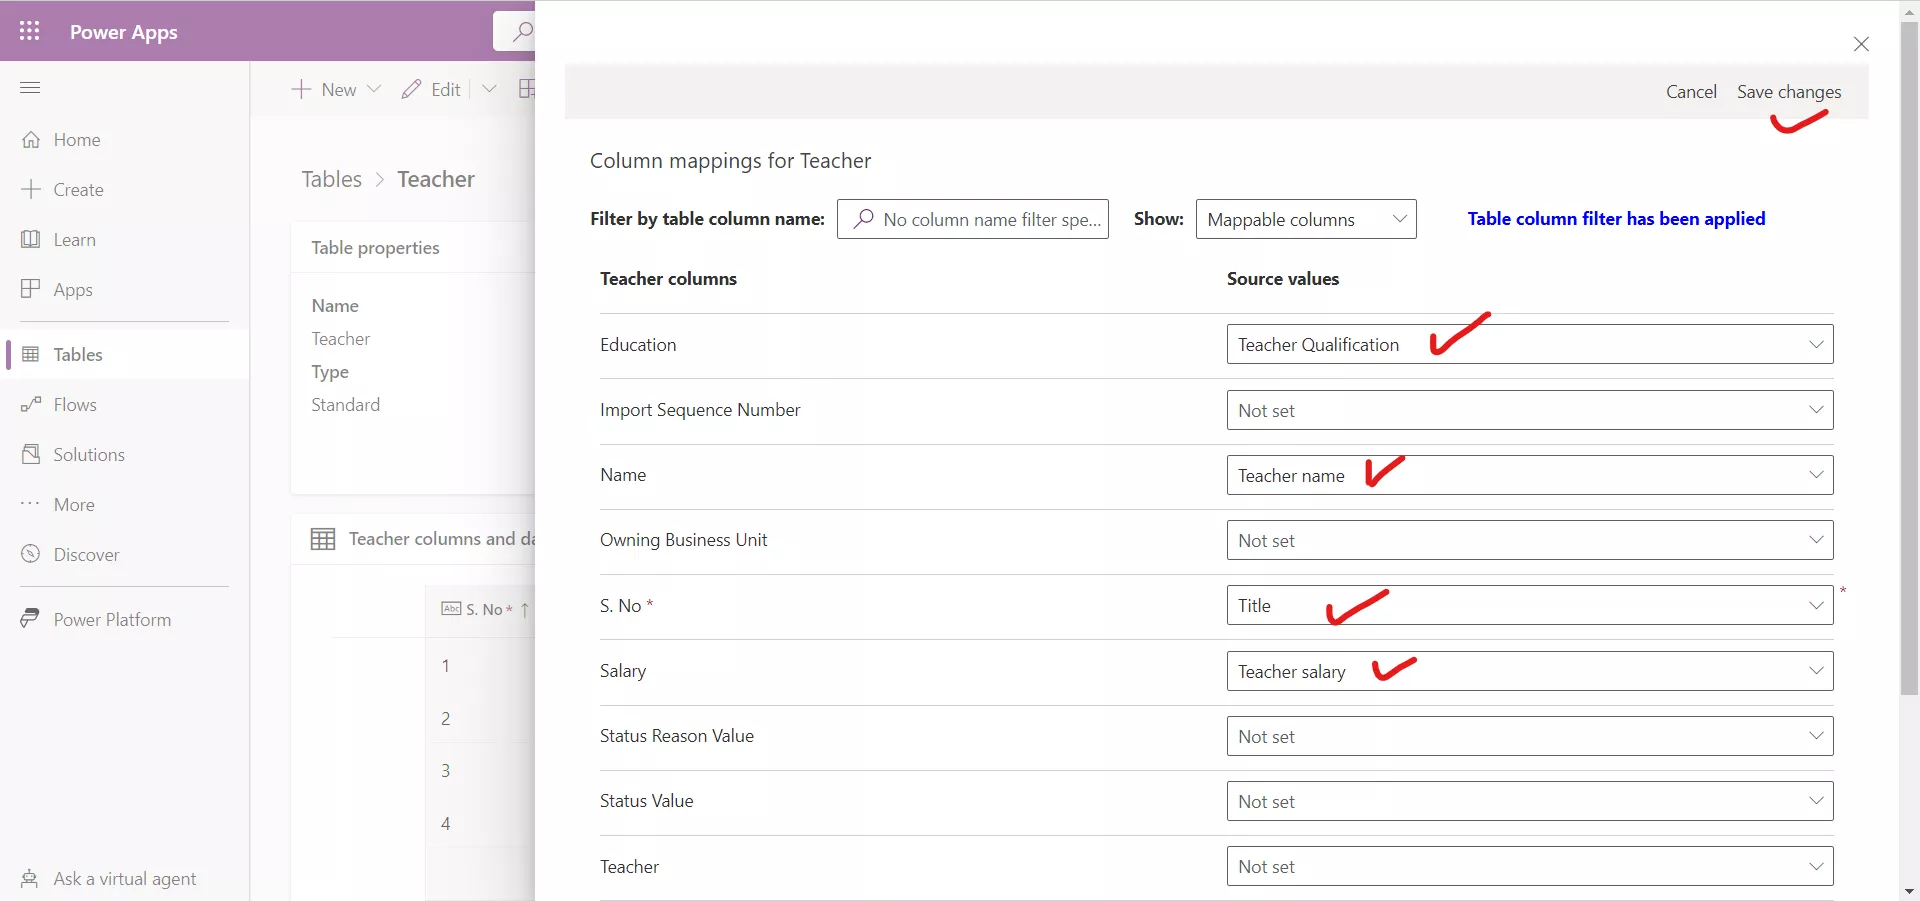
Step 6: Select Save Changes at the top right of the screen. If successful, you'll see a success notification under Mapping status saying "Mapping was successful".
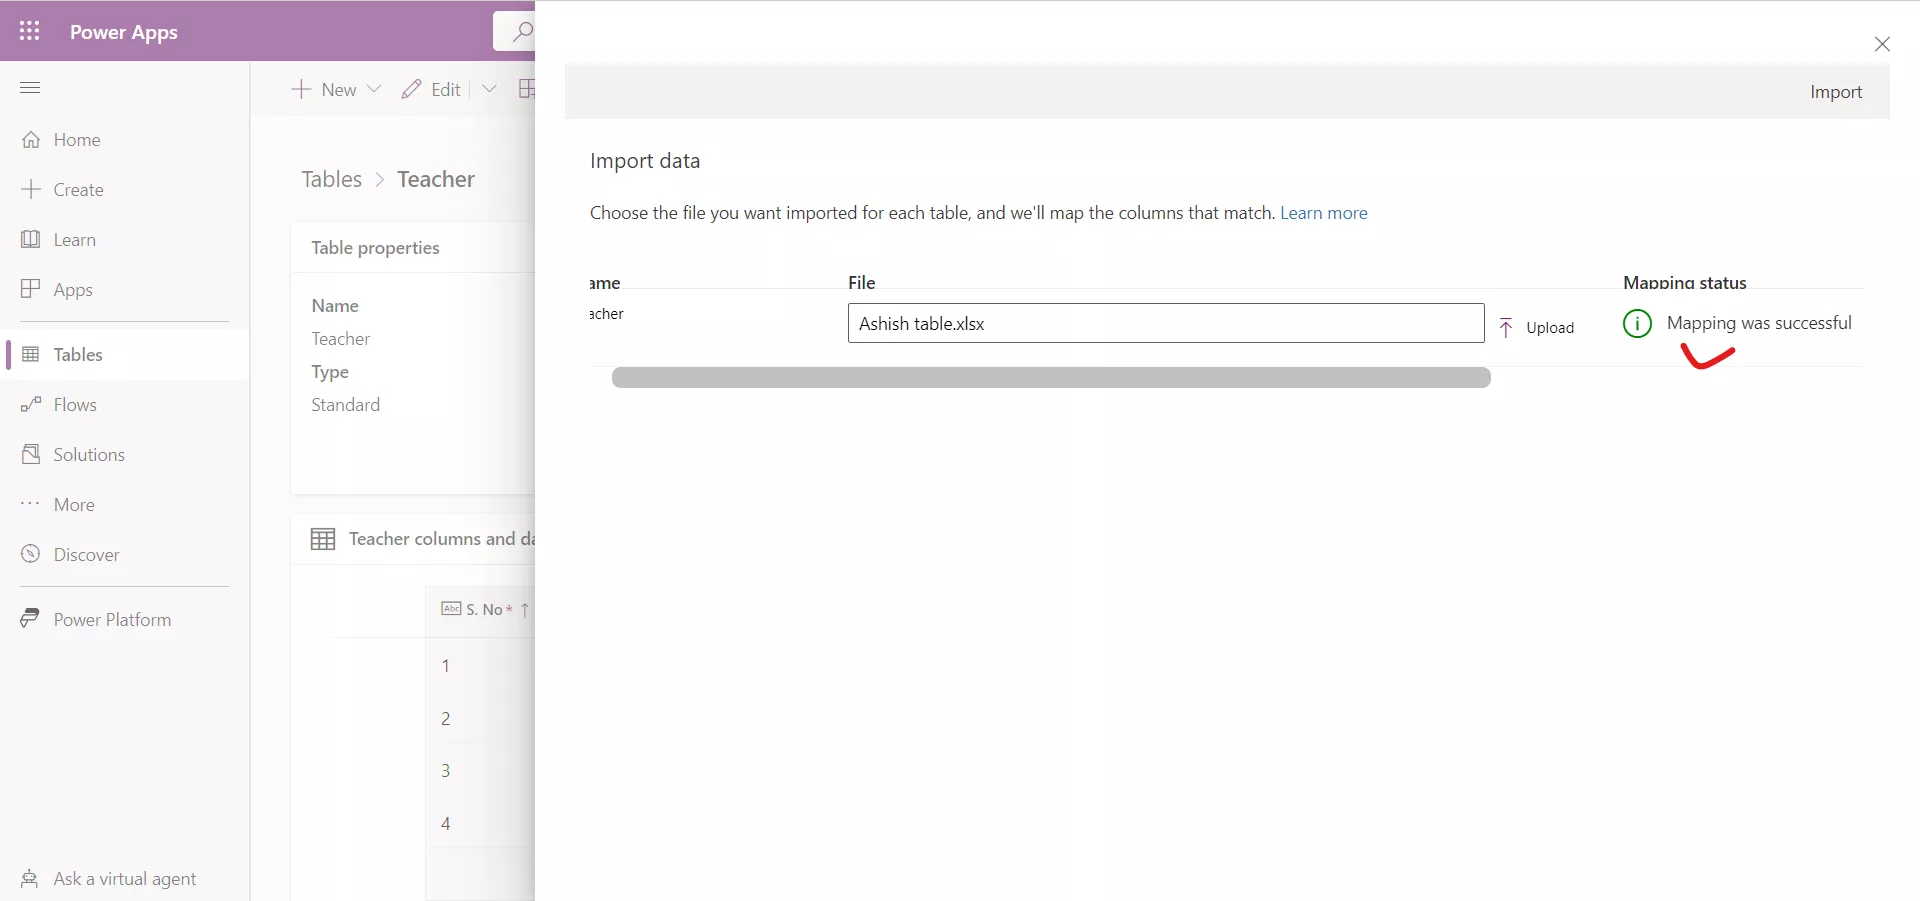
Step 7: Select Import at the top right of the screen. We have to wait while our data is being imported. If successful, we will see a notification saying "Import completed successfully." Close the window by selecting x at the top right of the window.
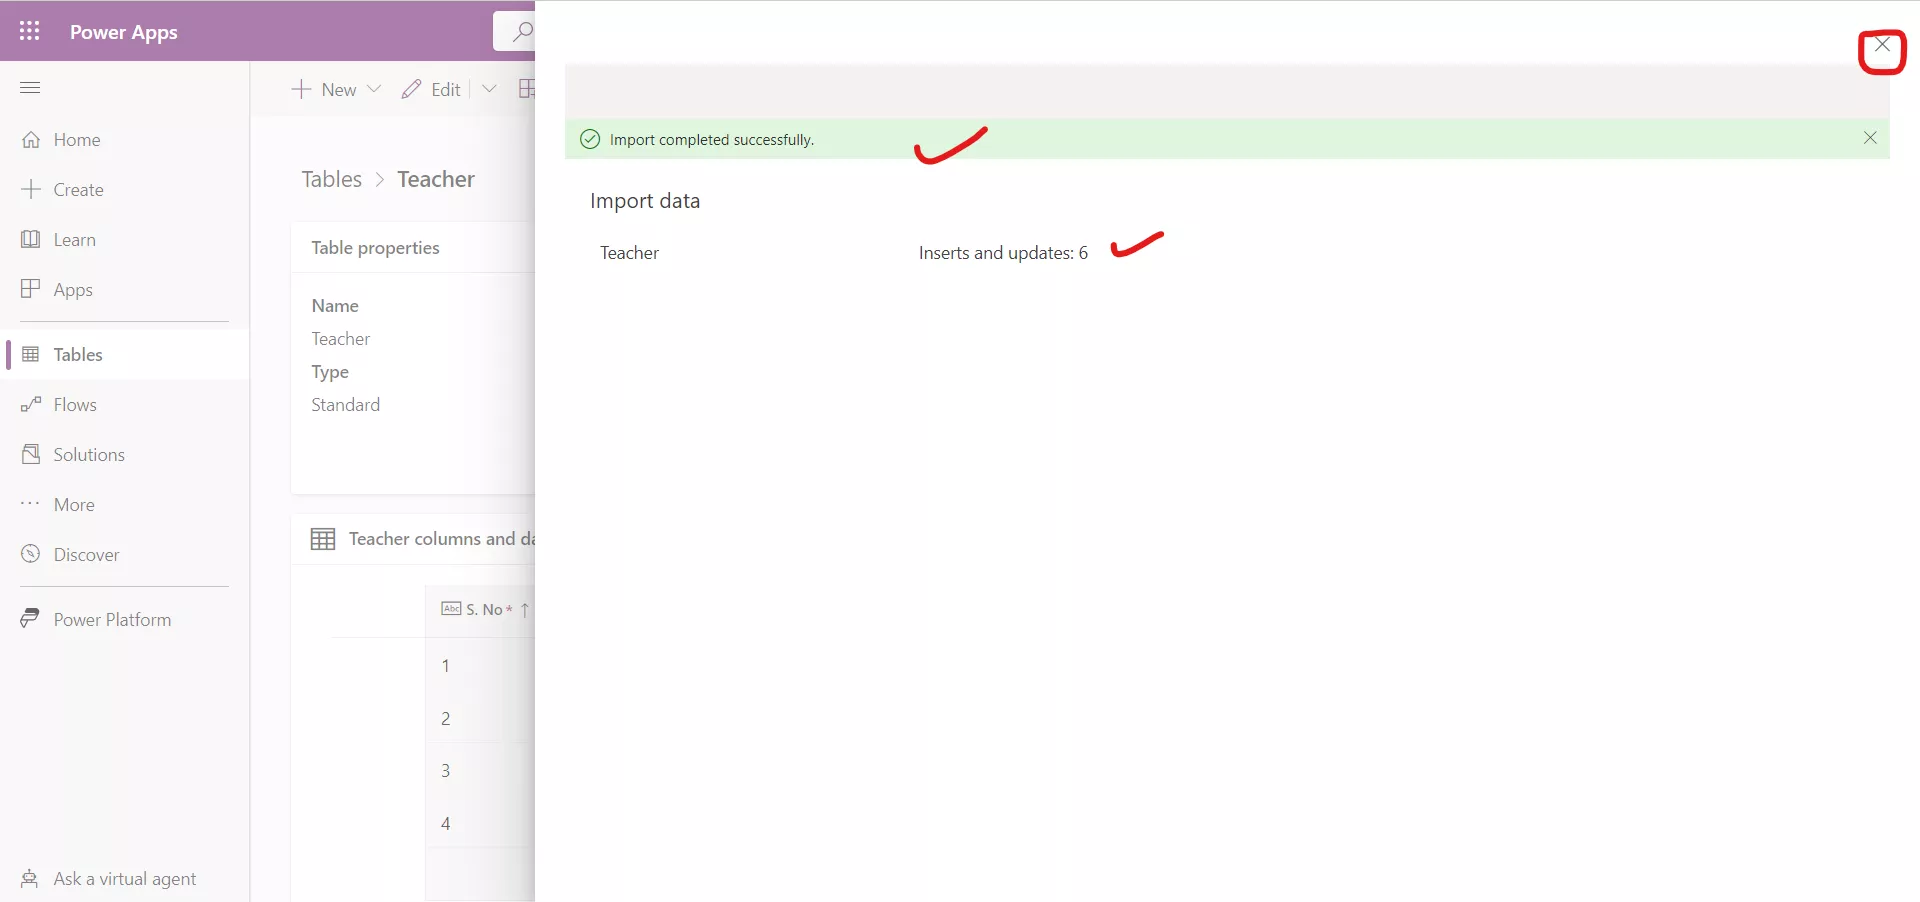
Step 8: To see the imported data refresh the browser screen, if it is not seen.
