Trigger the flow from within the canvas app
We can trigger a power automate from the canvas power apps itself. We can also get the response from the power automate to the powerapps.
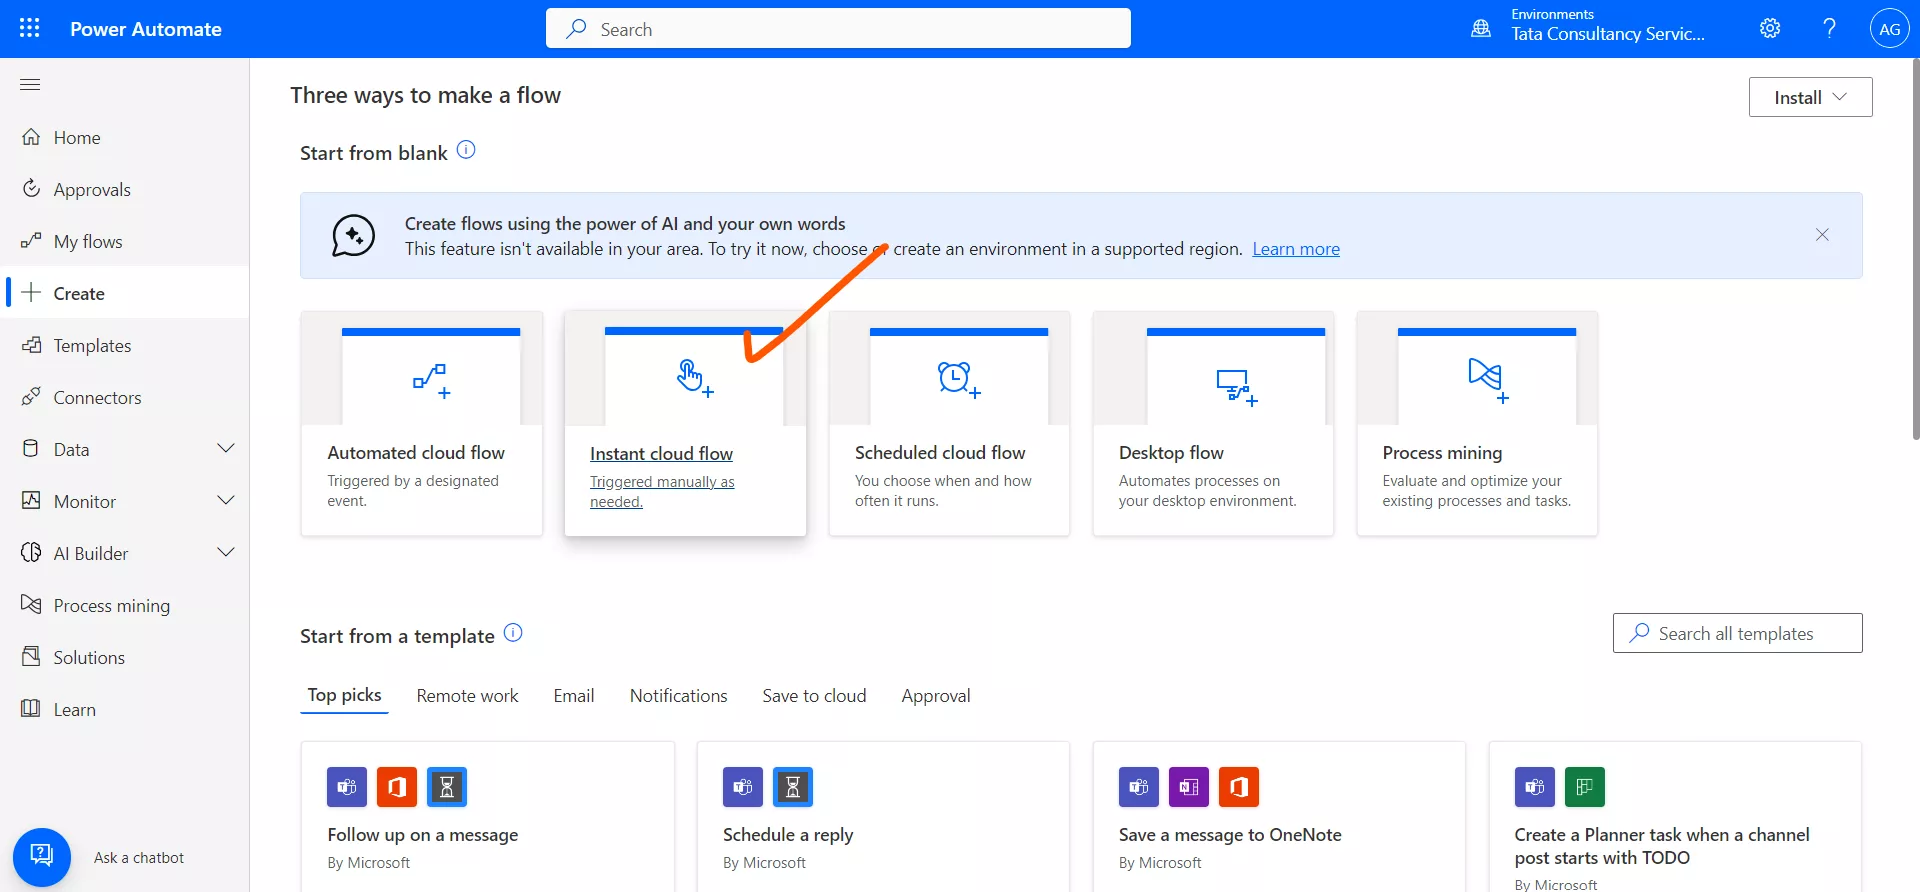
Step 1: Create an Instant cloud flow that has the trigger as PowerApps button.
Step 2: Give the flow a name and Choose PowerApps in how to trigger this flow.
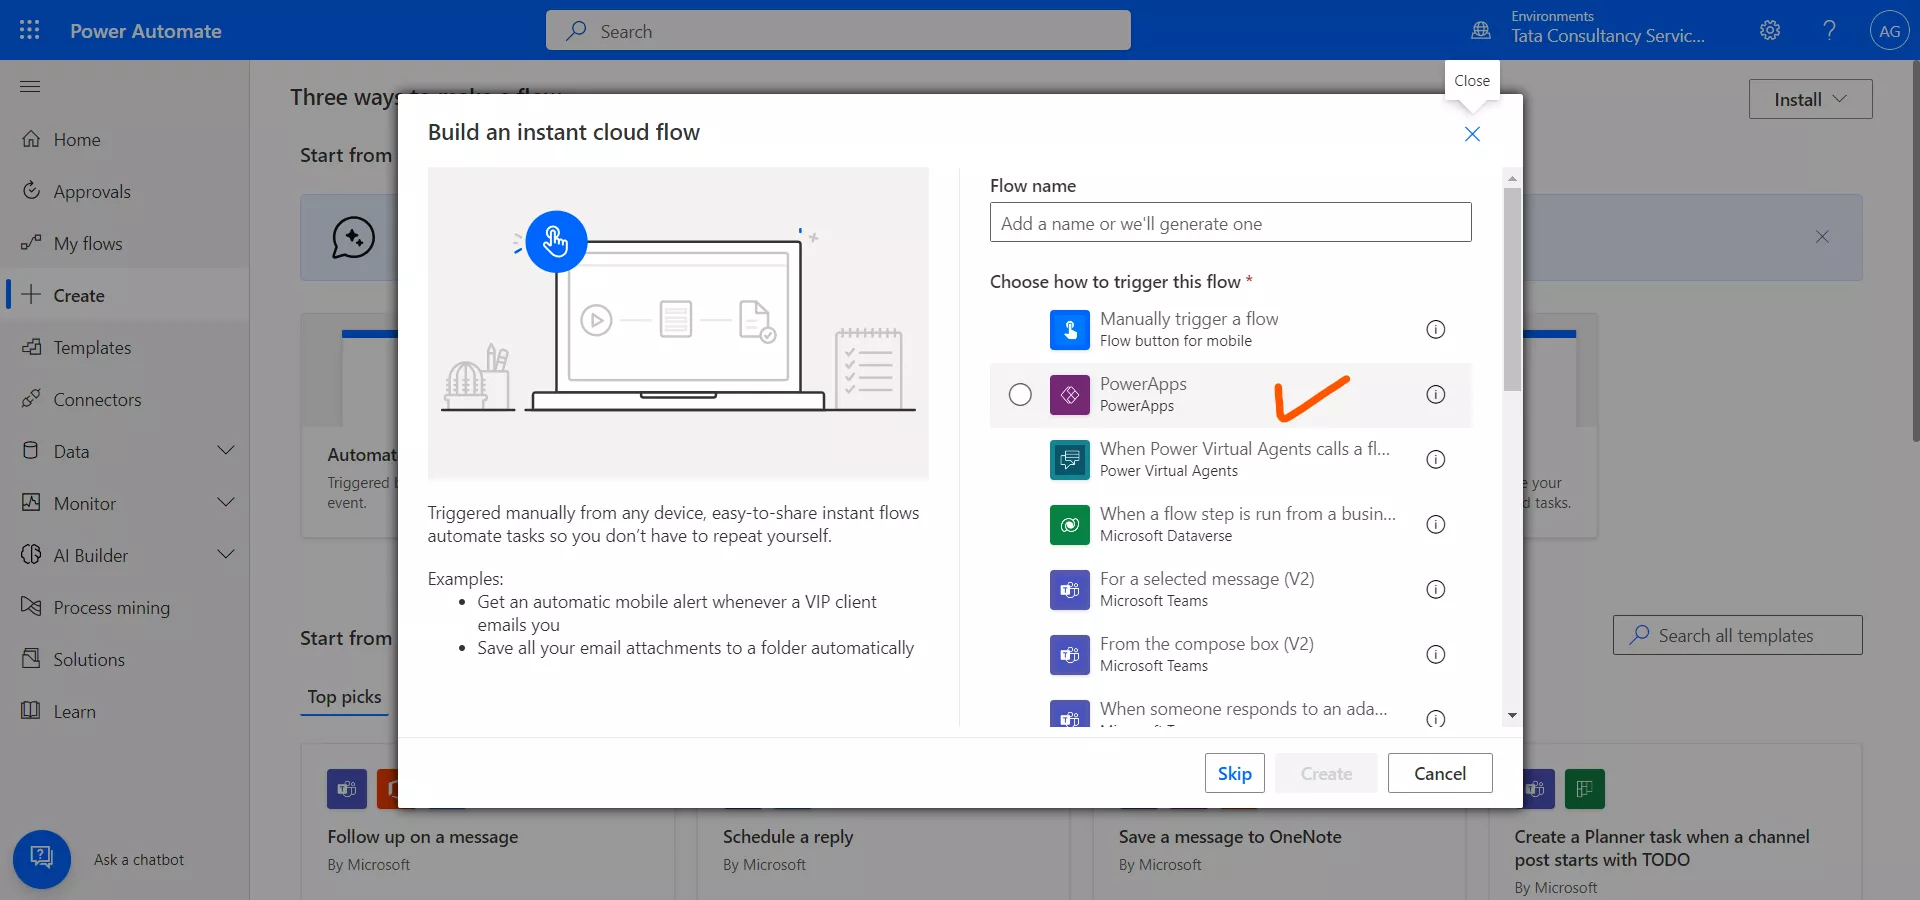
The following window appears.
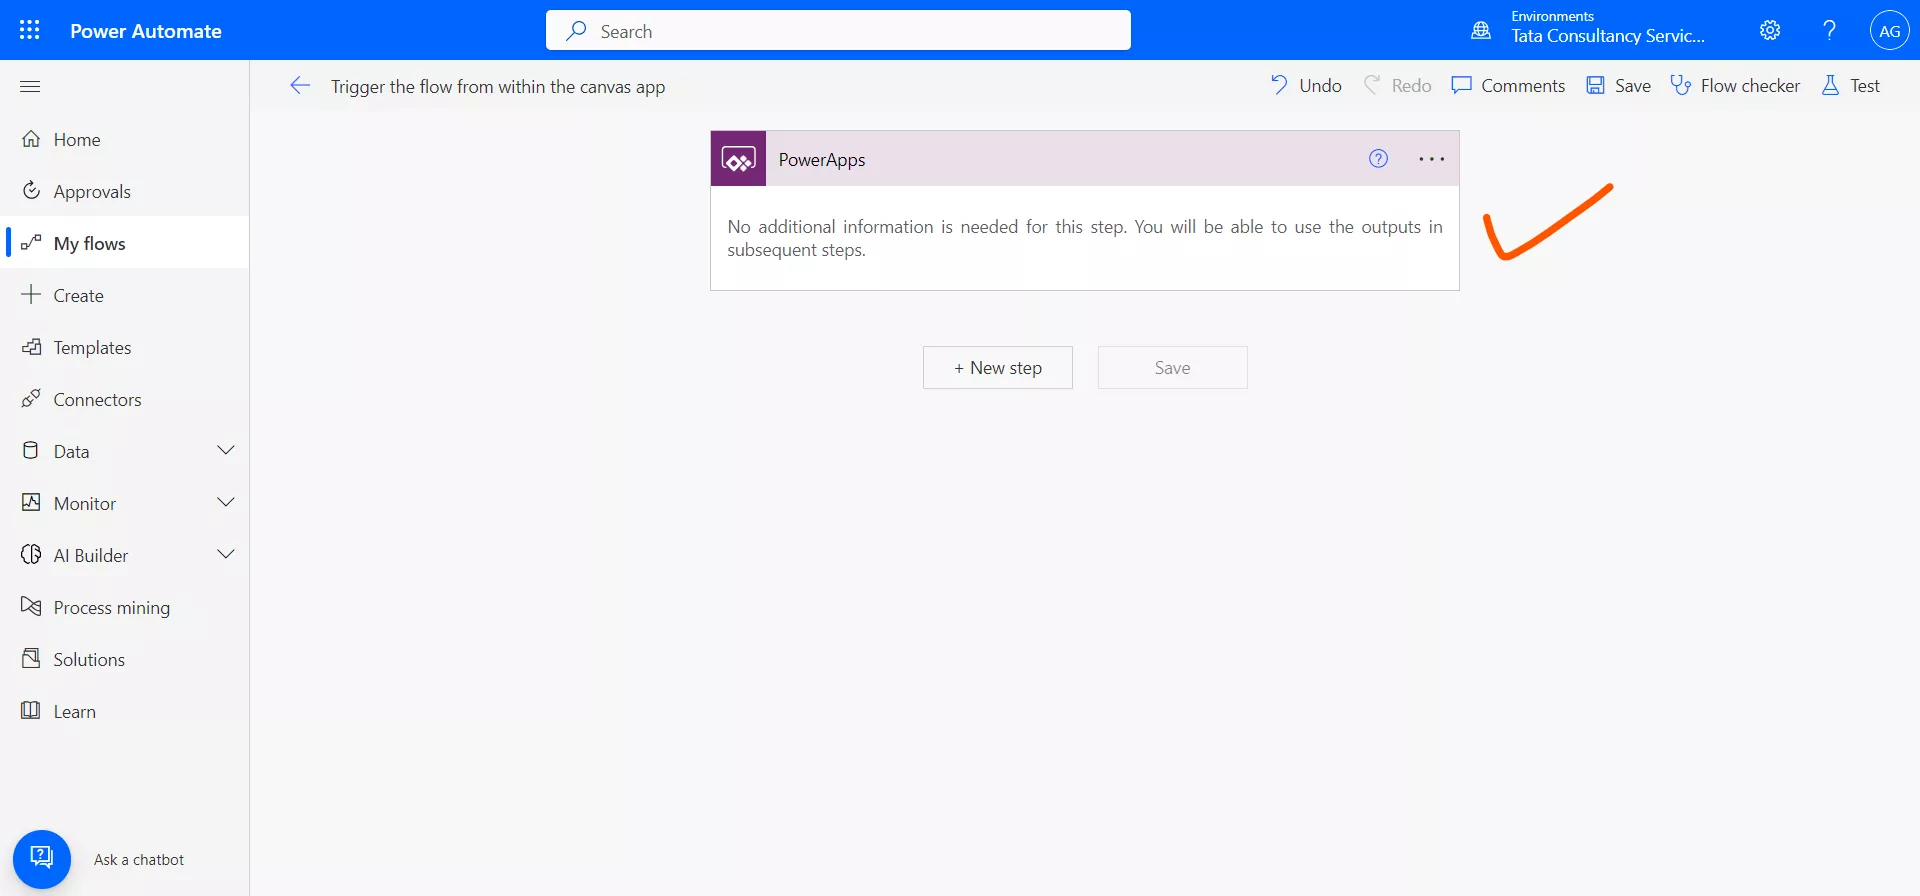
Step 3: Click on + New step in order to add Send an email (V2).
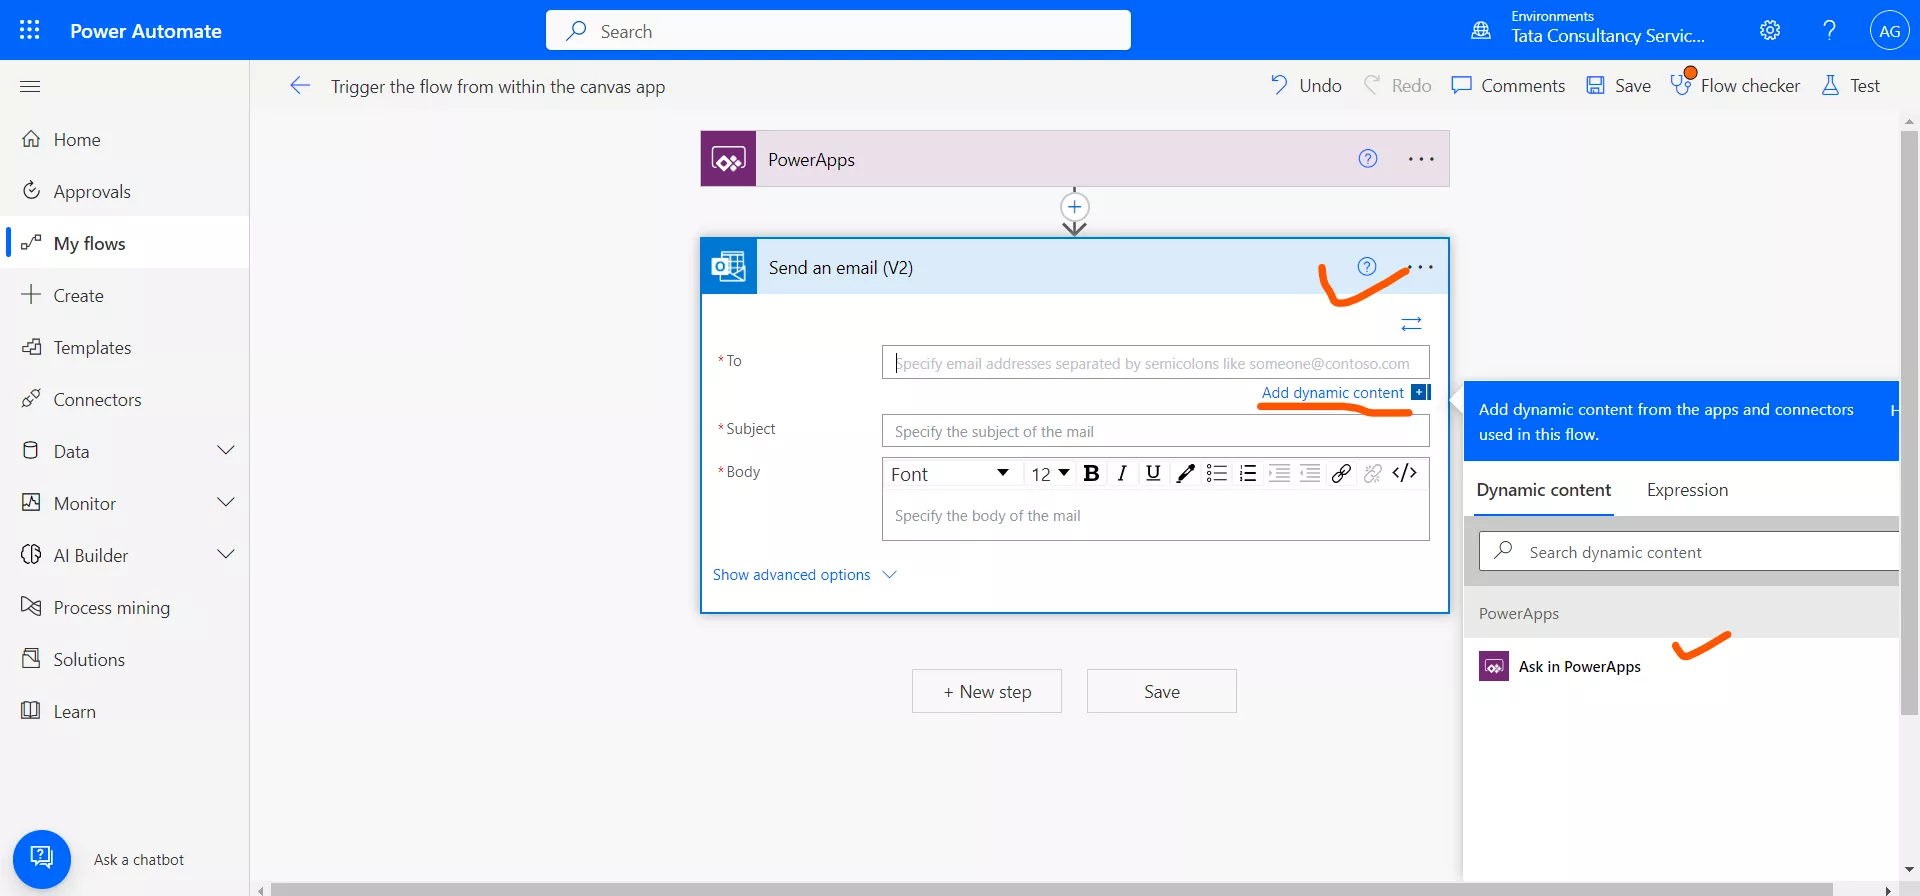
Step 4: Click on “To” section, click on Add dynamic content and from there select Ask in PowerApps, in order to get its value from the Power Apps.
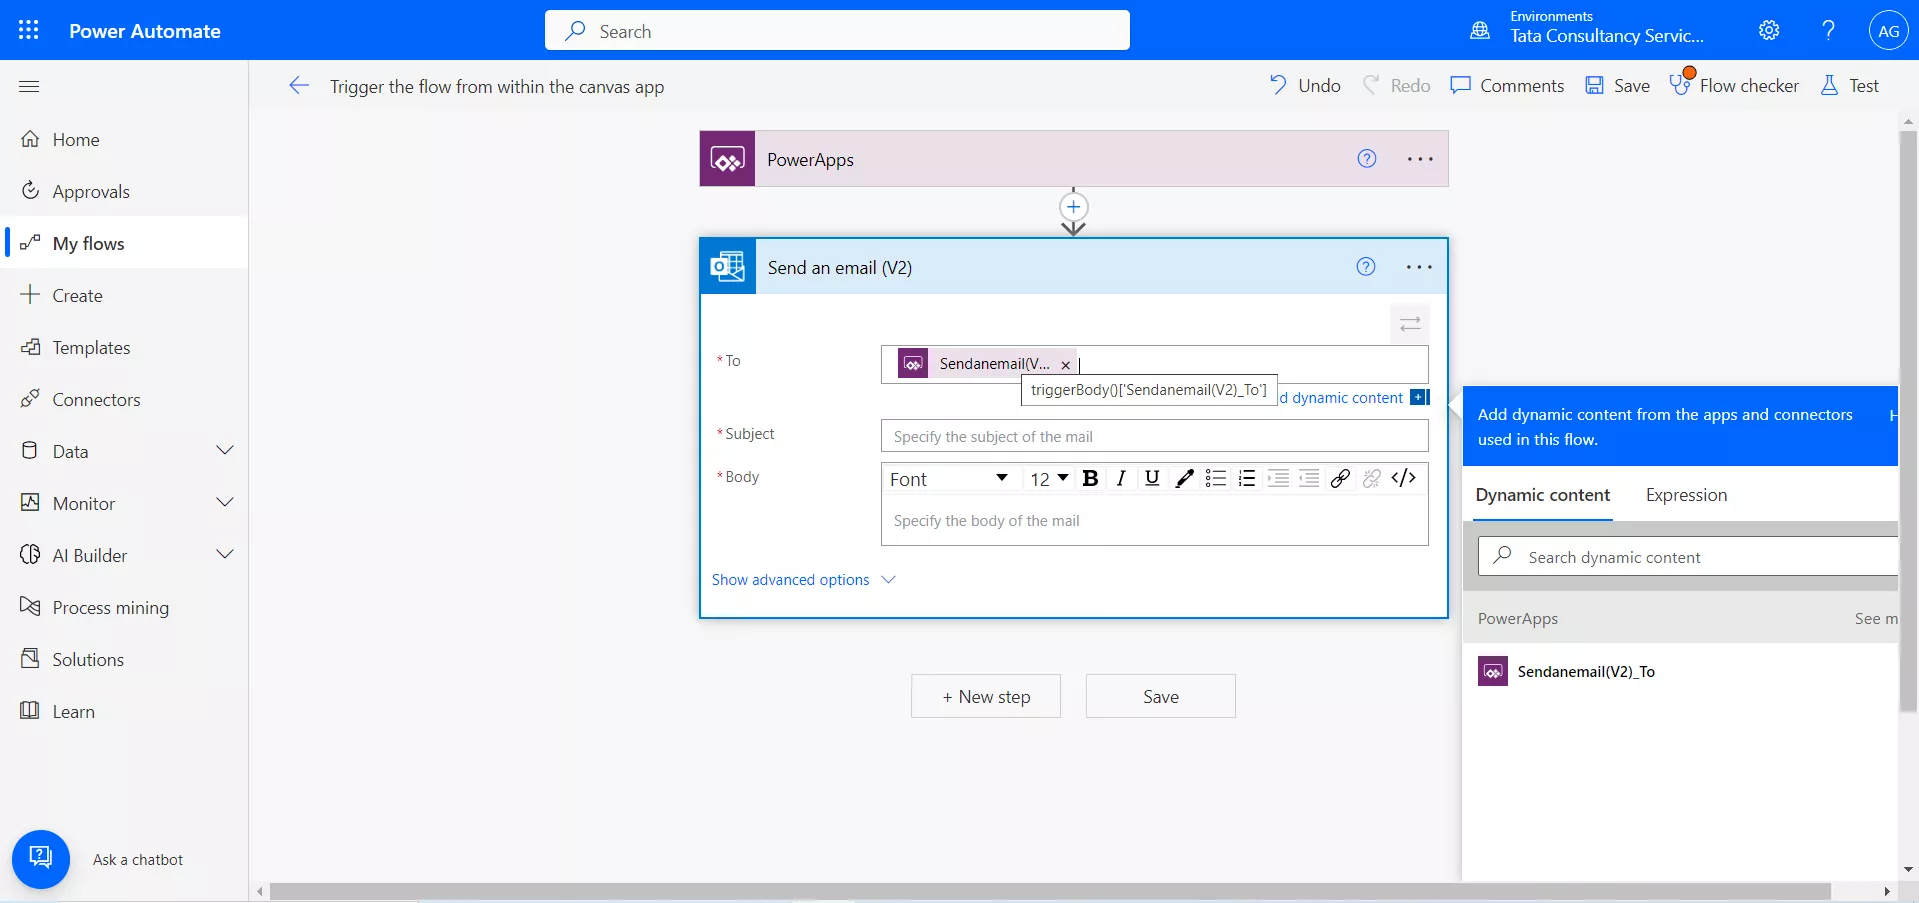
When we click on Ask in PowerApps then it creates a dynamic content which has almost the same name as the control name, so in order to make this dynamic content name similar to our requirement it is better to rename the action control before clicking on Ask in PowerApps.
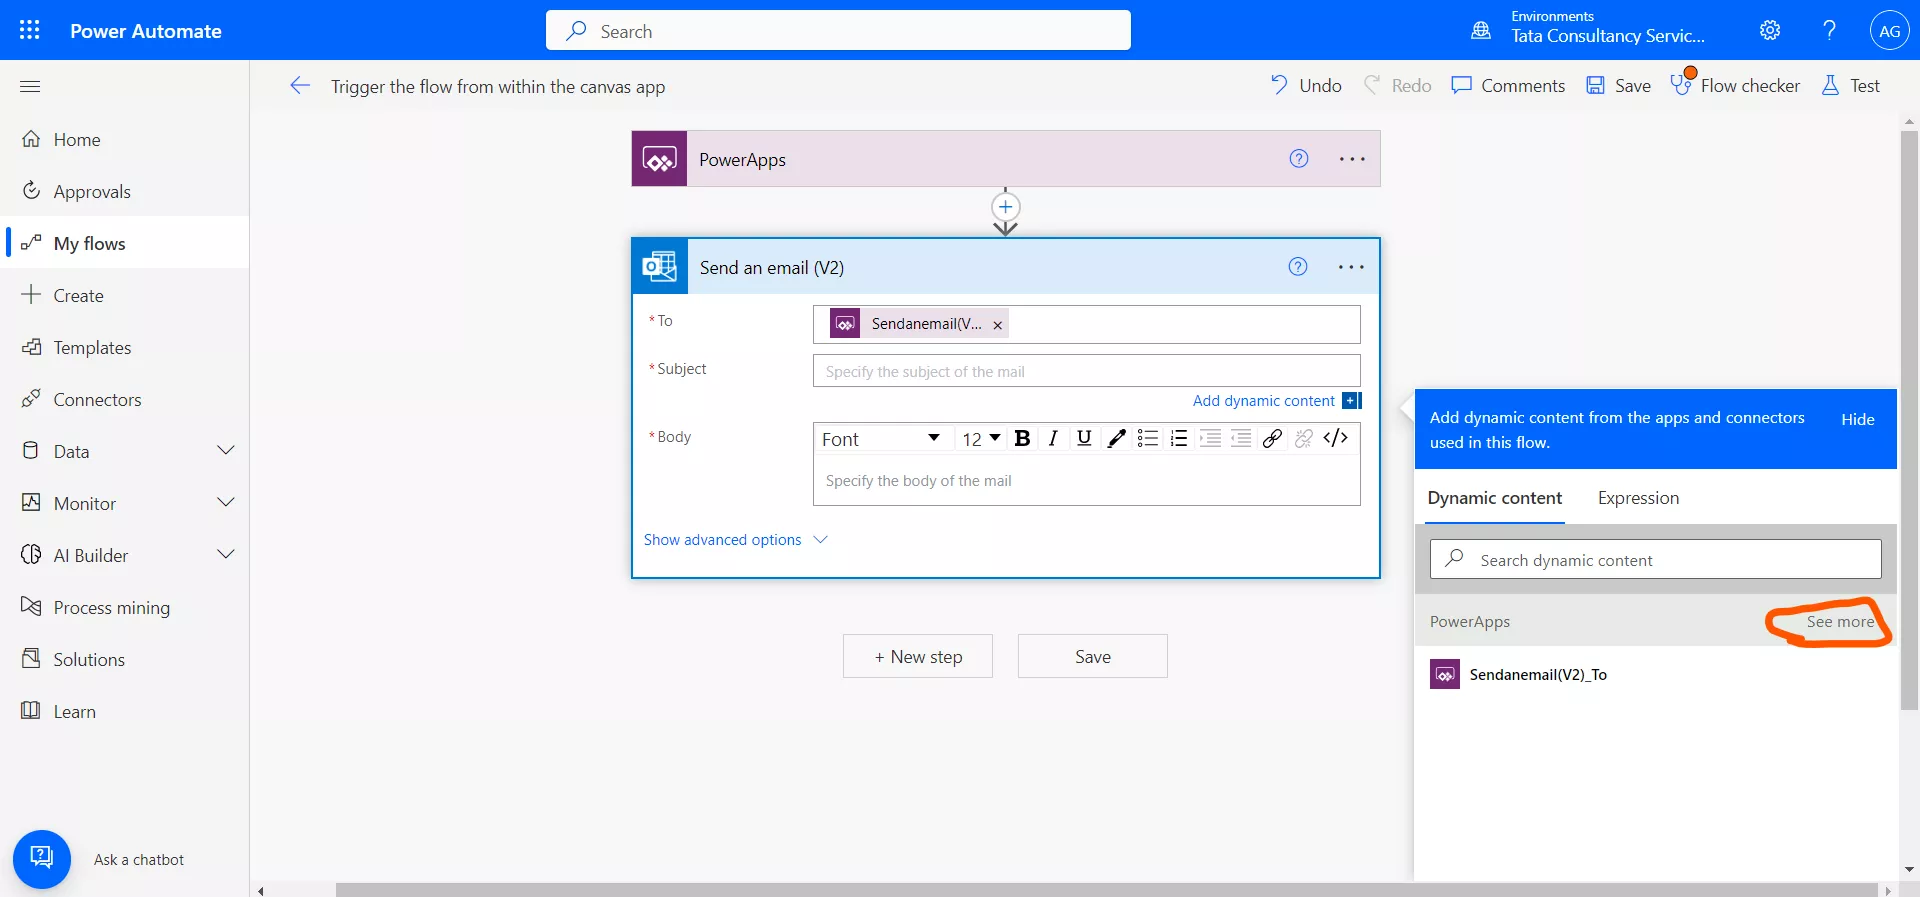
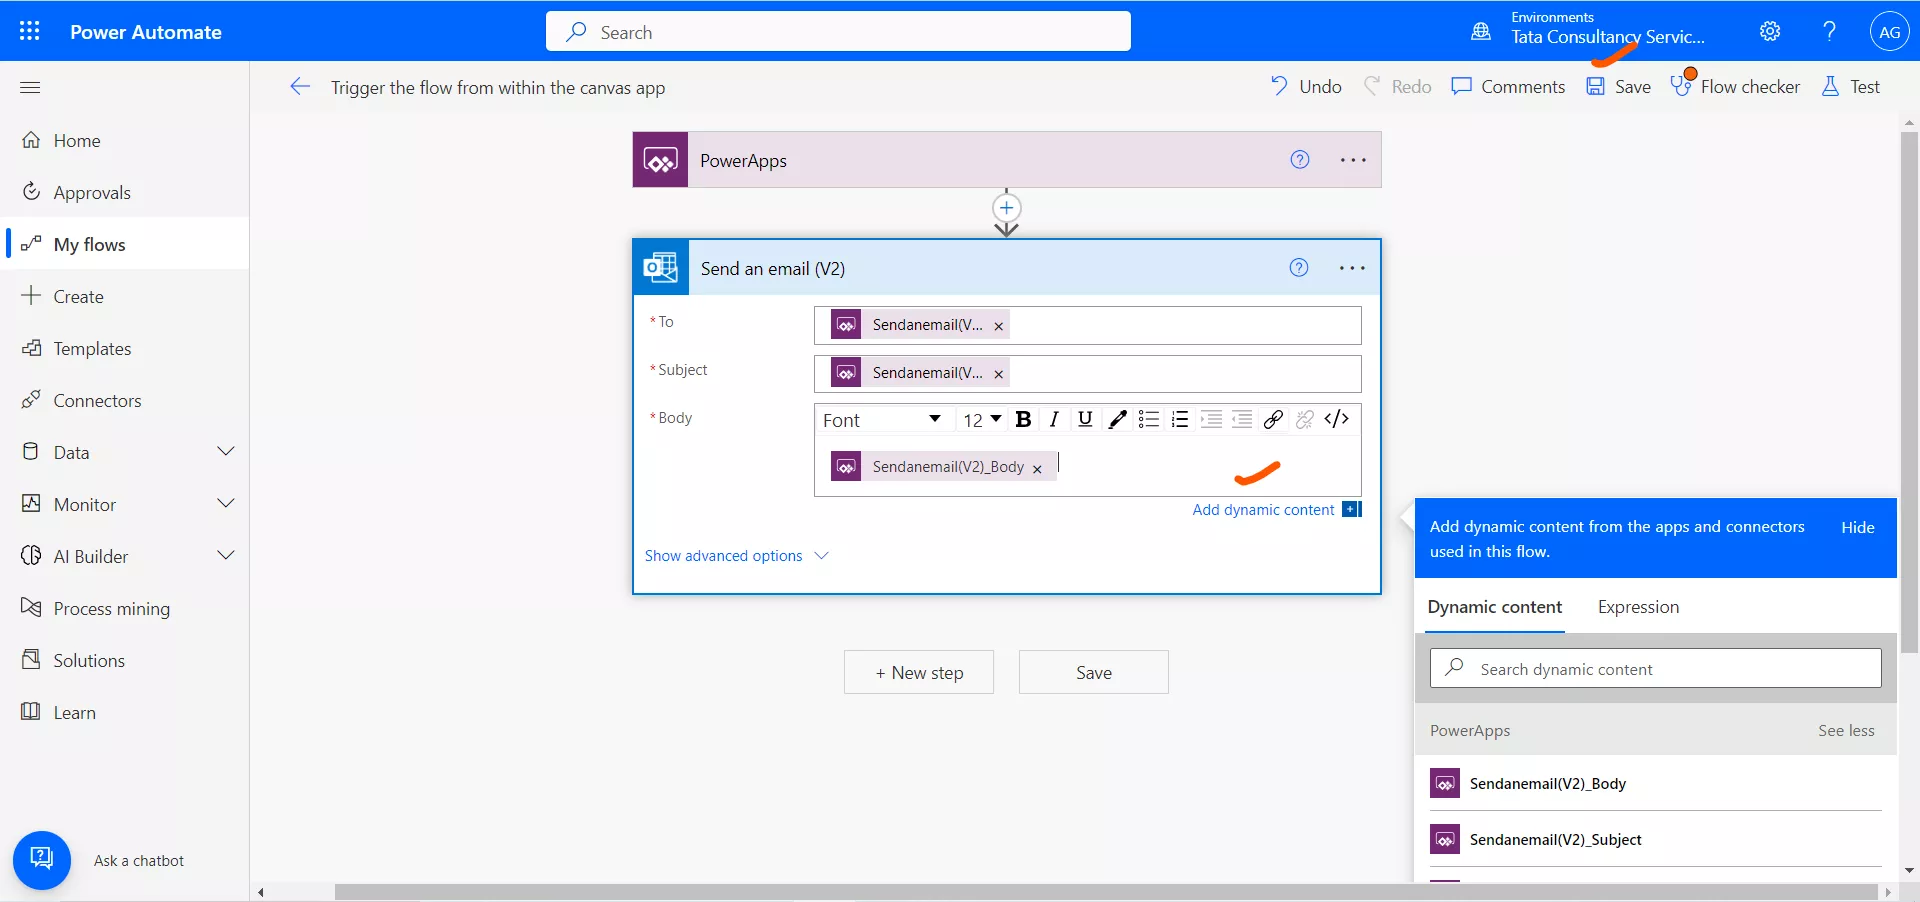
Step 5: Similarly click on Subject and Body from the dynamic content click on Ask in PowerApps
Click on See more if you are not able to see the Ask in PowerApps.
After adding the dynamic content, click on Save.
Step 6: Create a canvas app and add two Text input controls and a button on the screen,
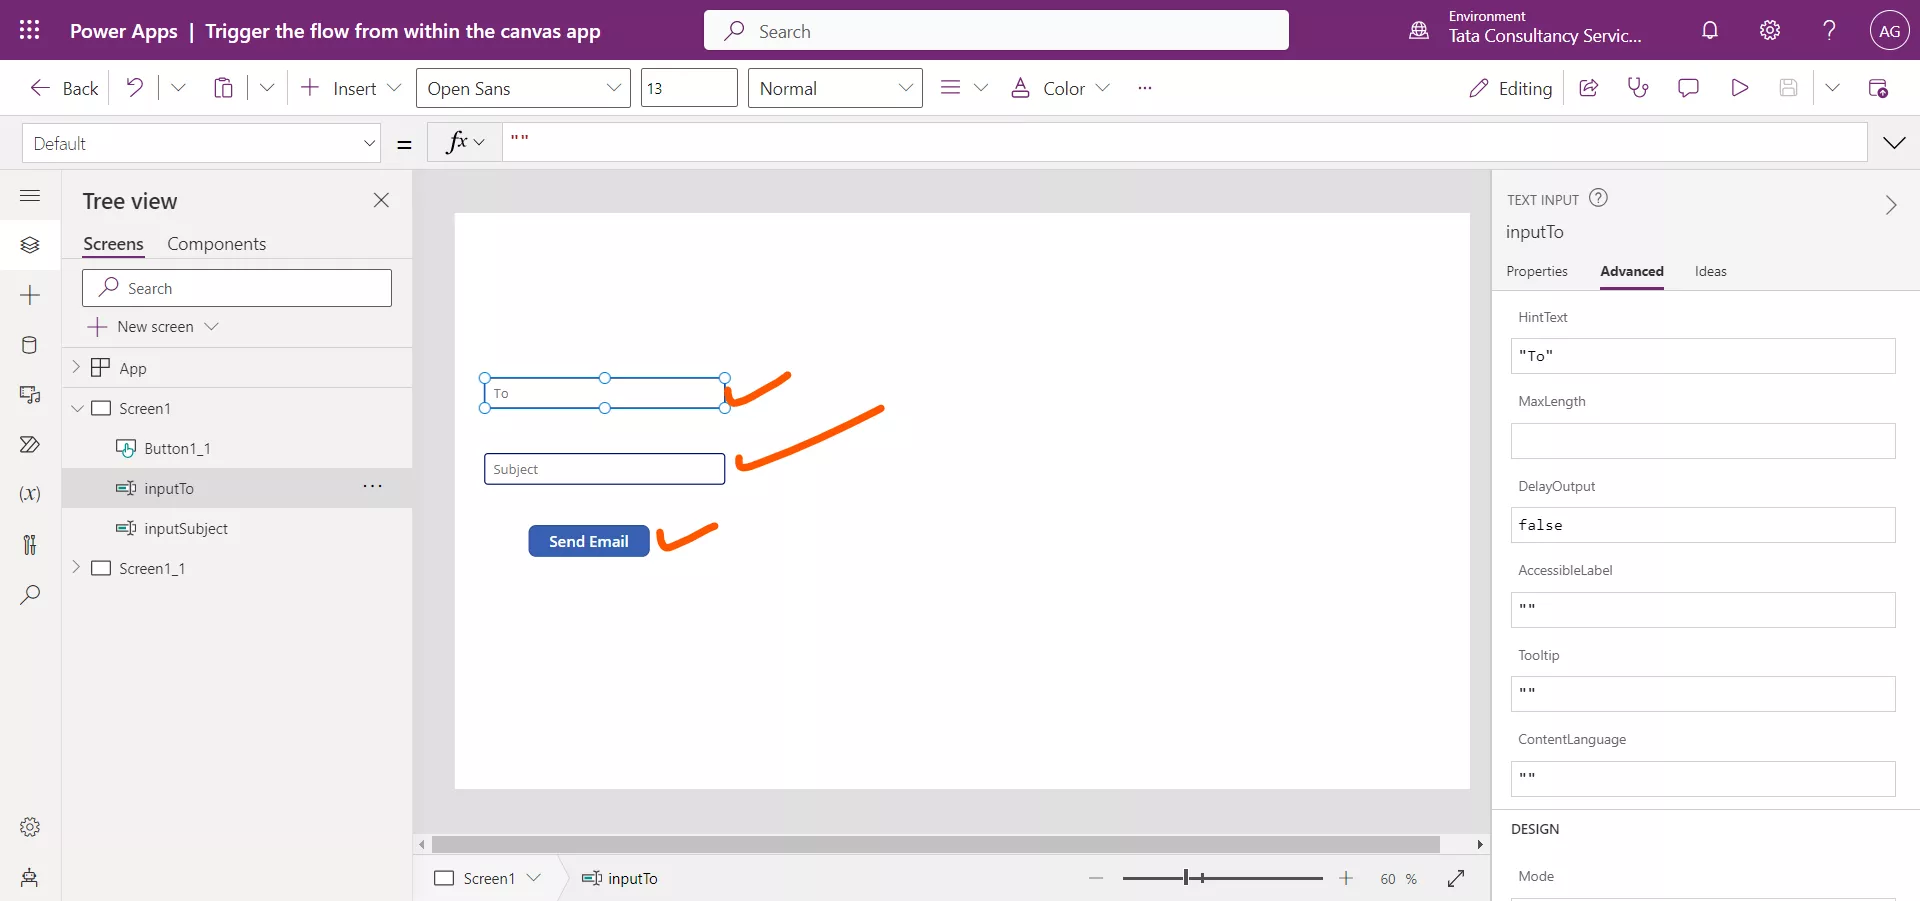
Step 7: Select the Power Automate icon and add the flow inside the power apps. Here we have also an option to create a power automate from the powerapps itself.
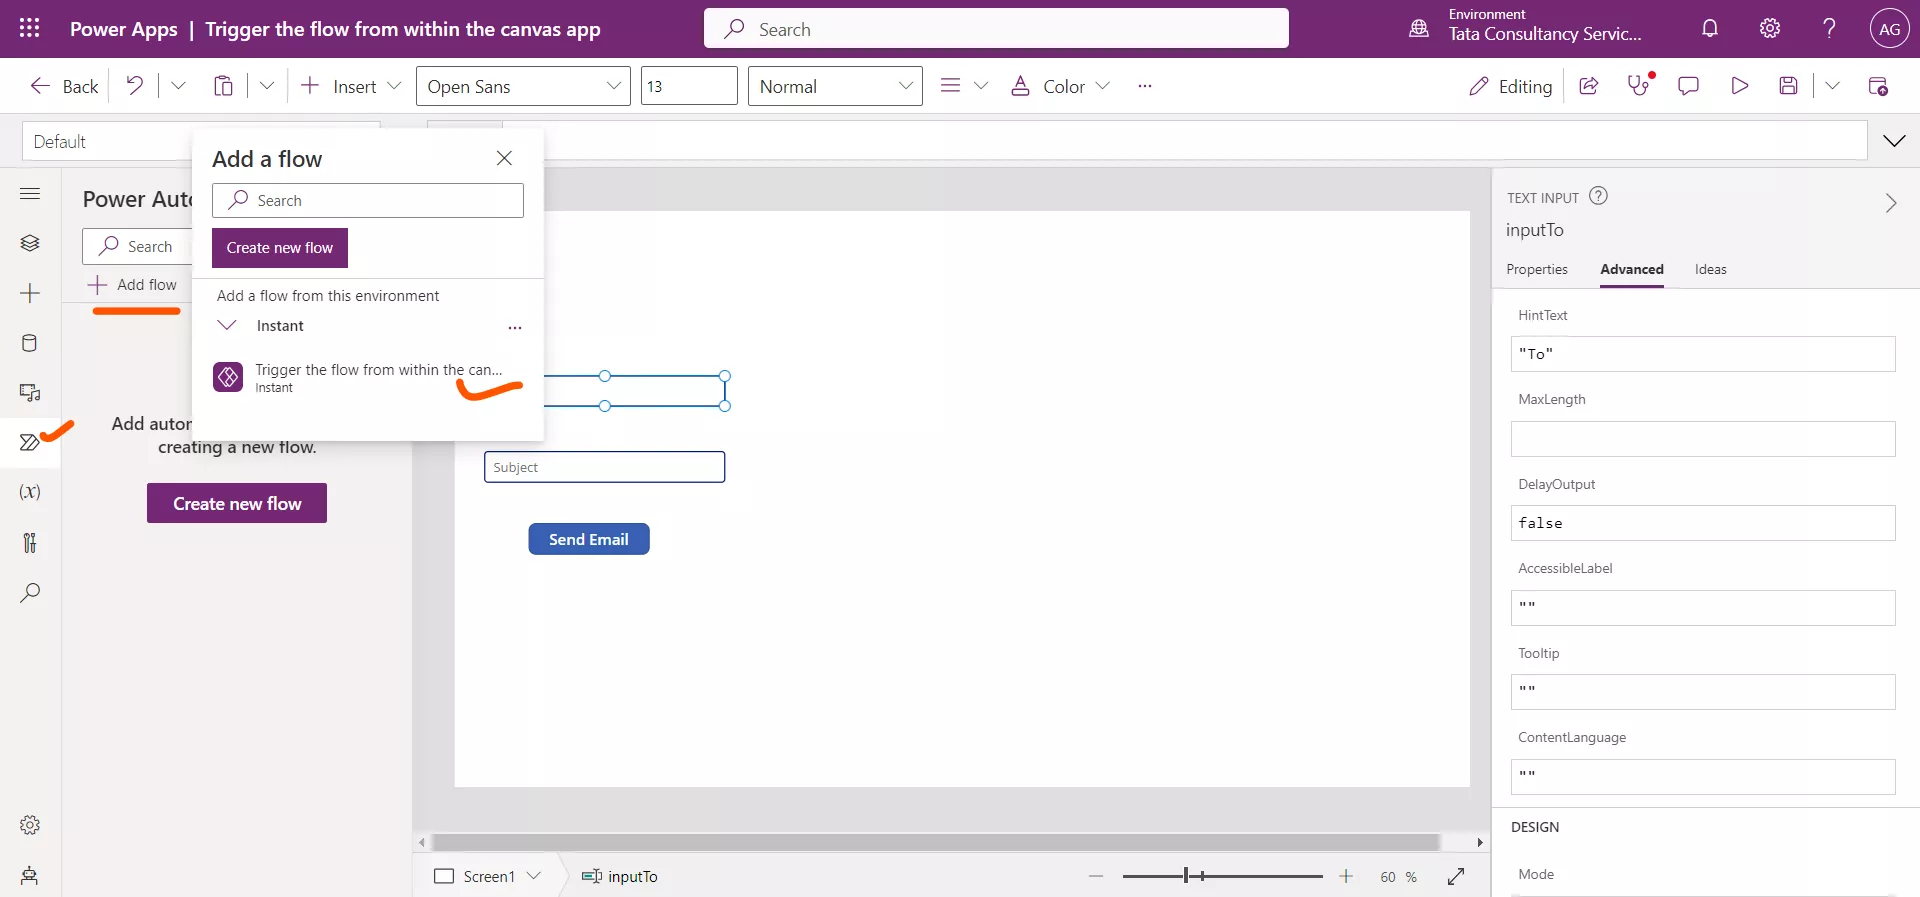
Step 8: Select the button control and on the OnSelect property when we are adding the formula the intellisense shows us that we need to add the parameters. We can see the sequence of parameters. We need to give the values in sequence.
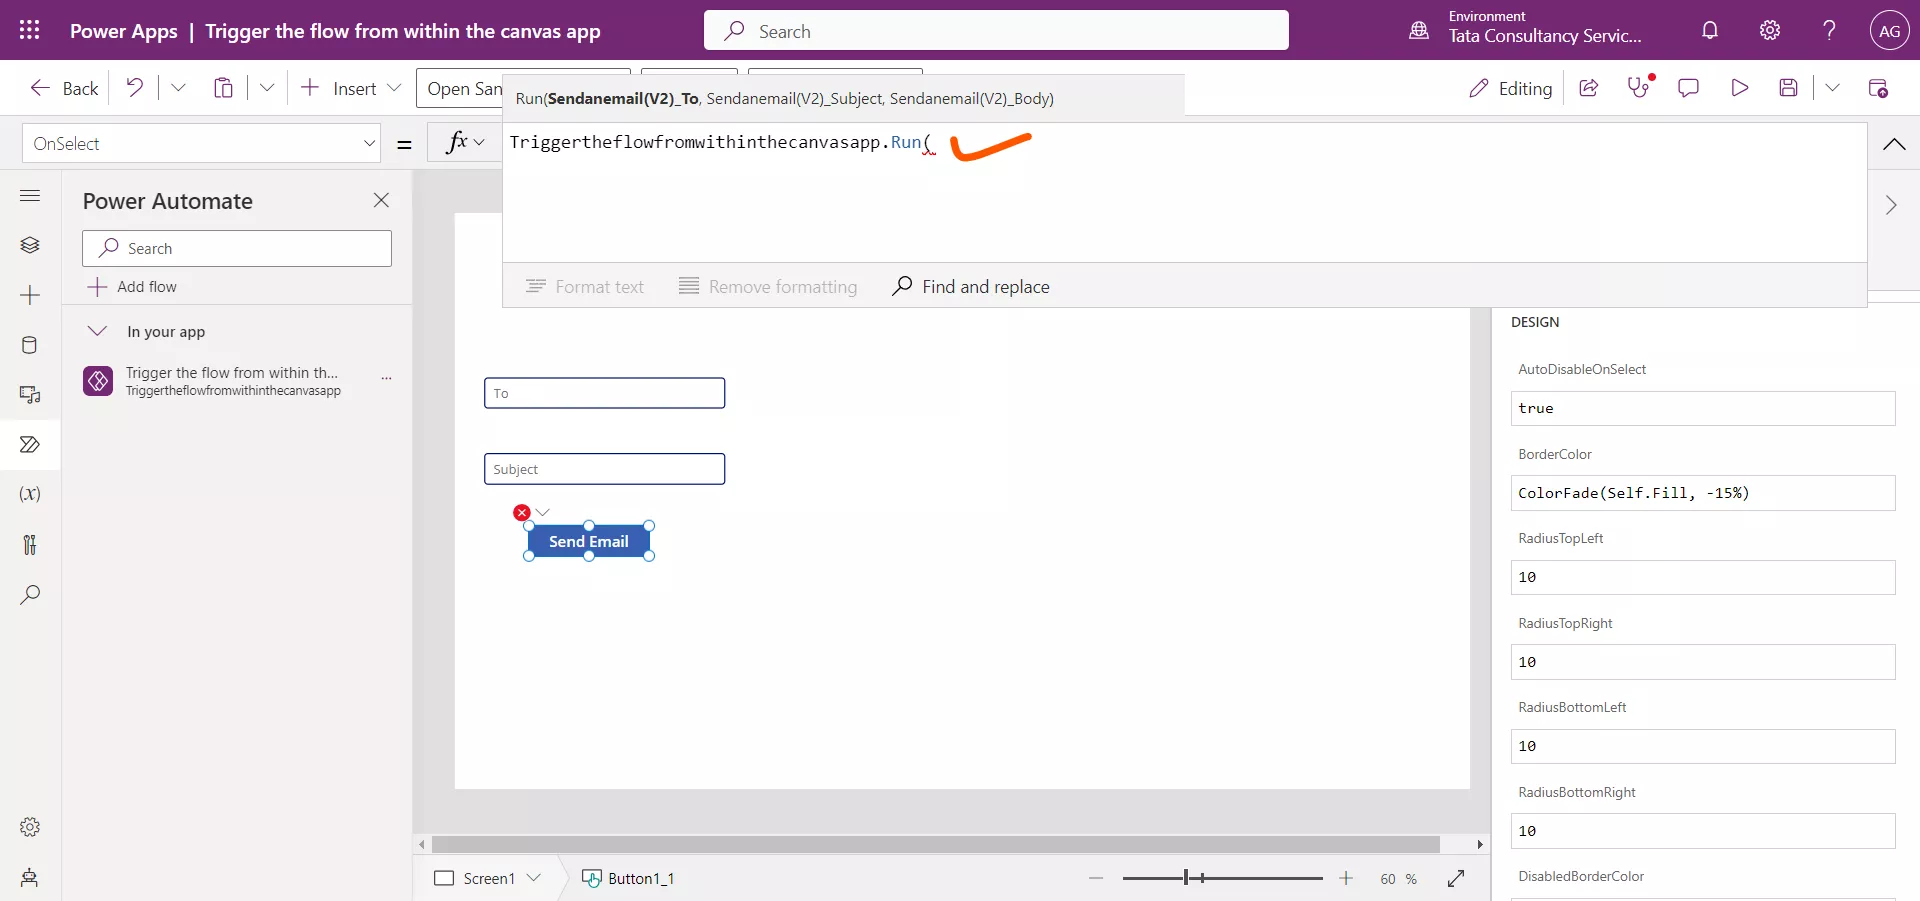
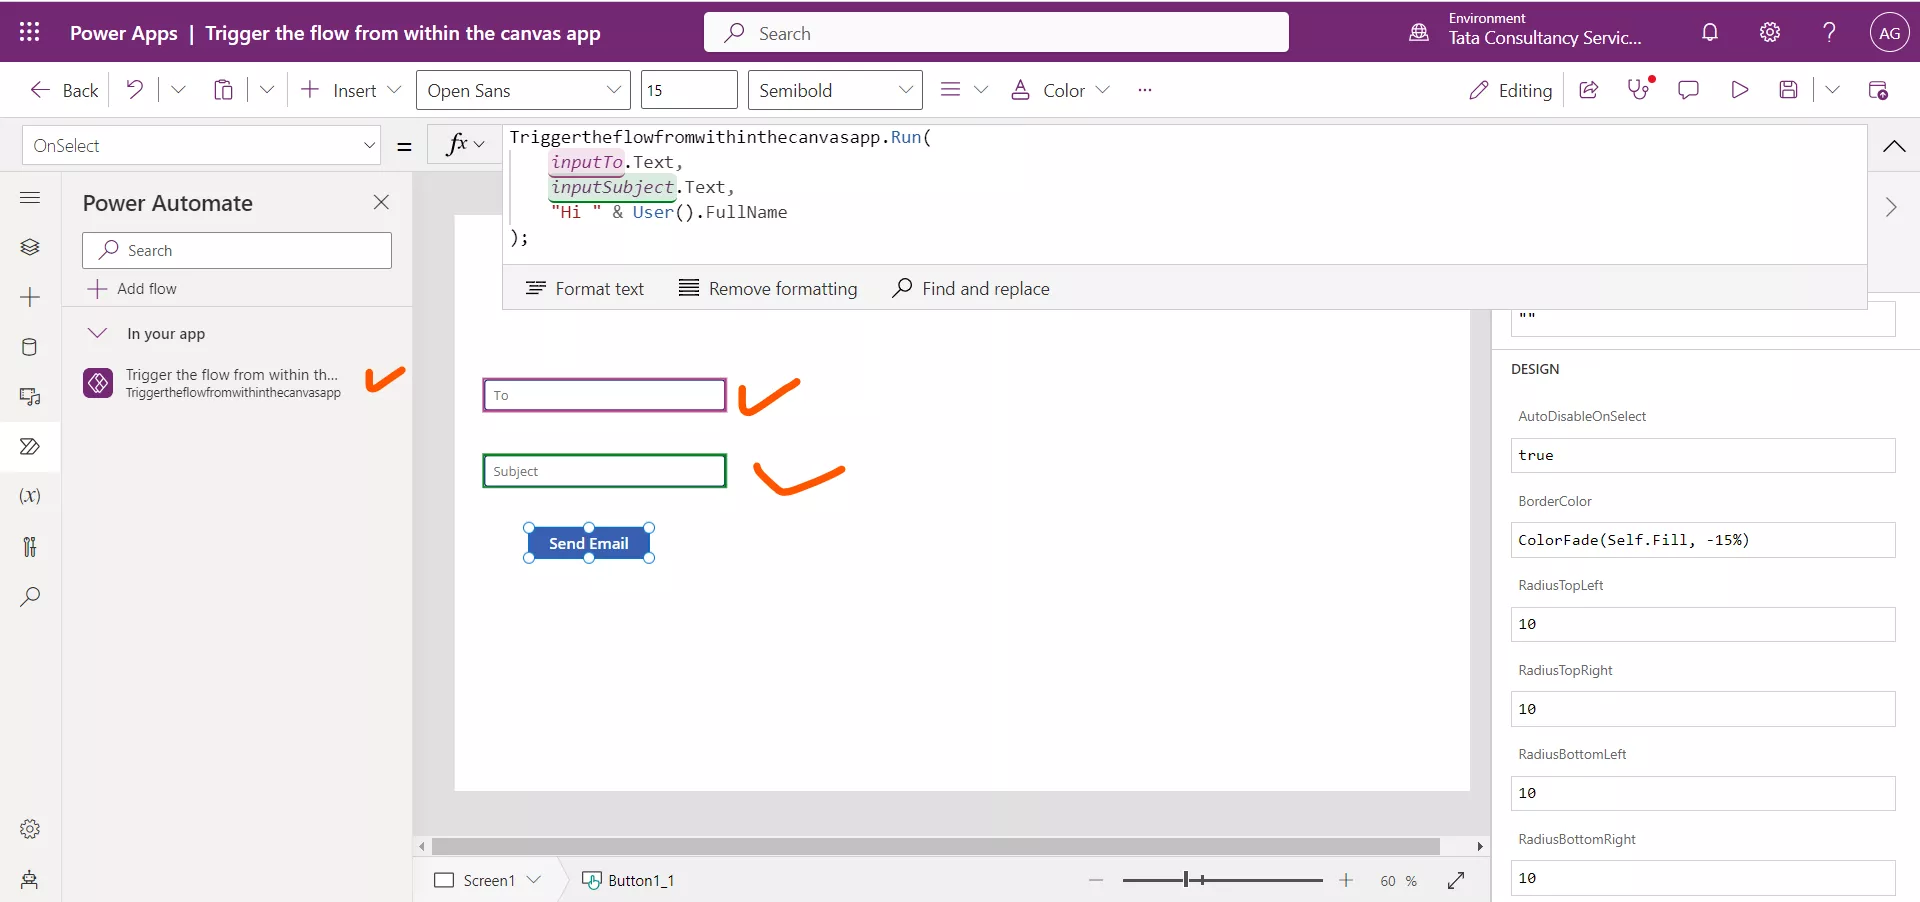
Select the button and the OnSelect property enter the following power apps formula:
Power Apps Formula
TriggerTheFlowFromWithinTheCanvasApp.Run(
    inputTo_1.Text,
    inputSubject_1.Text,
    "Hi " & User().FullName
);
Here, Triggertheflowfromwithinthecanvasapp is the name of our flow without spaces, that we have added in our Power Apps. The .Run specifies the flow to execute. The flow executes with the three inputs. The inputTo and inputSubject are the name of the controls.
Step 9: Now when we click on the button, these parameters will be passed to the Power Automate and flow will send email with the specified Subject and Body.
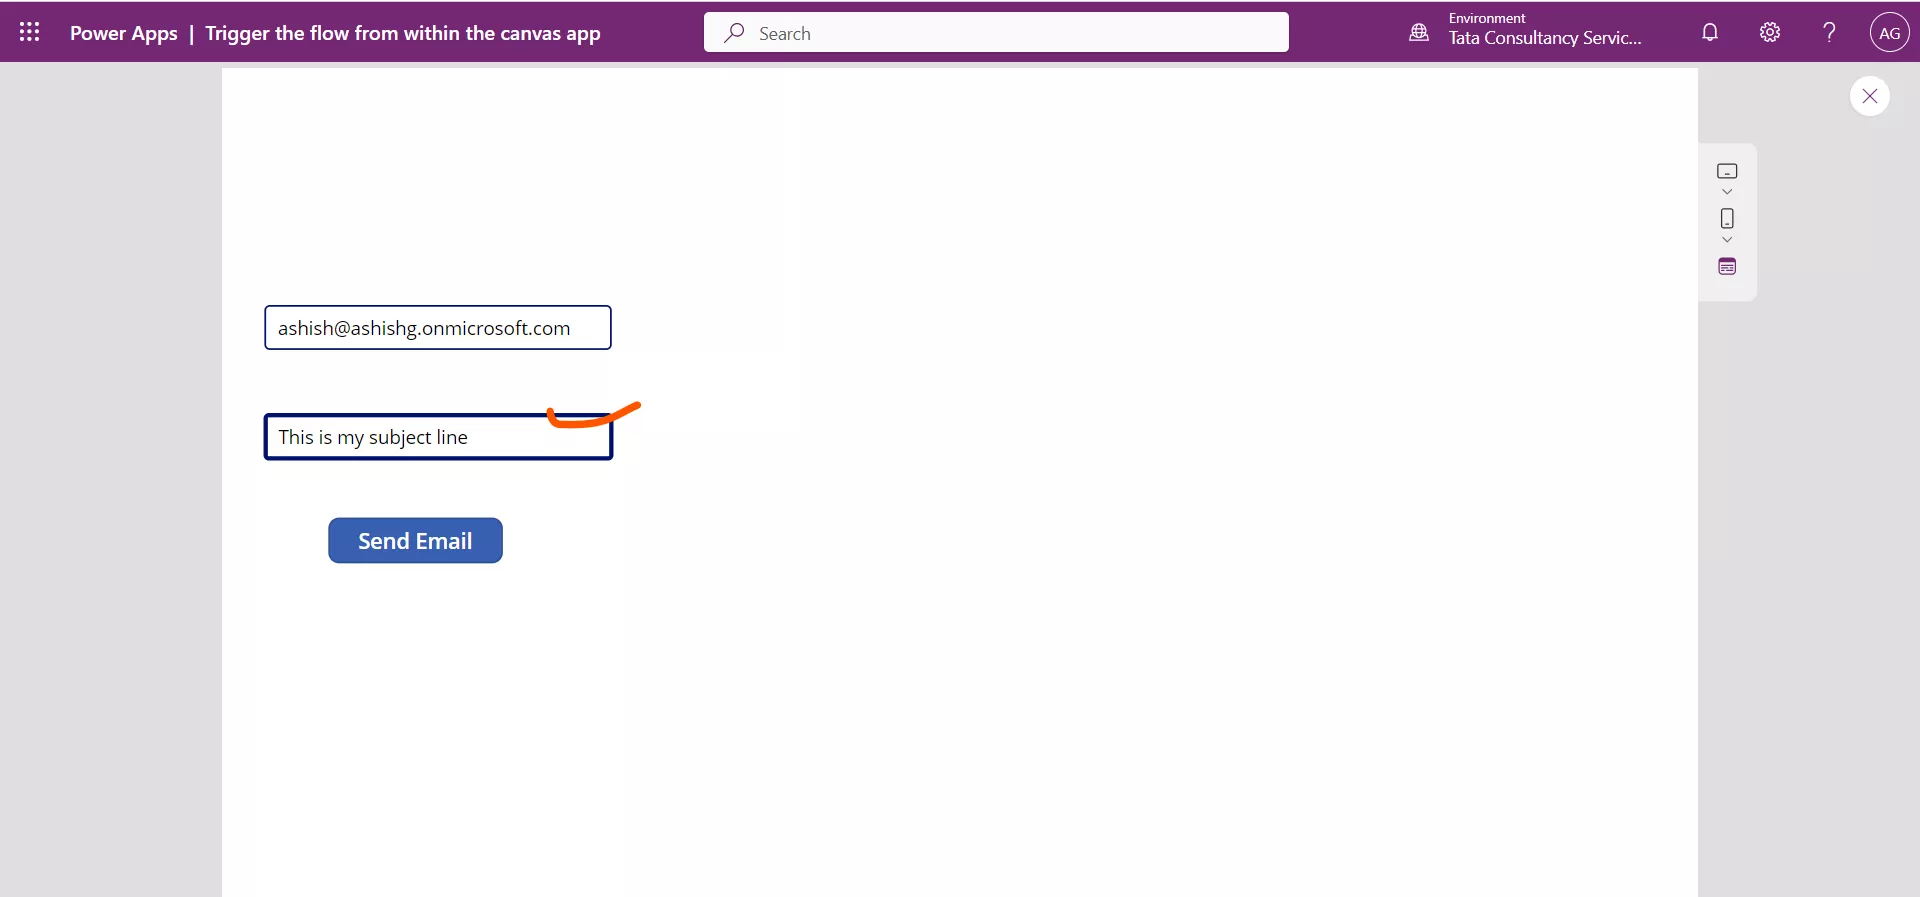
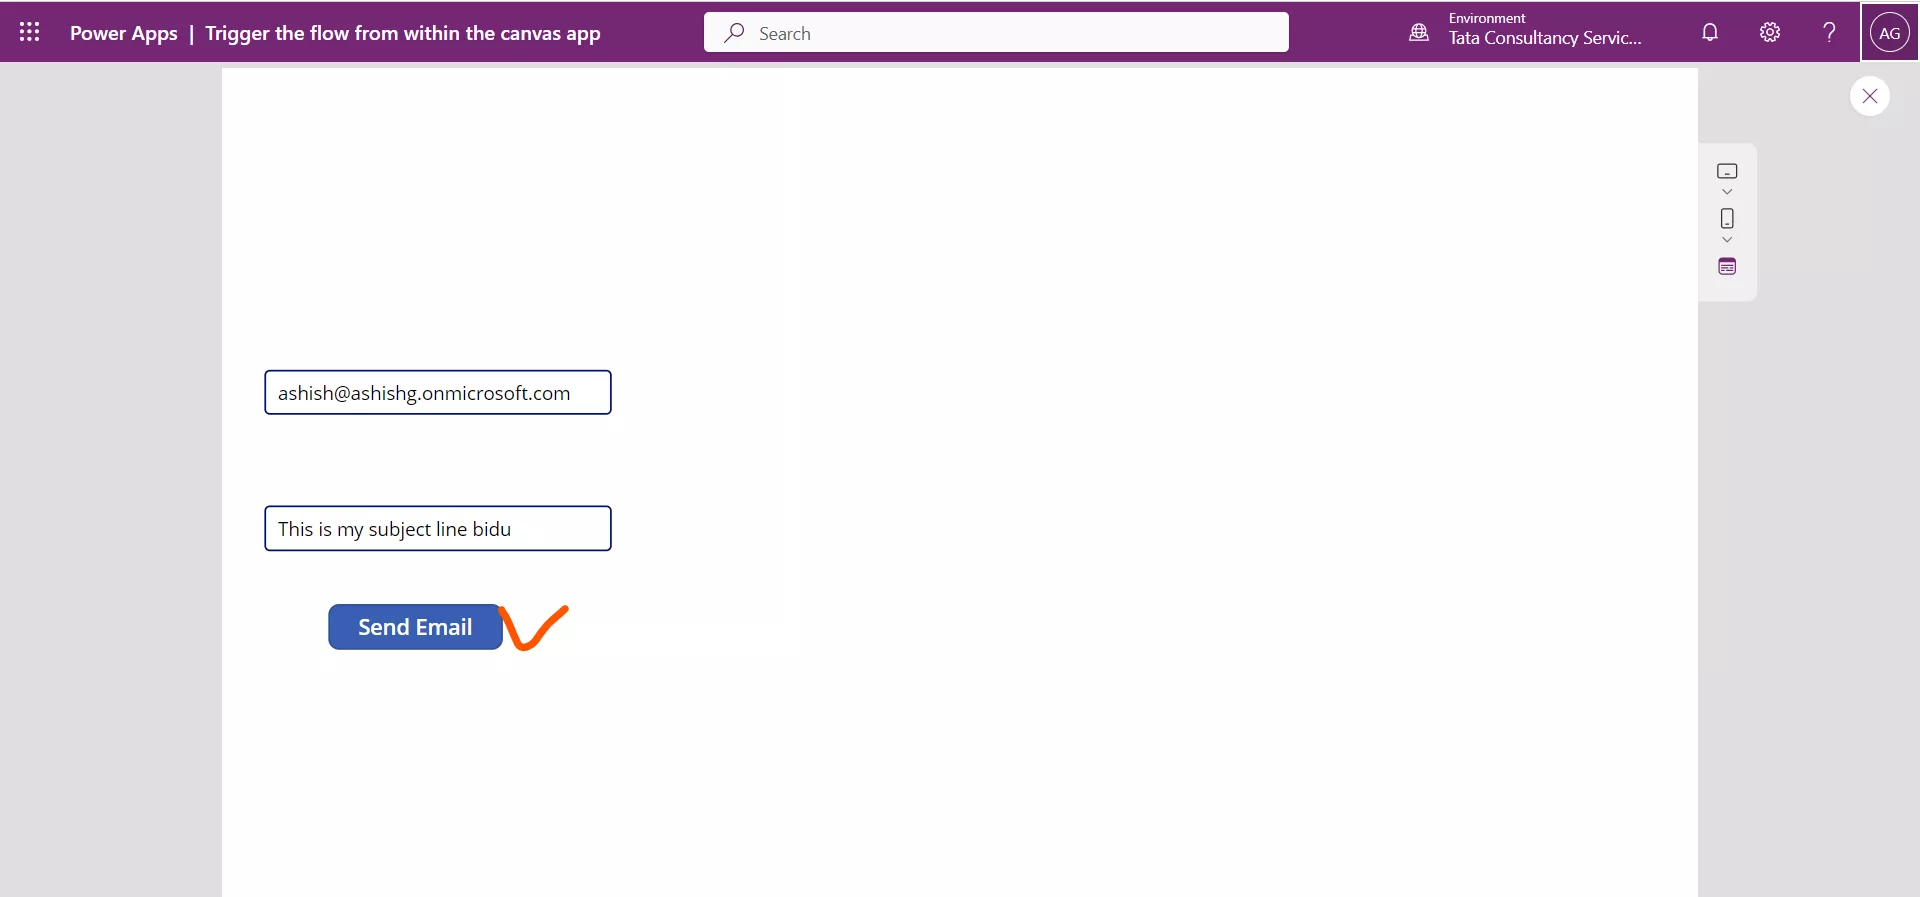
Click on Send Email.

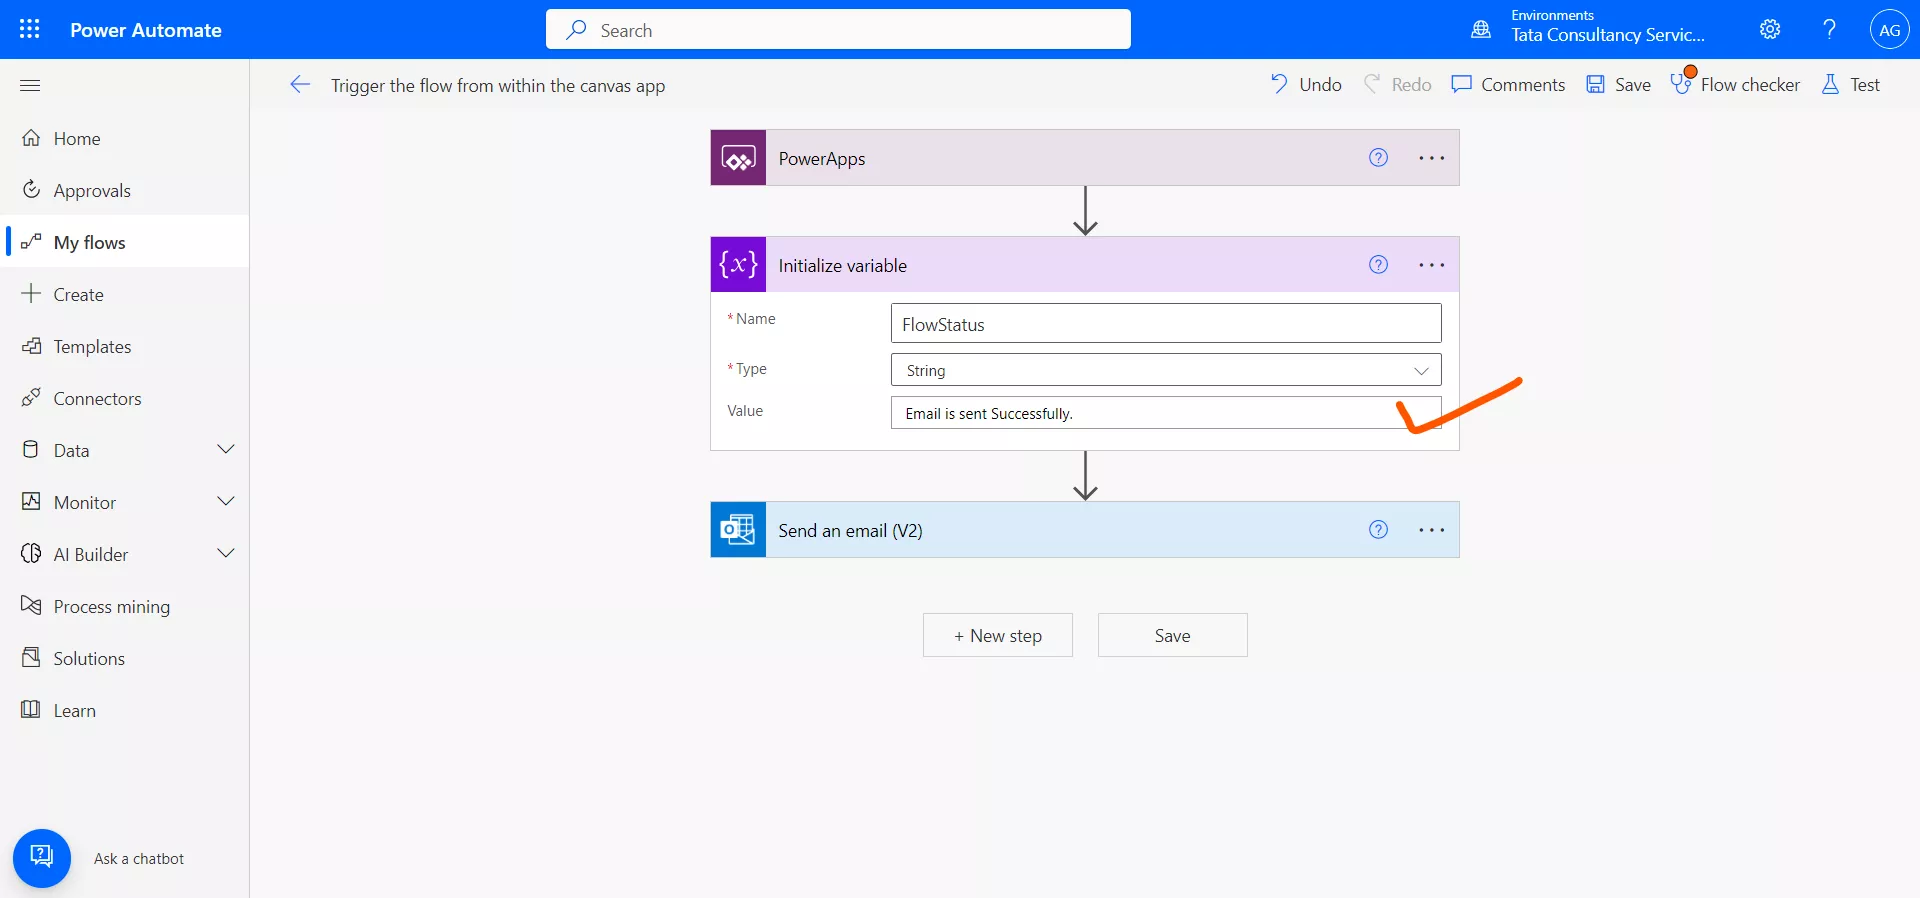
Step 10: We can also respond to the power apps from the power automate. Suppose we are initializing a variable with name FlowStatus, its Value is Email is sent Successfully.
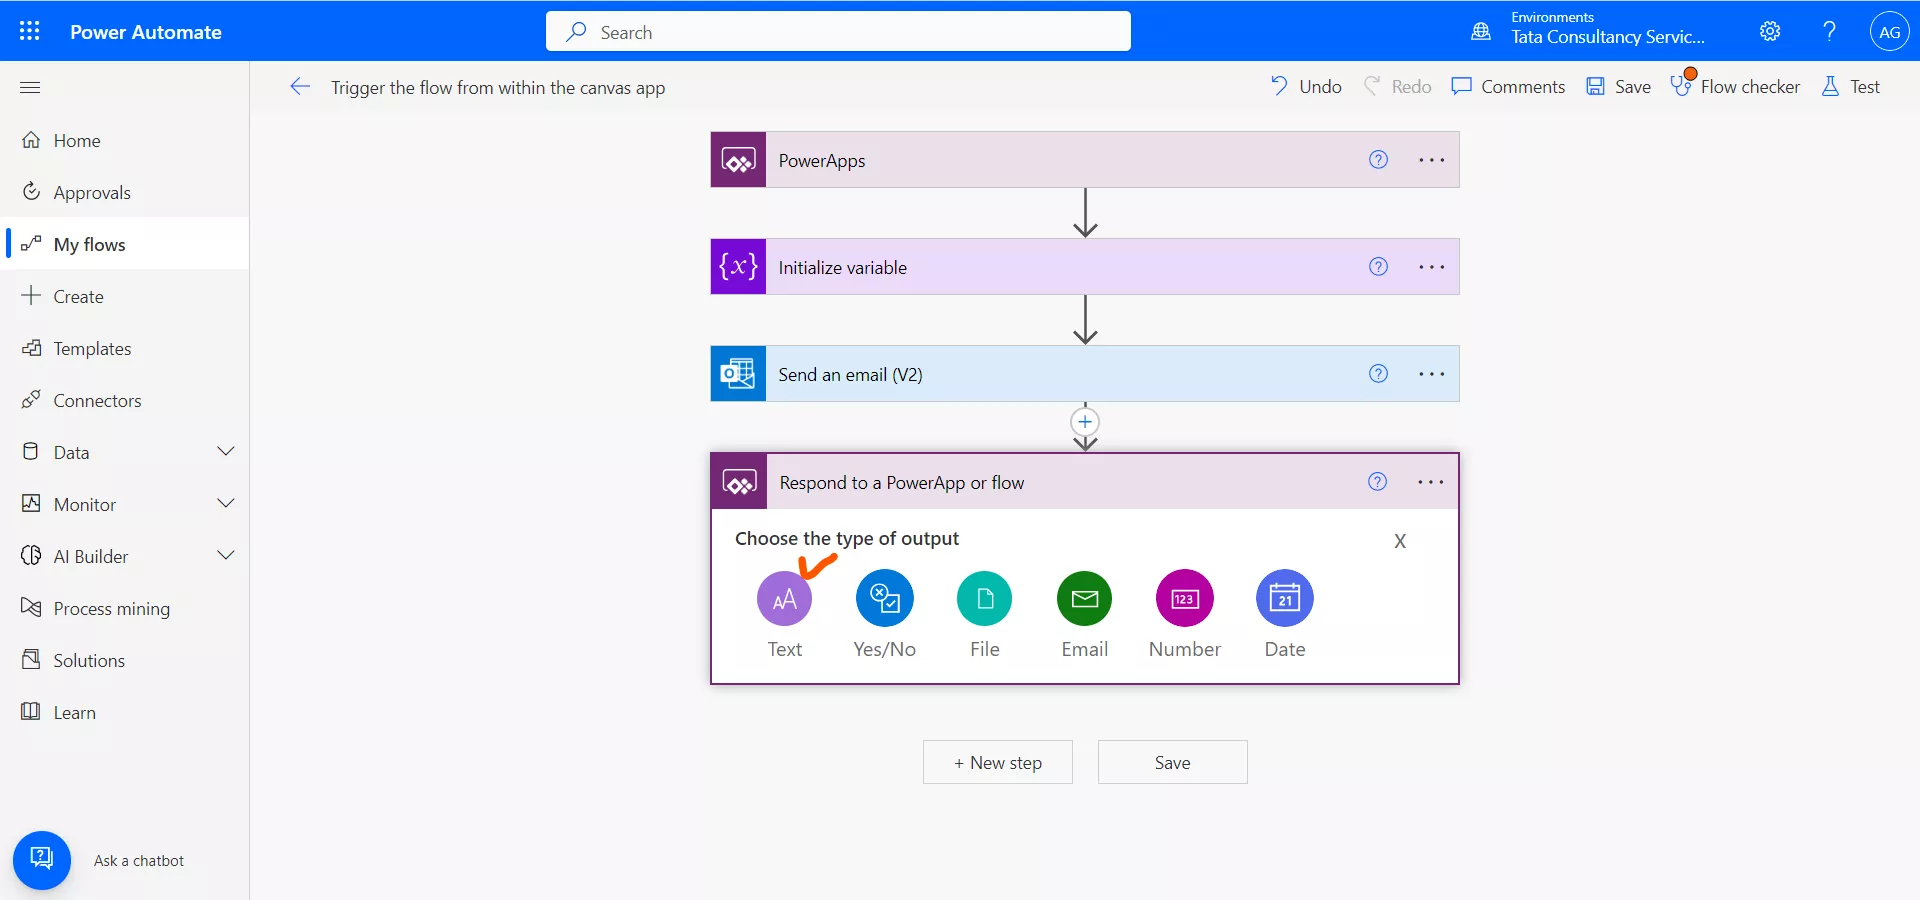
Step 11: Add an action called Respond to PowerApps, Use Type of Output as Text.
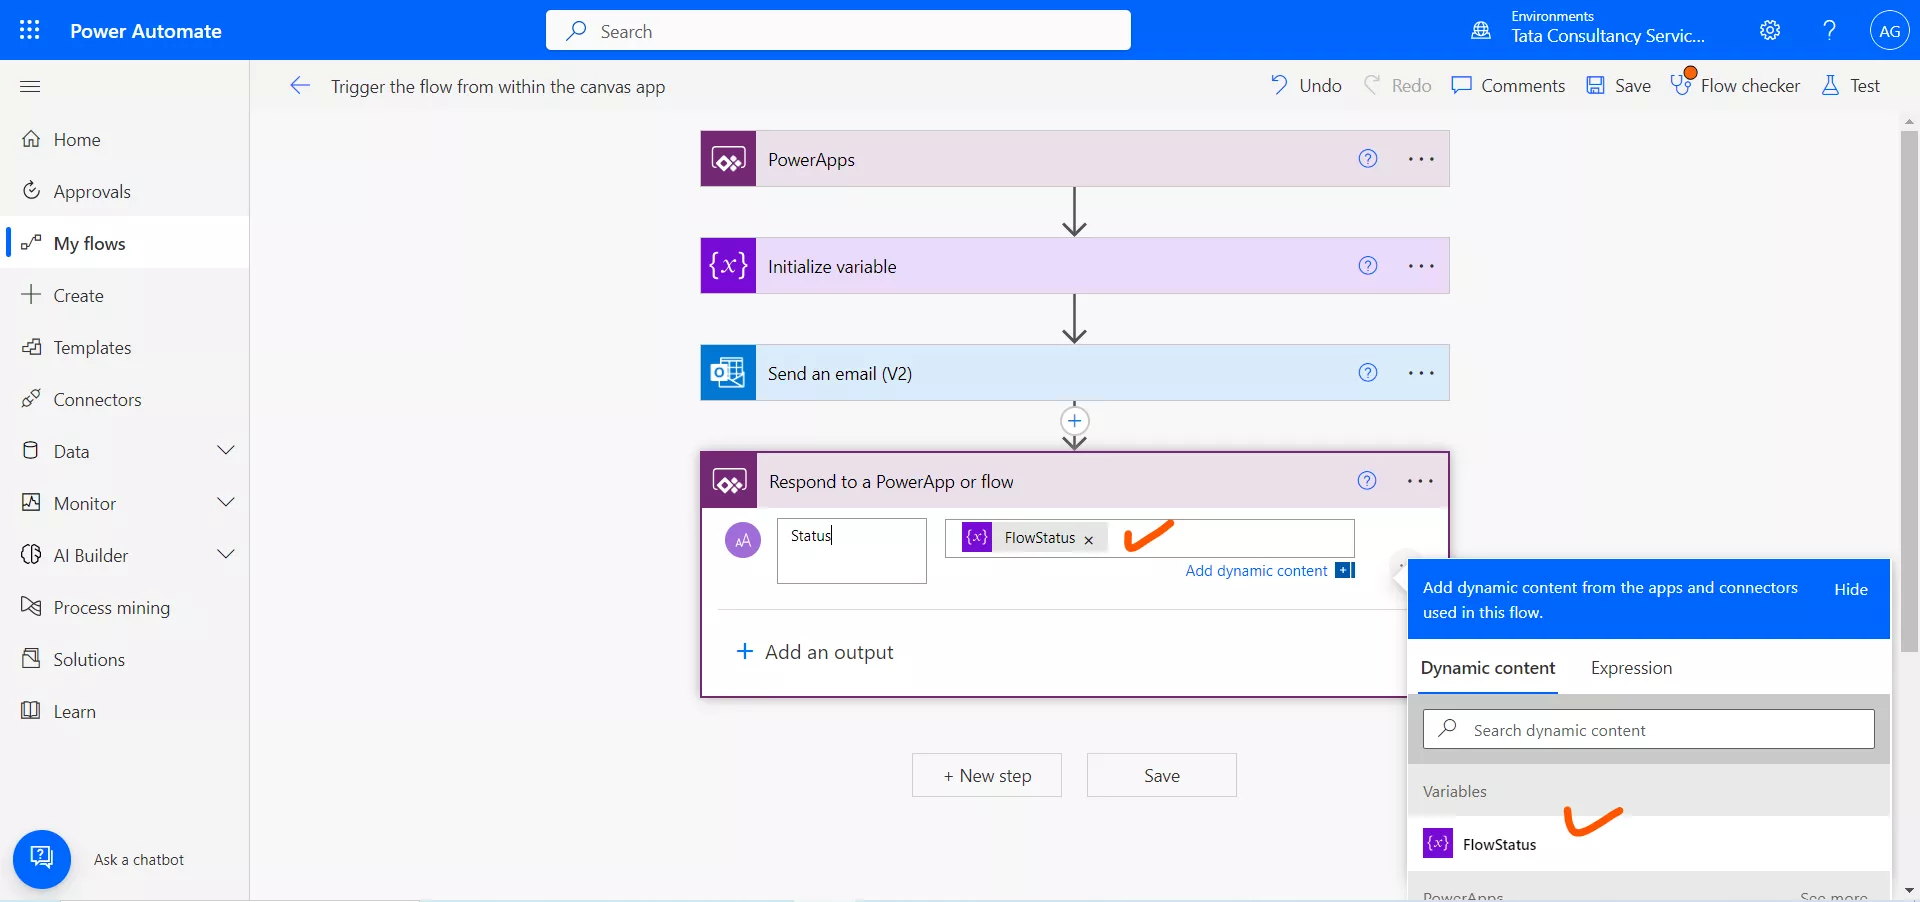
Give some name to the output parameter (Say "Status"). Its value is given from the dynamic content.
Step 12: Save the flow, by clicking on the Save at the top of the command bar.
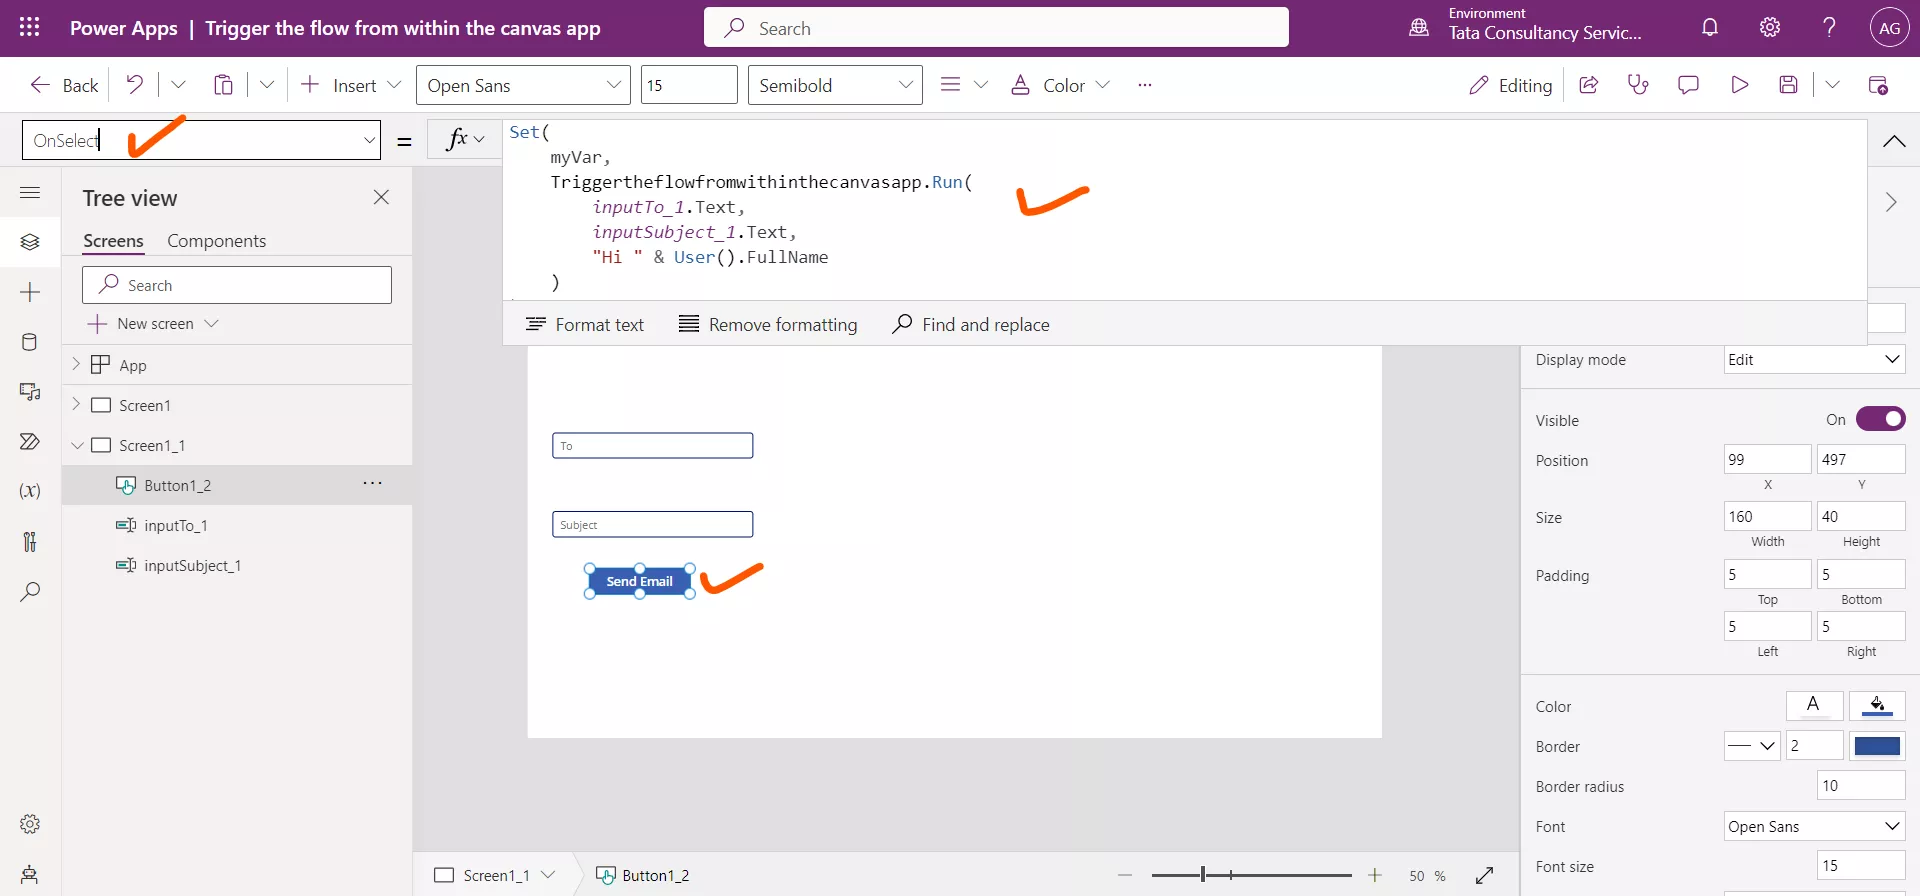
Step 13: Select the button and the OnSelect property enter the following power apps formula:
Power Apps Formula
Set(
    myVar,
    TriggerTheFlowFromWithinTheCanvasApp.Run(
        inputTo_1.Text,
        inputSubject_1.Text,
        "Hi " & User().FullName
    )
)
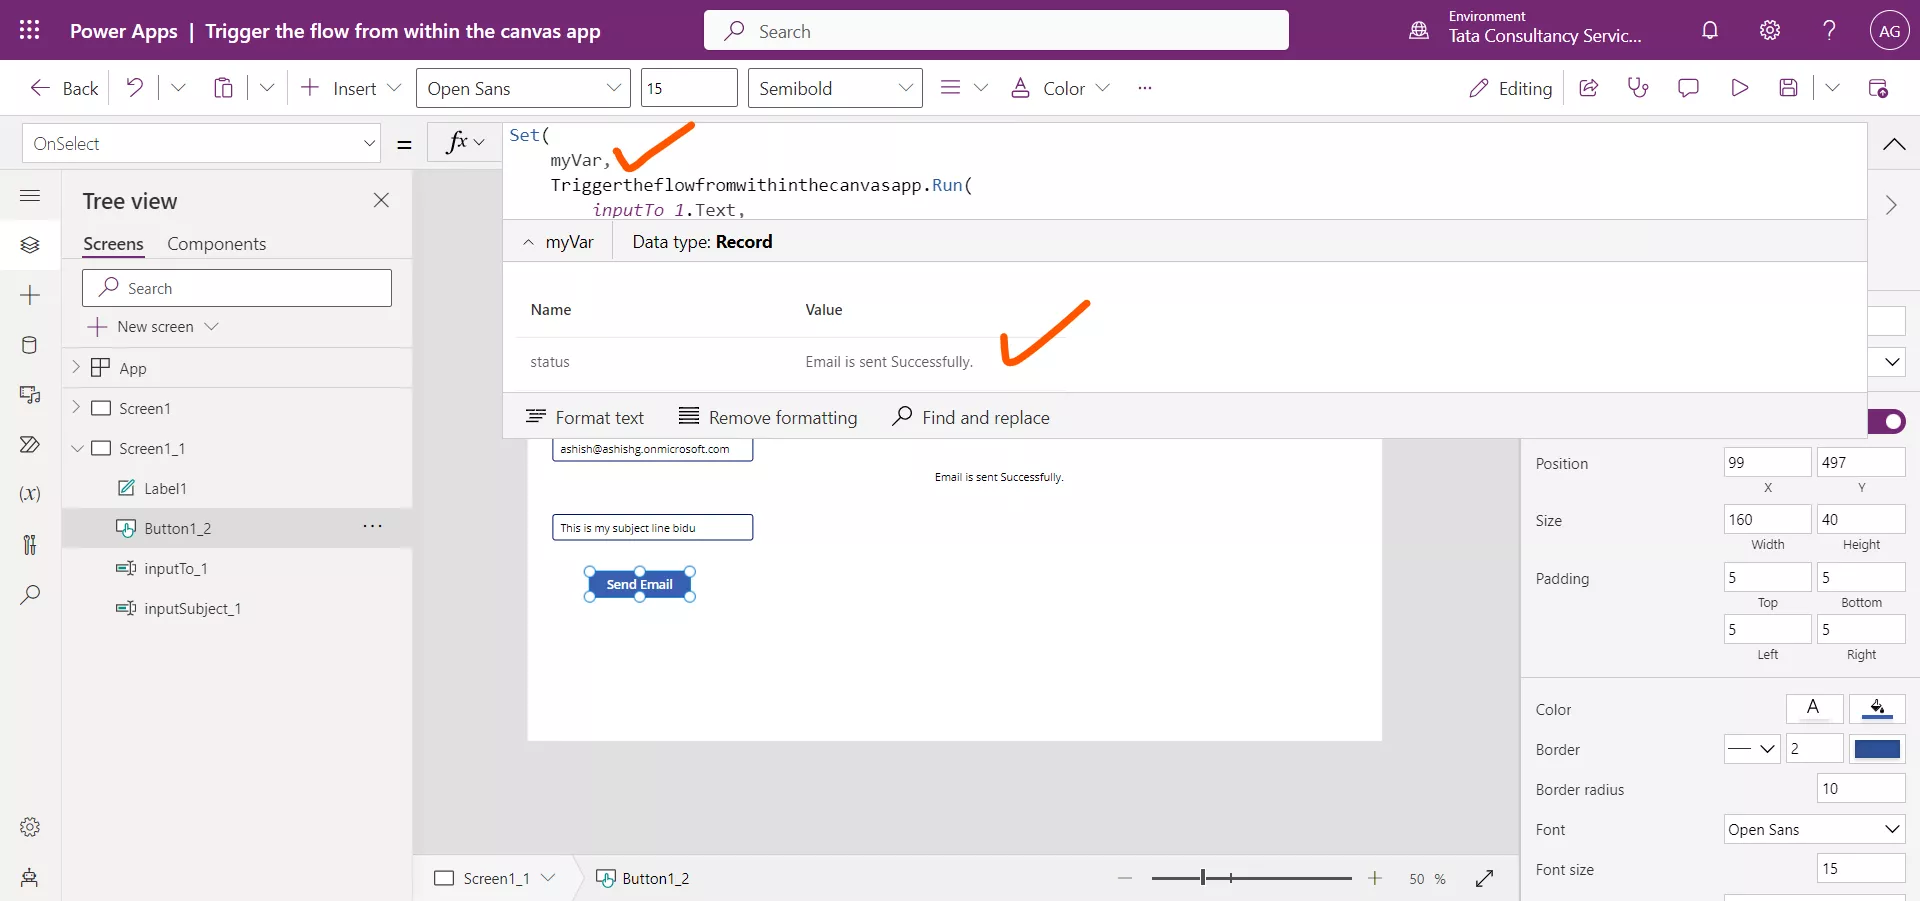
In this formula we are triggering the power automate flow and save its response in a global variable myVar.
Step 14: Sometimes the changes we have done in the power automate those are not reflected in the power apps, so we need to remove the flow from the power apps and add it again to resolve such issues.
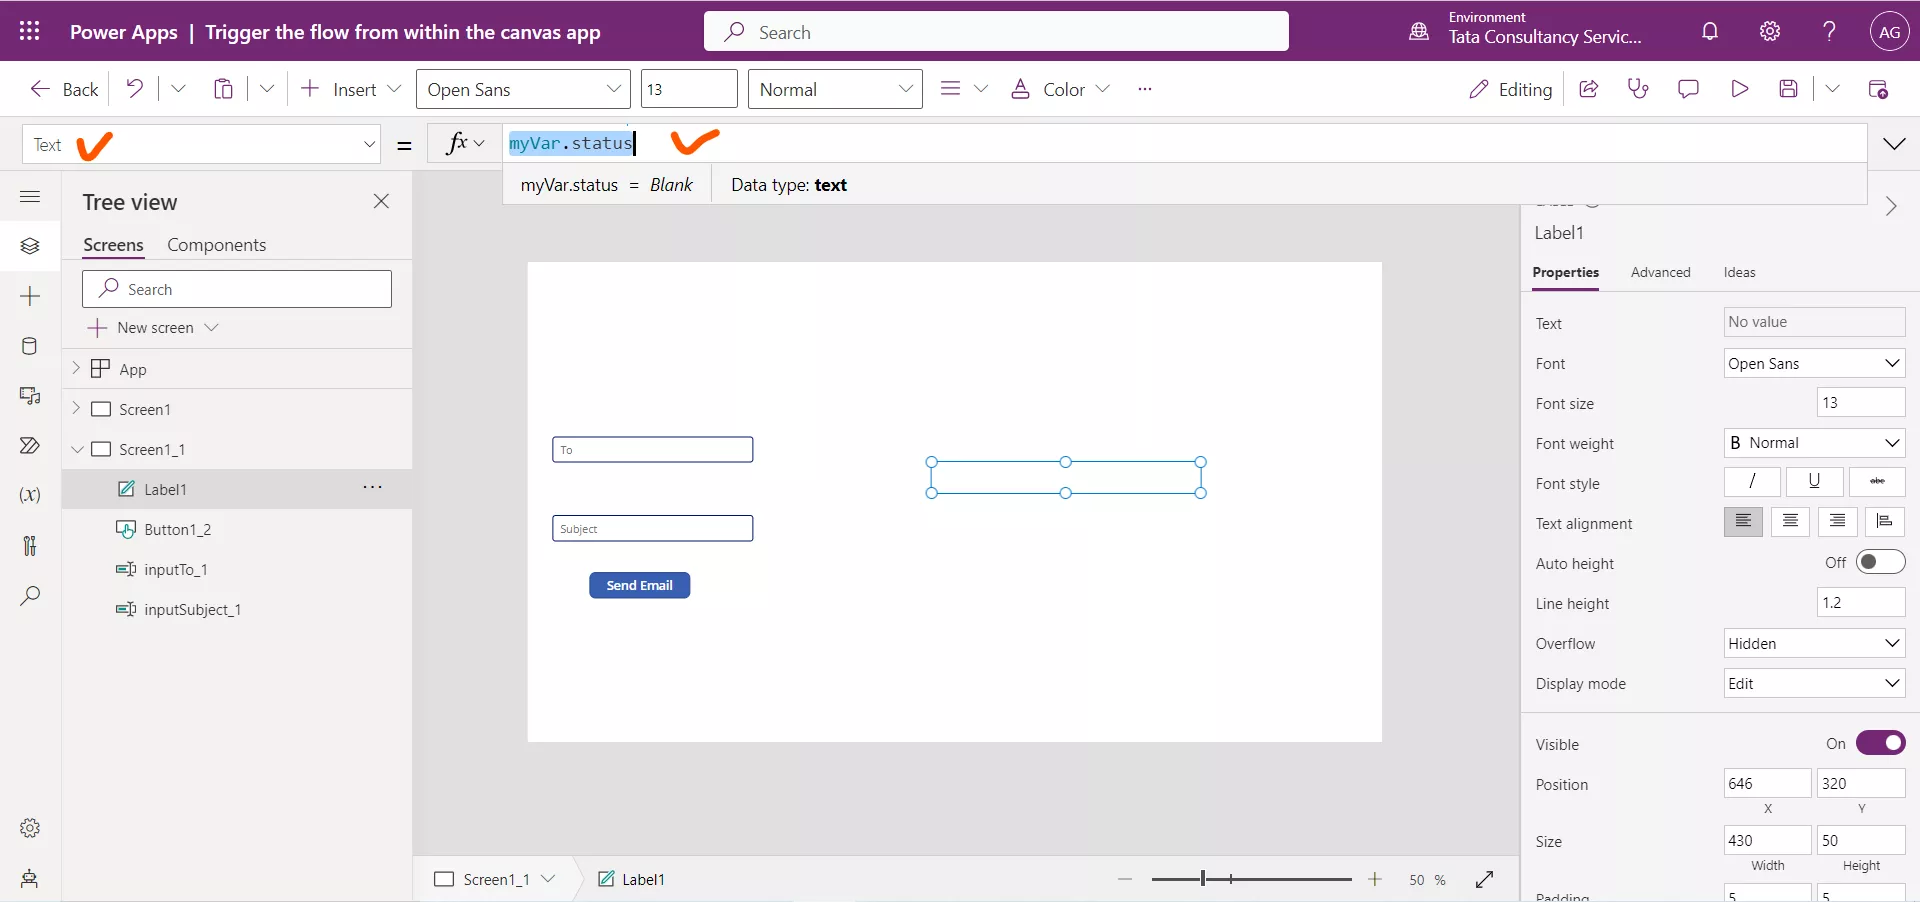
Step 15: Add one Text label, which will show the output of the flow. Set the Text property of the label to myVar.status, where status is the output parameter name that we have created earlier.
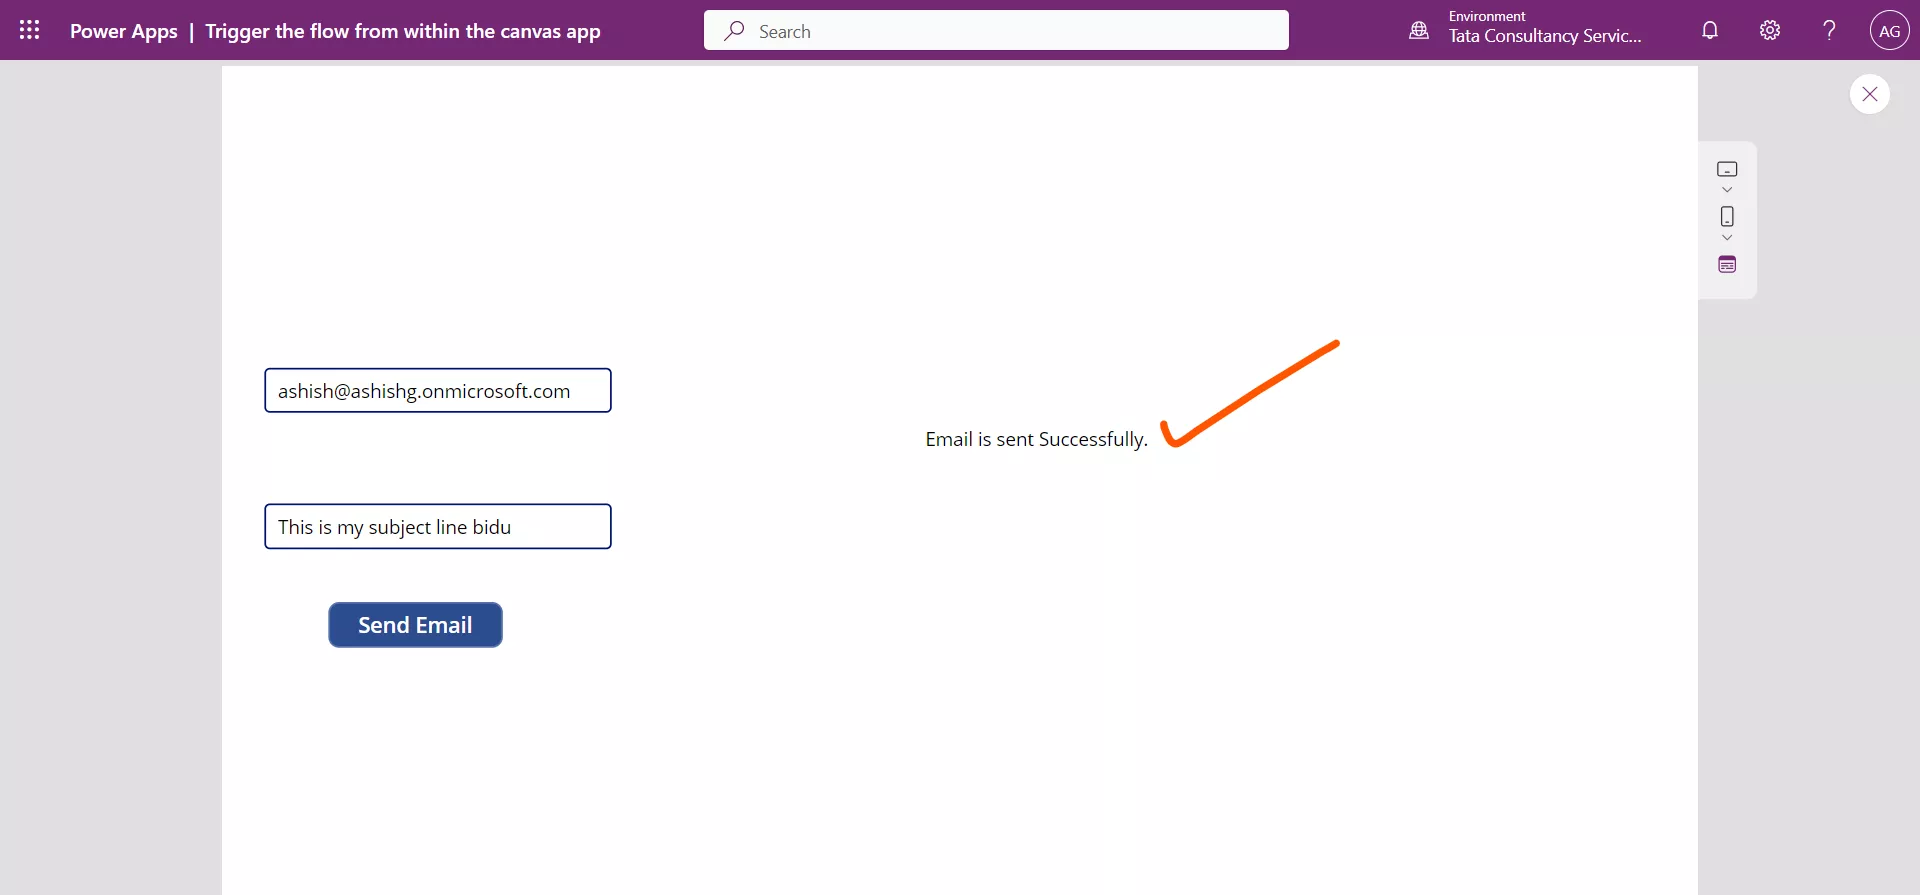
Step 16: Now run the flow by passing the values. We can see below that the flow ran successfully and the label is showing the answer:
When we click on Send Email button, the flow is triggered and from its response we are extracting the status in the Text label control, and show the user that the flow is executed successfully.
Even we can see that myVar variable contains the record.
