Notify() and User() function in Powerapps
1. Notify Function in Power Apps
The Notify function displays a banner message to the user at the top of the screen. The notification will remain until the user dismisses it or the timeout expires which defaults to 10 seconds.
An appropriate color and icon are used depending on the type of the message. The type is specified by the second argument to the function:
Note: The character limit for Notify function is 500 characters.
| S. No. | NotificationType Argument | Description |
|---|---|---|
| 1 | NotificationType.Error | Displays the message as an error. |
| 2 | NotificationType.Information | Displays the message as informational. This is the default value for NotificationType argument. |
| 3 | NotificationType.Success | Displays the message as success. |
| 4 | NotificationType.Warning | Displays the message as a warning. |
Power Apps Syntax
The function has the following parameters:
- Message – Required. The message to be displayed to the user.
- NotificationType – Optional. Type of the message to display from the table above. The default is NotificationType.Information.
- Timeout – Optional. Number of milliseconds to wait before automatically dismissing the notification. The default is 10 seconds (or 10,000 milliseconds). The notification will be displayed indefinitely with a Timeout of 0.
Example:Step 1: Add a Button control to the screen.
Step 2: Set the OnSelect property of the Button to the following powerapps formula.
Power Apps Formula
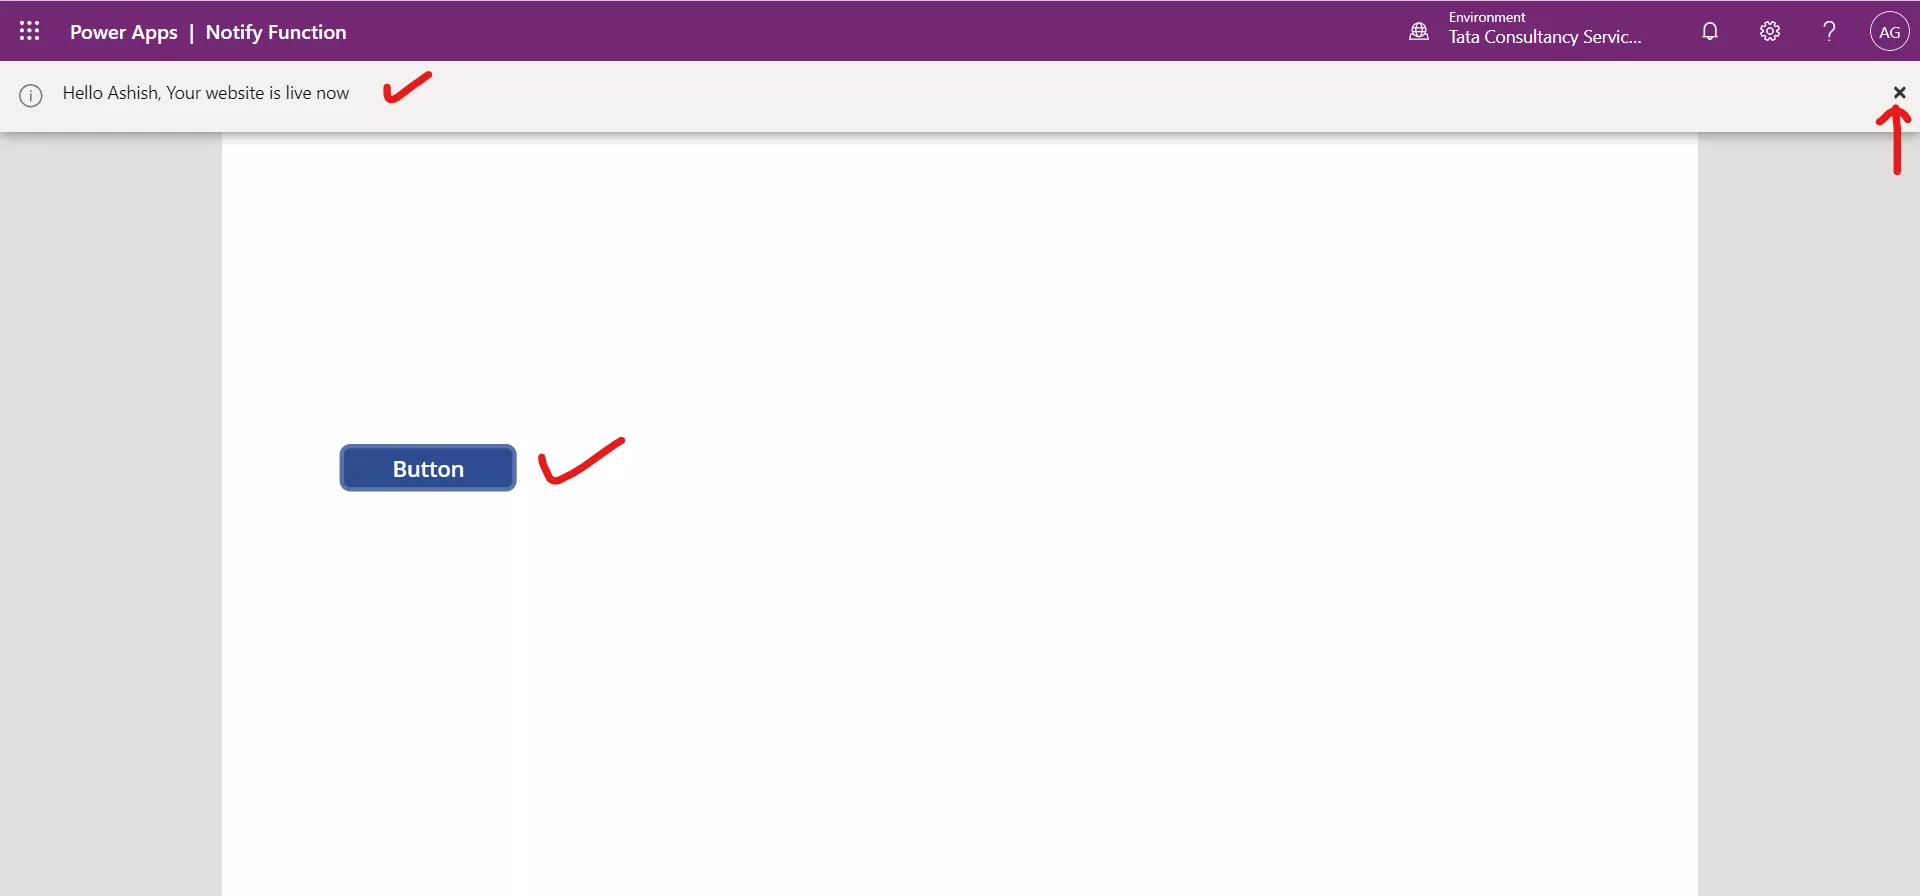
Step 3: Click or press the button.
Each time the button is clicked, the message “Hello Ashish, Your website is live now” is displayed to the user as informational. It will dismiss automatically in 10 seconds (default timeout) if the user does not dismiss it or press the button again. To dismiss it press the x icon on the top-right of the notification bar.
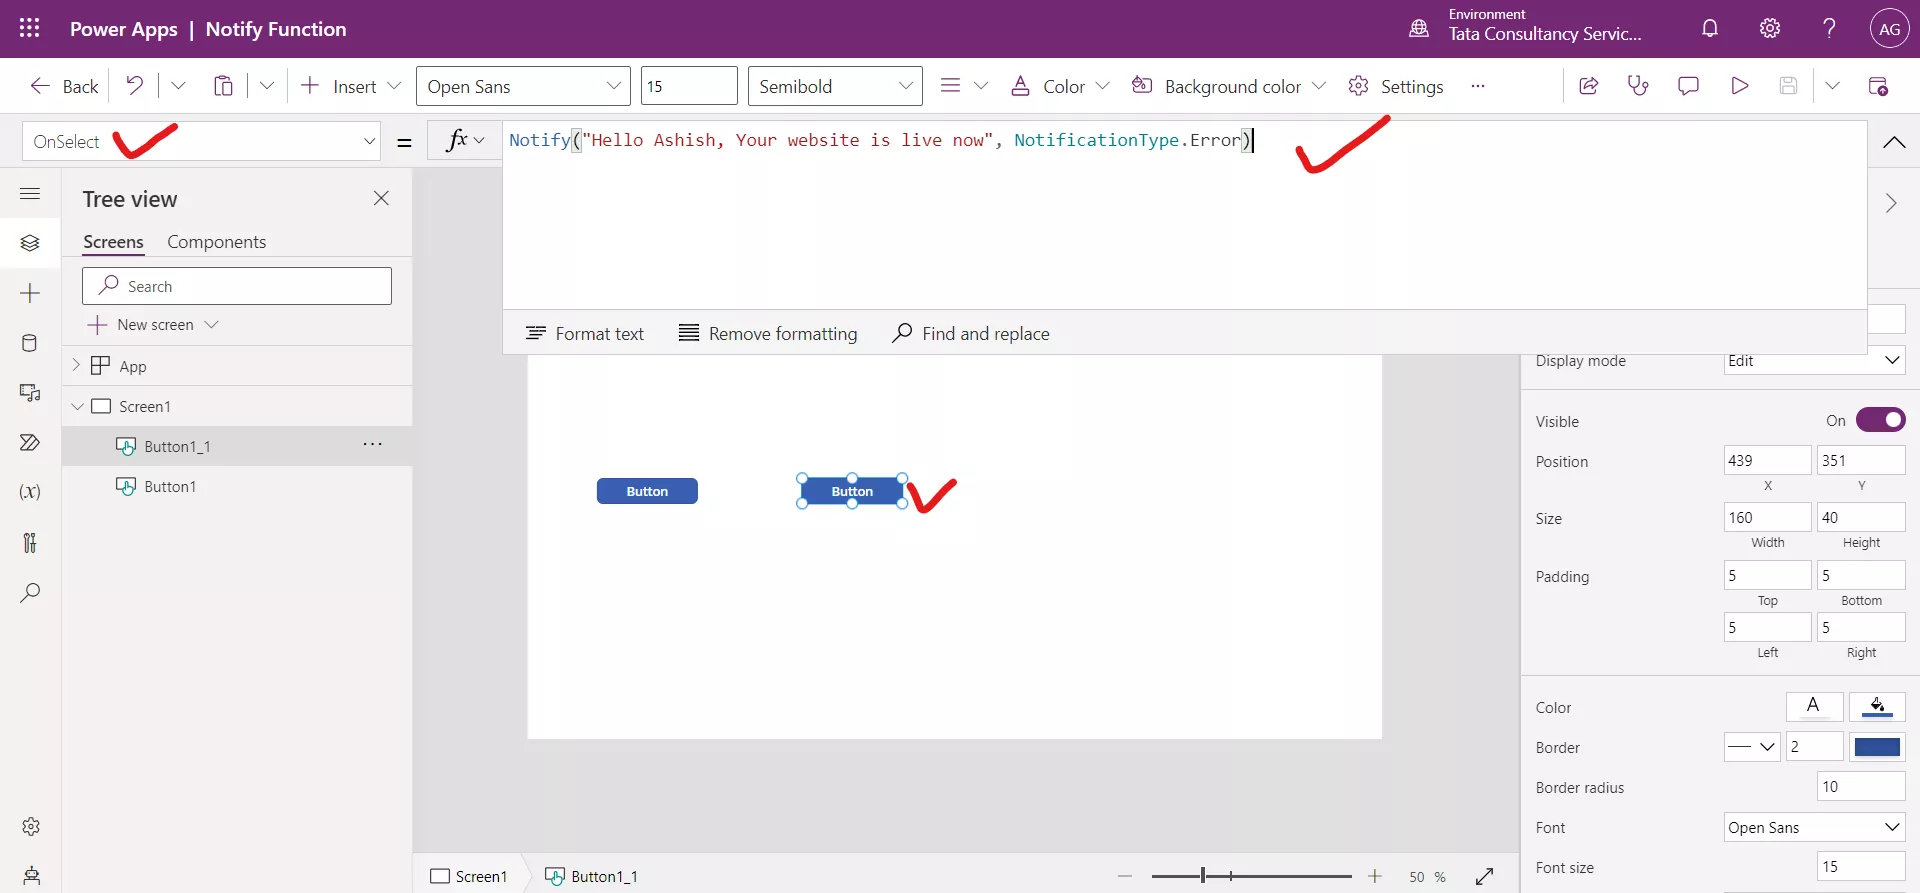
Step 4: Change the type of message to indicate an error. Add a second argument to our formula:
Power Apps Formula
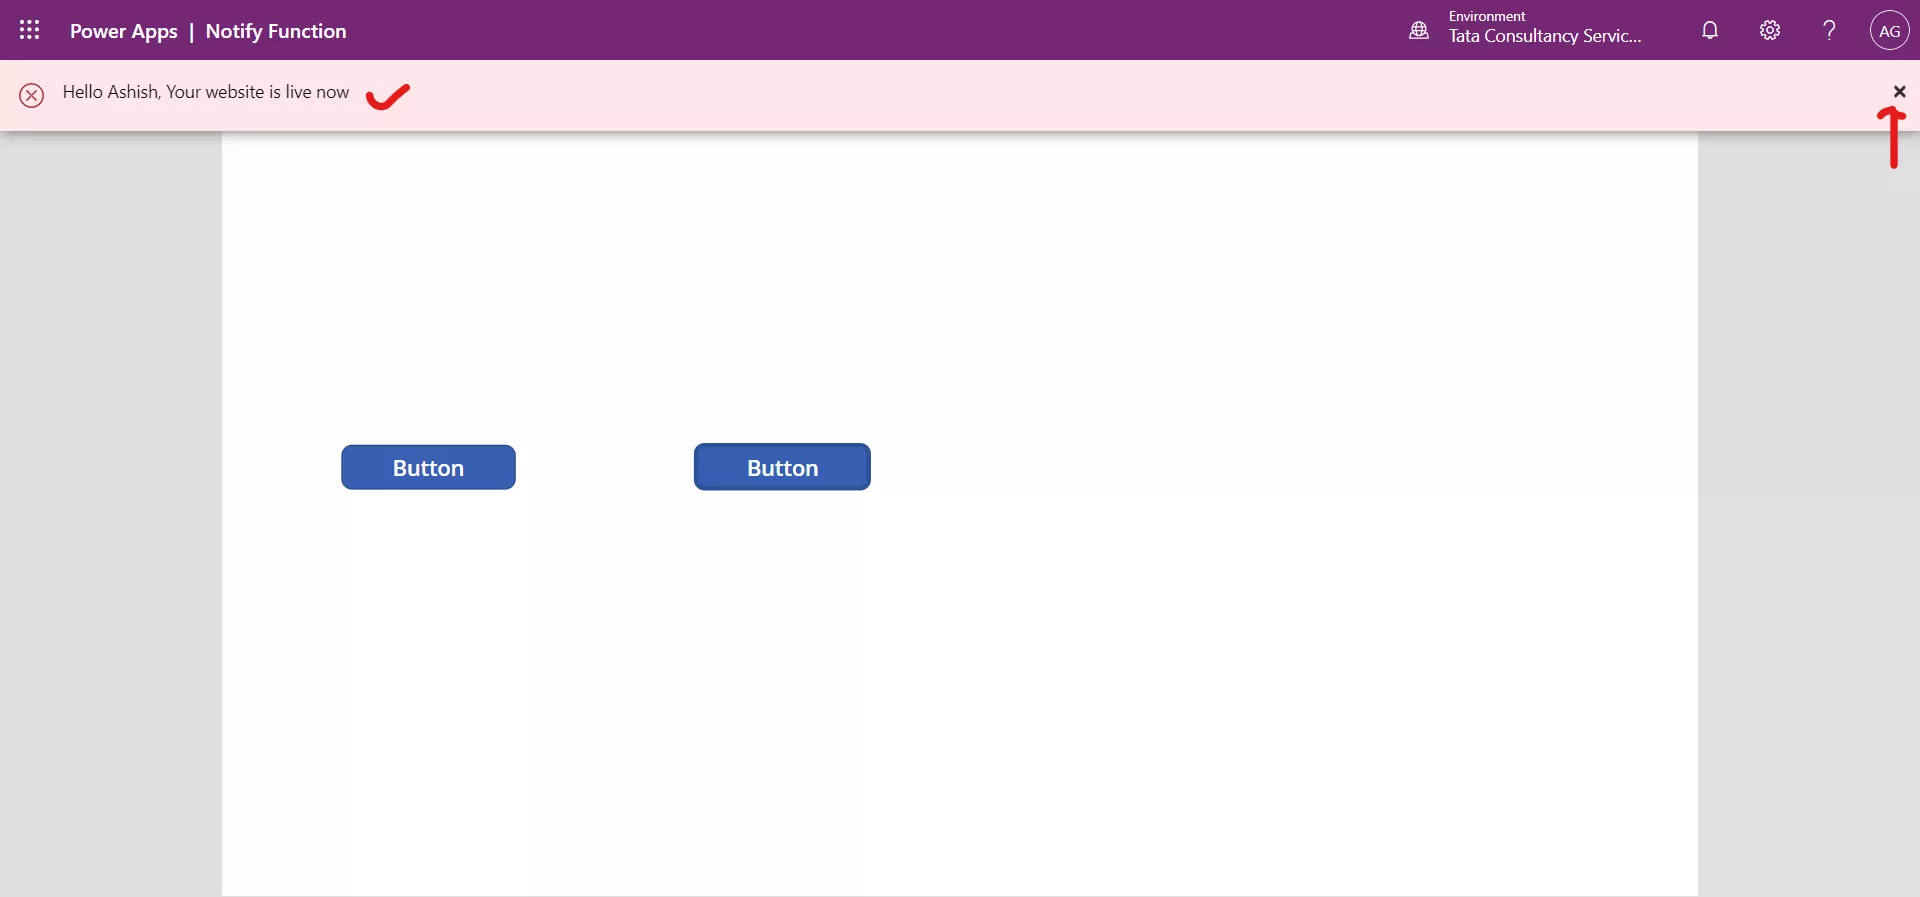
Step 5: Click or press the button.
Now each time the button is clicked, the message “Hello Ashish, Your website is live now” is displayed to the user as an error. It will dismiss automatically in 10 seconds (default timeout) if the user does not dismiss it or press the button again. To dismiss it press the x icon on the top-right of the notification bar.
Step 6: Change the type of message to indicate a warning. Change the second argument in our formula:
Power Apps Formula
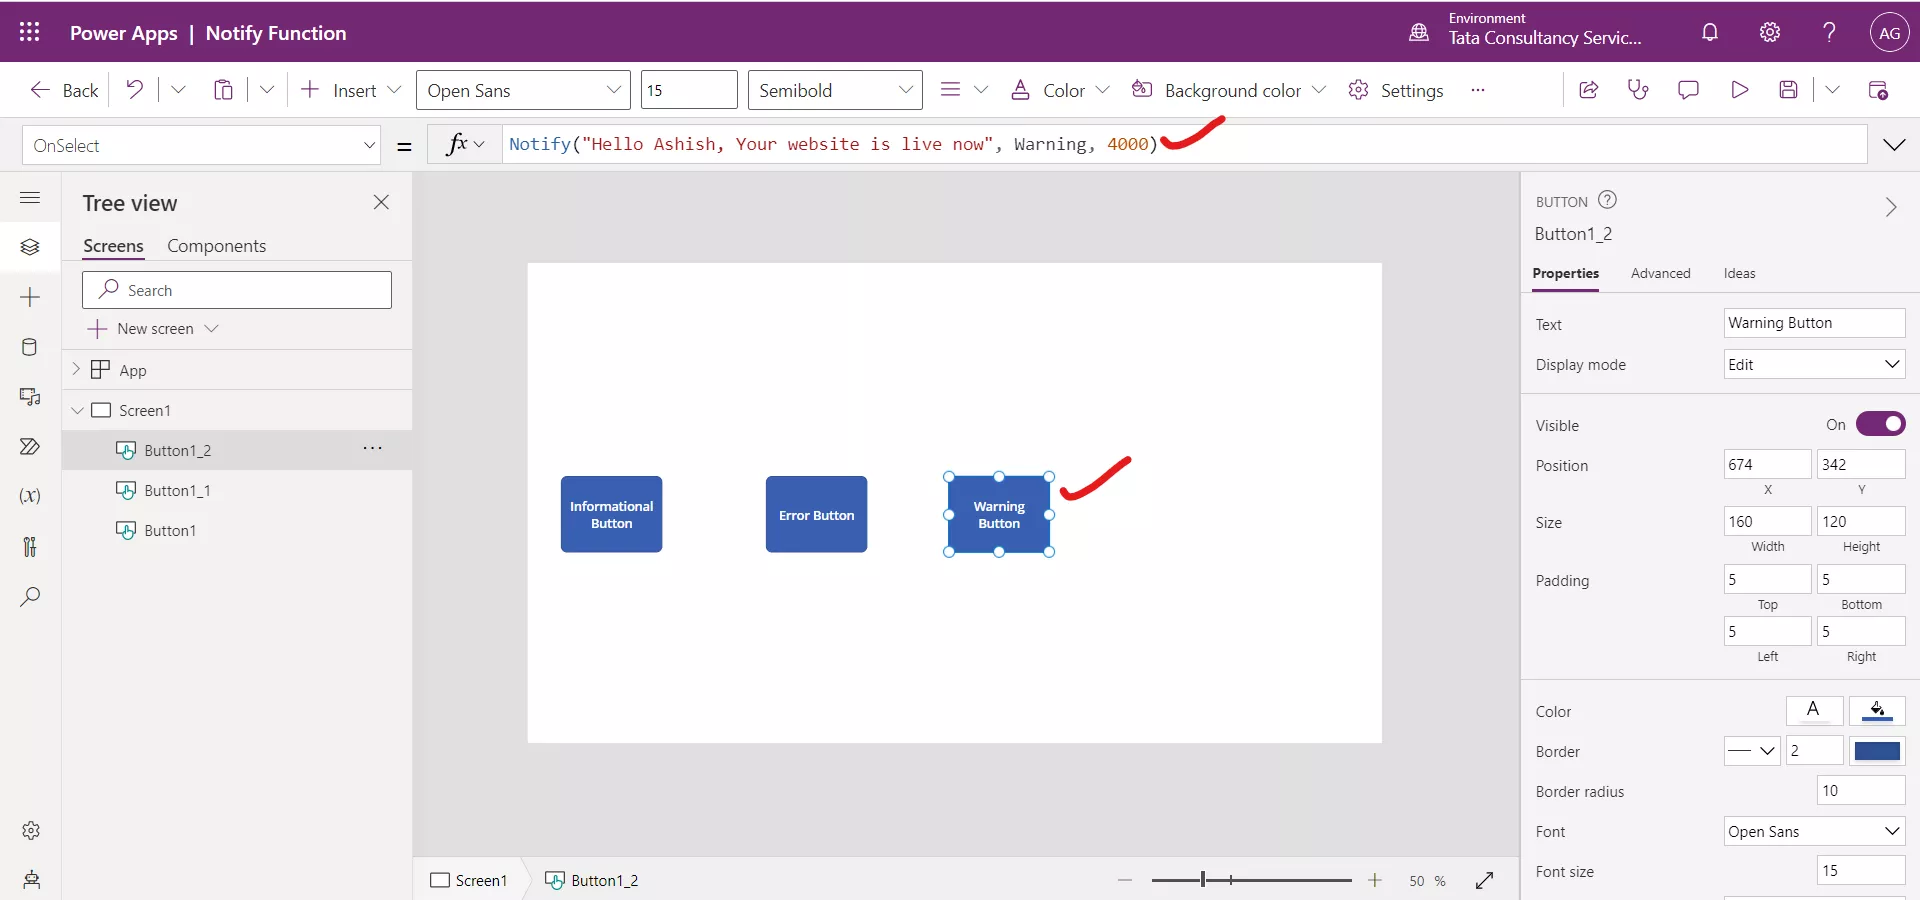
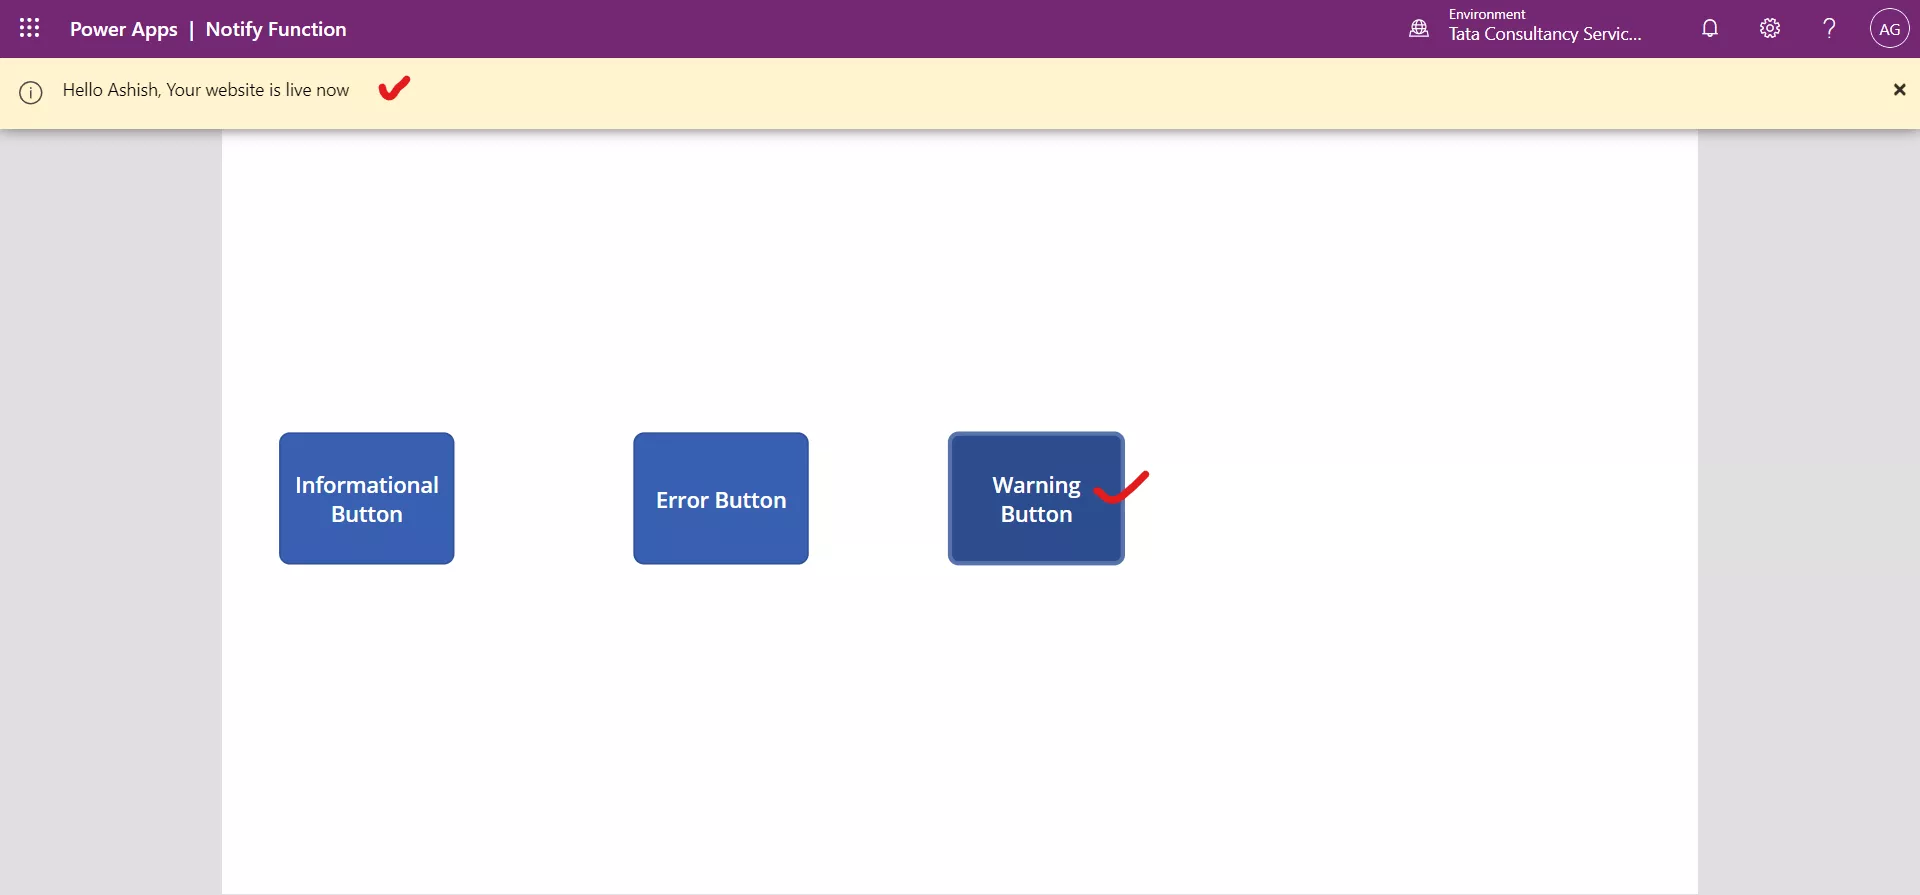
Step 7: Click or press the button.
Now each time the button is clicked, the message “Hello Ashish, Your website is live now" is displayed to the user as a warning. It will dismiss automatically in 4 seconds (4,000 milliseconds) if the user does not dismiss it or press the button again. To dismiss it press the x icon on the top-right of the notification bar.
Step 8: Change the type of message to indicate success. Change the second argument in our formula:
Power Apps Formula
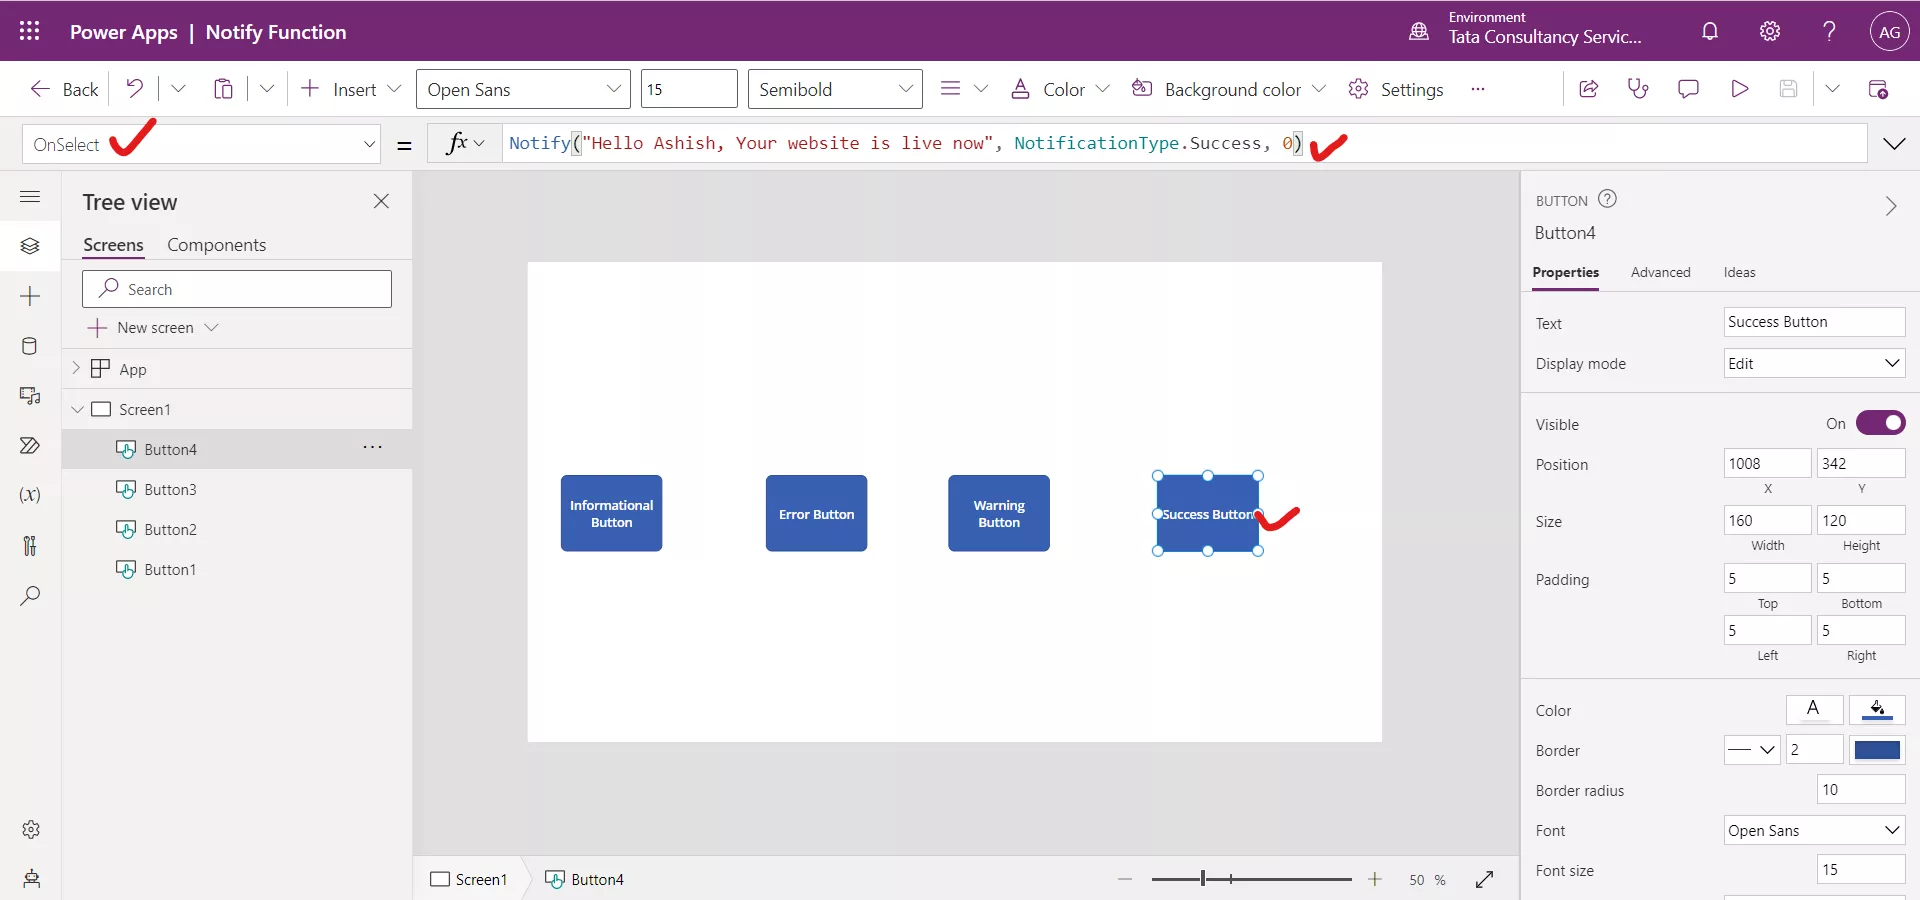
Step 9: Click or press the button.
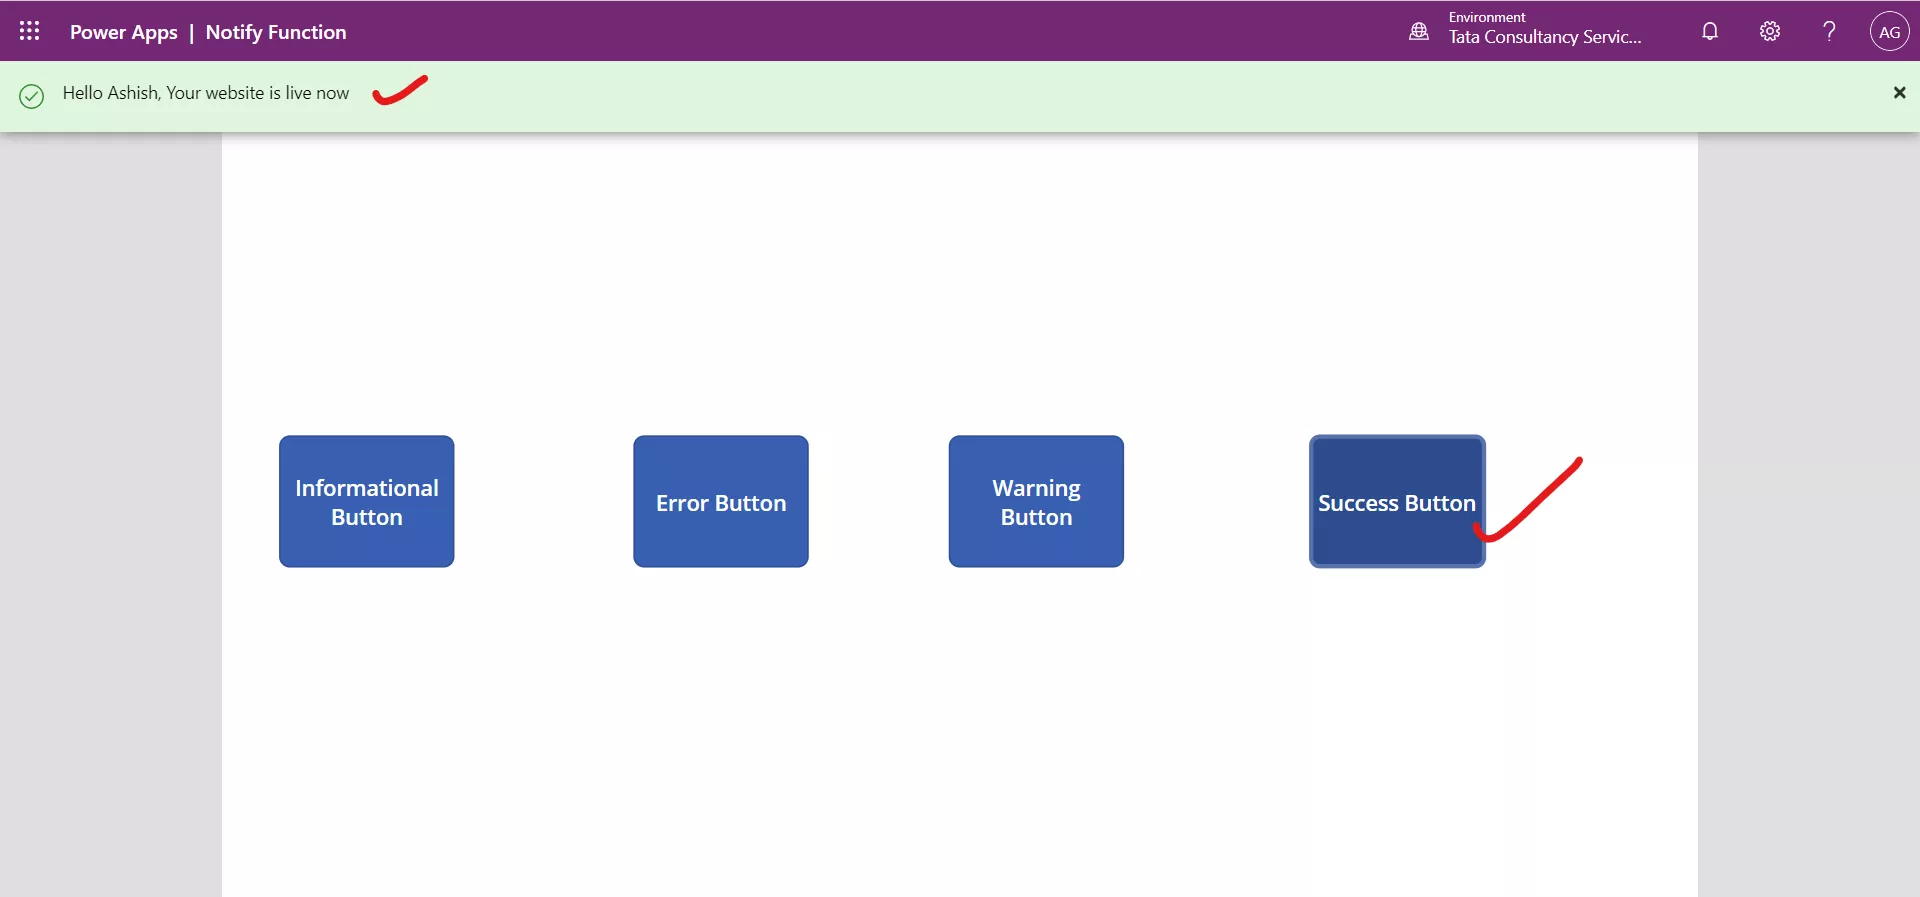
Now each time the button is clicked, the message “Hello Ashish, Your website is live now" is displayed to the user as success. With a 0 timeout, the notification will only be dismissed by the user or by pressing the button again. To dismiss it press the x icon on the top-right of the notification bar.
2. User Function in Power Apps
In Power Apps, we can show information about the current user who is signed into a canvas app with the User() function.
The User() function returns the following information about the current user:
- Full name,
- Email address, and
- the picture
| Formula | Description |
|---|---|
| User() | It returns a record that have three information User Full name, User’s Email and the User picture. |
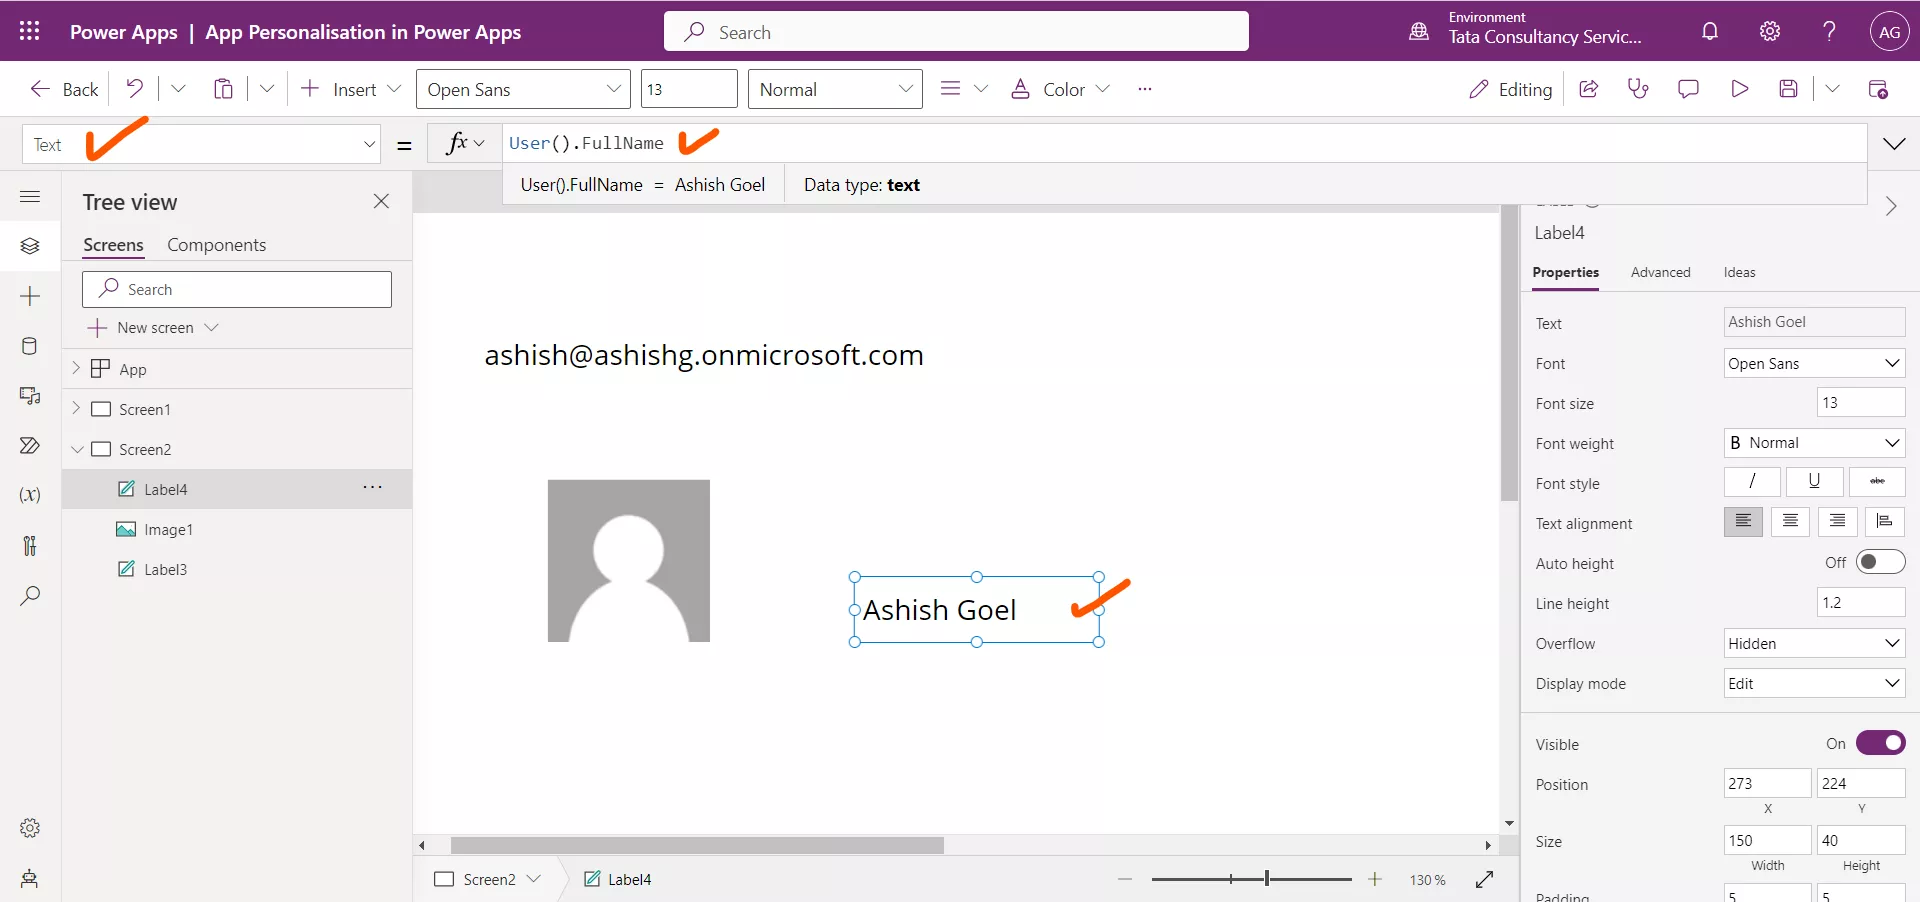
| User().FullName | It returns the User’s FullName as Text. |
| User().Email | It returns the User’s Email as Text. |
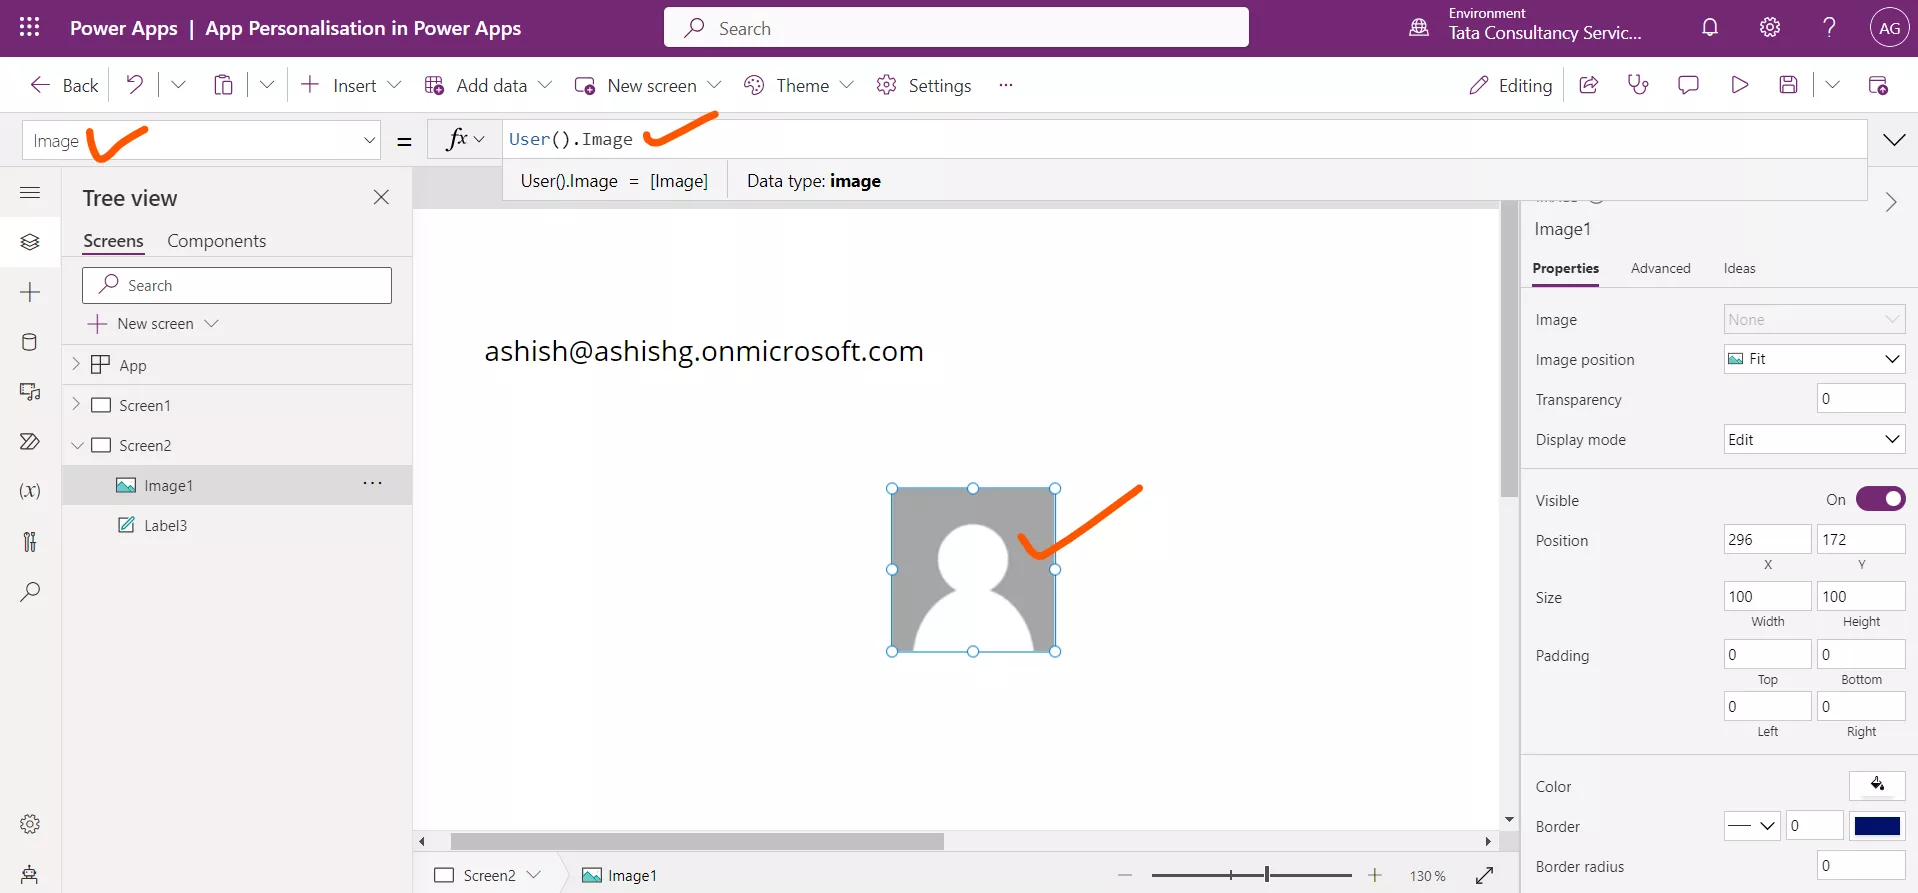
| User().Image | It returns the User’s picture. |
Example:Step 1: Add a Text label control and set its Text property to User().Email.
In the following Image we can see that the User() returns a record in which we have three information.
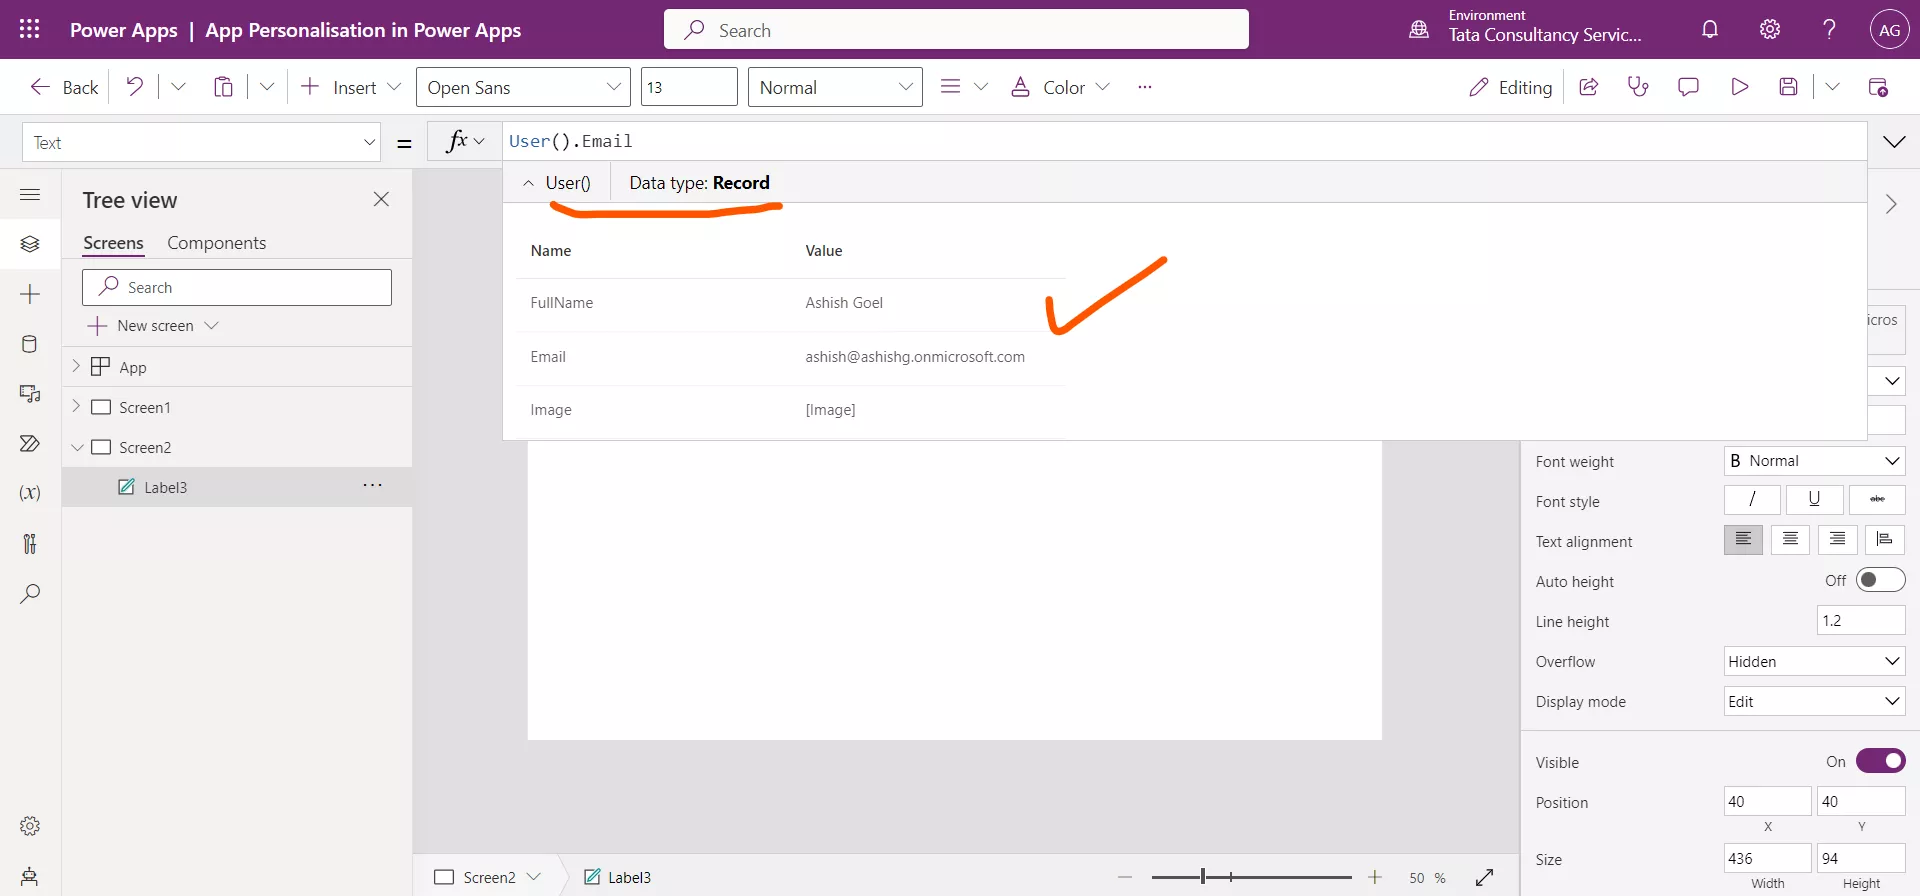
We can show the email id in the label control.
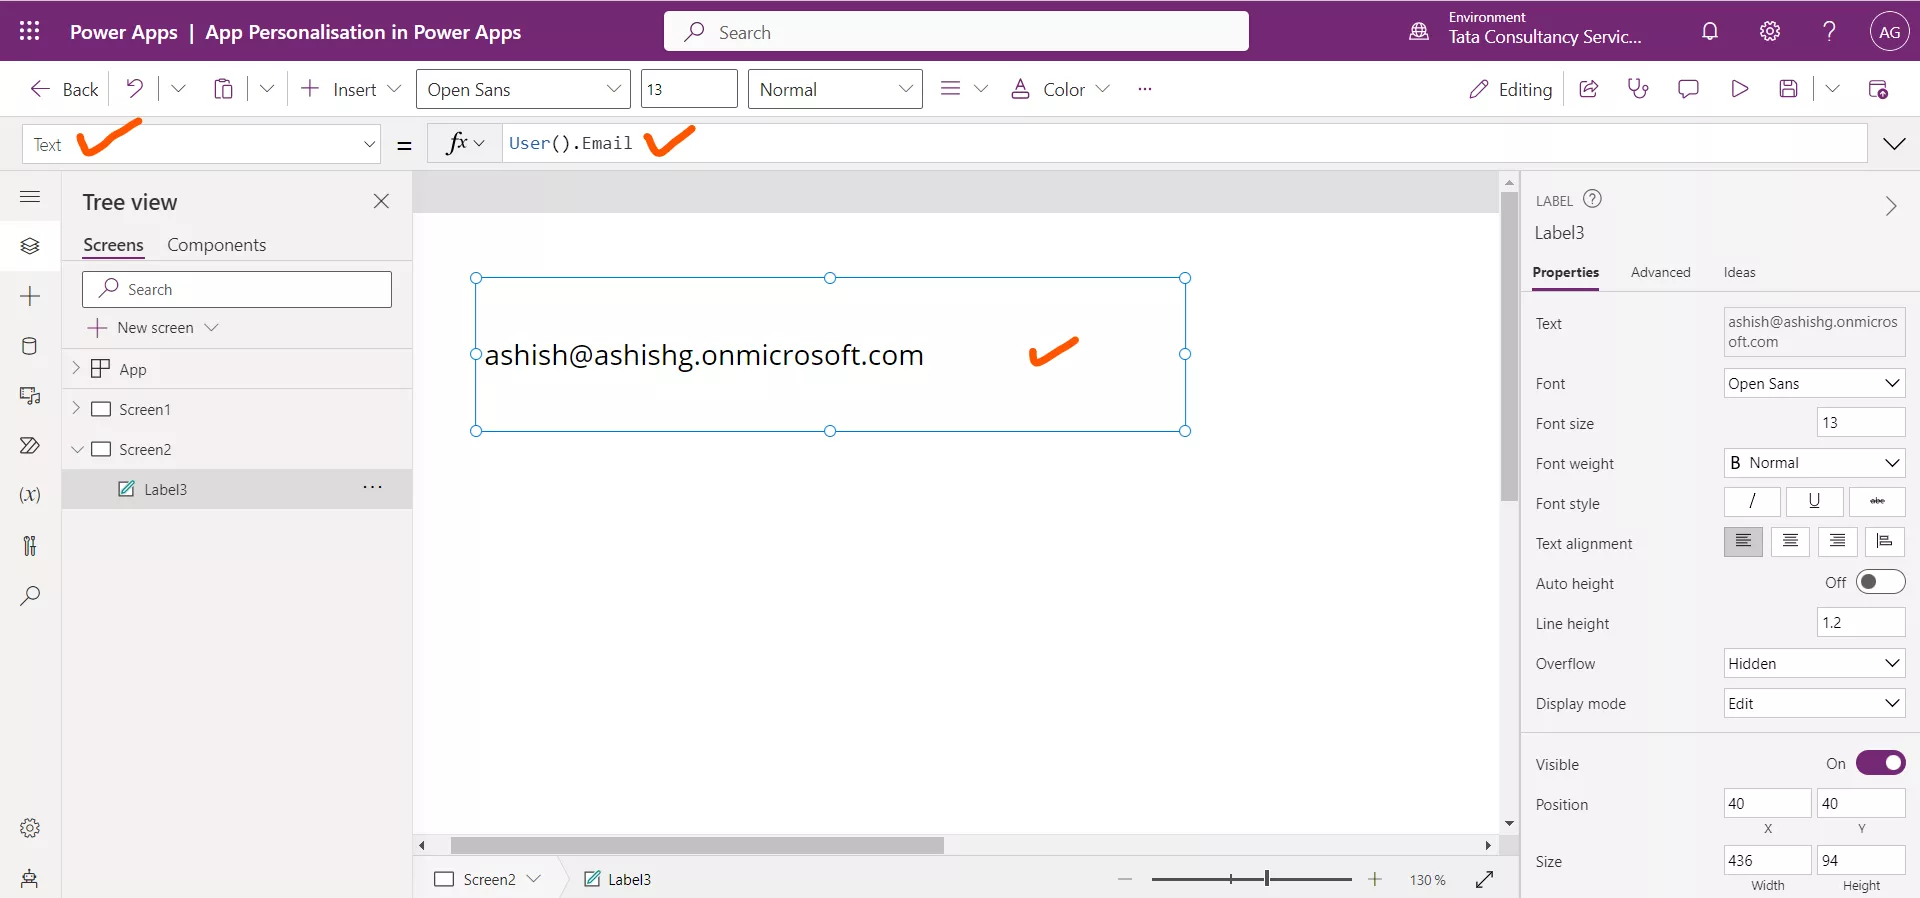
Step 2: Add one Image control to the screen. And set its Image property to the formula User().Image.
It shows the Image of the current user, if no image is added in the account, then the default image is shown, as in the following image.
Step 3: Insert a Text label control and change the Text property to the formula User().FullName. The formula returns the full name of the current user.
App Optimization The User() function queries Azure Active Directory for the current user's information. If we use the User() function multiple times, it needs to query the data each time. This creates repetitive calls to the network that slow down our app.
A better approach would be to store that information in a global variable when the app opens, and then reference that variable throughout our app. We could do this by Modifying the OnStart property of the app with the following formula.
Power Apps Formula
Now if we want to display the full name of our user, we would change the formula on Text property of the Text label control to the following.
Power Apps Formula
The above formula gets us the same output as the formula User().FullName, but instead of having to go back to Azure AD on every screen, Power Apps can reference the value stored in the variable.