Collections in Power Apps
Collections are table variables in which we can store data temporarily in a structured format, as we would in a tabular data source, without writing to a data source. In other words, they store values in rows and columns. We can use collections with table functions as we would any other data source. However, we cannot use a collection with the Form control.
1. Create a collection
We can create a collection within our app. For example, we can create a collection when pressing a button by changing the OnSelect property of the button, or even create a collection whenever we come to a certain screen by changing the OnVisible property of that screen, or even the OnStart property of the App.
We can create a collection named MyFirstCollection by using this formula.
Power Apps Formula
{FirstName: "Ashish", LastName: "Goel", ZipCode: 131001}
)
The collection would have columns named FirstName, LastName, and ZipCode. The collection would have one record (row) of data with Ashish as the value of FirstName, Goel as the value for LastName, and 131001 as the value for ZipCode.
Note: After loading data in the collection variable. When we leave the app and returns to the app, the app has no data in the collection variable, only the name of the columns are there. We need to again load the data in the collection variable.
You could add another record to the collection by using this formula.
PowerApps Formula
You can also add more than one record at a time by using this formula.
PowerApps Formula
{FirstName: "Ayesha", LastName: "Sharma", ZipCode: 4533257},
{FirstName: "Priya", LastName: "Verma", ZipCode: 678537}
)
If we ran all those commands, our collection would look like this table:
| FirstName | LastName | ZipCode |
|---|---|---|
| Ashish | Goel | 131001 |
| Nicola | Purple | 456785 |
| Ayesha | Sharma | 4533257 |
| Priya | Verma | 678537 |
You could then use that collection as a data source for our Gallery or Drop-down control.
Step 1: Select the Insert tab in the Canvas app and add a Button control, and set its OnSelect property to the following formula:
PowerApps Formula
{FirstName: "Ashish", LastName: "Goel", ZipCode: 131001},
{FirstName: "Abhishek", LastName: "Bachhan", ZipCode: 456785},
{FirstName: "Ayesha", LastName: "Sharma", ZipCode: 4533257},
{FirstName: "Priya", LastName: "Verma", ZipCode: 678537}
)
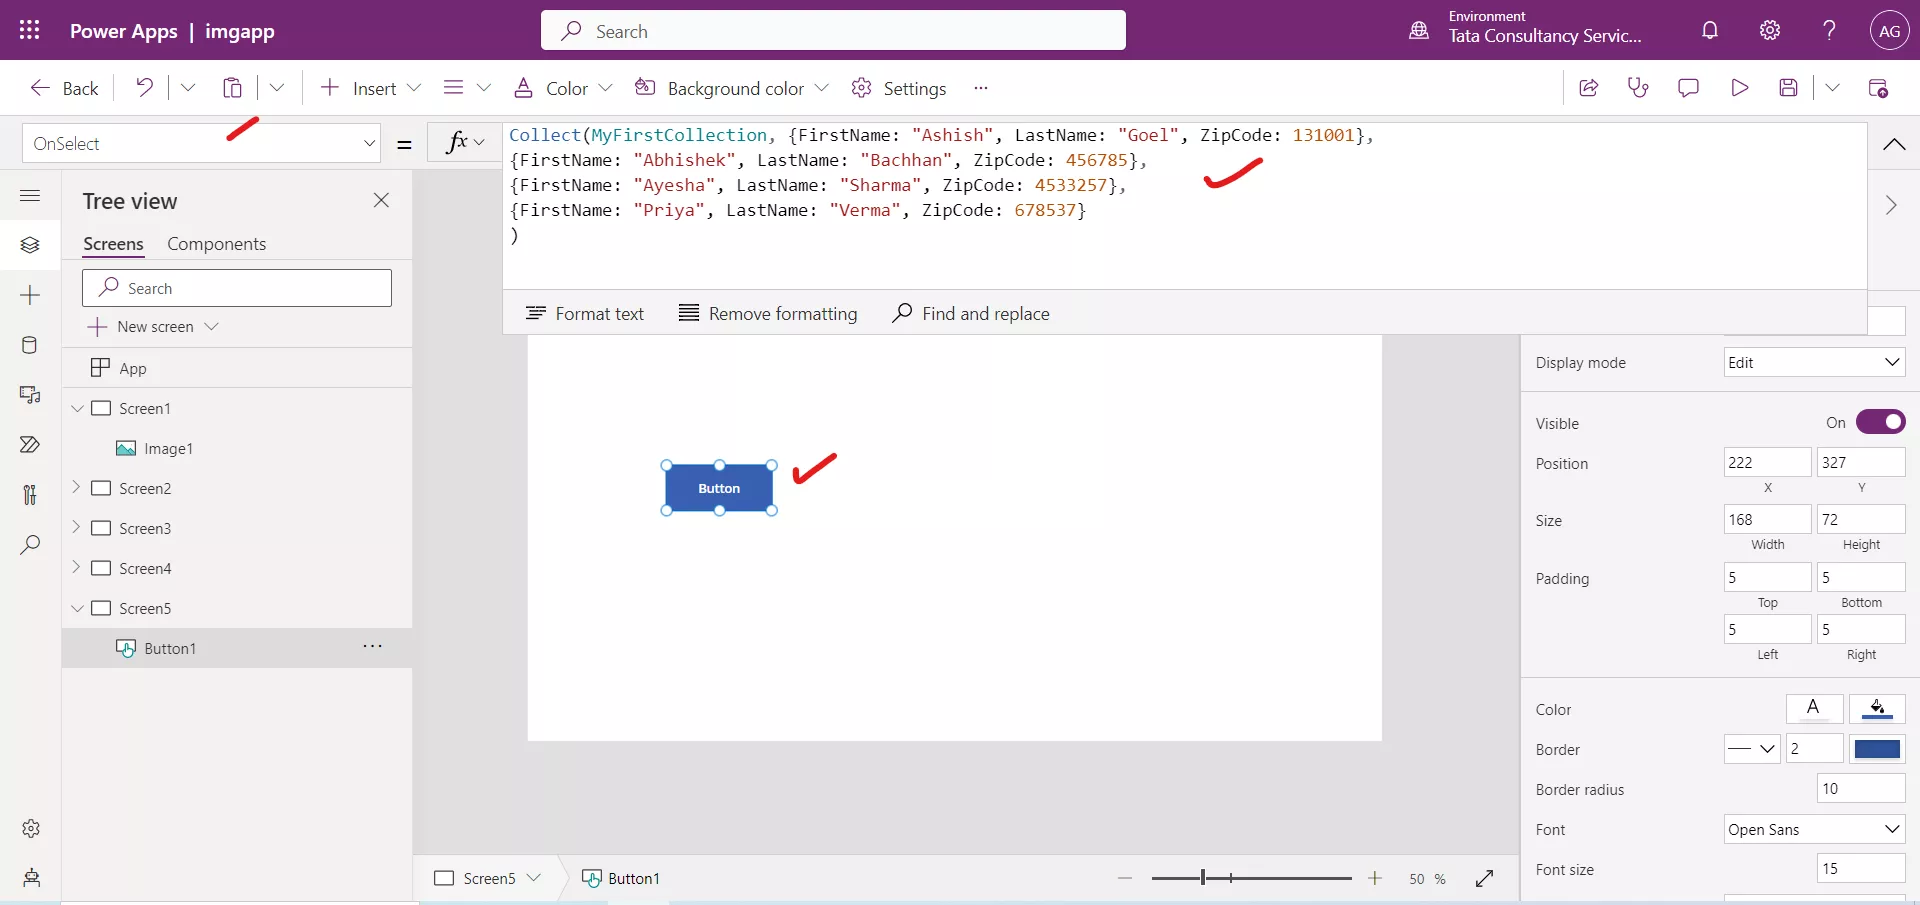
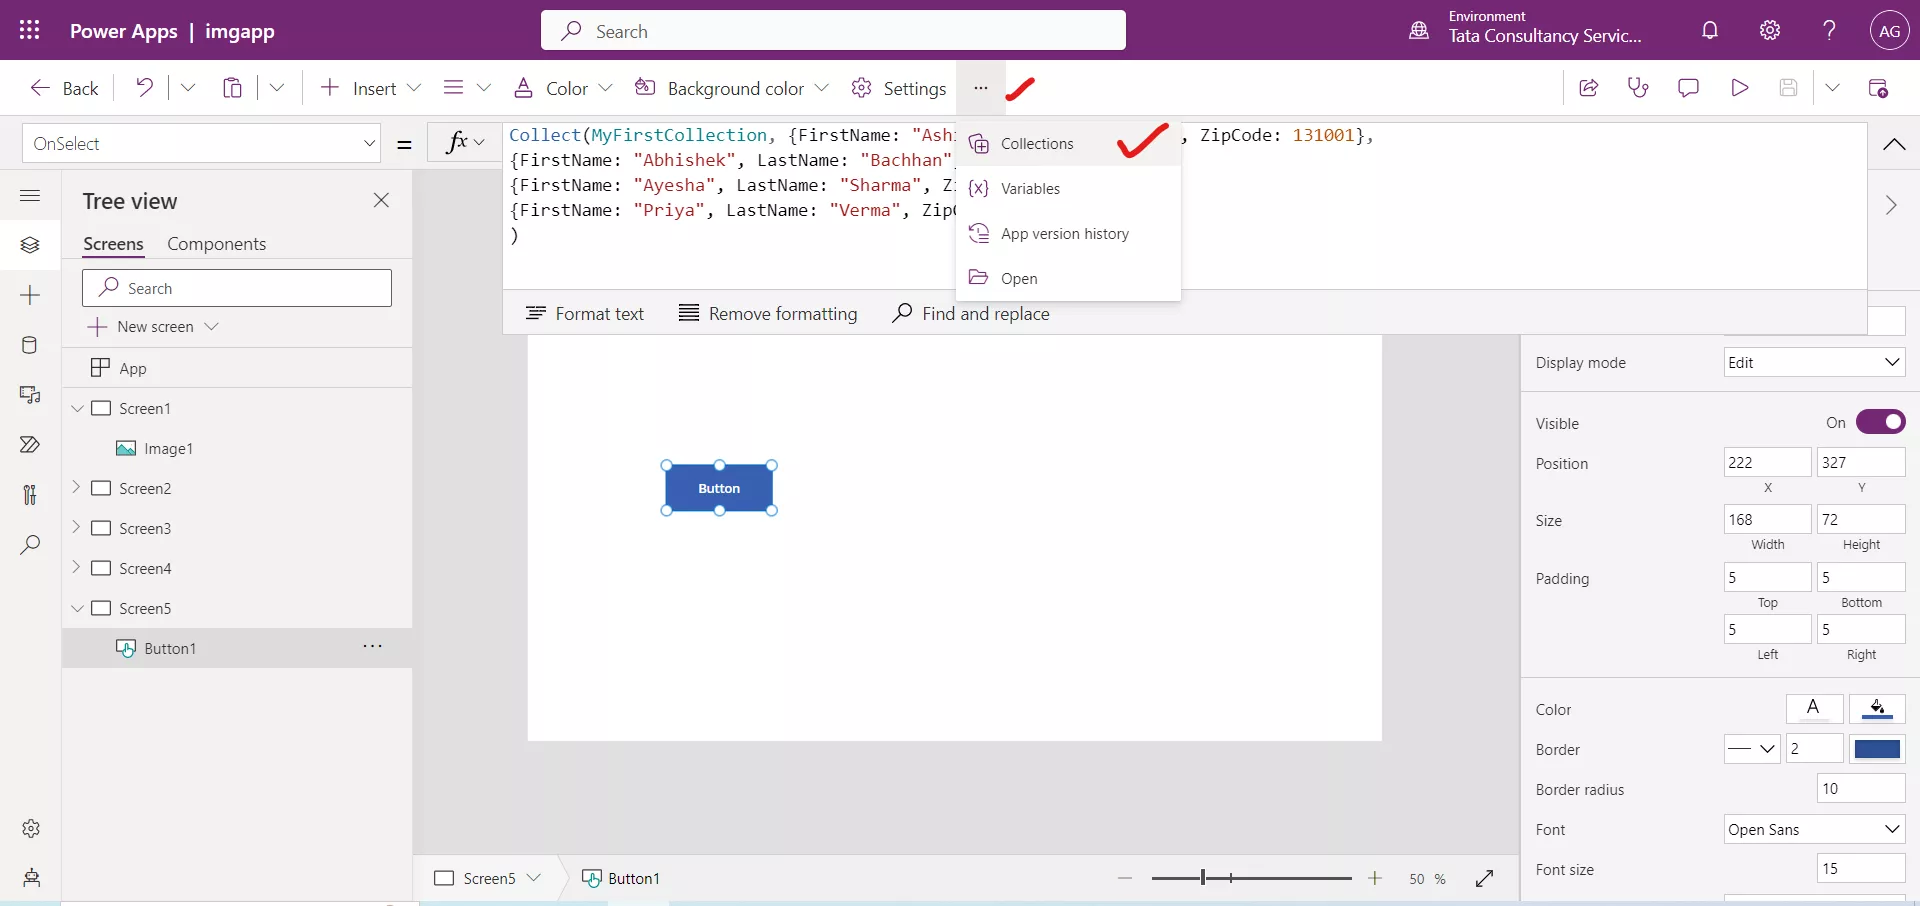
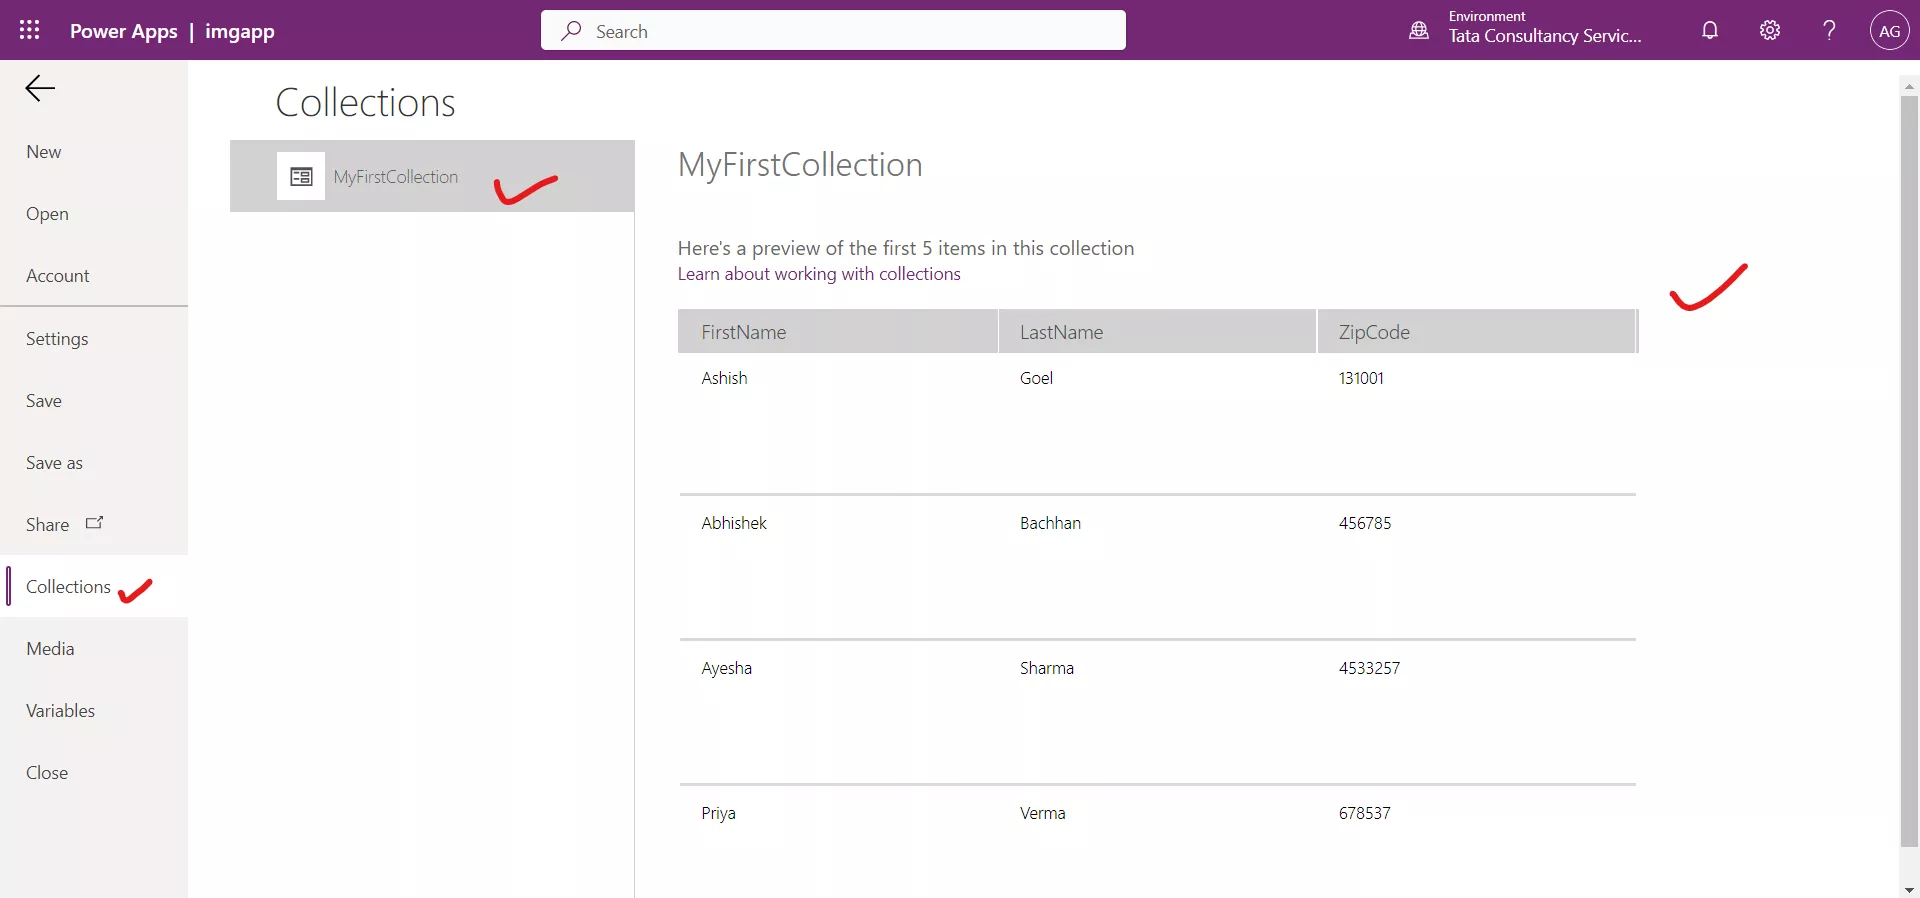
Step 2: Press and hold Alt Key, and select the Button control. (This will create our collection and store all the information.). We can see this by clicking on the three dots and then click on Collections.
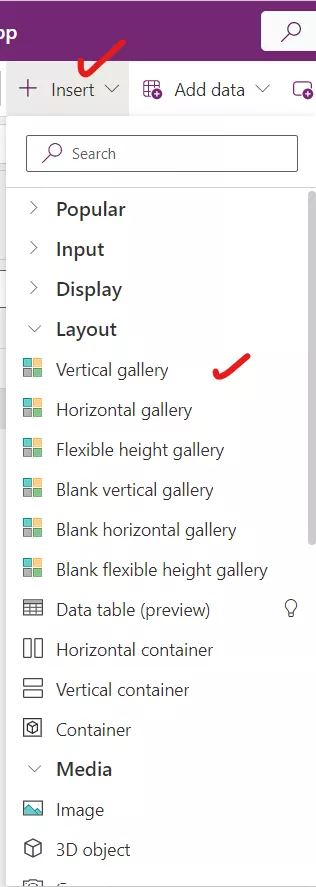
Step 3: Click on + Insert from the command bar at the top. Select the Gallery dropdown at the top and choose Vertical gallery.
Step 4:When we add a gallery control to the Canvas, it immediately shows a dialog box giving us the option to Select a data source and choose MyFirstCollection from the data source pop-up.
We can see that the Items property of the Vertical gallery control to the MyFirstCollection.
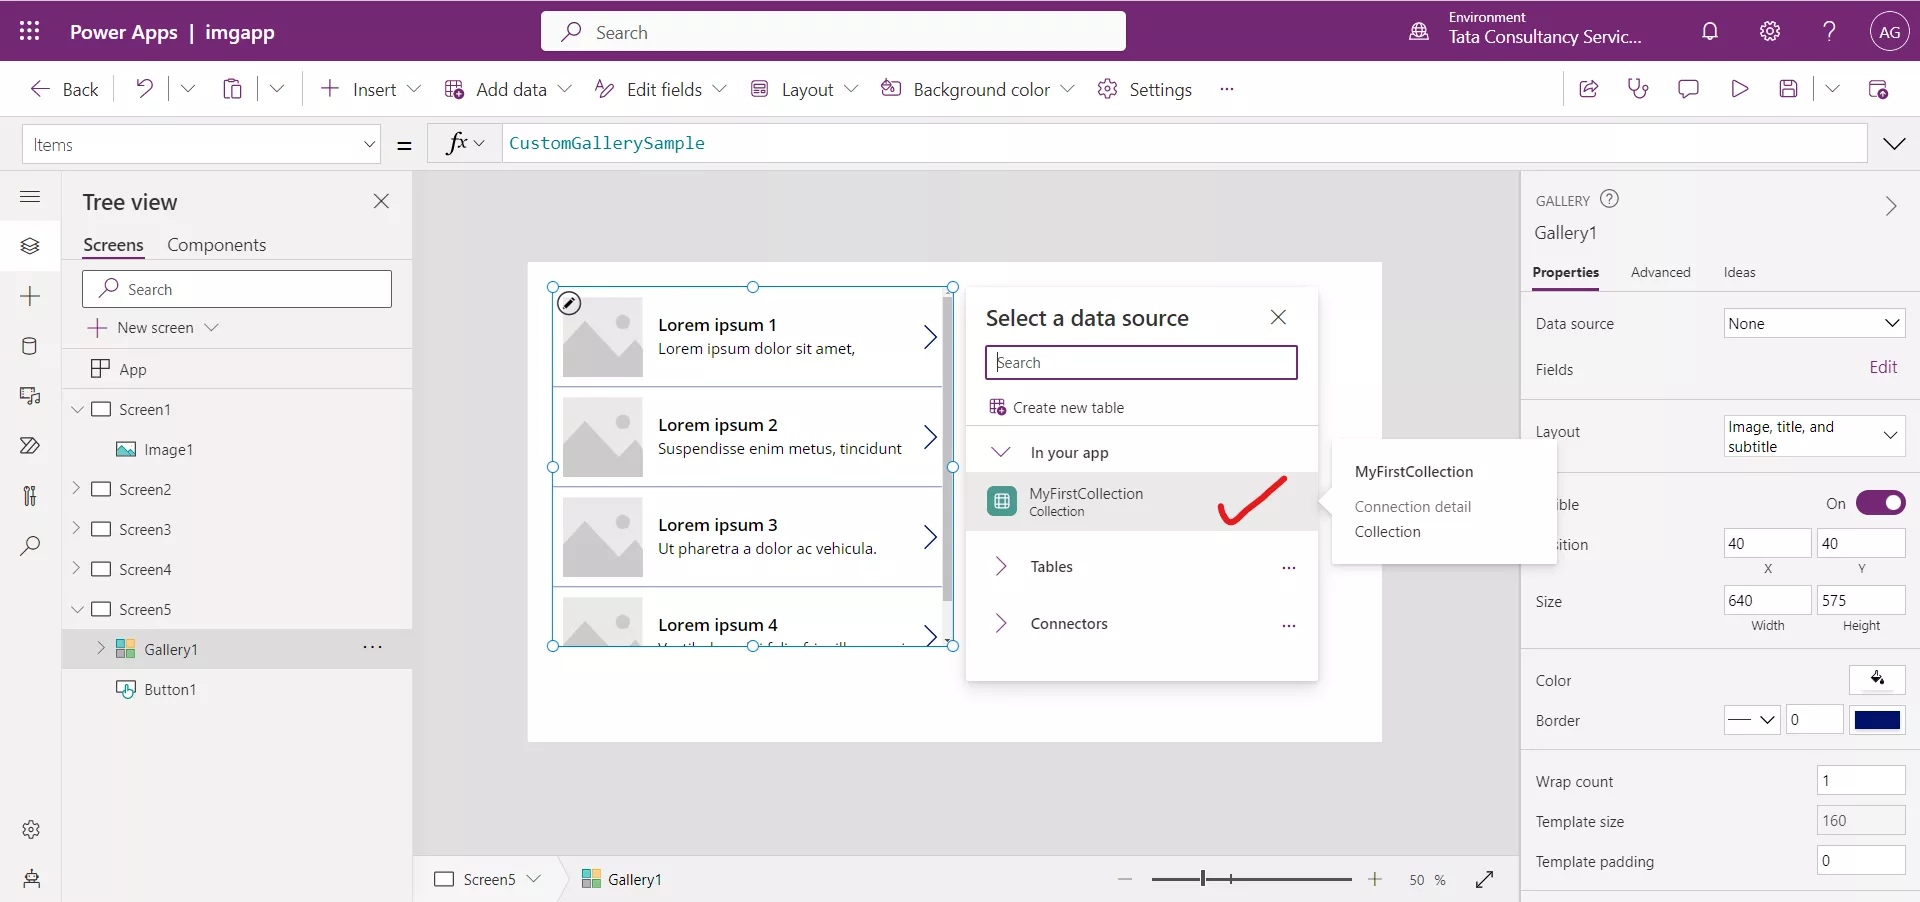
By default, within this dialog box the In your app data sources will be expanded, but we can either search for one via the search field or expand the Tables or Connectors dropdowns and scroll through the list. Alternatively, in our Gallery's Properties menu on the right side of the screen we can use the dropdown next to Data source which displays the same Select a data source dialog.
Step 5: With the gallery selected in the tree view, under the Properties pane, select from various Layout options, change the layout from blank to Title, subtitle, and body.
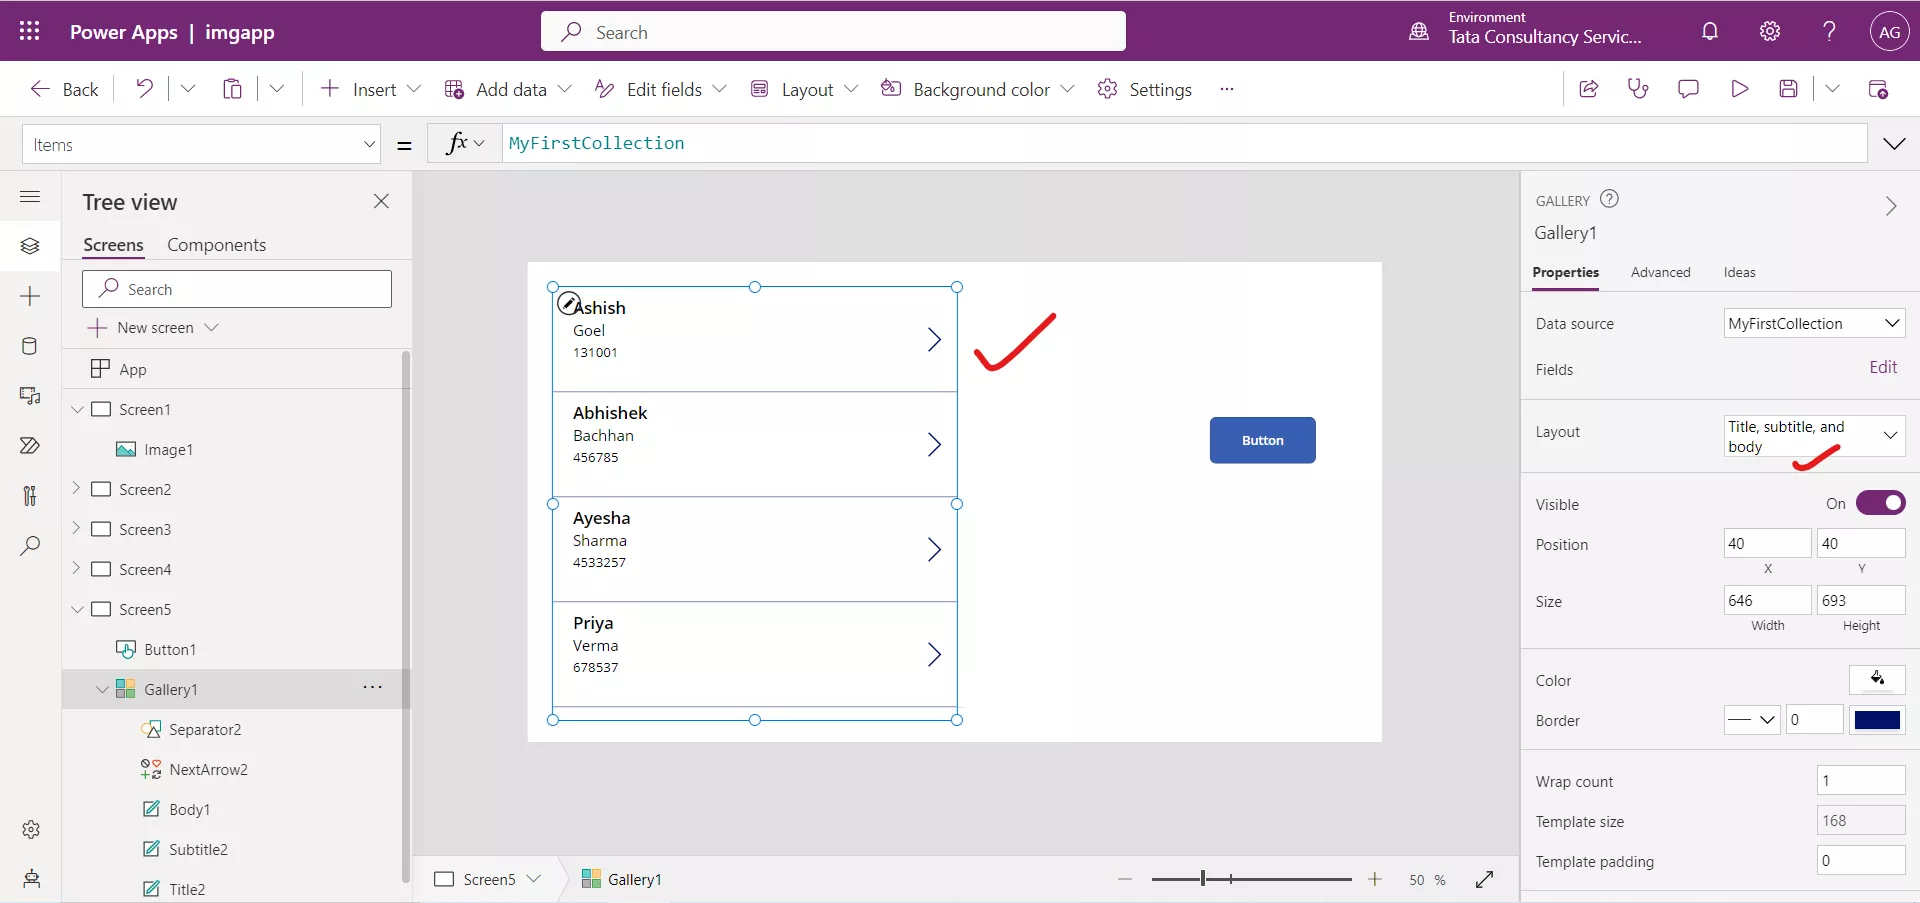
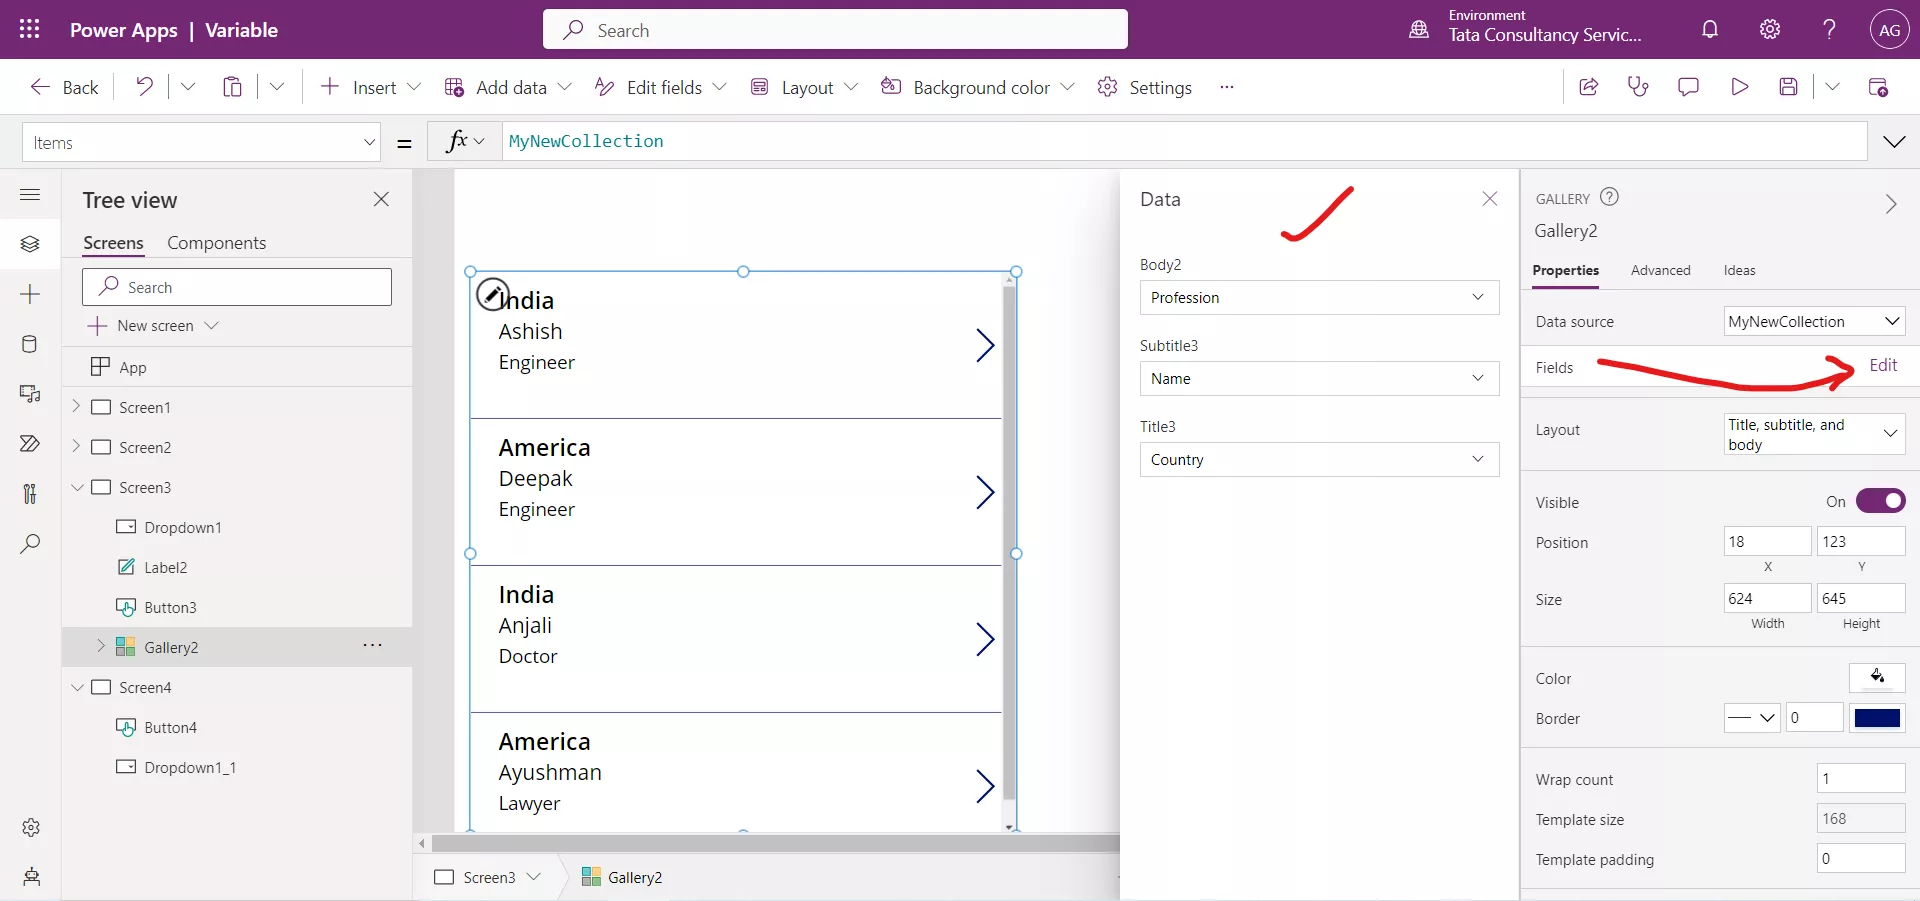
We can change the content of the gallery's fields, go to the Properties pane and select Edit next to the Fields option. The areas that we can change will depend on the gallery layout that we selected. For each field, use the drop-down list to choose the data.
Step 6: Select the Body of the first gallery item. Change the Text property of this control to:
PowerApps Formula
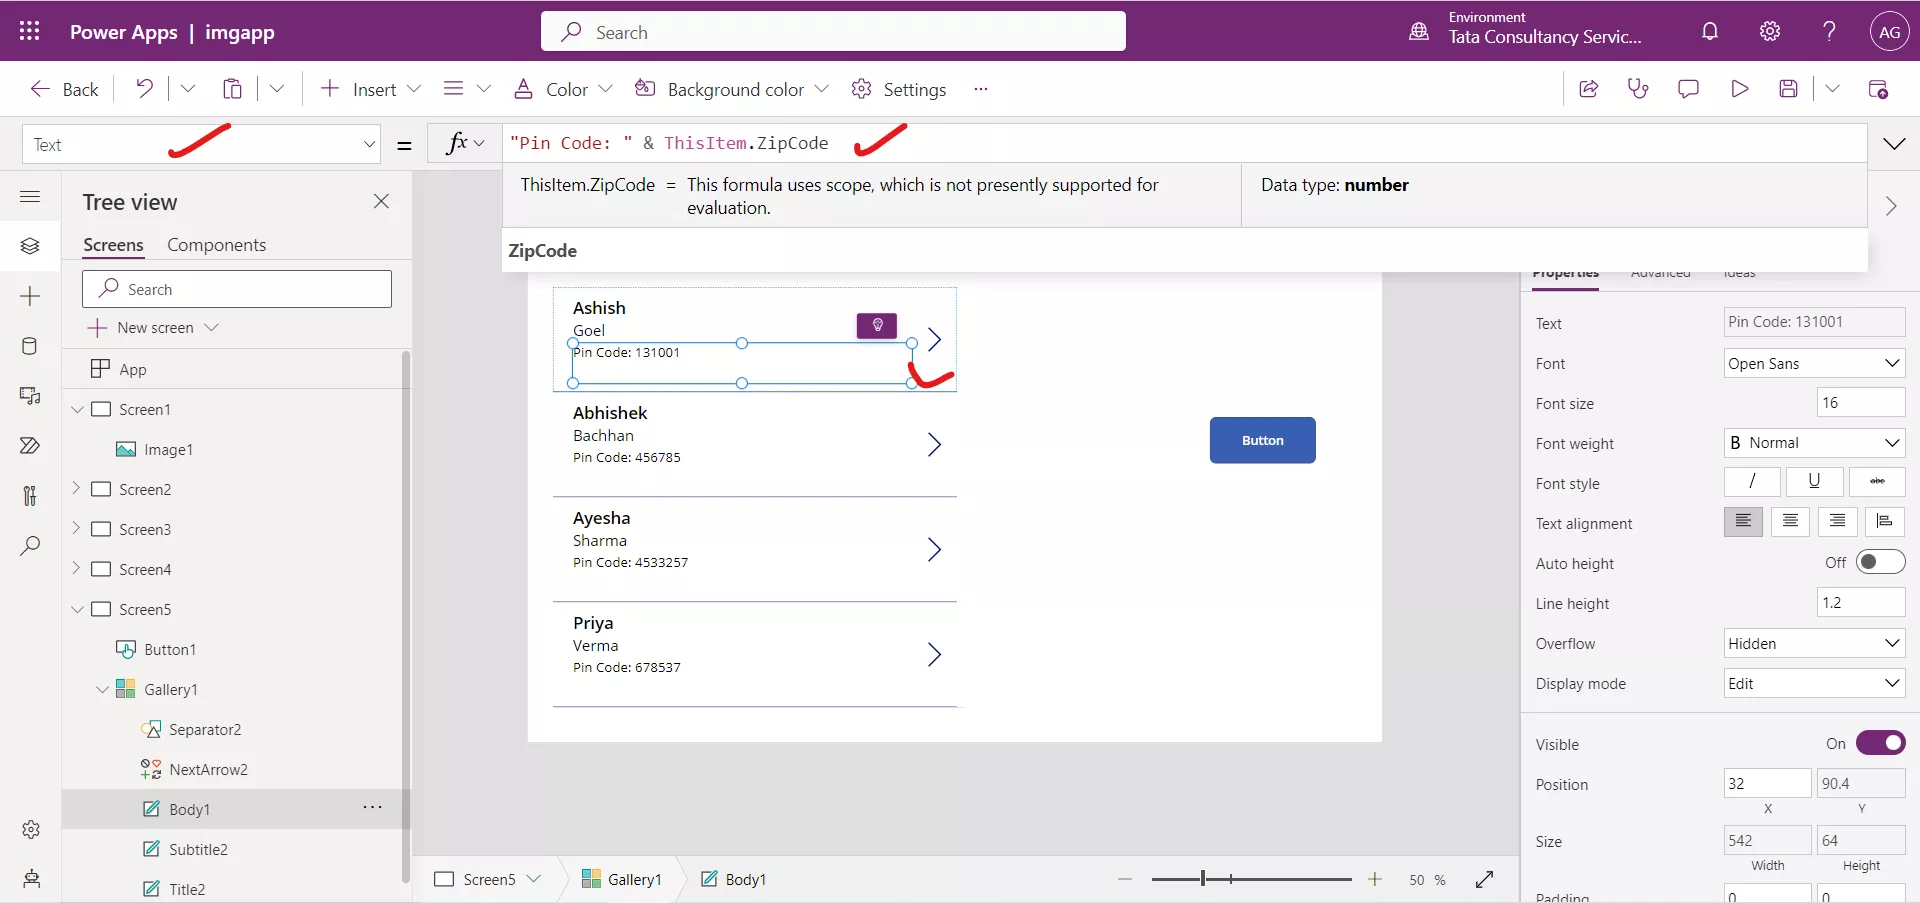
Note: We can see that the change is appeared in each cell of the gallery. This is as intended since a gallery repeats the format for all items the same as the first item.
Collect function without column name
We can use the collect function and give the value without giving the name of the column. Add a Text Input control and add a Button control and set the OnSelect property to this formula: Collect(myData, TextInput1.Text )
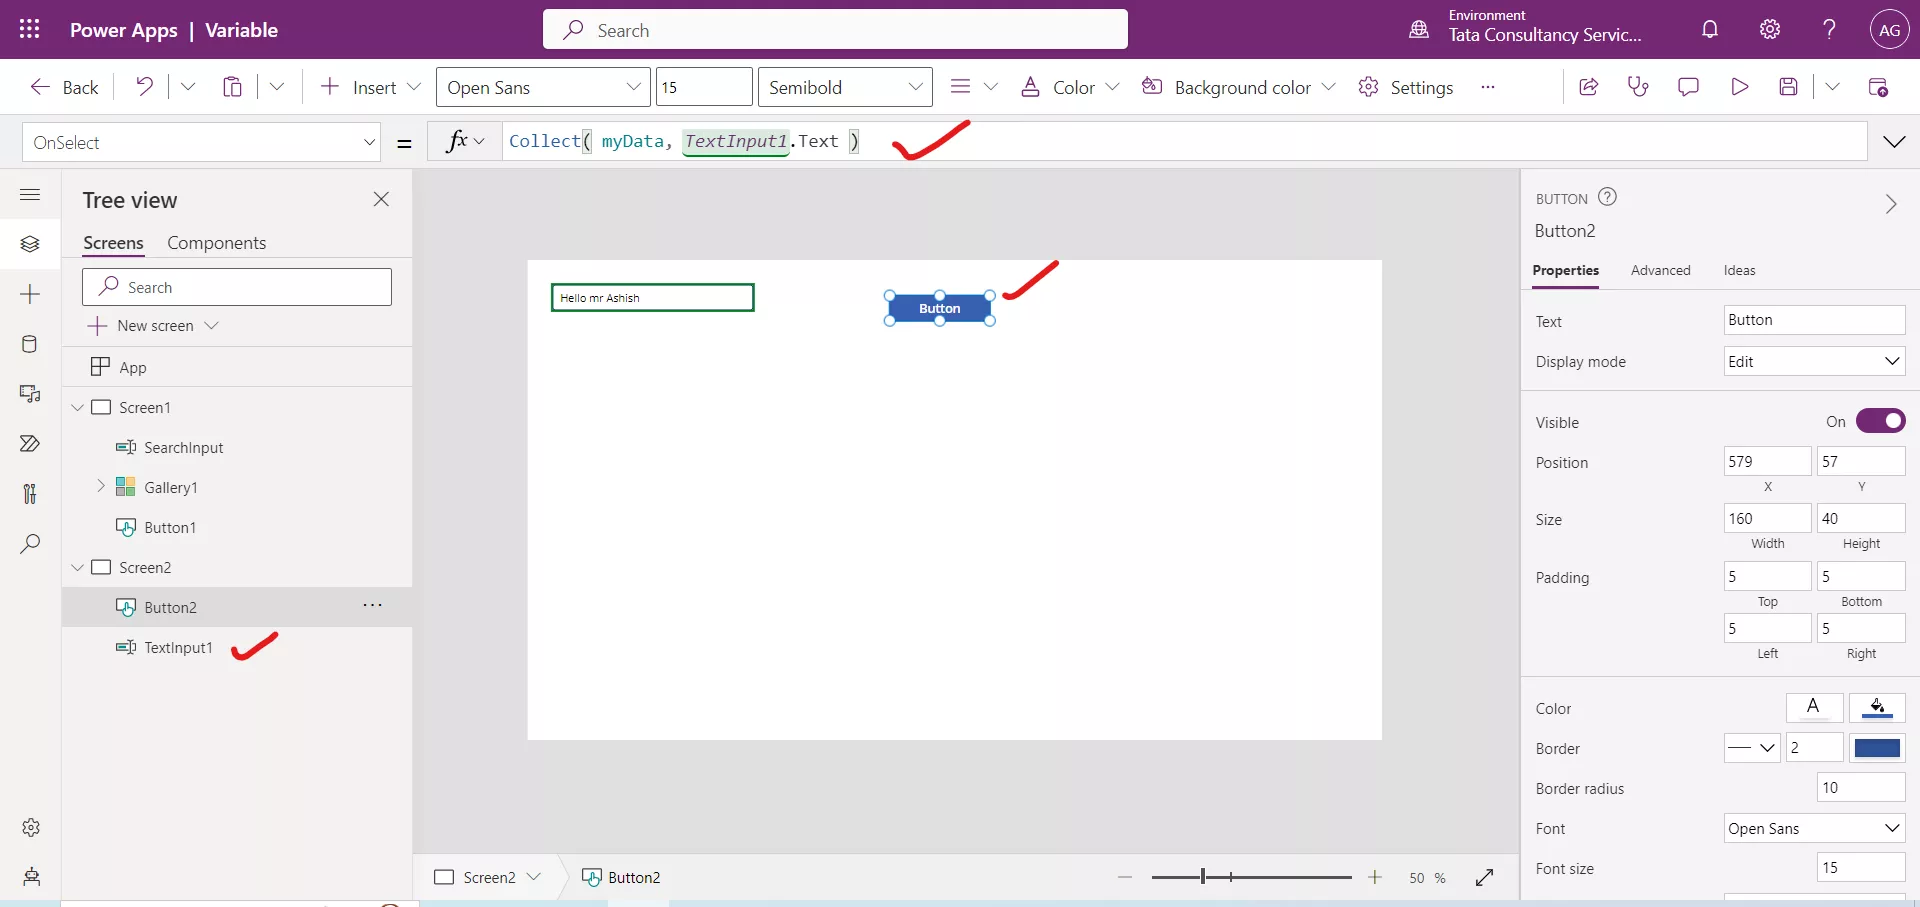
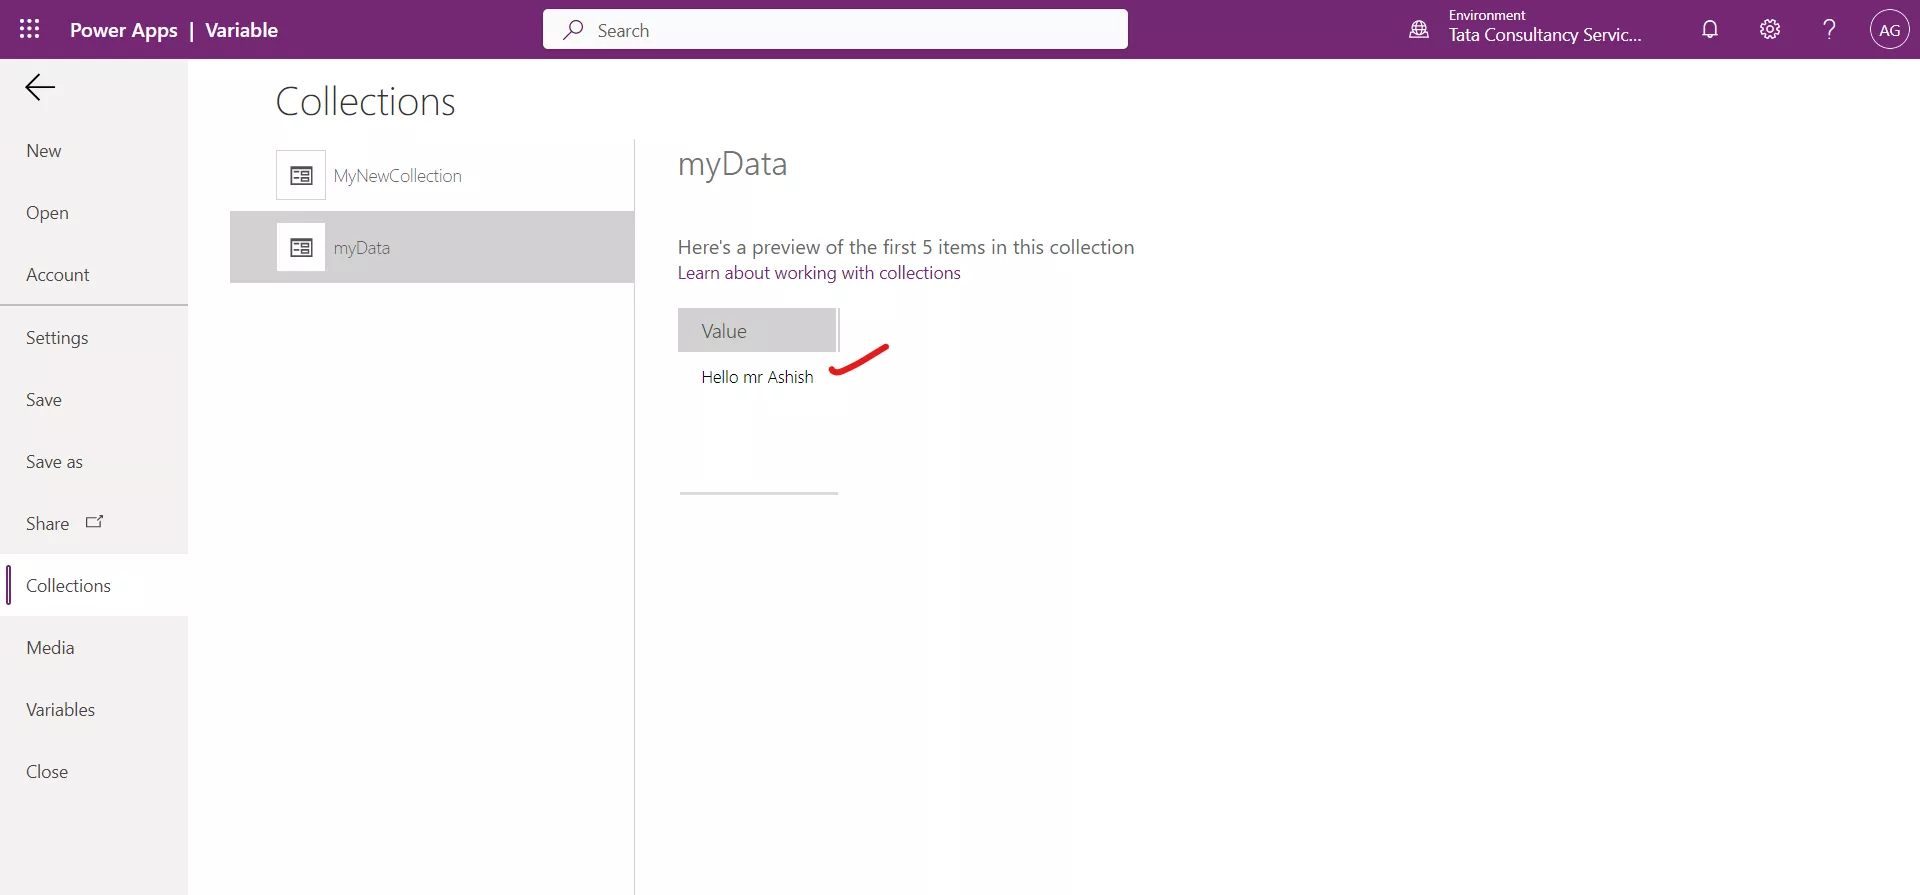
Click on the Preview app and write some text in the Text Input control and then click on the Button control to execute the formula. The formula adds the new value to the end of the collection. Because we're adding a single value, Collect automatically places it in a single-column table, and the column's name is Value, which we can use in our app.
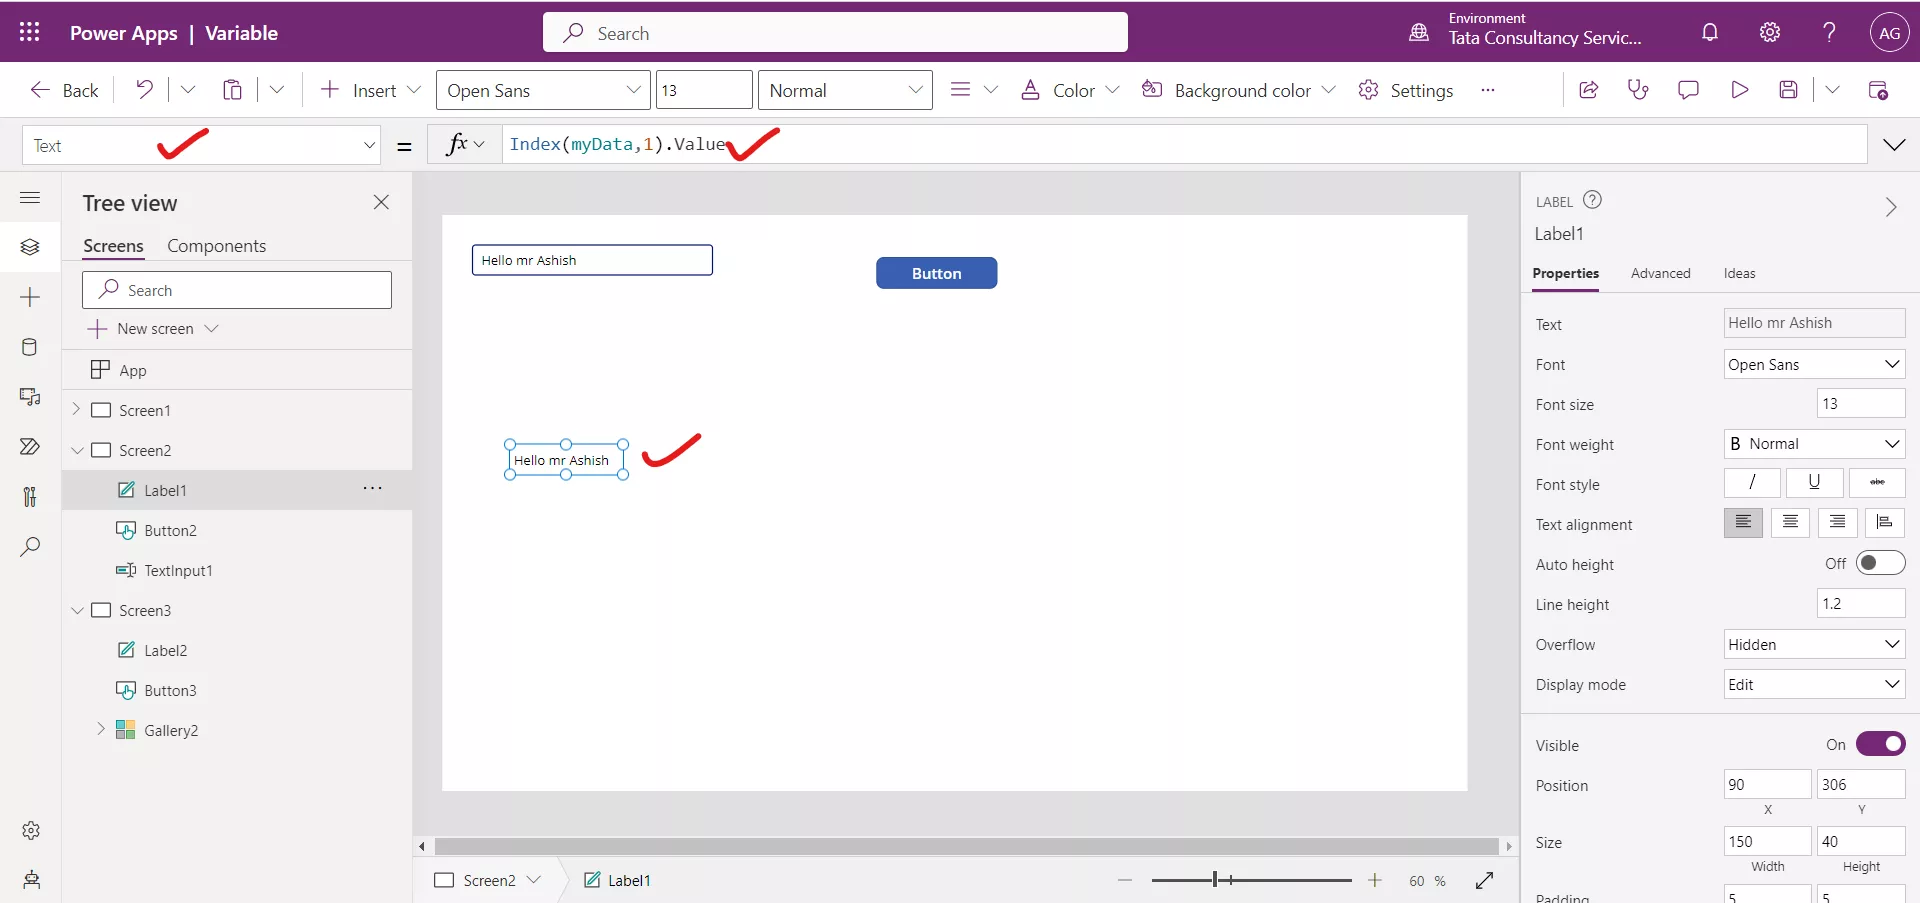
Add a Text label control. Set the following formula to the Text property of the Label control.
2. Remove data from our collection
To clear out the existing data from our collection before we add data, we can use the ClearCollect function.
PowerApps Formula
Now our collection would look like this table:
| FirstName | LastName |
|---|---|
| Shweta | Gehlot |
We can also remove all the records from a collection by using the Clear function. This formula removes all the records from our collection but leaves our columns intact:
PowerApps Formula
3. Filter the collection
The Filter function in Power Apps allows us to query a table of data (which could come from a collection or a data source) for the records that match the evaluation criteria.
We can use the filter functionality in the collection to filter the records.
Step 1: Select the Insert tab in the Canvas app and add a Button control, and set its OnSelect property to the following formula:
PowerApps Formula
{FirstName: "Ashish", LastName: "Goel", Marks: 80},
{FirstName: "Abhishek", LastName: "Bachhan", Marks: 70},
{FirstName: "Ayesha", LastName: "Sharma", Marks: 60},
{FirstName: "Priya", LastName: "Verma", Marks: 40},
{FirstName: "Anjali", LastName: "Saini", Marks: 30},
{FirstName: "Ashu", LastName: "Dahiya", Marks: 70}
)
Step 2:Add a Vertical gallery control. And add it to the MyFirstCollection data source.
Step 3:Add a Slider control to the Canvas. And name it as Slider2.
Step 4: Select the slider and change the Min property to:
PowerApps Formula
Step 5: Next, change the Max property to:
PowerApps Formula
Step 6: Add a Text Label control that reads the slider value. Set the Text property to Slider2.Value.
Step 7: Now select the gallery and change the Items property to:
PowerApps Formula
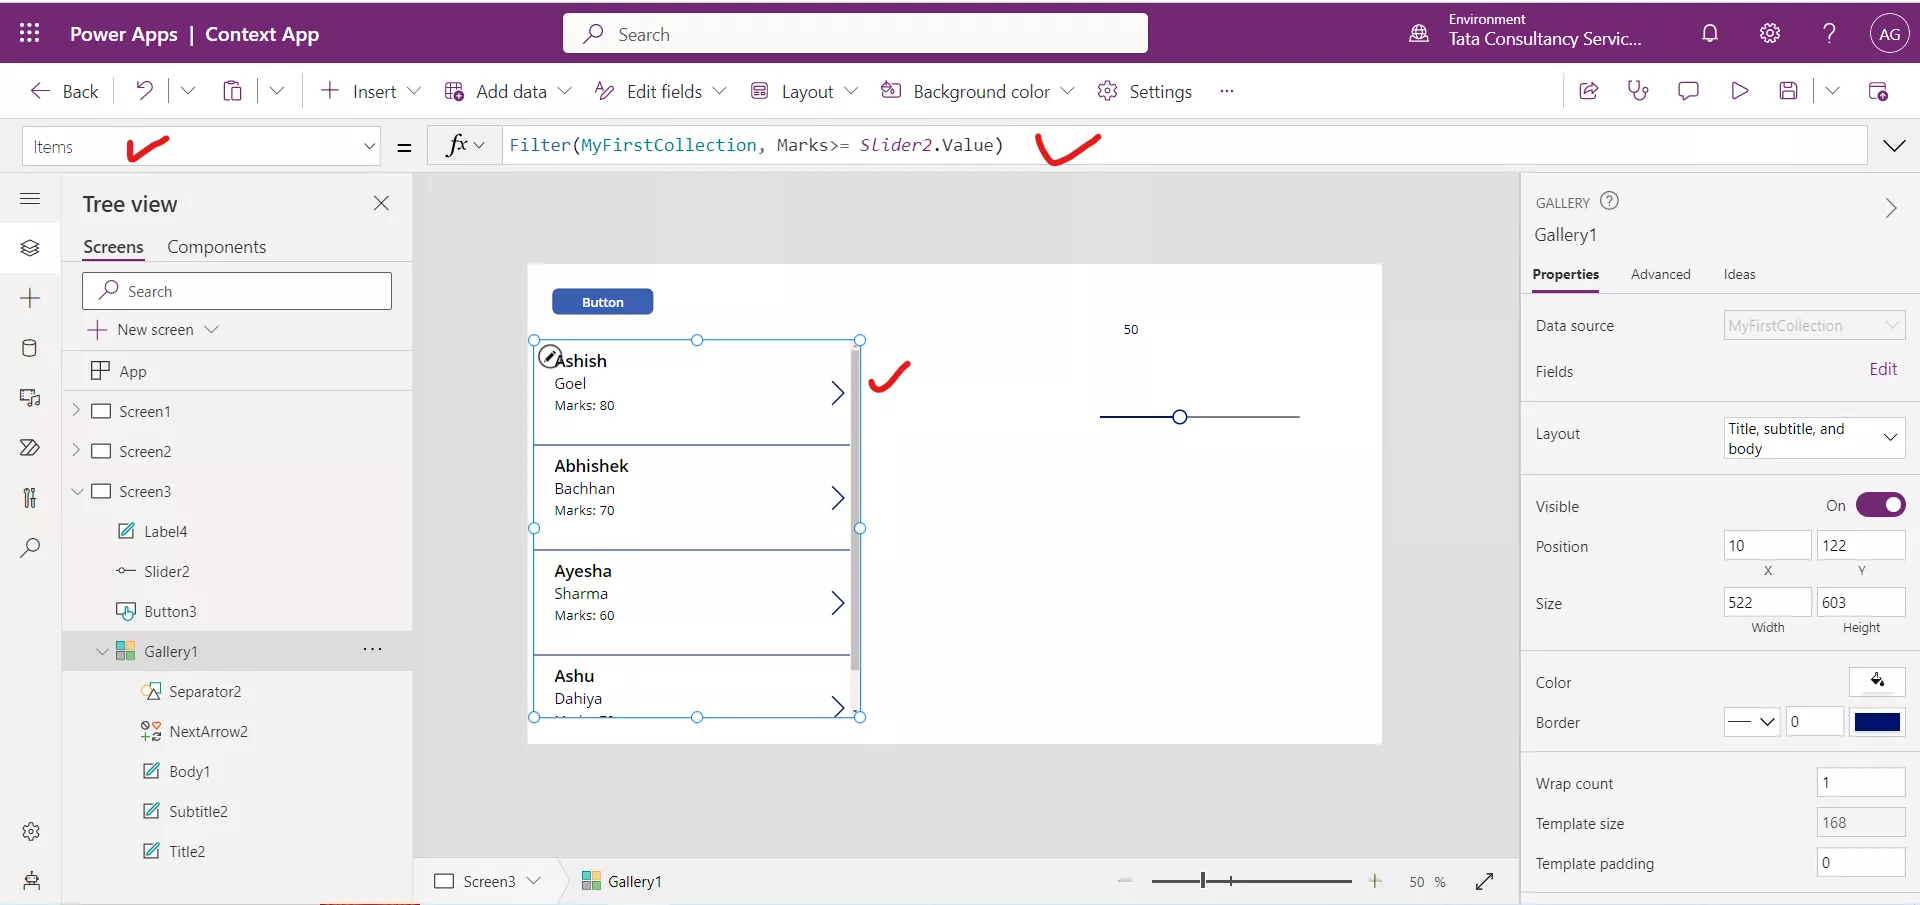
Step 8: Now we will only be seeing records that are greater than the selected slider value. Move the slider around to see this in action.