Bookmark Navigator in Power BI
In this exercise, we will learn how to use the bookmark navigator in Power BI. Before we can create the bookmark navigator, we need to create the bookmarks.
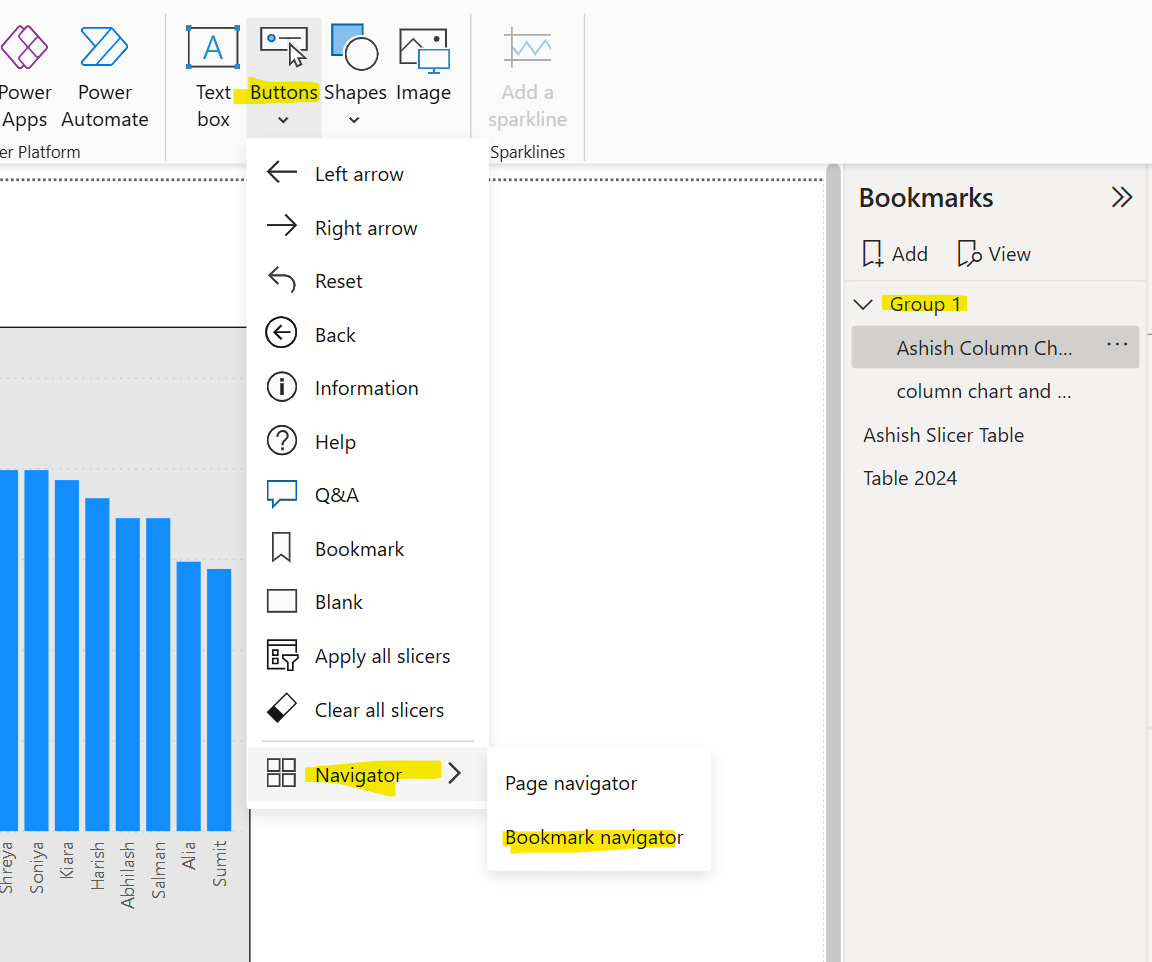
Step 1: After creating the bookmarks, insert the Bookmark navigator. Go to the Insert tab, select Buttons and then Navigator and then Bookmark navigator.

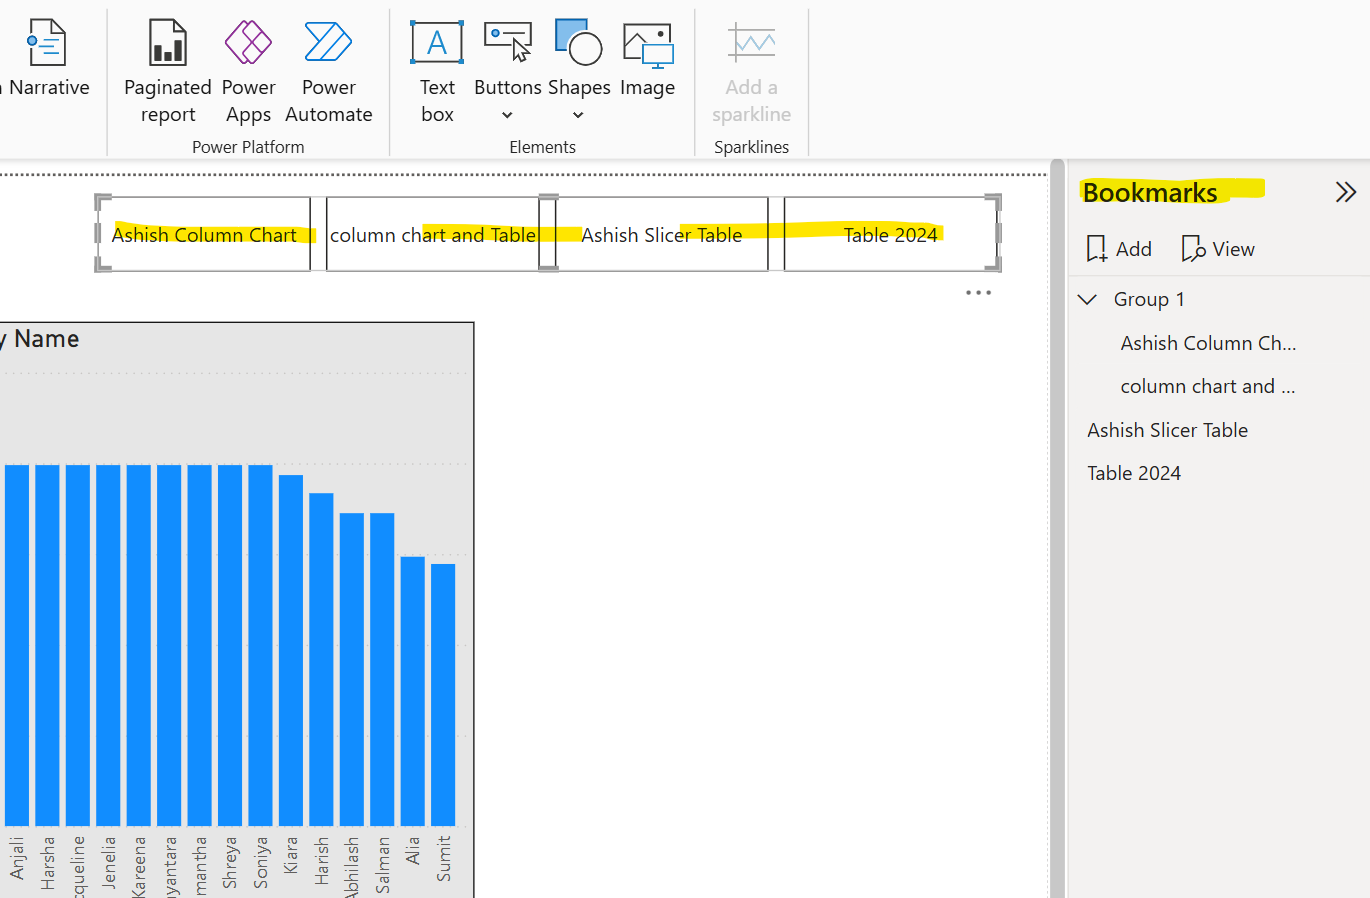
Power BI automatically creates a bookmark navigator for you:

The bookmark navigator is automatically in sync with our report bookmarks, meaning:
• Titles of the buttons match the bookmark display names.
• Ordering of the buttons matches the order of your report bookmarks.
• The selected button is the last selected bookmark.
• The navigator updates automatically as we add or remove bookmarks in our report.
• The titles of the buttons update automatically as we rename bookmarks.
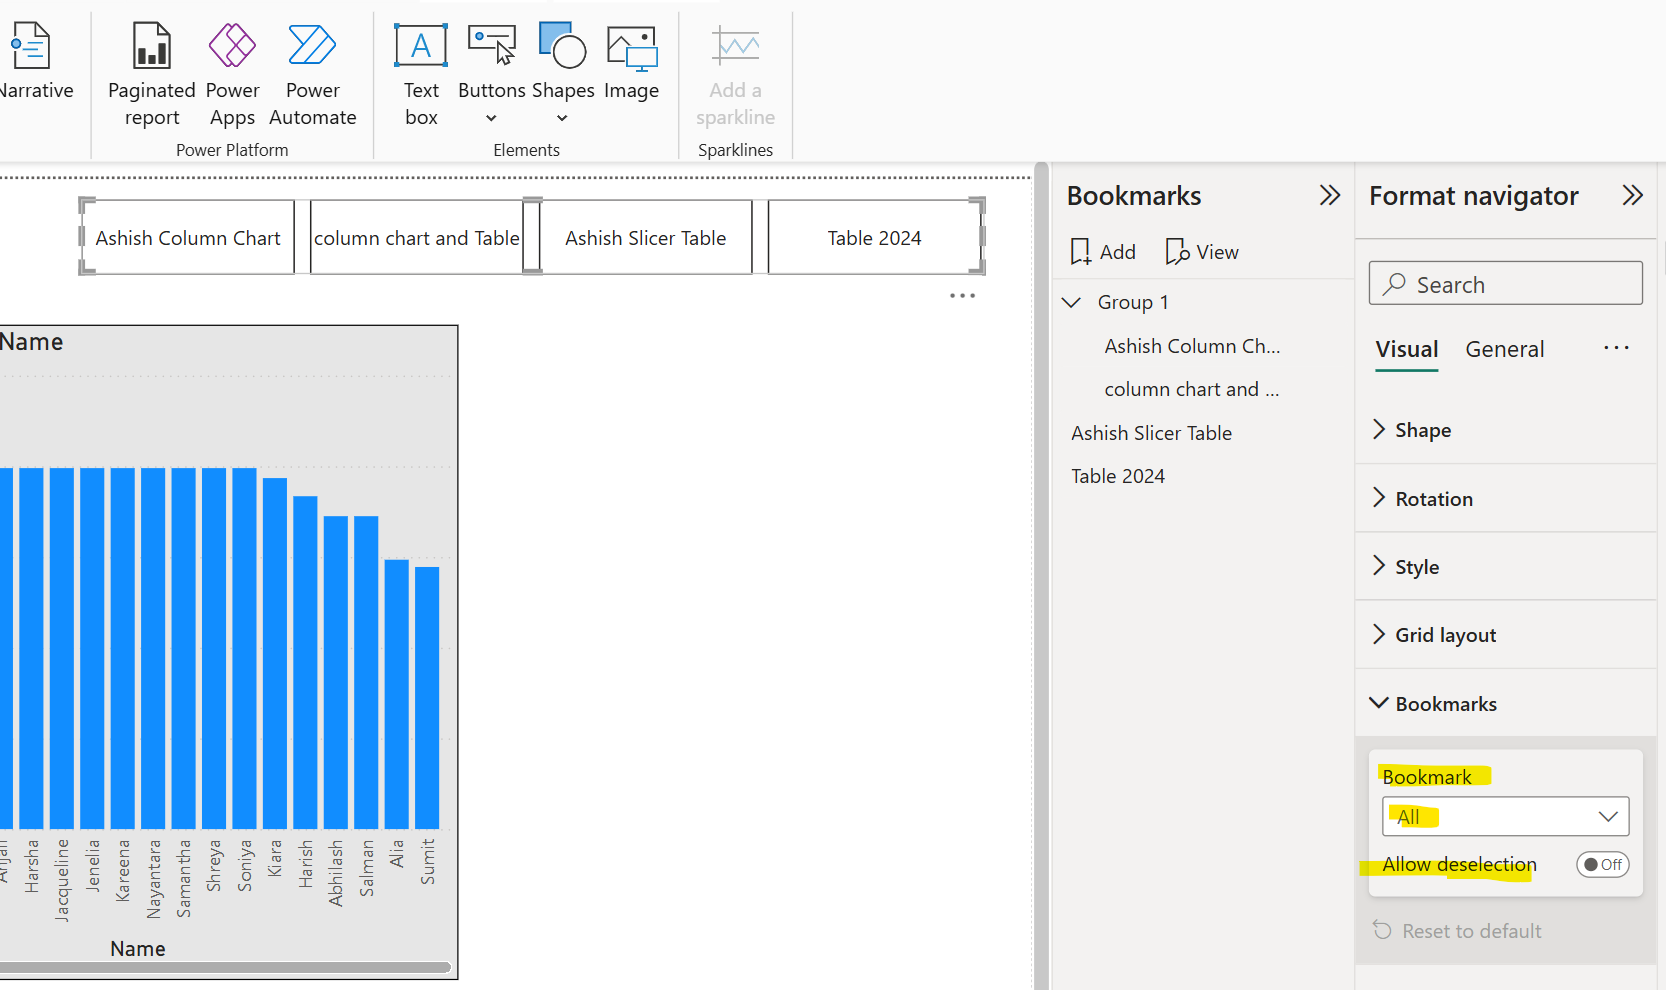
Step 3: If we want to further customize the bookmarks that show or hide in the bookmark navigator, go to the Format navigator pane >Bookmarks tab:

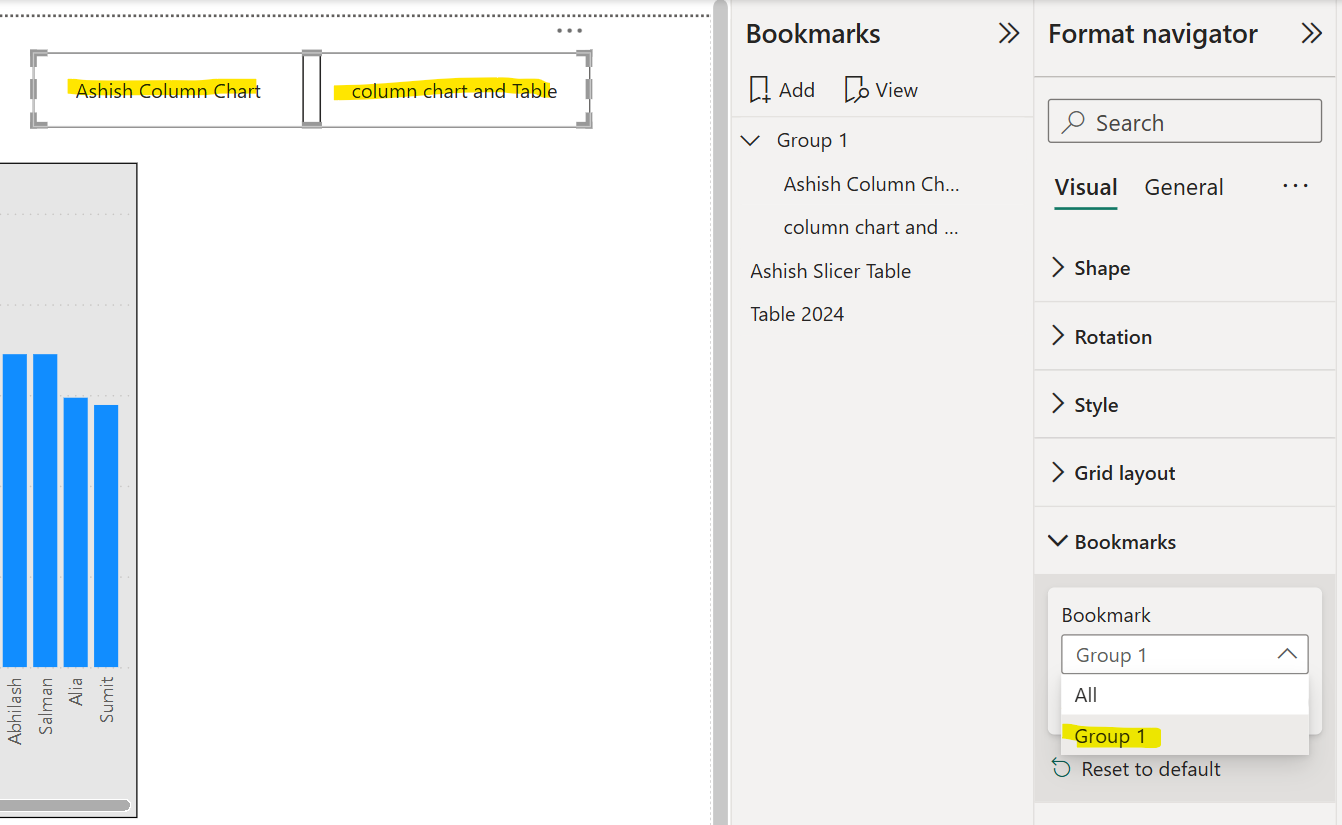
By default, “All” bookmarks are shown in the bookmark navigator; however, we can create and select a specific bookmark group to show only the bookmarks within that group.

Note: We can create separate bookmark groups if we plan on creating different bookmark navigators within the same report.