Group and Ungroup Bookmarks in Power BI
In this exercise, we will learn about grouping and ungrouping the bookmarks in the Power BI.
Create a bookmark group To create a bookmark group, follow the following steps:
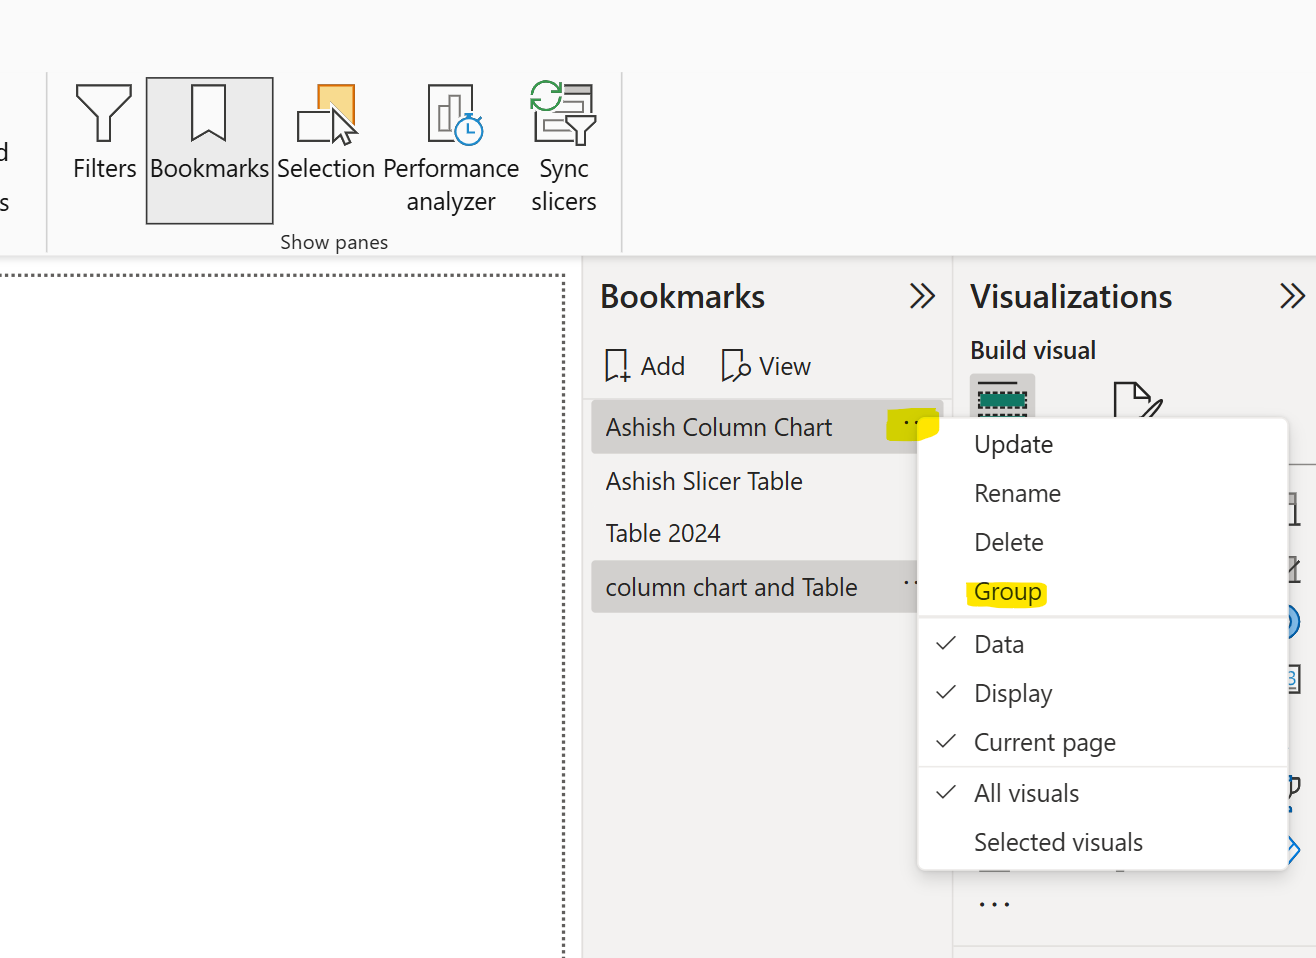
Step 1: Press Ctrl key and select the bookmarks we want to include in the group.
Step 2: Select More options (...) next to our selected bookmarks, and then select Group from the menu that appears.

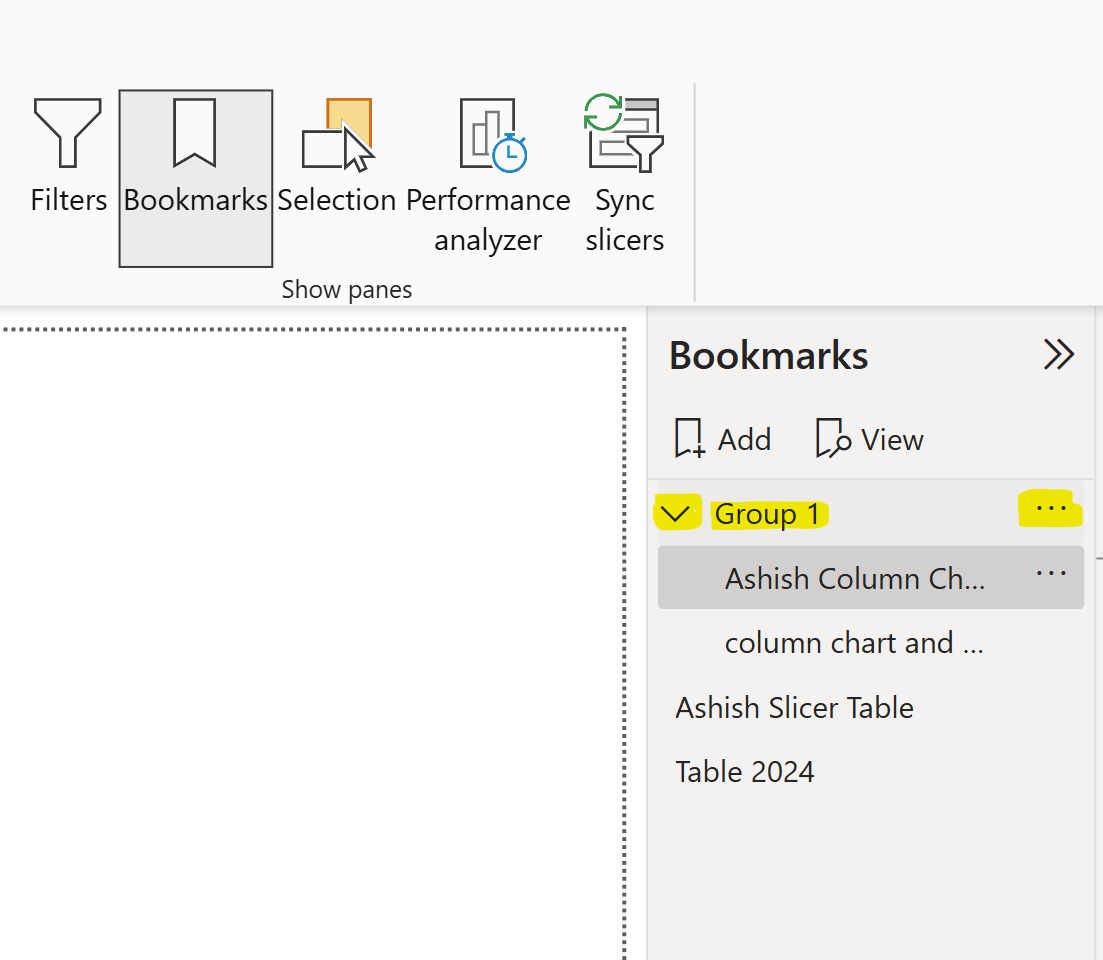
Power BI Desktop automatically names the group as Group 1.

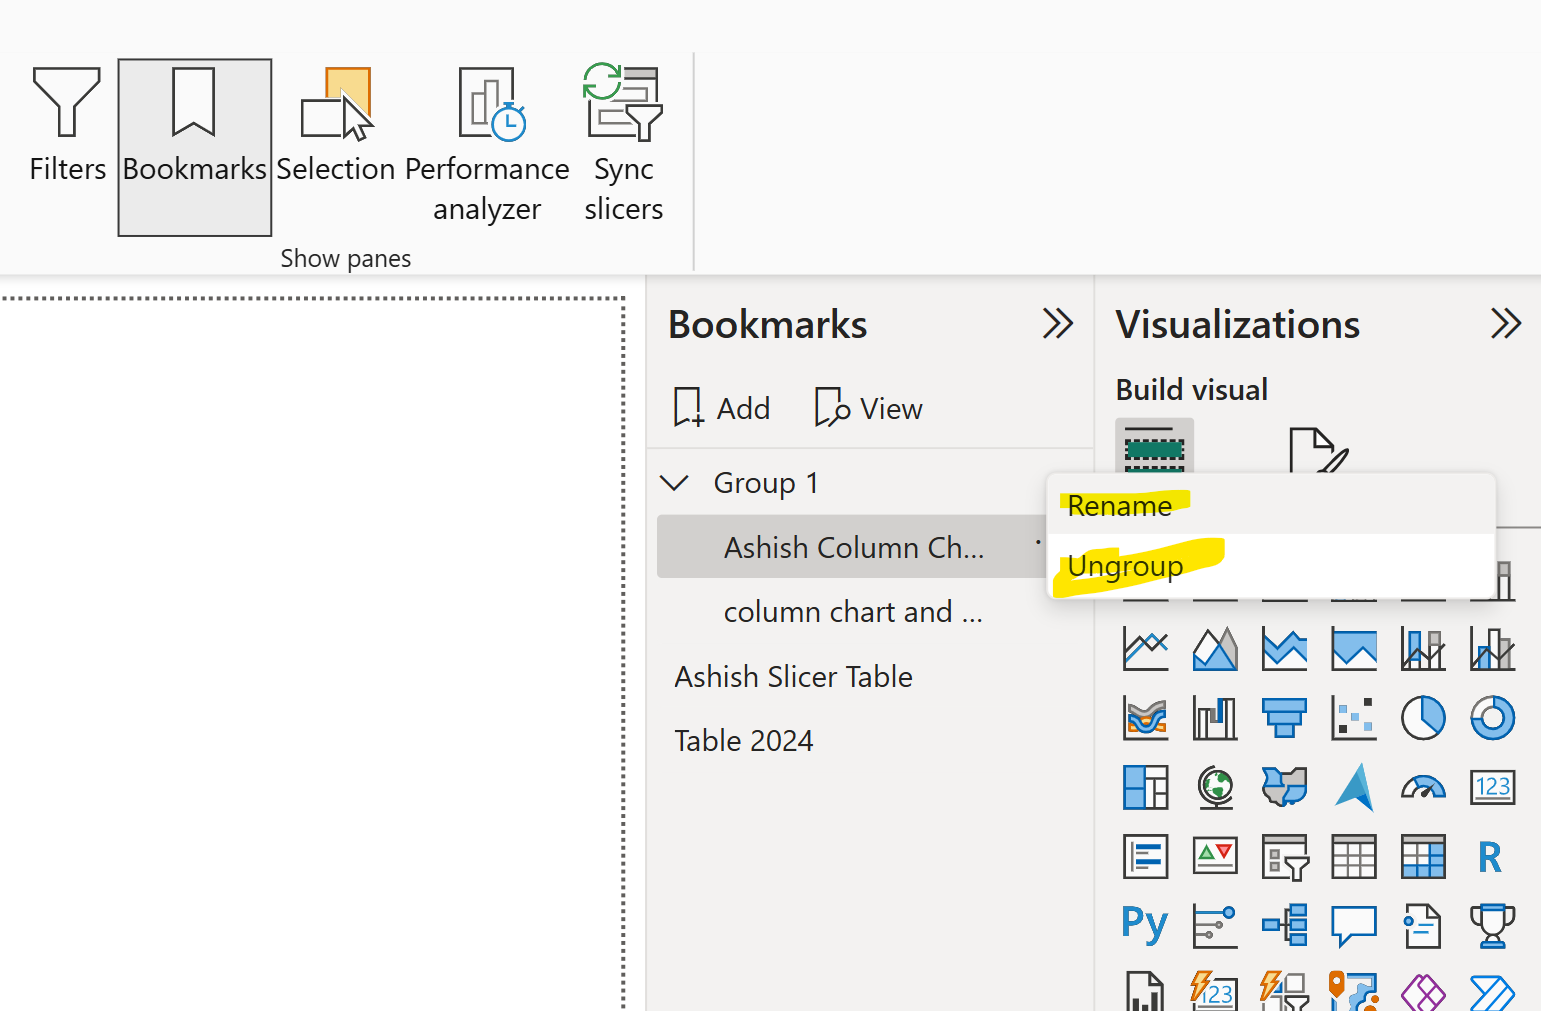
Step 3: We can select More options (...) next to this name, select Rename, and rename it to whatever we want.

Note: Expanding the bookmark group's name only expands or collapses the group of bookmarks, and doesn't represent a bookmark by itself.
Step 4: Select Ungroup from the menu to ungroup the bookmarks. It removes all bookmarks from the selected group; it deletes the group, but not the bookmarks themselves.
Note: • If we click on the More options (…) on the bookmark in the group, and select Ungroup, it will delete the entire grouping.
• Drag the bookmark from the list and drop it onto the desired group to add the bookmark to an existing group.