Row-Level Security in Power BI
We can set up Row level security in Power BI, by creating one or more roles. A role has a unique name in the model, and it usually includes one or more rules, which decided the filter to apply in the report in that role. The filters are specified by using the Data Analysis Expressions (DAX) expressions. Rule expressions are evaluated within row context. Row context means that the expression is evaluated for each row by using the column values of that row. When the expression returns TRUE, the user can "see" the row.
The filters applied by the roles are just added on the top of the filters that are added in the report, so we can consider it as always adding another filter to the appropriate users, regardless of the filters, slicers, or interactions that the users choose on a Power BI report.
Note By default, a data model has no roles. A data model without roles means that users (who have permission to query the data model) have access to all model data.
Tip We can define a role that includes no rules. In this case, the role provides access to all rows of all model tables. This role setup would be suitable for an admin user who is allowed to view all data.
Type of RLS We can define rules that are either static or dynamic.
• Static
• Dynamic
1. Configure row-level security with the static method The static method in row-level security (RLS) uses a fixed value in the DAX filter, while the dynamic method uses a DAX function.
Consider the following rule that's applied to the Branch table that restricts data access to Electrical department only.
DAX
This acts as a filter in the report so if any relationship is created with the table, the other tables are also filtered based on this filtered value. To restrict access to all table rows we can use the DAX expression FALSE() on that table.
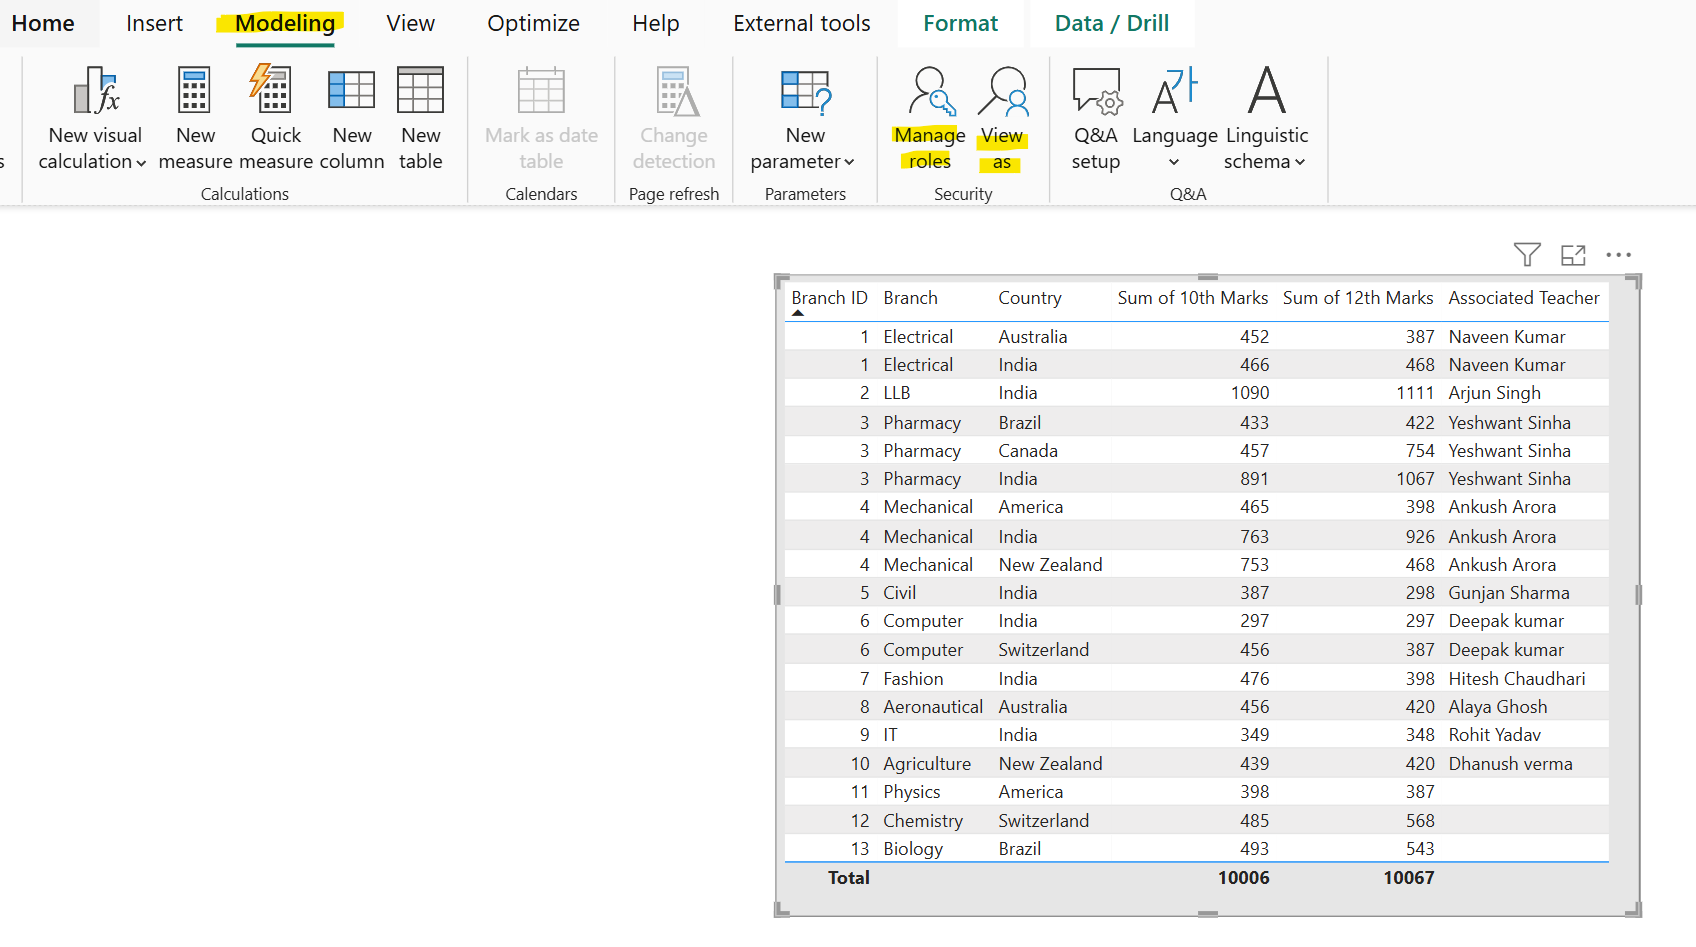
Create RLS roles in Power BI Desktop by using DAX After creating a report in Power BI desktop, to create RLS roles, select the Modeling tab, and then select Manage Roles.
On the Manage security roles dialog box, under Roles, select + New and provide a name for the role.
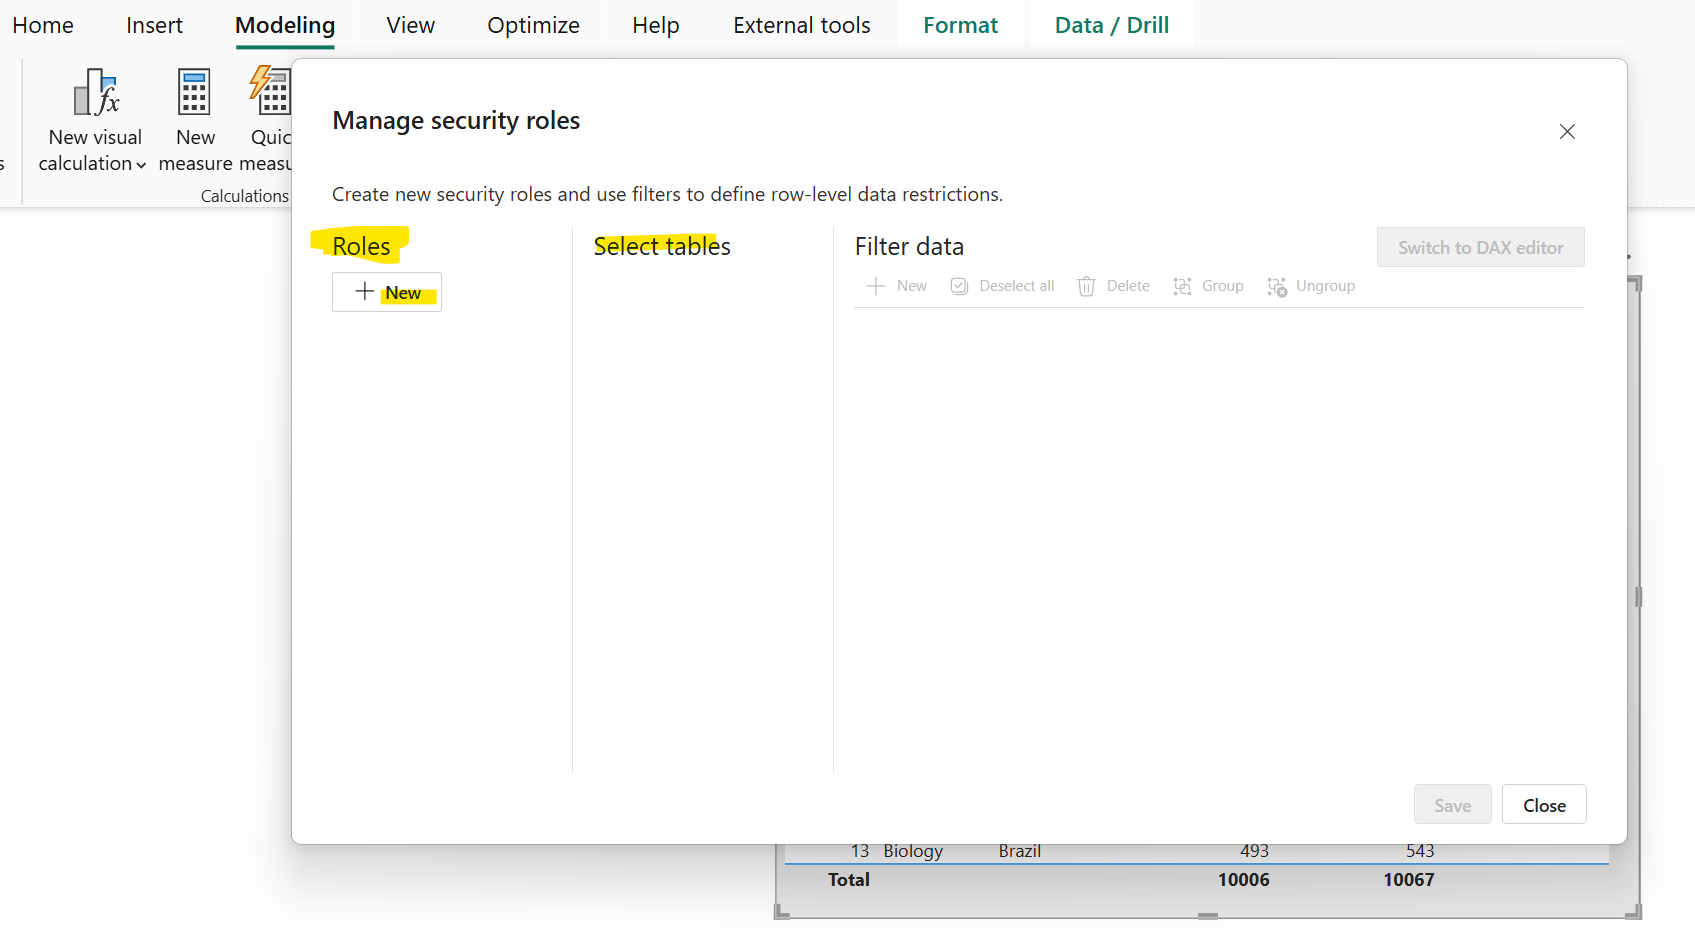
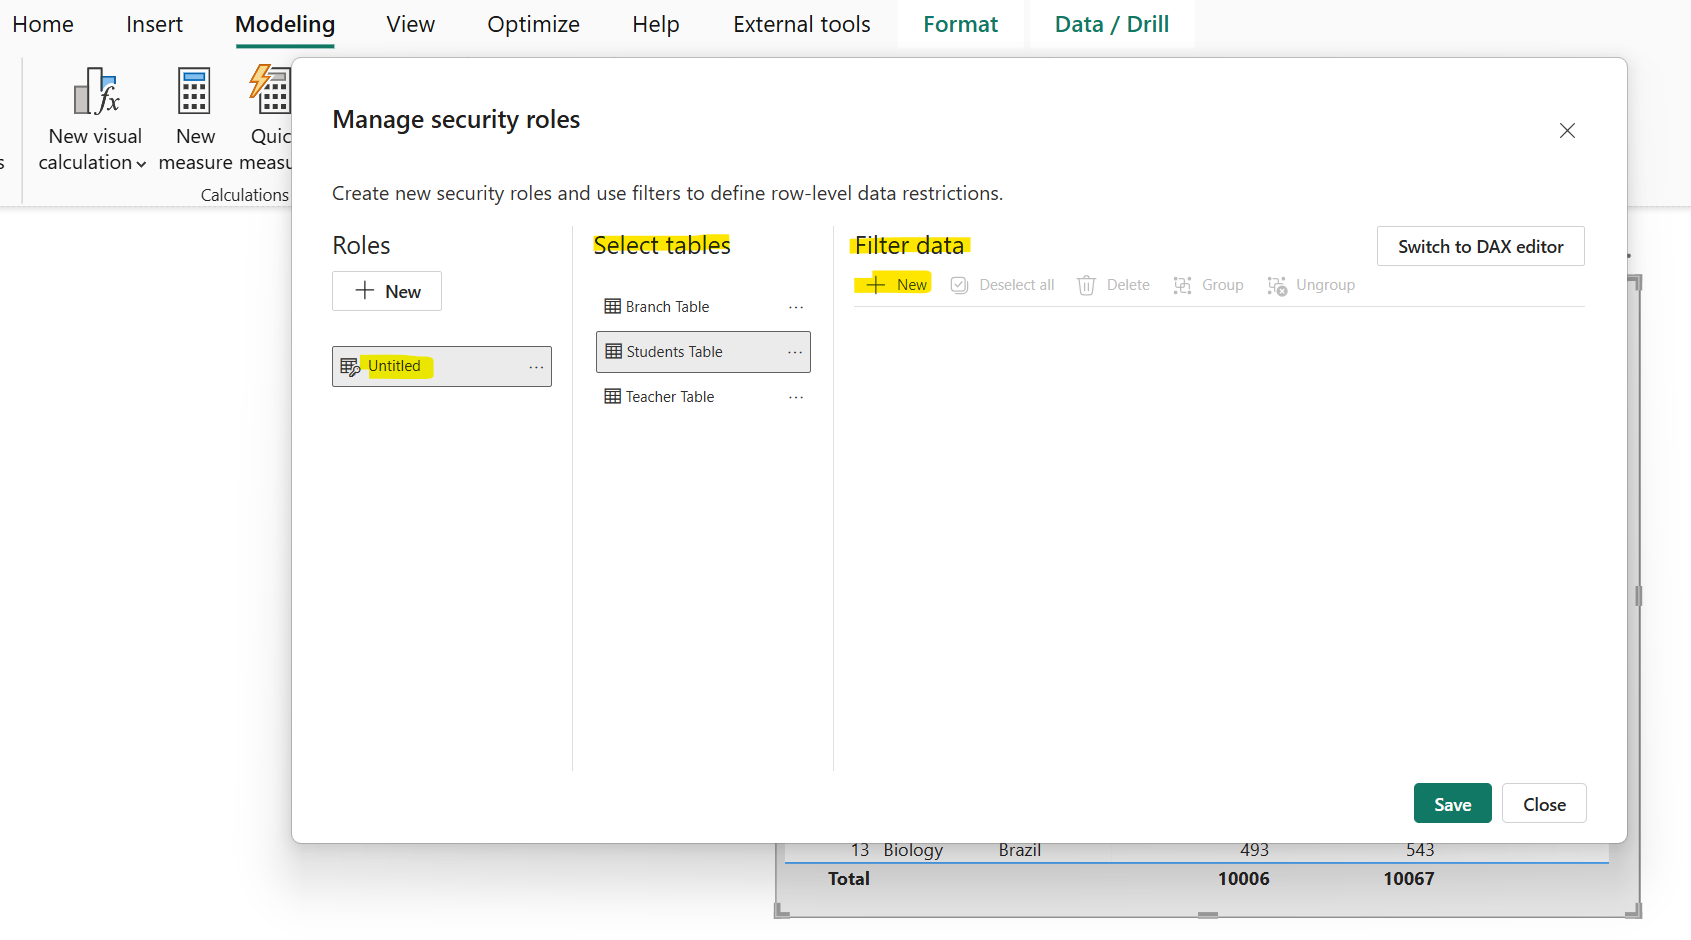
Note We can't define a role with a comma, for example Electrical,Eectronics.
Under Select tables, select the table to which we want to apply a DAX rule. In the Filter data select the + New to create the rule to filter the table. The overall expression returns a value of true or false. True means the row is going to be available in the report, False means the row is not going to be available. The basic DAX expressions syntax is written in the form of [Column_name] = “Value”.
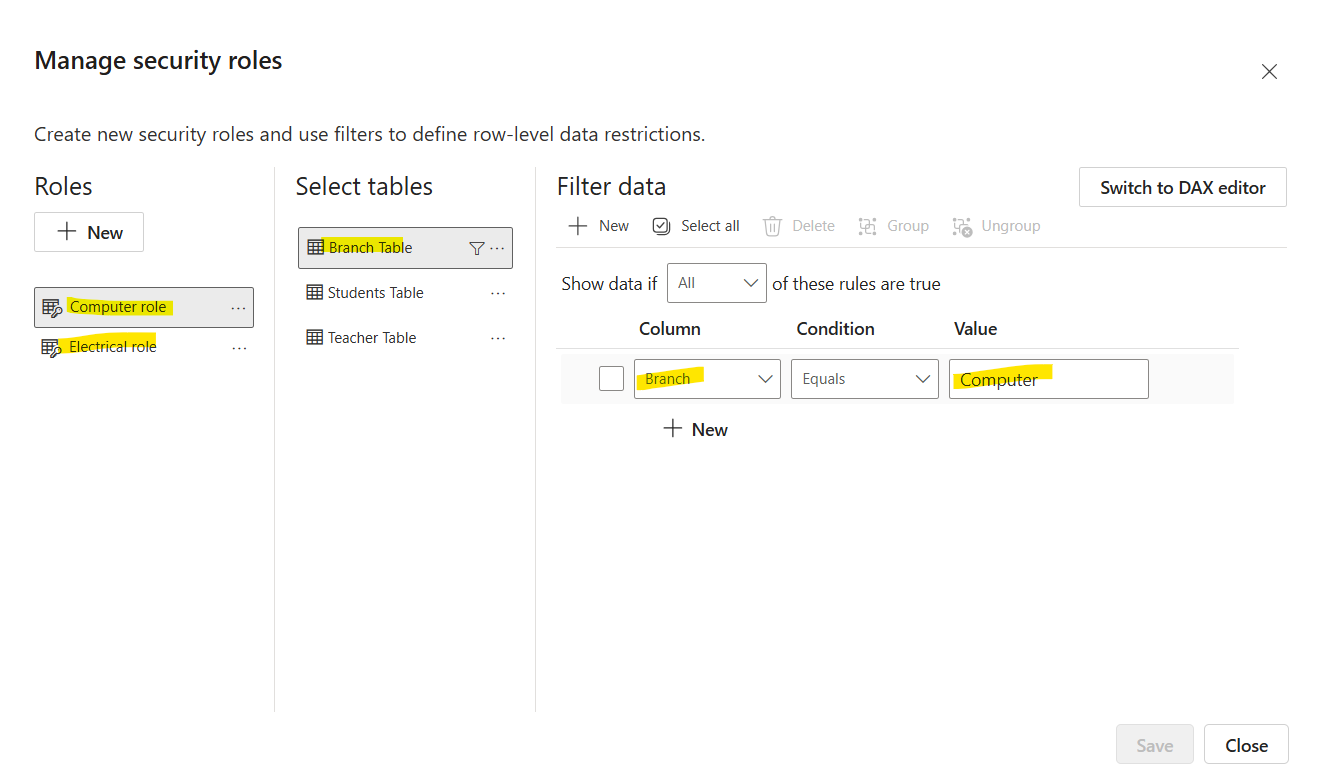
Let’s have created two roles:
• Computer role: In this we have filtered the Branch Table based on Branch column that has value Computer.
• Electrical role: In this we have filtered the Branch Table based on Branch column that has value Electrical.
In the Condition we have lot of different options like as shown in the image below.
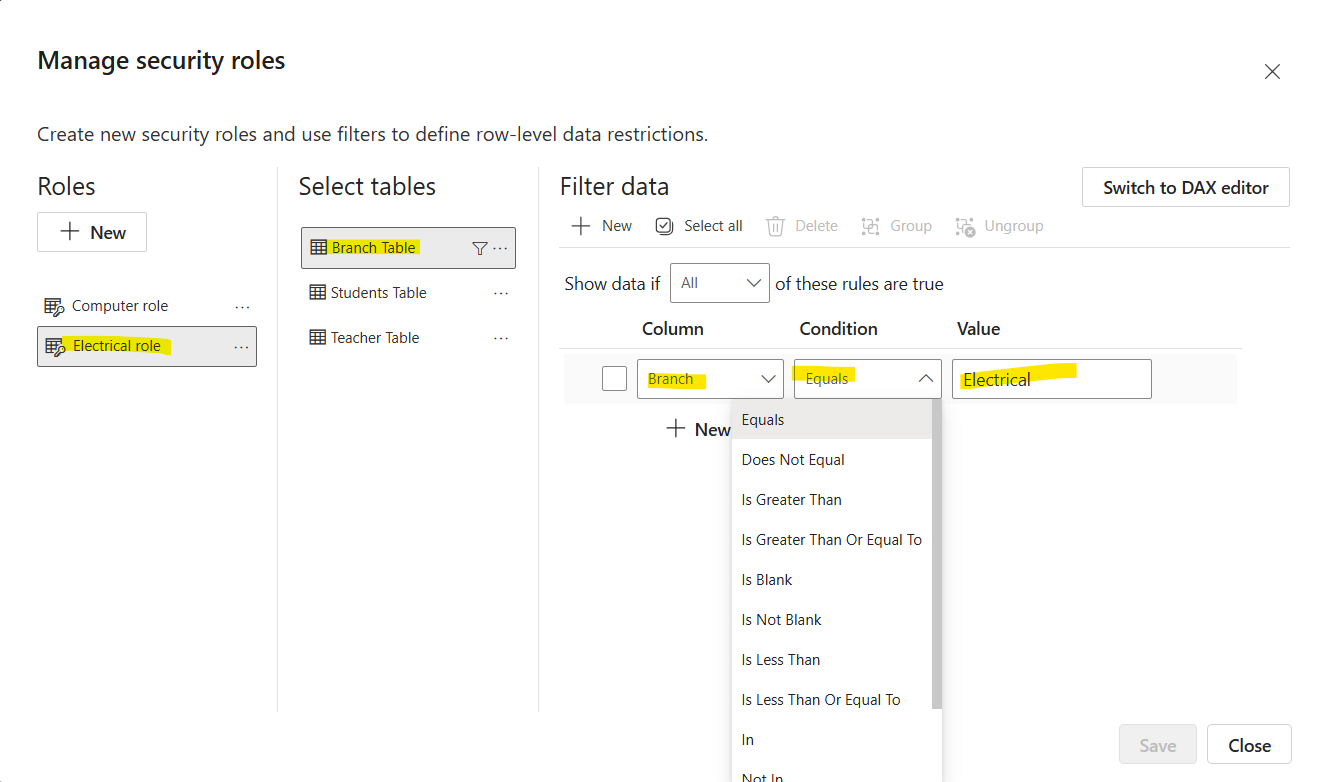
Note: • Please note that filter icon is placed on the right of the table only if the filter is filtered in the selected role.
• We can copy the filter from other roles also by clicking on the three dots next to the table name, only if in the other role that table is filtered by the DAX expression.
We also have the option to Switch to DAX Editor, which gives us the option to write the DAX expressions. We can also see the checkmark and cross icon above the dax expression box, which is used to validate the expression, and revert the changes respectively.
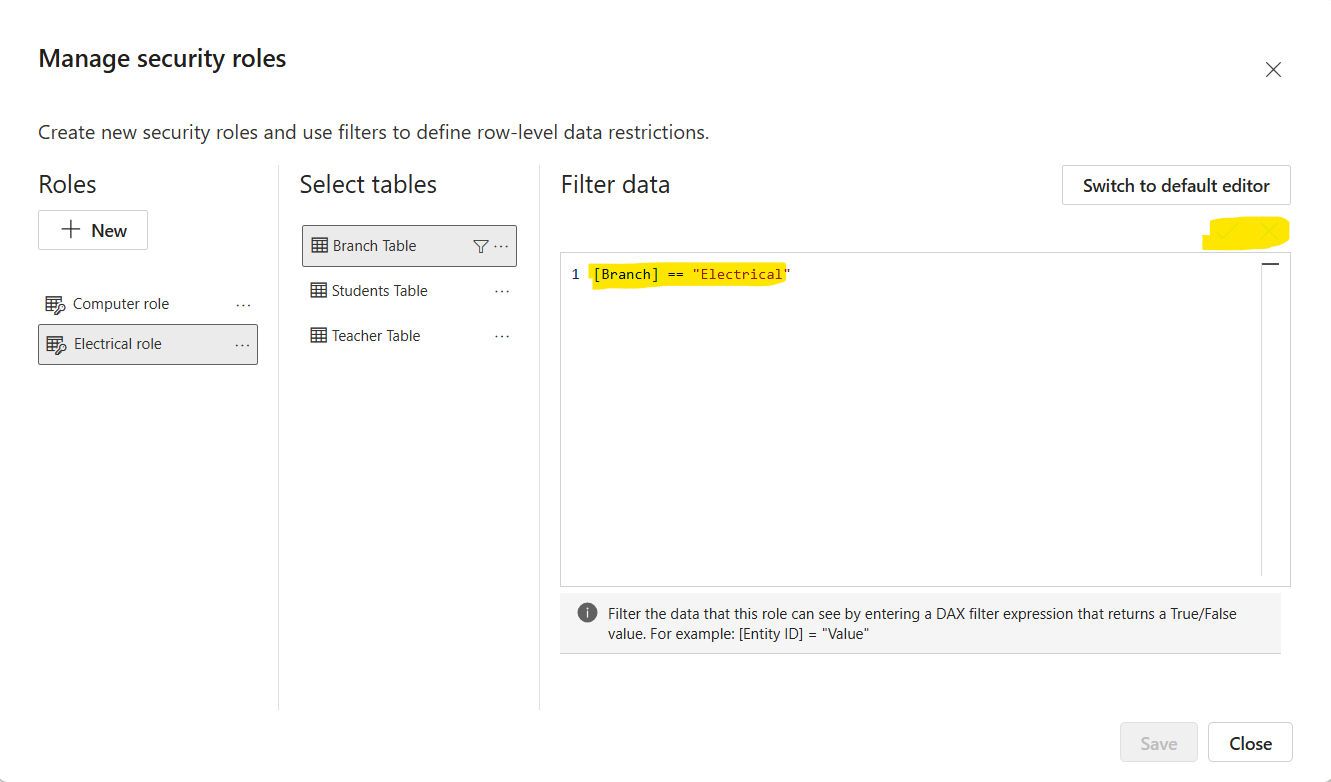
We have created the roles, now its turn to test the roles.
Step 2: Test the roles in Power BI Desktop We can validate that the filter is working by selecting the Modeling tab and then selecting View as.
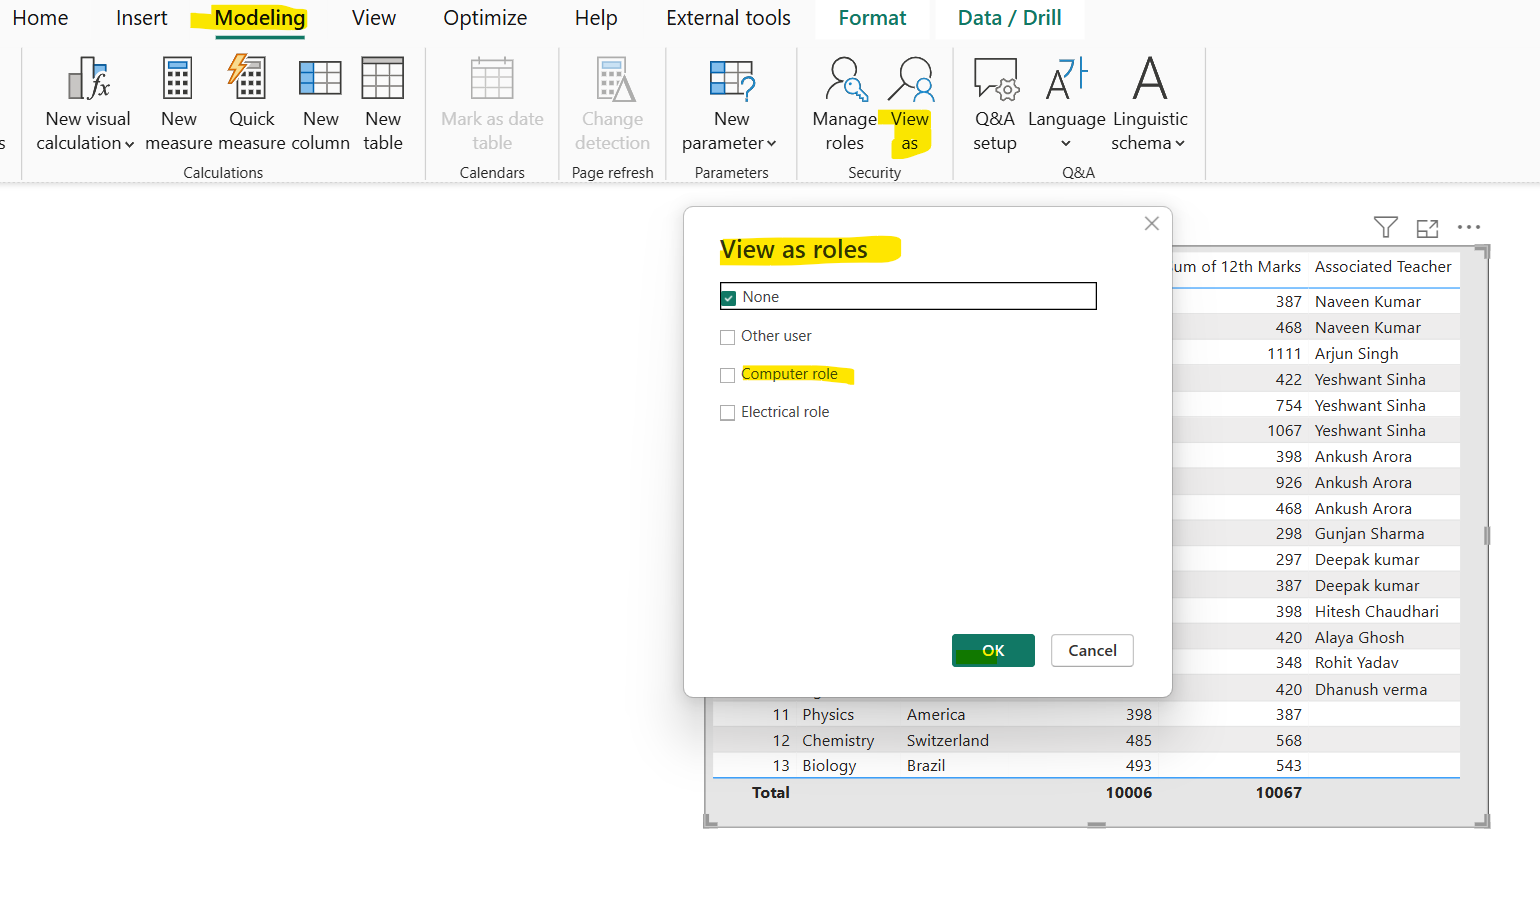
In the View as roles window, select the specified role. The report now renders as if we were in that role, and we will only see the records that are included in the specified role. Lets choose the Computer role, and click on Ok.
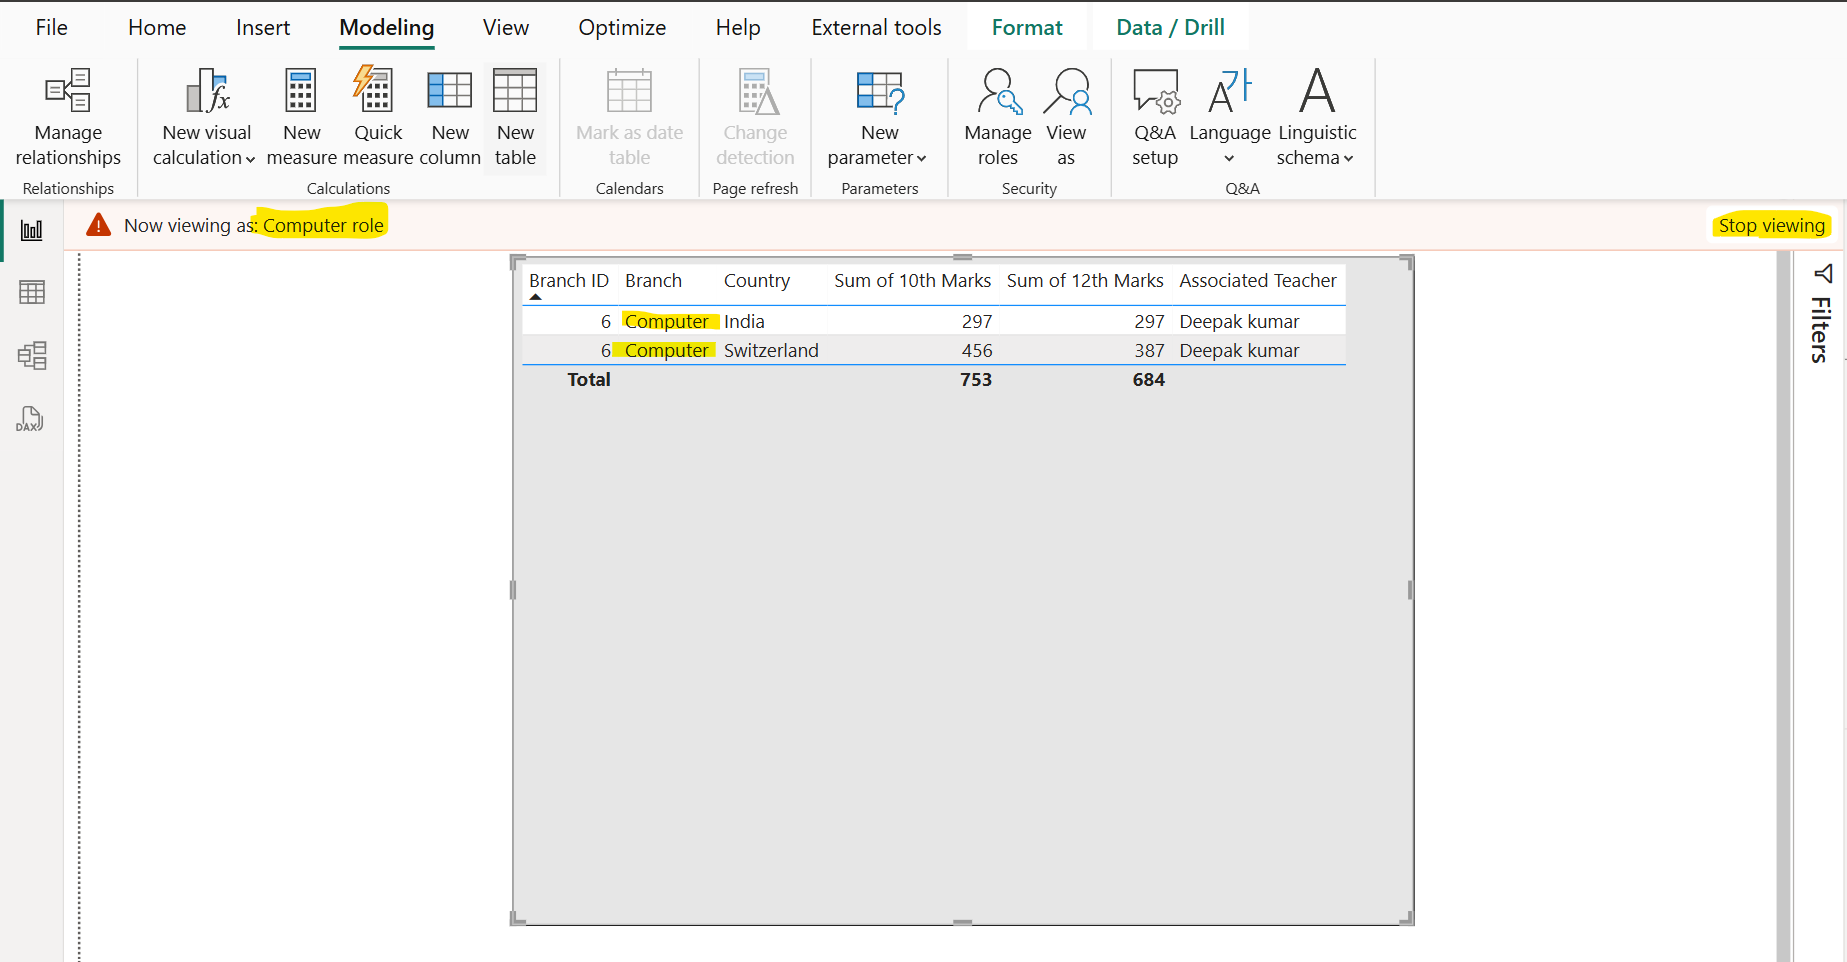
We can undo this filter by selecting View as again and then selecting None from the roles. Or just click on Stop viewing in the canvas header.
Step 4: Add members to the role in Power BI service After publishing the report to Power BI service, we can add members to the role in Power BI service.
a) In Power BI service, click on the more options (…) on the semantic model of our report and then click on Security.
Note: When we punlish the report the semantic model has the same name our report name.
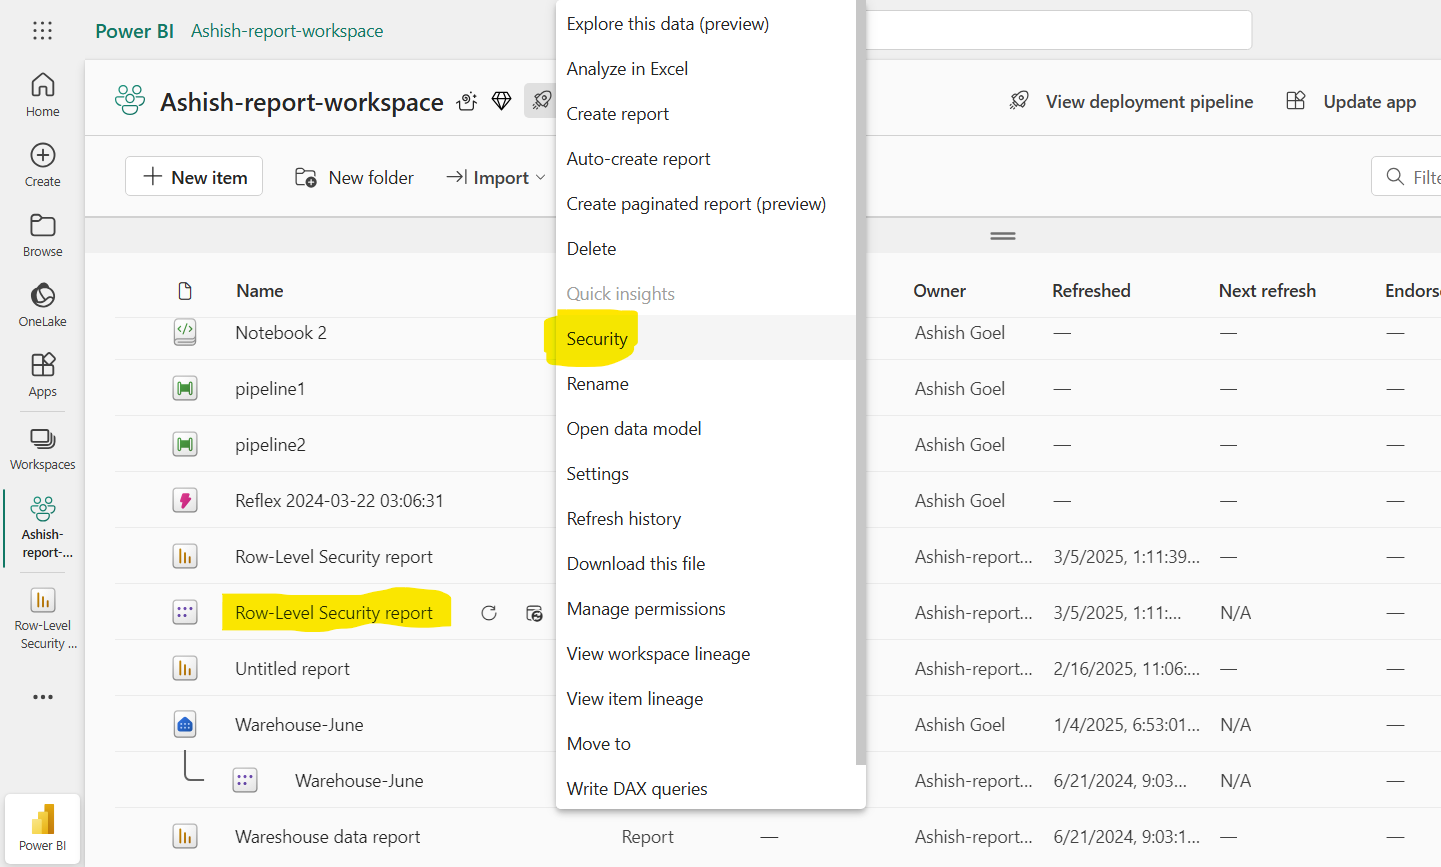
b) Now we can see the Row-Level Security screen, here we add the individual user email and/or security group to their corresponding role. Role mappings must be set up in advance of users accessing Power BI content. When members are added to the role, the corresponding DAX filter that we previously defined will be applied to them.
Note: If members are not added to the role, but they have access to the report, RLS will not apply to them. We can add the users to the respective roles. Now, when those members sign in, they will only see the report with data that applies to them.
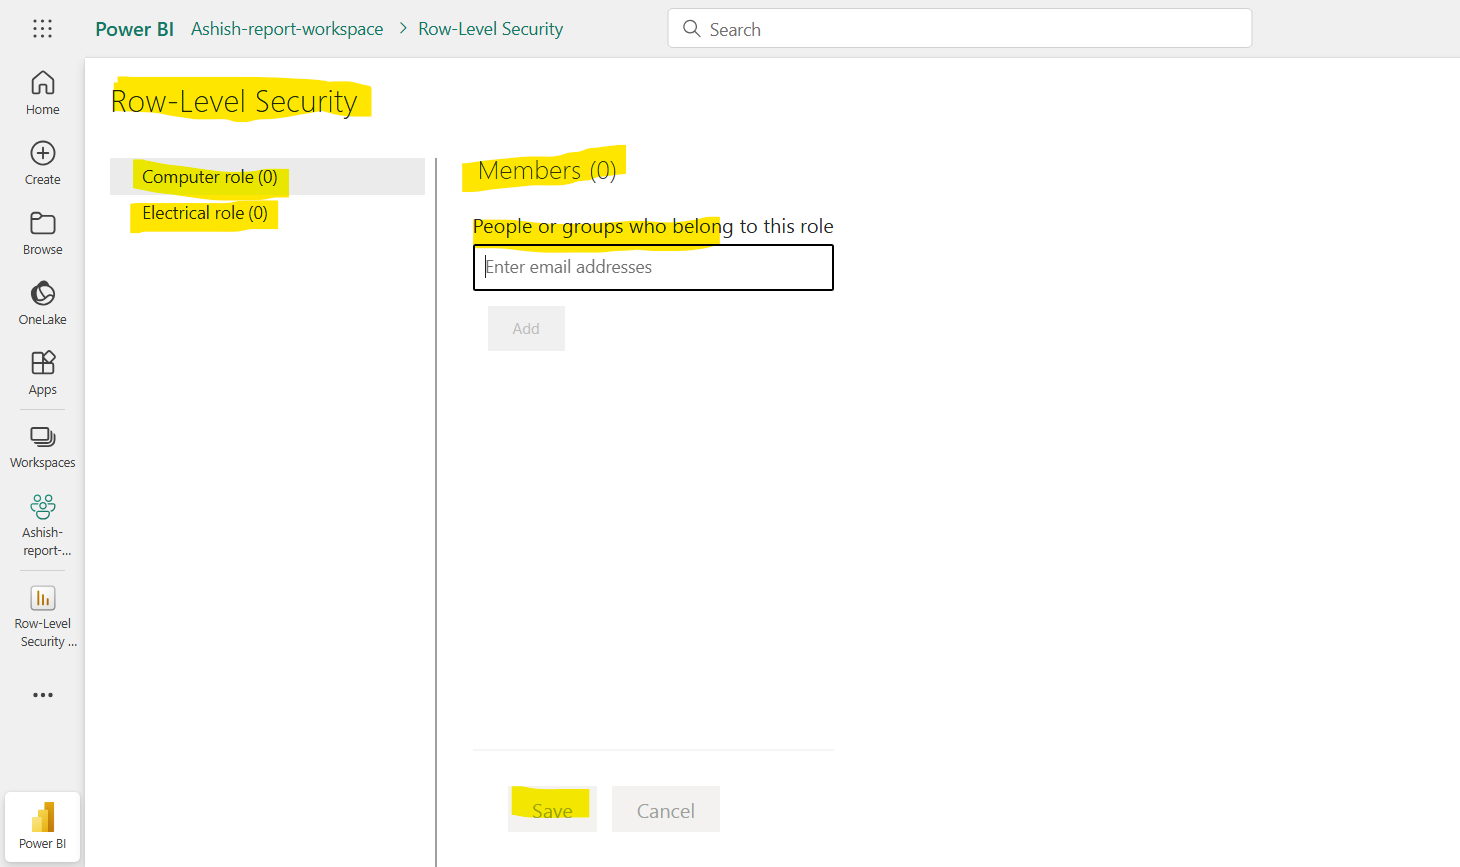
We can also see how many members are part of the respective role by the number in parentheses next to the role name, or next to Members.
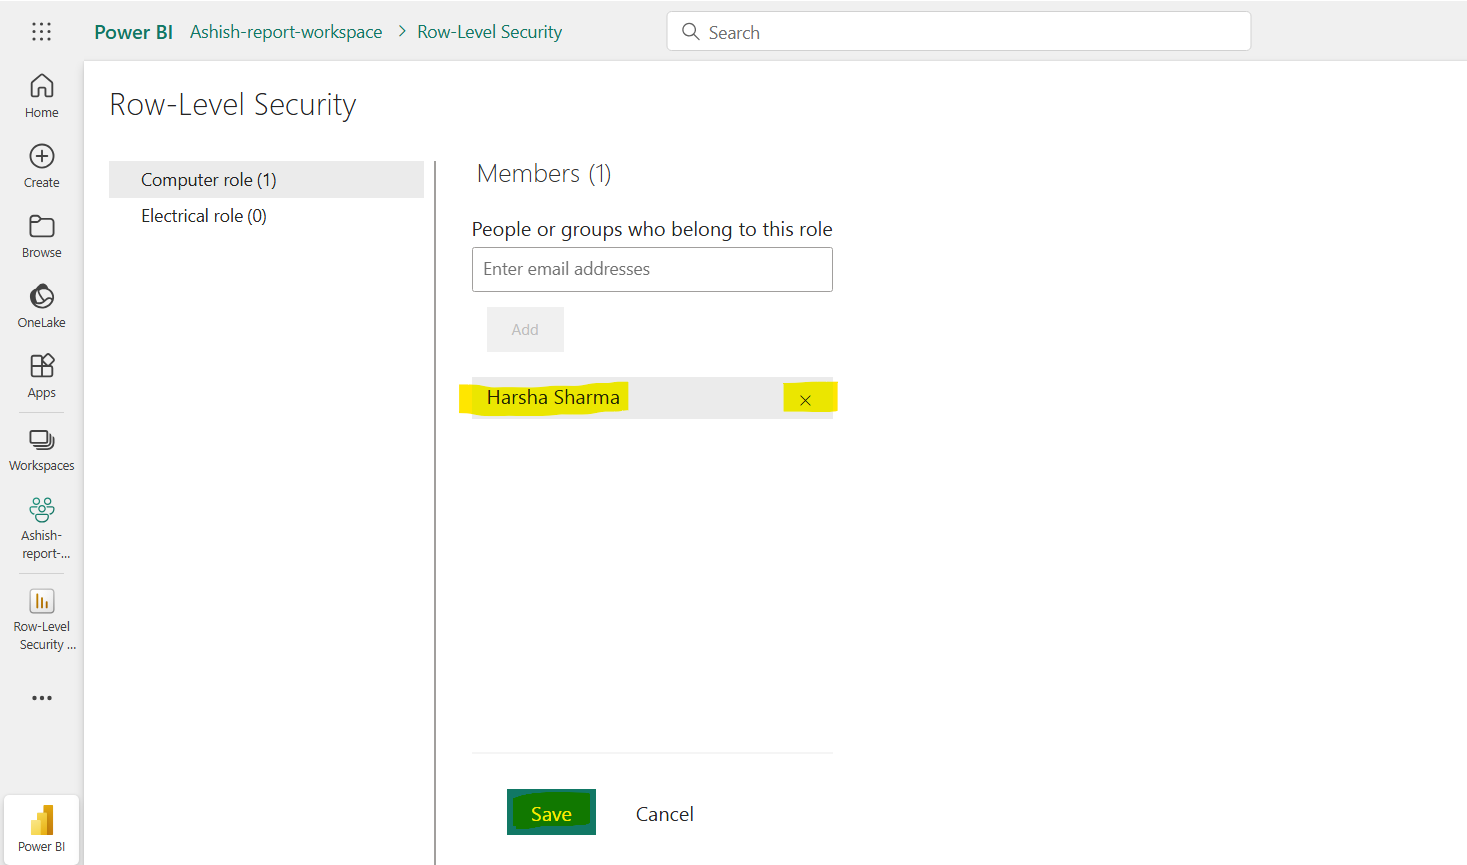
Remove members from the Role in Power BI Service We can remove members by selecting the X next to their name. And click on Save to save the changes.
Step 5: Test the roles in Power BI service We can also test the roles inside Power BI service by selecting the ellipsis (...) next to the role name on the Row-Level Security screen and then selecting Test as role.
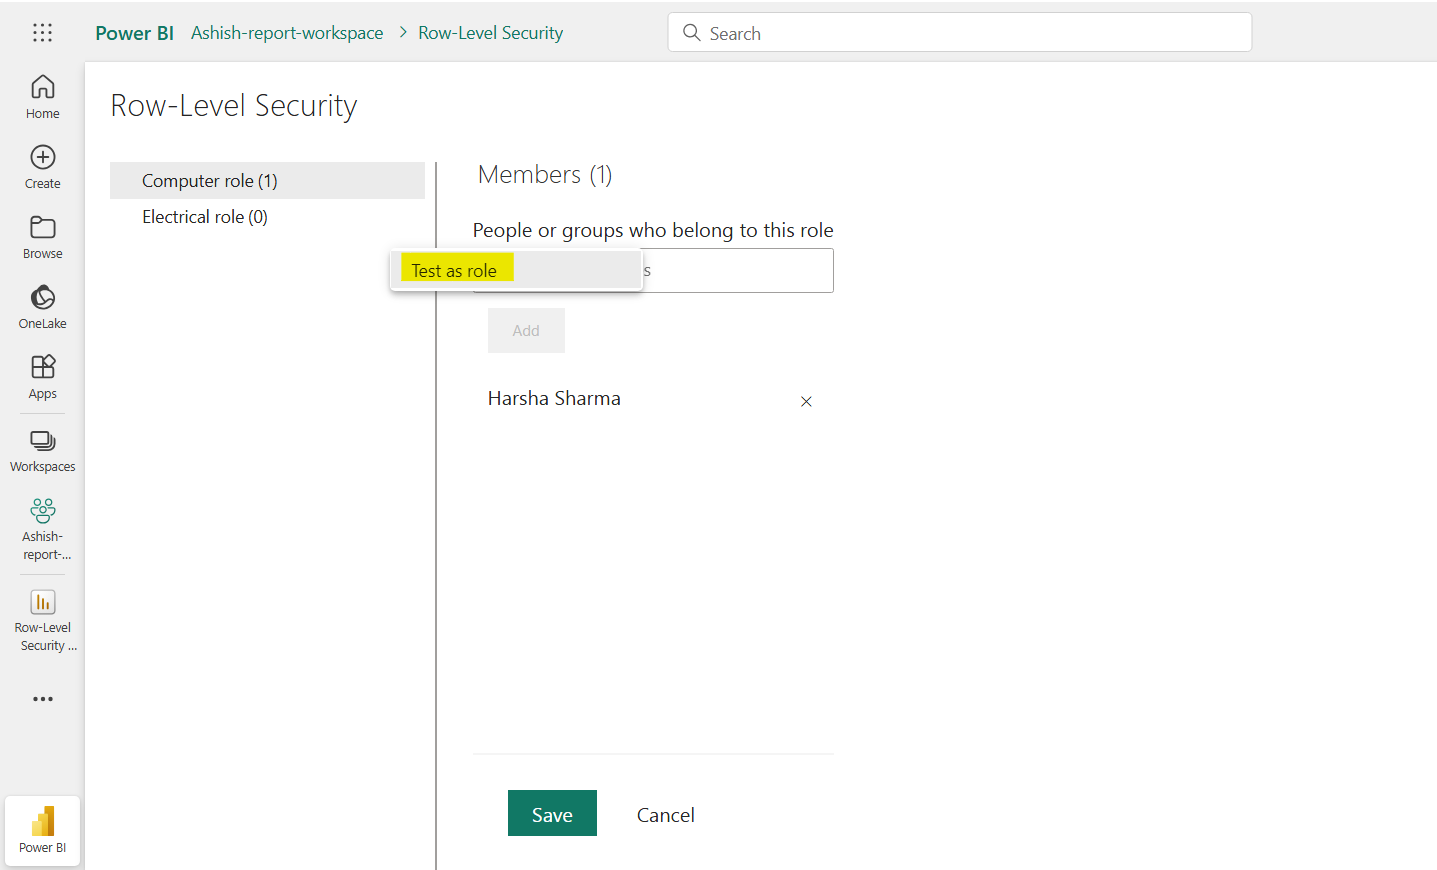
This selection will display the report as if we were a member of the role in Power BI service.
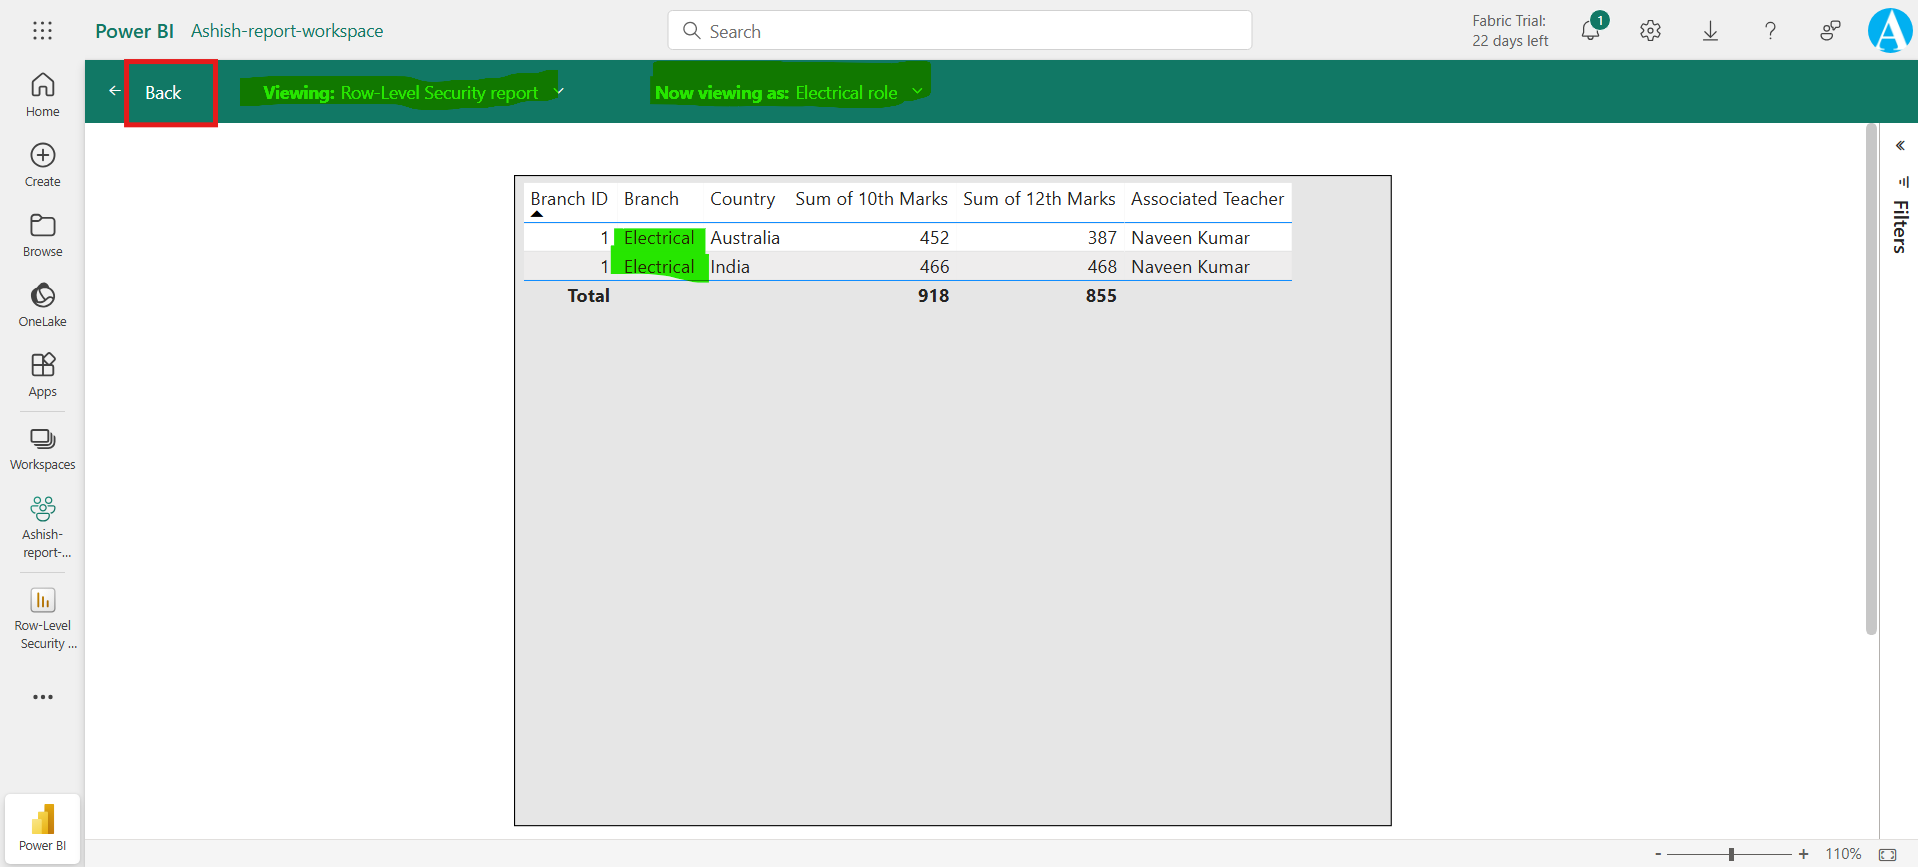
a) Selecting Viewing in the page header we can see our reports in the workspace.
b) In Now viewing as we can see what role we are seeing now.
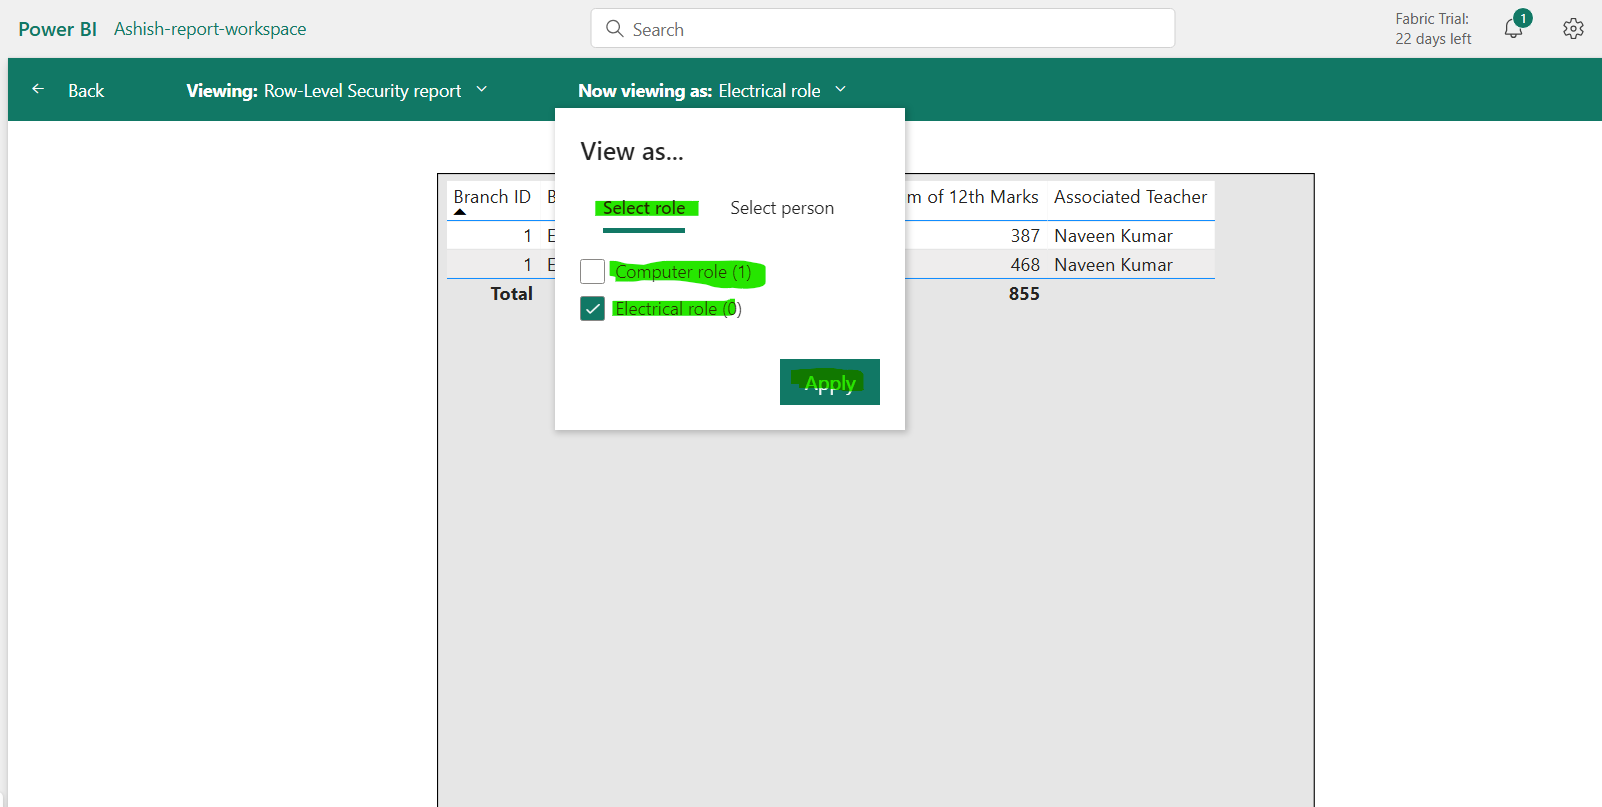
Note: If a user is a member in multiple roles, then the user can see the data from all those roles. To return to normal viewing, select Back.
2. Configure row-level security with the dynamic method We can set up row-level security only once, without the need to continue maintaining it dynamically. We want Power BI row-level security to only show sales to the person who made them.
We can configure row-level security exactly the way we configured the static method, with only a single change. Instead of providing the fixed value, we can provide the dynamic value. The DAX filter for that role would look like the following image.
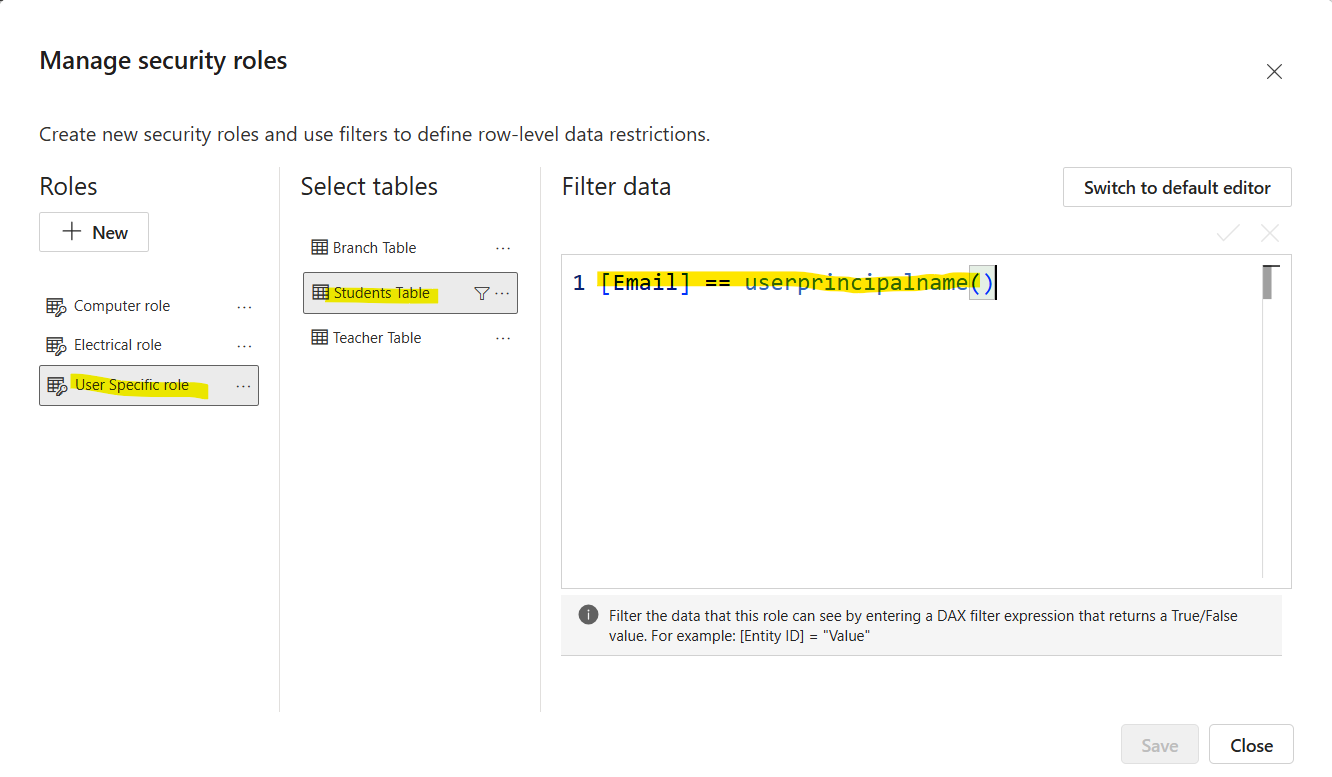
Instead of using the fixed string, such as Electrical or Computer, this uses a DAX function in the row-level security filter. The userprincipalname() function will compare the Email column from the "Students Table" table with the email that the user entered when signing in to Power BI service. If some user uses the email address abc@example.com to sign in to Power BI service, the system will compare that value to the email address in the "Students Table" table.