Create Page navigators in Power BI Desktop
The Page Navigator in Power BI is a feature designed to simplify navigation between pages in a multi-page report. It is a built-in interactive visual (under the Buttons menu) that lists all report pages as clickable links.
Page navigator in Power BI
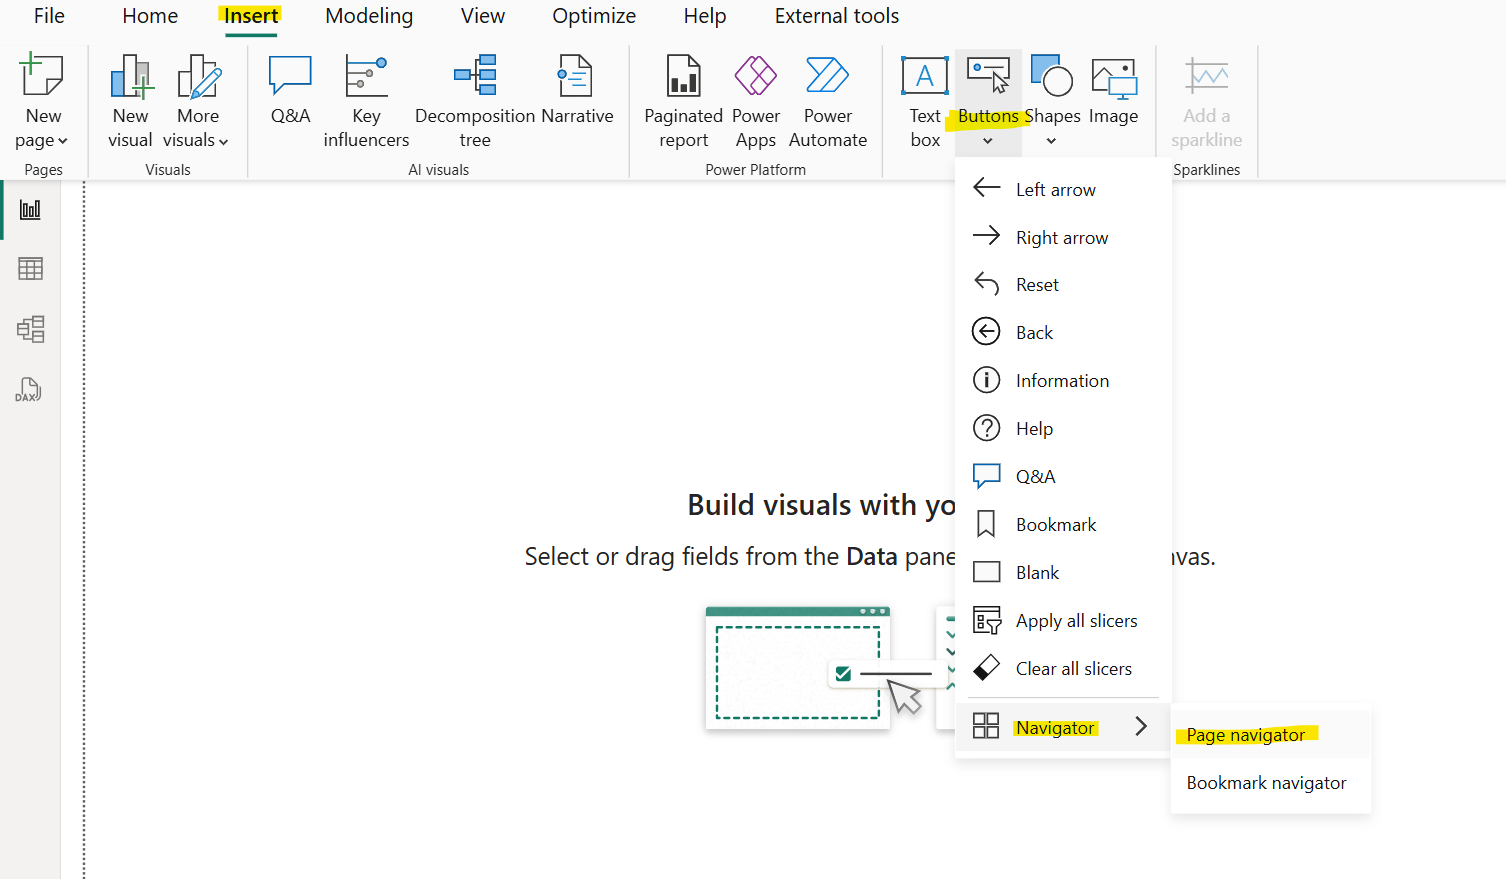
Click on the Insert tab, select Buttons and then click on Page navigator under the Navigator section.

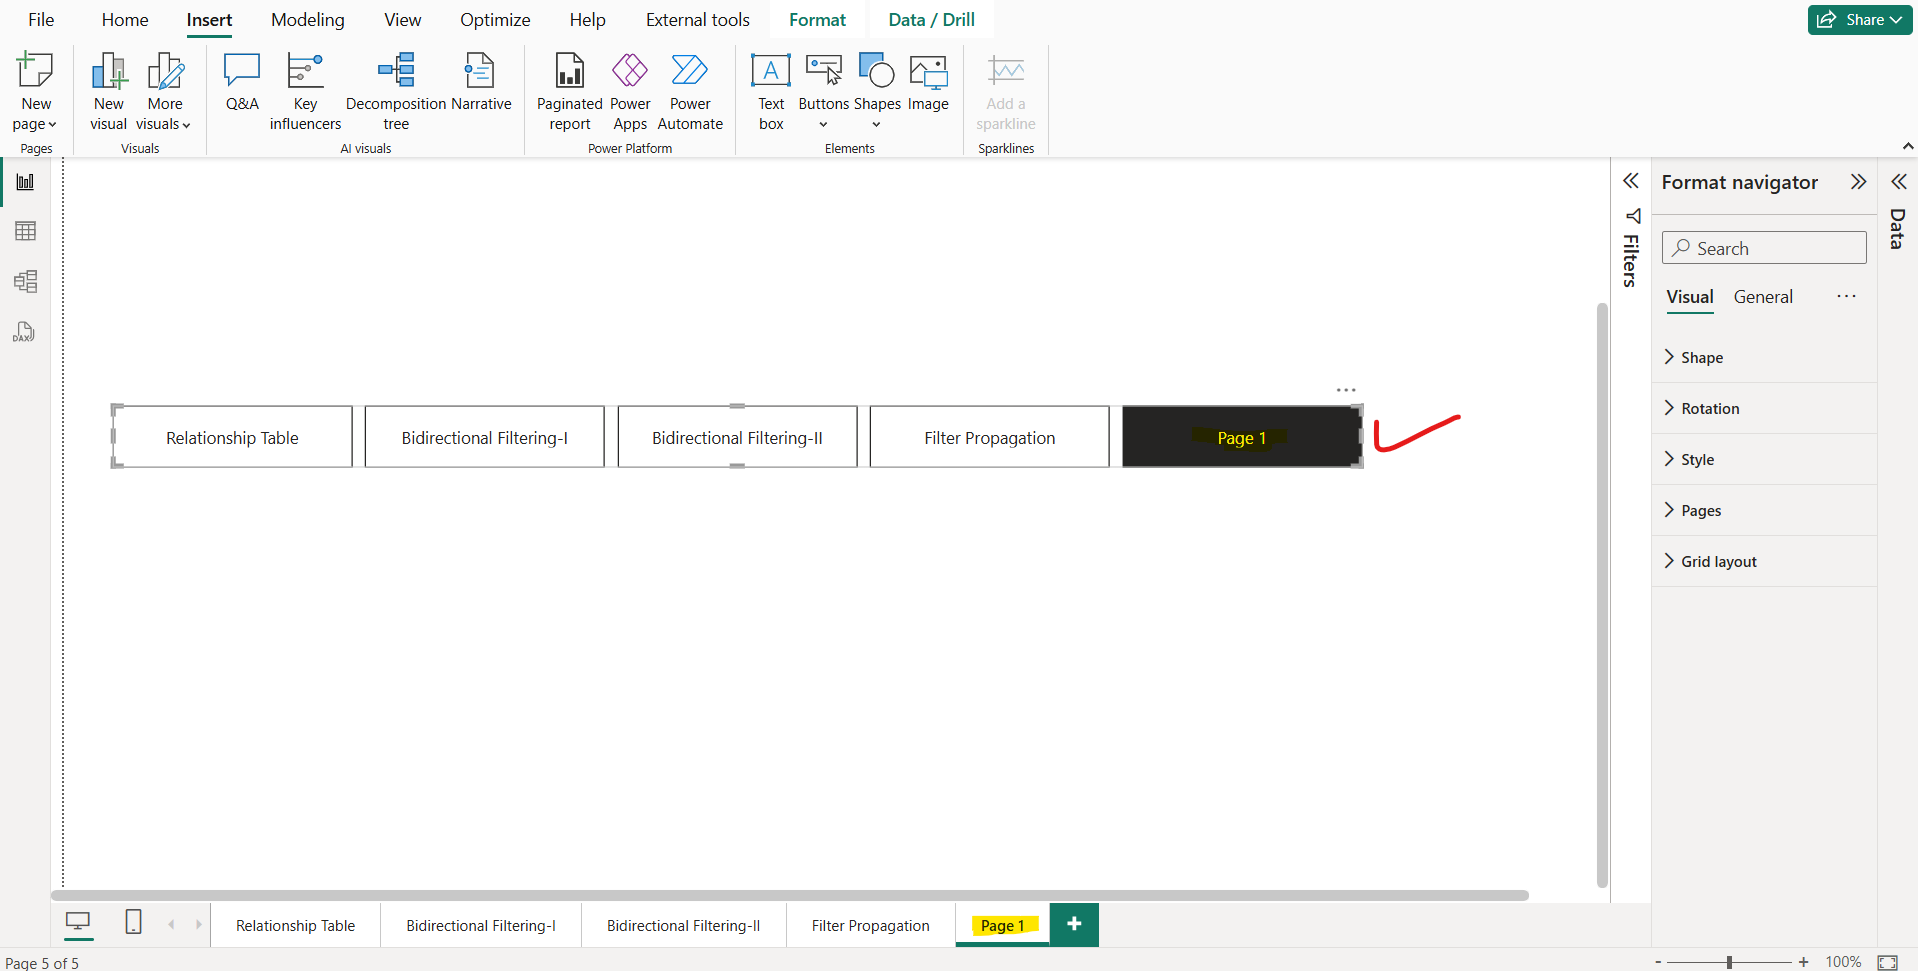
When we select the Page navigator option, Power BI automatically creates a page navigator for us:

The page navigator is automatically in sync with our report pages, meaning:
• The titles of the buttons match the page display names.
• The ordering of the buttons matches the order of our report pages.
• The selected button is the current page.
• The navigator updates automatically as we add or remove pages in our report.
• The titles of the buttons update automatically as we rename pages.
Note: If we’re testing out the page navigator in Power BI Desktop or in edit mode of the Power BI Service, we need to press Ctrl + click to navigate to the desired page.
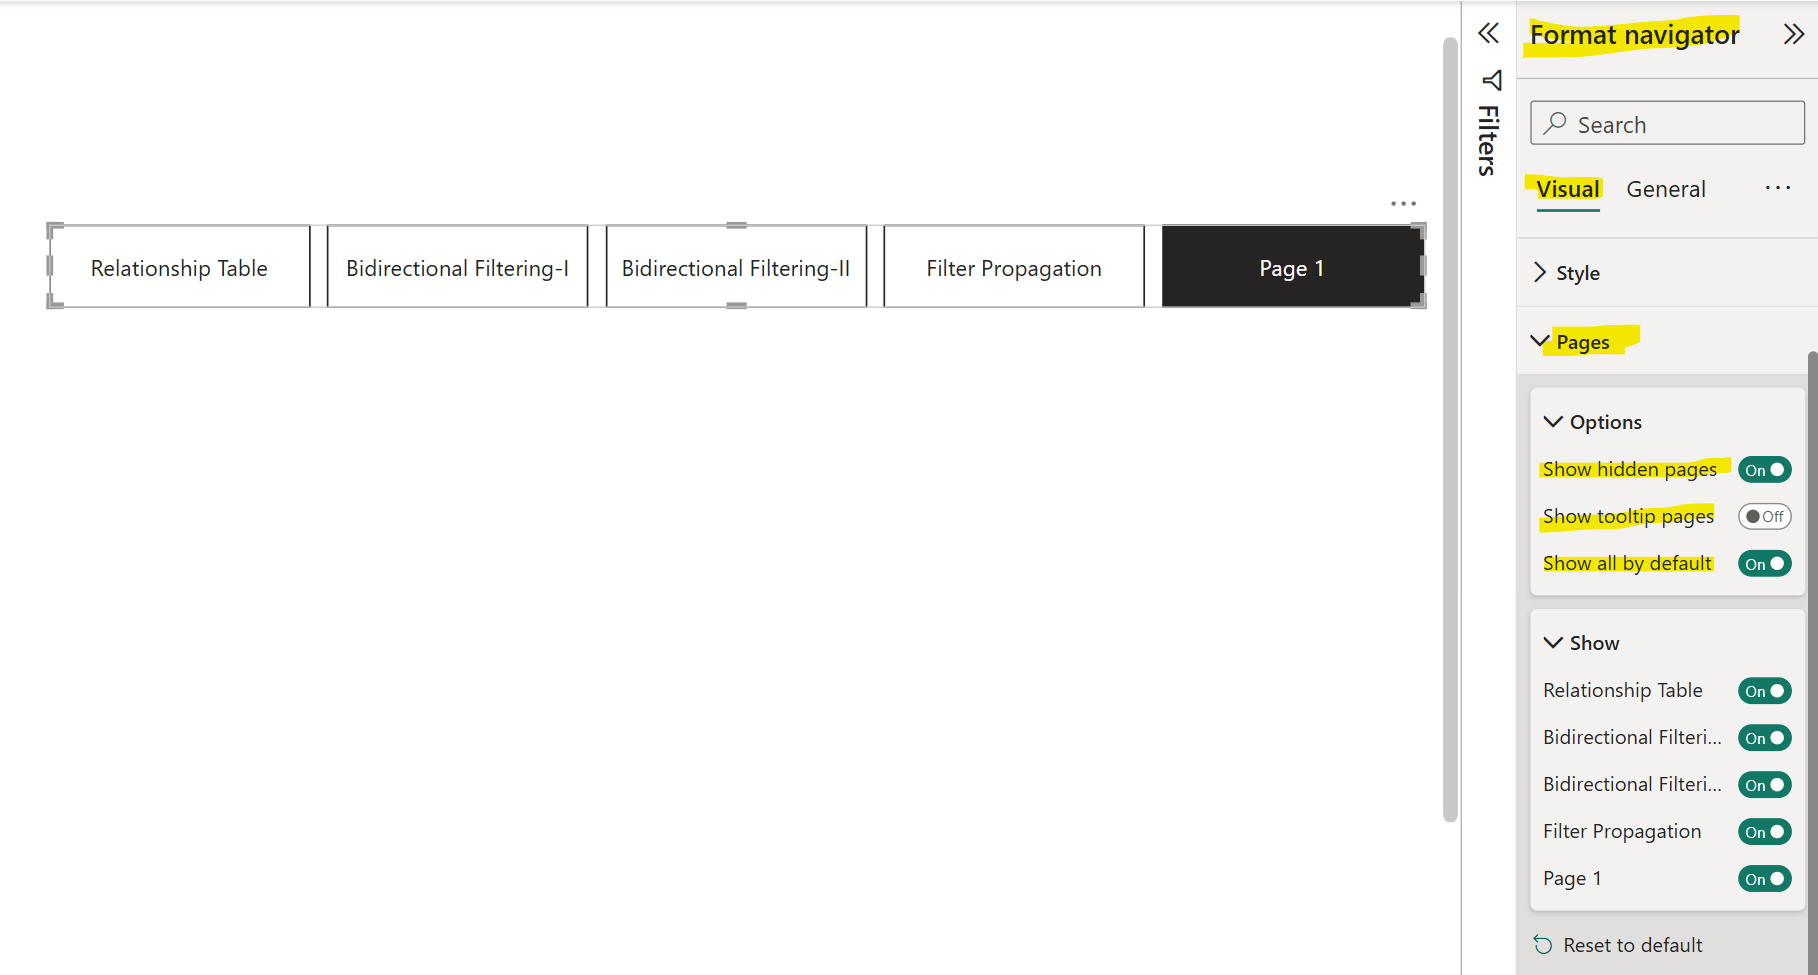
If we want to further customize the pages that show or hide in the page navigator, go to the Format pane and in the Pages section. There, we can Show/hide hidden pages or Show/hide tooltip pages:

We also have the option to show or hide control for the individual pages in the Show section.
Grid layout
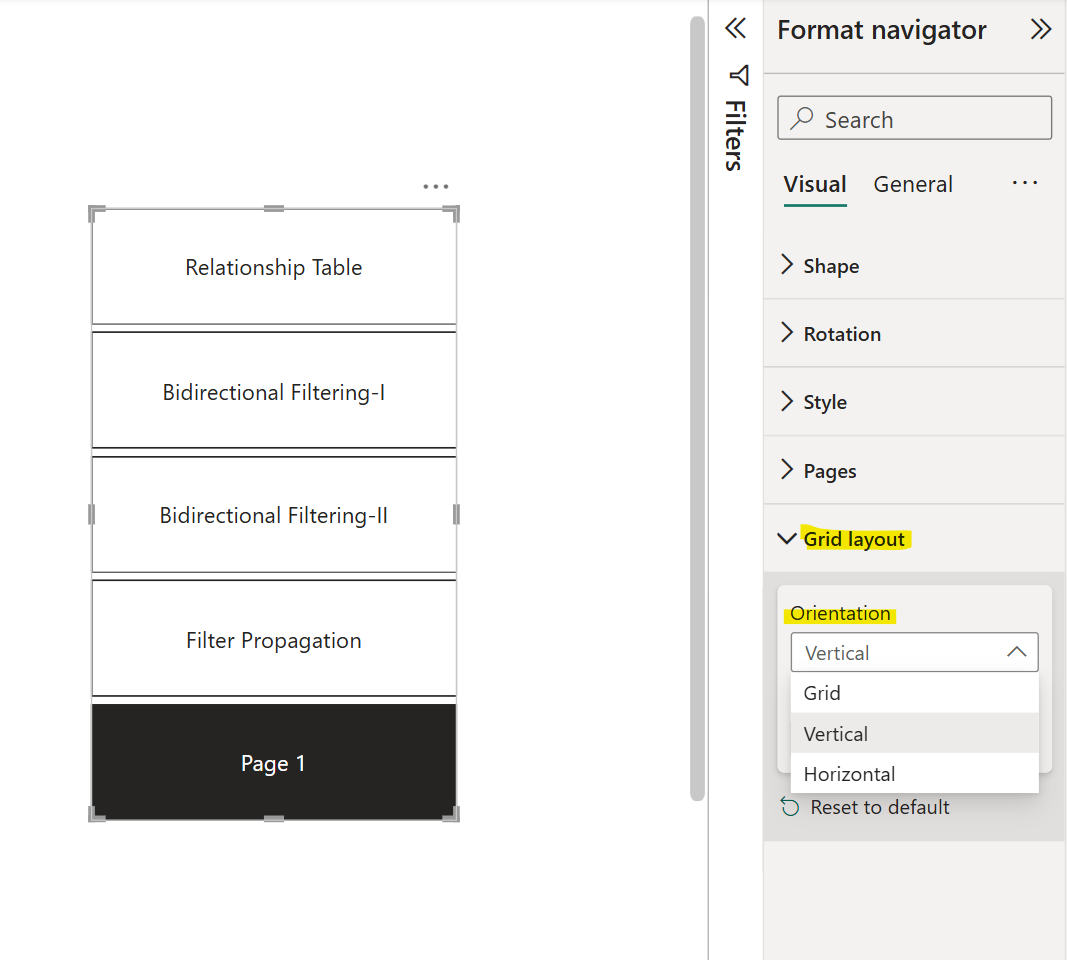
The grid layout tab includes options to change the orientation of the navigator in the following forms:
• Horizontal: The pages are laid in a row format.
• Vertical: The pages are laid in a column format.
• Grid: The pages are laid in a rows and columns format.
