Sync slicers in Power BI
By default, all the visuals on the report page are affected by the change in slicer of the that page. Syncing slicers in Power BI allows us to use one slicer to filter data across multiple report pages, ensuring a consistent user experience. Here's how it works and how we can set it up:
When we have a multi-page report, you might want the same filter applied across all pages. Syncing slicers means that when a user selects a value on one slicer, the same selection is automatically applied on other pages, maintaining consistency in our analysis.
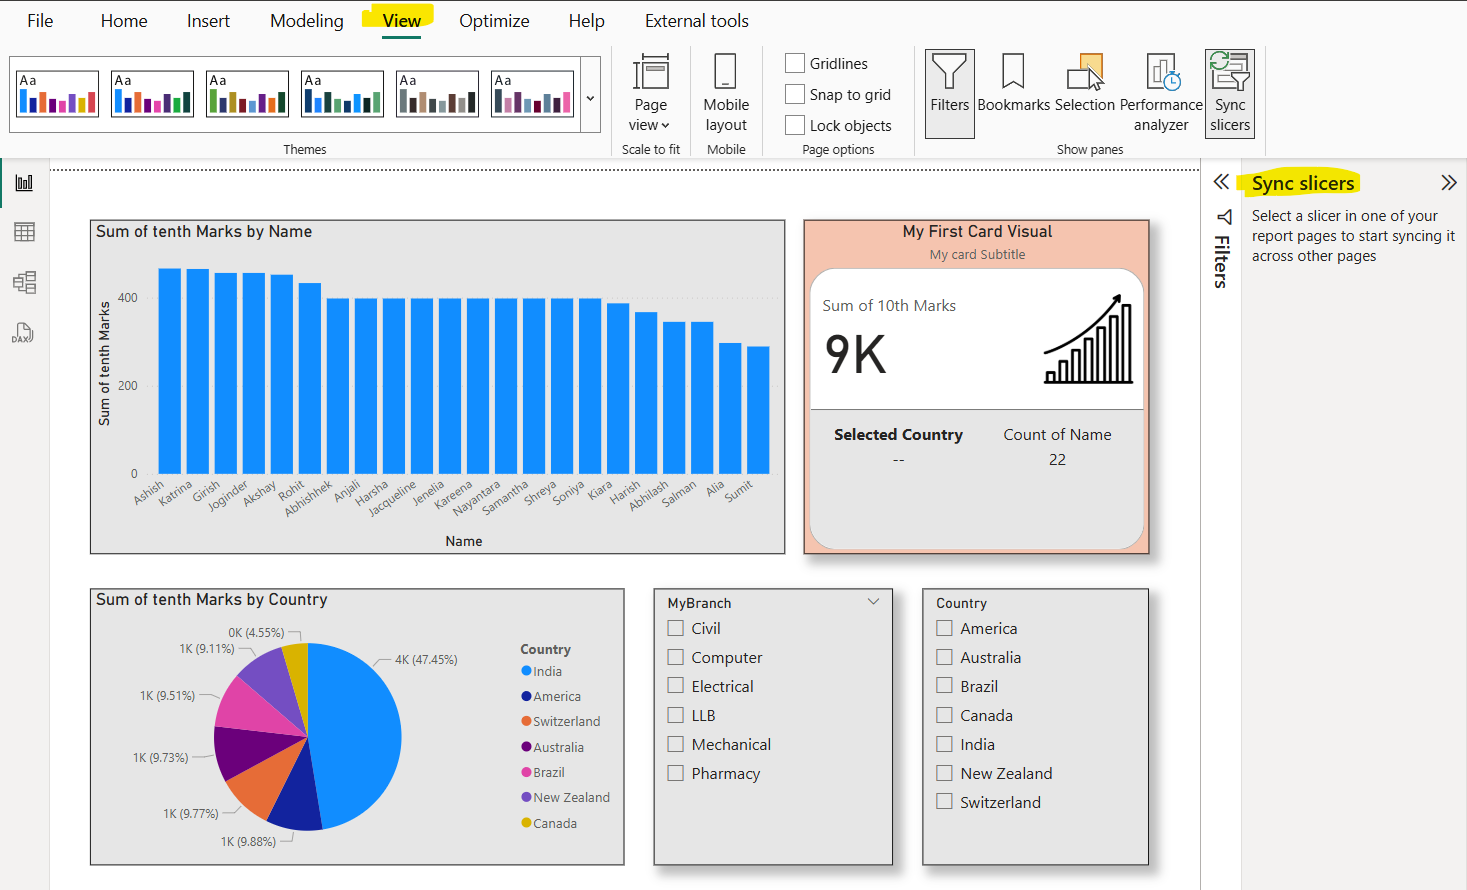
Step 1: Go to the View tab in Power BI Desktop and click on Sync slicers.

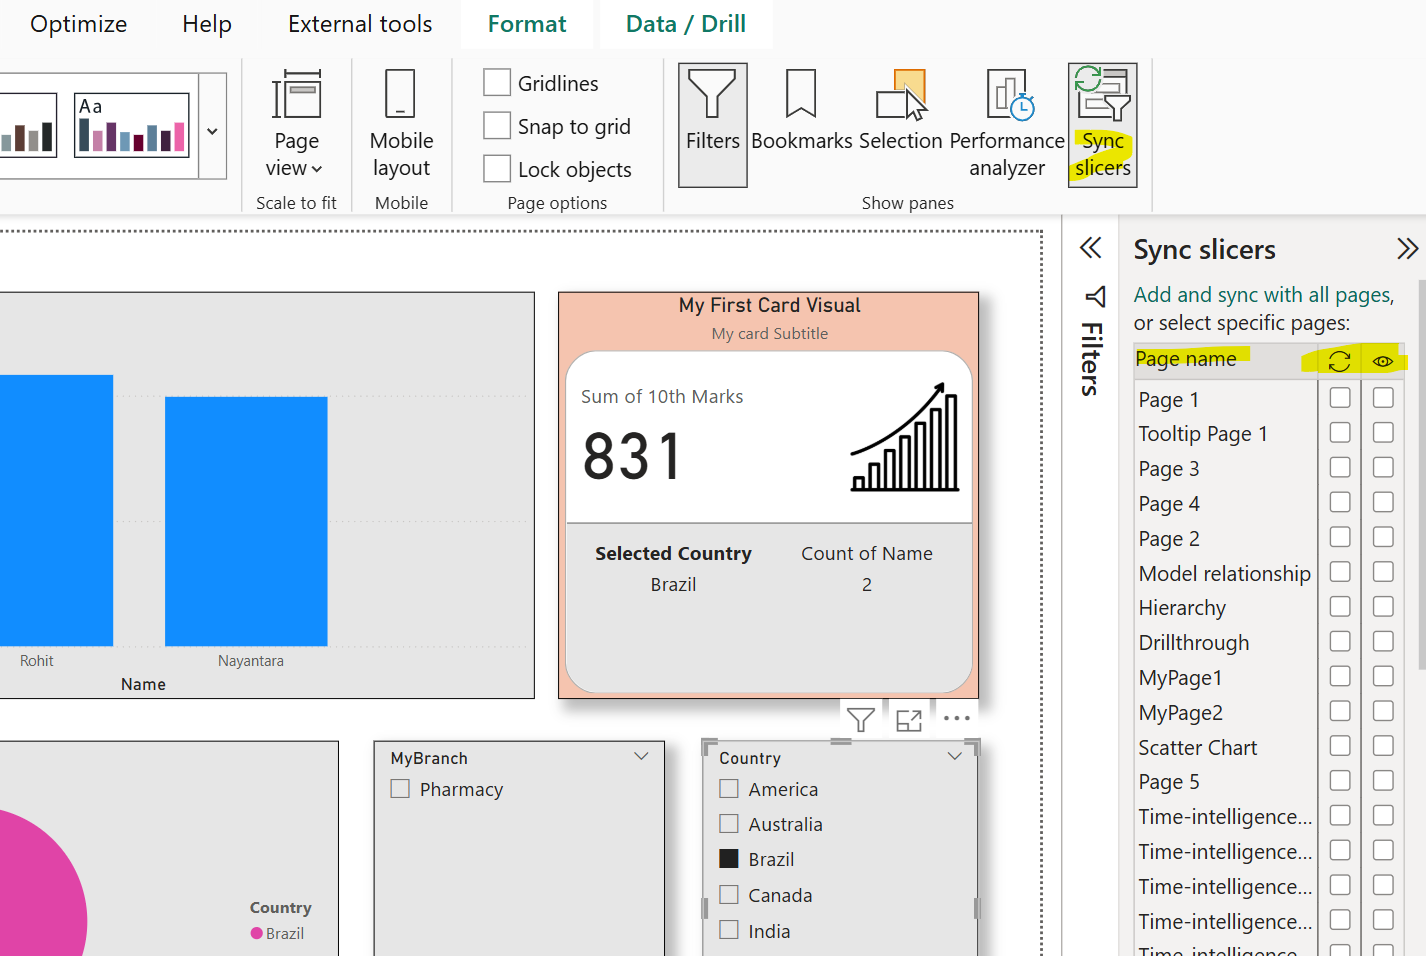
Now select the slicer which we want to sync on the other pages of the report. This pane will display all the pages in our report.

In the Visible column of the Sync slicers pane, the slicer is made visible or not by selecting the checkbox. In the other column which looks like a refresh icon, when selected, the slicers are synced on the selected pages.

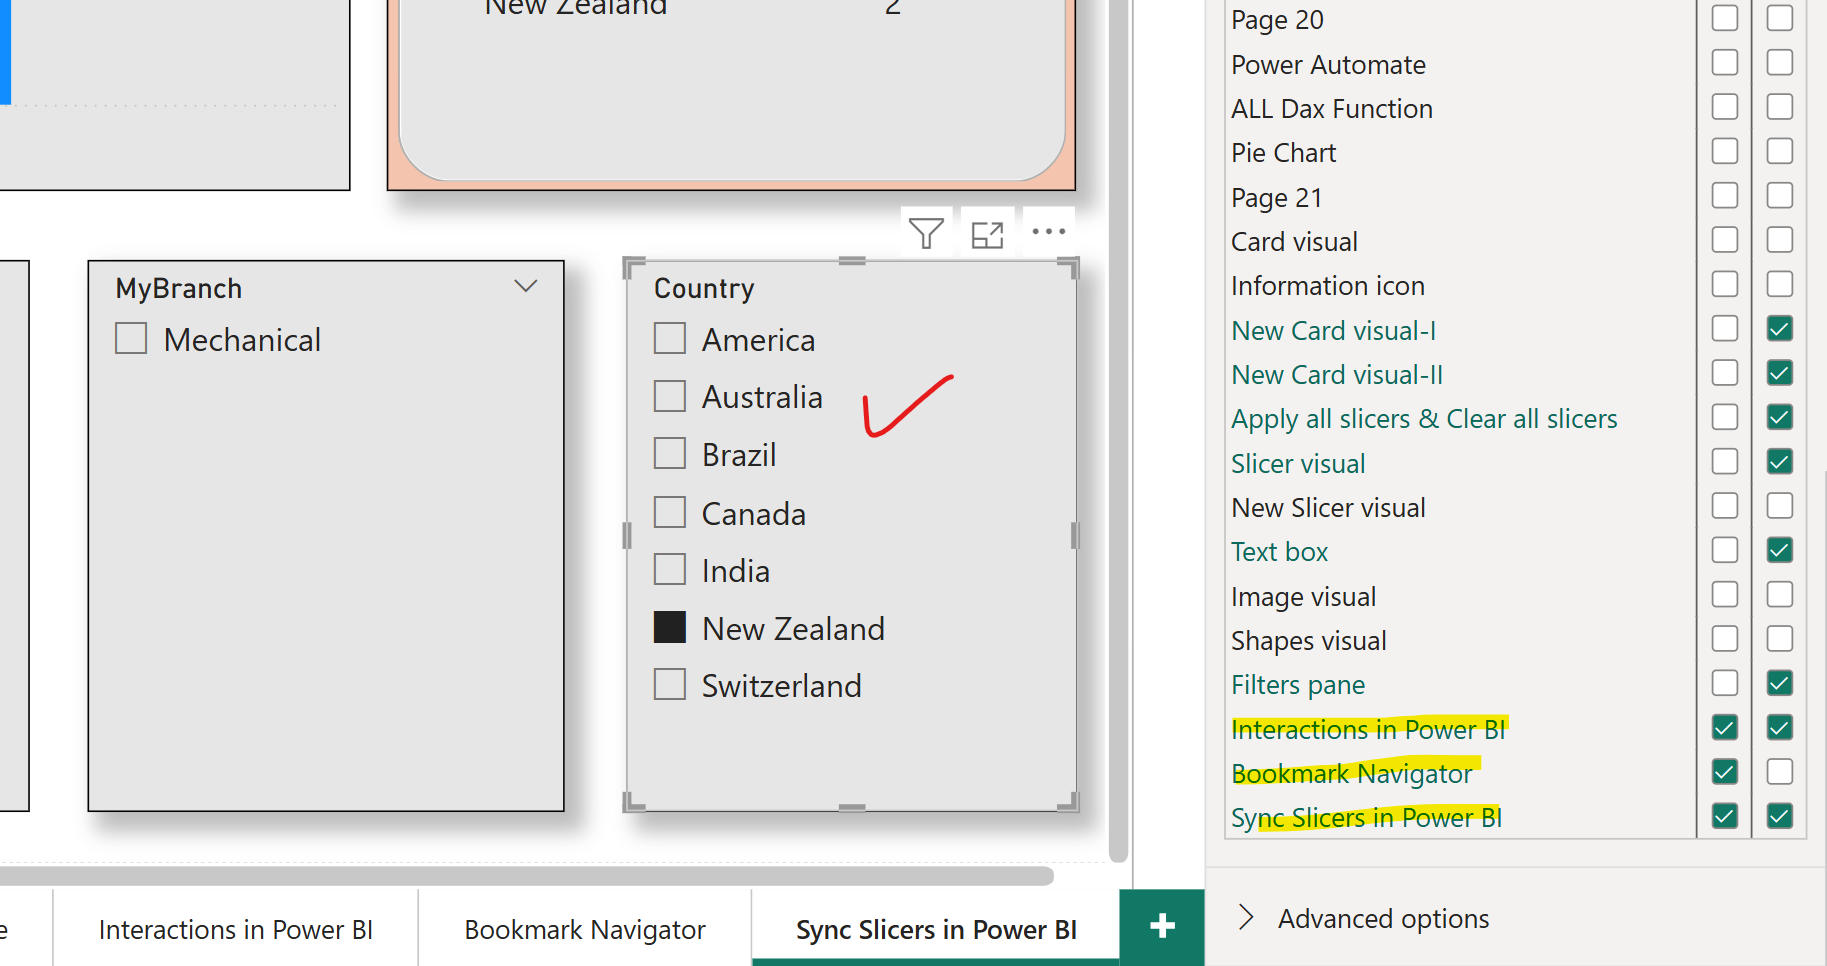
Let’s consider the last three pages only, where we have synced the selected slicer on the three pages, but slicer is not visible on the “Bookmark Navigator” page.
Interesting Fact Here, interesting thing is I have not added the Country slicer on the “Bookmark Navigator” page but still due to syncing it affects the report page to filter the visuals according to the selected value in the slicer.
Key Considerations • Same Field Requirement: All synced slicers must use the same underlying data field (e.g., "Year" from the same table).
• Bidirectional: Syncing is bidirectional. For example, a slicer on Page 1 can filter Page 2, and filter on Page 2’s slicer affects Page 1.
• Visibility: The slicer doesn’t need to be visible on synced pages for the filter to apply. However, visible slicers will reflect the current selection.