Workspace and its roles
Workspace in Power BI, is a house for our reports in one location, make them shareable, collaborate with other teams, and update reports.
Create a workspace
To create a workspace, follow the following steps:
Step 1: Sign into Power BI Service.
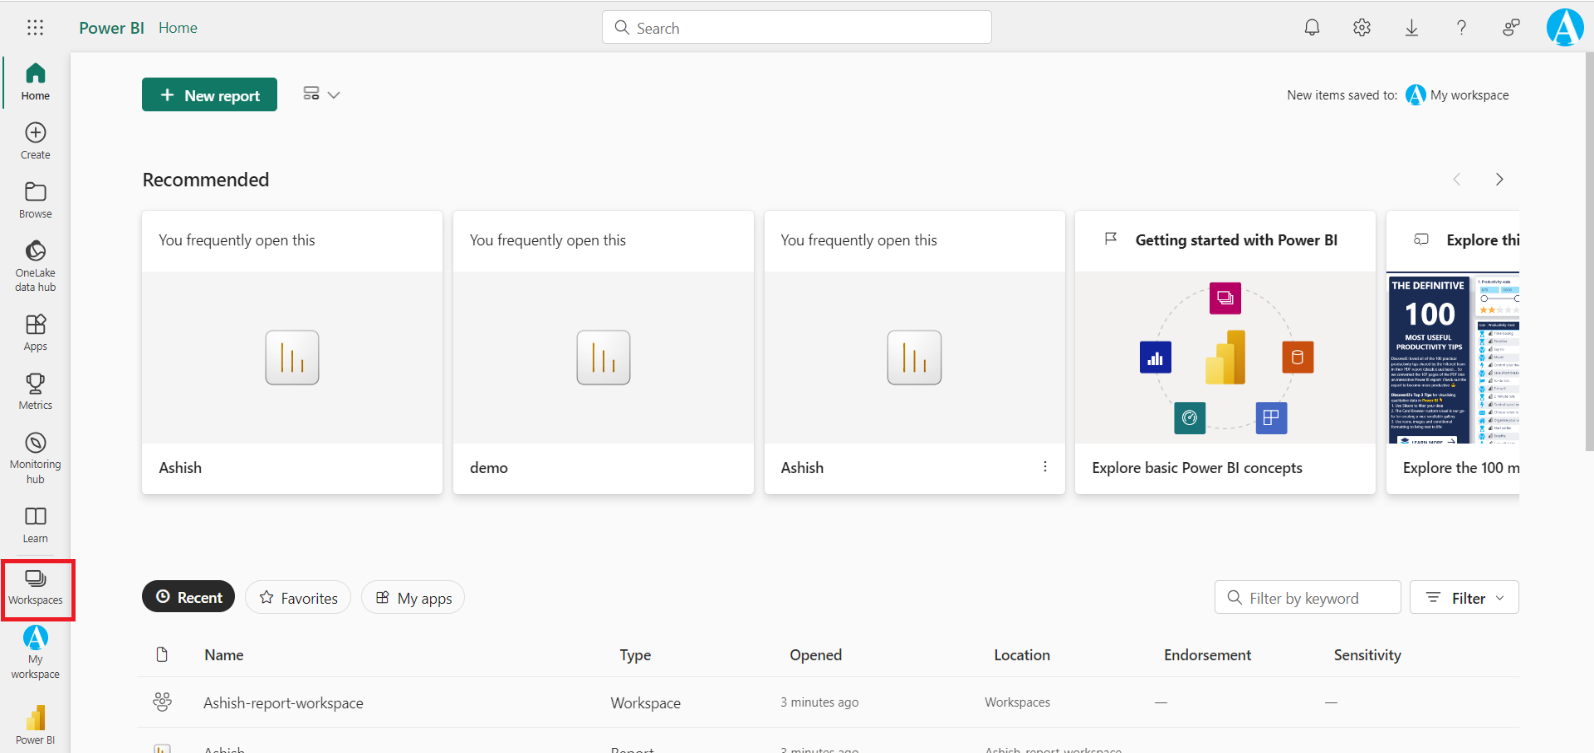
Step 2: Select the Workspaces drop-down menu.
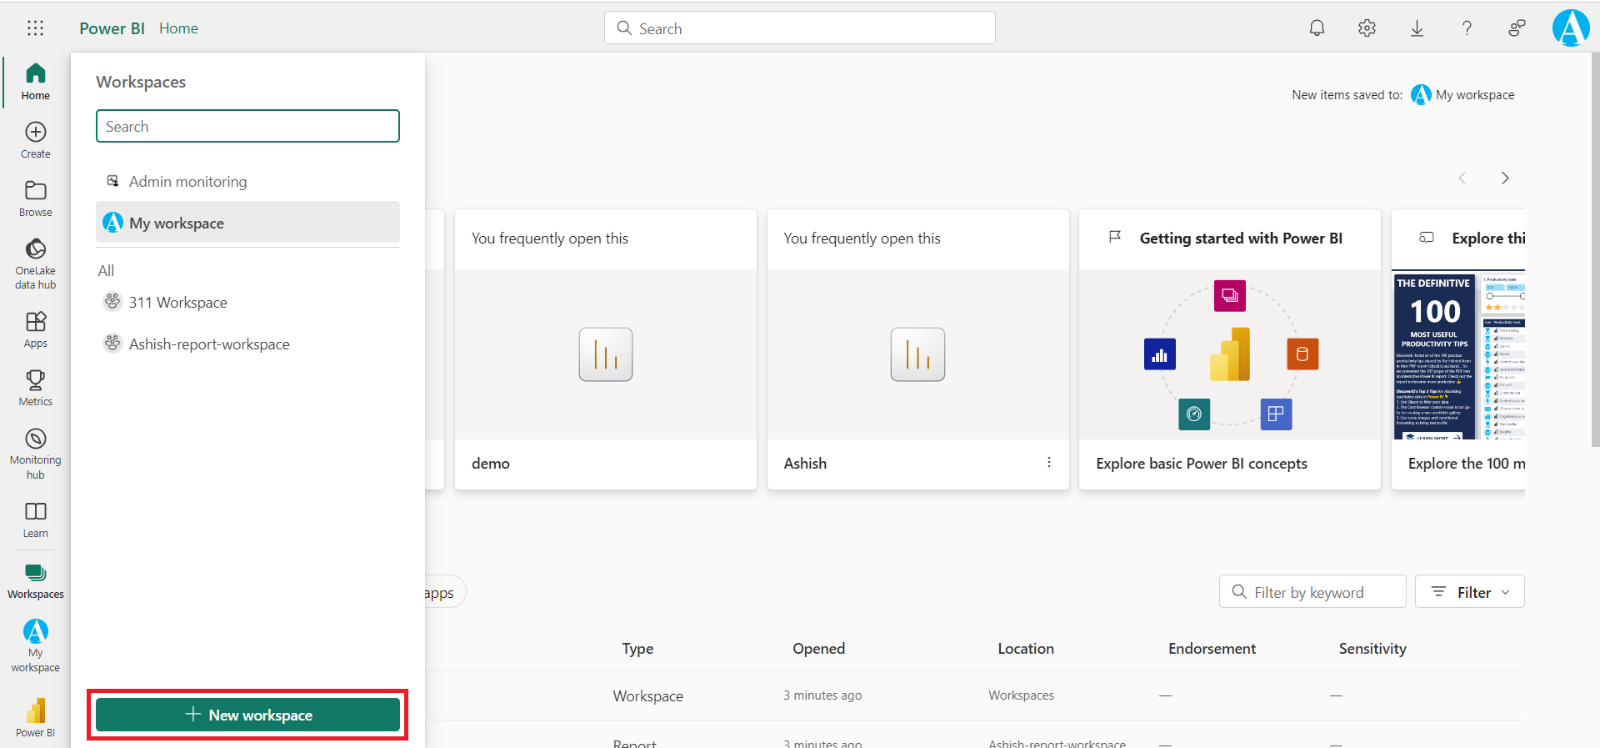
Step 3: Select the + New workspace button at the bottom of the resulting panel.
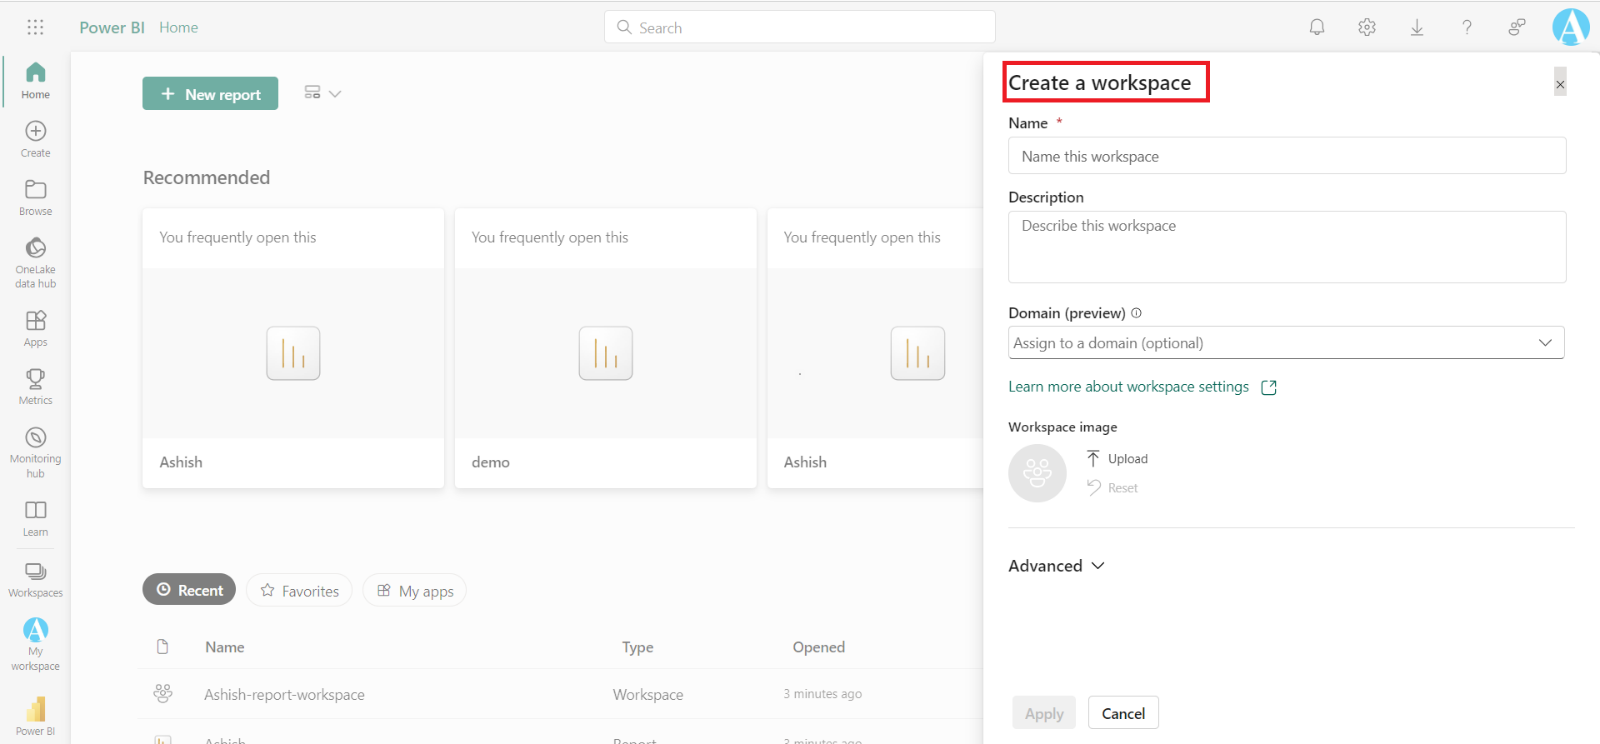
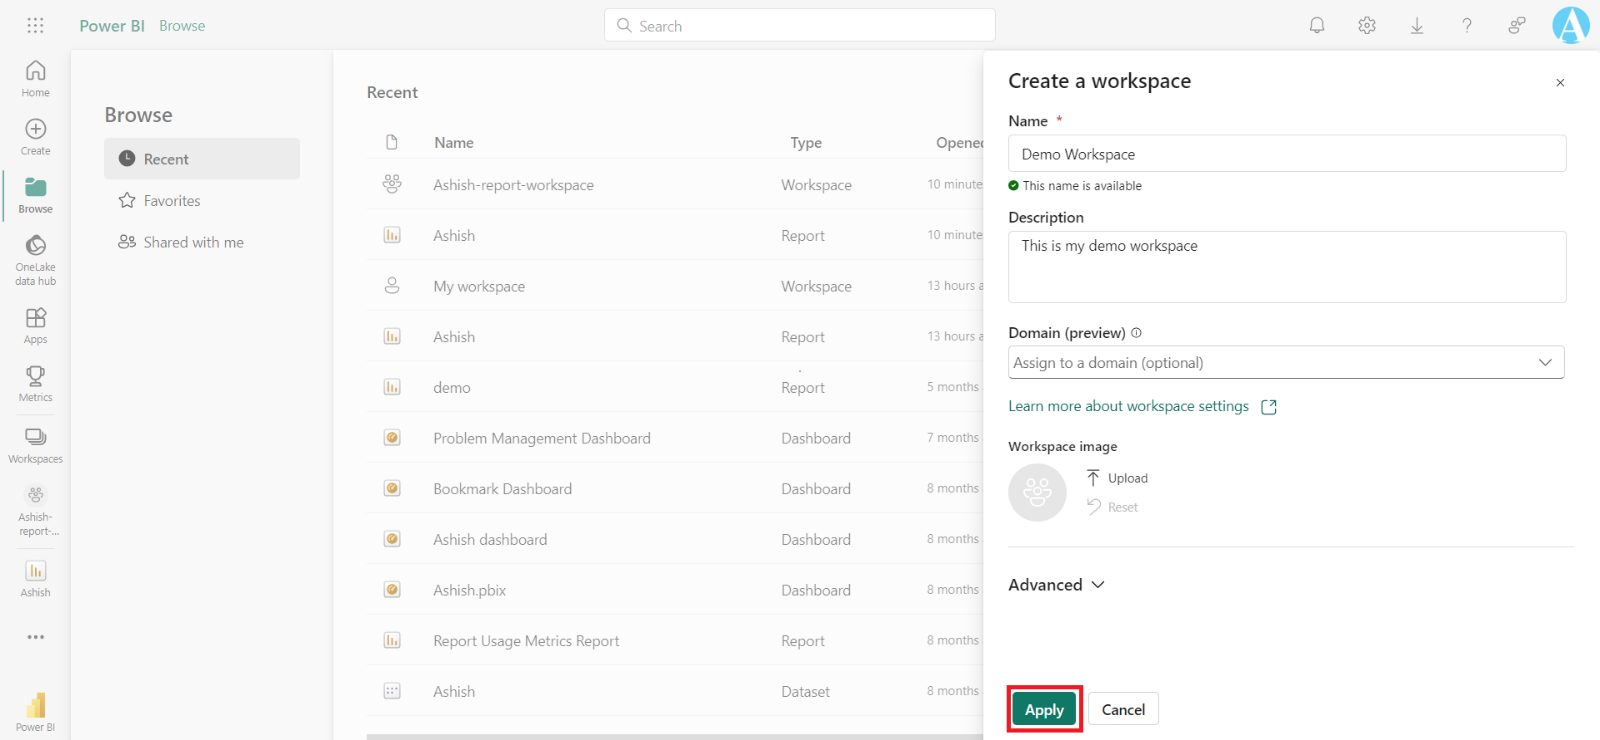
Step 4: In the Create a workspace window, enter the information in the following fields:
- Name: It specifies the name of the workspace
- Description: It is used to describe the workspace.
- Upload a Workspace image.
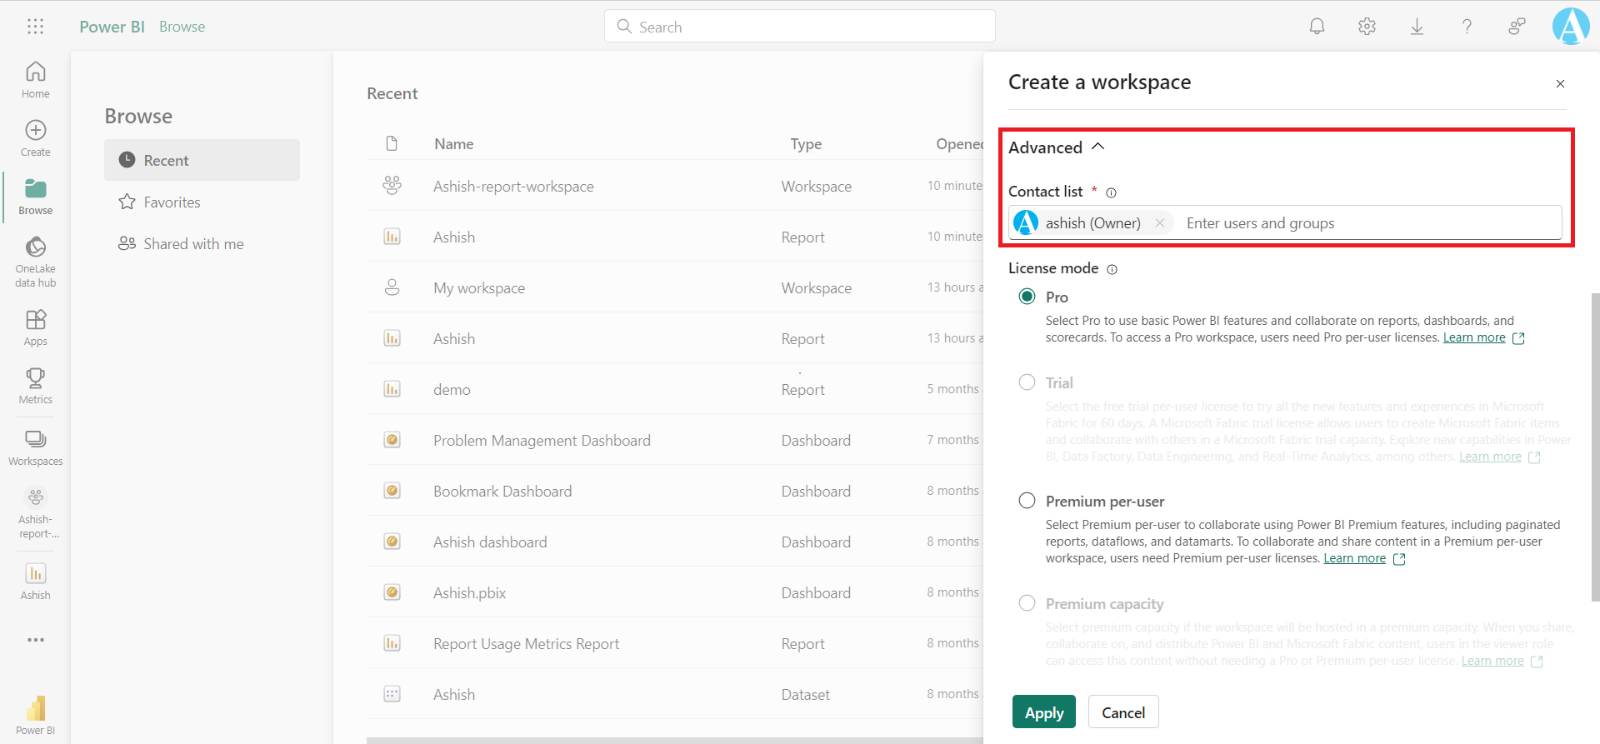
Step 5: In the Advanced drop-down menu, we can create a Contact list of users who will receive notifications if issues with the workspace occur.
Step 6: After entering the details, click on Apply, to create the workspace.
Assign workspace roles As the workspace oner we can assign workspace roles to the users. Workspace roles allow you to designate who can do what within a workspace.
To grant access to a new workspace, assign those user groups or individuals to one of the workspace roles: Admin, Member, Contributor, or Viewer.
The four roles are listed below, in order of most permissive to least, along with select permissions. For full permissions, review the Roles in workspaces documentation.
The abilities of role types in a workspace include: 1. Admin
- Only Admins can Add/remove other users from the workspace
- Publish, update, and/or share an app in a workspace
- Create, edit, delete, and publish reports and content in a workspace, can delete the workspace itself
- View and interact with reports and dashboards in a workspace
- Configure data refreshes
- Add or remove people, including other admins
2. Member
- Add members or others with lower permissions
- Publish, unpublish, and change permissions for an app
- Cannot remove users
- Cannot delete the workspace
- Cannot update the metadata about the workspace
Note: If a user is added to any workspace role, then the user who has Member role on the workspace is not able to modify the existing user’s role of the workspace. Only admins can modify other users' access.
3. Contributor
- Cannot add or remove users
- Cannot publish, update, or edit an app in a workspace unless given this ability by admins/members
- Can create, update, and publish content and reports to the workspace
- Can schedule data refreshes
4. Viewer
- Cannot add or remove users
- Can only view a report or dashboard in a workspace
- Can read data that is stored in workspace dataflows
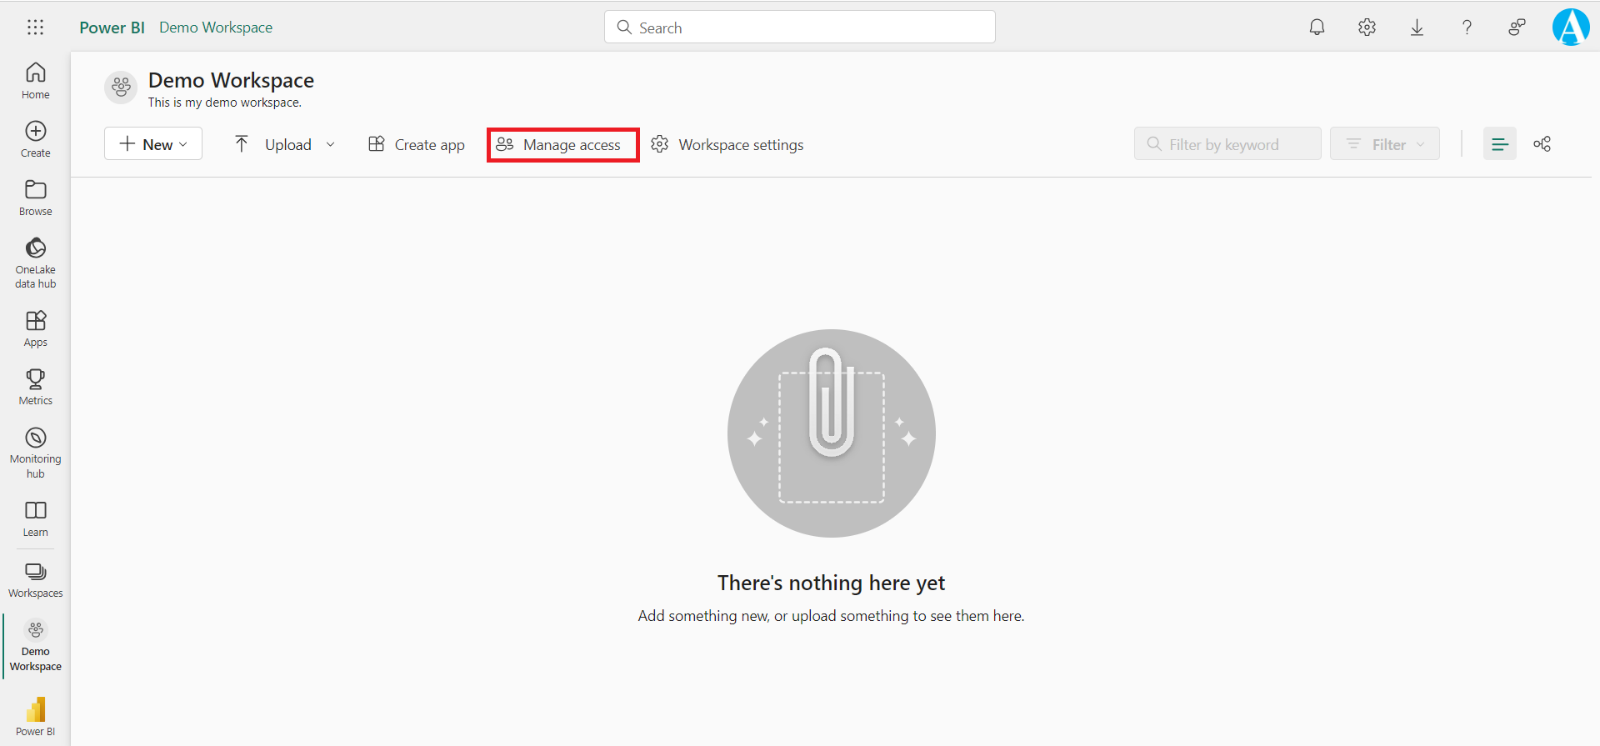
To assign these roles to users, go to the workspace that we have created, and select Manage access.
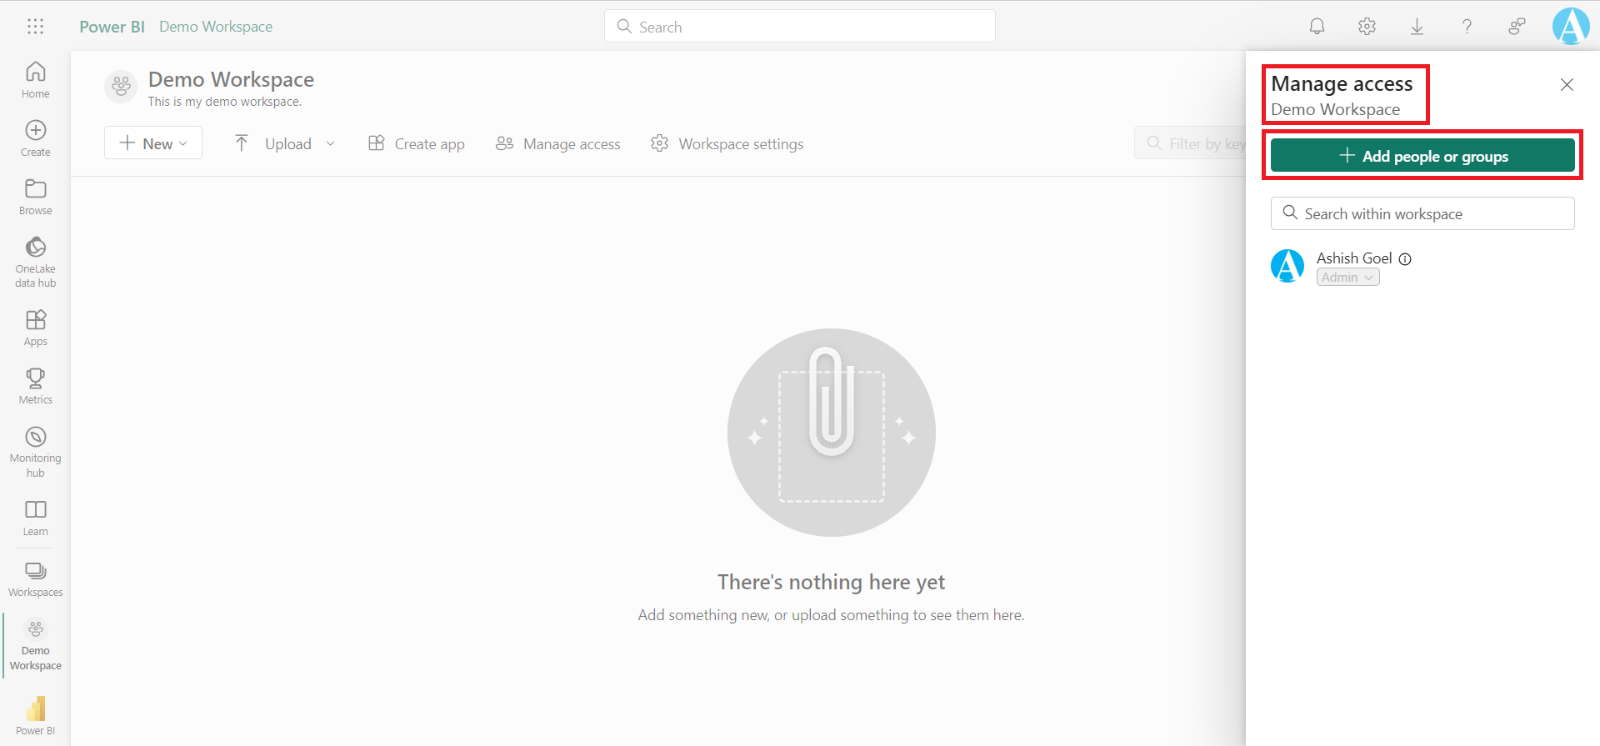
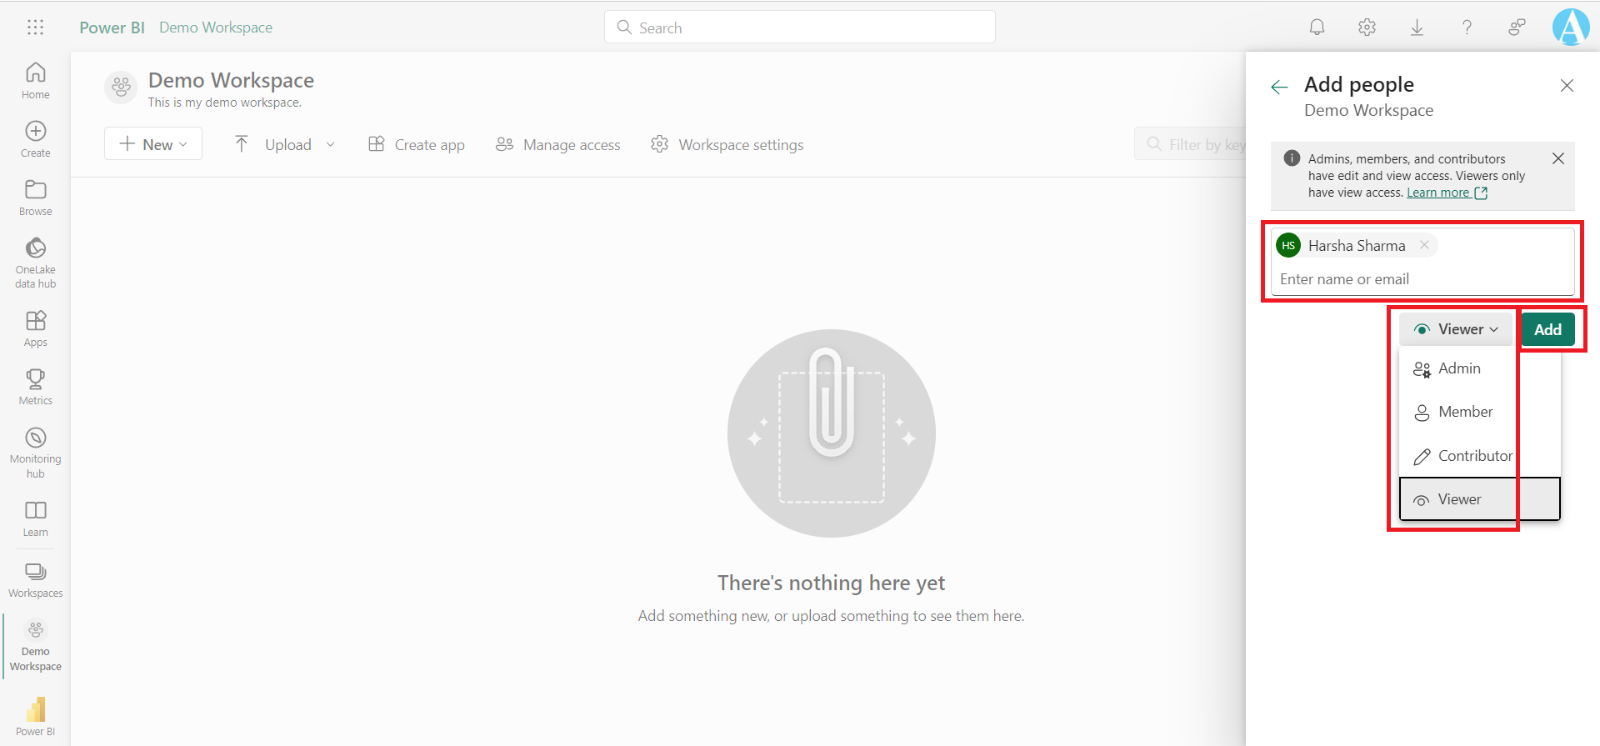
In the resulting Manage access window, we can add email addresses of individual users, mail-enabled security groups, distribution lists, Microsoft 365 groups, and regular security groups, and then assign them to their specific roles, by clicking on the + Add people or groups.
To assign the specific role select the dropdown and choose the role, by default Viewer is selected.
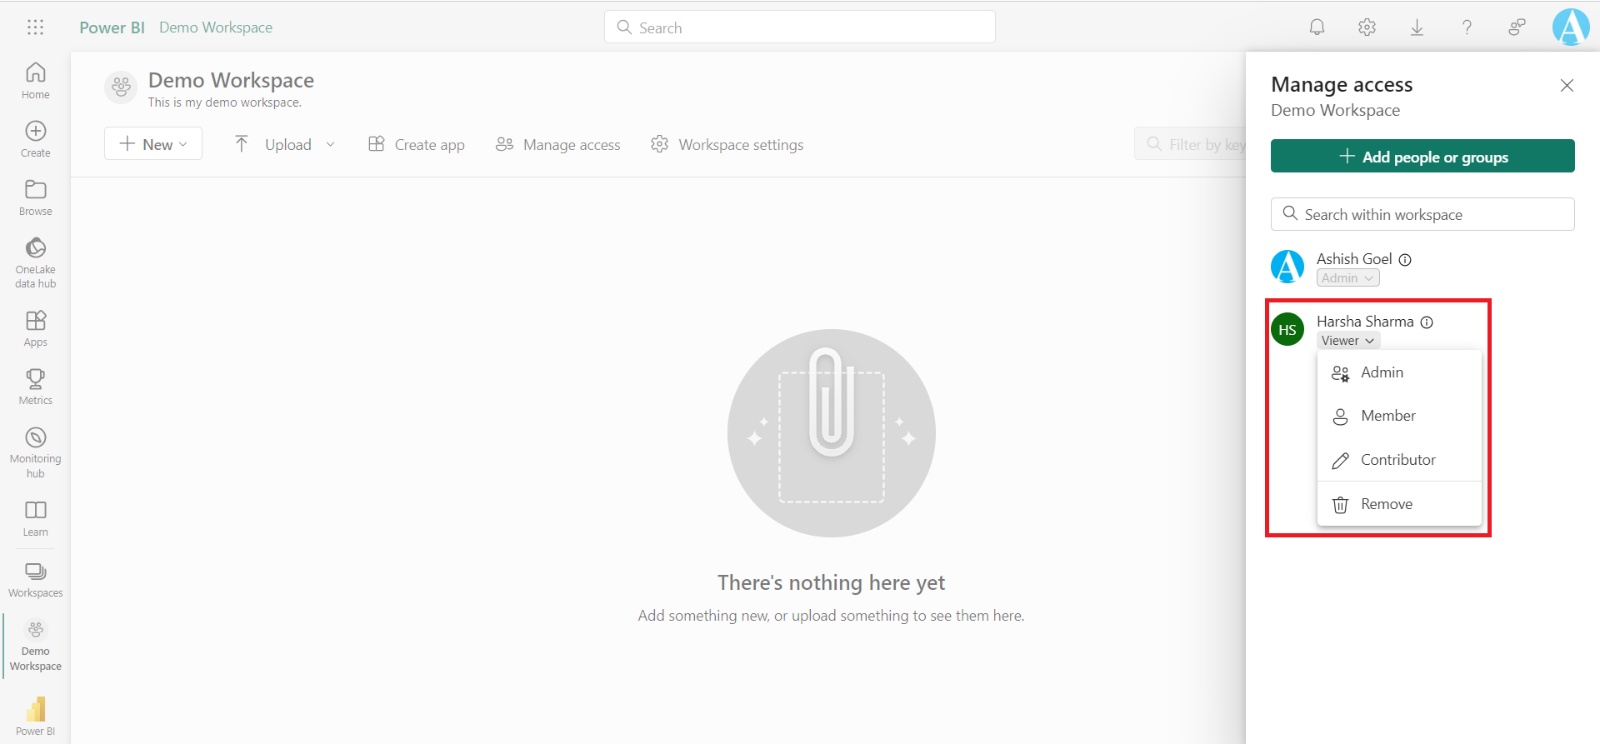
We can also change the user's assigned role and remove the user from the workspace by selecting the role dropdown assigned to them below their name.
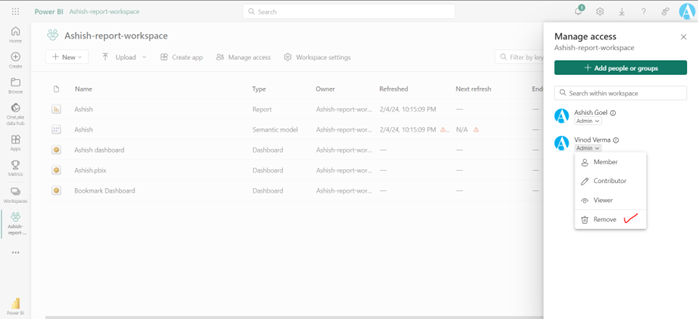
Note: Here, we can see the Remove option also which is used to remove the user from the workspace, this option is only available for Admins.
An admin can add another admin to the workspace, even Admins can remove other admins including the original creator of the workspace.
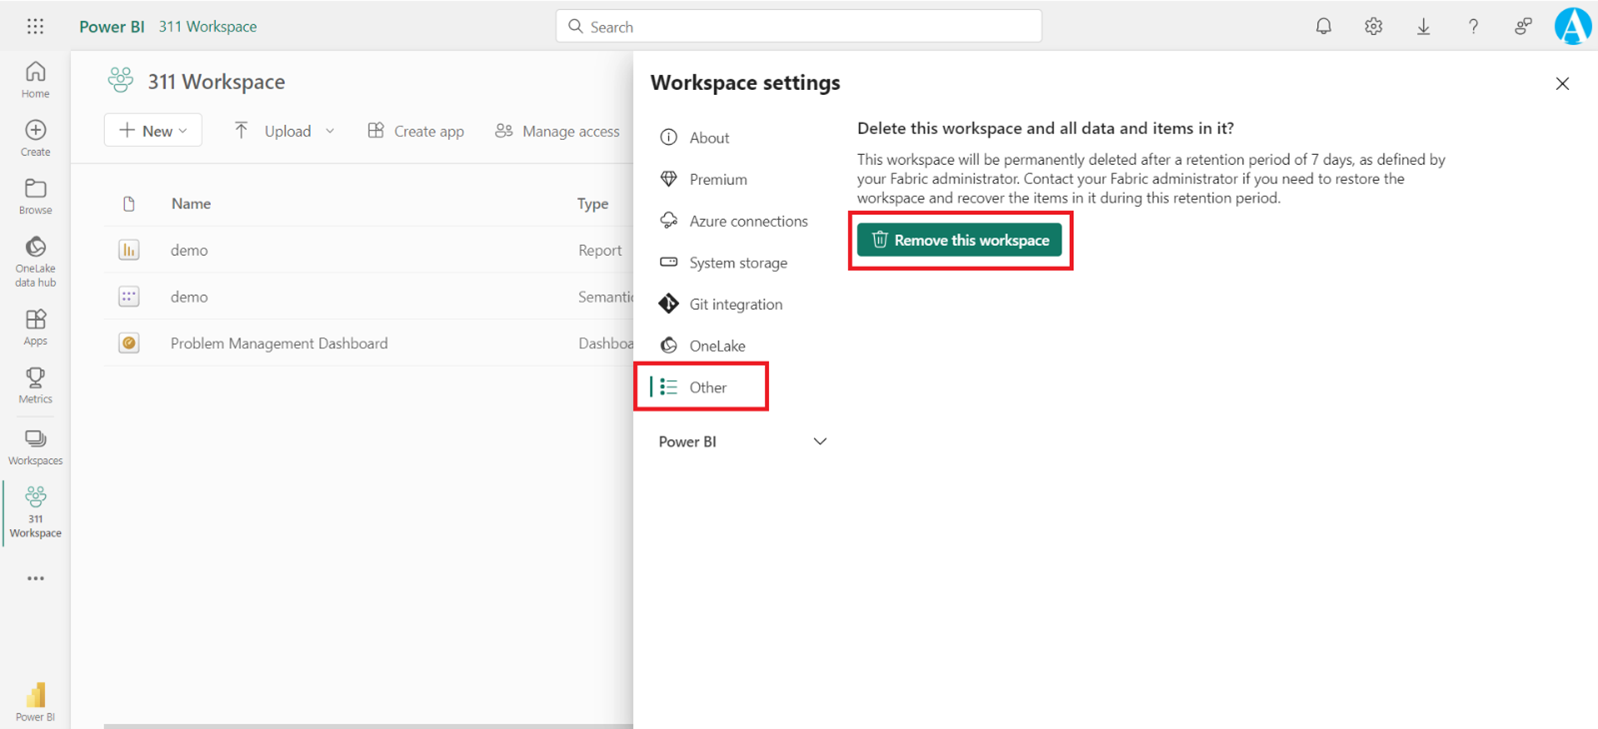
Delete a workspace
We can delete the workspace in Power BI Service.
Note: Only the users who have Admin permissions on the workspace can delete the workspace.
When we delete the workspace, the associated app is also deleted for all group members.
Step 1: From the nav pane, click on Workspaces, and open the workspace we want to delete.
Step 2: Select Workspace settings at the top banner of the workspace.
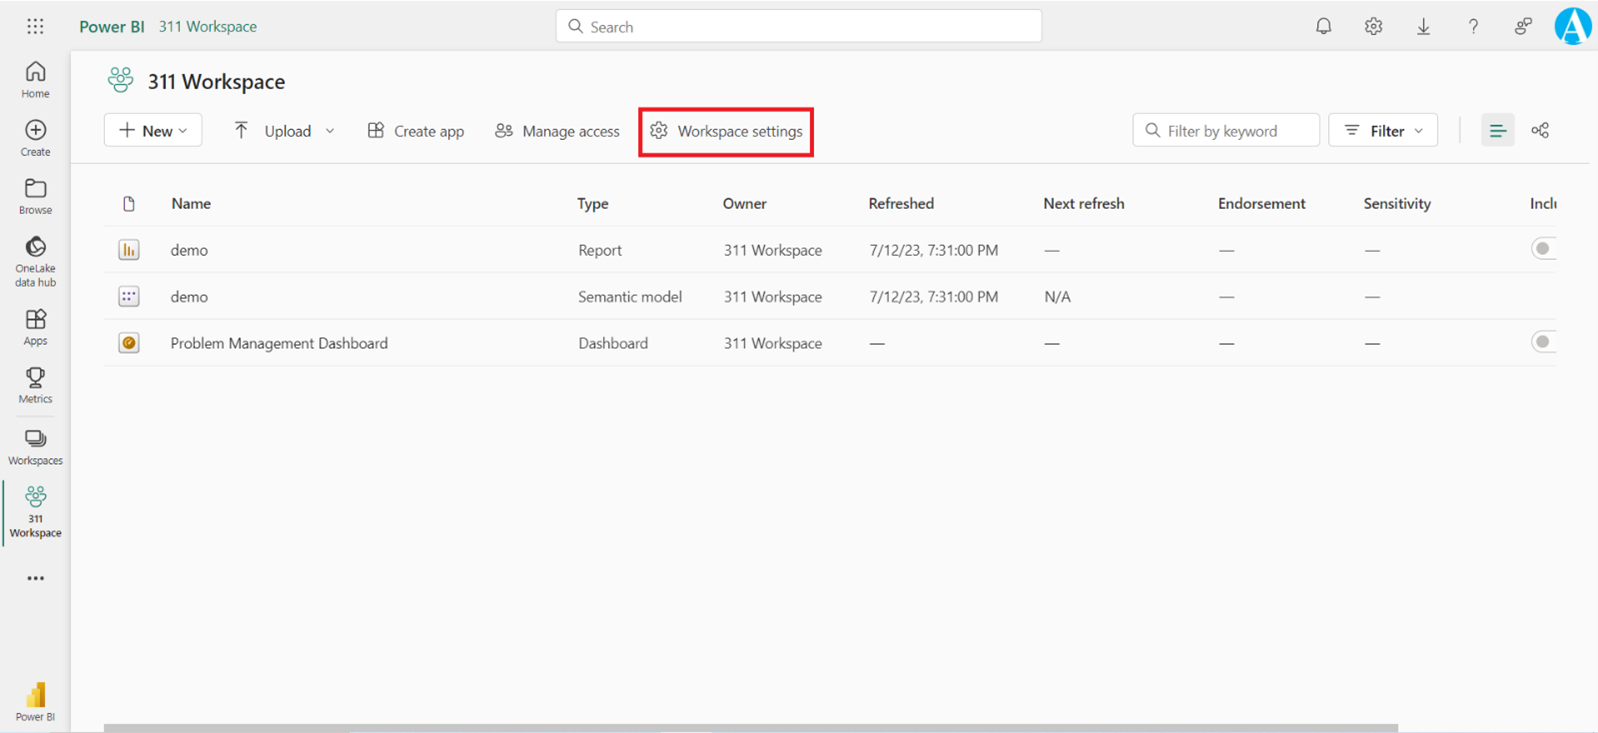
Step 3: In the Workspace settings pane, select Other > Remove this workspace.
