Lakehouse in Microsoft Fabric
Lakehouse, a modern data architecture that combines the strengths of data lakes and relational data warehouses into a single, unified platform for storing, managing, and analyzing structured, semi-structured, and unstructured data.
Lakehouse is an analytical store that combines the file storage flexibility of a data lake with the SQL-based query capabilities of a data warehouse.
Let’s create a Lakehouse in Microsoft Fabric:
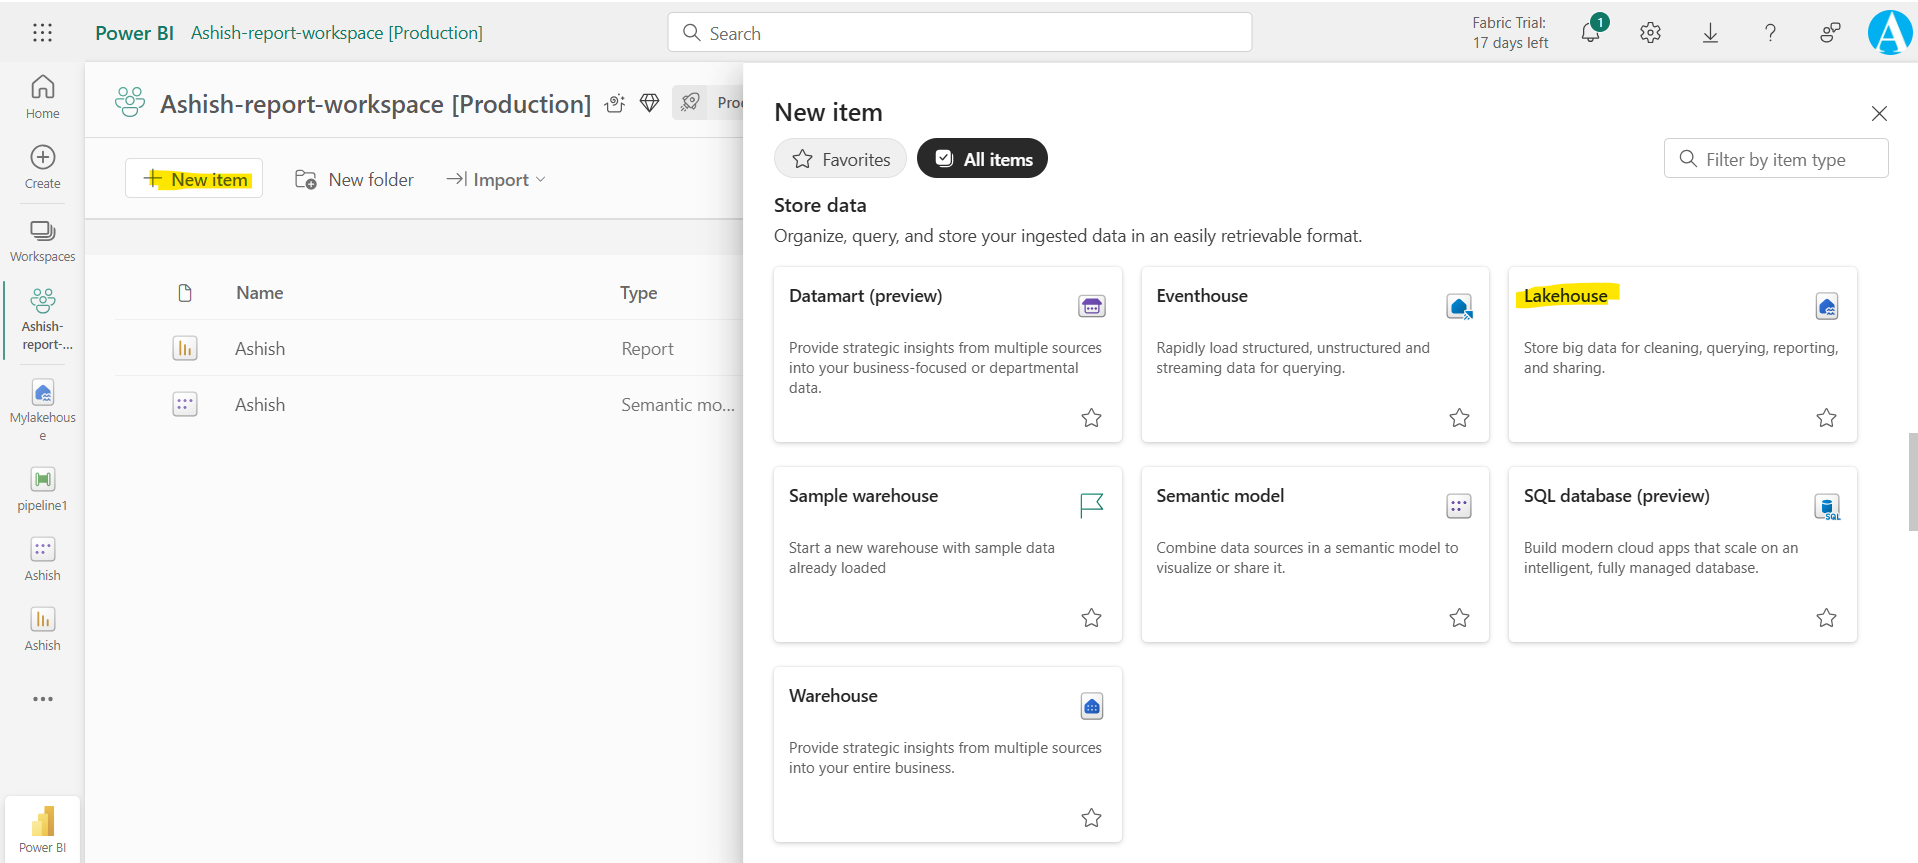
Step 1: Go to the workspace in which we want to create the Lakehouse. Click on the + New item and then click on the Lakehouse from the given options.
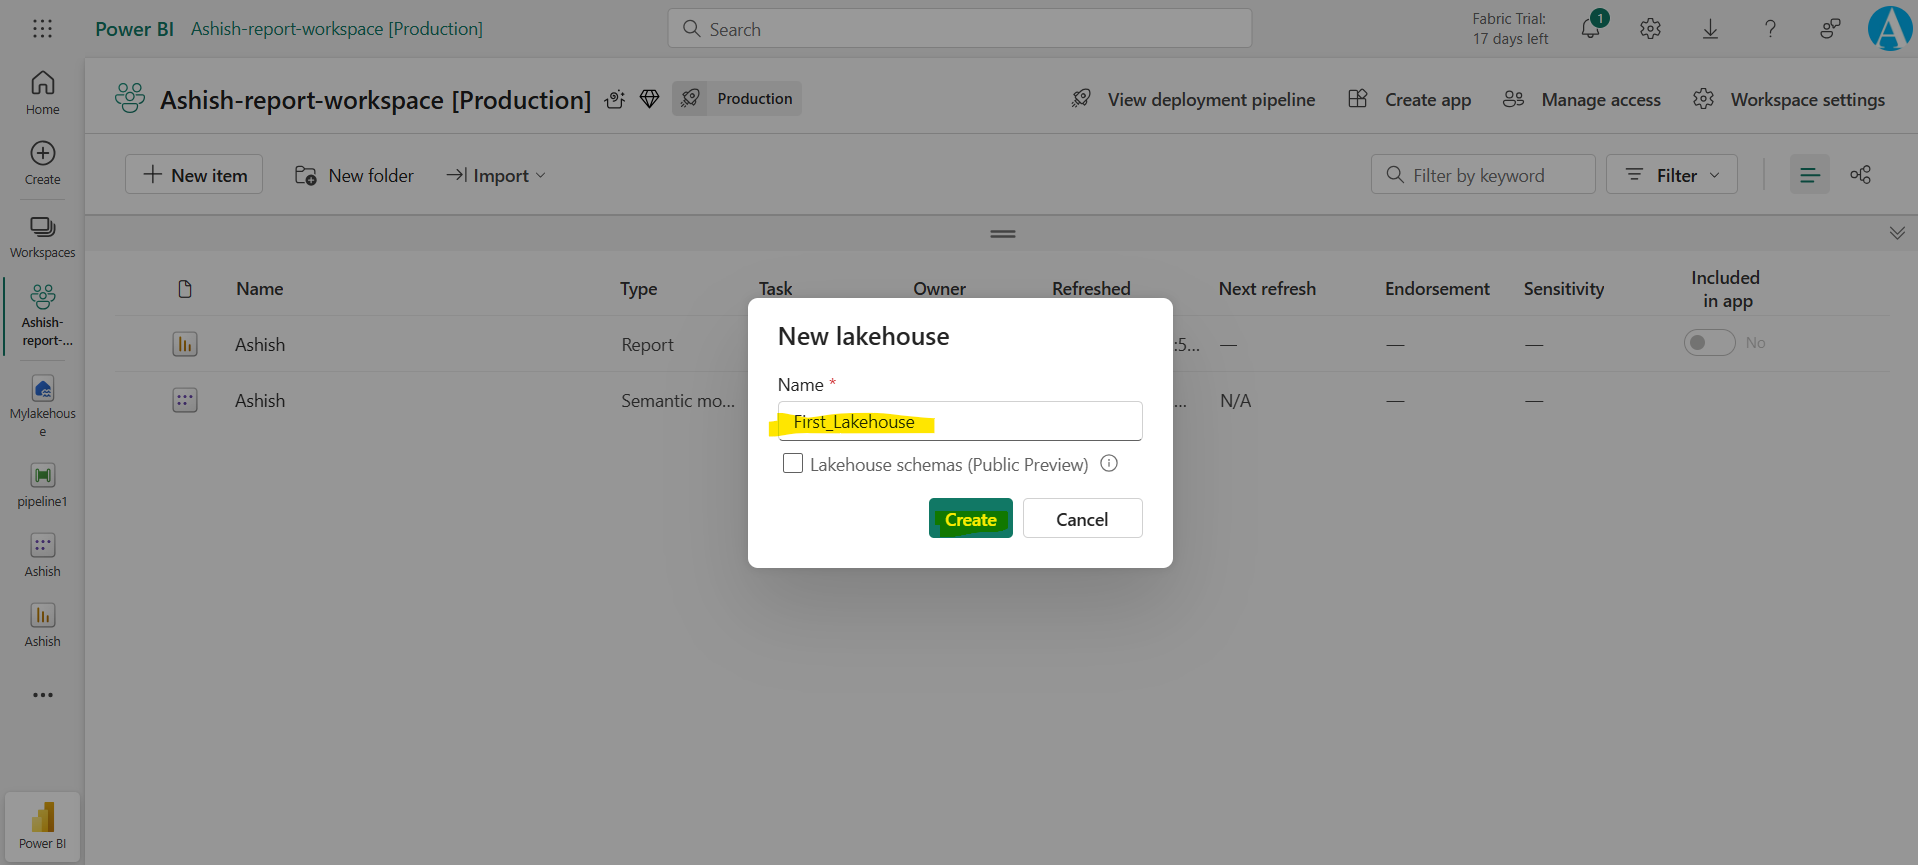
Let’s give a name to the workspace and click on Create.
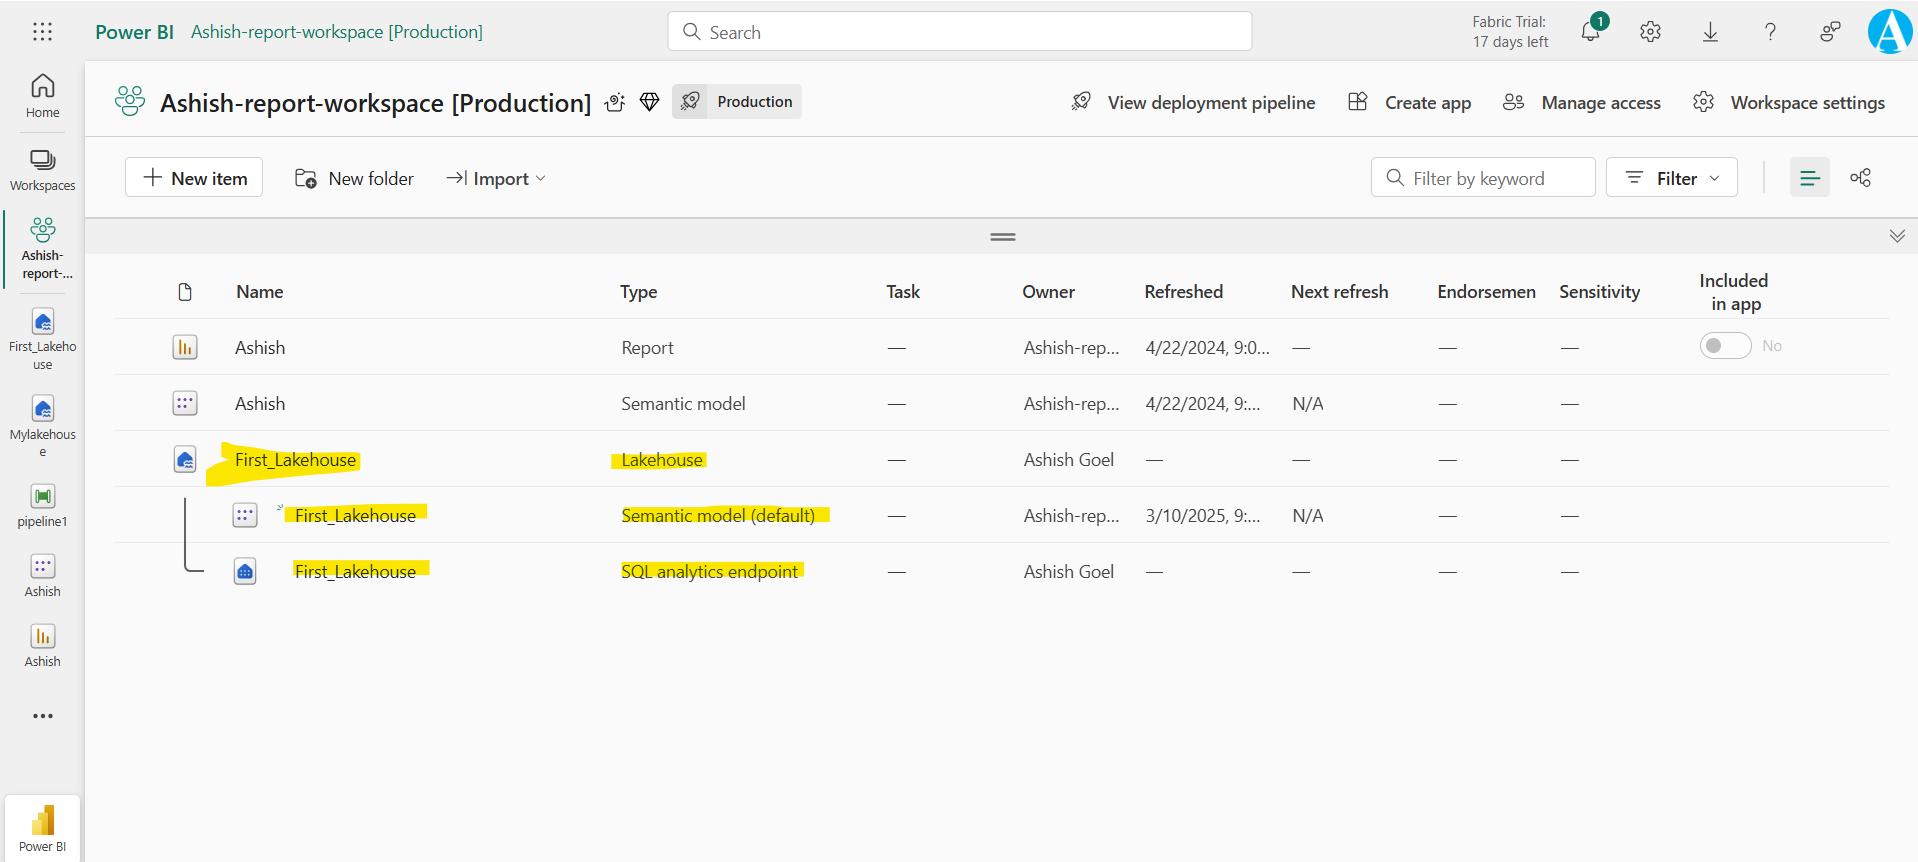
In the workspace we can see that the Lakehouse is created. It has three components: • Lakehouse is the lakehouse storage and metadata, where we add and interact with files, folders, and table data. • Semantic model (default) is an automatically created data model based on the tables in the lakehouse. Power BI reports can be built from the semantic model. • SQL analytics endpoint is a read-only SQL endpoint, enables us to use SQL to query the tables in the lakehouse and manage its relational data model.
Step 2: Click on the Lakehouse to ingest data into a lakehouse. There are many ways to load data into a Fabric lakehouse, including:
- Upload: Upload local files or folders to the lakehouse. We can then explore and process the file data and load the results into tables.
- Dataflows (Gen2): Import and transform data from a range of sources using Power Query Online and load it directly into a table in the lakehouse.
- Notebooks: Use notebooks in Fabric to ingest and transform data and load it into tables or files in the lakehouse.
- Data Factory pipelines: Copy data and orchestrate data processing activities, loading the results into tables or files in the lakehouse.
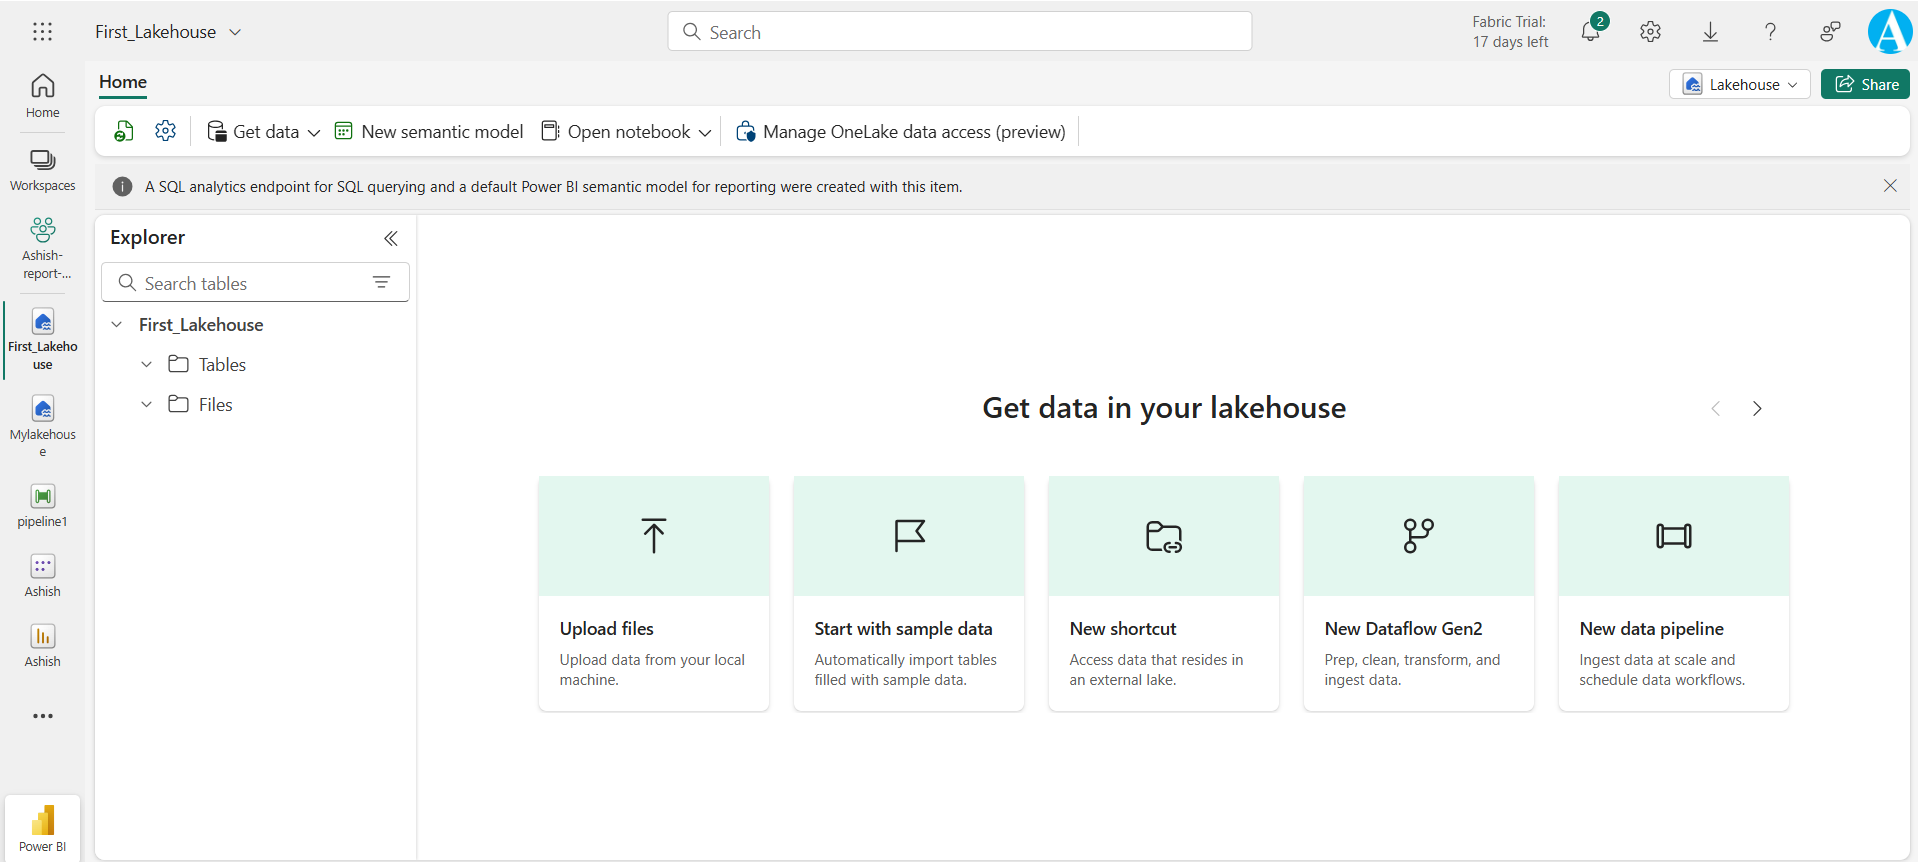
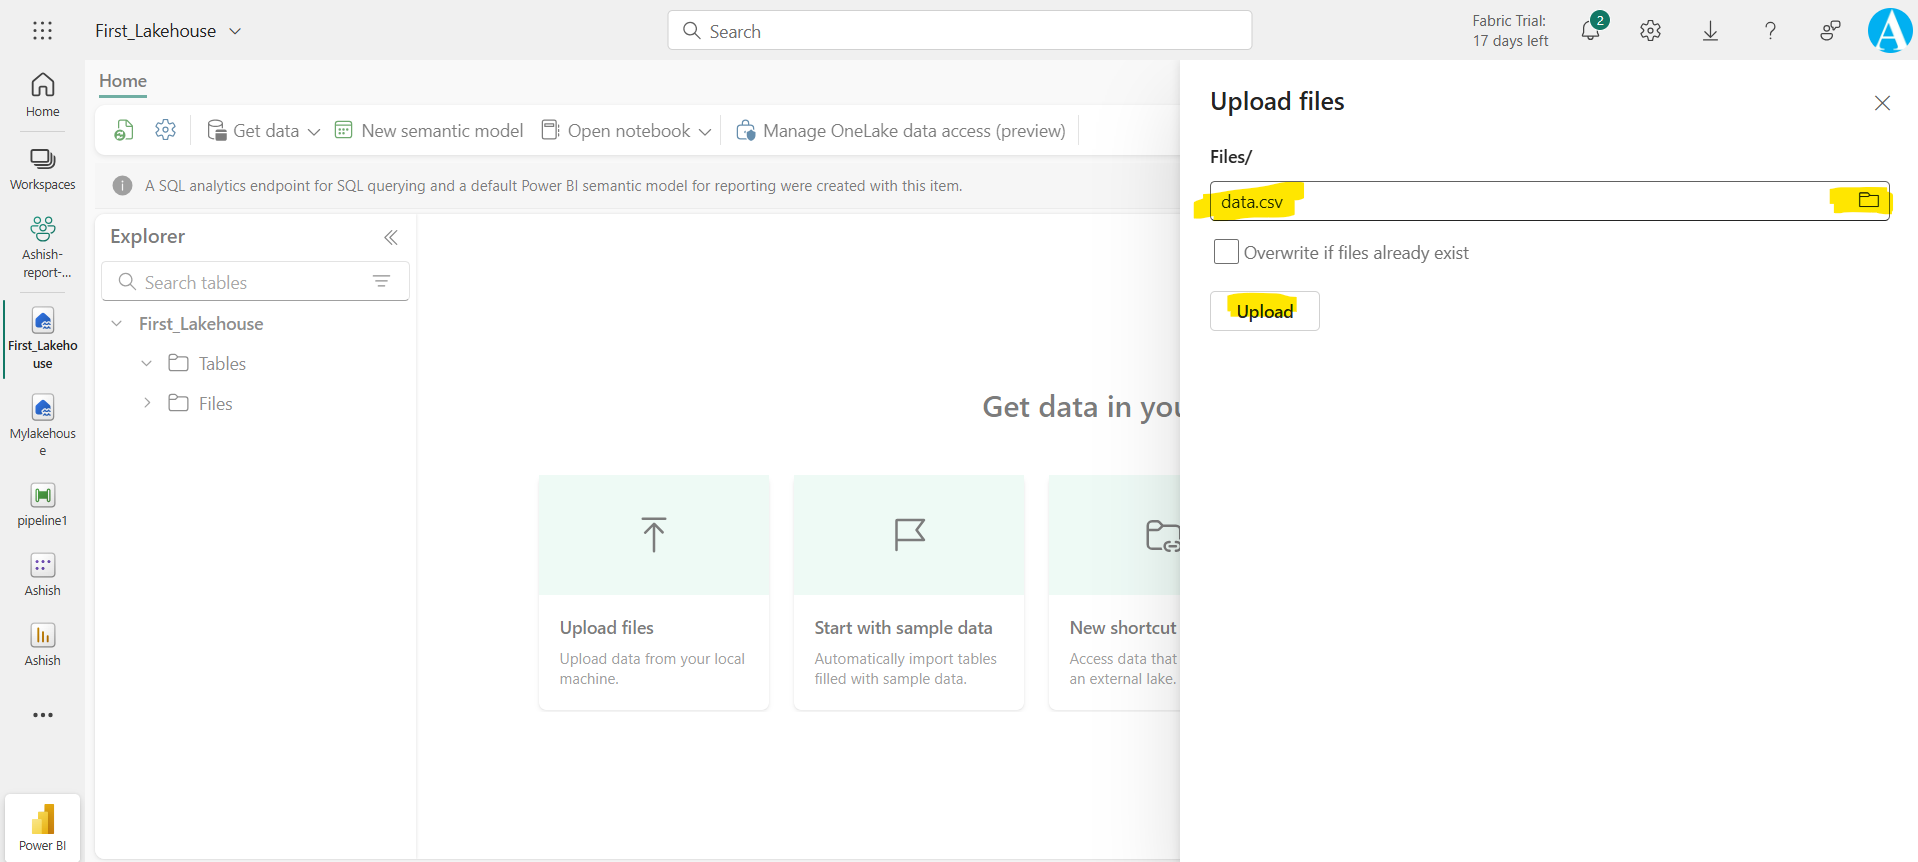
Click on Upload files. Select the file from the local computer by clicking on the folder icon and then click on Upload.
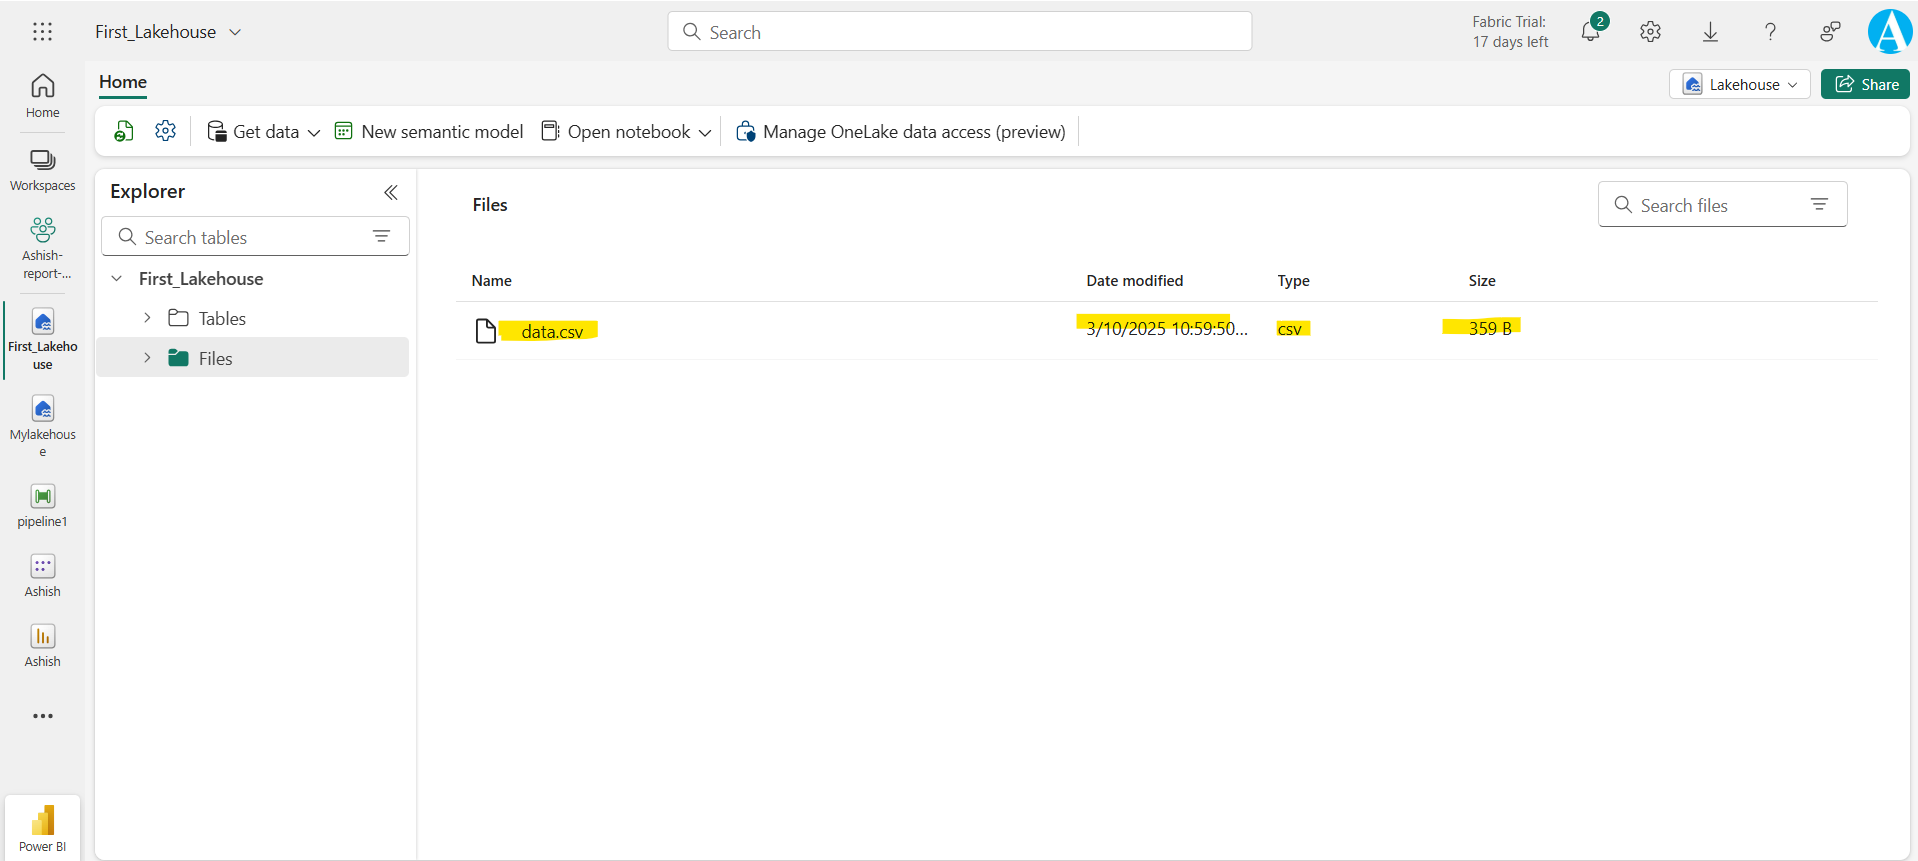
We can see that the file is loaded successfully, as shown in the image below:
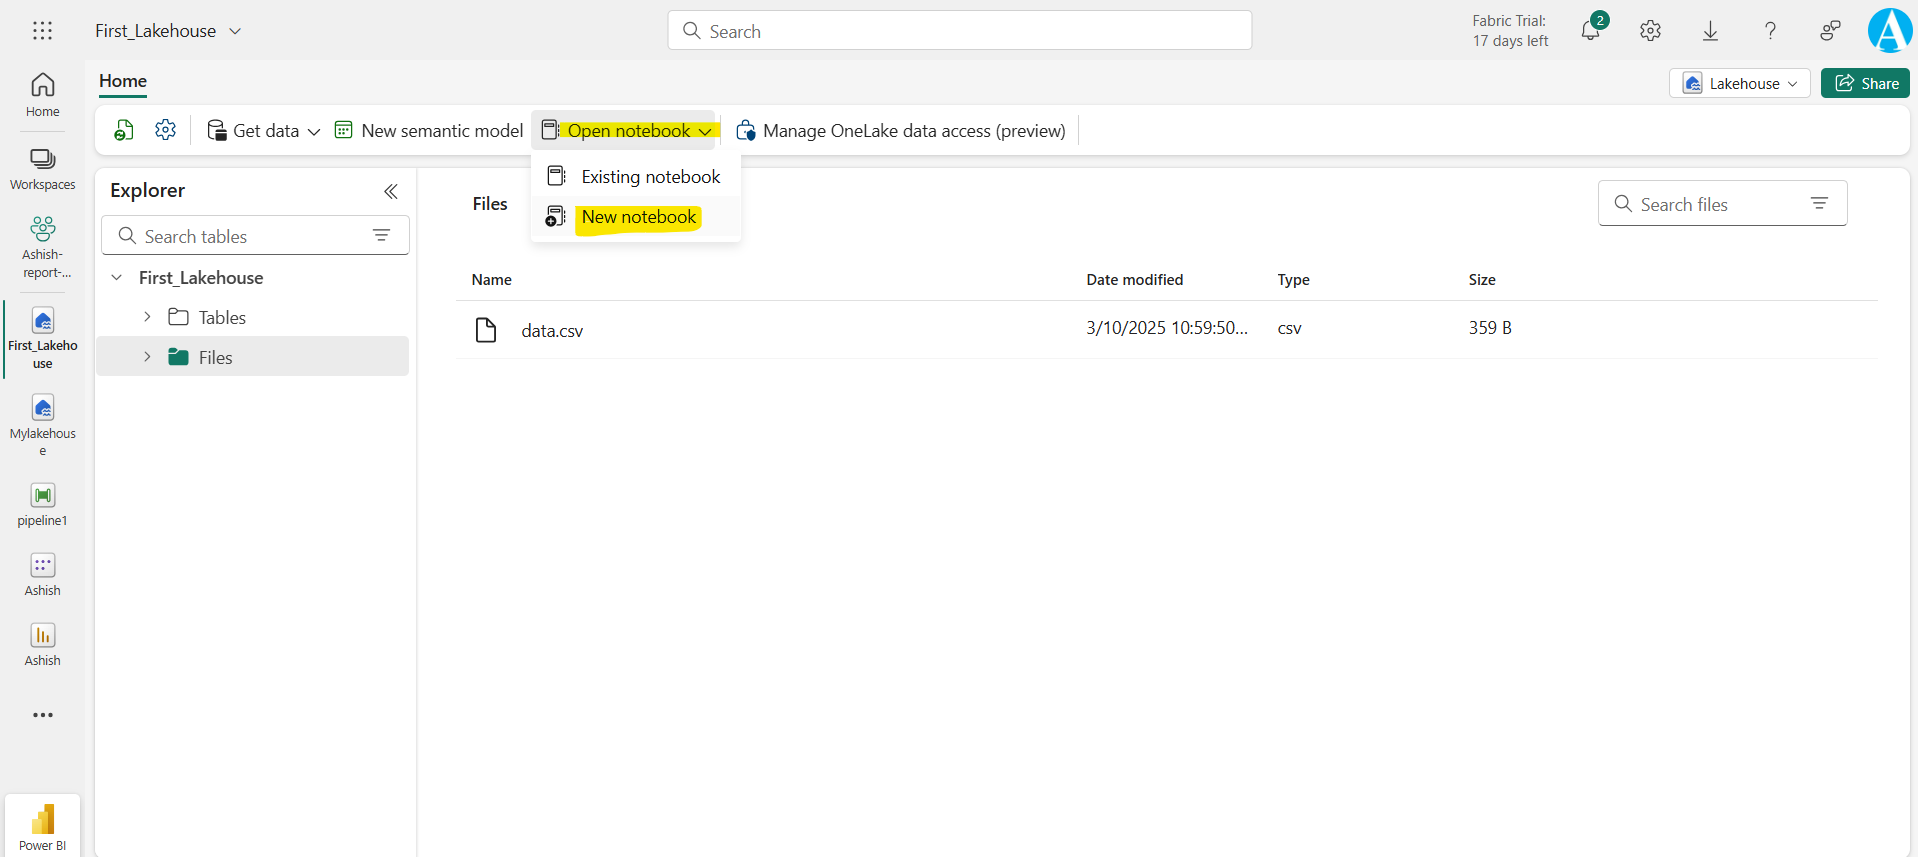
Step 3: We can create a notebook in the Fabric, which uses the files stored in the lakehouse and do the transformation on that. The notebook enables interactive Spark coding. The SQL analytics endpoint mode doesn't support interactive Spark code.
To create a notebook, click on “New notebook”.
We can see a new notebook is created in the workspace and we can add the Data sources or use the one which are in the Lakehouse and Warehouse in the workspace. As we have uploaded one file in the lakehouse, we can see that the one item is added in the Lakehouse.
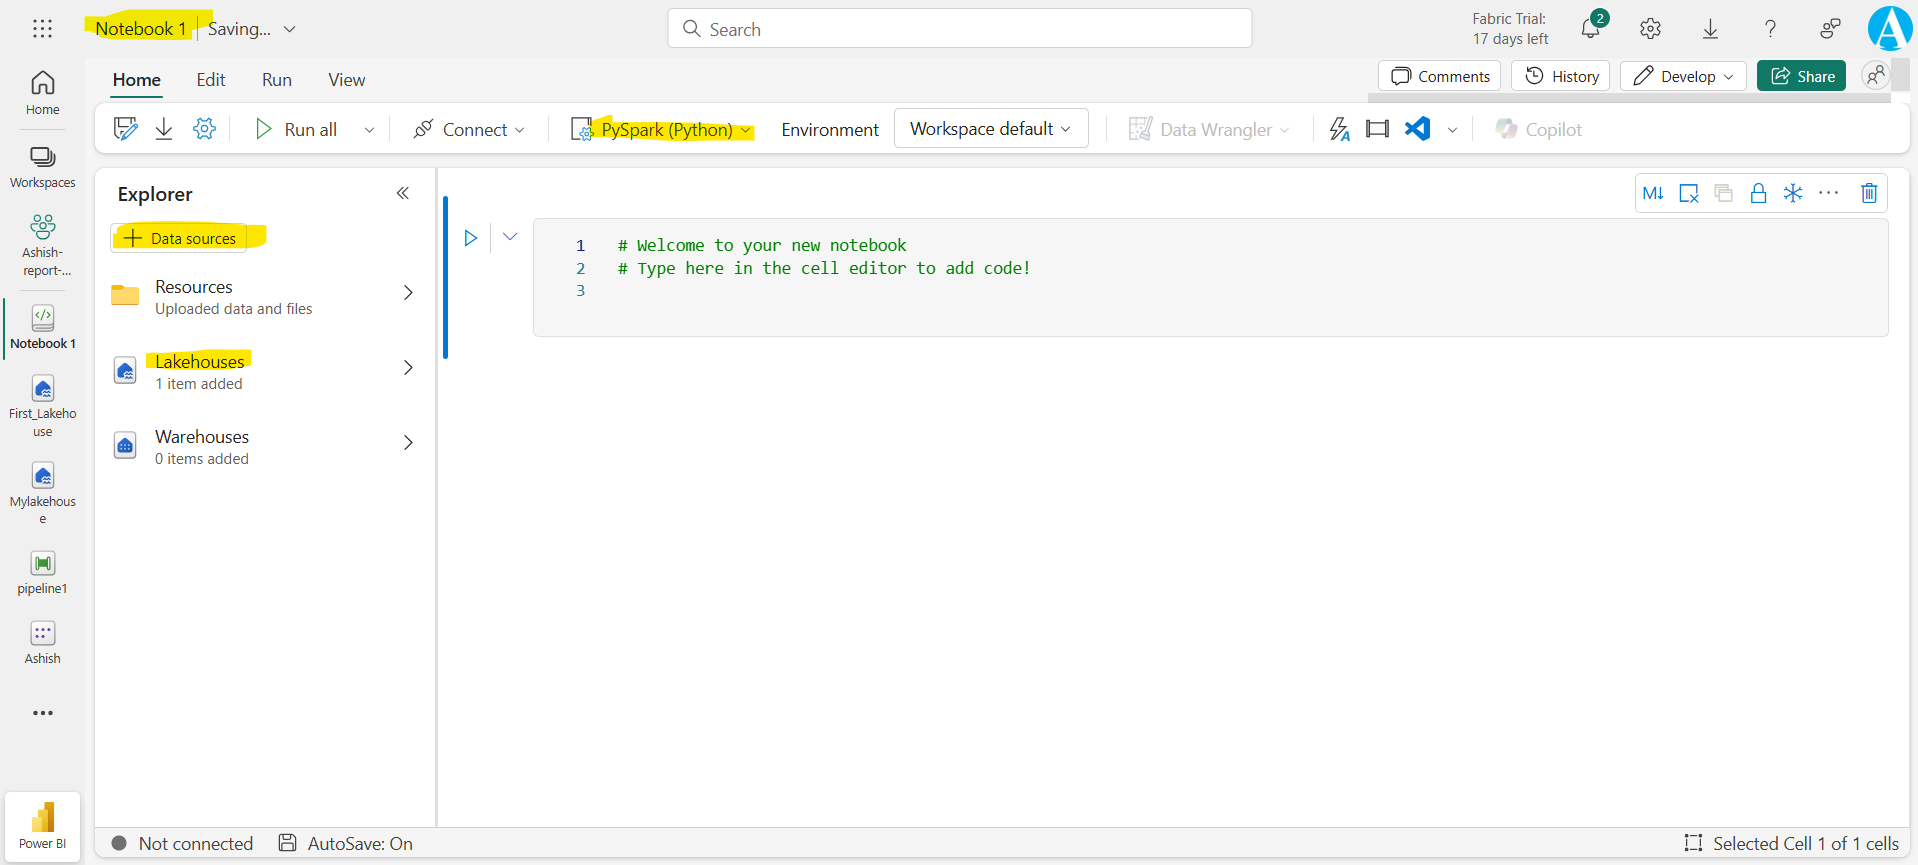
We can select the language, that we use in the notebook.
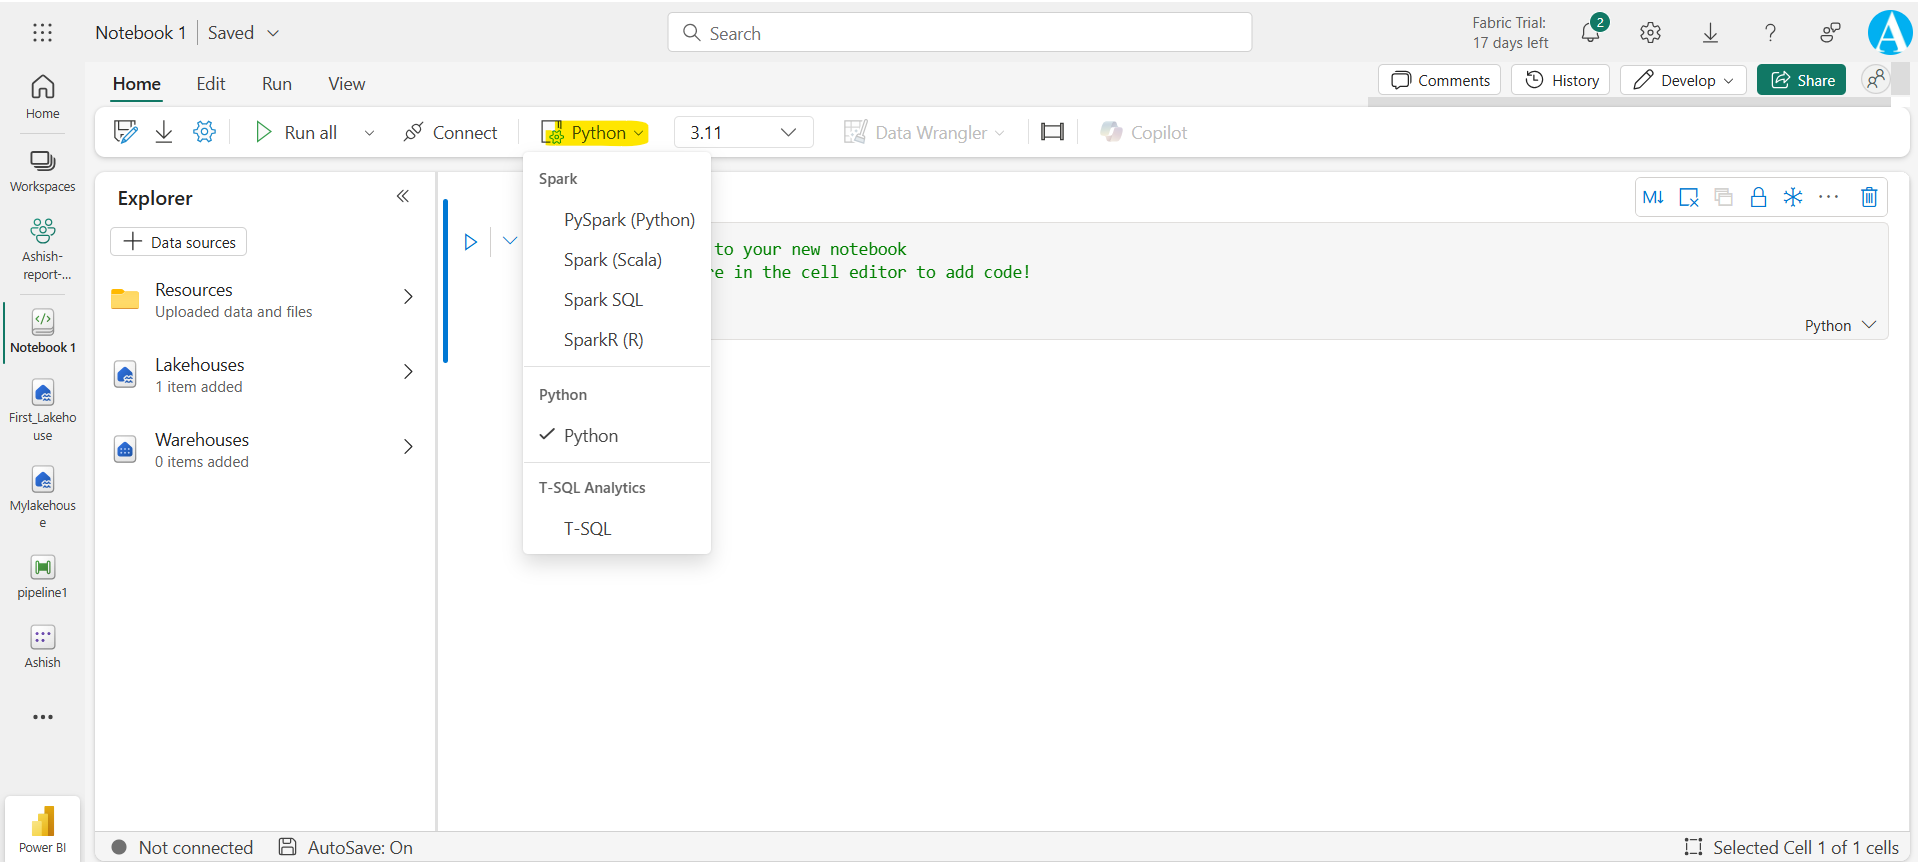
Let’s have selected Python, now click on the Lakehouses to use the resources from them. In the Files we can see our uploaded file, click on the more option next to the file name, then click on the Load data and then click on the Pandas. You will see that a block of code is added to the notebook.
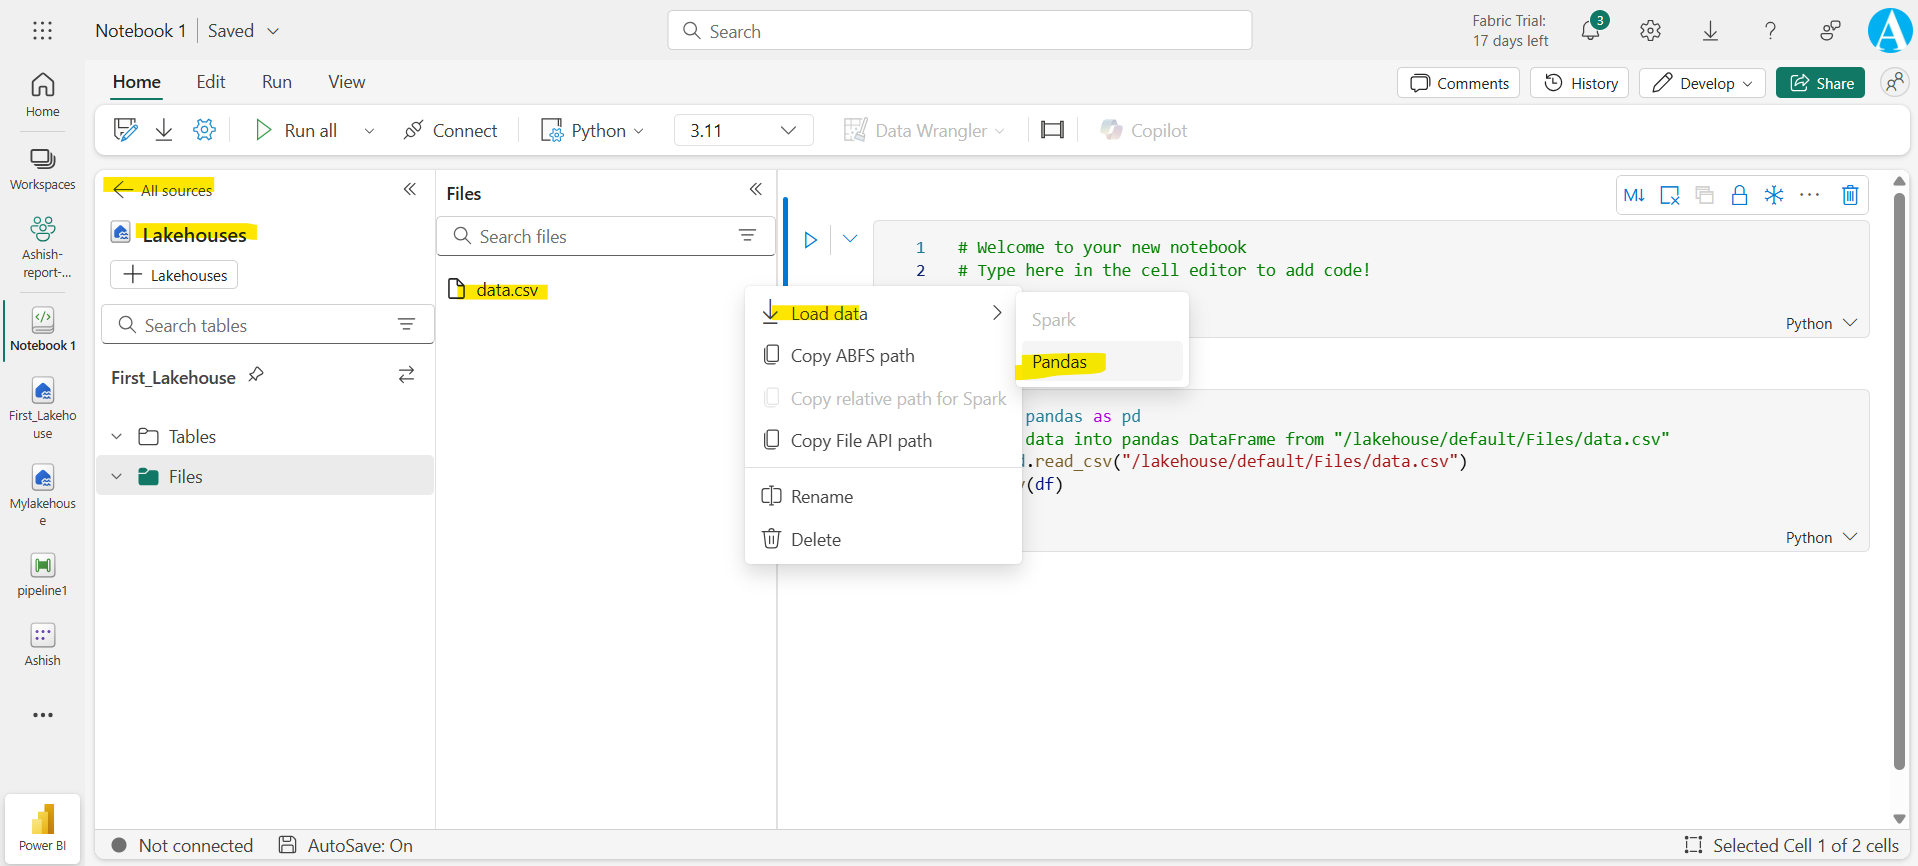
The block of code basically imports the panadas package, read the file and display it on the notebook result. Now it’s time to run the code. To run first click on the Connect, to start the machine on which the code runs.
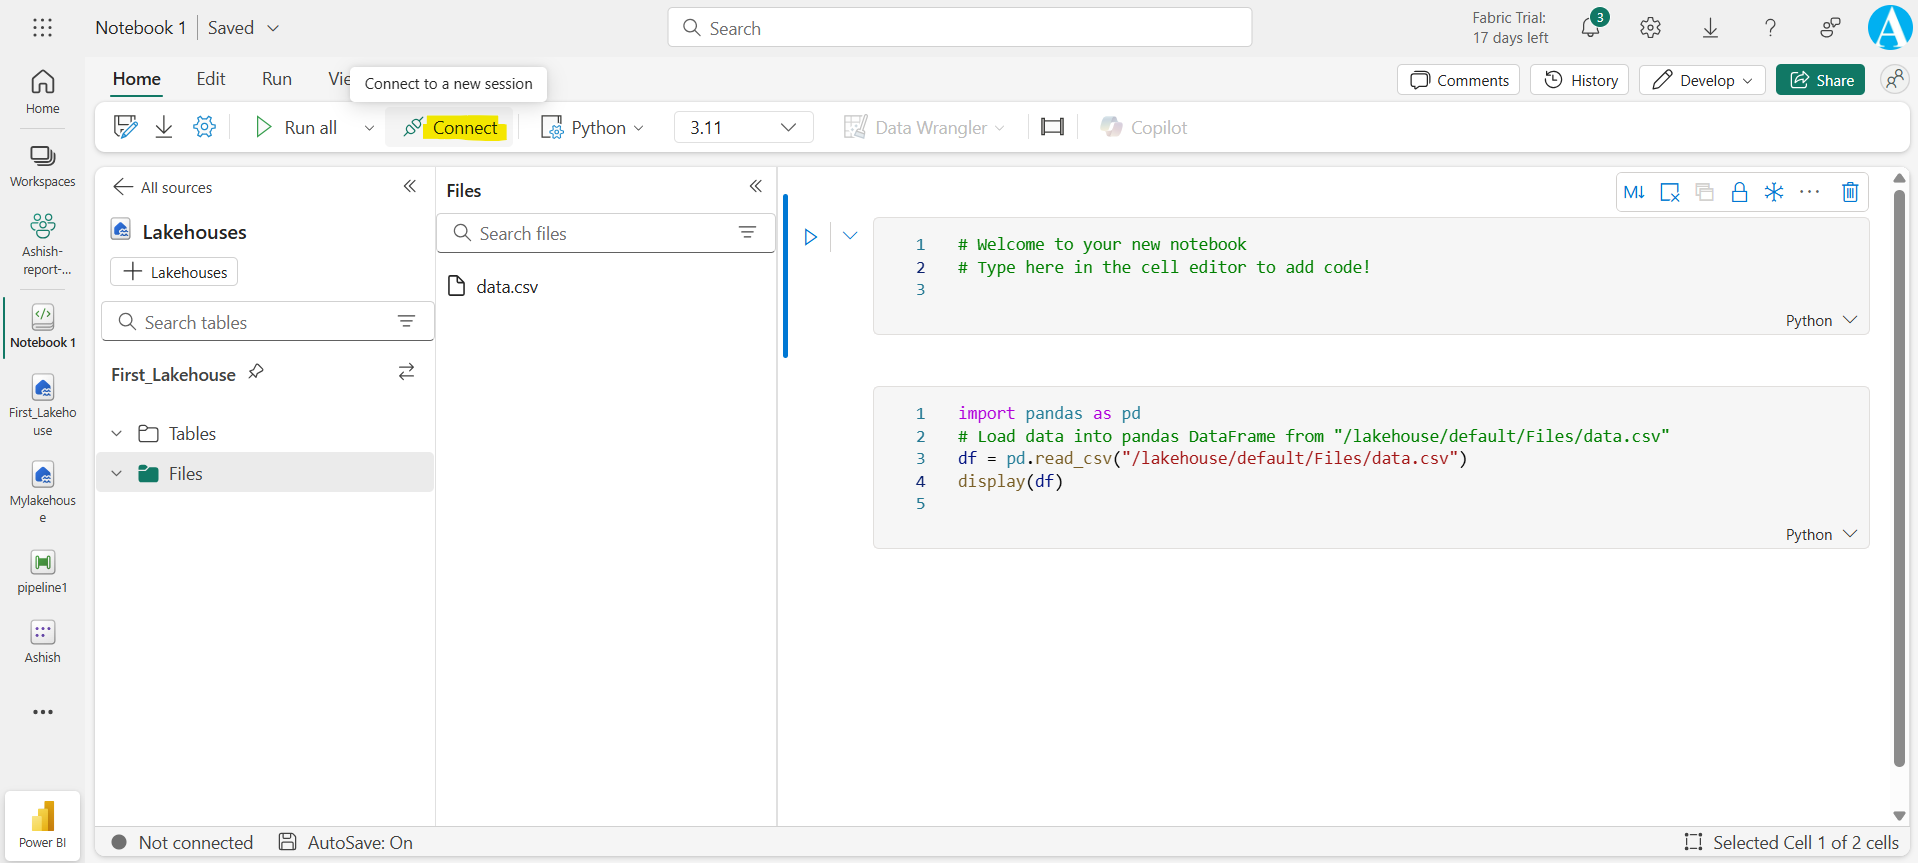
After the session is started, it is changed to Connected. Now click on the run icon of the cell to execute it. We can see the corresponding output, as shown in the image below:
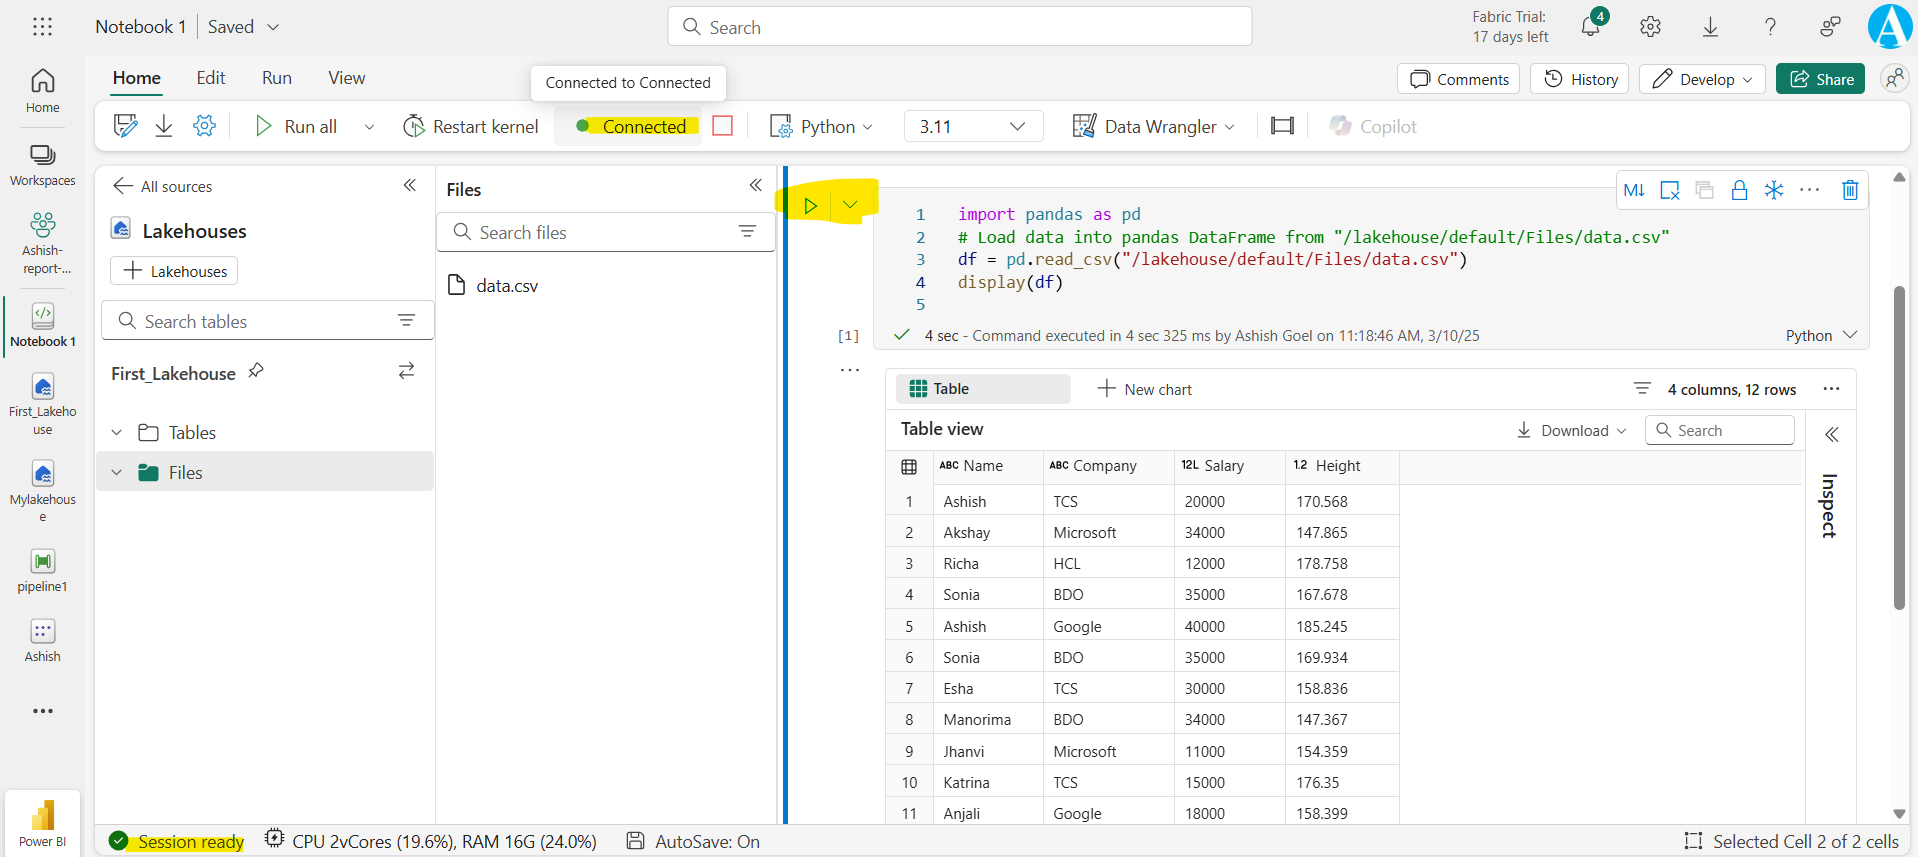
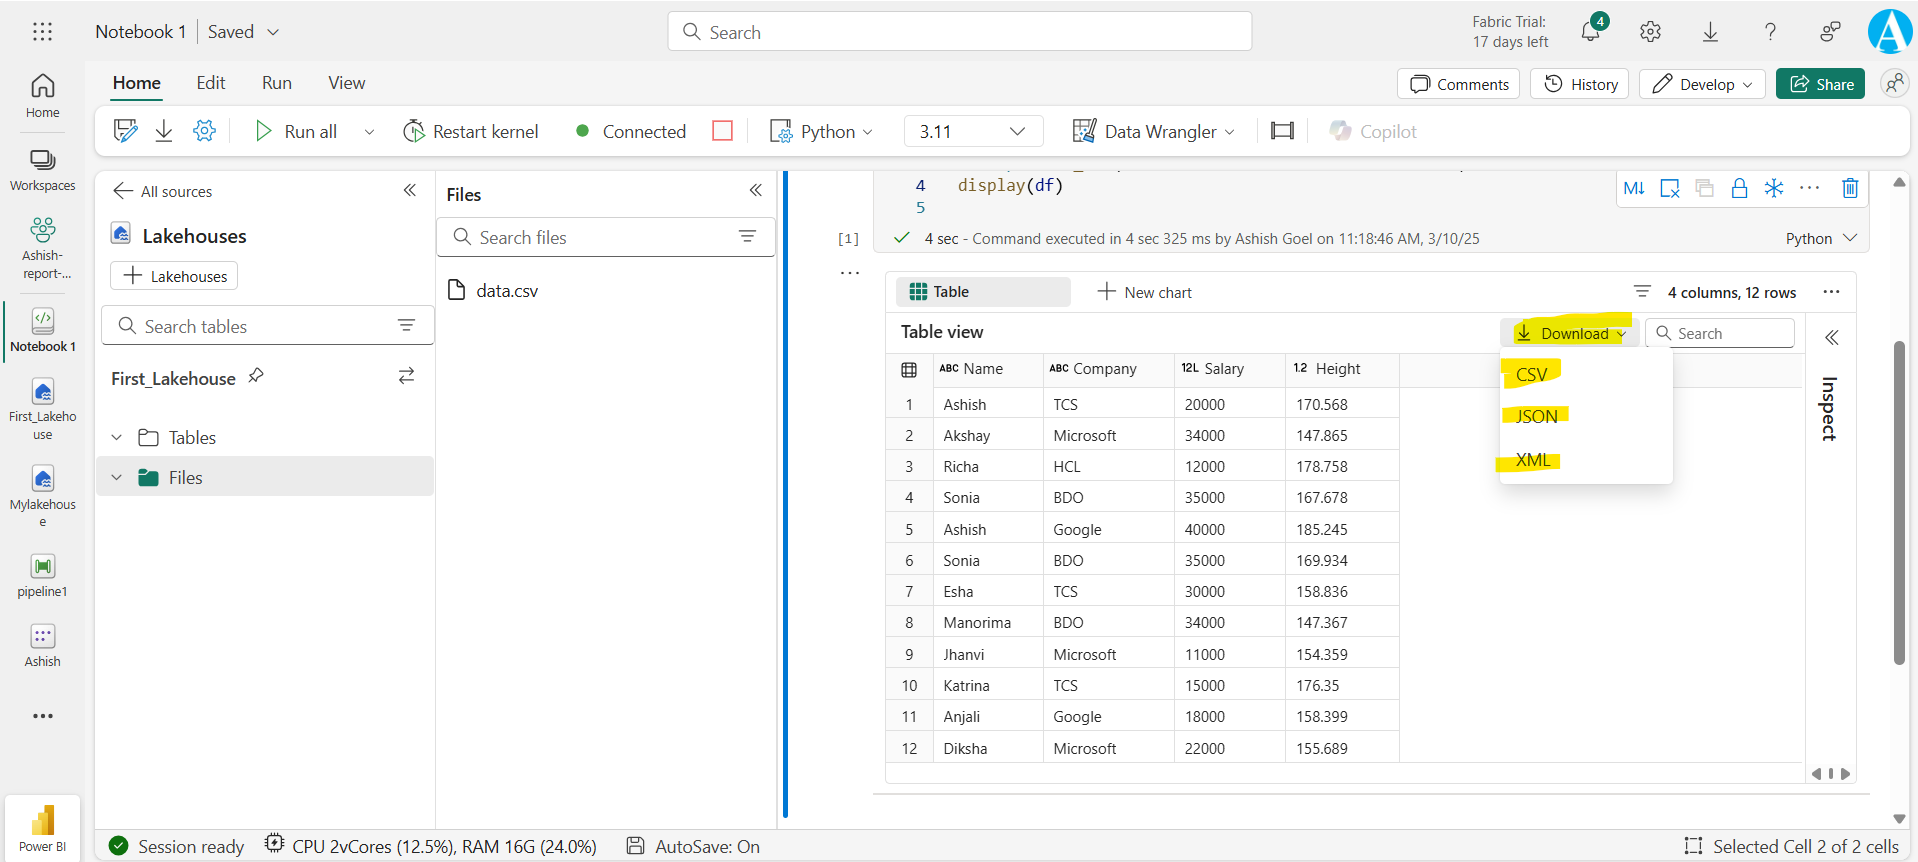
We have the option to download the result in the CSV, JSON and XML format, as shown in the image below:
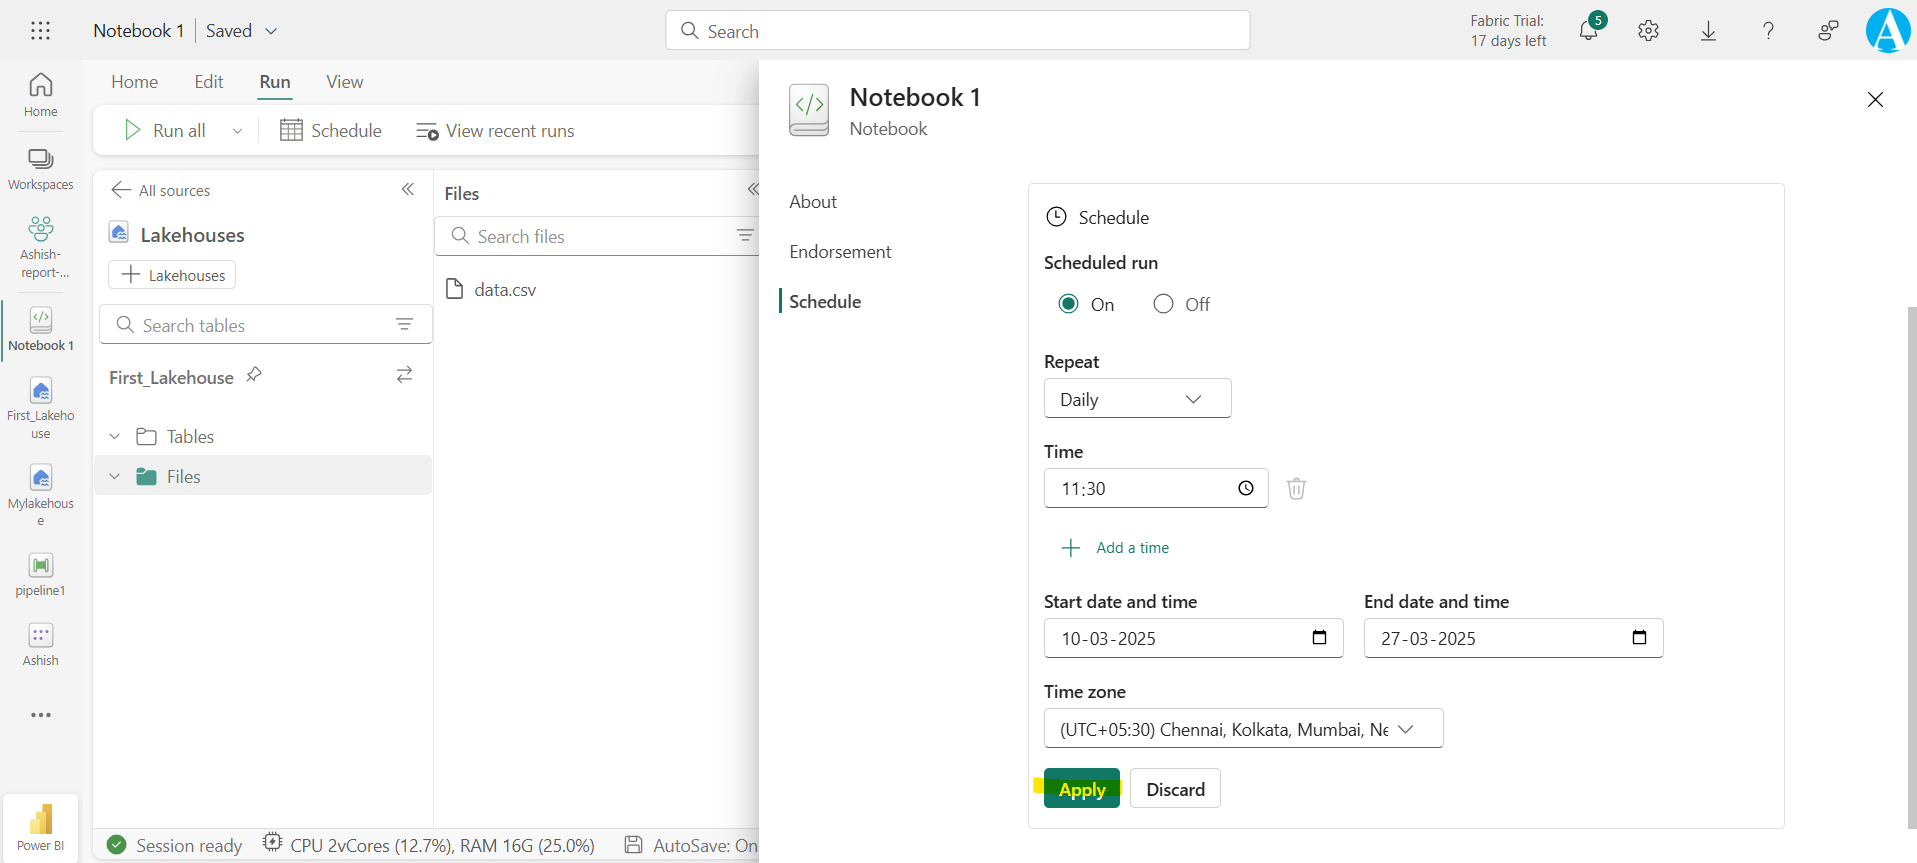
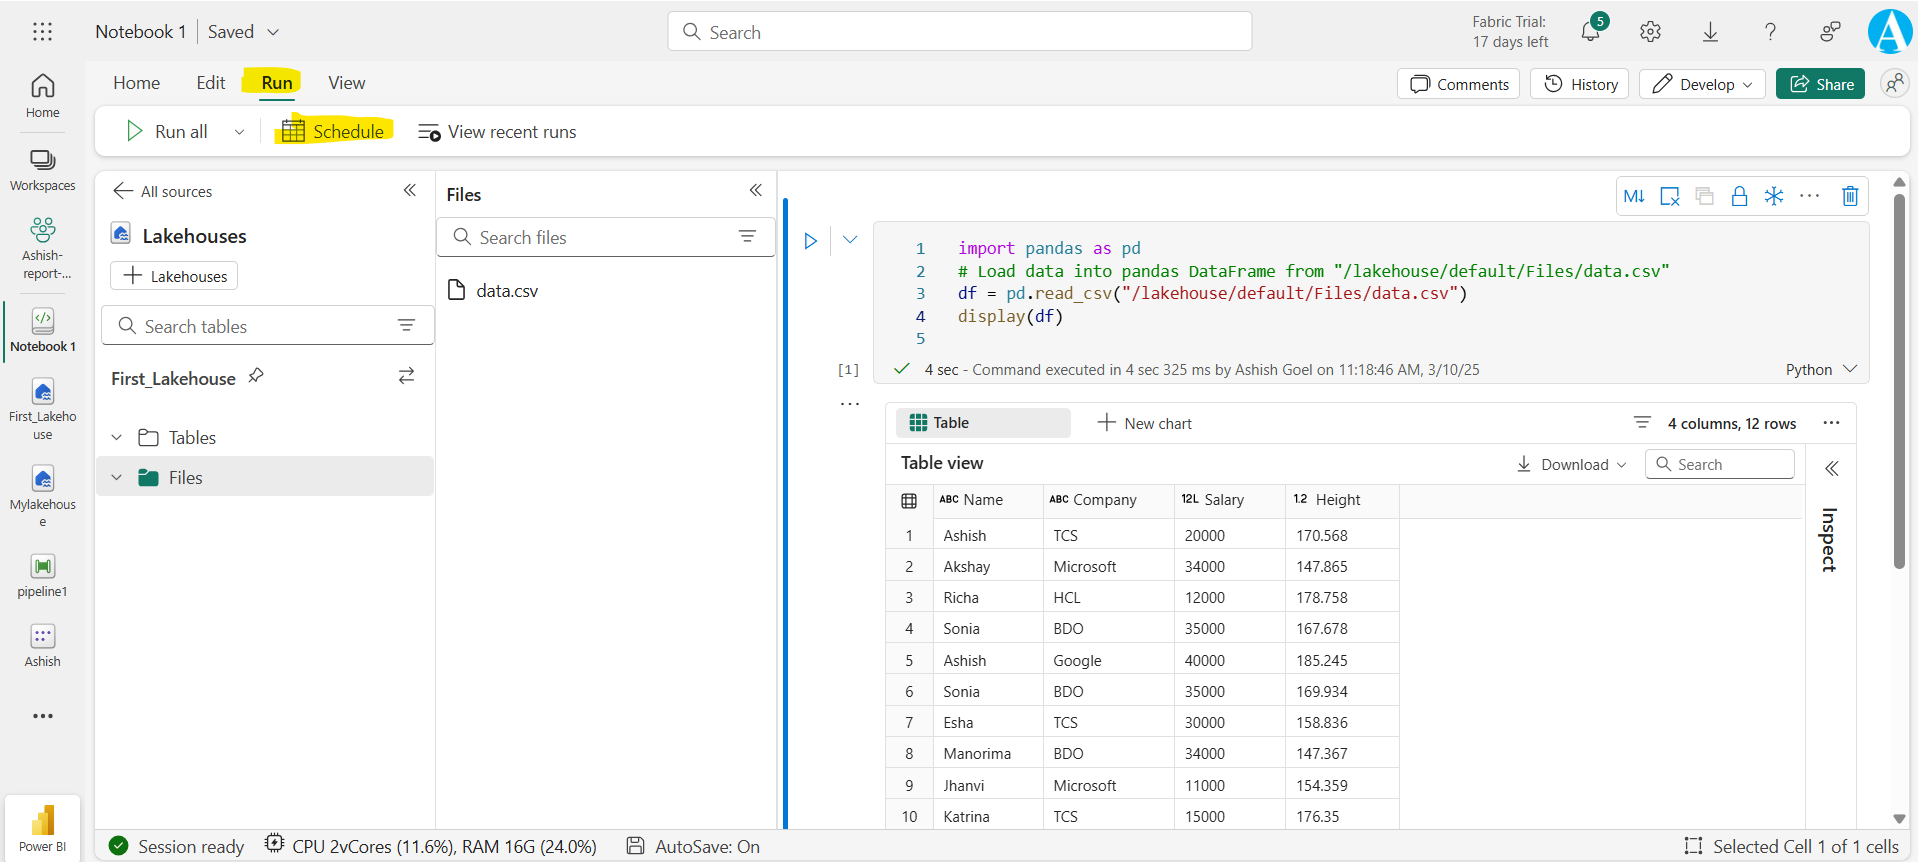
We have the option to execute the notebook on a specified schedule. To enable it click on the Run and then click on Schedule.
In the following window, we can see we can schedule it on hourly, monthly, weekly, daily and by the minutes also. Also specify the start time and end date of the schedule run. We have the option to select the timezone.
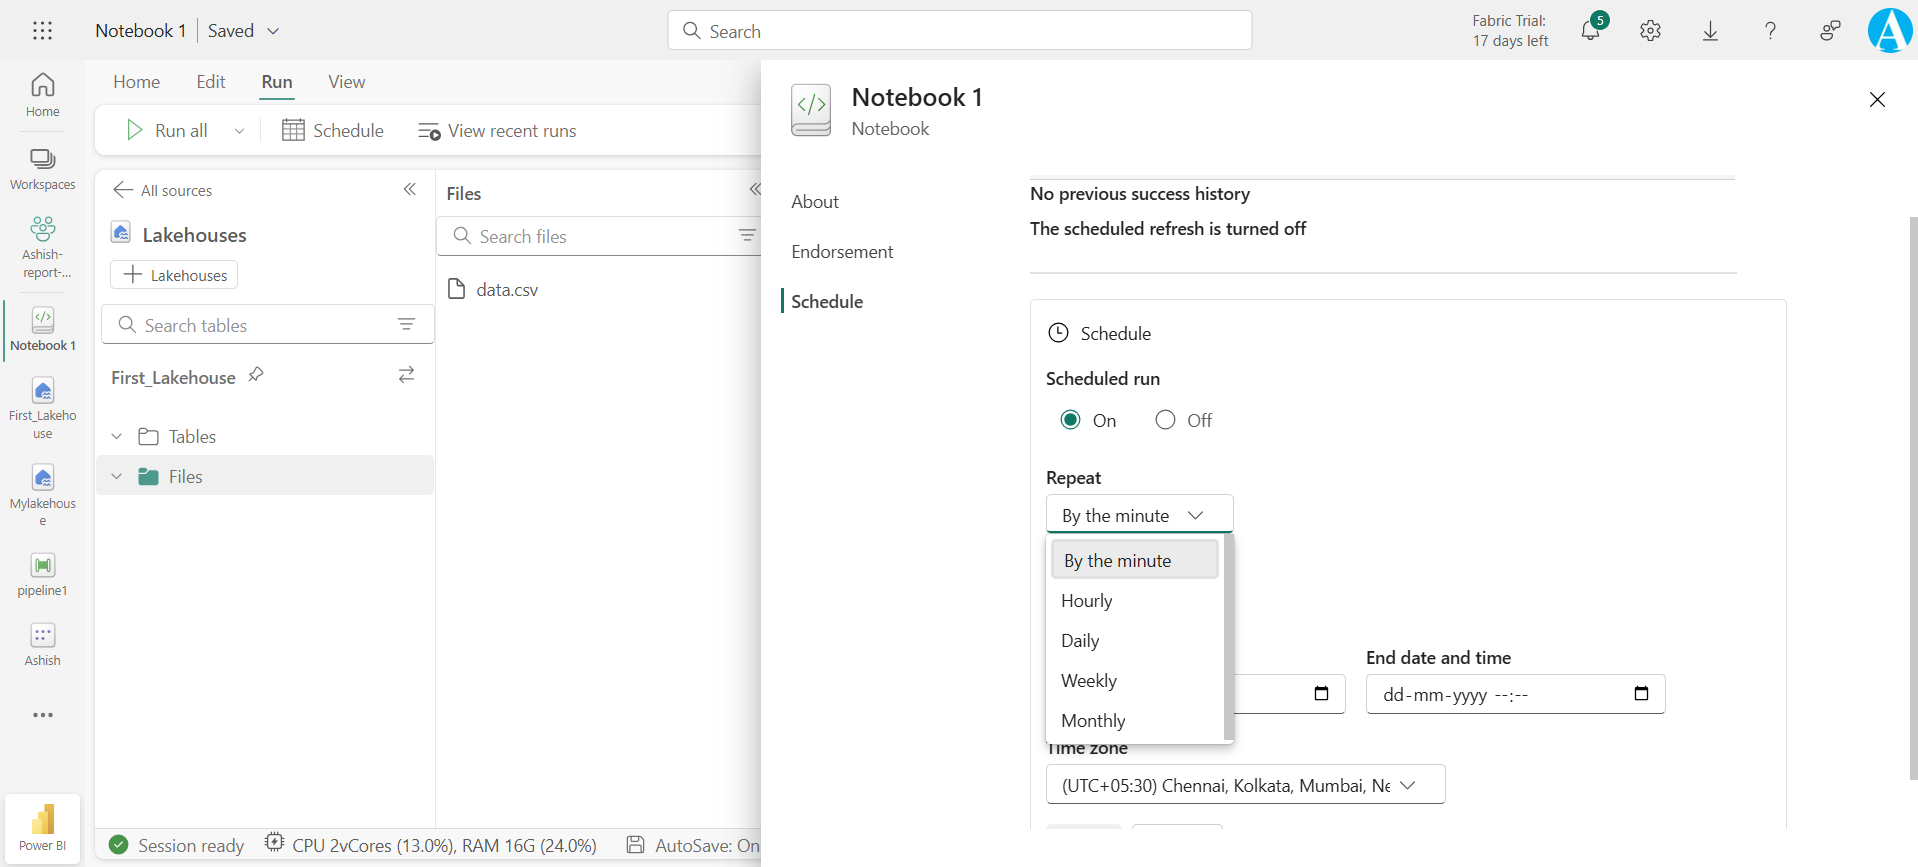
At the end click on Apply to save the changes.
