With Trigger Expressions Trigger Power Automate flow when an item is Modified in SharePoint List
We can use the Trigger Condition in the Power Automate flows, which specifies the conditions when the power automate triggers.
Follow the following steps to demonstrate the use of Trigger Conditions in Power Automate flows:
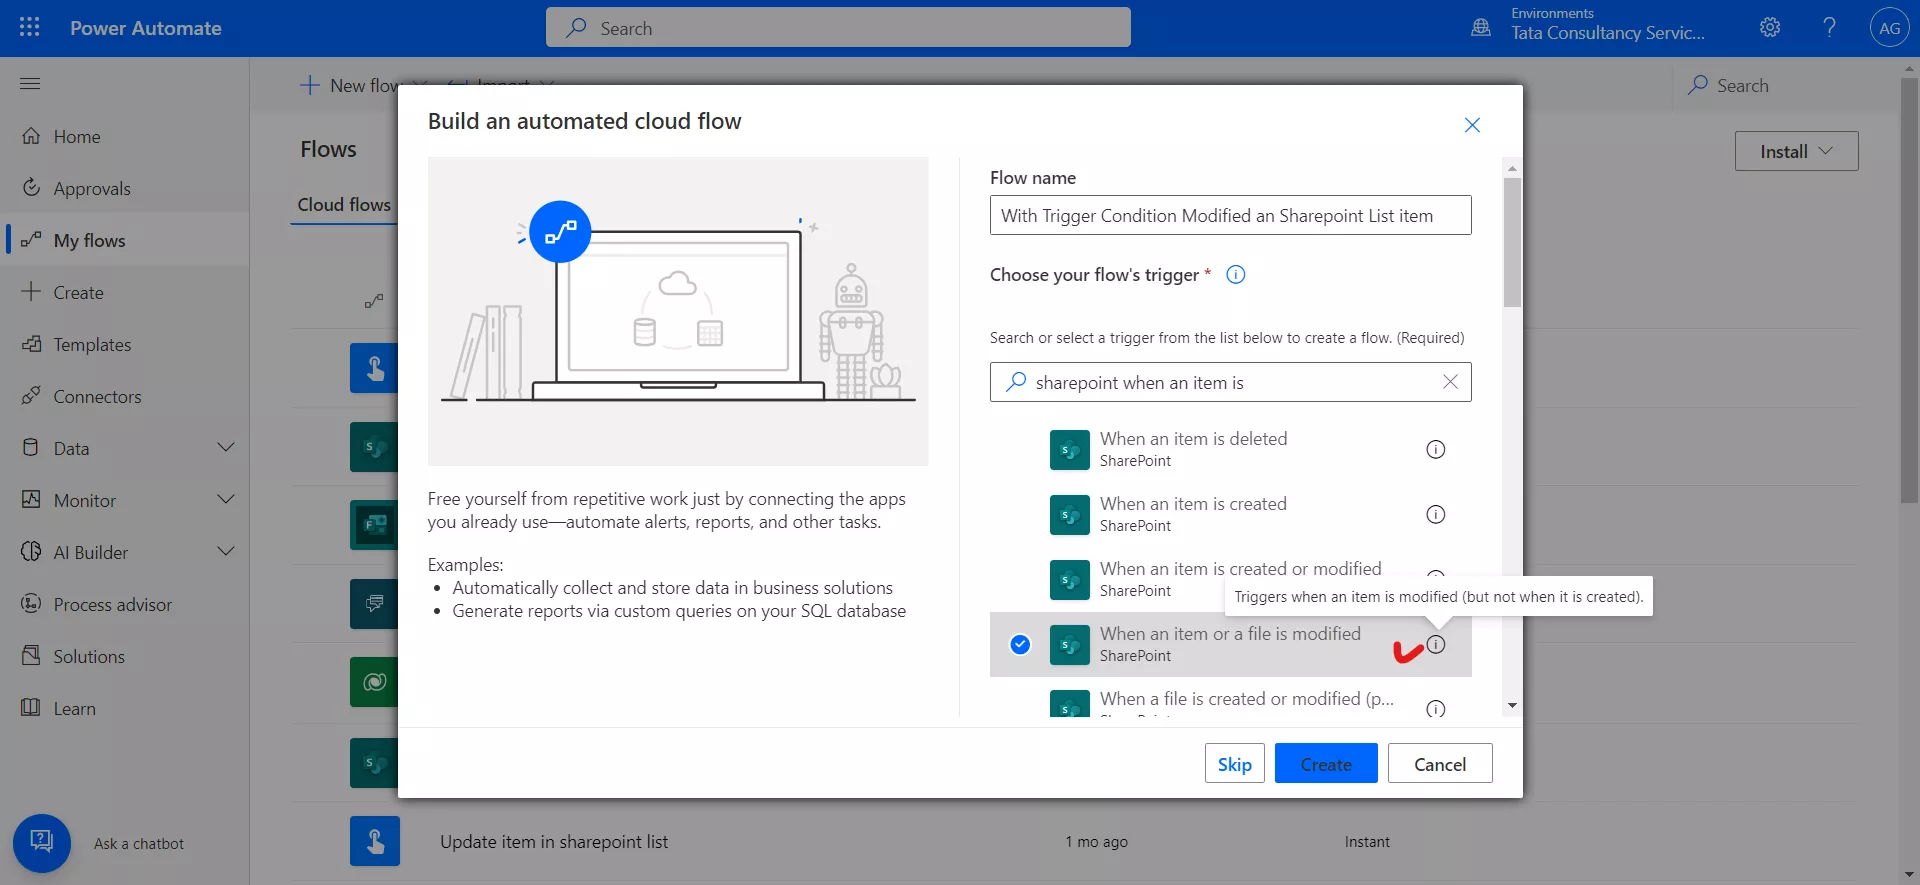
Step 1: Click on Create and then on Automated Cloud flow.
Step 2: Write the Flow name as With Trigger Condition Modified an Sharepoint List item.
Step 3: Select When an item or a file is modified.
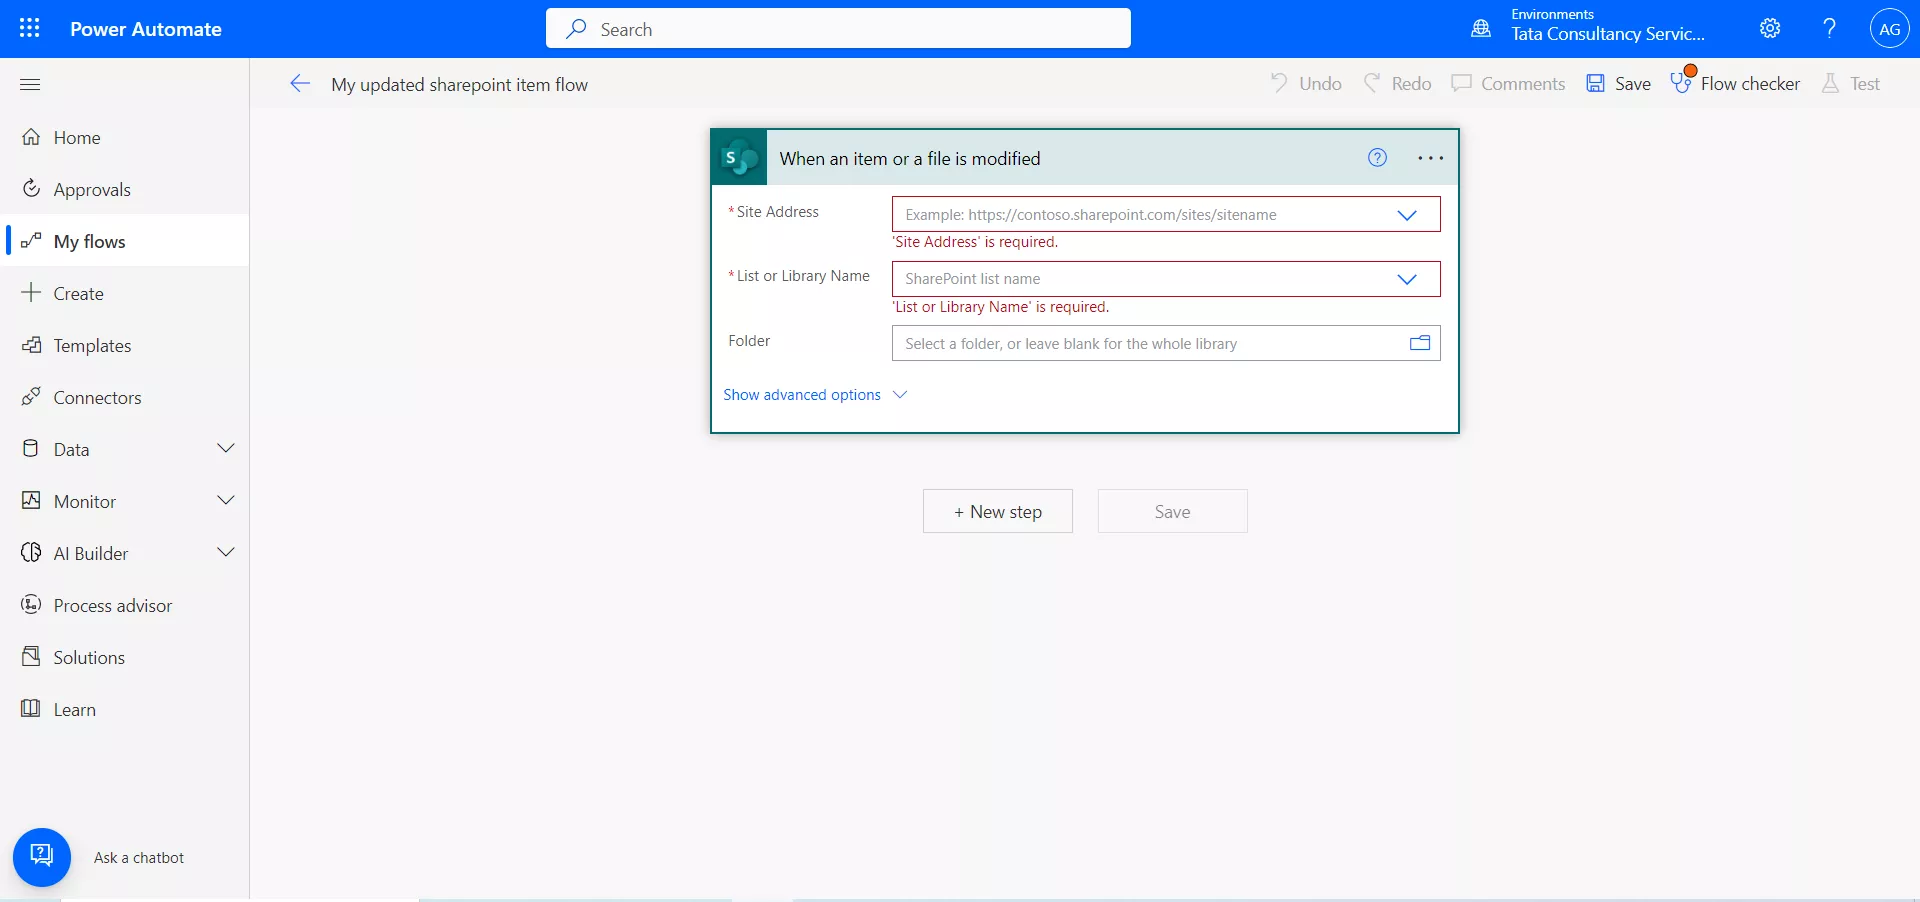
Step 4: Enter the Site Address and the List or Library name.
After adding the Site Address and List name our power automate looks like the following image.
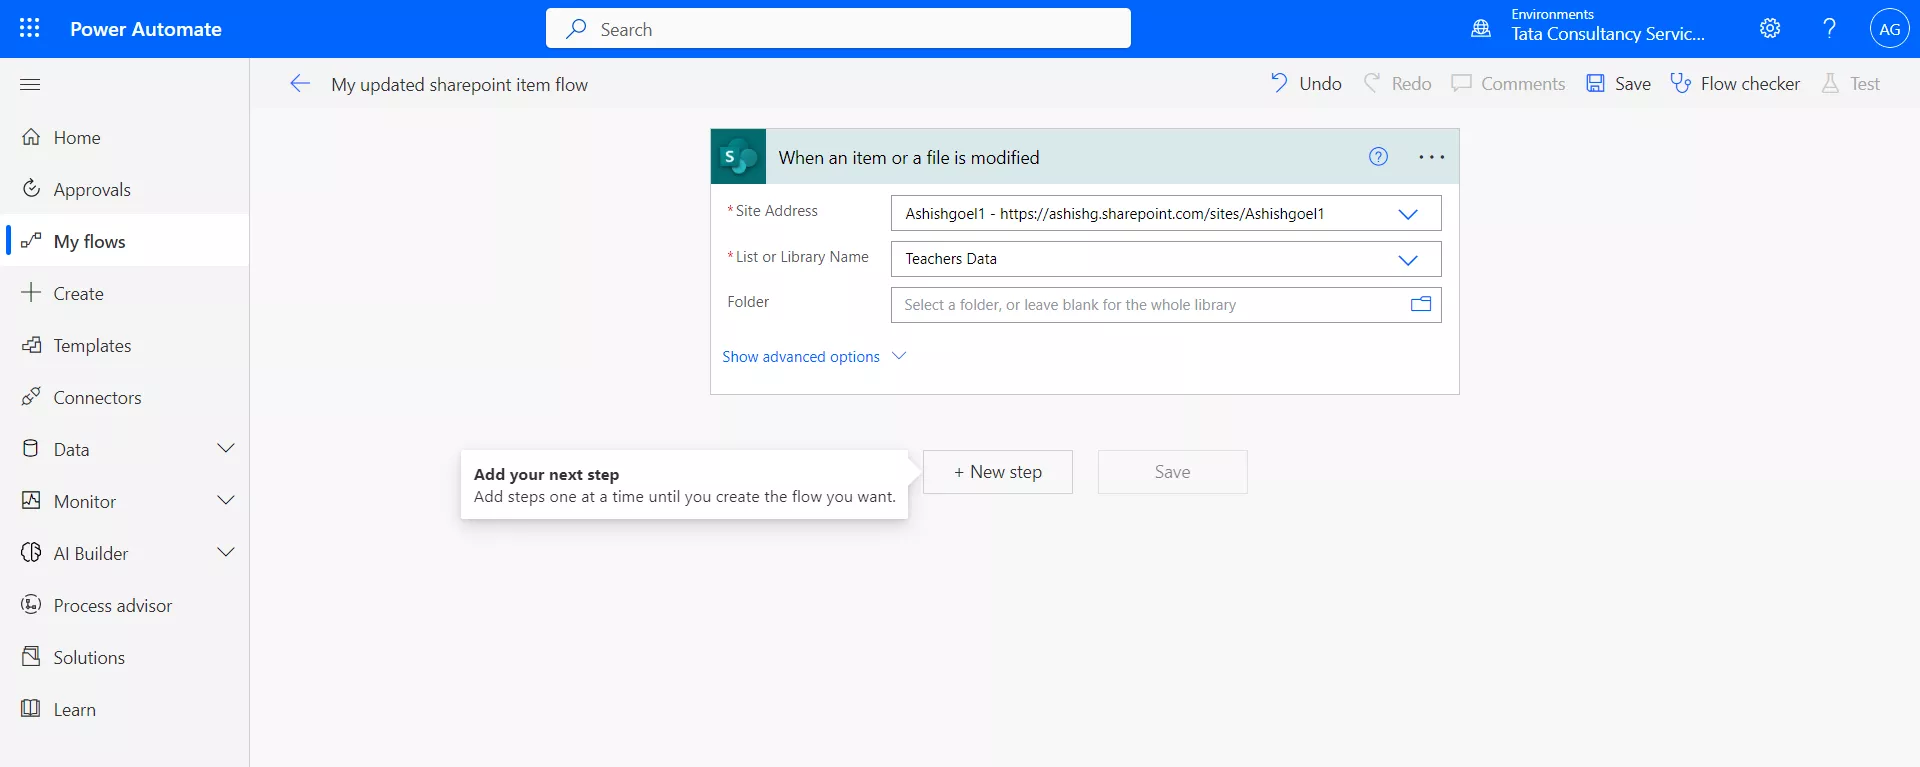
Step 5: Click on + New step, to add a new step.
Step 6: Select Send an email (v2), from the actions.
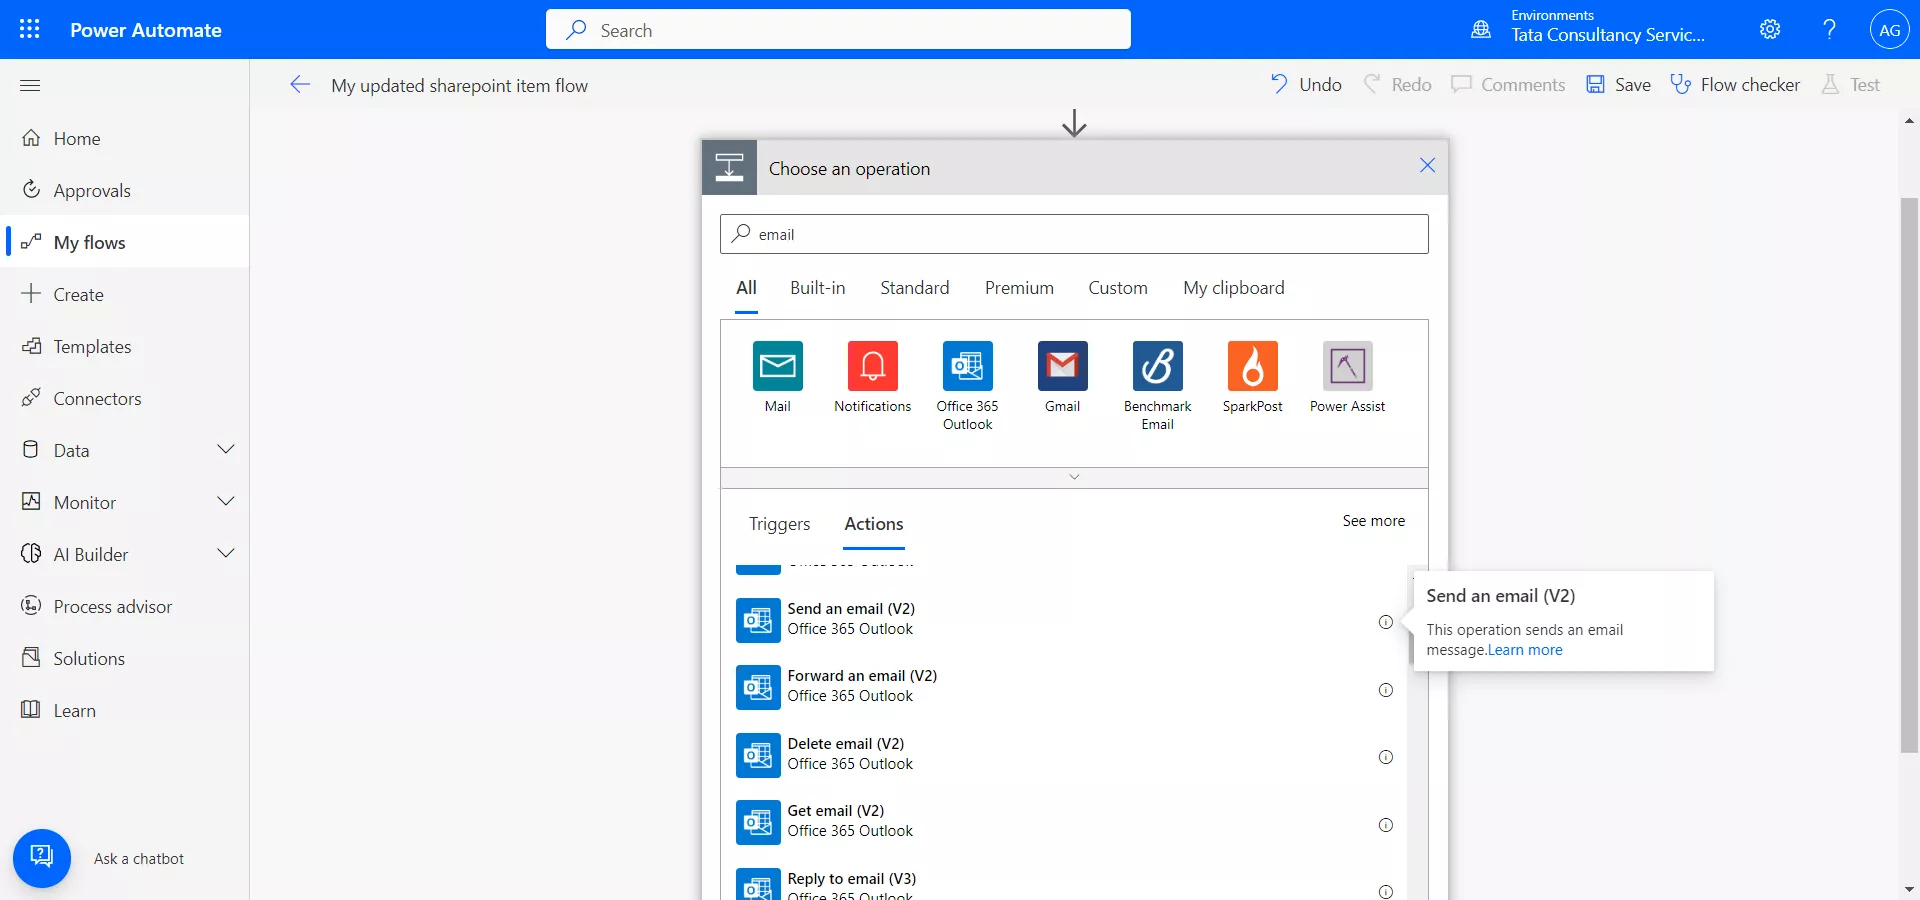
After adding the email control our power automate flow is look the following image.
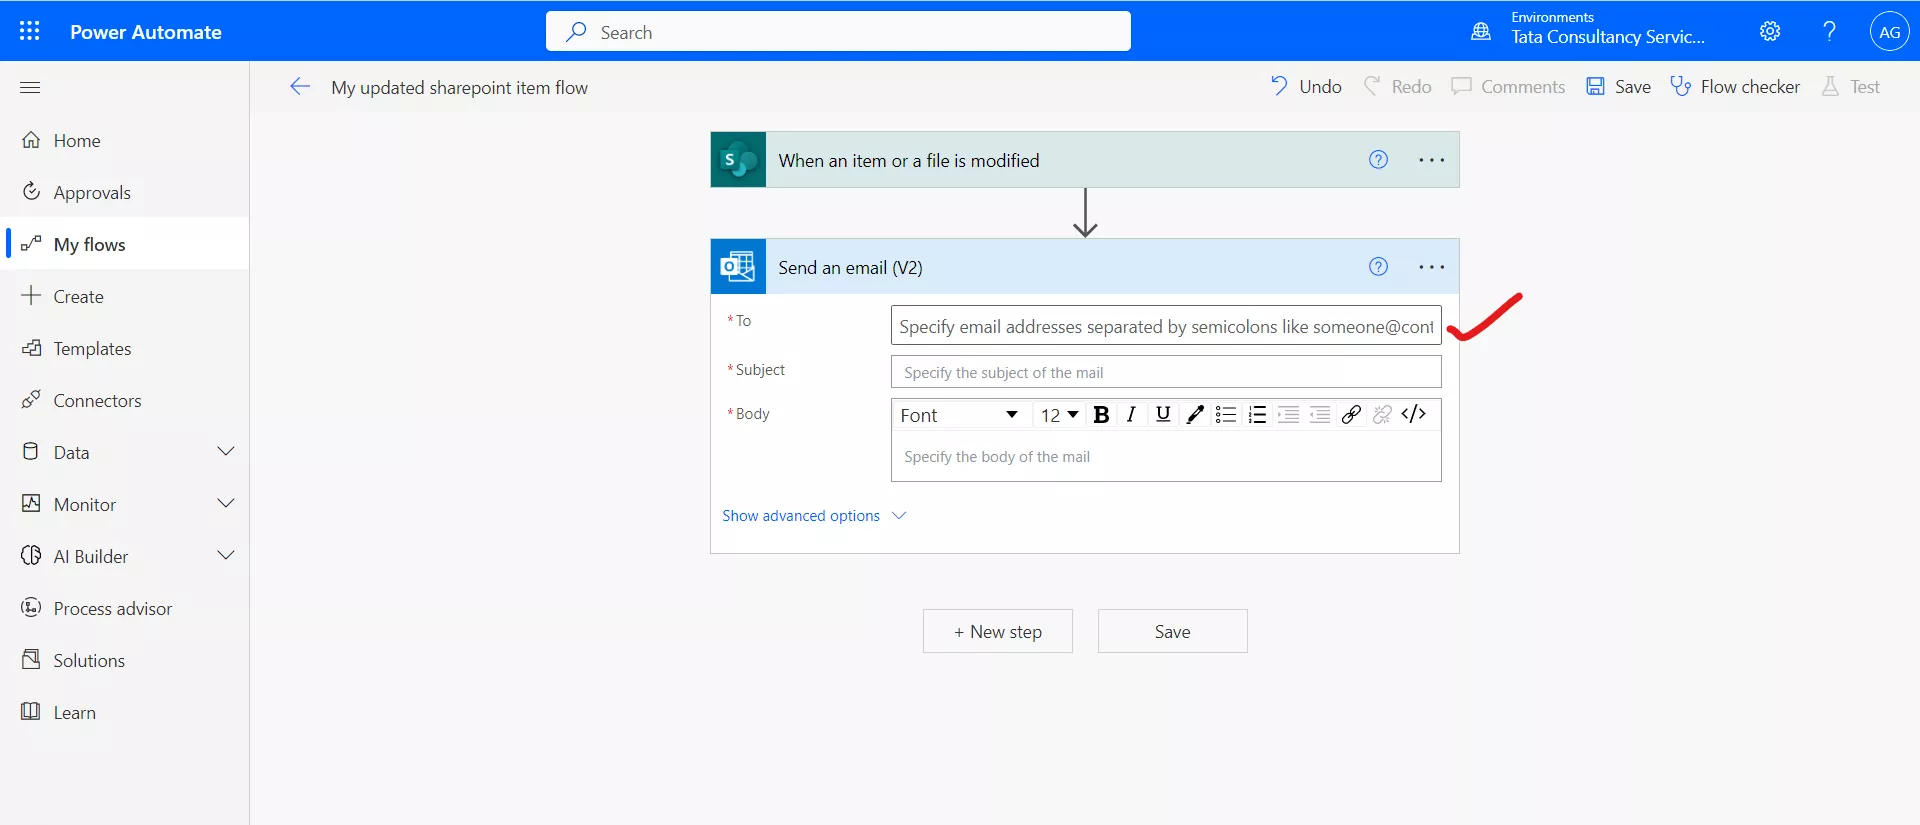
Step 7: Add the email in the “To” section, if want to specify multiple emails then separate them with the semi-colons.
Step 8: Specify the Subject and Body of the email.
In the Dynamic content, we have a list of all the columns of the SharePoint list that we have specified in the above trigger control.
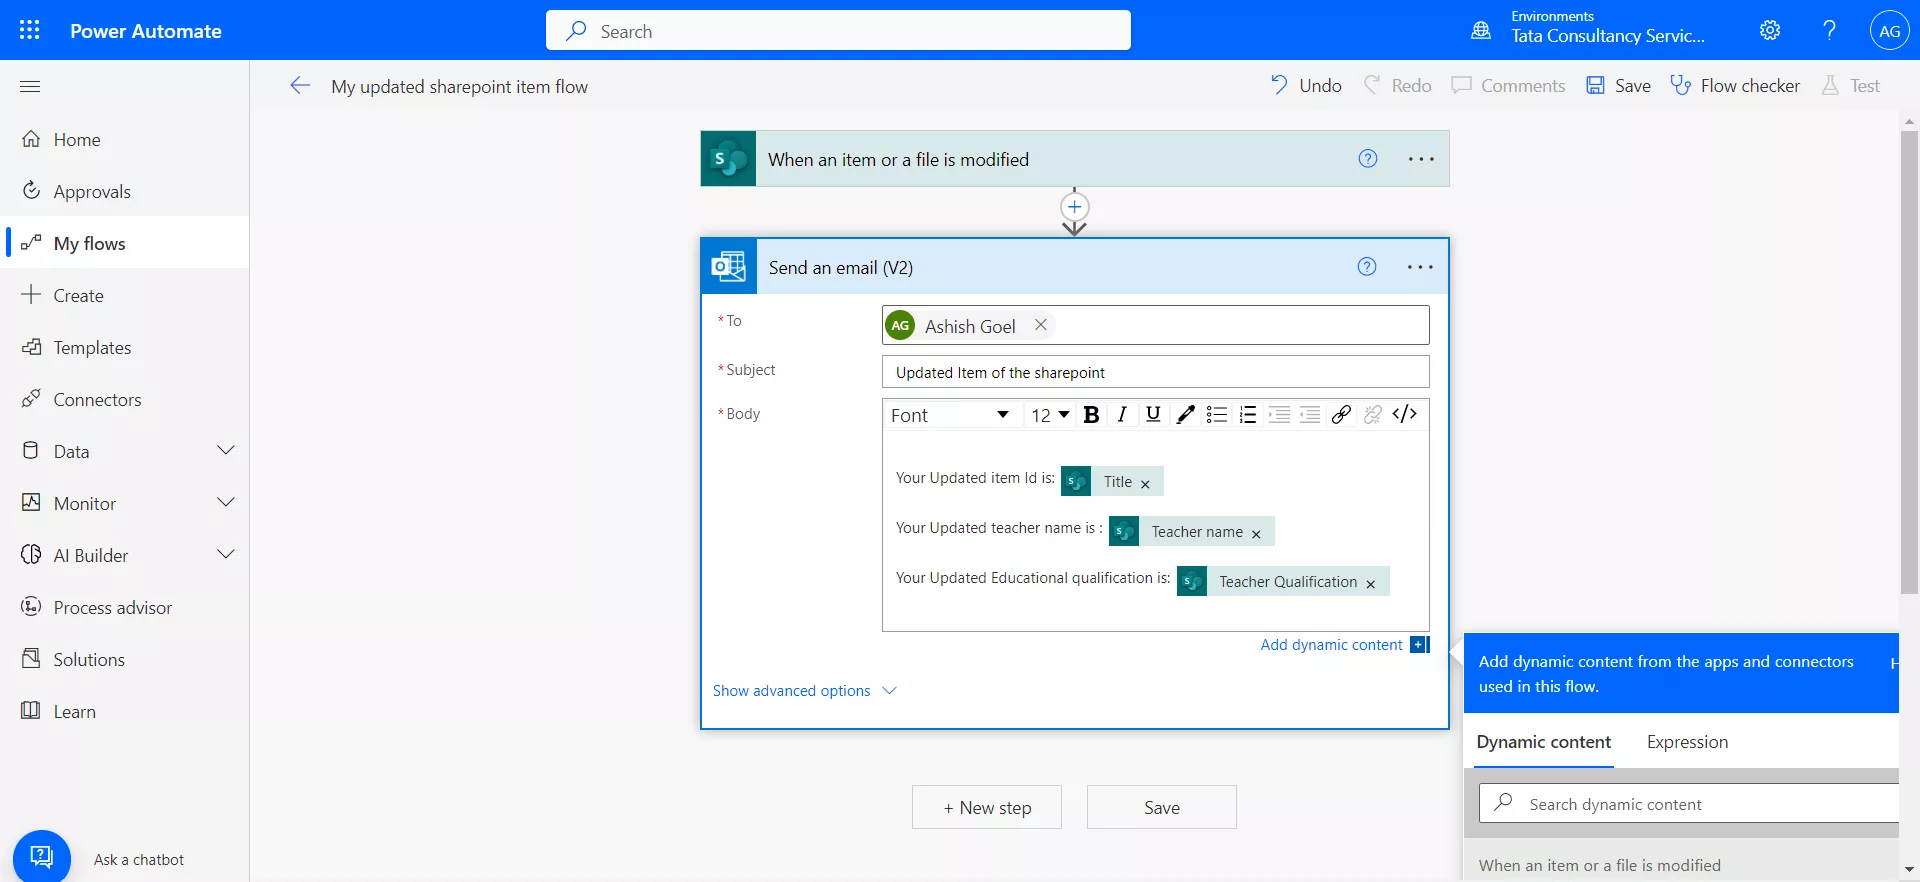
Step 7: After adding all the details whatever we want, save the flow, and go to the specified list and modified an item. After this the flow will run.
Step 8: In the sharepoint list we have a choice column “Record Status” has two values “Draft” and “Submitted”.
If we want to add a condition that our flow will only trigger when the item is modified in the sharepoint point with the condition that its “Record Status” column value in the sharepoint list is “Submitted”.
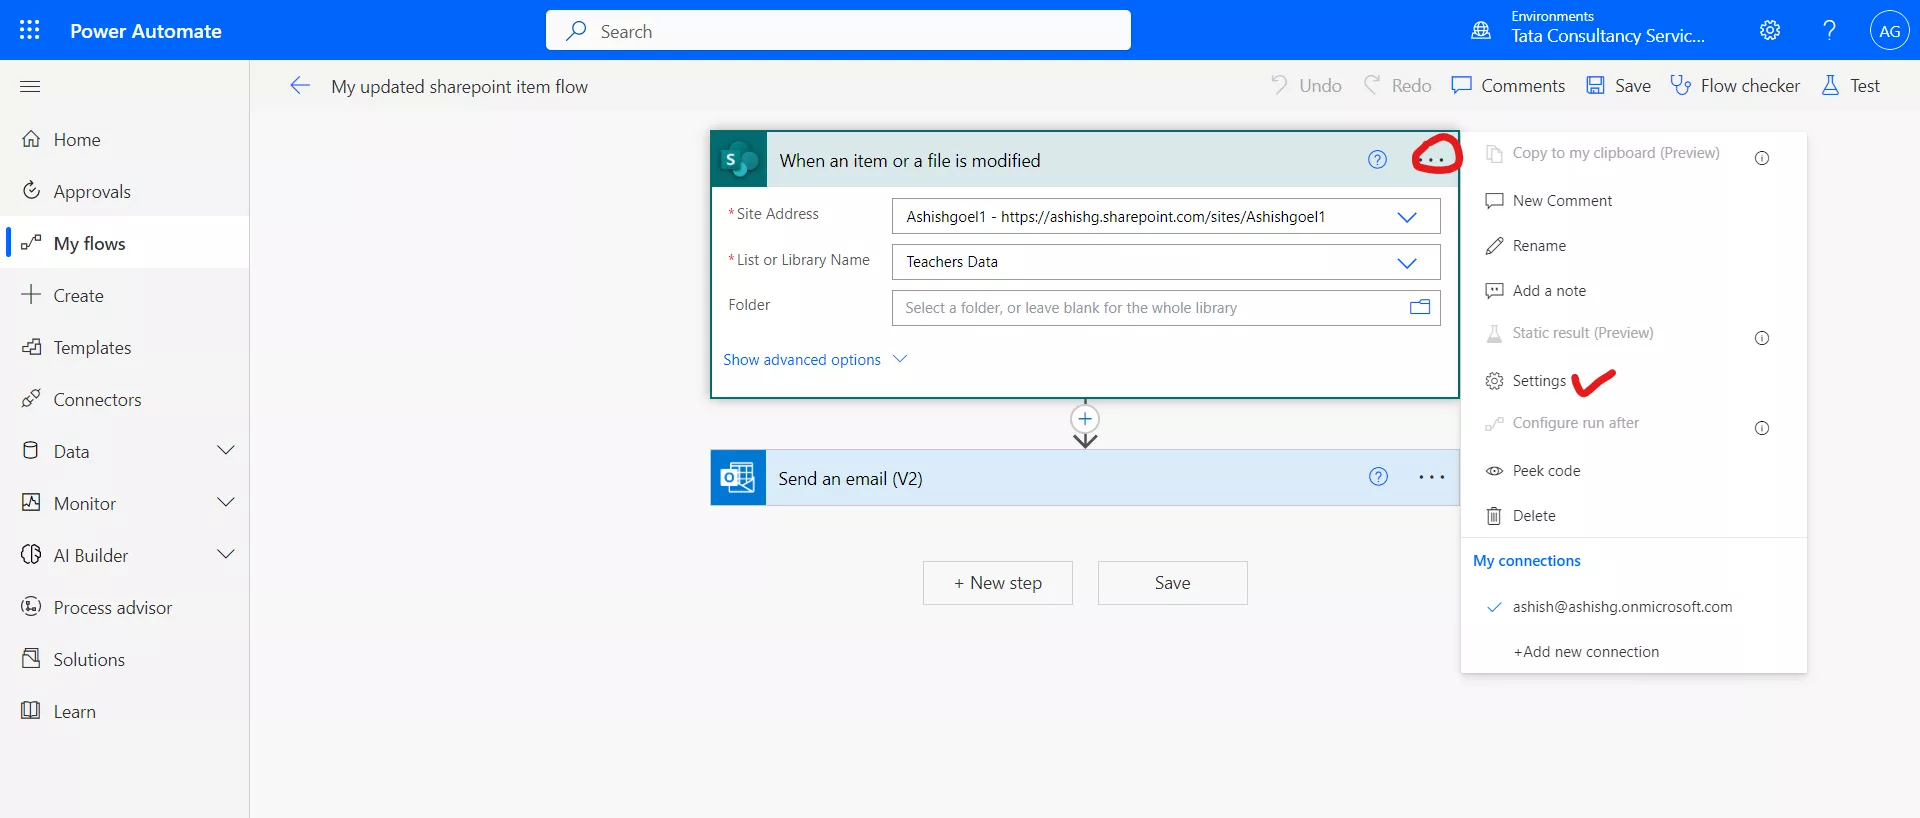
To add a trigger conditions, select the Trigger action, click on three dots (…), then click on Settings, as shown in the following image.
Scroll down, there we find Trigger Conditions.
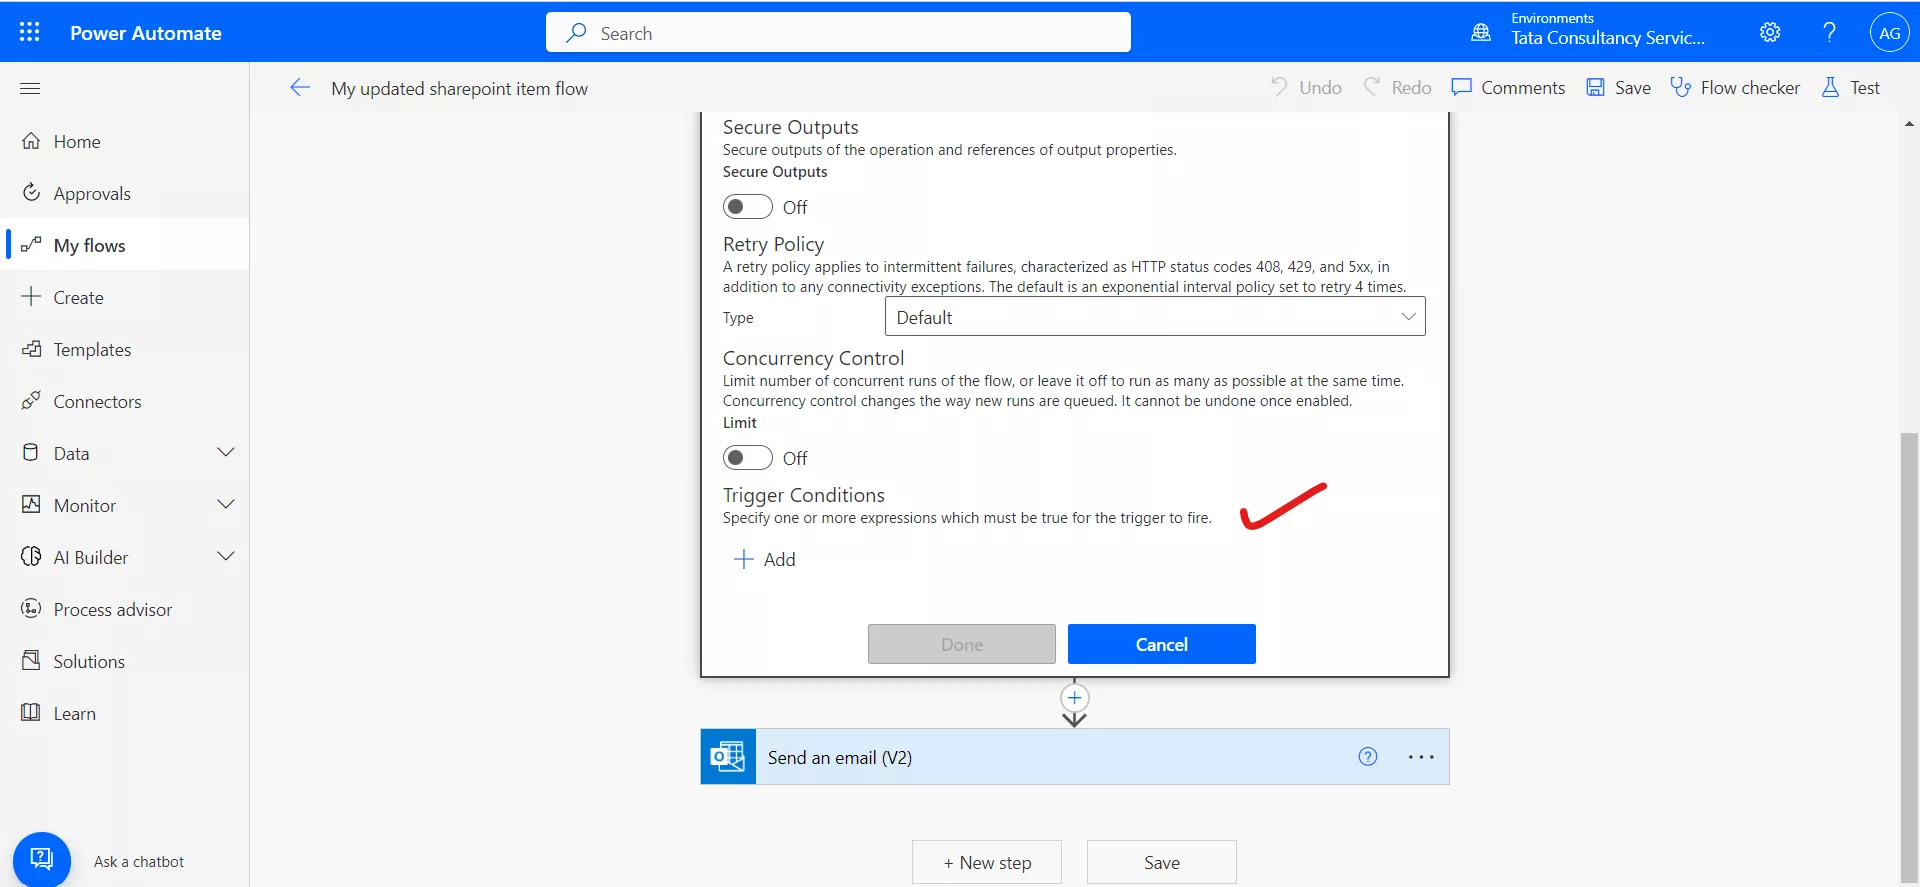
Click on + Add to add the expression. Add an expression and then select Done. Note one thing that every trigger condition must start with a @ symbol.
The following conditional expression can be written:
Conditional Expression
So here when the Record status which is a choice column and when value is Submitted only then we need to trigger the power automate flow. Then put the above expression on the Trigger Conditions expression tab and click on Done.
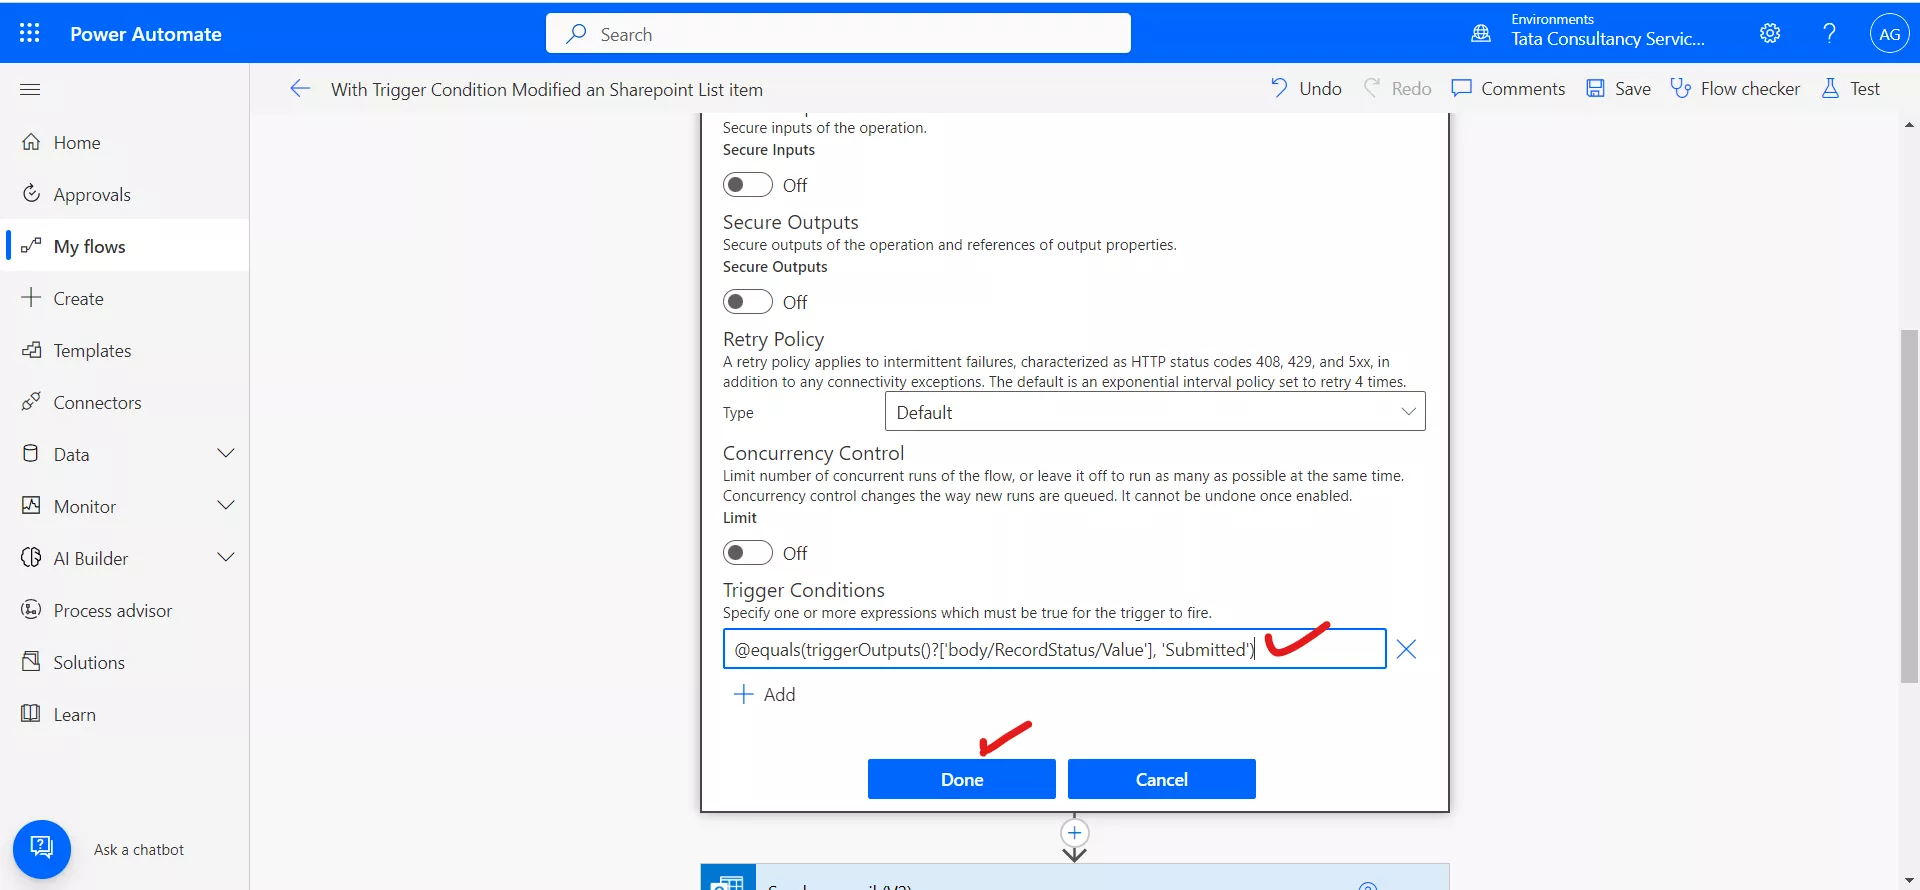
If we have multiple filter conditions to add, Select + Add again and add expressions. By default, all conditions must be met for the condition to be true. If any condition is optional, we will need “or”, and then use the syntax @or(test1, test2, test3).
With out specifying multiple conditions we can merge them using the “and”. The syntax of the ‘and’ expression is @and(test1, test2, test3).
Easily create expressions
As an alternative, follow the instructions in to easily generate the conditional expressions. Our flow can generate expressions for you.
1. On the flow, select the + sign in the down arrow, and then select Add an action.
2. Search for and select the Filter array action.
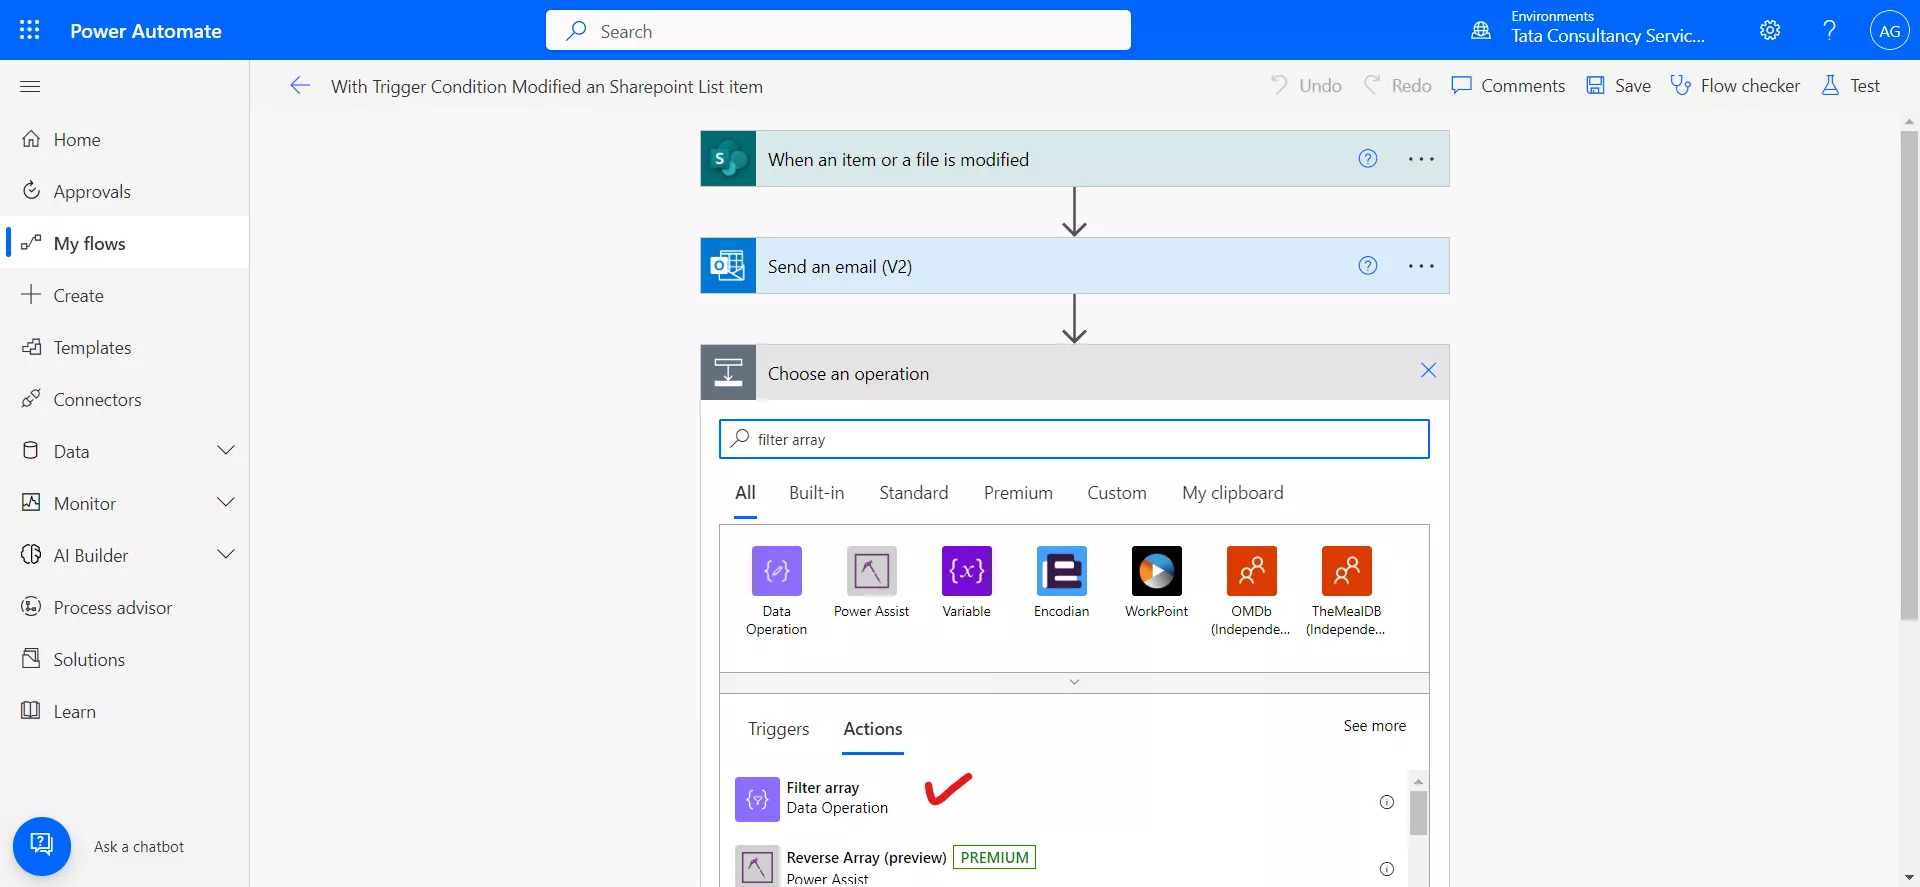
3. On the Filter array card, create your condition.
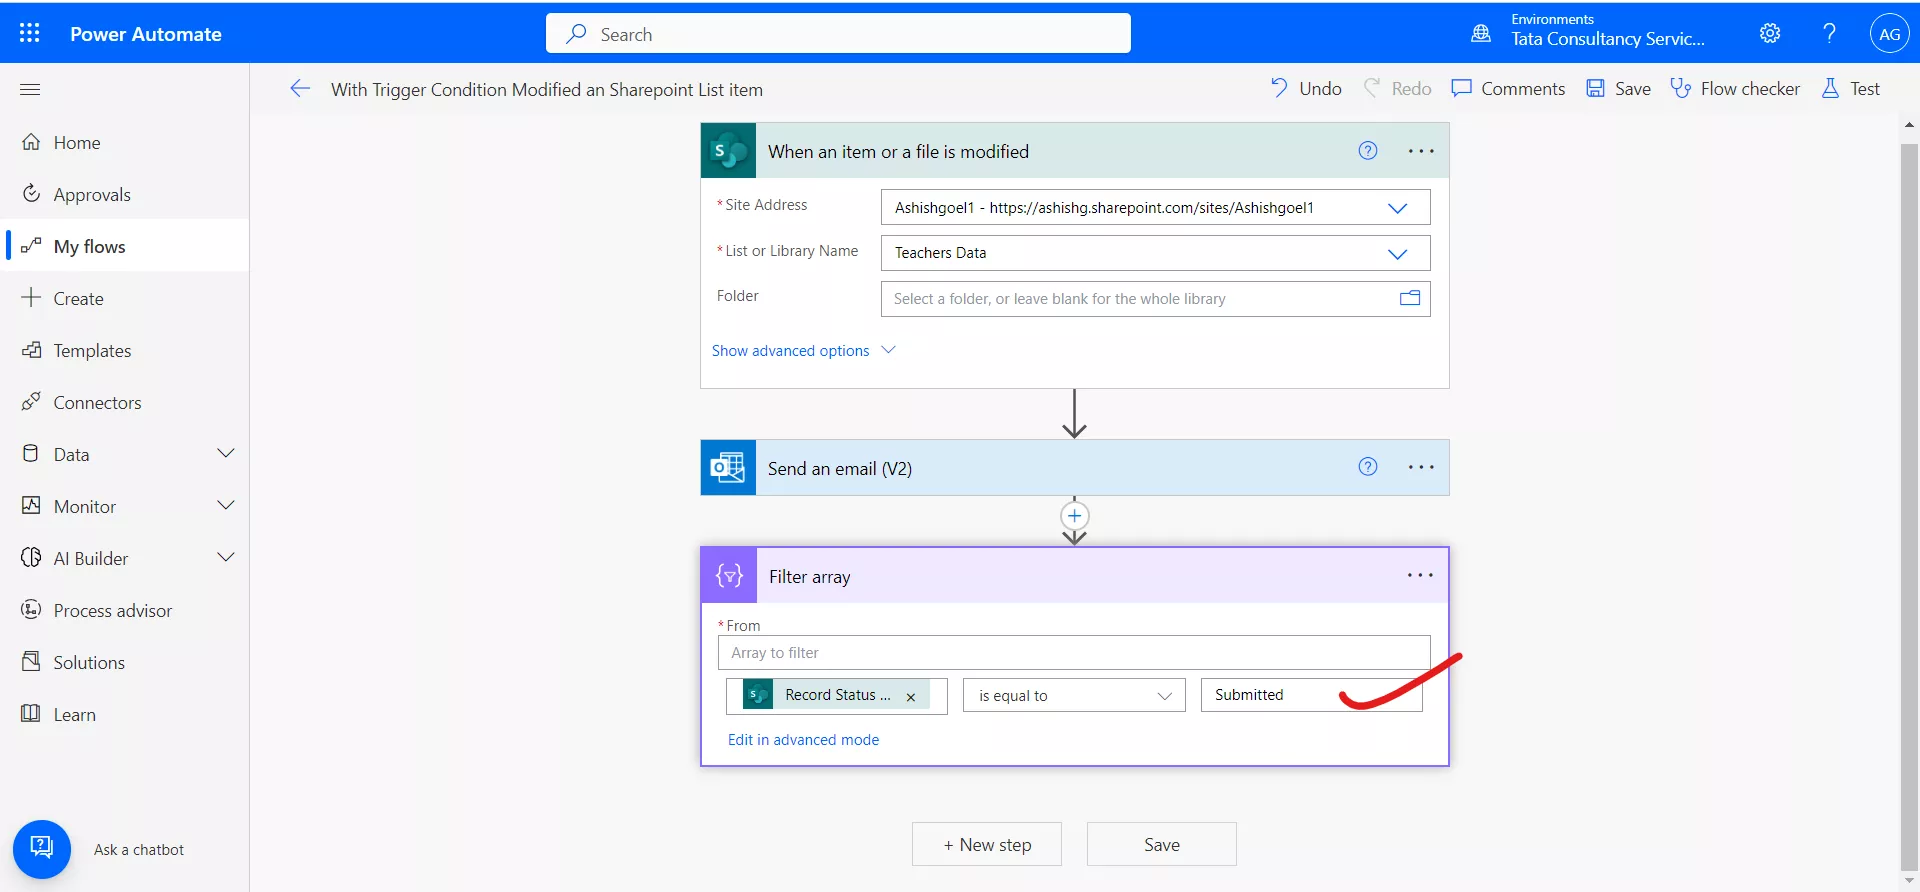
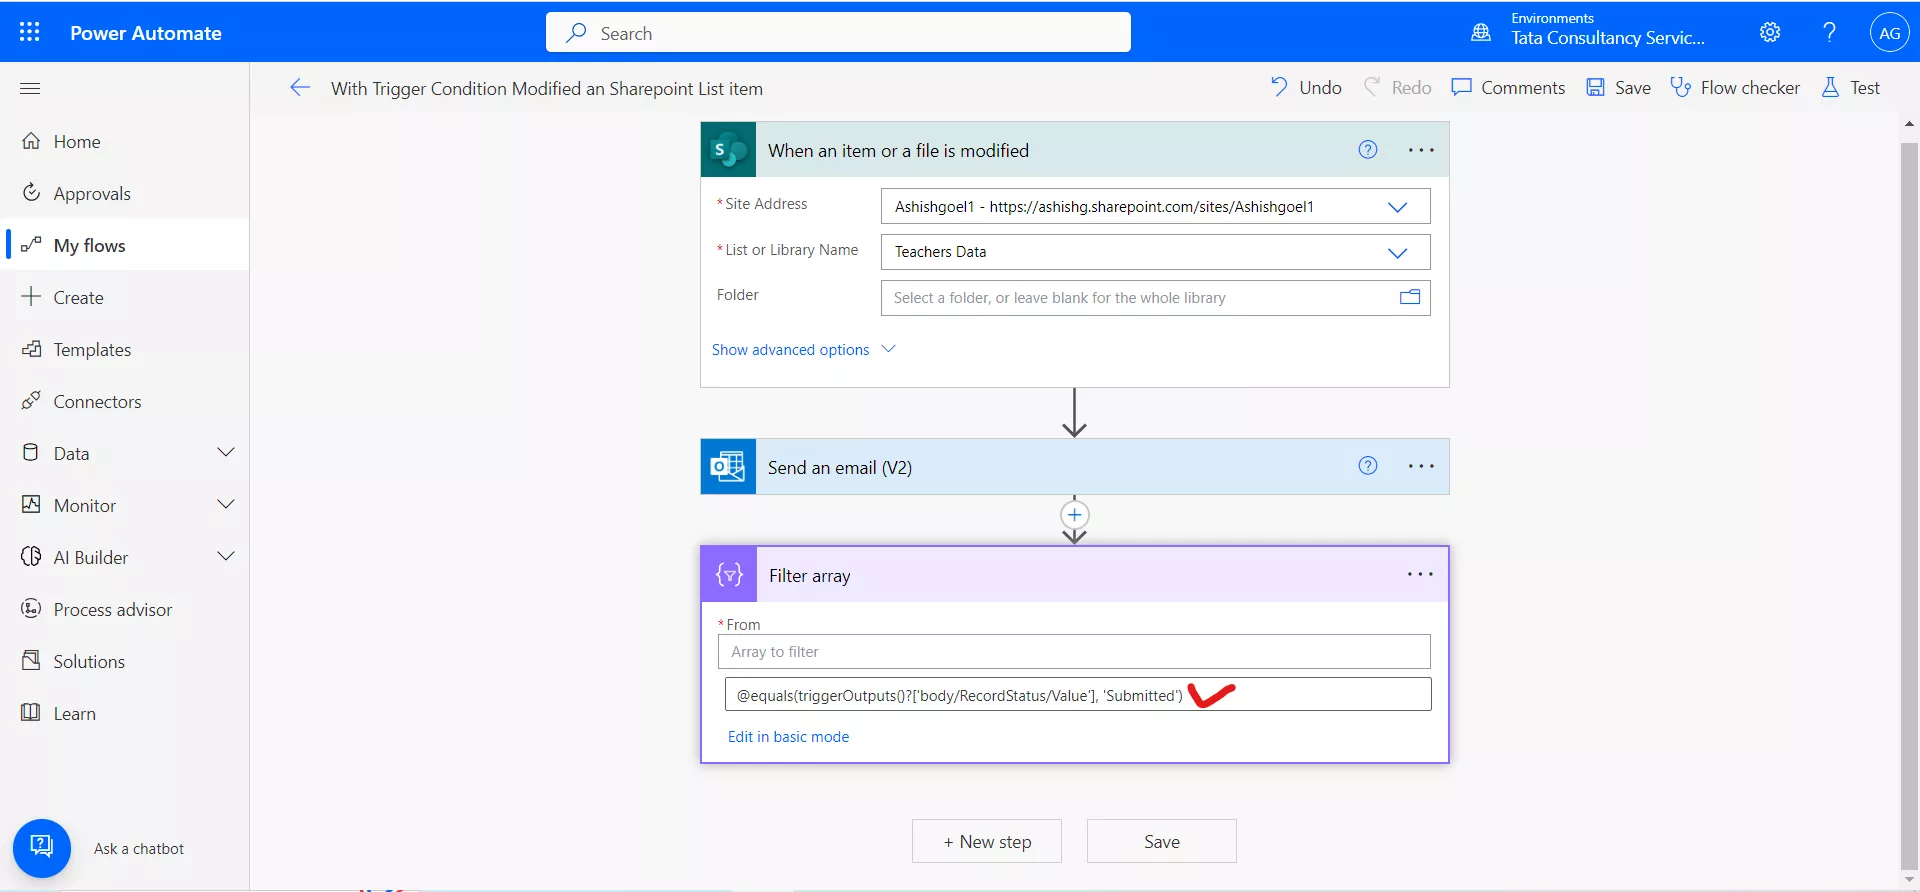
4. Select Edit in advanced mode and copy the expression.
We can use the different comparators from the dropdown. Suppose we need to select is not equal to and set to Draft. So, we need to trigger the flow when the Record Status column value is not Draft.
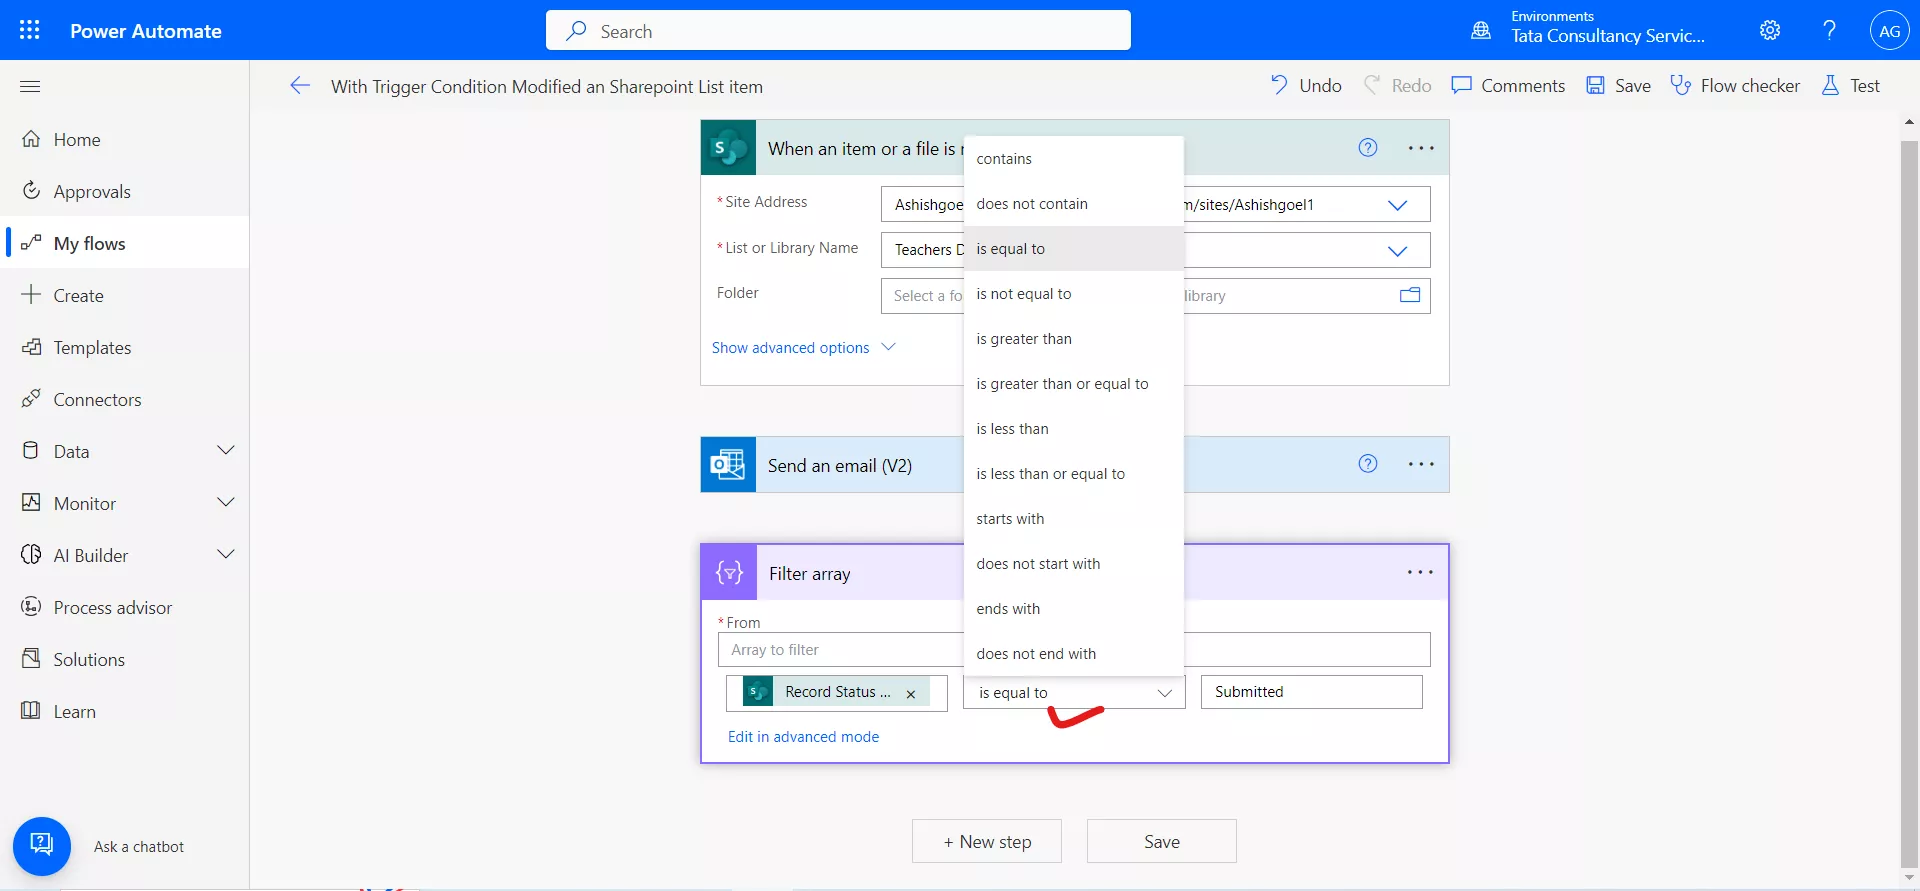
Just select is not equal to from the dropdown.
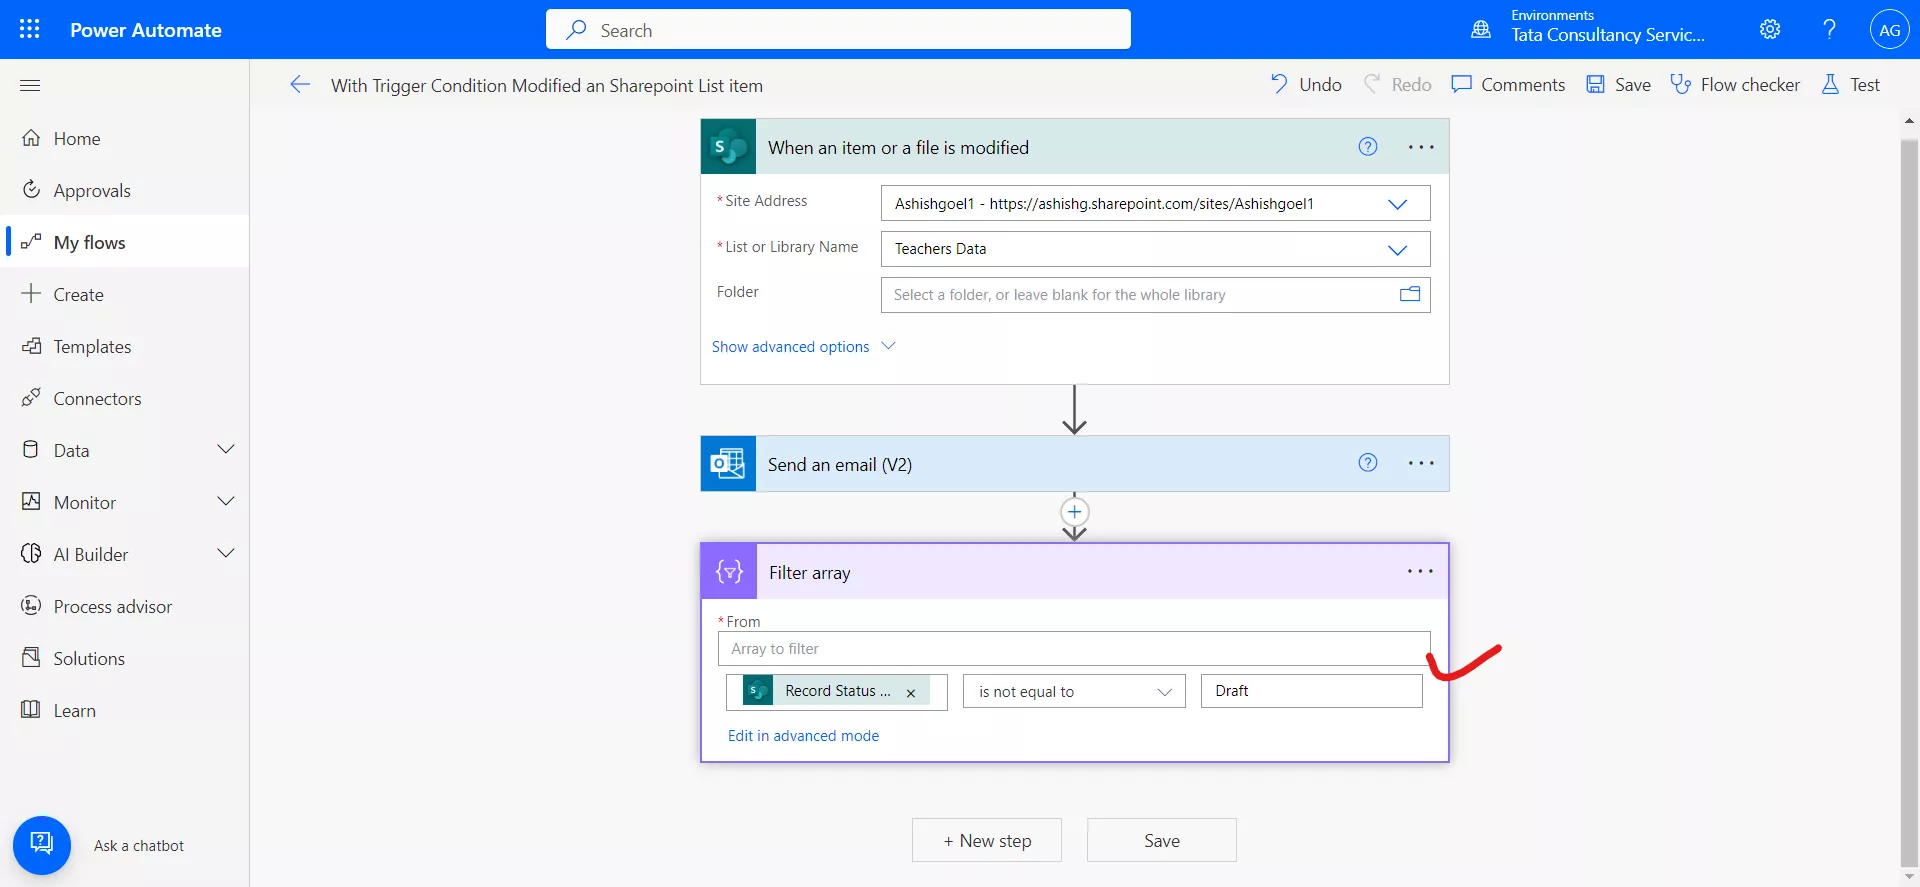
The following expression is generated when we click on Edit in advanced mode.
Conditional Expression
5. Paste the expression into the trigger condition.
6. Remove the Filter array action.