Create an Approval Flow with SharePoint list
In this exercise, we will learn how we can create an approval flow in the power automate.
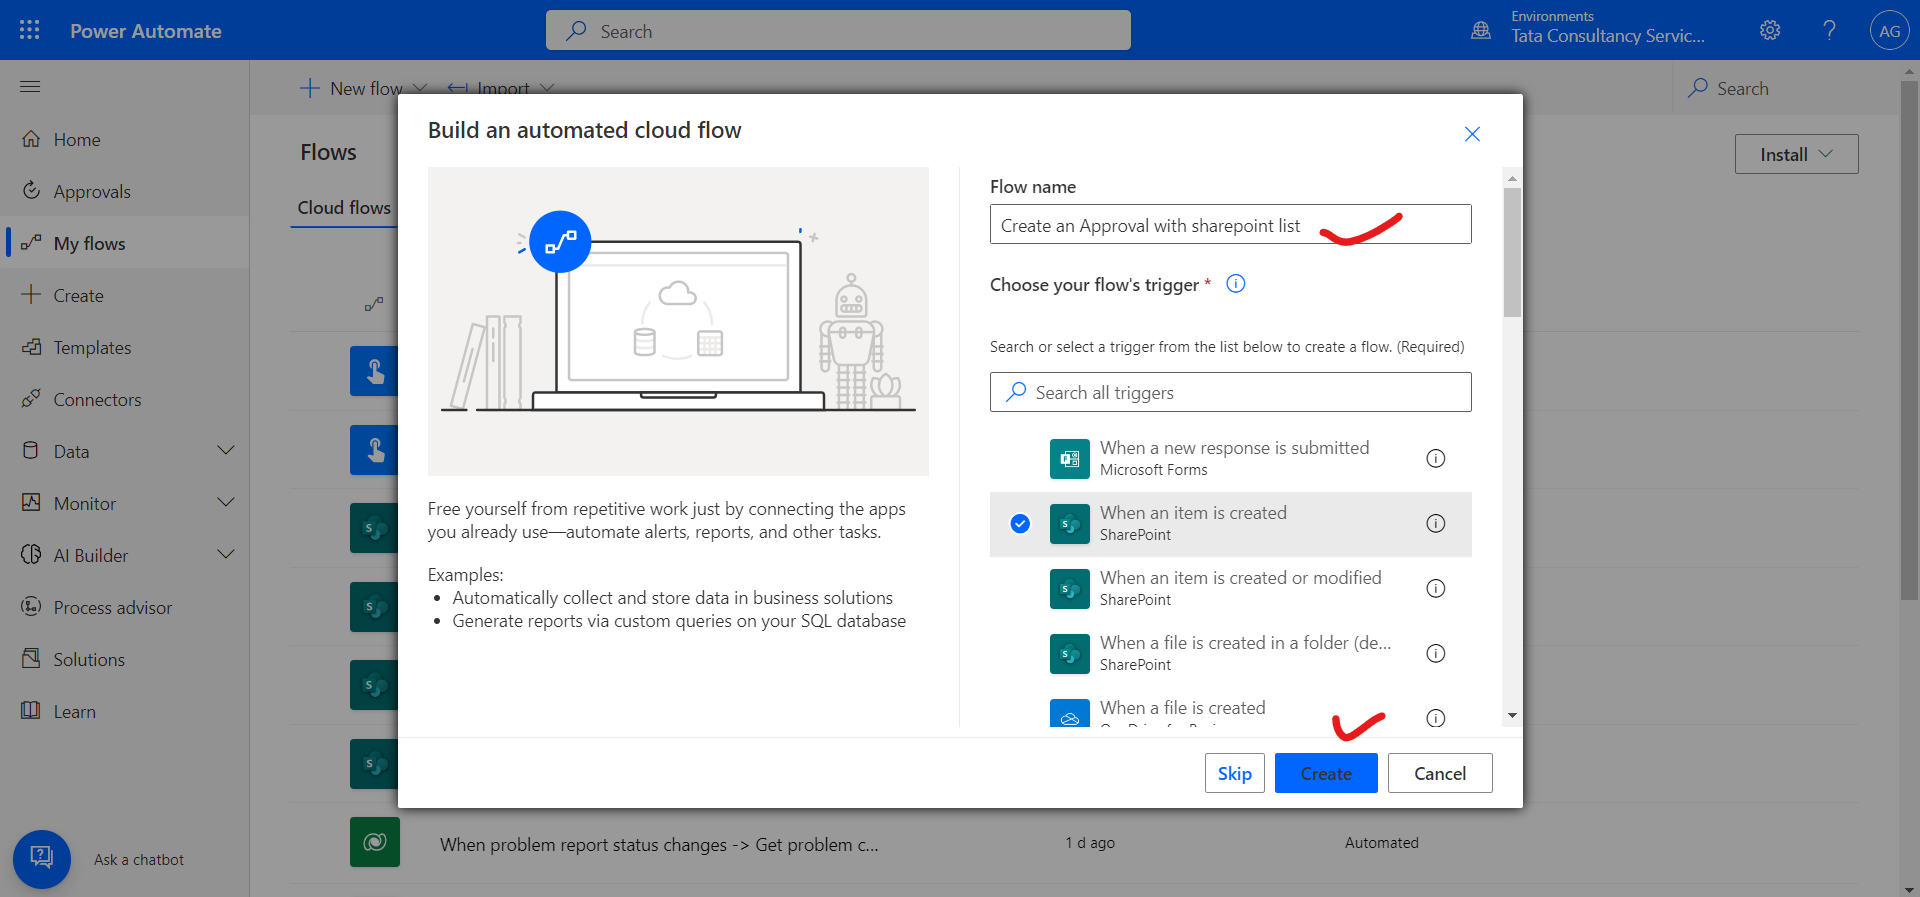
Step 1: Create an Automated cloud flow, and choose the trigger “When an item is created” in the sharepoint.
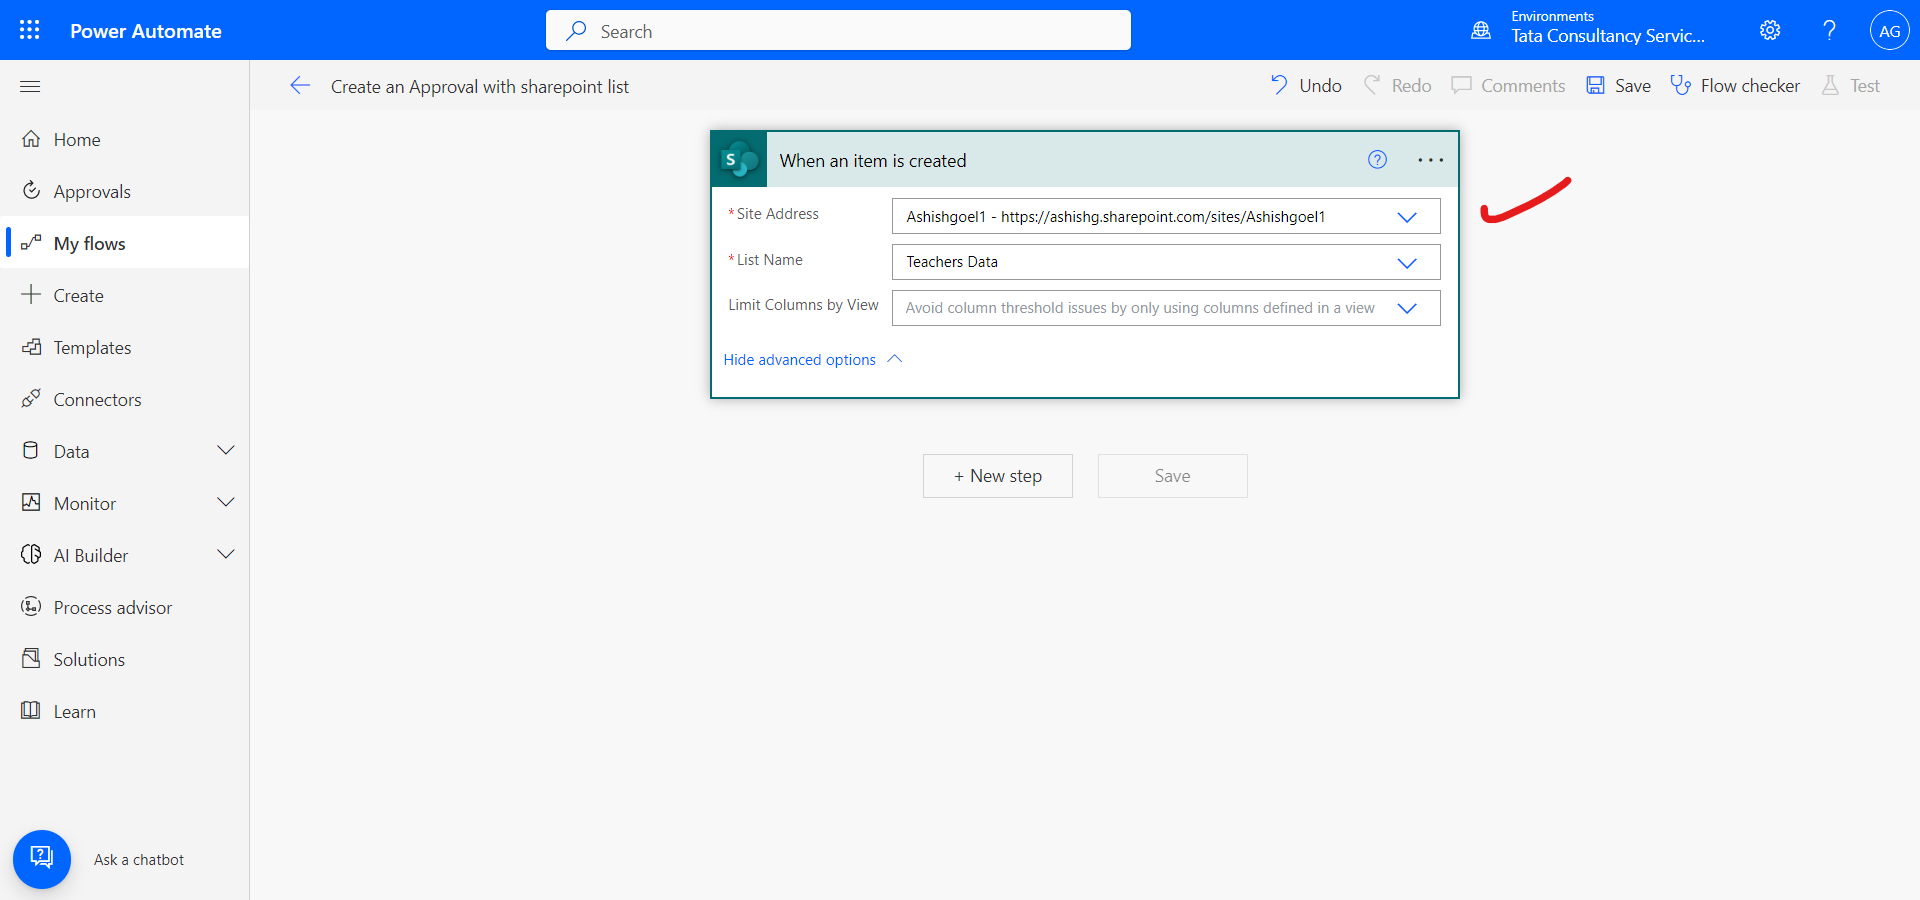
Step 2: Specify the Site Address and the List Name.
Step 3: Click on + New step, to add a new action and select “Update item” for sharepoint.
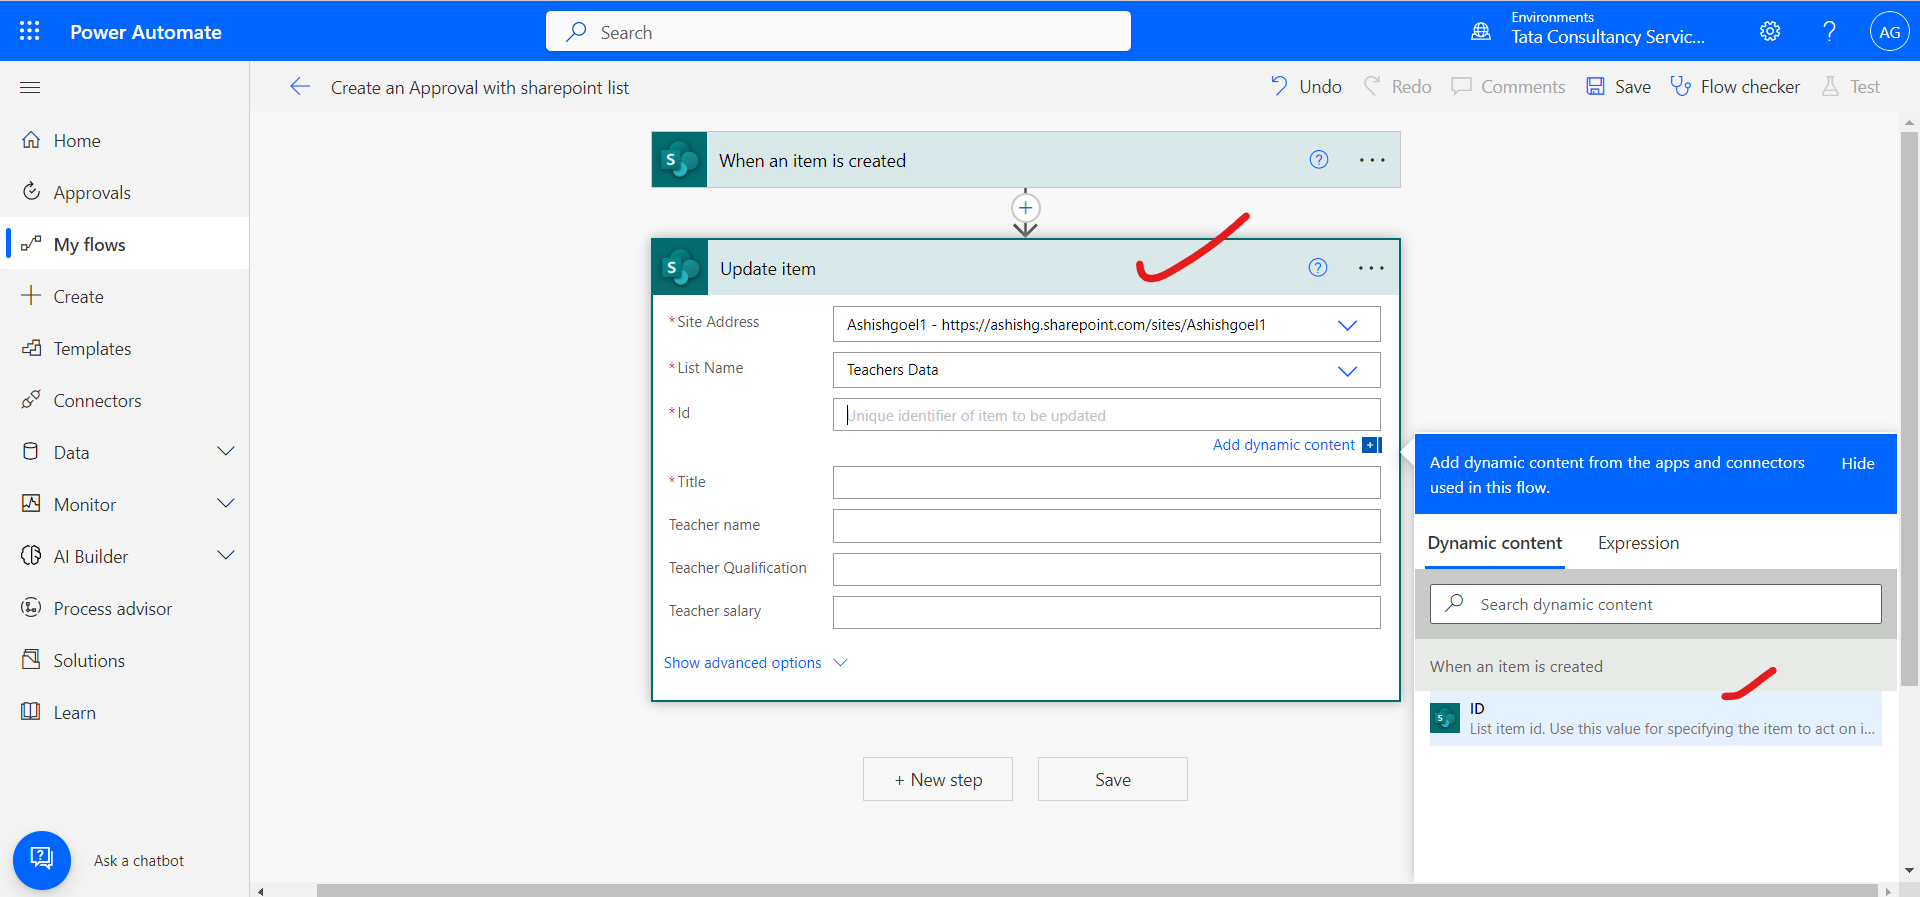
Step 4: Add the required fields.
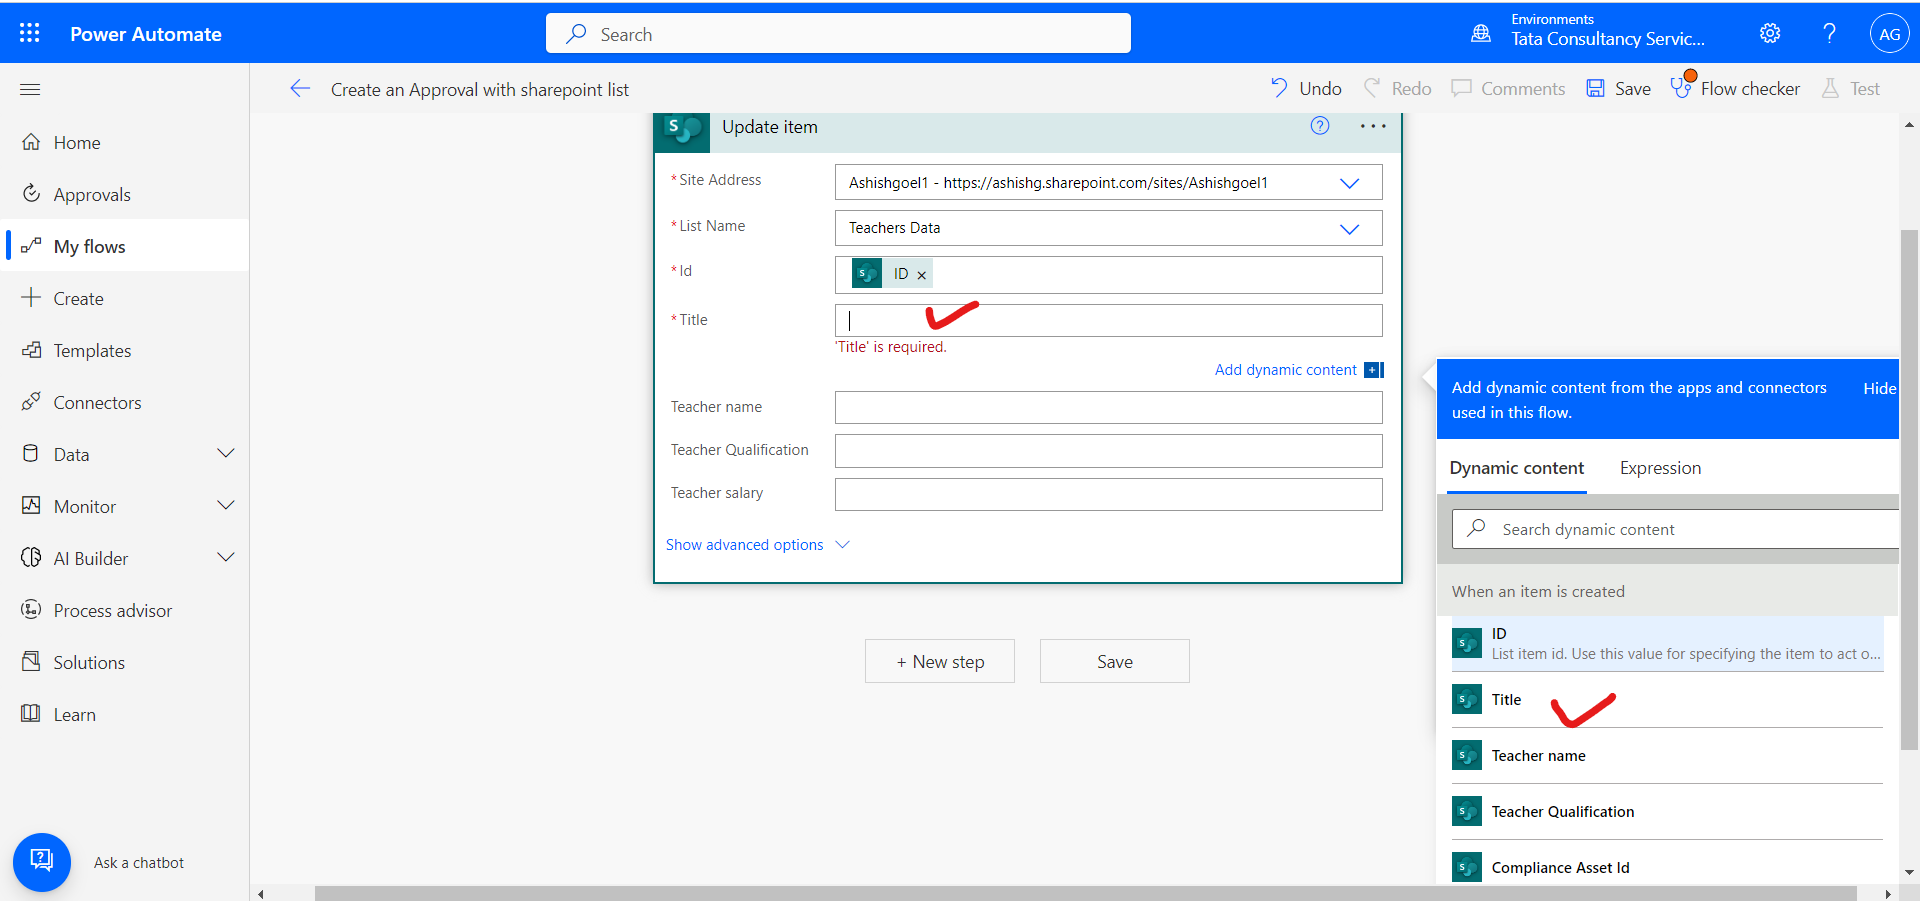
Also update the Status Value field as Under Review. And update the comment in the sharepoint list column.
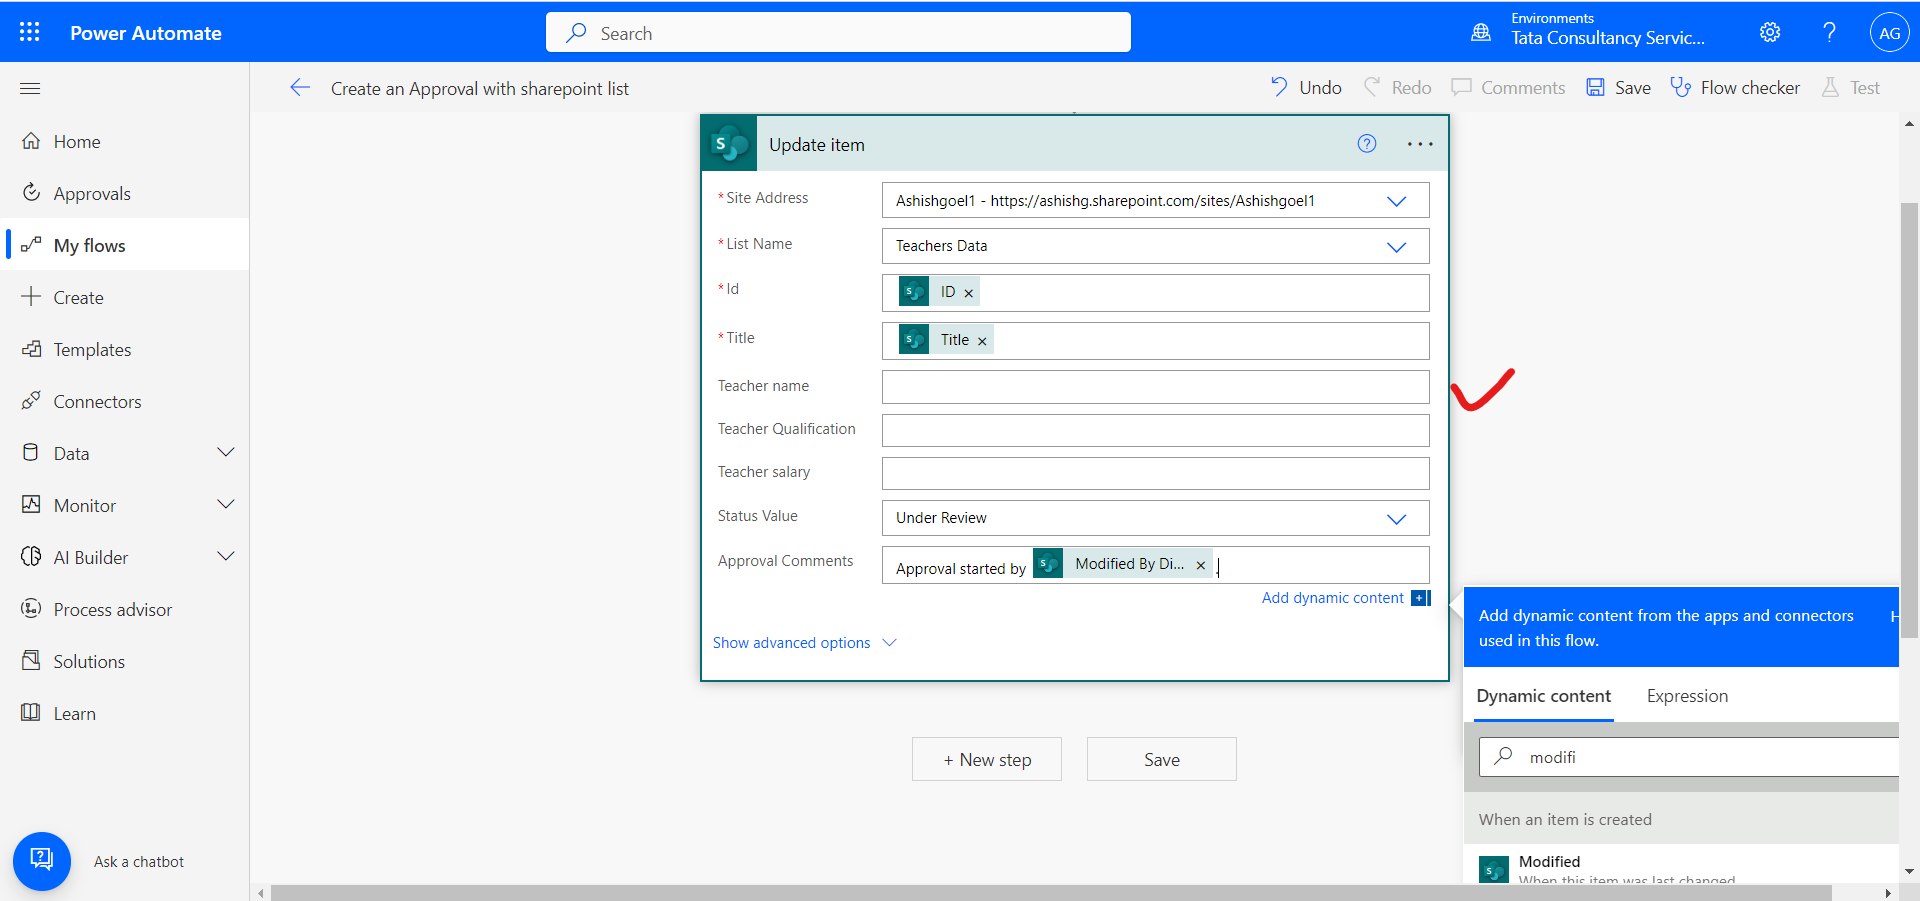
Step 5: Click on + New step again to create a new step.
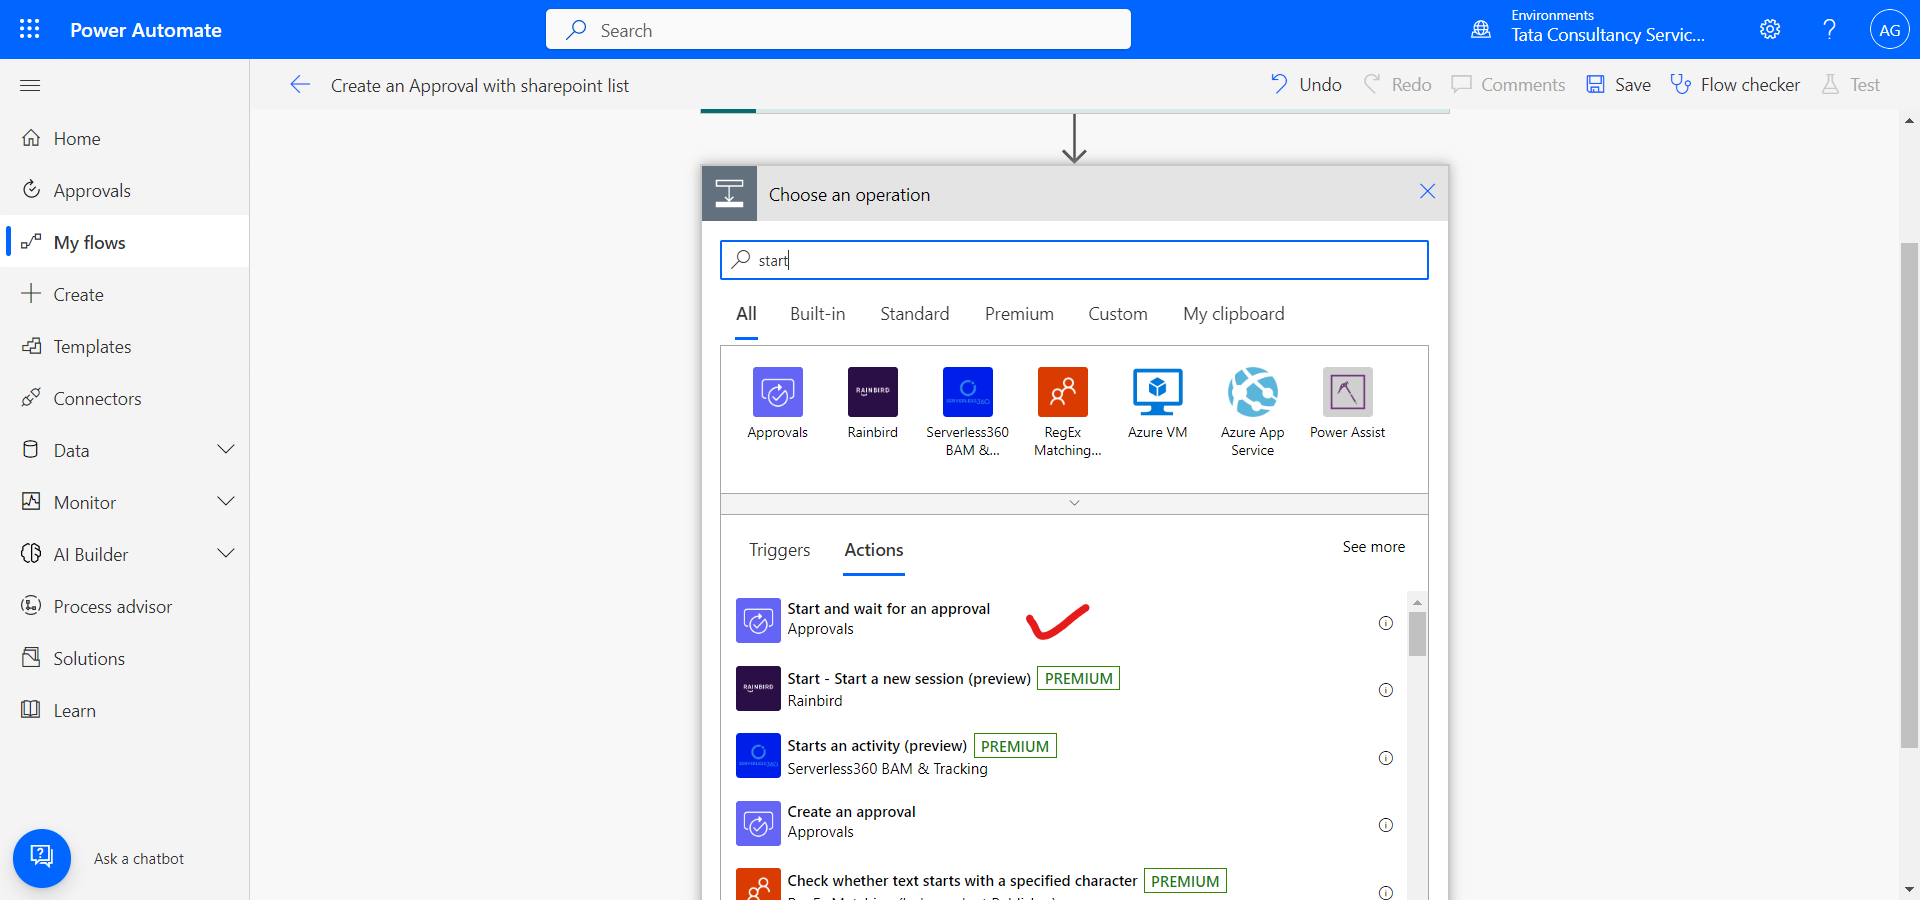
Select Start and wait for an approval.
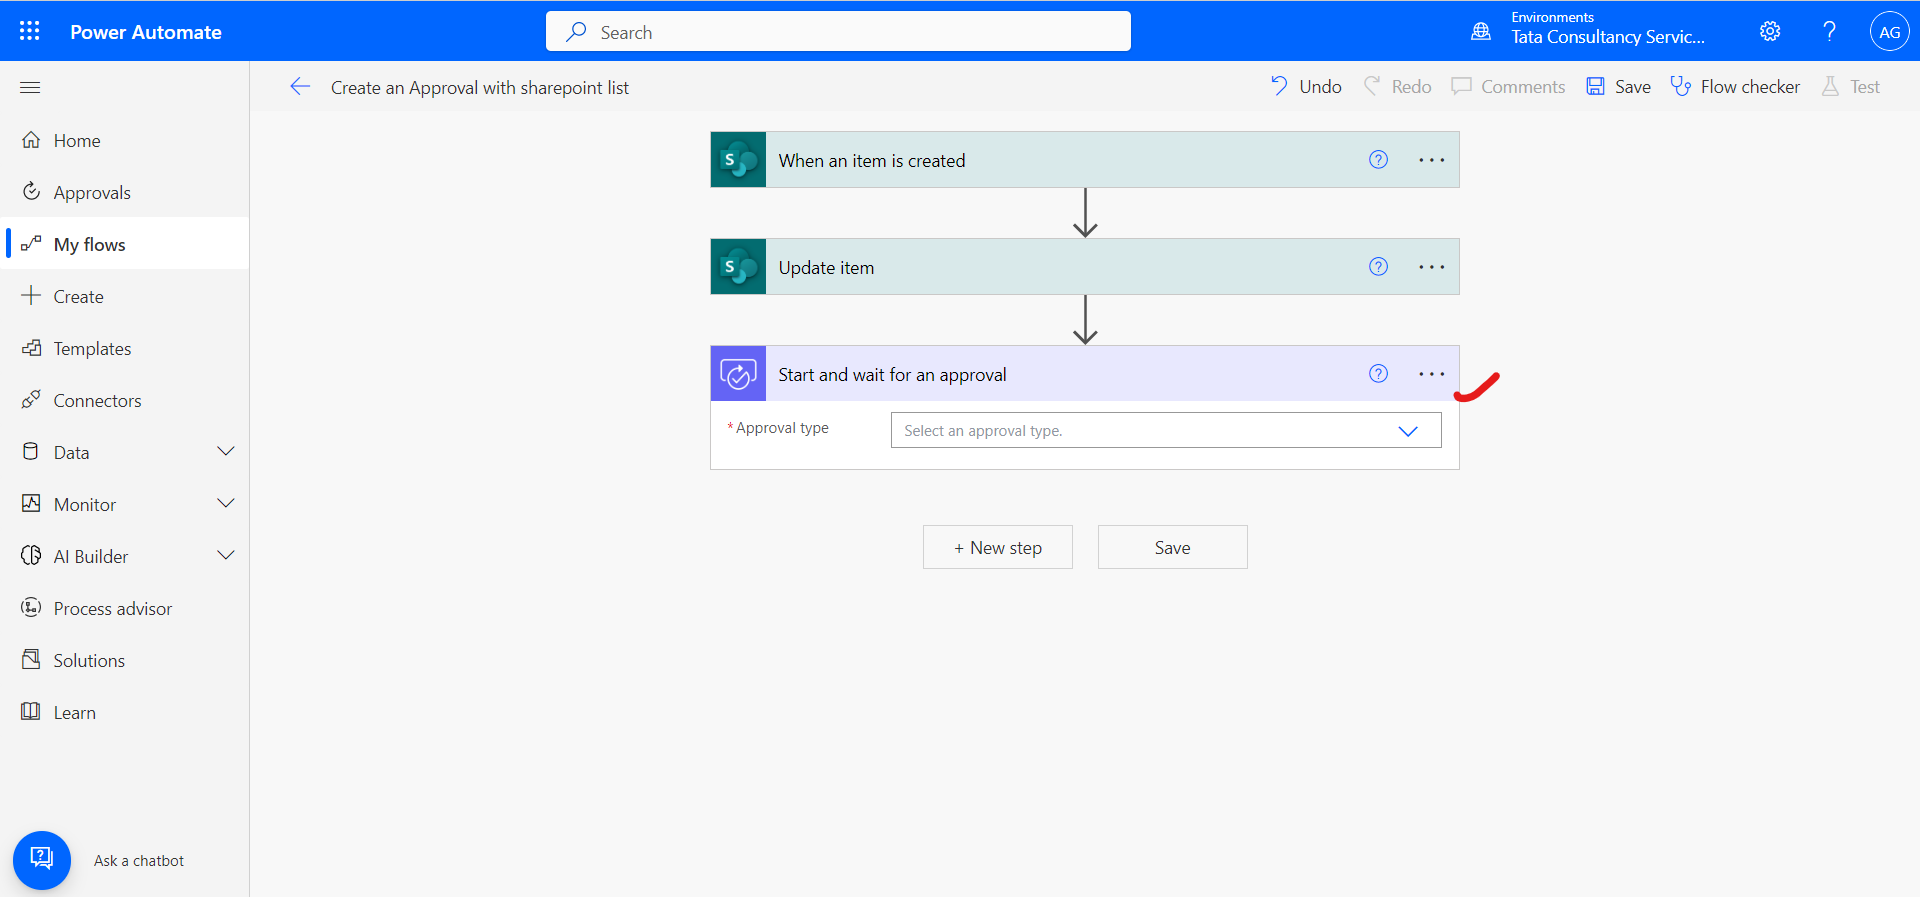
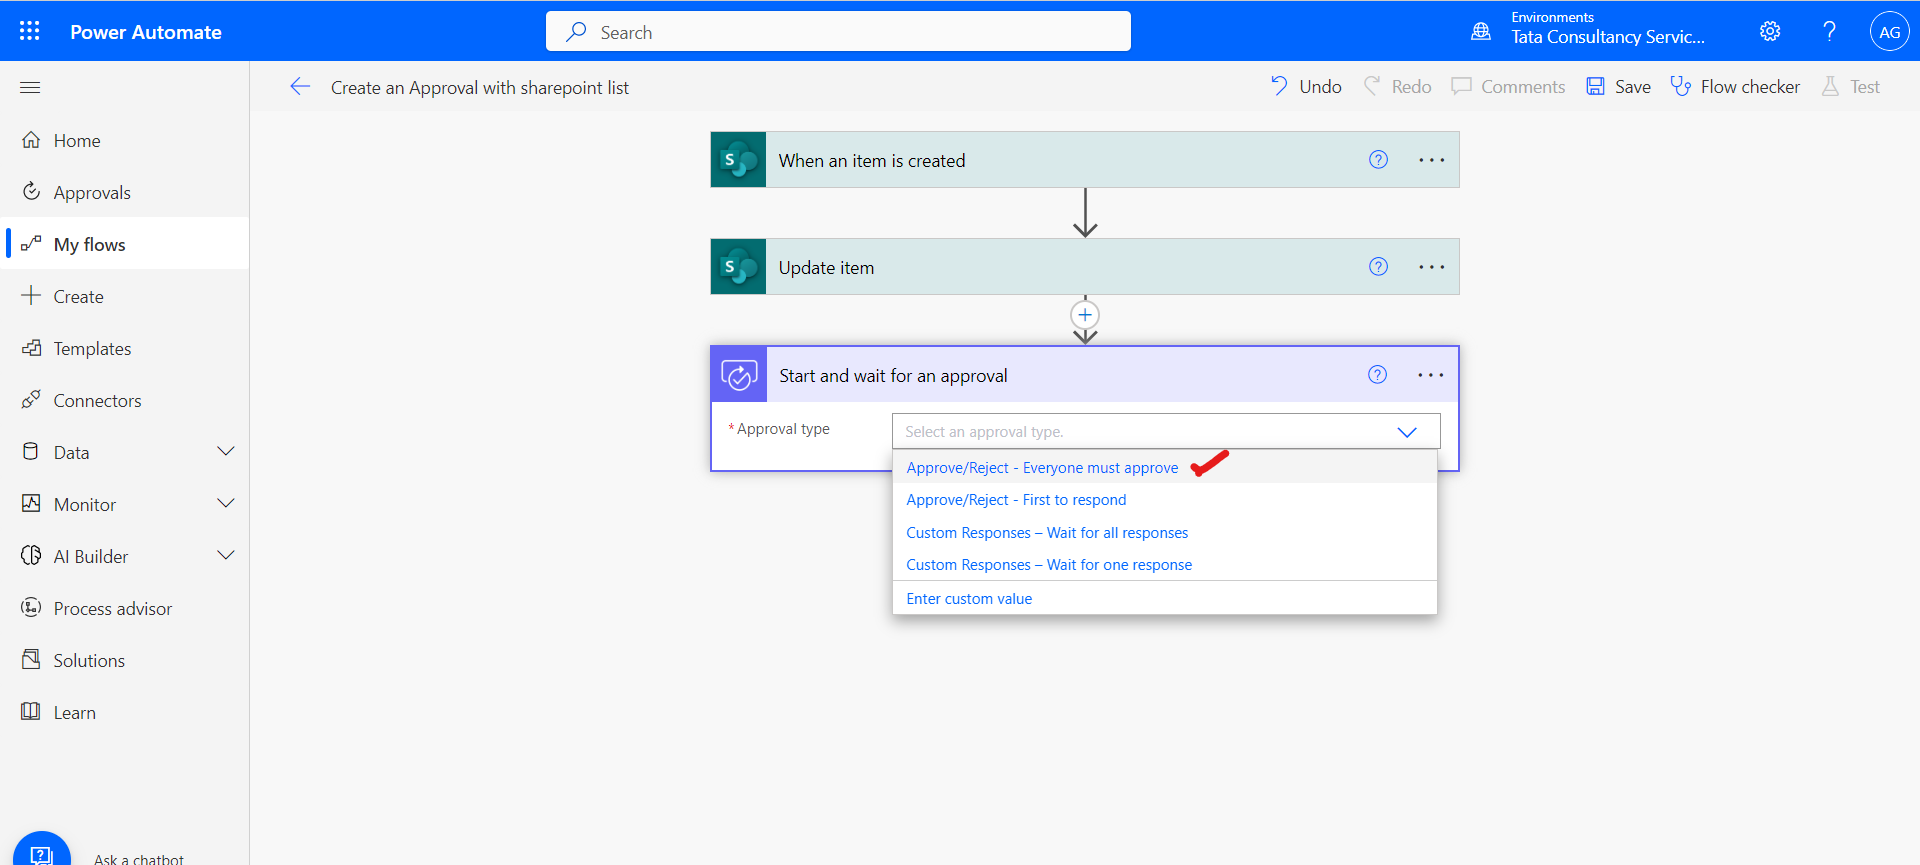
Step 6: Now it’s time to select the Approval type.
There are four approval types we can use.
| Approval type | Behavior |
|---|---|
| Approve/Reject - Everyone must approve | All approvers are given two options: Approve or Reject. A response is needed from each approver before the flow run is completed. The actions that follow the Start and wait for an approval action run after all the approvers respond, or when a single rejection occurs. |
| Approve/Reject - First to respond | Assigned approvers are given two options: Approve or Reject. Approval or rejection by any approver completes the request. The actions that follow the Start and wait for an approval action run after any one of the approvers gives approval. |
| Custom Responses - Wait for all responses | You define the options the assigned approvers can choose from. All approvers must respond to complete the process. |
| Custom Responses - Wait for one response | You define the options the assigned approvers can choose from. A response from any approver completes the process. |
After selecting the Approval type, other options are appeared according to the type selection.
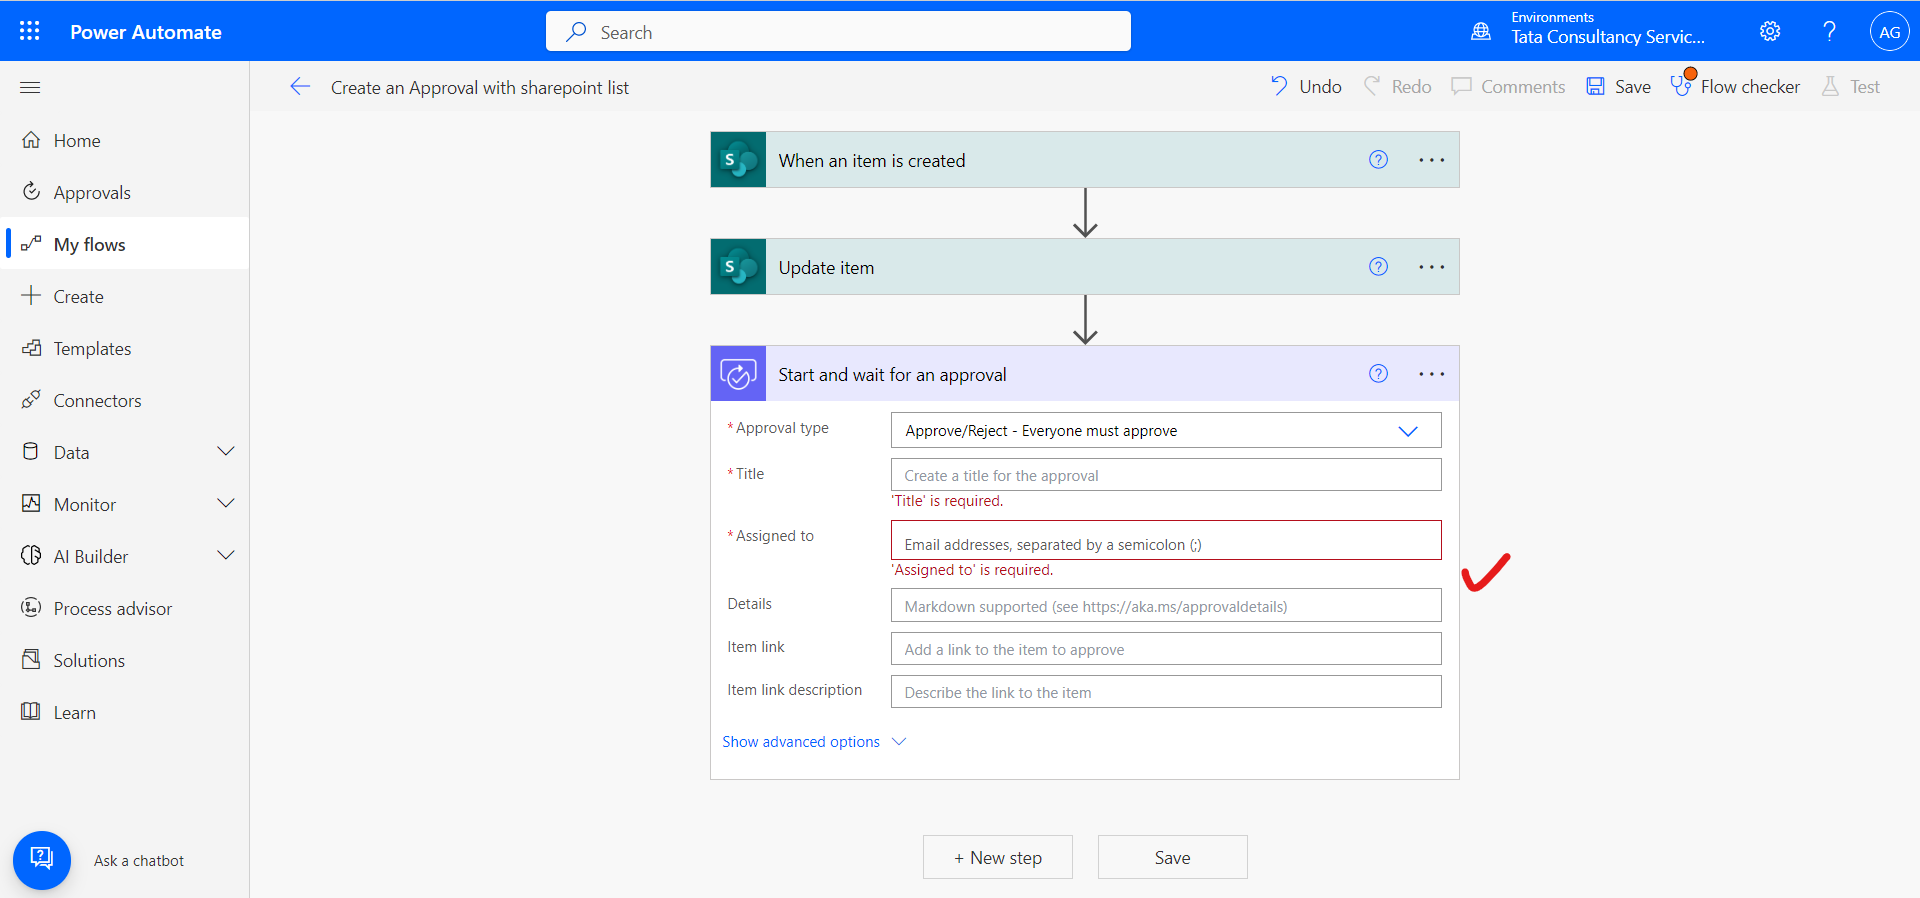
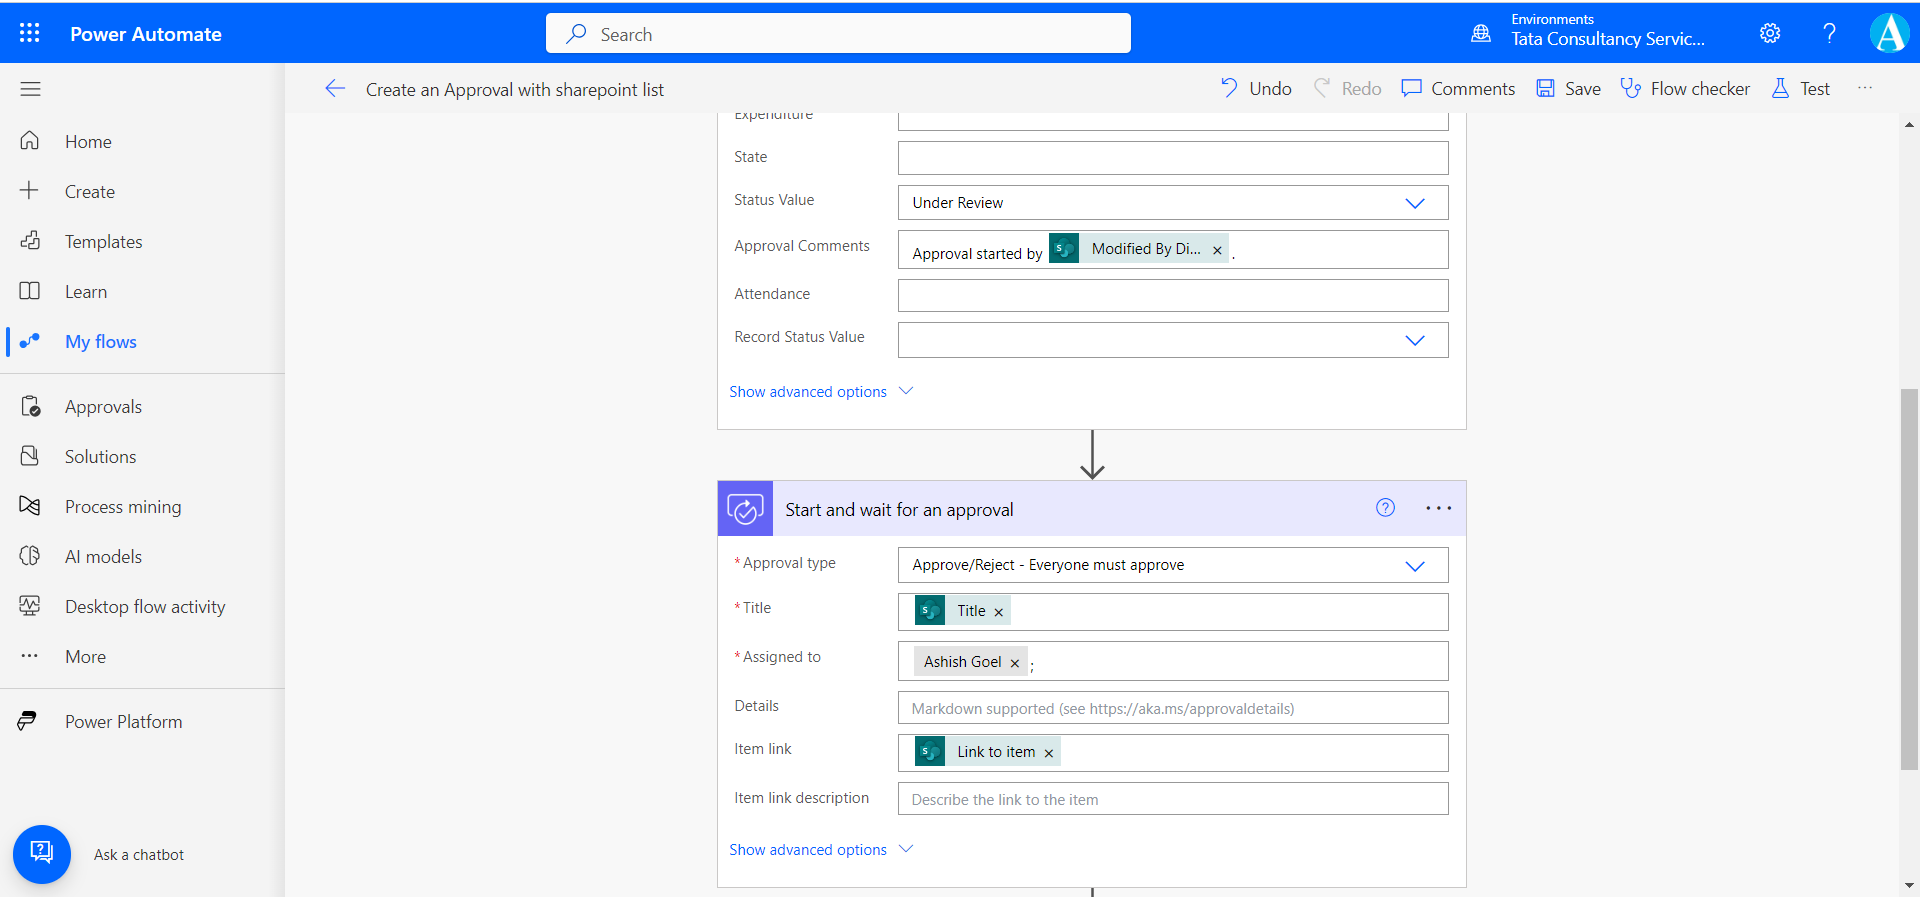
Specify the title of the mail in the Title field and specify the email address in the Assigned to field.
Step 7: Click on + New step, to add a new step.
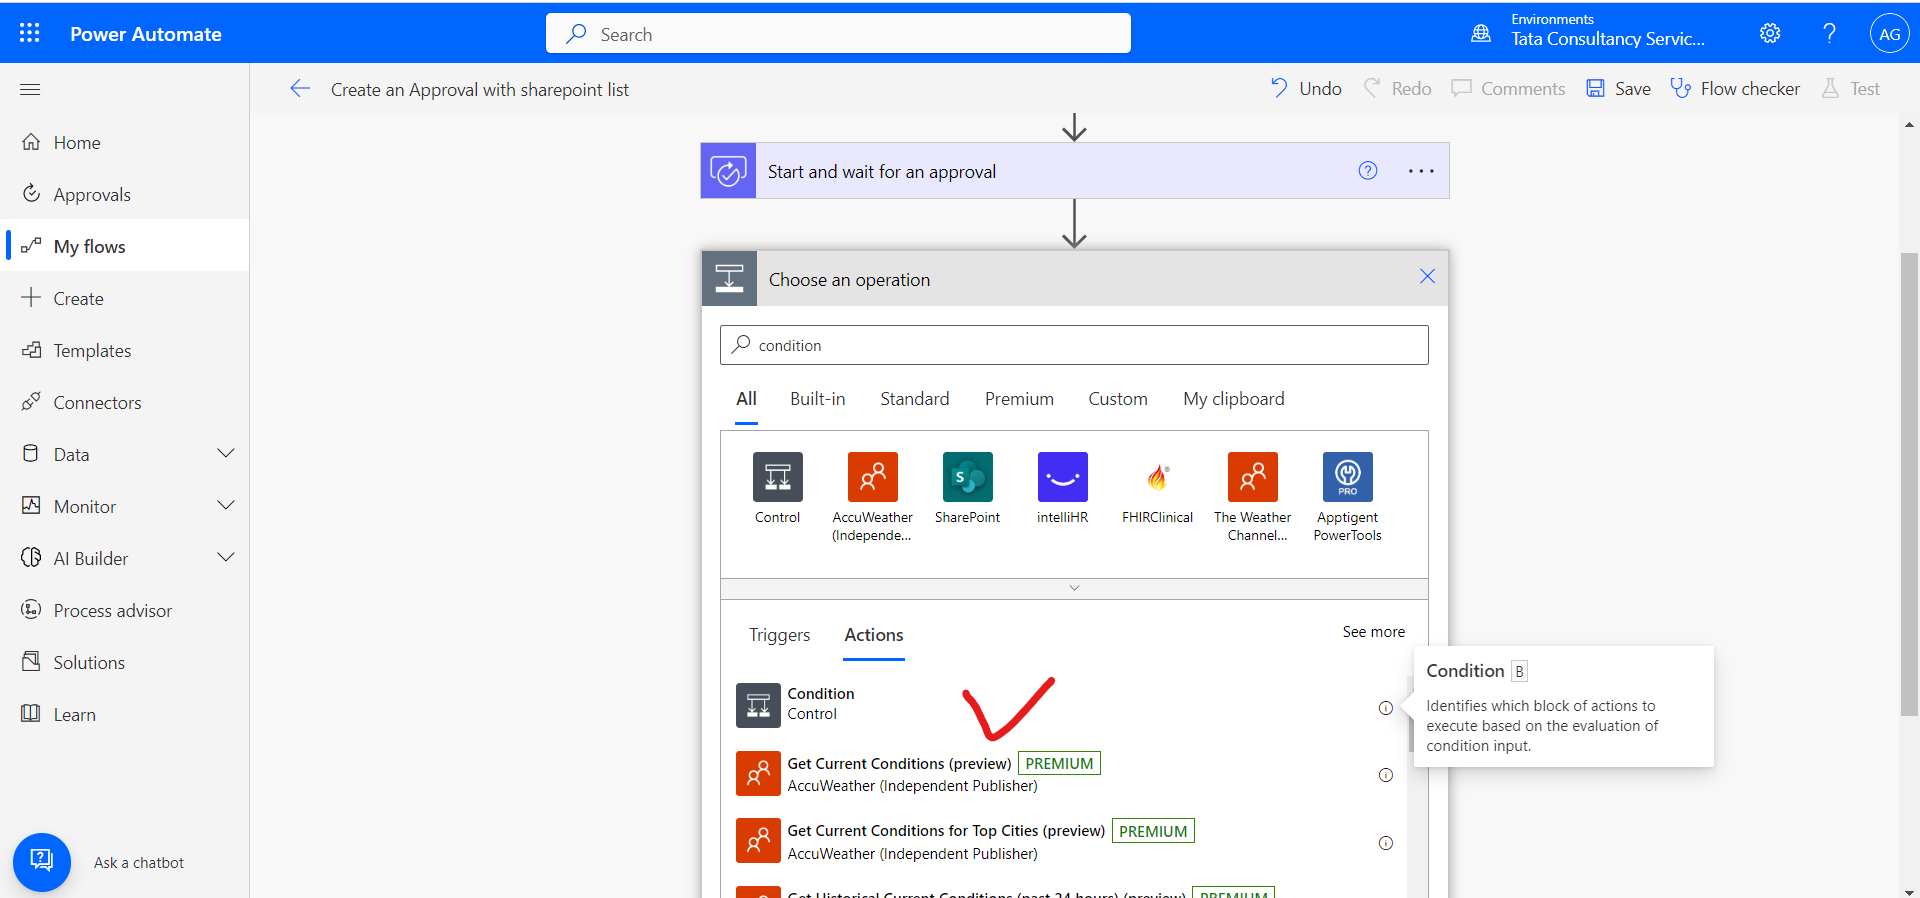
Select Condition control and select Outcome from the dynamic content.
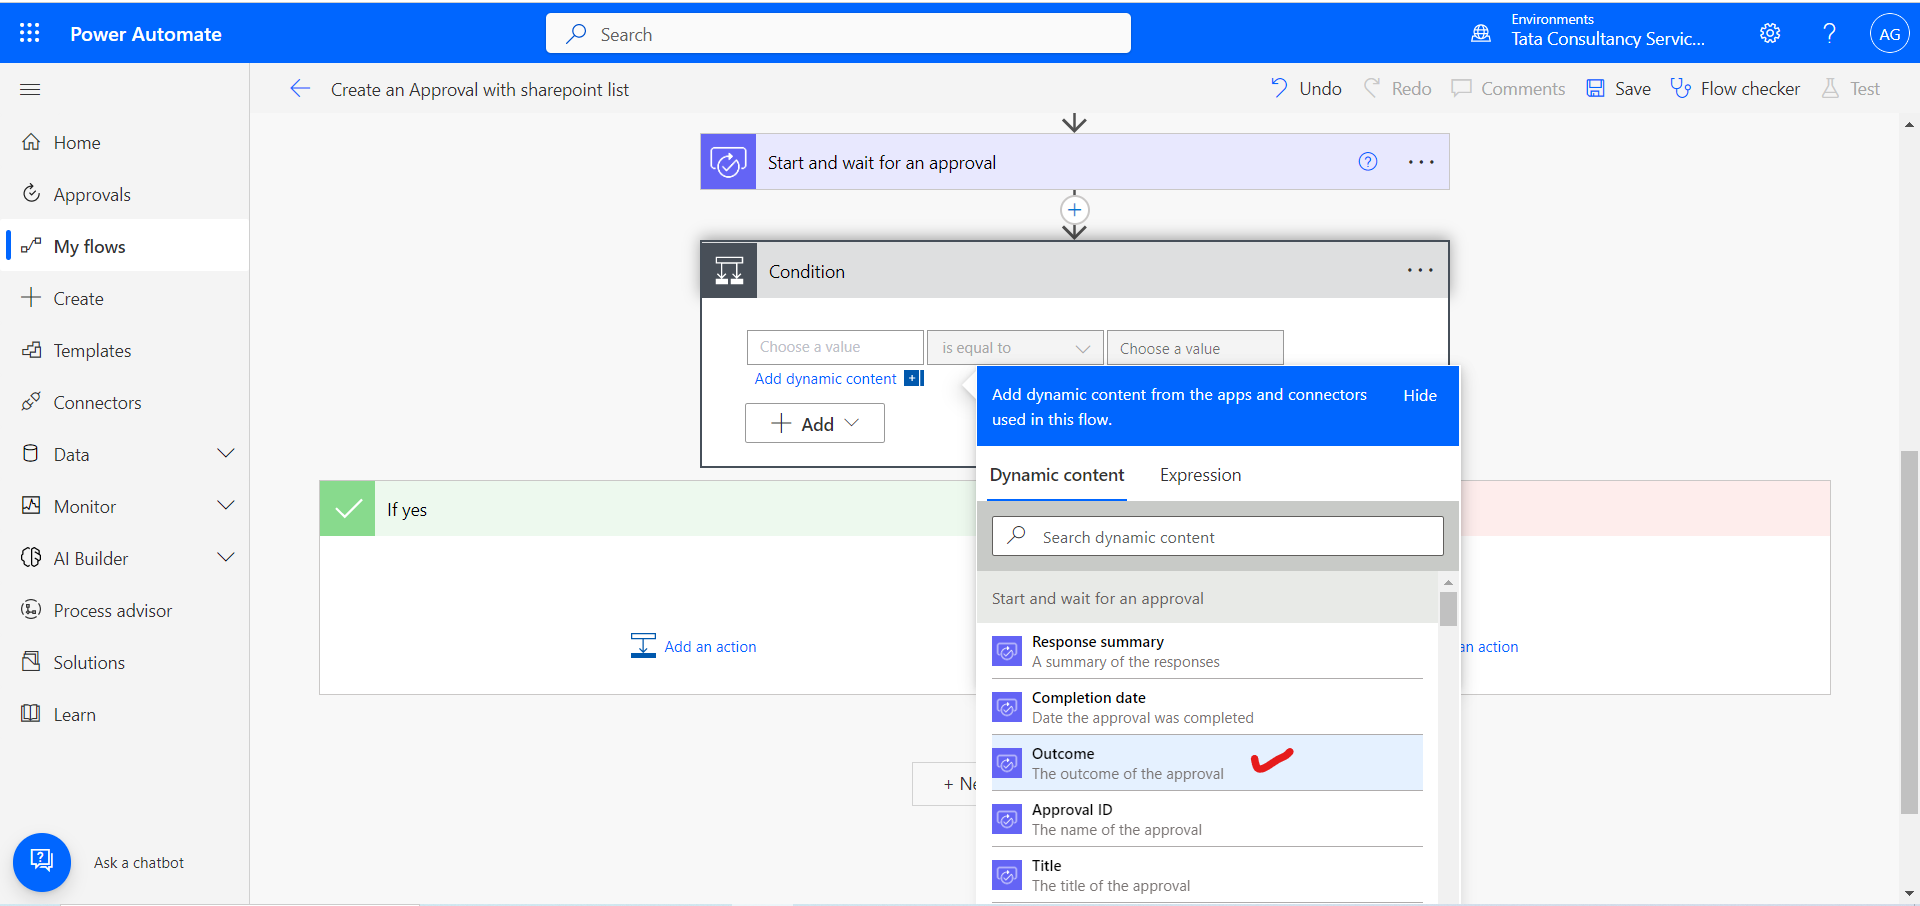
Step 8: Add an action “Update item” in the Yes section.
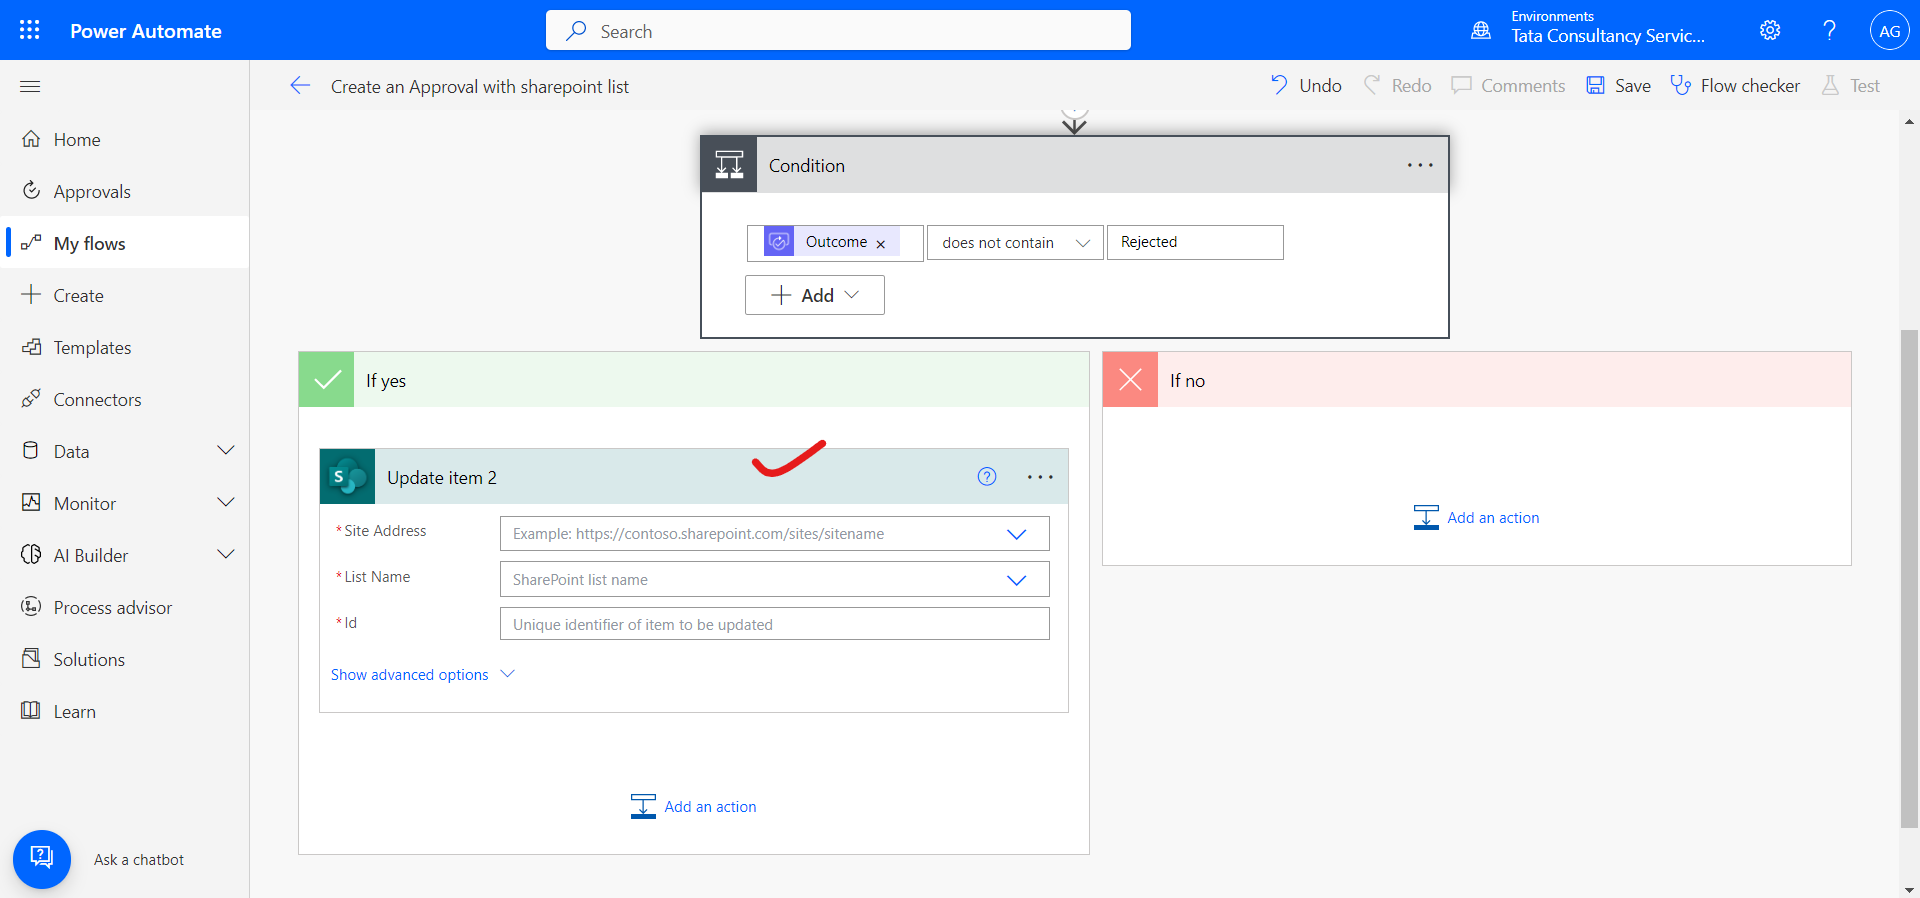
Update the Status value as Approved.
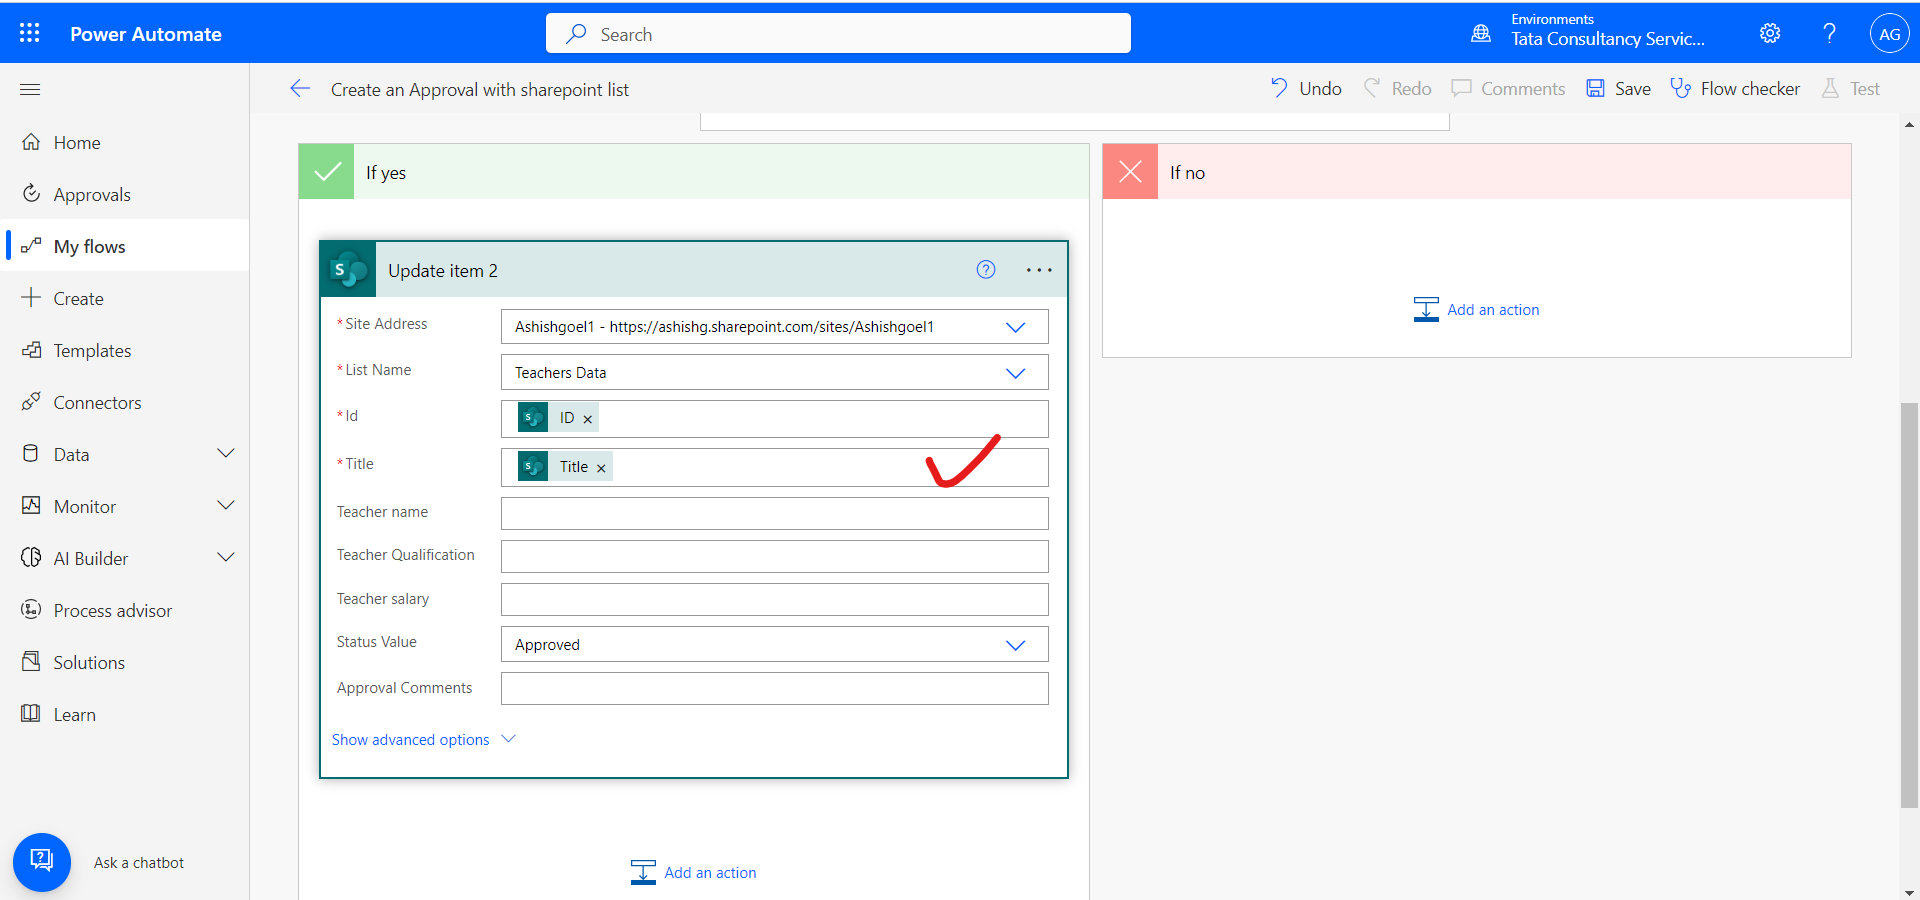
Copy the Update item action of the Yes side.
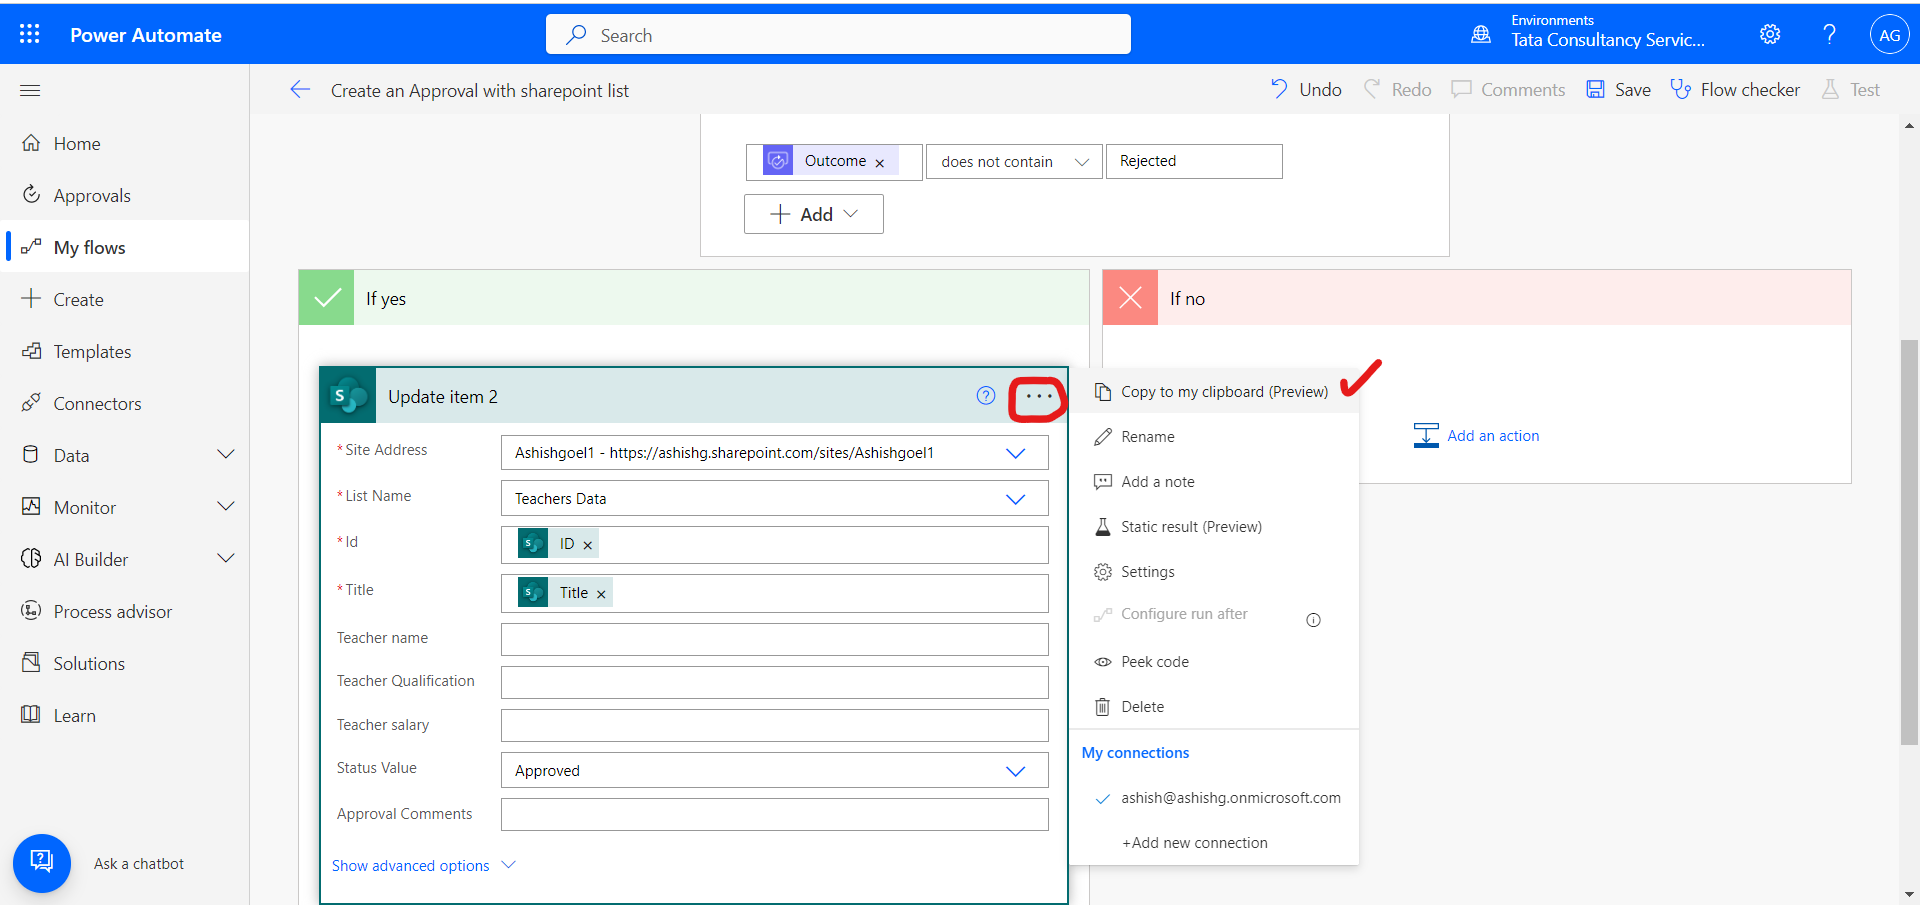
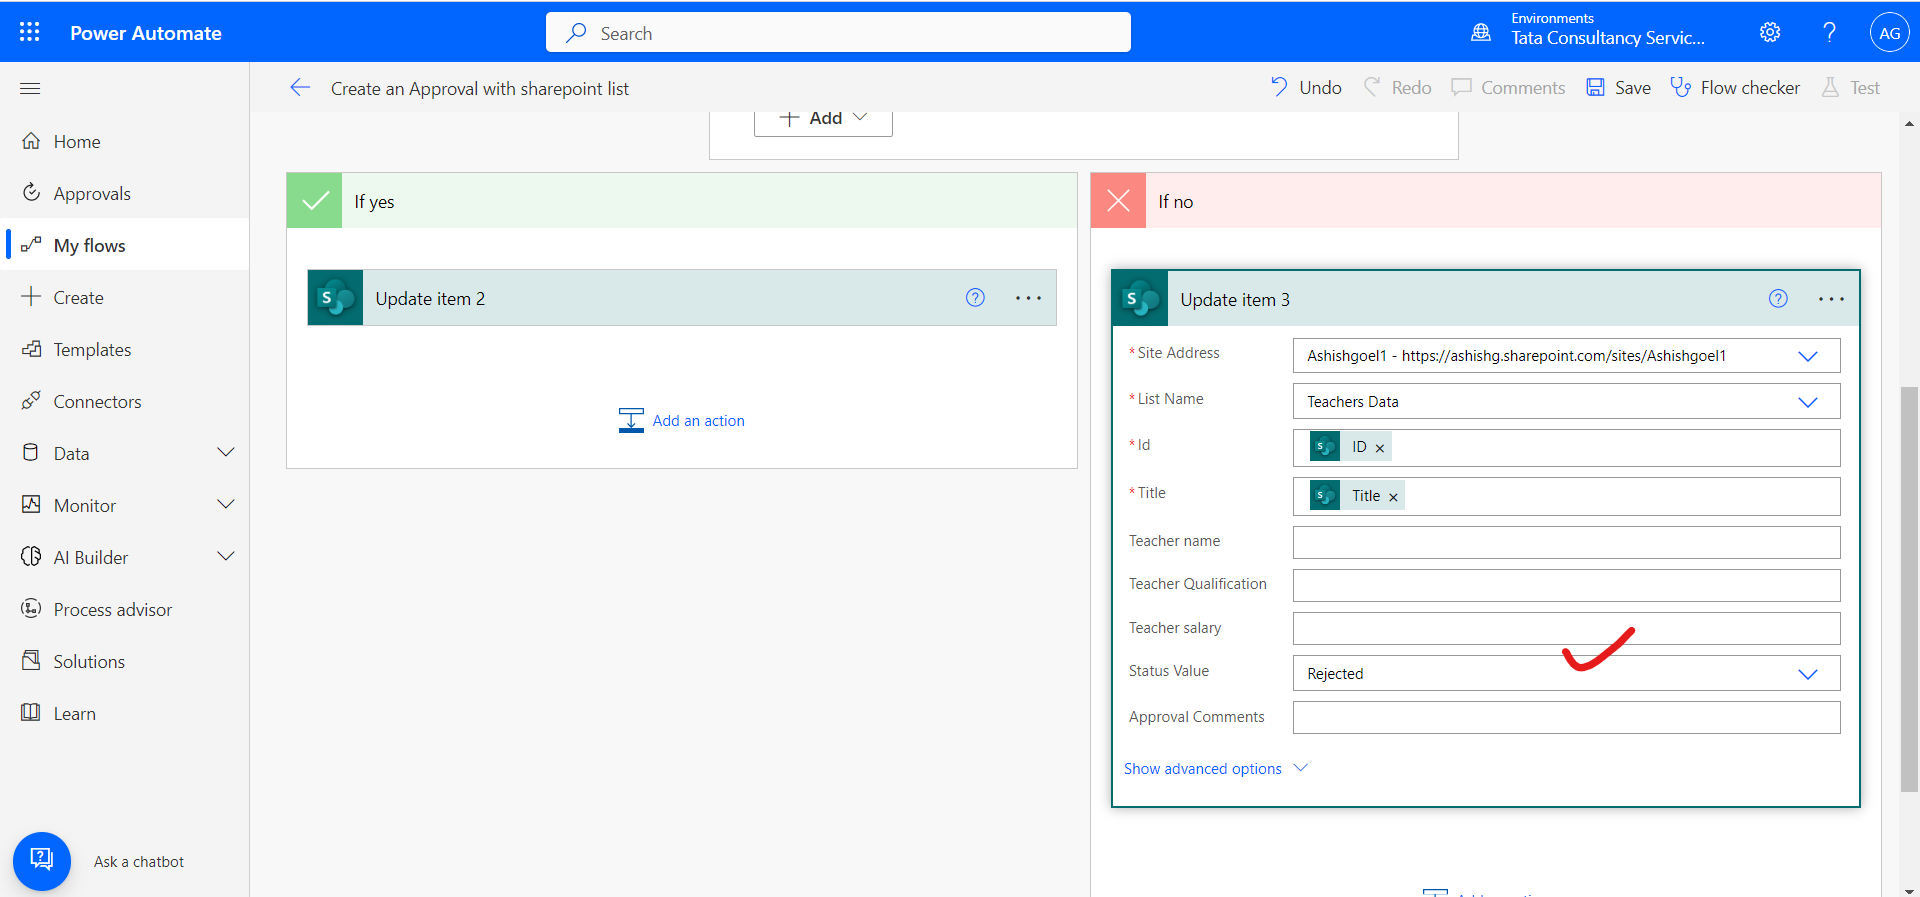
Click on Add an action in the No side of the condition control, then click on My clipboard.
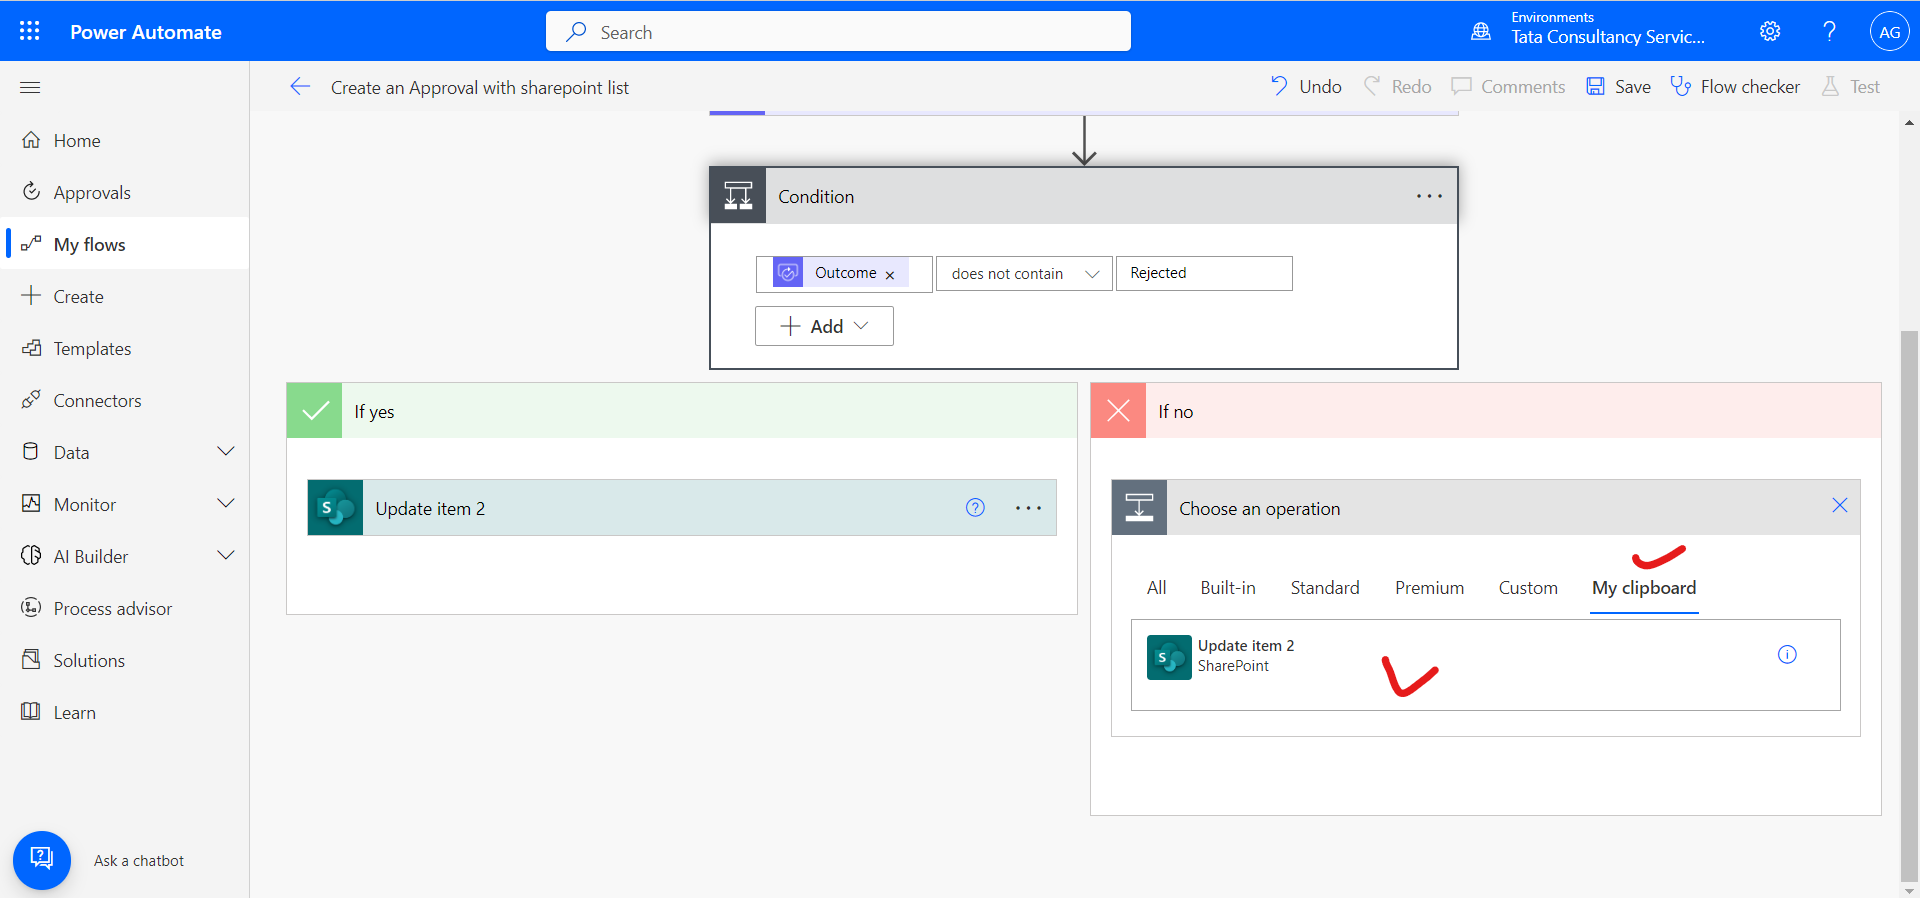
Change the Status value to Rejected.
Step 9: Now our flow is ready and it’s time to test the flow by creating an item in the list.
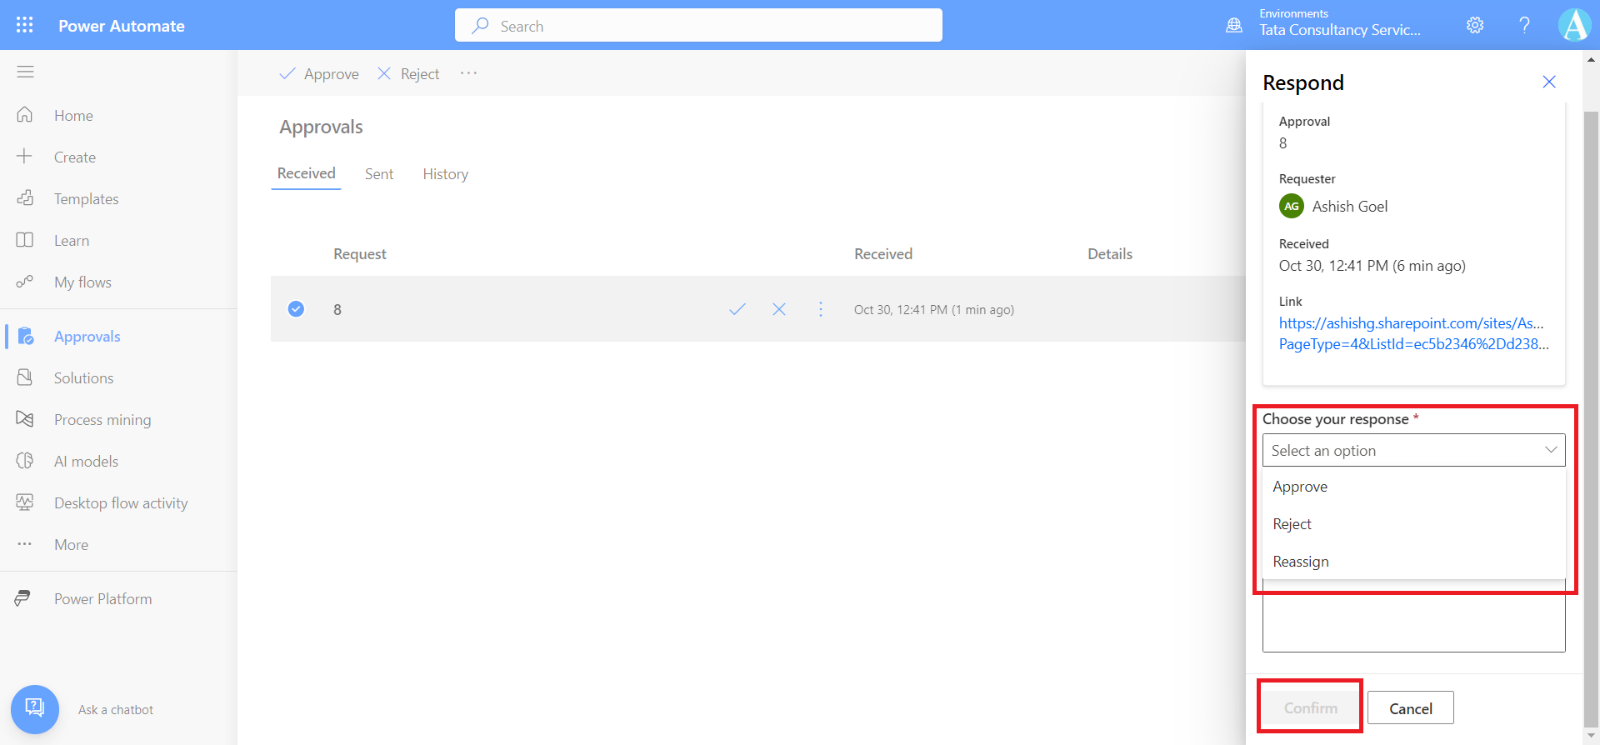
We can see the approvals in the Approvals section of the power automate.
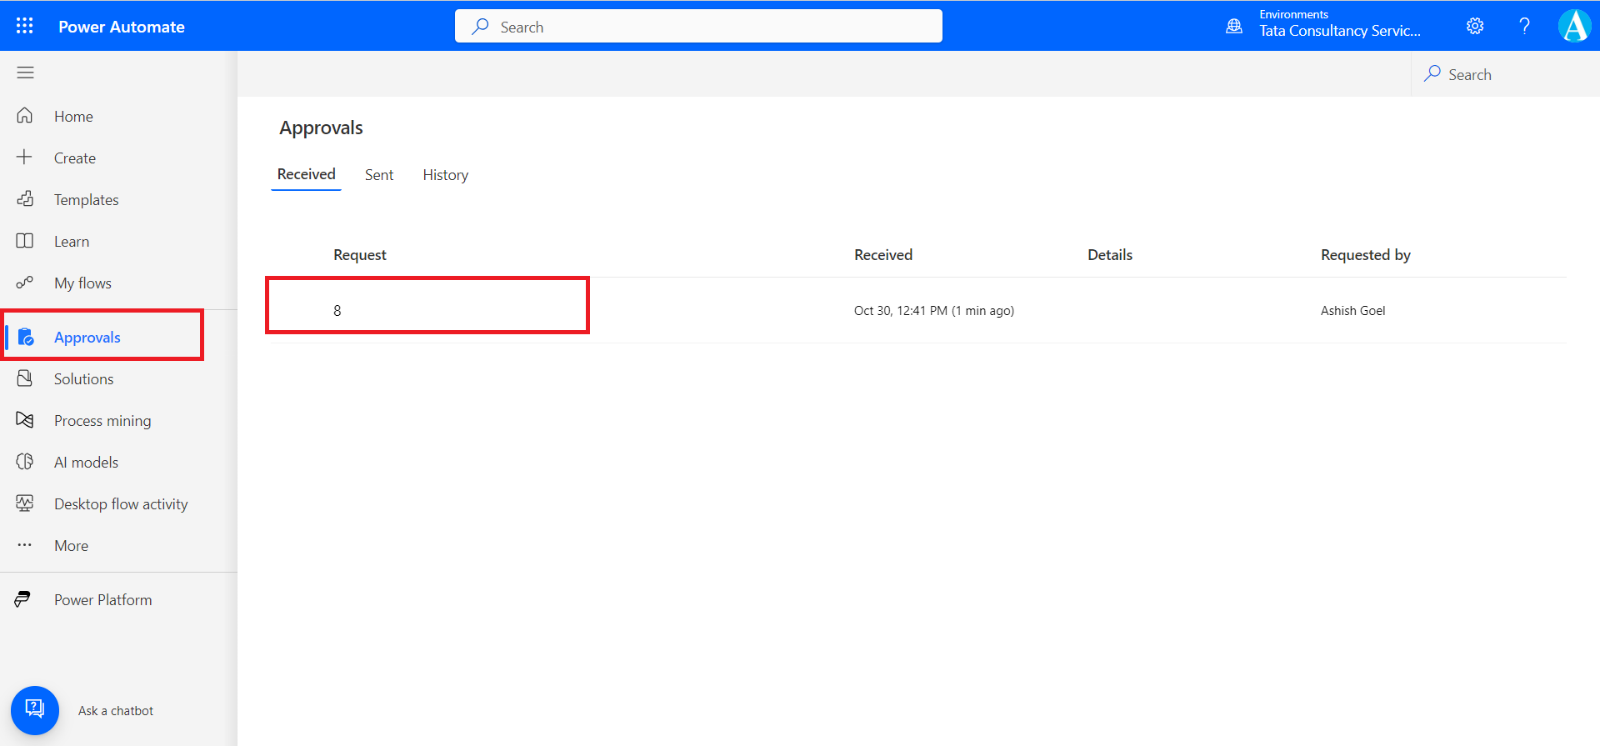
We have the option to Approve, Reject and Reassign.
