Create a rule to automate a list or library
After we create a list or library in Sharepoint, we can create rules to automate tasks such as sending someone a notification when data changes in the list or a new file is created in the library.
We can choose a condition that triggers the rule and the action that the rule will take.
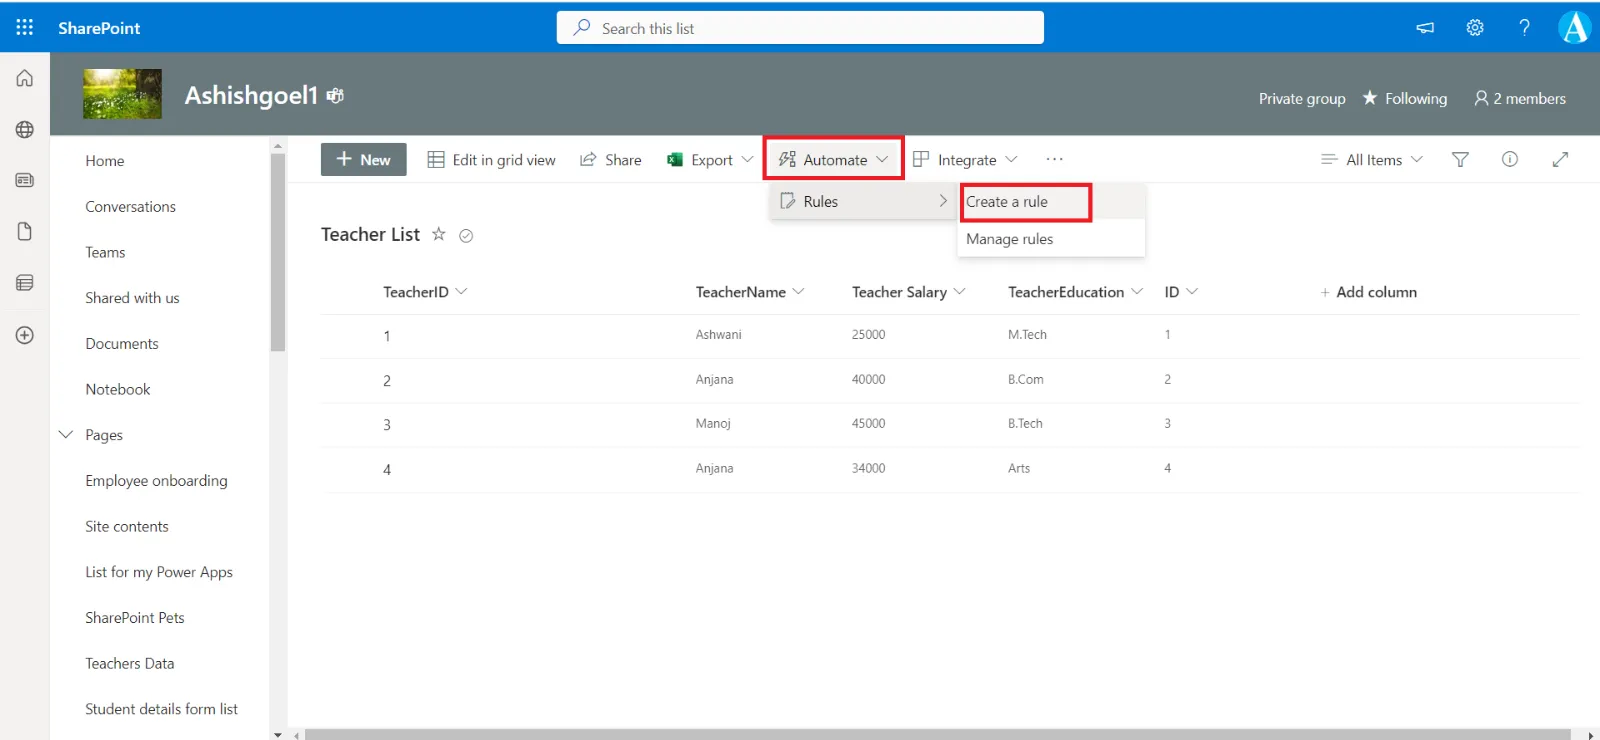
Step 1: With the list open in Sharepoint Lists, at the top of the page, select Automate and then Create a rule under Rules.
Step 2: Under Notify someone when, select a condition that triggers the rule. For example, A column changes.
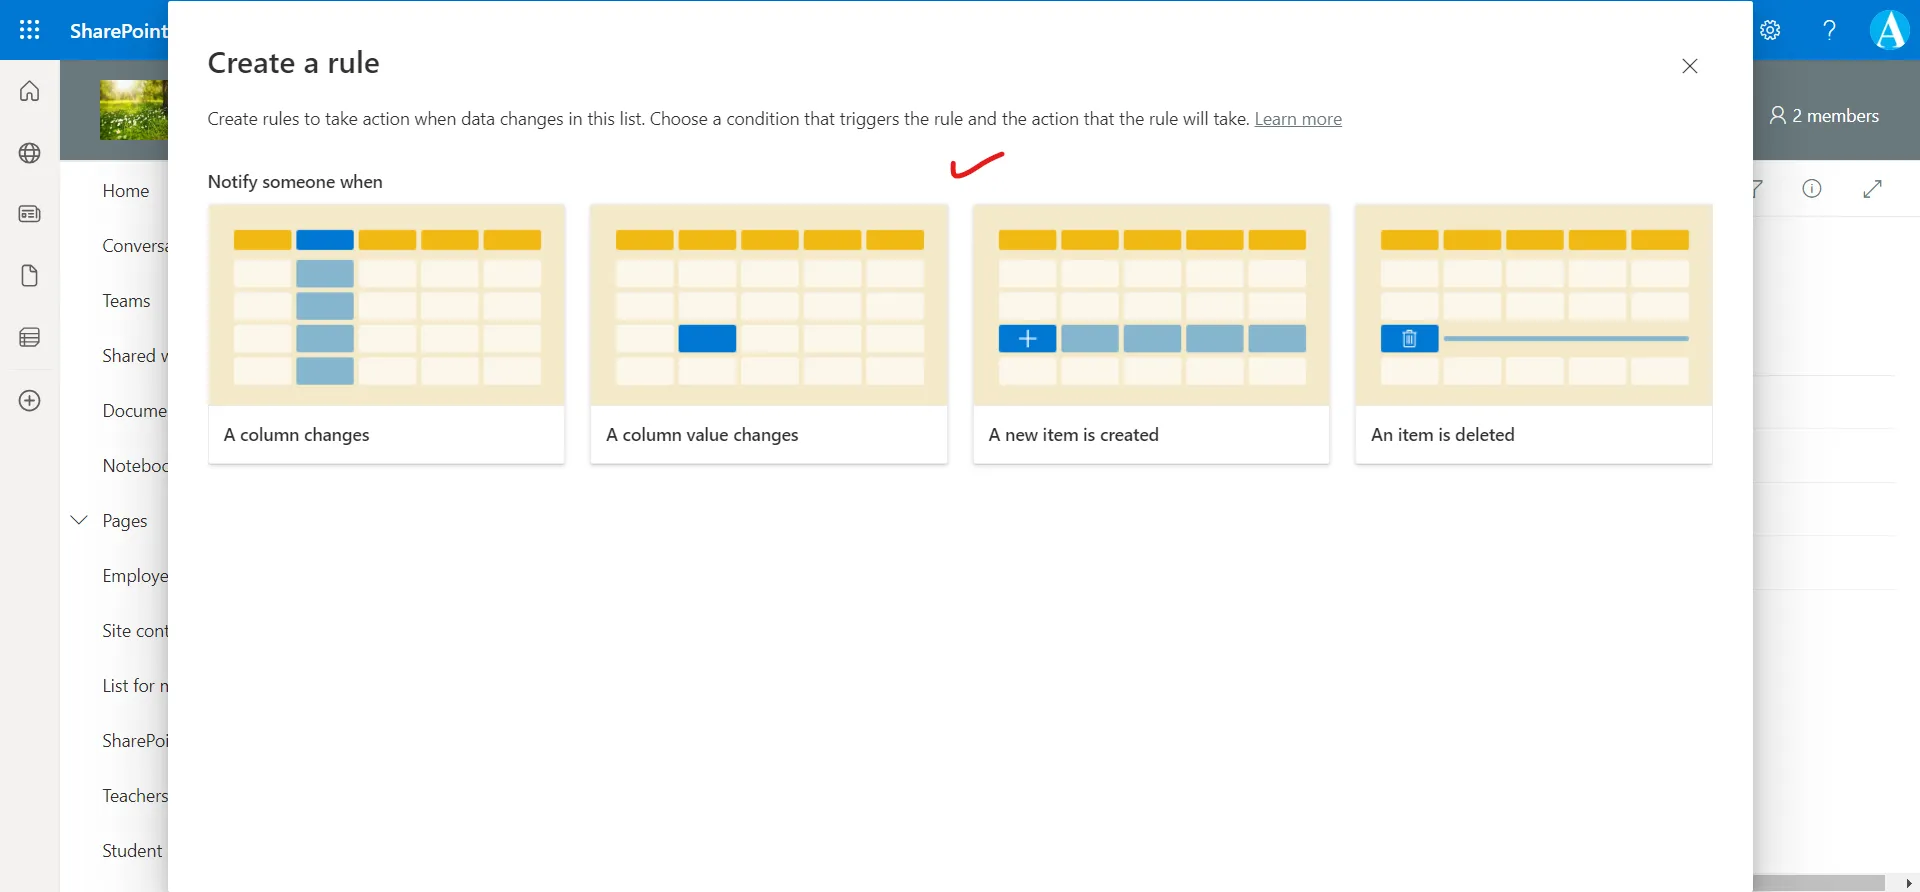
Note: We don't support creating a rule based on a multi-line text column.
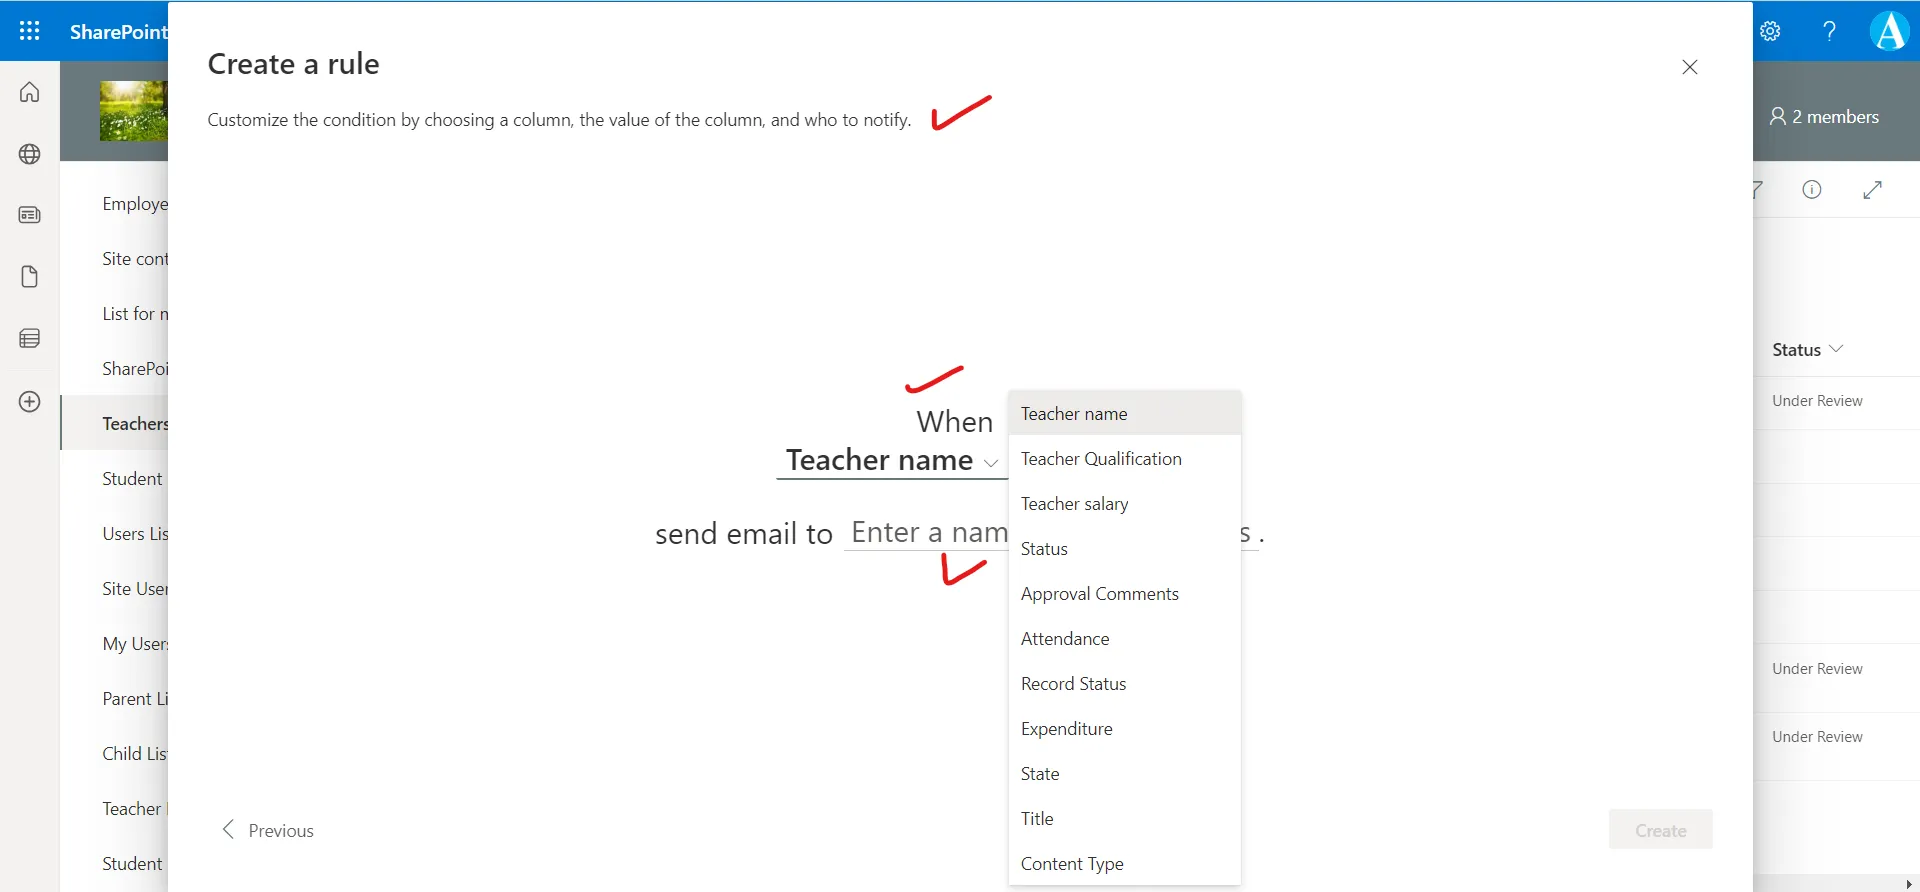
Step 3: Select the name of the column, and whom to notify on Create a rule.
In send email to section, we have the option to select Me, Created By, and Modified By. (We can specify a person, or multiple individuals, but not a group email address.)
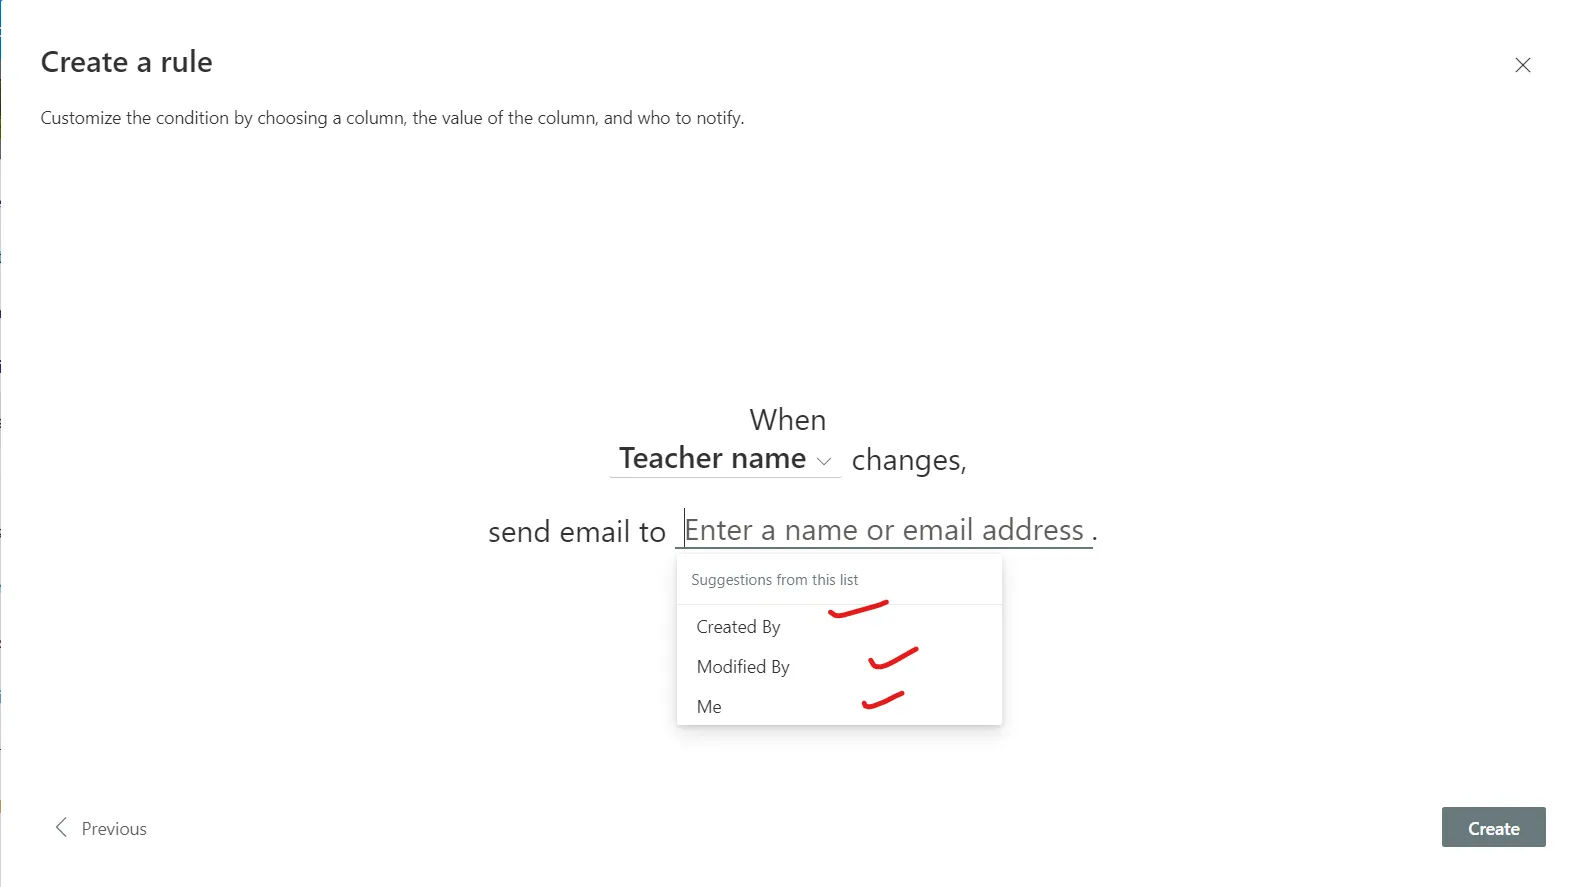
Step 4: After this select Create, to create the rule.
Step 5: We can see our completed rule on the Manage rules page, and the rule will be turned on. Notification emails are sent from the email address of the person who created the rule.
On Manage rules page we can edit, delete, or otherwise manage a rule. To turn off the rule, select the On slider to turn it off.
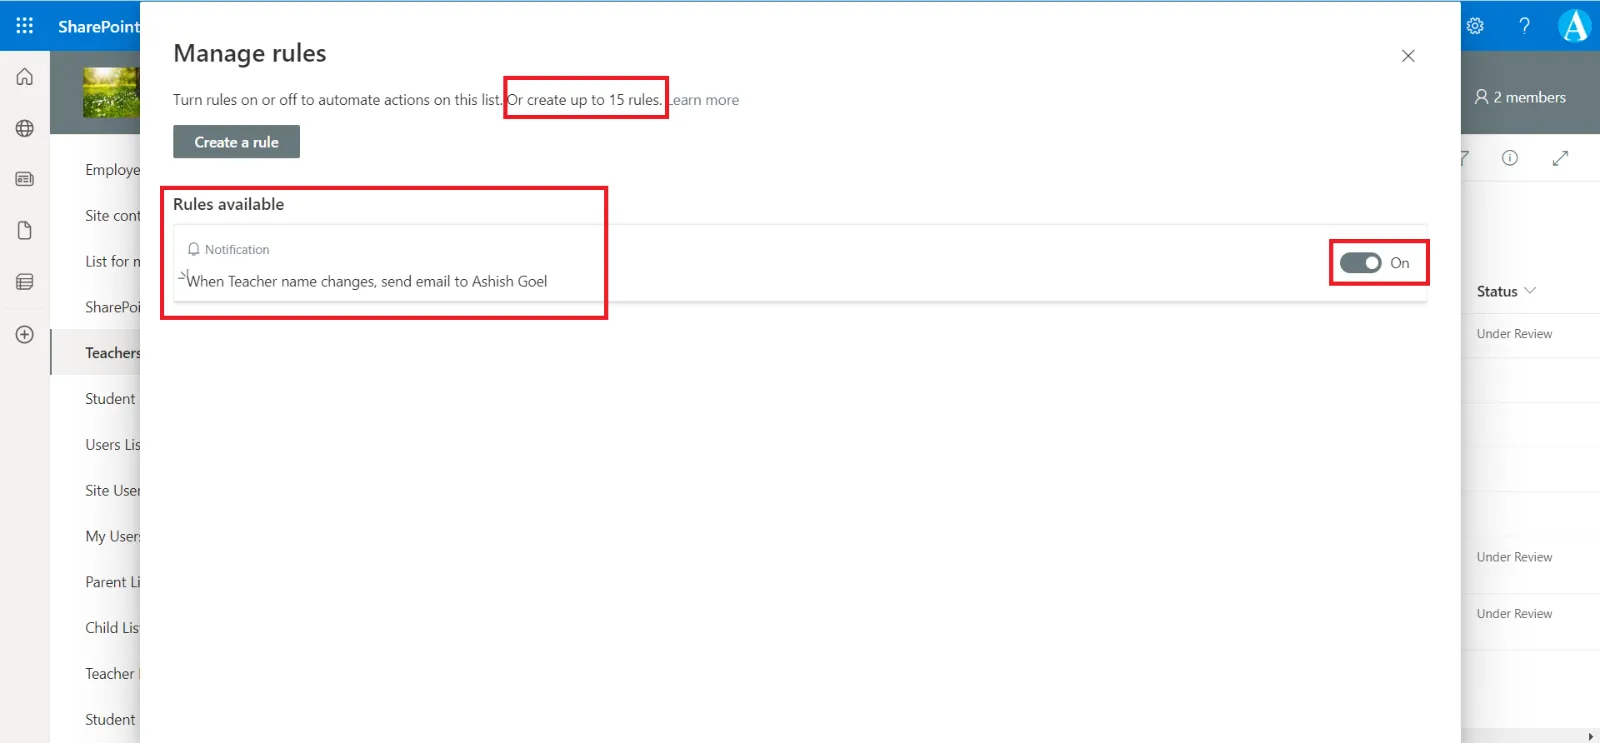
To edit a rule, click on the rule and then edit it and click on Save to save the changes.
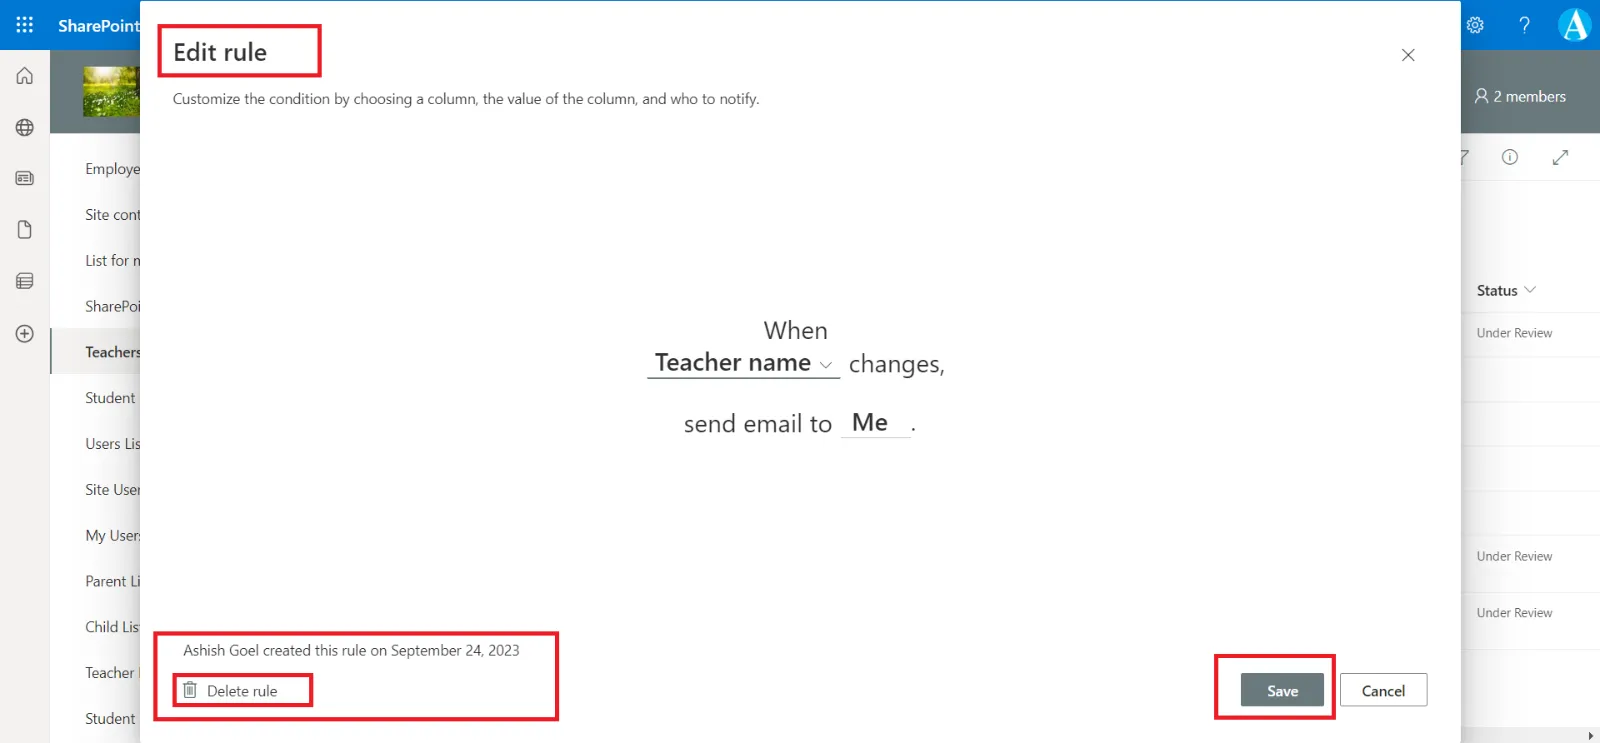
If we want to delete the rule click on Delete rule on the Edit rule pane.
Note: To manage rules, we must have “Edit" permission to the library or list.