Share Power Automate flows
When we create a new Microsoft Power Automate cloud flow, we are the only one who can view, edit, and run it. By sharing a cloud flow, we can allow other users within our organization to run or help edit our automation.
In this exercise, we will learn how we can share the power automate flow with the other users also.
1. Add an Owner
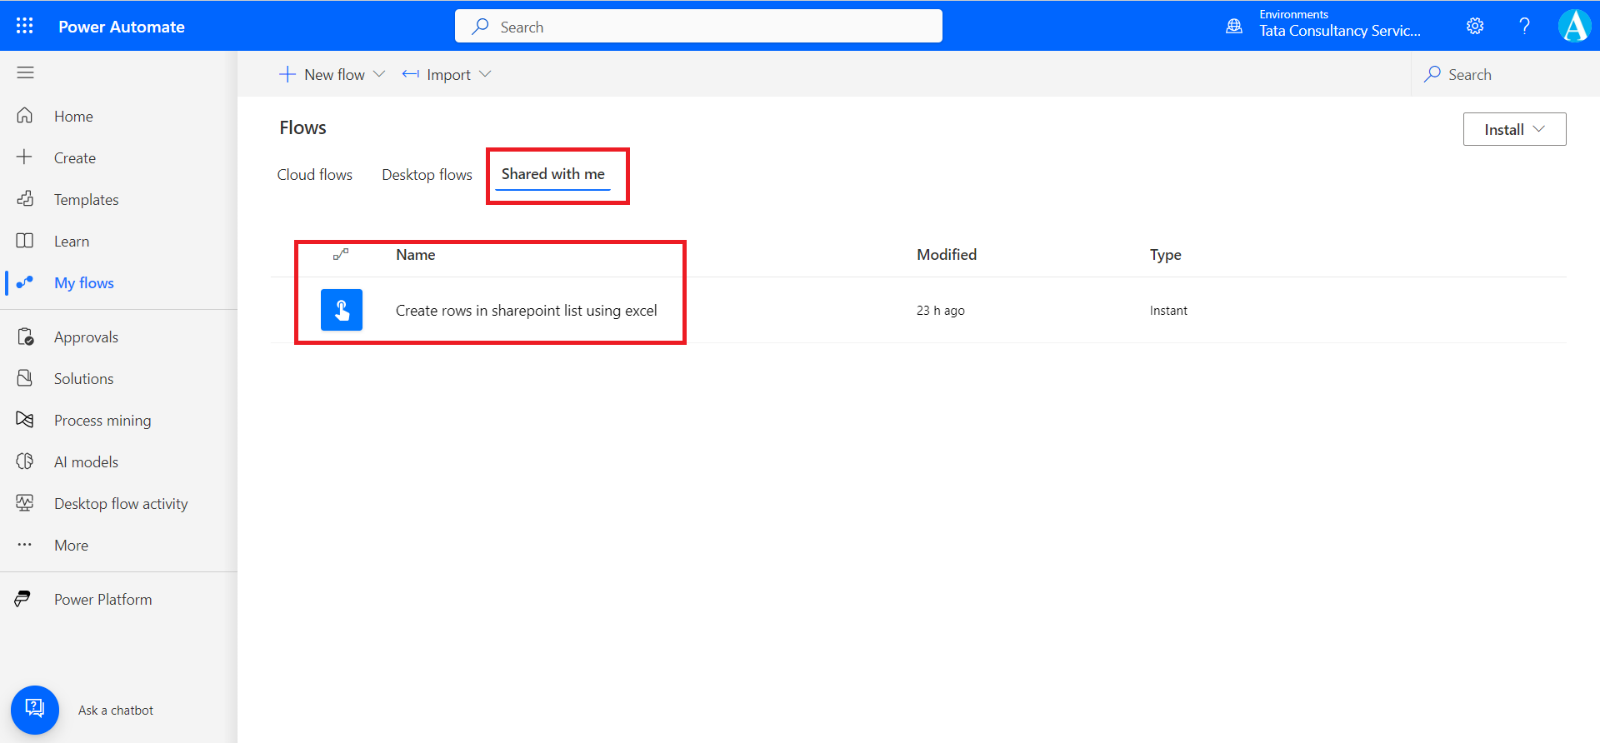
We can other owners to the power automate flow that we have prepared. After new owners are added to a flow, the flow appears on the Shared with me tab under My flows.
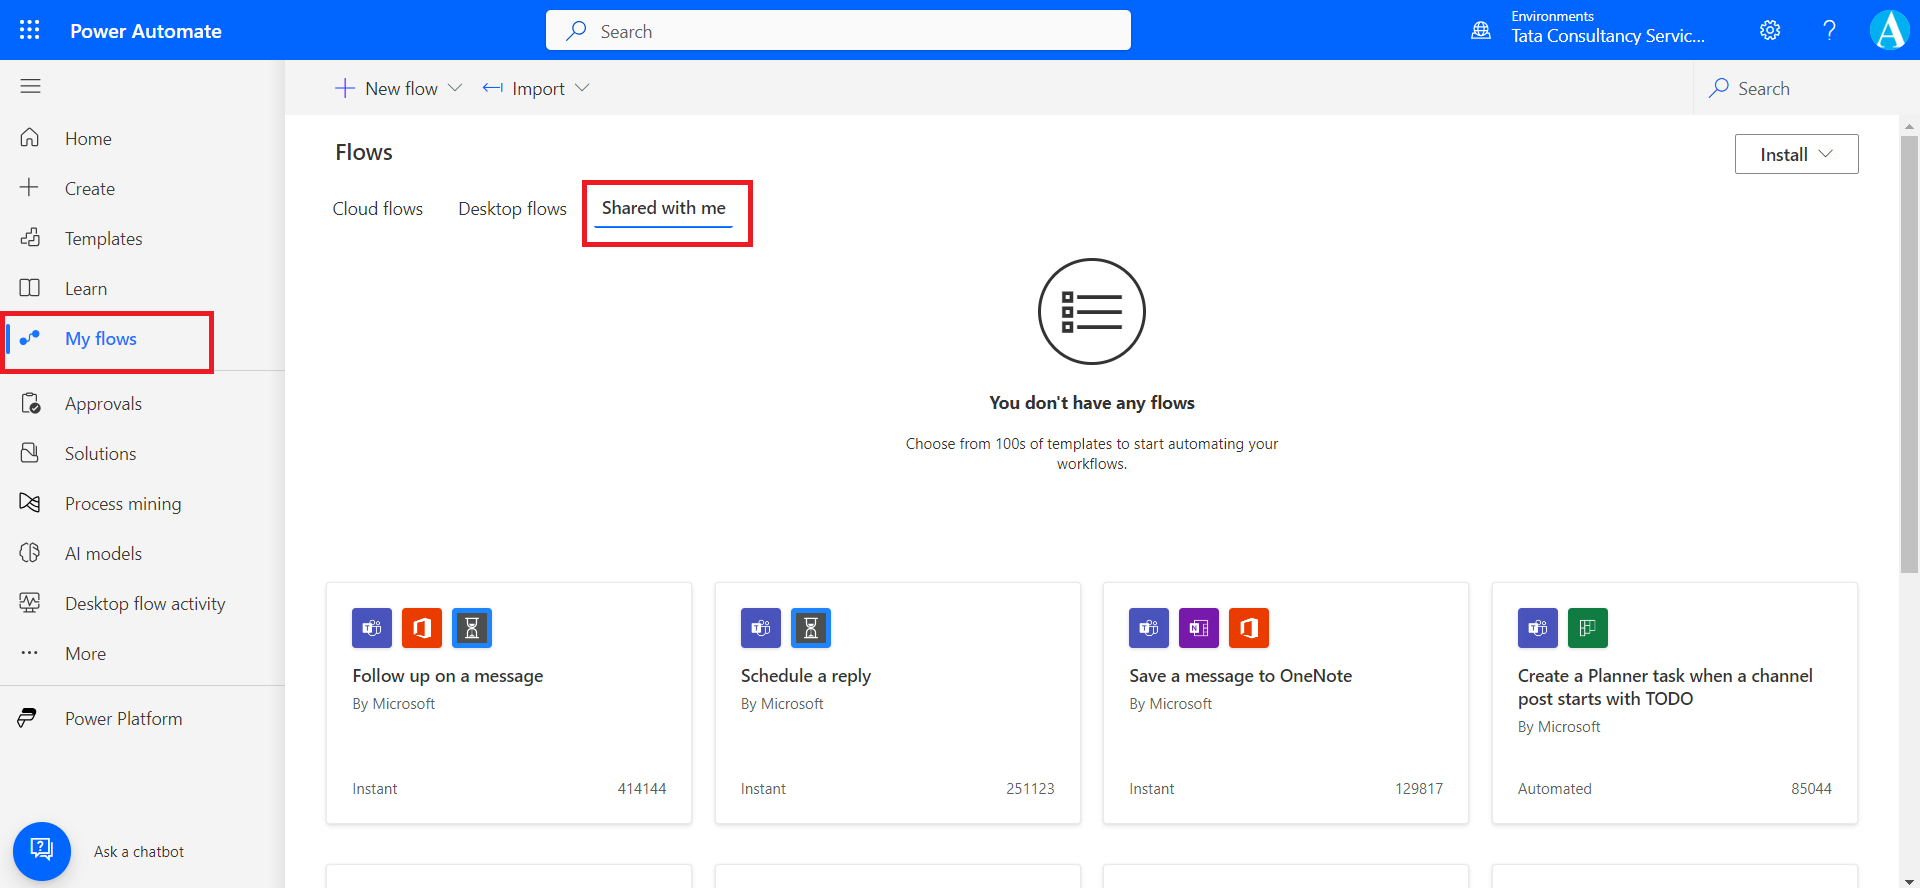
Step 1: Sign in to Power Automate using the organizational account.
Step 2: Select My flows.
Step 3: Select the Share button for the flow that we want to share.
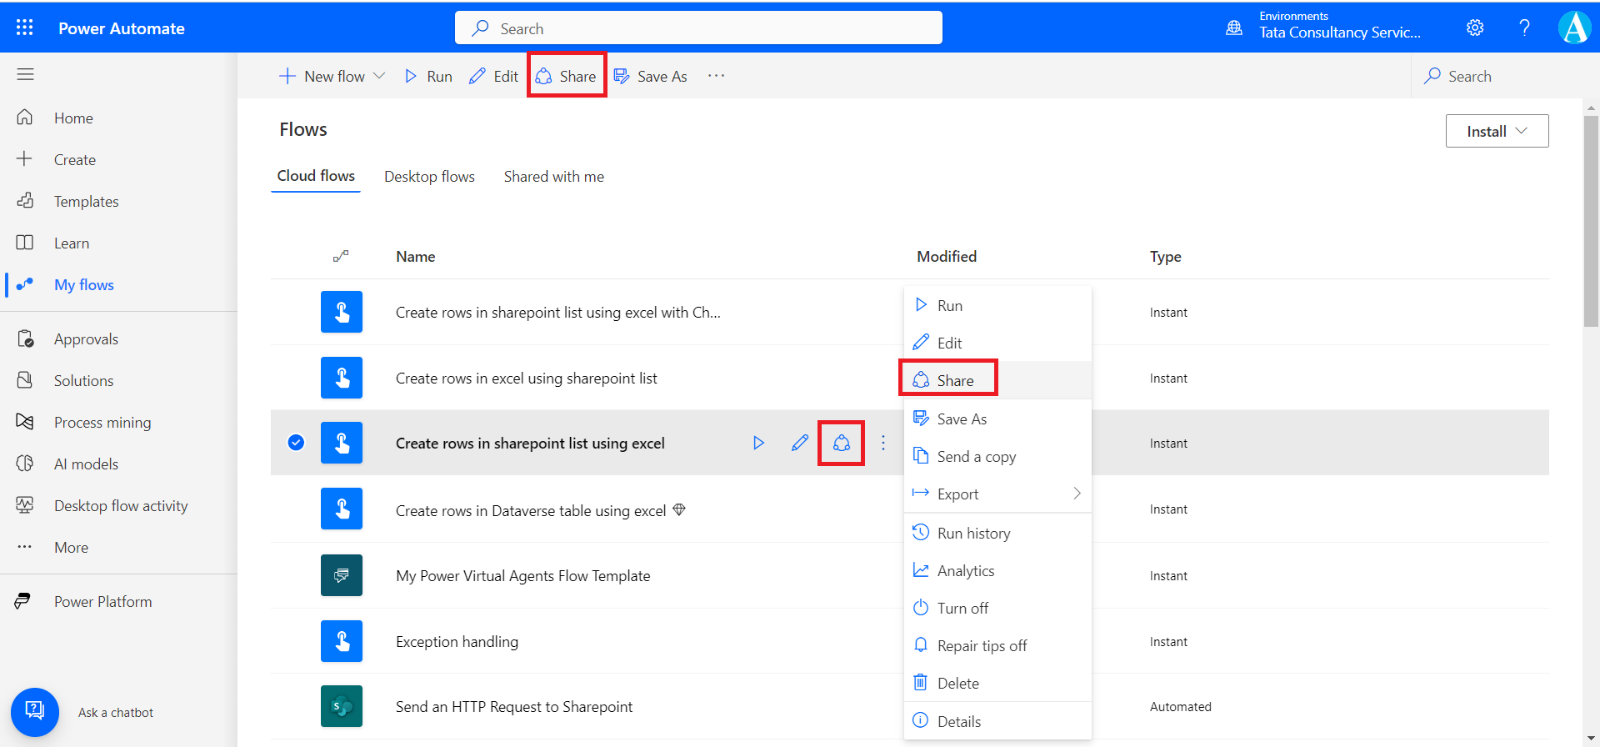
Step 4: In the Owners section, enter the name, email address, or group name of the person or group that we want to add as an owner.
Note: When we share it with a group, anyone who is a group member will become the flow co-owner automatically.
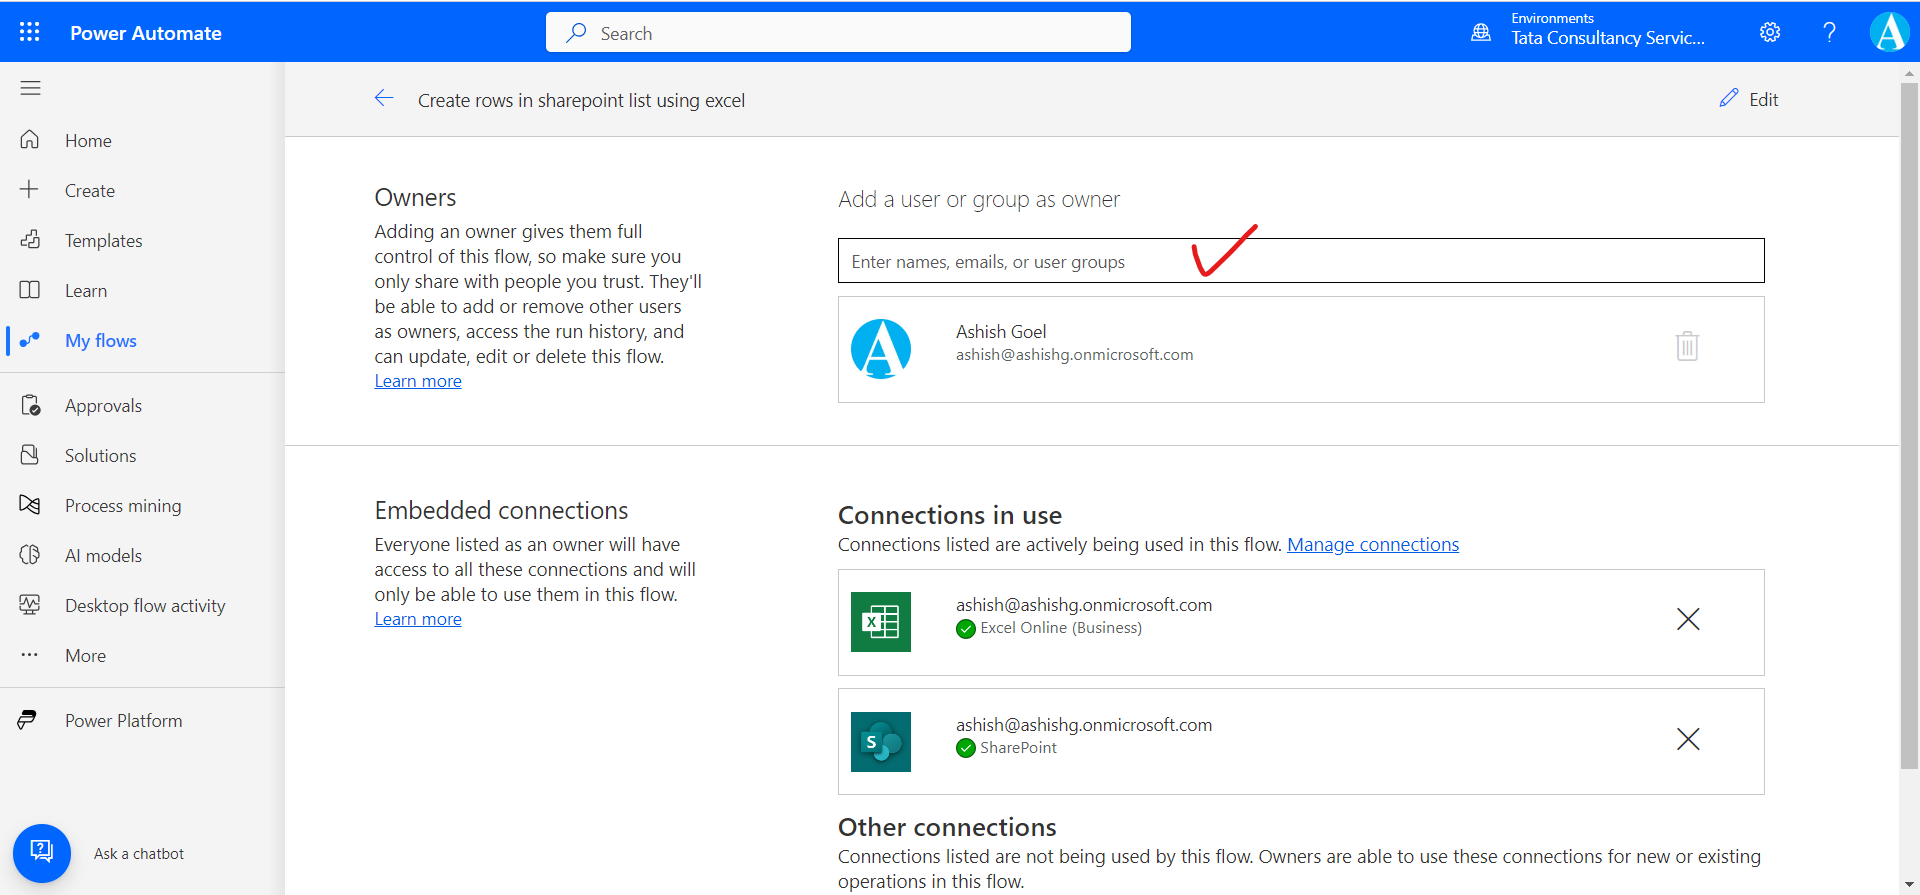
Owner Permissions Adding an owner to a cloud flow is the most common way to share a cloud flow. Any owner of a cloud flow can perform these actions:
- All owners of a shared flow can view its history,
- manage its properties, edit it,
- add and remove other owners of the flow (but not the flow's creator), and
- can delete the flow.
Considering that co-owners have full permissions, including deleting the flow, we should only add users whom we trust and need to perform these activities. If the flow is an instant flow and users only need to run the flow, it's better that we add them as run-only users instead of co-owners.
Advantage of Adding Owner The advantage of sharing the flow is if the creator of a shared flow leaves the organization, the other owners of the flow can continue to run it.
If we are the creator or an owner of a shared flow (the shared flow is nothing but one who has more than one owner), we will find it listed on the Shared with me tab in Power Automate. And it no longer appears on the Cloud flows tab.
Note: Users who have the Global Administrator and Microsoft Power Platform Administrator tenant roles can also manage the flow's owners, including adding themselves to the list.
2. Remove an owner
We can remove an owner from the flow, not the original owner of the flow. Original owner means the one who created the flow.
Step 1: On the Shared with me tab, select the Share button for the flow that we want to change.
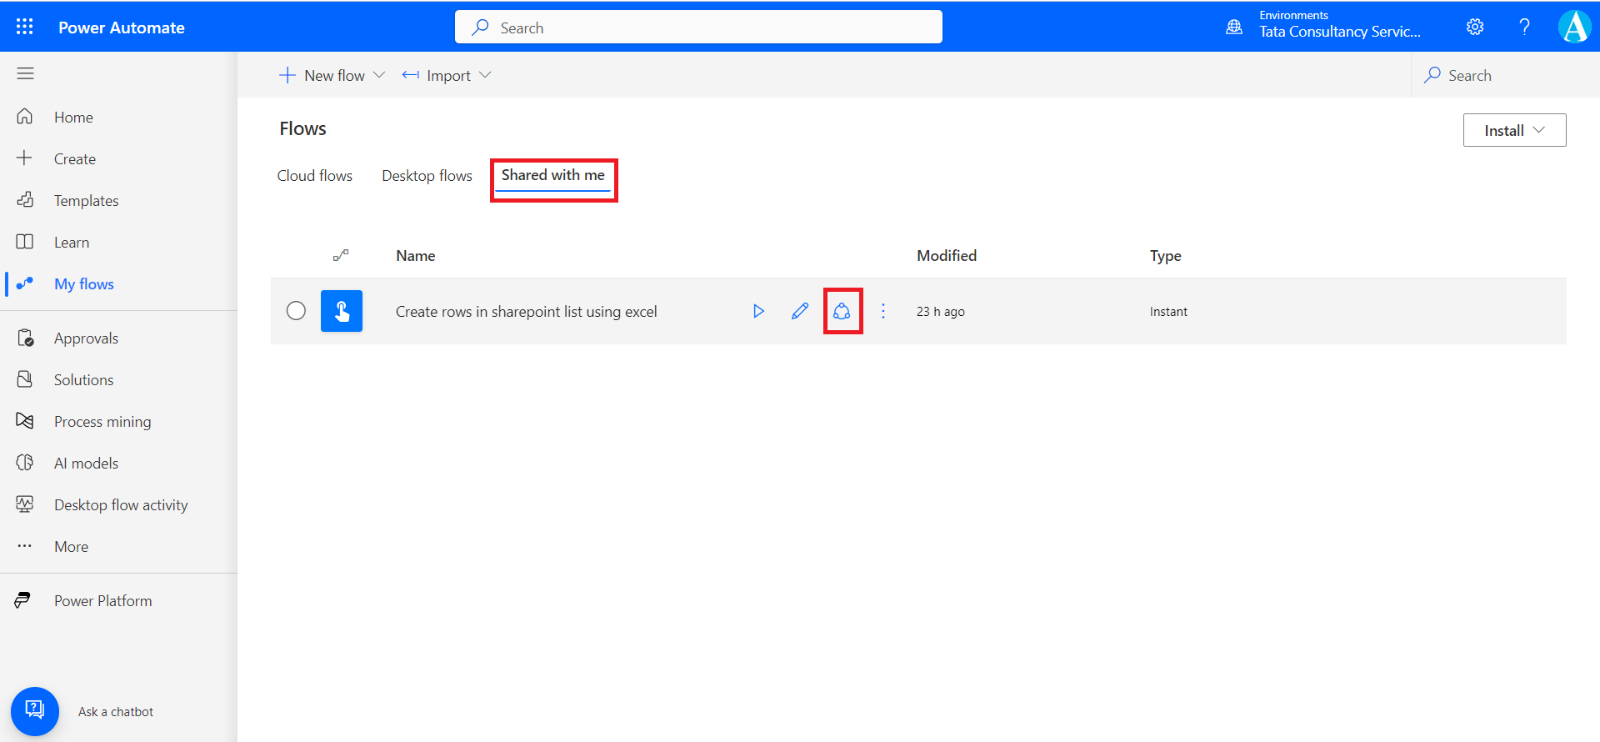
Step 2: Select the trash icon for the owner that we want to remove.
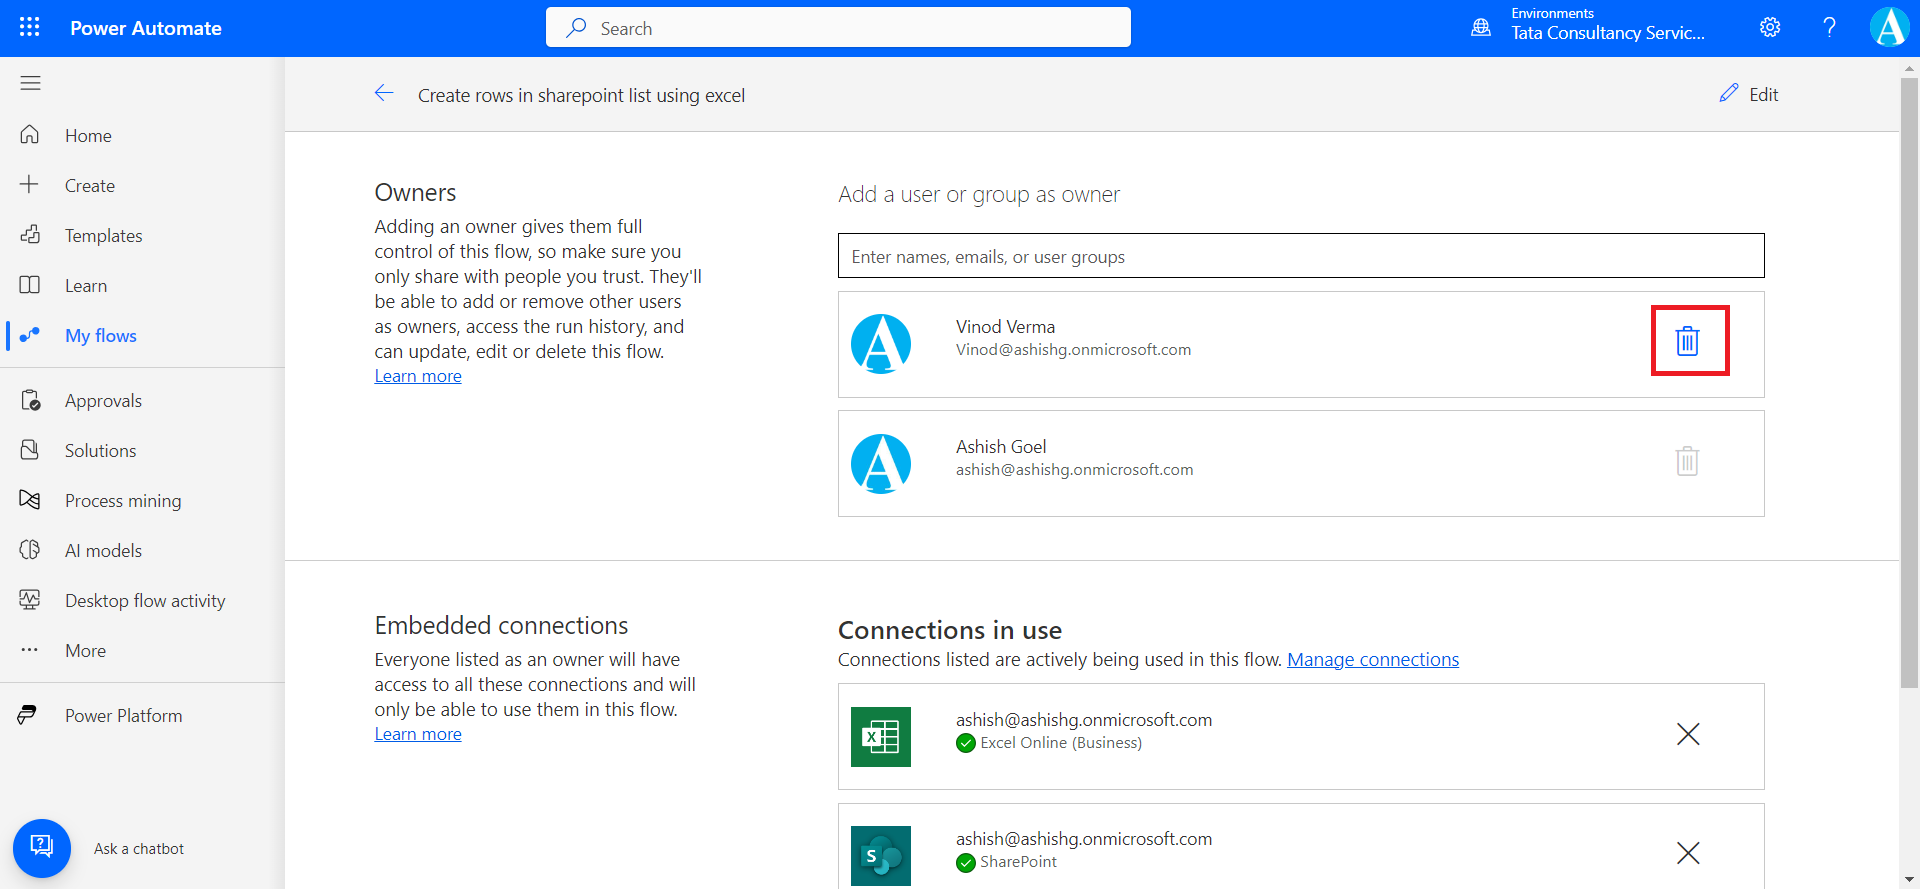
3. Embedded and other connections
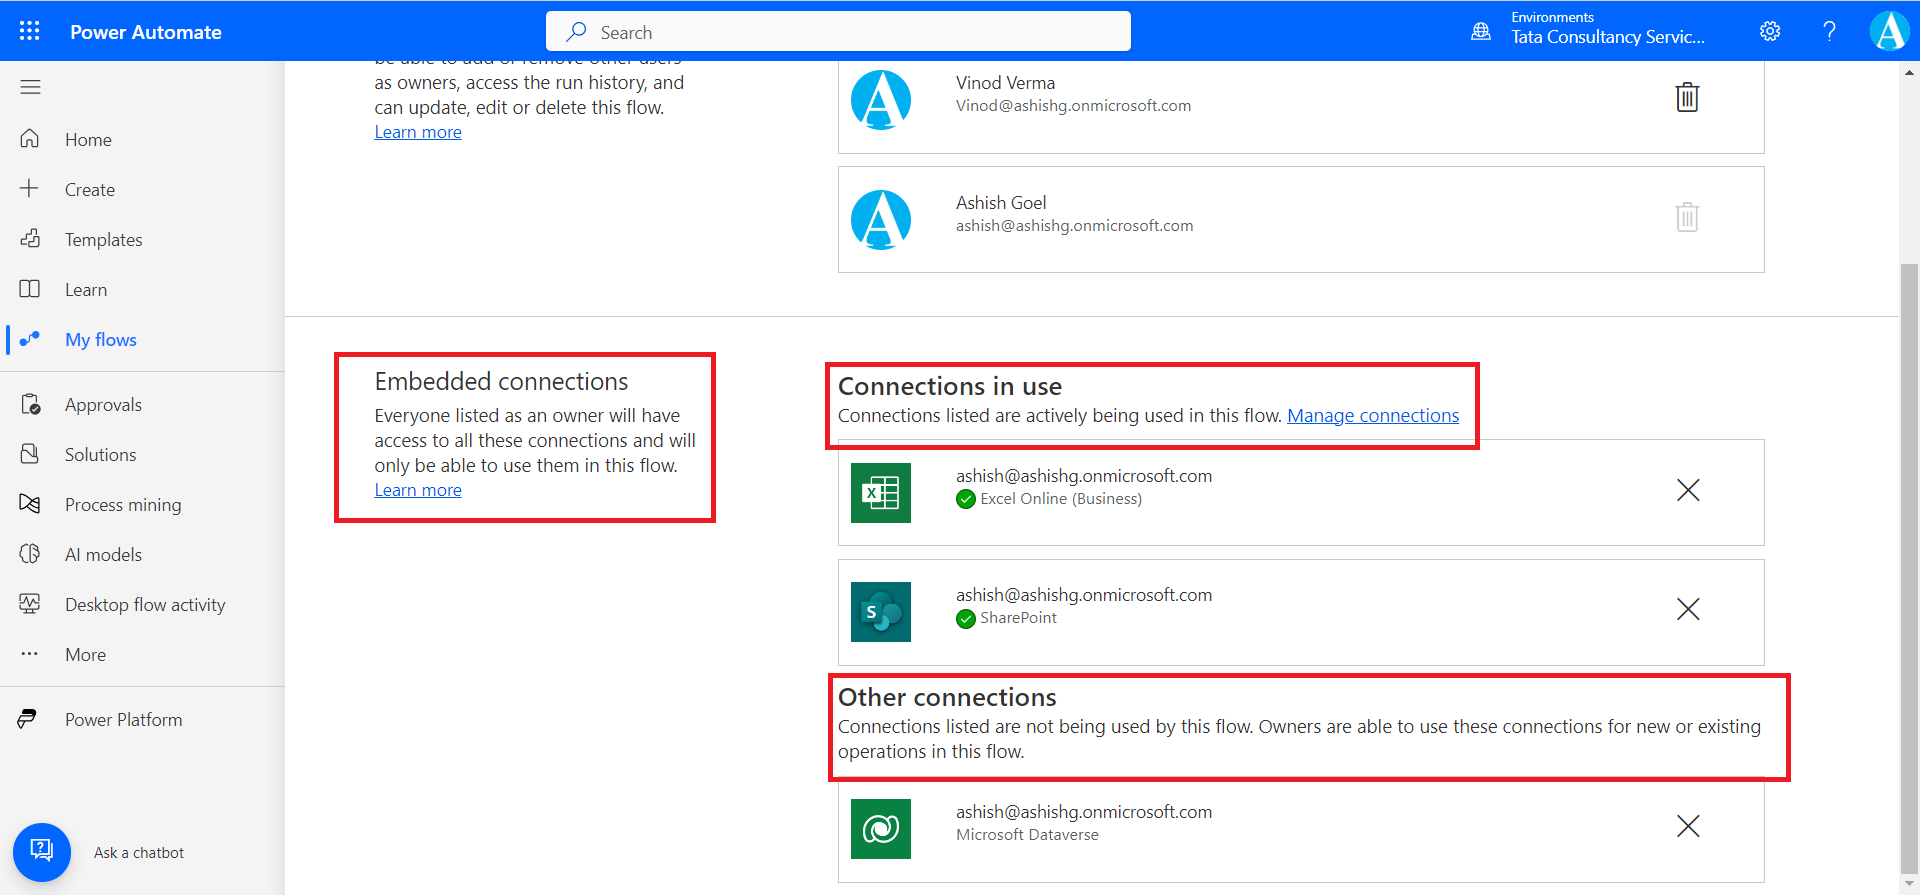
The connections that are used in a flow fall into two categories:
• Embedded: These connections are used in the flow.
• Other: These connections have been defined for the flow, but they aren't used in it.
If you stop using a connection in a flow, that connection appears in the Other connections list. It will remain there until an owner includes it in the flow again.
4. Send a copy
We can send a copy a flow in the in the power automate.
Step 1: Select the flow and click on the … (more options) and select Send a copy.
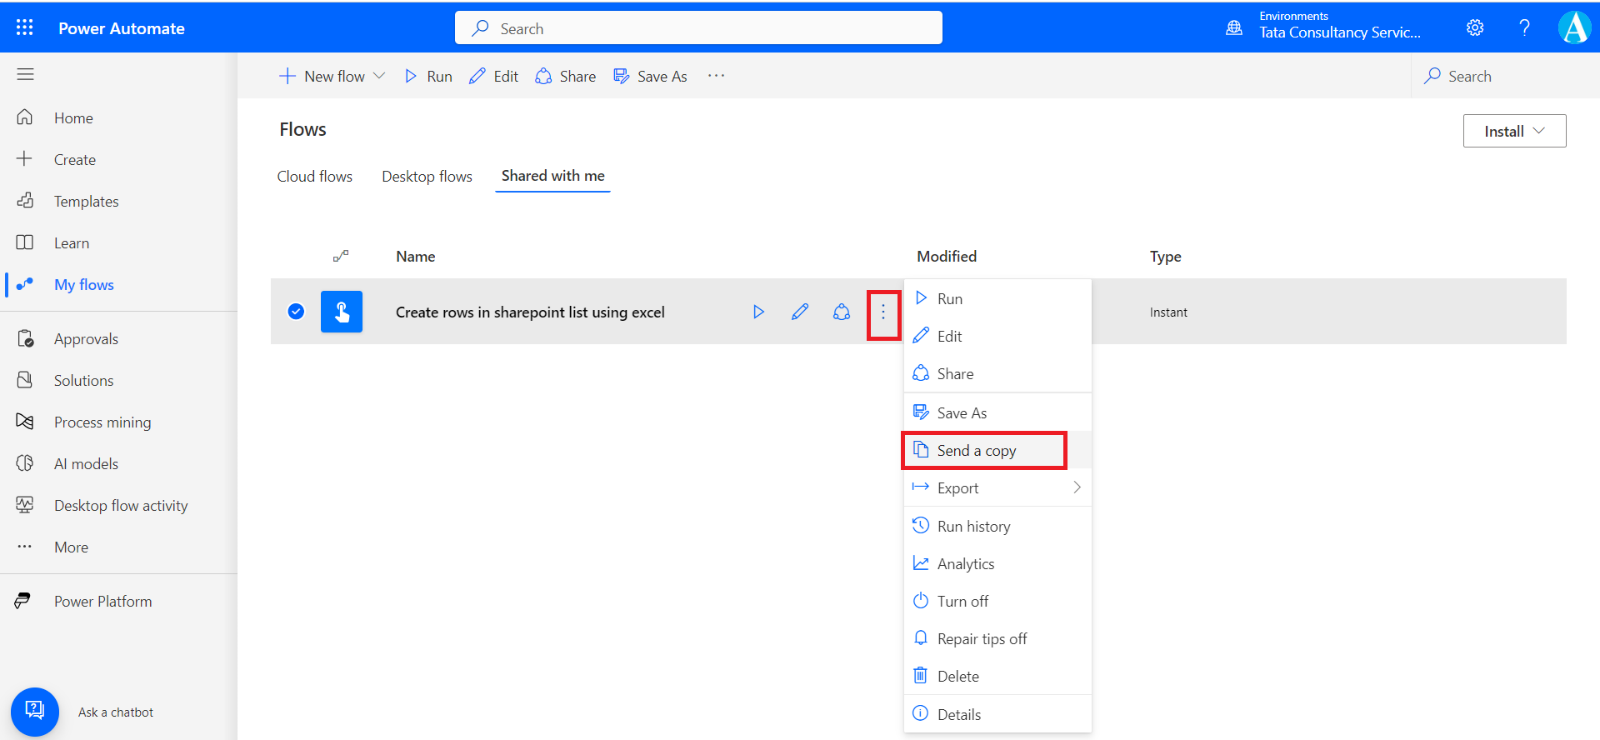
Alternatively, we can click on “Send a copy” from the command bar on the flow details page.
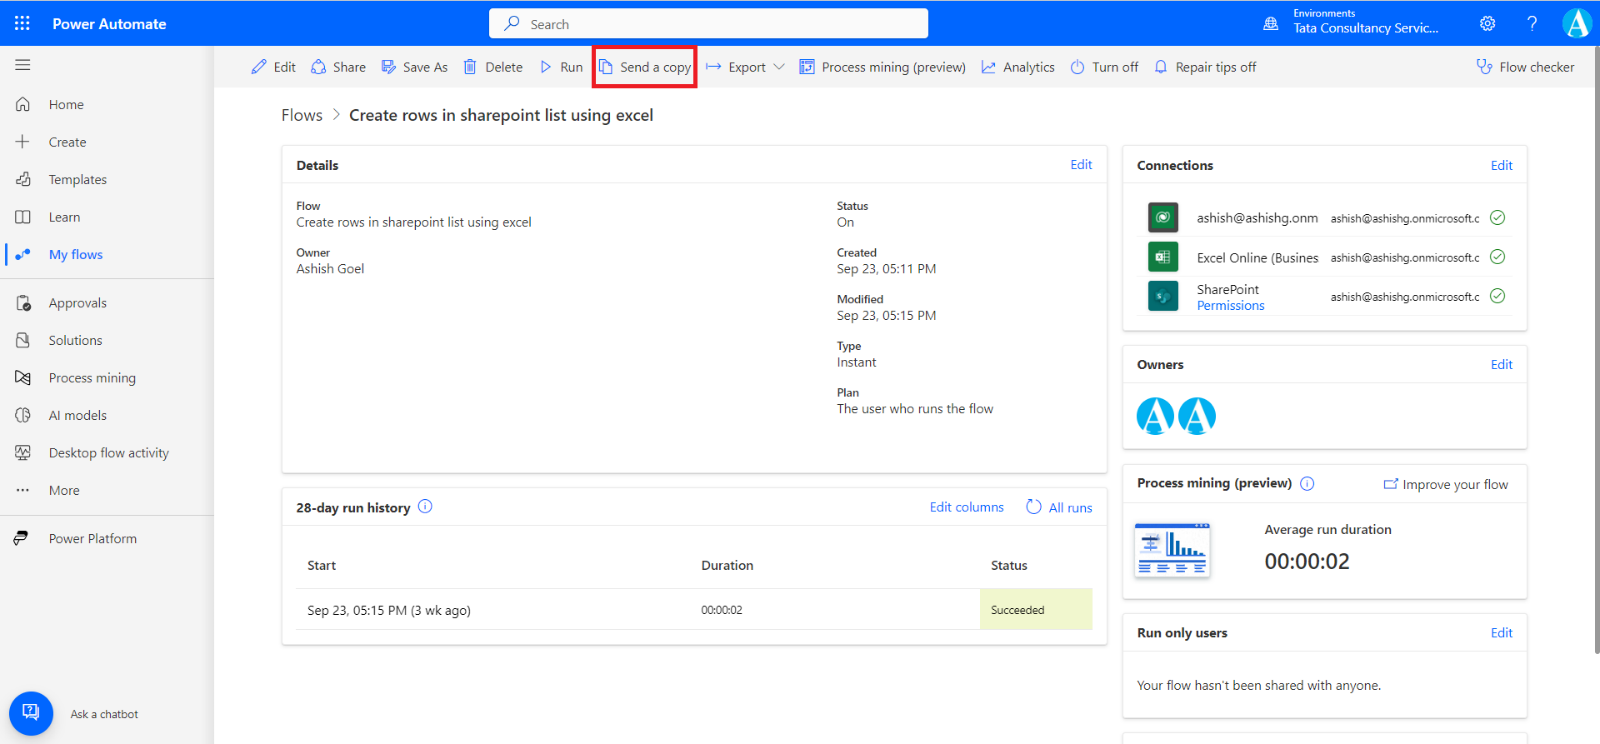
Step 2: On the Send a copy panel, enter name, email, or user group whom to send the copy of the power automate.
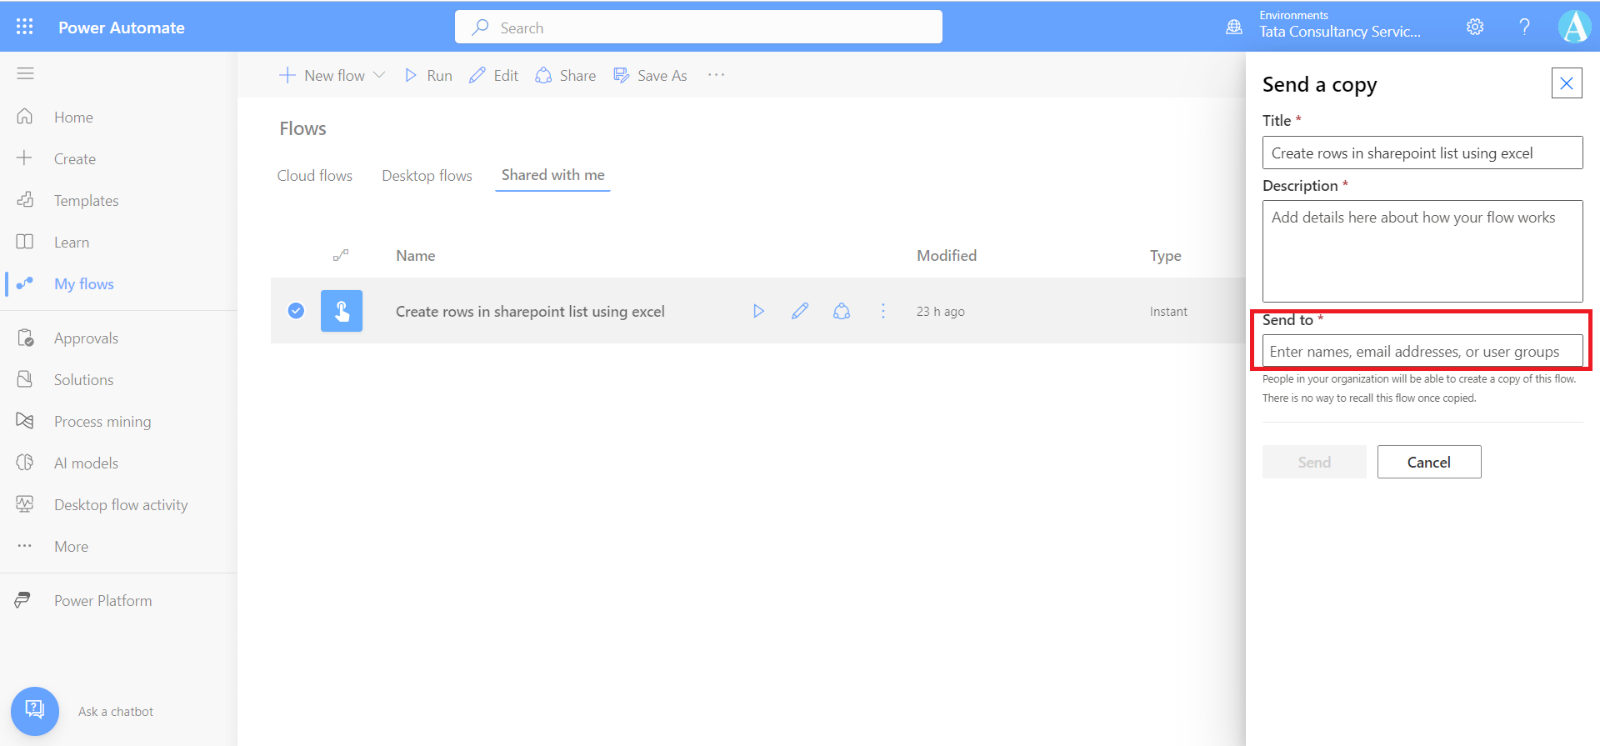
Note: 1. Sending a copy creates an independent instance of the flow for the recipient. We can't revoke access to the flow after we share it.
2. We must be a cloud flow owner to use the Send a copy feature. Additionally, we must have successfully run the flow since it was last modified before we can send a copy.
We add the email as shown in the image below and add the description.
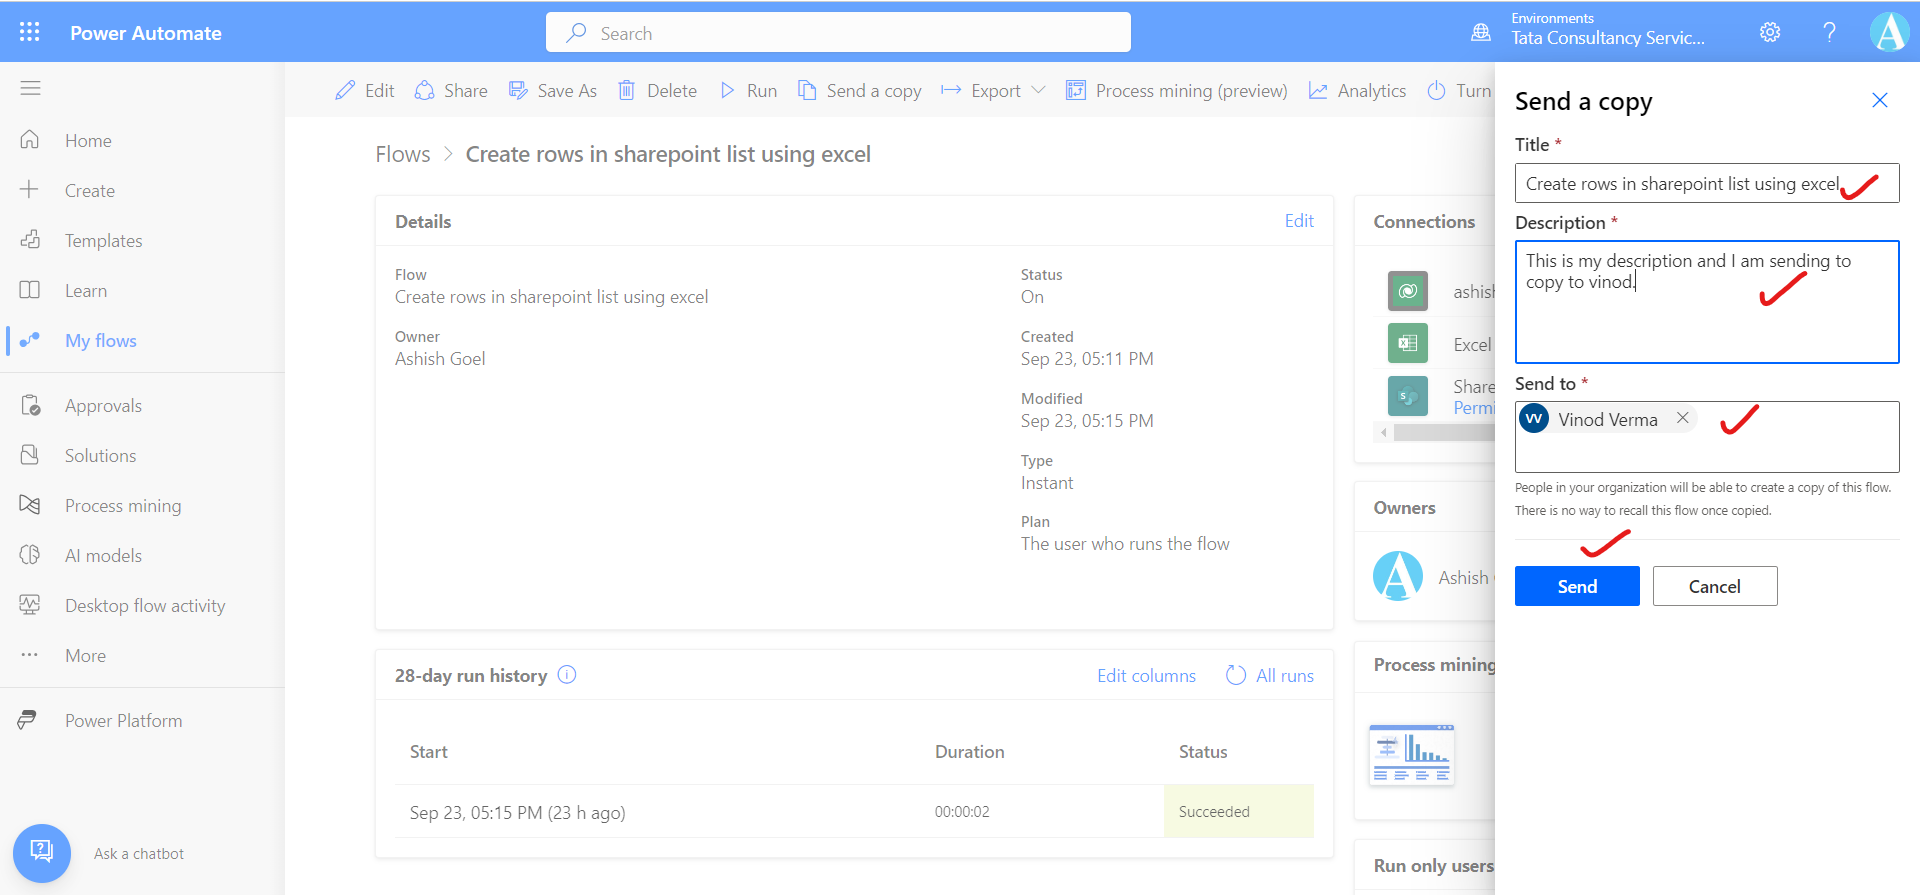
Note: If we send a copy to an individual user, they'll receive an email to launch the ability to create the flow. An email won't be sent when we send a copy to a group. Instead, group members will be able to access the copy on the flow portal.
If the individual user is given access, then an email is received from the Power Automate, the email is shown in the following image with Create My Flow link.
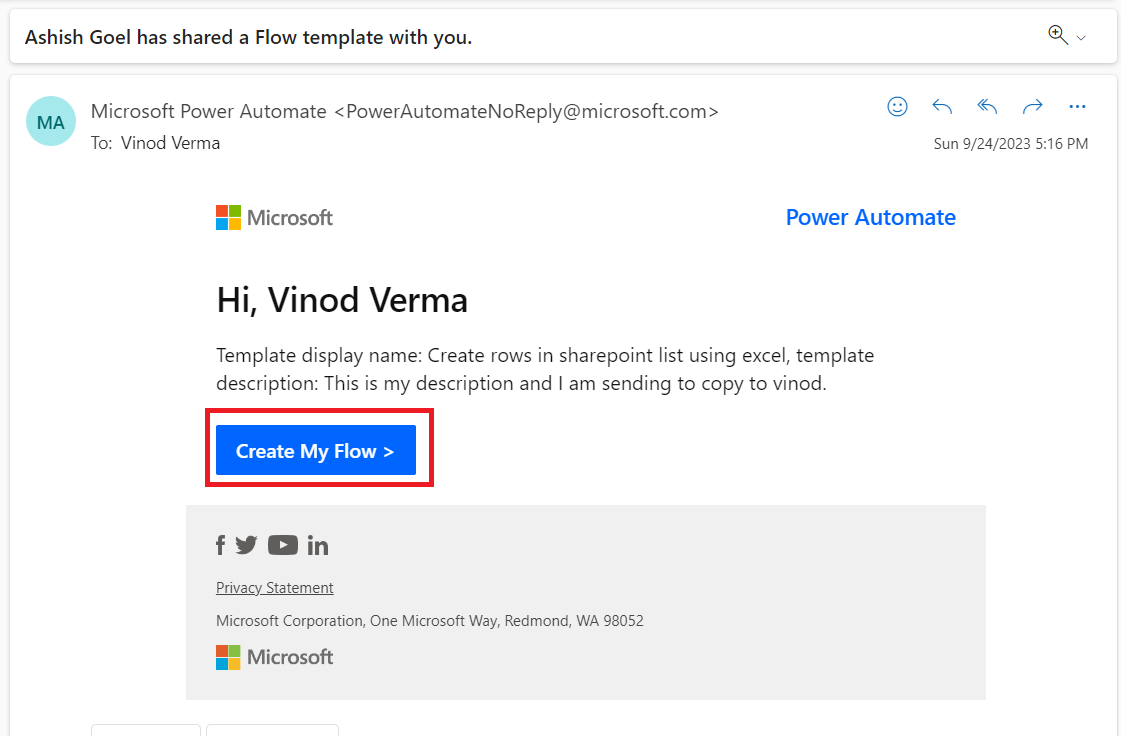
Individual users and users from groups can view and use the flow template by going to Templates >Shared with me.
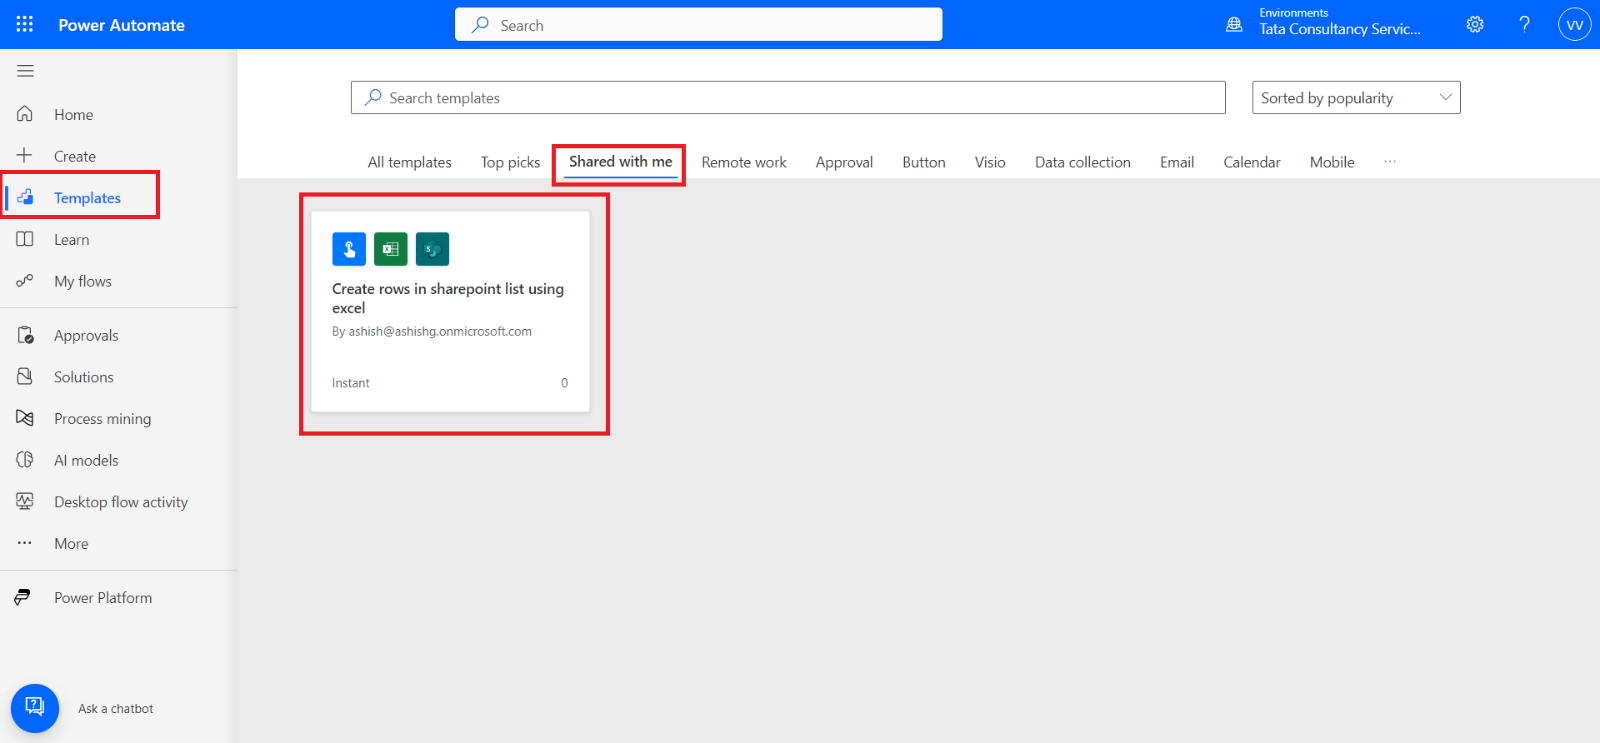
When we click on the template then select Create Flow.
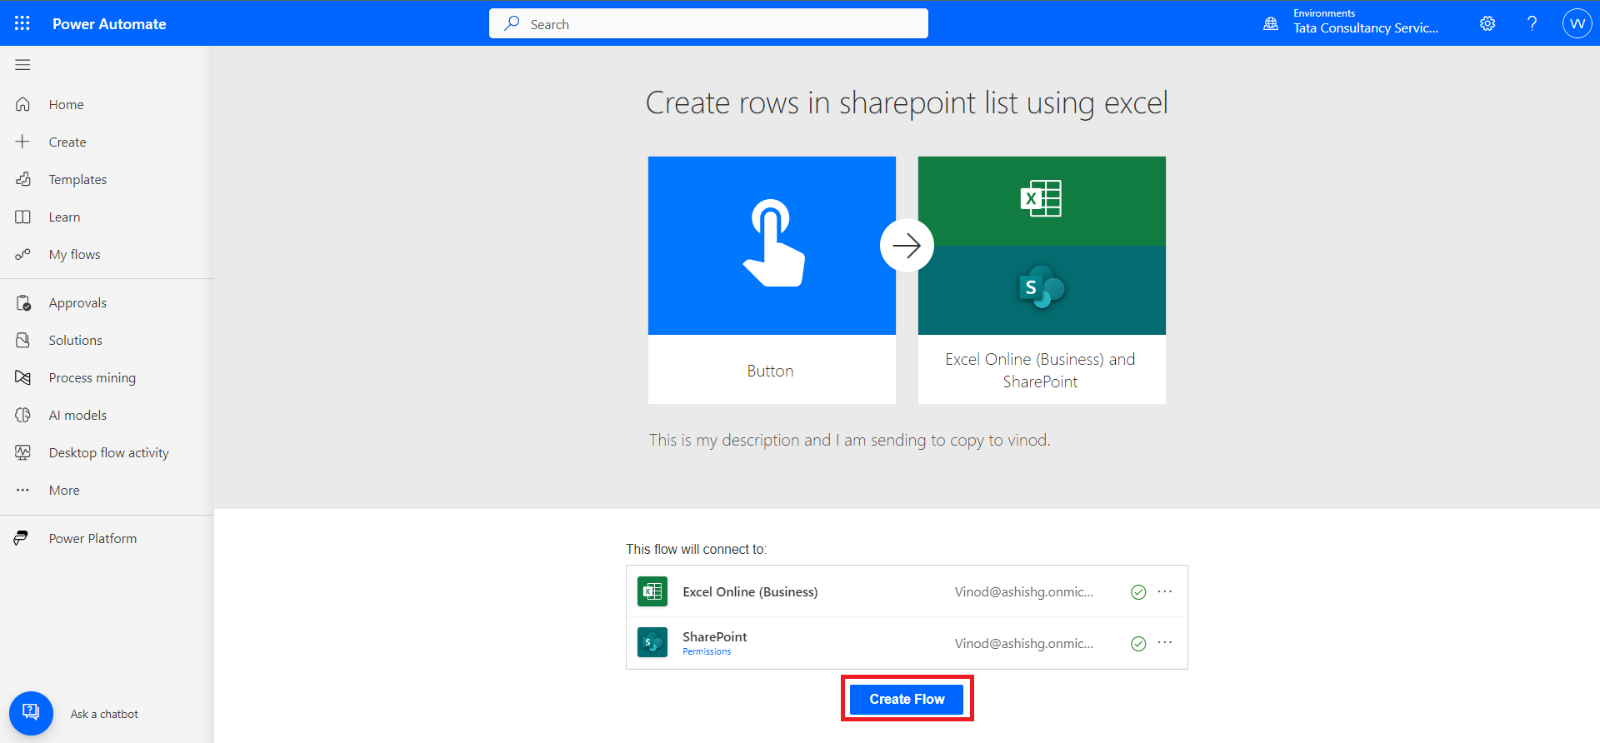
After we create the flow with the template, our flow appears in the My flows > Cloud flows.
Send a copy is the best approach to sharing when you have a cloud flow that would help others but needs personalization. When users have their own copy, it removes concerns about them modifying and breaking our flow.
Send a copy allows the user to create the flow in the same Microsoft Power Platform environment that your flow is in.
Send a copy works seamlessly in the default environment because everyone has access. If you send a copy of a flow to a user from an environment that they don't have access to, they'll get an error when they try to create the flow. To avoid errors, make sure that the same users and groups have access to the environment that you're sending the flow from prior to sending.
5. Flow Details
When we click on the flow from the list of flows, we reach the following screen.
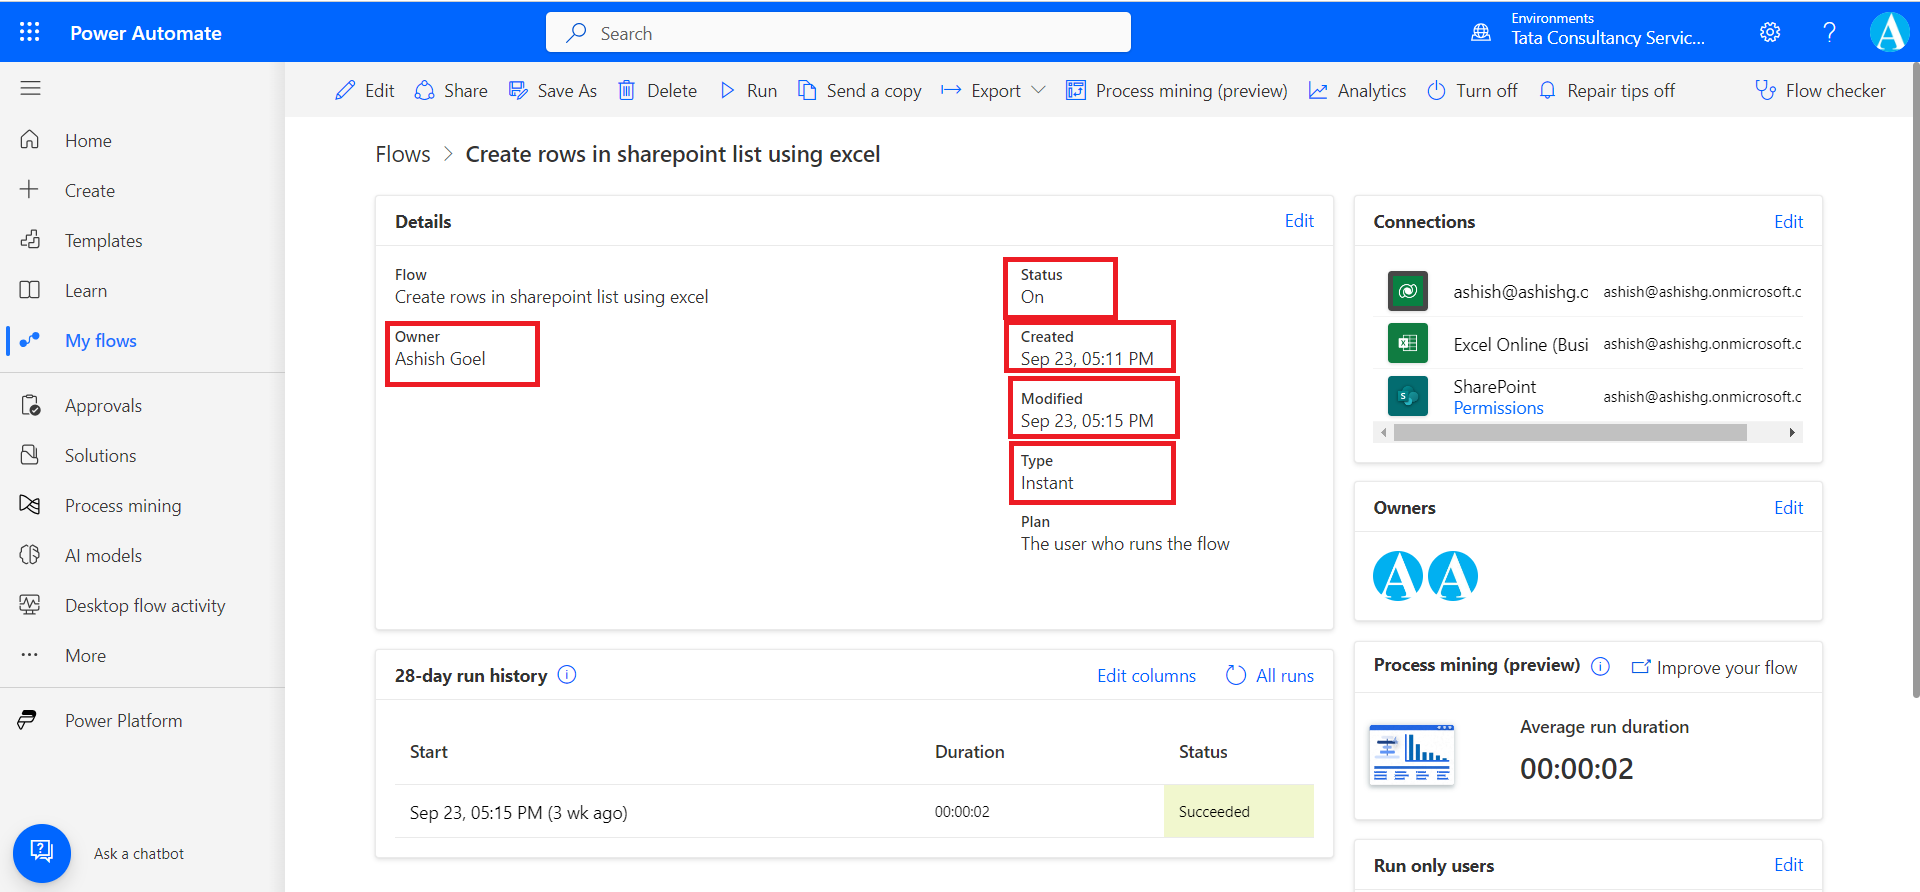
Here, we can see the original Owner name which is one created the power automate flow, its Status whether the power automate is “Turn On” or "Turn Off”, and its created date, and its Type and Modified date.
6. Run only users
Run-only users in Power Automate can run or execute flows, but they cannot edit or modify them. Run-only sharing is only available for instant cloud flows.
To share as the run-only user flow, open an instant flow and then select the Edit link in the Run only users section of the detail page to open the share panel.
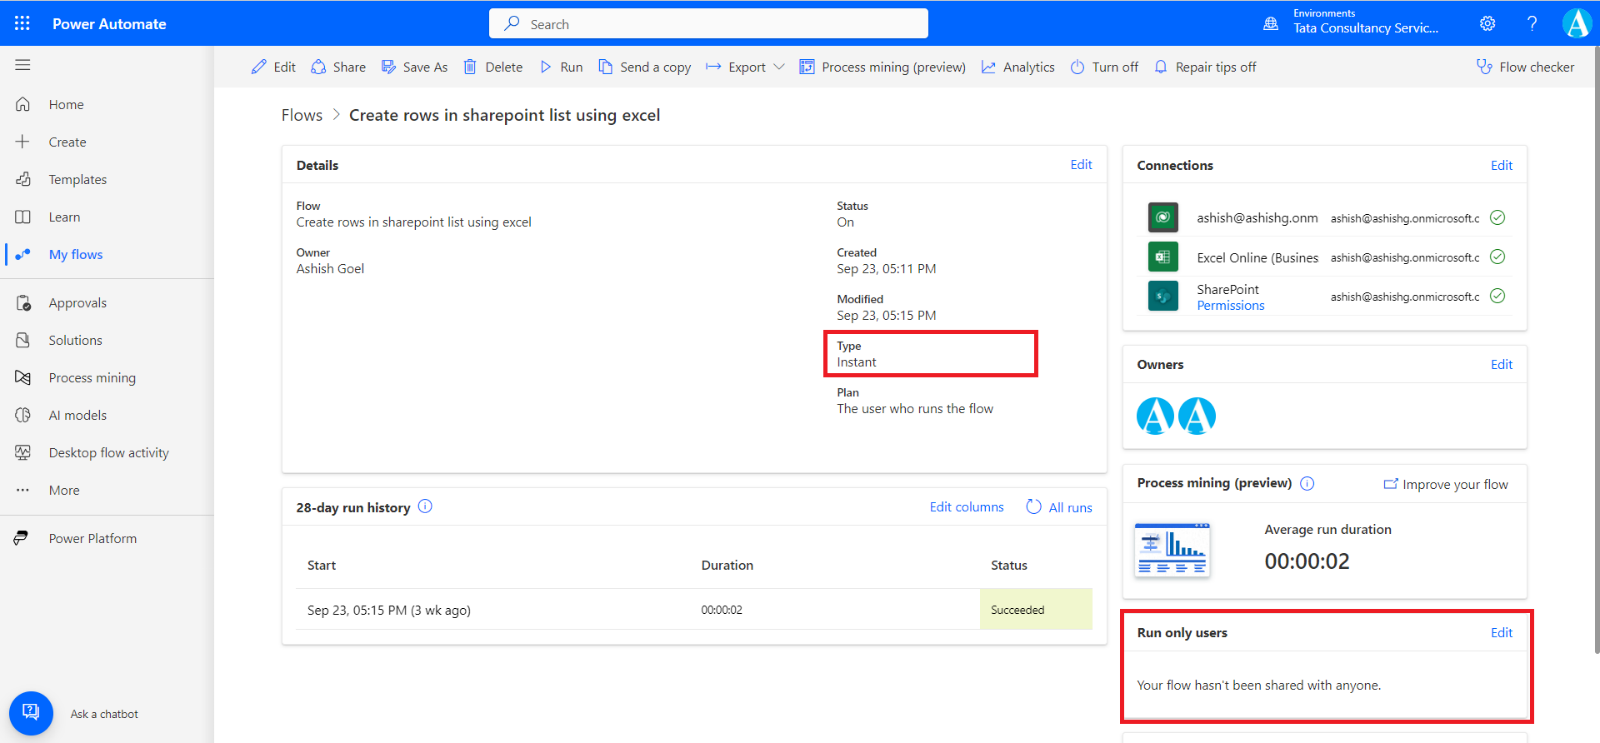
On the share panel that is displayed, we can choose to invite one or more users and groups.
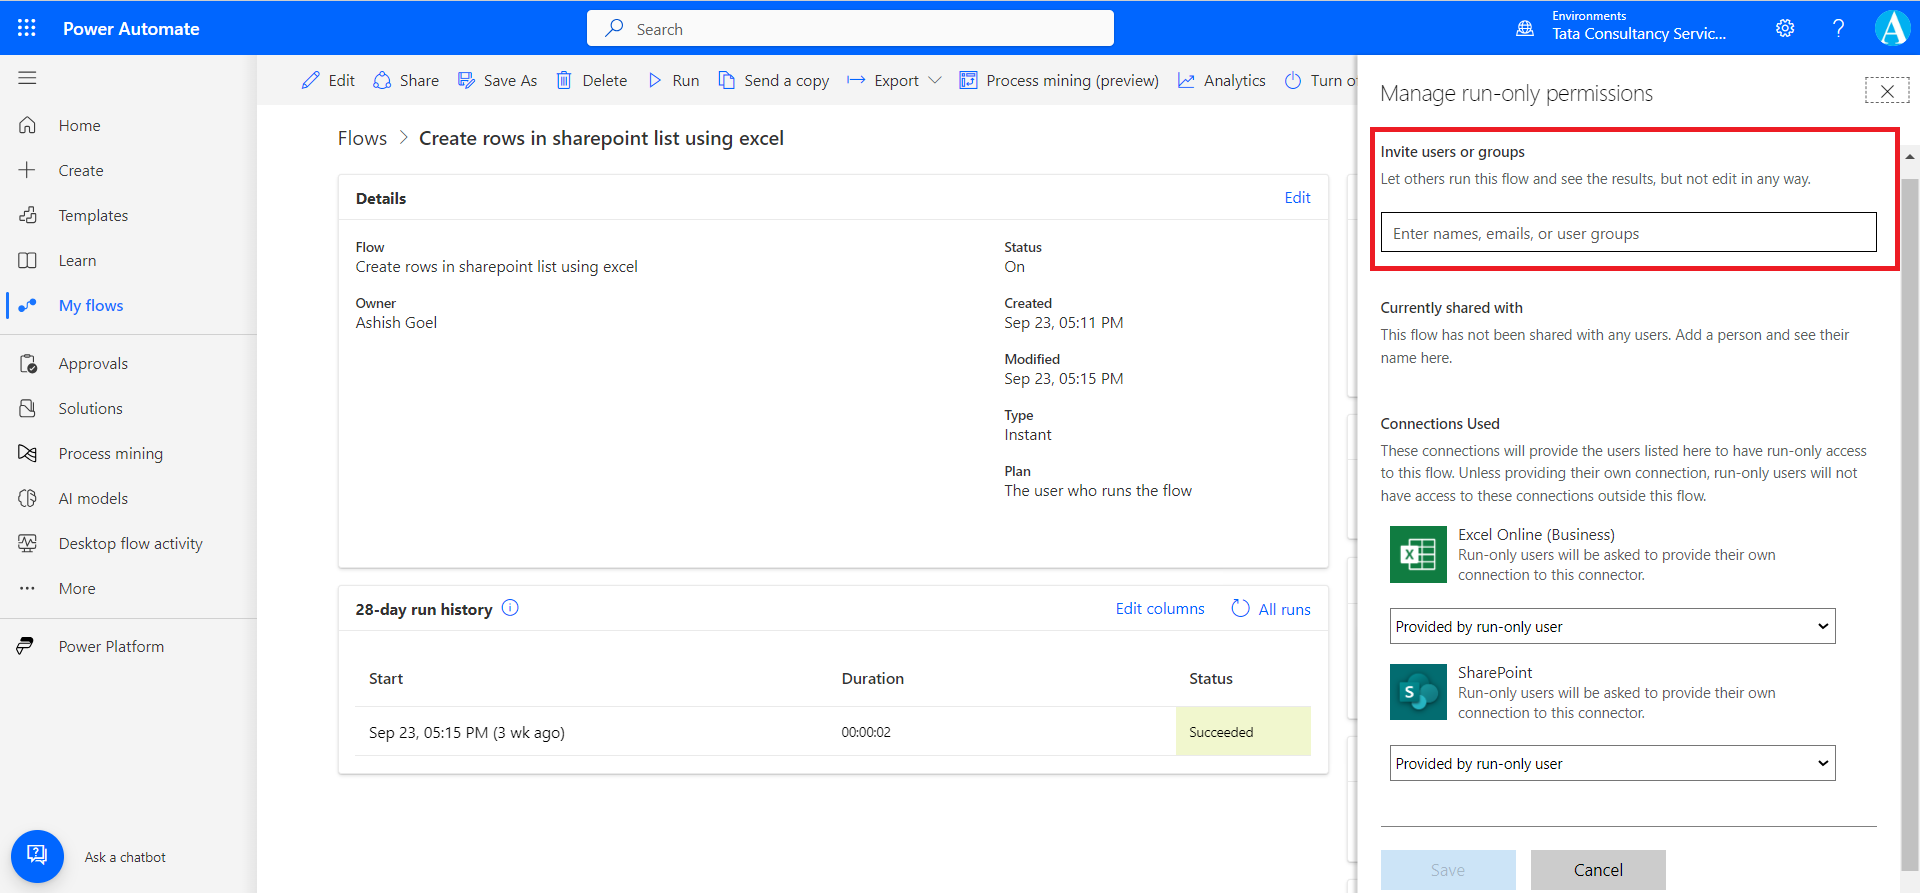
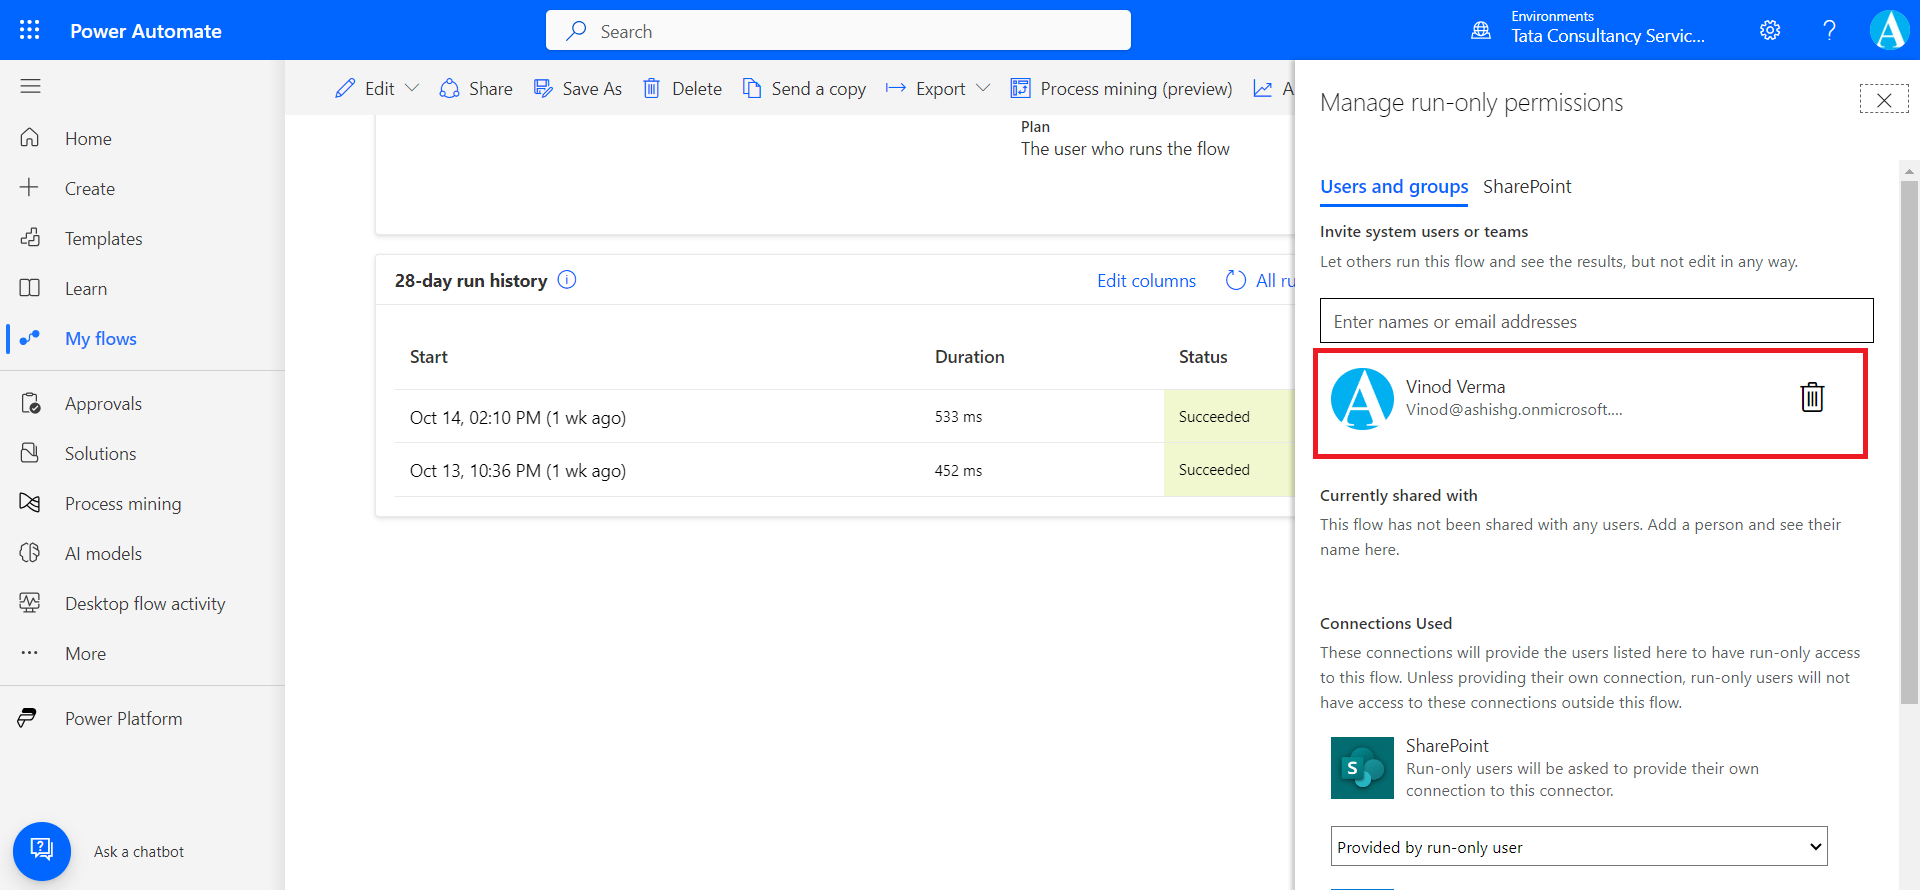
The user is added to the flow.
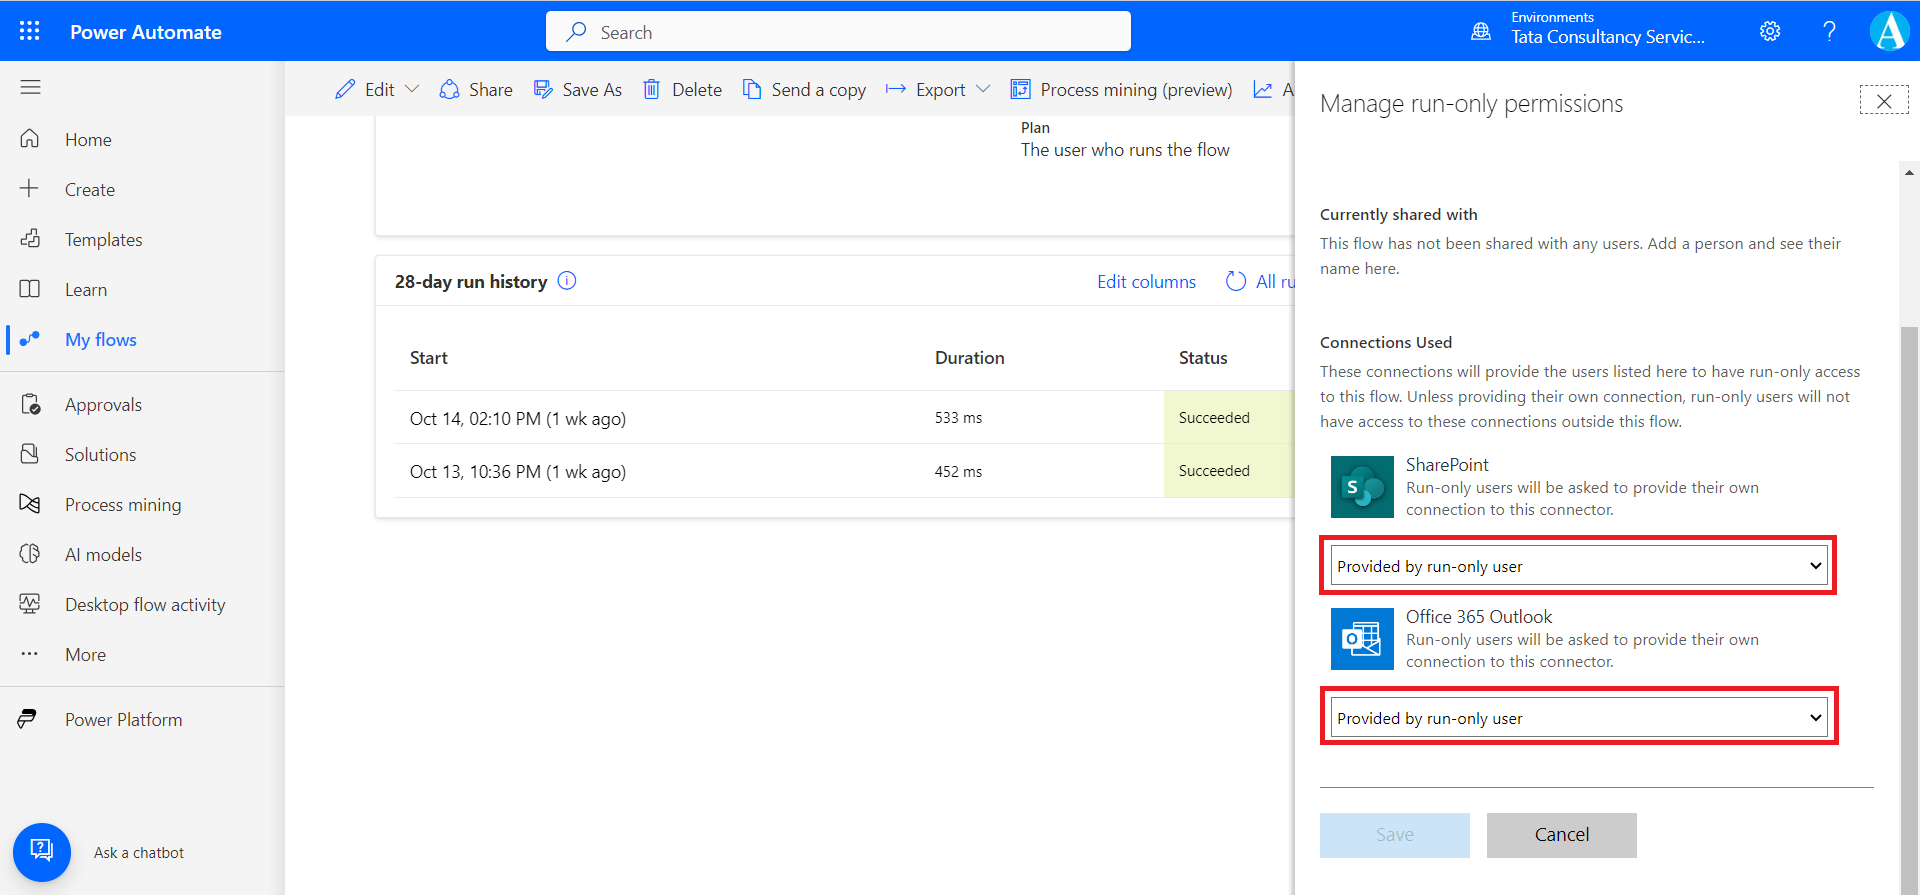
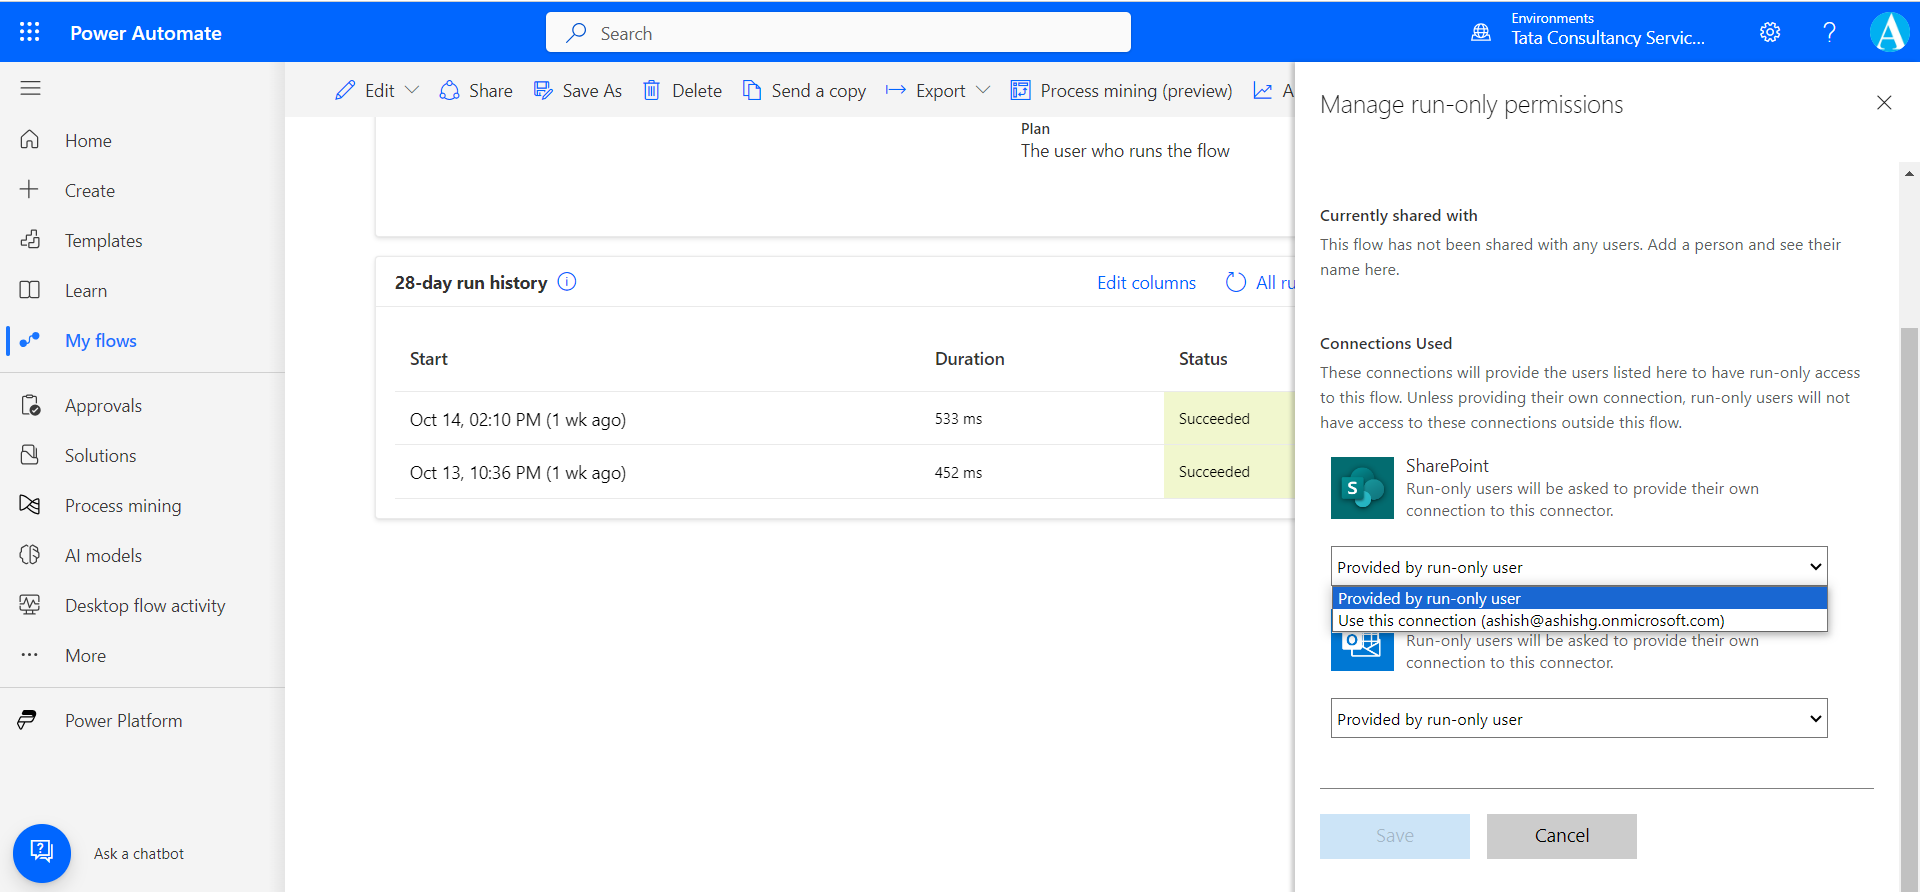
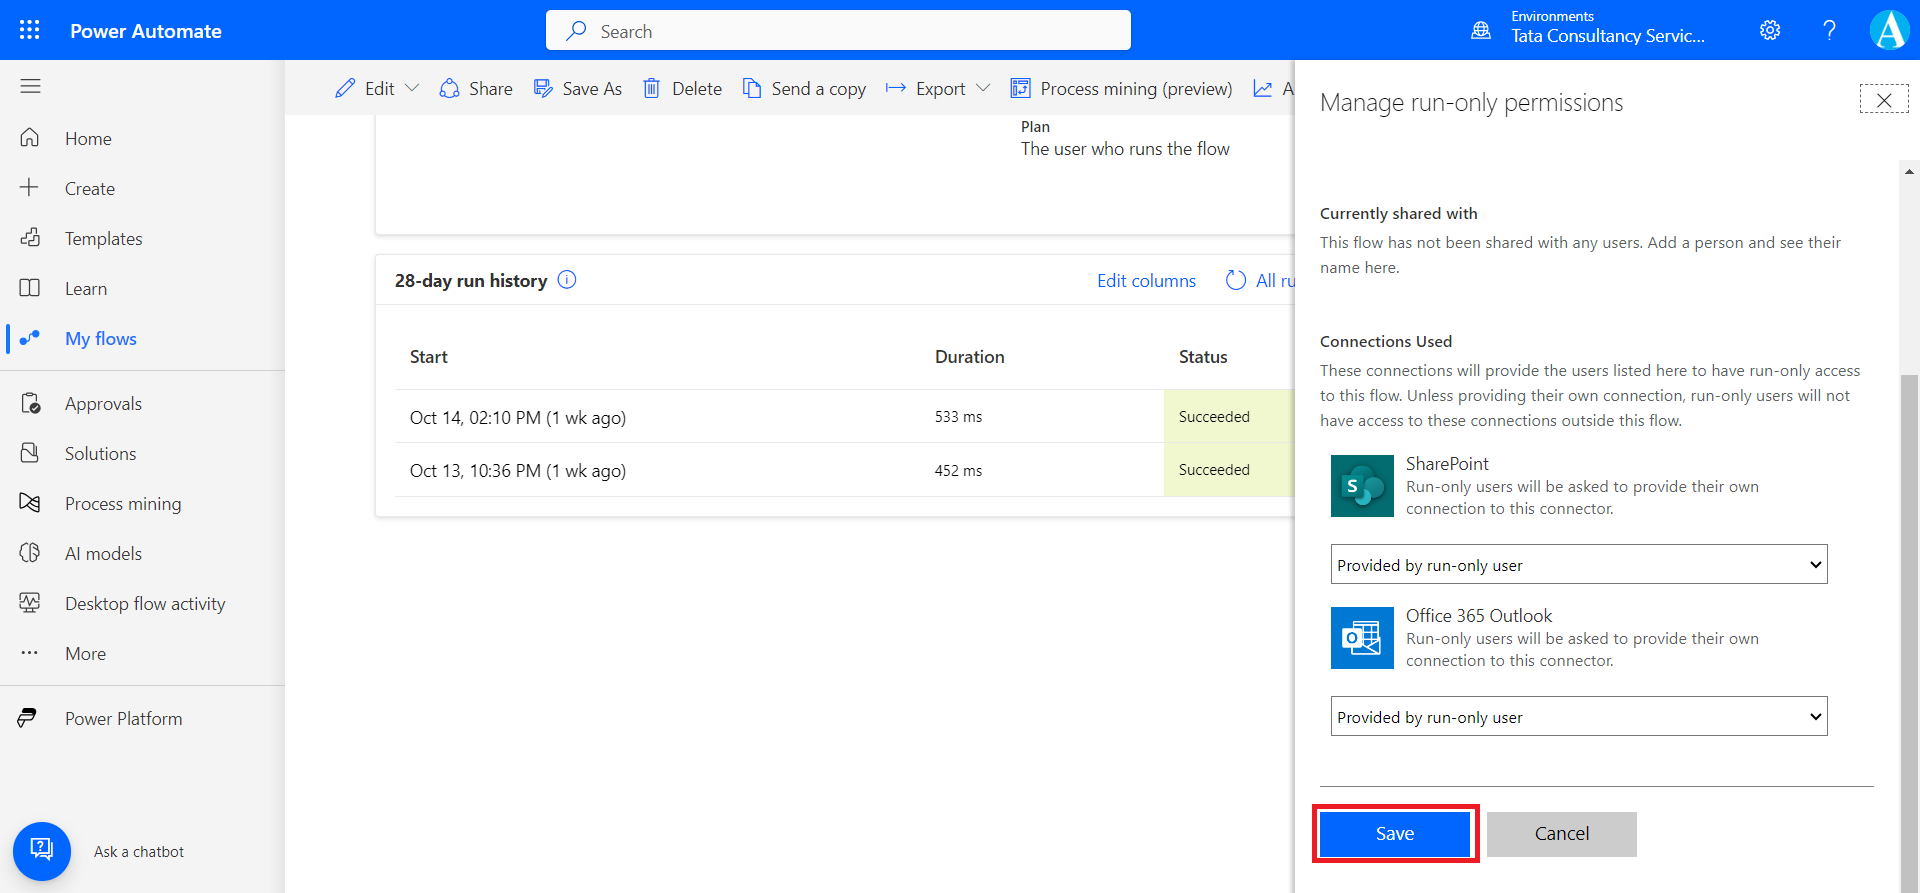
In the lower part of the share panel for each connector that is used by the flow, we can set up which connection to use when a user runs the flow. We can choose the Provided by run-only user or the Use this connection option.
If our flow uses the SharePoint connector, the SharePoint tab will display, where we can select a Site and List that can run the flow. List users must have edit permissions for the list items to be eligible to run the flow.
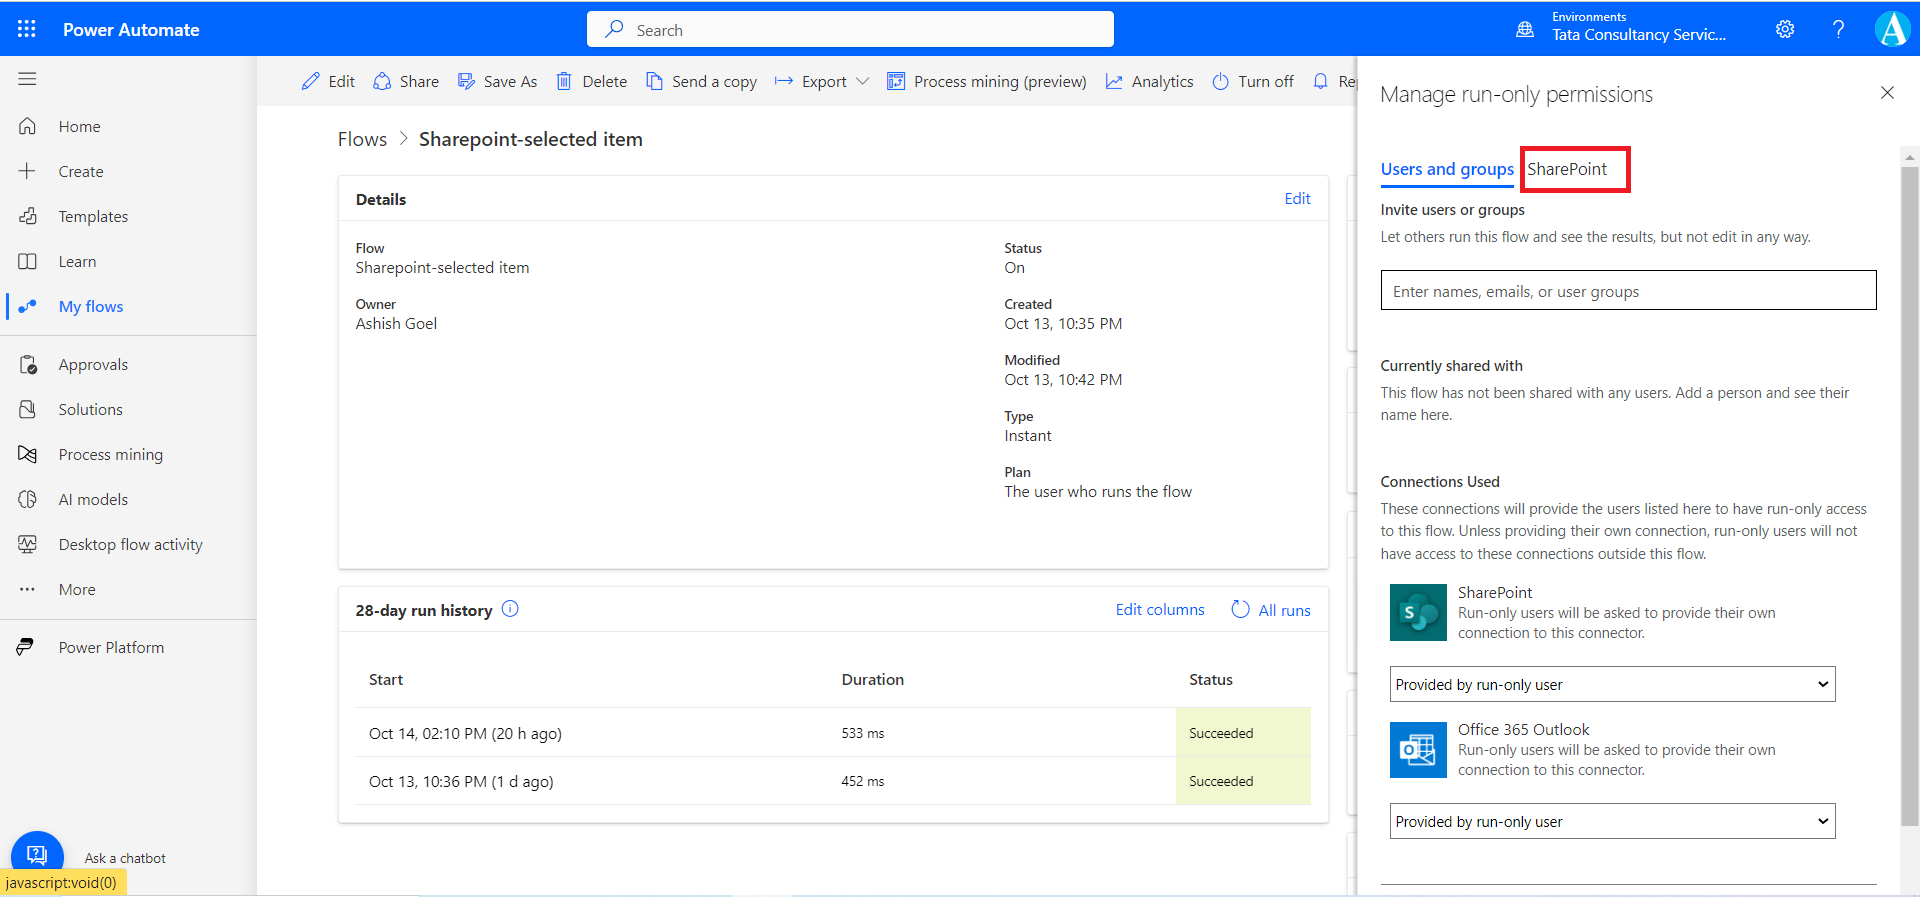
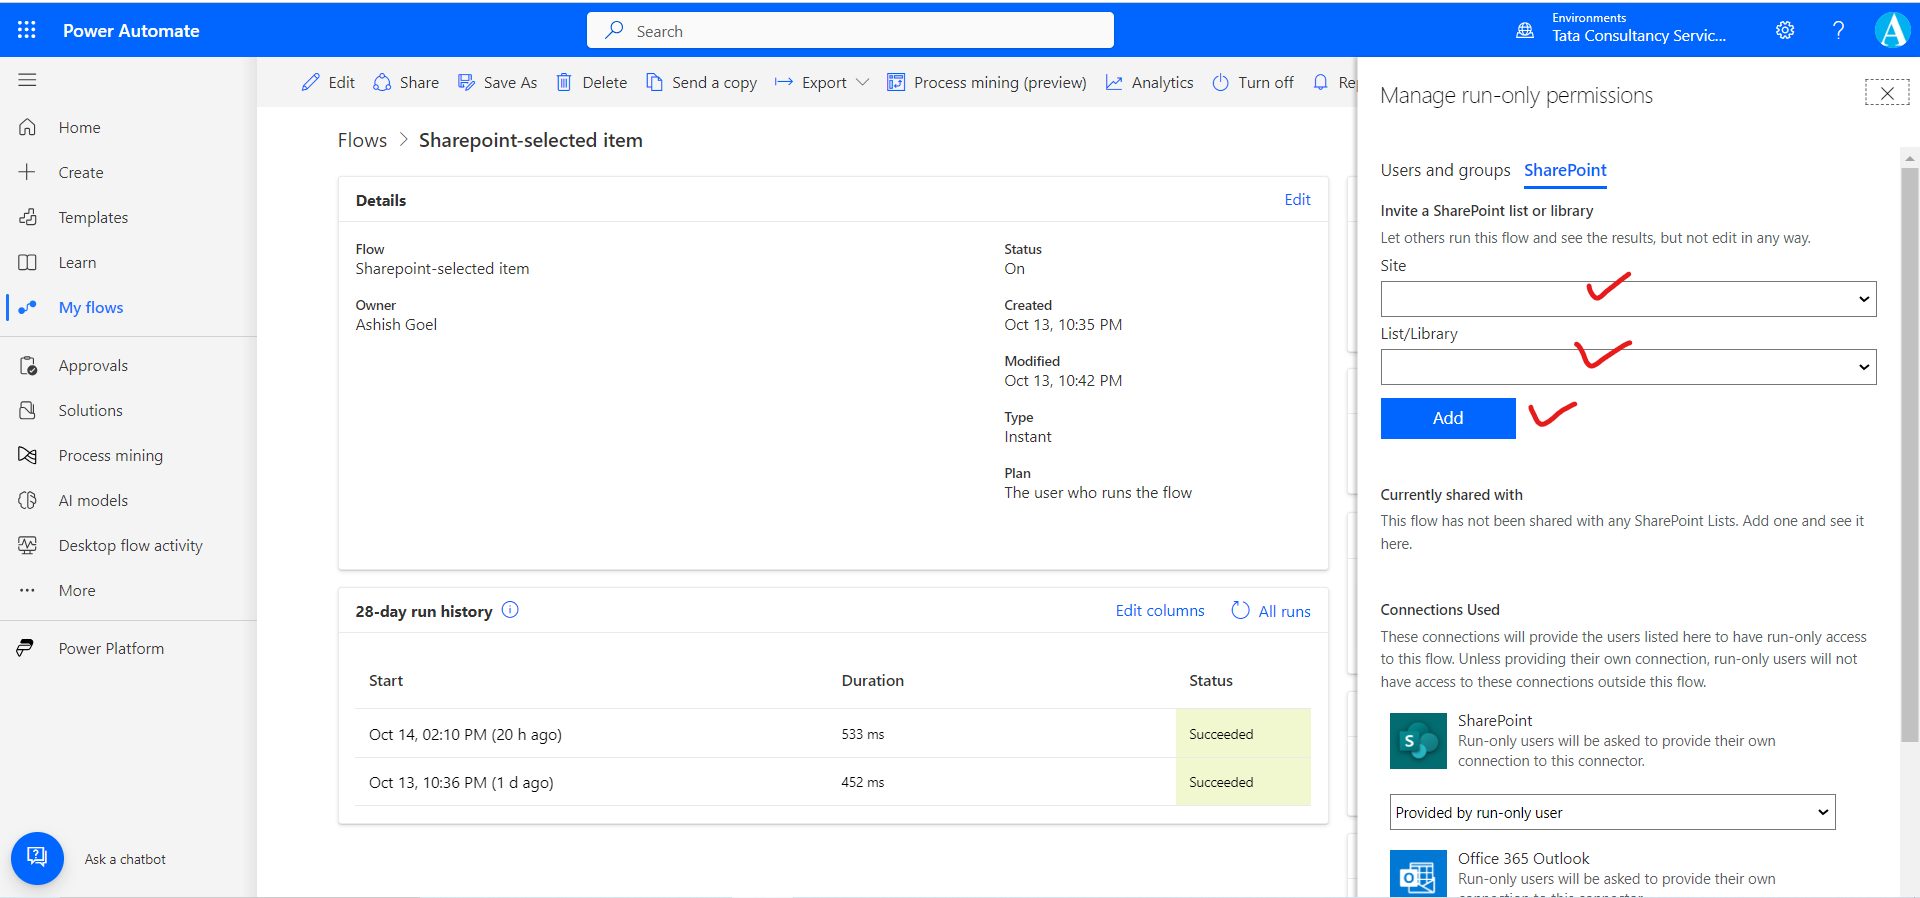
Select the SharePoint tab, select the Site from the dropdown, and then select the list from the dropdown.
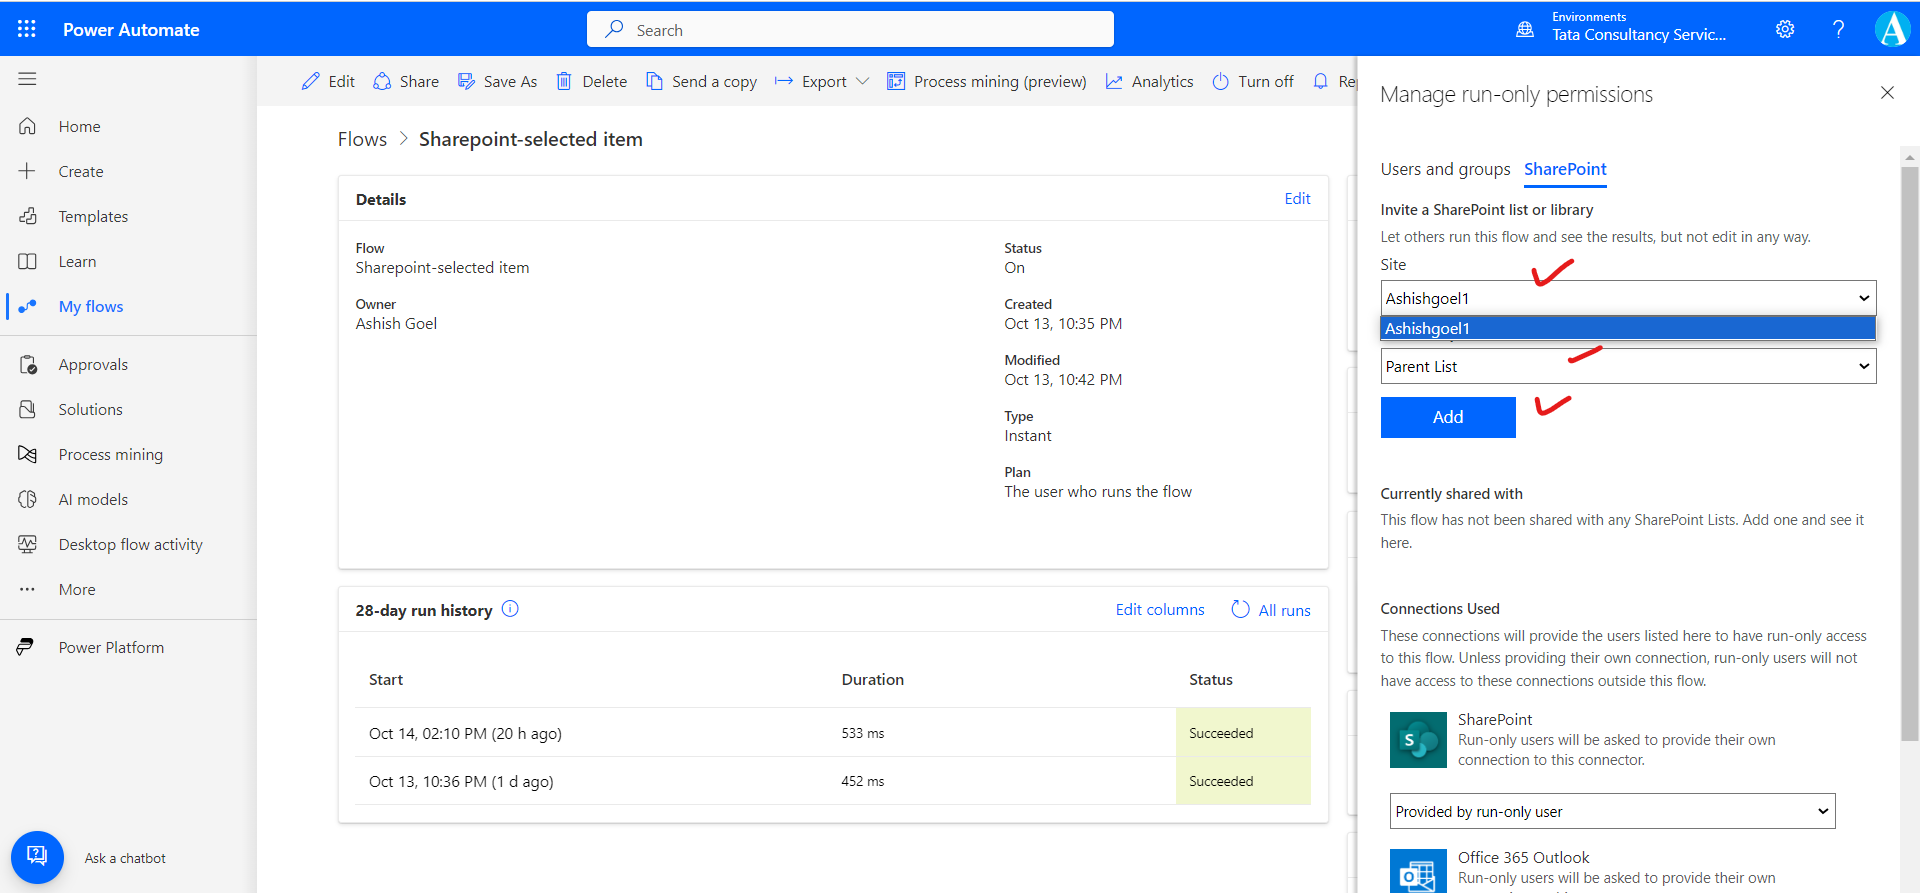
The site and list values depend on the trigger and actions we use in our flow. The appropriate sites and lists appear and are available for selection.
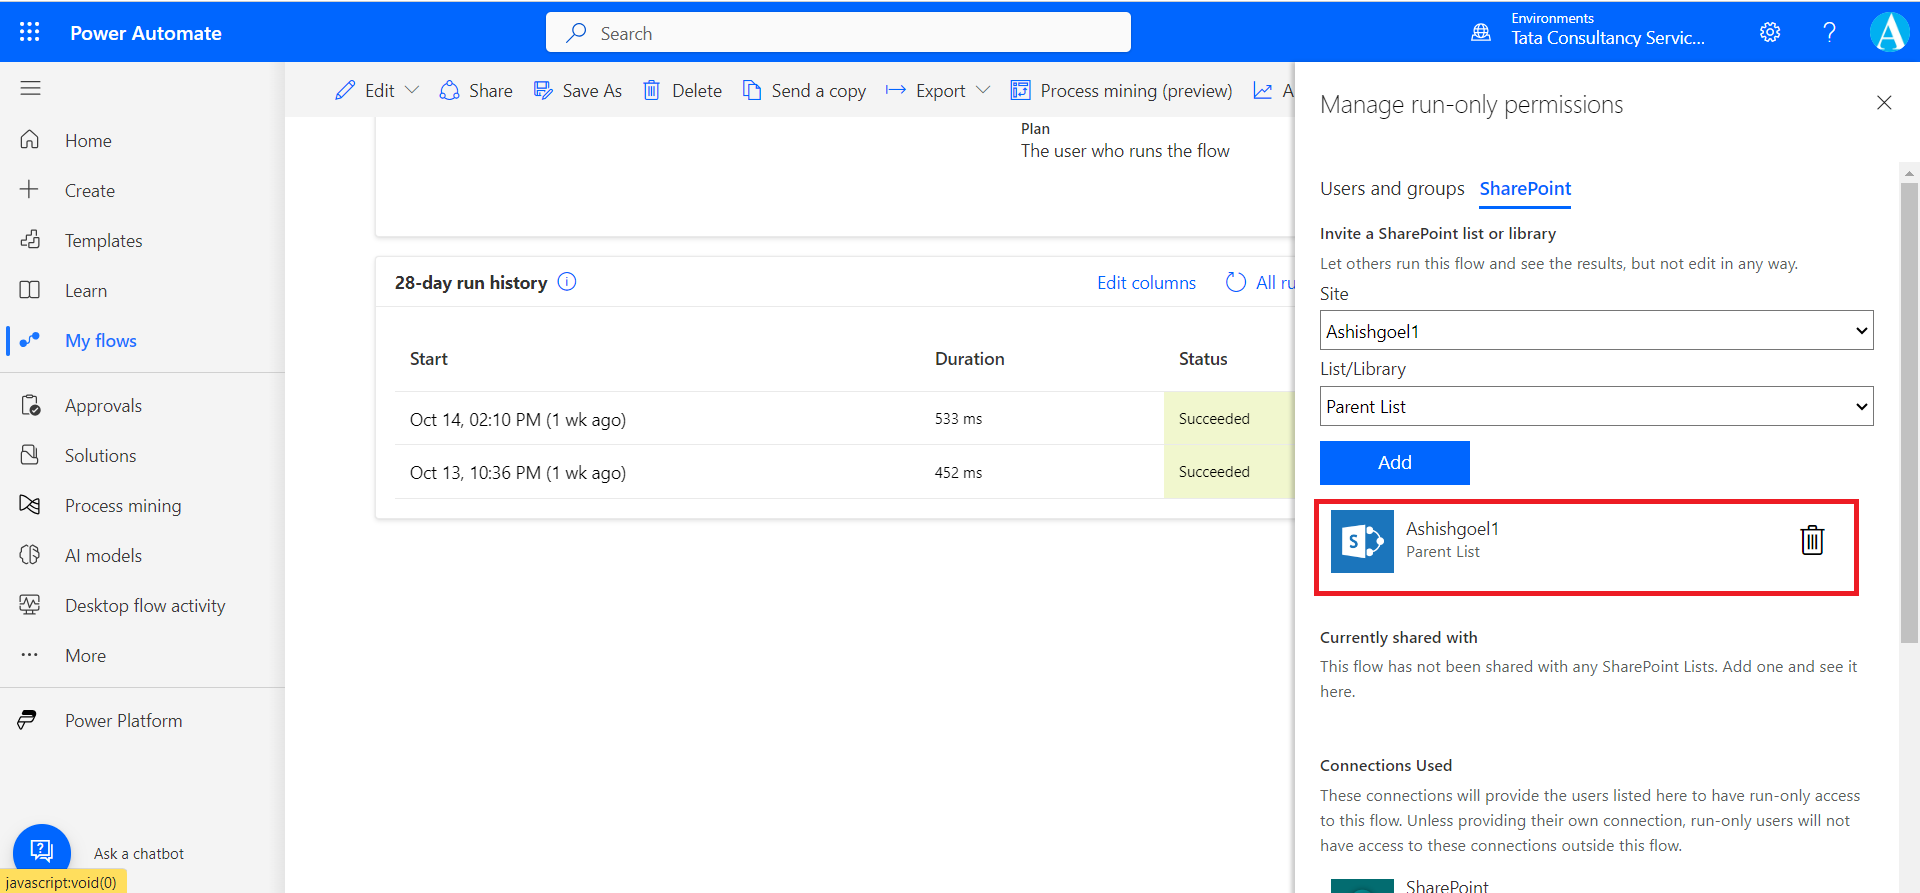
After we select Add, permissions are added to the flow, and these new owner(s) now appear.
Scroll down, and click on Save to save the changes.
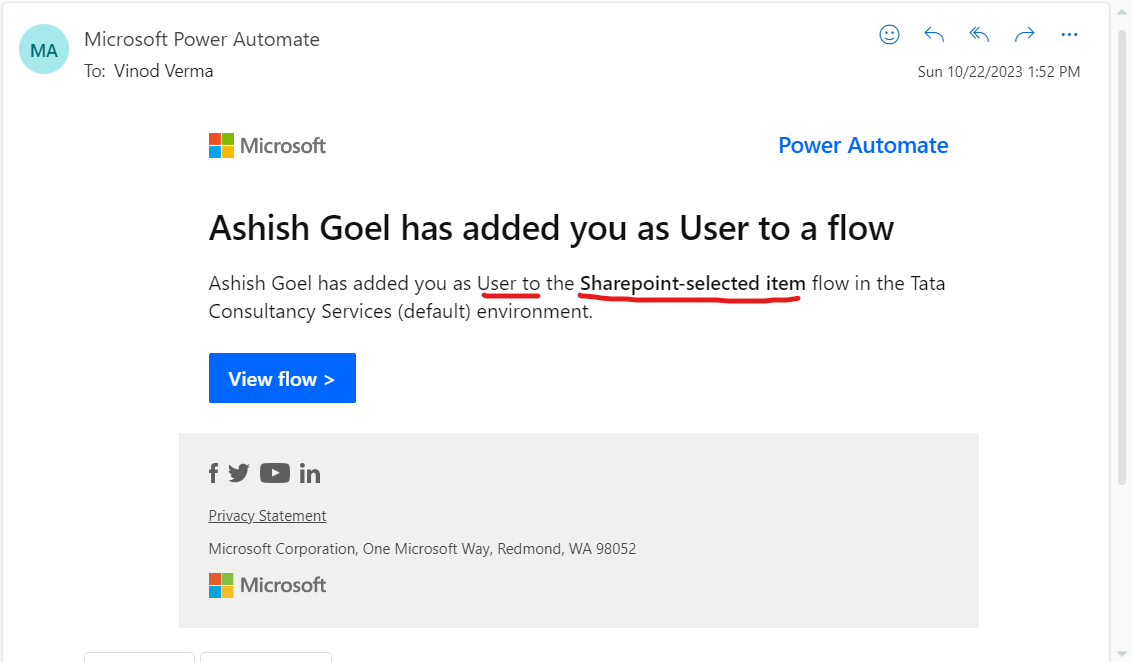
An email is received, in which it is stated that the flow is shared with you as a User.
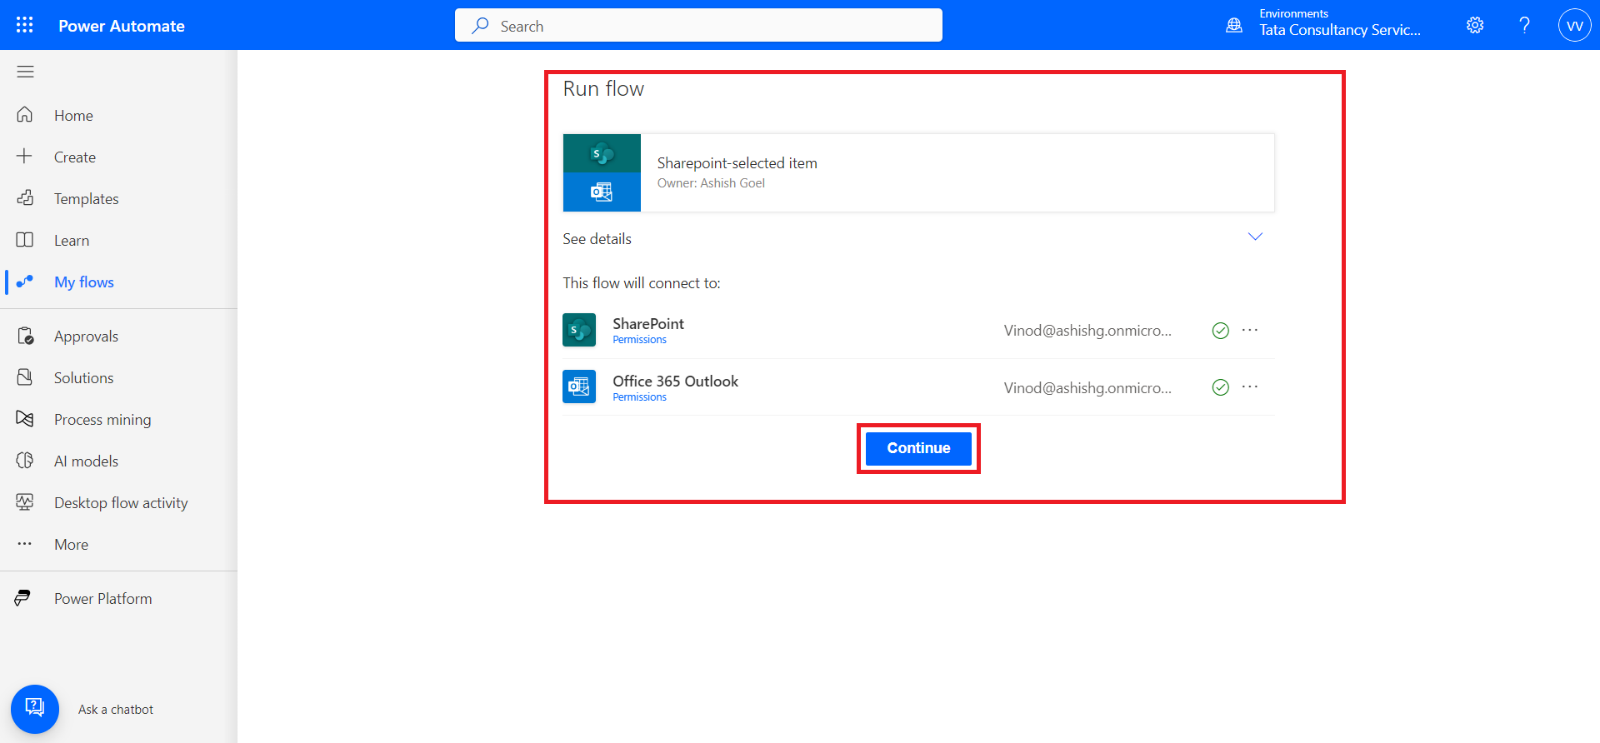
The default option for connection is Provided by run-only user, meaning that when a new user first uses the flow, they'll be prompted to create a connection for the connectors that use that option. In the following example, Ashish (the flow owner) has shared a flow with Vinod and the following prompt for connections will show on first use.
All connectors for this flow will be in the context of Vinod's connections.
In the following example, Ashish shared with Vinod again but changed the Sharepoint connection to use the existing connection. With this approach, when the flow runs, the Sharepoint connectors' actions will use Ashish's connection and permissions. This approach allows the flow to take actions that the implementing user might not have access to do. For example, the user can perform operation even though they are not able to access the sharepoint list.
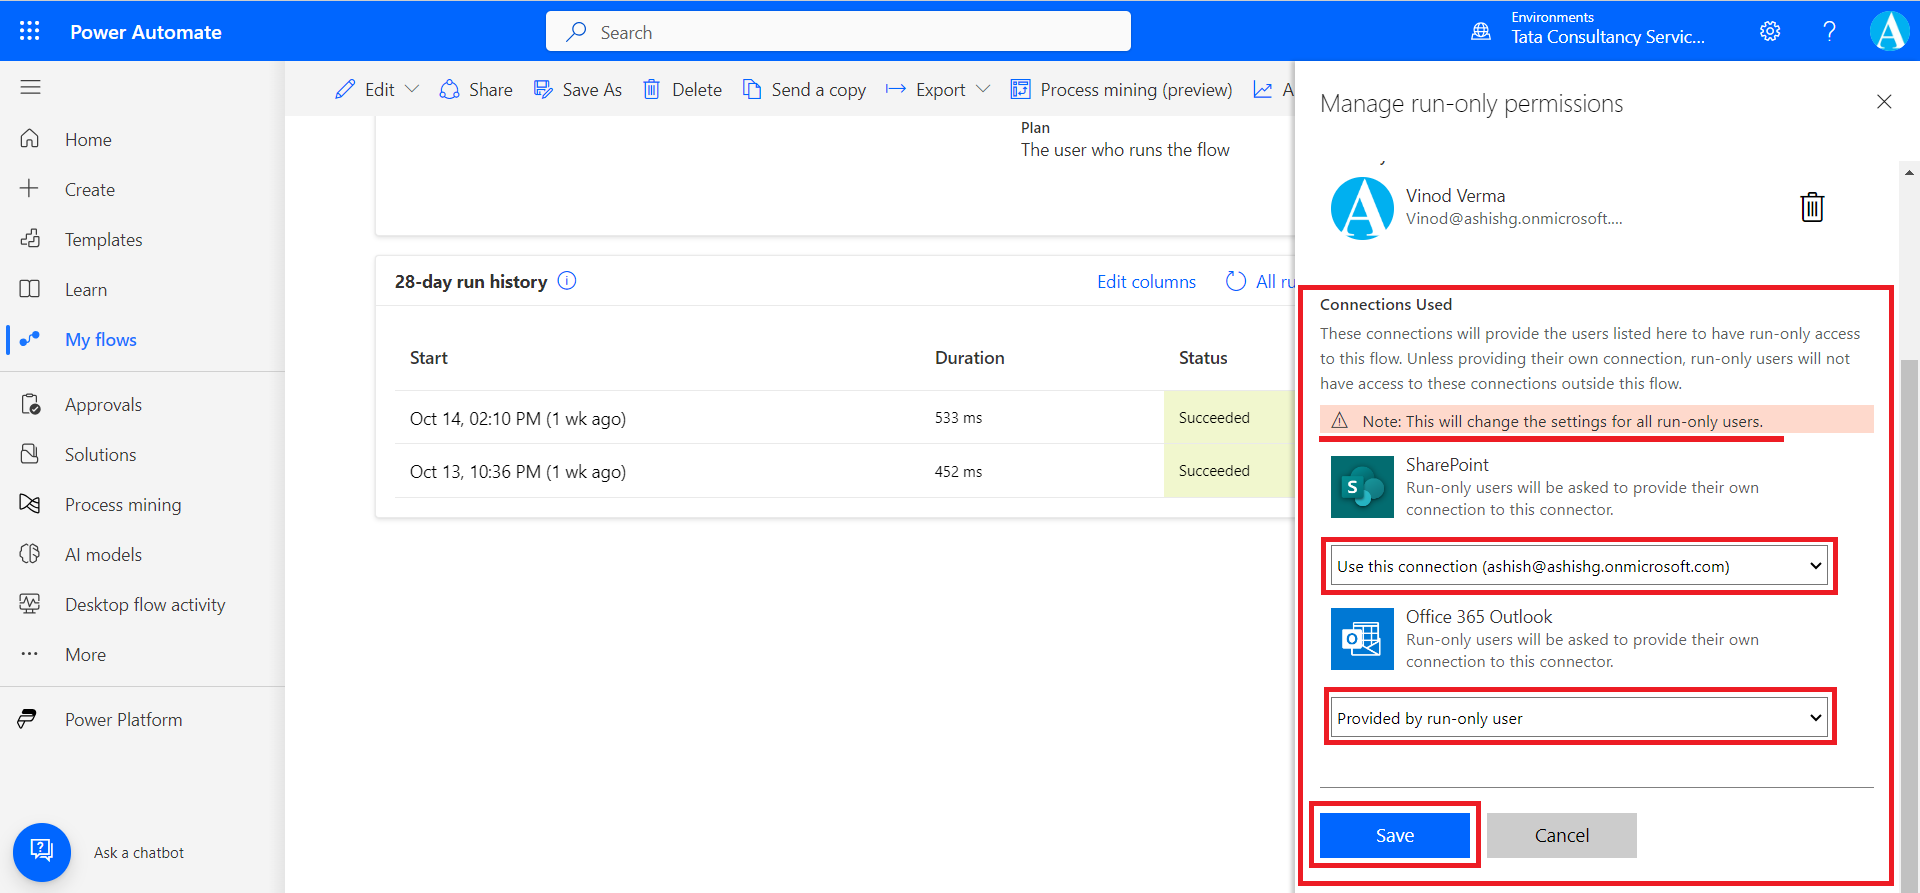
Note: We can change these selections anytime, but they'll apply to all users simultaneously. We can't have some users with different options.
With the new connection options, when Julie accesses the flow, it will now only prompt for the Office 365 Outlook connection.
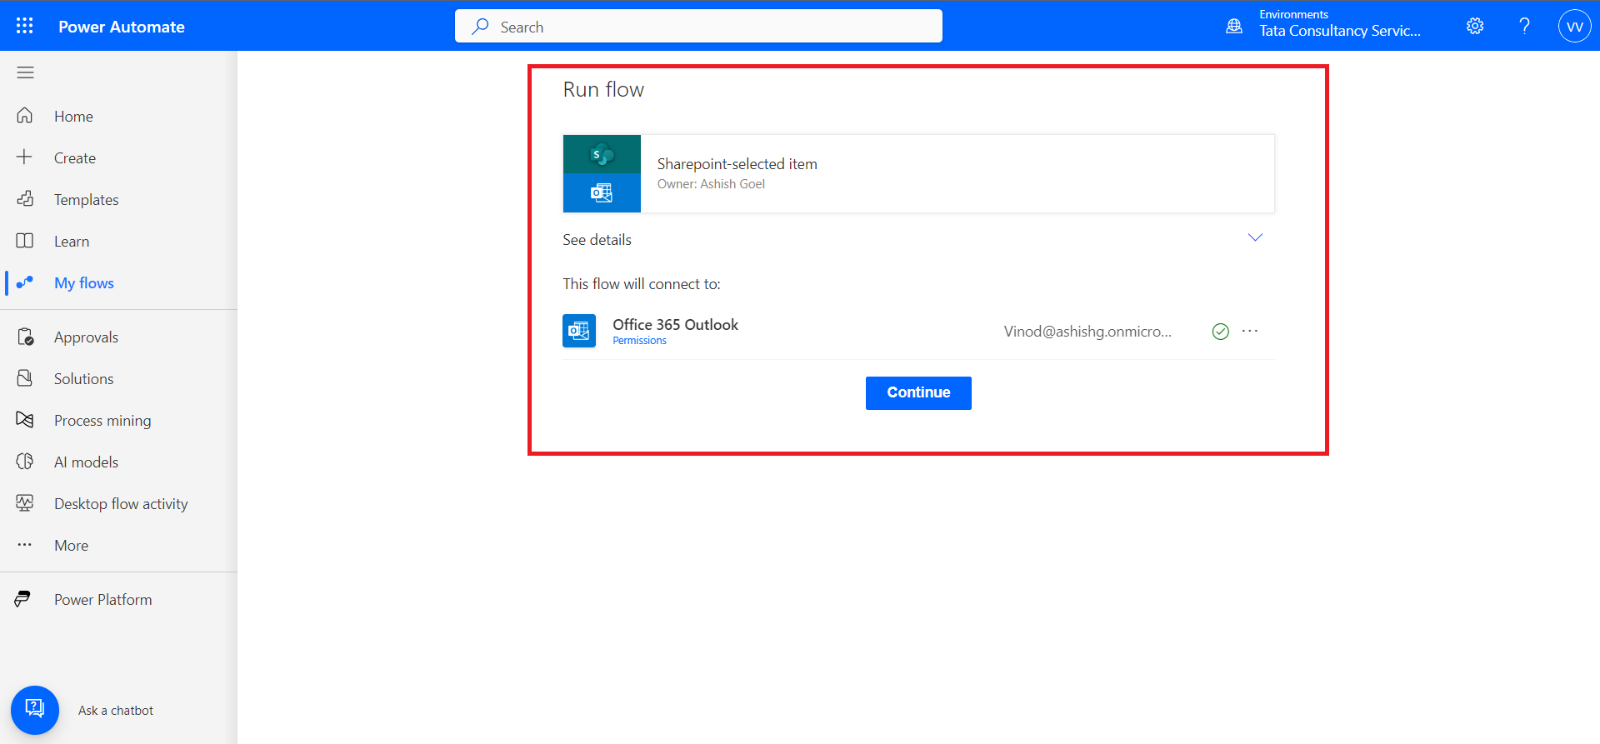
Note: A run-only user can find a shared cloud flow in the Power Automate mobile app and in the My flows cloud flow list.