Add a condition to a Power Automate flow
Use a condition to specify that a cloud flow performs one or more tasks only if a condition is true or false. For example, we can use a condition that indicates that you'll get an email only if the Teacher Salary is greater than 25000 and its record is modified.
Follow the following steps to demonstrate the procedure of adding and using the condition in the Power Automate flow:
Step 1: Sign into Power Automate.
Step 2: On the left pane, select Create.
Step 3: Select the Automated Cloud Flows.
Step 4: Write the Flow name.
Step 5: Select When an item or a file is modified, from the Choose your flow’s trigger section.
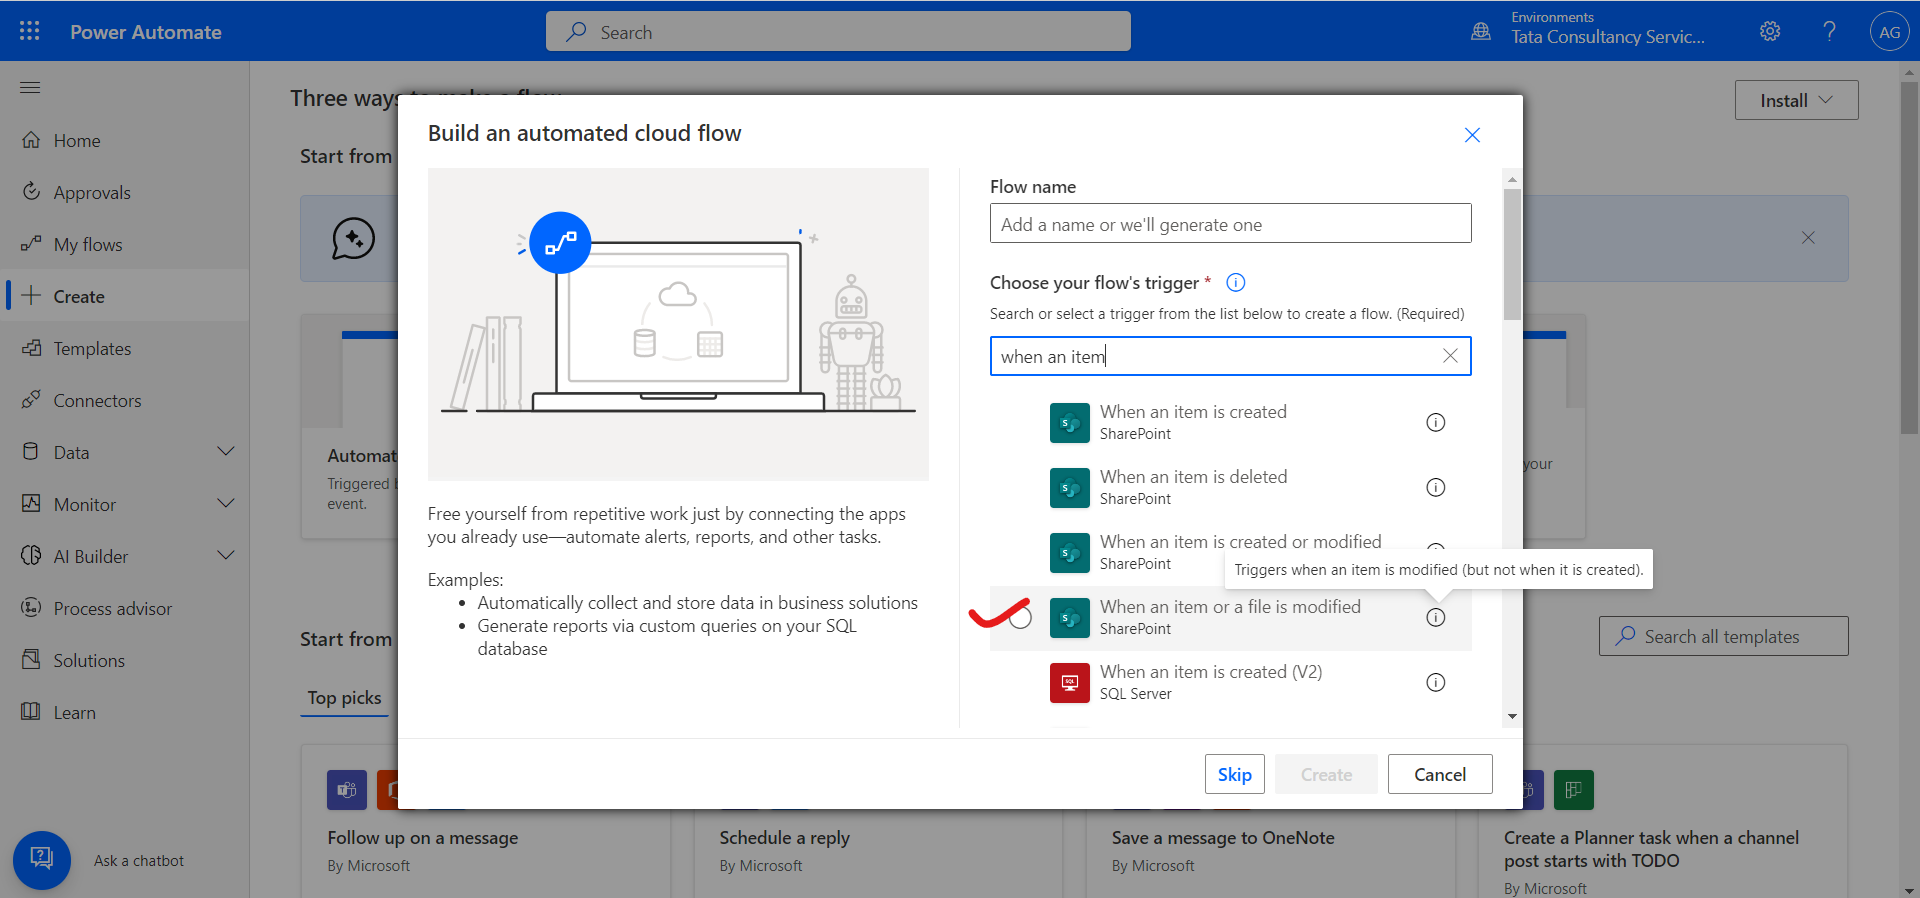
Note: When an item or a file is modified—This causes the Power automate trigger only when the item is modified in the specified sharepoint list but not when the item is created in the list.
Step 6: Enter the Site Address and the List Name. These two fields are mandatory for this.
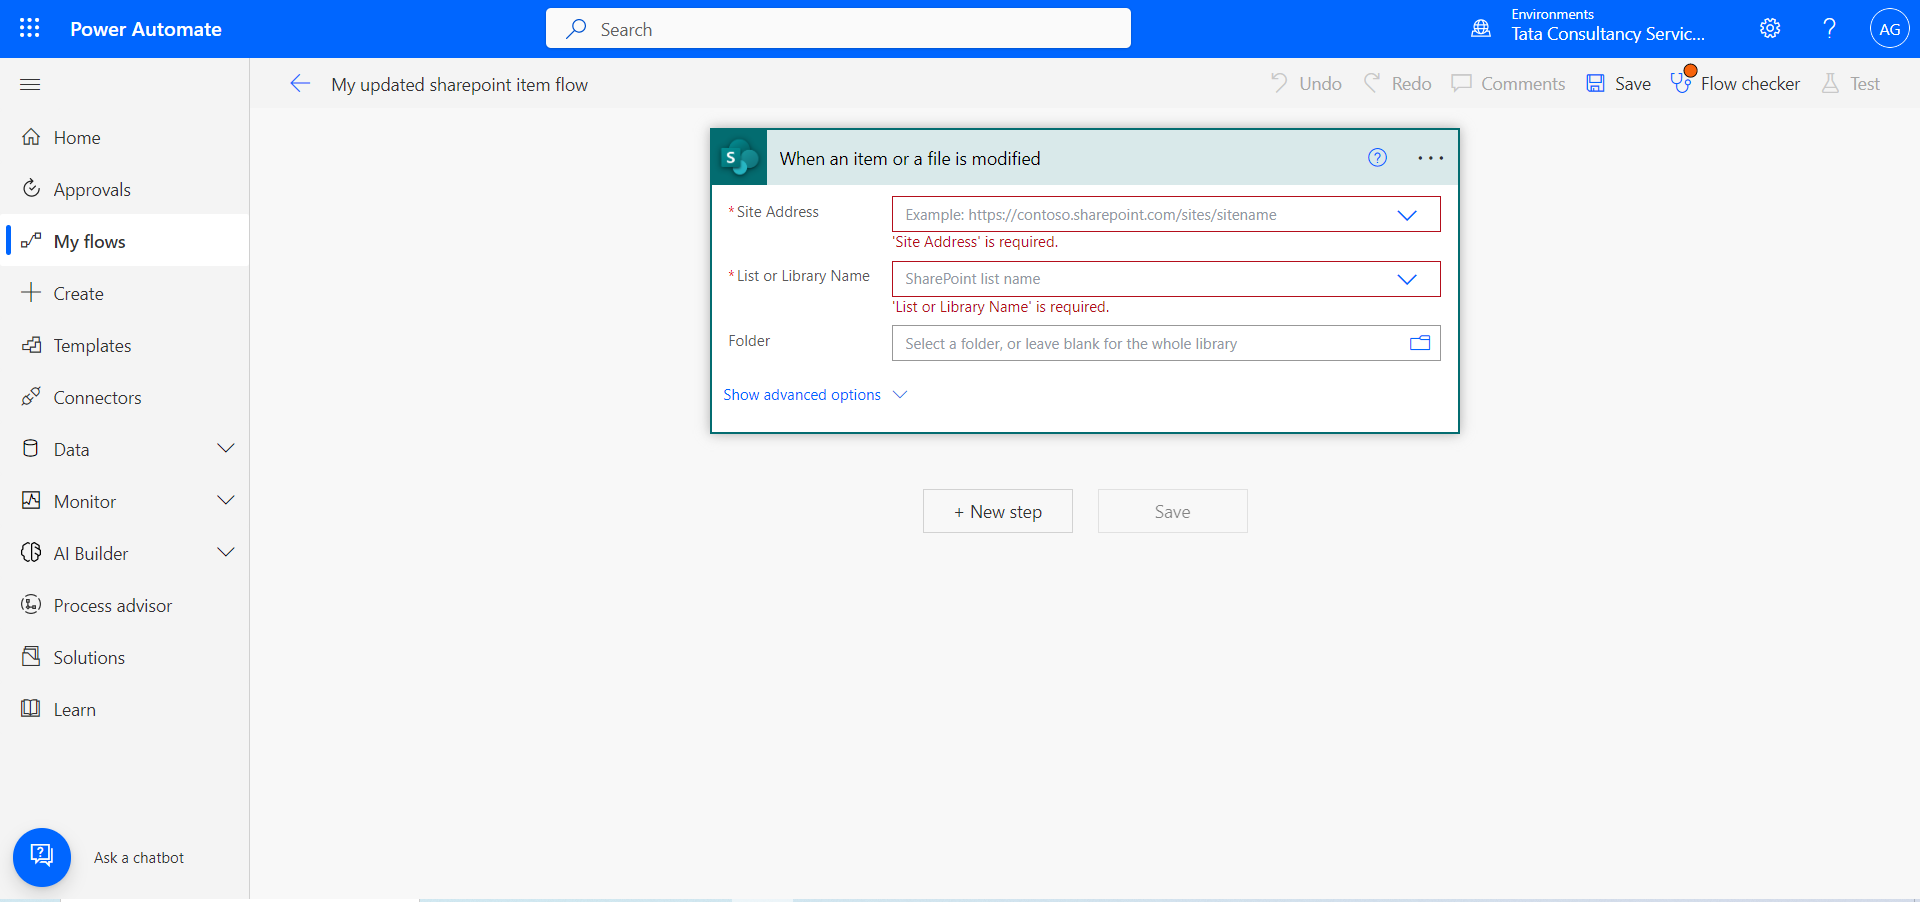
After adding our Power Automate flow is looks like the following image.
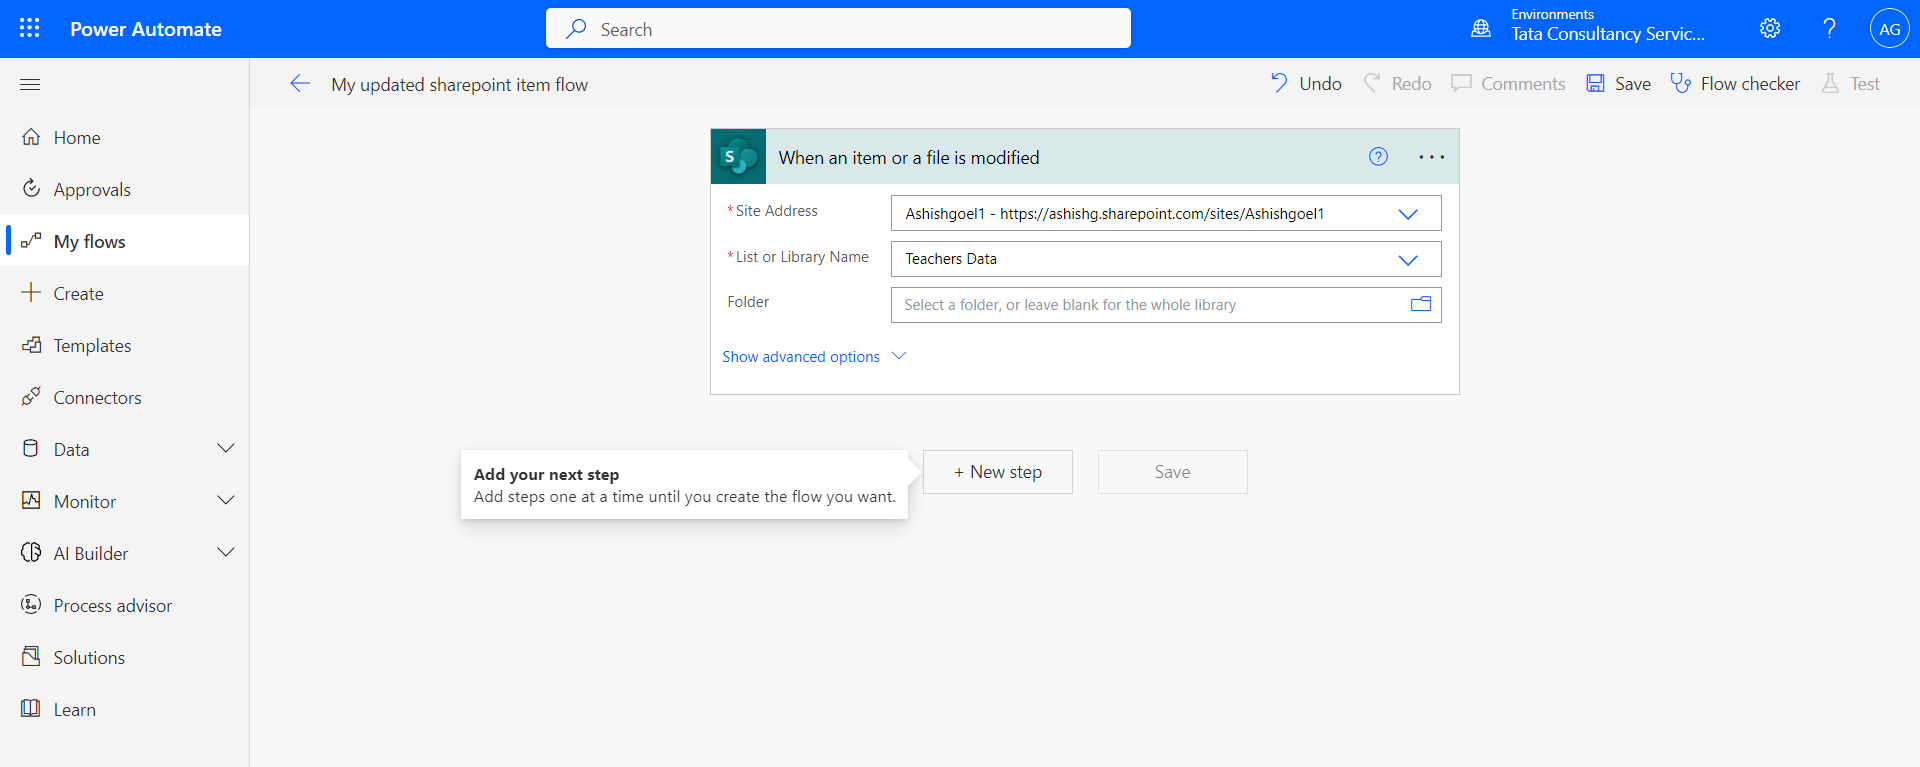
Step 7: Click on + New step.
Step 8: Select Send an email (v2), from the Actions.
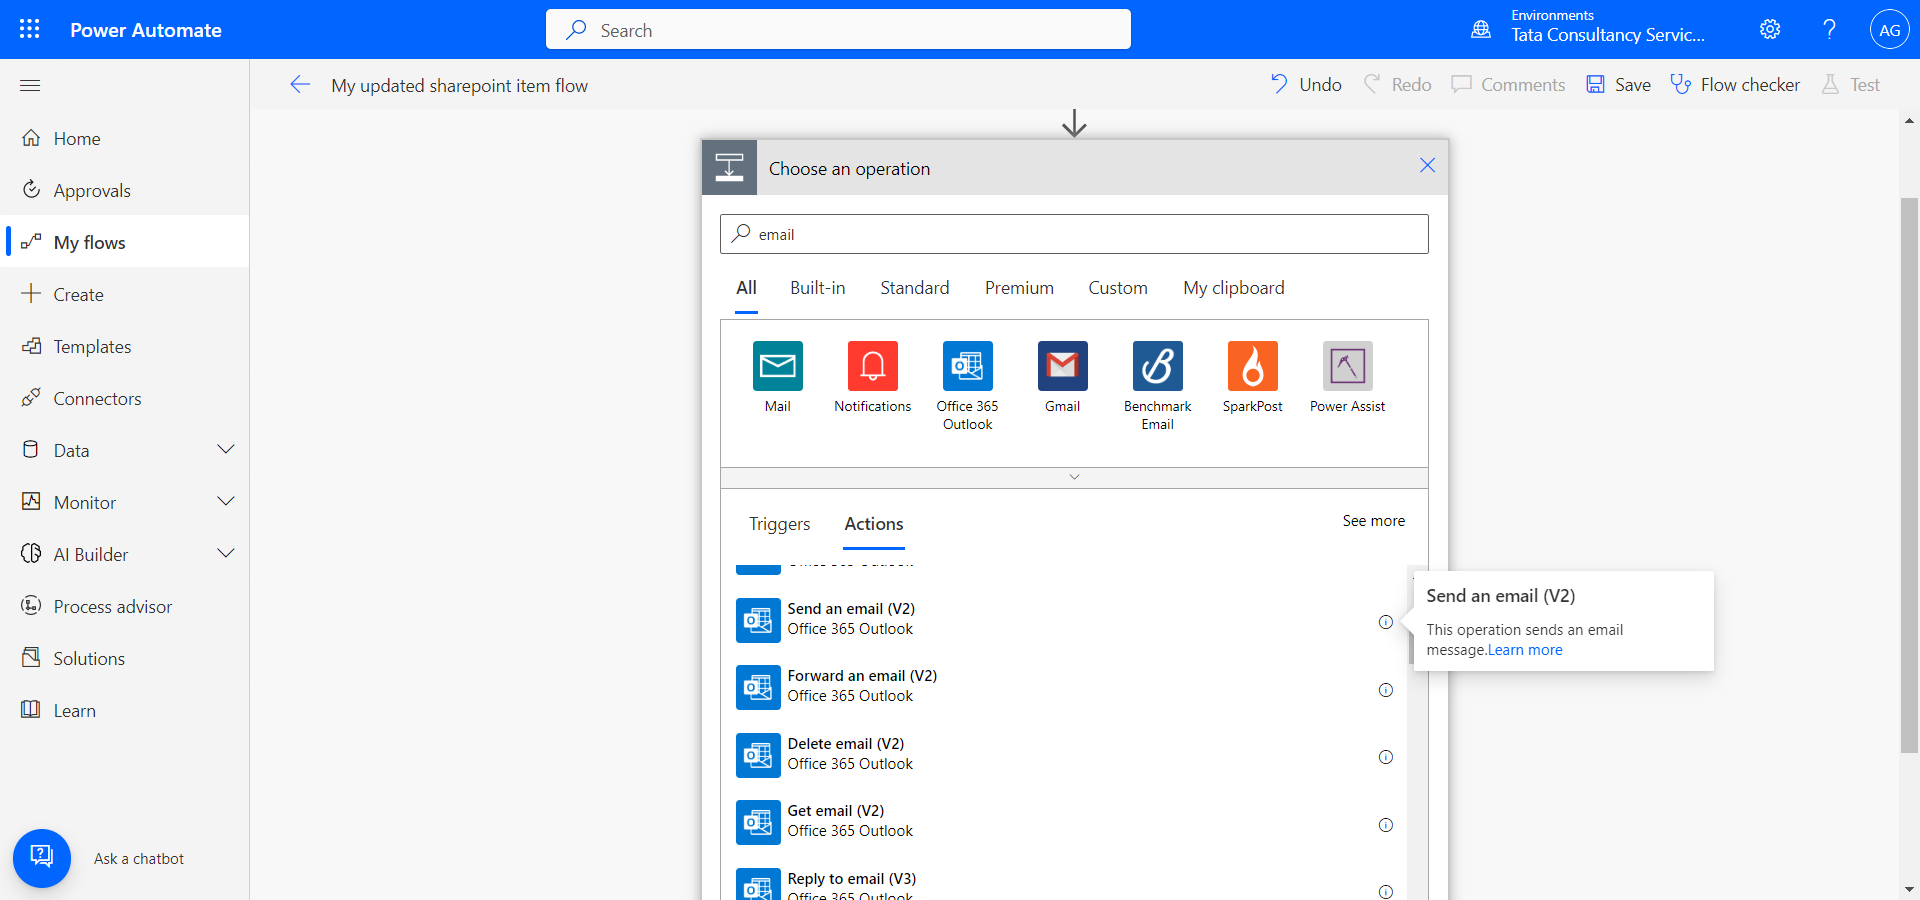
After selecting the action is added in the power automate flow.
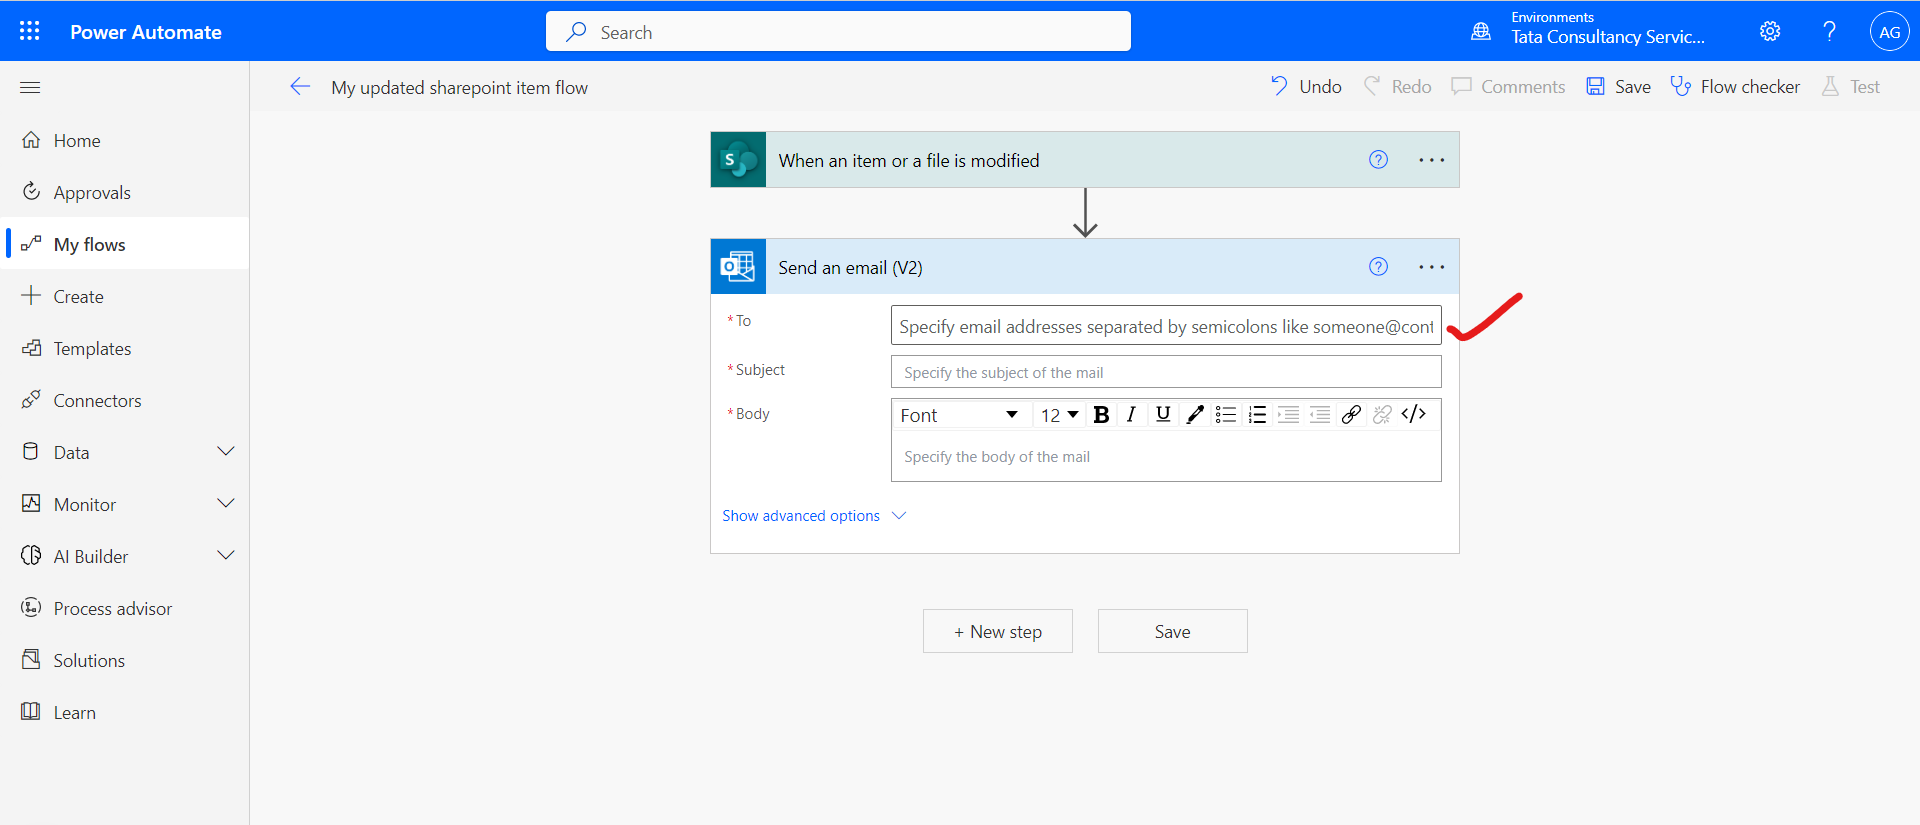
Step 9: Click on the “To” field, here we need to specify the email address of the person who receive the email. If multiple emails are given then separate them with semi-colons (;).
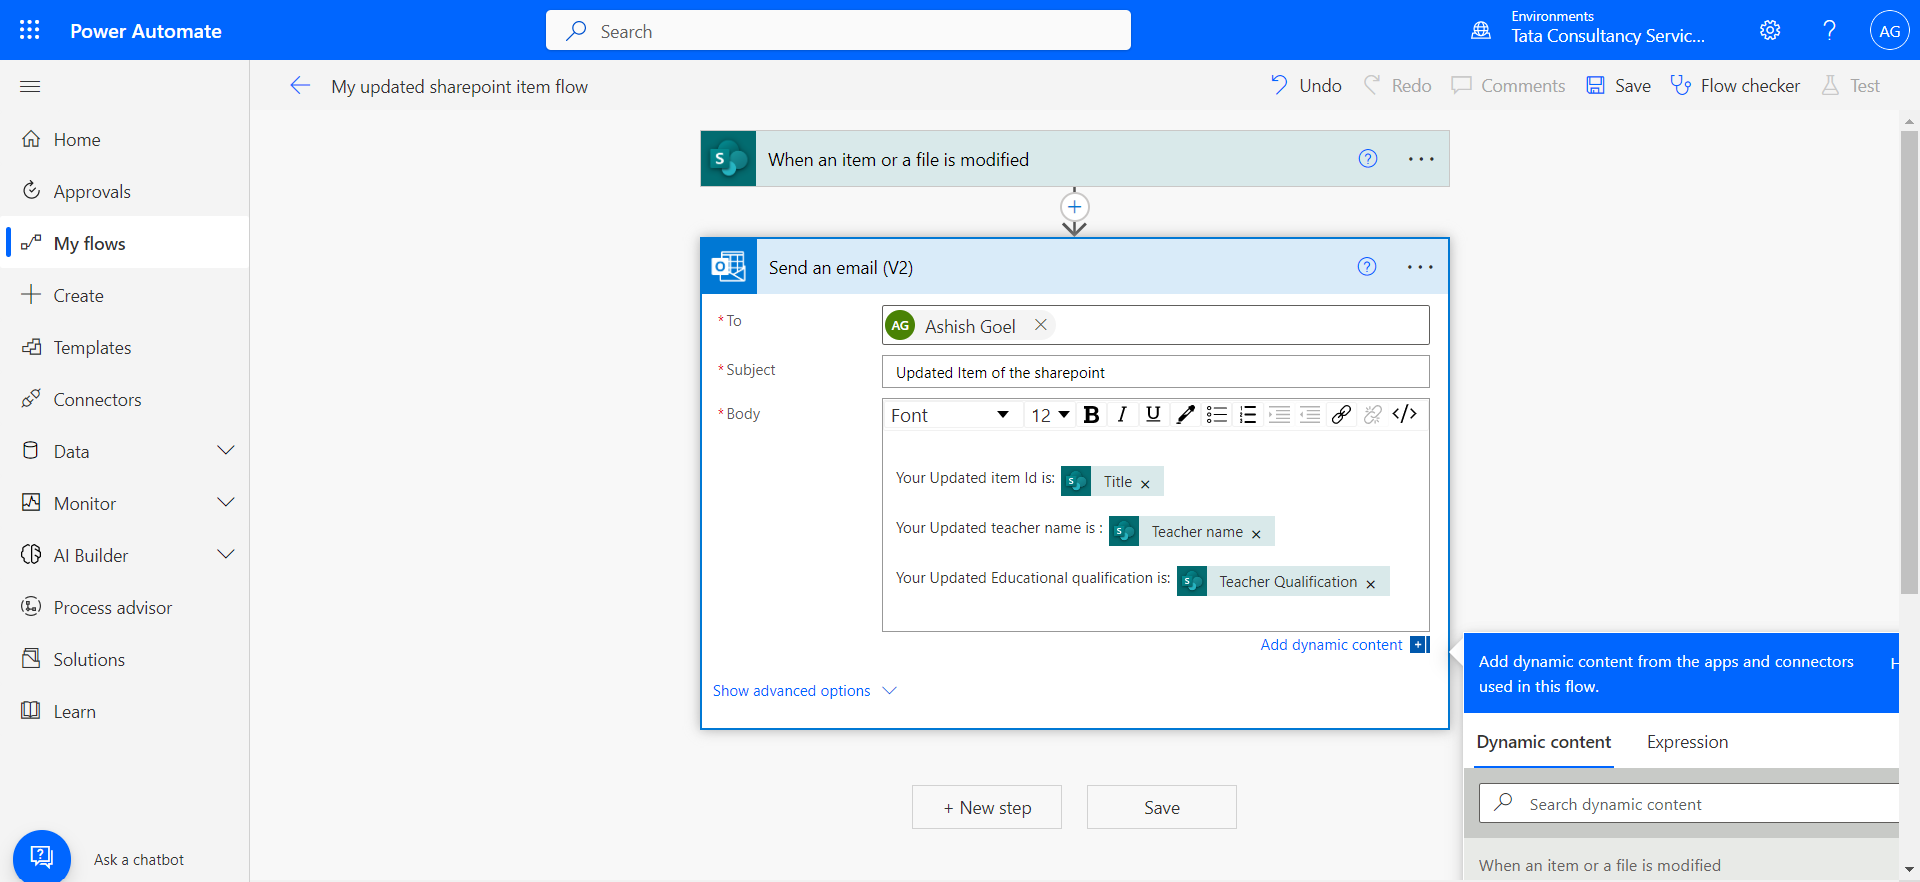
Step 10: Specify the Subject and Body of the Email. In the Dynamic content, we have a list of all the columns of SharePoint list that we have added in the above trigger control in power automate. We can specify the current item which triggered the flow in the email by the help of Dynamic content.
In the following image, in the Body of the email, we have used Title, Teacher name and Teacher Qualification columns of the item which triggered the power automate flow.
Step 11: Go to the specified list and modified any item in that list. After this the flow will run.
Step 12: If we want to send an email to person when the Teacher salary is above 25000, otherwise not then we can add a condition control above the email control in power automate flow.
To this select the + icon in between the two controls, then select the Condition.
Step 13: On the Condition card, select an empty area in box on the left. The Dynamic content list opens.
Step 14: Select the Teacher Salary column to add it to the box, which specify the current modified item’s Teacher Salary column value.
Step 15: In the box in the middle of the Condition card, select is greater than. In the box on the right, enter 25000.
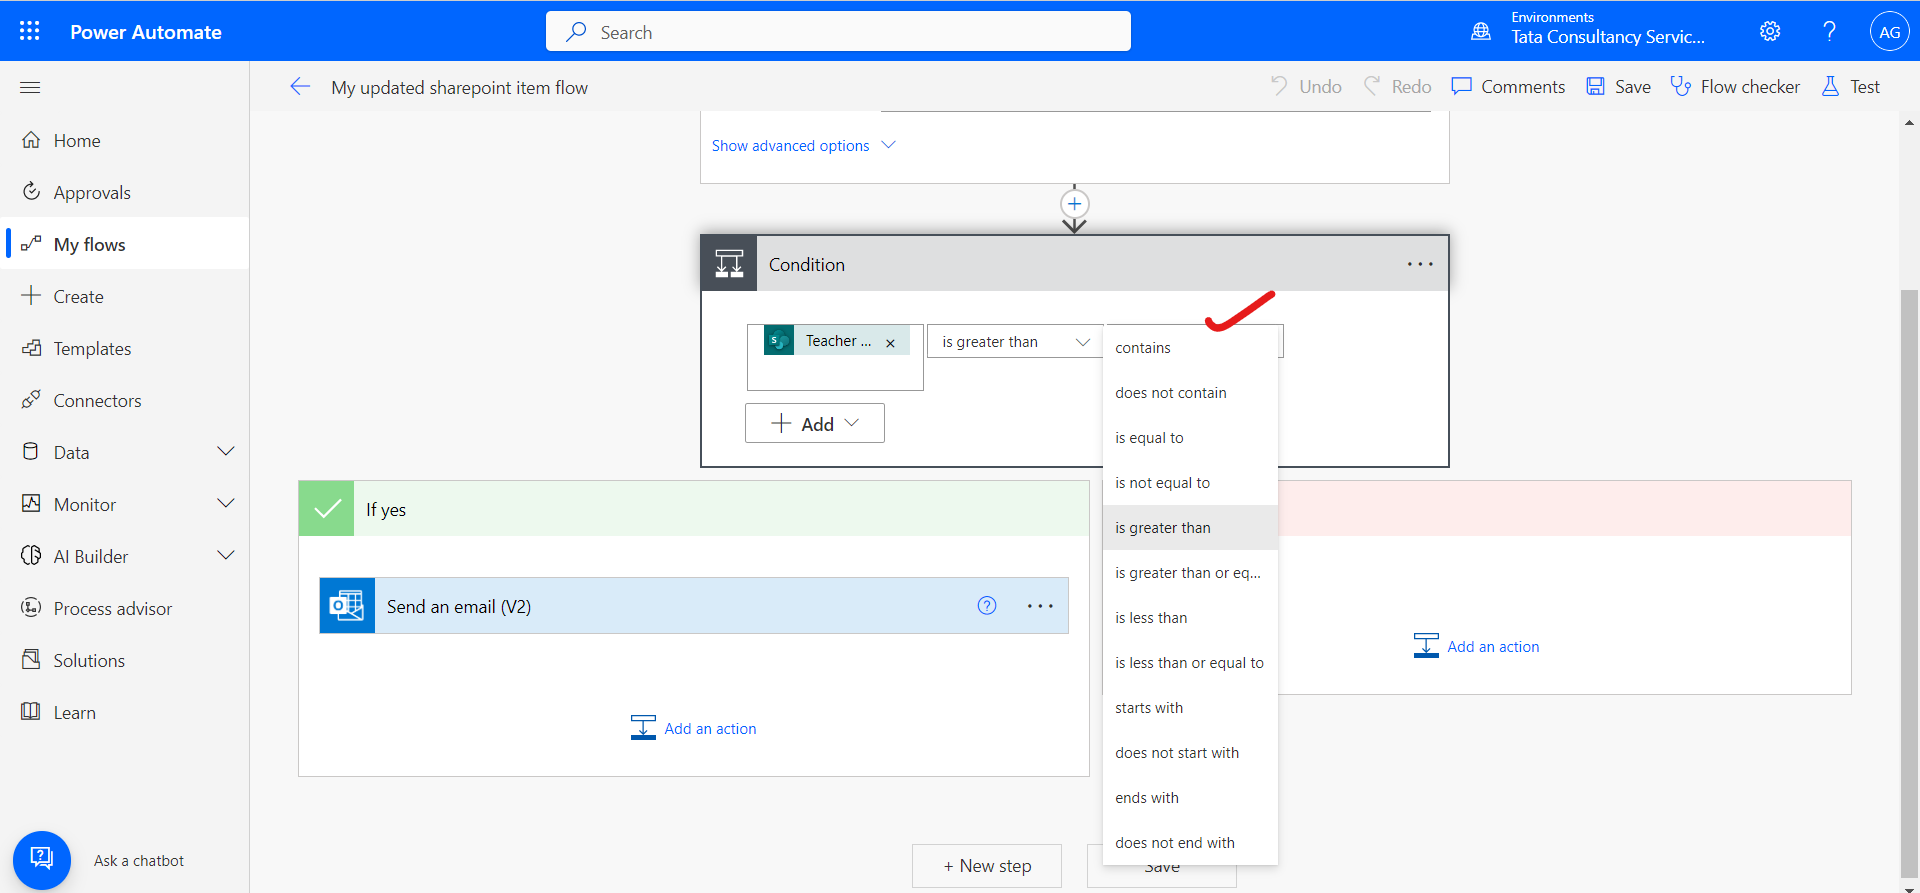
Now that we have configured the condition, continue with the following steps to send an email if the Teacher Salary is more than 25000.
Select the send an email action and drop it on the If yes condition of the control.
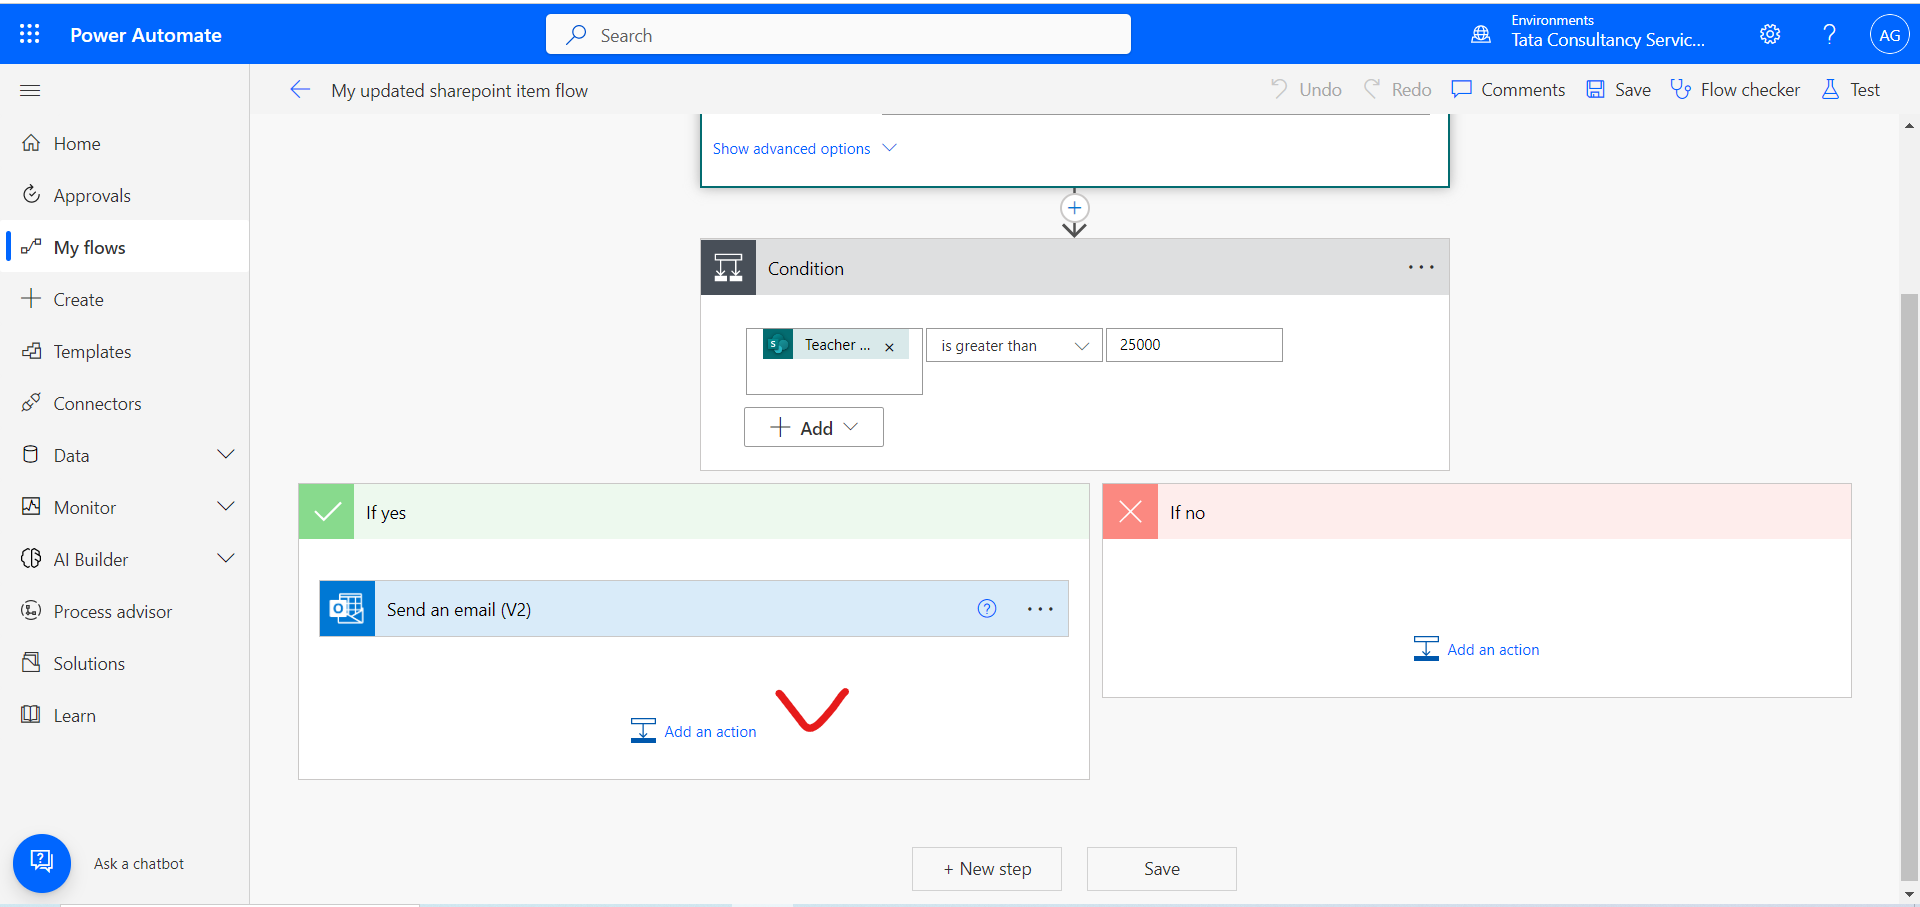
Step 16: We can also configure the If no side of the condition if we would like to take an when the Teacher Salary is less than or equal to 25000. But for now we are leaving this empty.
Step 17: Save the flow and try to modify the item in the sharepoint list.
Tip We can create complex and multiple conditions by using the Add button on the condition card.
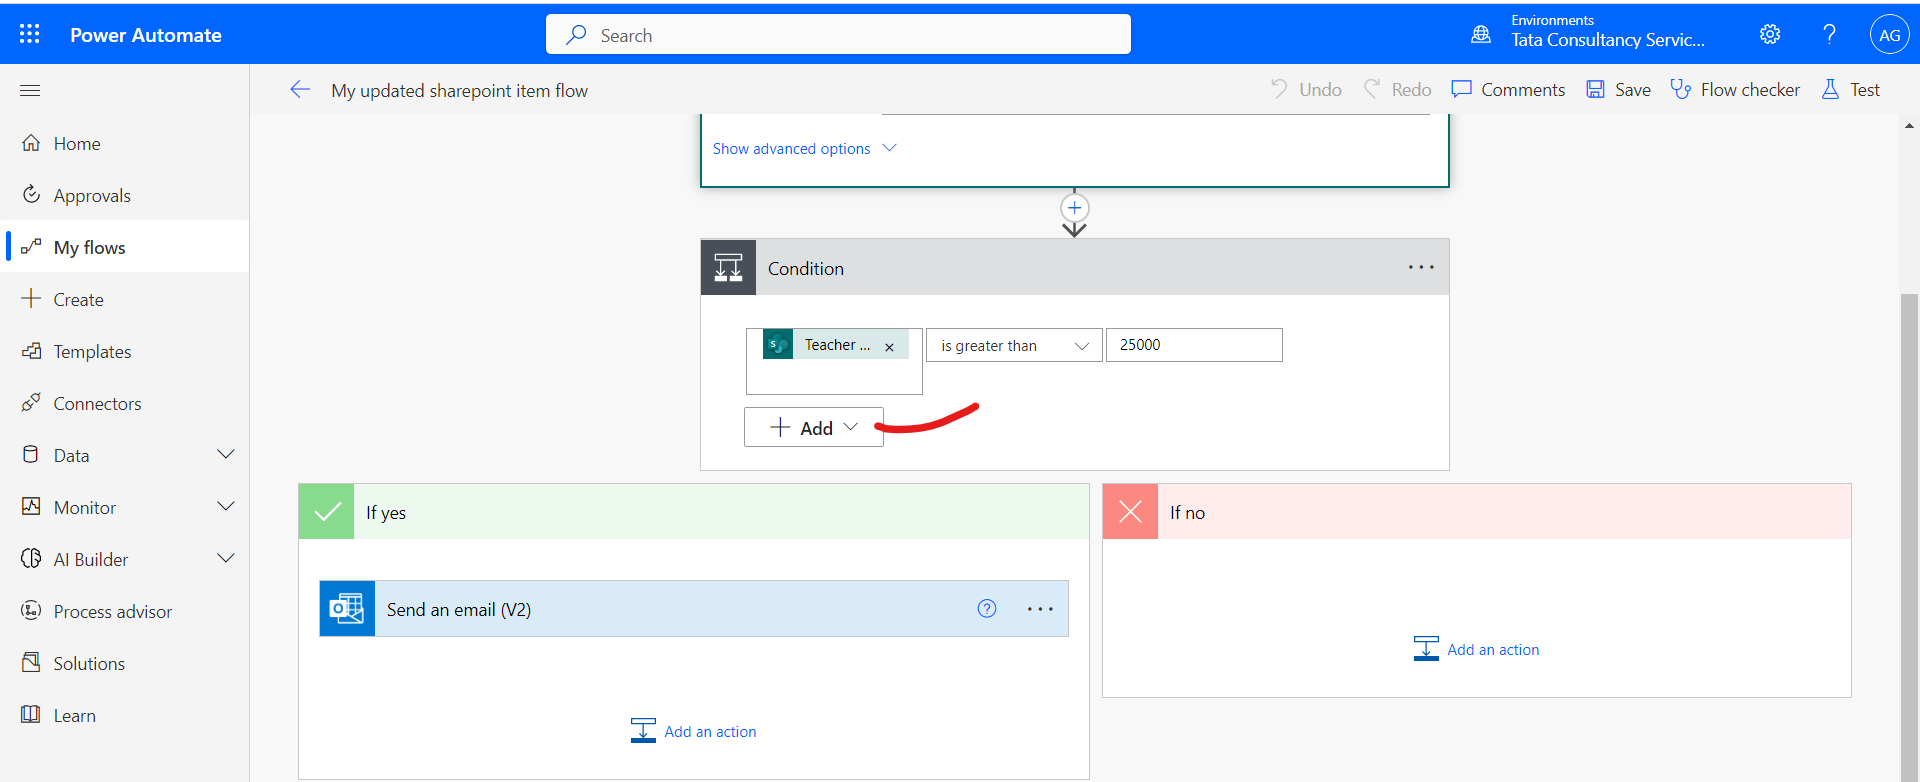
Note: 1. When the item’s Teachers salary column value is less than or equal to 25000, the flow is still triggered but do not send the email this time. We can also configure the condition of the false side.
2. When the item’s Teachers salary column value is greater than 25000, the flow is still triggered and send the email this time, as the condition becomes true, and on the yes side we have place an email action.