Remove, Count and Reverse Rows
1. Remove Rows
We can remove the rows from the data in the power query editor. A. Remove Top Rows To remove the top rows, select Remove Rows from the Home tab, then click on Remove Rows then on Remove Top Rows.
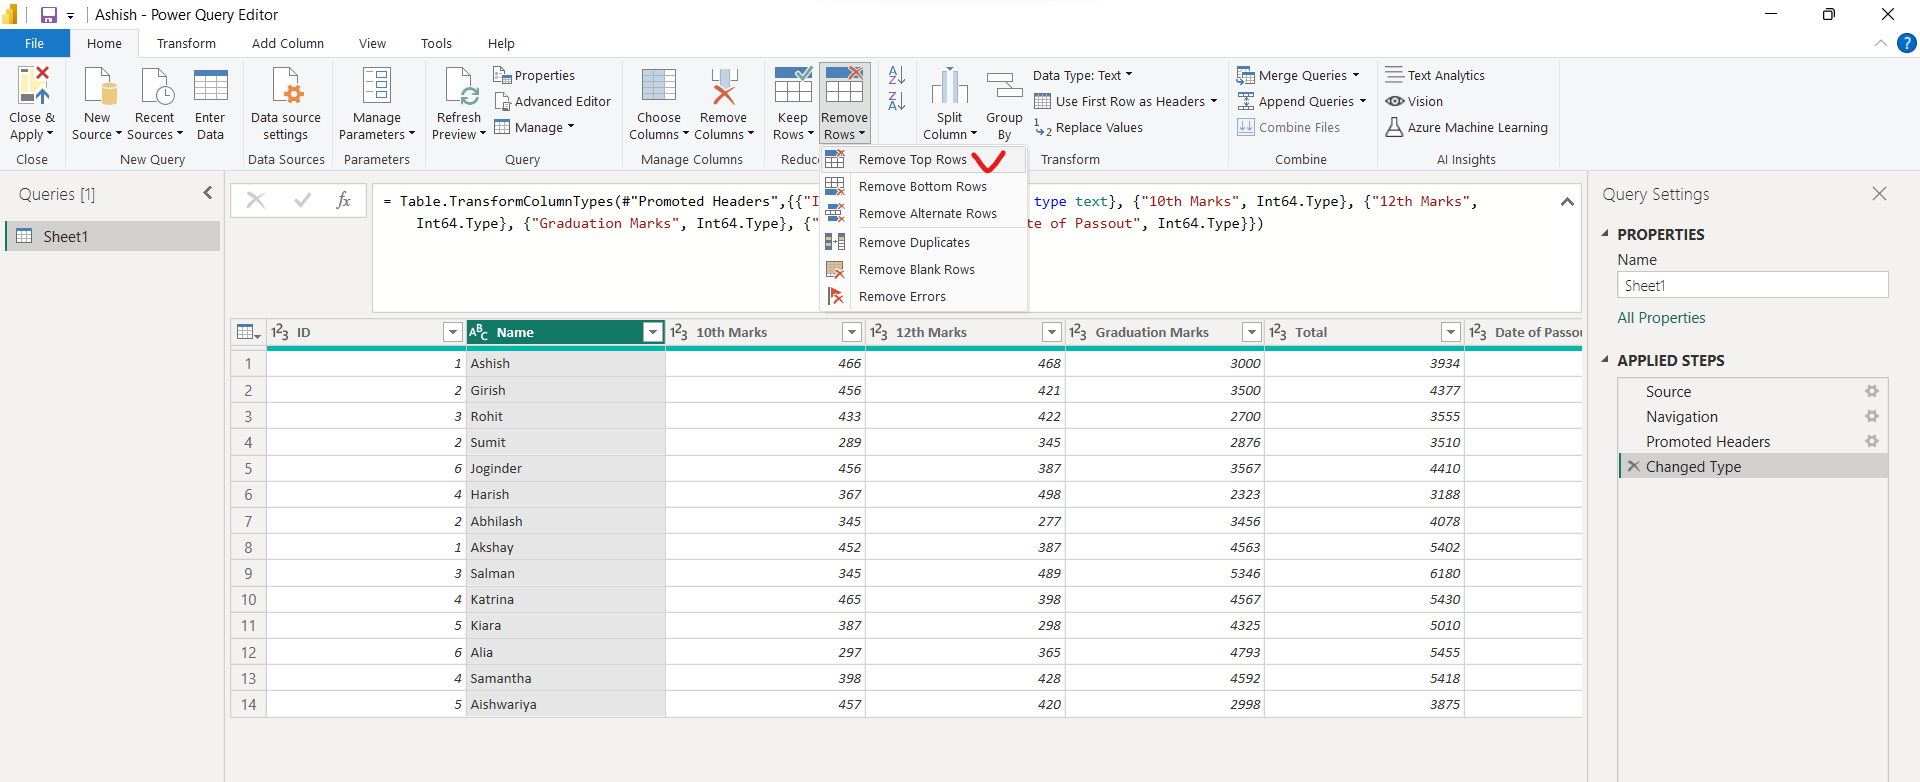
After clicking on Remove Top Rows the following dialog box appears.
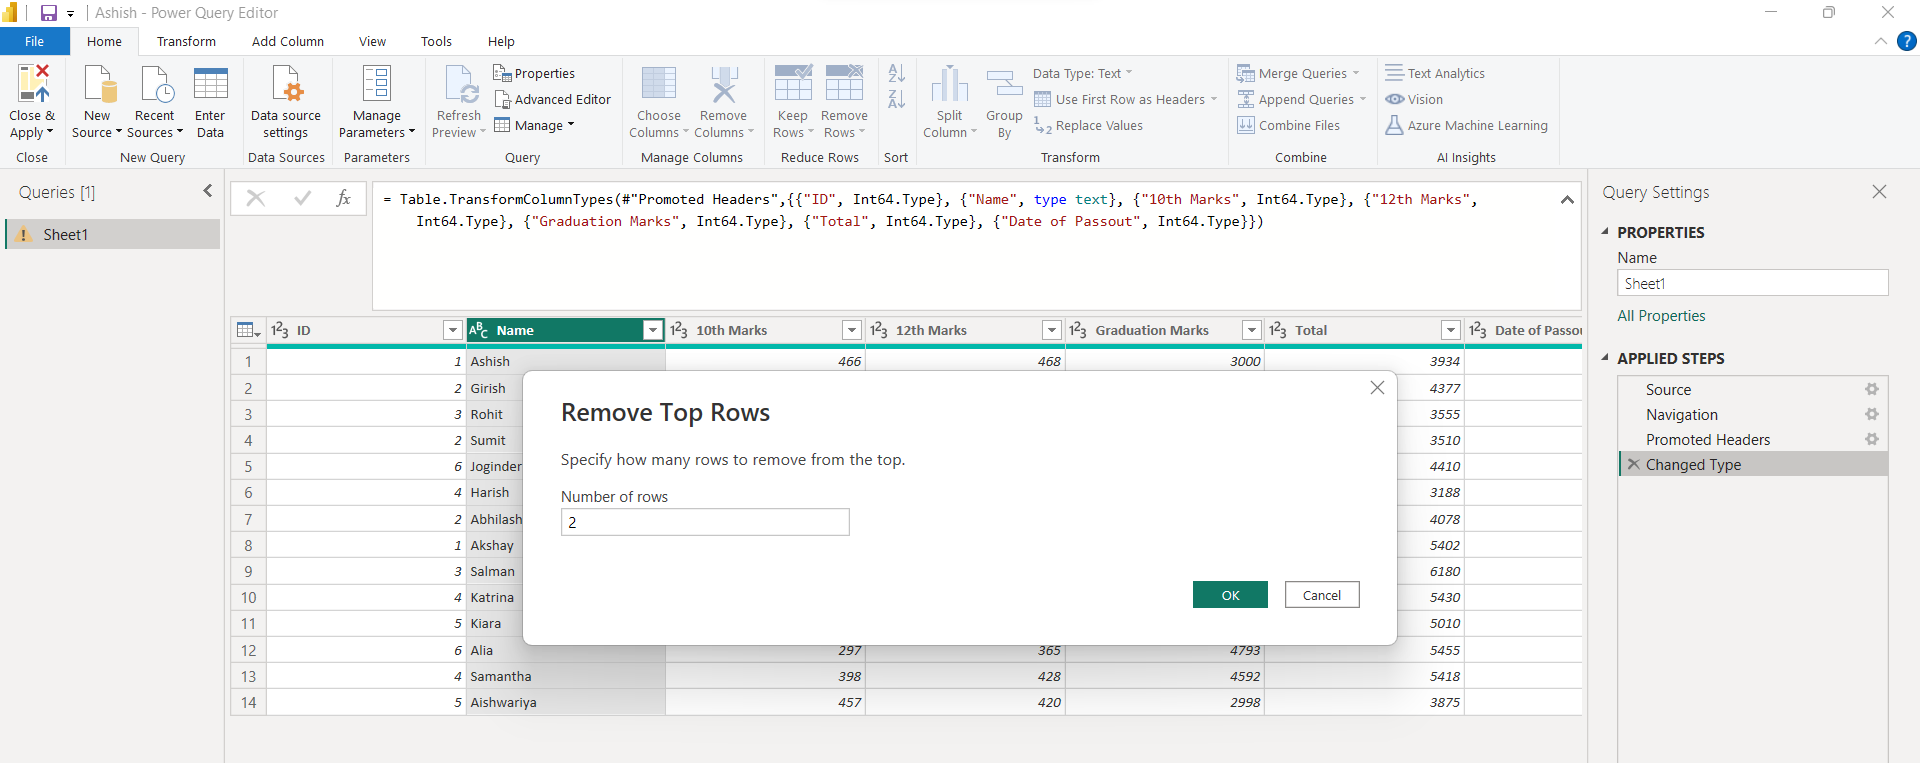
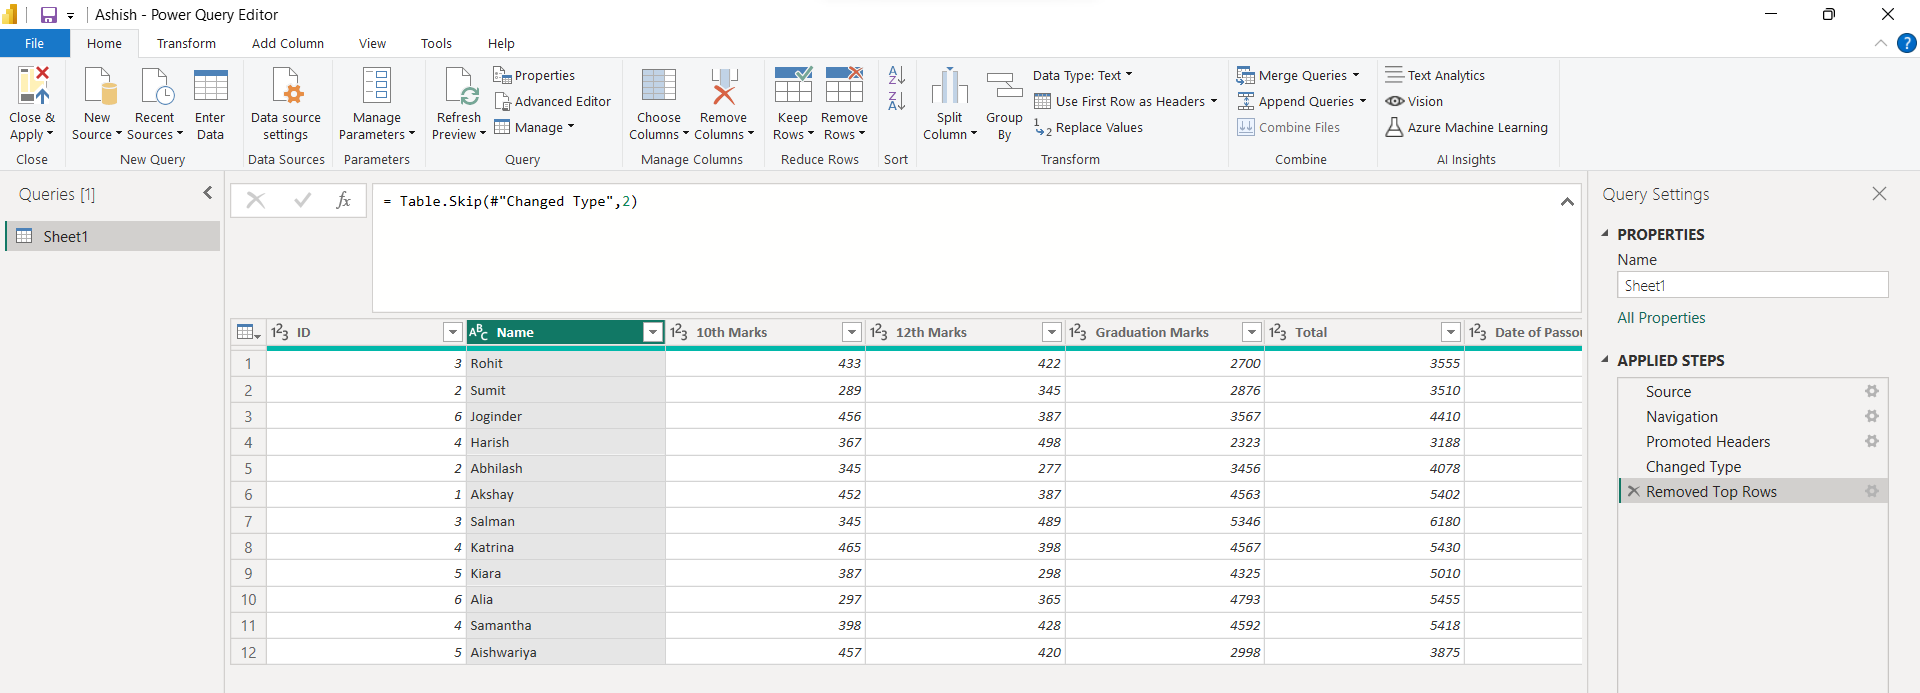
Let’s suppose enter the value 2. And click on Ok. The following image shown the result, in which the top two rows are removed from the query.
B. Remove Bottom Rows
To remove the bottom rows, select Remove Rows on the Home tab, then click on Remove Rows, then on Remove Bottom Rows.
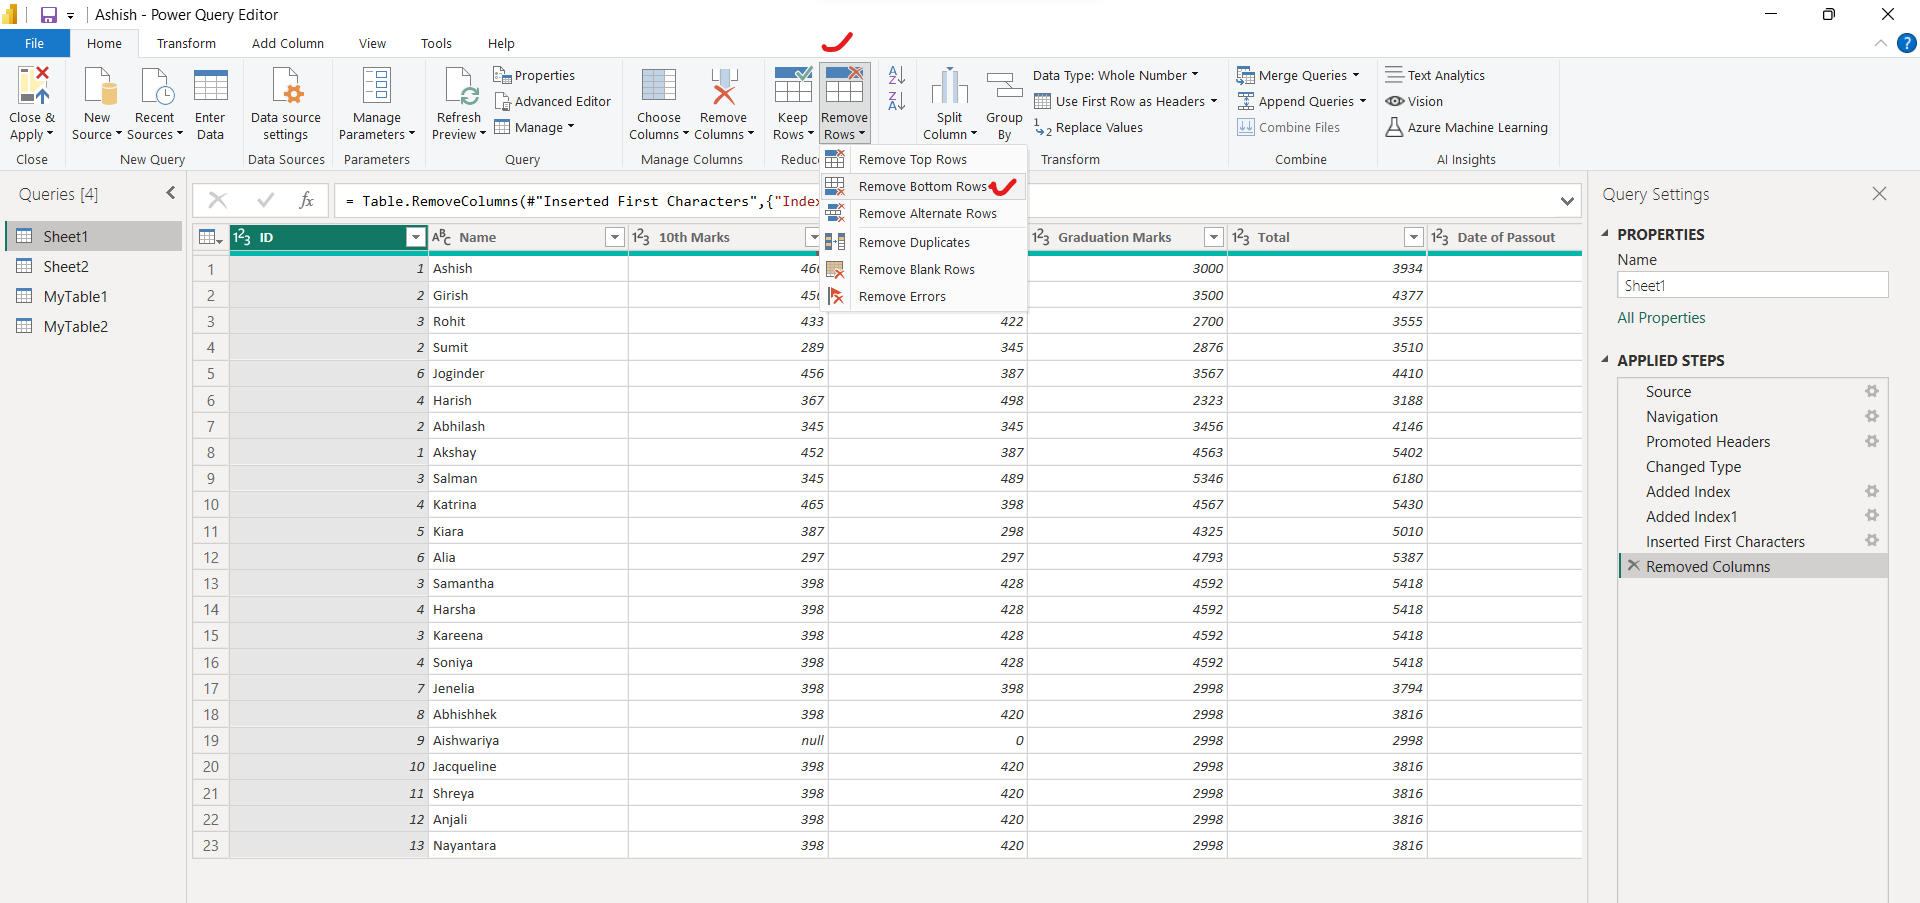
After clicking on Remove Bottom Rows the following dialog box appears. Let’s suppose enter the value 5.
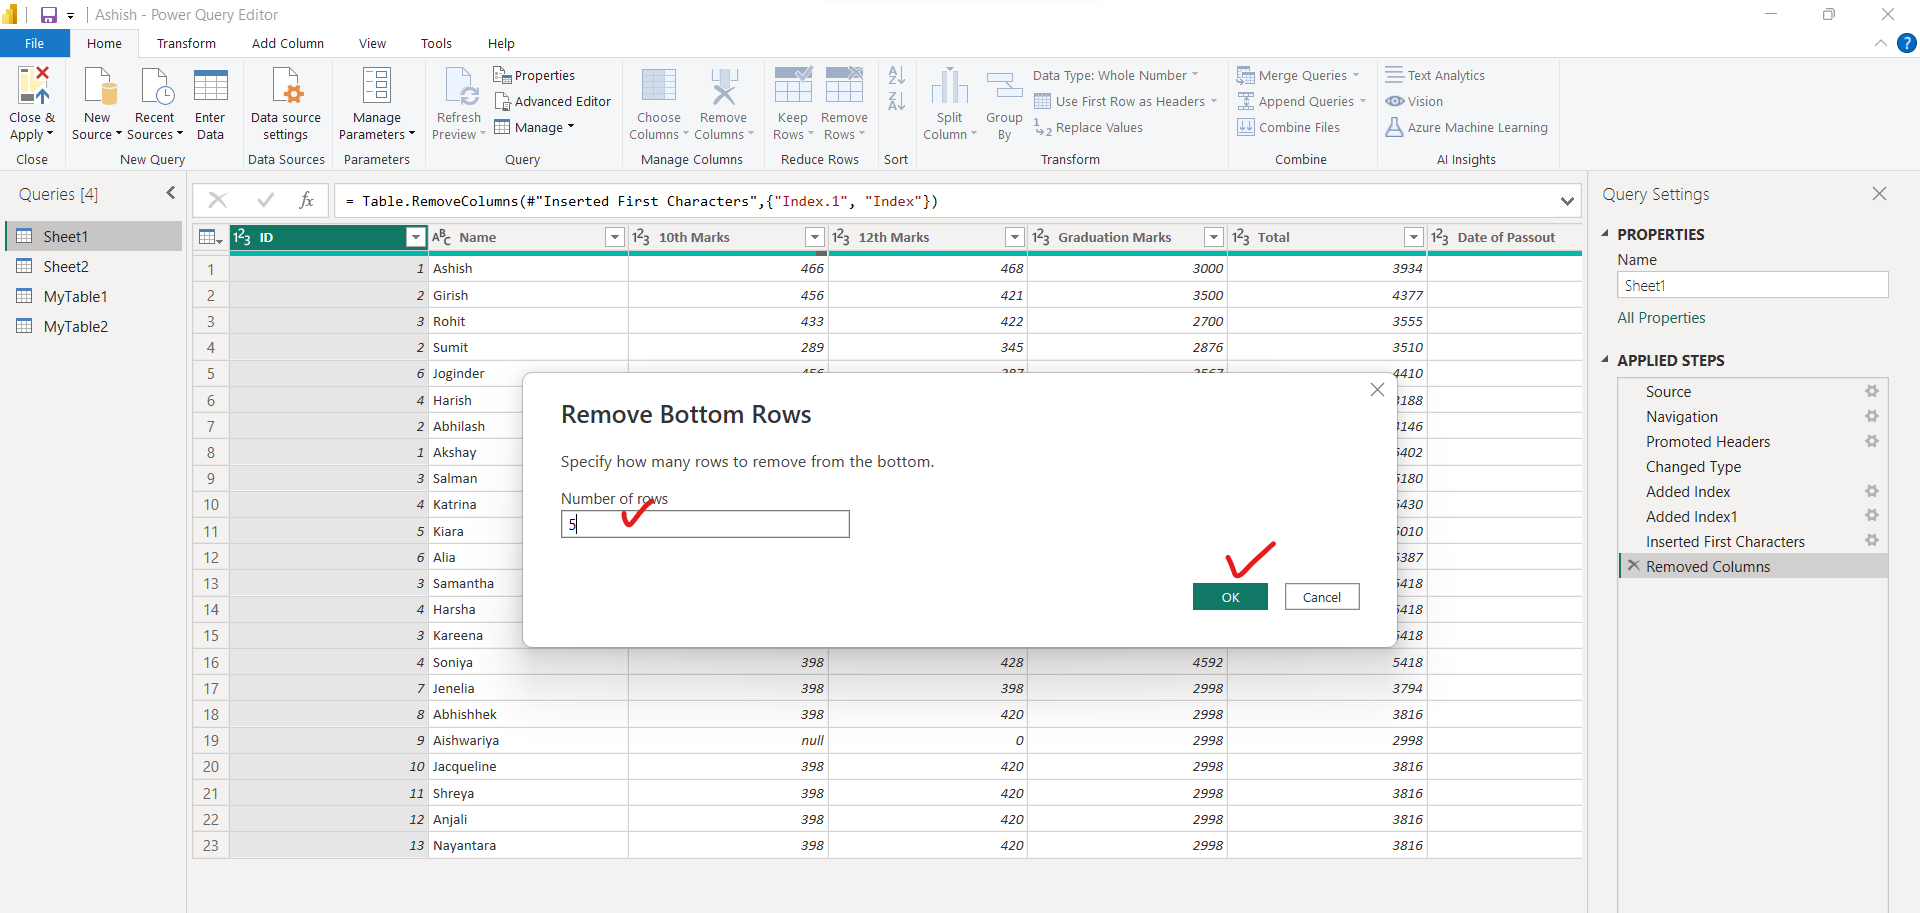
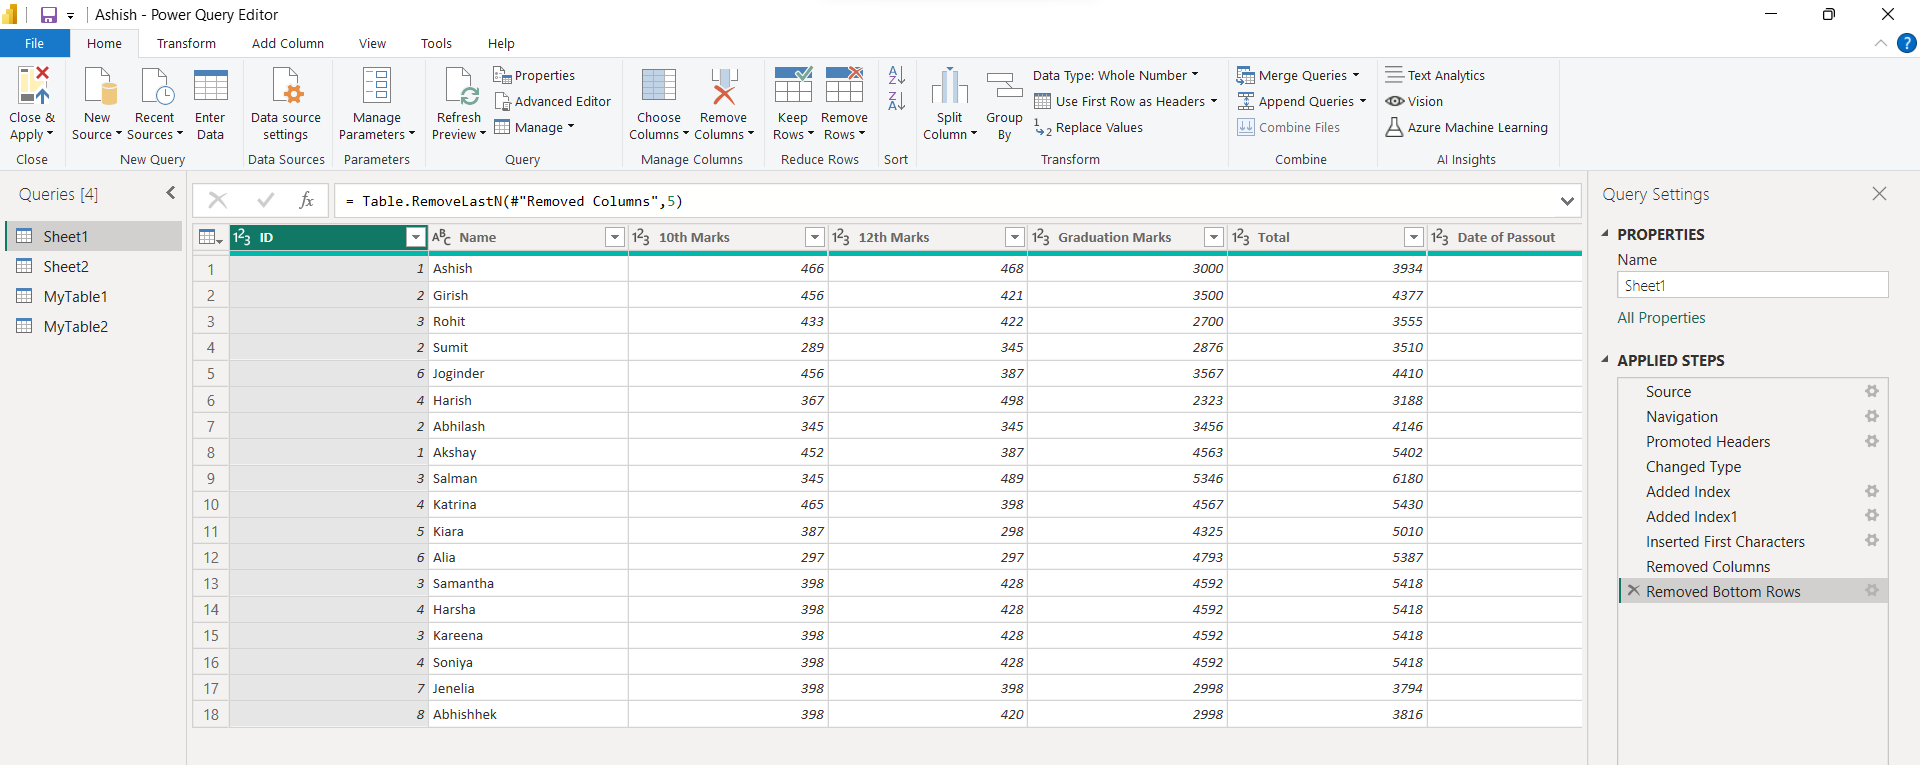
After clicking on Ok. The following image shown the result, in which the bottom five rows are removed from the query.
2. Count Rows
We can count the rows of a table by clicking on the Count Rows button of the Transform ribbon.
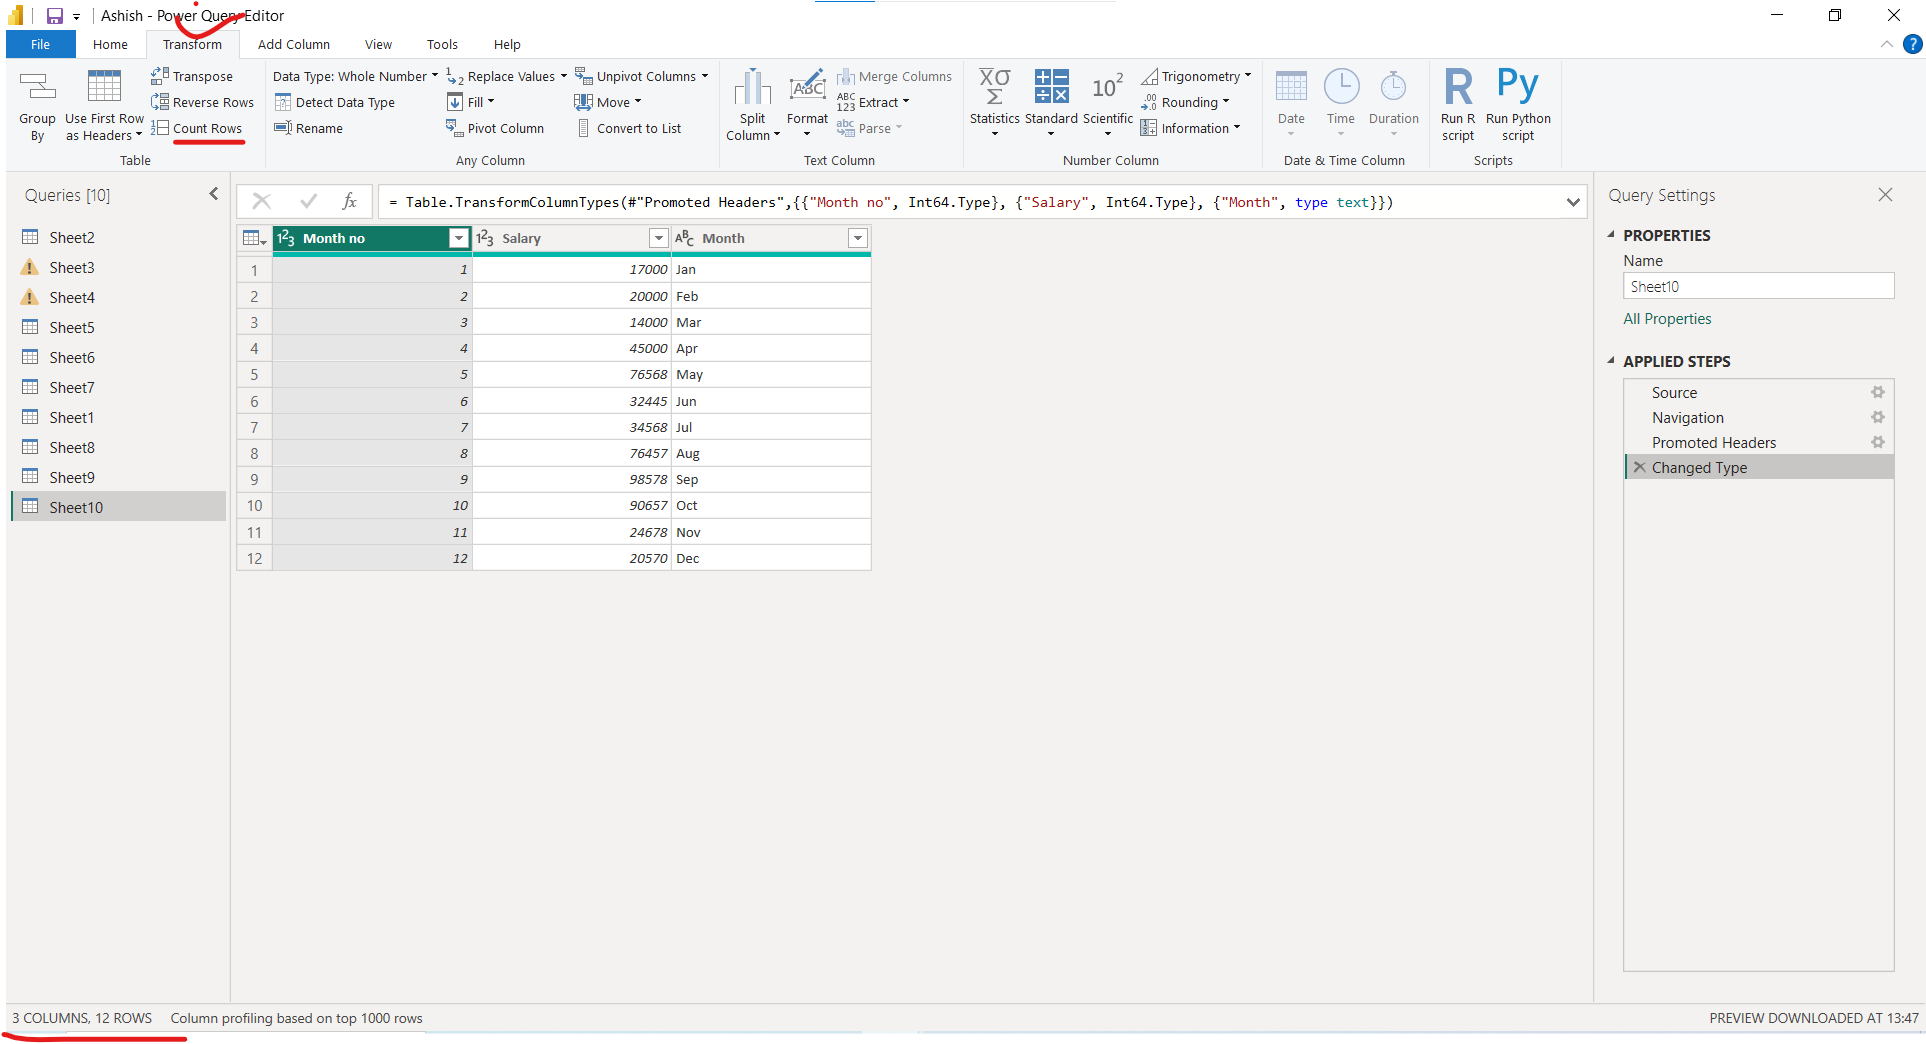
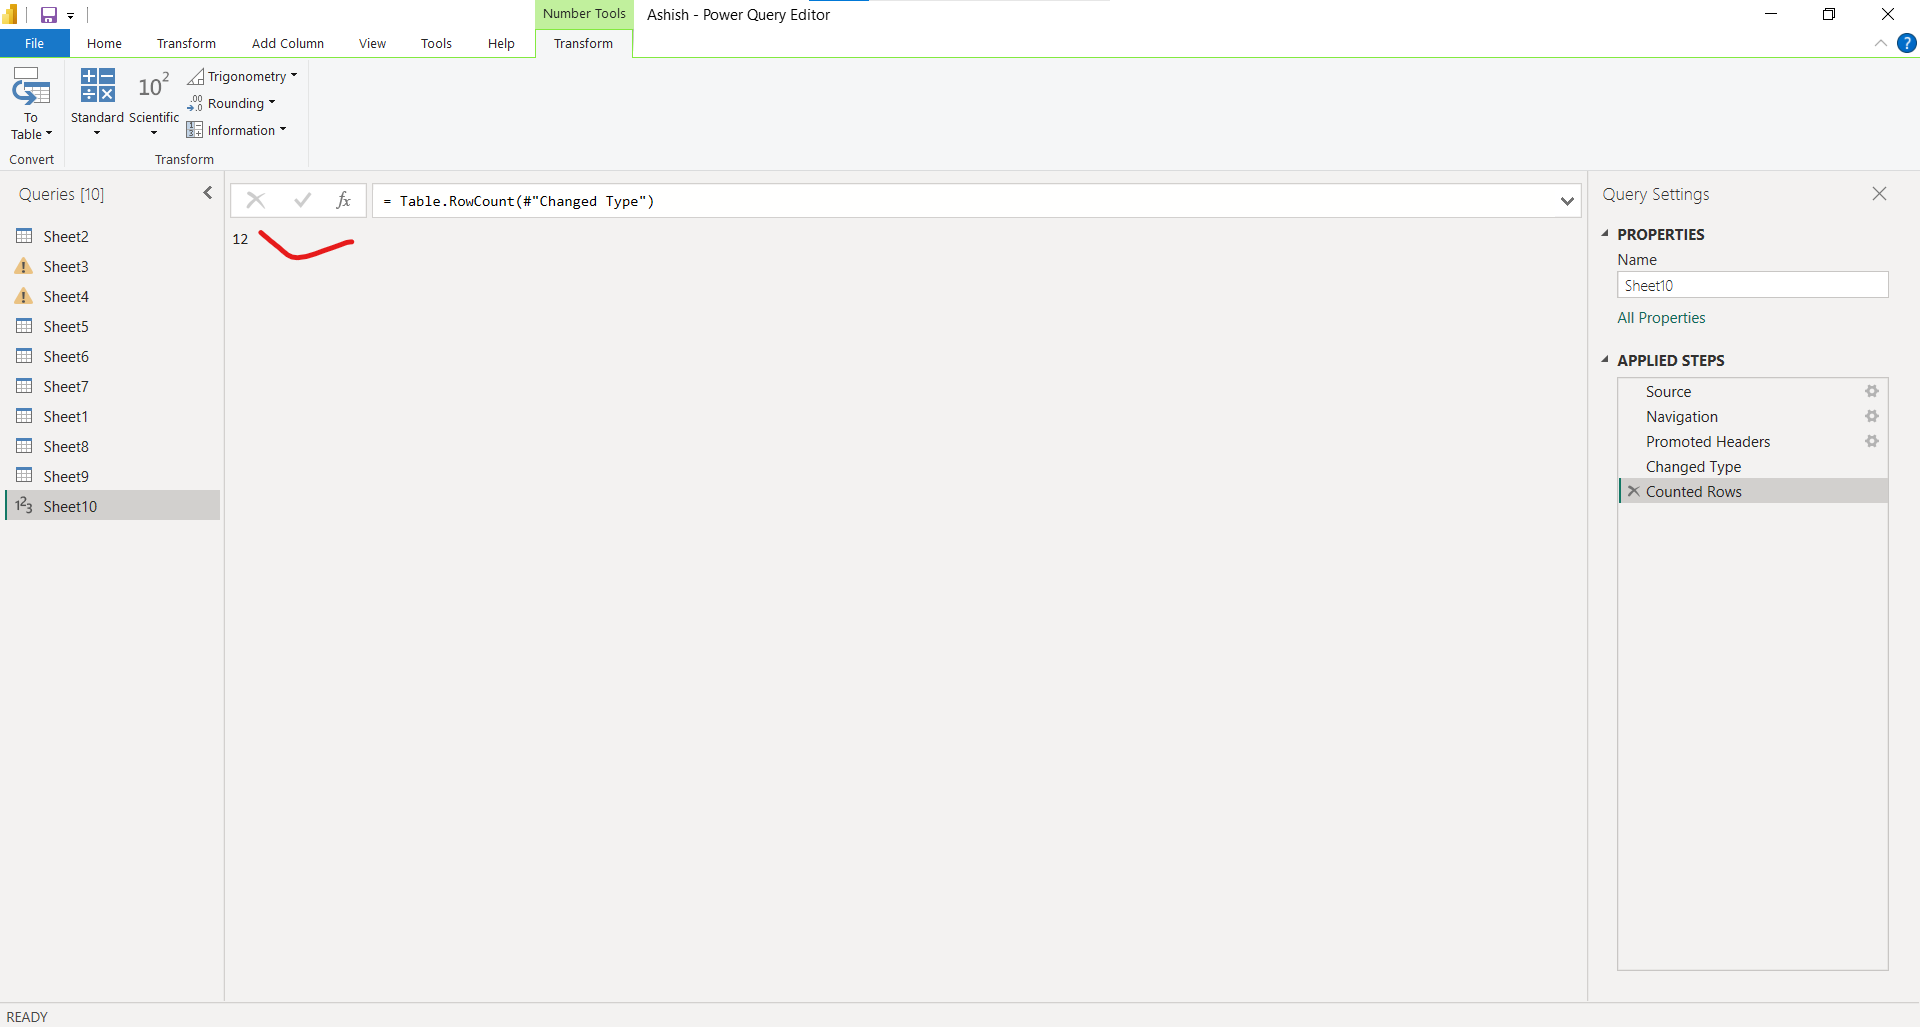
After clicking on Count Rows, the result would be:
3. Reverse rows
With Power Query, it's possible to reverse the order of rows in a table, such that the last row displays as first.
On the Transform tab, select Reverse rows.
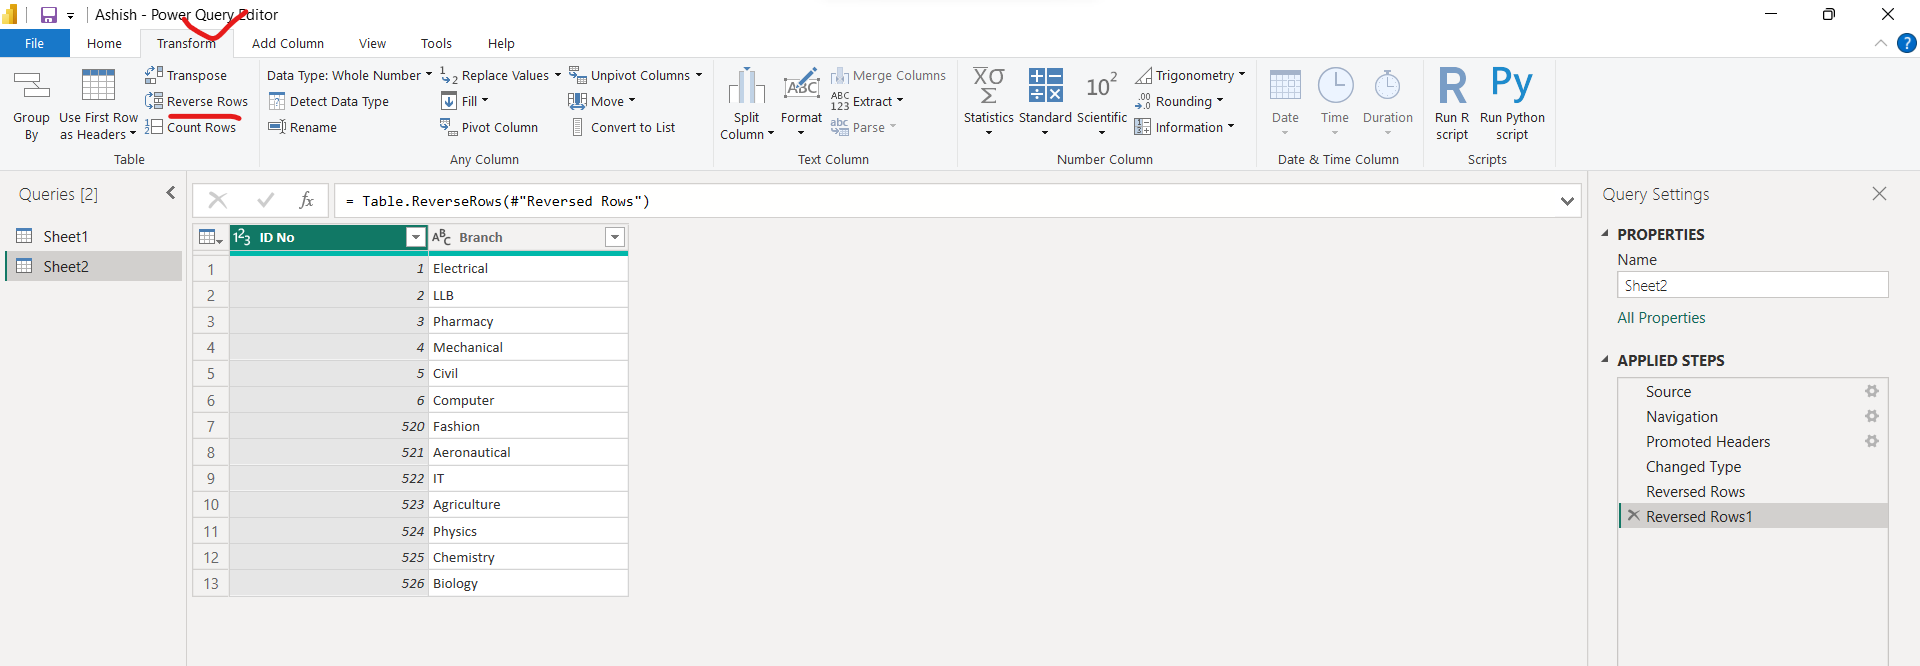
The result of this operation will look as follows.
