Merge, Remove, Rename, Choose and Go to columns in Power Query Editor
1. Merge Columns in Power Query Editor
To merge the columns, follow the following steps:
Step 1: Select the column header that we want to merge.
Step 2: While pressing the Ctrl key, select the other column(s), we want to merge.
Step 3: Right-click either of the selected column headers, and then in the context menu, select Merge Columns.
Or In the Transform tab select Merge Columns.
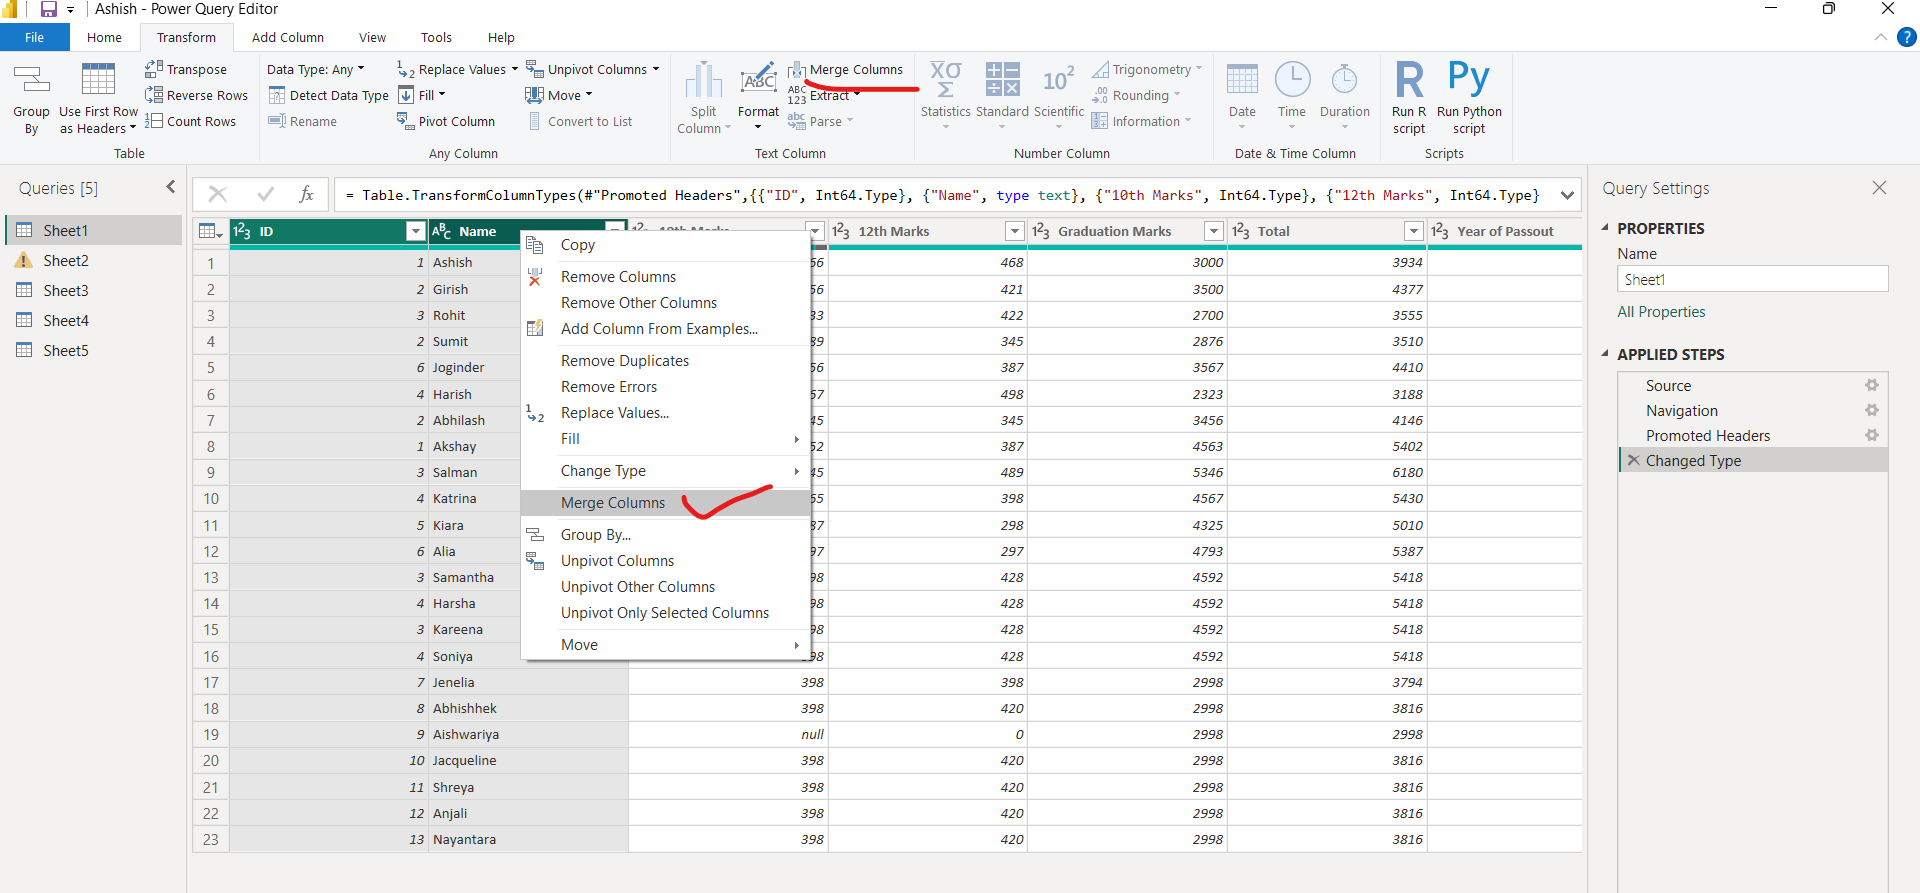
Step 4: In the Merge Columns window, in the Separator dropdown list, select Space or any separator that we want.
2. Remove Columns & Remove Other Columnss
We can remove the unnecessary columns from the data source. We can always add the columns to the report, if our requirements change over time.
One way to remove columns would be to limit the column when we get data from data source. For instance, if we are extracting data from a relational database by using SQL, we would want to limit the column that we extract by using a column list in the SELECT statement.
We can remove columns in two ways.
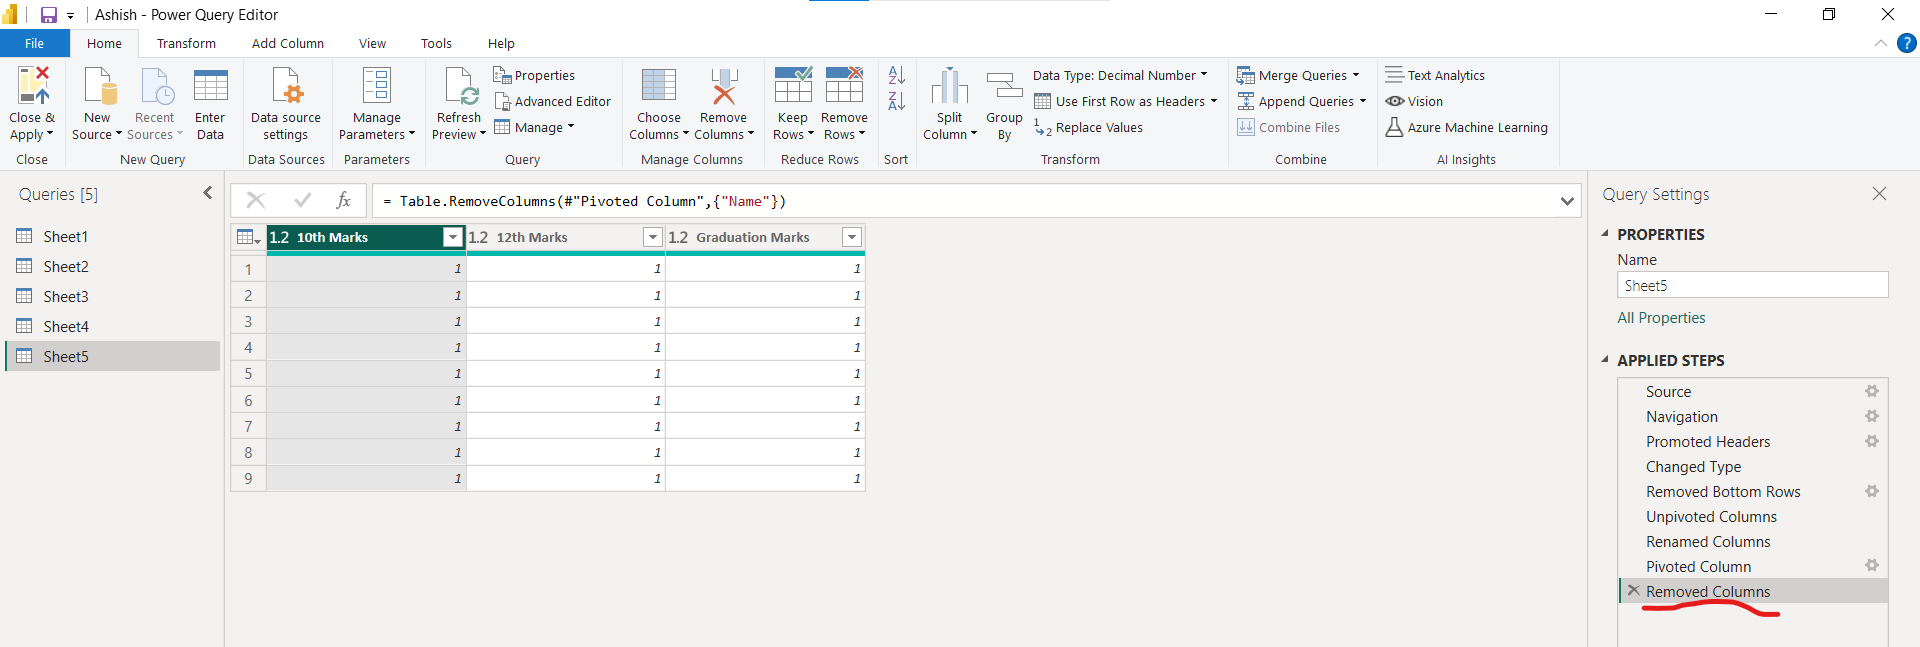
Method 1: The first method is to select the columns that we want to remove and then, on the Home tab, select Remove Columns and then again Remove Columns.
We can select multiple columns by holding down the Ctrl key.

The result would be shown in the following image.
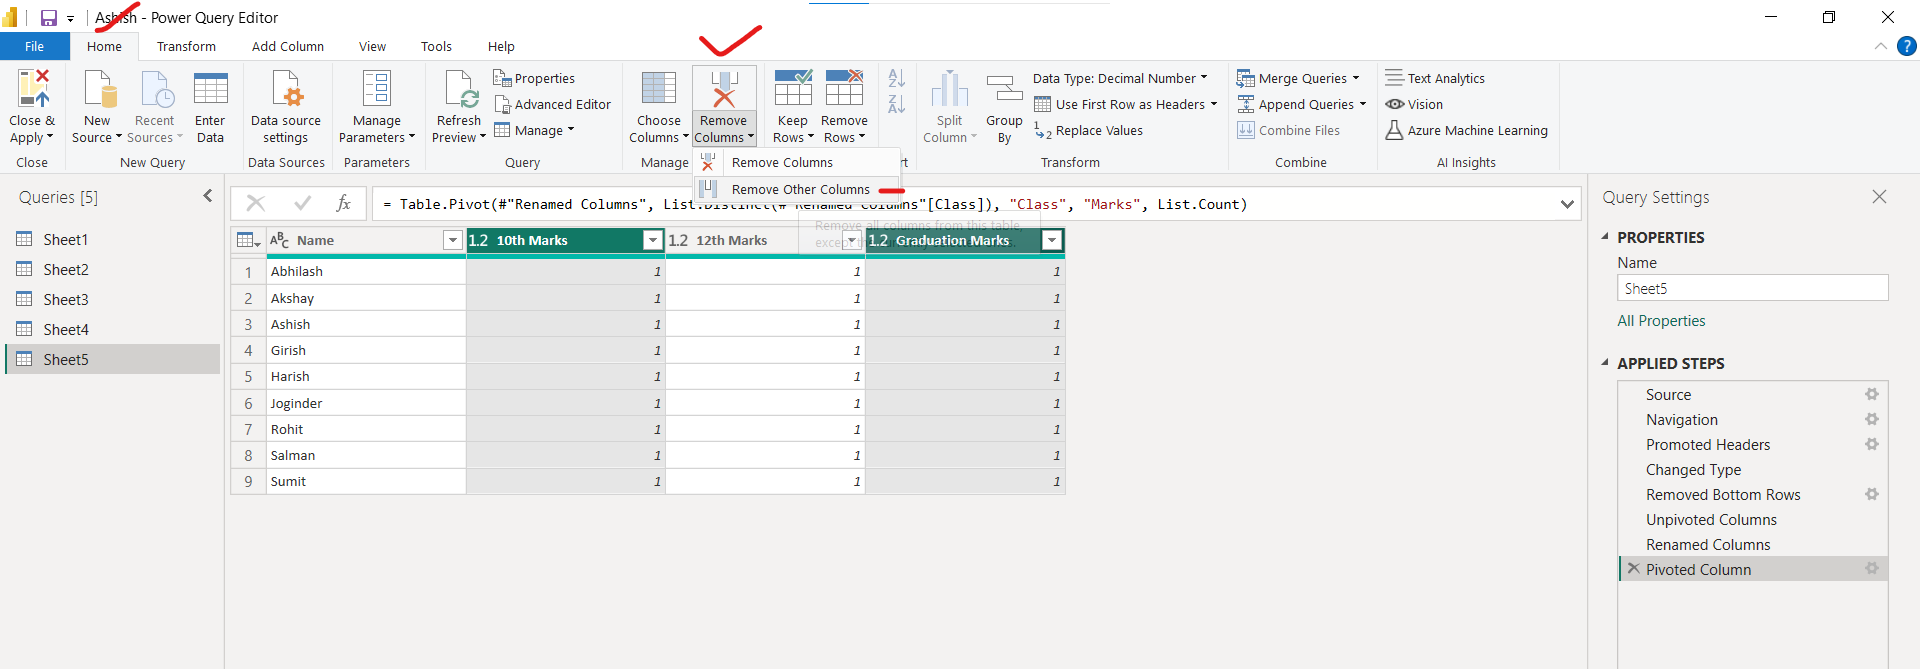
Method 2: Alternatively, we can select the columns that we want to keep and then, on the Home tab, select Remove Columns >Remove Other Columns.
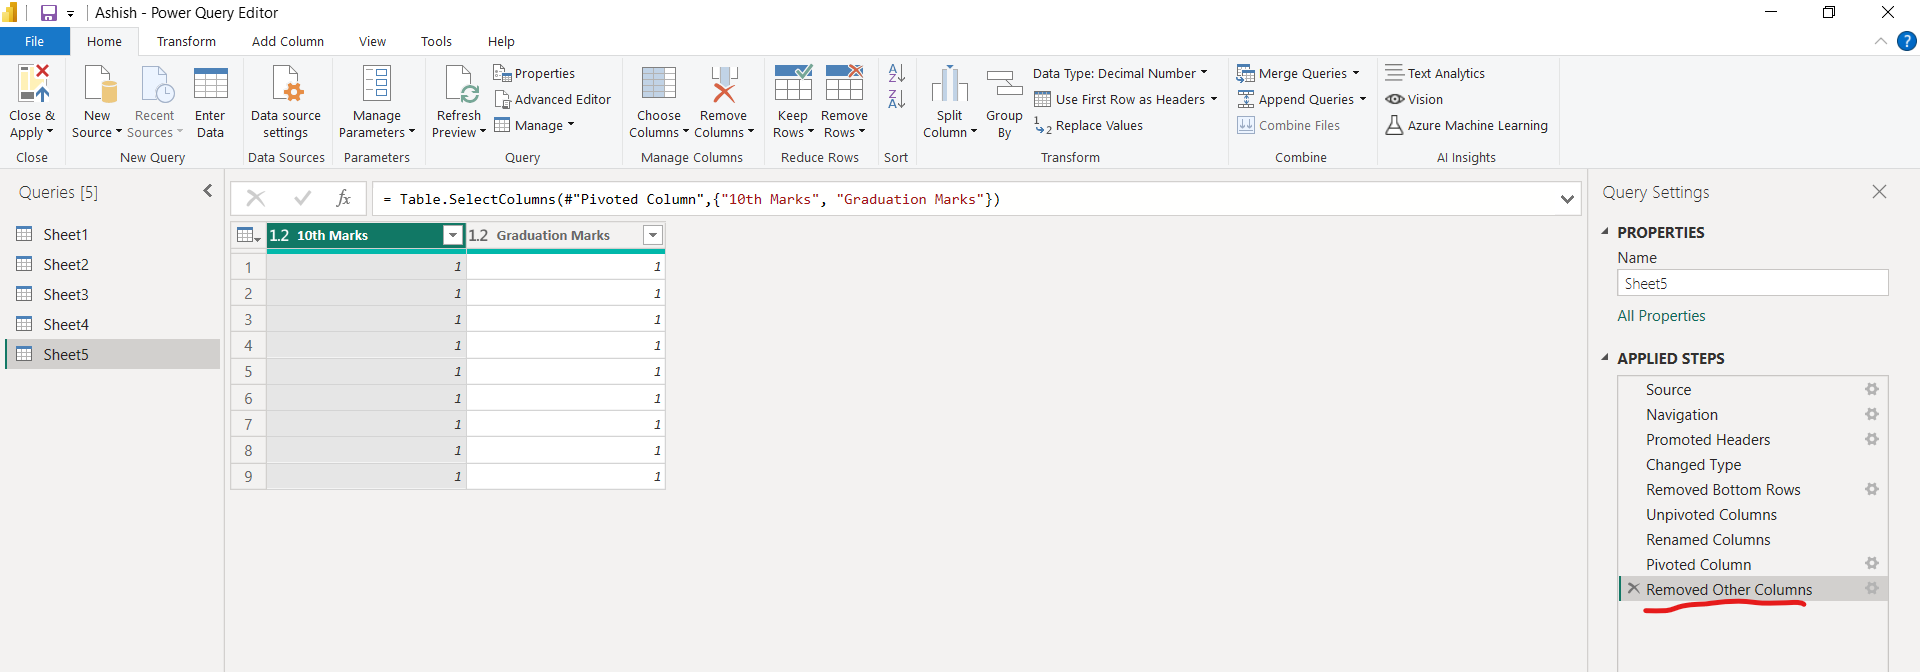
The result would be shown in the following image.
3. Rename columns
We can rename column headers in two ways. One approach is to right-click the header, select Rename, edit the name, and then press Enter. Alternatively, we can double-click on the column header and overwrite the name with the correct name.
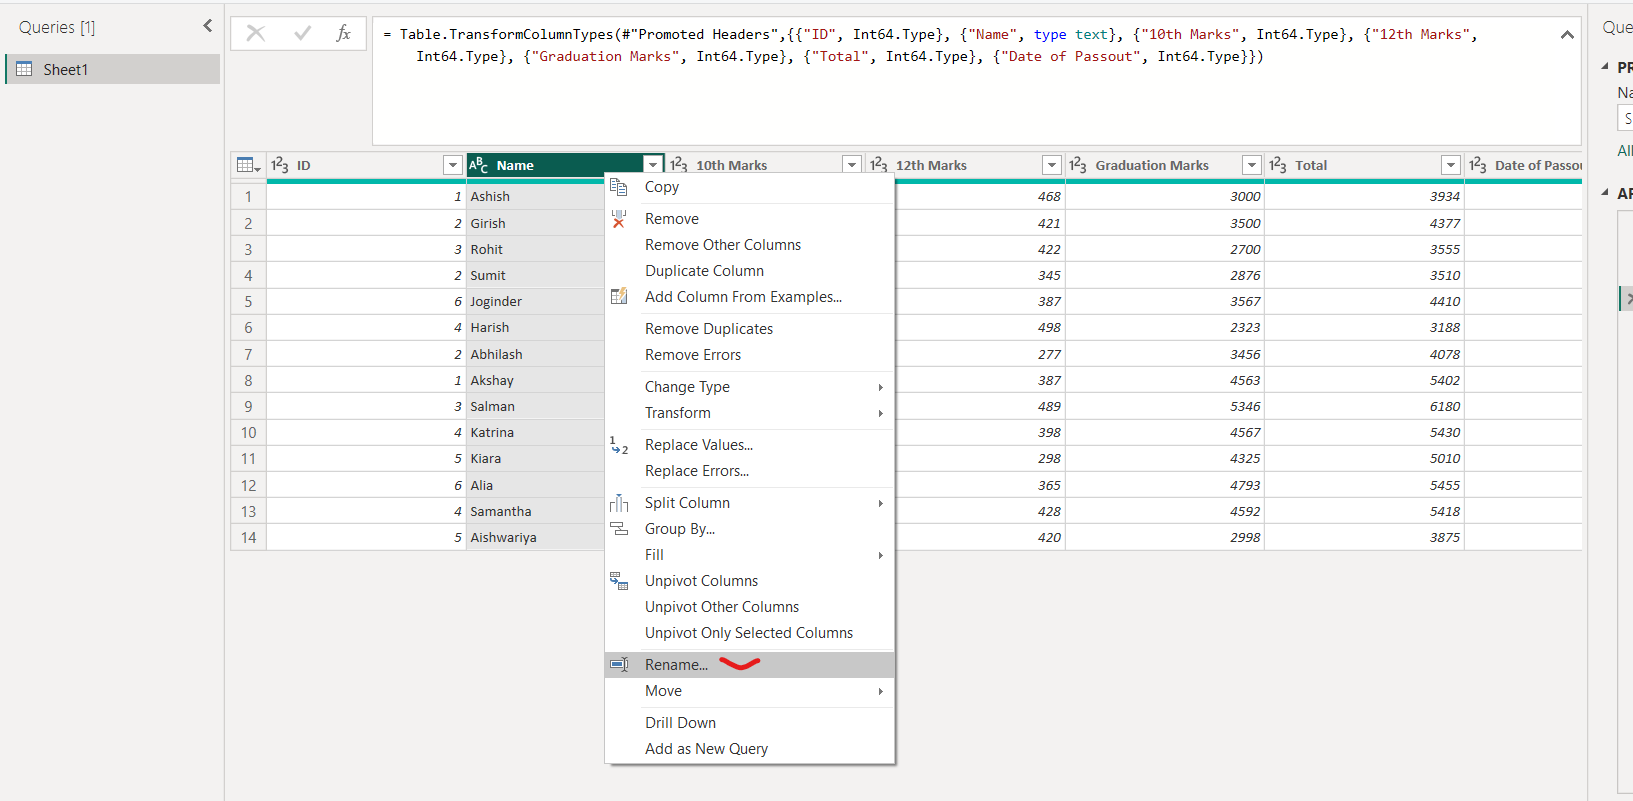
4. Choose columns and Go to column
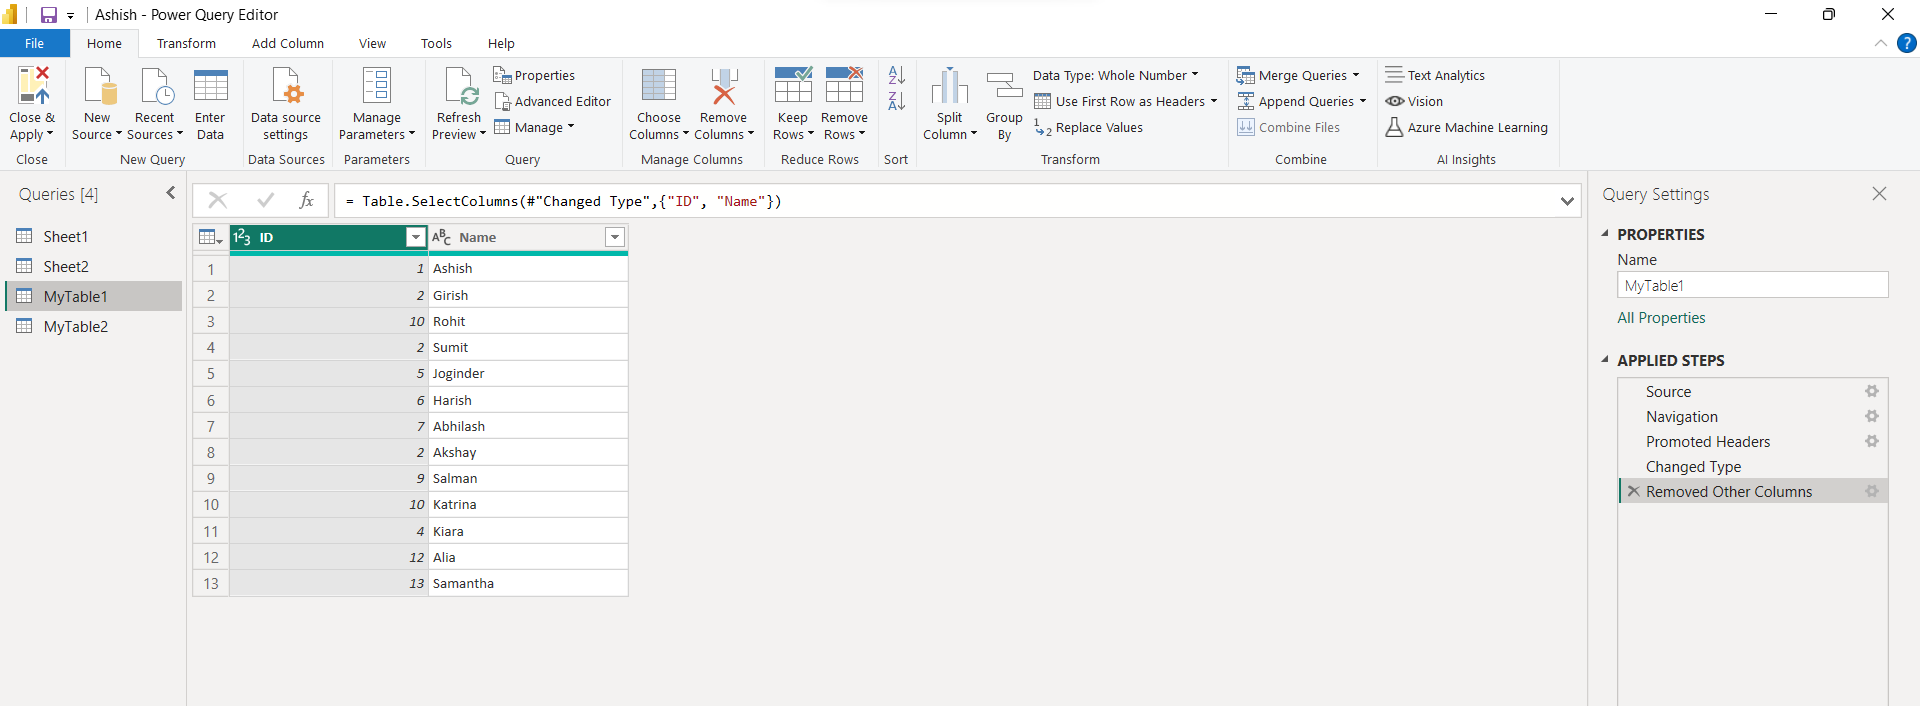
A. Choose Columns To remove columns, on Home tab, in the Manage columns group, select Choose columns.
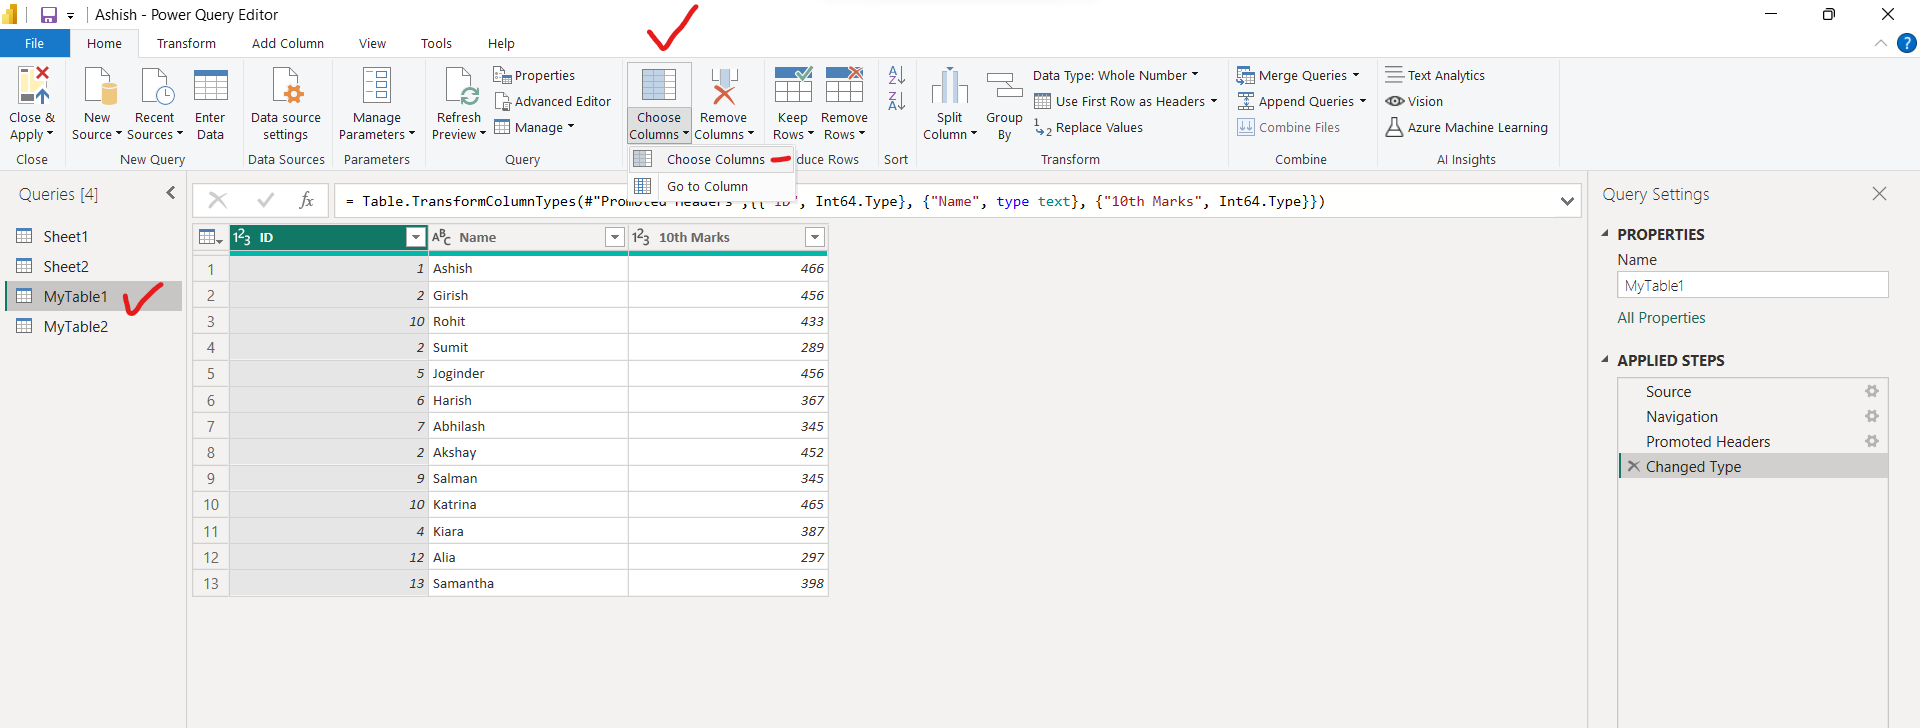
The Choose columns dialog box appears, containing all the available columns in the table. We can select all the fields that we want to keep and remove specific fields by clearing their associated check box.
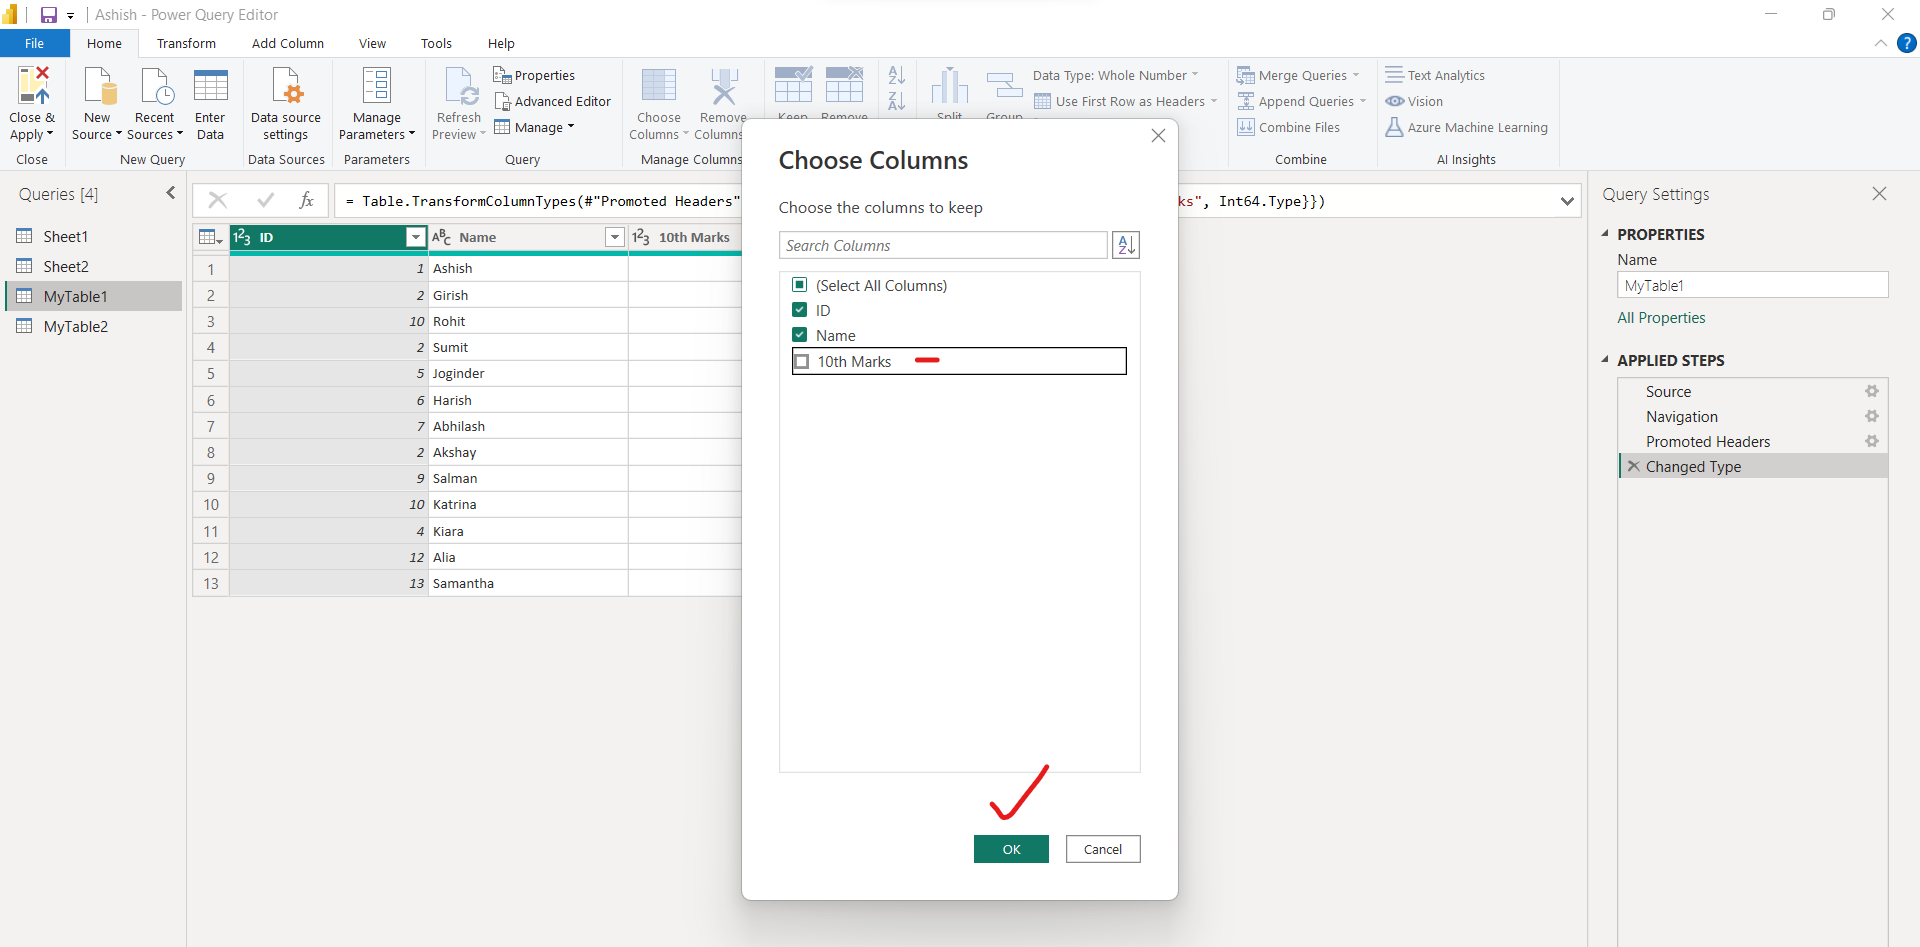
After selecting OK, the table is updated and contains only the selected columns.
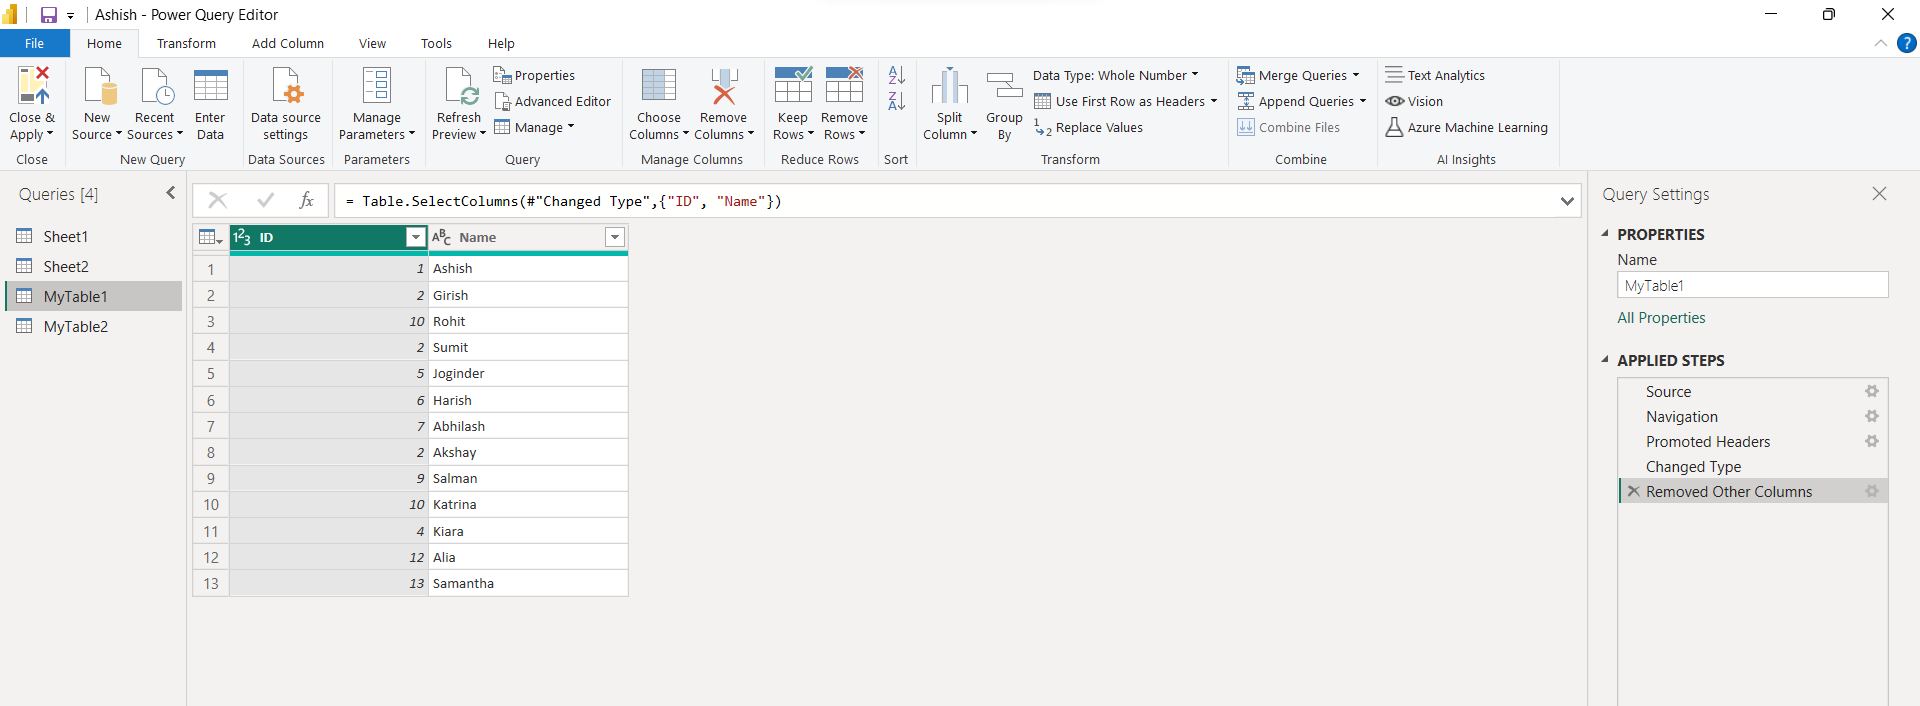
In the Applied Steps list, notice the addition of another query step, i.e., Remove Other Columns.
B. Go to column Usually, we can simply horizontally scroll to locate the column. This technique is useful when a query contains many columns.
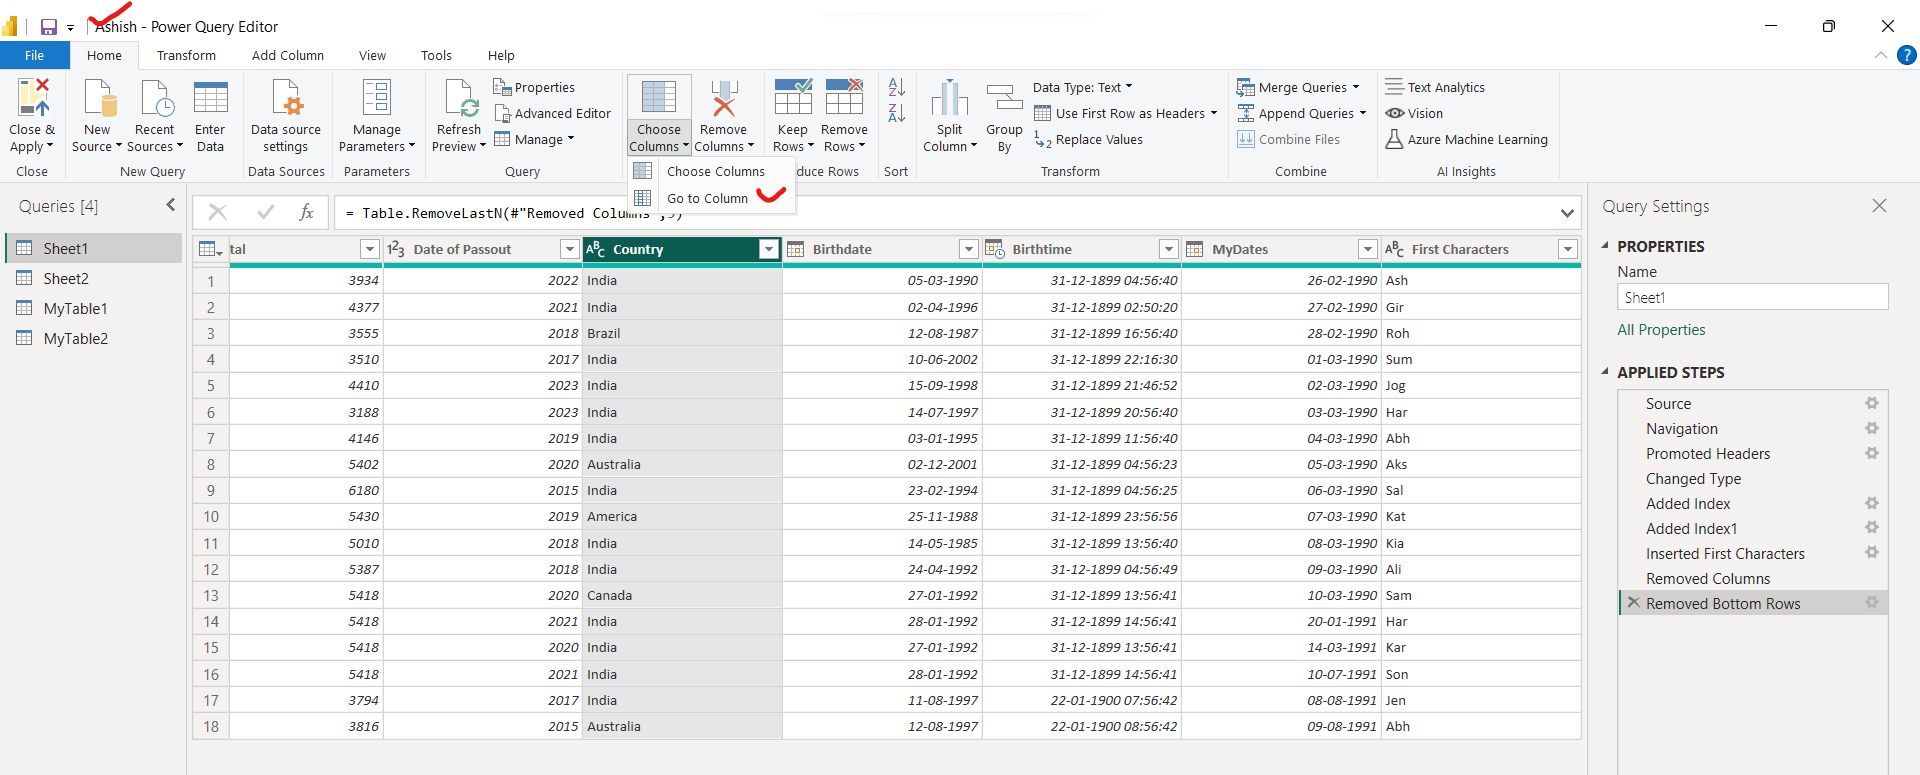
Path 1: Select the table and if we want to find a specific column, then on the Home tab, in the Manage columns group, select Choose columns down-arrow. And then select Go to Columns.
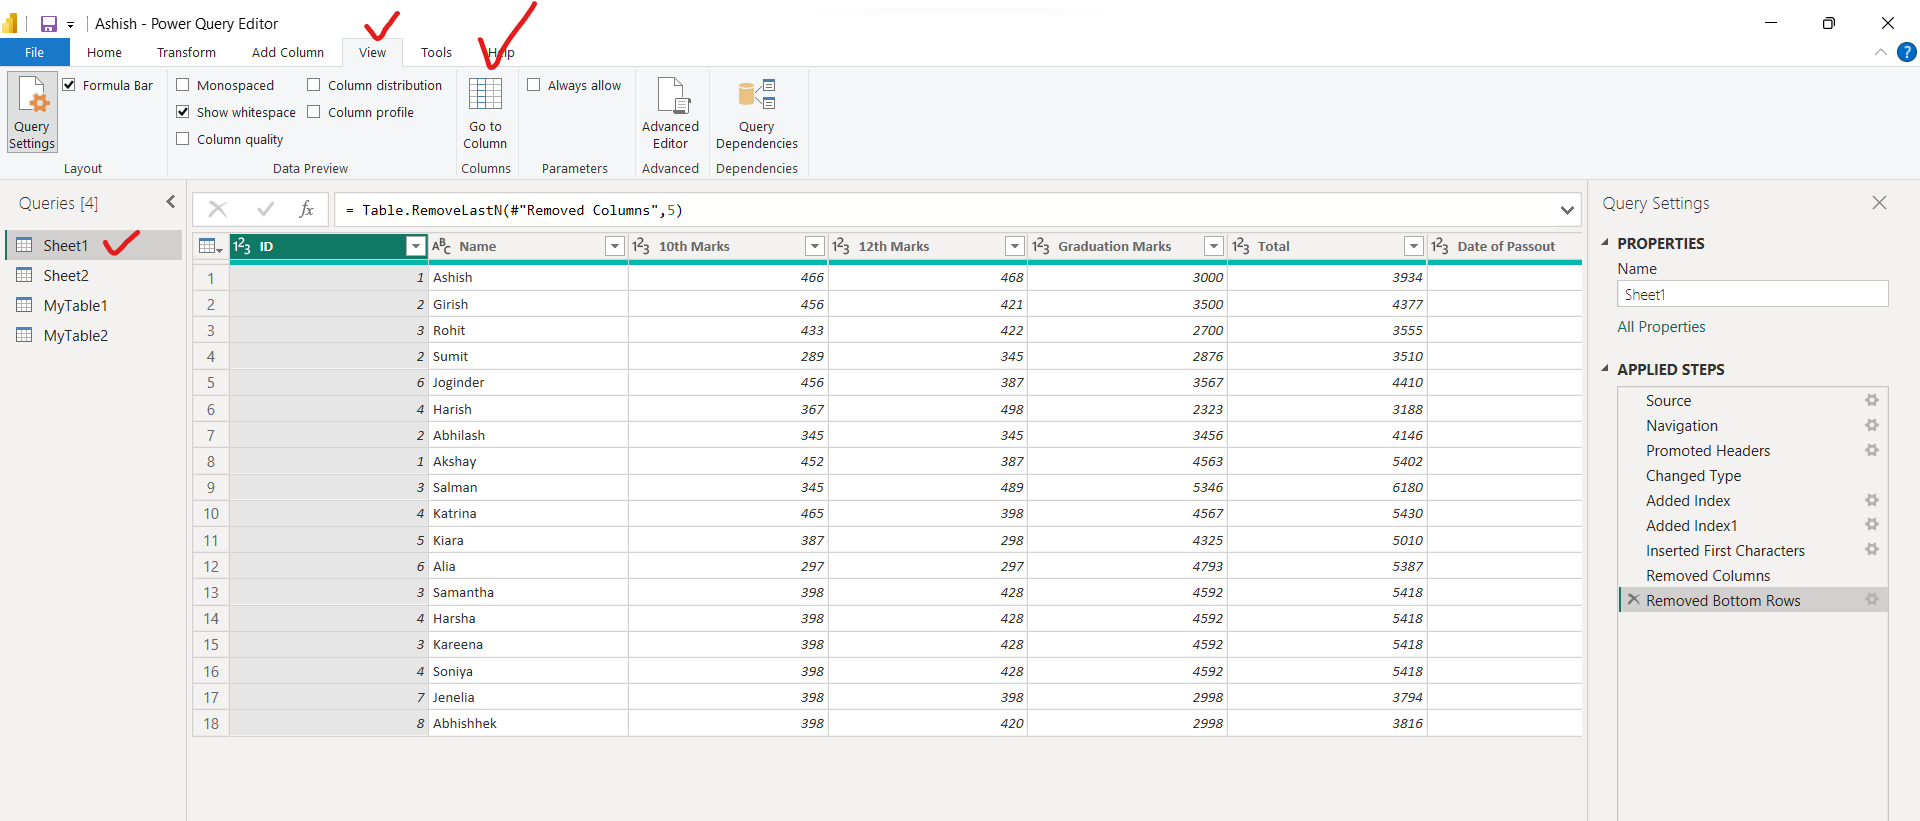
Path 2: Select the table and if we want to find a specific column, then go to the View tab in the ribbon and select Go to column .
From there, we can specifically select the column we would like to view, which is especially useful if there are many columns.
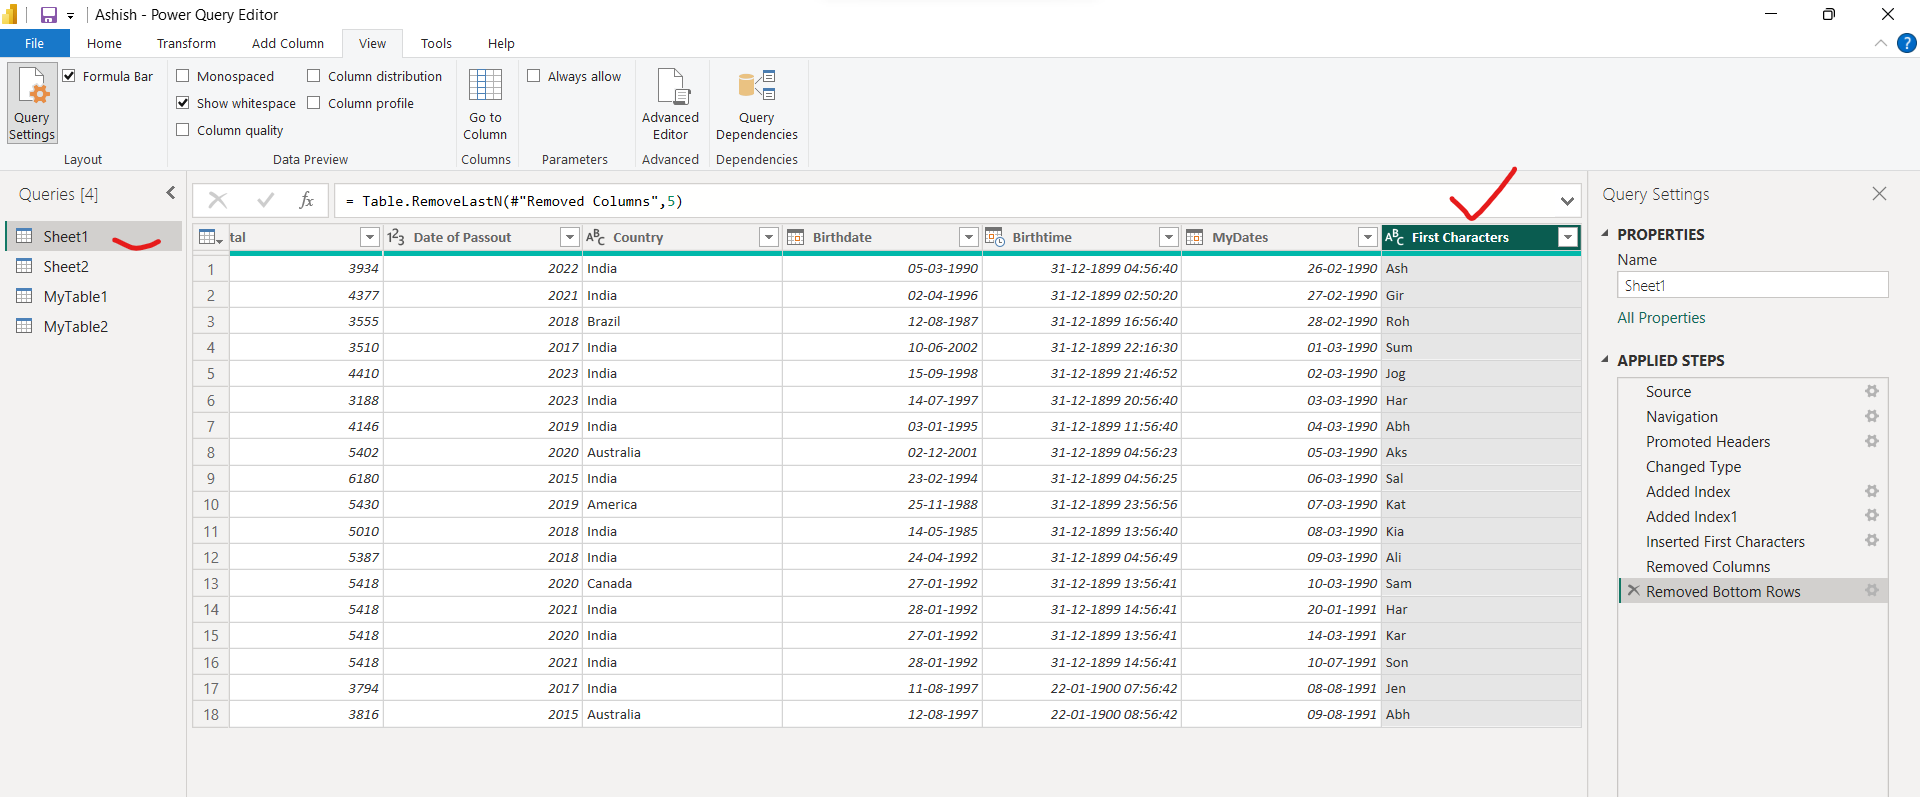
Let’s suppose we select First Characters column.
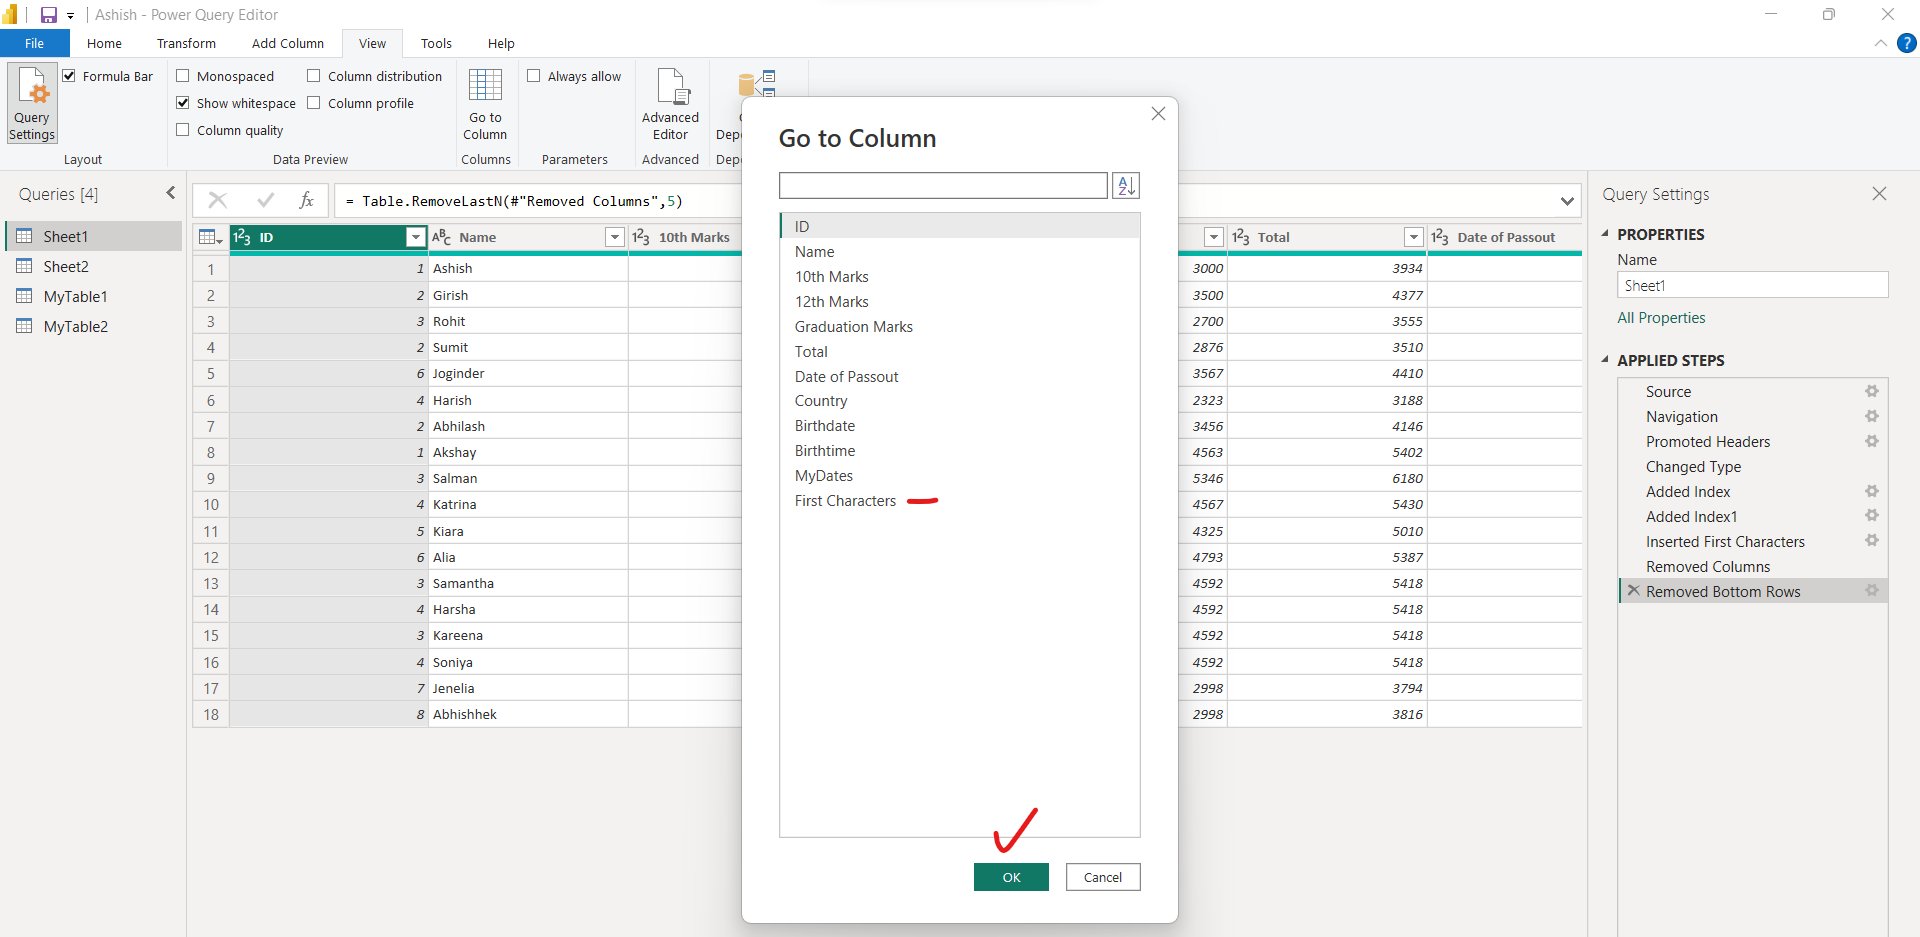
And then Press Ok. The result is shown below:
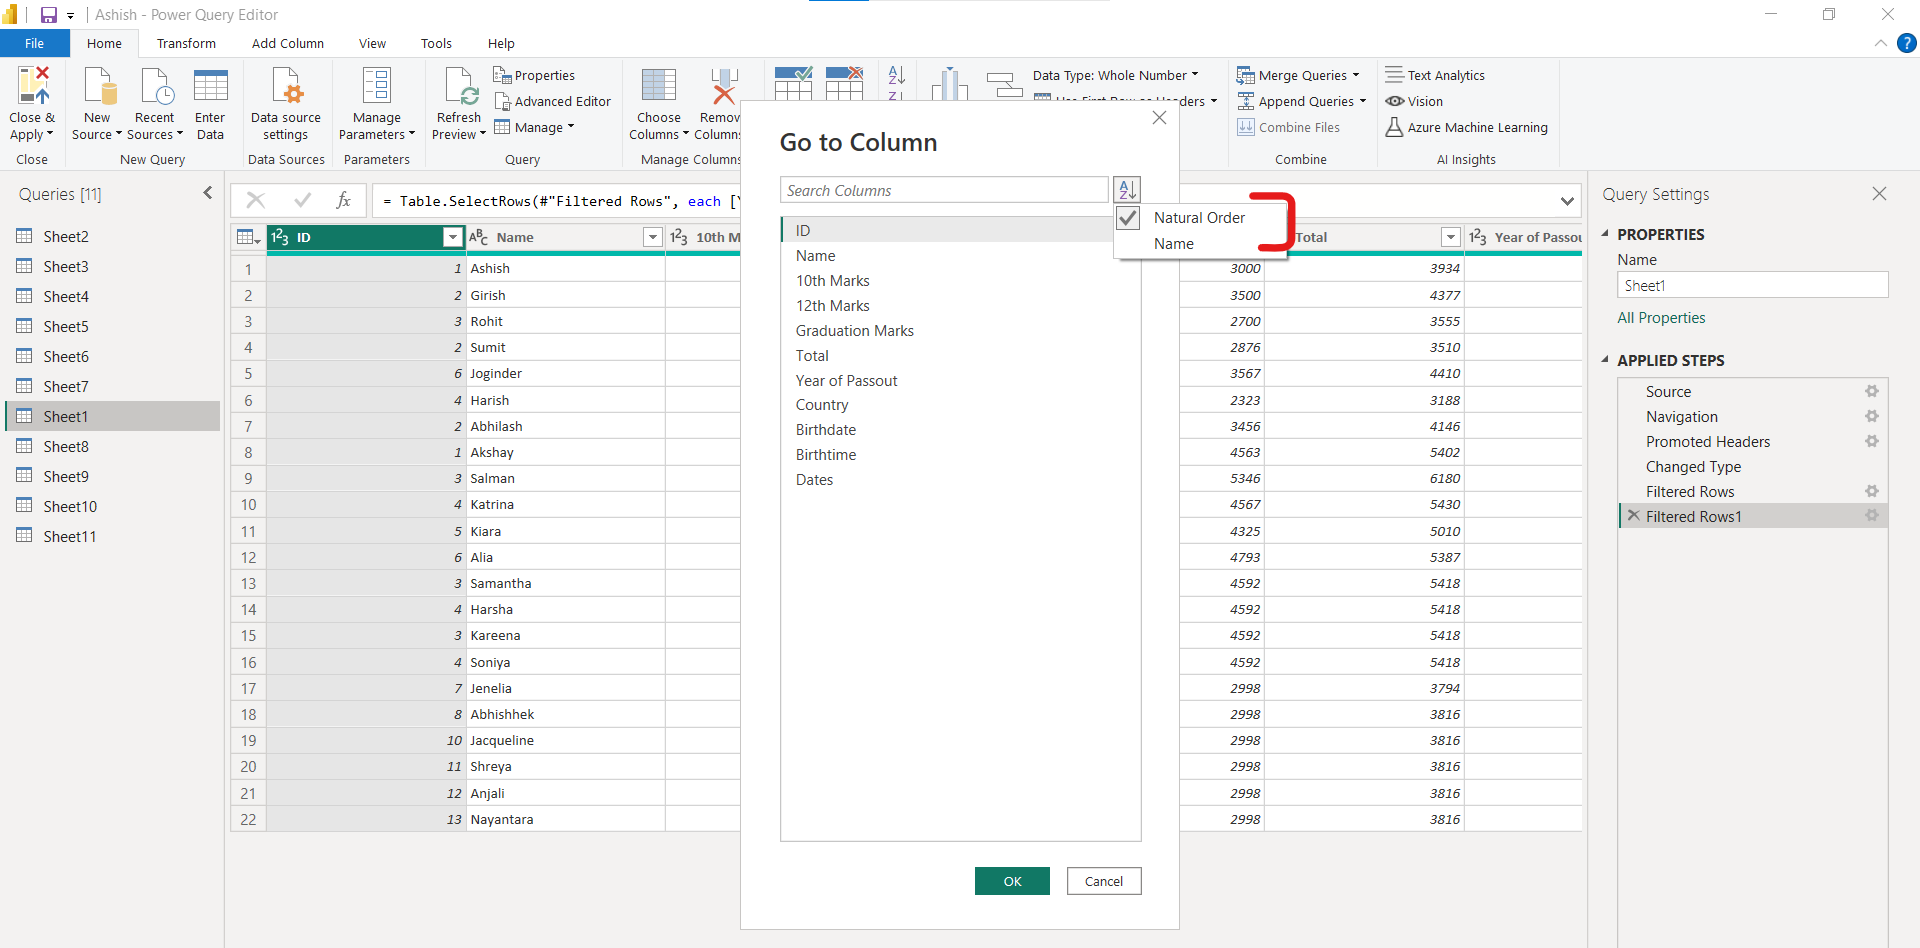
In the Go to Column window, to order the list by column name, click the AZ sort button, and then select Name.
After selecting Name as the sort order.
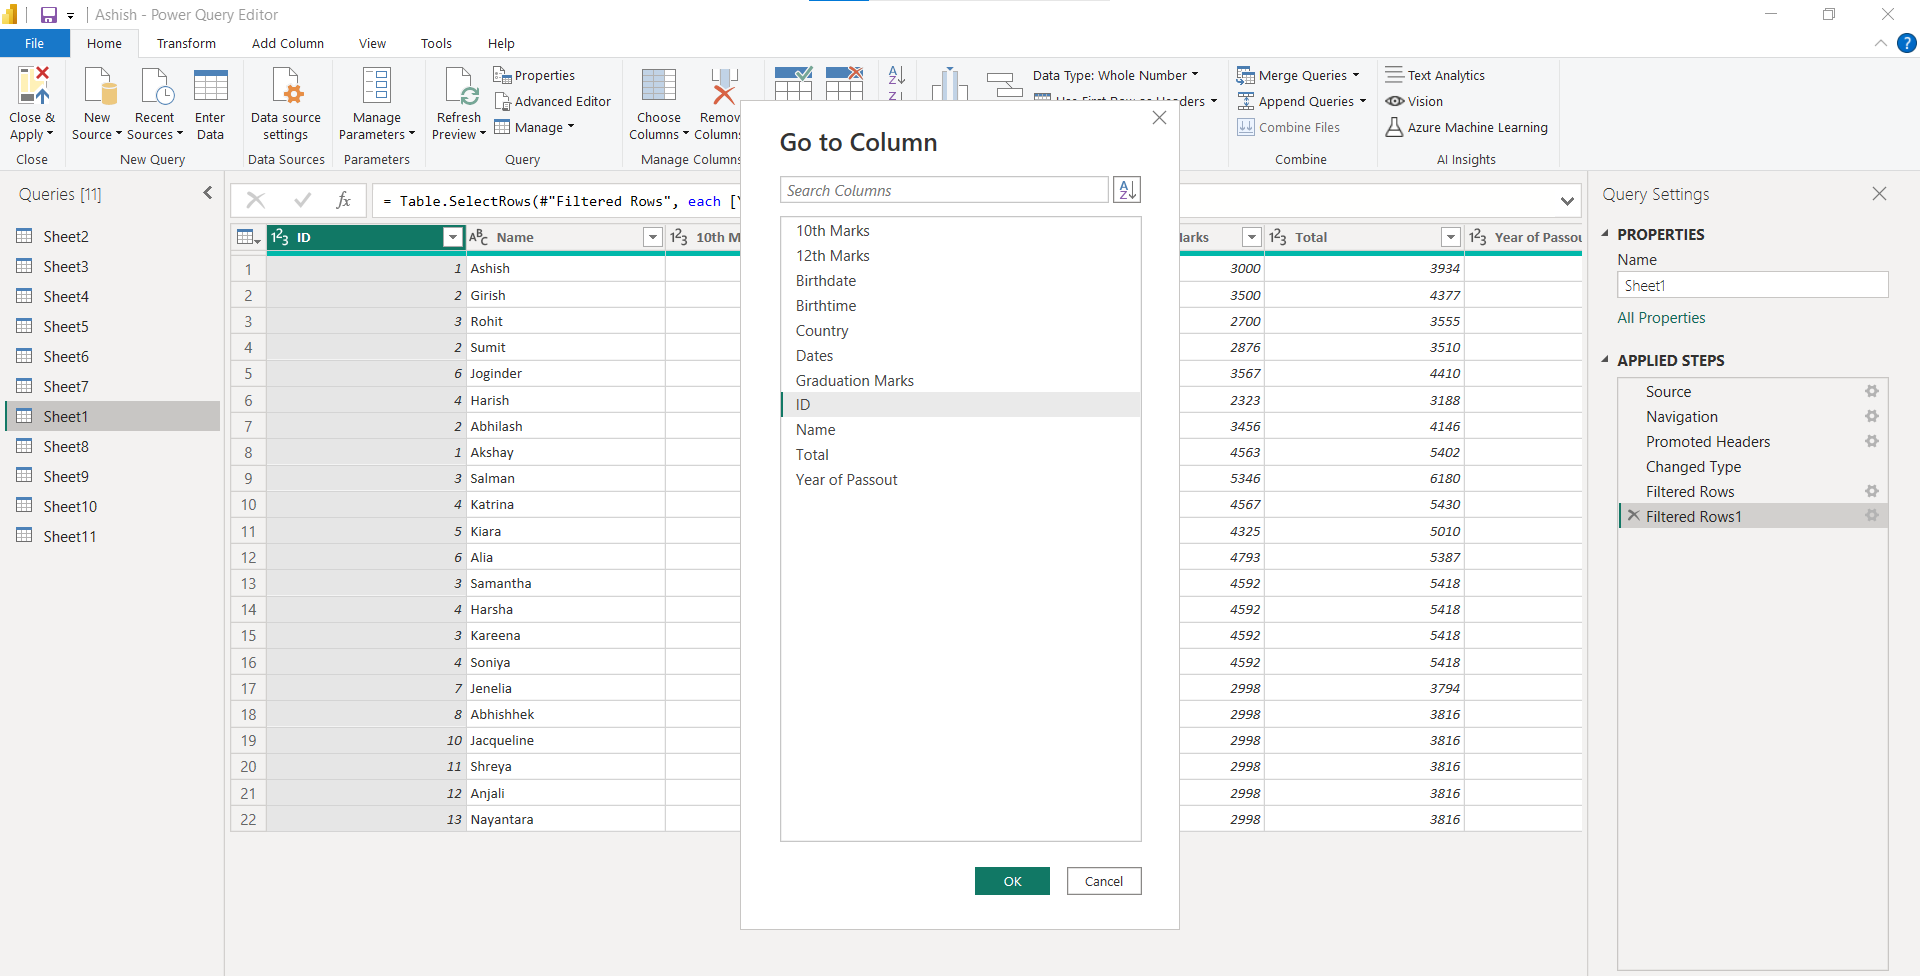
There are following sort order: 1. Natural Order Natural Order means the order in which the columns are in the query. 2. Name The Name means the order is arranged alphabetically