Organize Queries into Groups in Power Query Editor
In Power Query Editor, organizing queries into groups is a great way to keep your workspace tidy, especially when dealing with multiple queries. It helps us manage complex projects by categorizing related queries together. Here’s a step-by-step explanation of how to do it:
What Are Query Groups? • Groups in Power Query Editor are like folders in a file explorer. They don’t affect the data or transformations but provide a visual way to organize queries in the Queries pane (on the left side of the editor).
• We can group queries based on their purpose, data source, or any logical category that suits our workflow.
Steps to Organize Queries into Groups Step 1: Open Power Query Editor: In Power BI Desktop, go to the "Home" tab and click "Transform Data".
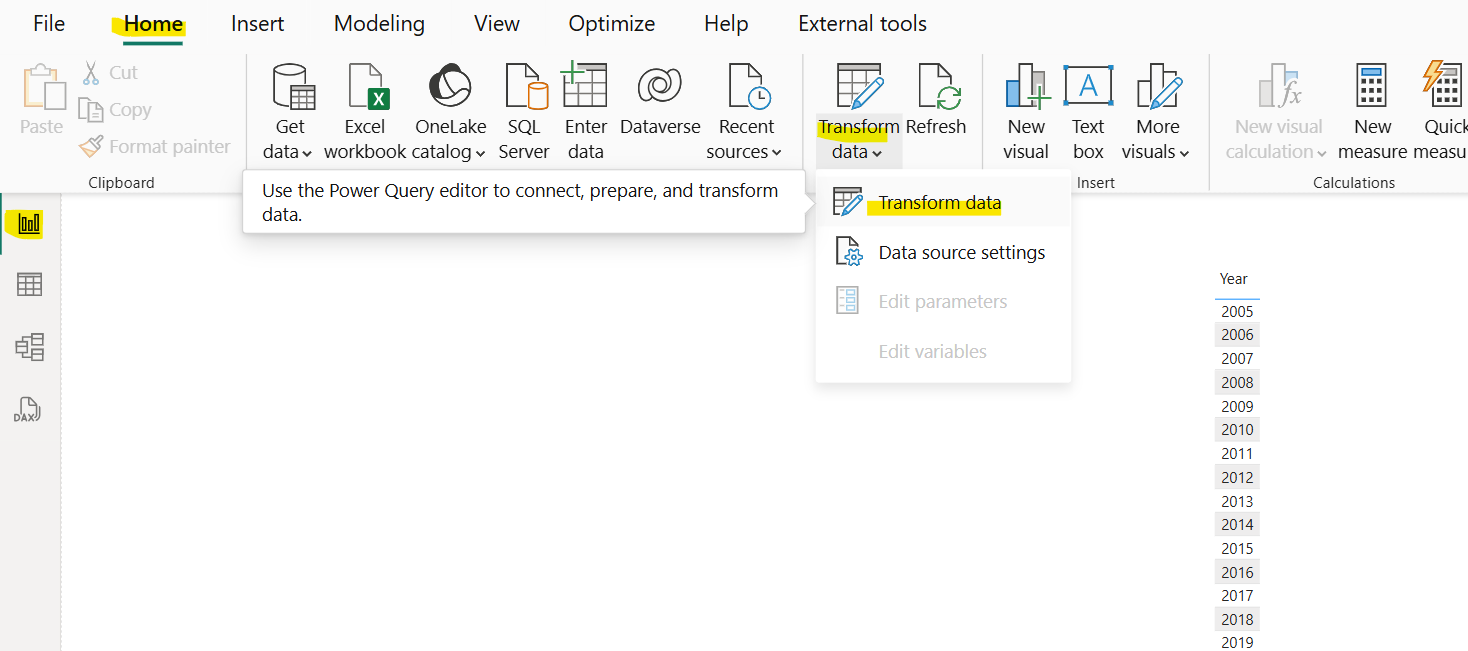
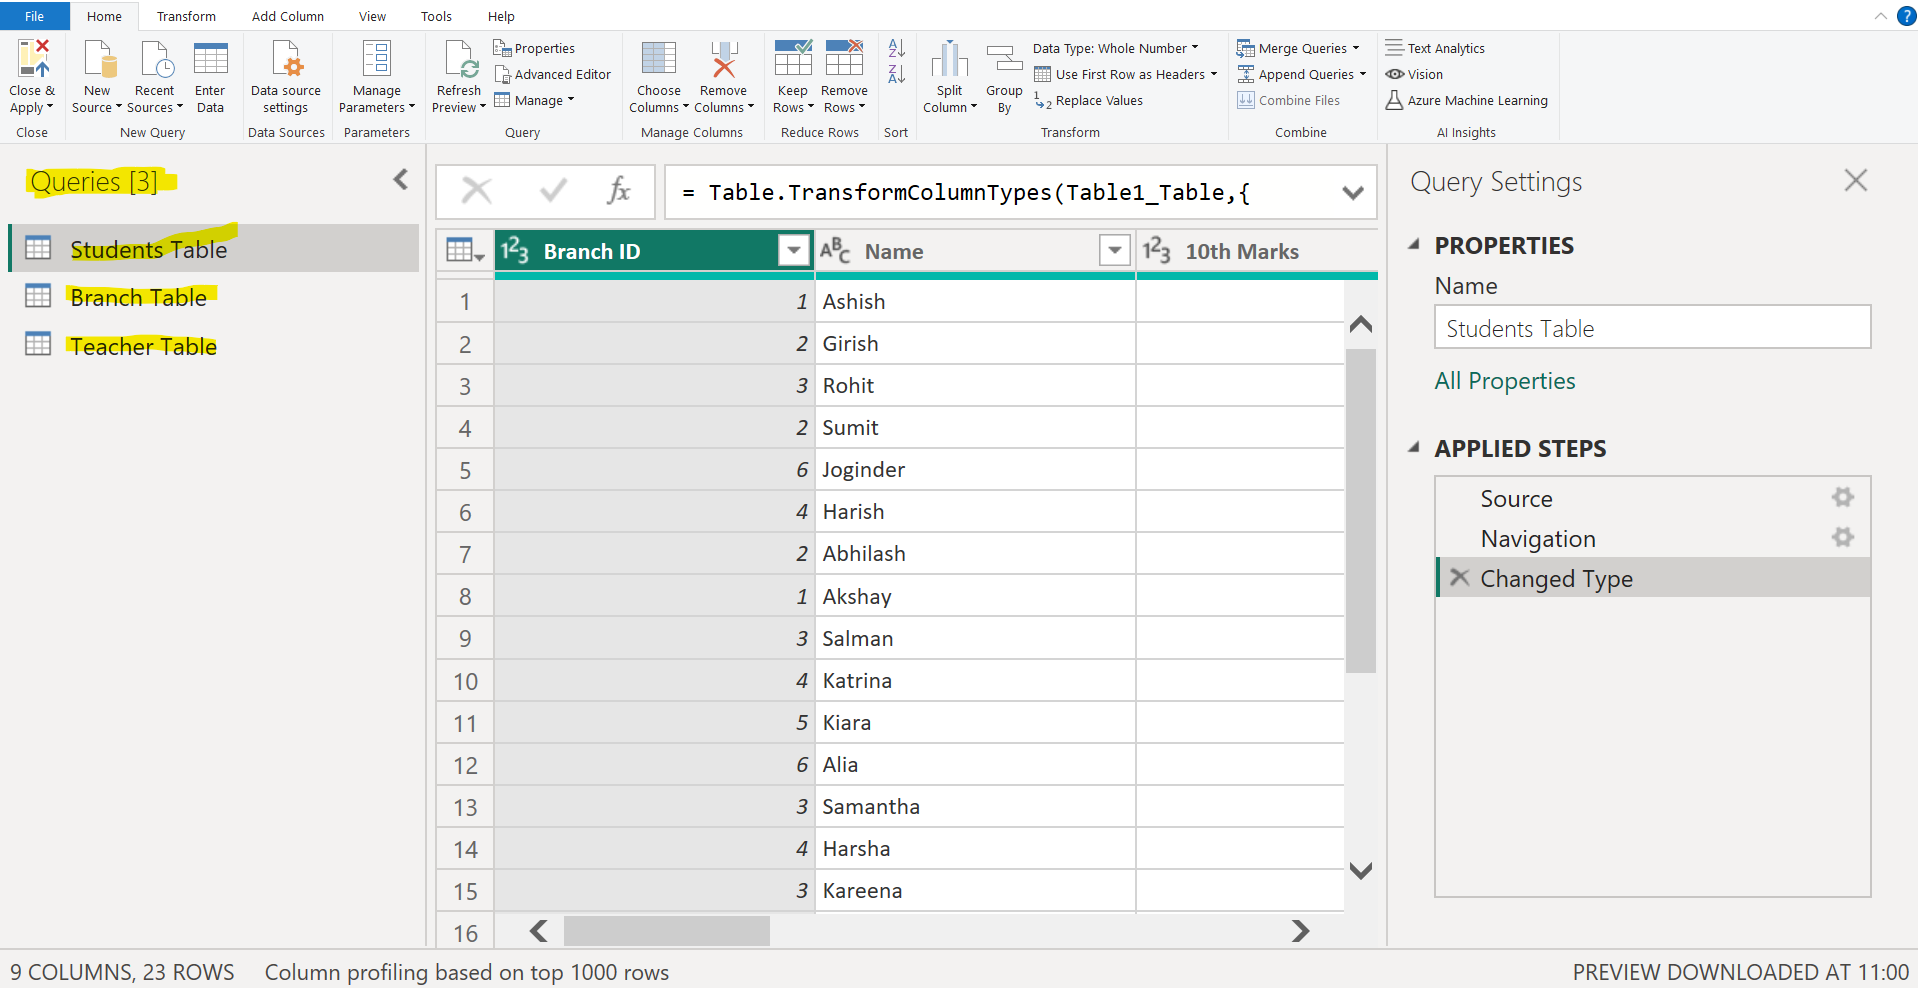
Step 2: View the Queries Pane: On the left side of the Power Query Editor, we’ll see the Queries pane listing all our queries.
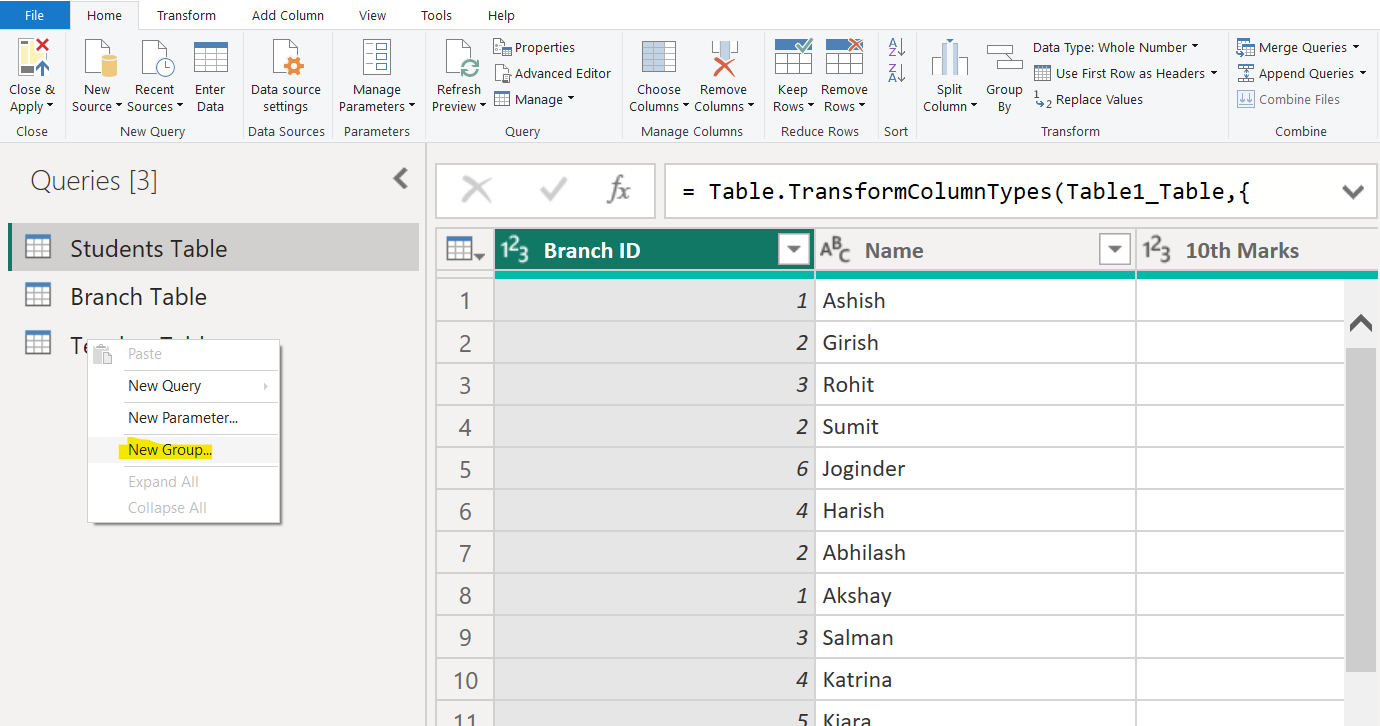
Step 3: Create a New Group: o Right-click anywhere in the Queries pane (either on an existing query or in an empty space).
o Select "New Group" from the context menu.
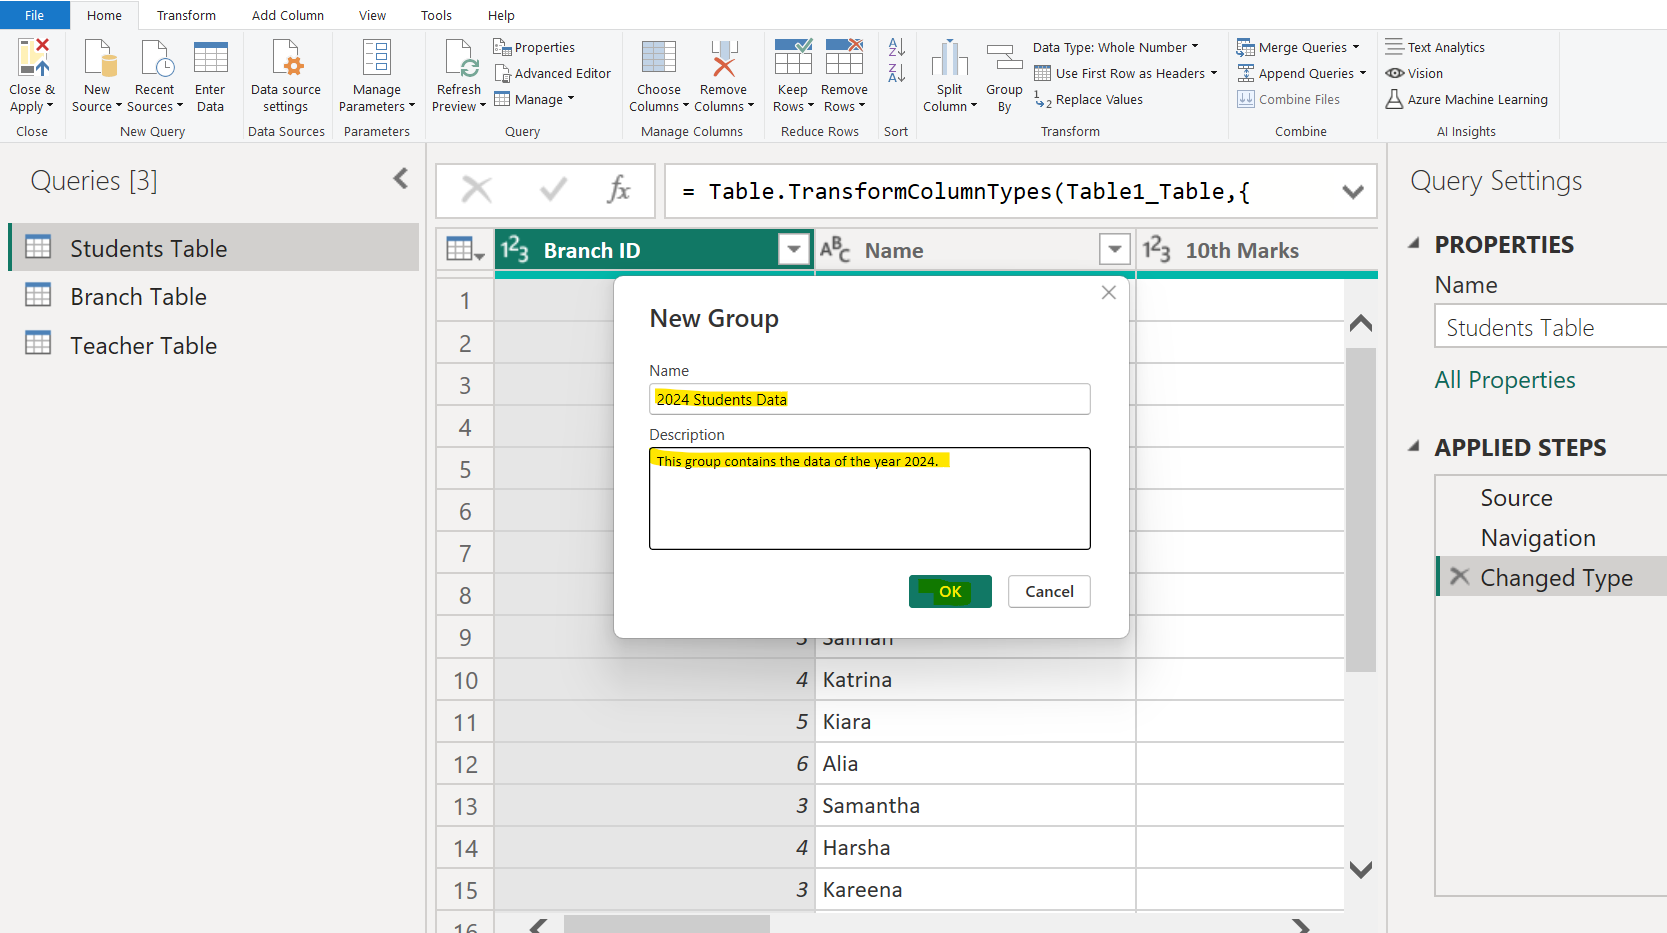
• A dialog box will appear prompting you to name the group. Enter a descriptive name (e.g., "Sales Data," "Transformations," etc.) and click "OK".
• The new group will appear as a folder-like icon in the Queries pane.
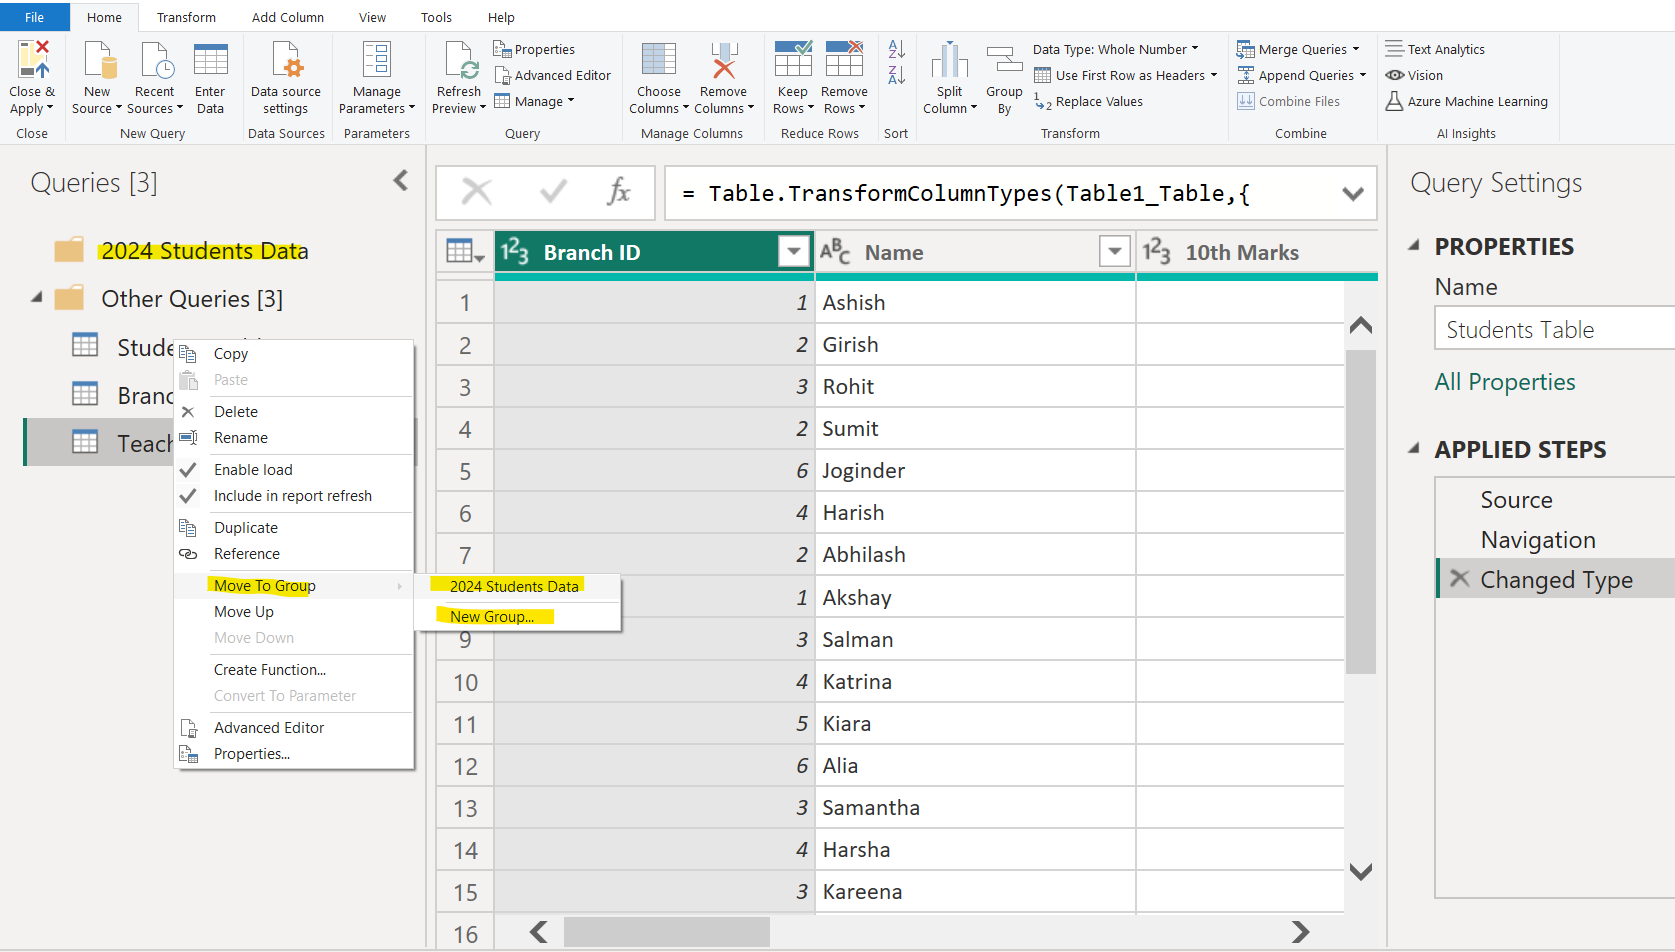
Step 4: Add Queries to the Group: • Drag and drop existing queries from the Queries pane into the group you just created.
• Alternatively, right-click a query, select "Move to Group", and choose the desired group from the list.
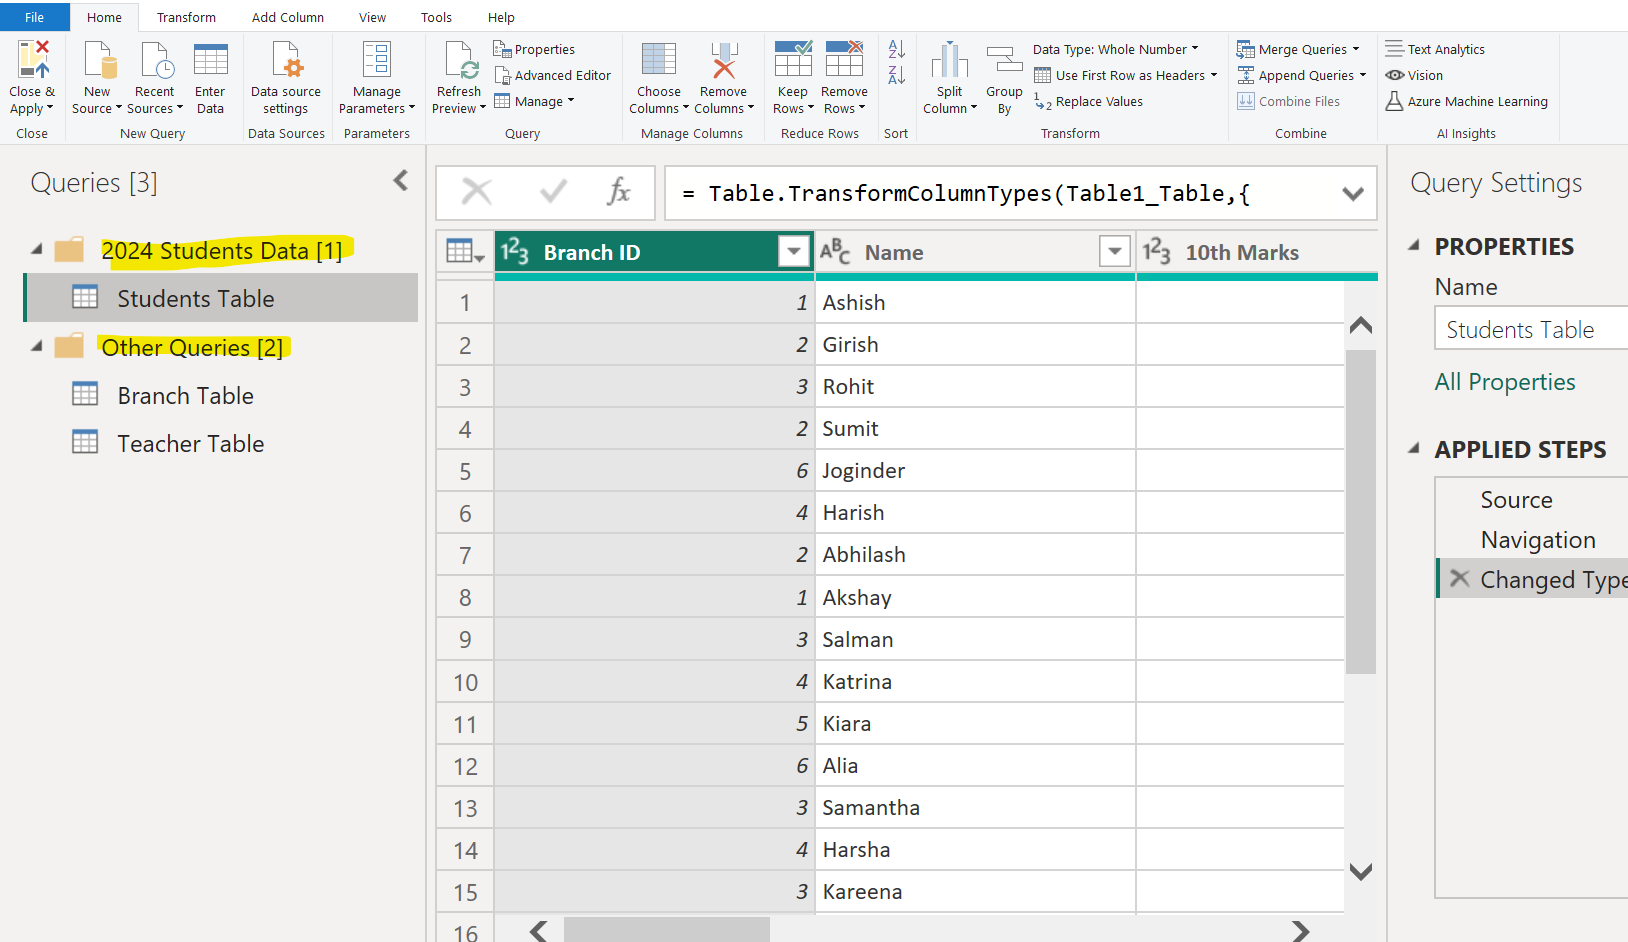
Note: • Please note that next to the group name we can see how many queries are there in the group in parentheses.
• Click the arrow next to a group name to collapse it and reduce clutter in the Queries pane.
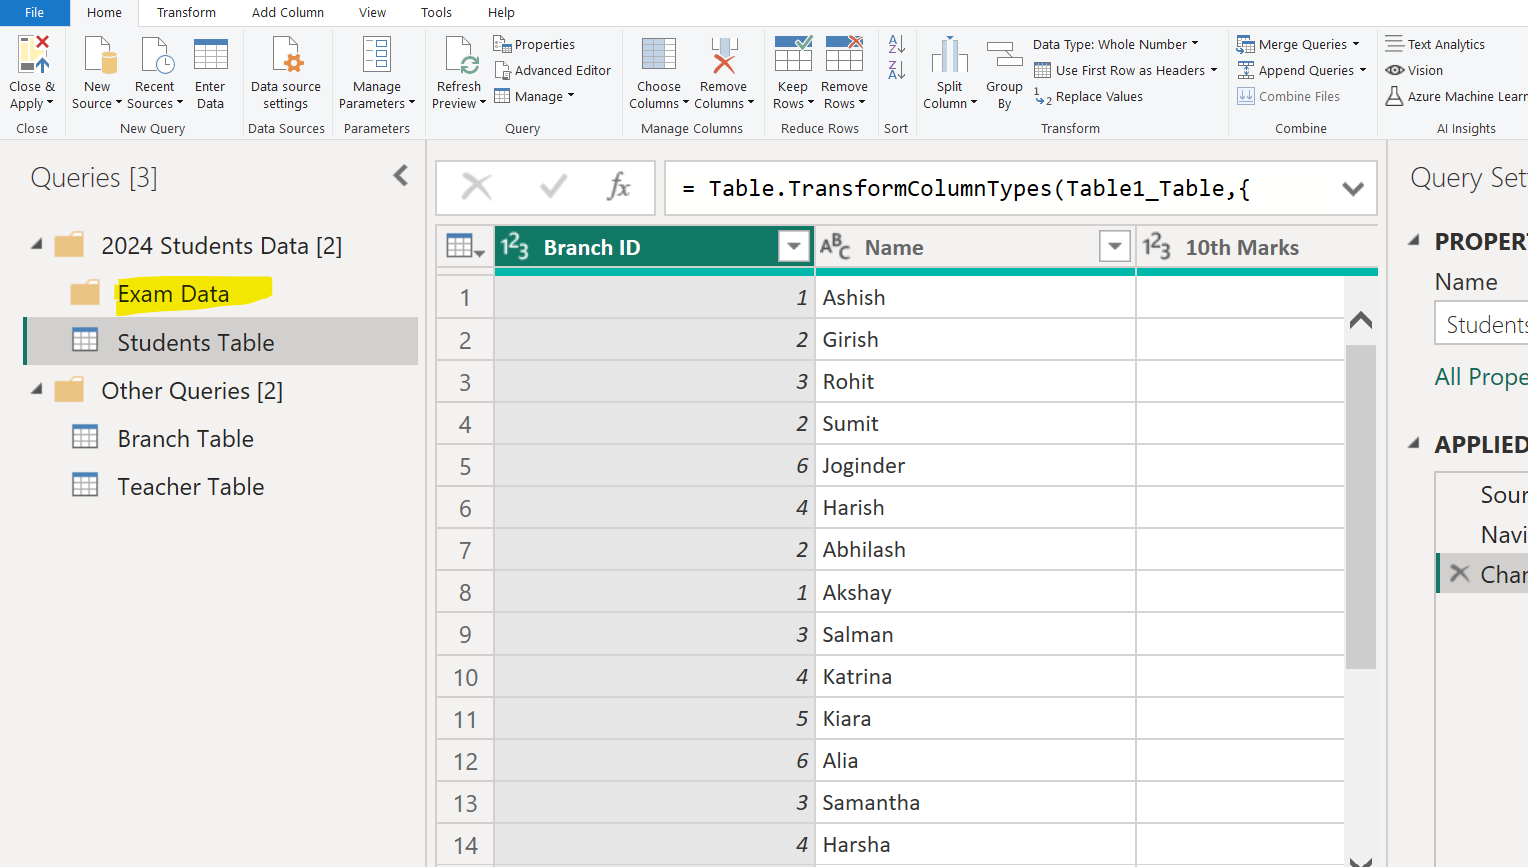
Step 5: Nested Groups (Optional): We can create sub-groups by right-clicking within an existing group and selecting "New Group". This is useful for deeper organization (e.g., a "Sales Data" group with sub-groups like "2024" and "2025").
Step 6: Rename or Delete Groups: • To rename a group, right-click it, select "Rename", and type the new name.
• To delete a group, right-click it and select "Delete".
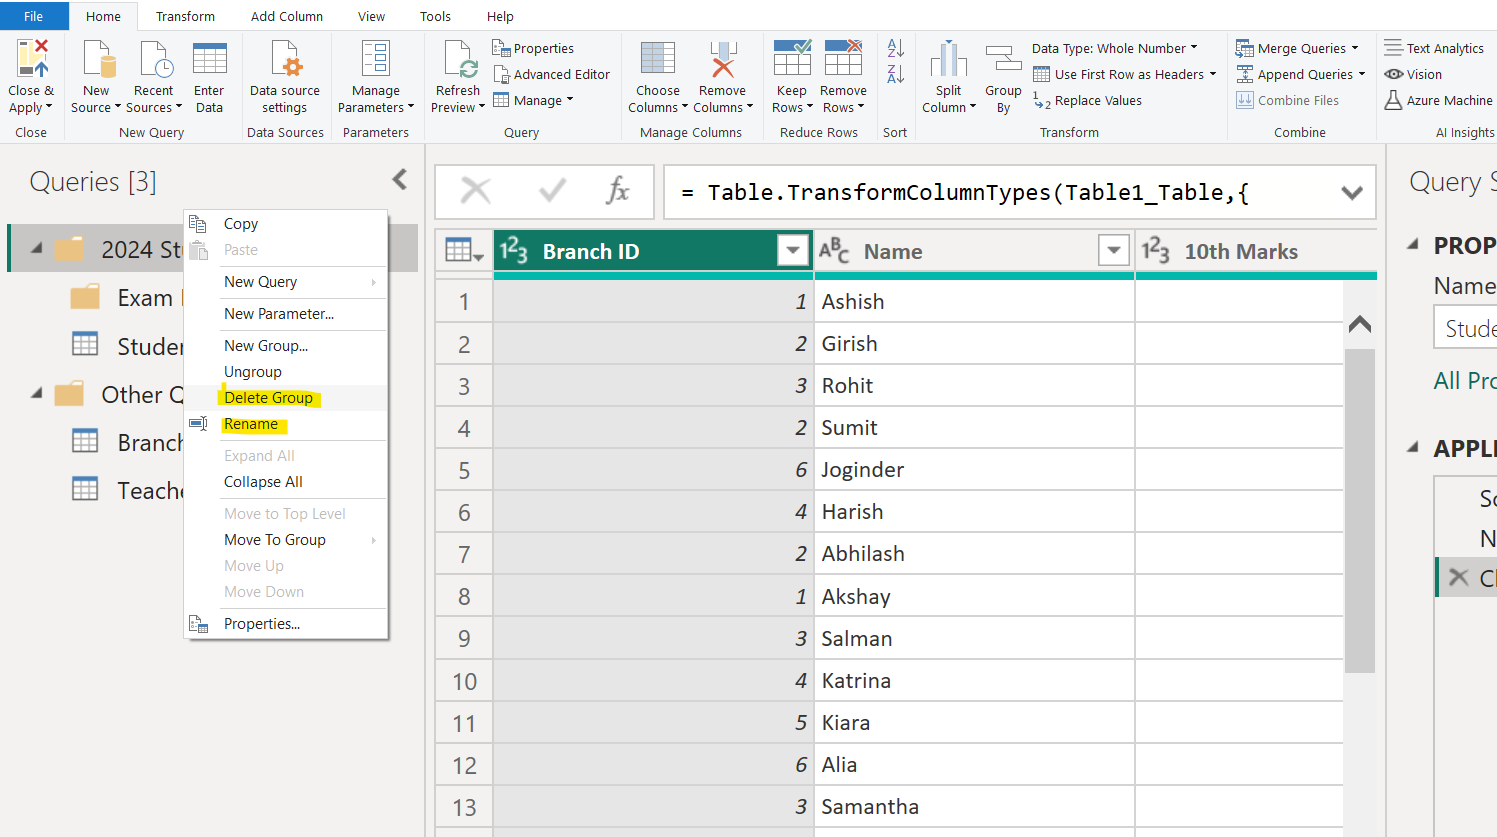
Note: Deleting a group does not delete the queries inside it; they’ll just move back to the root level of the Queries pane.
Step 7: Apply and Close: Once our queries are organized, click "Close & Apply" to save the changes and load the data.