Buttons in Power BI Desktop
In Power BI Desktop, buttons are interactive elements that allow users to trigger actions such as navigating between pages, activating bookmarks, applying filters, or resetting visuals. They play a key role in creating custom navigation, interactive reports, and user-friendly dashboards.
What Are Buttons in Power BI? Buttons are visual elements that users can click to perform specific actions. They do not display data themselves, but they control interactions within your report.
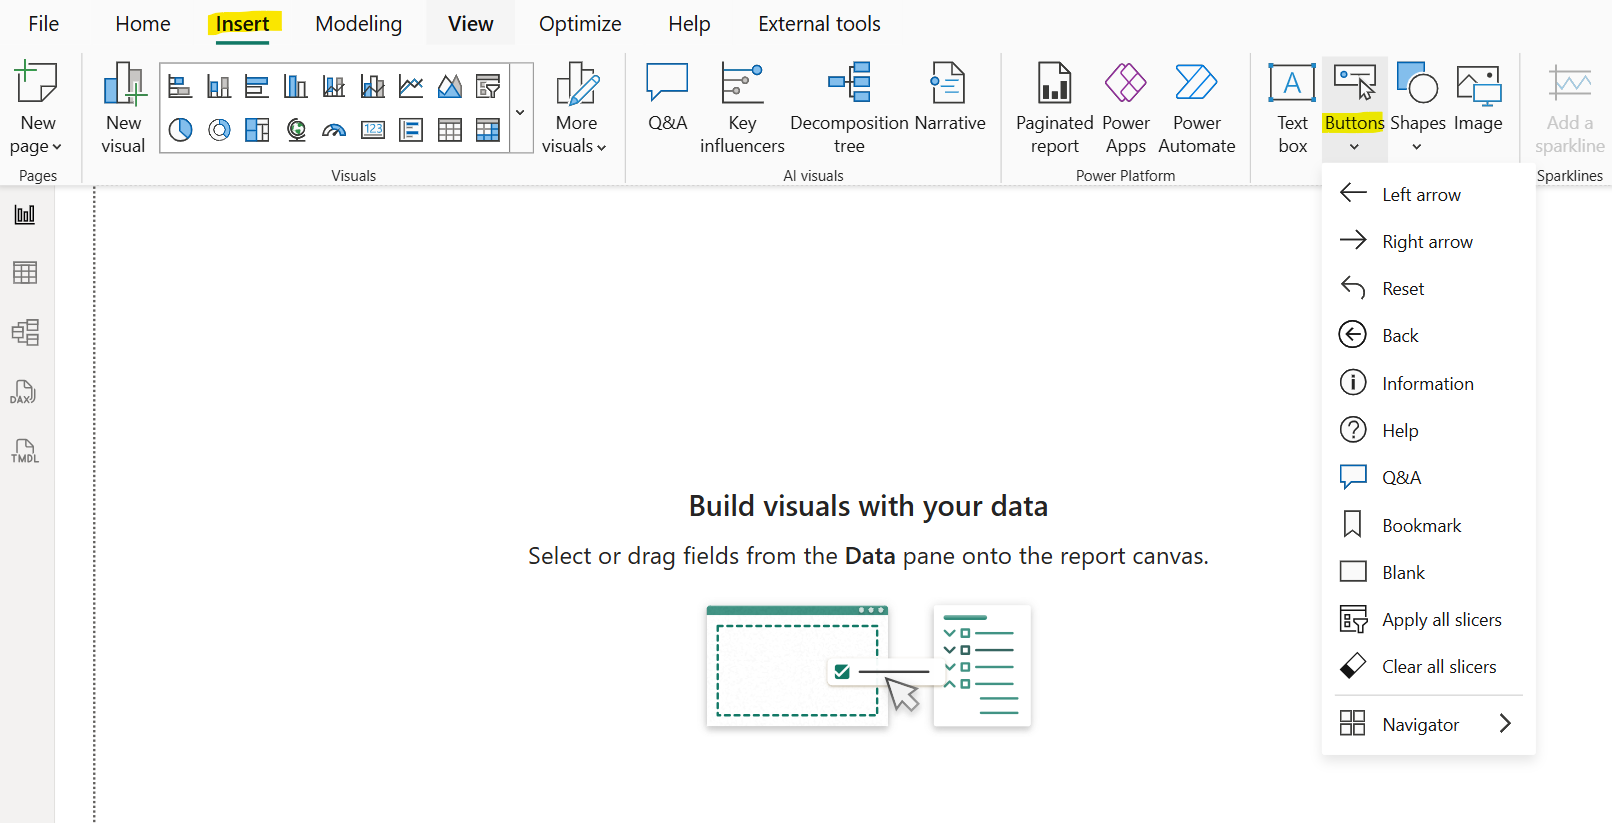
Types of Buttons and its Actions Power BI provides several pre-designed buttons, and we can also create custom buttons. The following pre-designed buttons and their specified actions include:
- Back: On this button we have the action Back. Allows users to navigate back to the previous report page. Most used on drillthrough report pages to return to the page from where it comes.
- Bookmark: Presents the report page that's associated with a bookmark that is defined for the current report. By default, the action selected for this button is Bookmark.
- Navigator: This can be used to create a bookmark and page navigator in the Power BI.
- Q&A: By default, Q&A action is associated with this button.
- Reset: No action is associated with this button. But we can create a bookmark after resetting all the filters and then specify that bookmark to this button.
- Apply all slicers & Clear all slicers: These buttons apply all the slicers or clear all the slicers on a page.
- Blank: A simple rectangular button that can be customized according to our requirements.
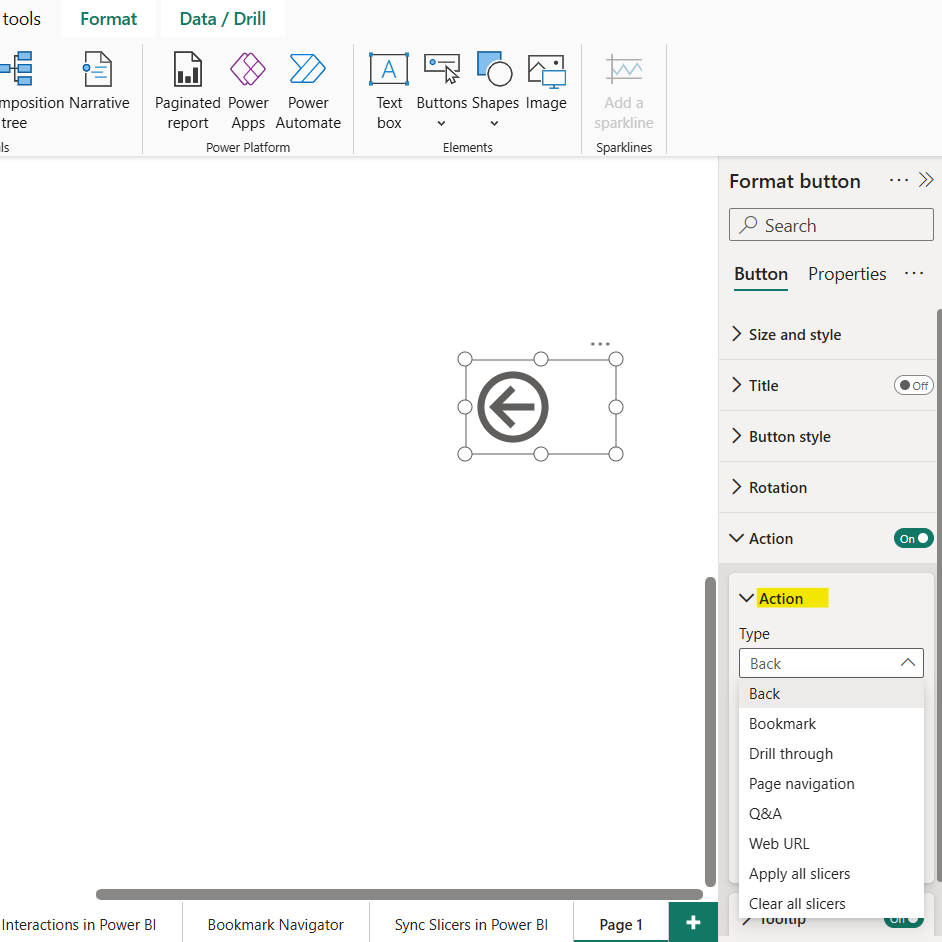
Actions in the report We can add an action to the button. Go to the Action slider near the bottom of the Visualizations pane and move the slider to the On position. Then, expand the Actions section to view the options. We can see a lot of options for the action types. The description of the various actions is listed below:
- Back: It returns the user to the previous page from which the user comes on this page.
- Bookmark: We can associate a bookmark in the report to the object.
- Page navigation: Brings the user to a different page within the report, also without using bookmarks, which is an effective way to create a navigation experience for our report users. If we want to disable or remove page navigation in Power BI, we can set the navigation destination to “None”.
- Q&A: Opens a Q&A Explorer window, where users can enter questions to quickly find the information that they are looking for and specify the type of visual that they want to see the information displayed in. This option can be useful if we want to save space in the report but still offer Q&A functionality to the user.
- Web URL: Opens the url in a default browser in new tab.
- Drill through: Brings the user to a drillthrough page that is filtered to their selection, without using bookmarks.
- Apply all slicers & Clear all slicers: These actions can be used on any button or shapes to apply all or clear all all the slicers on a page. So instead of creating bookmark to reset the filters we can use these actions.
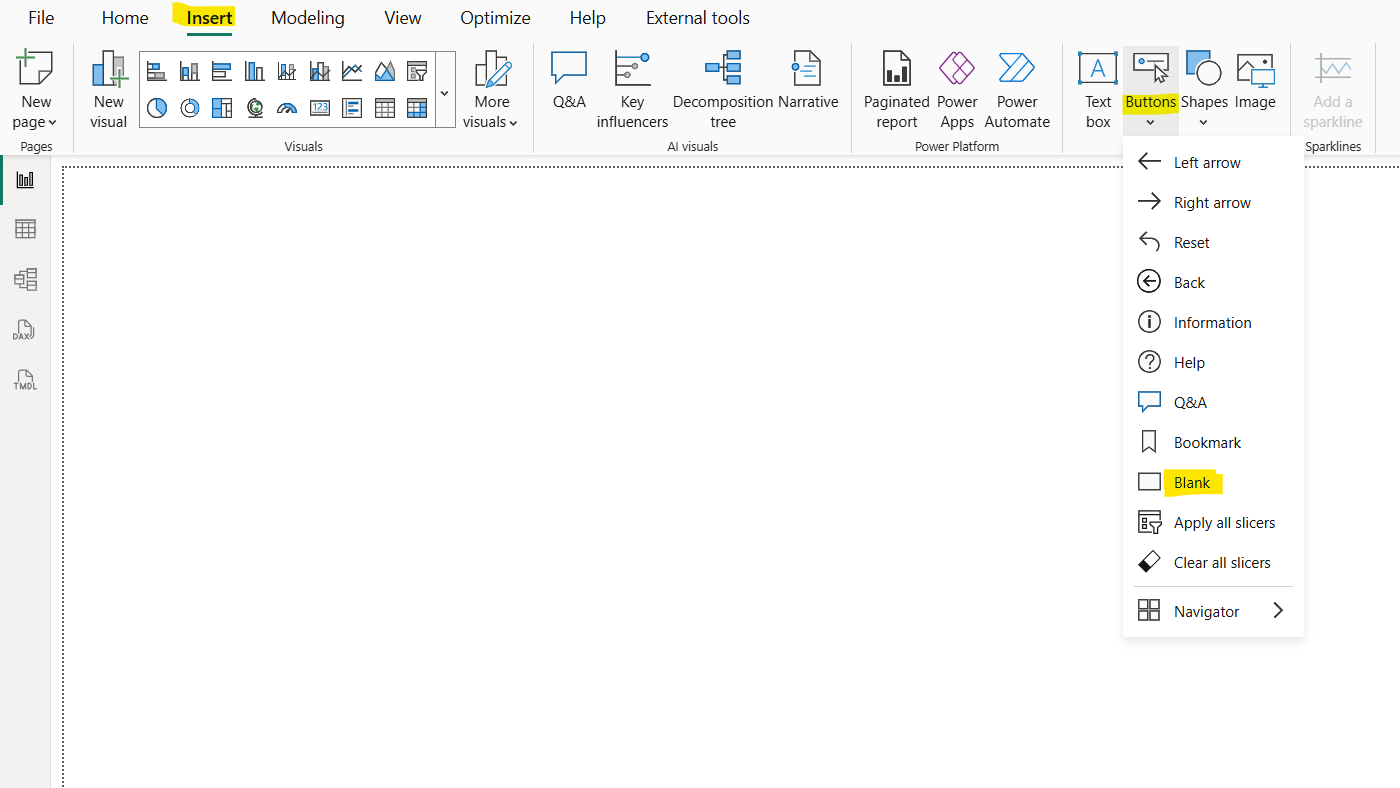
Let’s add a button and specify the Navigation action to it: Step 1: Go to the Insert tab on the ribbon and select Buttons. Then, select the type of button that we want to add from the list, let’s select the Blank option.
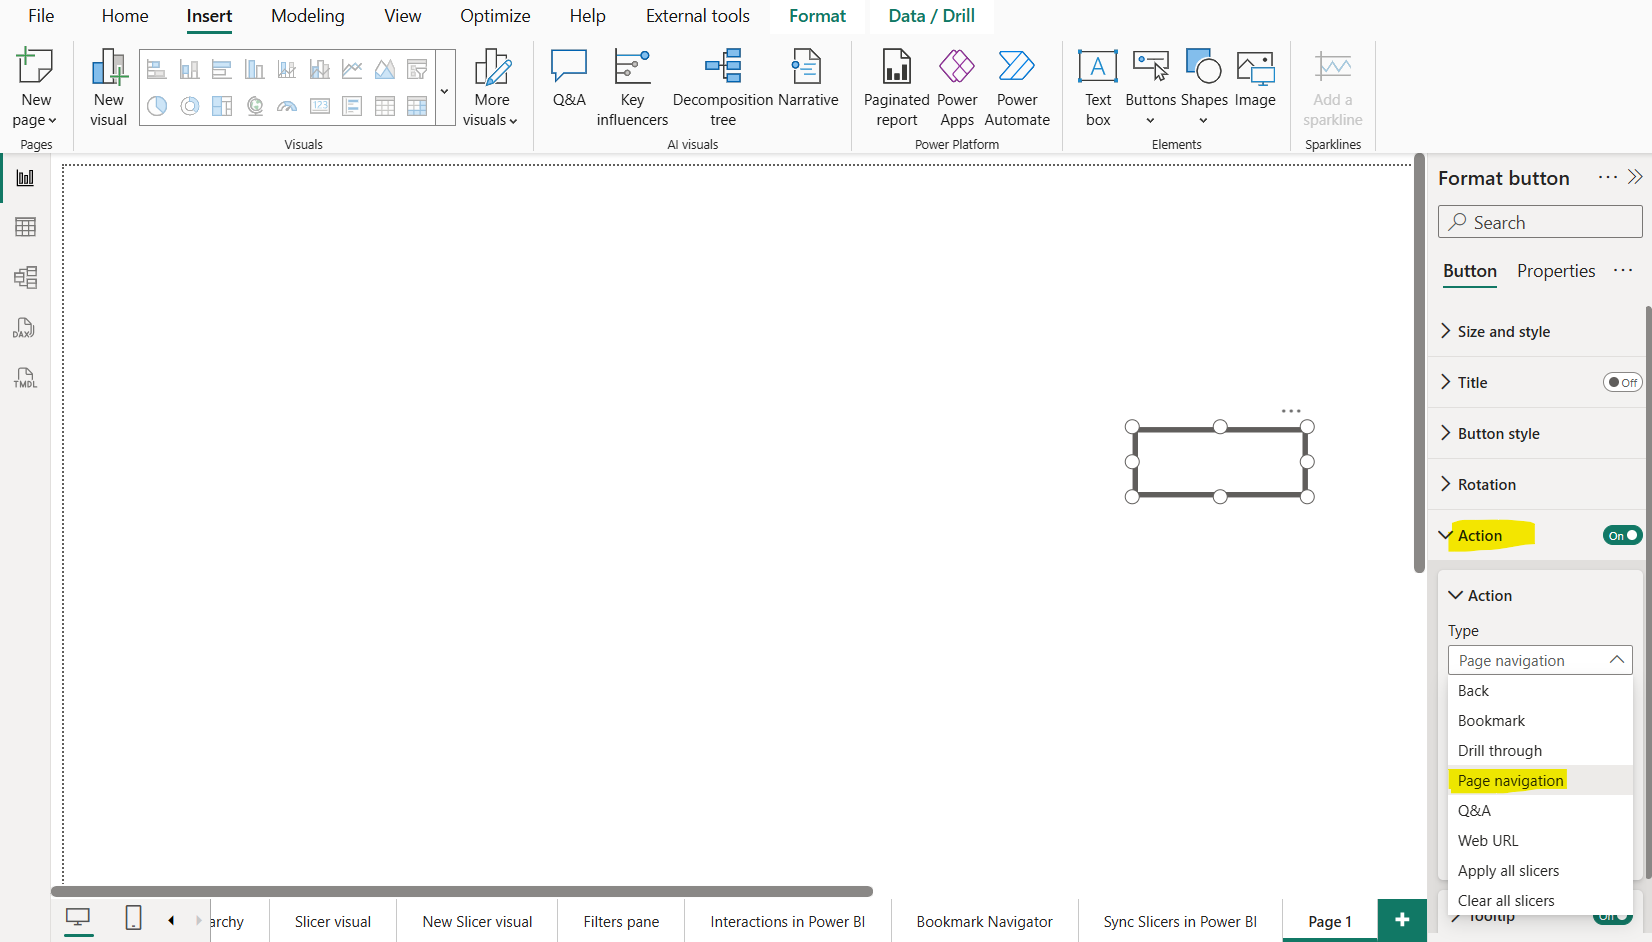
Step 2: Select the button on the page and turn On the Actions section in the Visualizations pane to make the button functional, and then select Page navigation as the action type.
And then select the page in our report that is the Destination for the button. Here we have selected the page “Interaction in Power BI”, means when we click on the button we reach on this page.
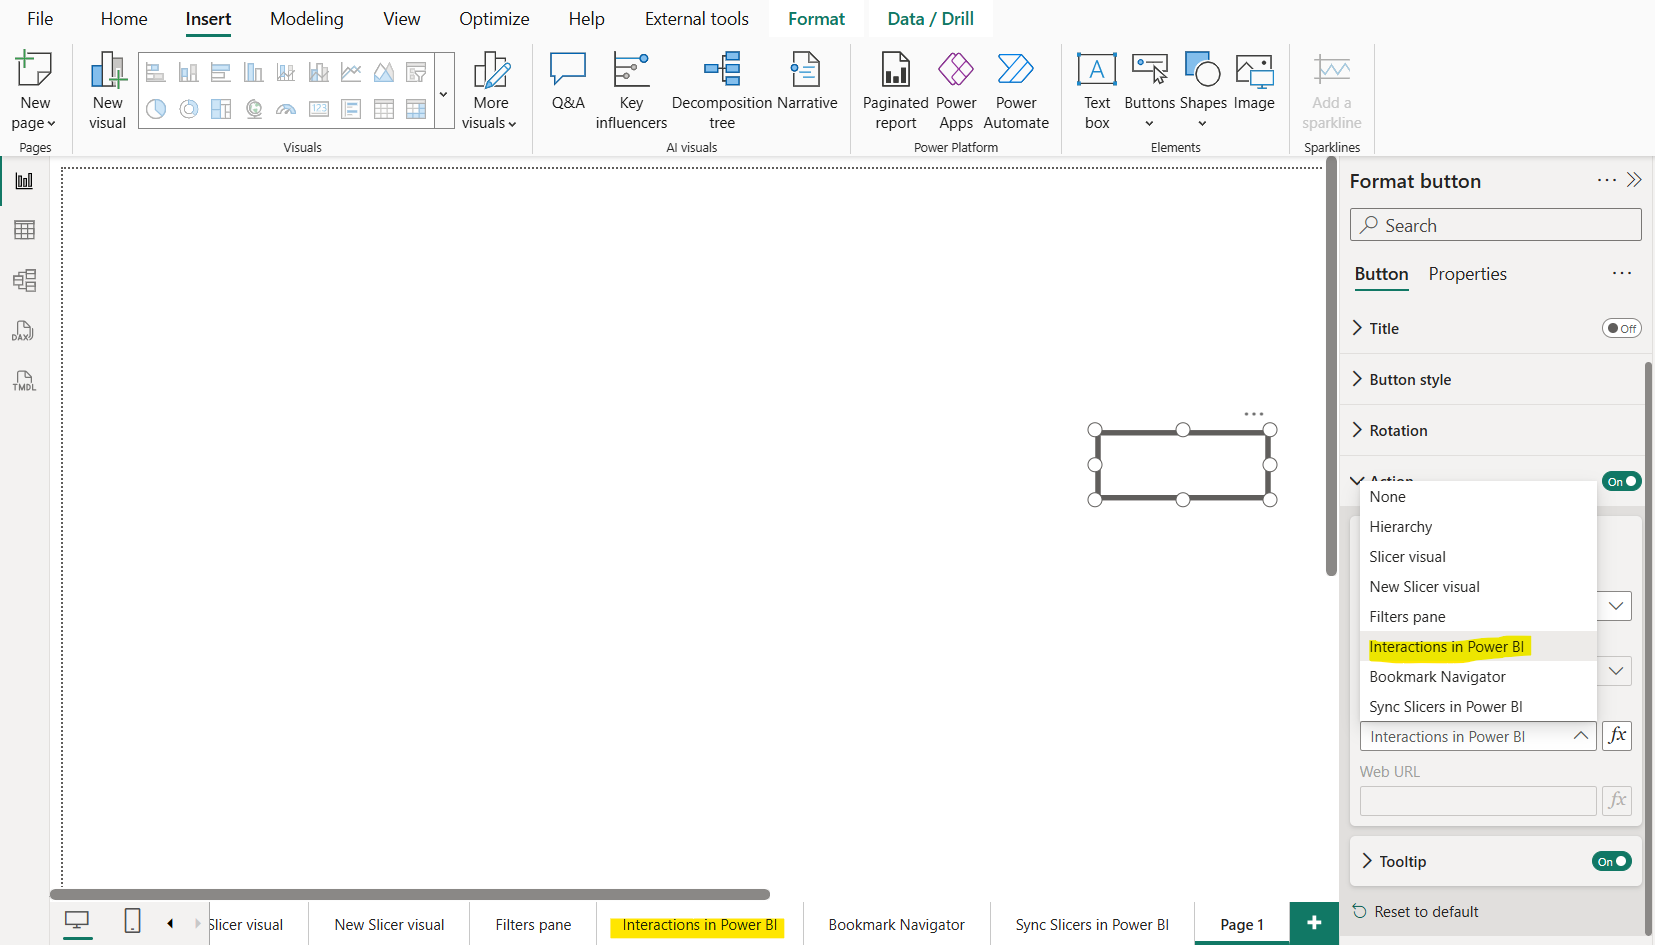
Note: We can also dynamically specify the navigation page in the destination.
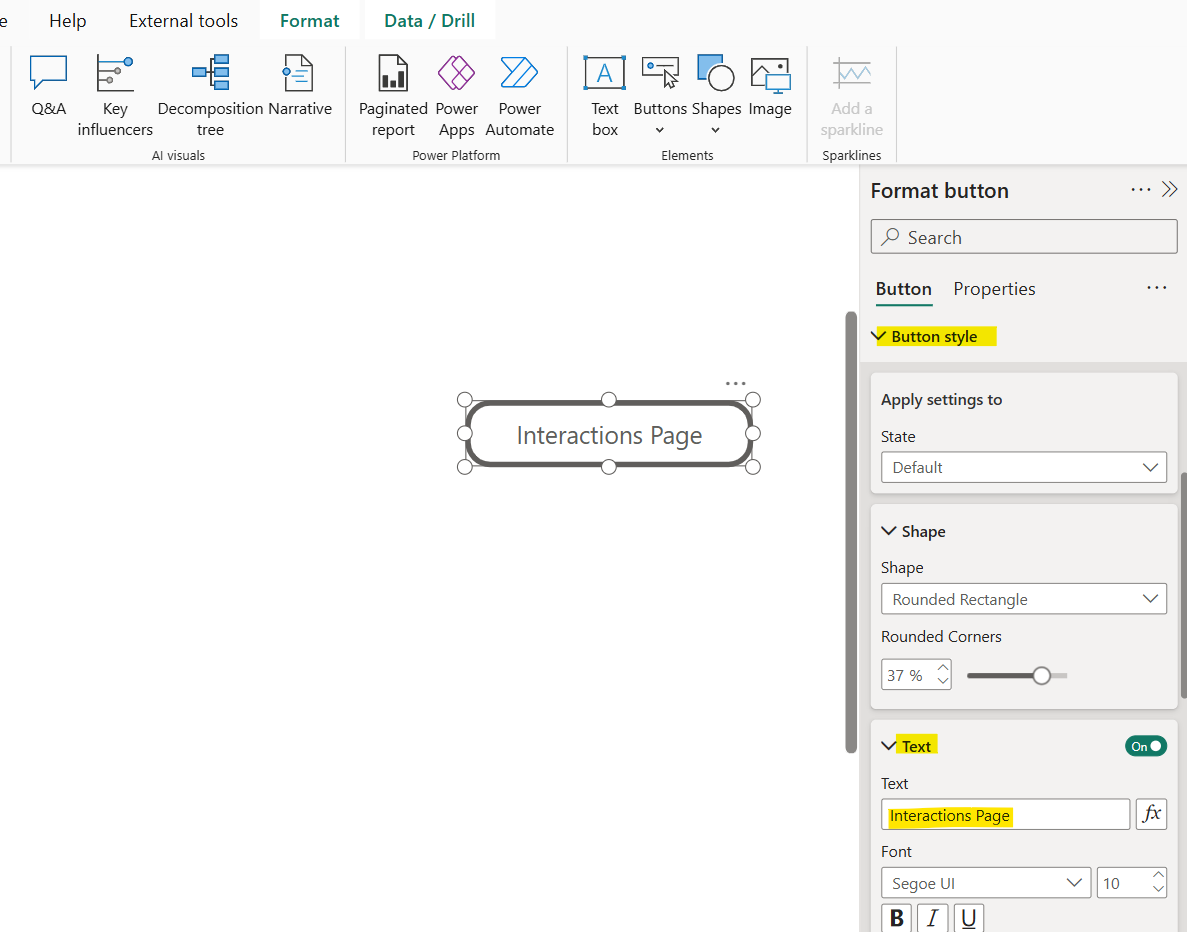
Step 3: Our button is functional now, let’s us some and formatting to it. Let’s add the button text and specify its shape. We can customize the text and font.
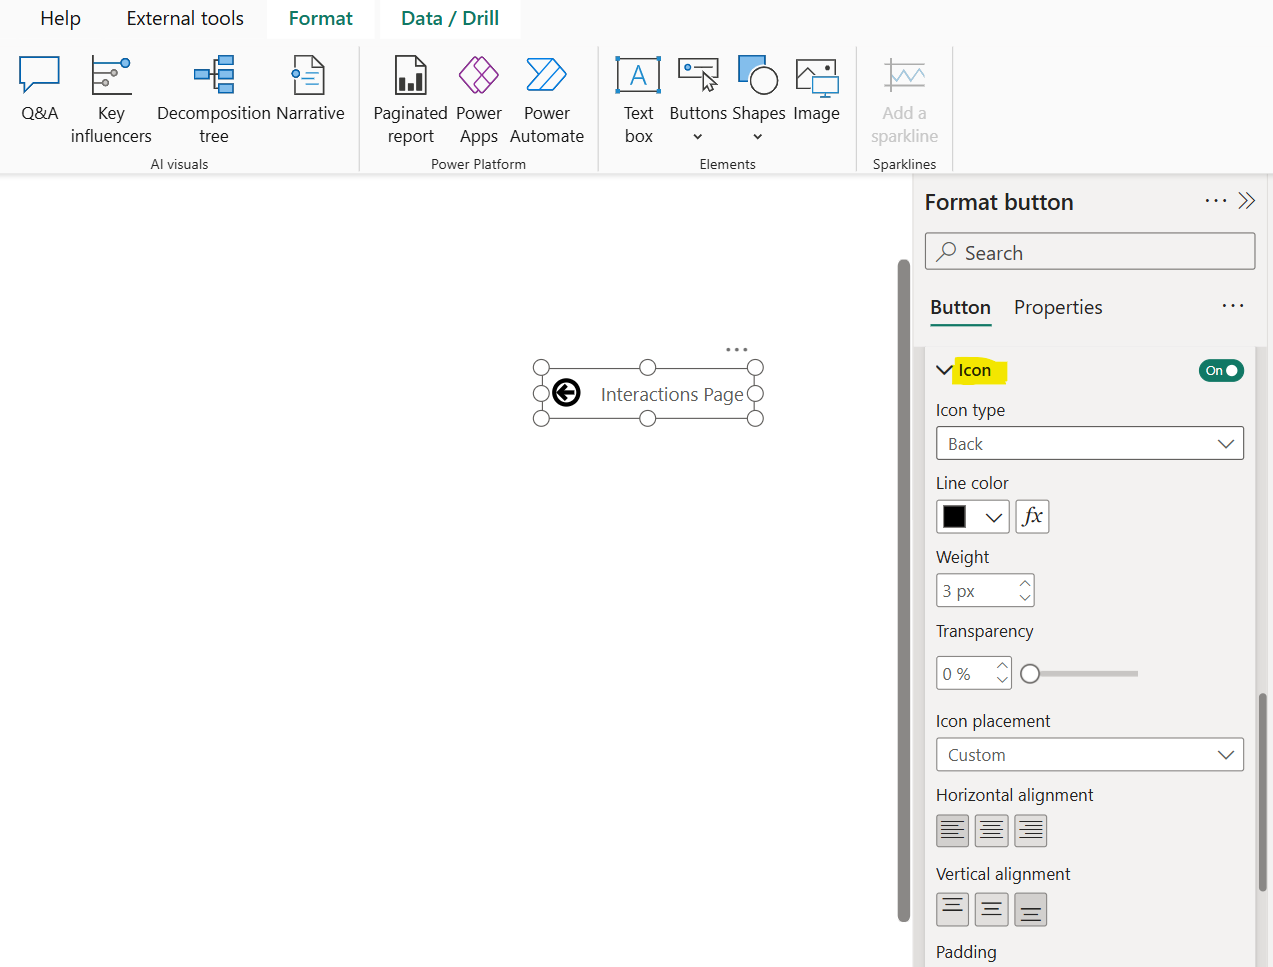
Step 4: We can use the Icon with the button. Here we can use predefined icons or also have the option to use the custom icon. We can also format the icon like its size, placement, alignment, padding, etc.
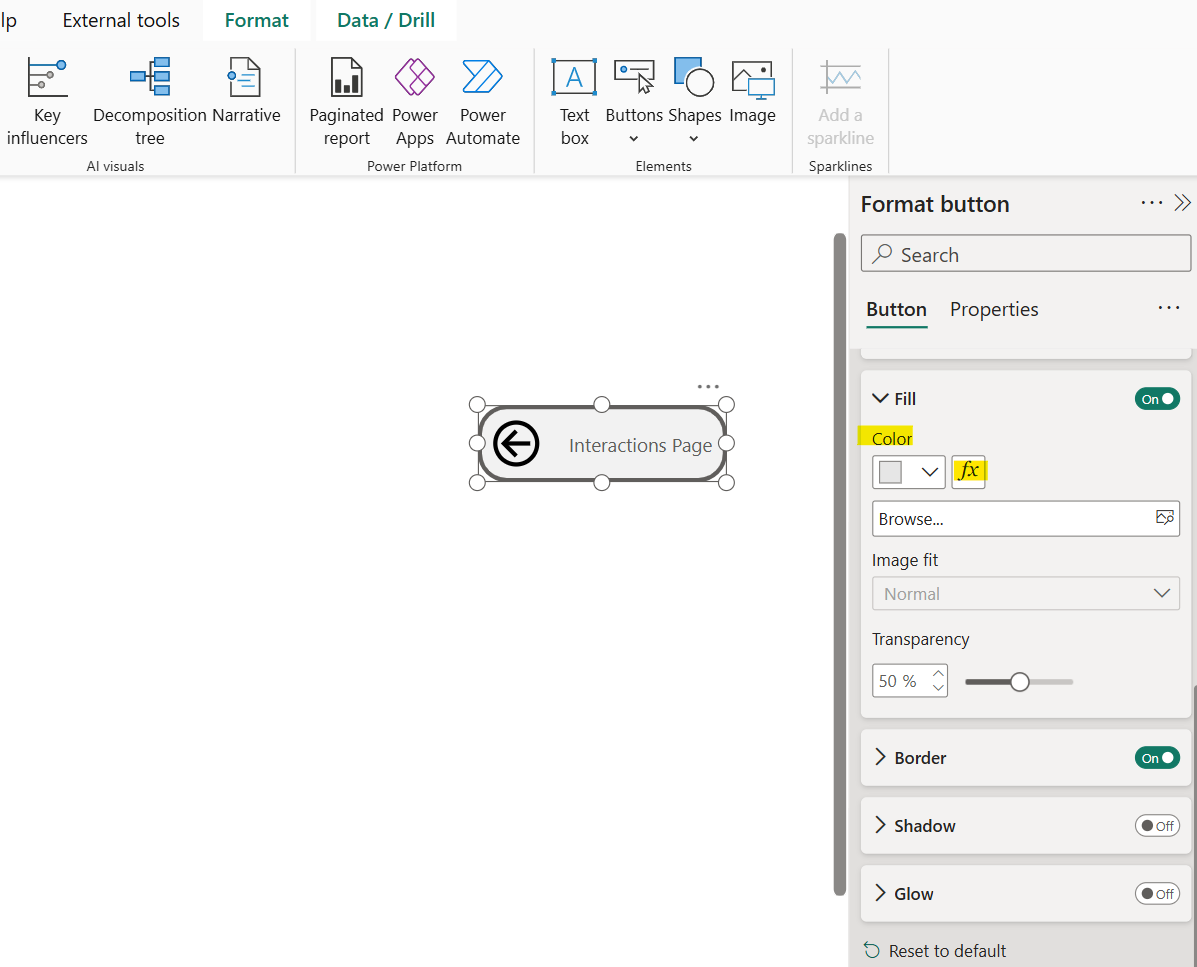
Step 5: We can add the Fill color to the button. We can add the colour on the based on the conditions also.
Step 6: We have different button states. Buttons in Power BI have four possible states:
- Default: This is the default state when not hovered over or selected.
- On hover: The state activates when the mouse hover over it.
- On press: How buttons appear when selected. This state triggers when the user clicks (presses) the button. This state only lasts while the mouse is held down.
- Disabled: How buttons appear when they can't be selected.
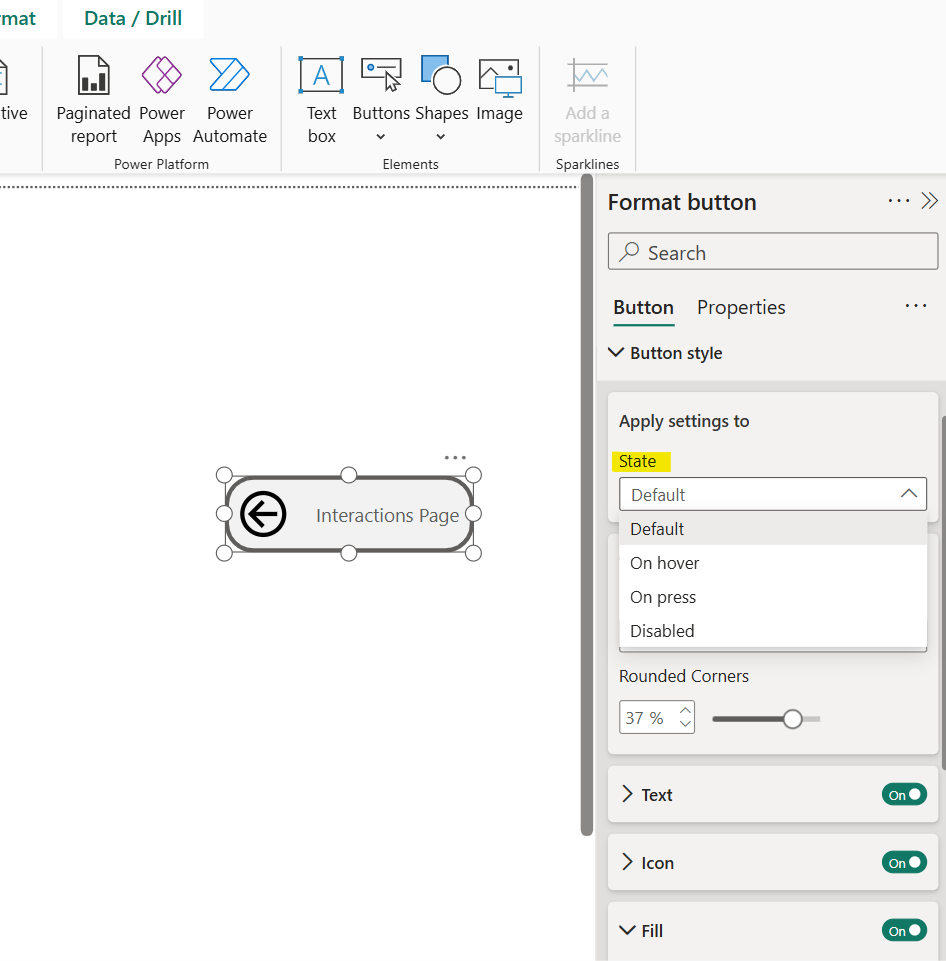
For each state we can customize all the options inside it which are allowed like button text, its icon, fill color, border and shadow. We can customize button using different visual states to enhance interactivity and improve user experience.
Step 7: We can add the tooltip to add helpful hover text to explain the button’s function.
Step 8: Let’s test the button, to test select the button (select Ctrl key on the keyboard and then click on the button when we are in Power BI desktop), we will be brought directly to the assigned page destination.
Tip When we are on that destination page, to return to the Navigation page, we can use the Back action to return the page from which we come on the destination page. We can use the Back button, and by default the action specified to it is Back.
Example: Dynamically Specify Navigation Destination Page Let’s dynamically specify the destination page for our button. To achieve this let’s create a table that has all the page names as shown below. In the table, ensure that the entered values exactly match our report page names.
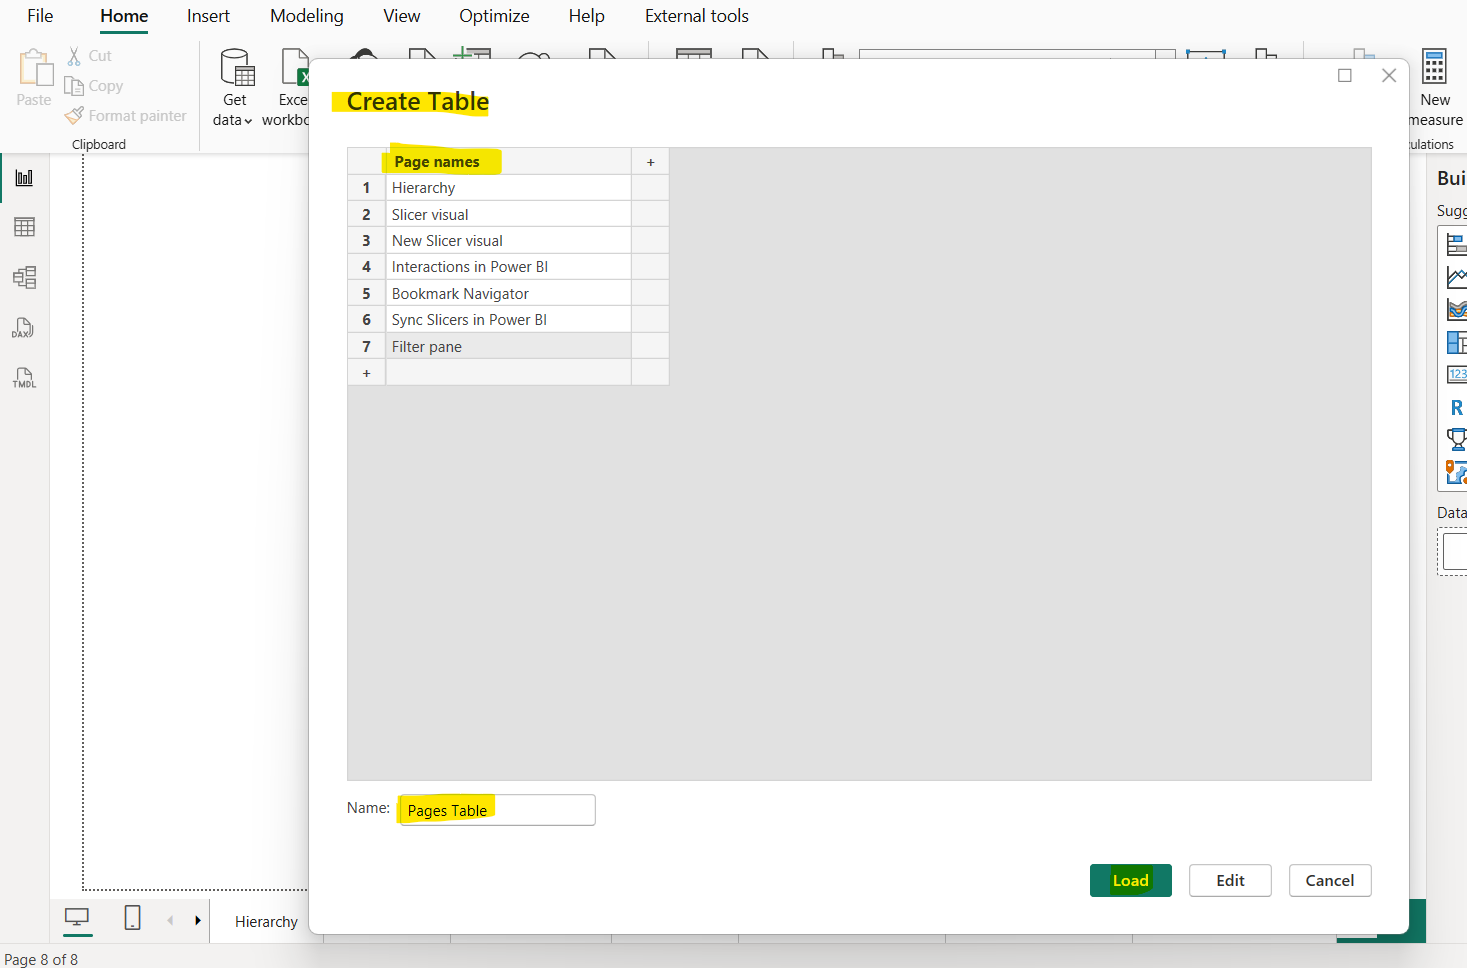
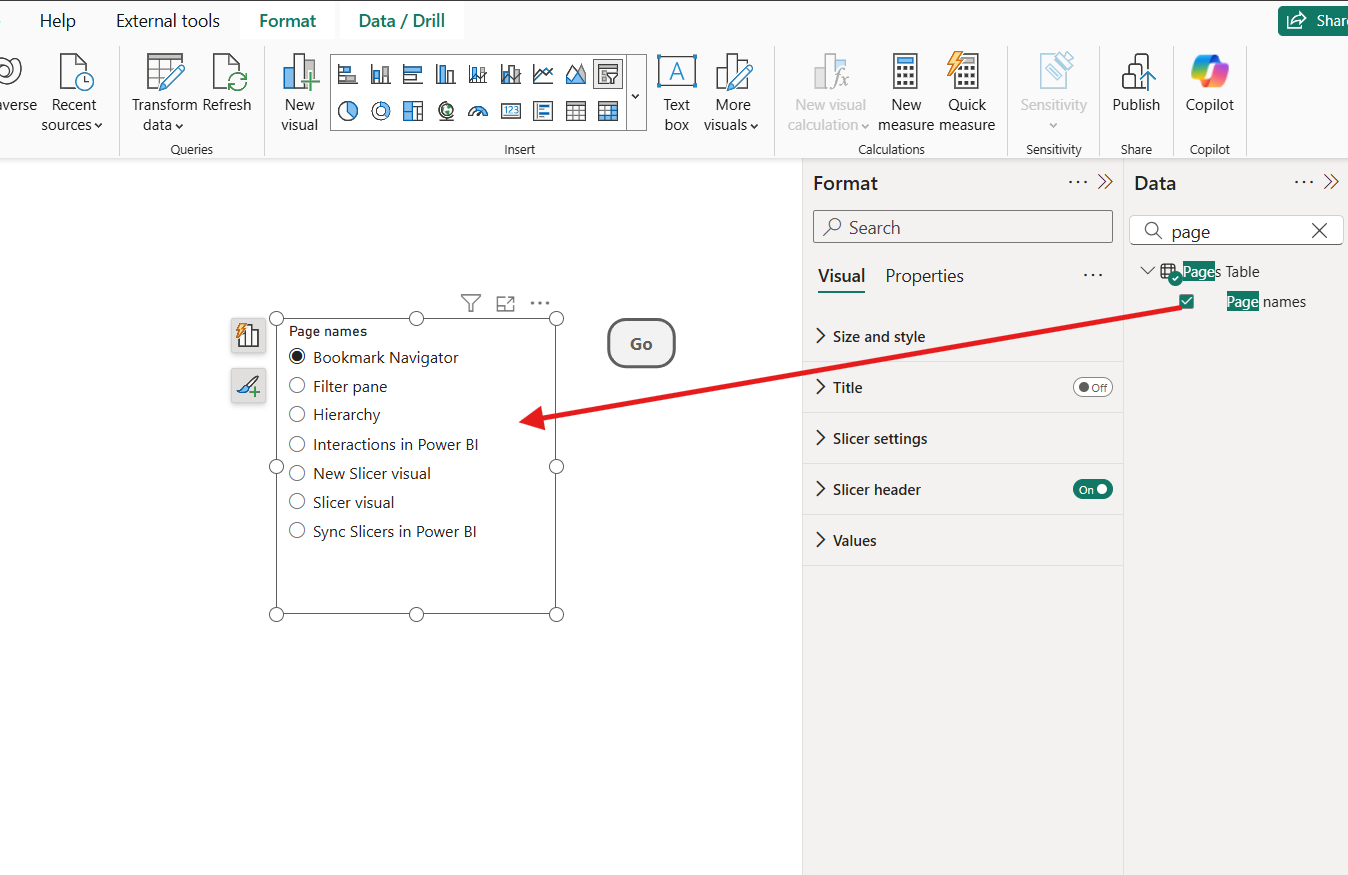
Click on Load to load the table and add it to a single select slicer on the report page.
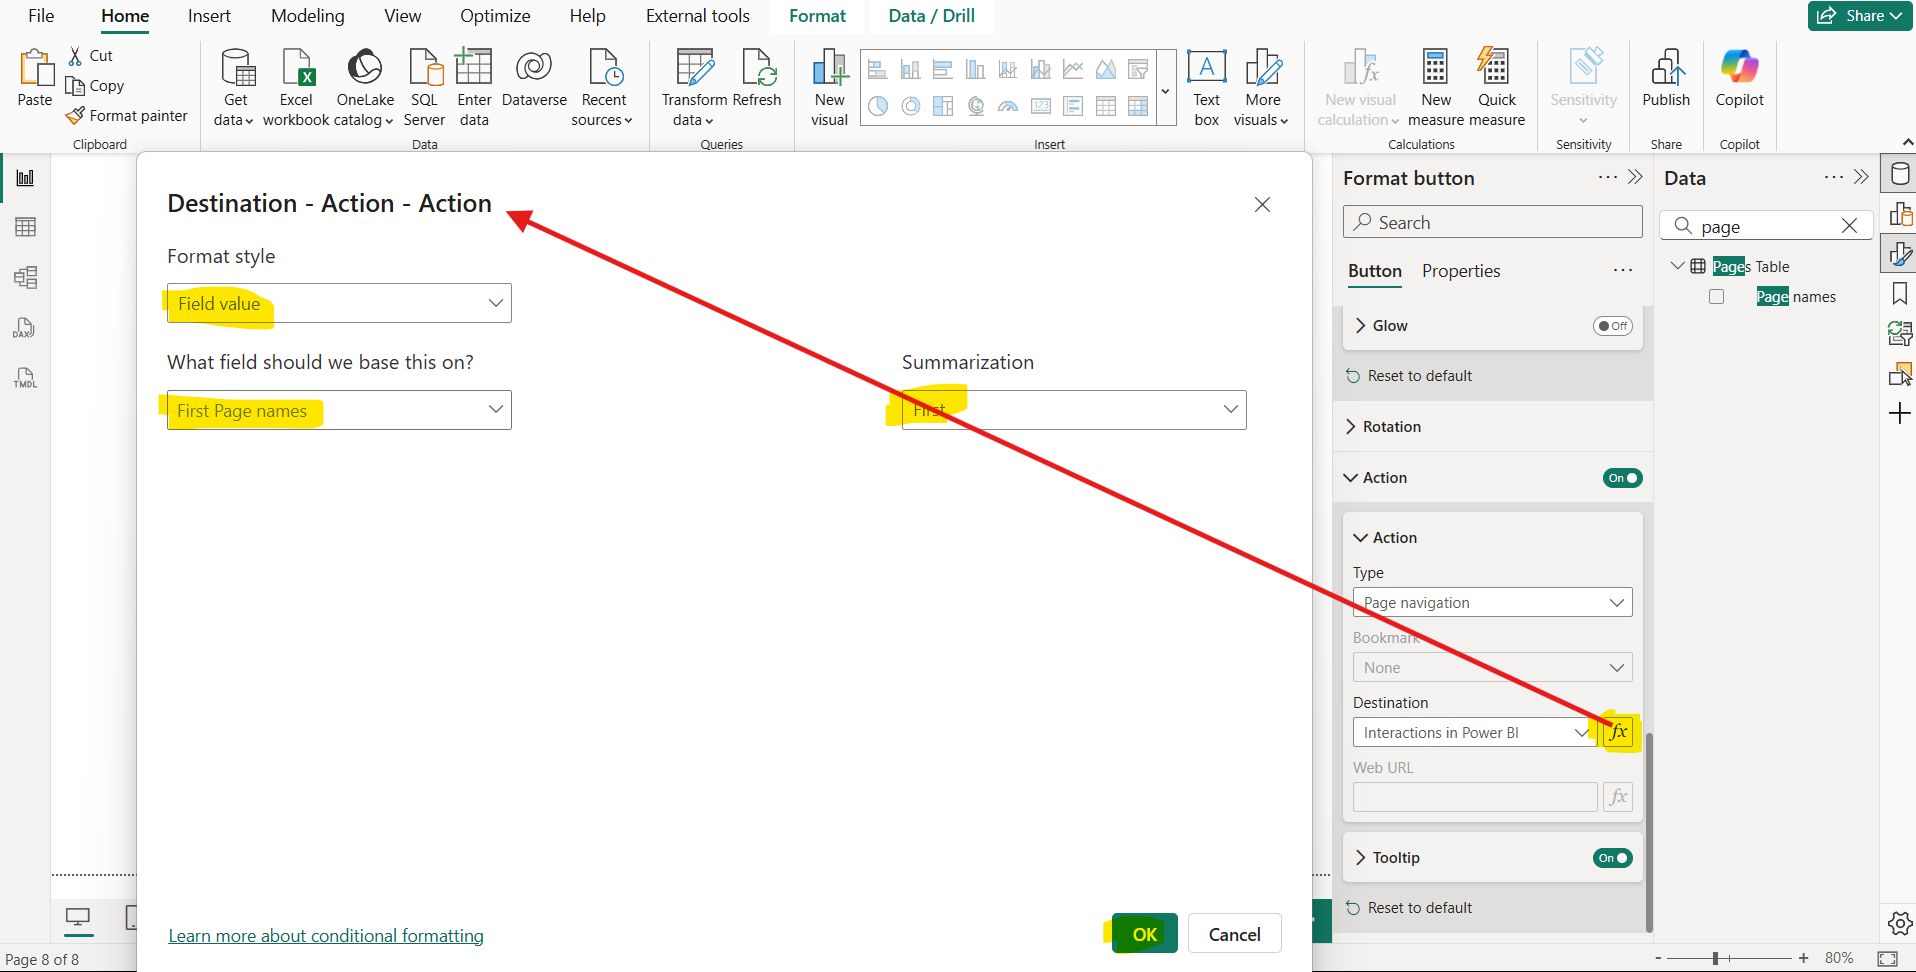
Now select the navigation button and click on fx to specify the destination dynamically. After configuring the conditional formatting click on Ok.
Now it is ready to test just select the value from the slicer, basically the page name on which we want to jump and then click on Go which is a button that have Navigation action that references dynamically the page names from the slicer
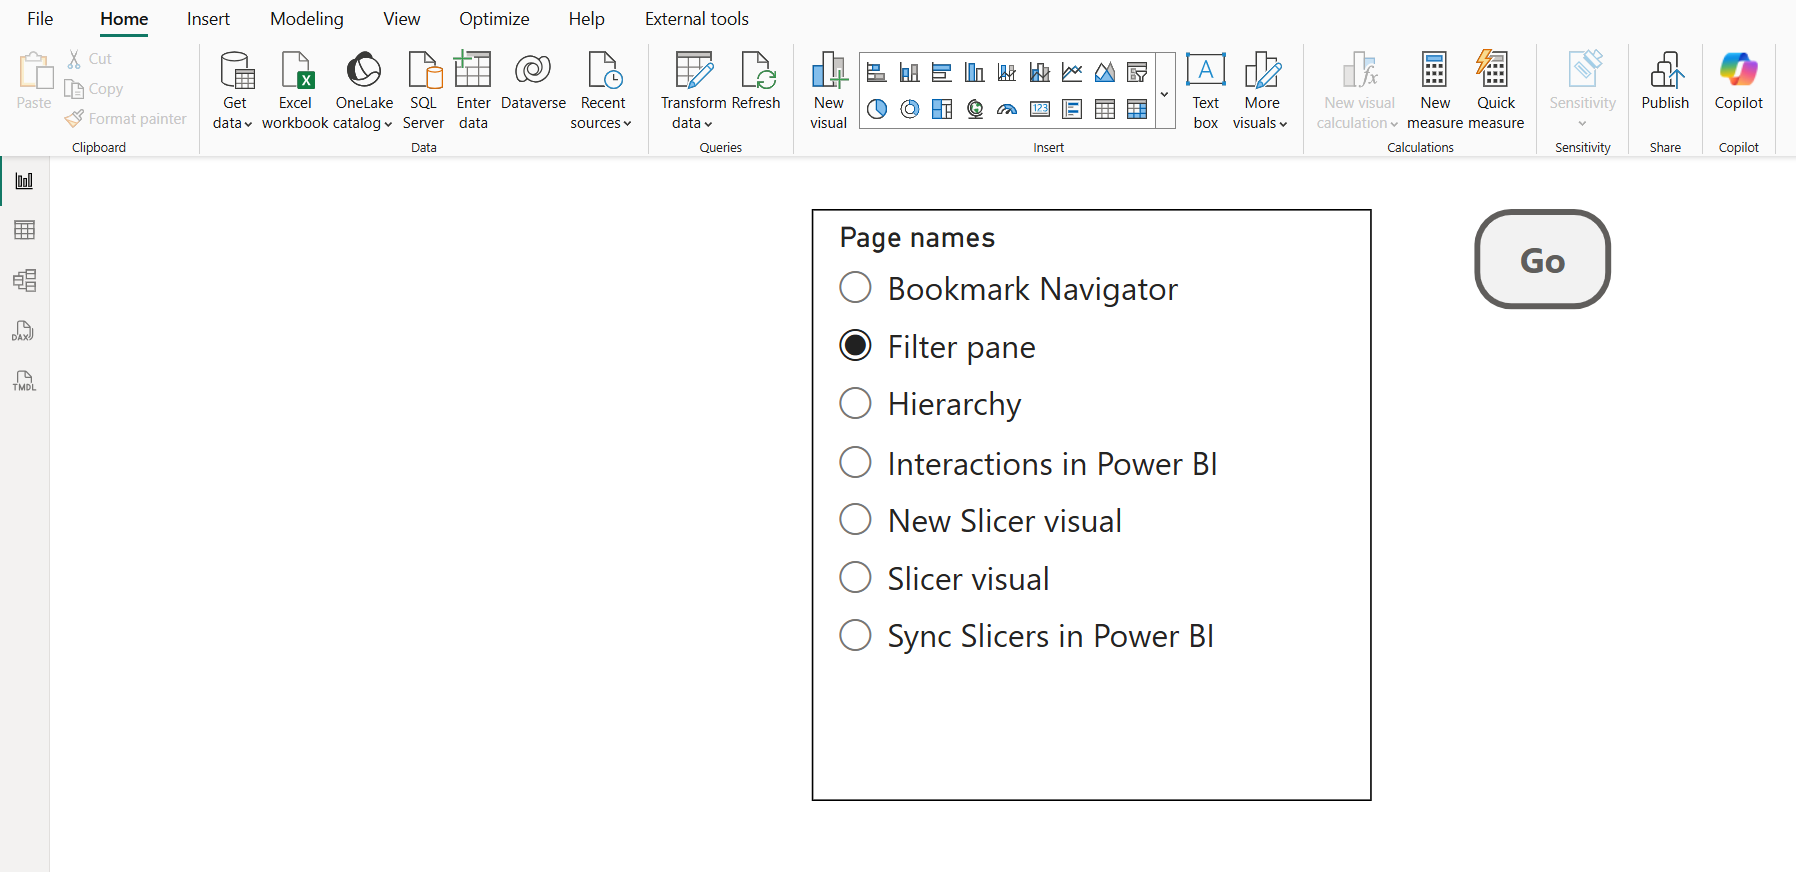
By using this design feature, we do not multiple navigation button for navigation.