Solutions in Power Platform
In this exercise, we will learn about the solution, its types (managed and unmanaged) and how we can import and export the solutions. And, how solutions are used for implementing ALM in Power Apps and Power Automate.
Important points about solutions:
- Solutions act as a container to make it easier to manage related resources, including cloud flows.
- Solutions can be exported and stored in source control for version tracking.
- Solutions enable the transport of the collection of resources from one environment to another with straightforward export and import actions, but not data, Data must export or import separately.
- An entity (or component) can be present in more than one solution.
A solution can be managed or unmanaged.
1. Unmanaged solutions Unmanaged solutions are generally part of the development environment to make the changes in the components of the solutions.
Important points about Unmanaged solutions:
- All the solution that are created in an environment are all unmanaged solutions. We cannot create Managed solution. Only we can export the solution as the managed solution or unmanaged solution.
- We can create any number of unmanaged solutions.
- We can export the solution as Managed or Unmanaged.
- When we delete Unmanaged Solution, only the solution will be deleted but the components inside the solution is not deleted. And we cannot undo the deletion operation of the Unmanaged solution. The solution components are present inside the Default solution.
2. Managed solutions Managed solutions are deployed to any environment that isn't a development environment for that solution. For example: Production environment.
Important points about Managed solutions:
- Deleting Managed solution deletes the solution with its components, it also deletes the components of that Managed solution from the Default solution of the environment in which it is imported.
- A managed solution can be uninstalled after it is imported. All the components of that solution are deleted by uninstalling the solution. When we import an unmanaged solution, we add all the components of that solution into our default solution. We can't delete the components by uninstalling the solution. So, we must manually delete the solution components from Default solution also to rollback. So that’s why it is better to use Managed Solutions for the Production environment.
Create a Solution
Our first task is to create a solution:
Step 1: To create a solution, sign in to Power Apps and then select Solutions, which is available in the left vertical navigation.
Note: We have the flexibility to create a solution in both Power Apps and Power Automate. From either service, we can access all services to add to our solution.
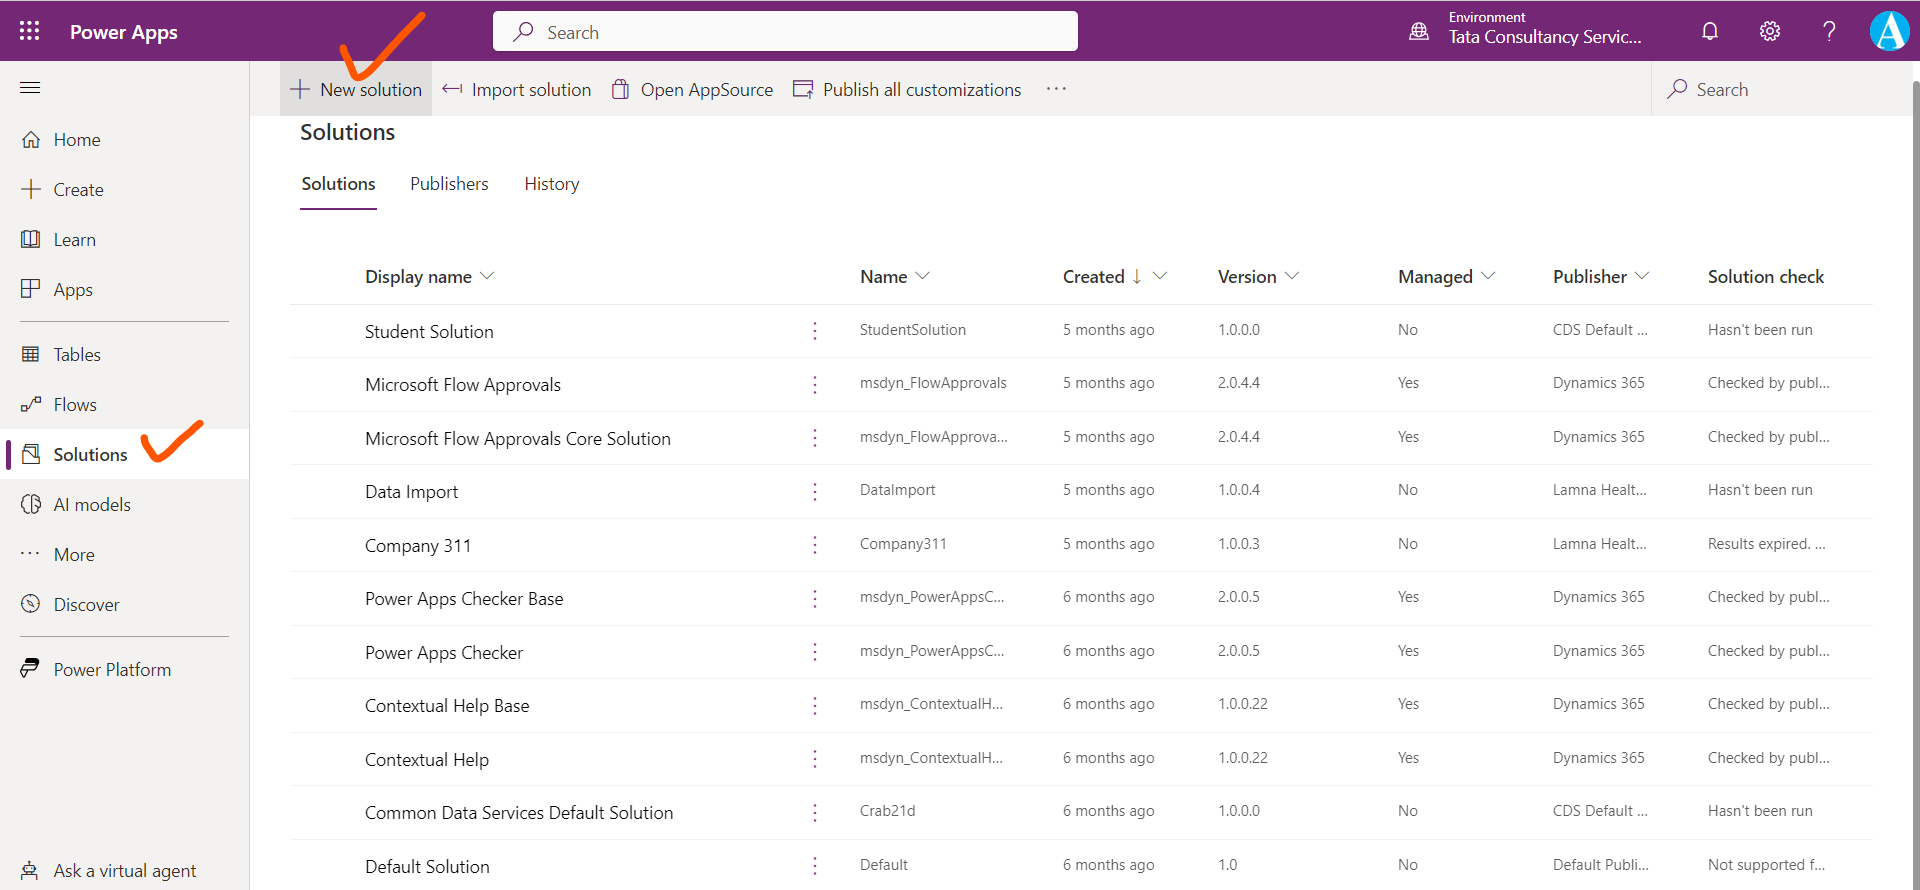
Step 2: Select + New solution.
In the New solution dialog box. Add the Display name, select CDS Default Publisher, and then enter a Description. Select Create.
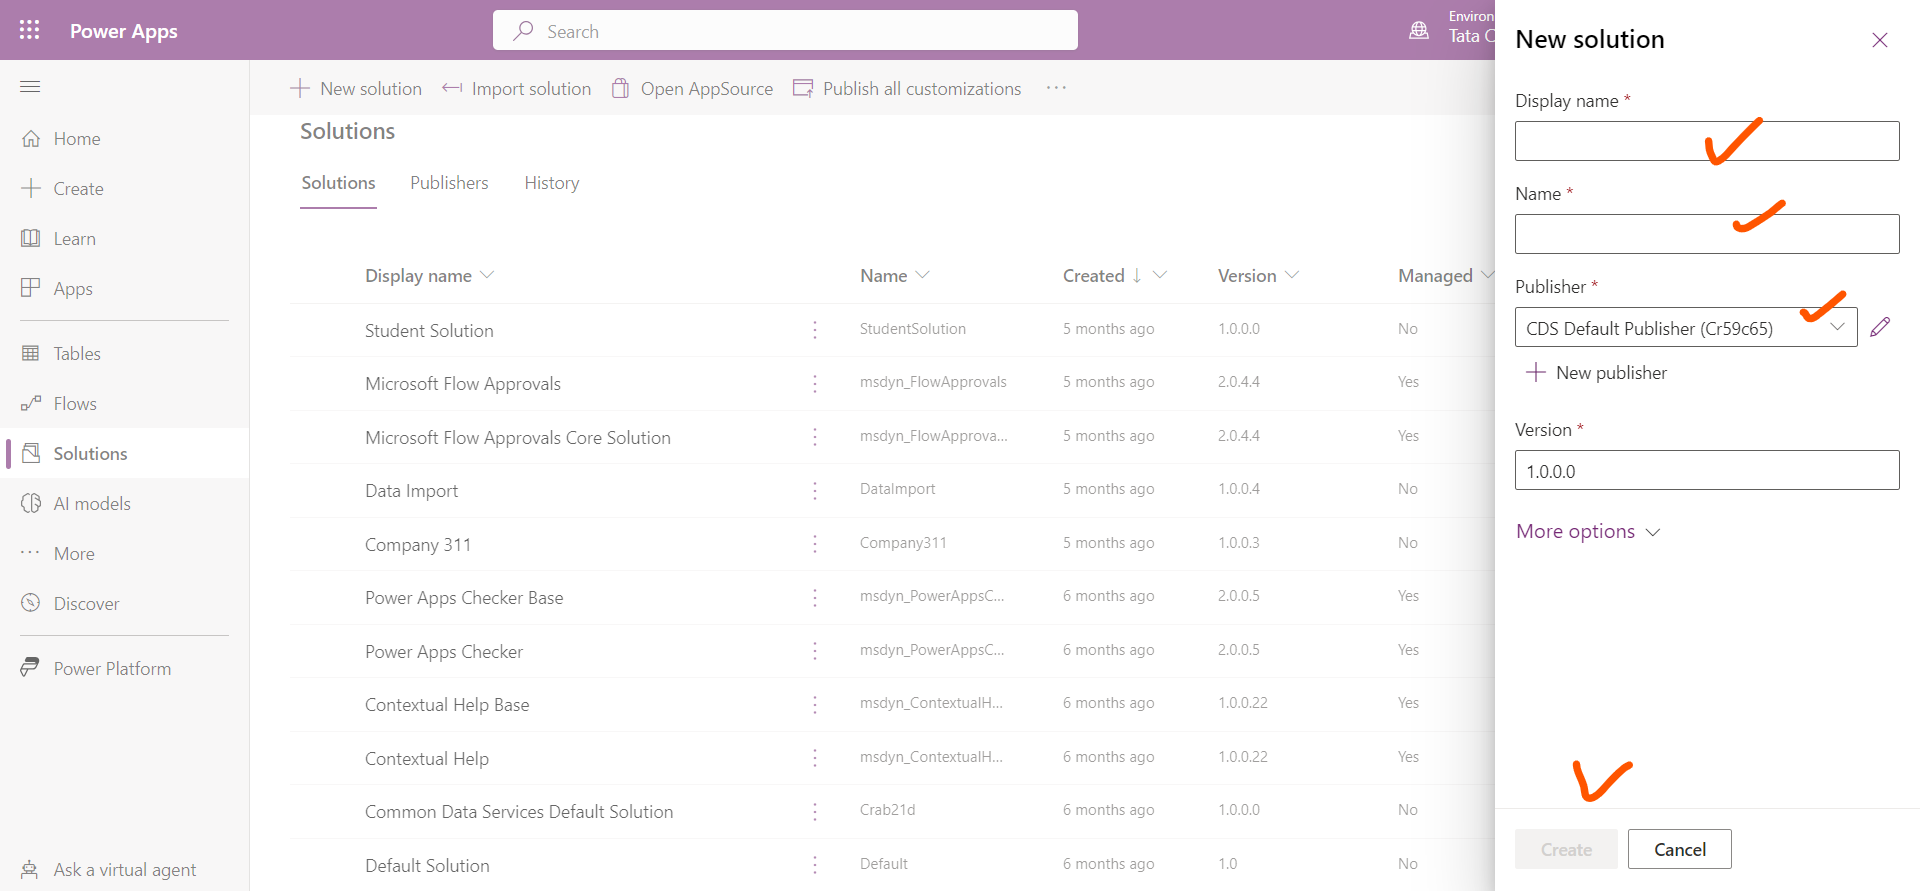
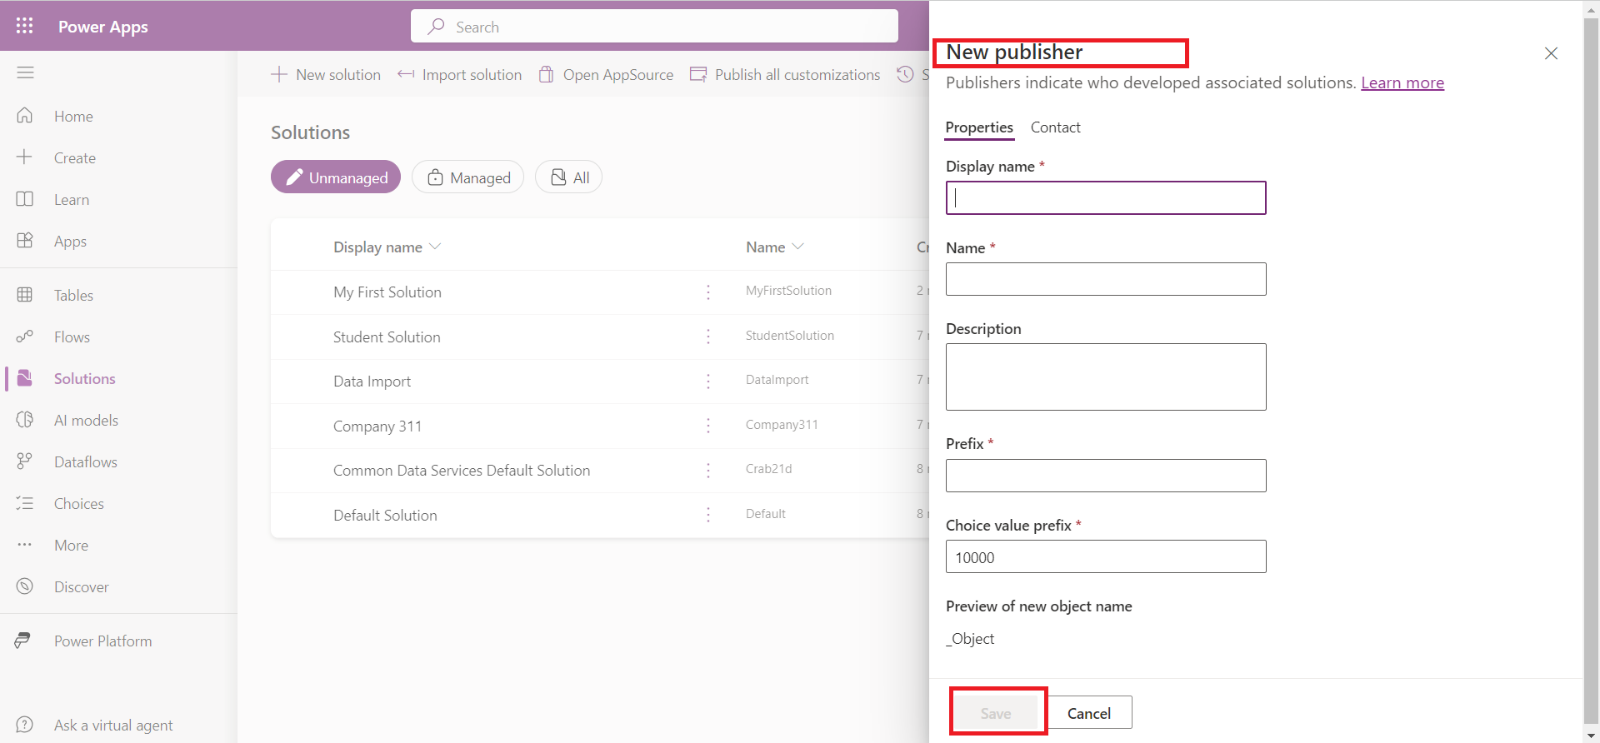
We also have the option to create a new publisher by clicking on the + New publisher.
a) Enter the Display name, Name, Prefix, and then select Save.
b) Select the dropdown to choose the publisher that we created, select Publisher, and then select Create.
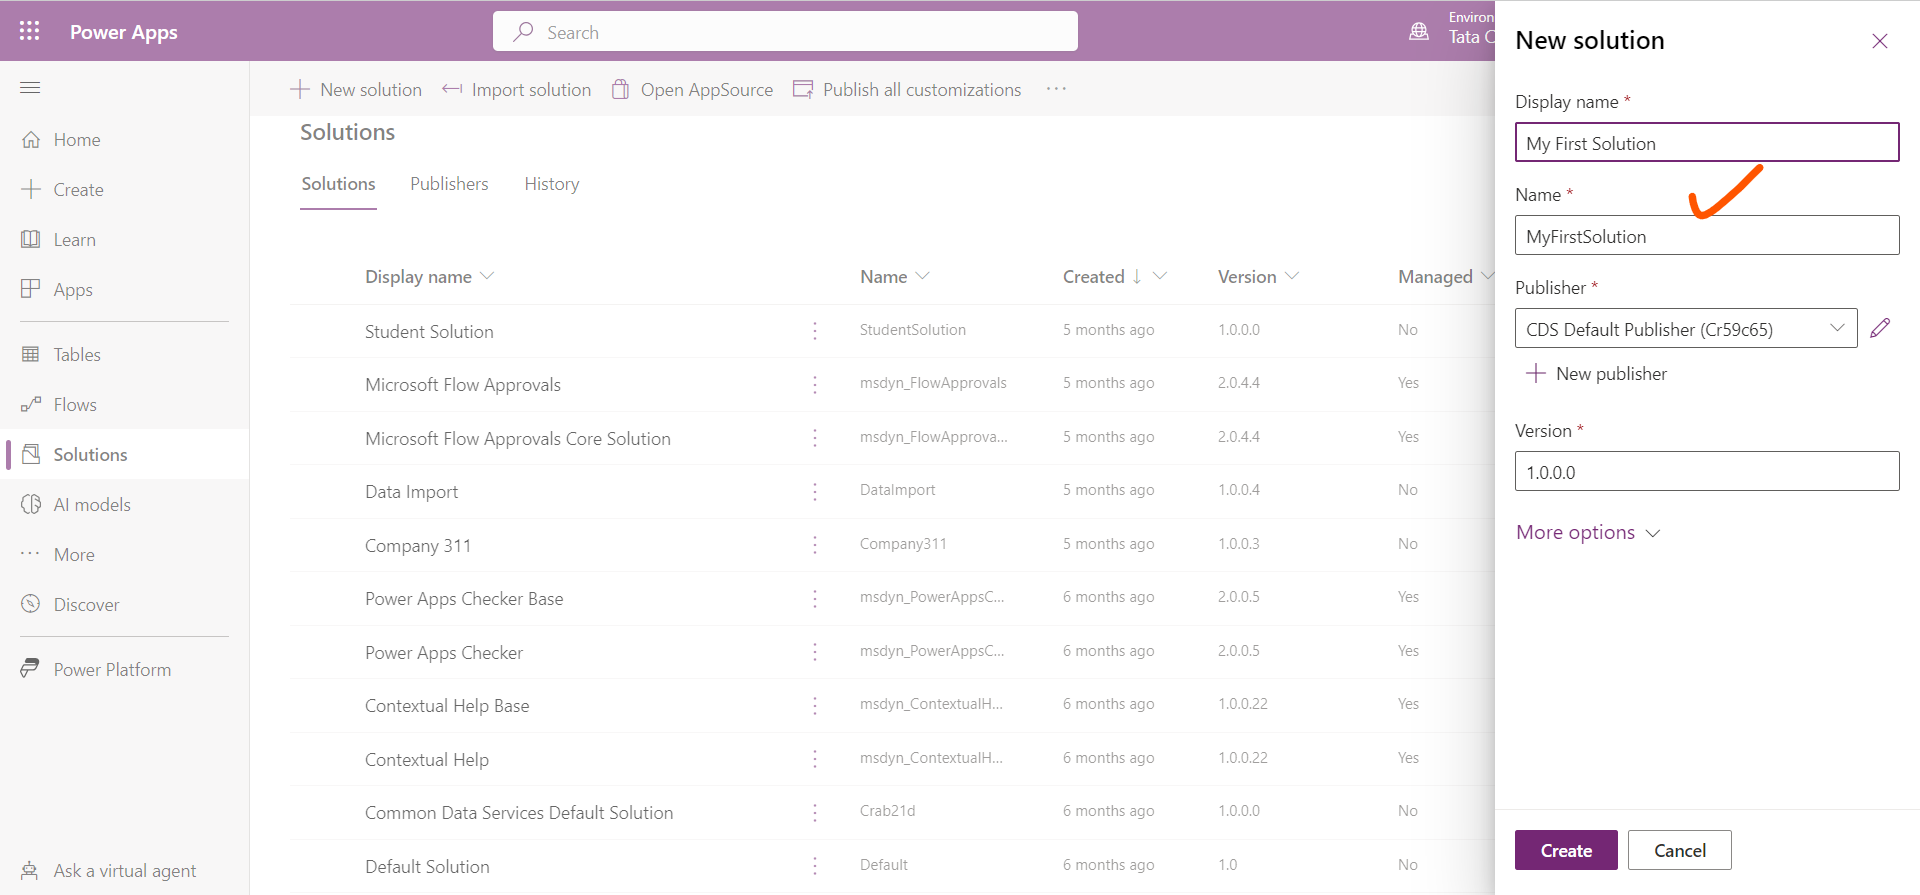
Our Solution is created, and its available in our list of solutions.
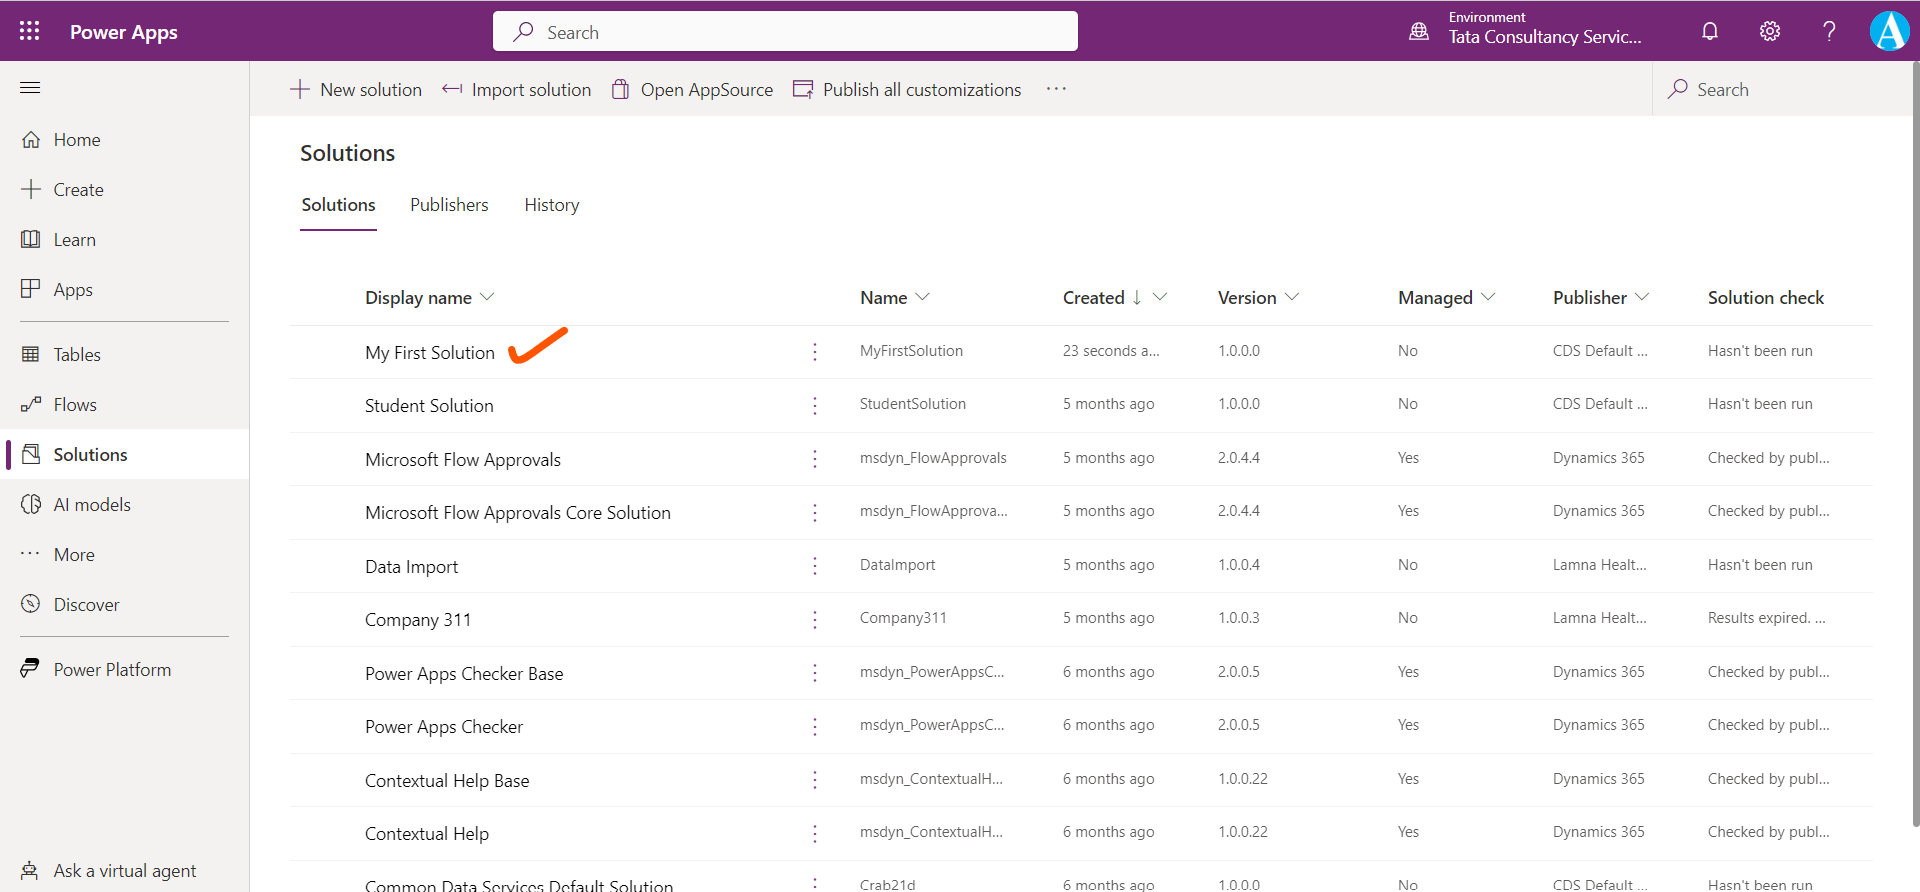
Step 3: We can now create new apps, flows, and tables into this solution or add existing ones. To add new apps, flows, and tables, select the solution “My First Solution”, and then select + New in the upper-left corner of the screen, and then select what we are going to create in the solution.
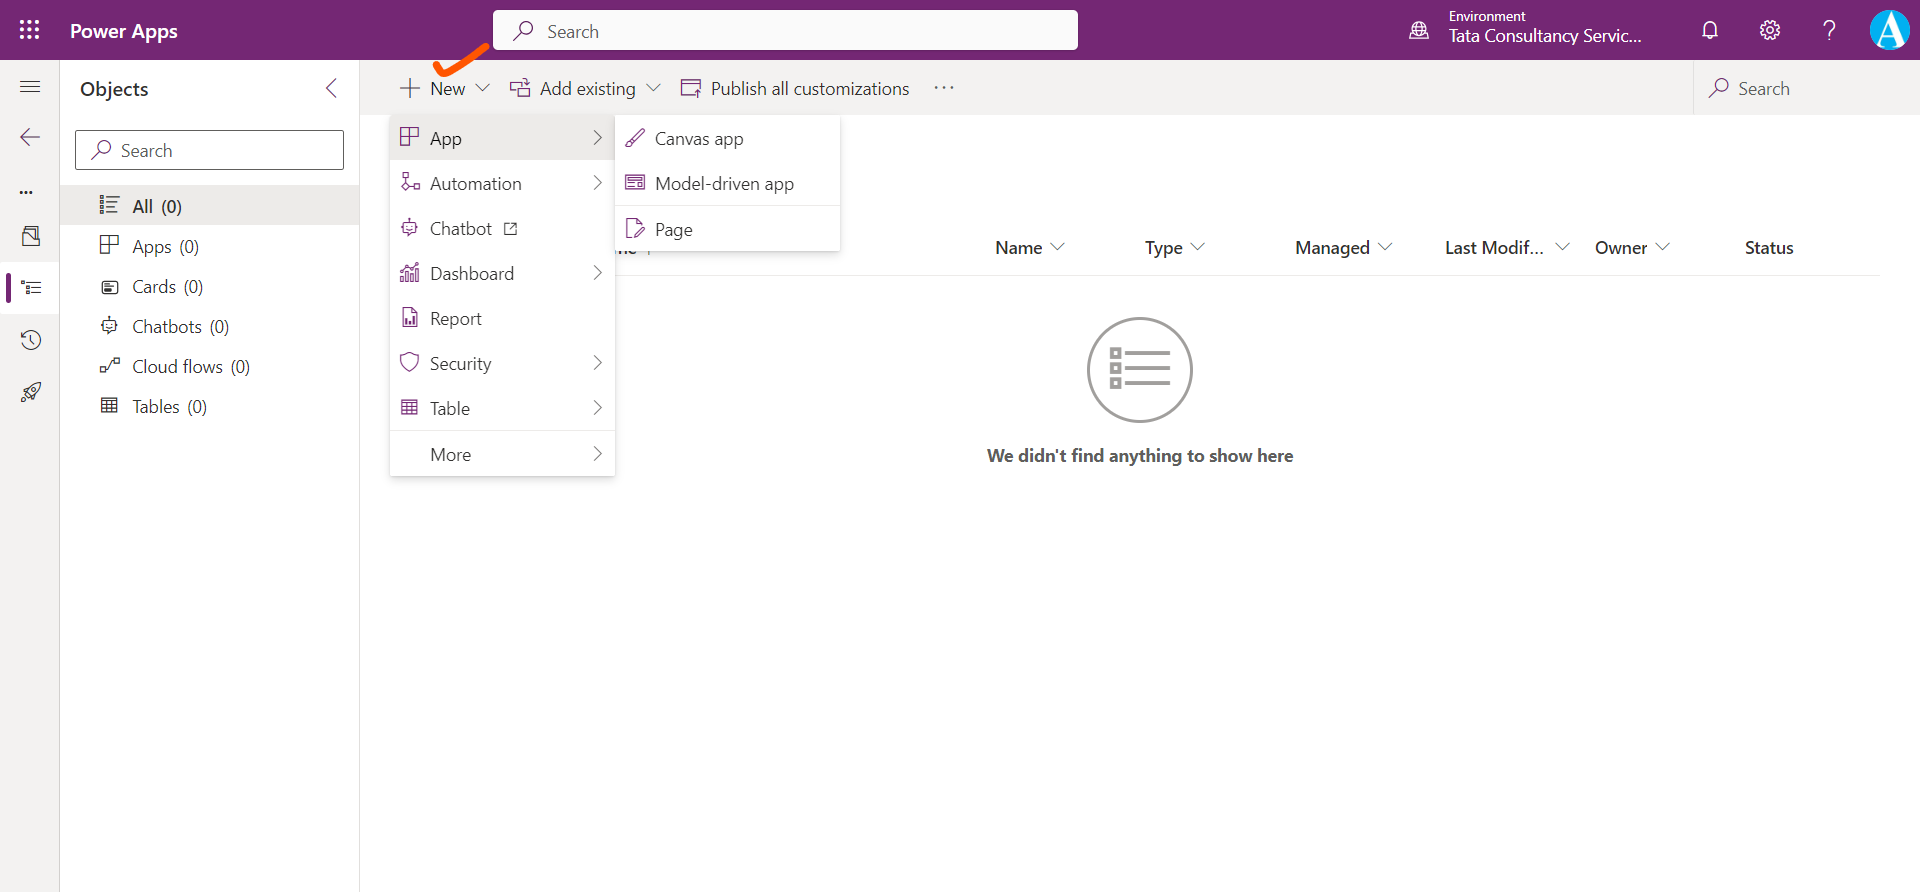
We can add an app (Canvas app, Model-driven app), Cloud flows, Table, Choice, etc.
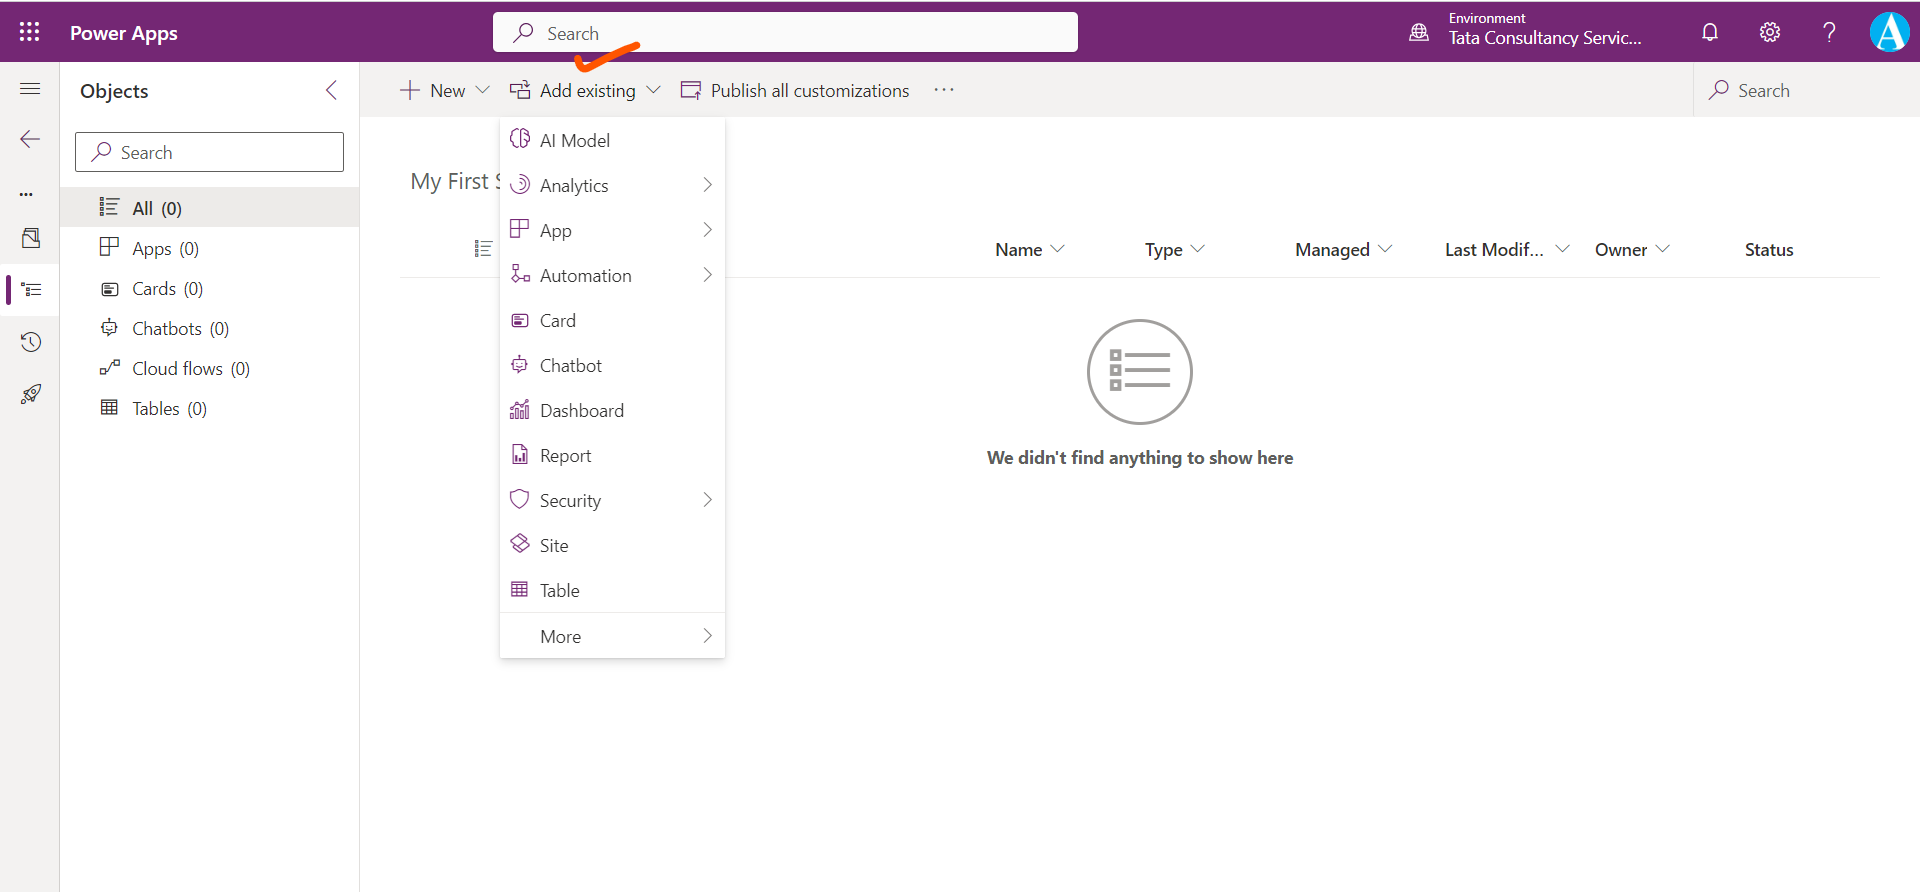
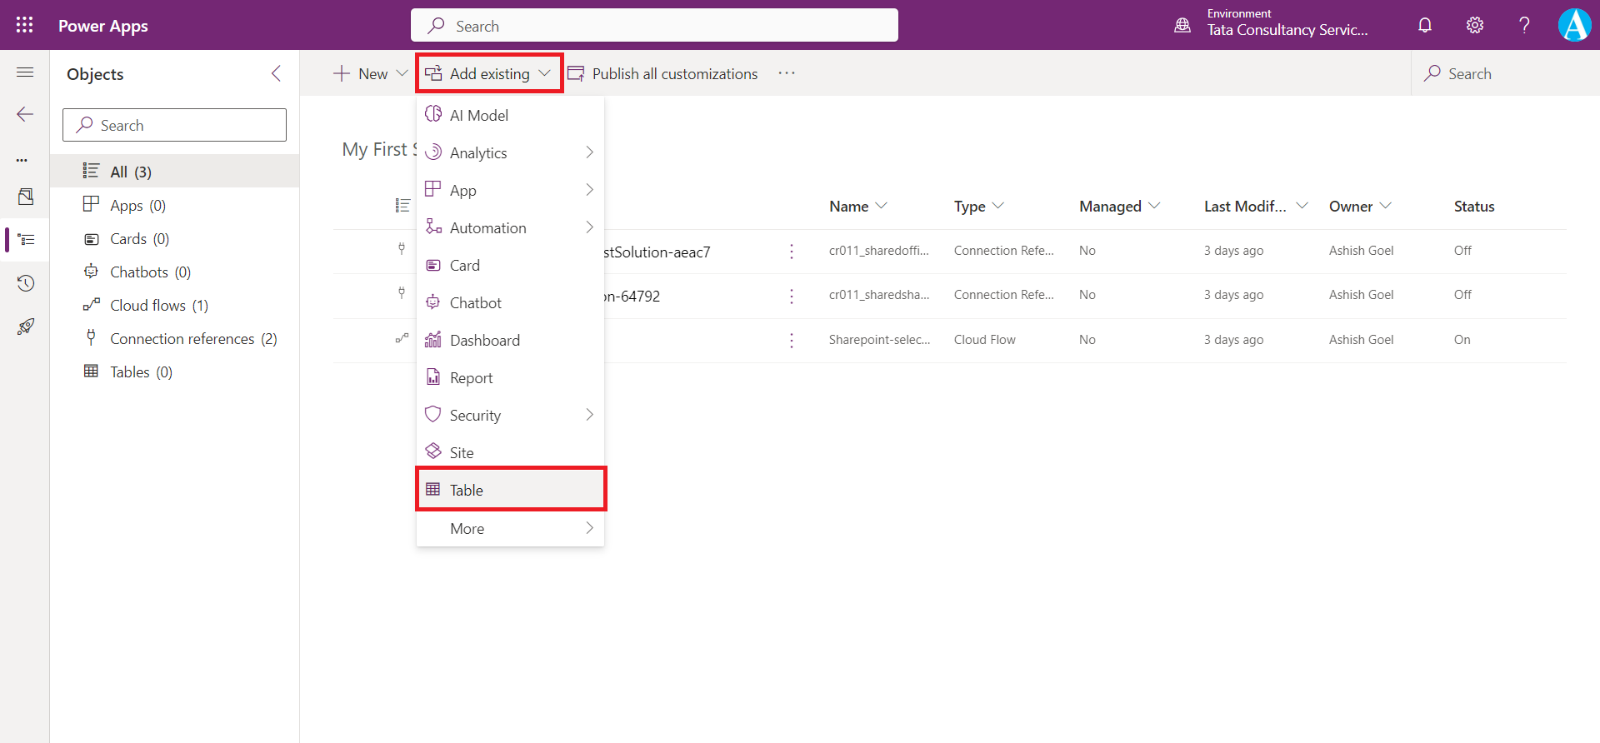
Step 4: To add existing apps, flows, and tables, select Add existing. Select App to add existing apps, Table to add existing tables, and Automation to add existing flows.
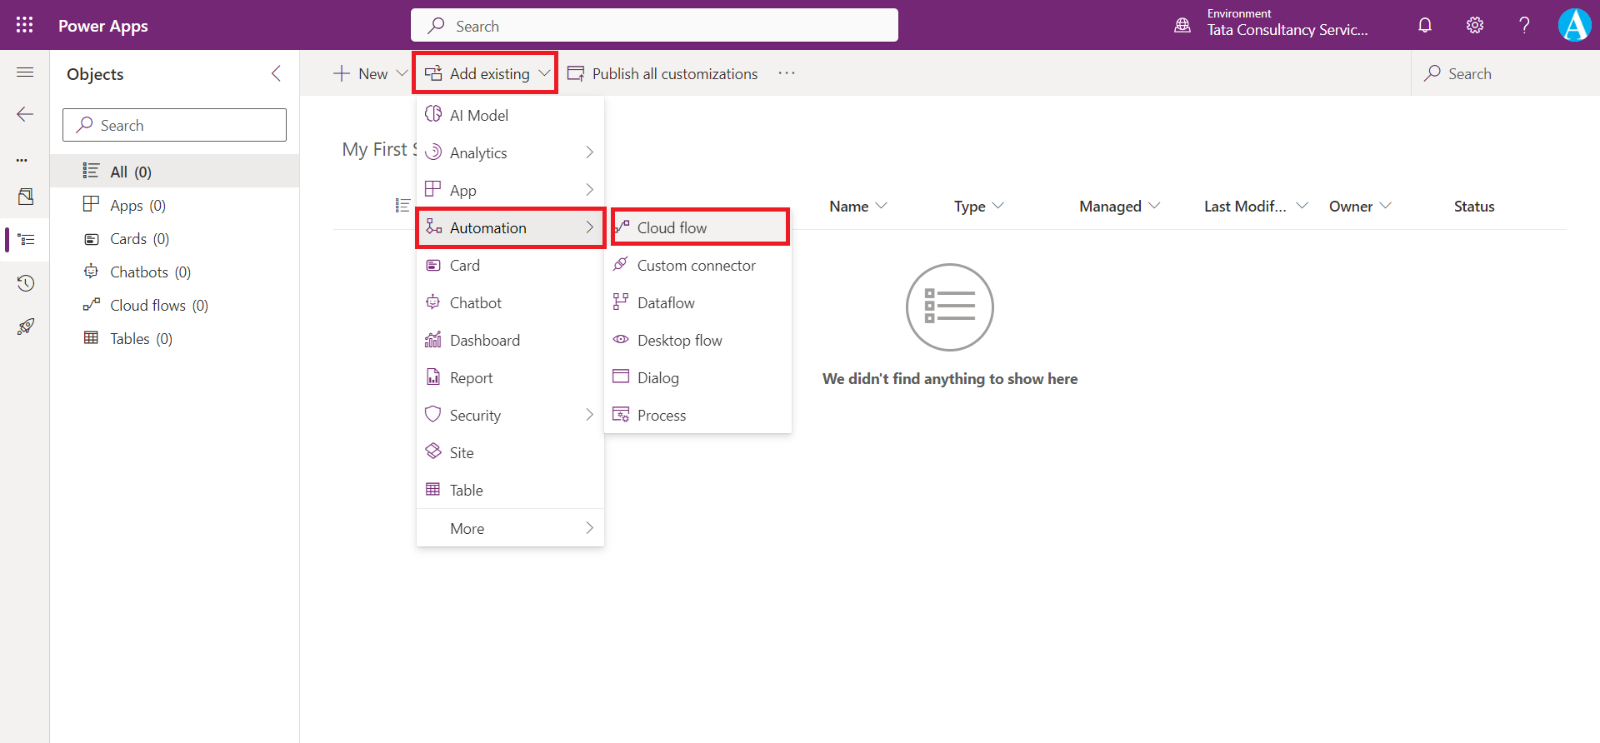
Let’s add a flow to the solution, Select Add existing and then select Automation >Cloud flow.
a) Select the Outside Dataverse tab.
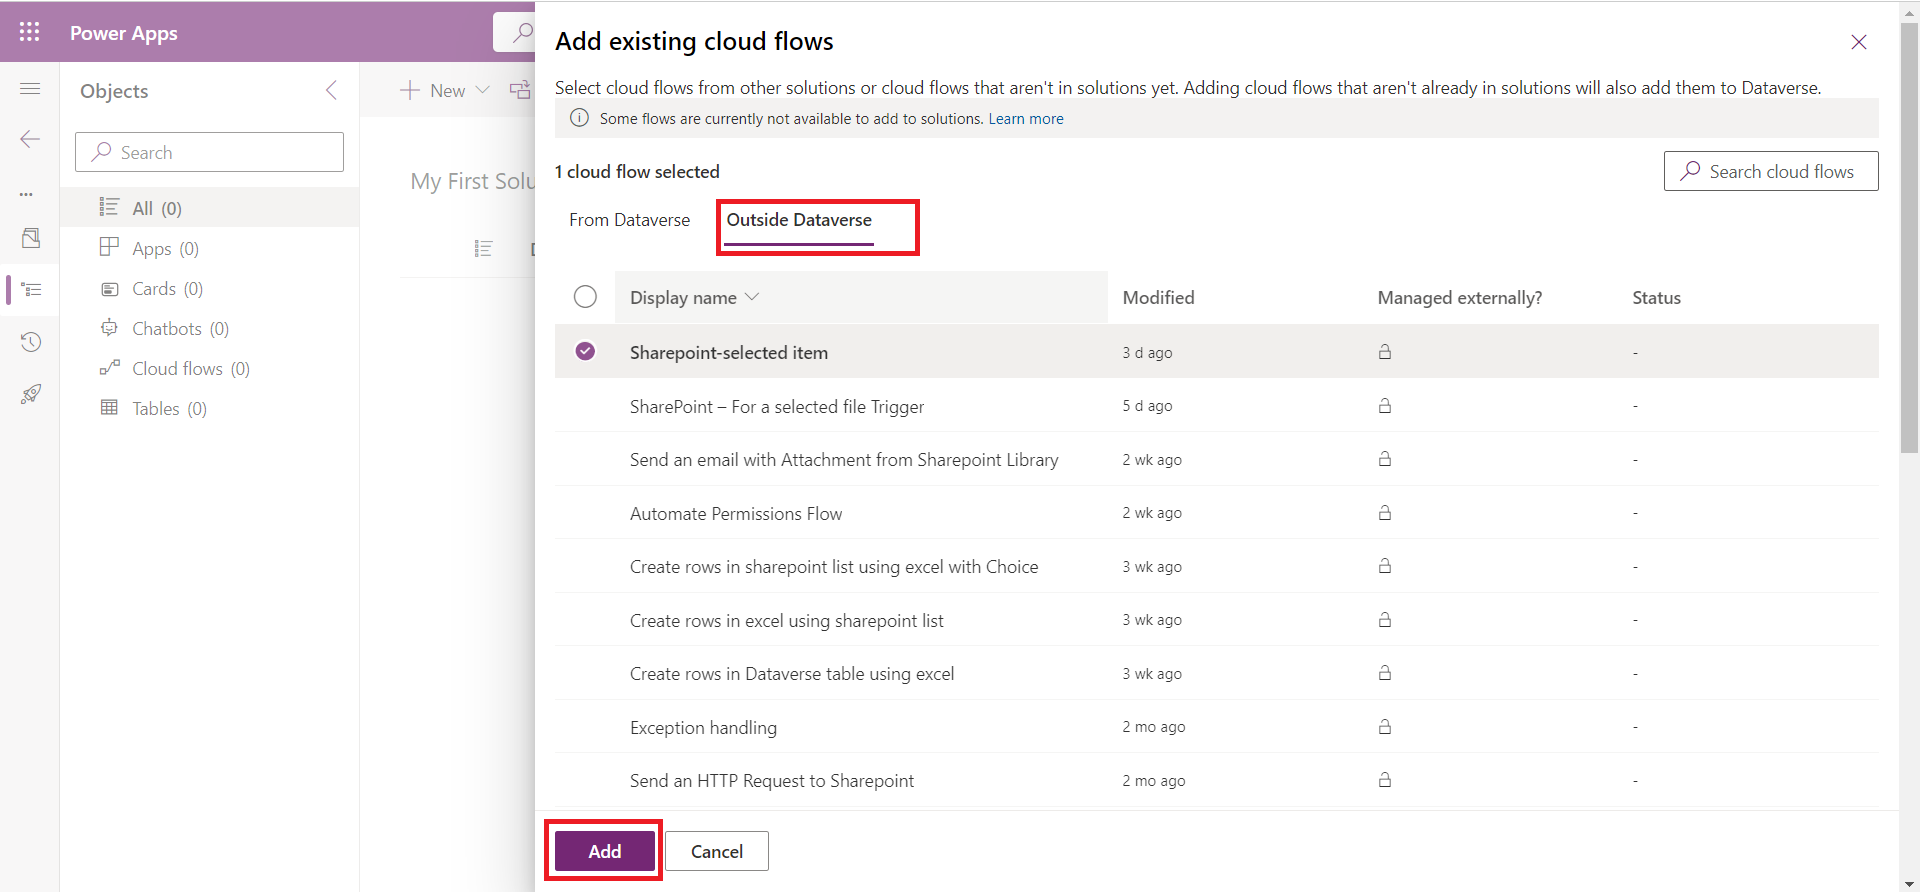
b) Select the Sharepoint-selected item cloud flow that we have created in our environment and then select Add.
The flow is added in the solution.
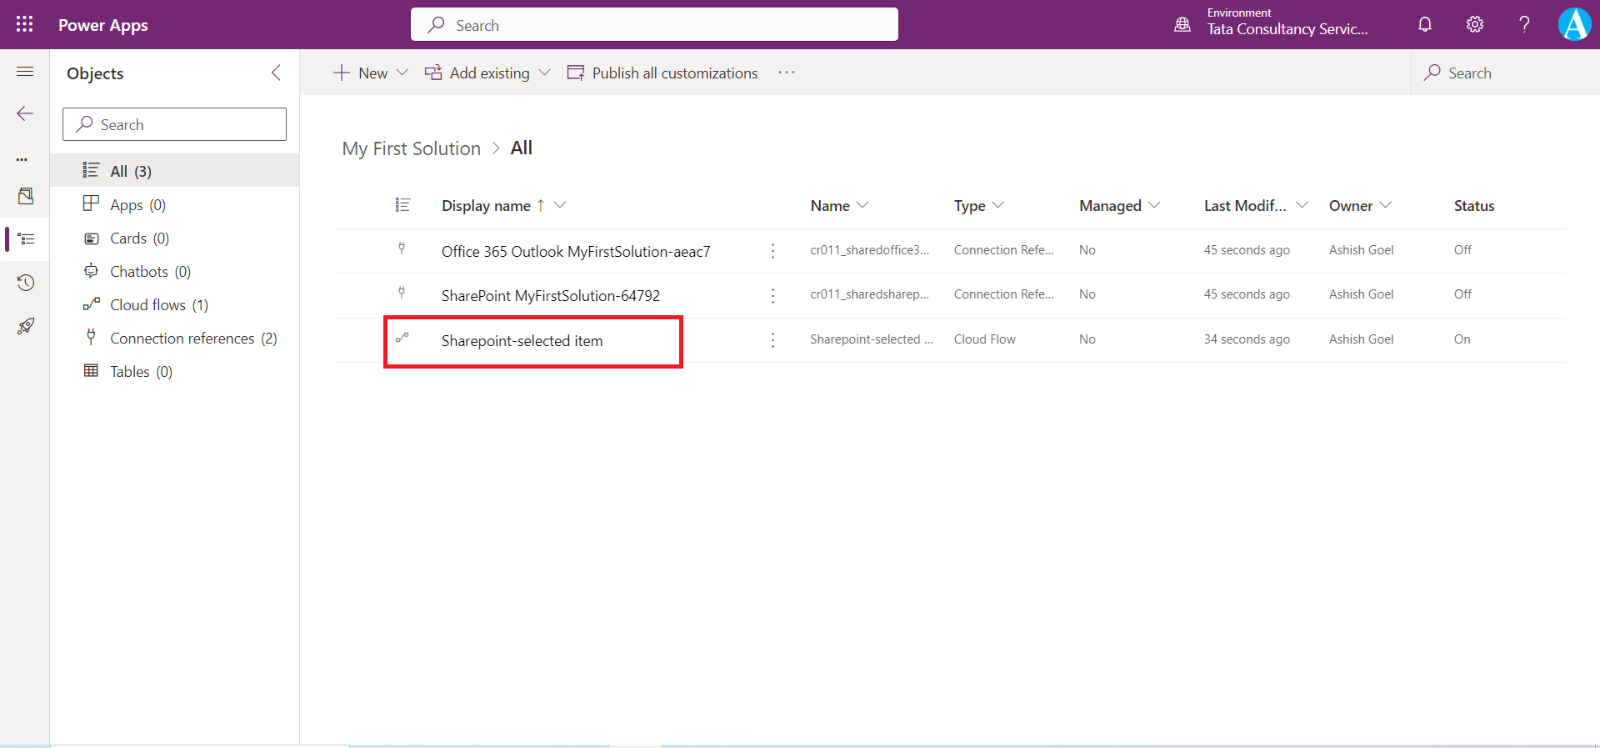
Note: Canvas apps can use existing instant cloud flows that exist within the solution. Canvas apps created within a solution cannot reference any Power Automate flows that are outside of the solution. Canvas apps can only use or trigger instant cloud flows. Business process flows cannot be used within canvas apps.
Step 5: To add the existing table. Select Add existing and then select Table.
By default, only 100 items are loaded. We can click on “Load the next 100 items”.
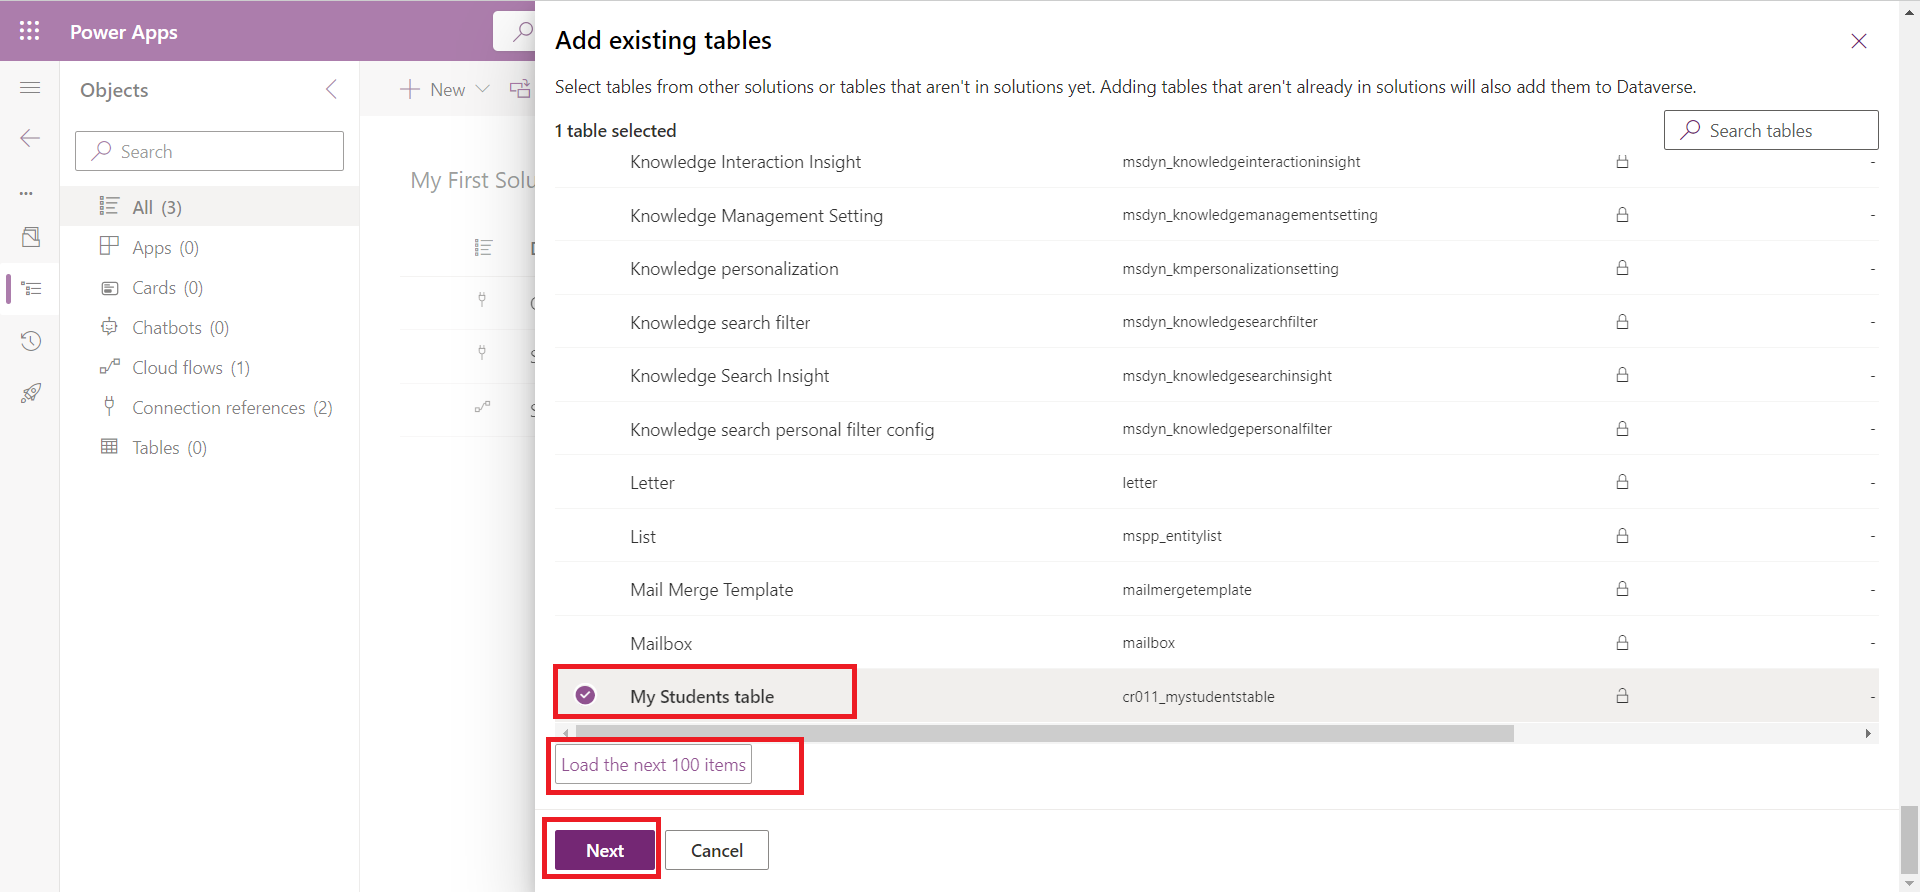
Select the table, and click on Next.
On the following screen, we can choose the objects of the entity which we want to select.
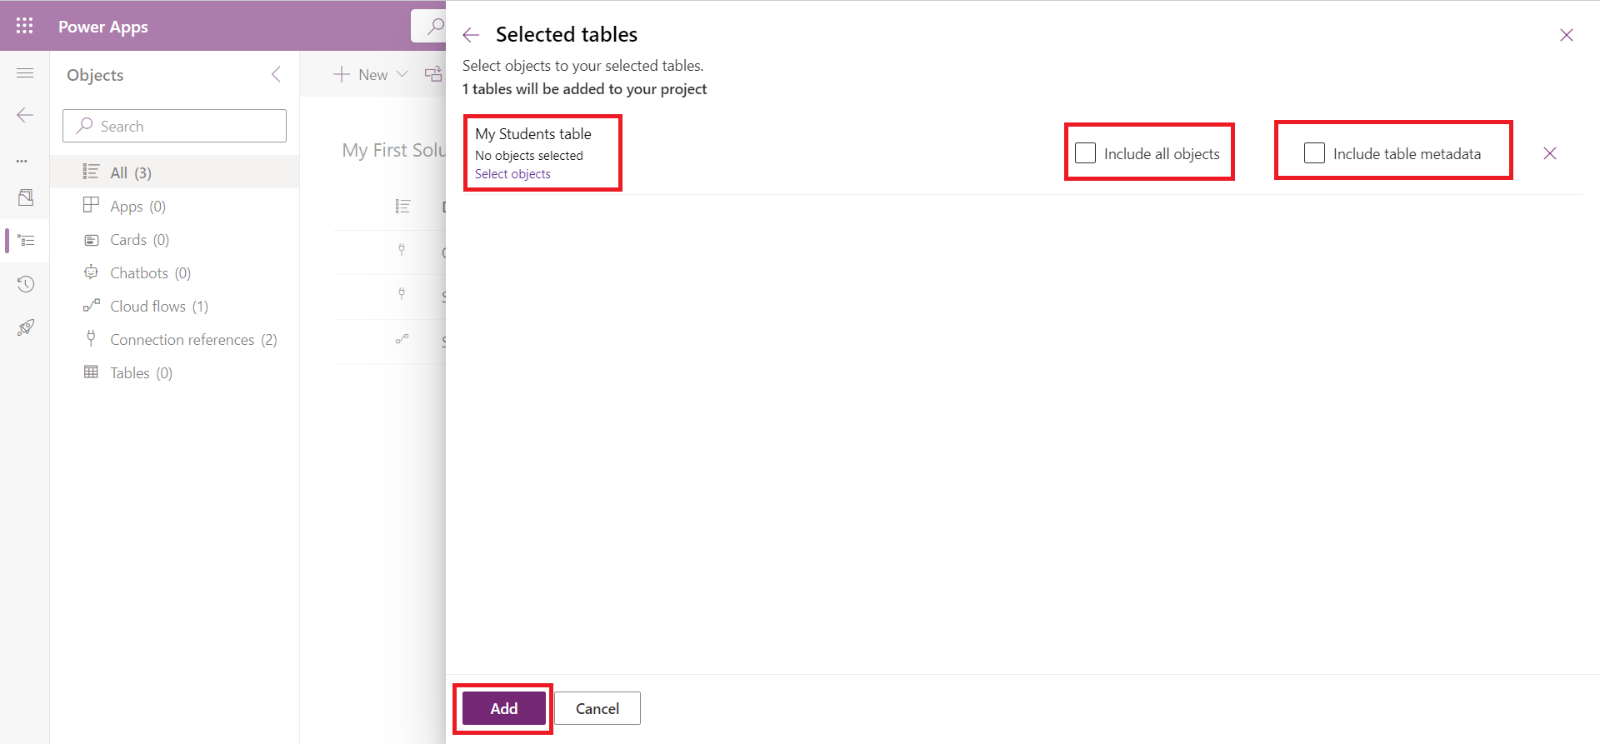
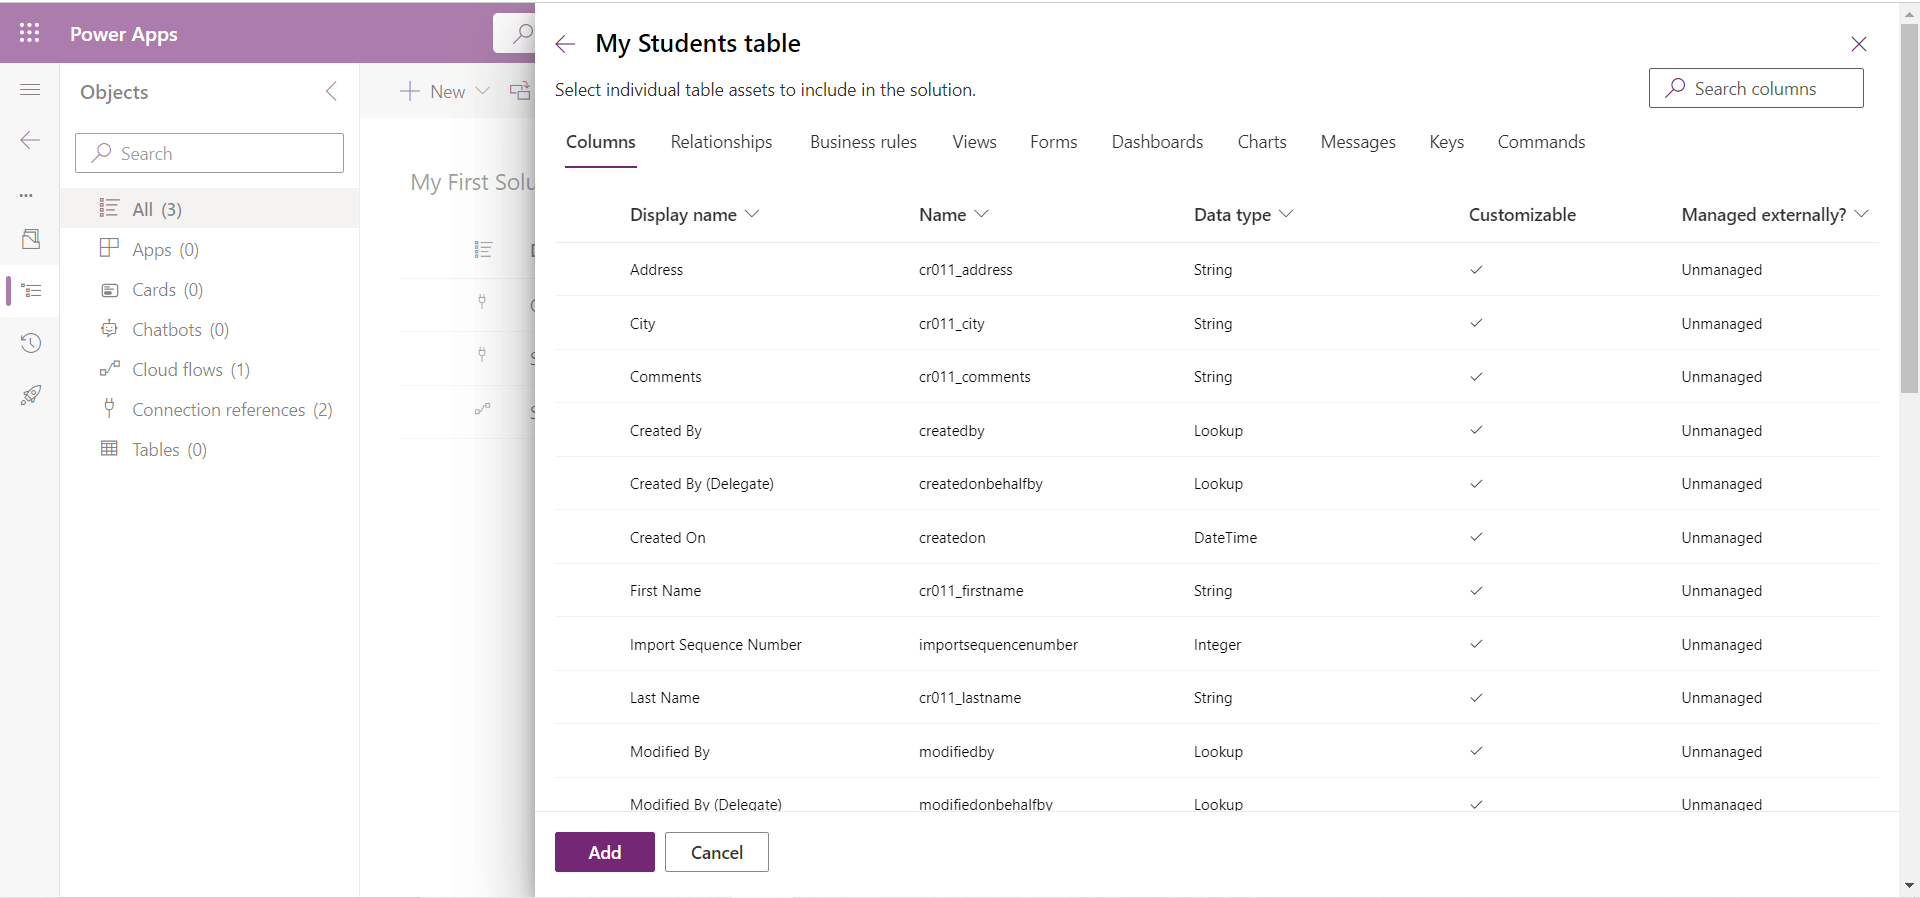
Click on Select objects. On the following screen we can select the object, then click on Add.
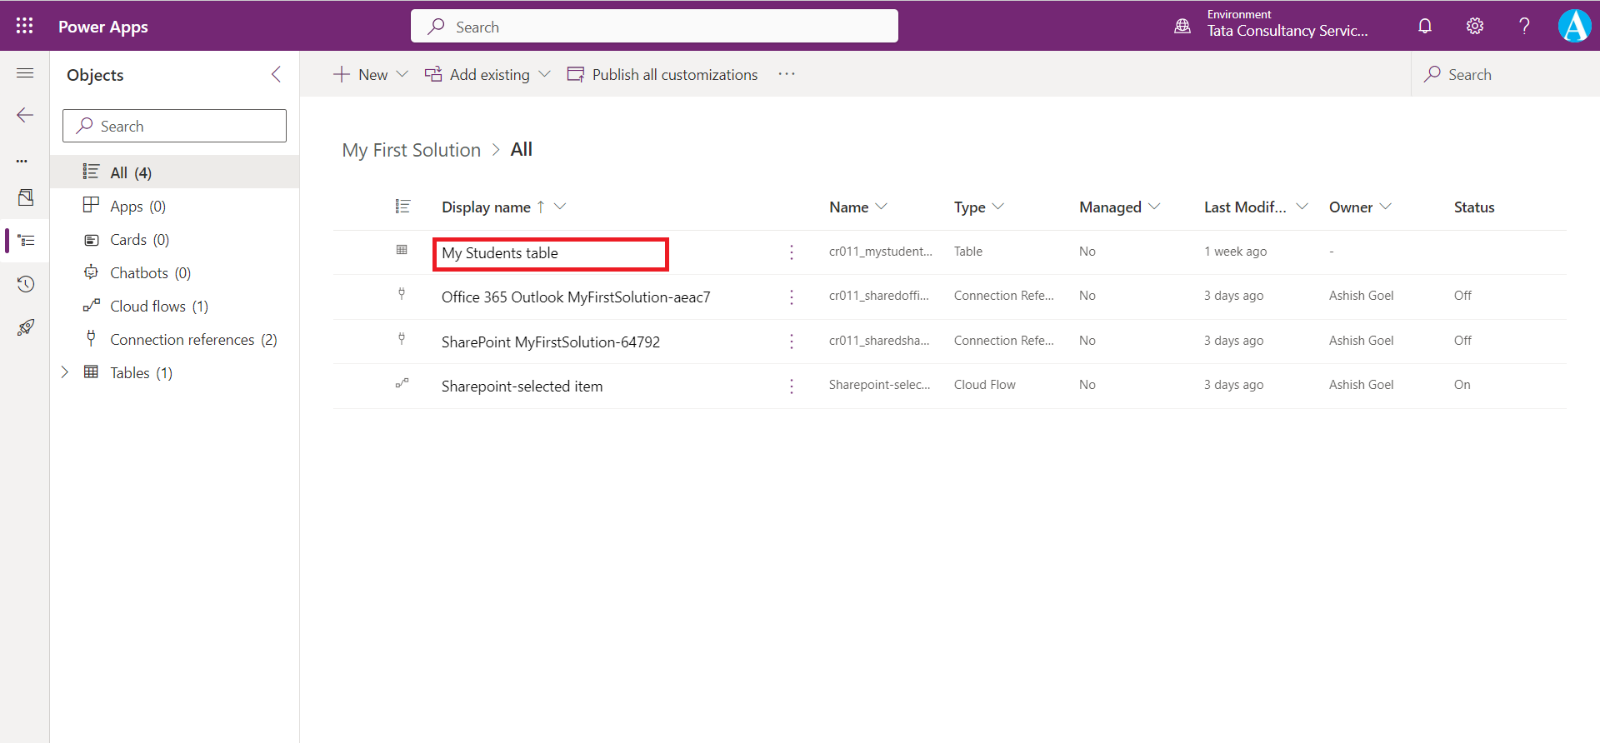
We can see that the table is added to the solution.
Step 6: We can also edit the solution components.
To edit the component, select the component, and then select Edit, which is available in the upper portion of the screen, or we can select the ellipsis, and then select Edit.
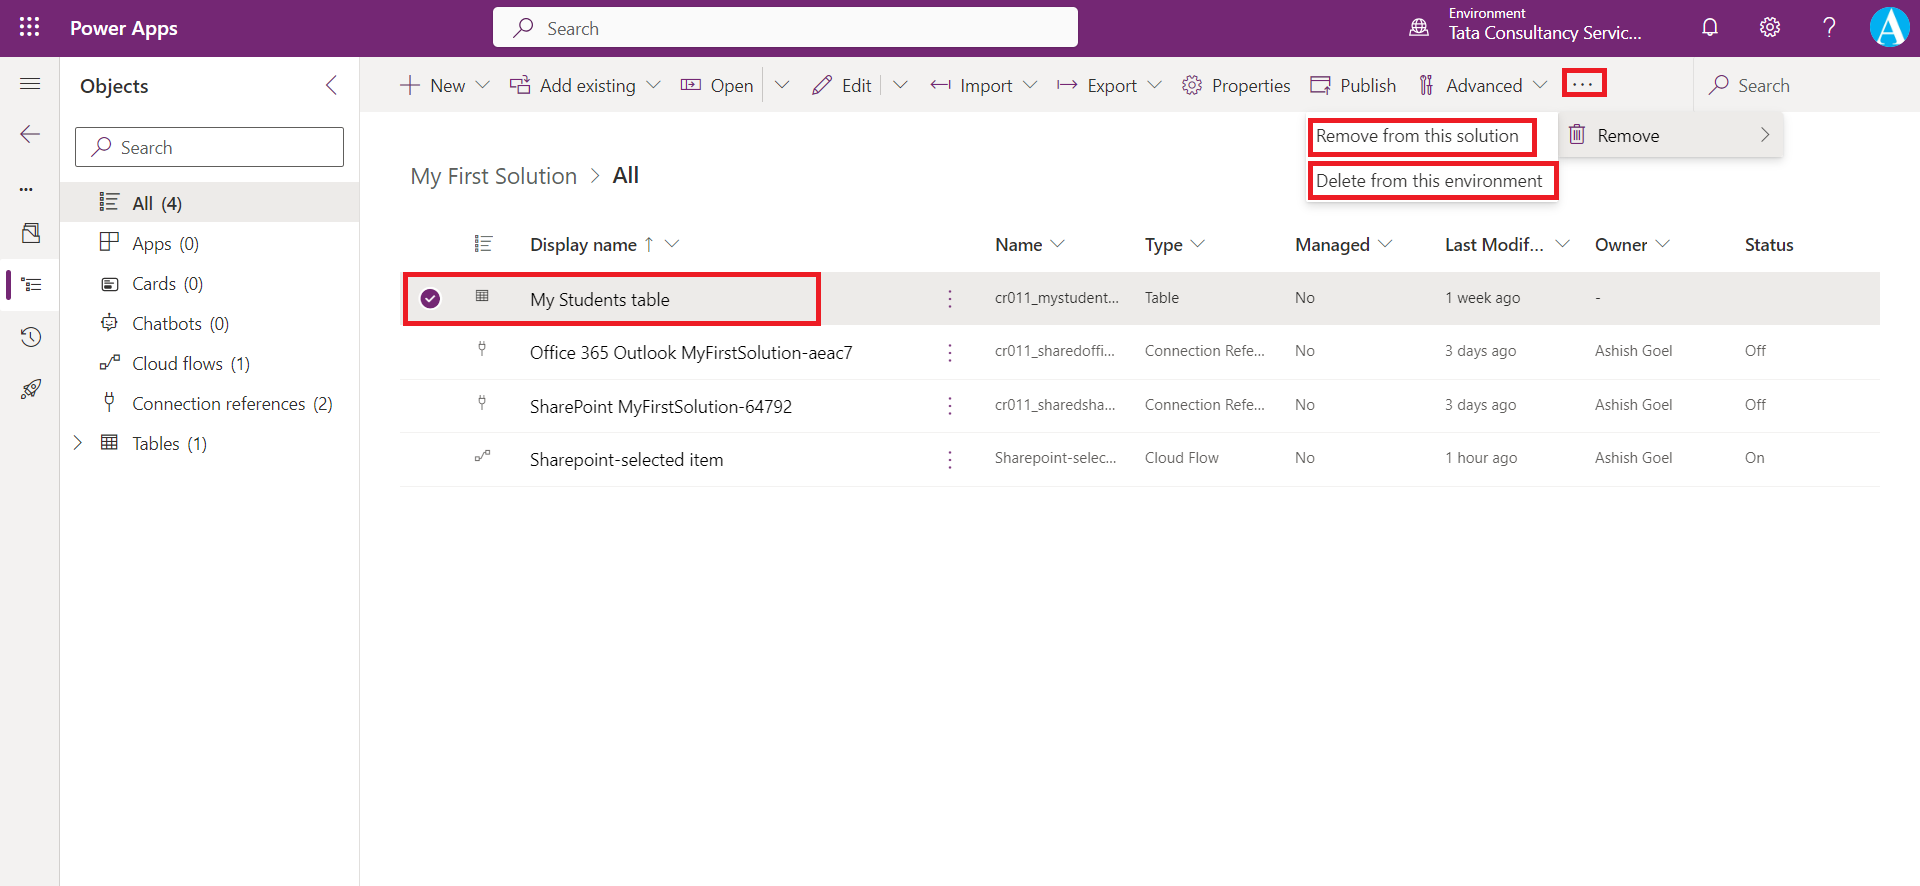
Step 7: We can remove any component from the solution itself. Select the component, and then click on three dots (…) then Remove. We have two options:
a) Remove from this solution: It remove the component from the existing solution only.
b) Remove from this environment: It remove the component from the current environment.
Import and export solutions
Let we have a solution and within it we have solution components (e.g., app, table, flow). Now, we want to export this solution from one environment to the other environment in the same tenant or an environment in a new tenant.
Step 1: In the source tenant, sign in to Power Apps and then select Solutions, which is available in the left vertical navigation.
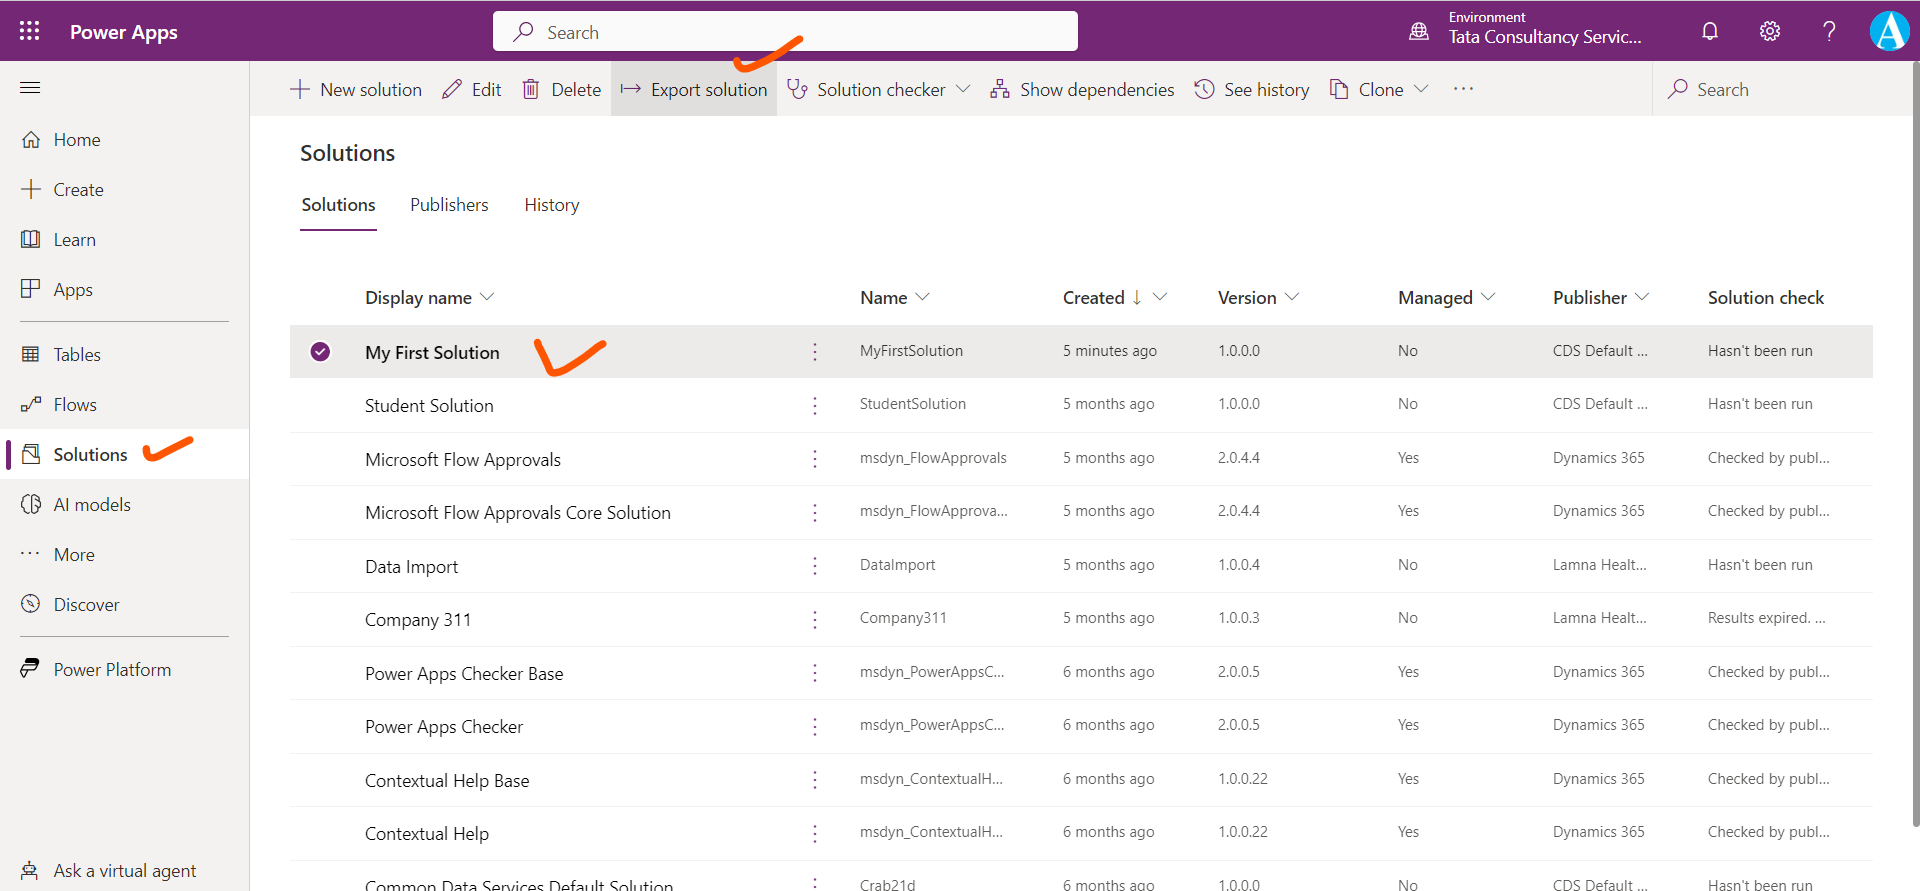
Step 2: Select the solution which we want to export from the Solutions list and then select Export solution.
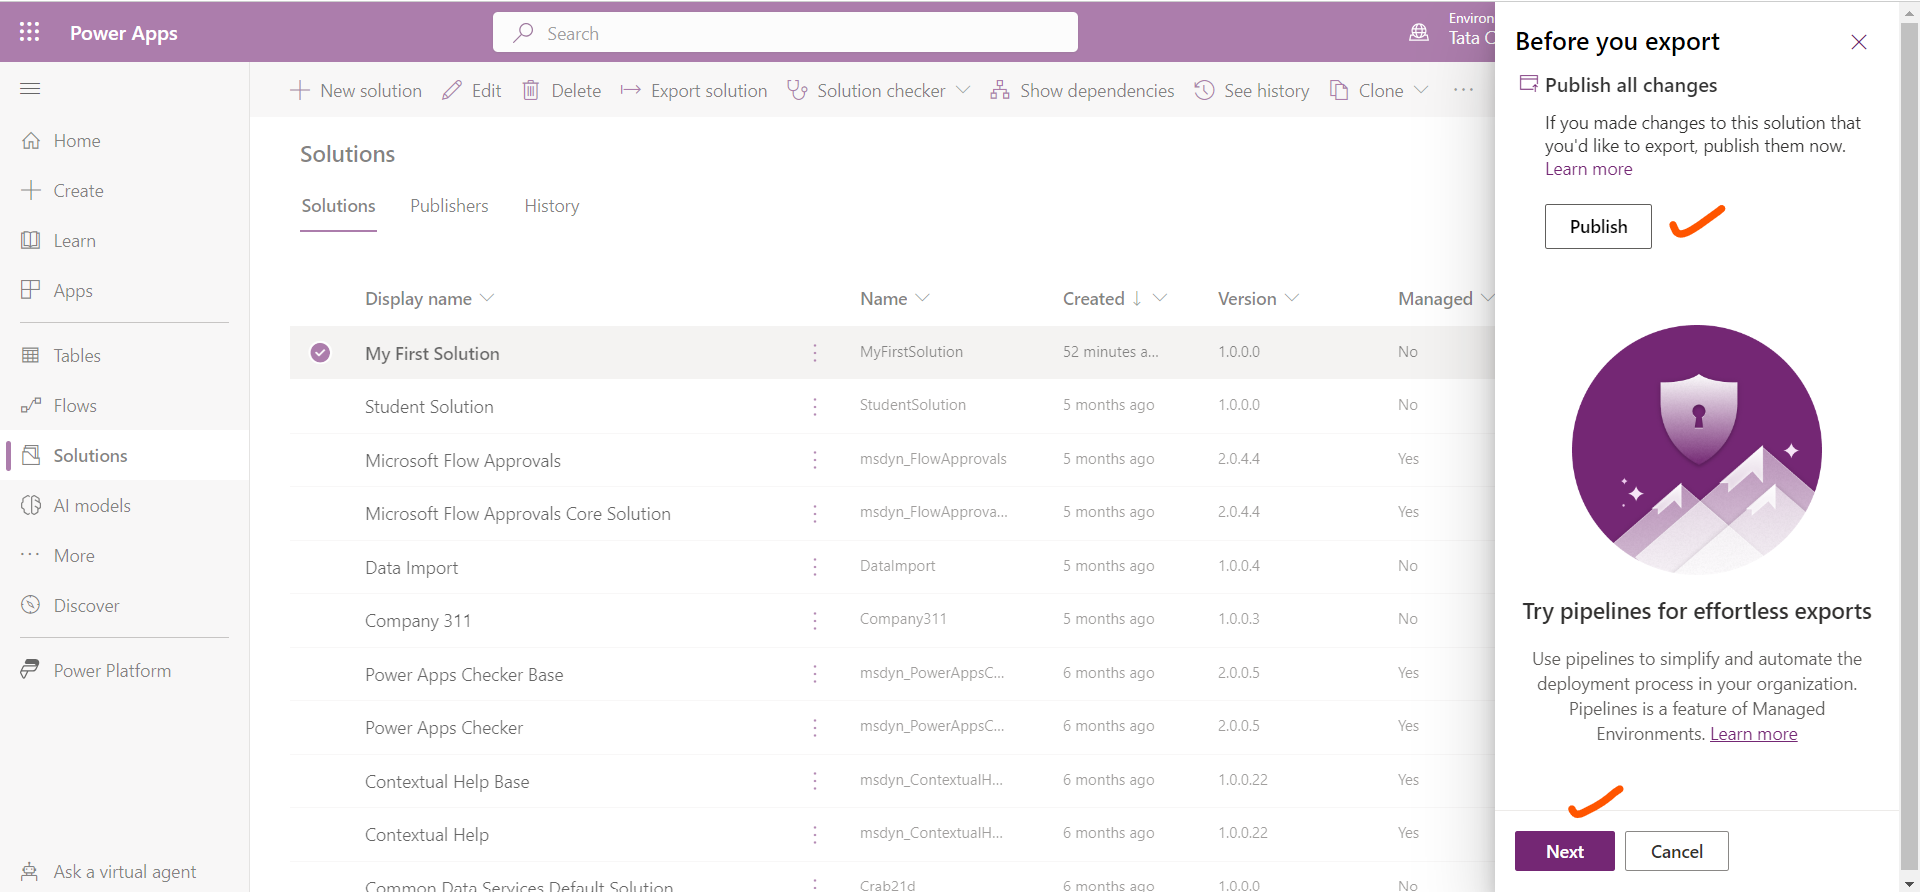
Step 3: Select Publish. This selection will make sure that all changes that are made to this solution are part of this published solution.
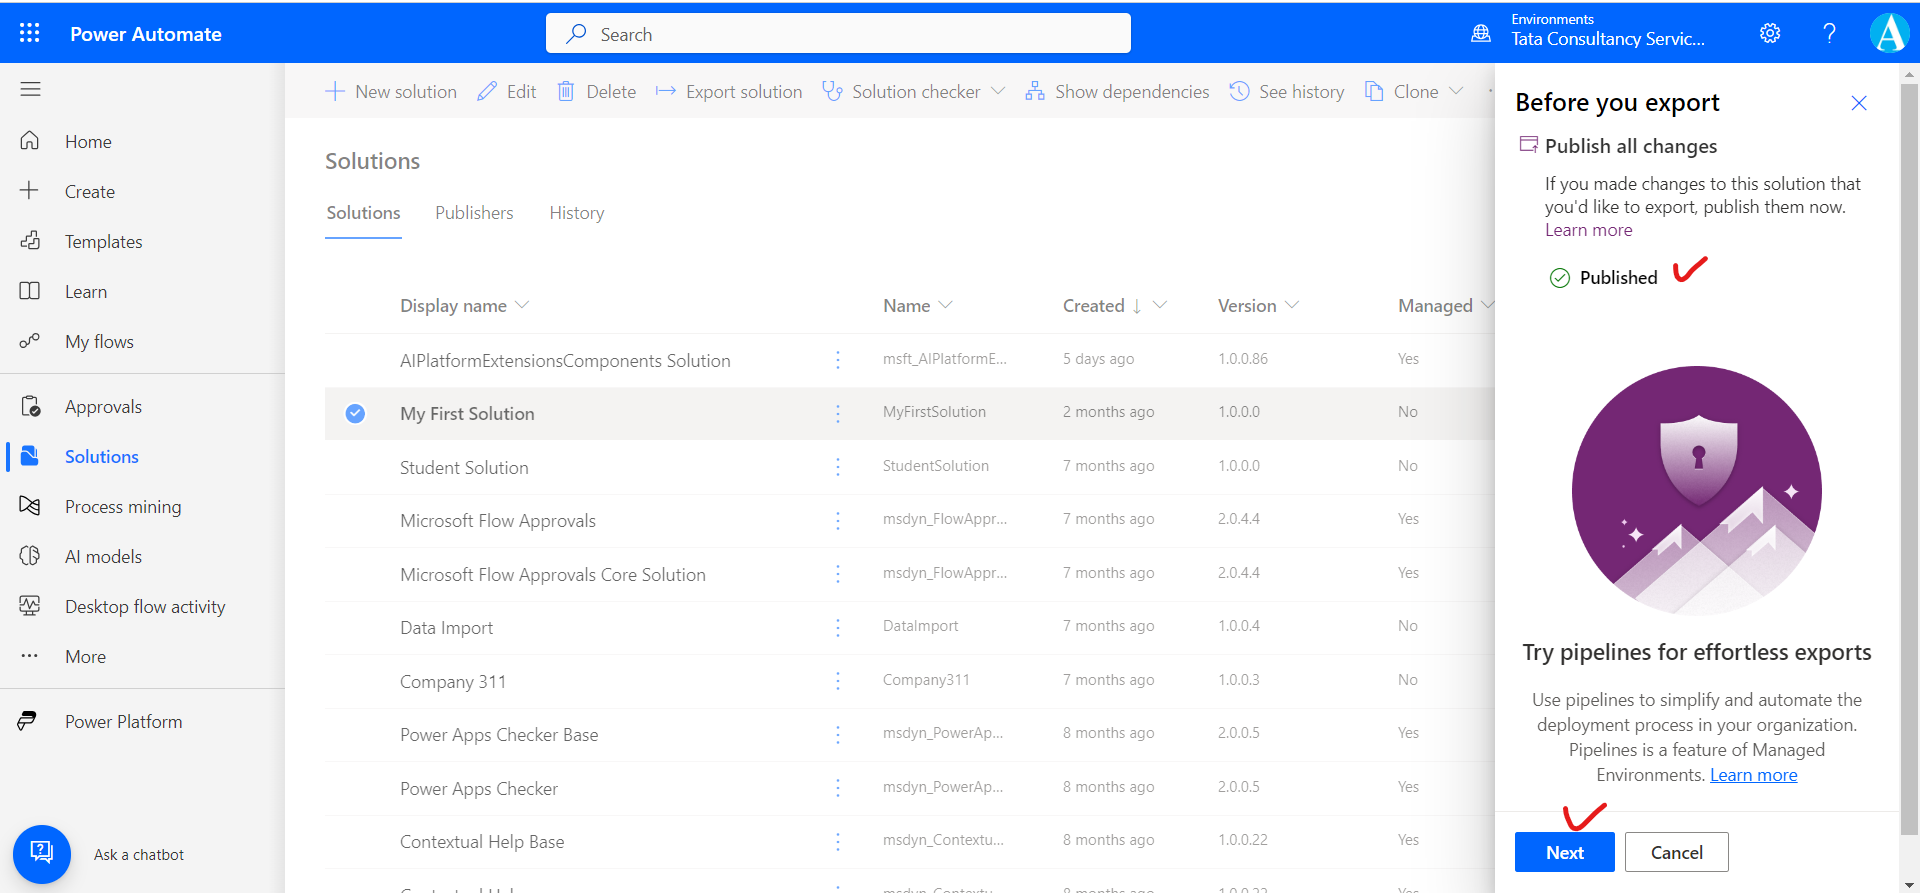
After the solution get published, click on Next.
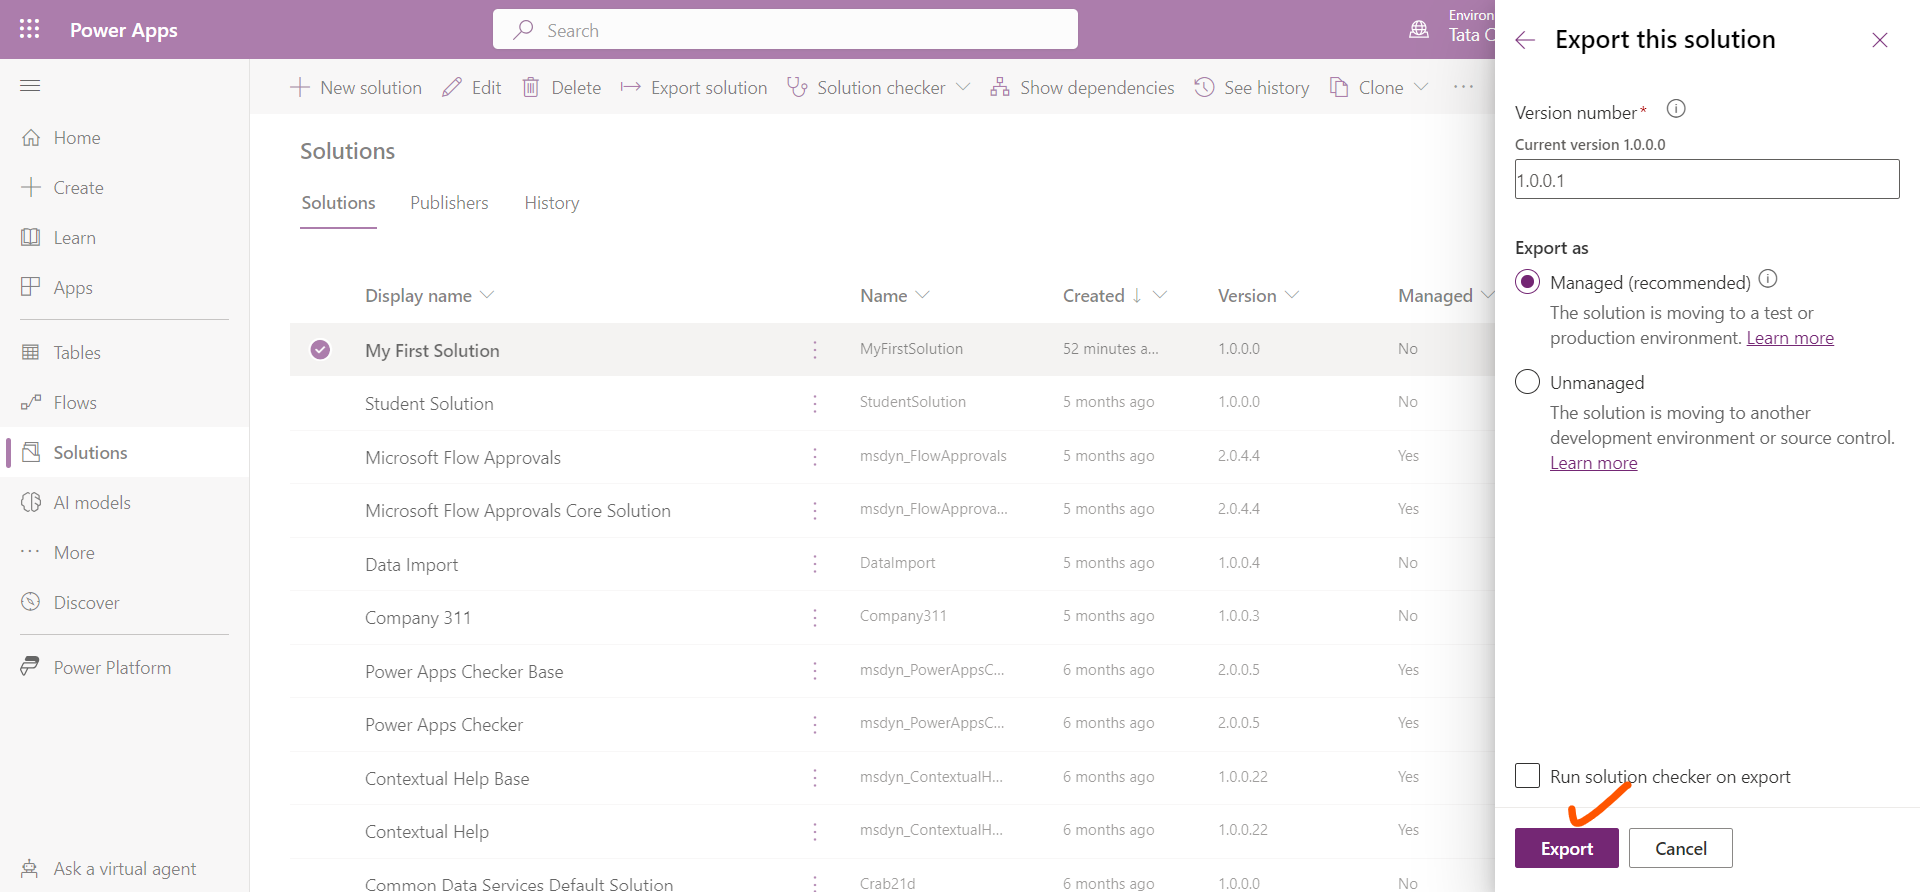
Step 4: Now, we need to decide which environment that this solution will be exported to. If it's a test or a production environment, then select Managed (recommended). If we are moving it to another development environment, select Unmanaged and then select Export.
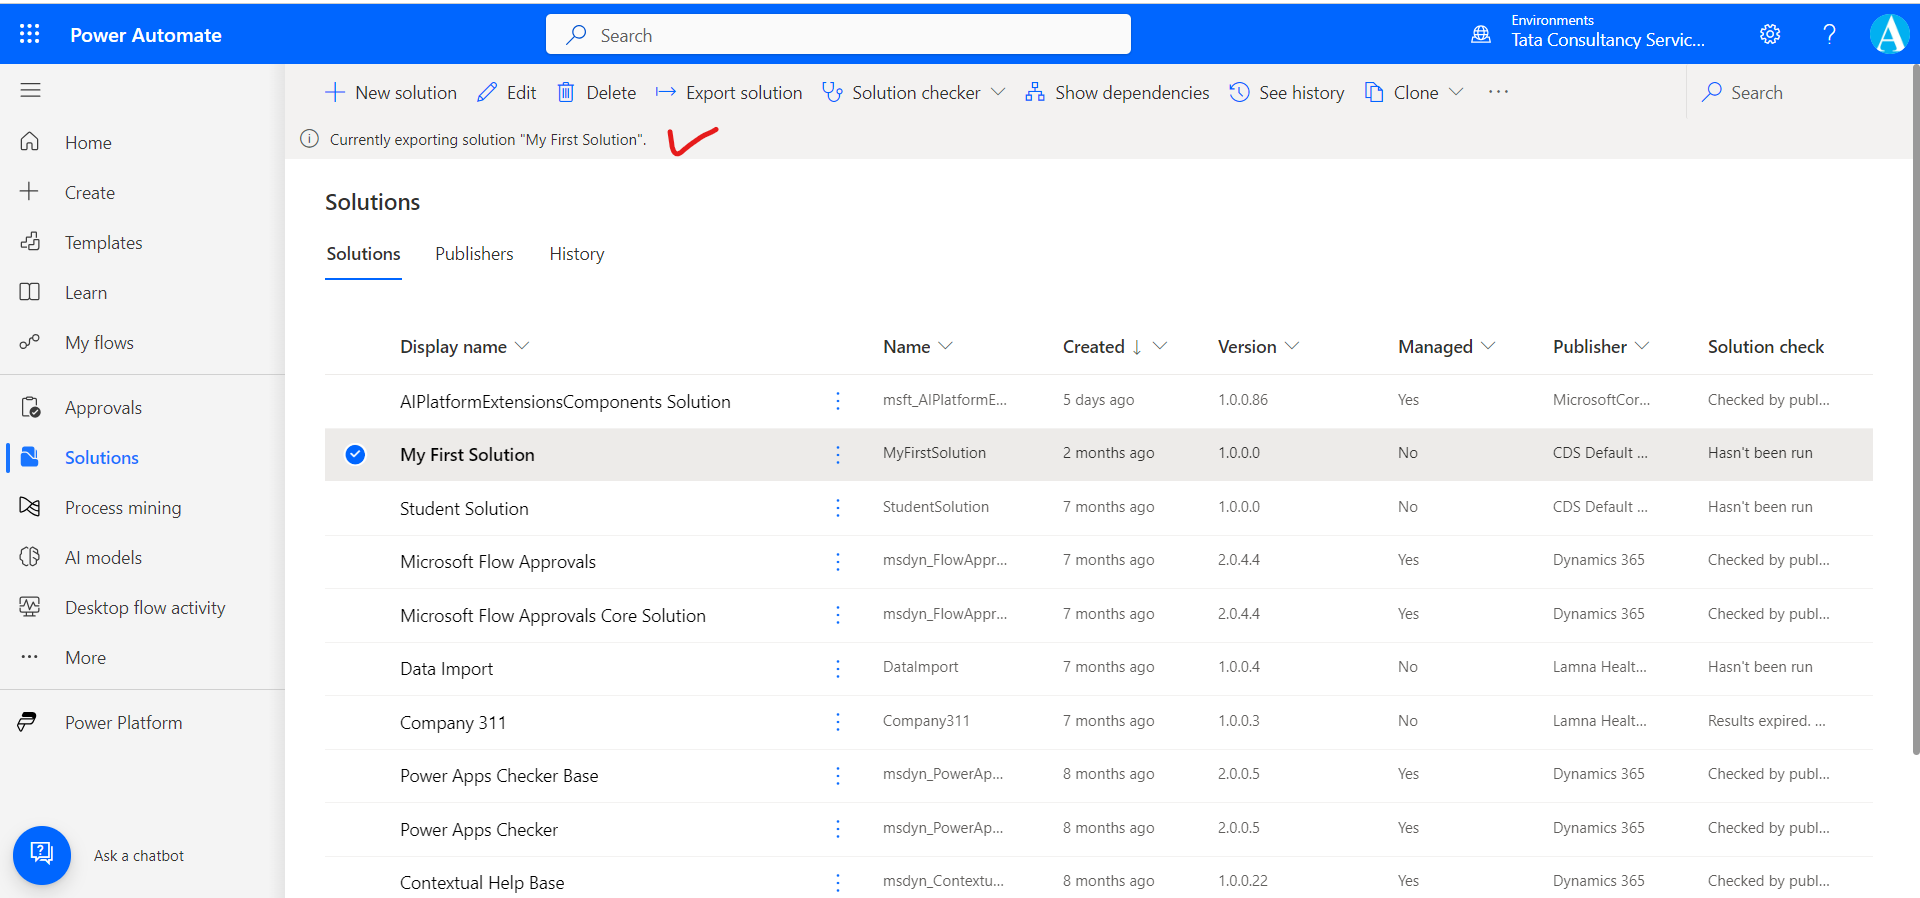
In the upper left of the screen, we should see a message stating that the solution is currently exporting.
Step 5: After exporting the solution completed, we should see a message that the solution is exported successfully and a download button is present.
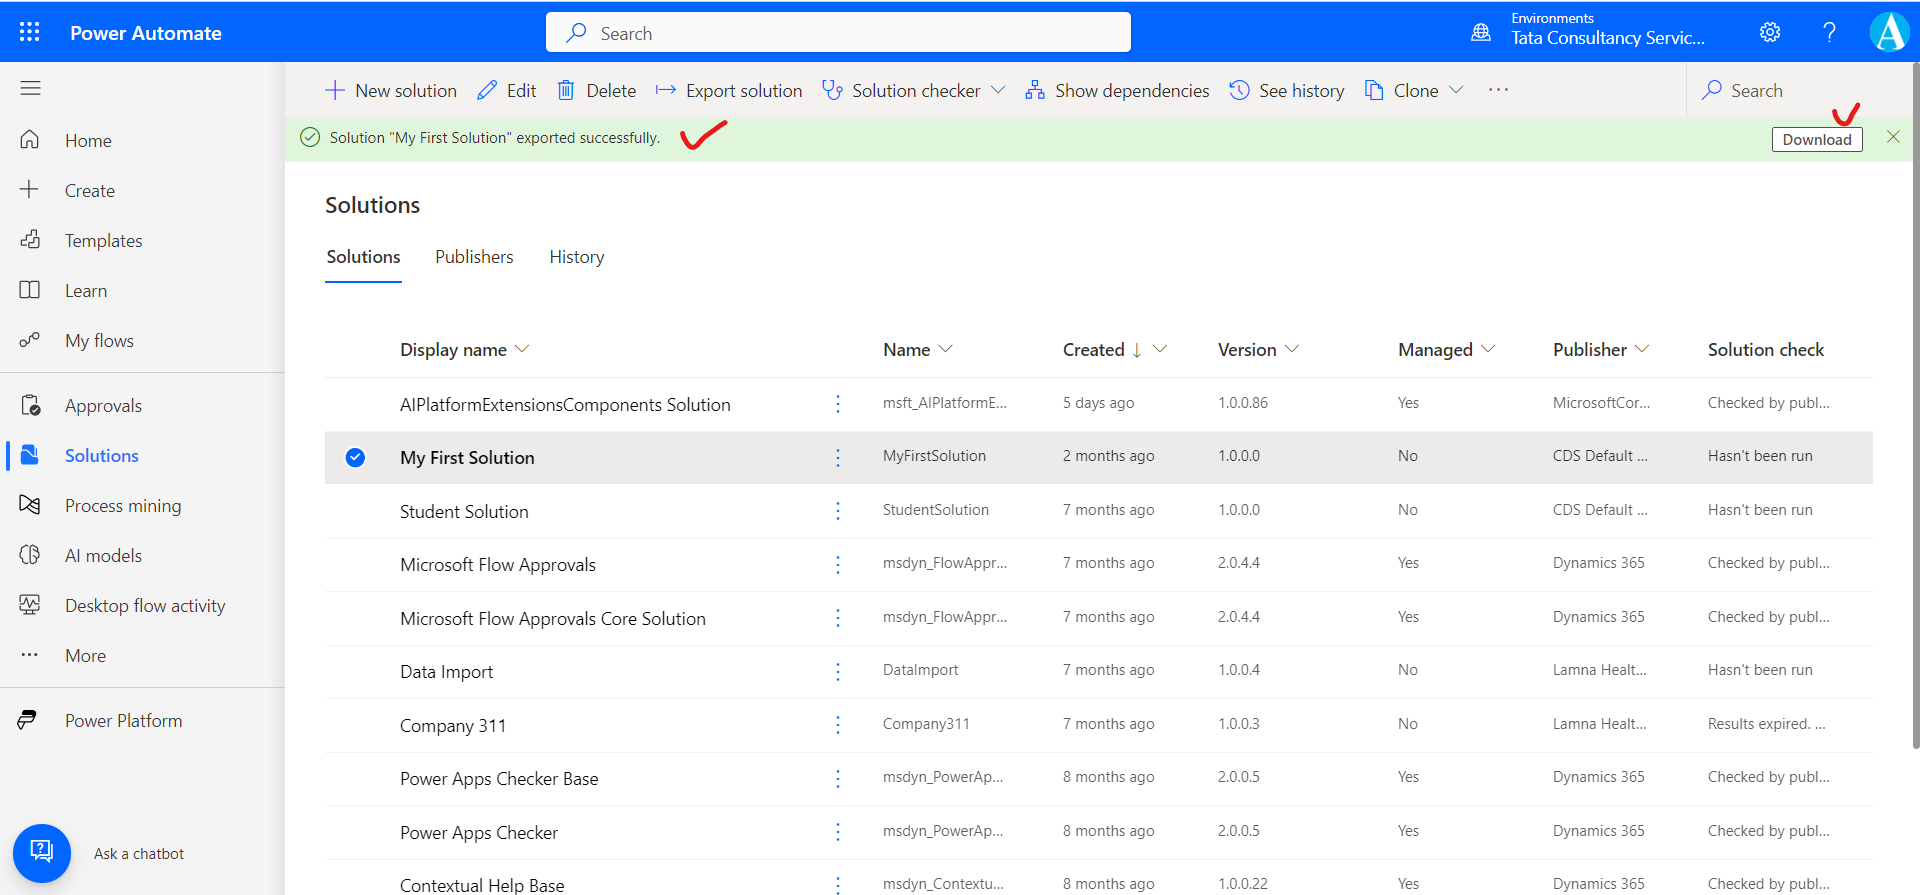
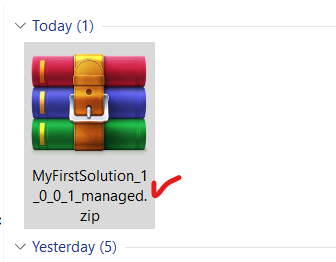
By clicking on the Download button, a zipped file will be downloaded to our default download location.
The zipped file name contains the solution name, if it's managed or unmanaged, and the version number.
Step 6: To deploy a solution to another environment, we will import an exported solution file. We can import the managed or unmanaged solution file.
Go to the destination tenant, sign in to Power Apps, and then select Solutions, which is available in the left vertical navigation. Select Import solution.
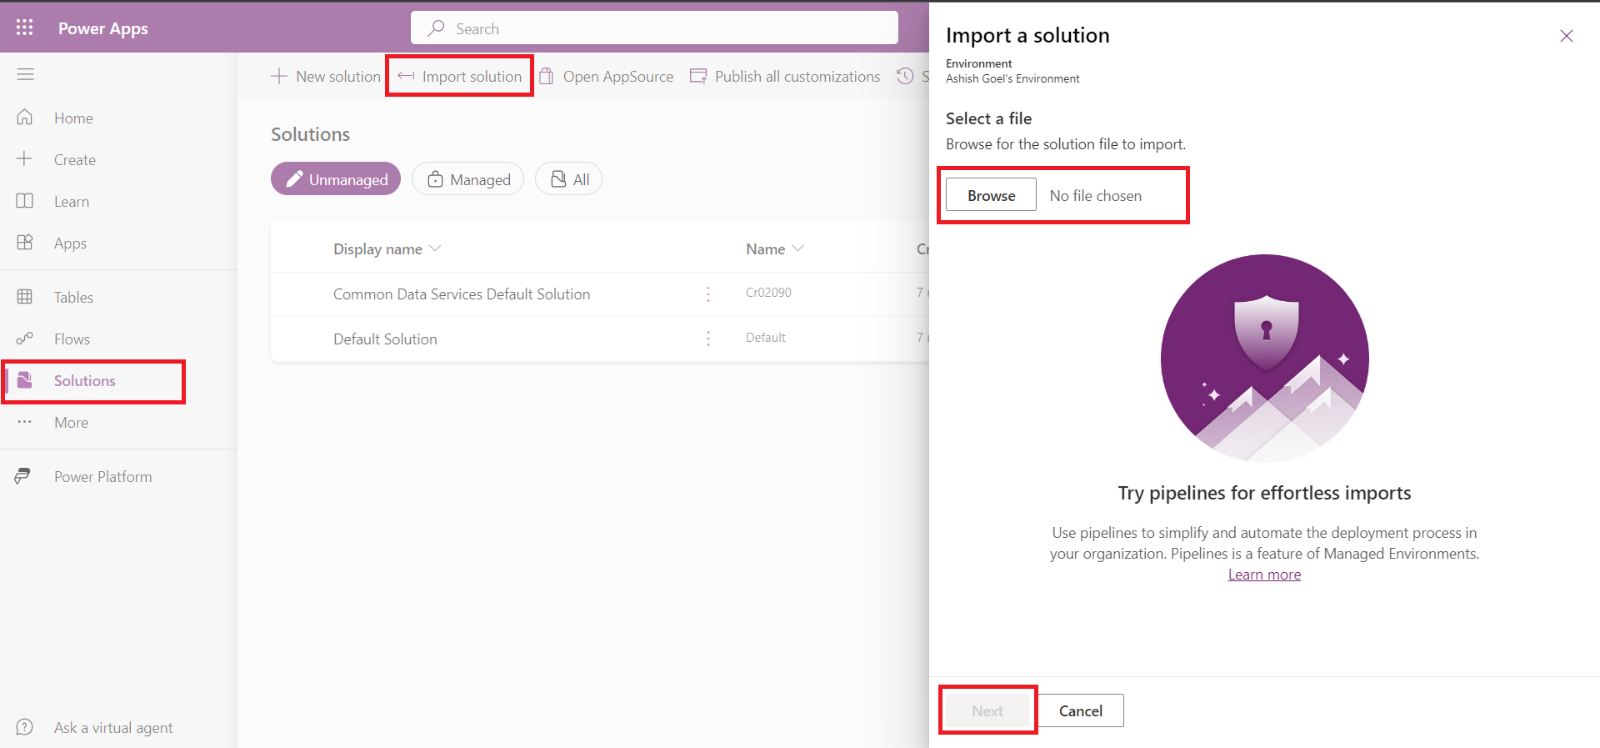
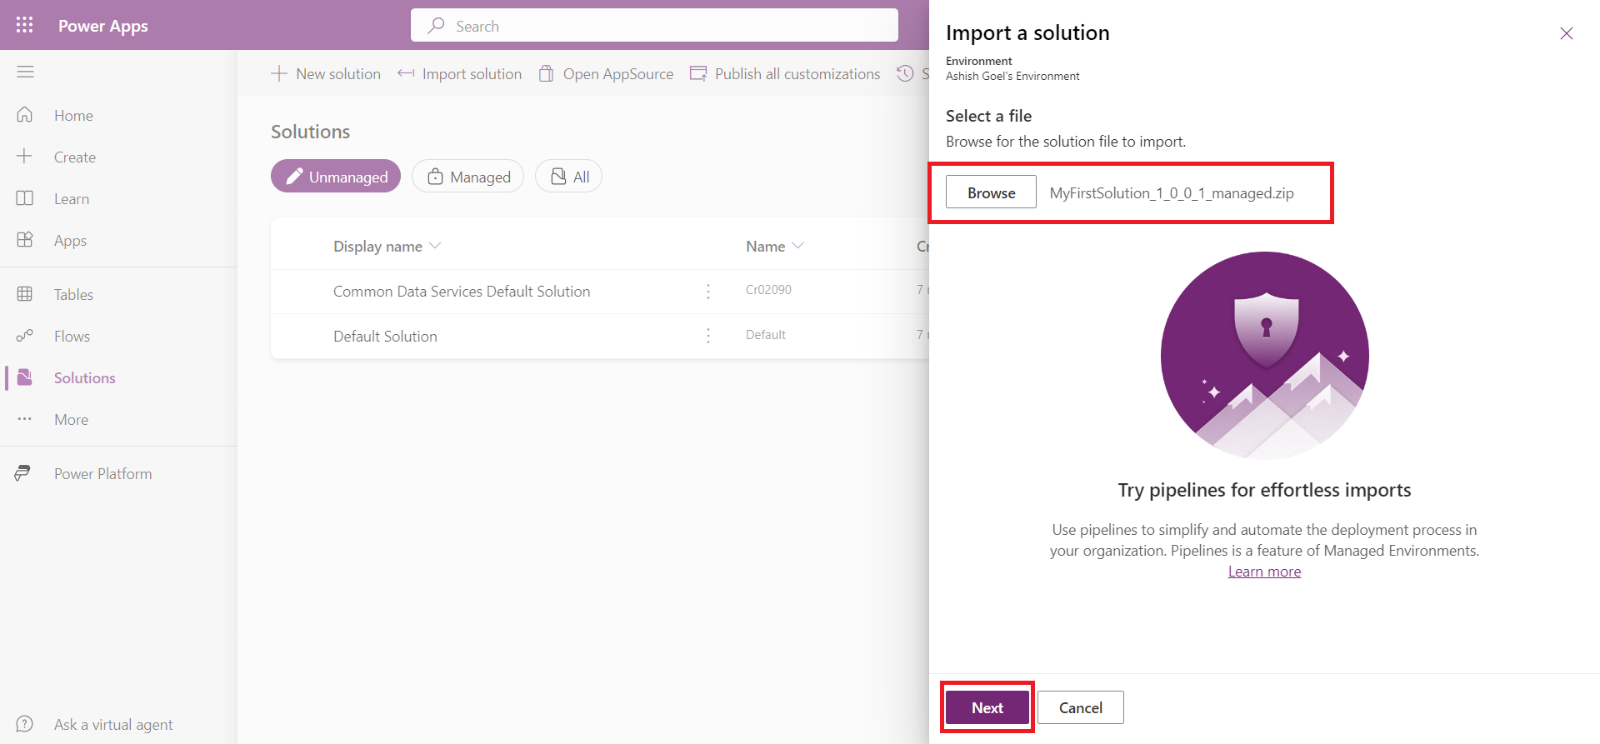
Step 7: In the Import a solution pane, select the zipped file that was exported, and then select Next.
Note: Do not unzip the file. Upload the zip file.
Step 8: On the next screen we ca our name of the solution and its other details as shown in the image below.
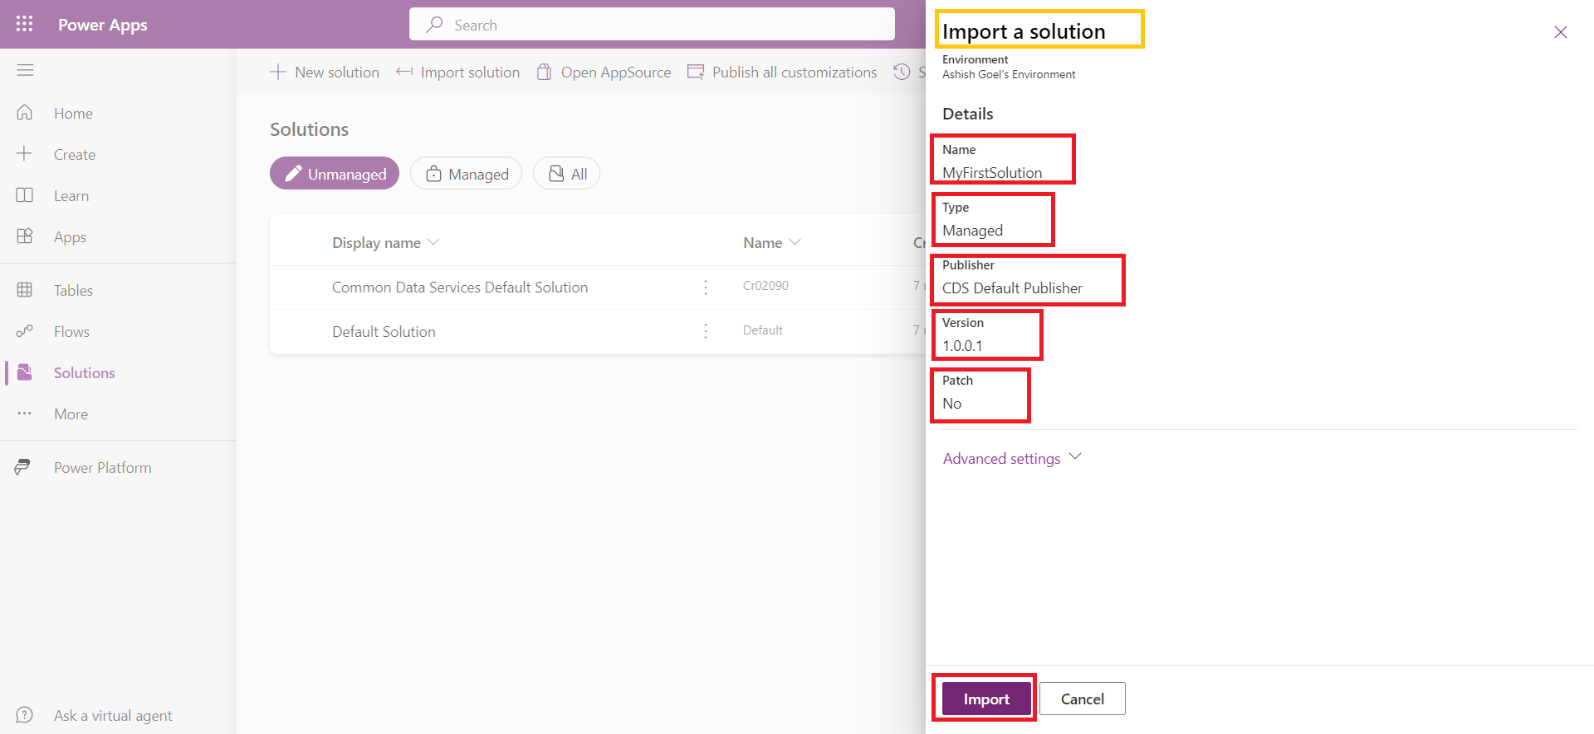
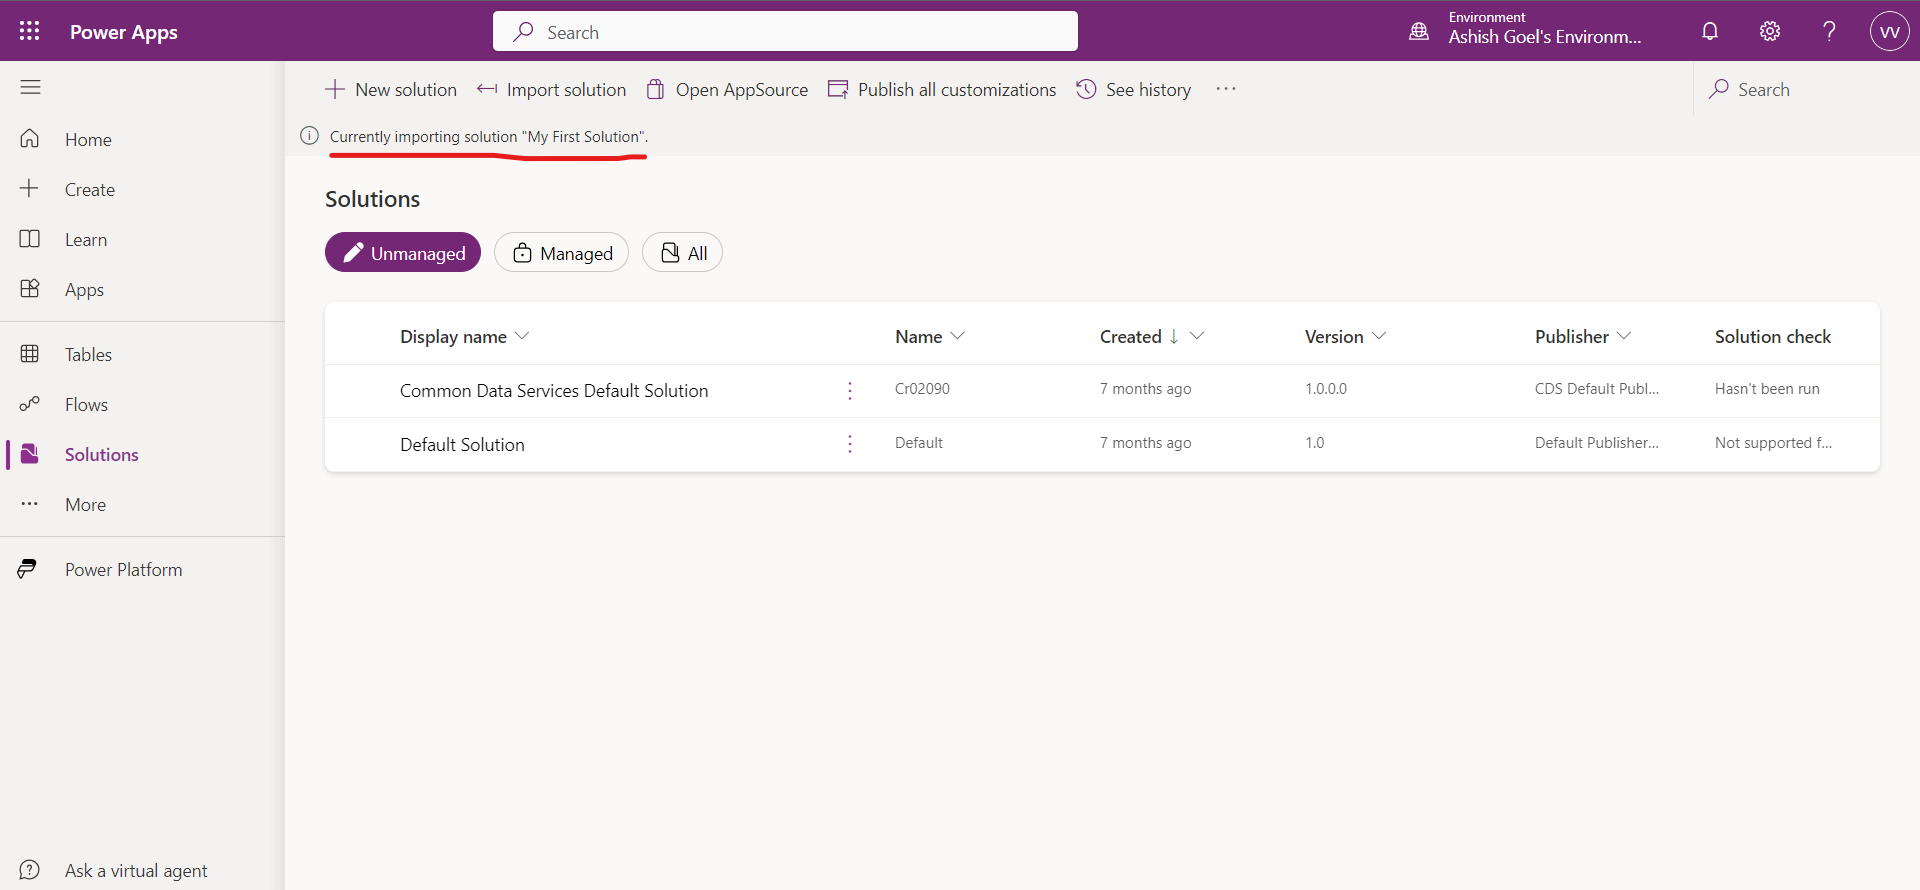
After clicking on Import the importing started in the other environment.
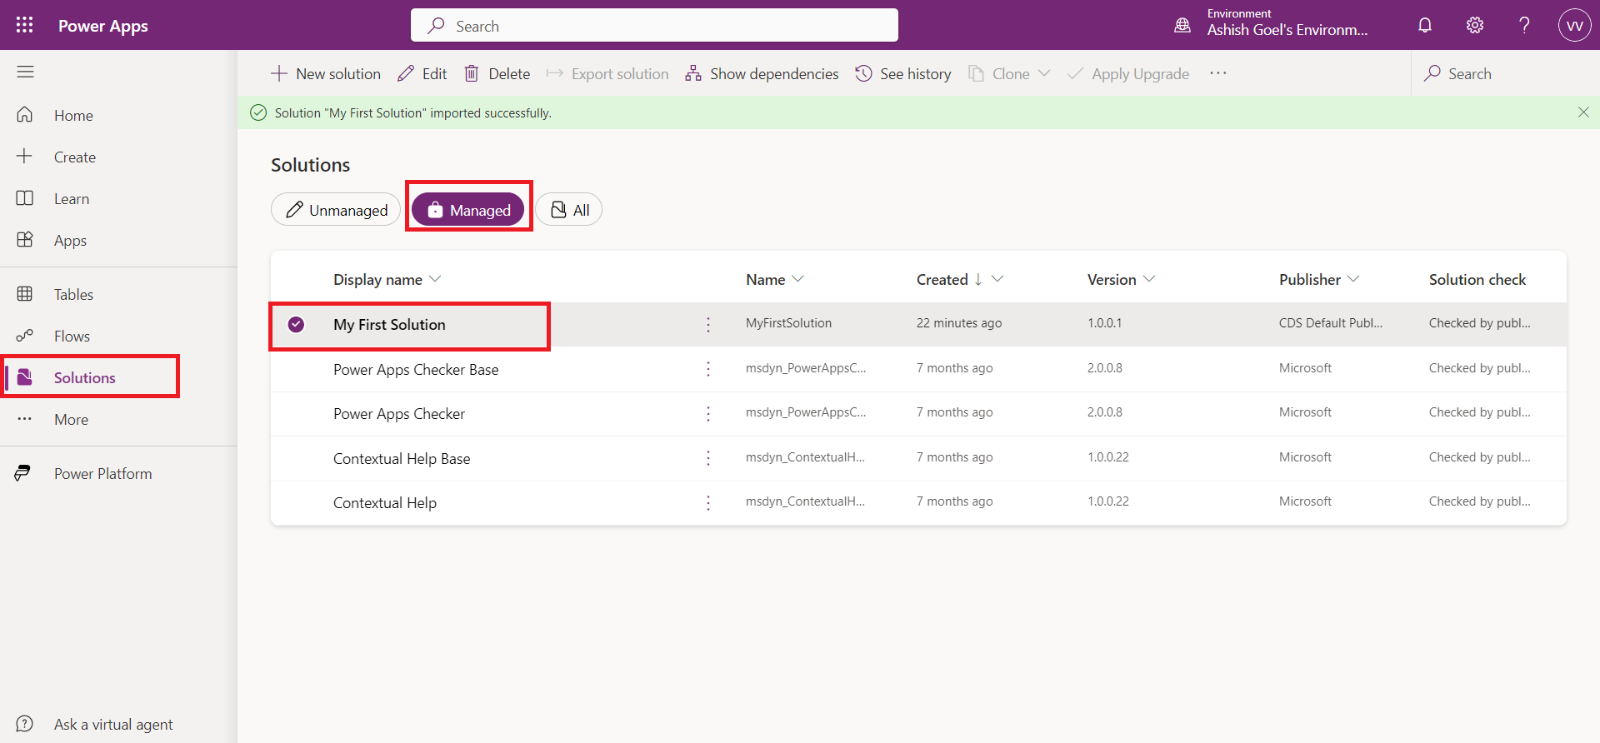
After importing it shows in the Managed tab, because we import the Managed solution.
Managed properties
We can use managed properties to control which of our managed solution components can be customized.
View and edit entity managed properties
Step 1: Sign in to Power Apps or Power Automate and select Solutions from the left pane.
Step 2: Open the solution that we want to configure.
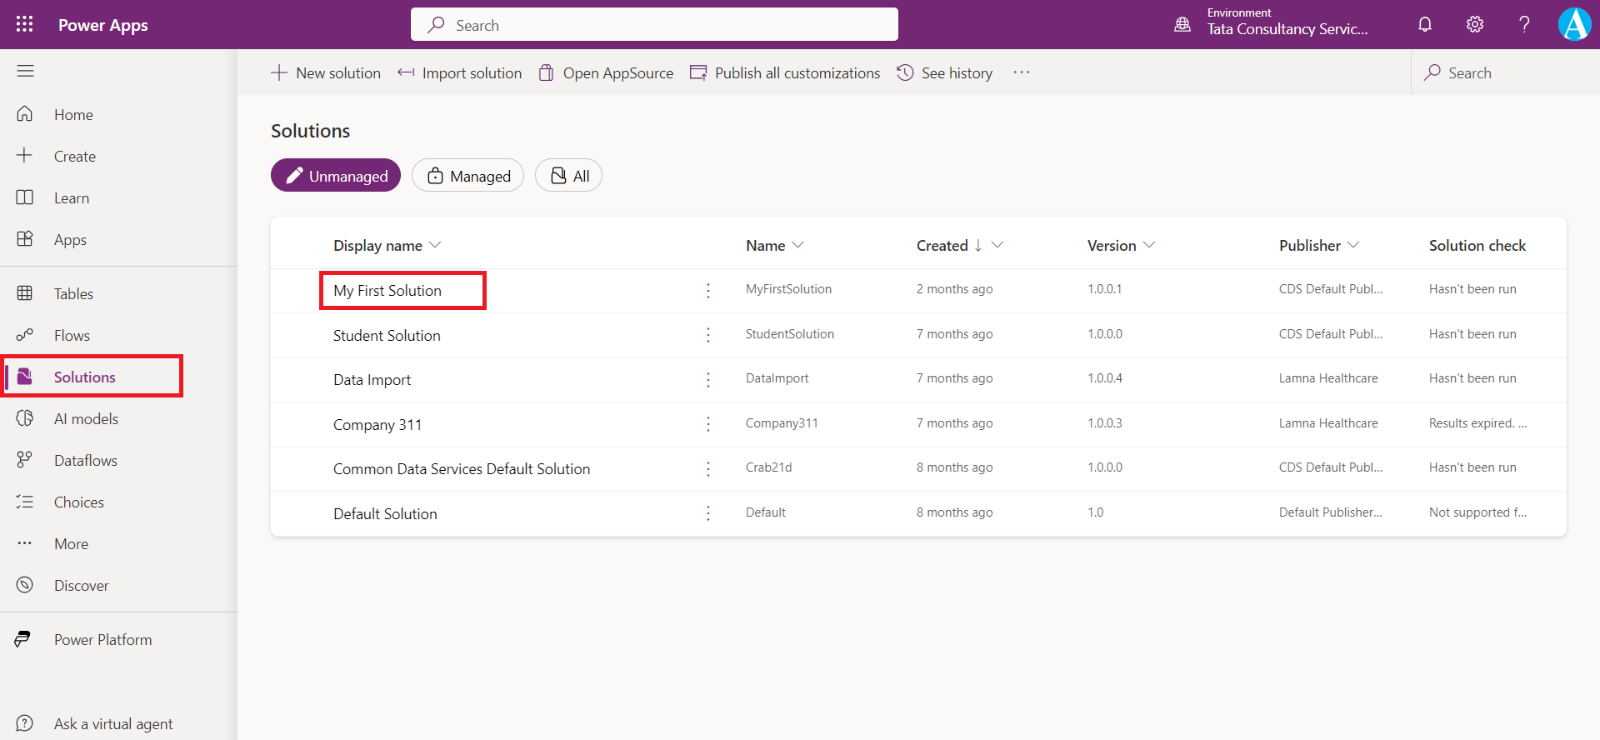
Step 3: From the list of components in the solution, select … next to the table that we want to view the managed properties, and then select Managed properties from the Advanced section.
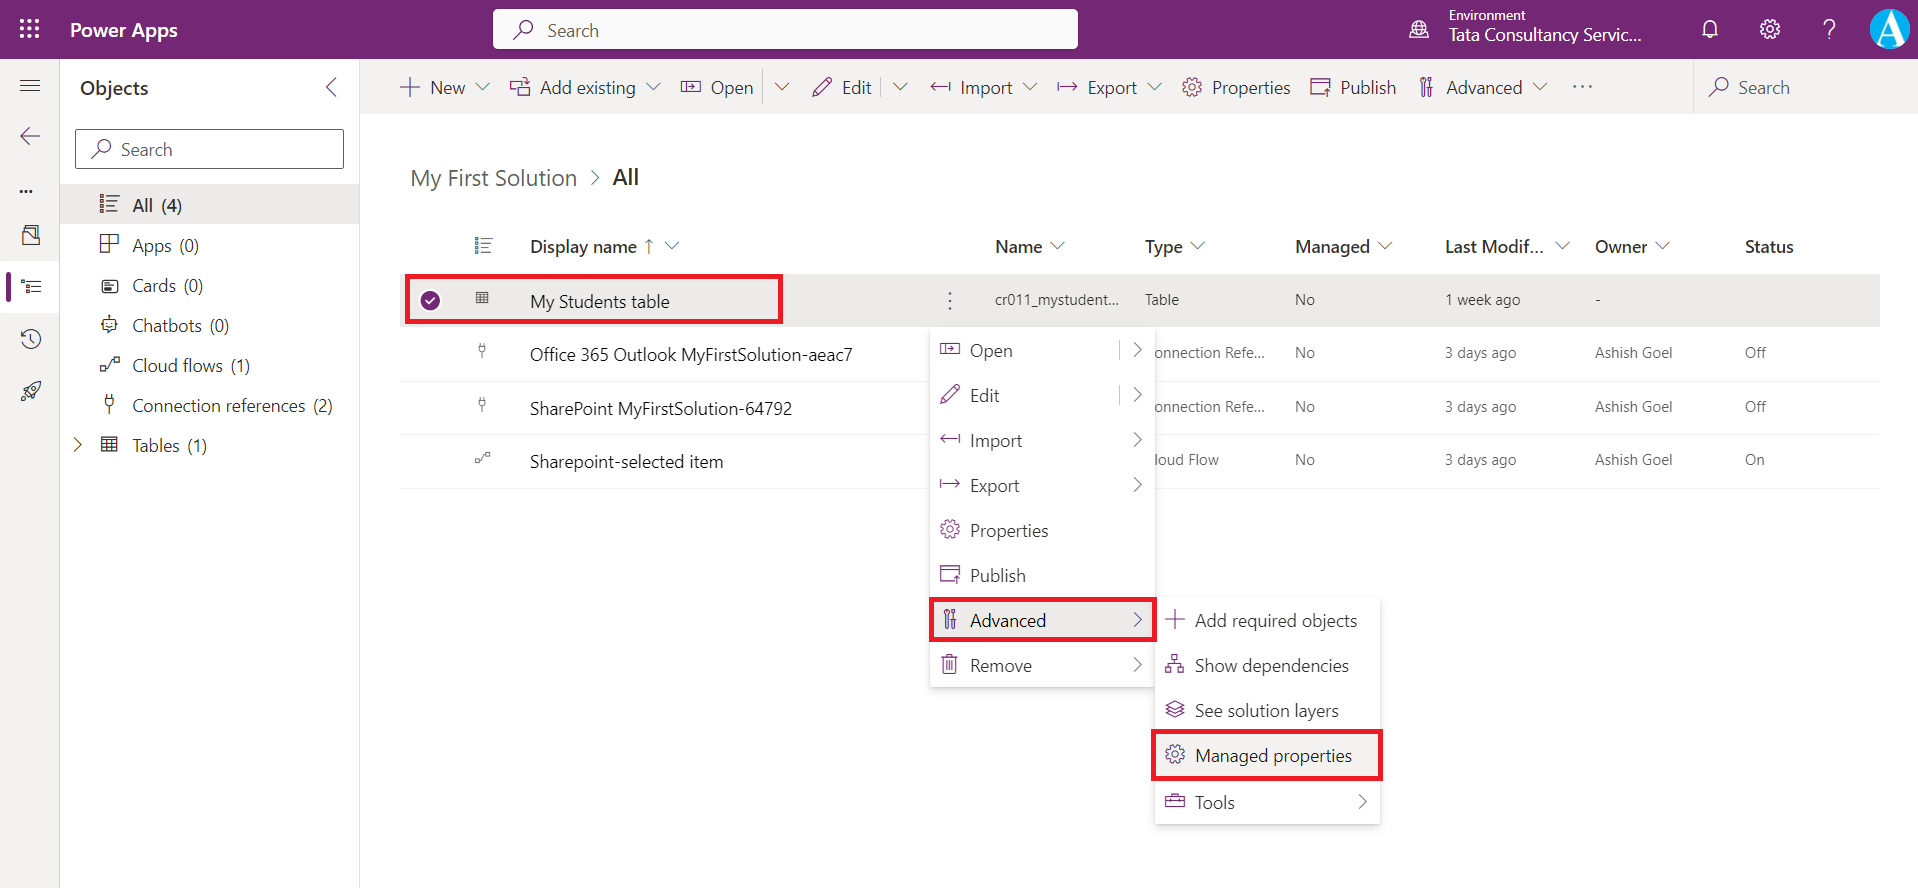
The managed properties page is displayed.
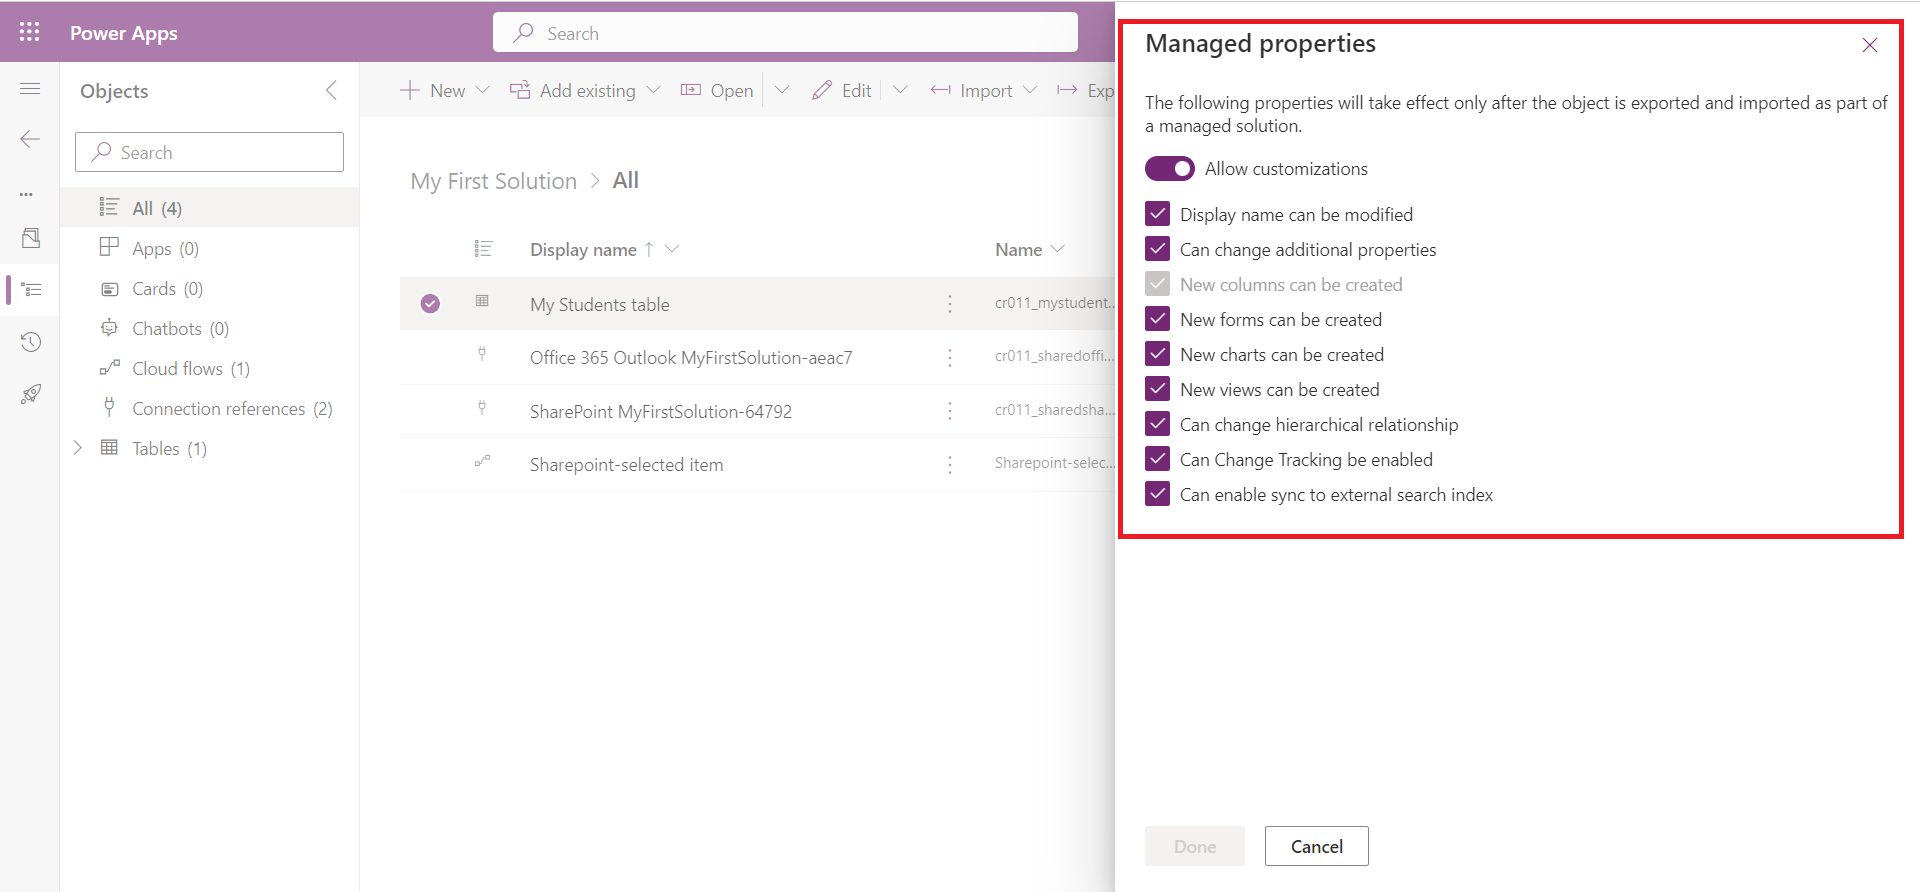
Entities have more managed properties than any other type of solution component. If the entity is customizable, we can set the following options:
| Option | Description |
|---|---|
| Allow customizations | Controls all the other options. If this option is False, none of the other settings apply. When it is True, we can specify the other customization options. When False, it is equivalent to setting all other options to false. |
| Display name can be modified | Whether the entity display name can be modified. |
| Can Change Additional Properties | Applies to anything not covered by other options. |
| New forms can be created | Whether new forms can be created for the entity. |
| New charts can be created | Whether new charts can be created for the entity. |
| New views can be created | Whether new views can be created for the entity. |
| Can Change Hierarchical Relationship | Whether Hierarchical Relationships settings can be changed. |
| Can Change Tracking Be Enabled | Whether the entity Change Tracking property can be changed. |
| Can Enable sync to external search index | Whether the entity can be configured to enable Dataverse search. |
Solution patches
Sometimes when we already exported our solution as the Managed in the Production environment. And if in when we some changes in the solution of the development solution in the unmanaged solution then we have two approaches.
First Approach: Delete the Managed solution from the production environment. Export the whole solution from the development environment and then import it in the production environment.
Second Approach: We can create a patch for a parent solution and export it as a minor update to the base solution.
Important points about solution patches
- A patch is created from an unmanaged solution. We can’t create a patch from a managed solution.
- The parent solution must be present in the target system to install a patch.
- When we import a patch into a target system, we should export it as a managed patch. Don’t use unmanaged patches in production environments.
- We can delete a patch solution.
Create a solution patch We can create a solution by following the below steps:
Step 1: Go to the Power Apps, and then select Solutions.
Step 2: In the solutions list, select an unmanaged solution to create a patch for. On the command bar, select Clone, and then select Clone a Patch.
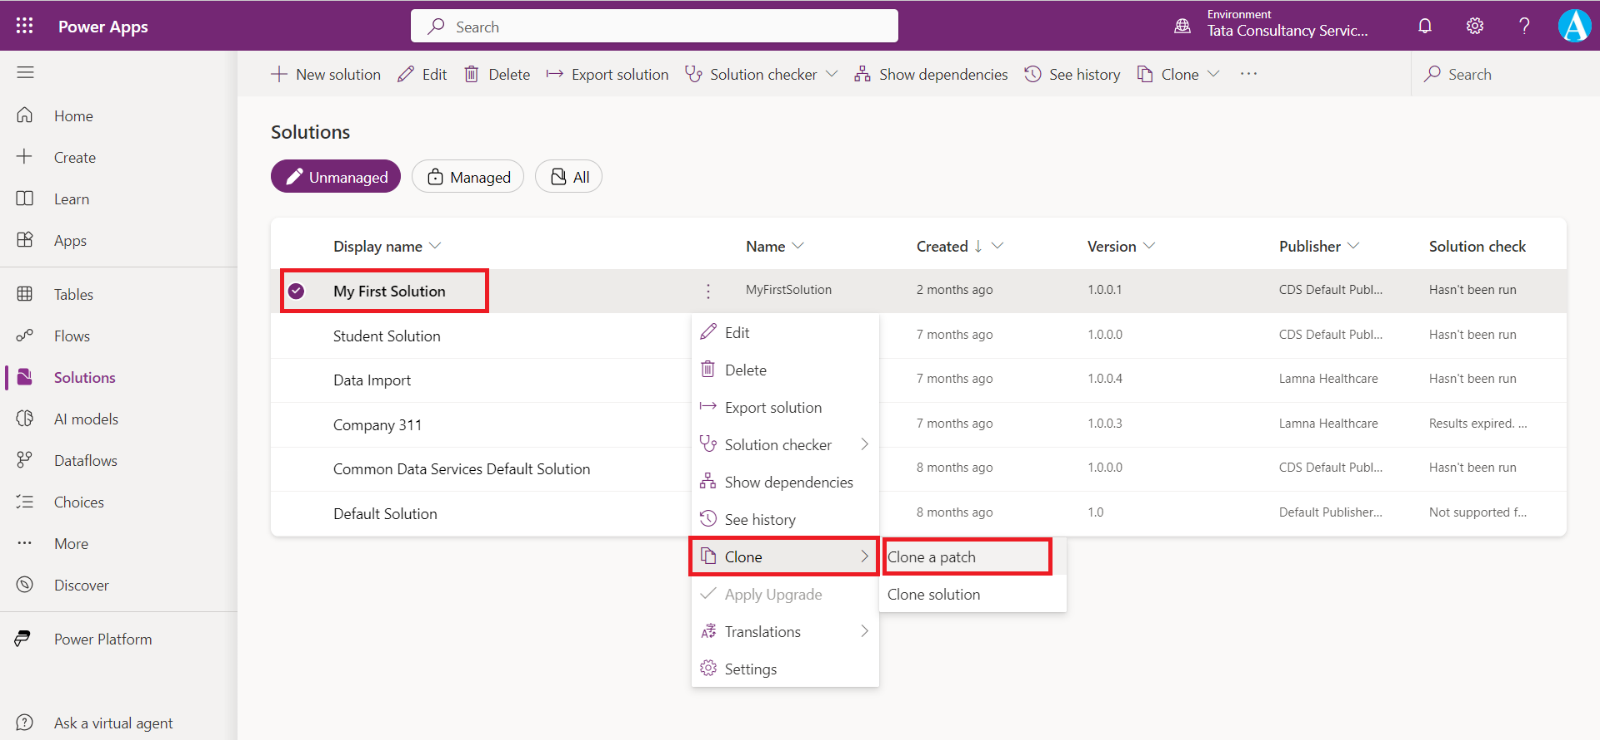
Step 3: When we clone a patch, the version number we specify includes the build and revision positions.
Note: Power Platform solution versions are in the format <major>.<minor>.<build>.<revision>.
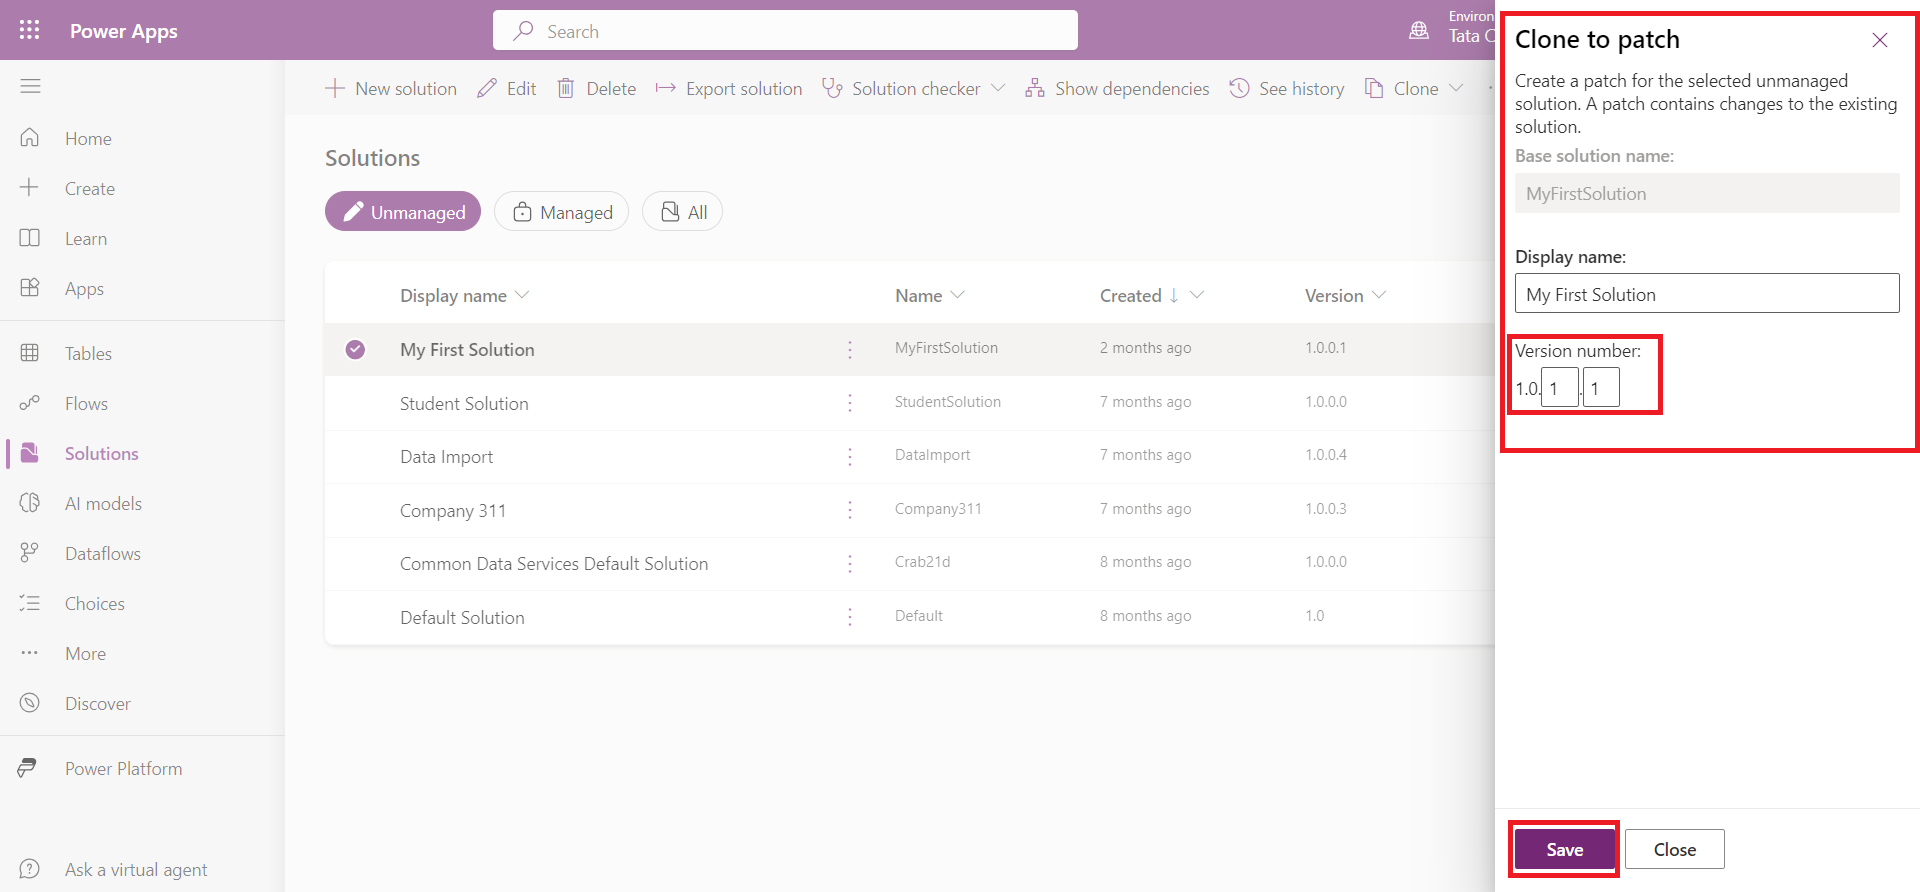
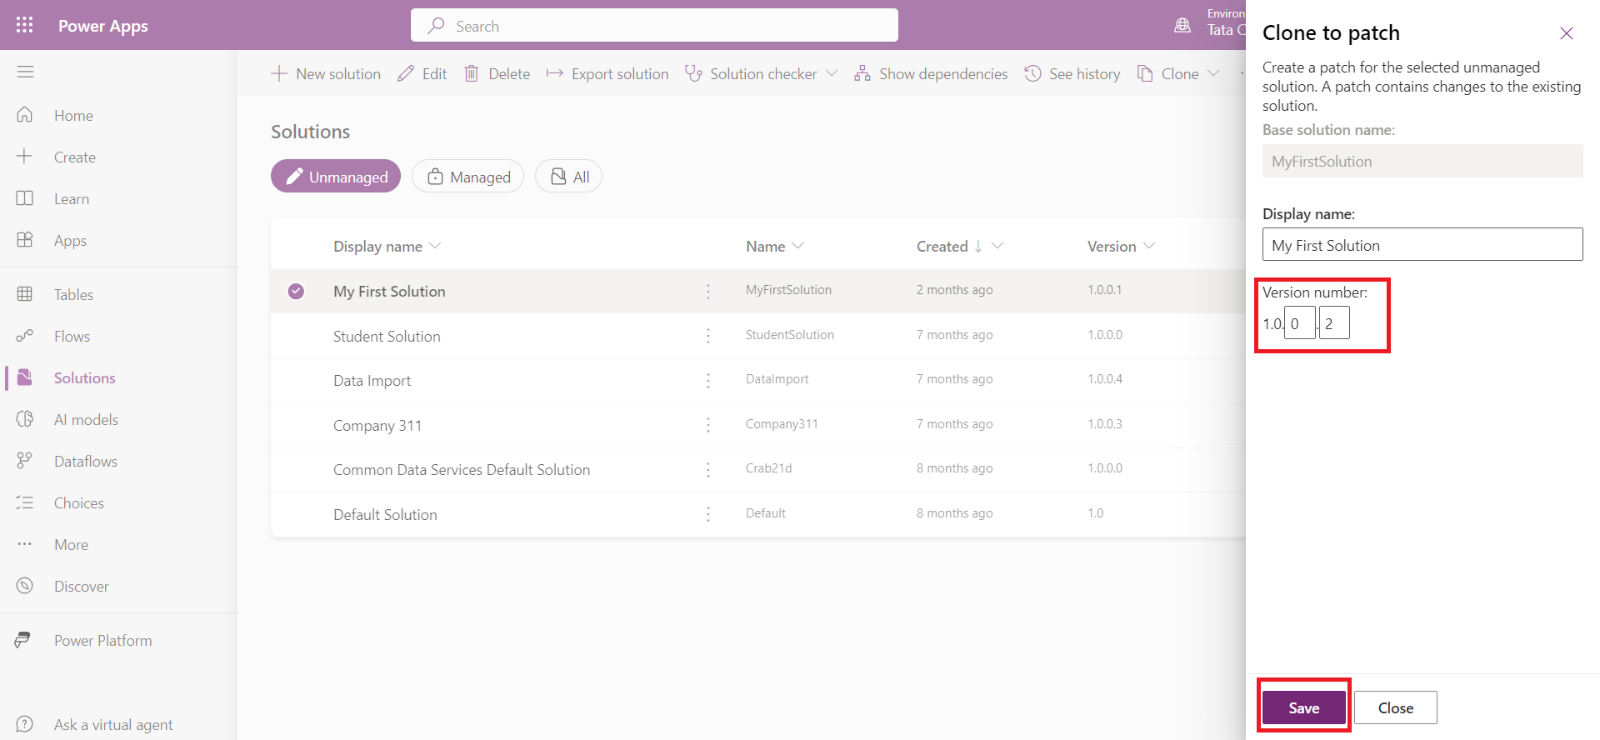
Step 4: Update the version numbers and click on Save.
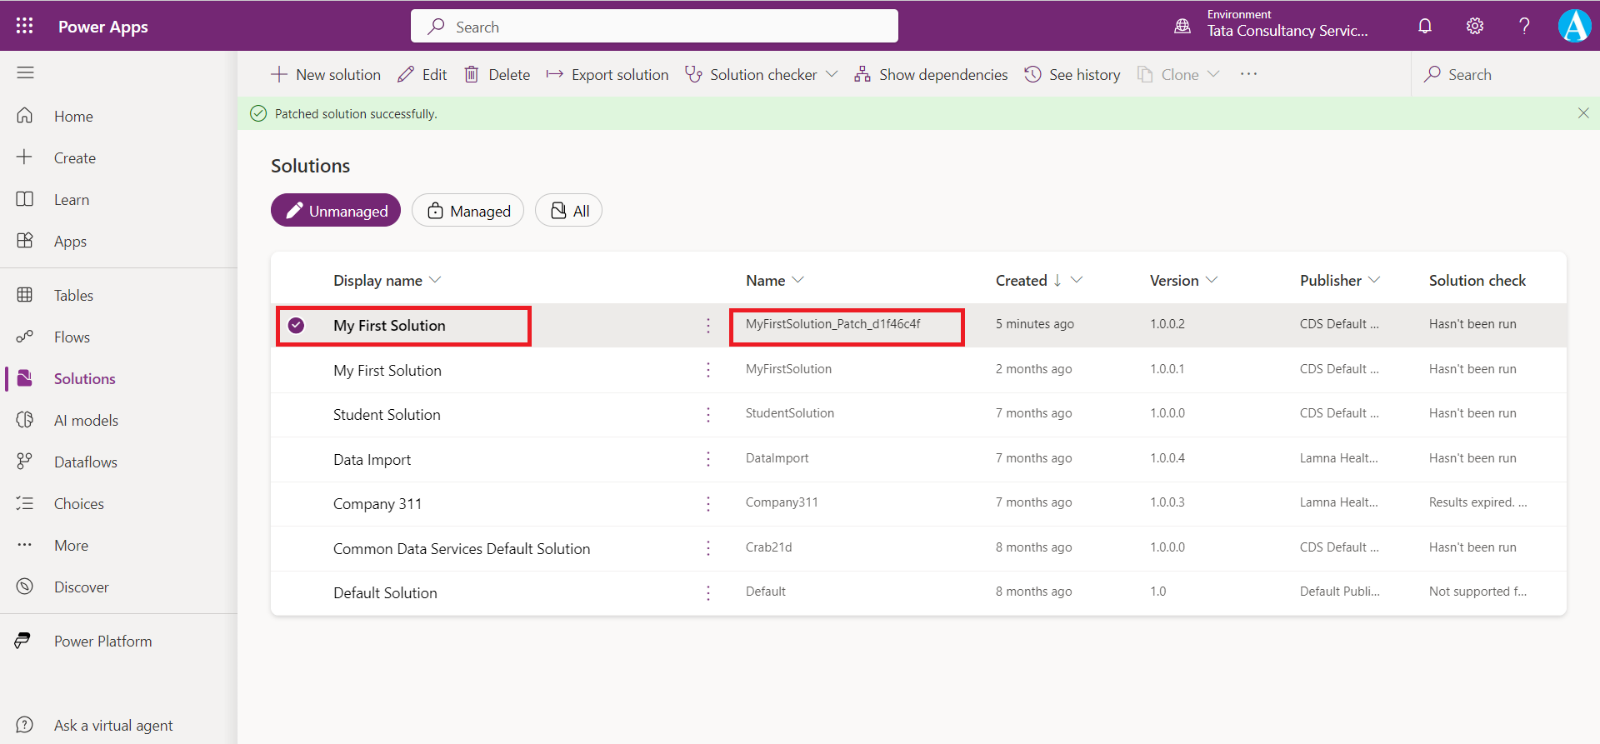
Step 5: In the solutions list, find the newly created patch. Notice that the unique name of the solution has been appended with Patchhexnumber.
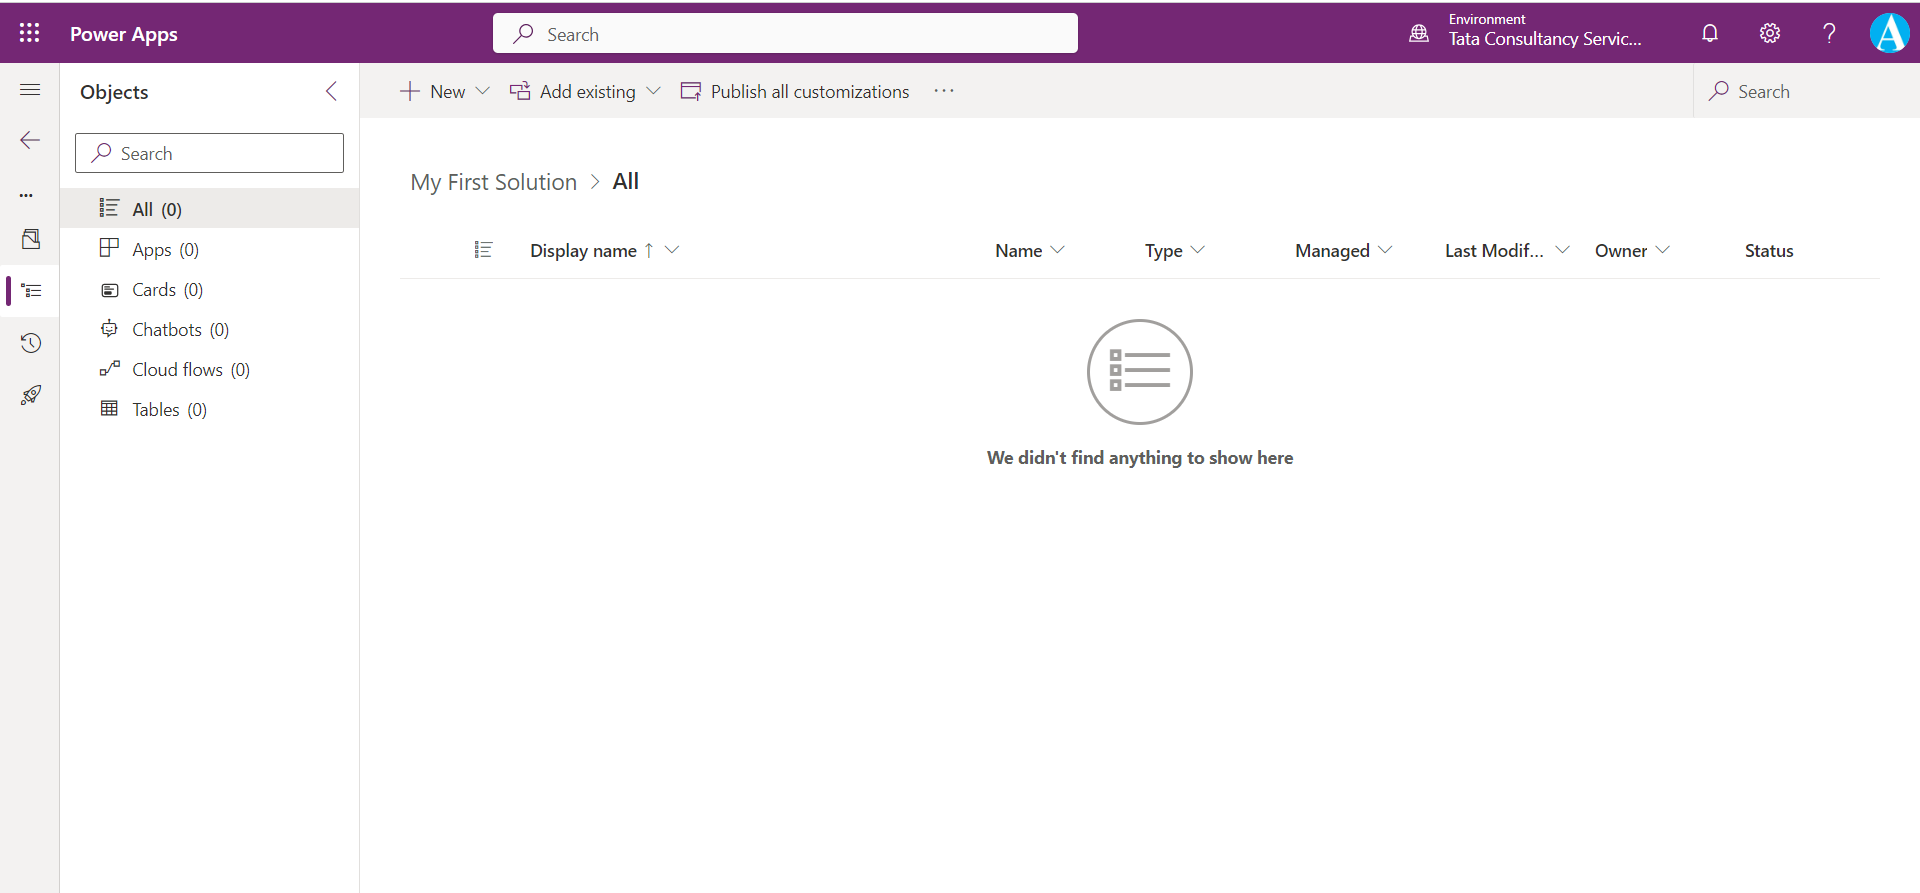
Open the newly created solution patch. We can see that the patch is empty. We just need to add the only components in those we have changed somethings.
The addition process is just like with the base solution, add the components and assets we want.
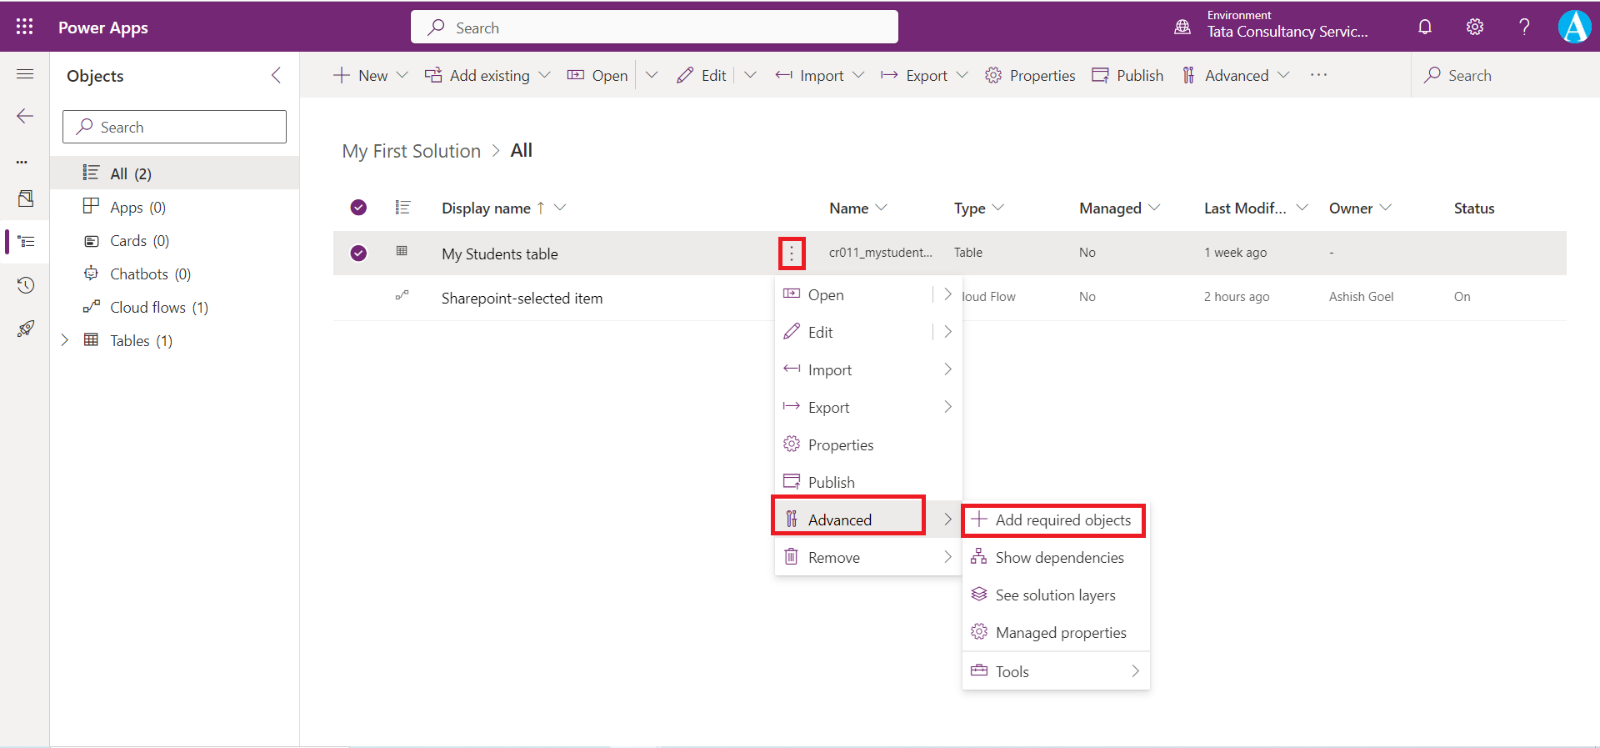
After add click on the three dots and then click on Advanced and then + Add required object, to add any missing object that are used by the components in the solution.
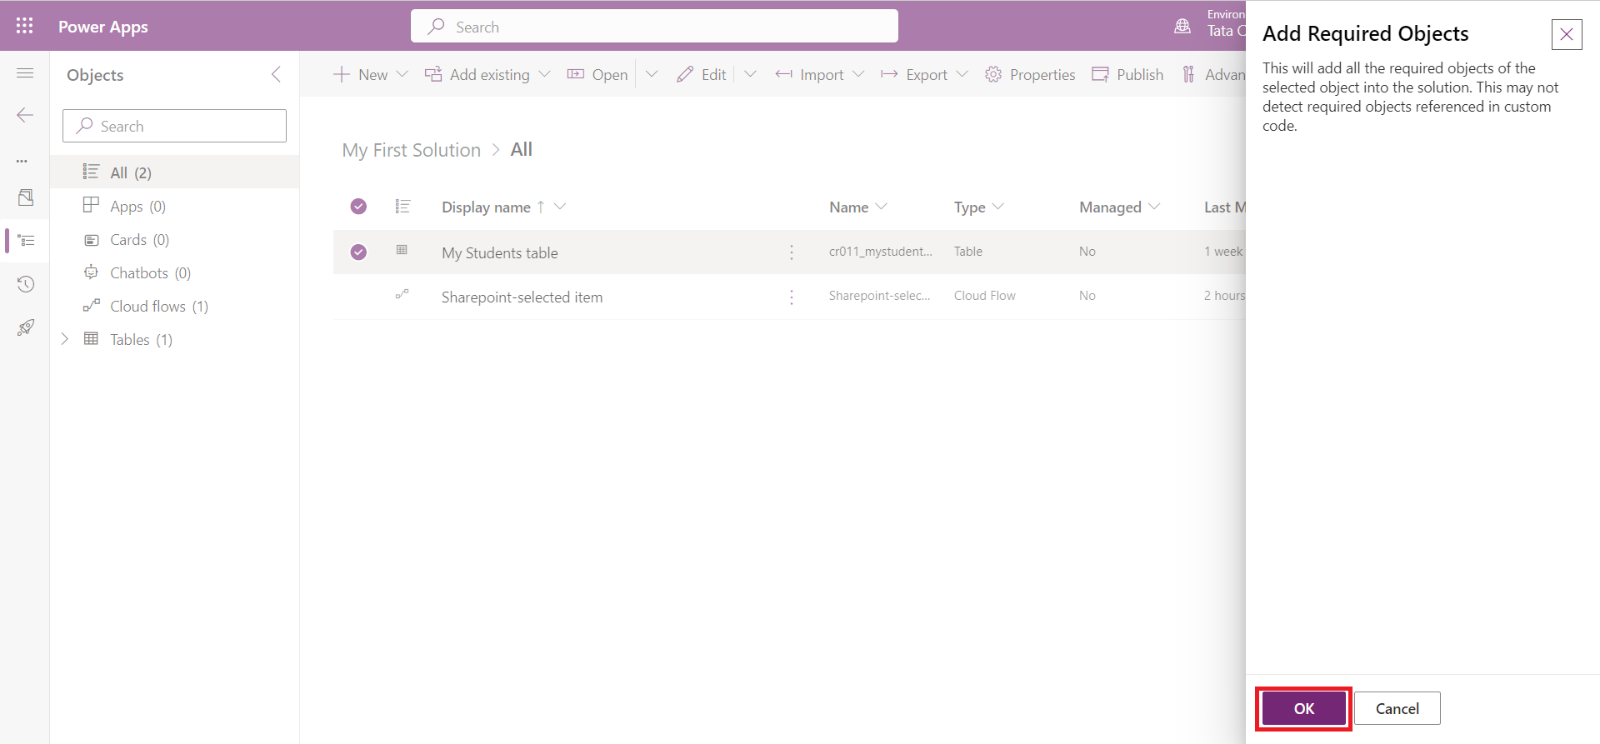
In the Add Required Objects dialog box click on Ok.
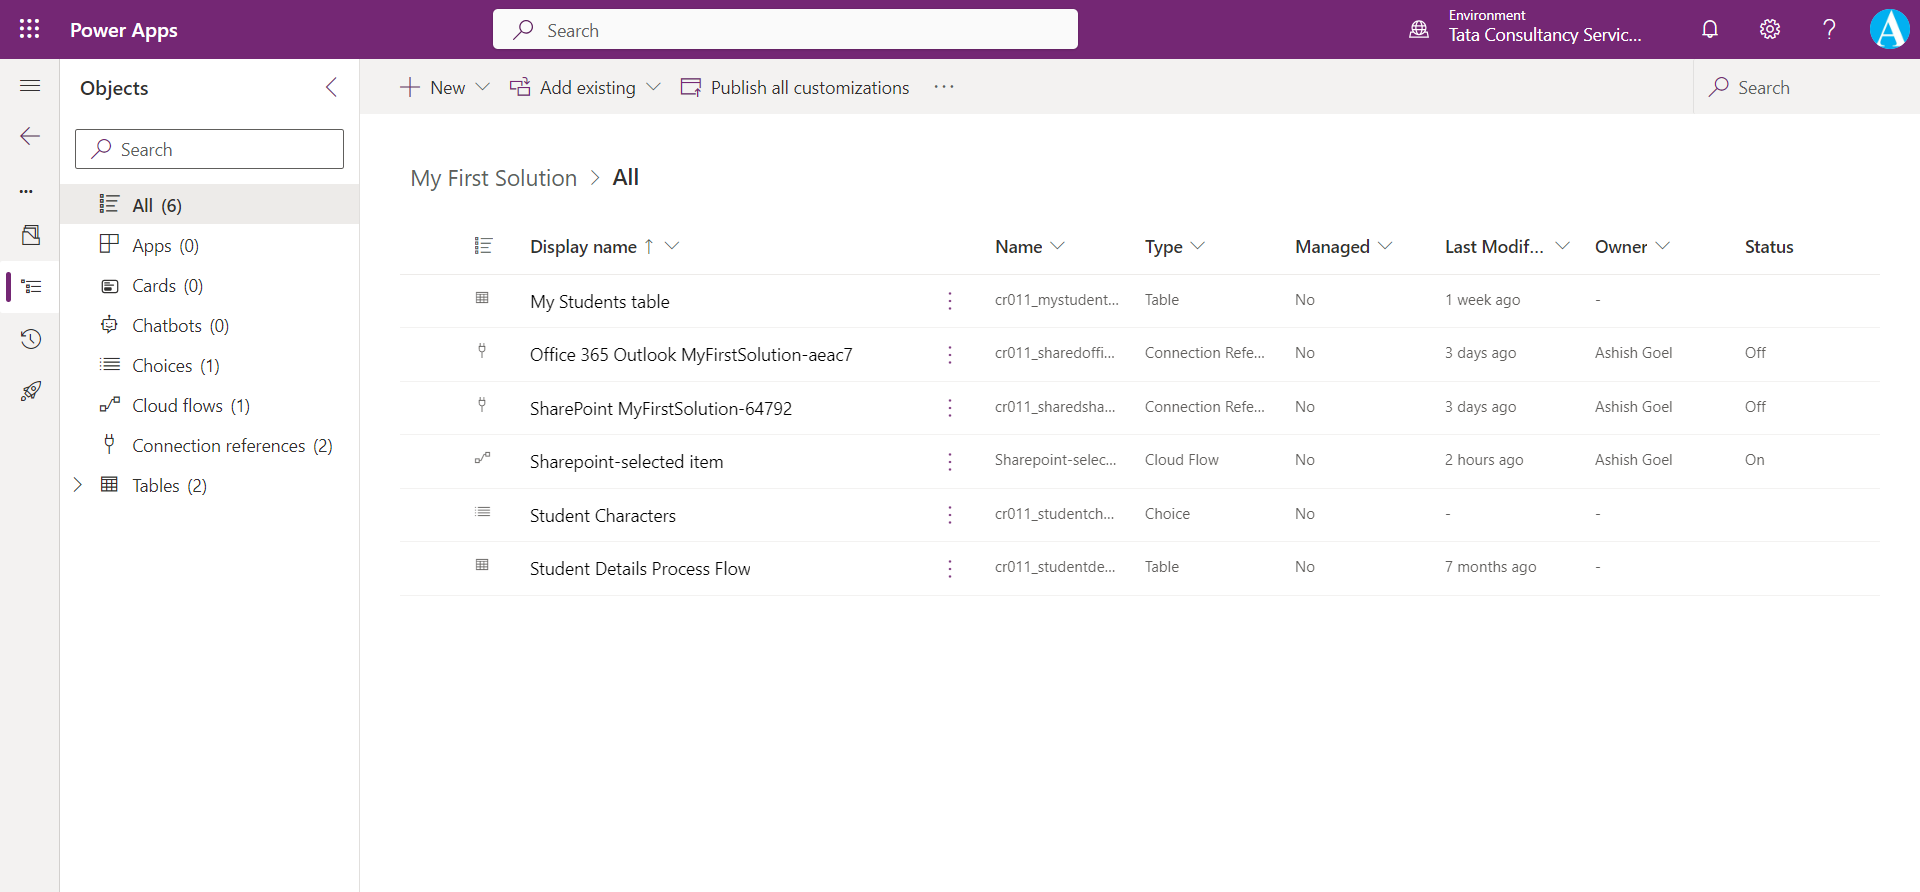
After adding the solution looks like the image below.
Then export the solution by clicking on the Export solution.
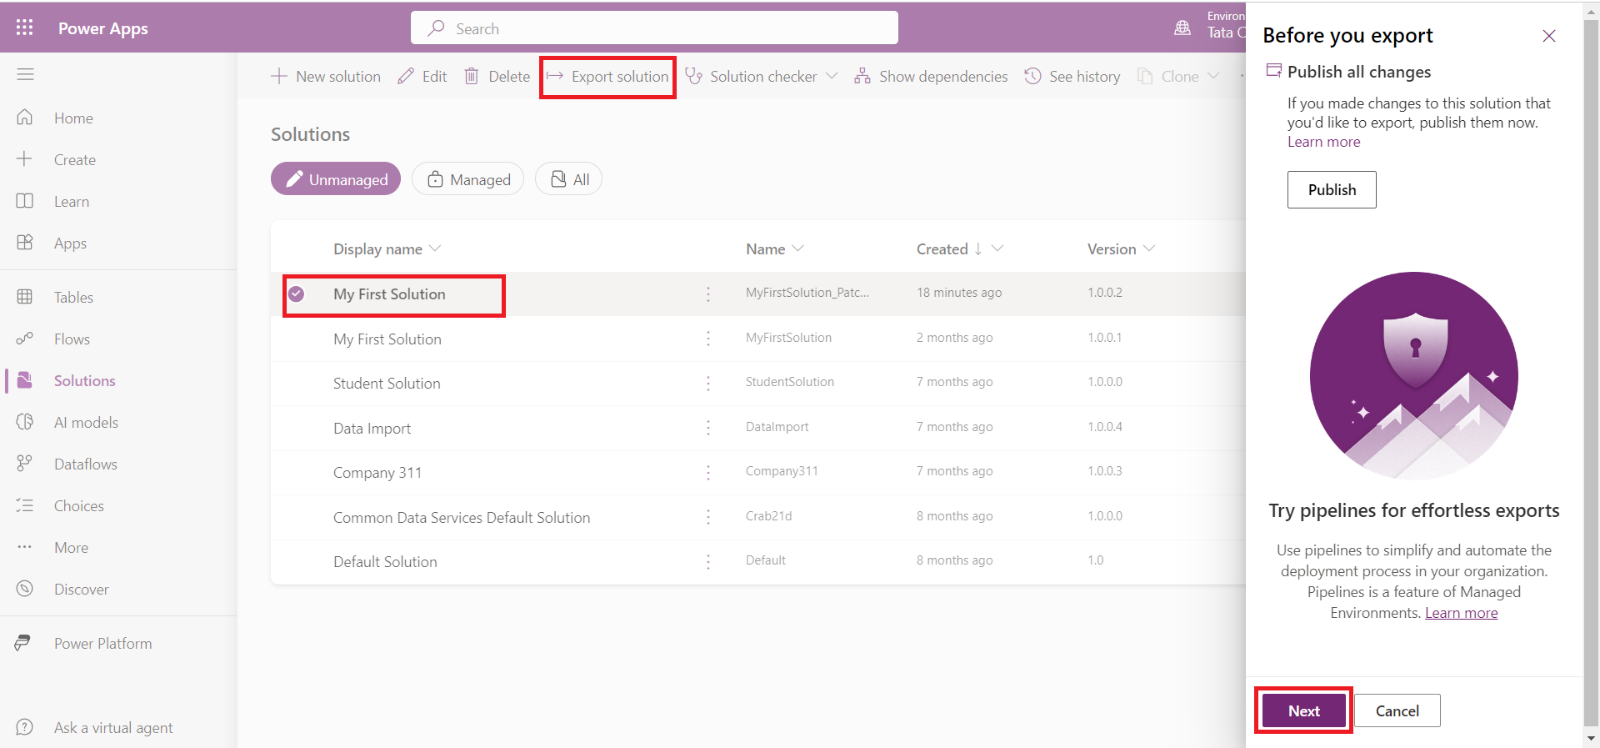
Export the solution as the Managed. And click on Export.
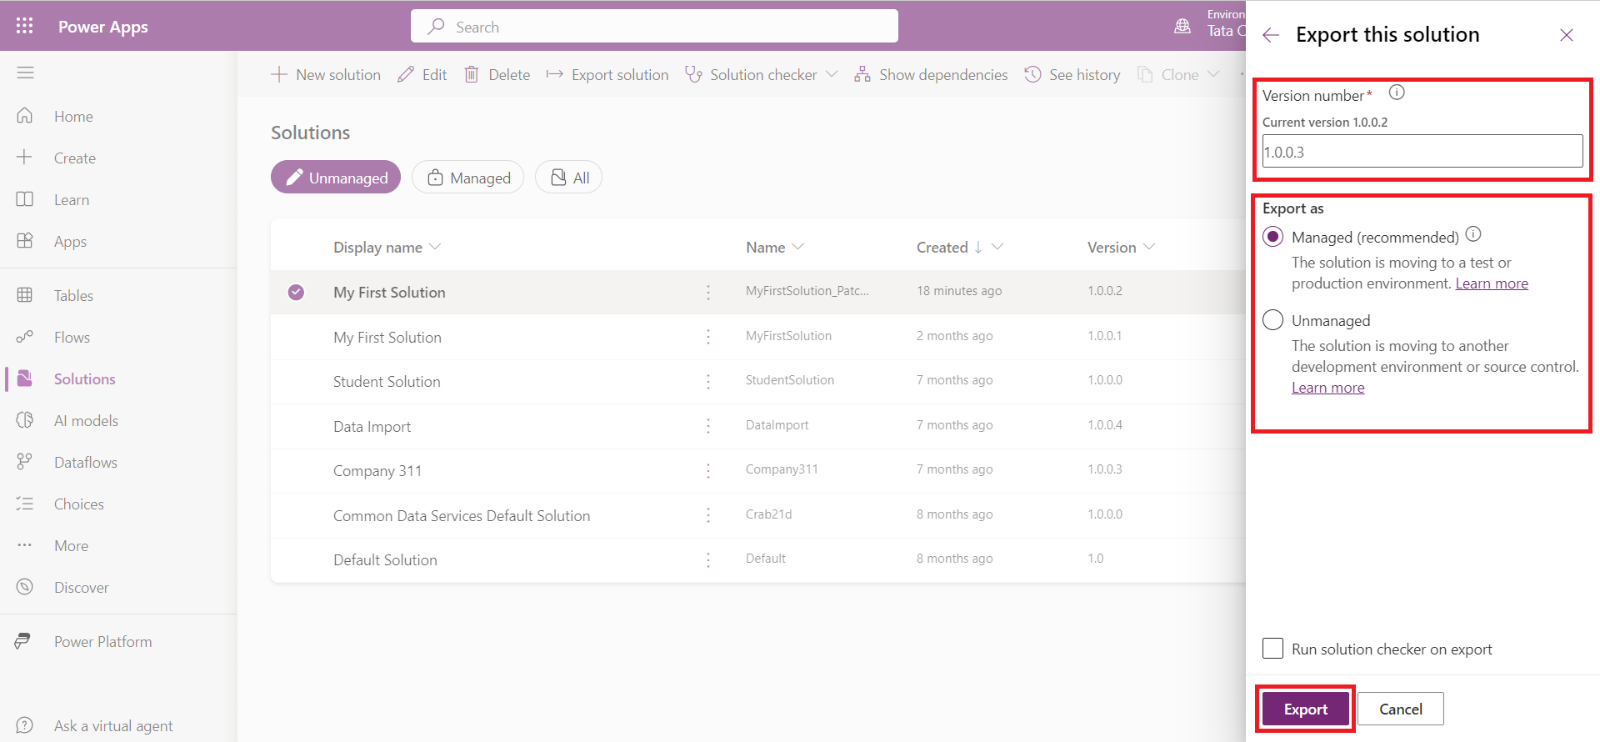
A zip file is downloaded, now go back to the product environment, and then select Import solution.
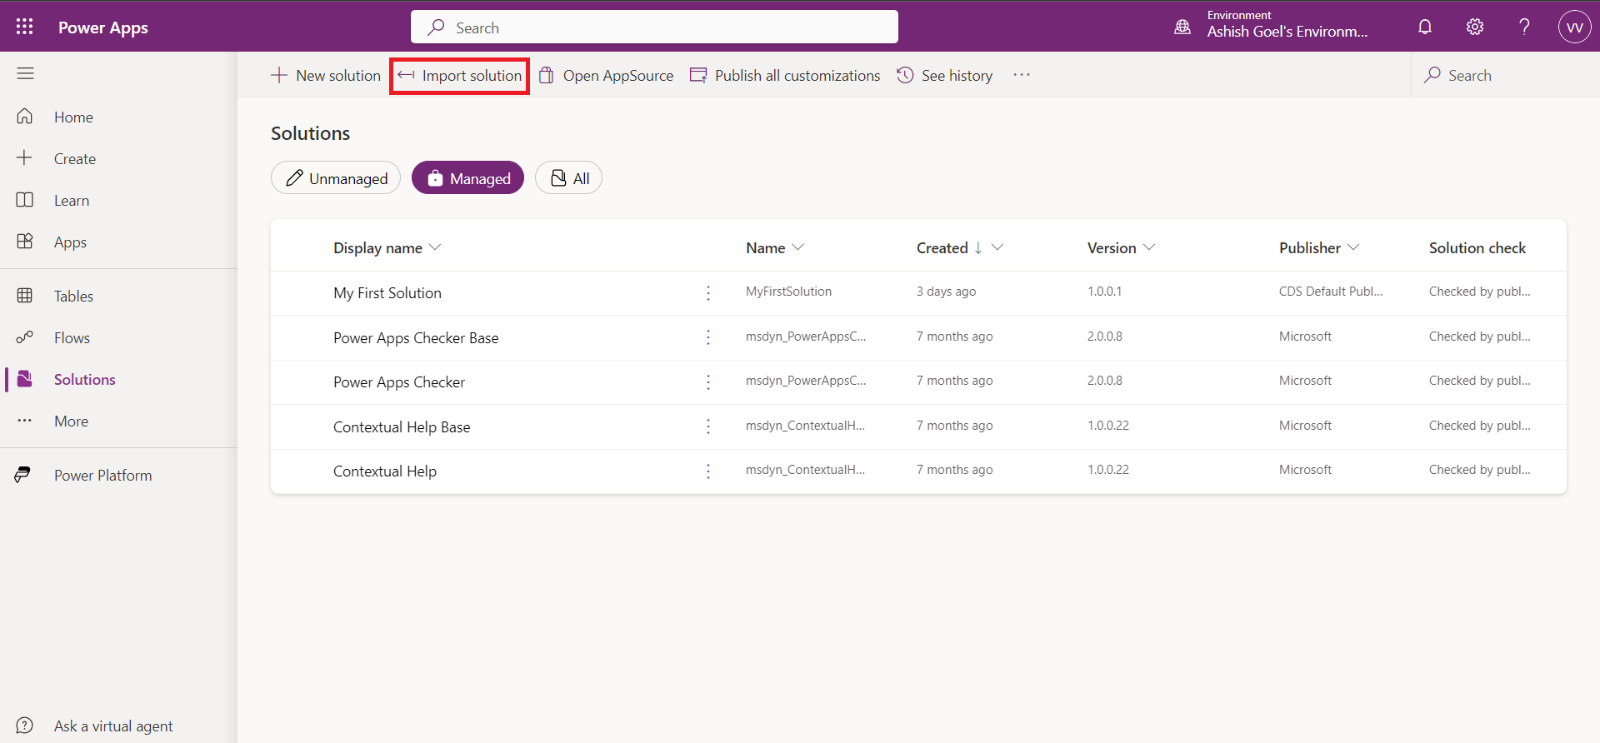
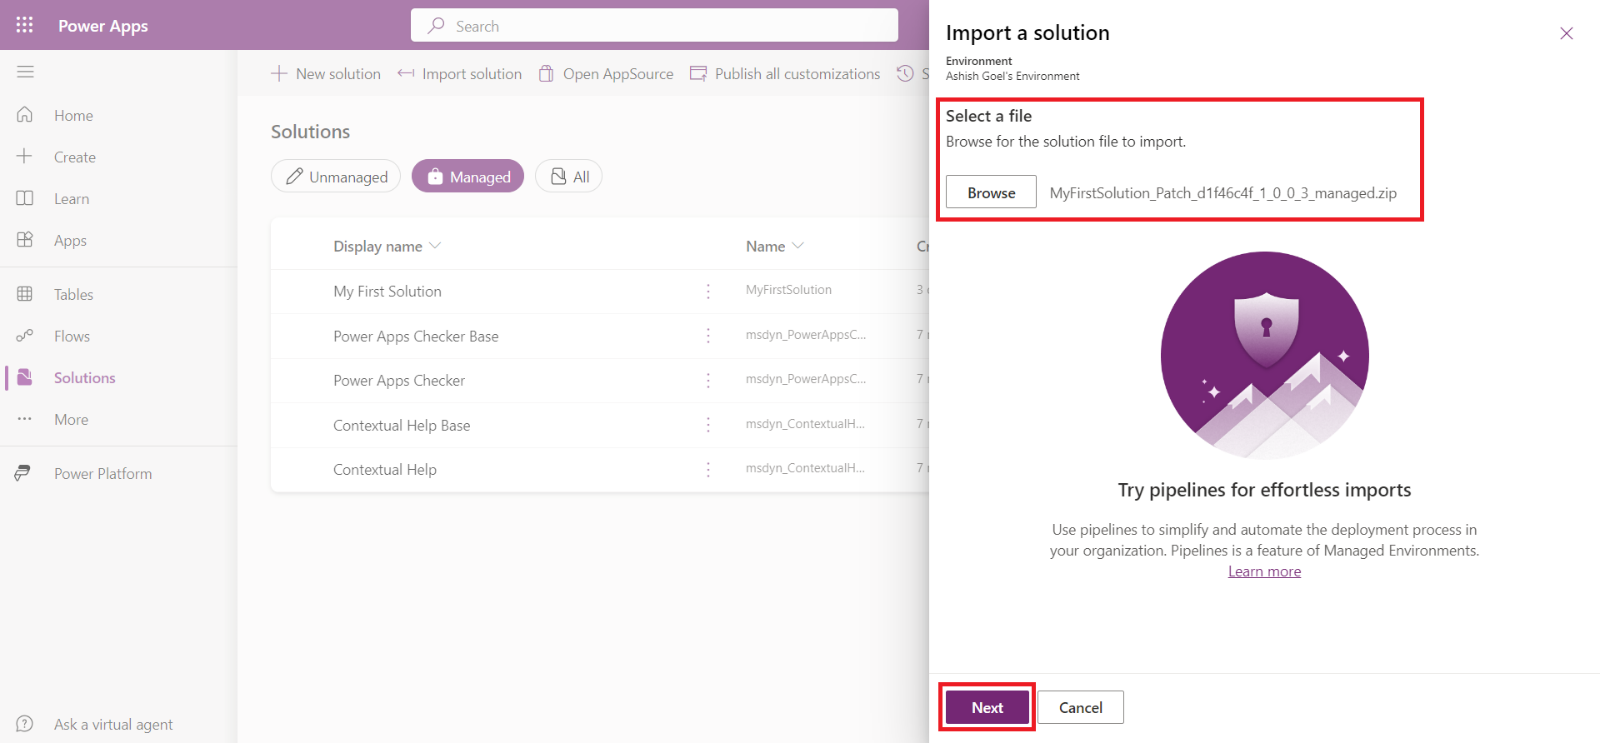
Browse the zipped file and then select Next.
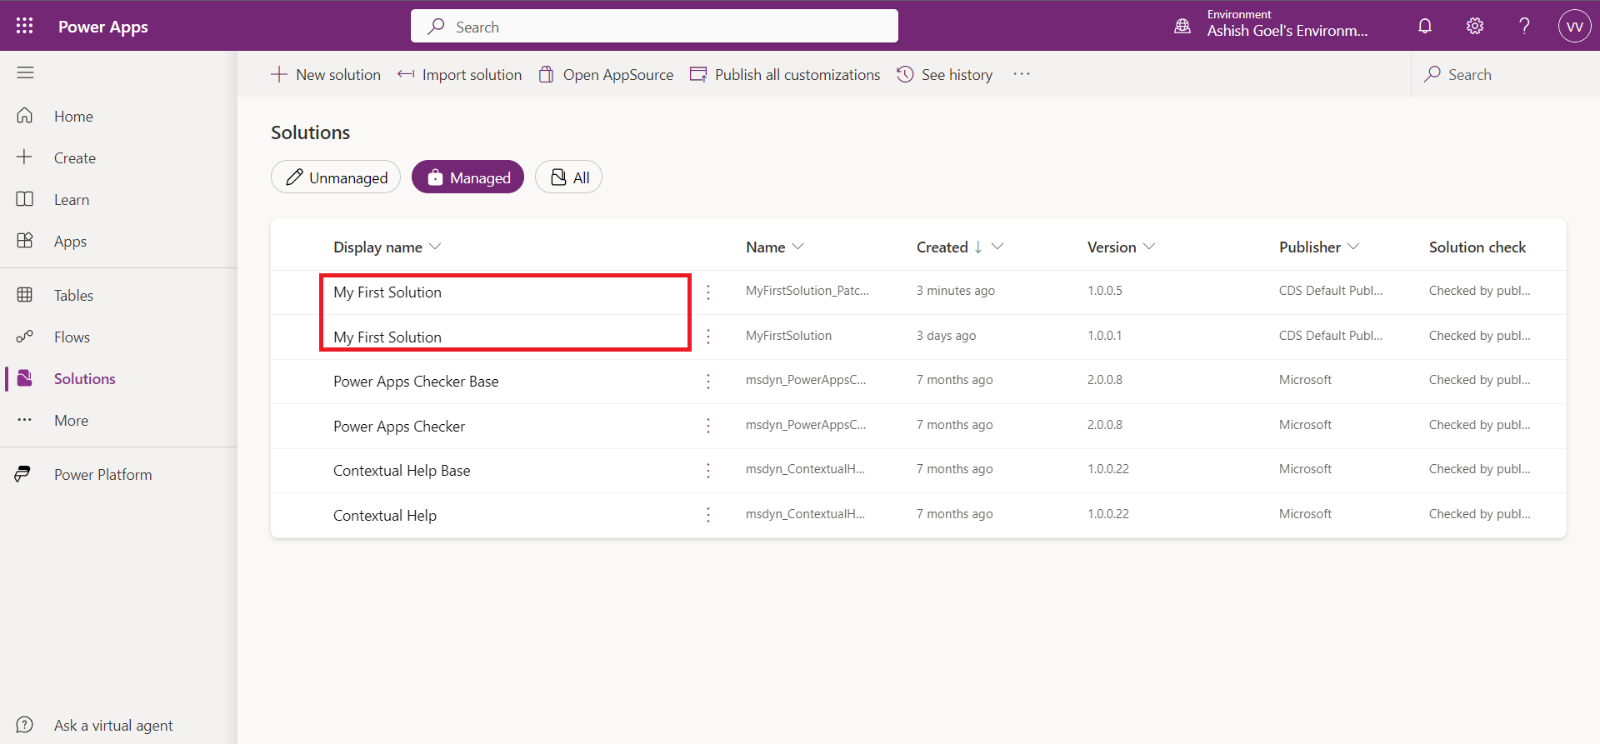
After successfully importing, we can see our two Managed solutions.
In the development environment, after we have created the first patch for a parent solution, the solution becomes locked, and you can’t make any changes in this solution or export it. However, if we delete all of its child patches, the parent solution becomes unlocked.
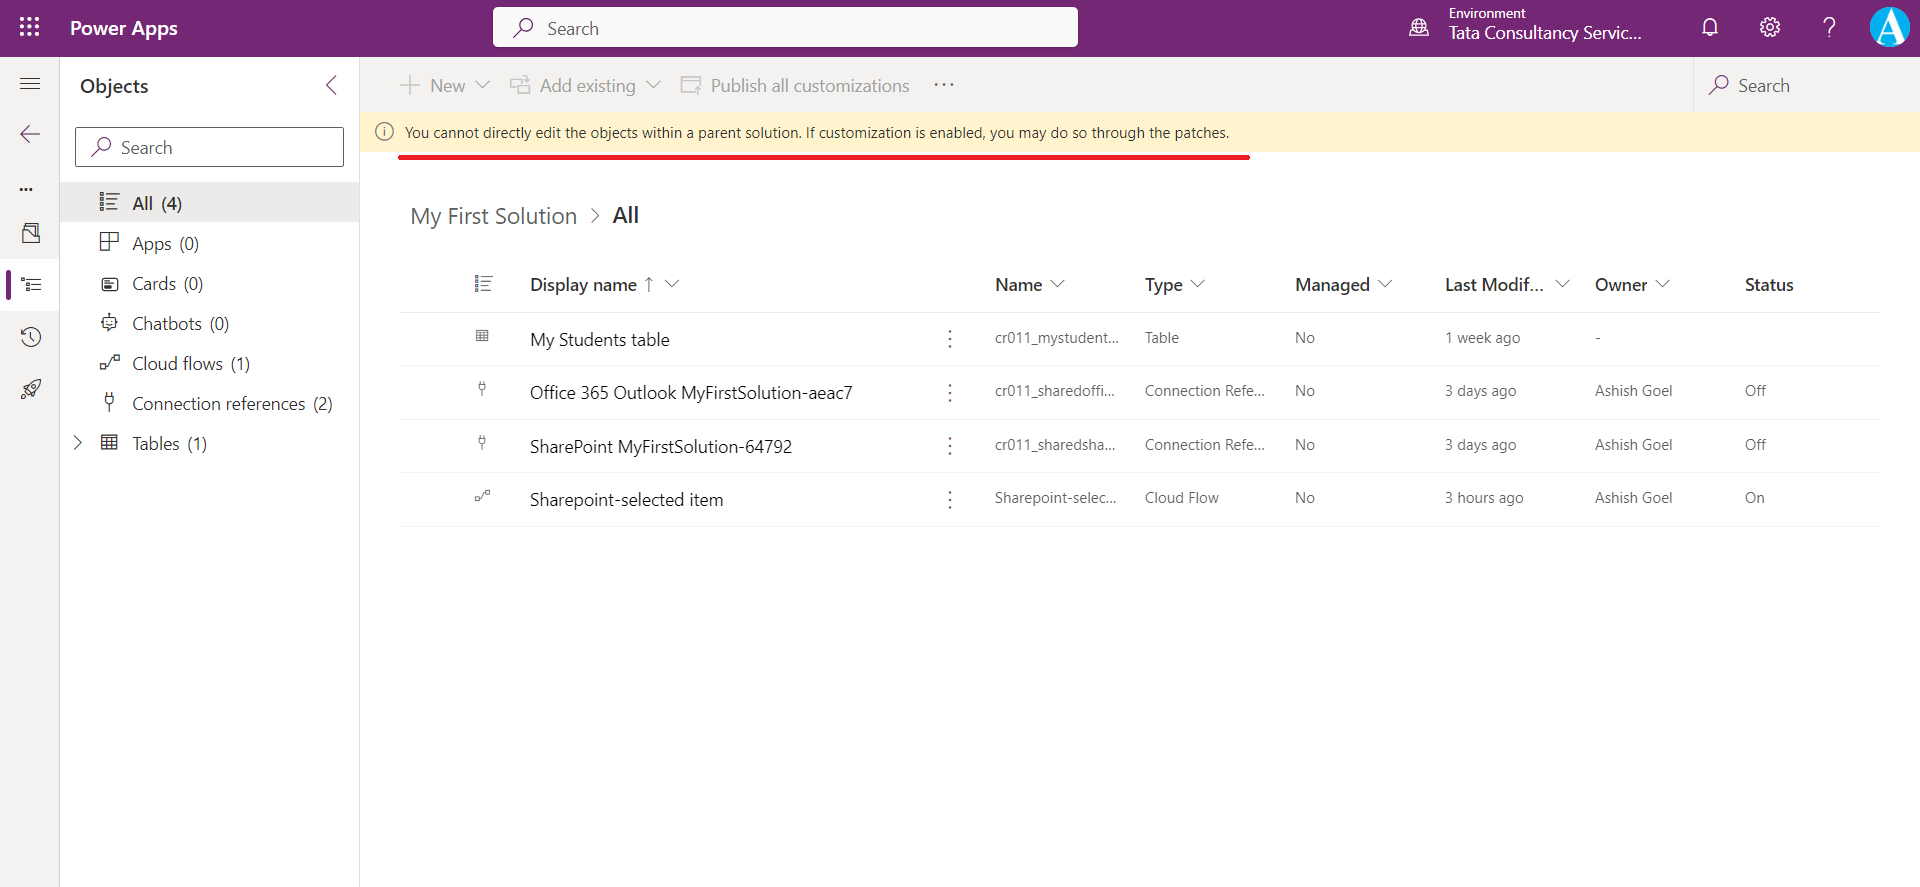
We must merge both solutions (Patch ==> Parent Solution). To merge the patch into the parent solution, select the parent solution. Then click on three dots (…), then select Clone solution.
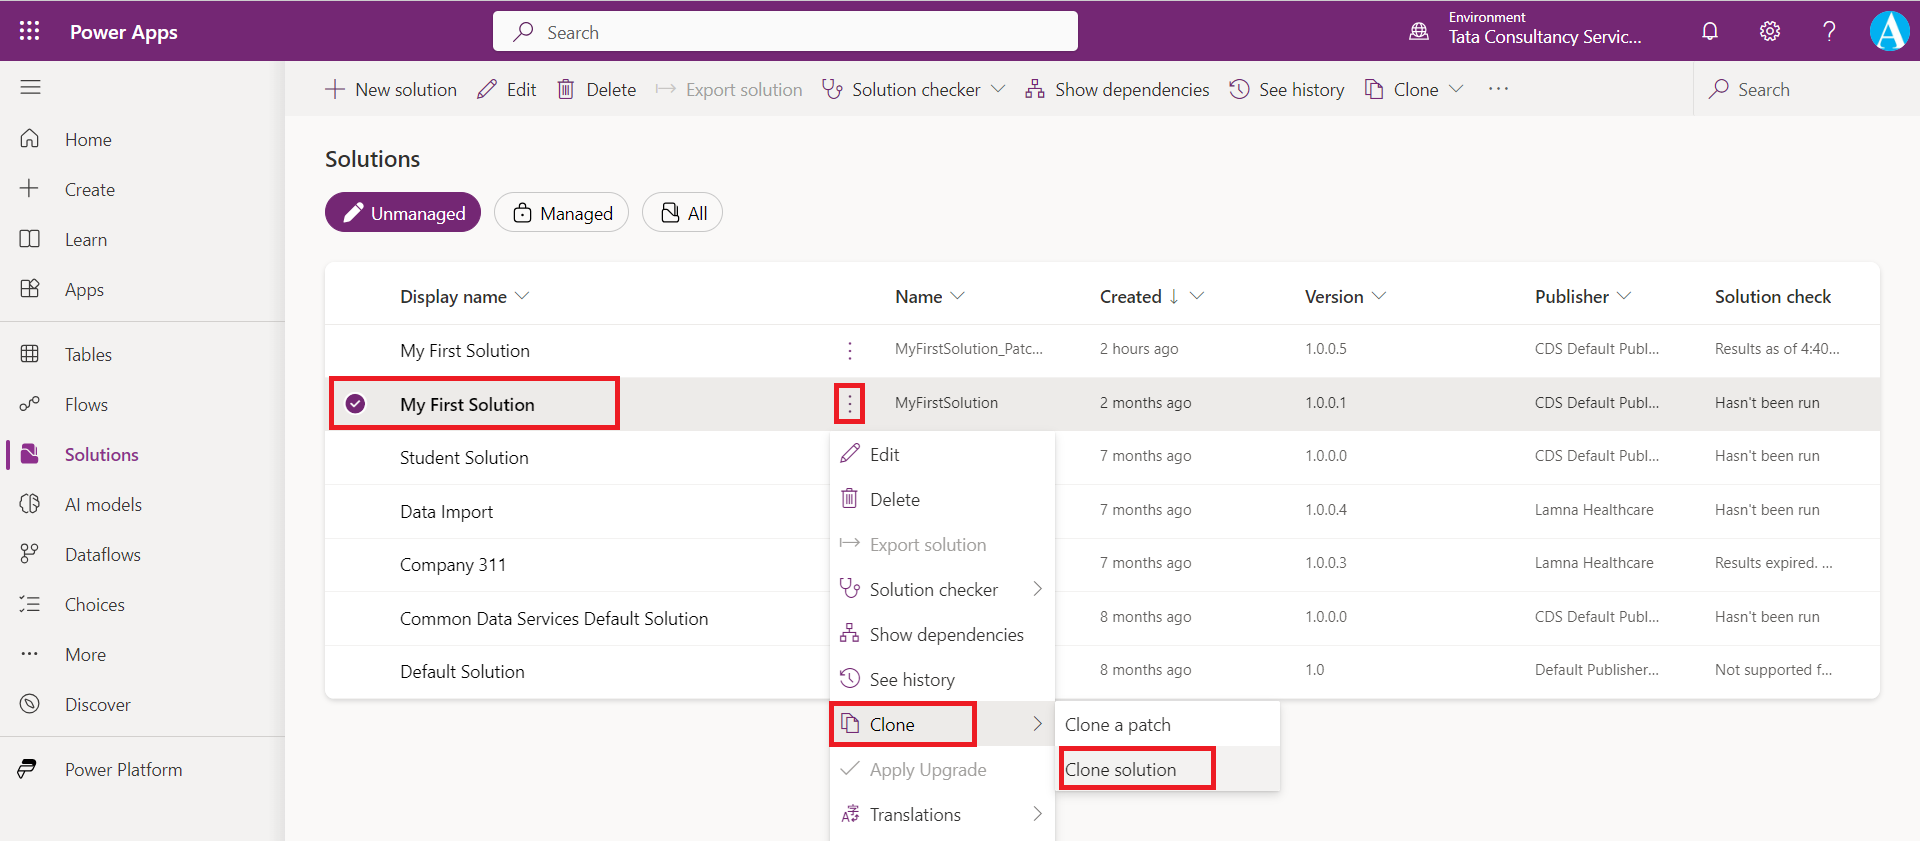
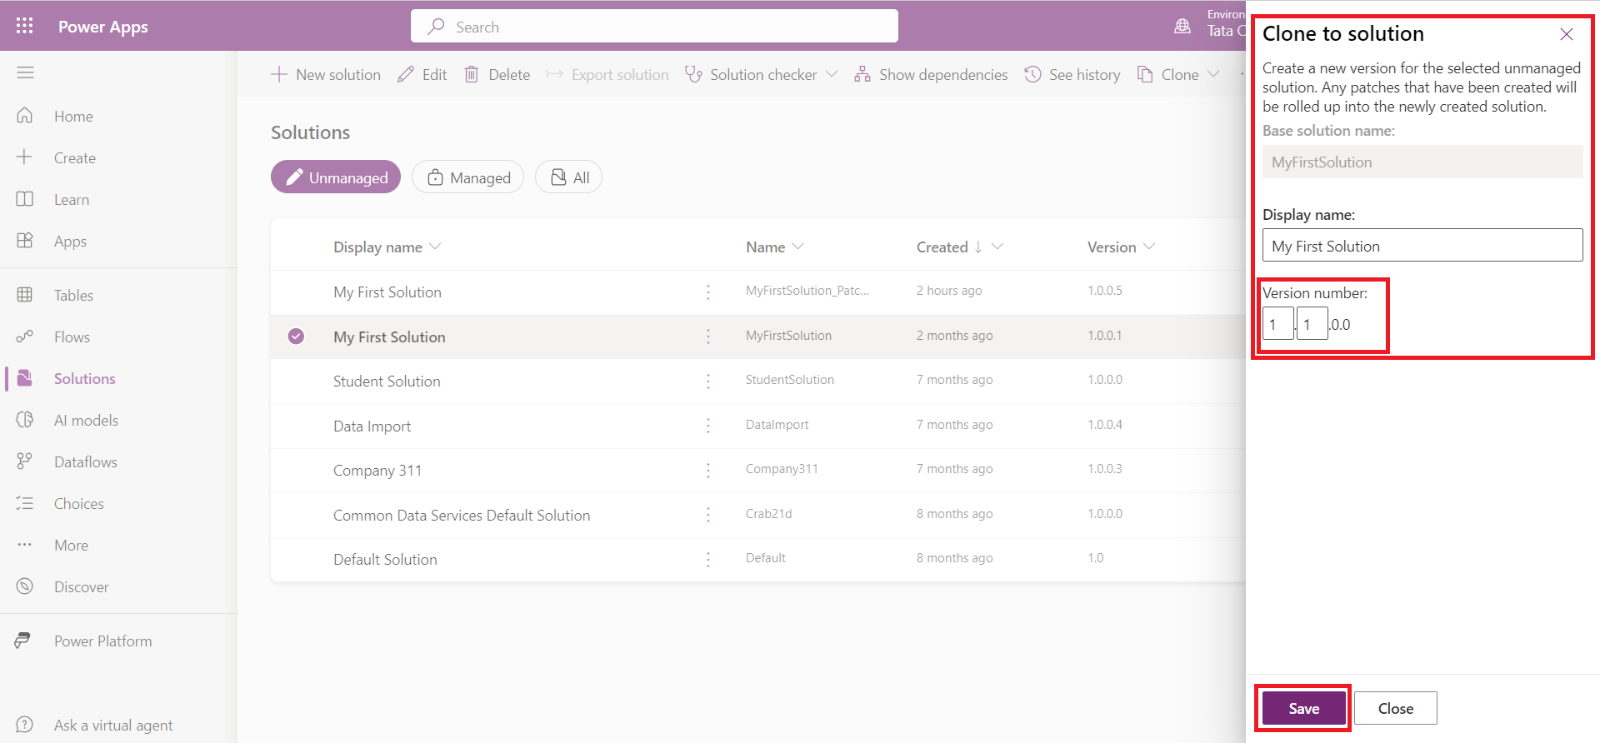
Please note in the Clone to solution dialog box, we can see the message, "Create a new version for the selected unmanaged solution. Any patches that have been created will be rolled up into the newly created solution."
And the version number (major) is automatically updated to the next one. This time we are able to update the major and minor positions of the version number.
After the successful Clone operation, we are not able to see our patches anymore, as they are merged into our base or parent solution as shown in the image below.
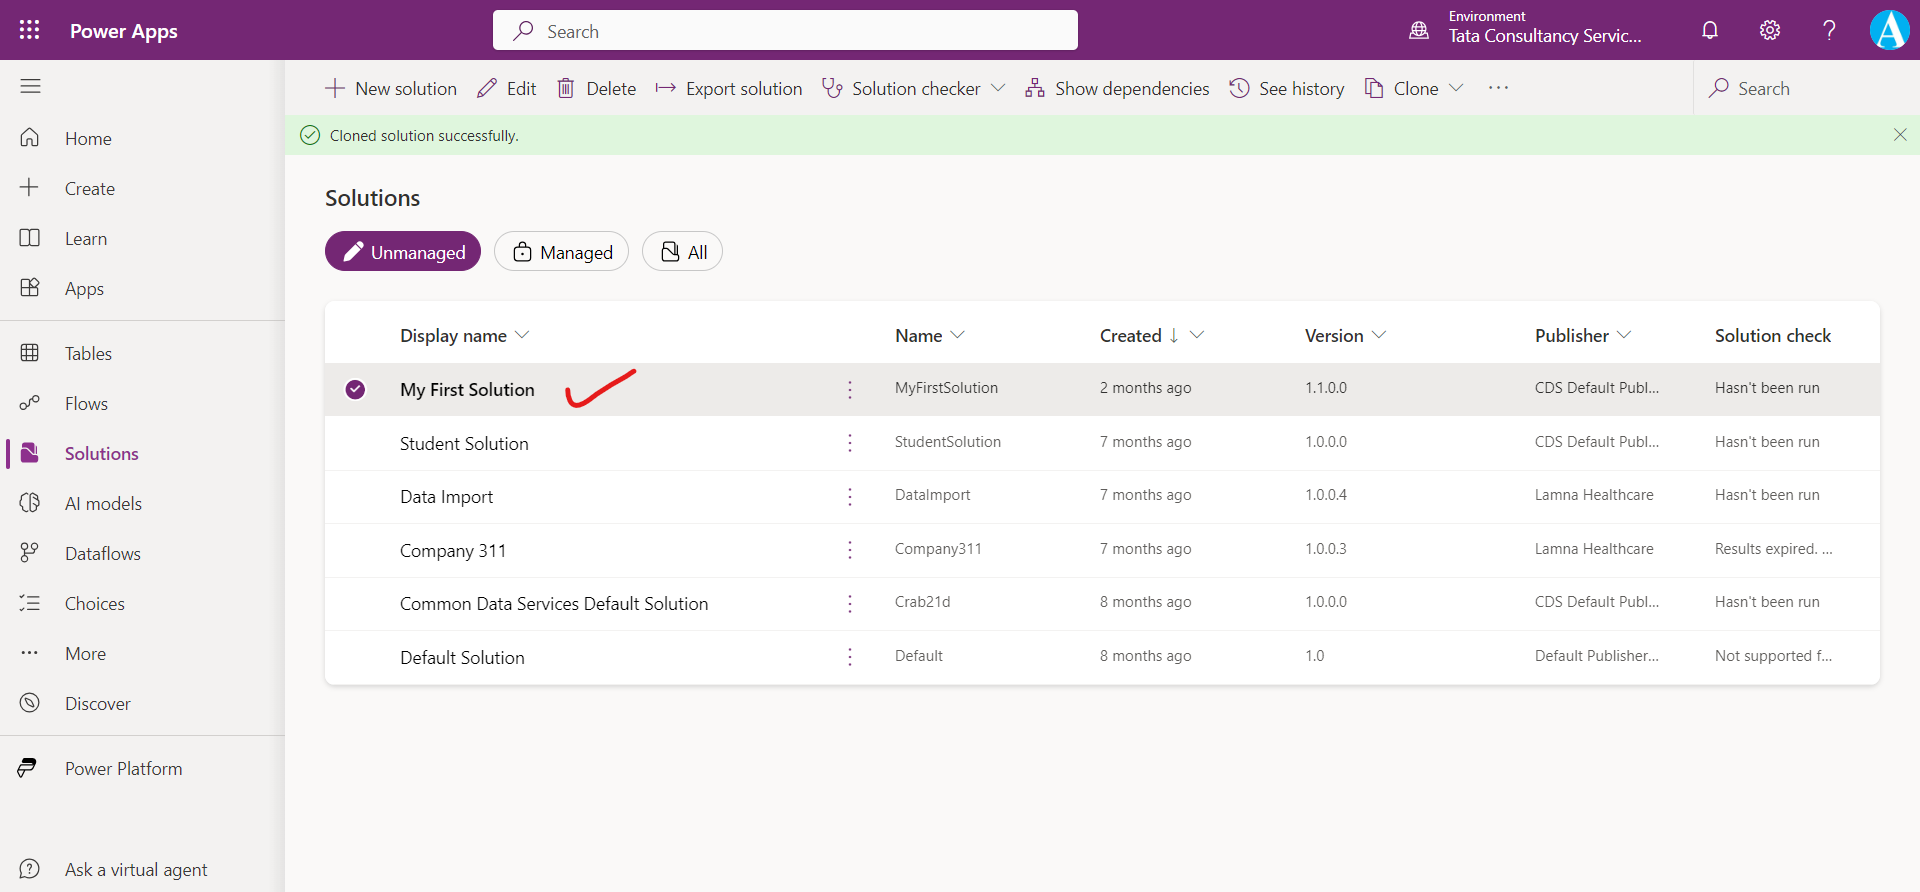
We can add, edit, or delete components and assets in the cloned solution.