Create a Microsoft Dataverse table
We have many predefined tables in Dataverse which we can use. We can also create a custom table.
To create a new table in Dataverse, follow these steps:
Step 1: Go to the Power Apps and sign in with the organizational account.
Step 2: In the left navigation pane, select Tables, and then select + New table.
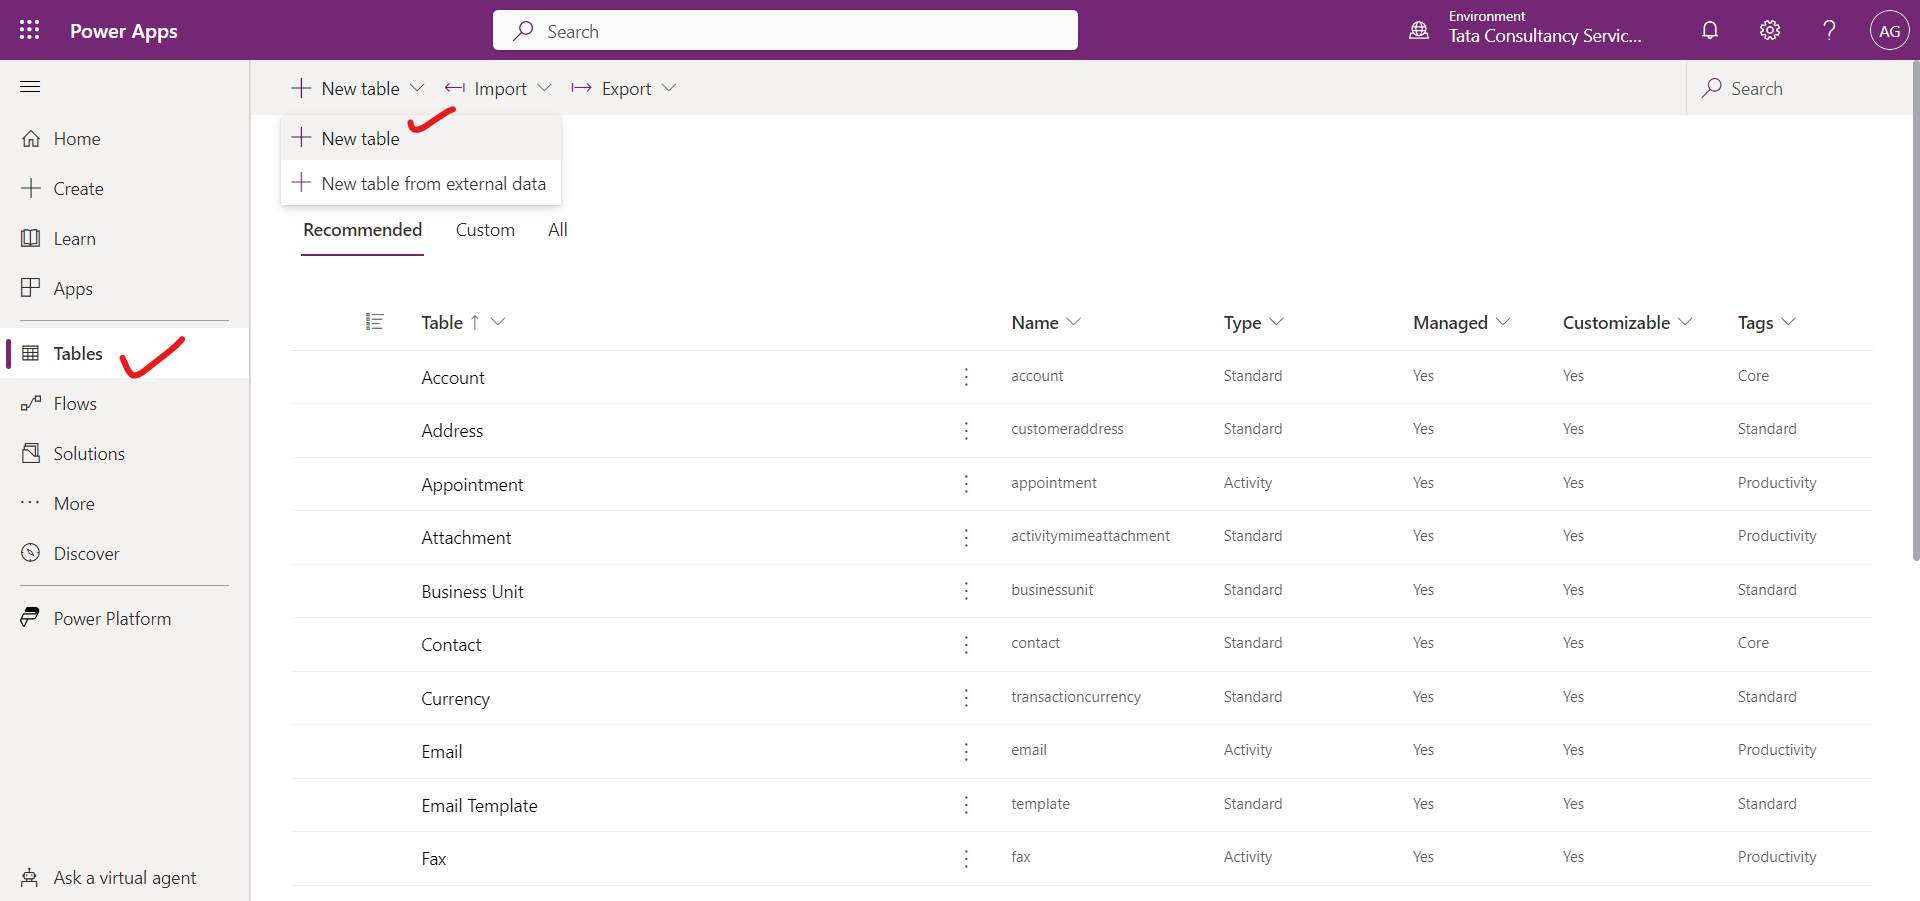
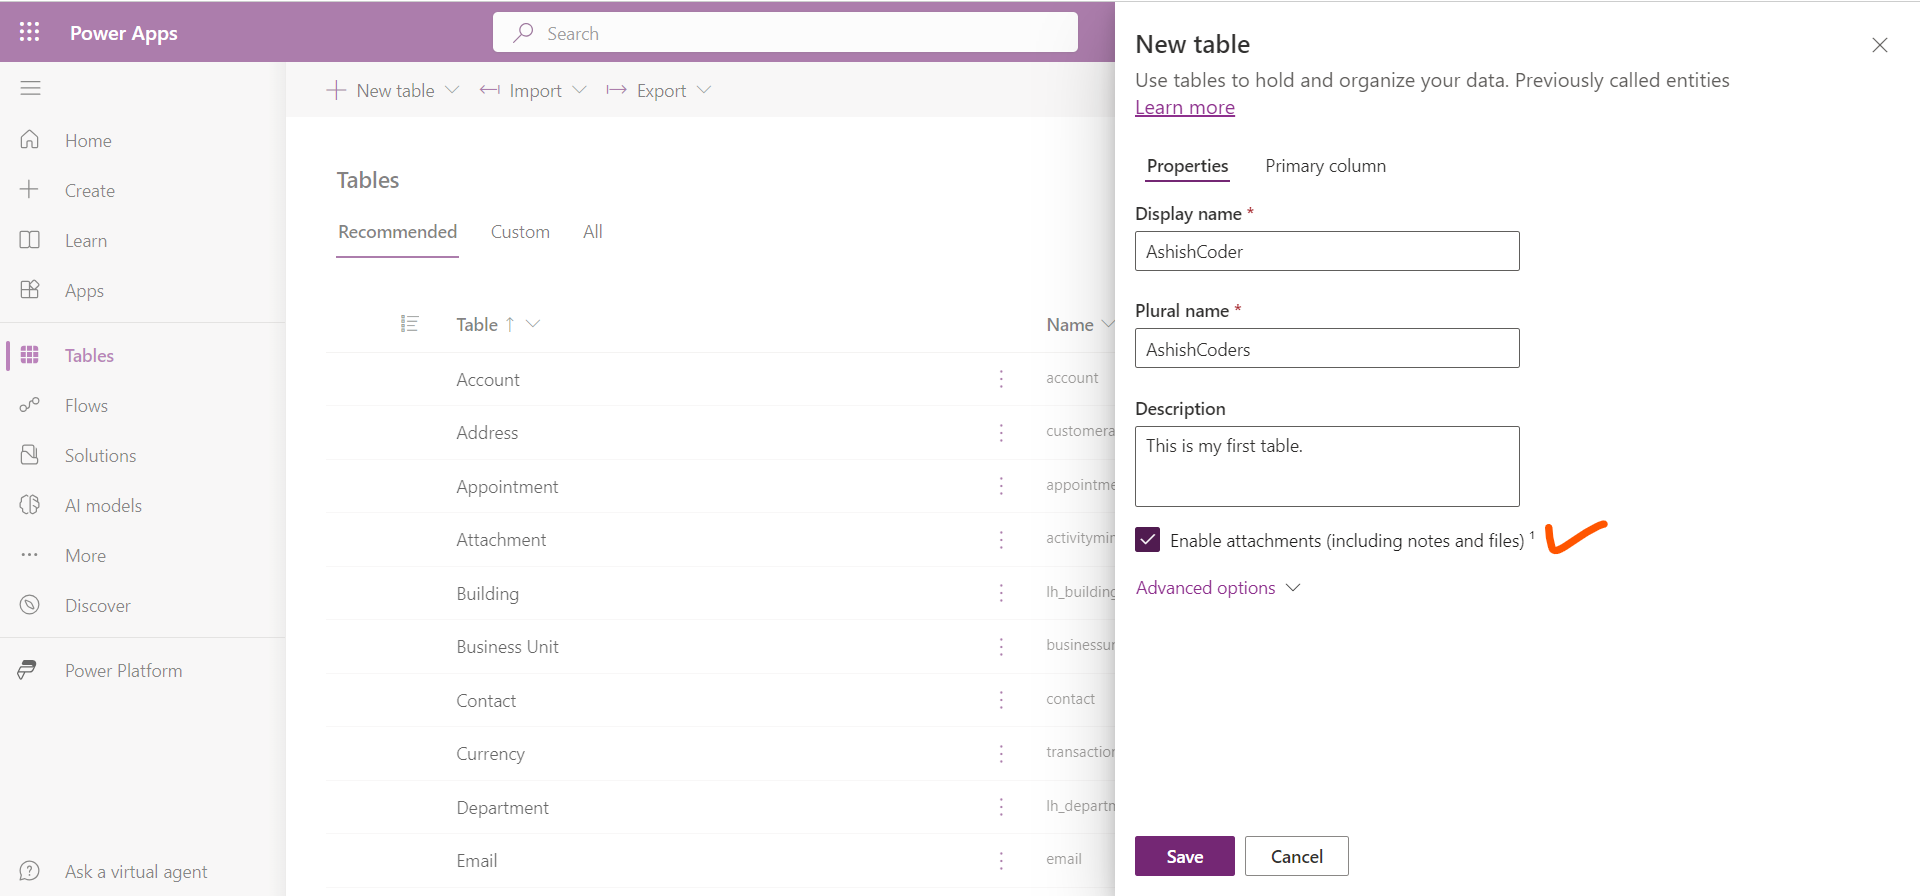
A New table pane is opened at the right of the screen.
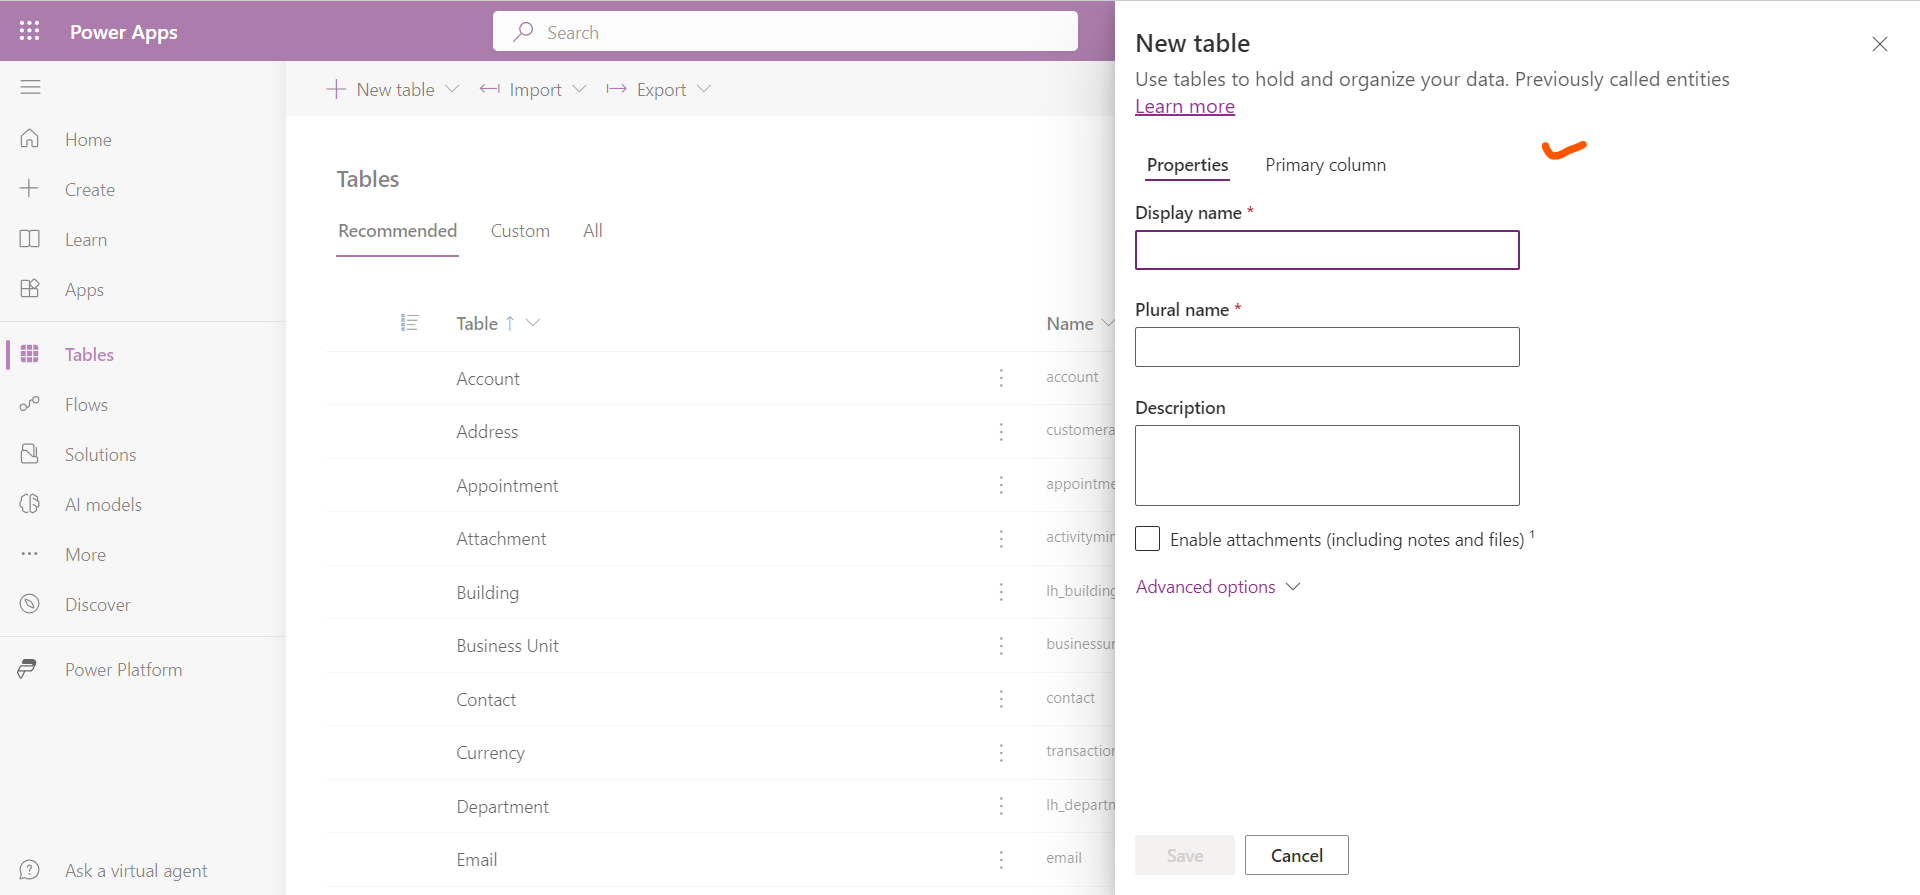
There are the following fields in the New table pane:
• Display name: The Display name field is the name of the table which is shown to users in Dataverse.
• Plural name: We will use the Plural name in model-driven apps and when we are writing to Dataverse through Microsoft Power Automate. If we enter a display name, we will notice how the Plural name auto-populates with an "s" after it, but we can also change the plural version manually.
• Description: We can write the description about the table.
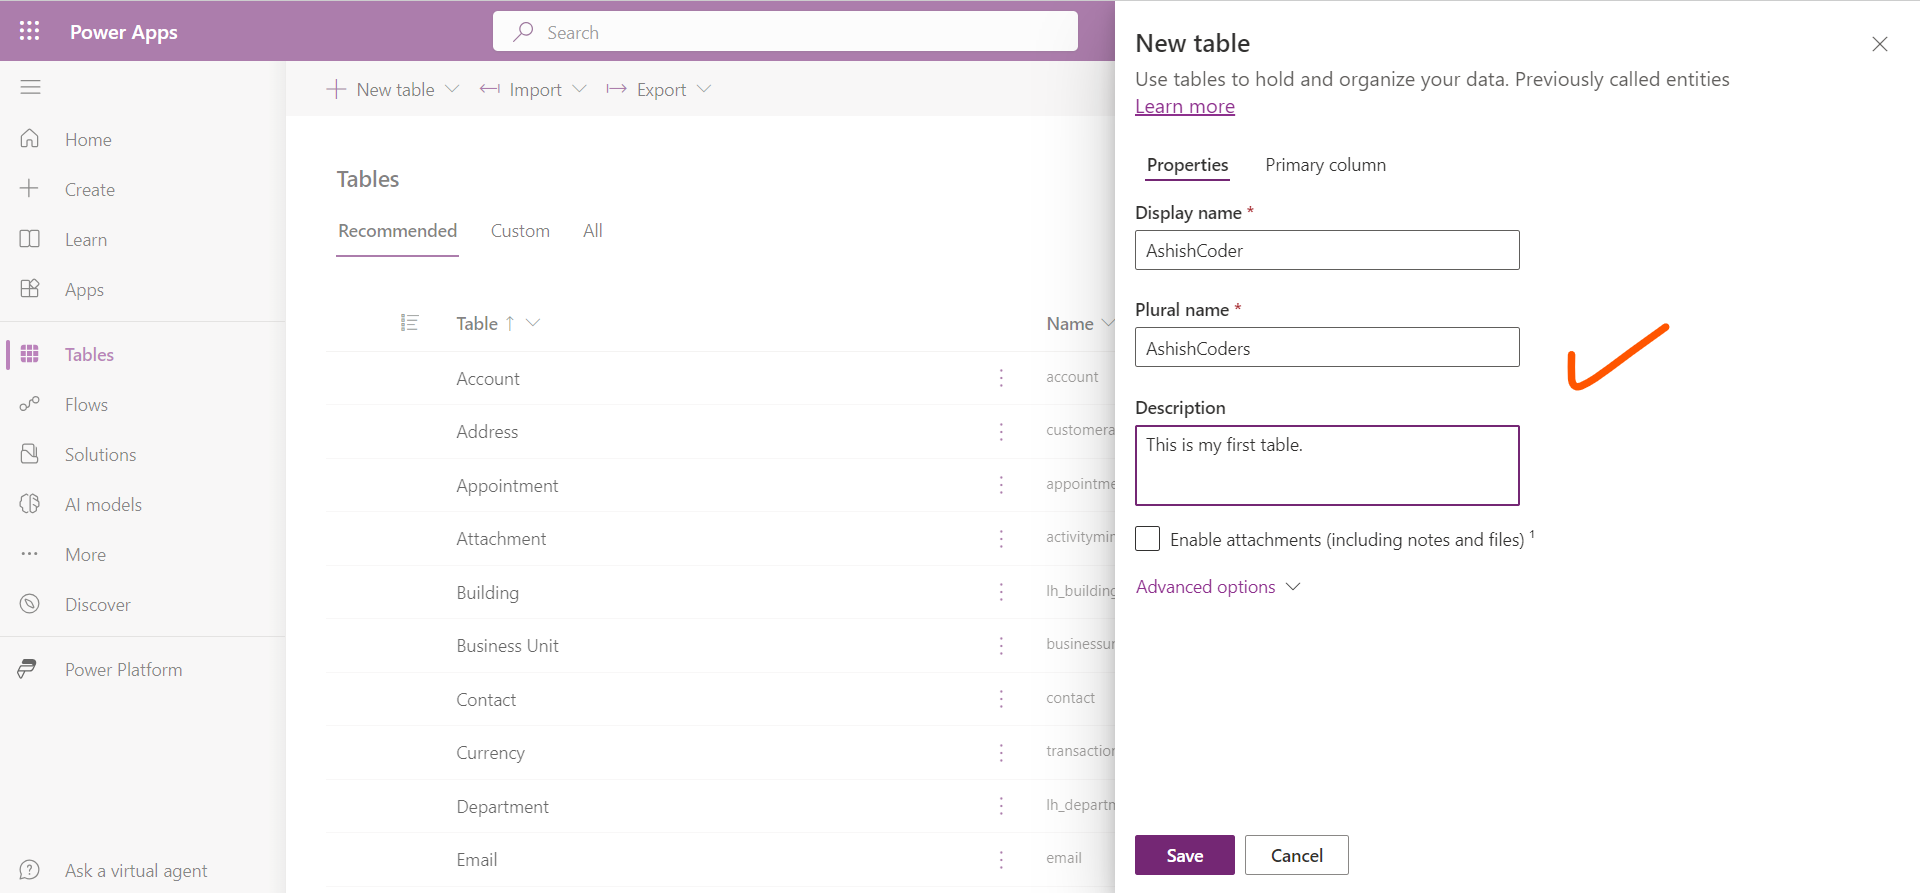
Step 3: We can also include attachments by selecting the checkbox Enable attachments. We can enable attachments after creating the table also, so we don't need to know on creation of the table whether our solution requires this functionality.
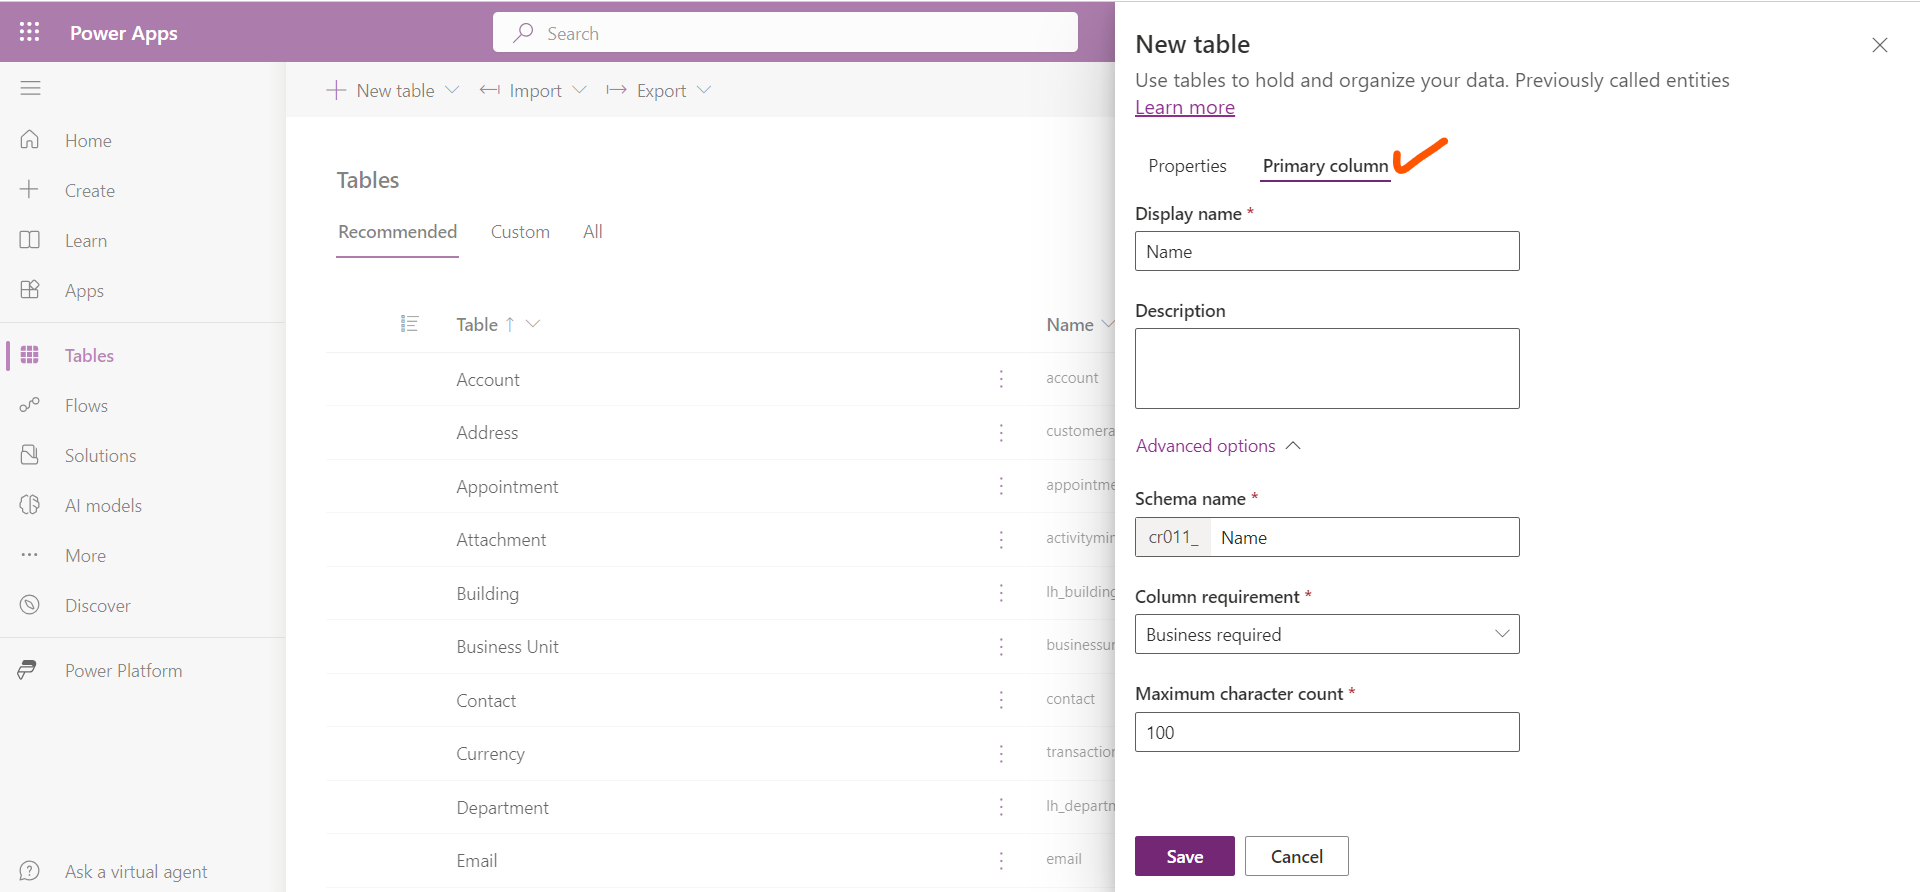
Step 4: Now click on Primary column tab, the Primary column is always created by Microsoft Dataverse when we create a new custom table. Enter the name of the column in Display name. And the Description field is used to add the description about the column.
Note: By default, the name of the primary column is Name.
At the bottom, select Save.
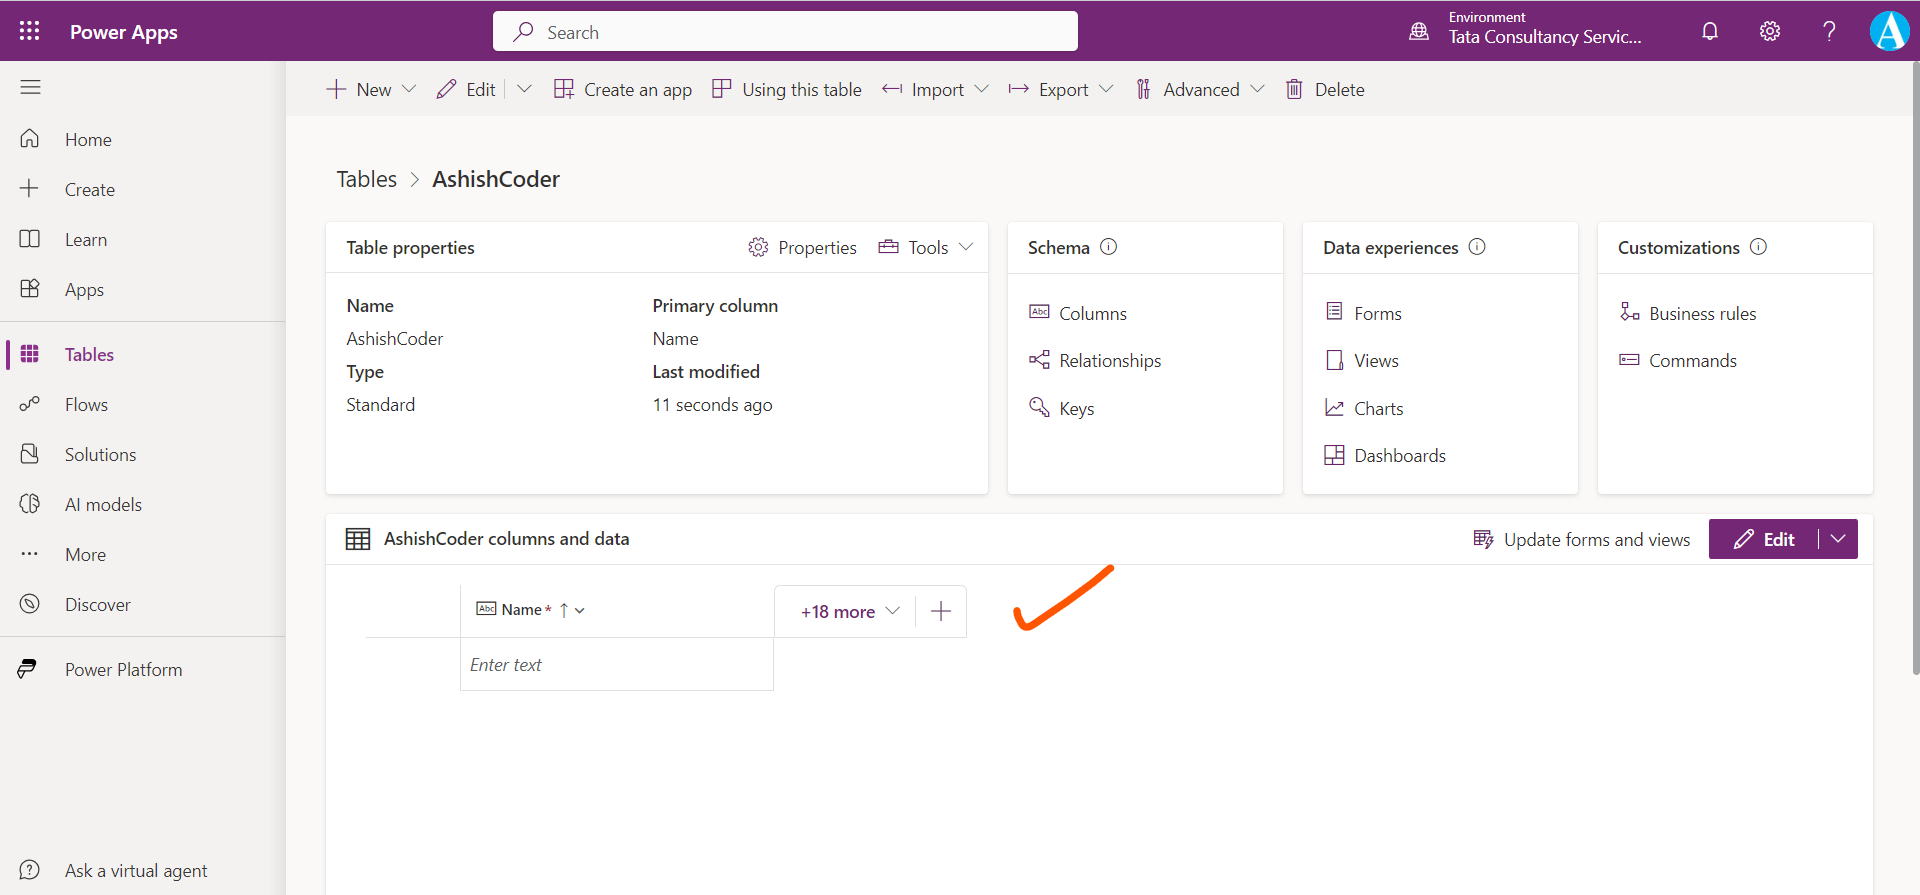
On this screen we can see by default by Primary column with +18 more and next to this a plus (+) sign.
We can select the + 18 more to see what other columns are currently available to display in our table. Dataverse has created several read-only system columns to help us organize and secure our information. Notice that there's a search field that enables quickly finding our data fields for inclusion.
Step 5: Adding a new column:
We can add columns when we create a new custom table, or we can add columns to an existing table at any time. Adding a new column is the same whether we are creating a new table or adding to an existing table.
To add a new column to the table, click on the plus sign (+), right aside of + 18 more, it opens a New column pane on the right side of the screen.
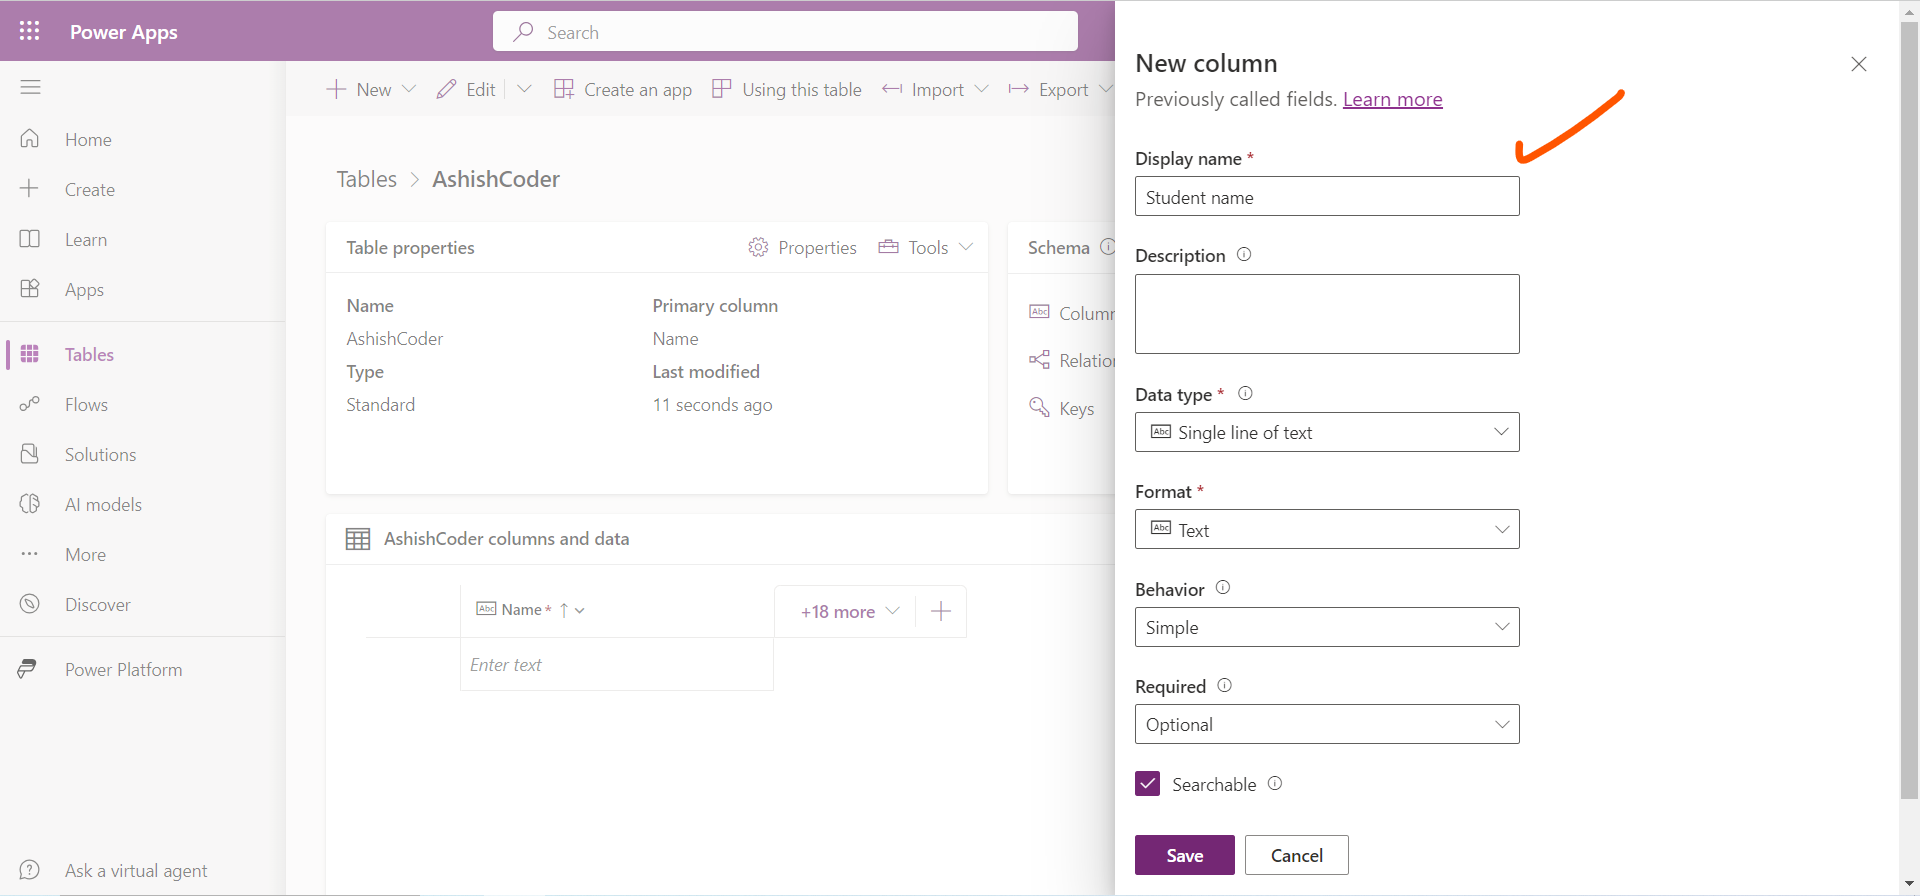
Or we can click on Columns in the Schema section, then click on + New column at the top. The New column pane is opened in the right side of the screen.
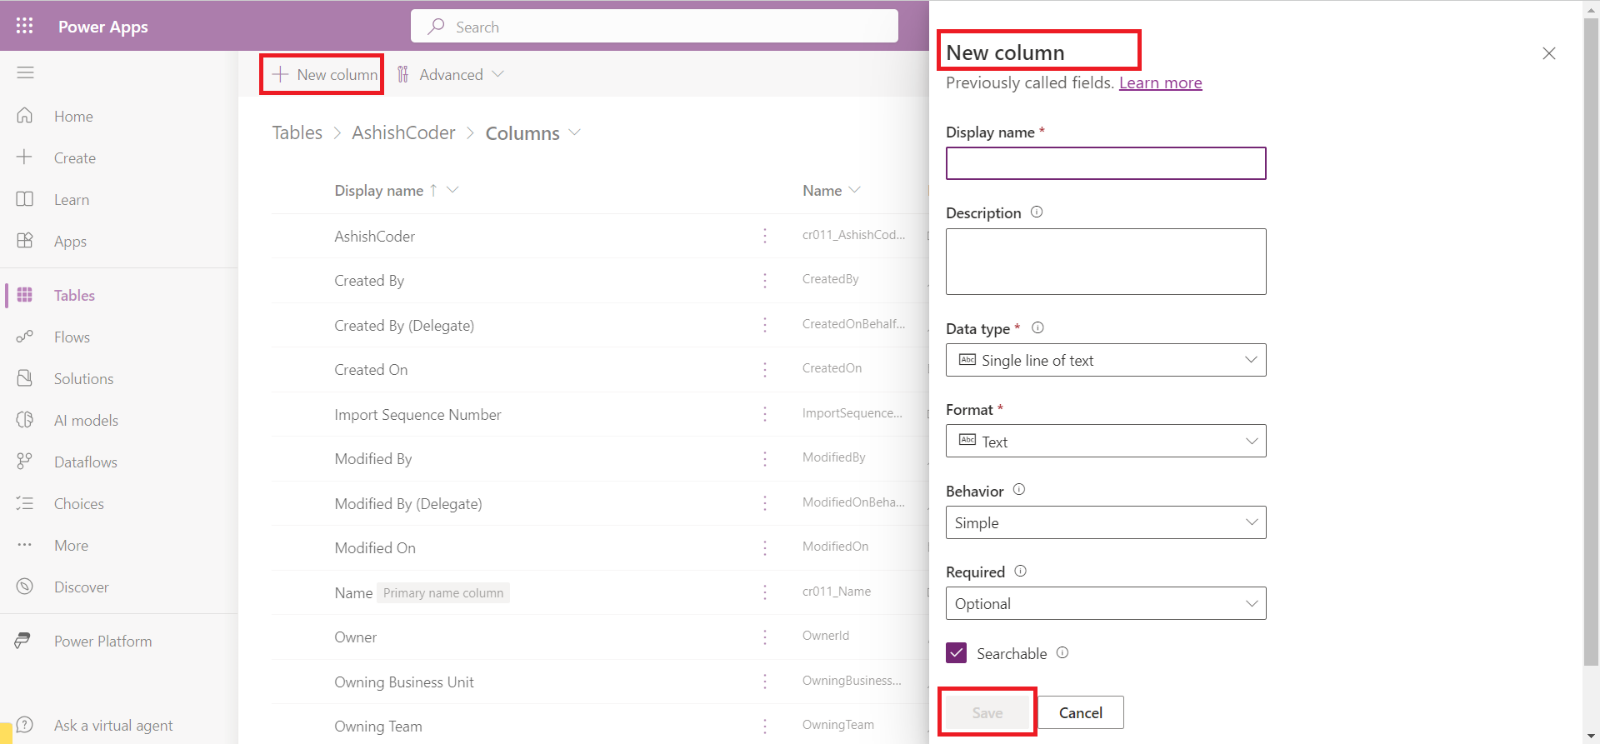
In the New column pane, enter the following values:
• Display name: It specifies the name of the column that is shown to users.
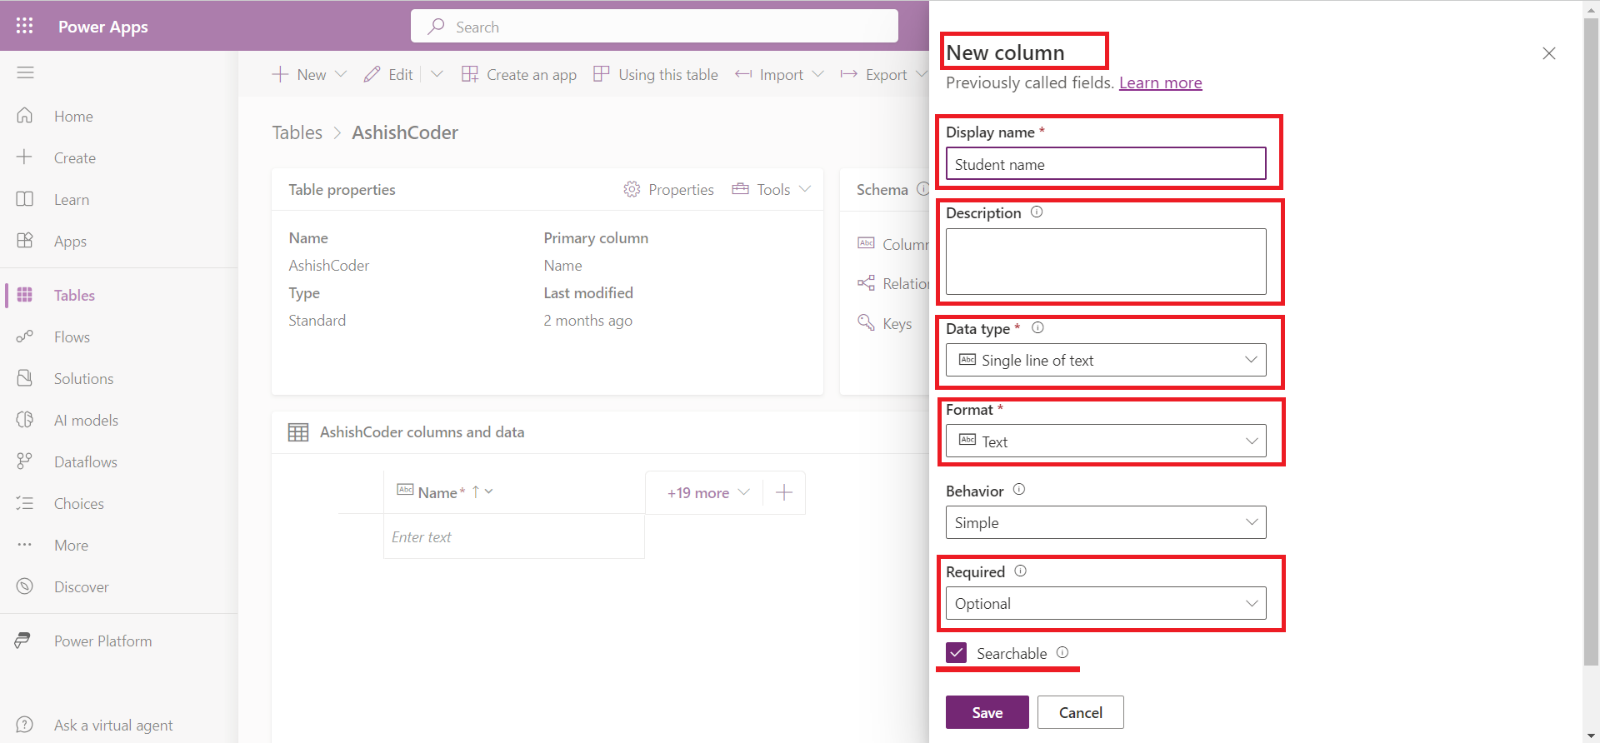
- Description: It specifies the description of the column. The description appears as a tooltip in the model driven app when the user hovers over the label name of the column.
- Data type:It specifies the Data type of the values store in this column. Defining a data type is important for data validation or to ensure that your users only enter the correct data into that column.
- Required: It specifies whether the column is optional or required when creating a record.
- Searchable: When a column is searchable it appears in Edit filters panel on views pages in model-driven apps and is available when customizing views. De-selecting this will reduce the number of options shown to people using Edit filters panel to customize views.
By clicking on the Advanced options, we can find many different options.
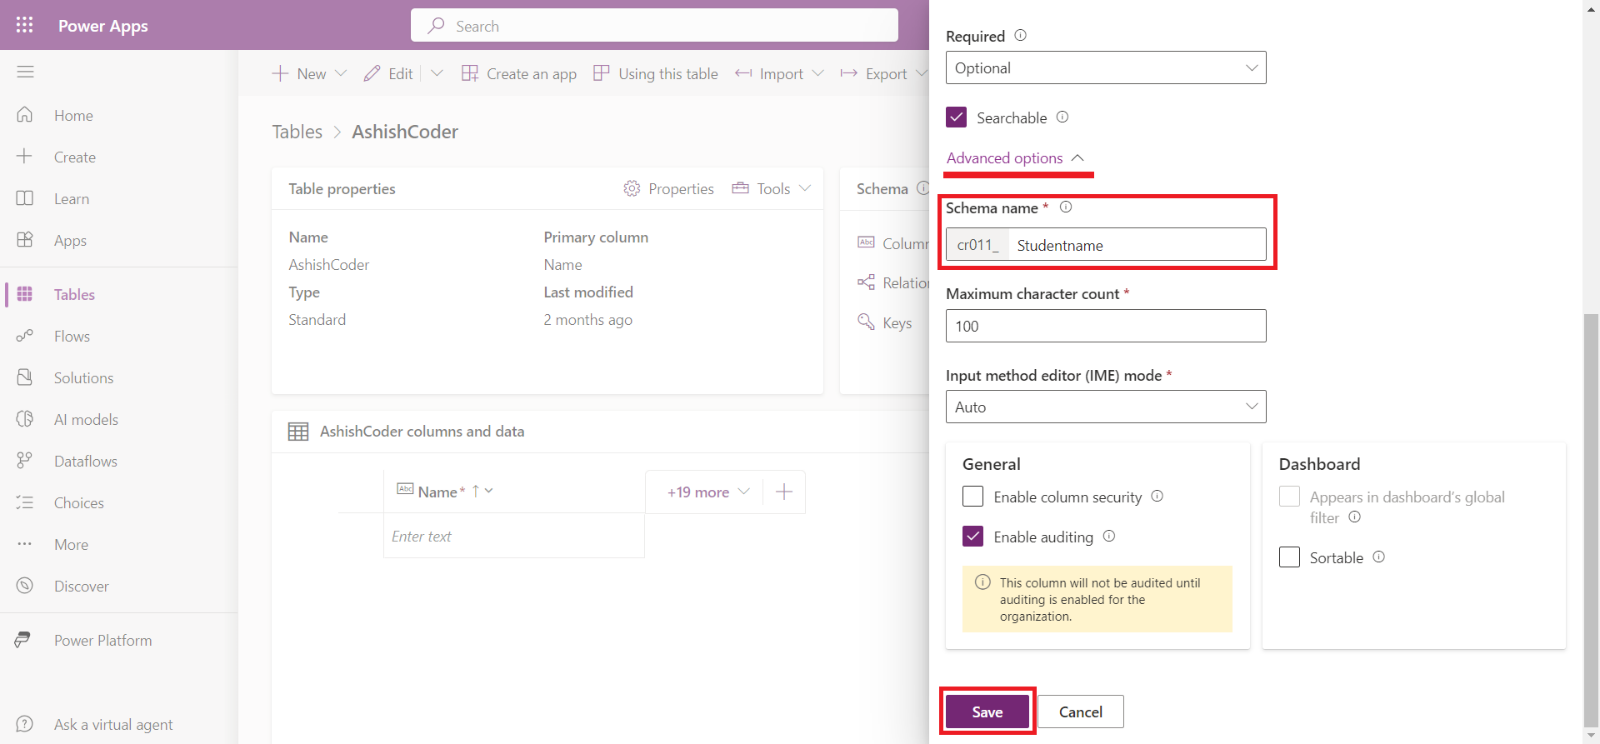
Step 6: At the end click on Save, to save the column. We can see that the column is created.
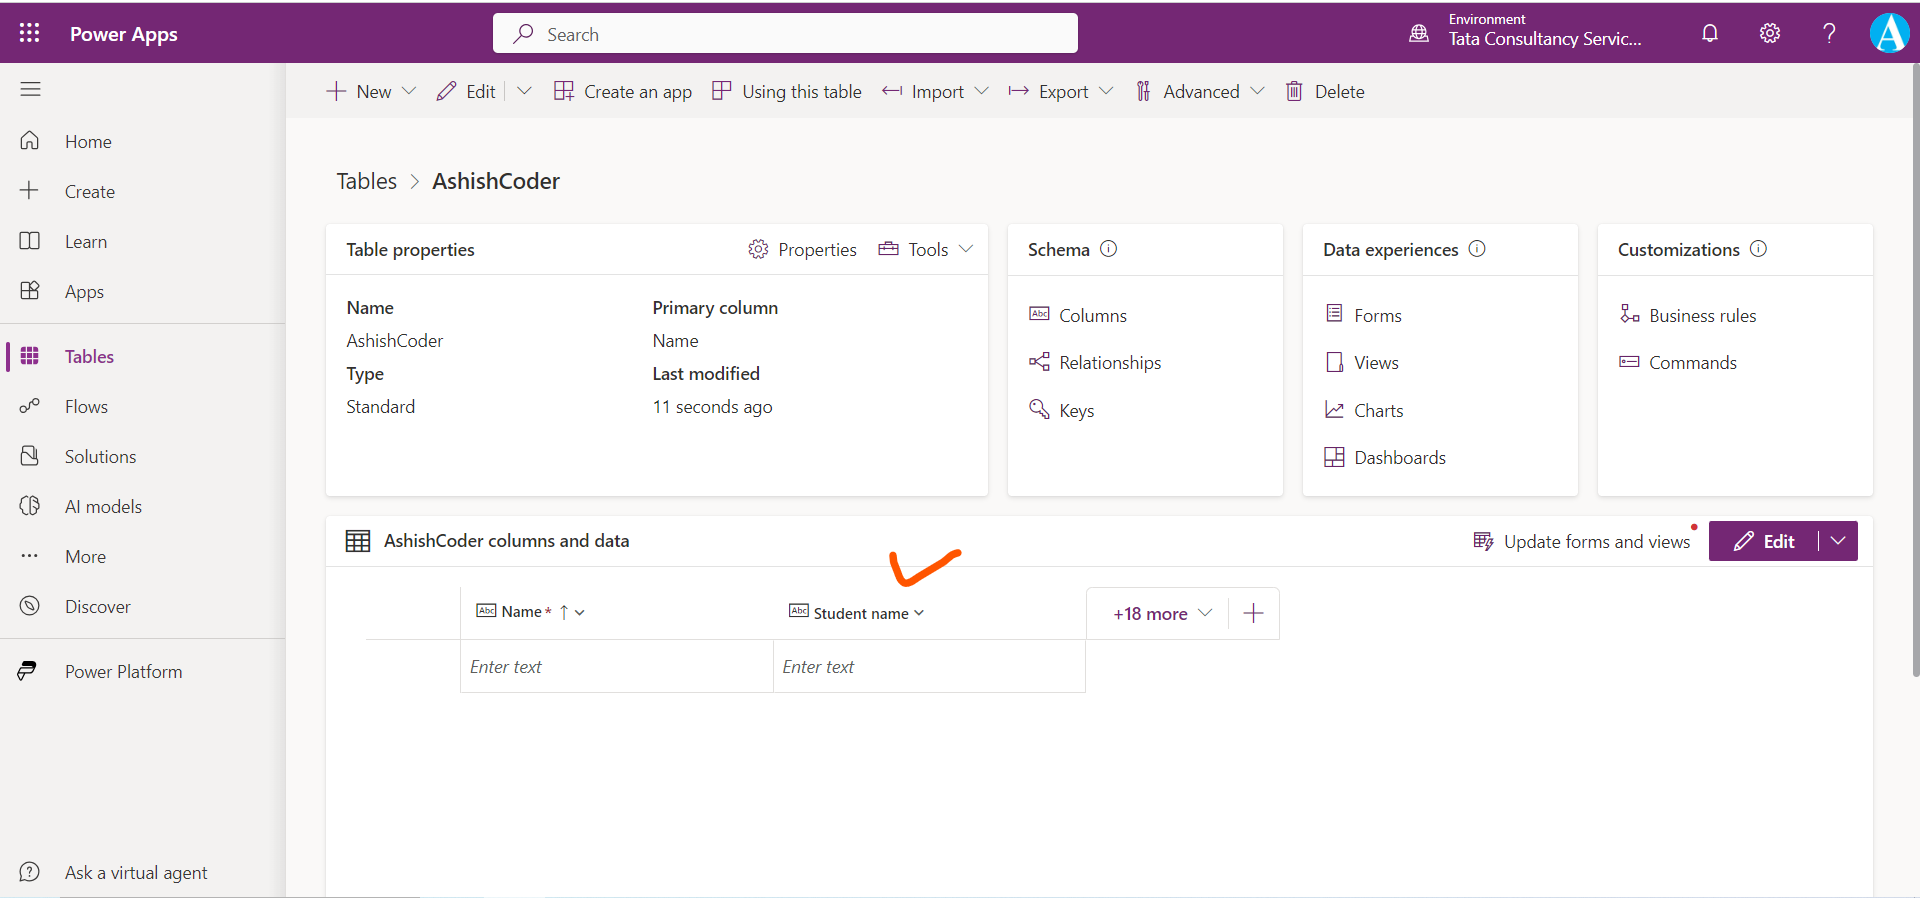
Step 7: Add one more column by selecting the + New and then Column button again. In the New column pane, enter the following values, and then select Save.
• Display name: Student DOB
• Data type: Date and Time
• Format: Date only
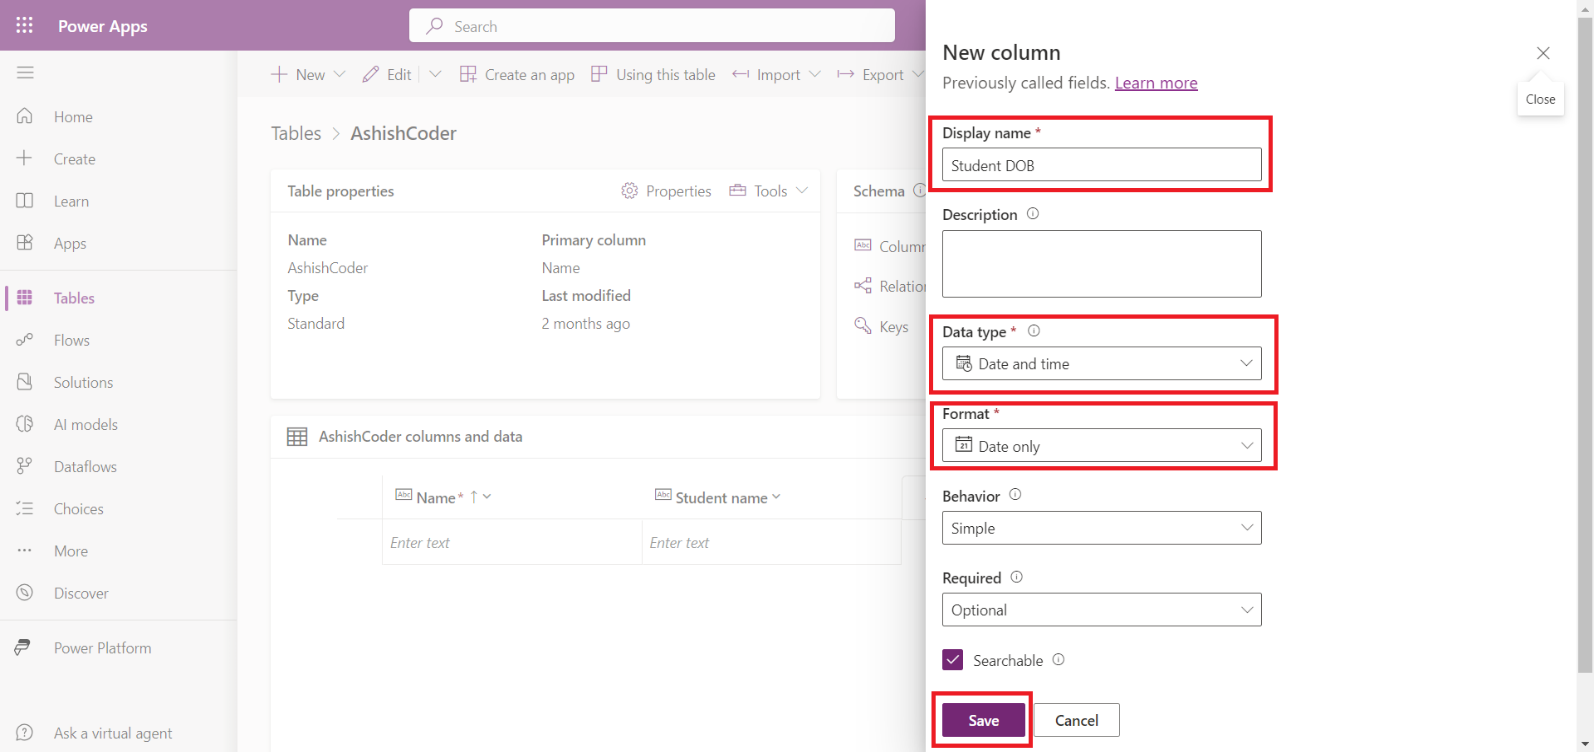
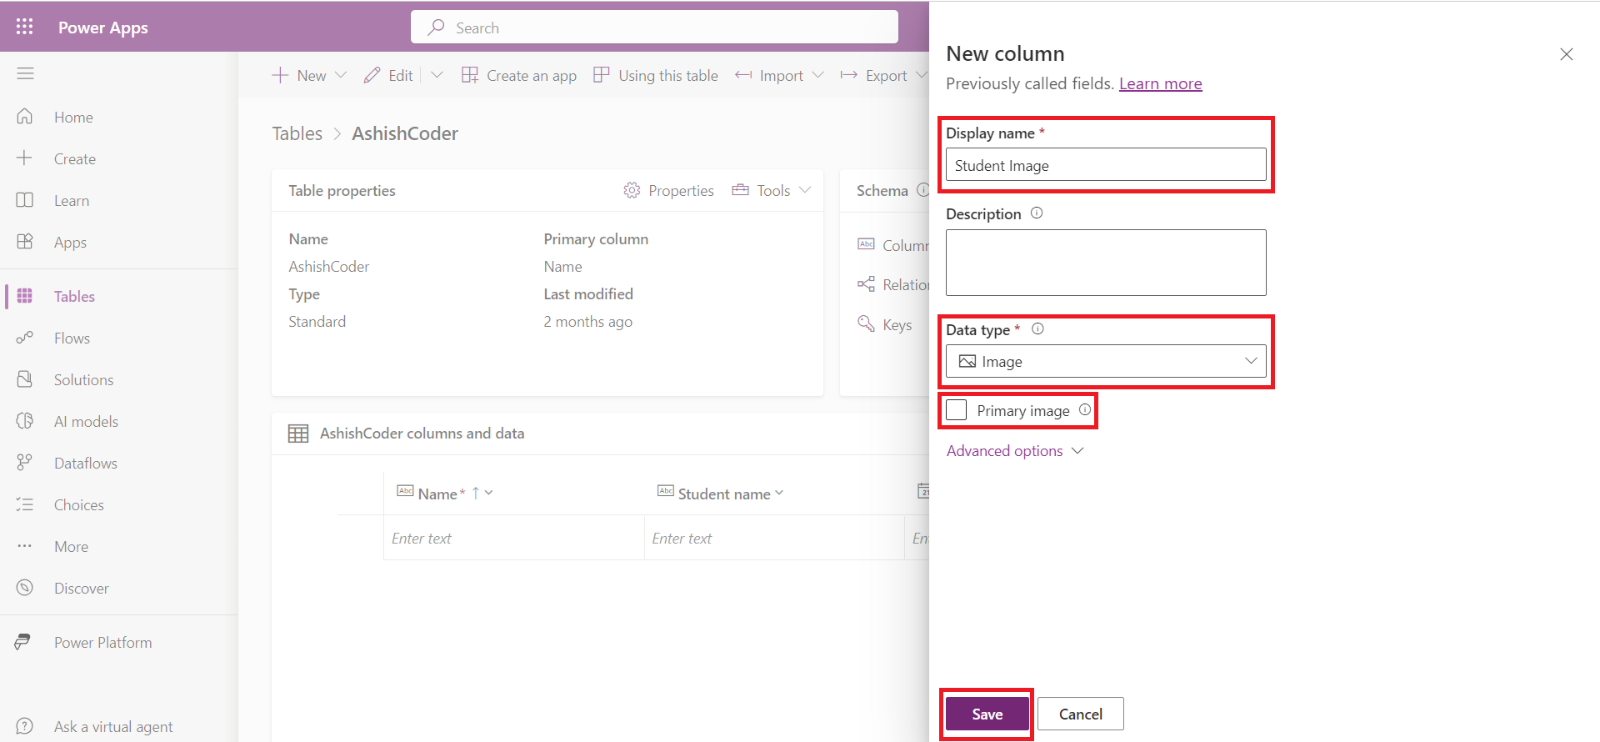
Step 8: Add one more column by selecting the + New column button again. In the New column pane, enter the following values, and then select Save. • Display name: Student Image
• Data type: Image
• Primary Image: select this checkbox (This image will be used as the main Student picture)
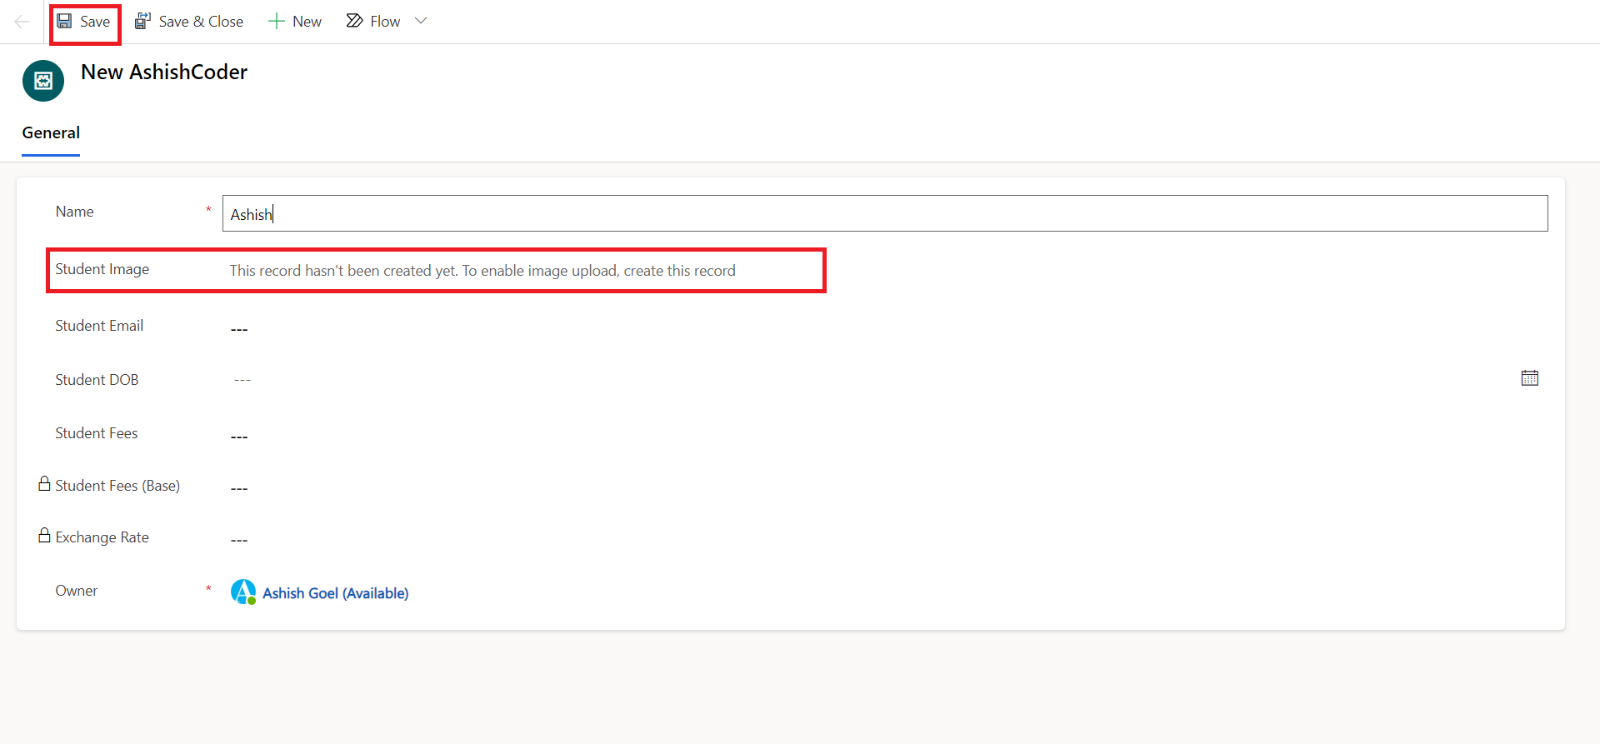
Add the image column to the form, when we are creating a record, it shows us that to enable image upload, we first need to create the record.
So, first must fill all the required fields and then click on Save to save the record.
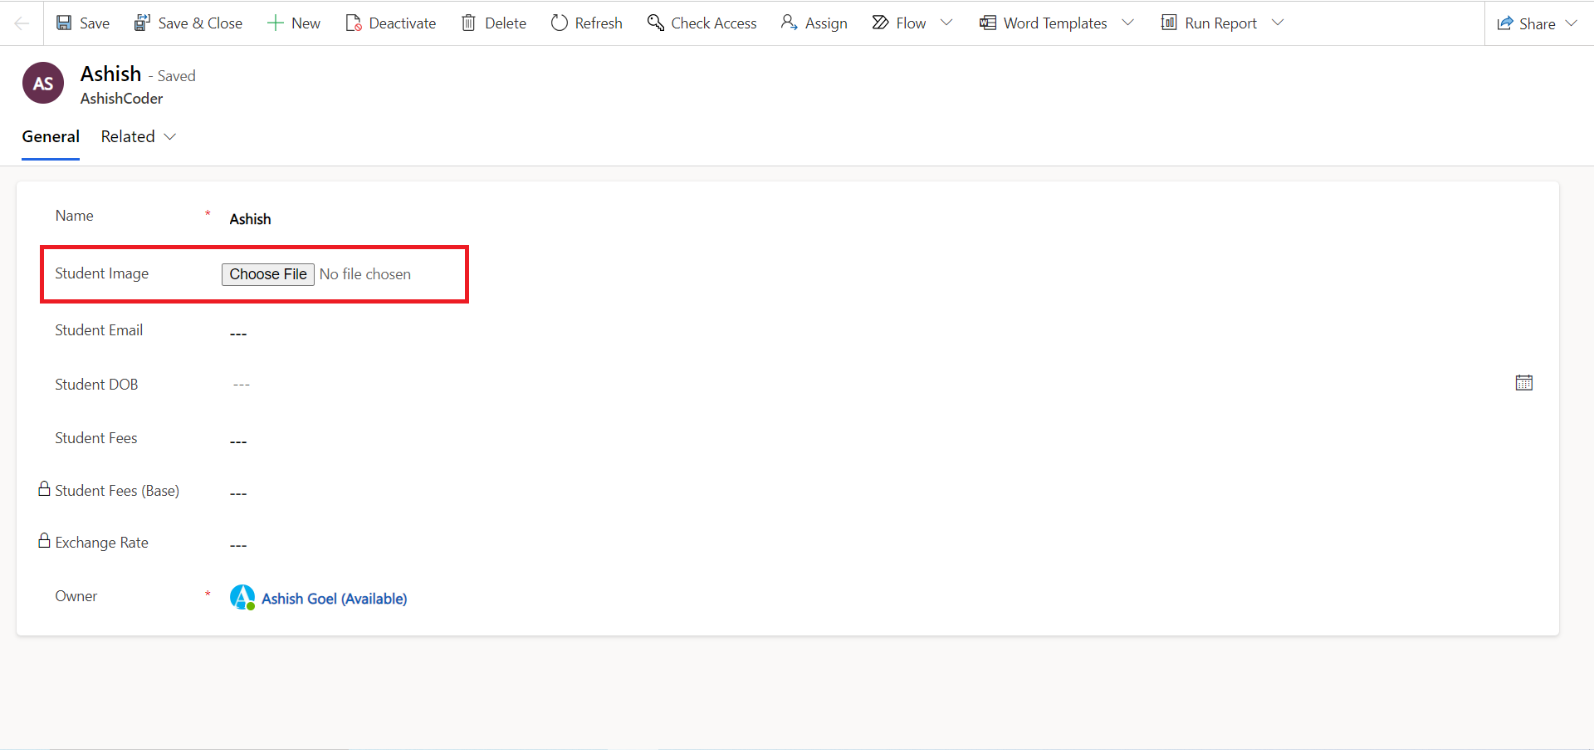
After that the image column is enabled, here we can upload the image.
Step 9: Add one more column by selecting the + New column button again. In the New column pane, enter the following values, and then select Save.
• Display name: Student Email
• Data type: Single line of text
• Format: Email
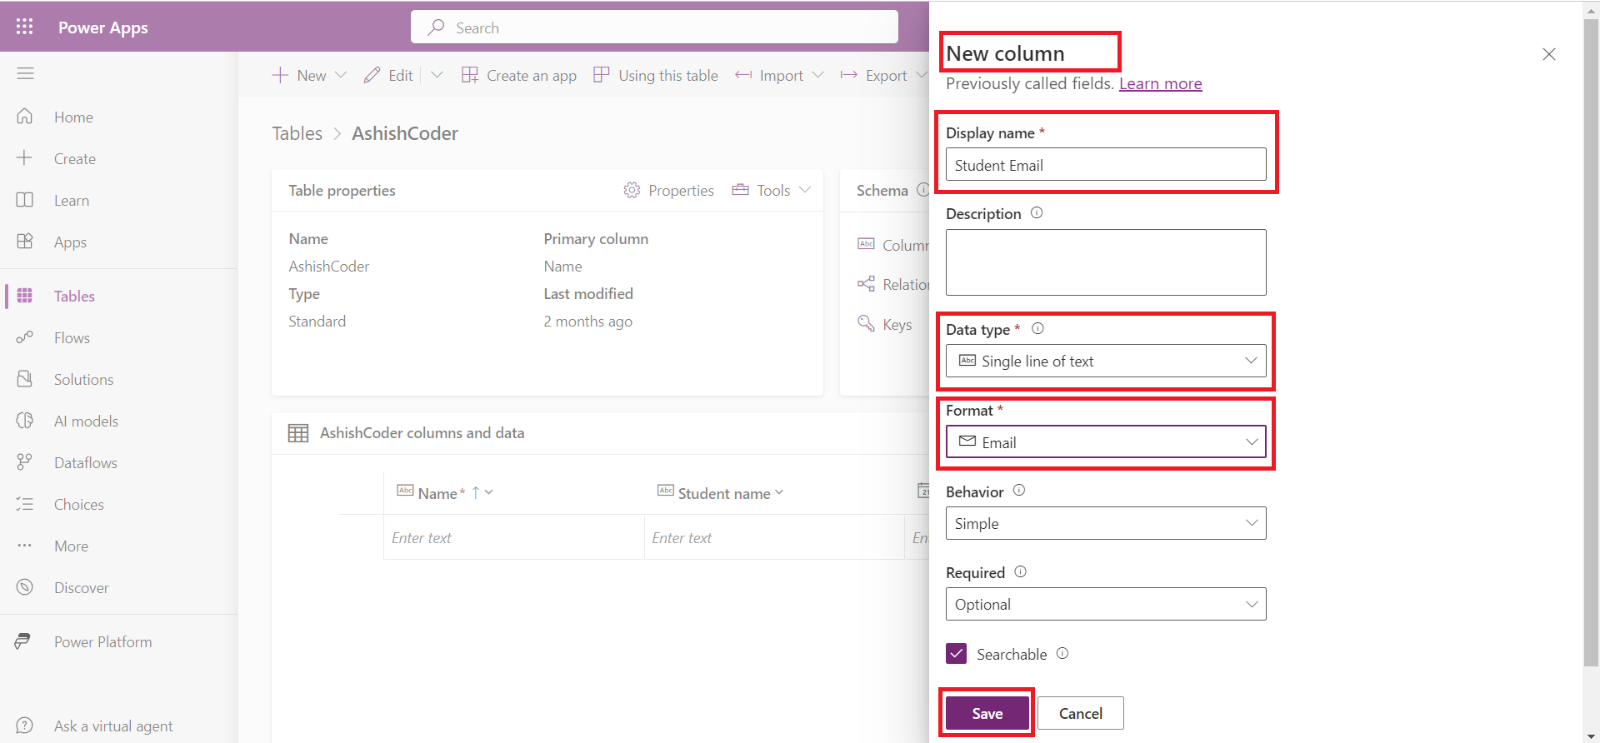
Step 10: Add one more column by selecting the + New column button again. In the New column pane, enter the following values, and then select Save.
• Display name: Sports Played
• Data type: Choice > Yes/no
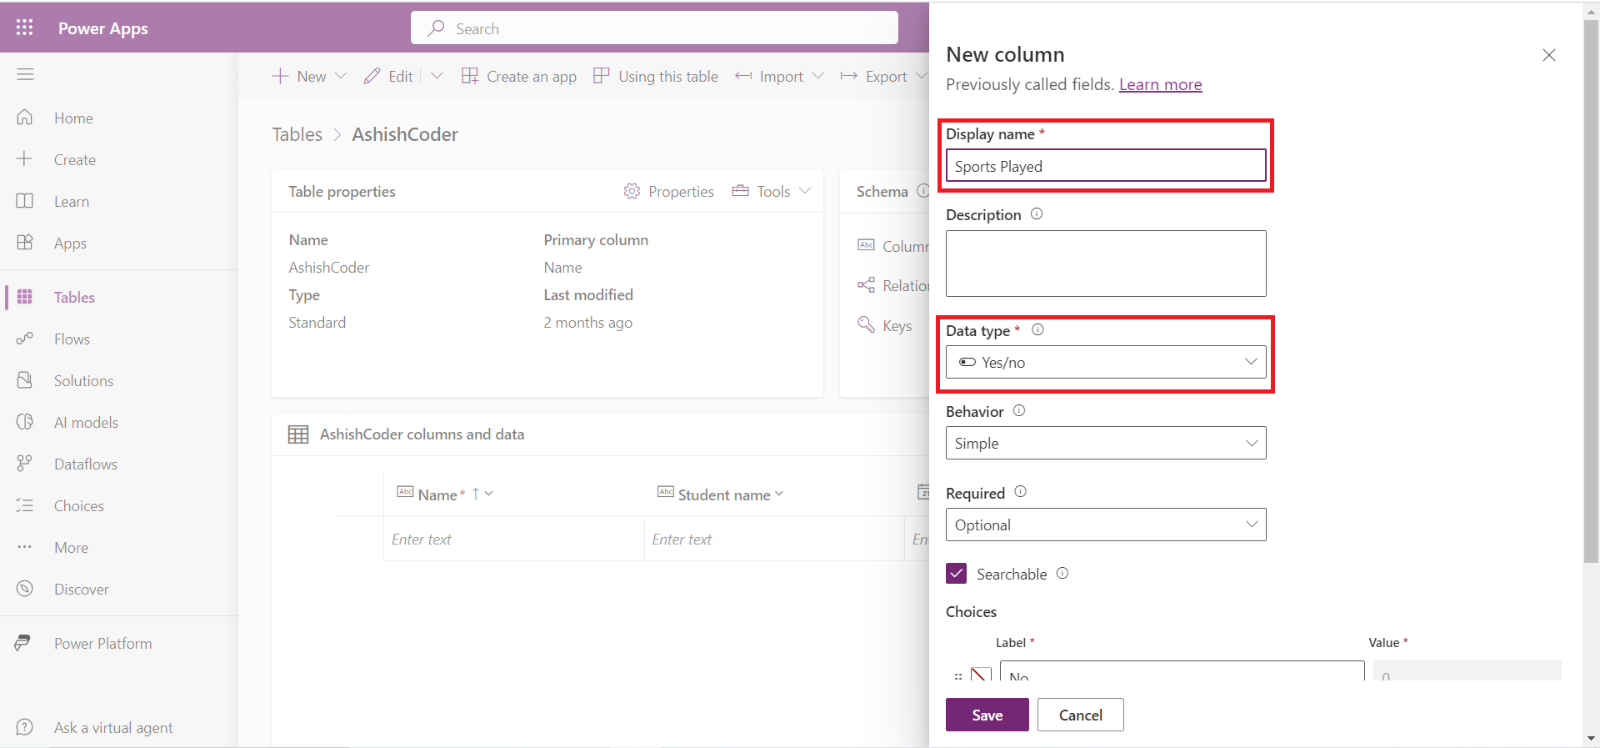
We can see that we cannot add more choices or edit the choice No and Yes and their Value.
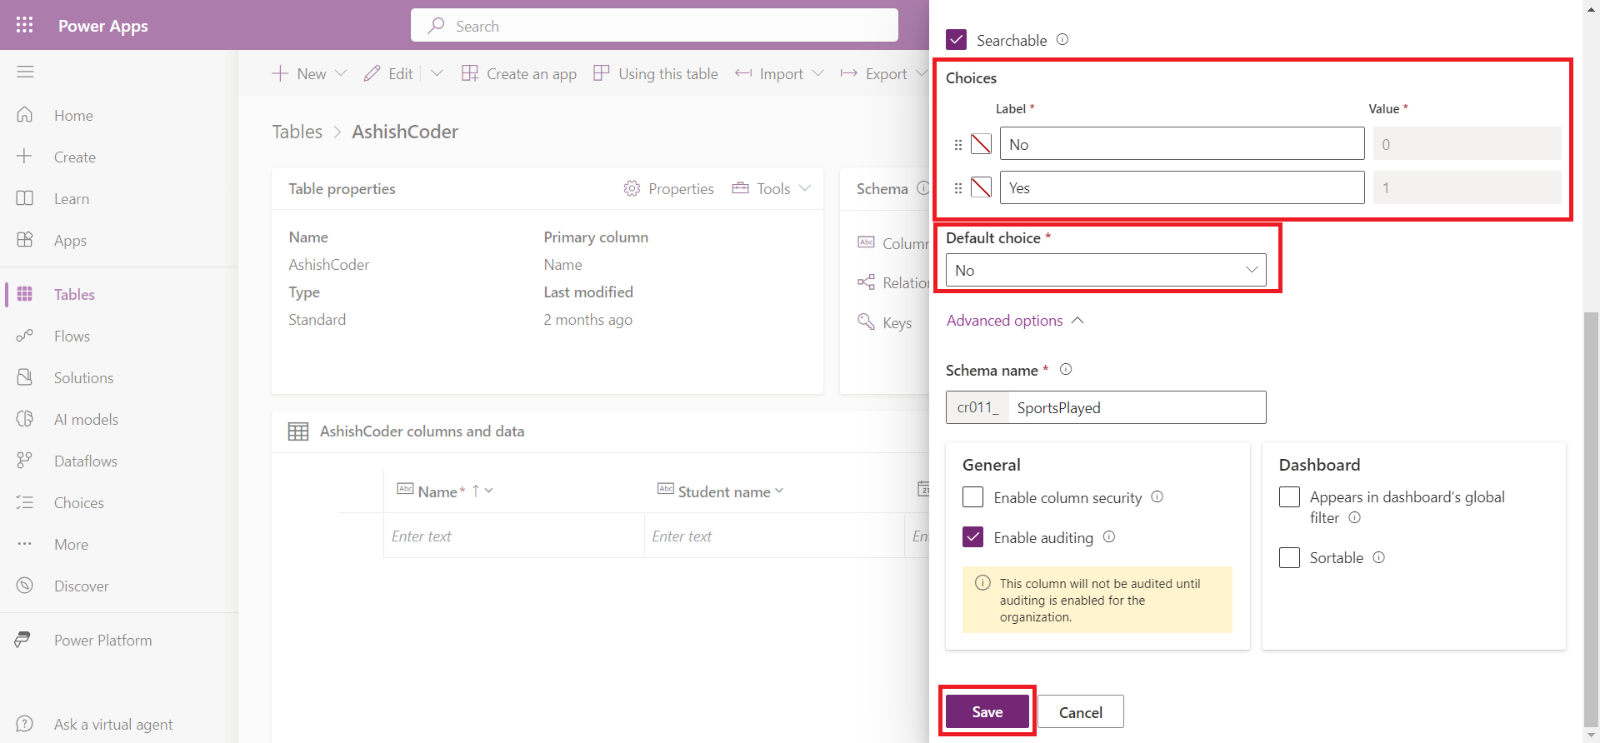
Please note the Default choice can be only Yes or No. Even we don’t have any option called None.
Step 11: Add one more column by selecting the + New column button again. In the New column pane, enter the following values, and then select Save.
• Display name – Student Fees
• Description -Yearly Fees of the college
• Data type - Currency
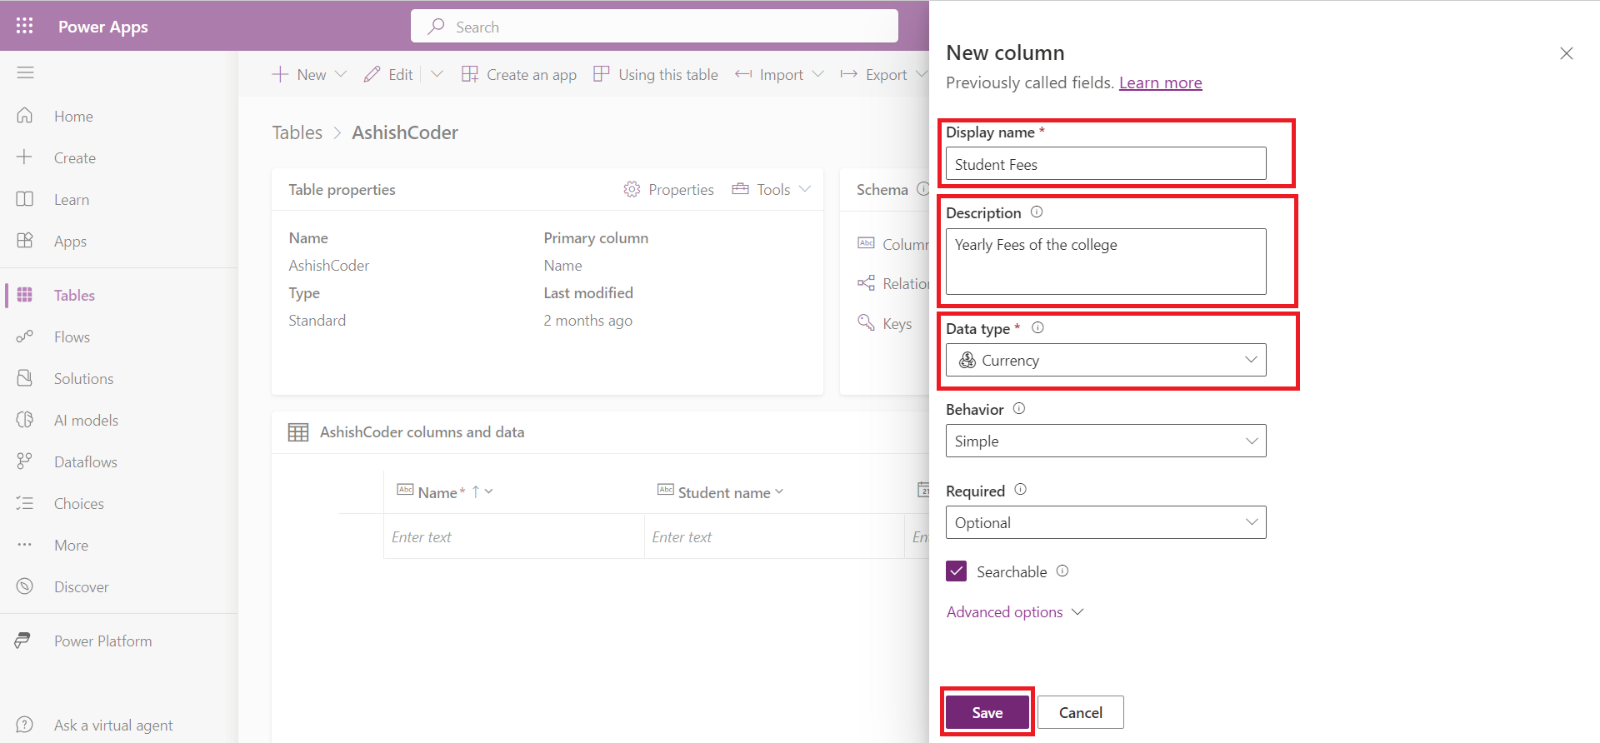
Step 12: Add one more column by selecting the + New column button again. In the New column pane, enter the following values, and then select Save.
• Display name – Class 10 Percentage
• Data type - Decimal
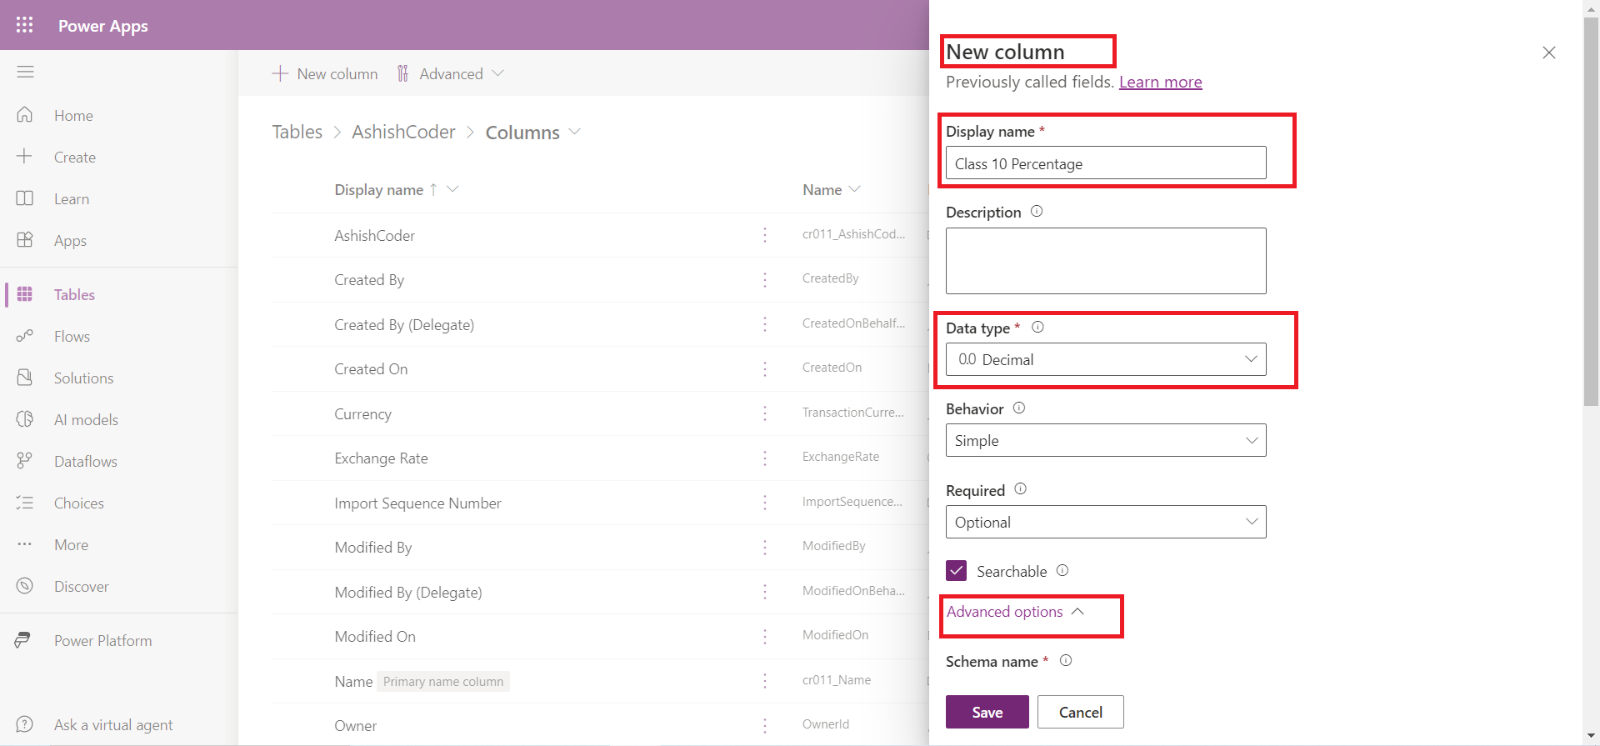
Click on the Advanced options to see the advance options. Here, we can change the number of points of precision, between 0 and 10. The default value is 2. Also, can change the Minimum and Maximum Values. The minimum and maximum value must be between -100000000000 (11 Zeroes) and 100000000000 (11 Zeroes). And the default maximum value is 100000000000 (11 Zeroes). And the default minimum value is -100000000000 (11 Zeroes).
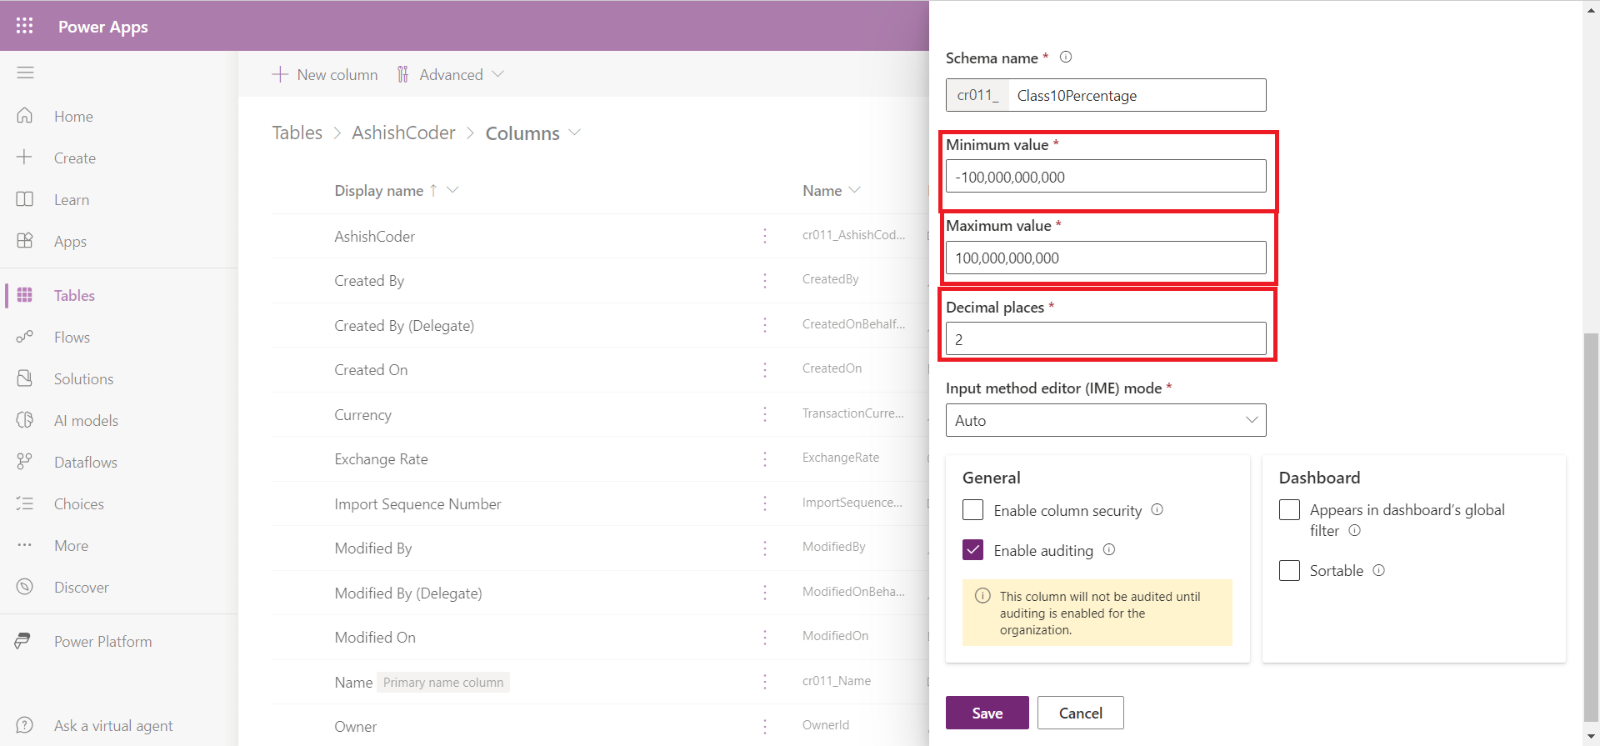
Step 13: Add one more column by selecting the + New column button again. In the New column pane, enter the following values, and then select Save.
• Display name – Family Income
• Data type – Whole number
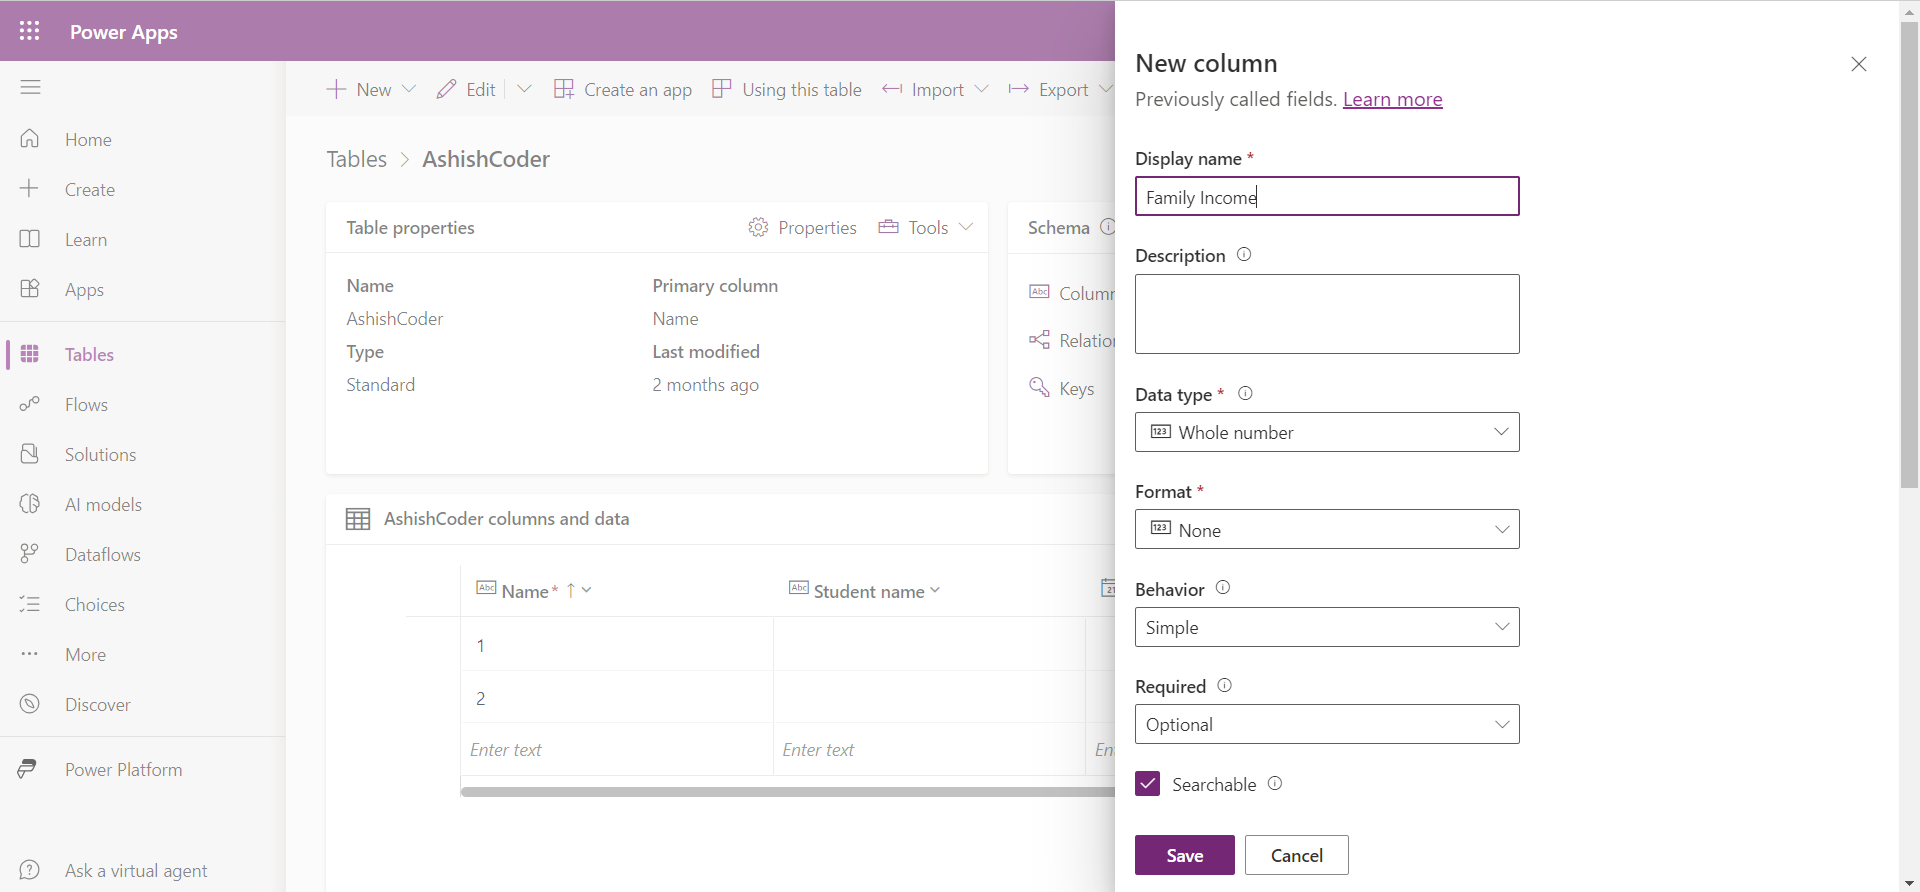
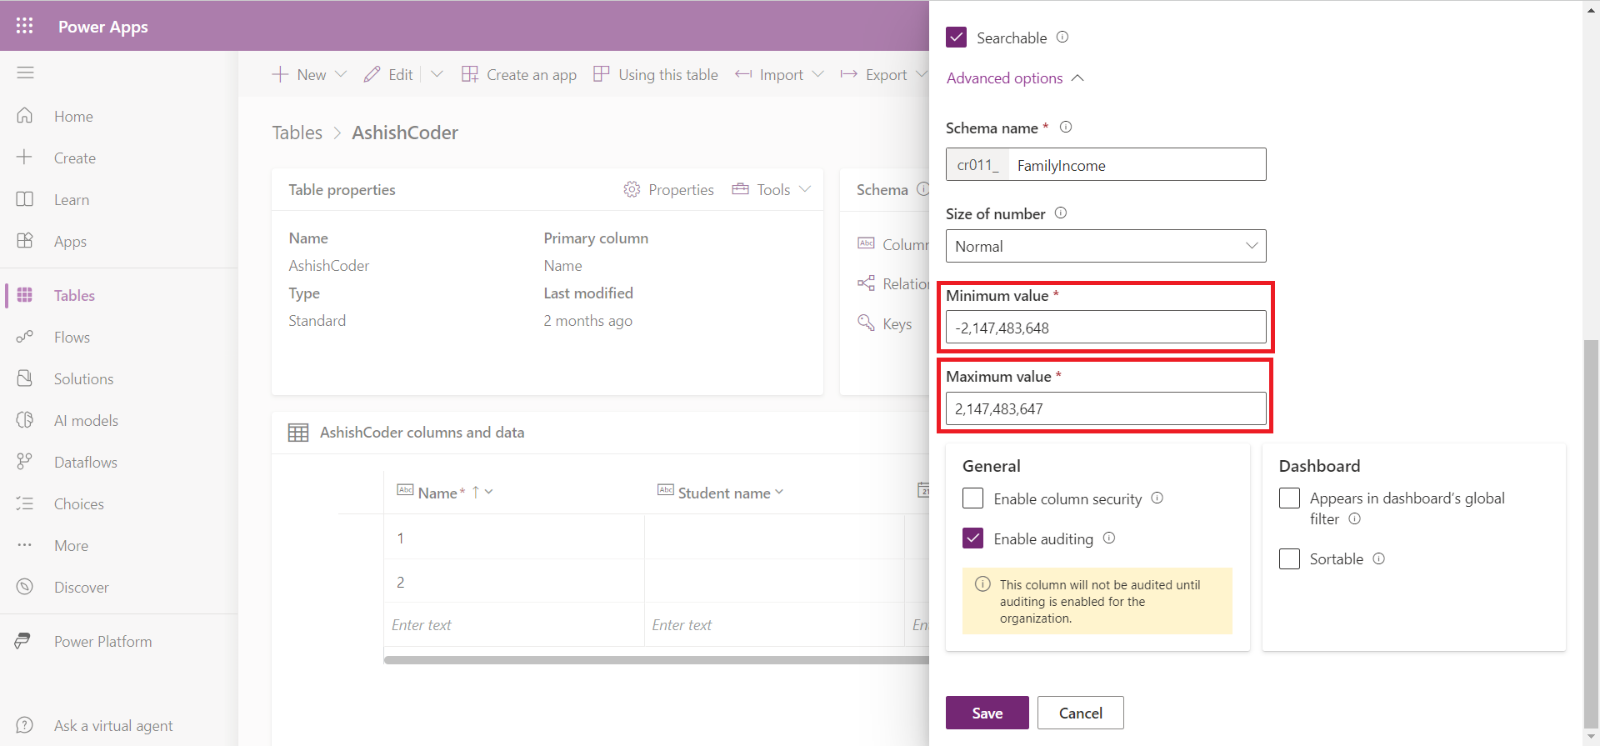
The minimum and maximum value must be in between -2,147,483,648 and 2,147,483,647. The default maximum value is 2,147,483,647 and the minimum value is -2,147,483,648.
Note: • The maximum value can’t be less than the minimum value.
• The Whole number can include negative numbers also.
Step 14: Add one more column by selecting the + New column button again. In the New column pane, enter the following values, and then select Save.
• Display name – Graduation Percentage
• Data type – Float
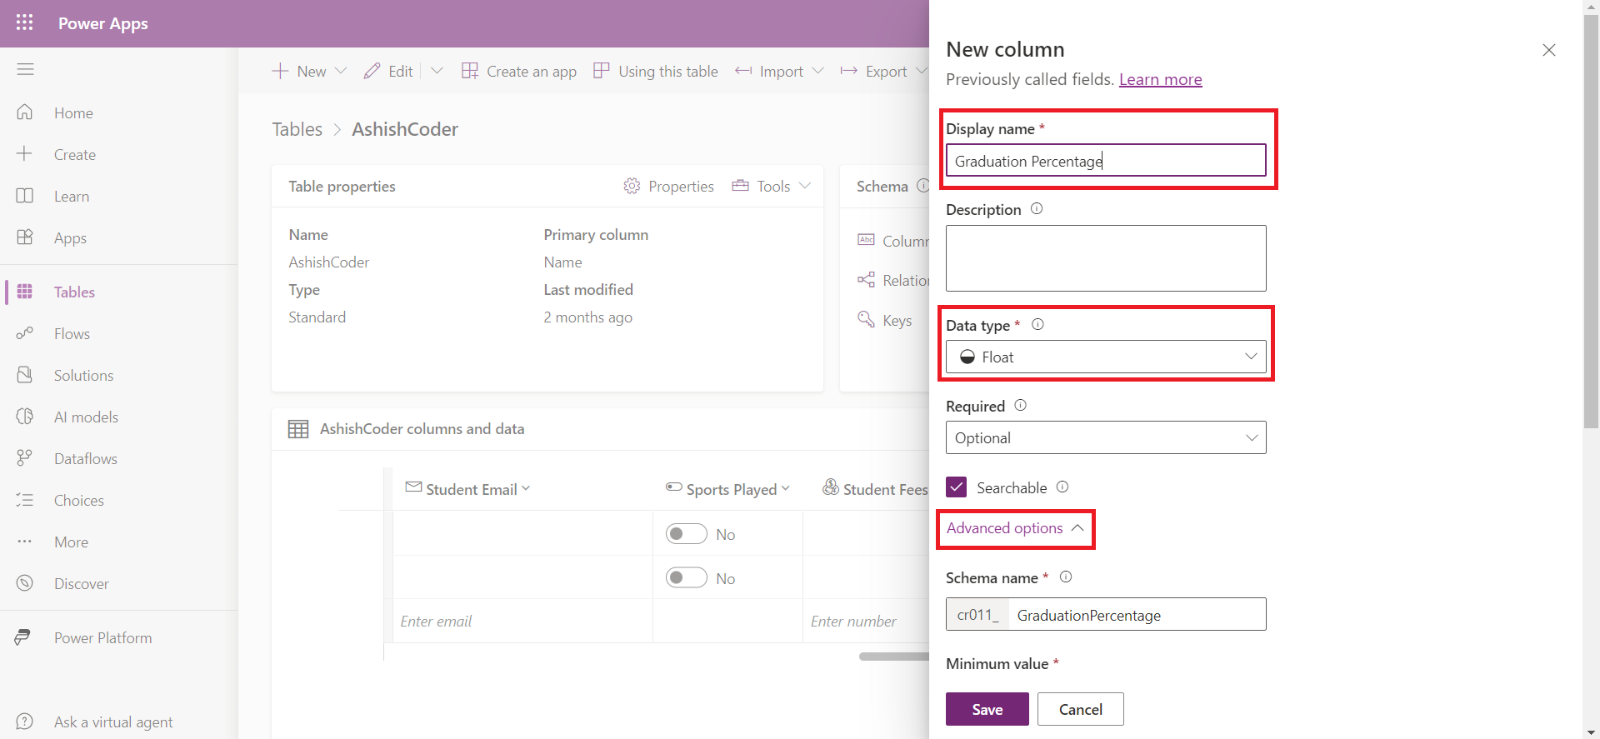
Note: The default number of decimal places is 2. The number can be between 0 and 5.
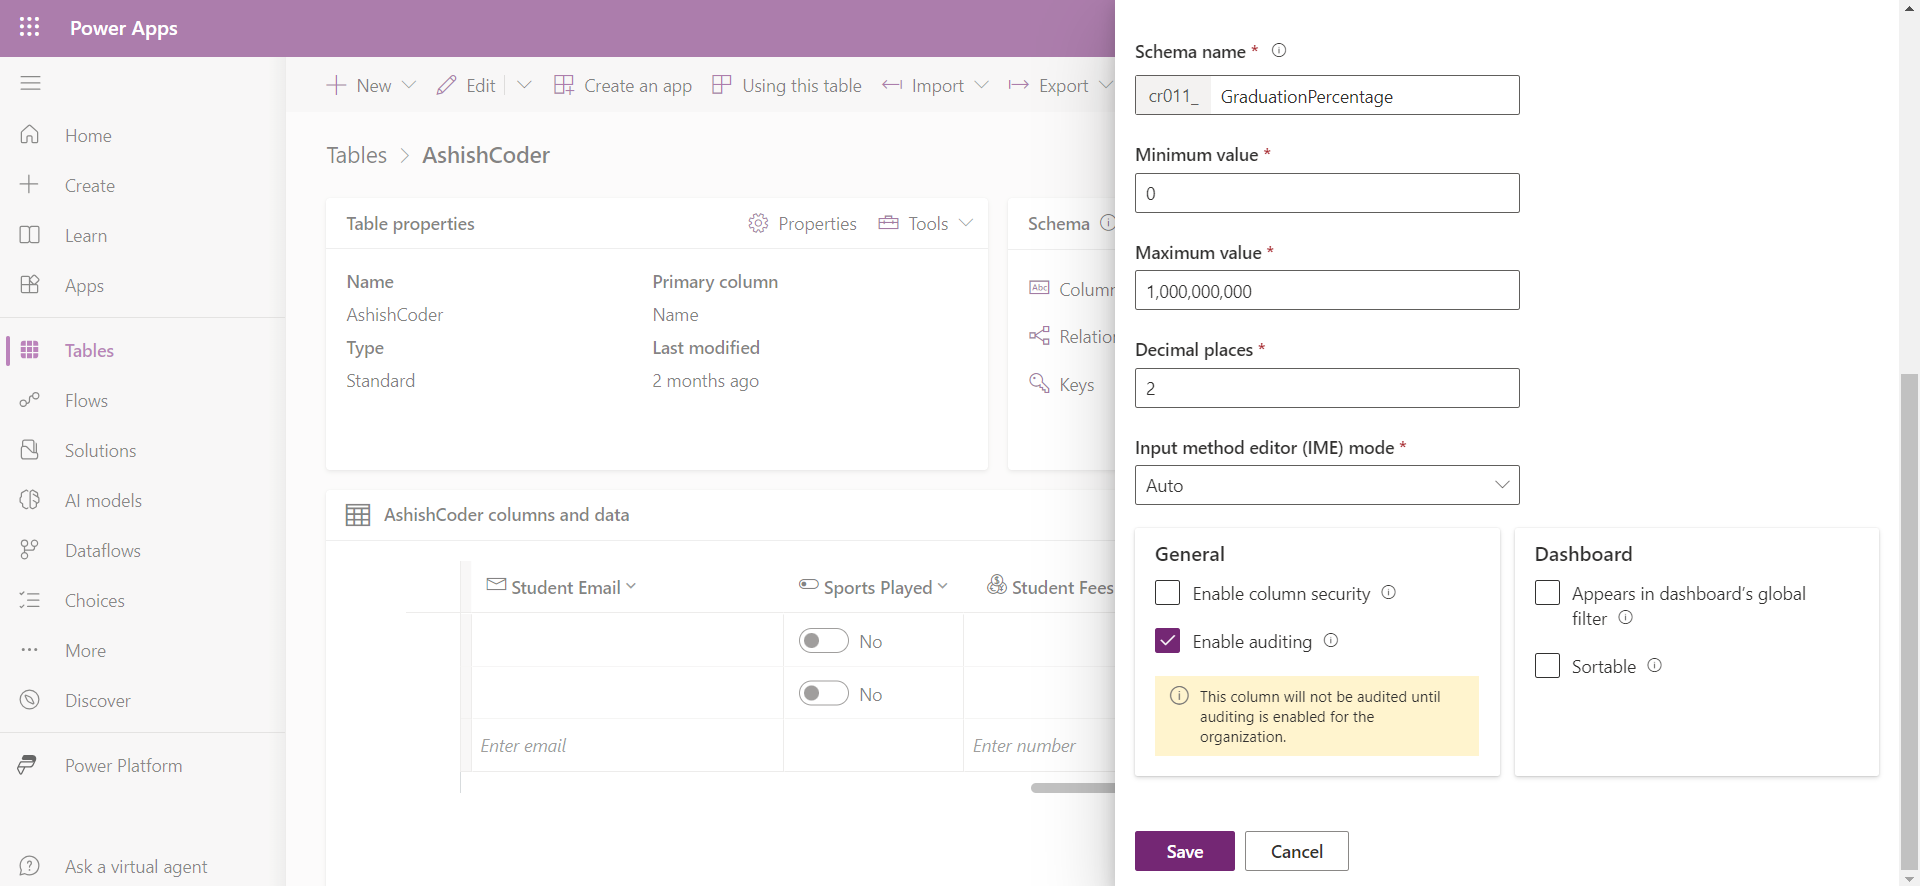
The default minimum and maximum value is 0 and 1,000,000,000 respectively. The Minimum and Maximum value must be between -100000000000 and 100000000000.
Note: Between Decimal and Float, choose the Decimal data type, when we need very accurate calculations, otherwise, floating point numbers also work for us.
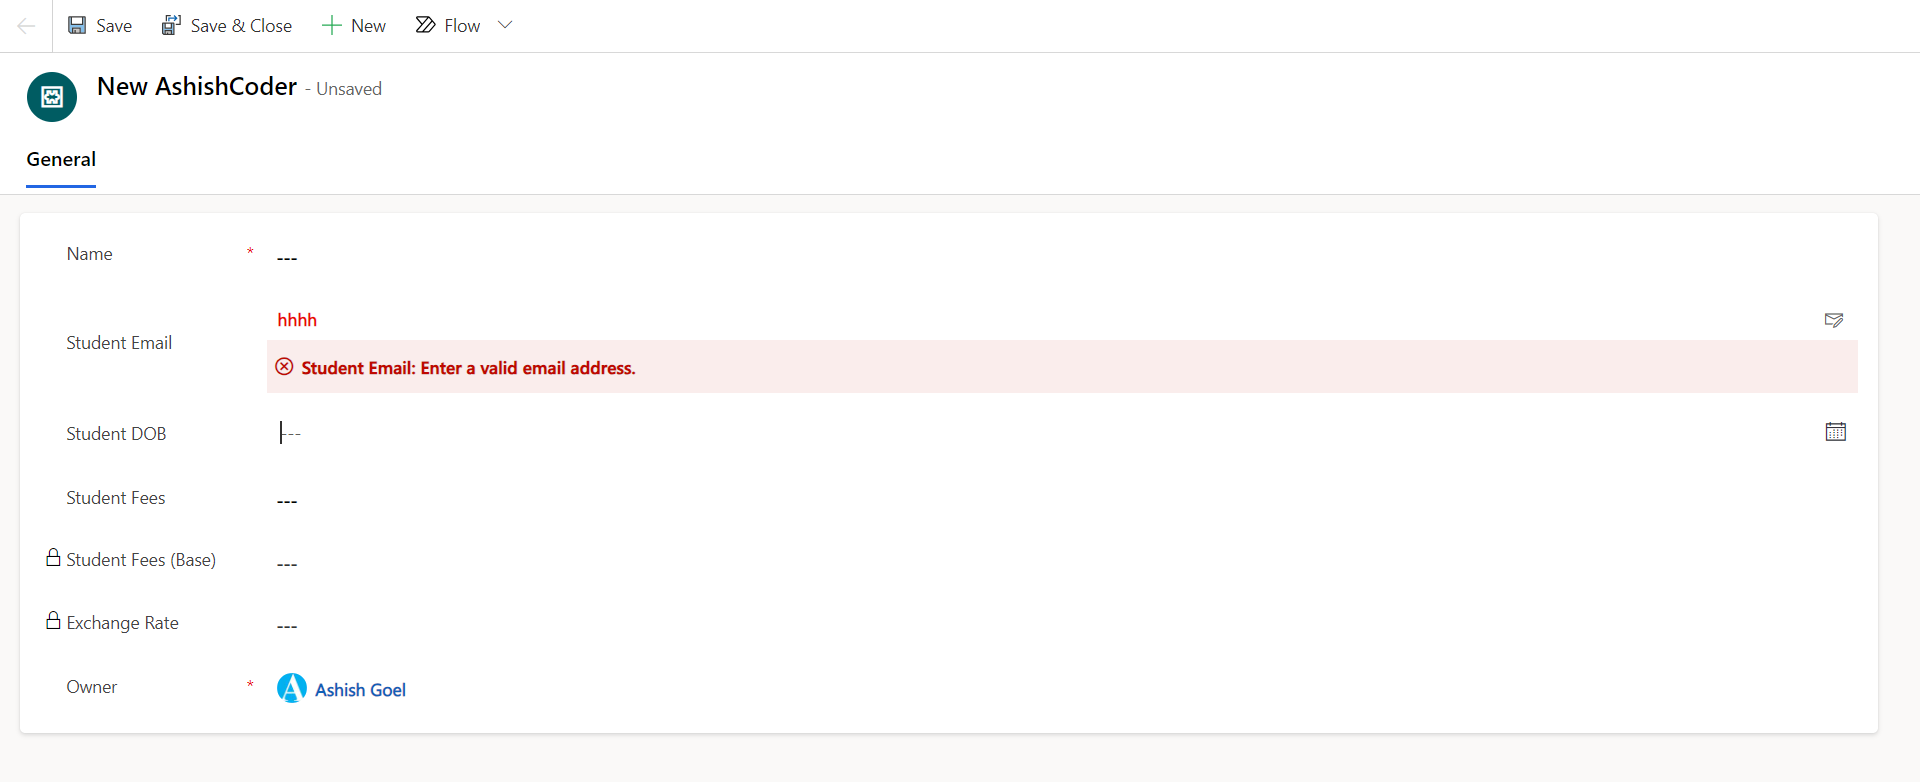
Step 15: When we are trying to create a new record using a form we can see if the email in a wrong format it throws an error that “Enter a valid email address.”
Note: Email is a dataverse data type that will prevent users from entering data that is not formatted in proper email format.
Rename a primary column
By default, every table contains a Primary Name column that is used by lookup columns when establishing relationships with other tables. Typically, the Primary Name column stores the name description of the data that is stored in a table's row.
Note: • We can only have one primary column for each custom table.
• We can also specify the primary name column data type of Autonumber type.
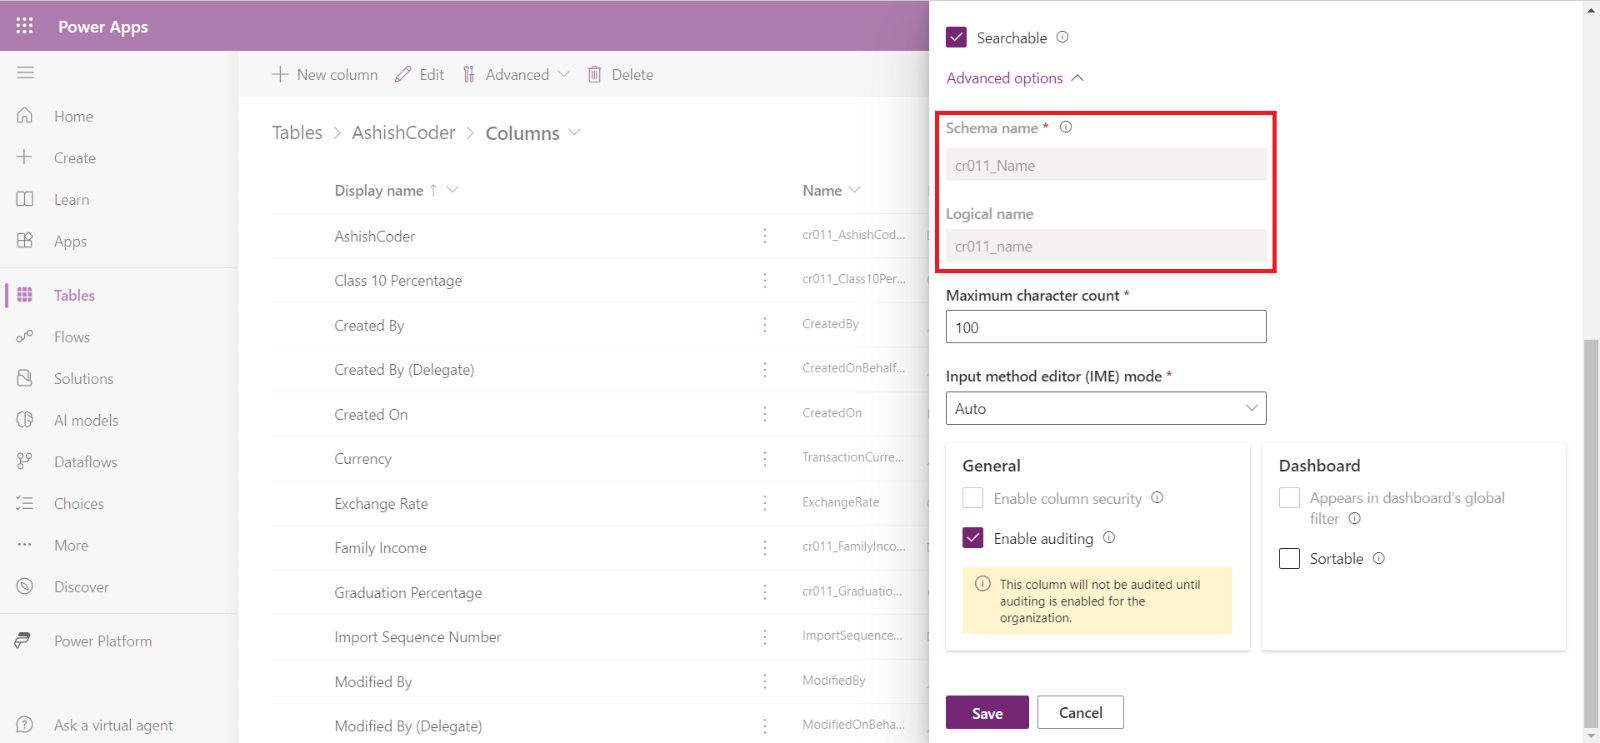
We can update the Display name of the Primary Name column after the creation of the table also, but we can’t change its logical name. We can rename the primary columns by following the below steps:
Step 1: Click on the Columns under the Schema section.
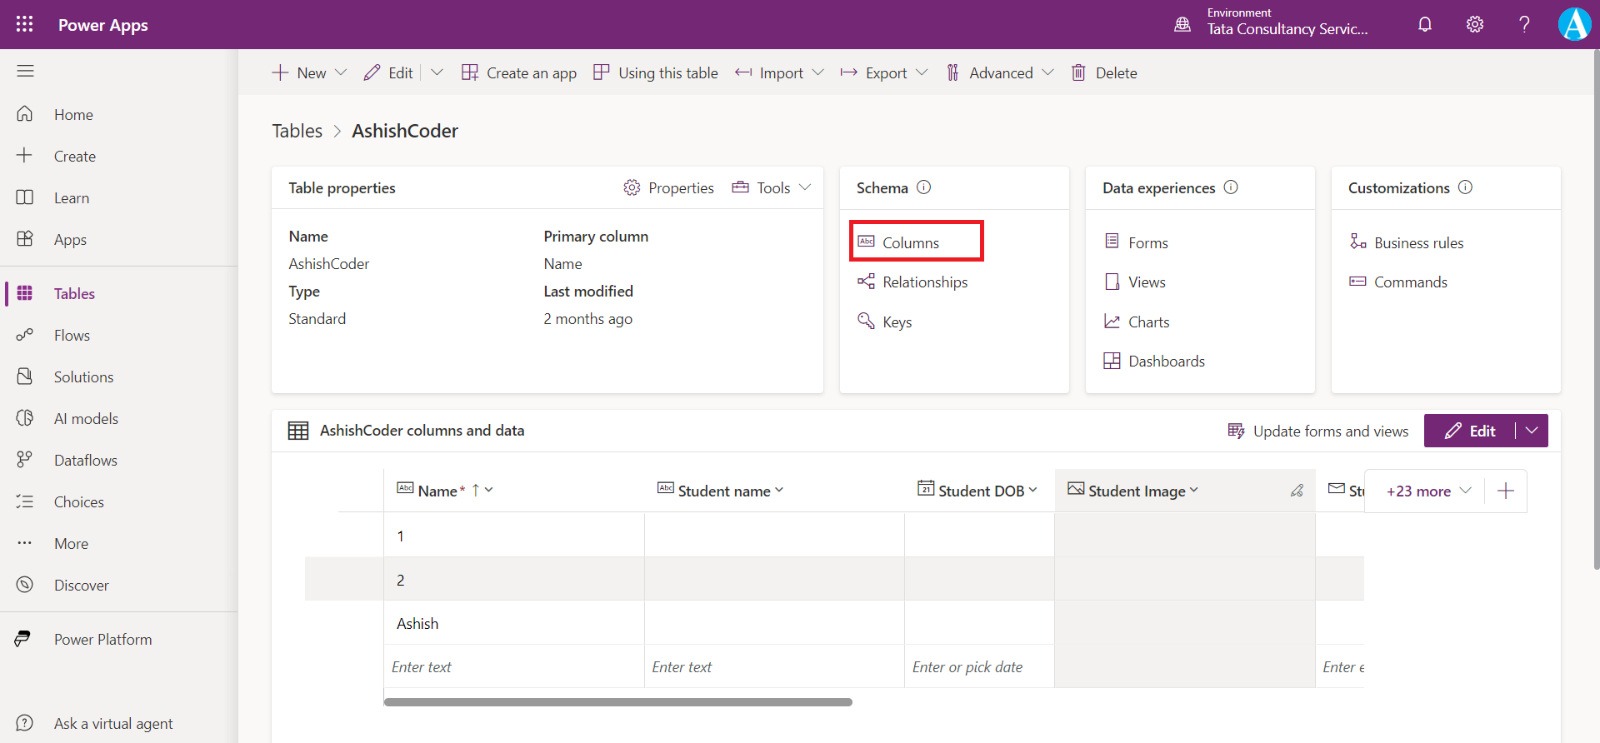
It opens a list of all the columns of the table. We can also identify our Primary name column.
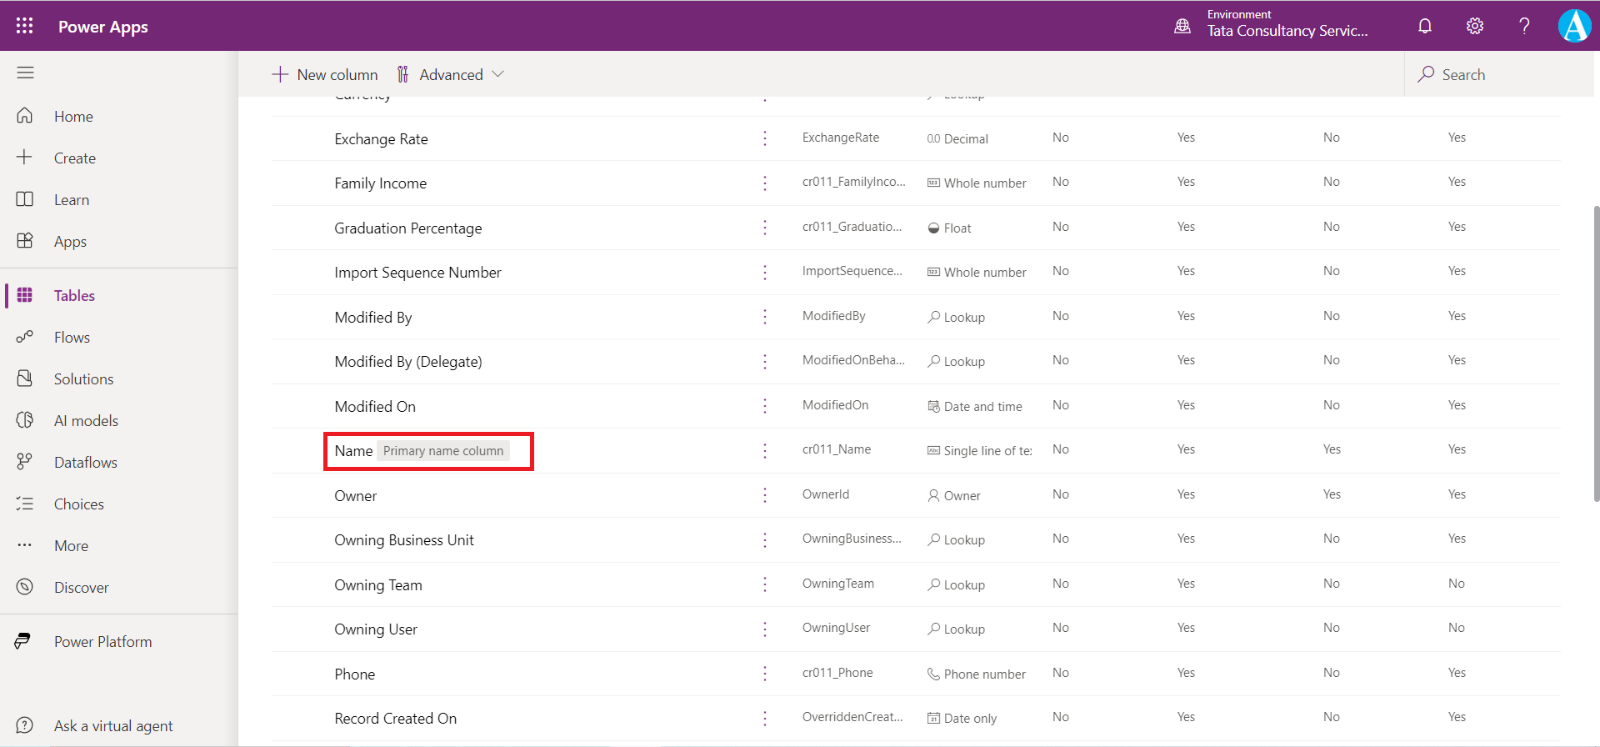
Step 2: The Edit column dialog box opens at the right.
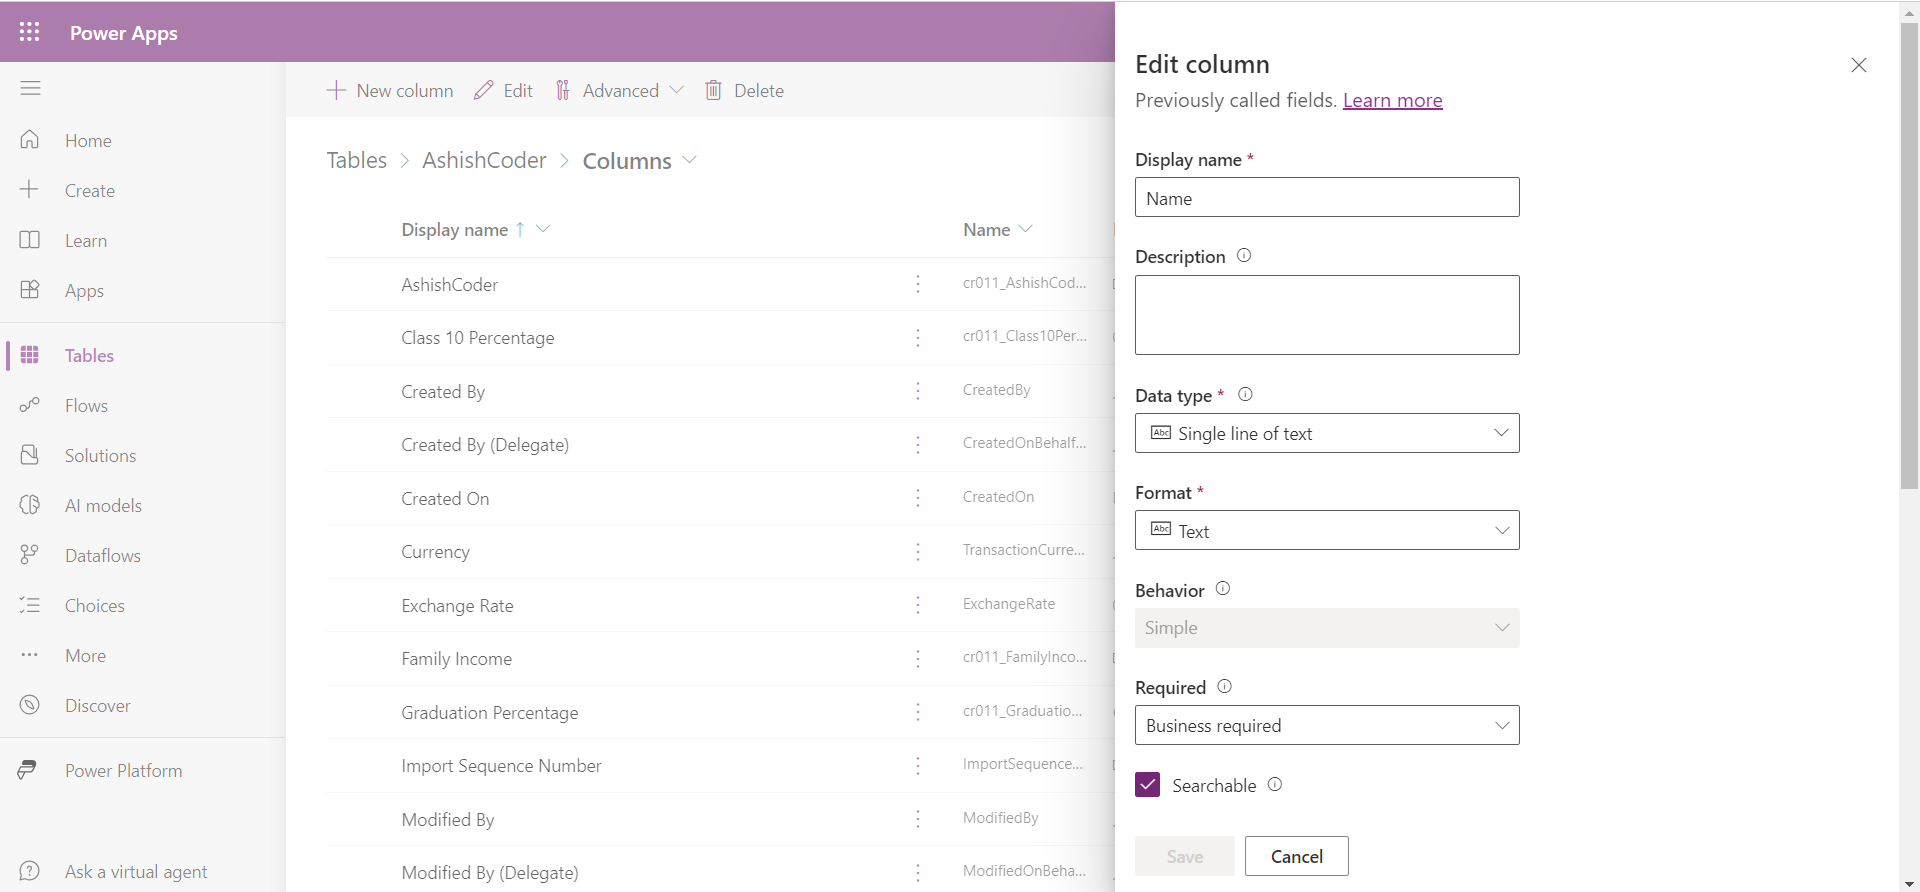
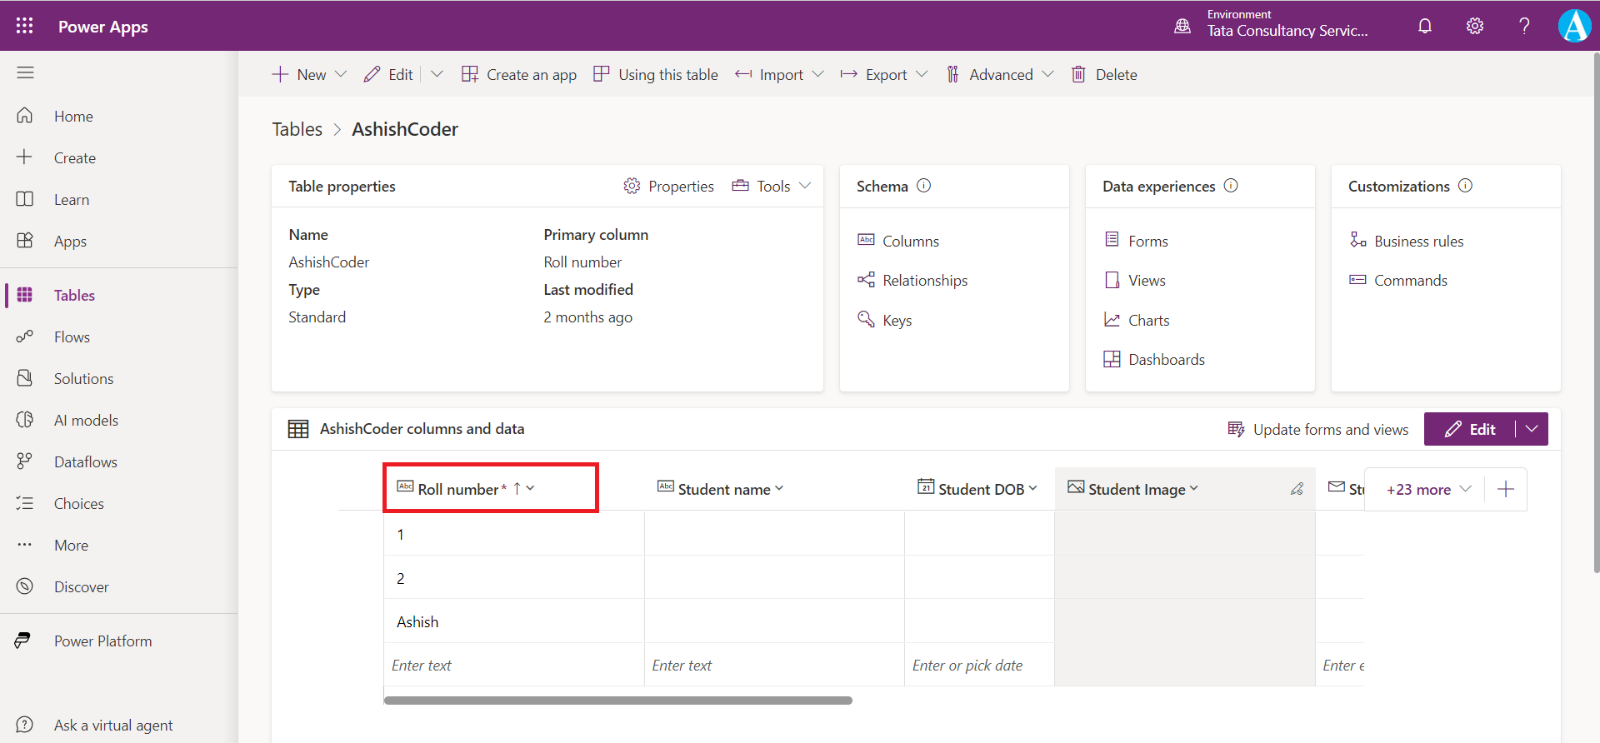
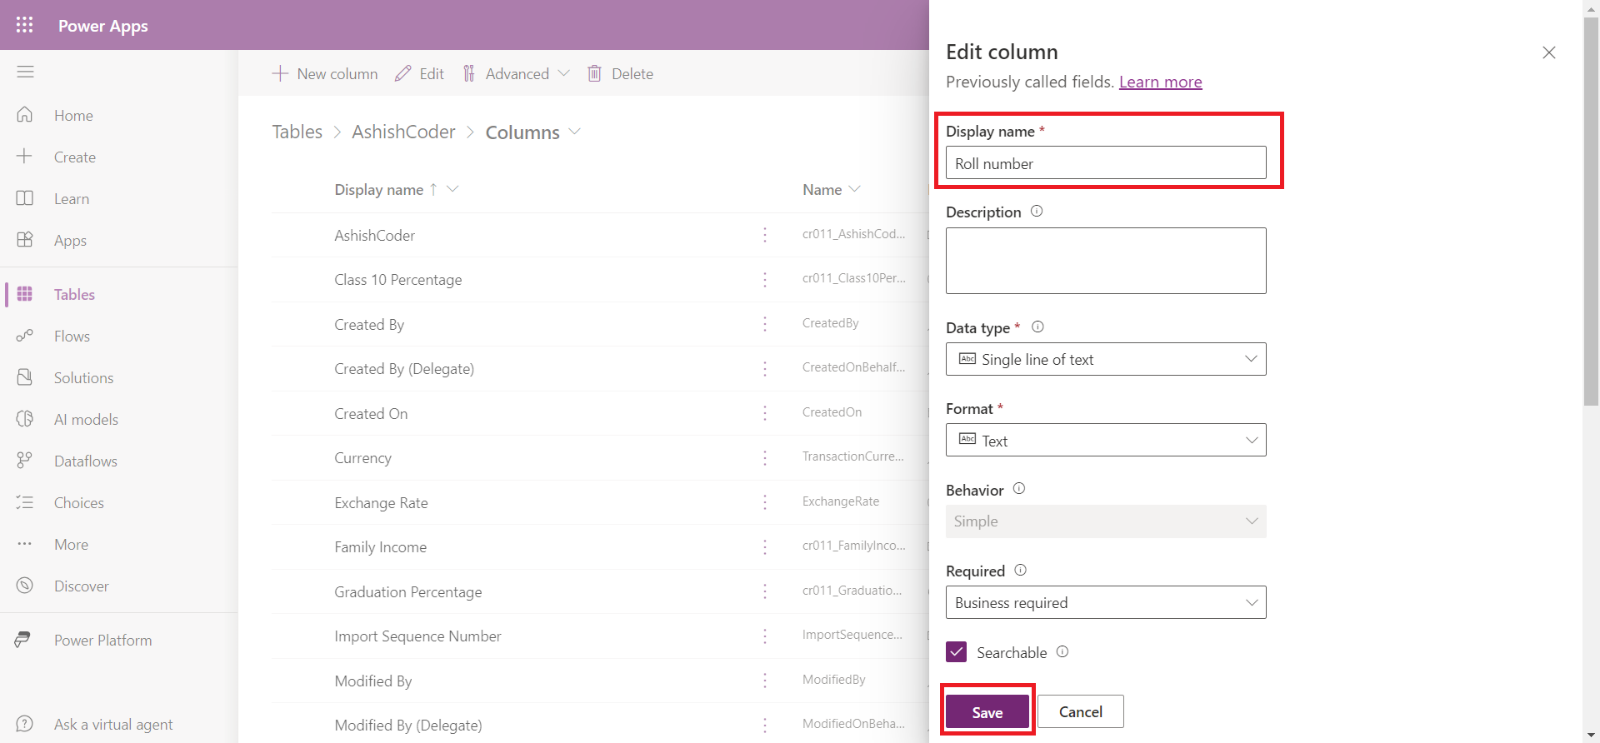
Here we can update the Display Name field to Roll Number, as shown in the following figure.
When we scroll down, we can see that we cannot change the Logical and schema name of the column.
Step 3: Select Save to save the changes. Our new name is reflected in the table as shown in the image below.
