office365outlook.SendEmail
To send an email from Power Apps we can use Office 365 Outlook connector and the following power apps syntax can be leveraged.
Power Apps Syntax
The parameter in the curly brackets is optional. Only three parameters To, Subject and Body are required.
Example: Demonstration of the send an email from Power Apps.
To send an email from Power Apps itself follow the following steps:
Step 1: Click on the + Insert menu, select Text input control to add to the canvas app. Add two more Text Input controls by using the same process.
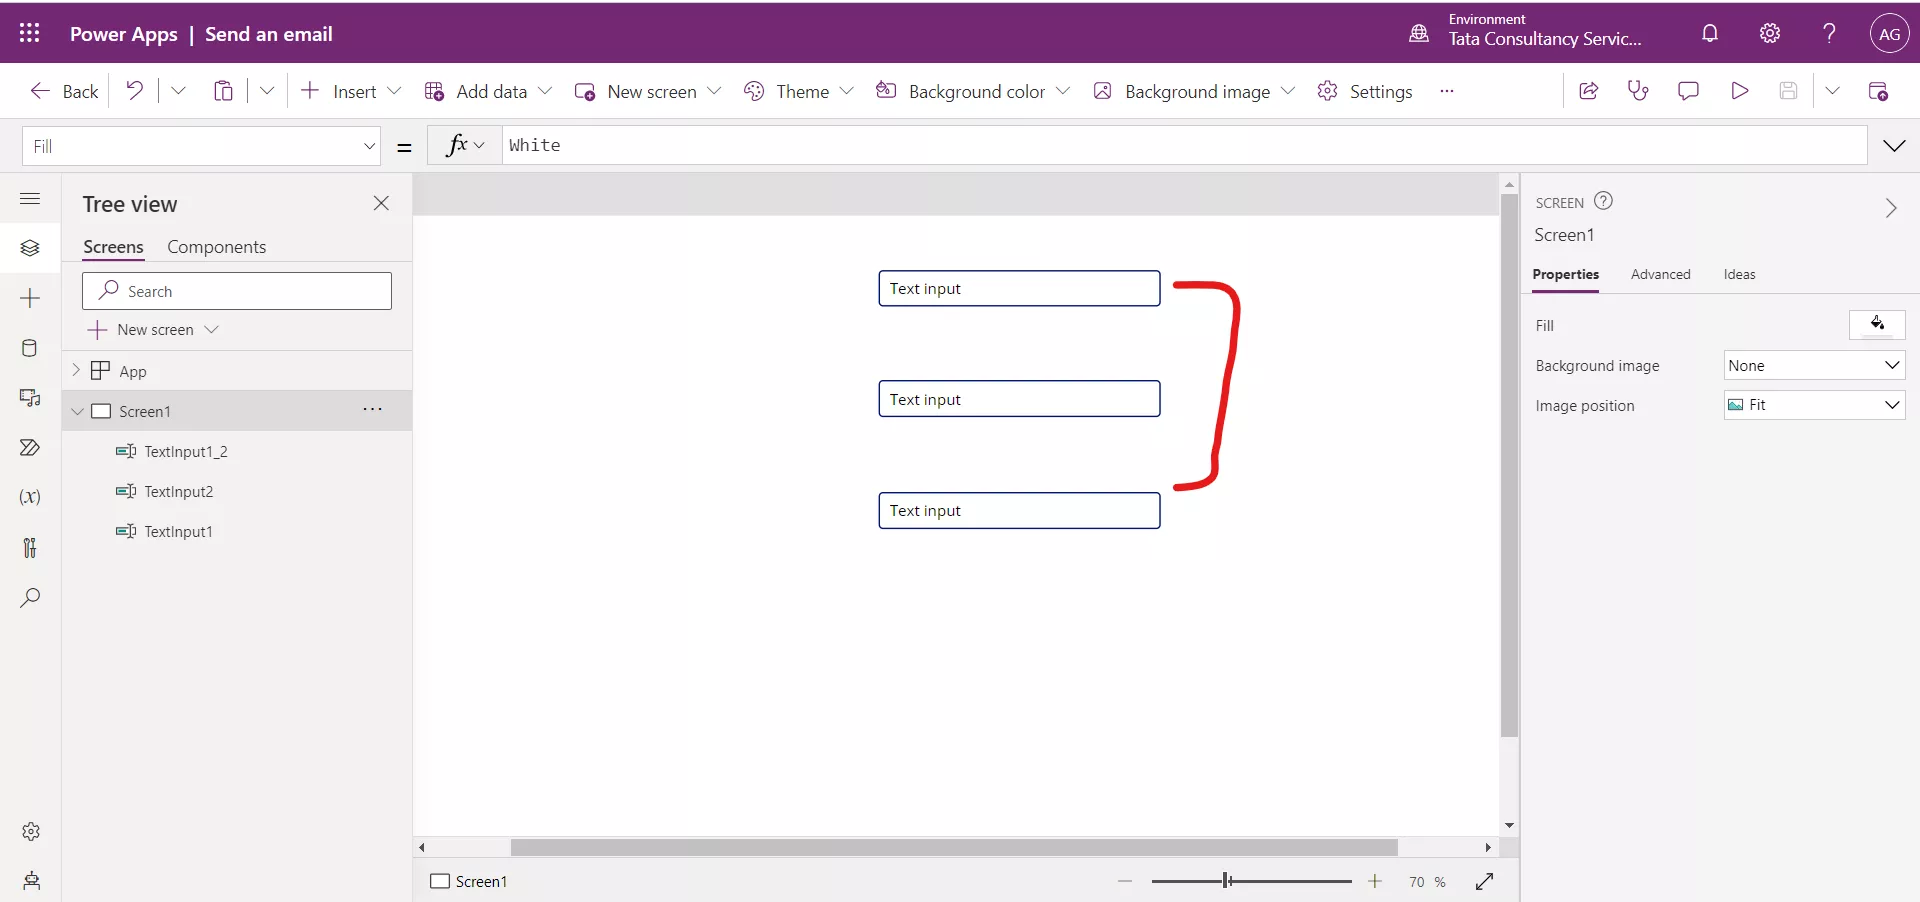
Step 2: Rename the controls to:
- inputTo
- inputSubject
- inputBody
Clear the Default values of the controls and add the HintText property of the controls to:
- To
- Subject
- Body
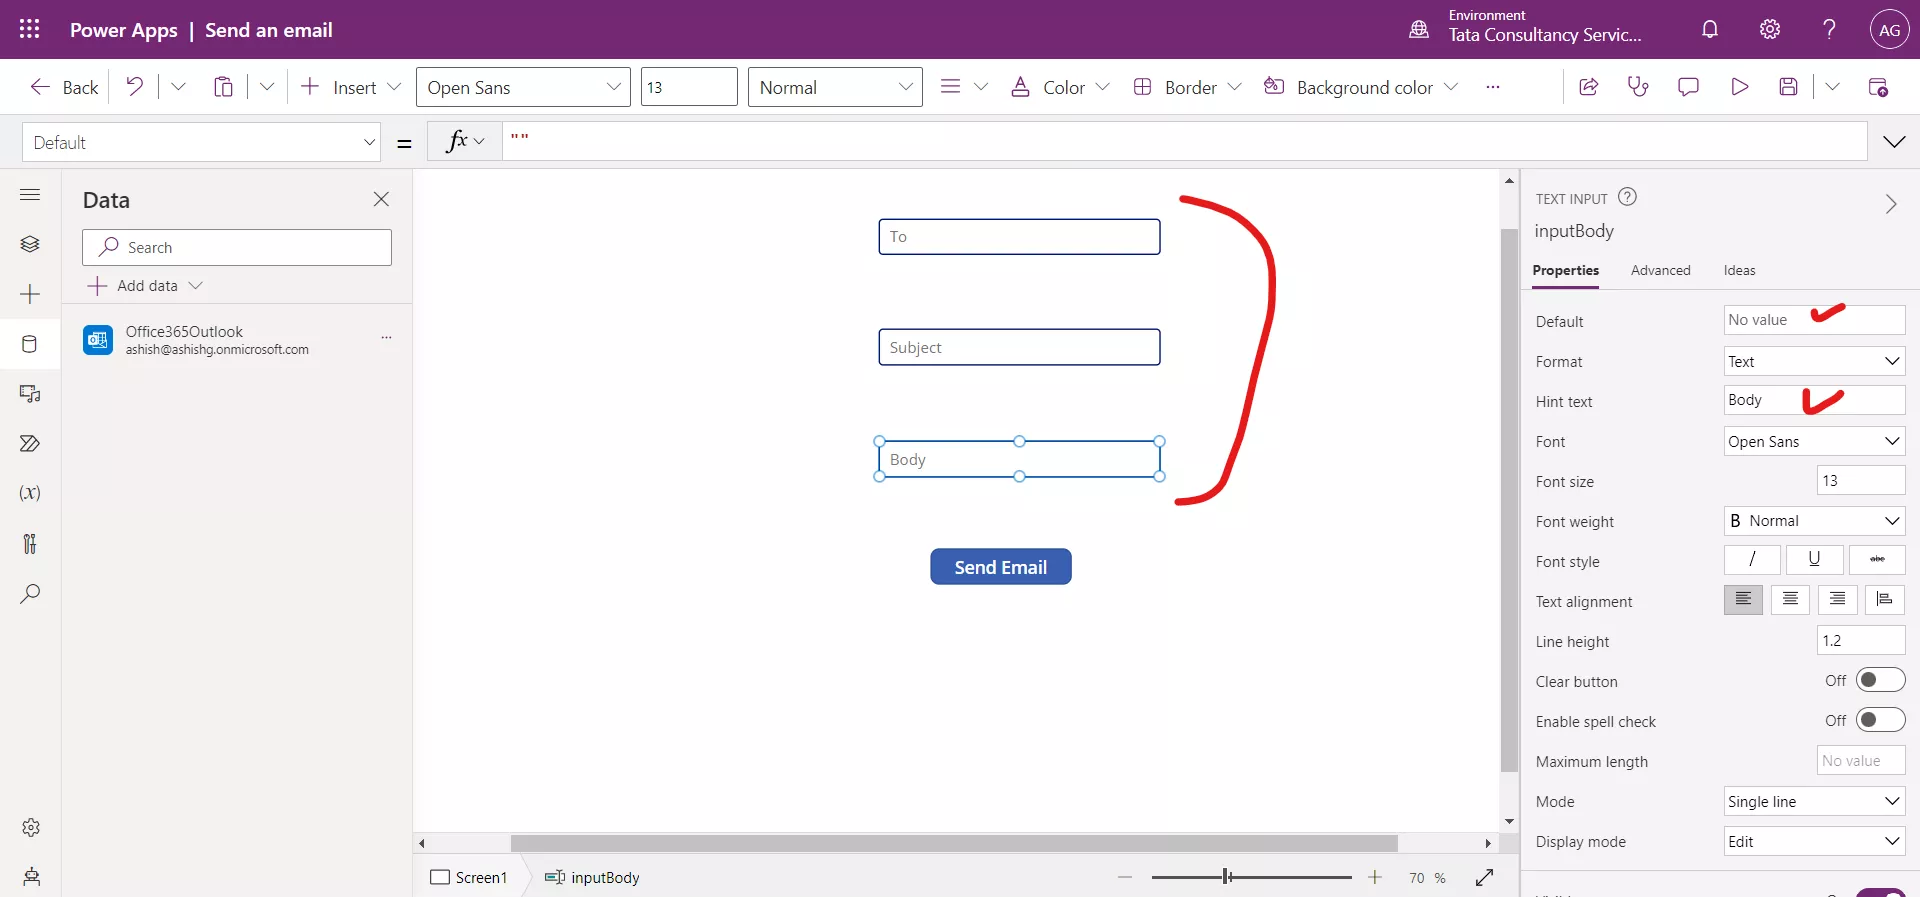
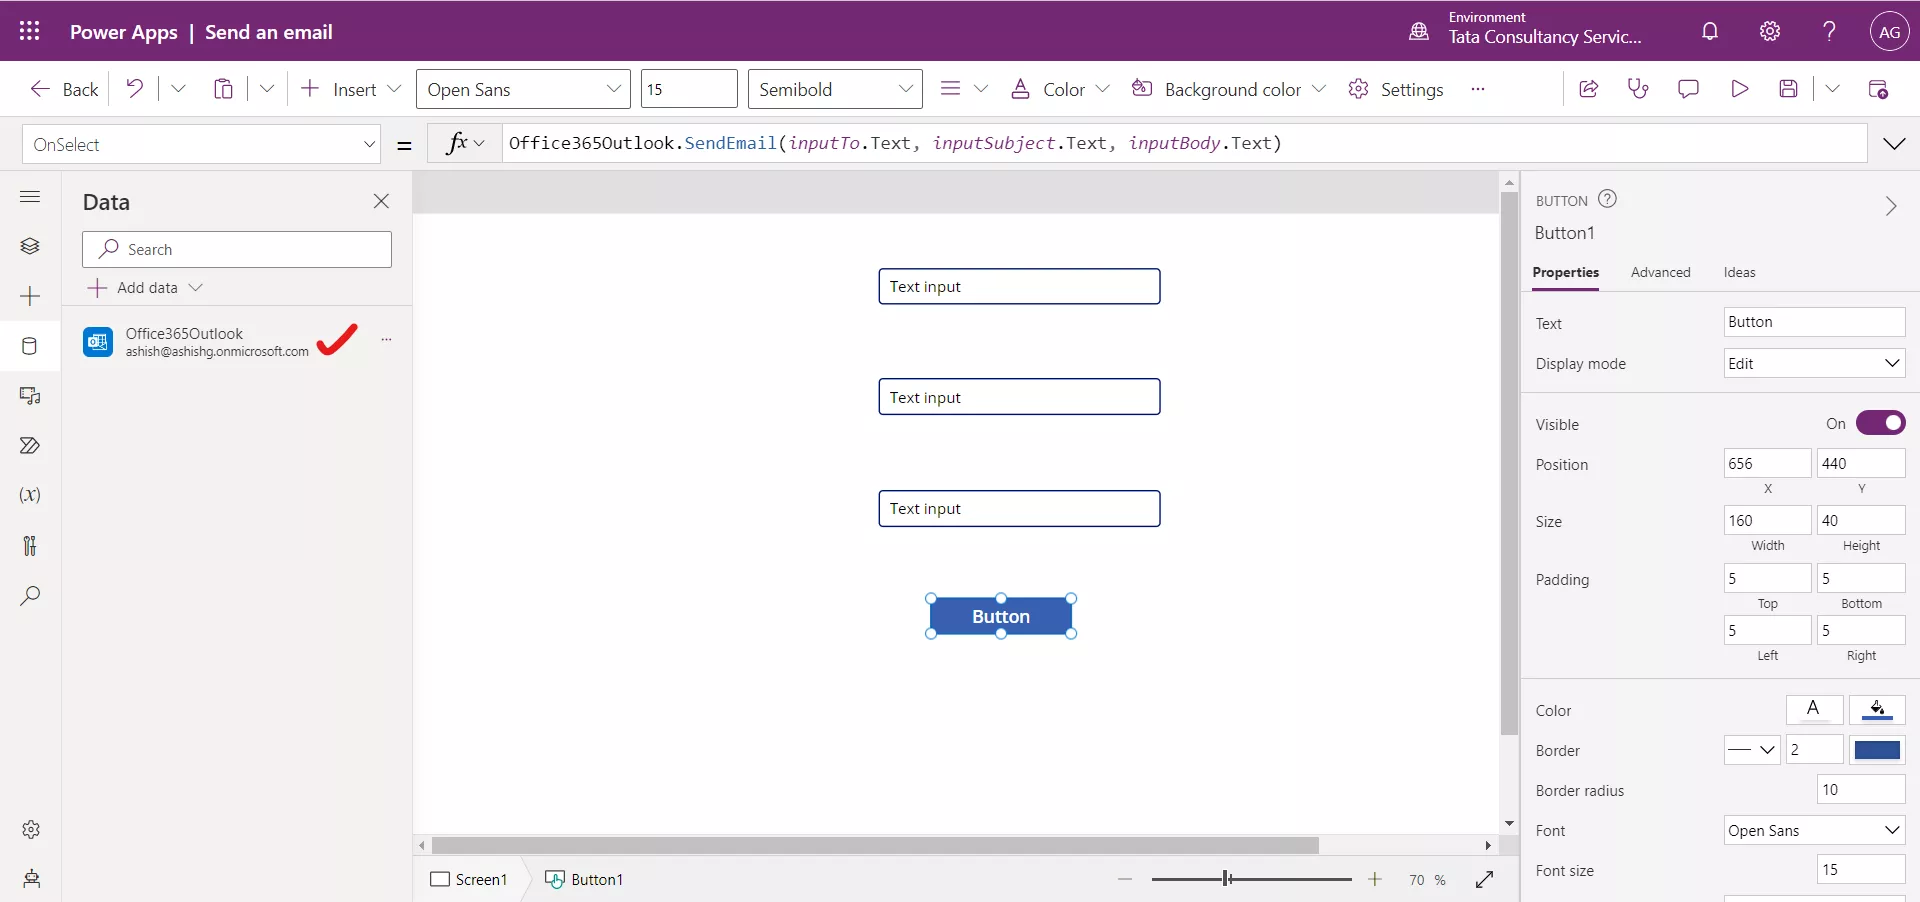
Step 3: Click on the + Insert menu, select the Button control to add it to the screen. Set its OnSelect property to the following powerapps formula.
Power Apps Formula
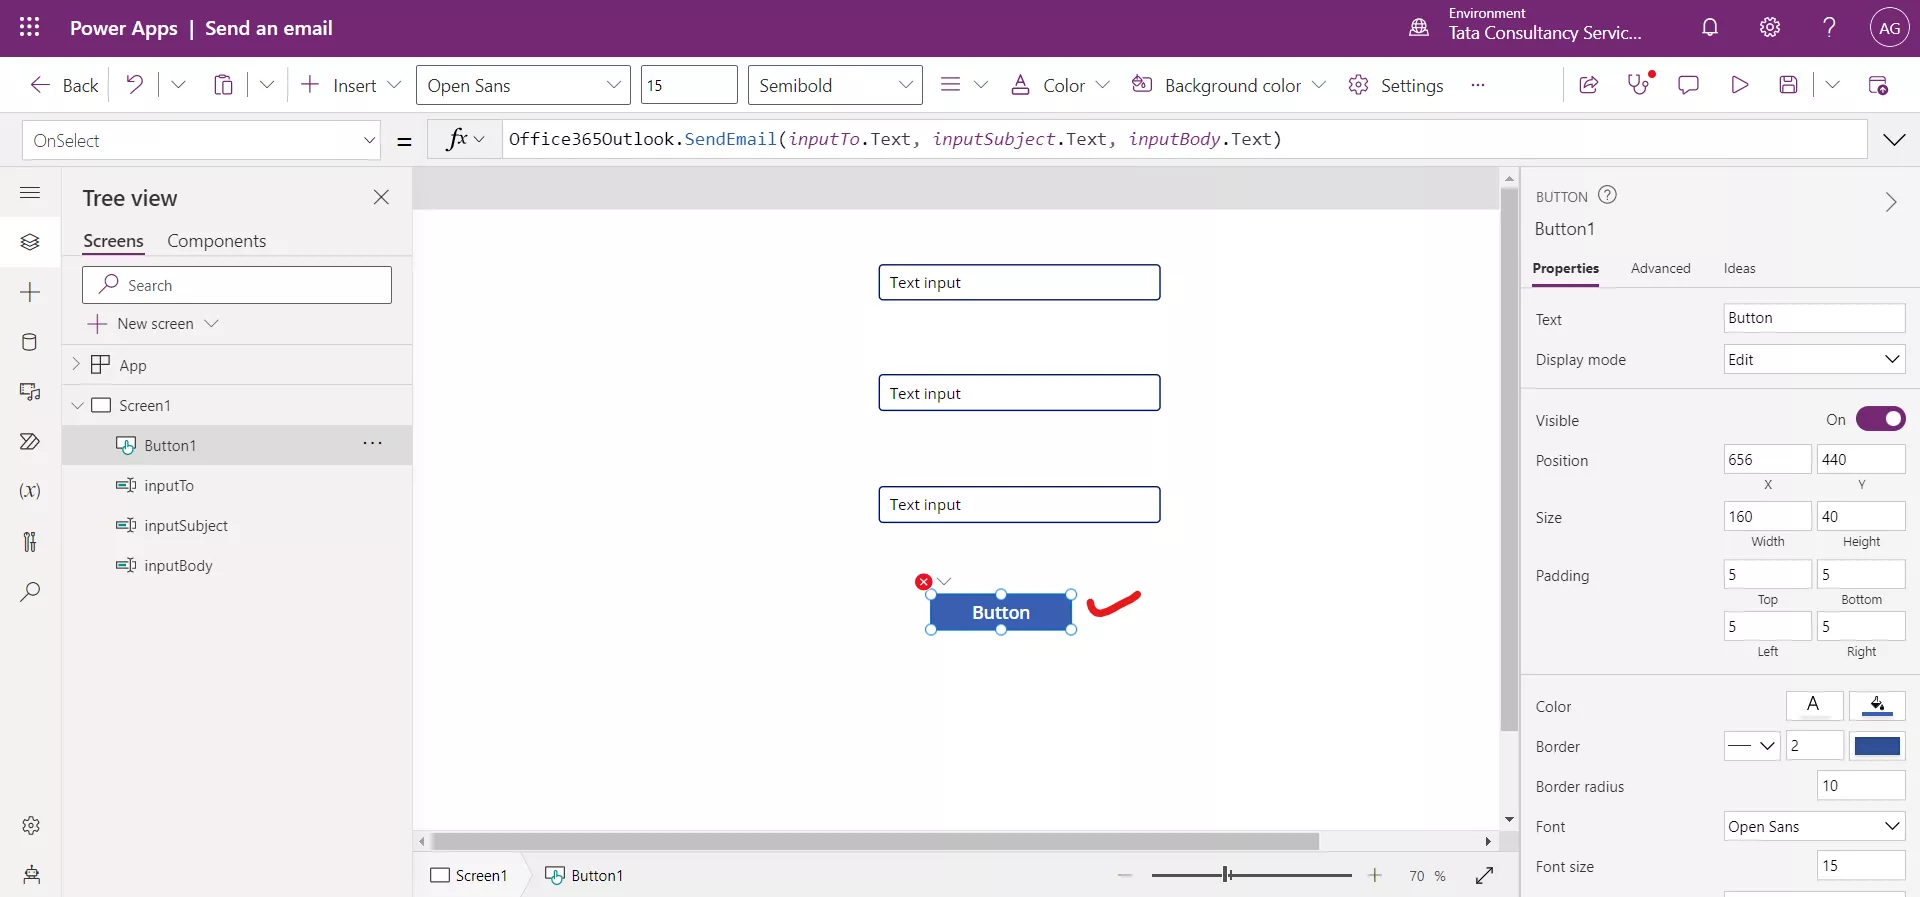
It shows error as we need to add Office365Oulook data connection. Click on the Add data and select Office365Oulook from the list.
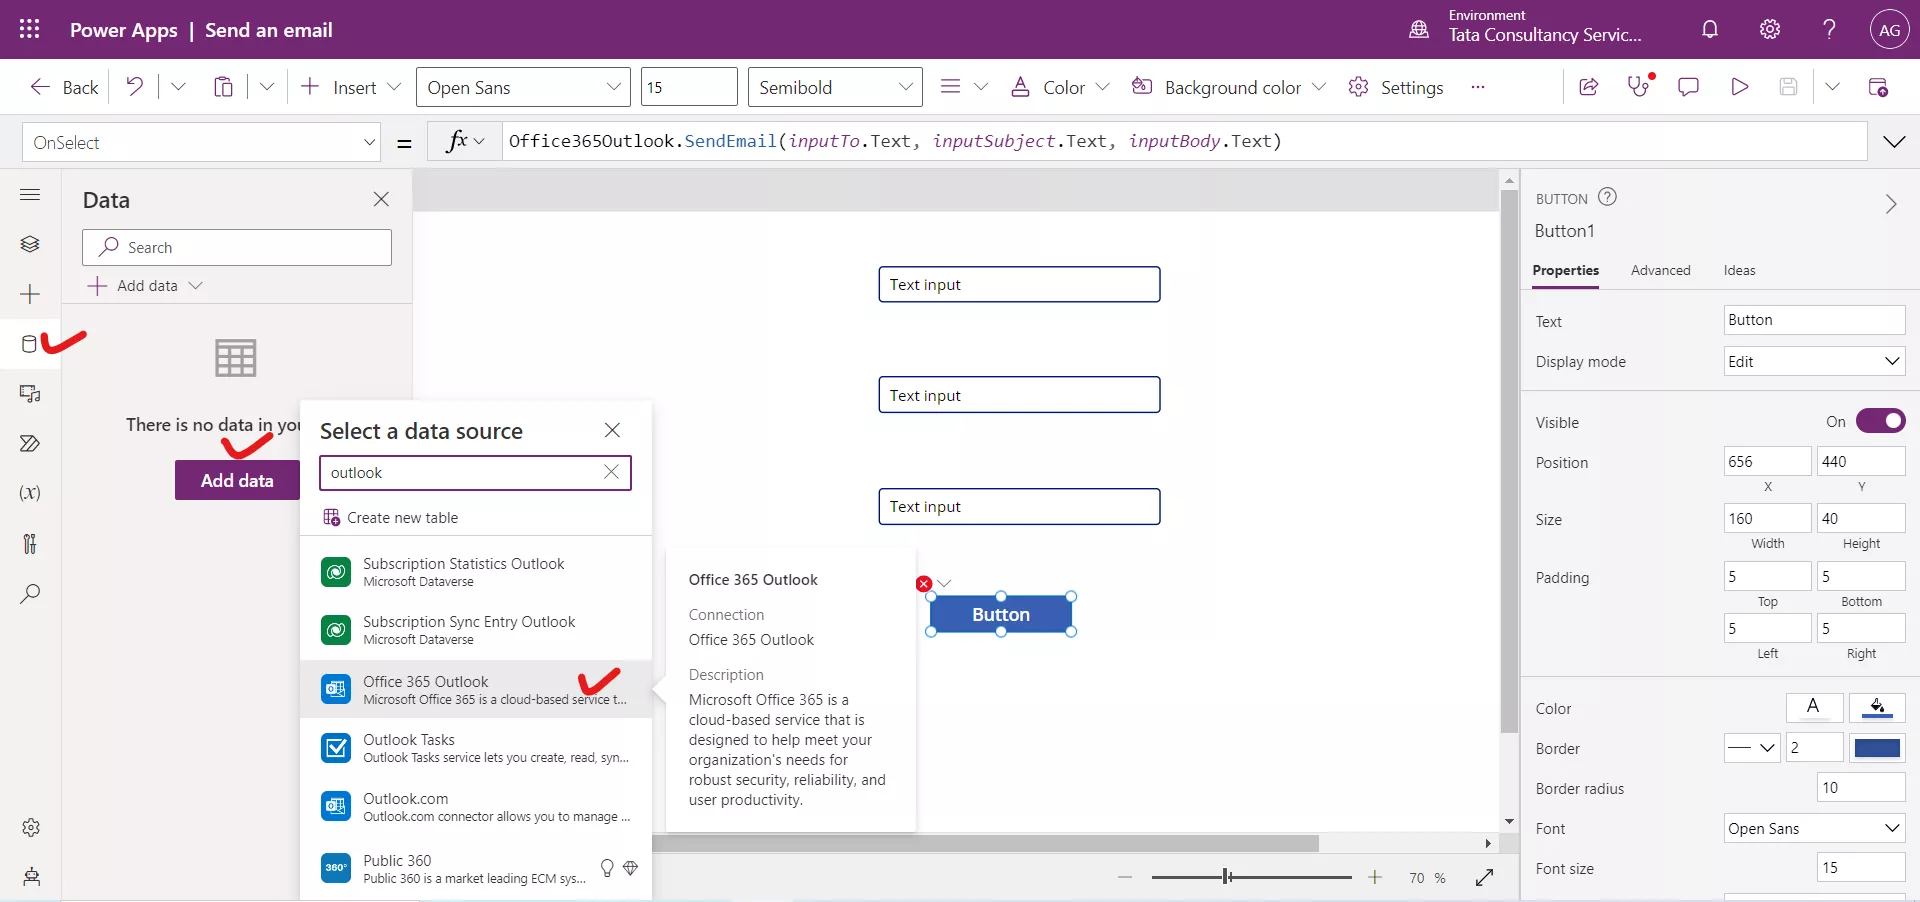
The Data connector is added in the app.
Step 4: Move the button so that it appears under all the other controls, and set its Text property to "Send email".
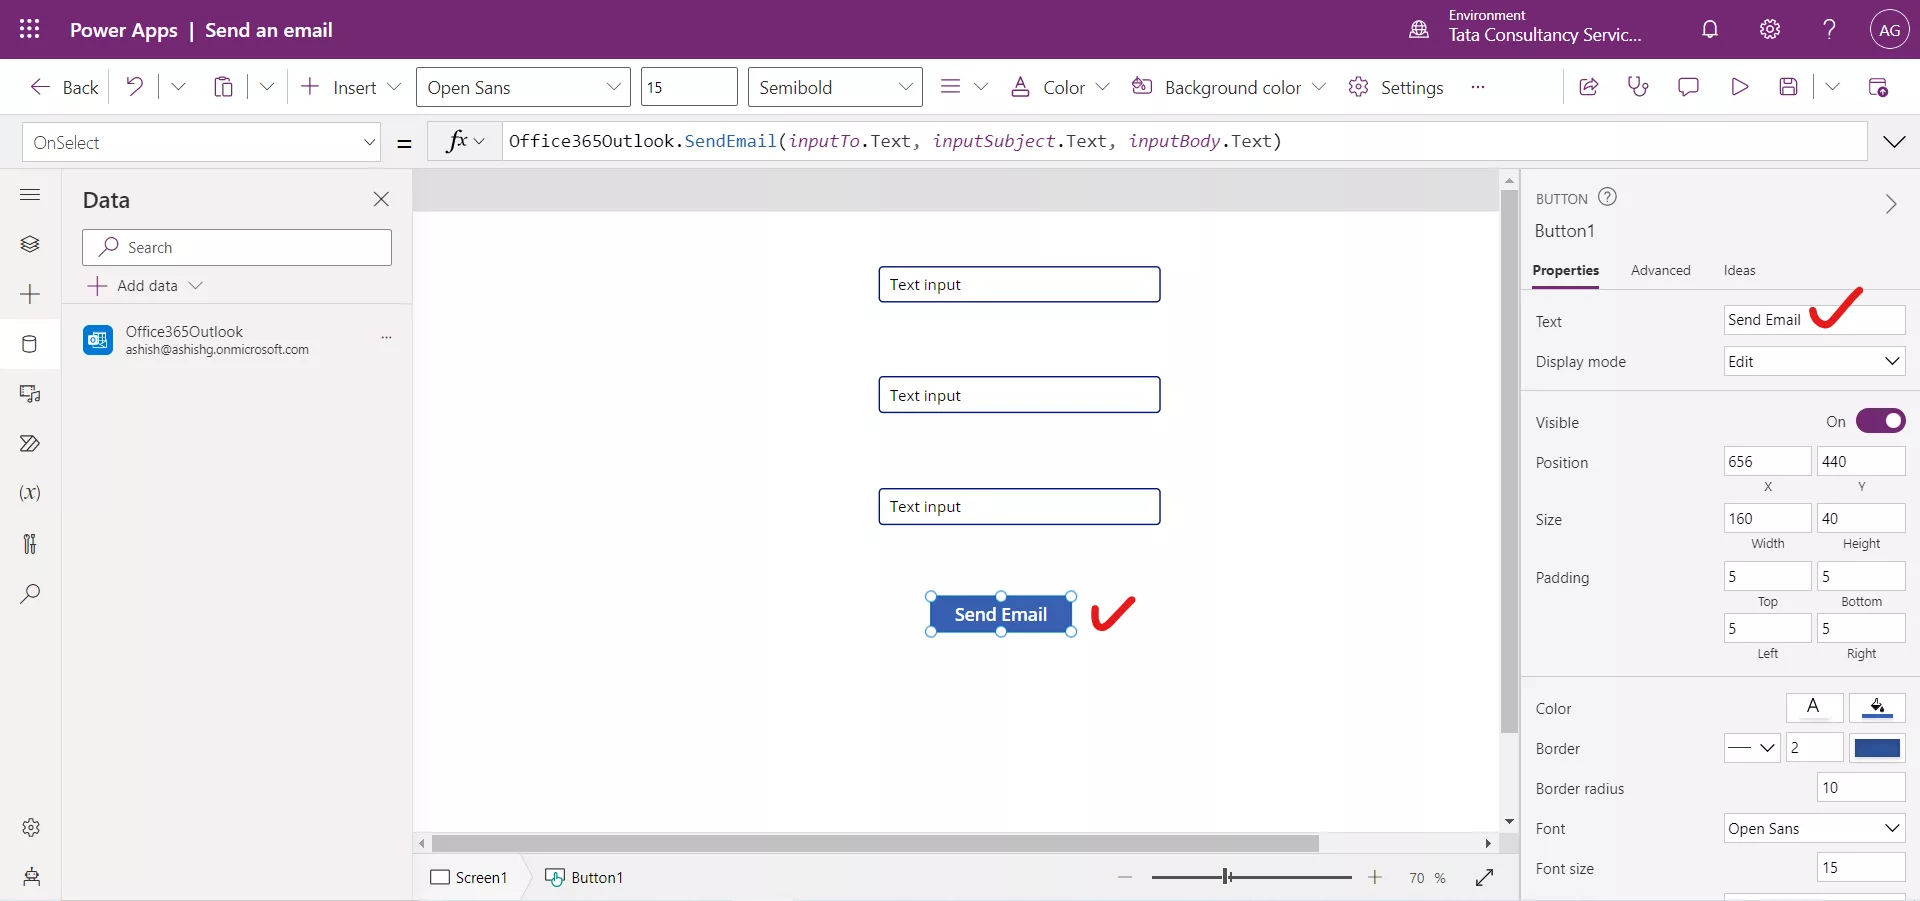
Step 5: Press F5, or select the Preview button. Type in a valid email address in inputTo, and type whatever you want in the other two Text input controls.
Step 6: Select Send Email button to send the message. Press Esc to return to the default workspace.