Share the Powerapp
1. Share the Canvas app
We can share the app with the others also, we can share an app with specific users, groups, or our whole organization.
Step 1: Sign into Power Apps with an organizational account.
Step 2: Select Apps in the navigation menu.
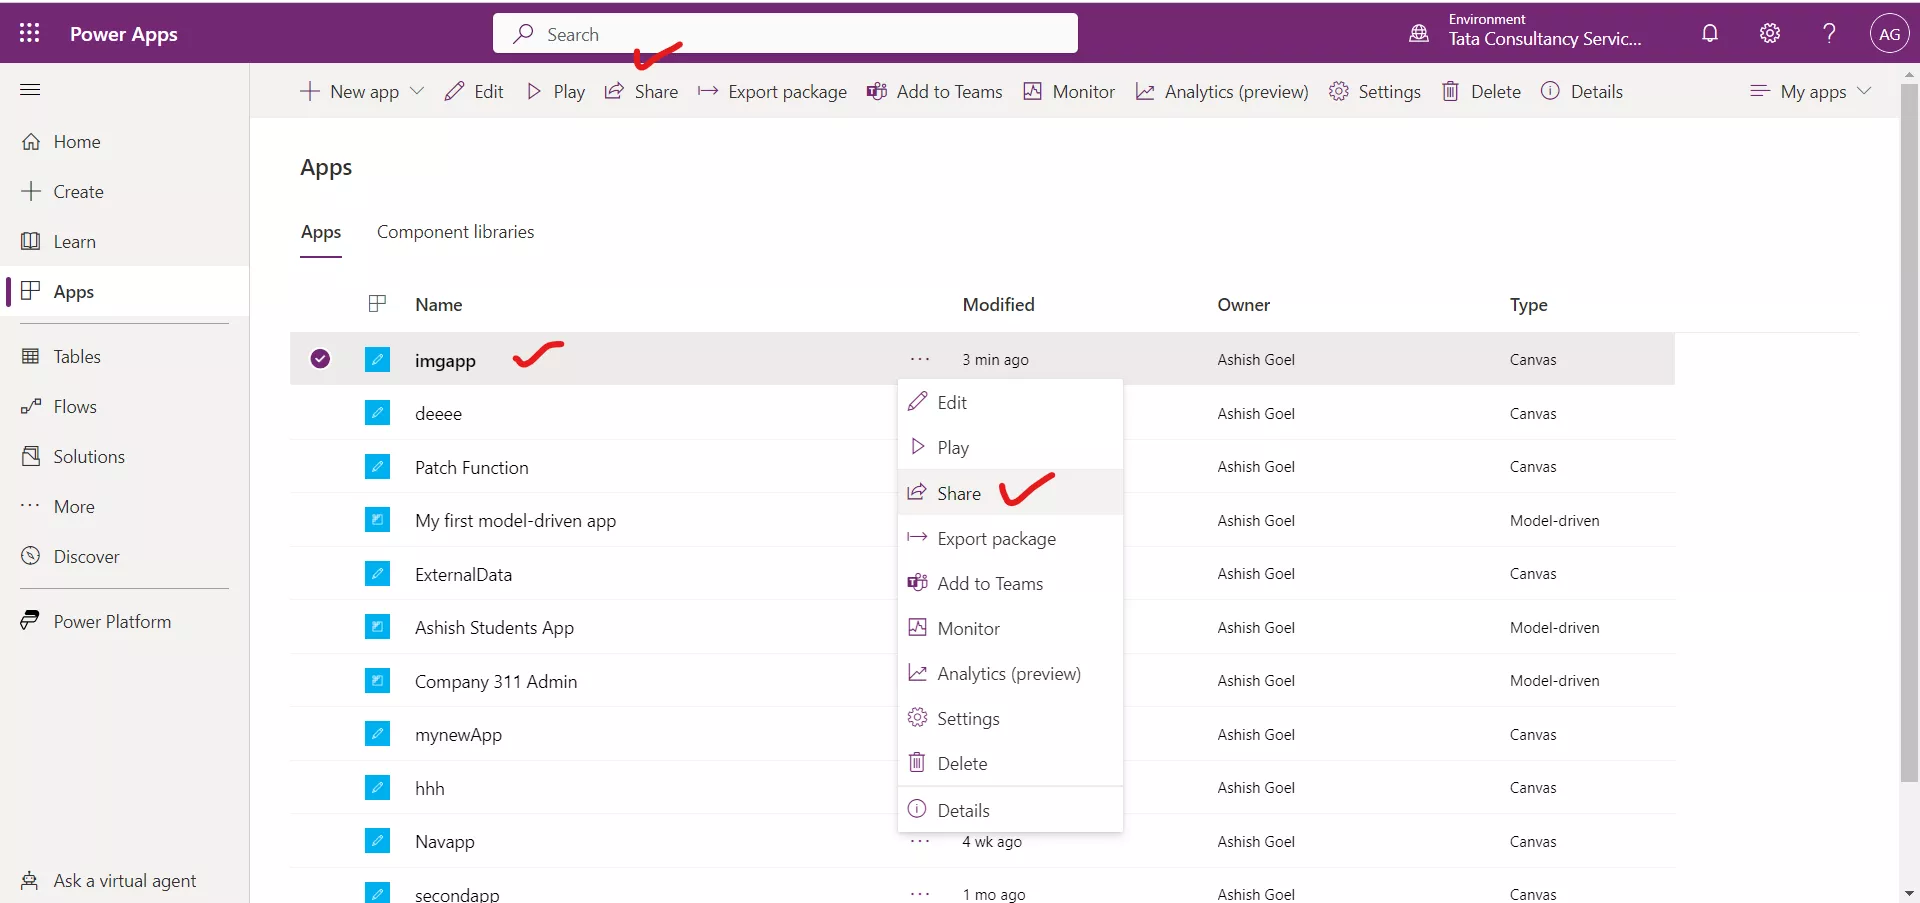
Step 3: Find the app and then select the ellipses (...) beside it. In the pop-up menu, select Share. Or alternatively, select the app, and then select the Share button from the command bar.
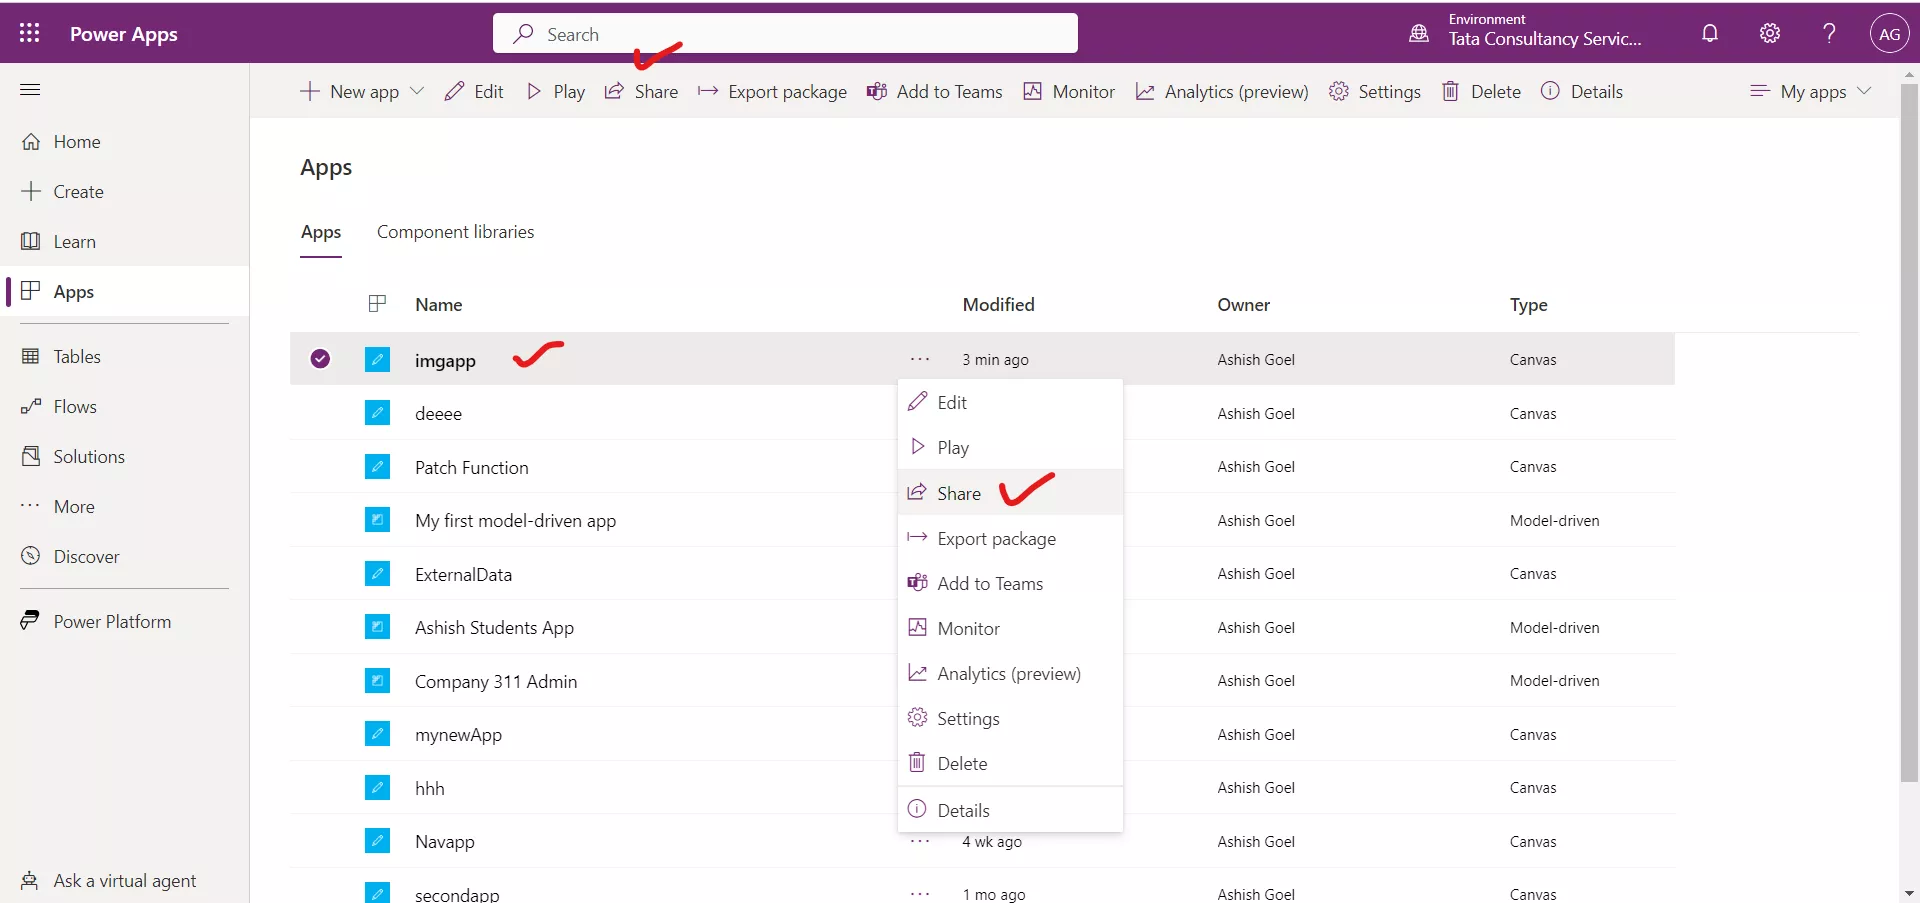
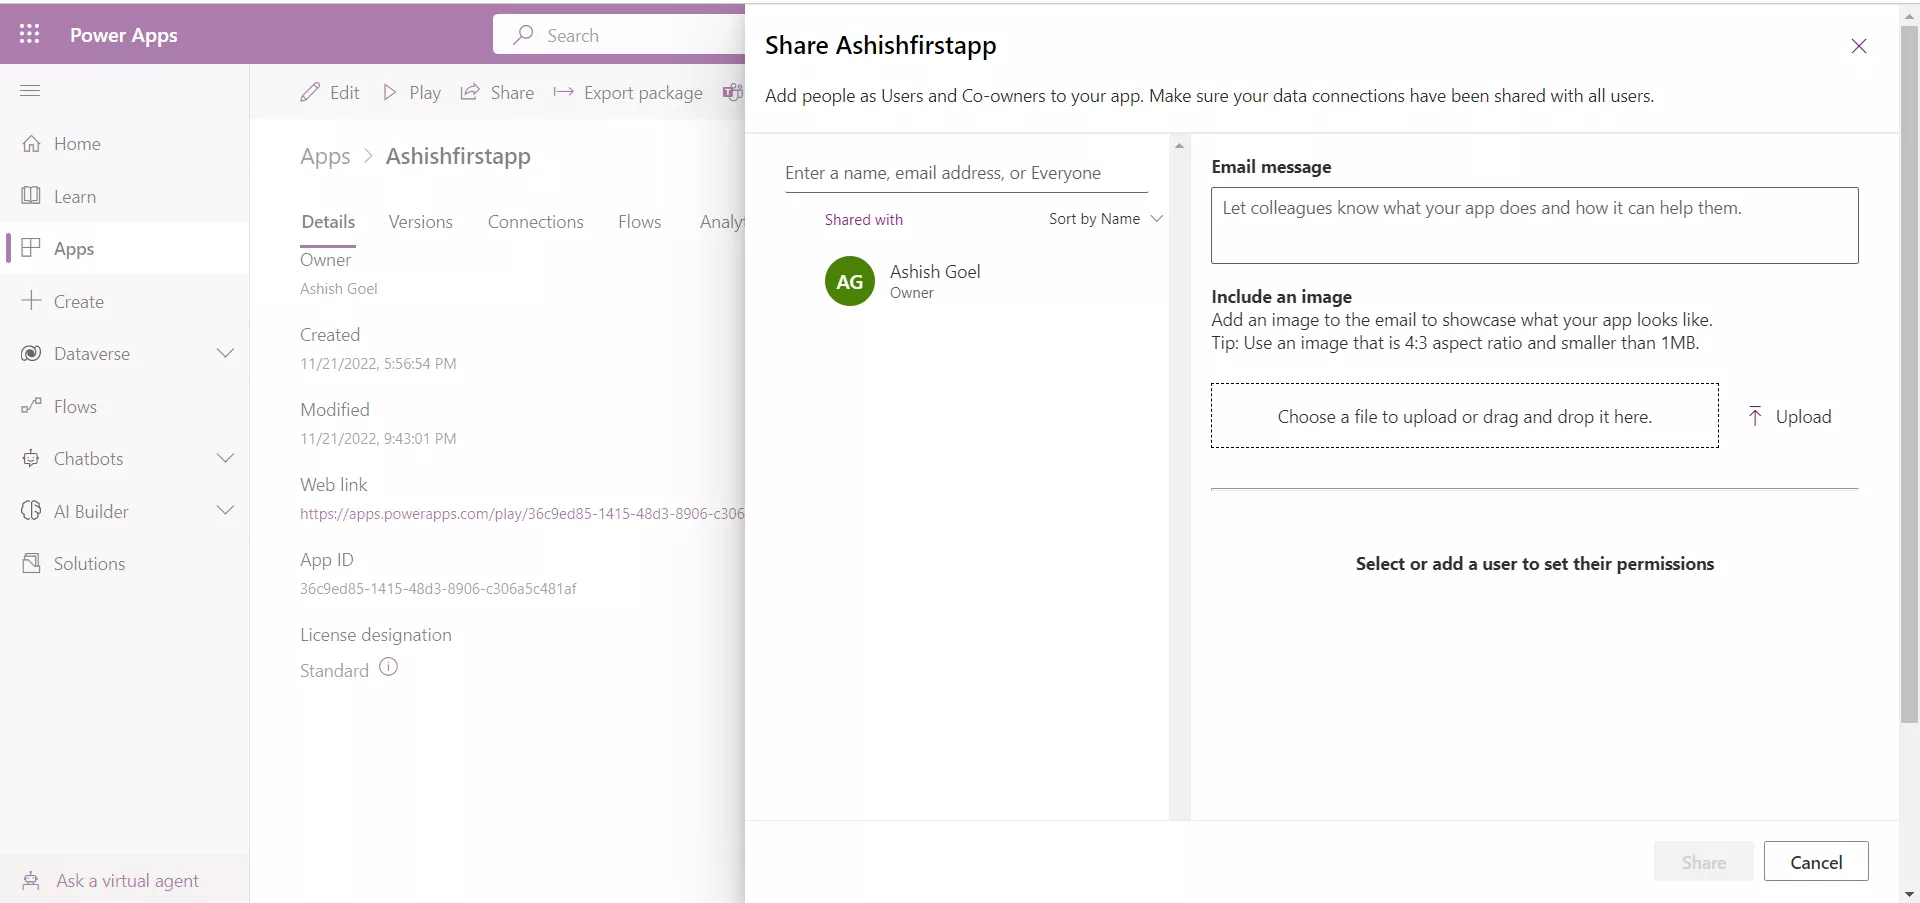
A sharing flyout menu will appear. From here we can manage the sharing permissions for the app. Before we begin adding/editing users, make sure that you note several important details or options.
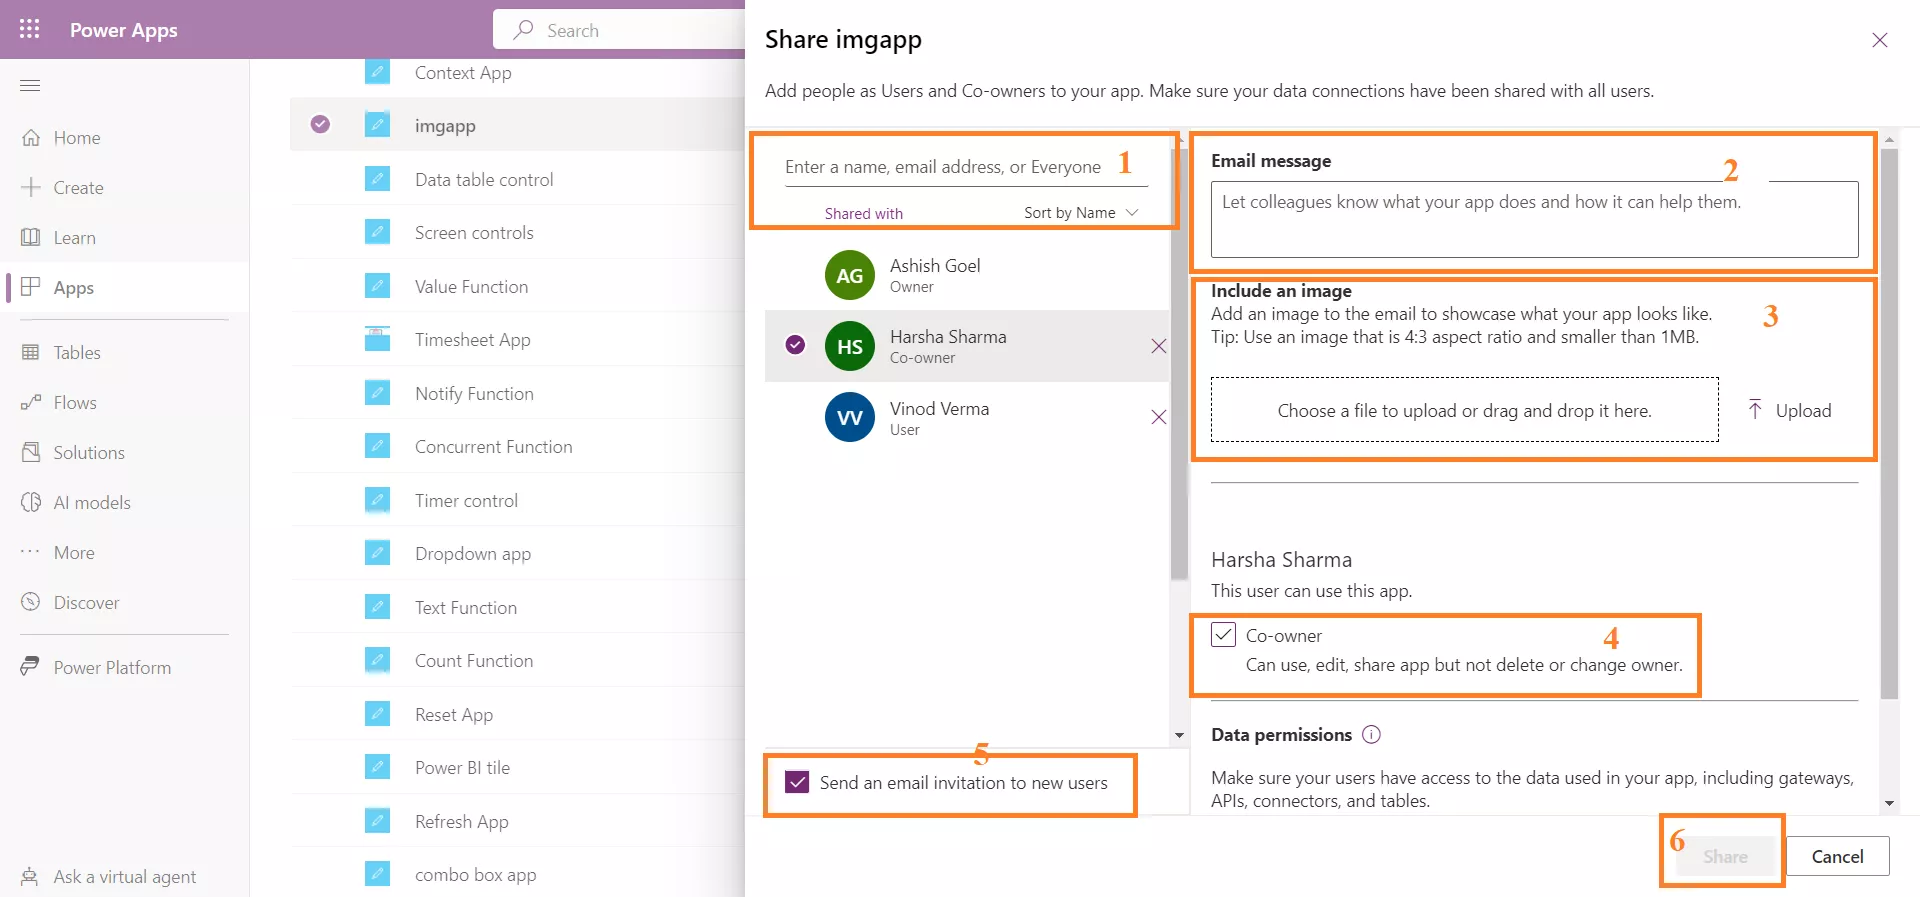
Step 4: Add users from your Microsoft Azure Active Directory (Azure AD) service by typing their names or email addresses in the box. Selected users will appear below the field so that you can add several at once. In addition to adding users one-by-one, we can type everyone to share with every user in our tenant.
As an app owner, the two roles that we can choose from when sharing the app with someone are User and Co-owner.
Step 5: By default, the user receives the User role permission, if we share the app with the user. If we want the user to also be able to edit the app, then select the Co-owner check box. The following is a description of both permissions:
- Co-owner
- Users with Co-owner role can use the app
- Edit the app to make changes in the code
- Share the app with other users
- Change the role (Co-owner or User) of other users to whom the app has already been shared
- Can remove users from the app, whether they have Co-owner or User role
- But cannot delete the app or change the owner of the app.
- User
- Users with User role can Use the app
- Cannot Edit the app (i.e., modify its code)
- Cannot Share the app with others
- Cannot delete the app
Step 6: To add only one person or group and use Microsoft Dataverse as a data source, set user roles so that app users can make changes to the underlying data. Regardless of your data source, users need to have the proper roles or permissions to take action on data.
Step 7: Select the Send an email invitation to new users checkbox so that an email will be sent to users with a link to access the application. The invitation email would look similar to the following image.
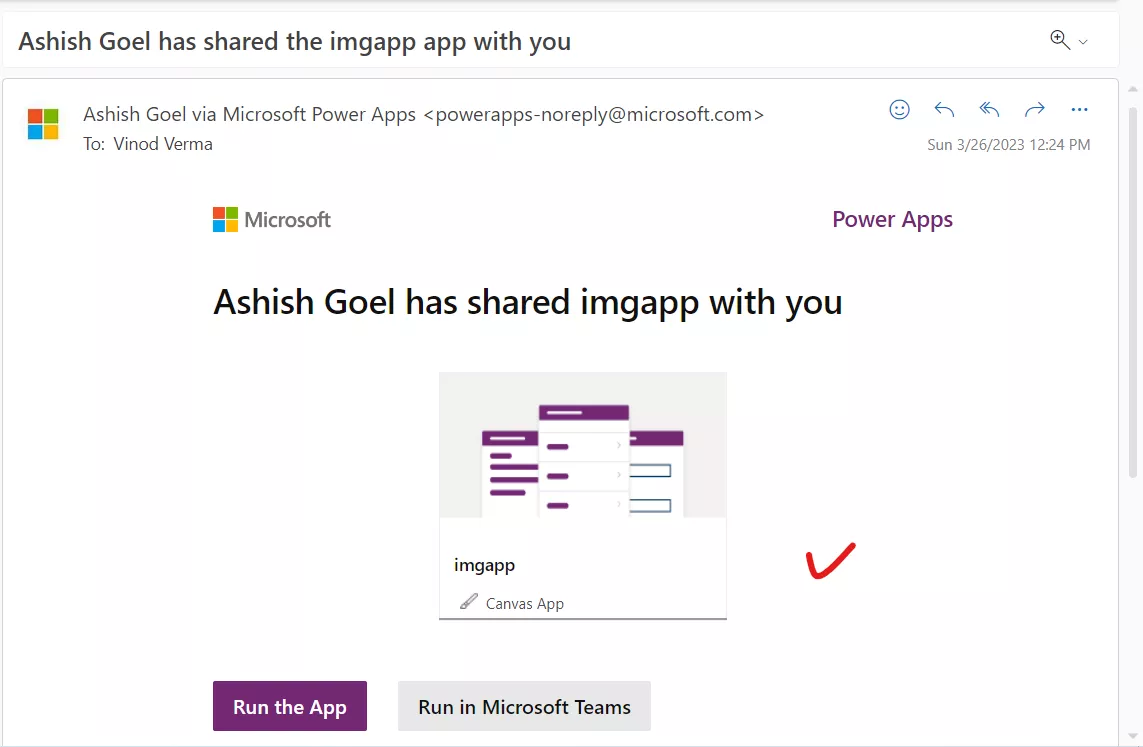
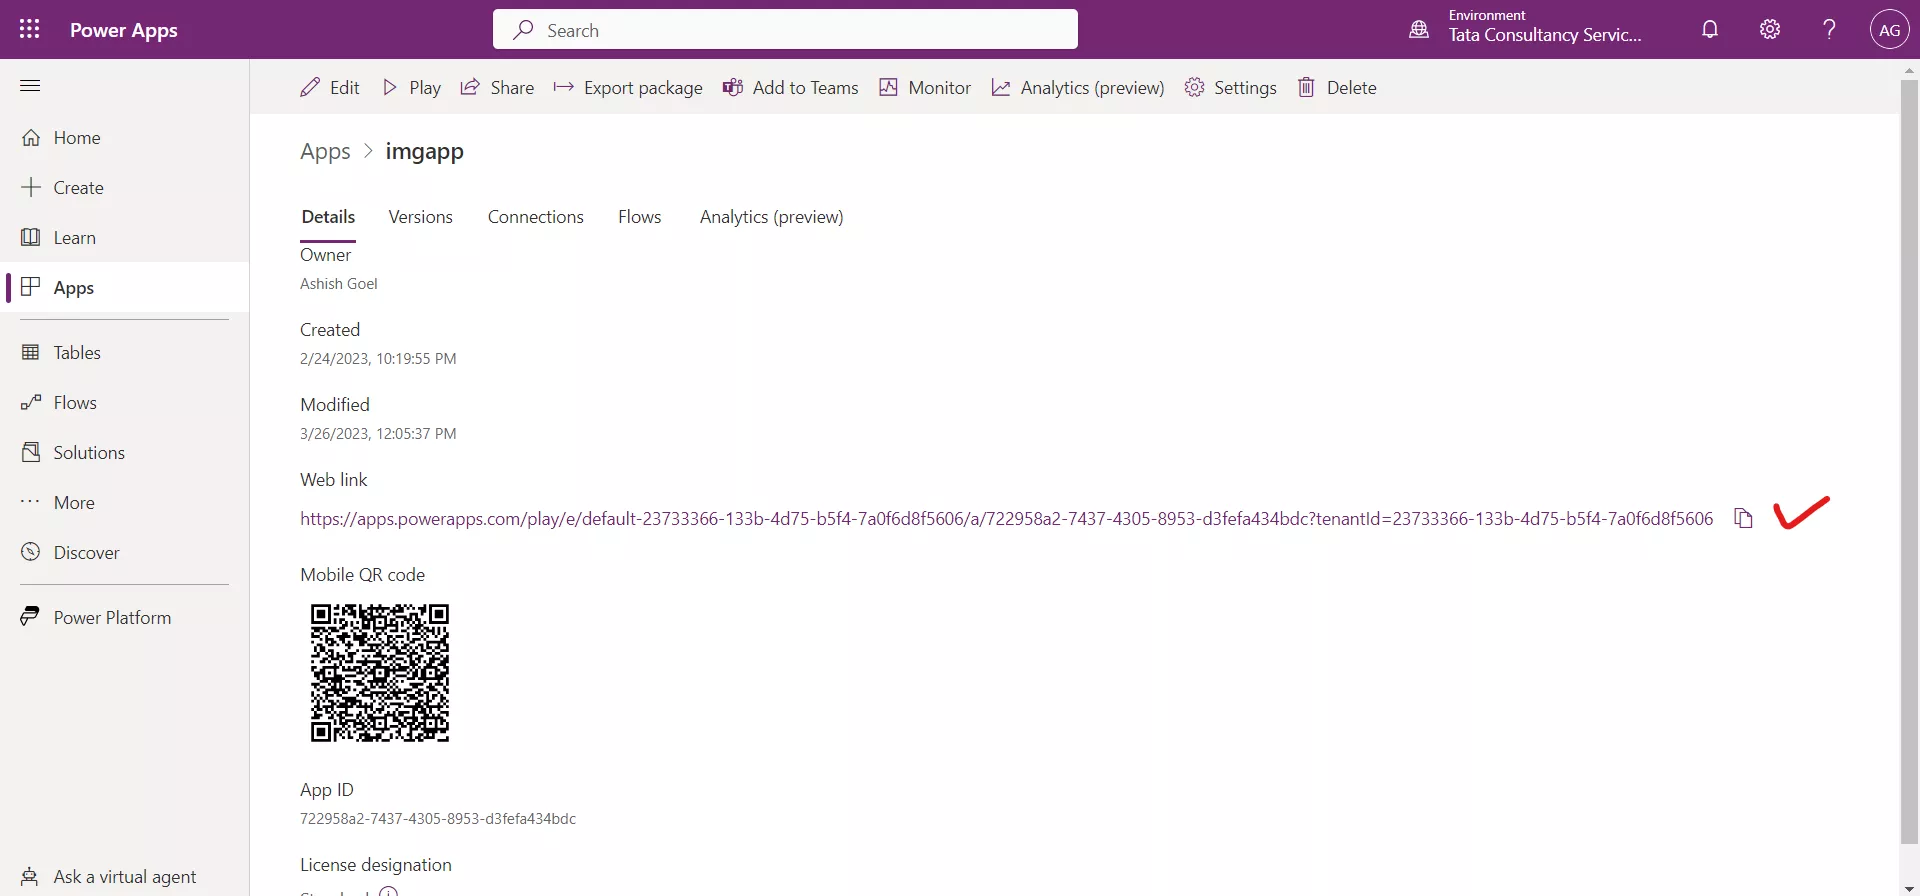
If we cleared the Send an email invitation to new users checkbox, we can still send a link to the users of our app. We can find the link for the app on the app Details screen in the Web link section.
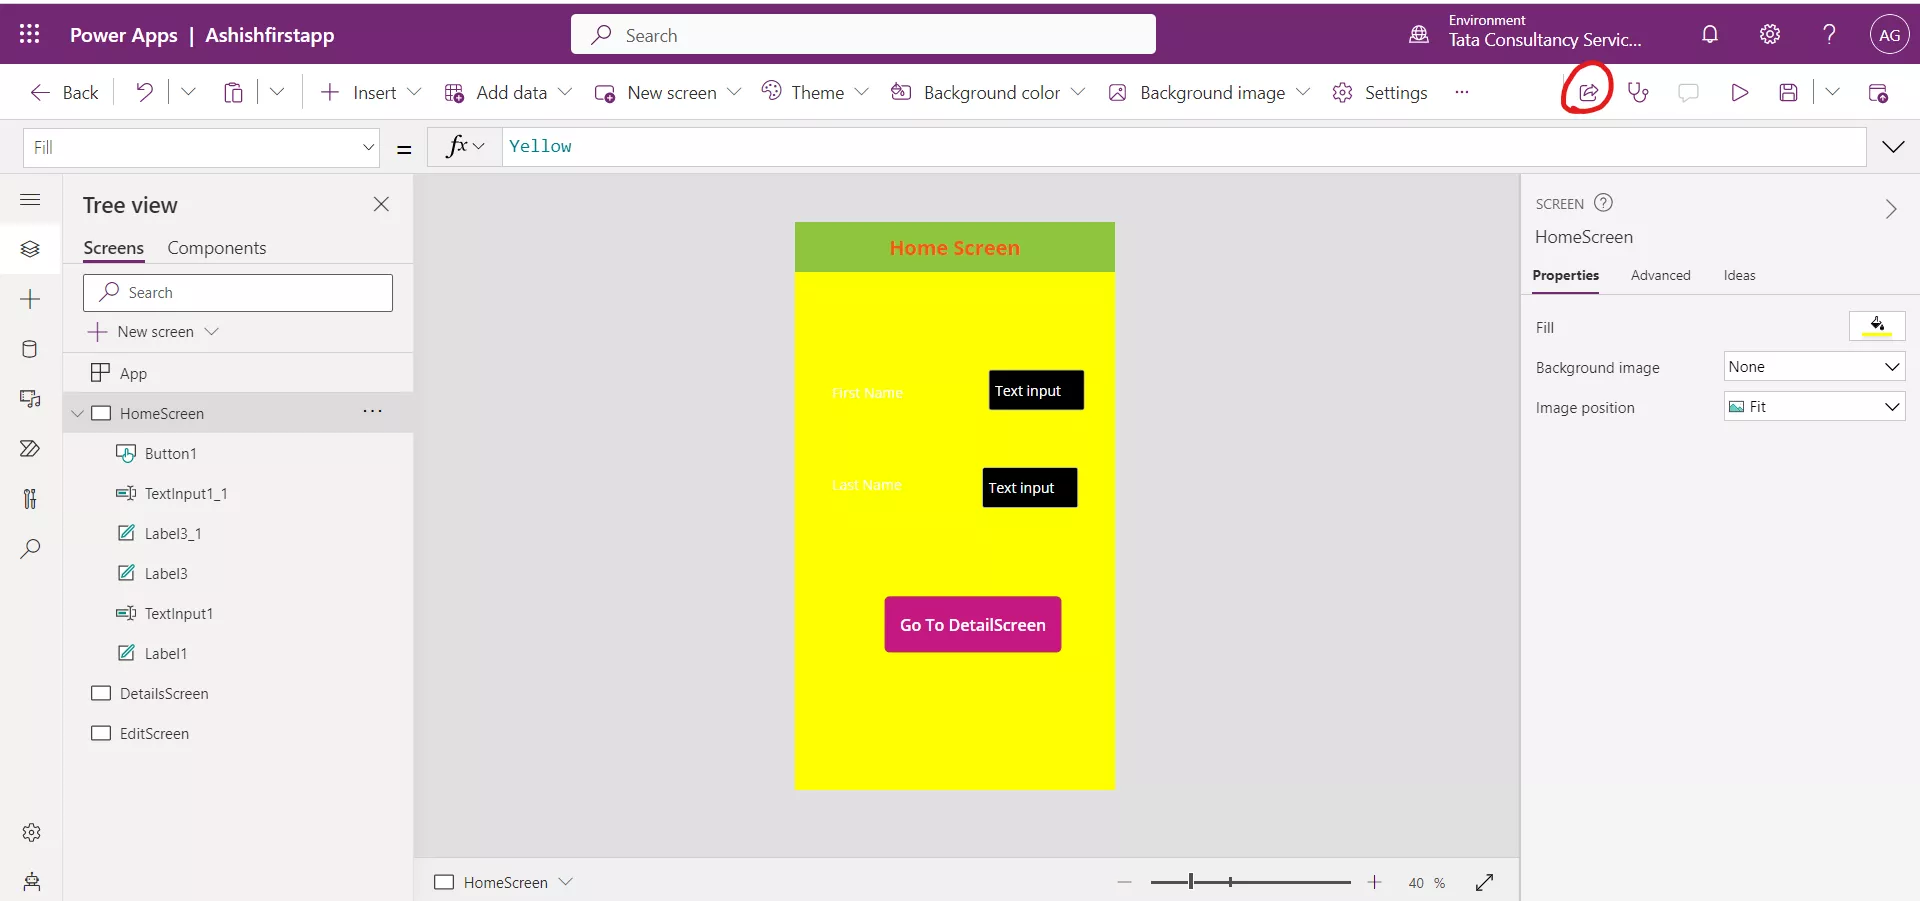
Step 8: Select the Share button to share the app with our users in our organization. Alternatively, we can share the app, by clicking on the share icon, in the power apps studio itself.
After clicking the following window appears.
Note: If we make and save changes to a shared app, the people whom we shared the app will automatically see the changes that we have done when we publish the app.
Consider the following points about security groups:
1. When we share an app with a security group, both existing members and new joiners will be granted the specific permissions we've defined for that group. If someone leaves the group, they lose those permissions, unless they are part of another group with access, or we grant them individual permissions.
2. All members within a security group have the same permission level for the app as the group itself. However, we have the flexibility to grant higher permissions to specific individuals within that group, granting them greater access. For instance, we can assign the Security Group the "User" permission, allowing all members to run the app. Additionally, we can give a particular user within the group the "Co-owner" permission, granting them the ability to edit the app. Even if we assign the Security Group the "Co-owner" permission and the specific user the "User" permission, that user can still retain the ability to edit the app.
2. Remove a User
If we accidentally shared the app with someone, or if we need to remove a user(s) permission, follow these steps:
Step 1: Find the app and then select the ellipses (...) beside it. In the pop-up menu, select Share.
Step 2: Select the user or hover the cursor over their name and then select the X icon.
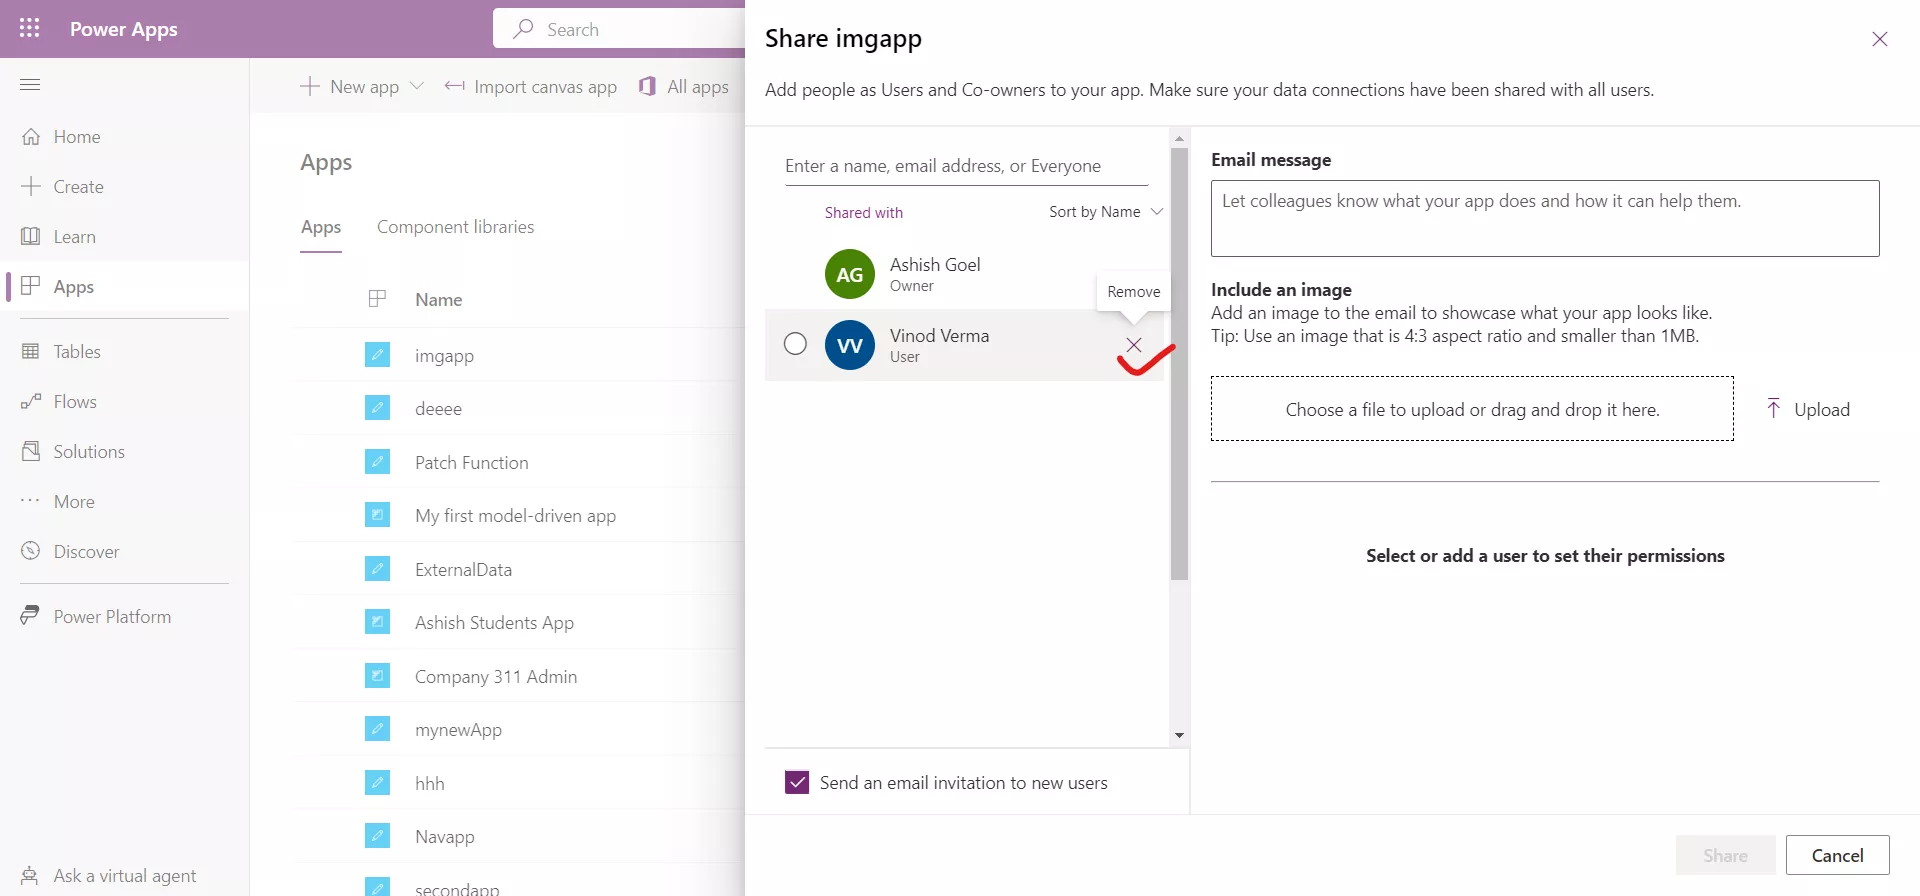
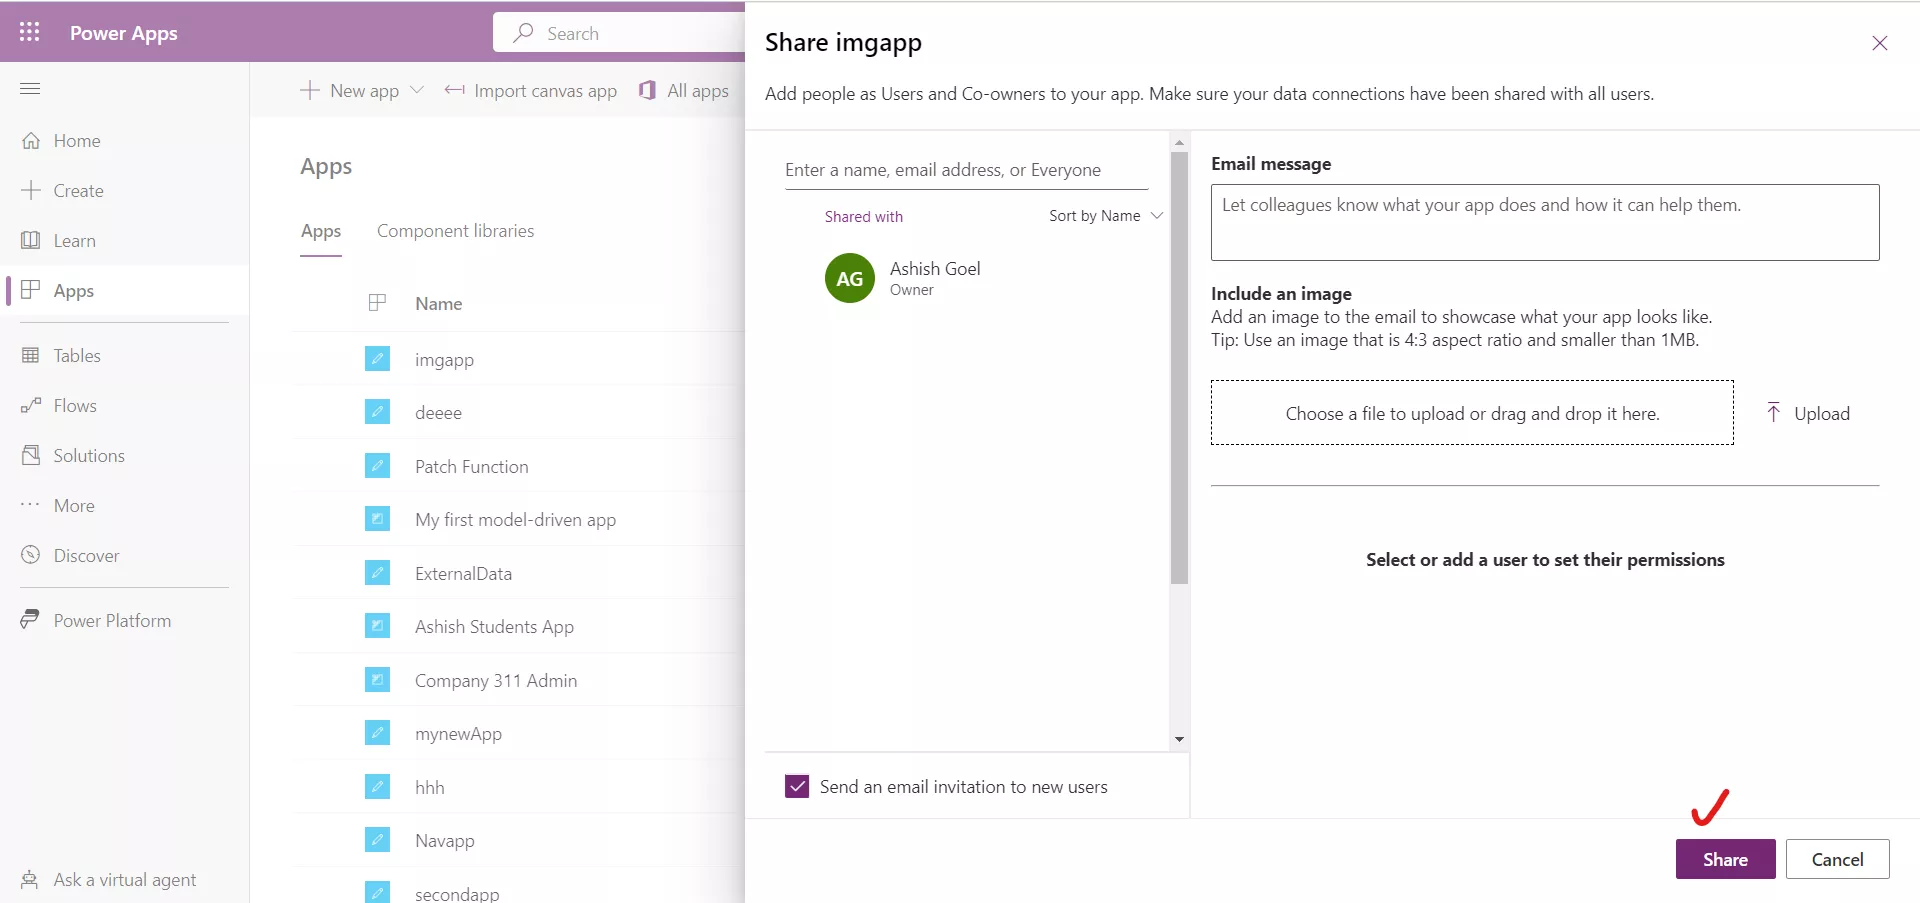
Step 3: Select Share in the lower part of the screen to save the updated sharing permissions.
3. Share the Model-Driven app
Sharing a model-driven app involves two primary steps. First, associate one or more security role(s) with the app, then assign the security role(s) to users.
Note: Security roles control a user's access to data through a set of access levels and permissions. The combination of access levels and permissions that are included in a specific security role sets limits on the user's view of data and interactions with that data. One or more security roles must be assigned to the app. The apps that users can use depend on the security roles they are assigned to.
Step 1: Sign into Power Apps with an organizational account.
Step 2: Select a model-driven app and click Share.
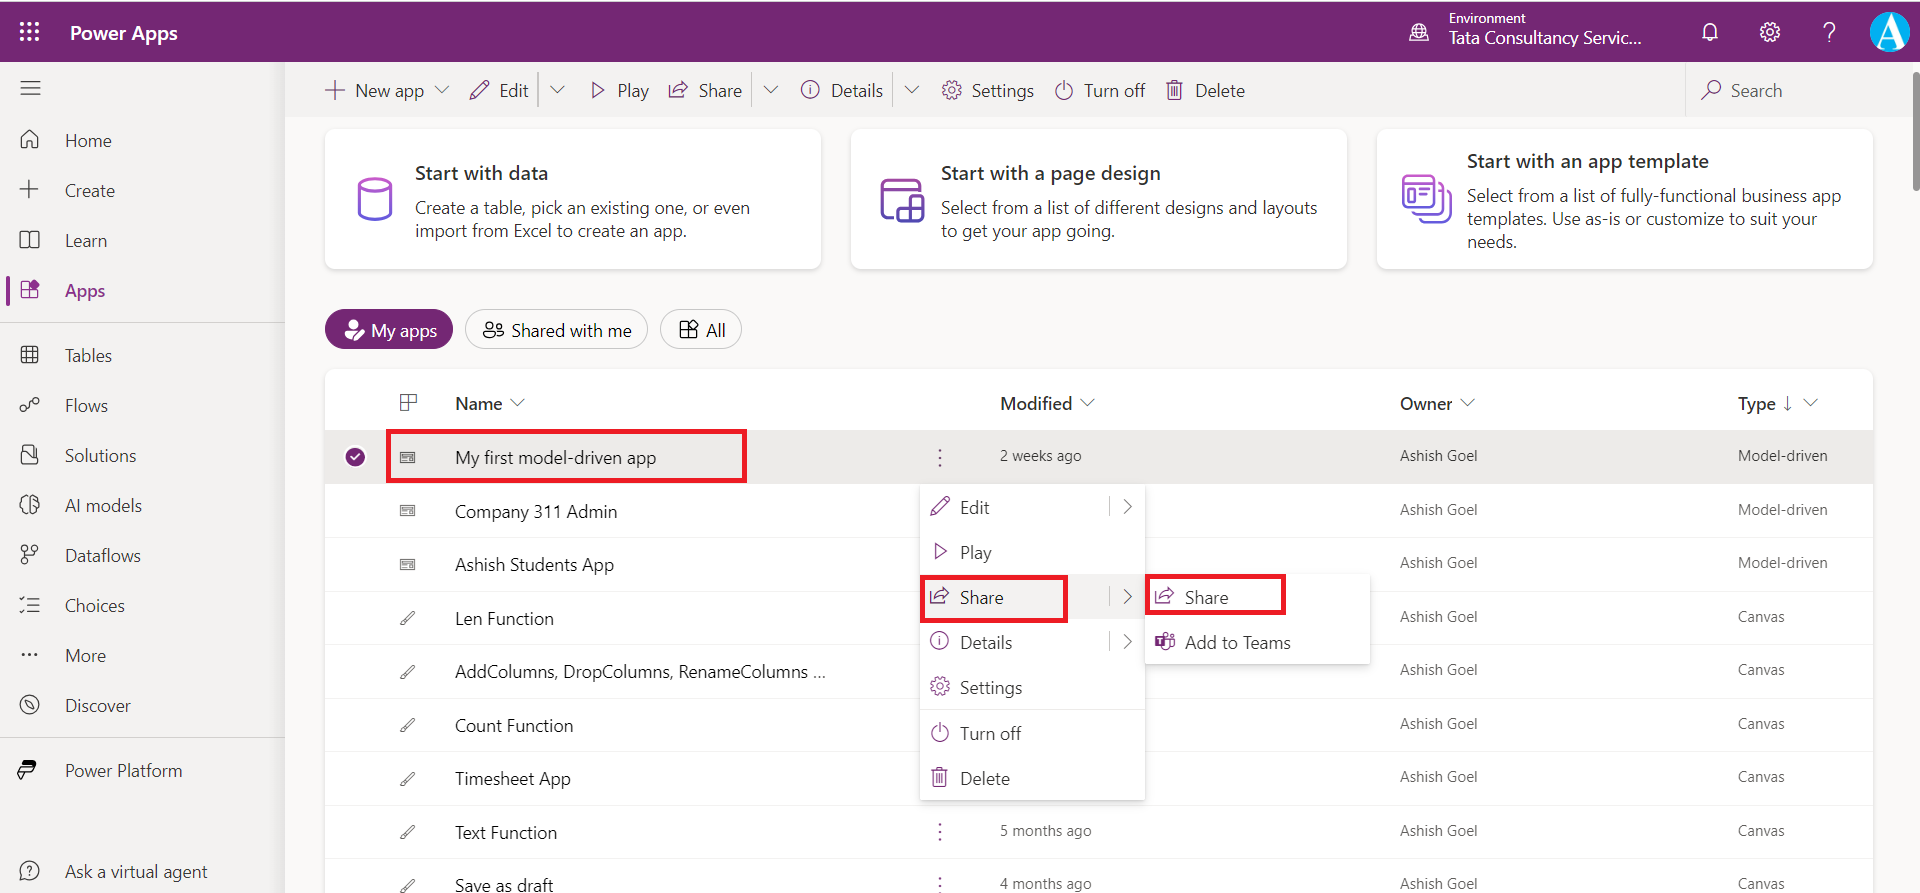
Step 3: Select the app then choose a security role from the list. And select Share at the bottom to update the security roles which our app will use.
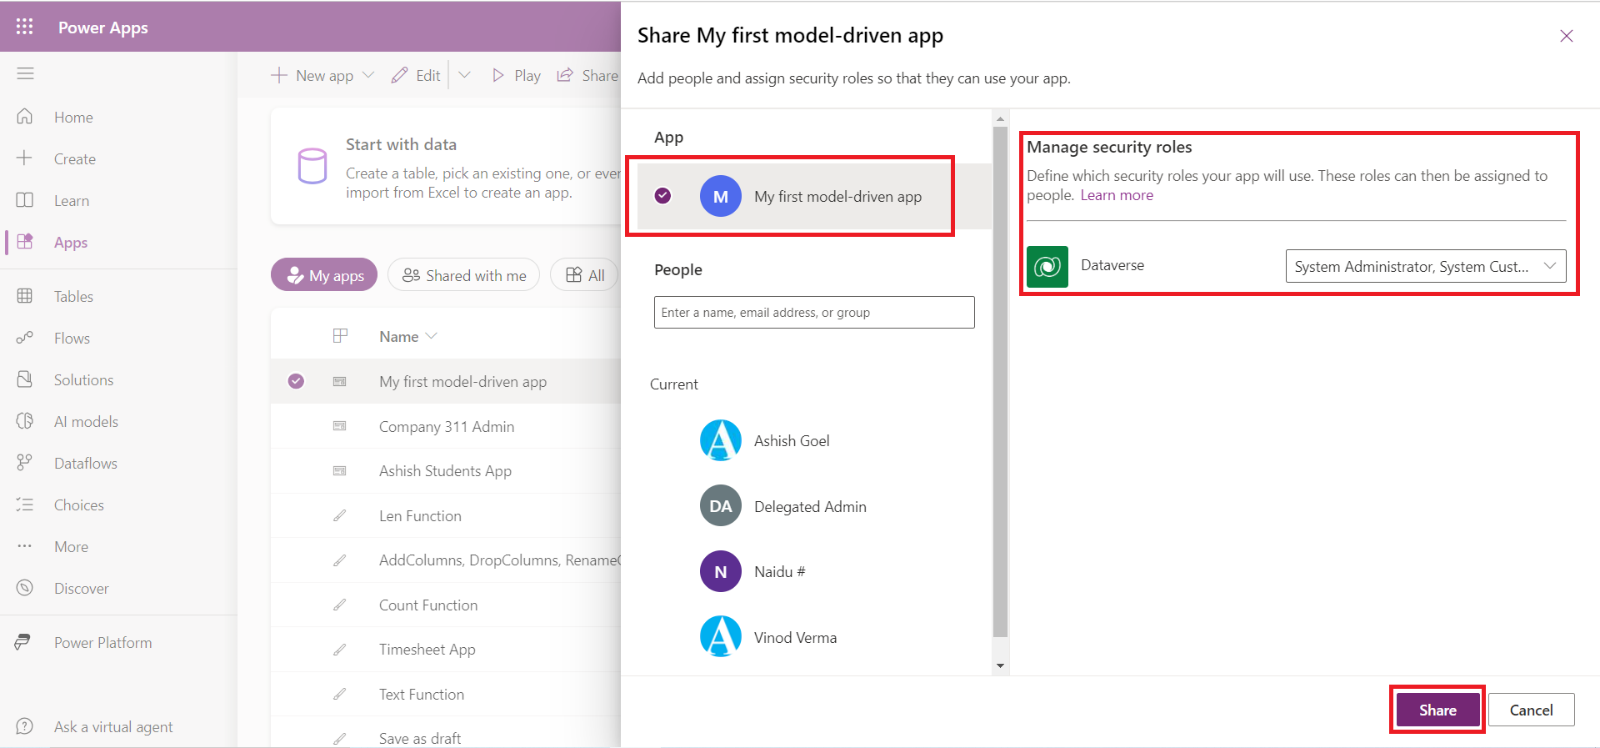
Step 4: To add a user to the app. Search for a user in the search bar, we can add here a security group or M365 Group as well.
Step 5: Select the user, then select a role from the list. In the list, we can see all the security roles which our app is using.
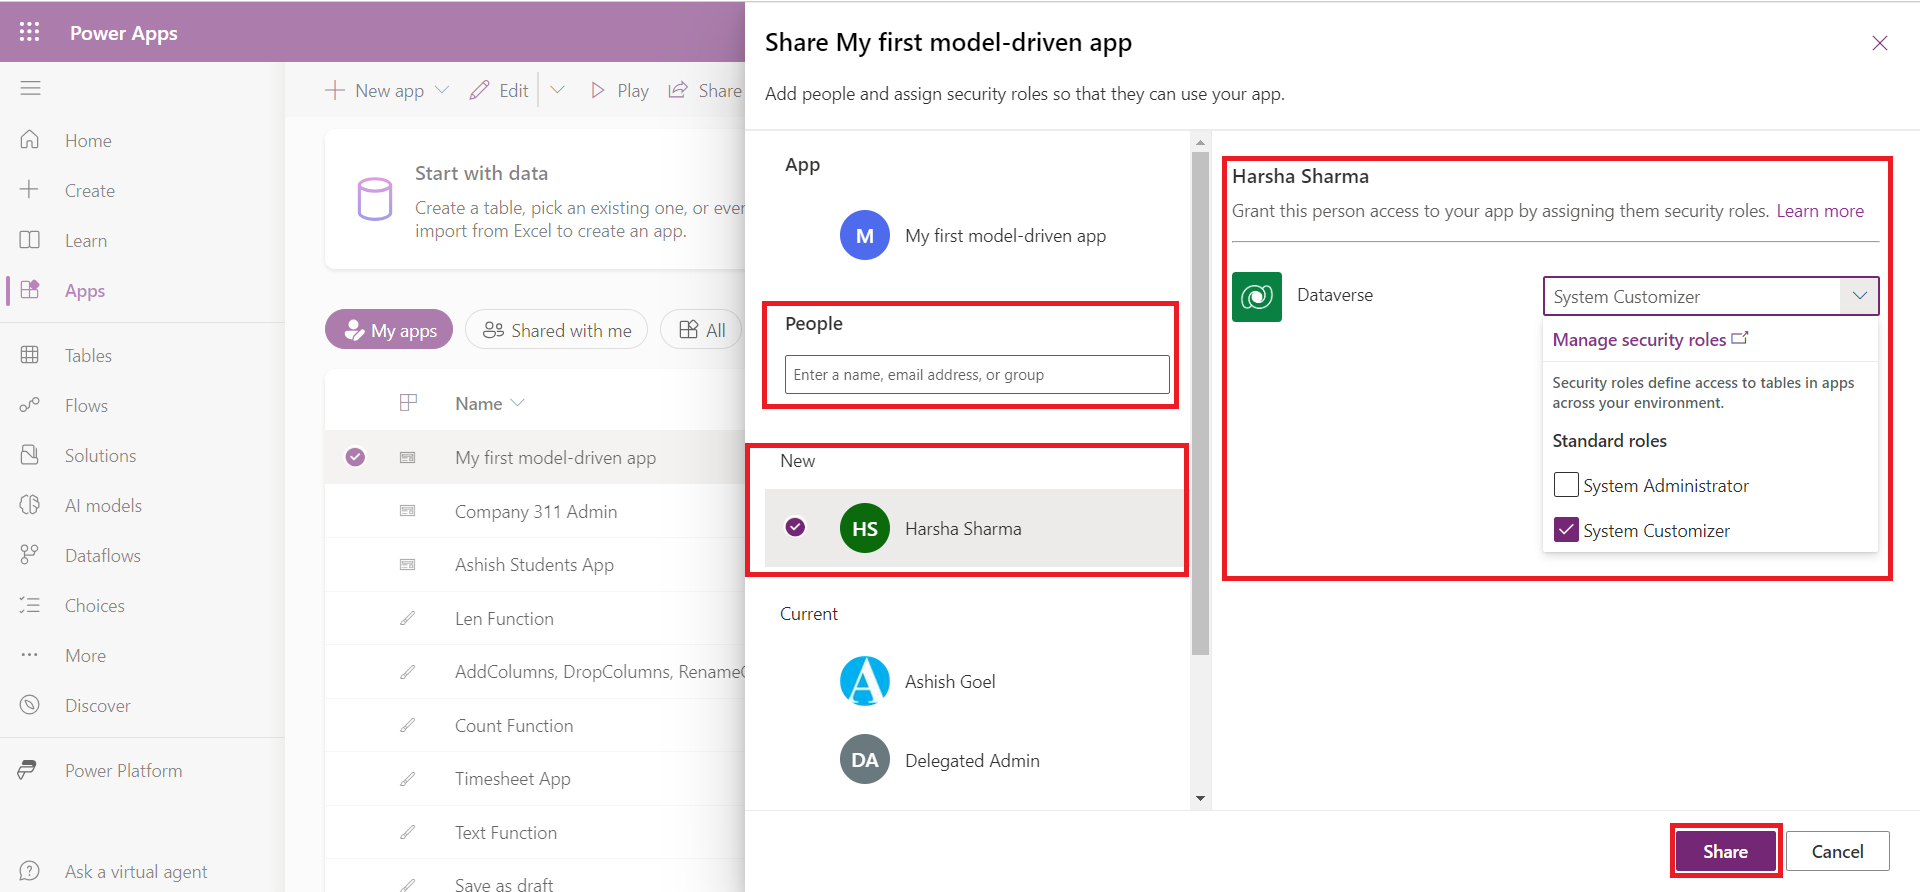
Step 6: Click Share.
Note Unlike sharing canvas apps, sharing model-driven apps does not currently send an email with a link to the app.
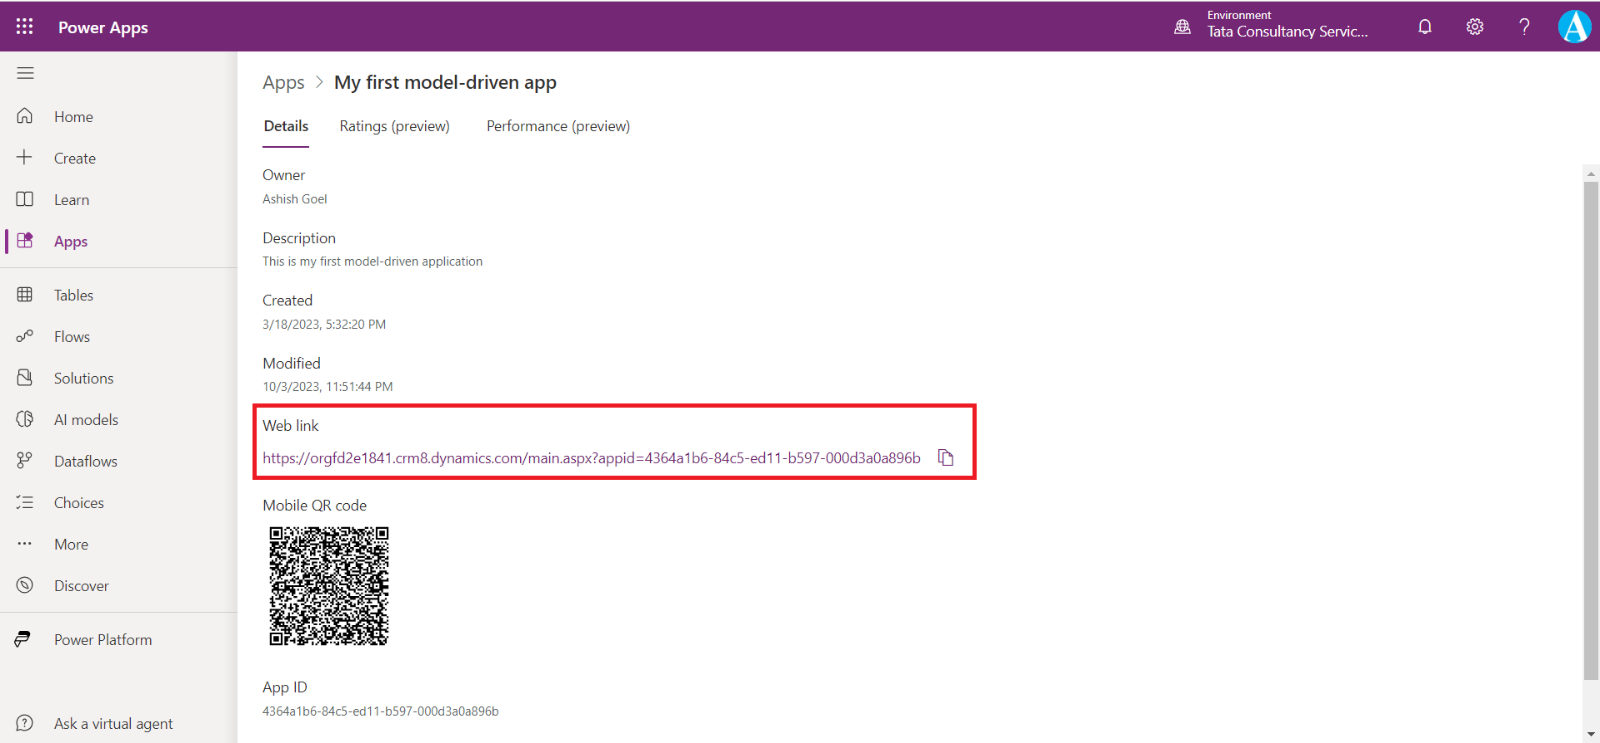
Step 7: We can get the direct link the app, by clicking on three dots (…), then click on Details.
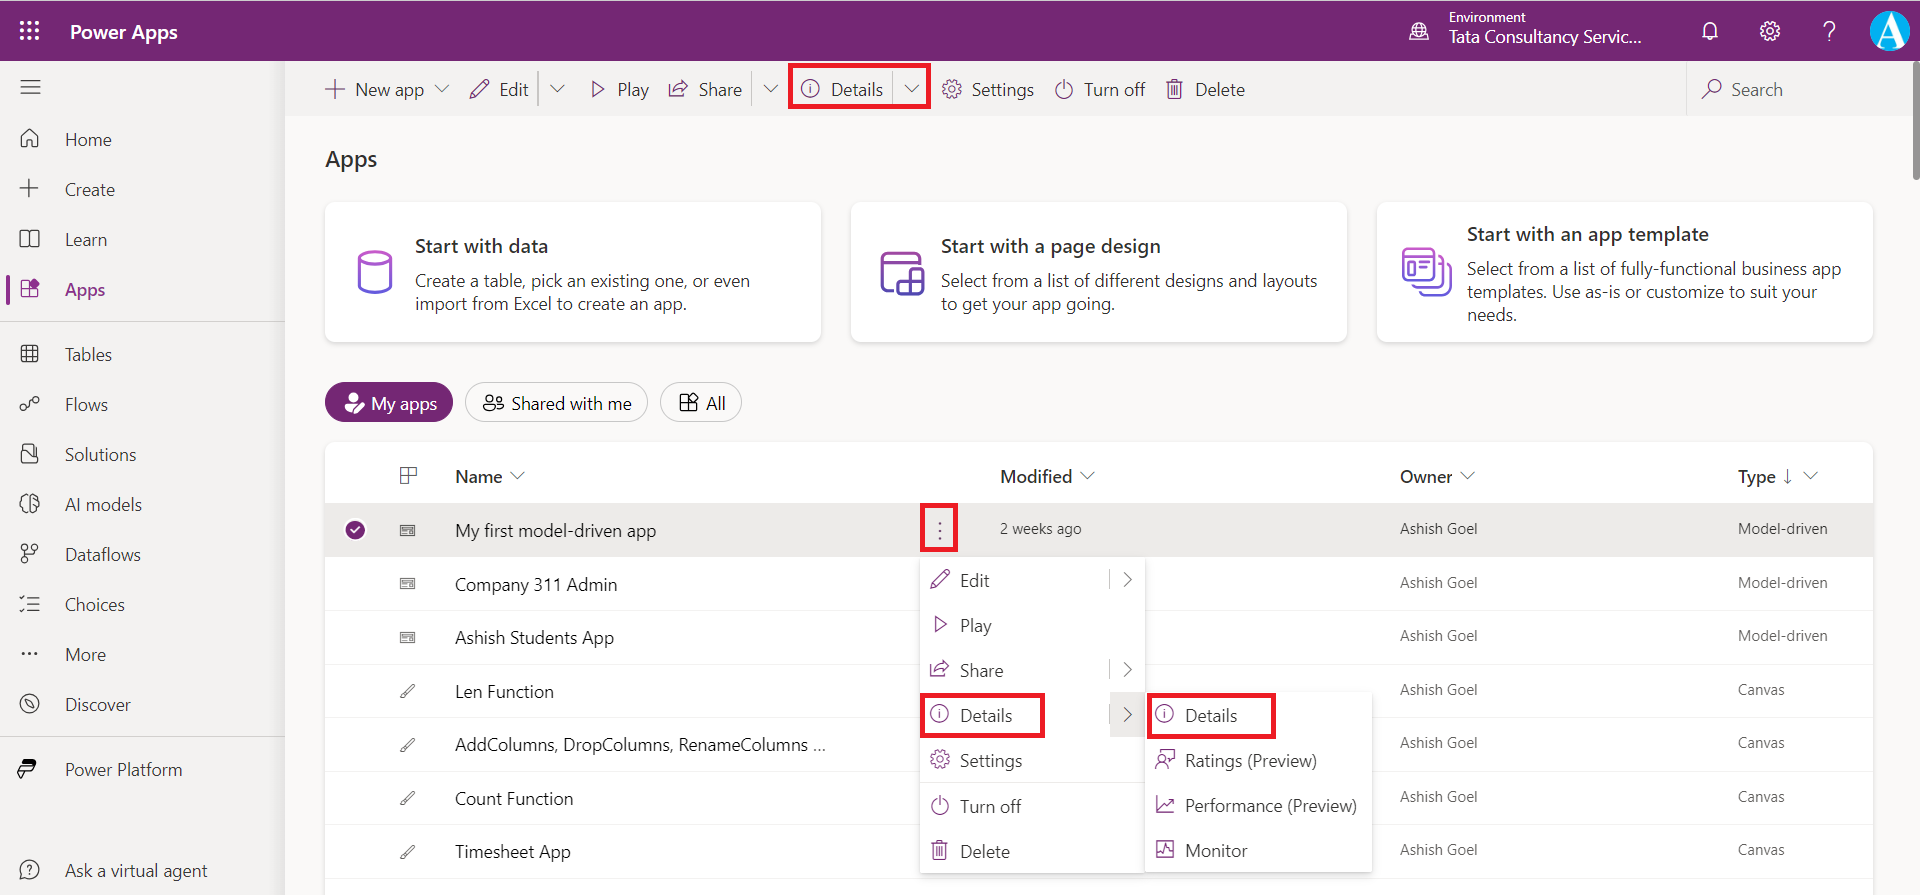
Copy the Web link and share it with the end user.
