Keep and Remove Duplicates in Power Query Editor in Power BI
In the Power Query Editor, we can keep or remove duplicates.
Let’s have the following table named Students.
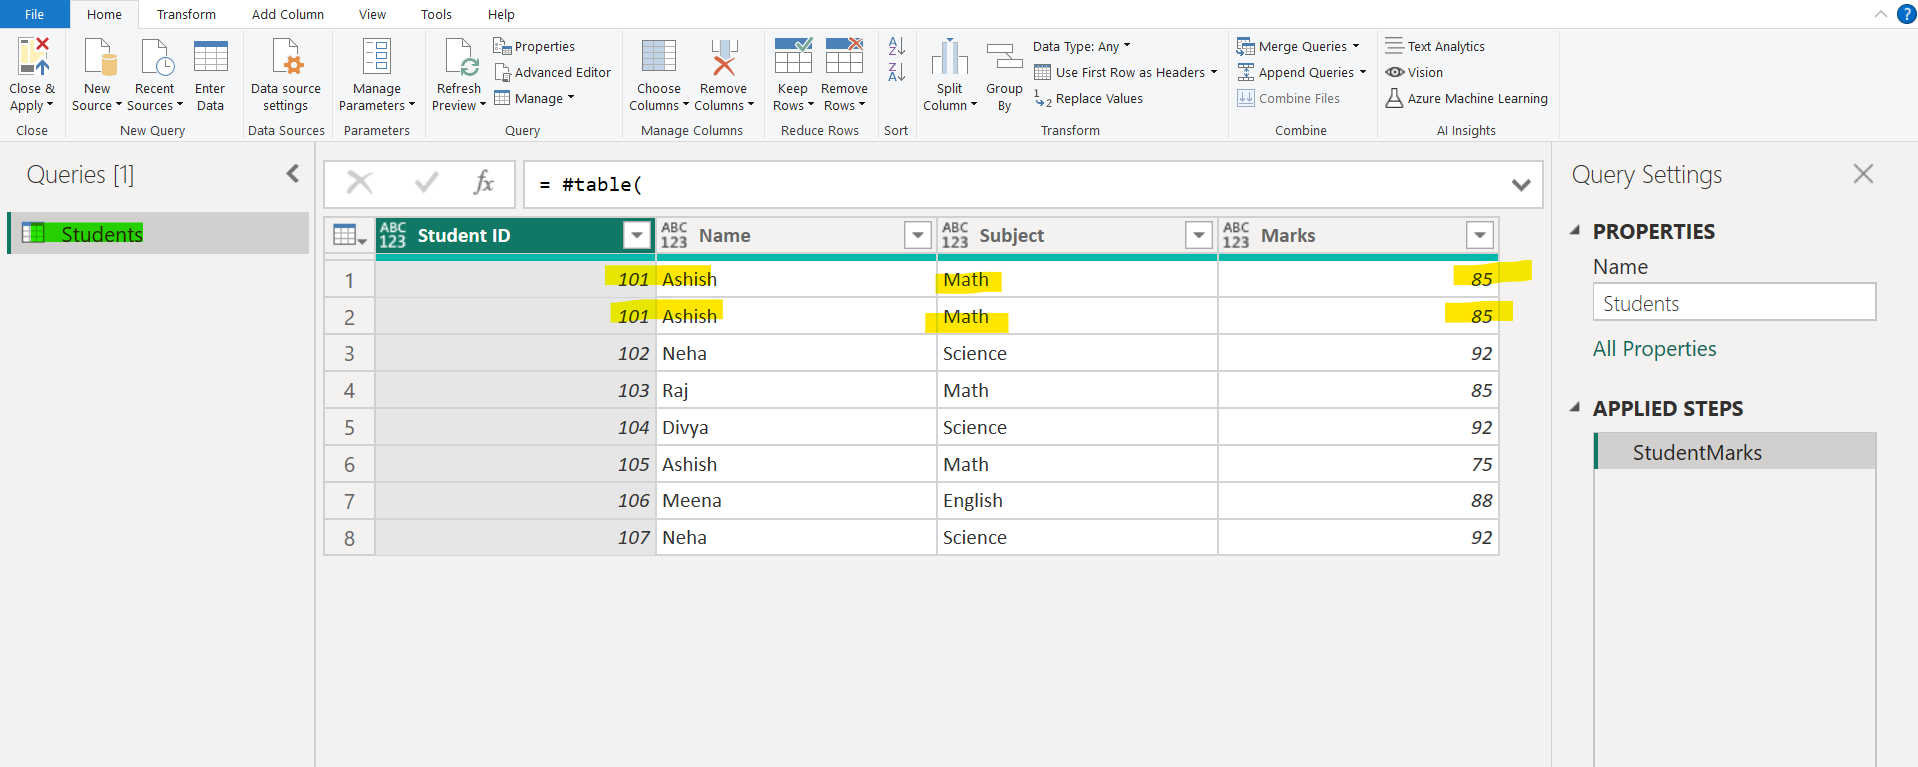
The M code for creating the above table:
Example: Creating a table of student marks.
Power Query M
let
    StudentMarks = #table(
        {"Student ID", "Name", "Subject", "Marks"},
        {
            {101, "Ashish", "Math", 85},
            {101, "Ashish", "Math", 85},
            {102, "Neha", "Science", 92},
            {103, "Raj", "Math", 85},
            {104, "Divya", "Science", 92},
            {105, "Ashish", "Math", 75},
            {106, "Meena", "English", 88},
            {107, "Neha", "Science", 92}
        }
    )
in
    StudentMarks
This code creates a sample table named StudentMarks with student IDs, names, subjects, and marks.
a) Keep Duplicates
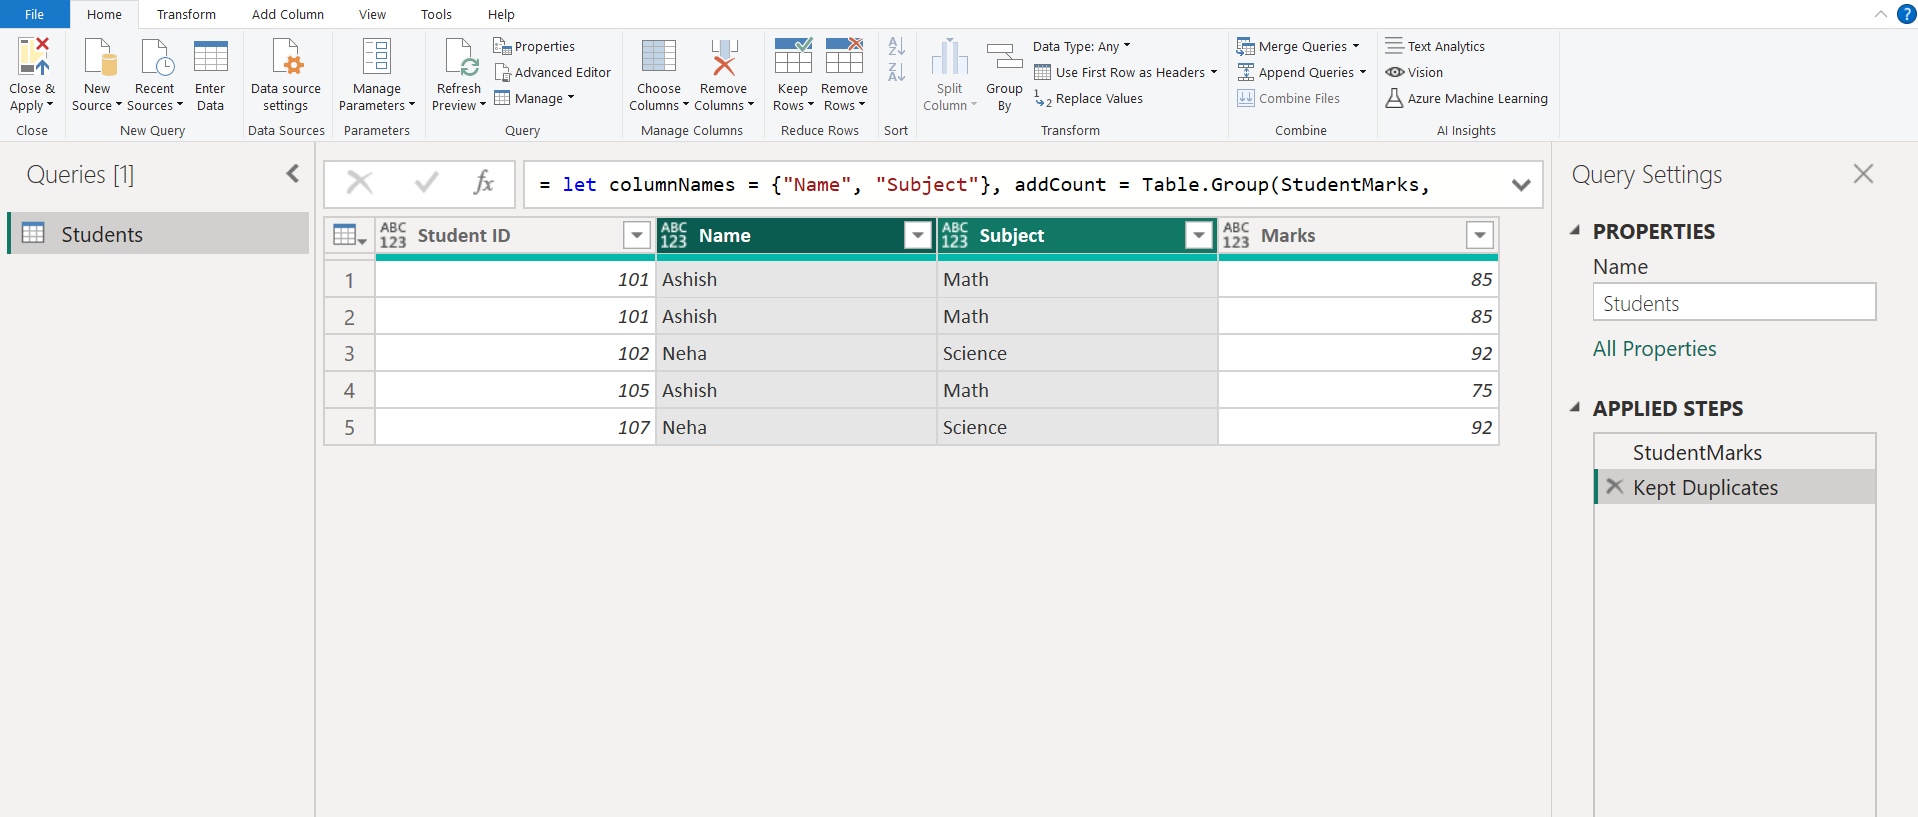
The Keep Duplicates operation returns all the rows which are duplicated in the selected columns.
Step 1: Select the table icon, then from the context menu, select Keep Duplicates.
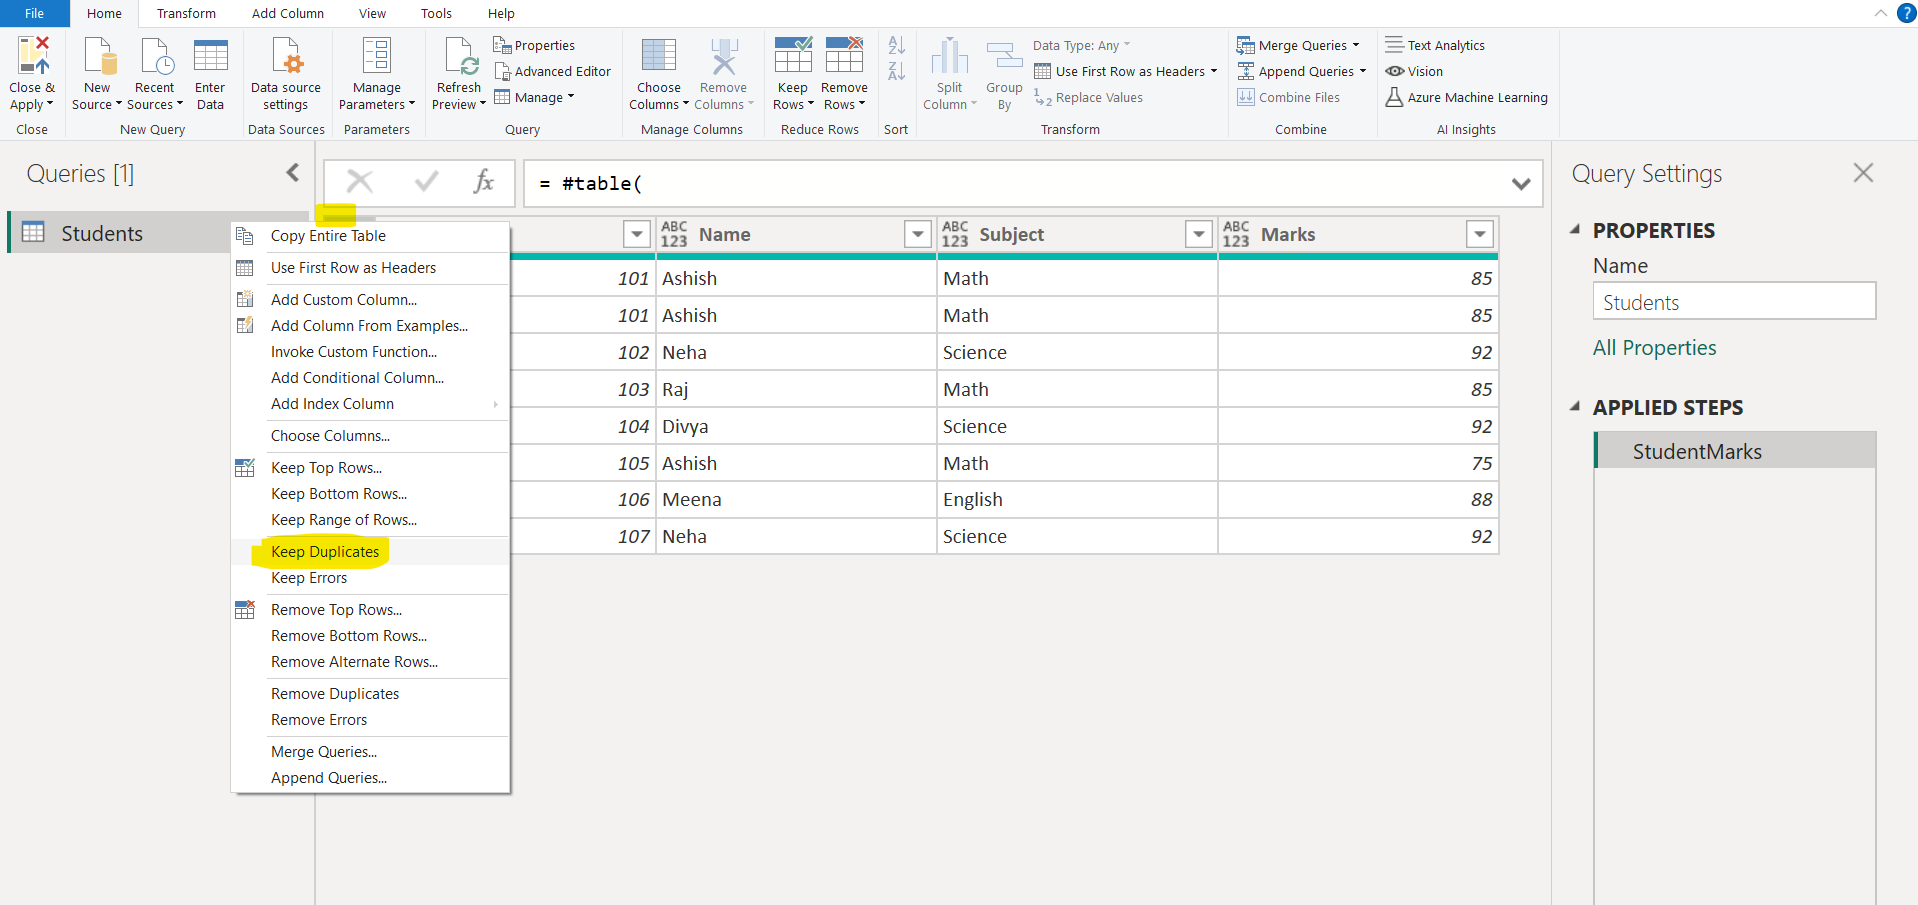
Now we can see the rows which are duplicated in the table.
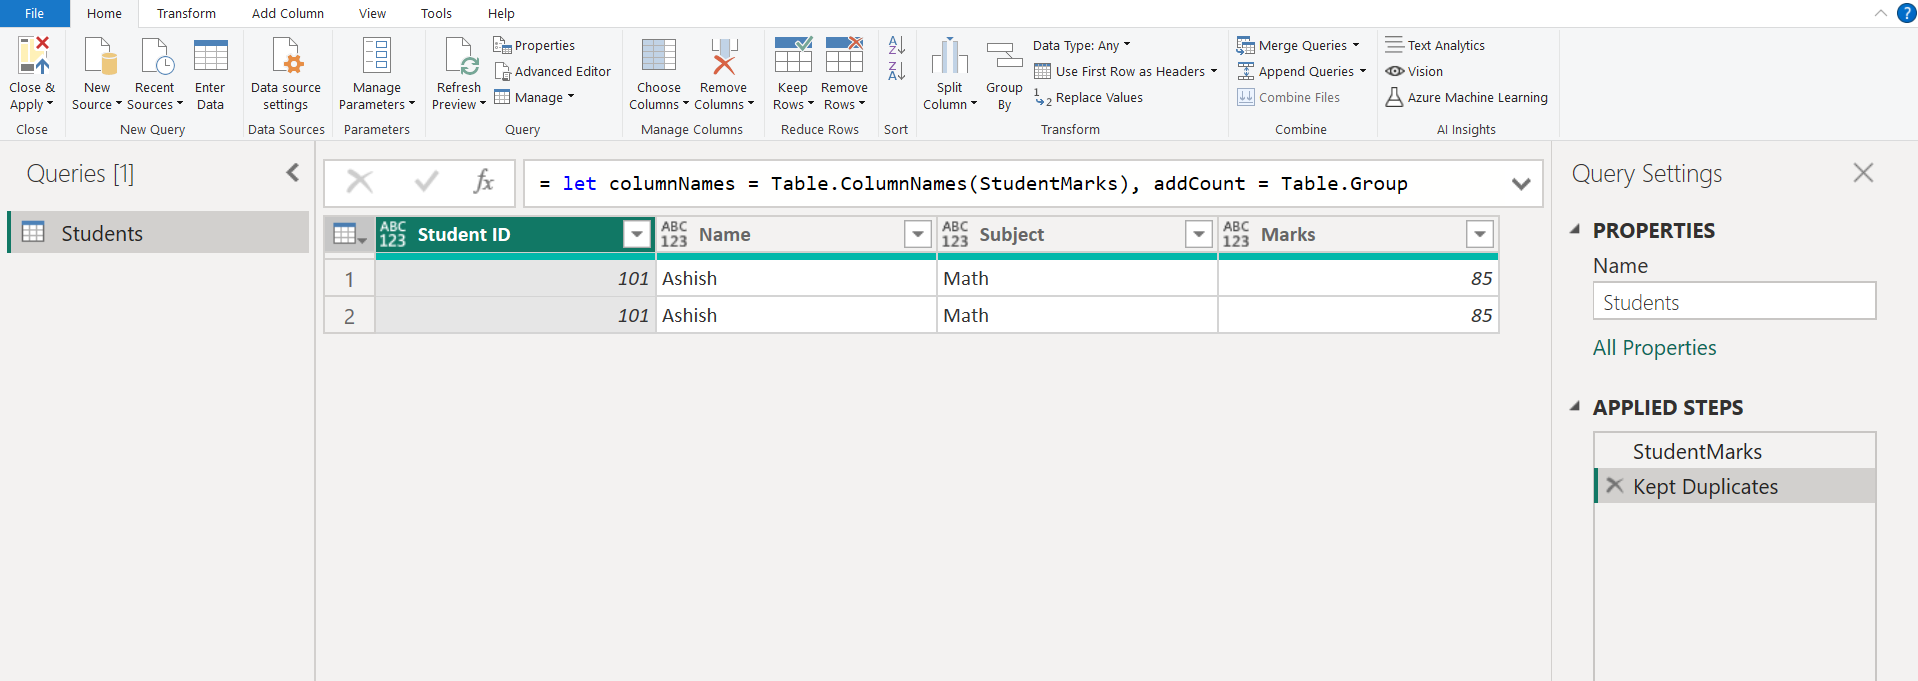
Step 2: Alternatively, select the columns from the table, then choose Keep Duplicates from the Keep Rows dropdown.
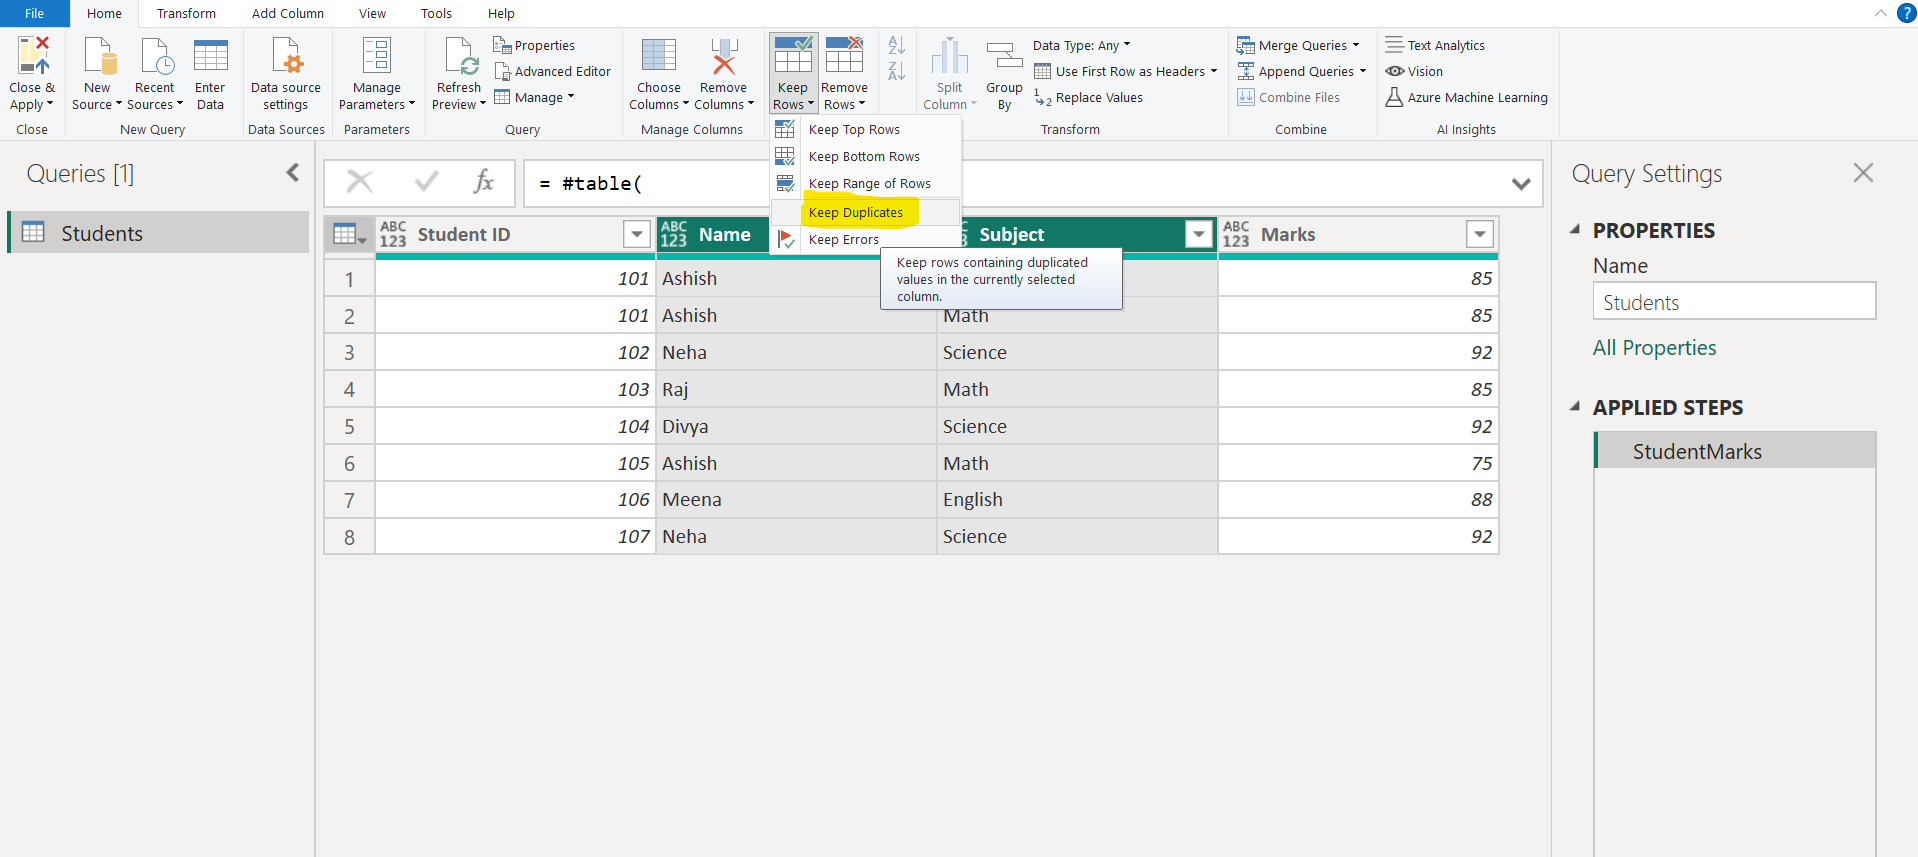
The output is shown below:
b) Remove Duplicates
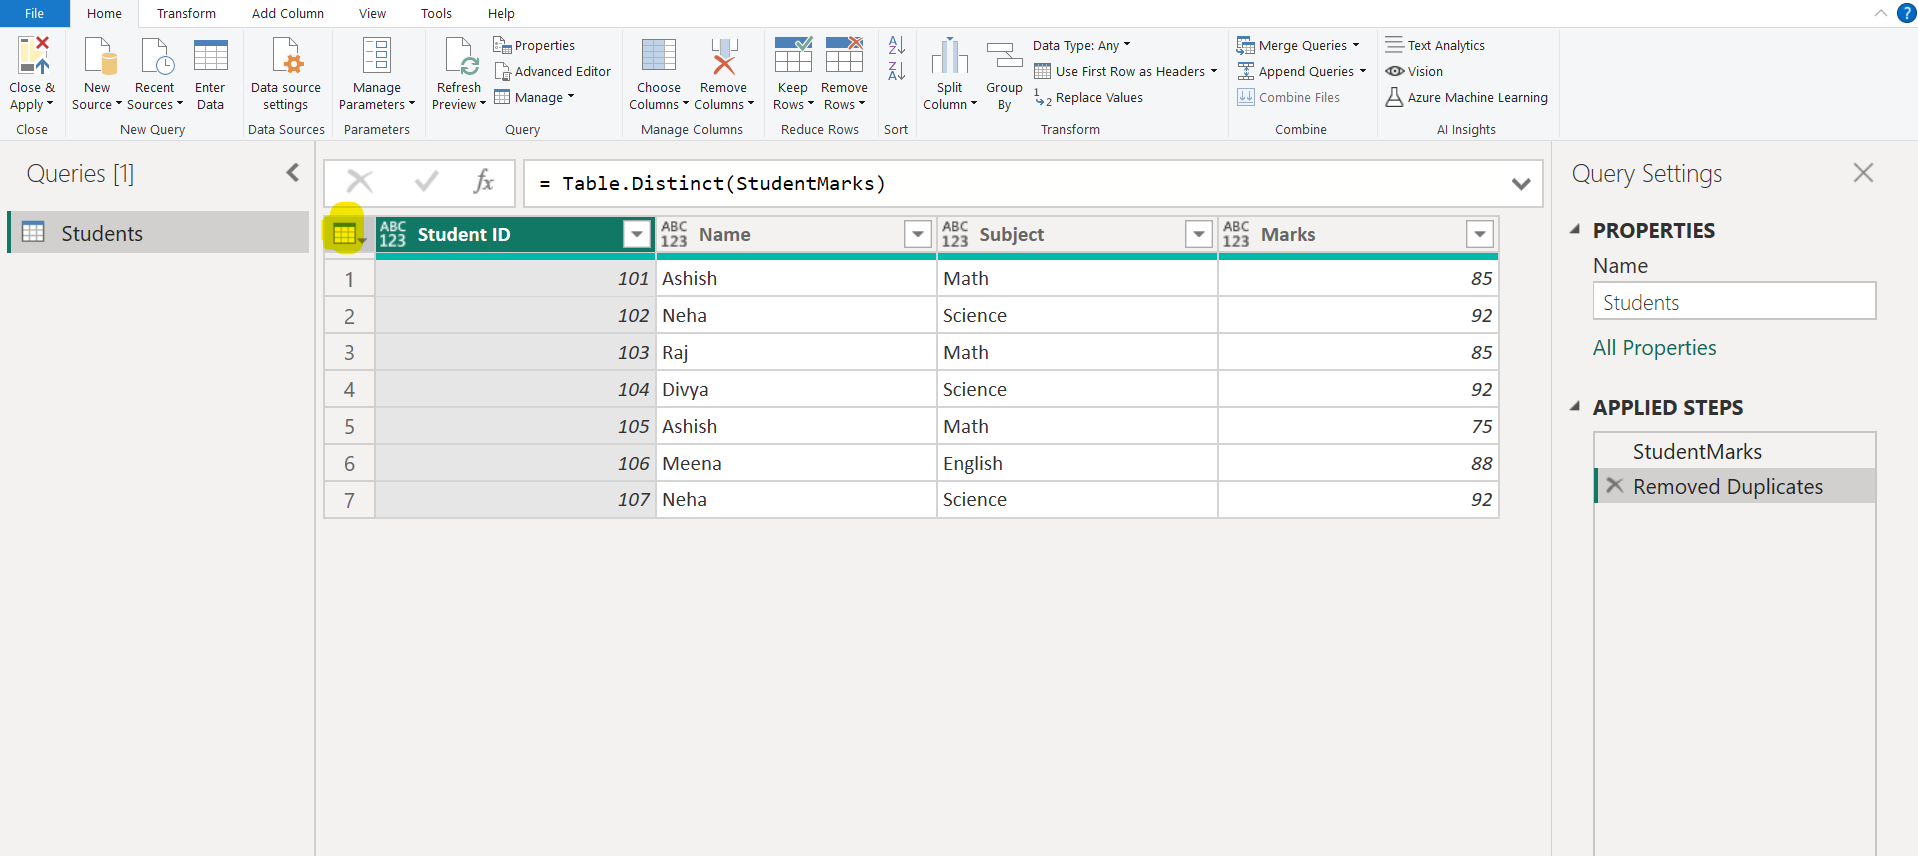
The Remove Duplicates option removes duplicate rows and keeps only unique rows in the table.
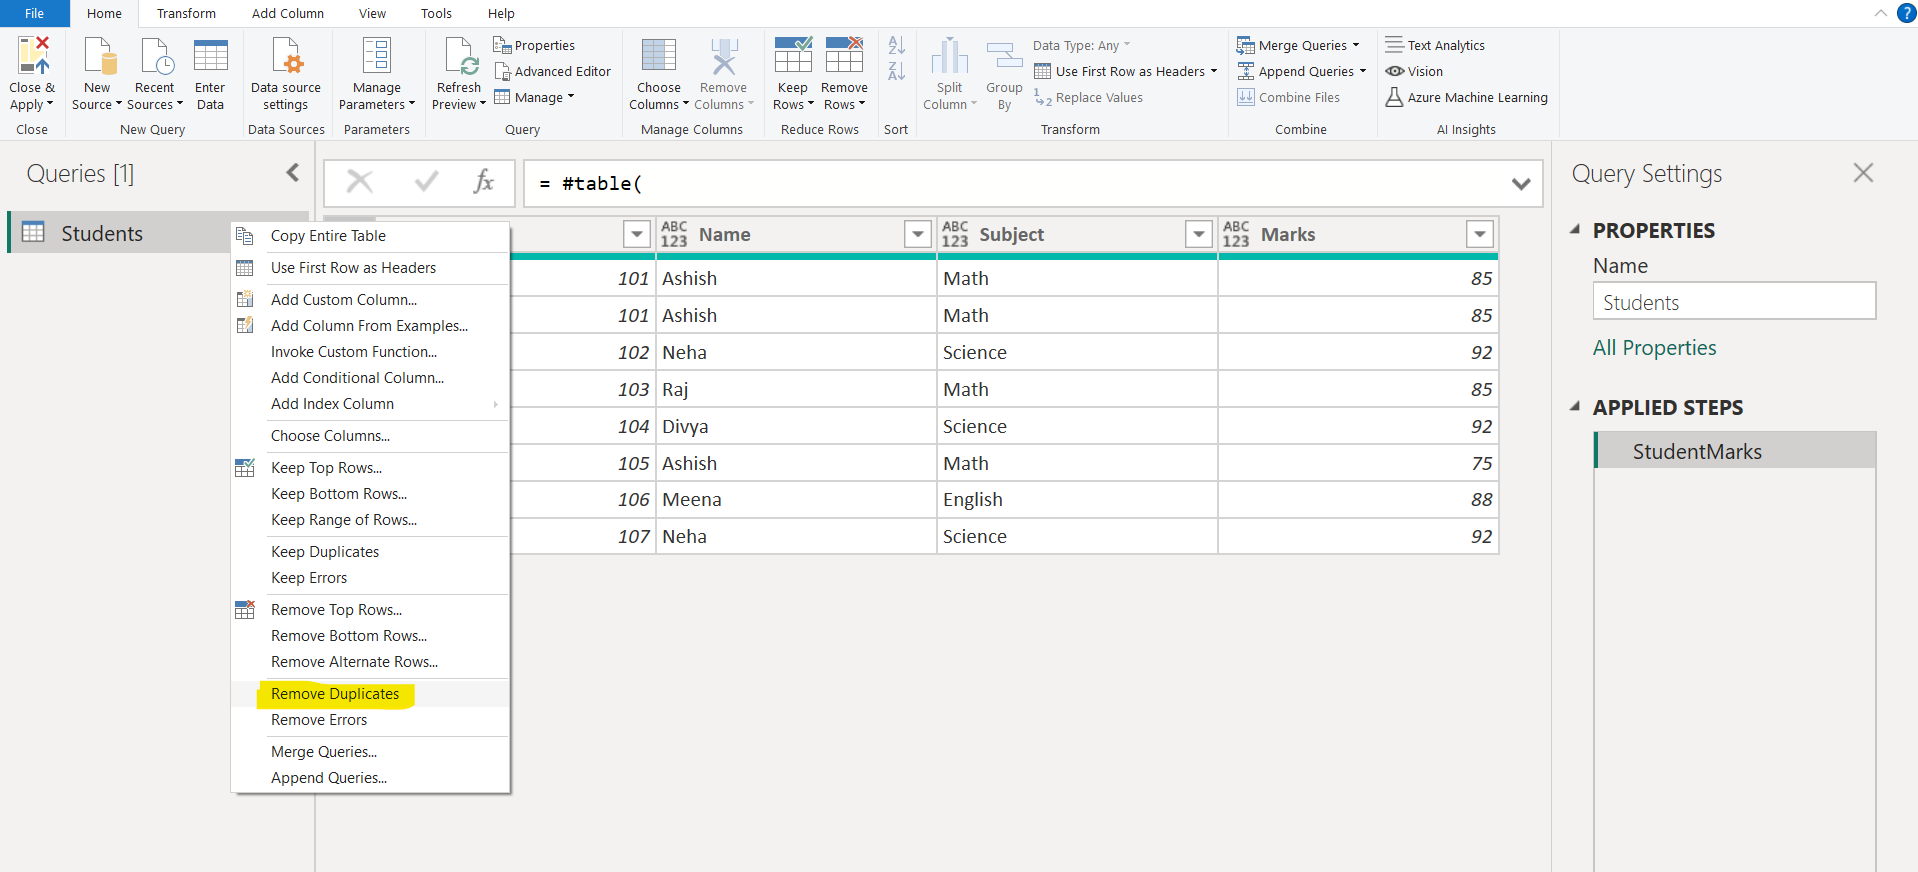
Step 1: Select the table dropdown, then choose Remove Duplicates from the context menu.
The output after removing duplicates is shown below:
Step 2: You can also select a specific column (or multiple columns) and then choose Remove Duplicates.
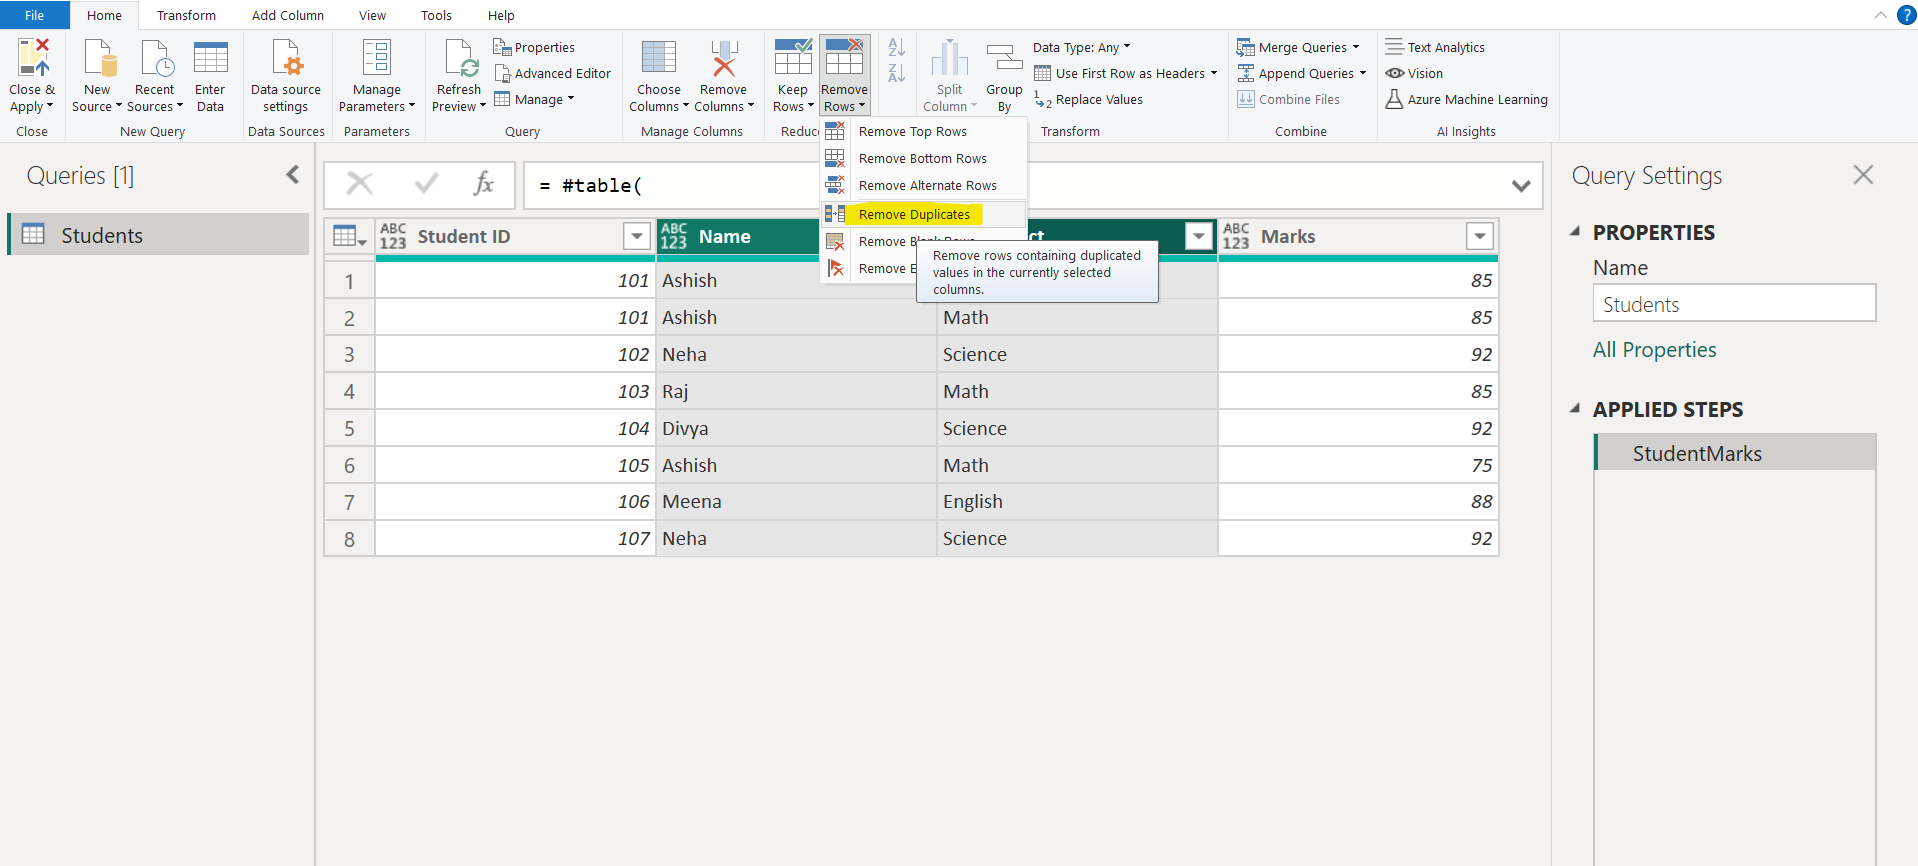
After removing the duplicates, the final output is shown below:
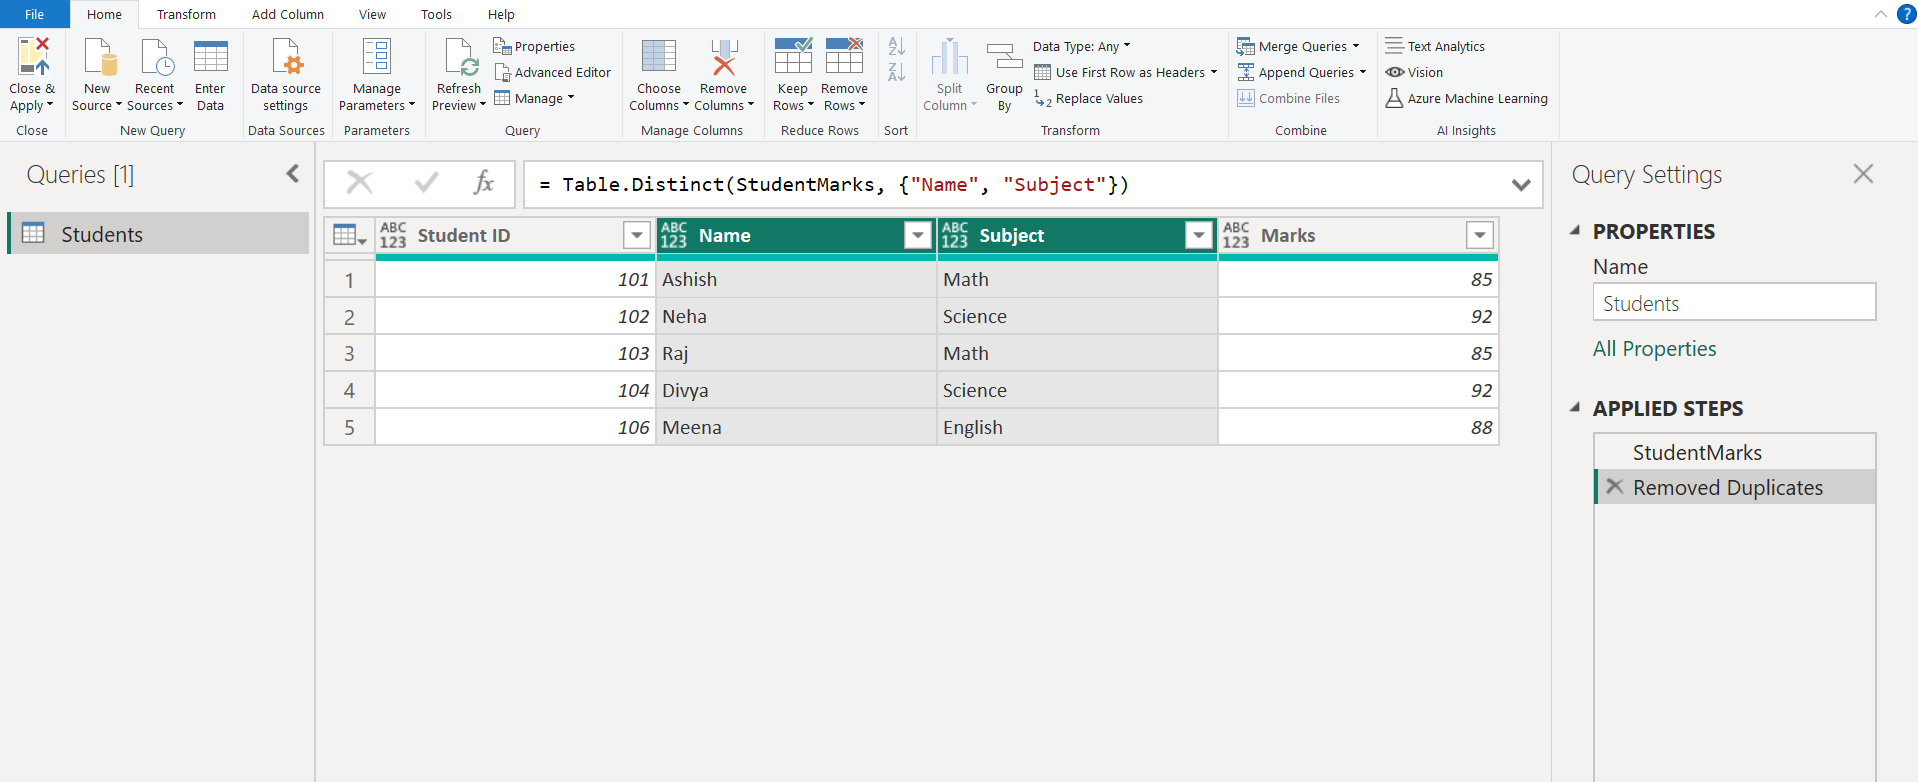
Internally remove duplicates uses the Table.Distinct M function.
Warning: Power Query is case-sensitive. When working with duplicate values, Power Query considers the case of the text, which might lead to undesired results. As a workaround, users can apply an Uppercase or Lowercase transform prior to removing duplicates.