SharePoint List Custom Form
Using Power Apps, we can easily customize a New item form for a SharePoint list that works best for our team or organization.
The create a custom form for the SharePoint list follow the following steps:
Step 1: In the SharePoint site, browse to the list for which we need to create a custom form.
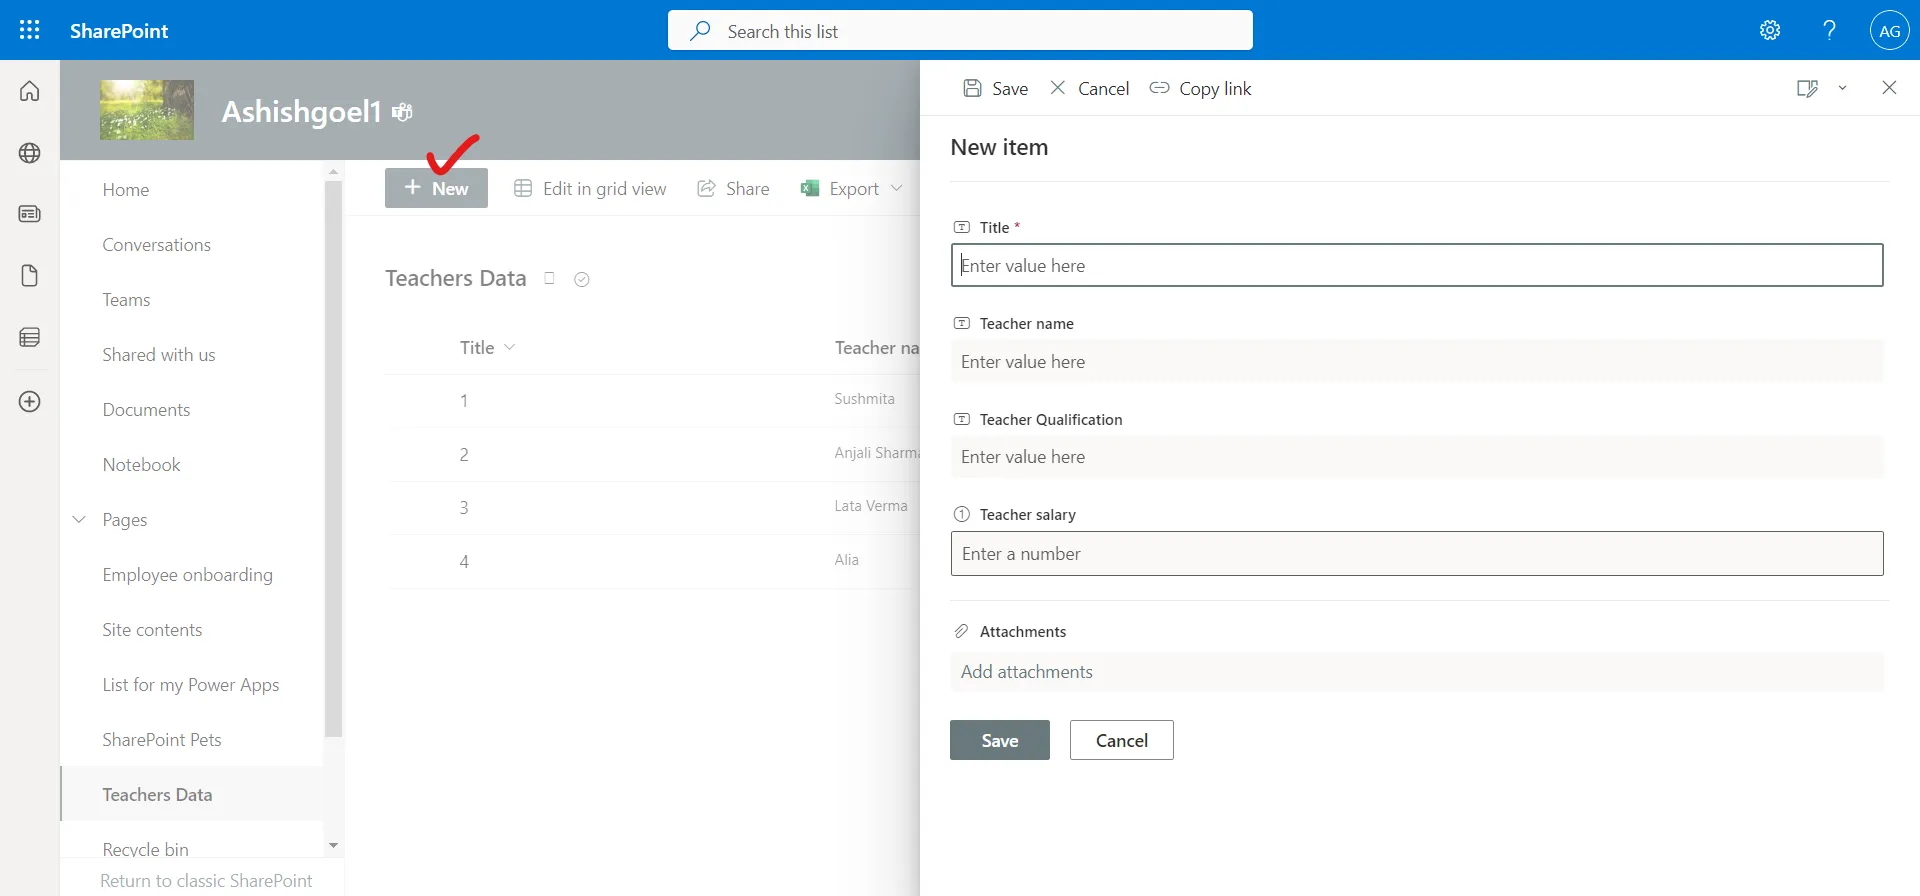
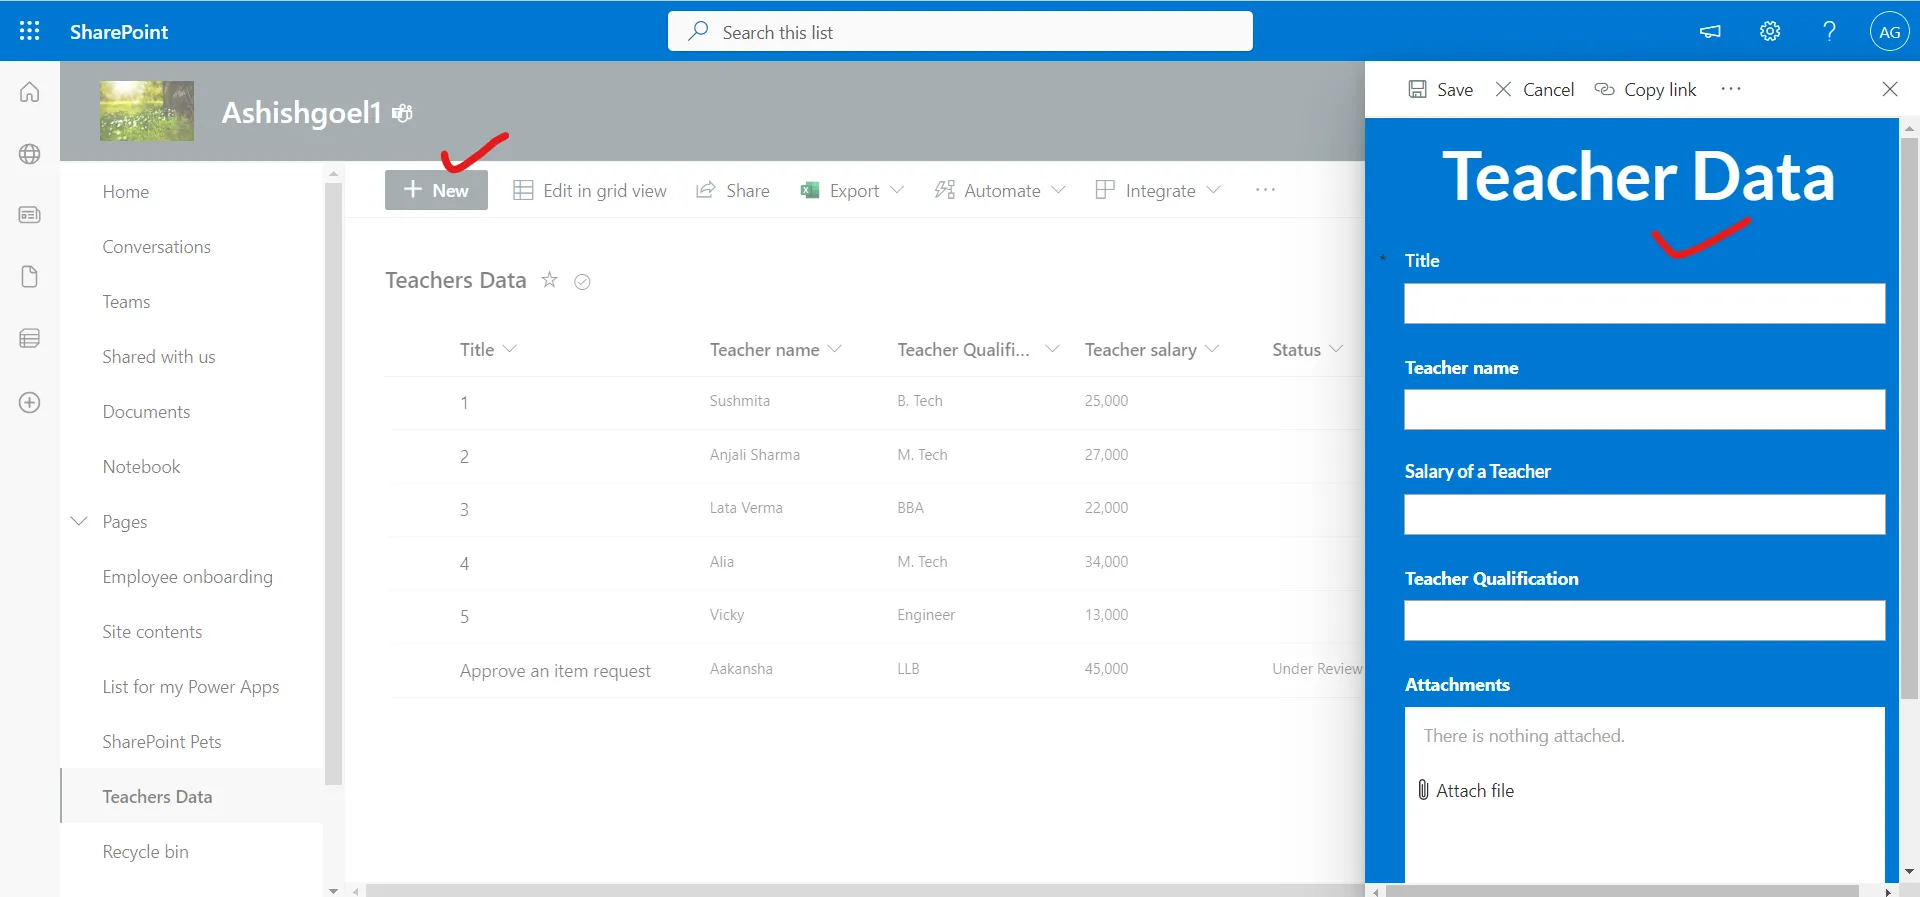
Step 2: If we click on + New. We can see there is a form to fill in to create a record in the sharepoint list. We are going to customize this form.
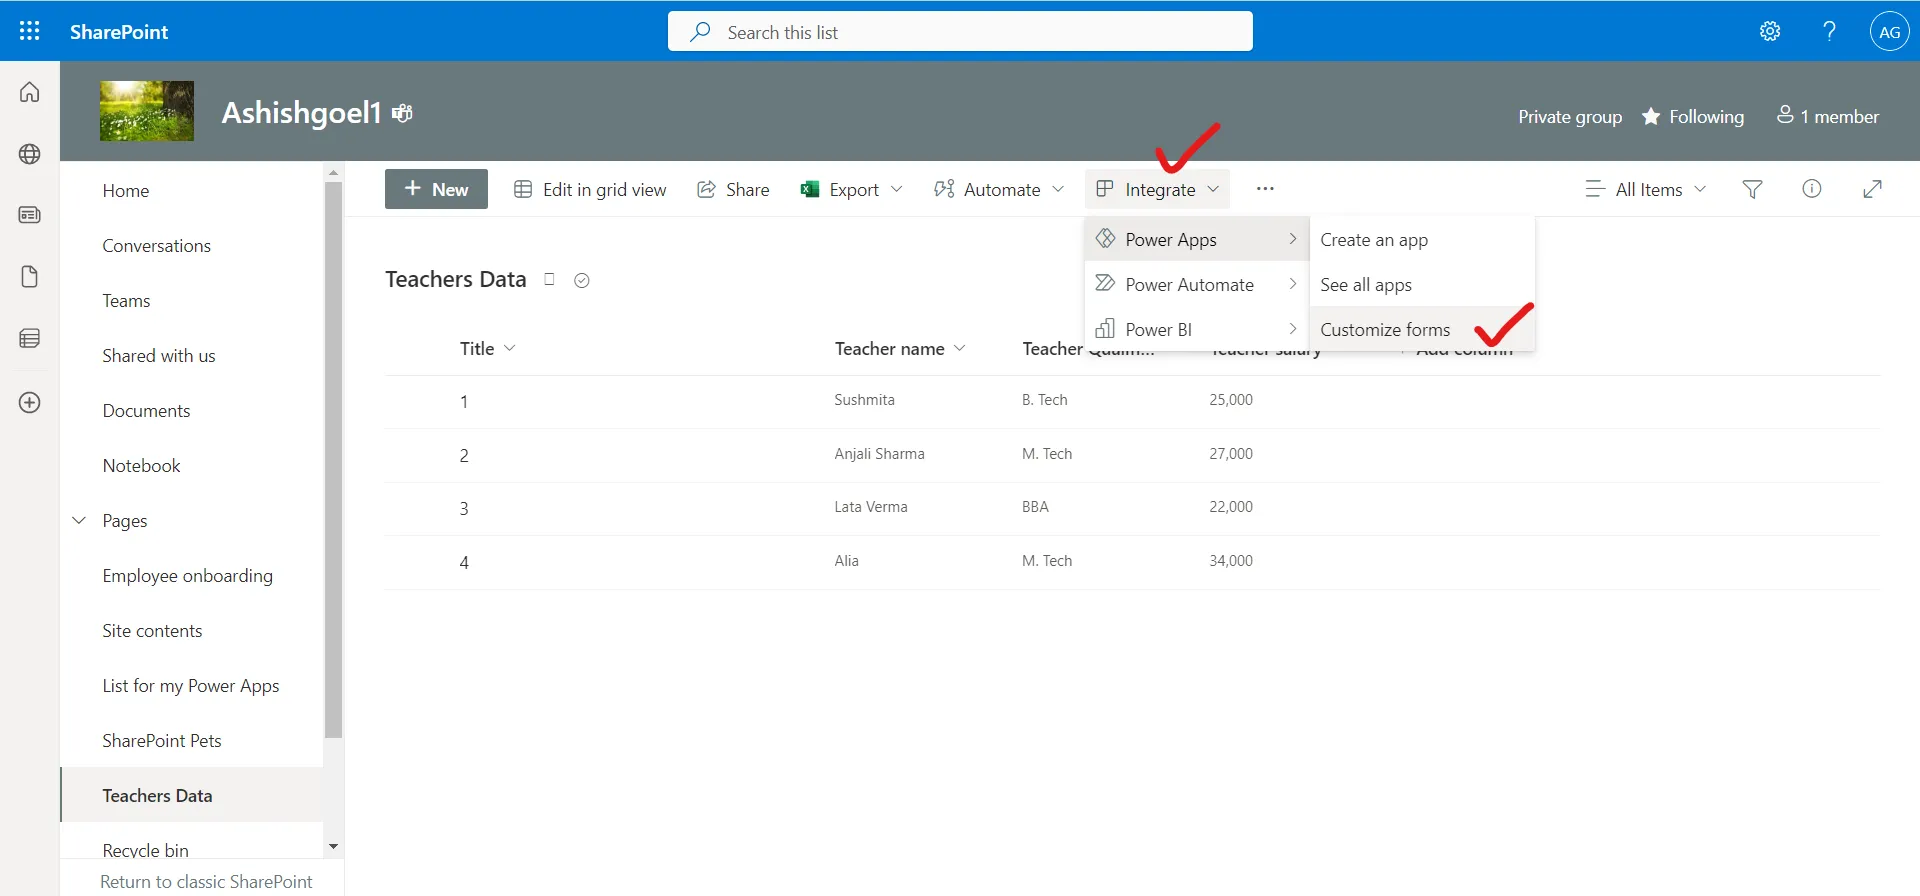
Step 3: From the command bar, on the list page, select Integrate > Power Apps. More options appear:
- Create an app
- See all apps
- Customize forms
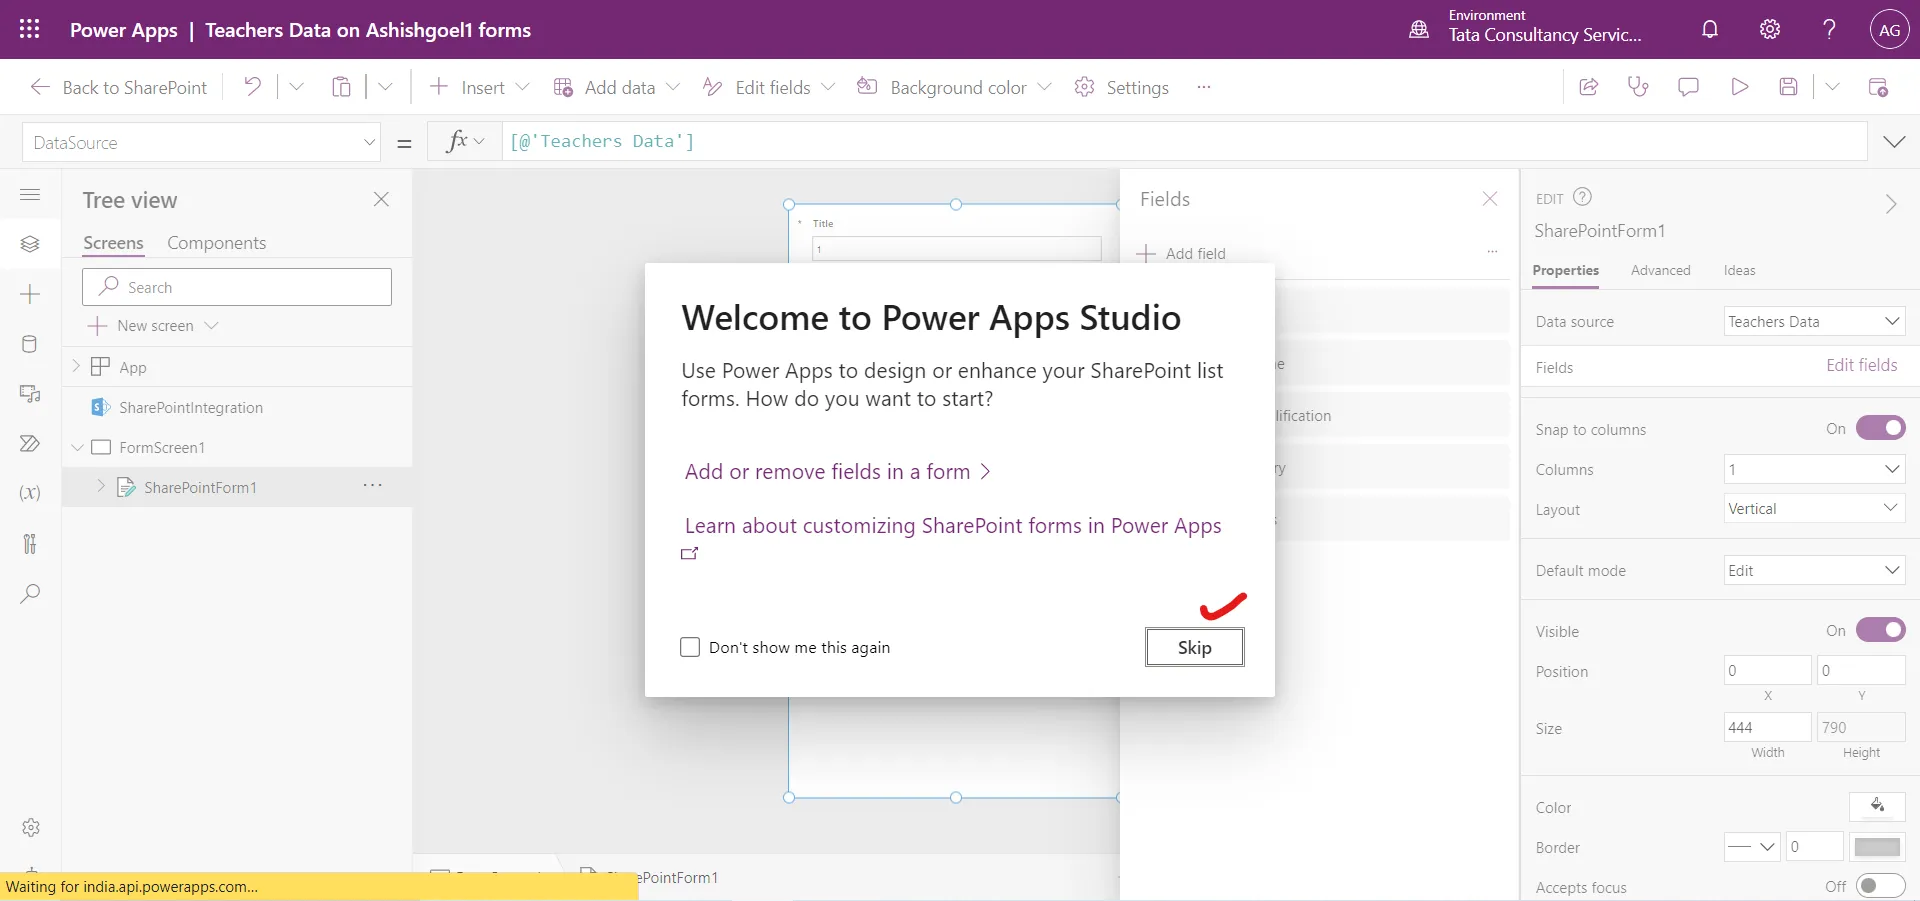
Step 4: Select the Customize forms option. The Power Apps studio appears and loads the form onto the canvas. If the Welcome to Power Apps Studio dialog box opens, select Skip.
On the SharePointIntegration object, we have the following properties:
- OnNew – It sets SharePointForm1 in new mode. The powerapps formula NewForm(SharePointForm1) is written on this property. It specifies the actions to perform when a user selects the New button to create a new item SharePoint.
- OnView – It sets SharePointForm1 in view mode. The powerapps formula ViewForm(SharePointForm1) is written on this property. It specifies the actions to perform when a user selects an item or opens the Item detail form in SharePoint.
- OnEdit – It sets SharePointForm1 in edit mode. The powerapps formula EditForm(SharePointForm1) is written on this property. It specifies the actions to perform when a user selects the Edit all button or opens the Edit item form in SharePoint.
- OnSave – It specifies the actions to perform when a user selects the Save button in SharePoint form. The powerapps formula SubmitForm(SharePointForm1) is written on this property, it submits the changes to SharePointForm1. On successful submission of the form, the SharePointForm1.OnSuccess formula is executed.
- OnCancel – It specifies the actions to perform when a user selects the Cancel button in SharePoint form. The powerapps formula ResetForm(SharePointForm1) is written on this property, it resets the changes to SharePointForm1.
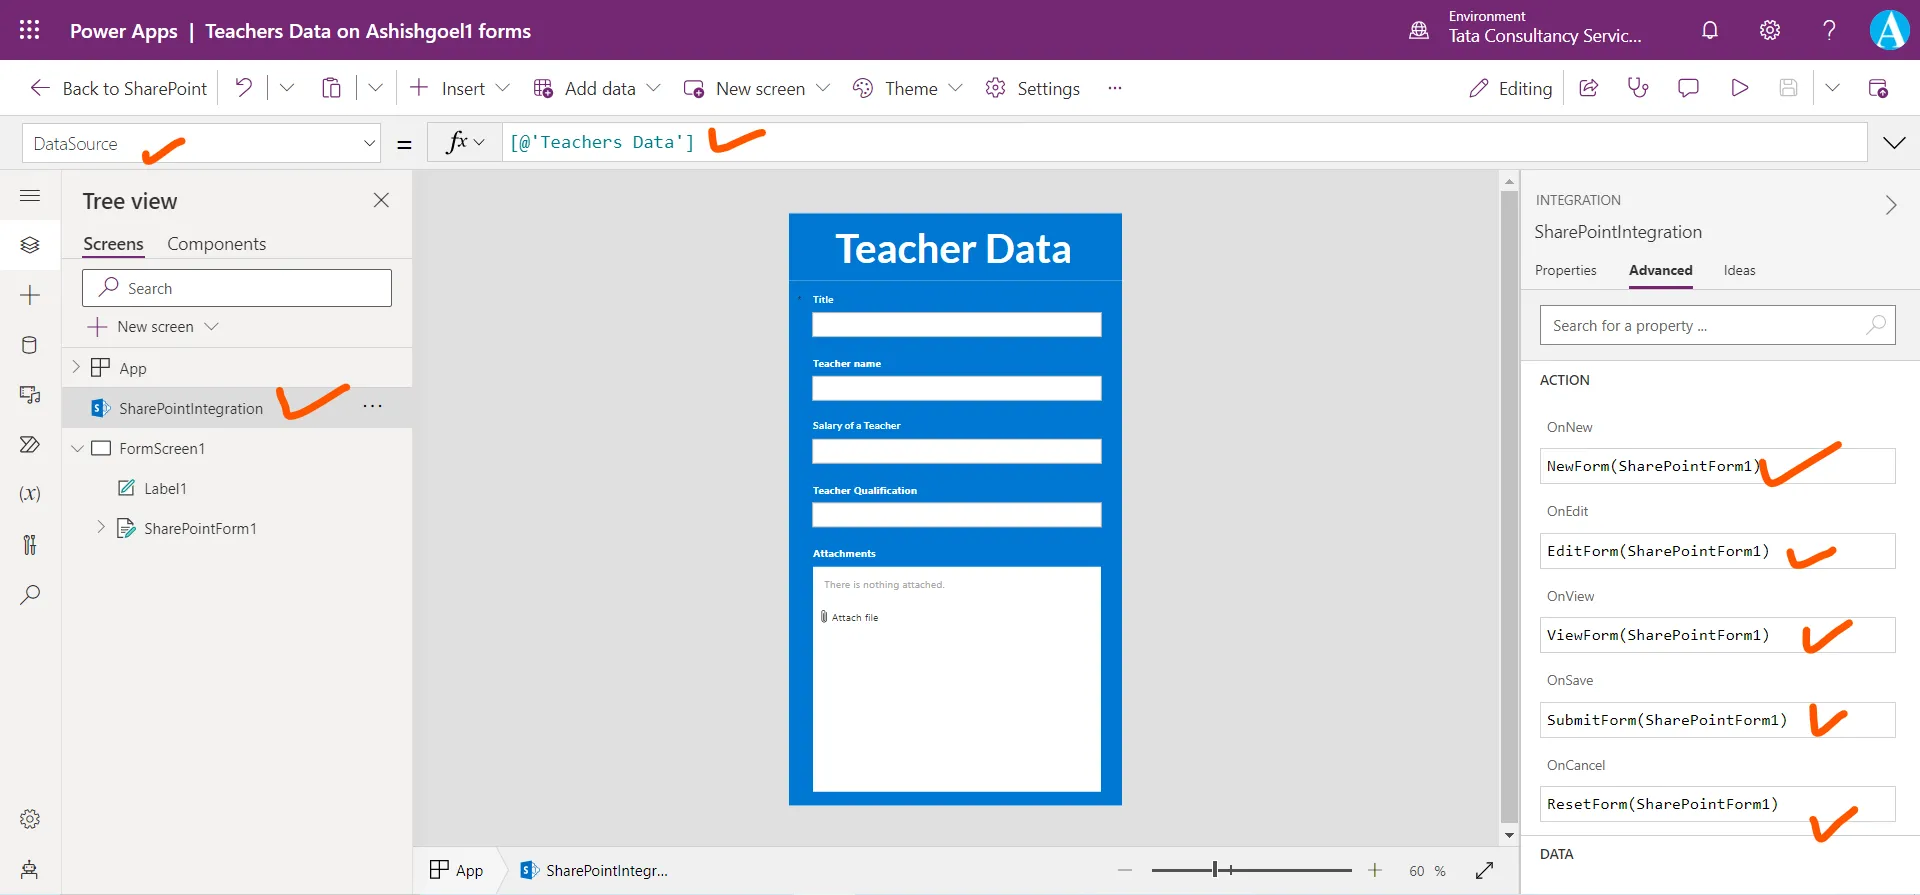
The following form is same as shown in Step 2.
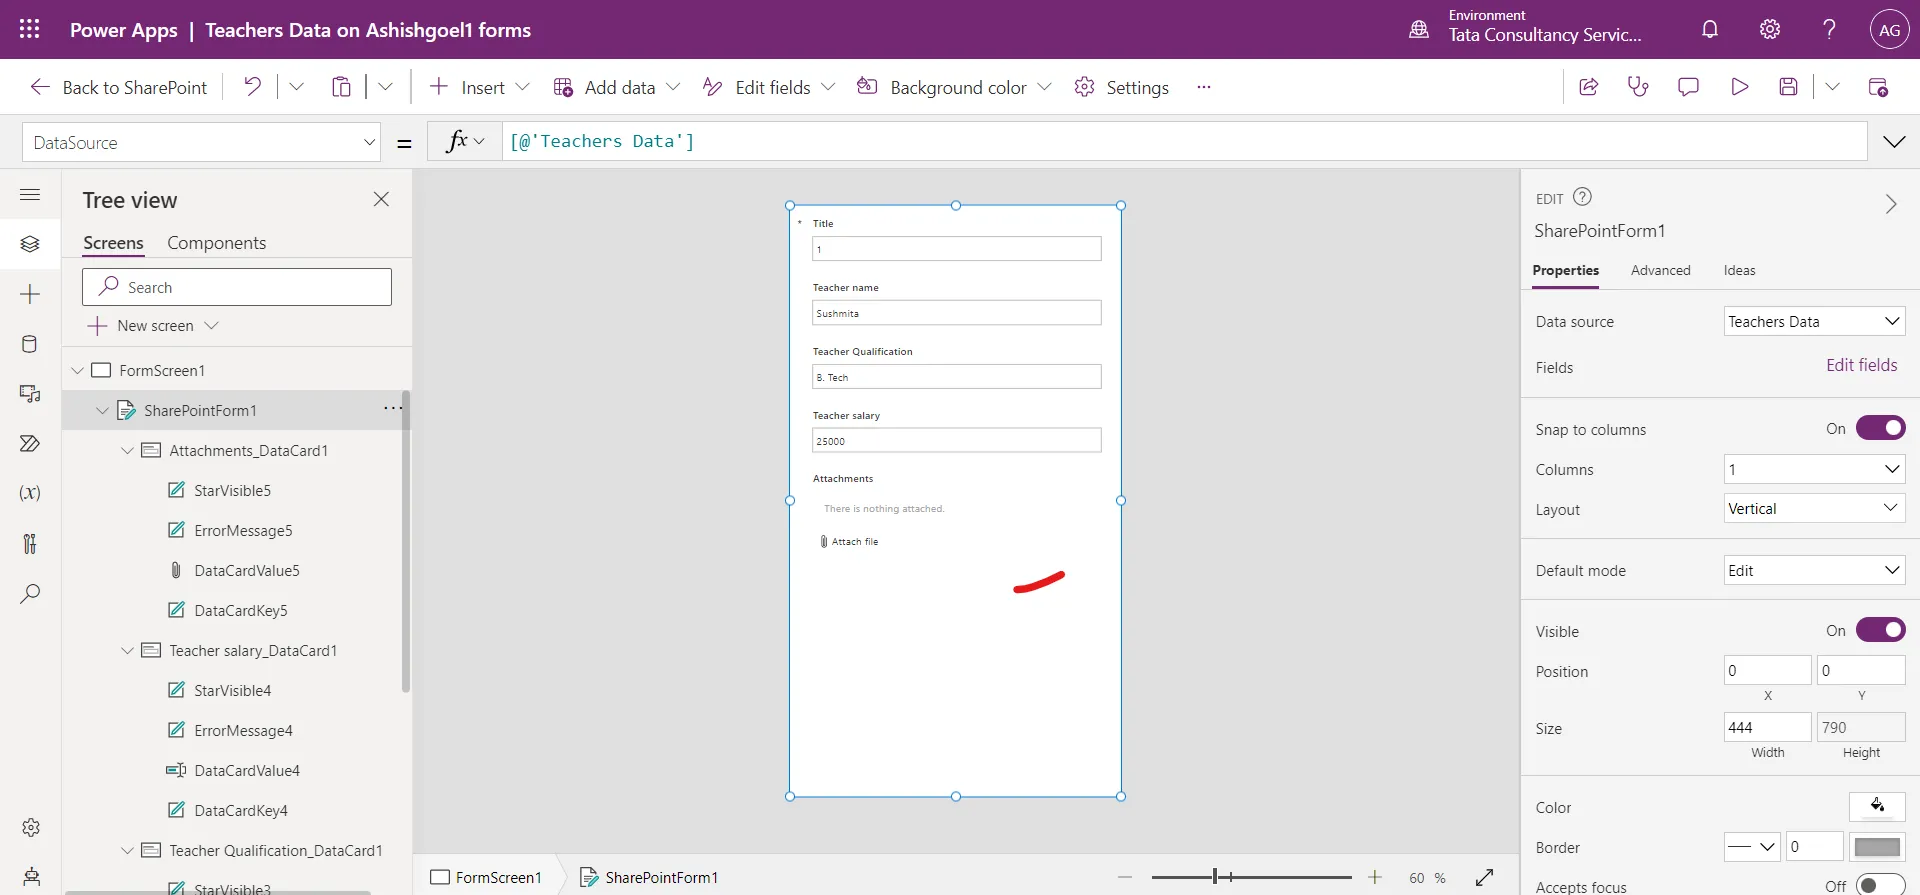
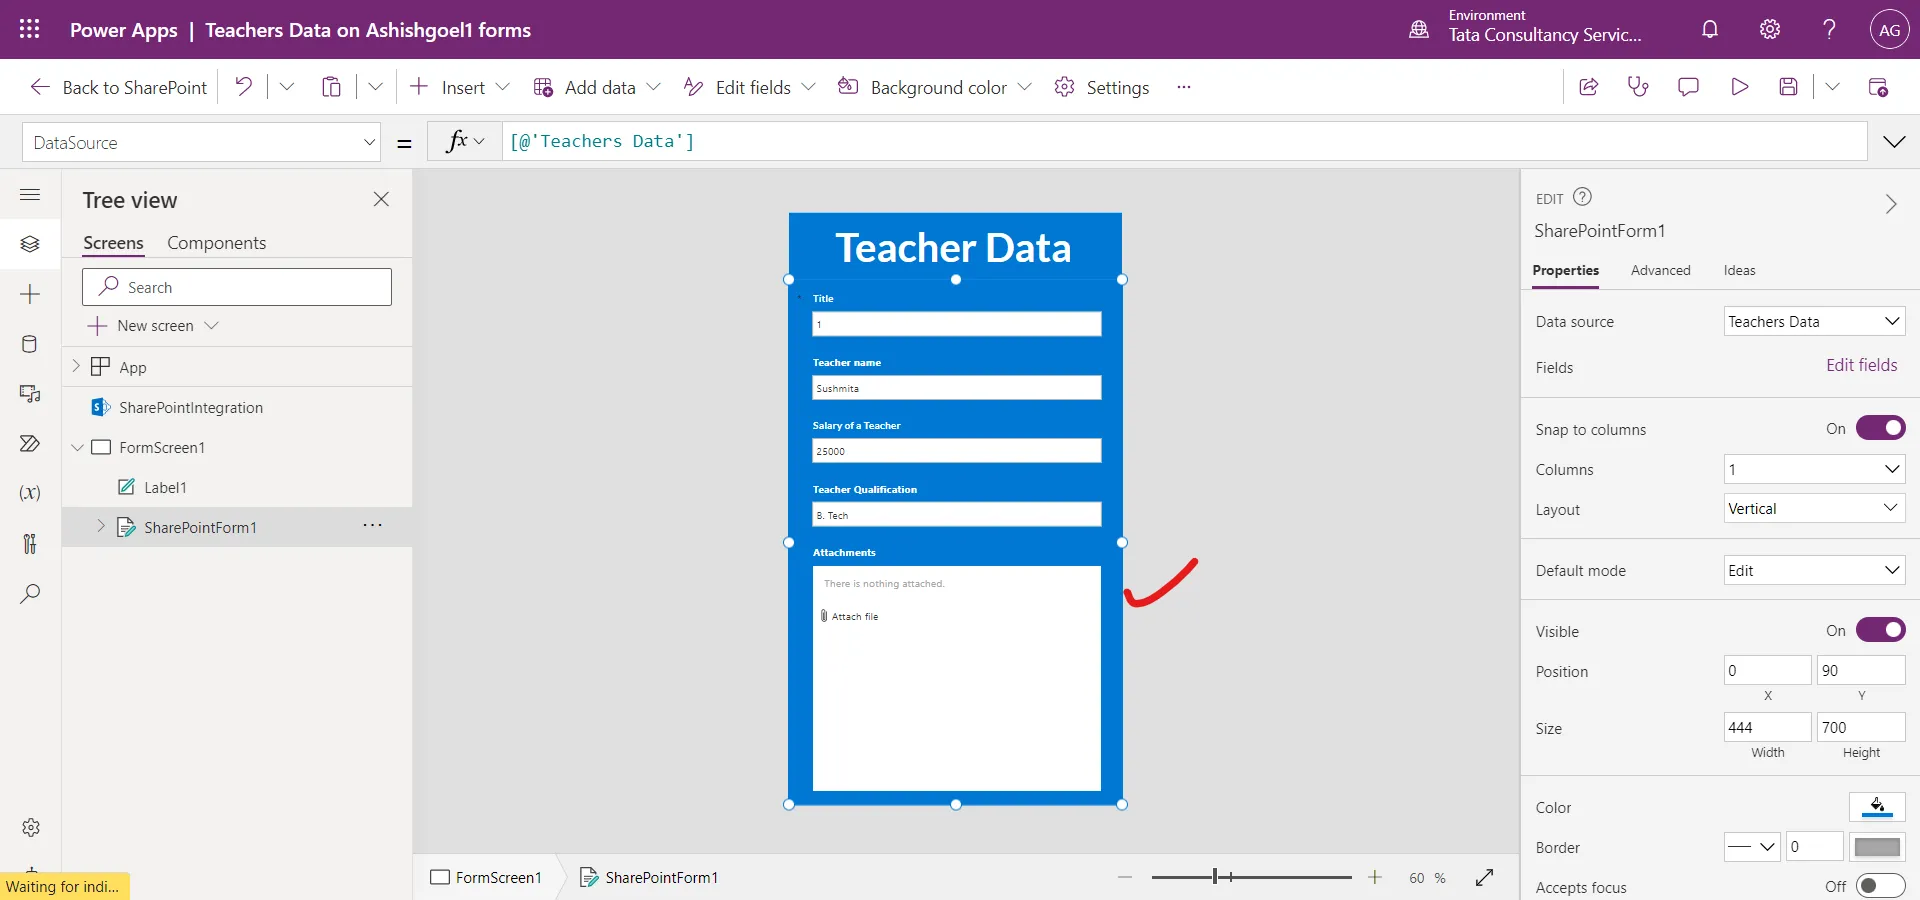
Step 5: Add one Text label control and do some other changes like the fill colour and the font color of the labels.
Step 6: Set a field to be view-only. Set the DisplayMode of a field to DisplayMode.View as the formula.
Step 7: We can specify the conditions based on the Selected record in the sharepoint list. The SharepointIntegration.Selected returns the selected record in the sharepoint list.
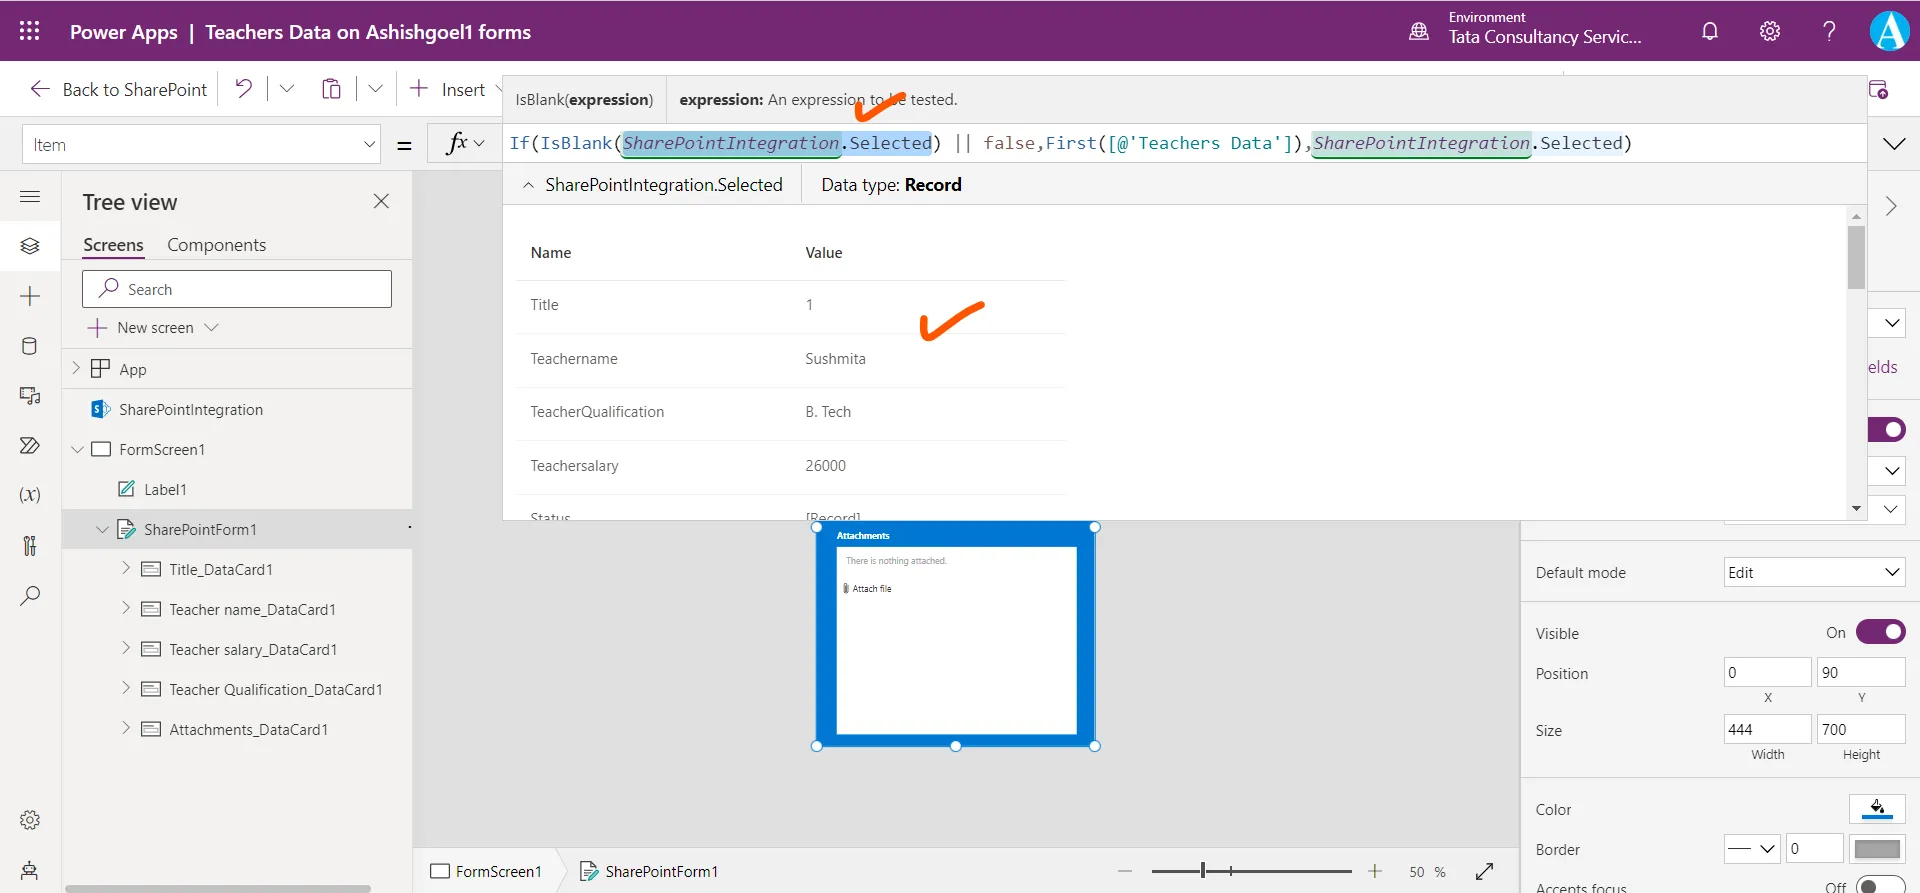
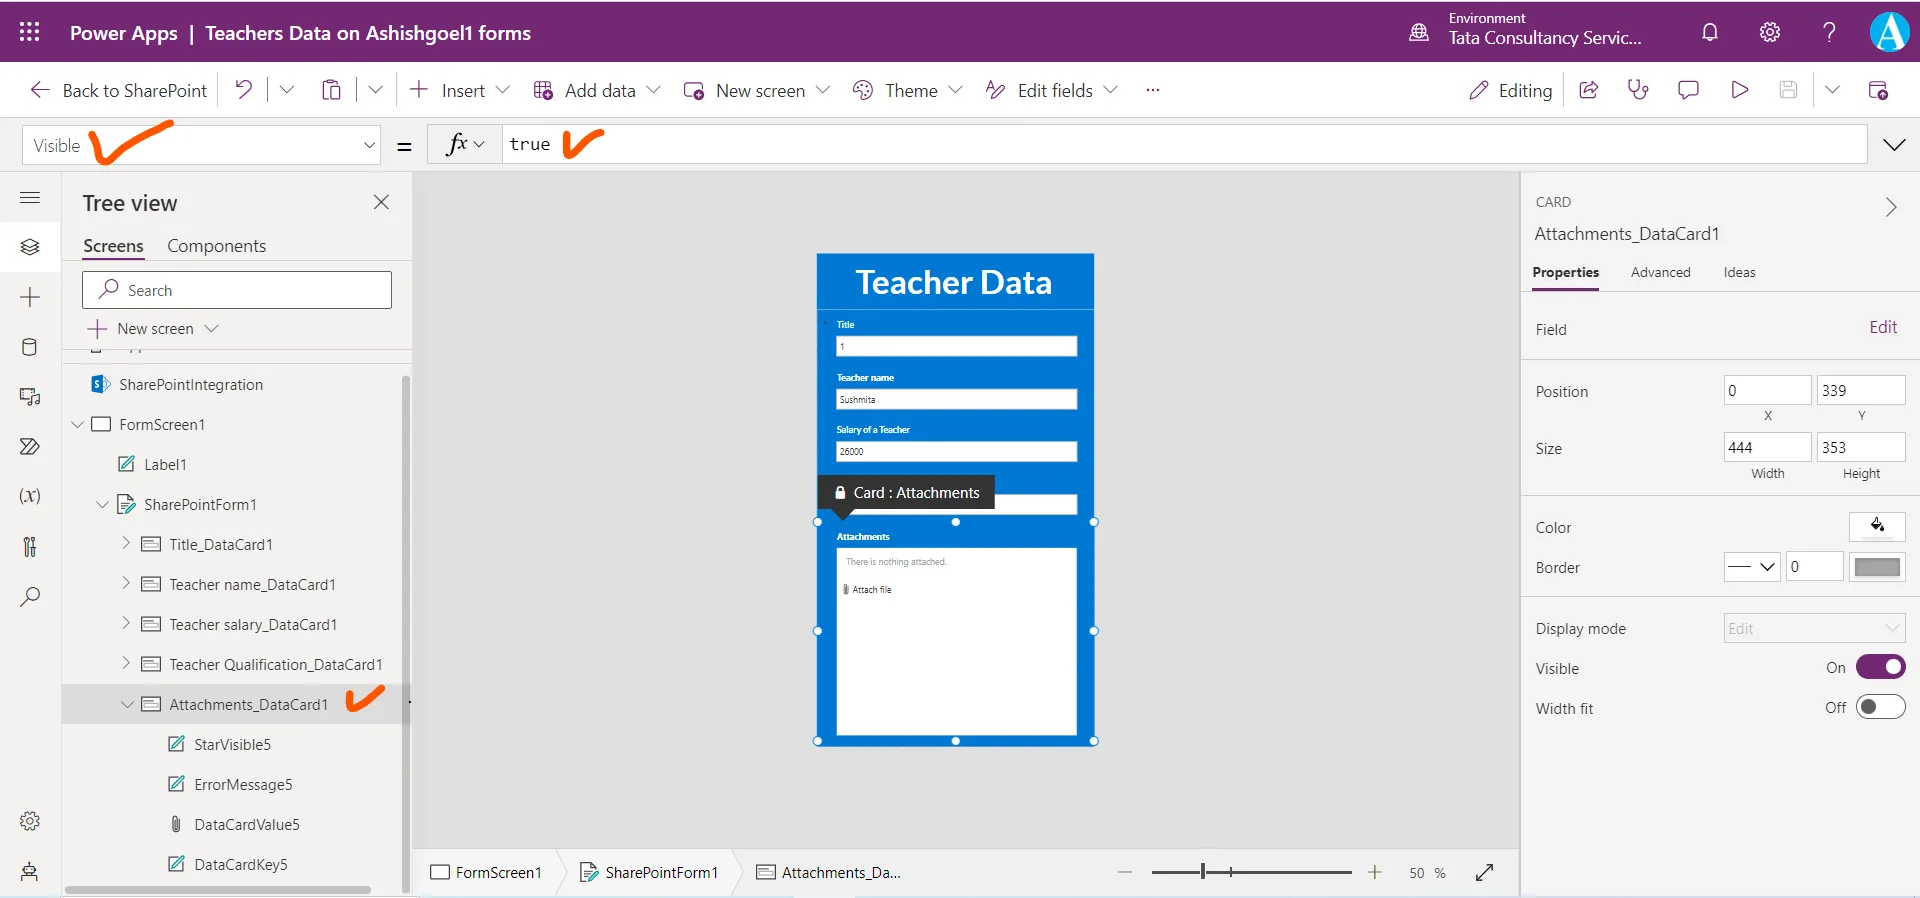
For example, we are going to hide the Attachments field, if the Teachersalary is less than 20000. Select the card and set the visible property of that to the following powerapps formula.
Power Apps Formula
Step 9: The next step is to Publish our custom form. On the top of the command bar, click on Save icon to save the app.
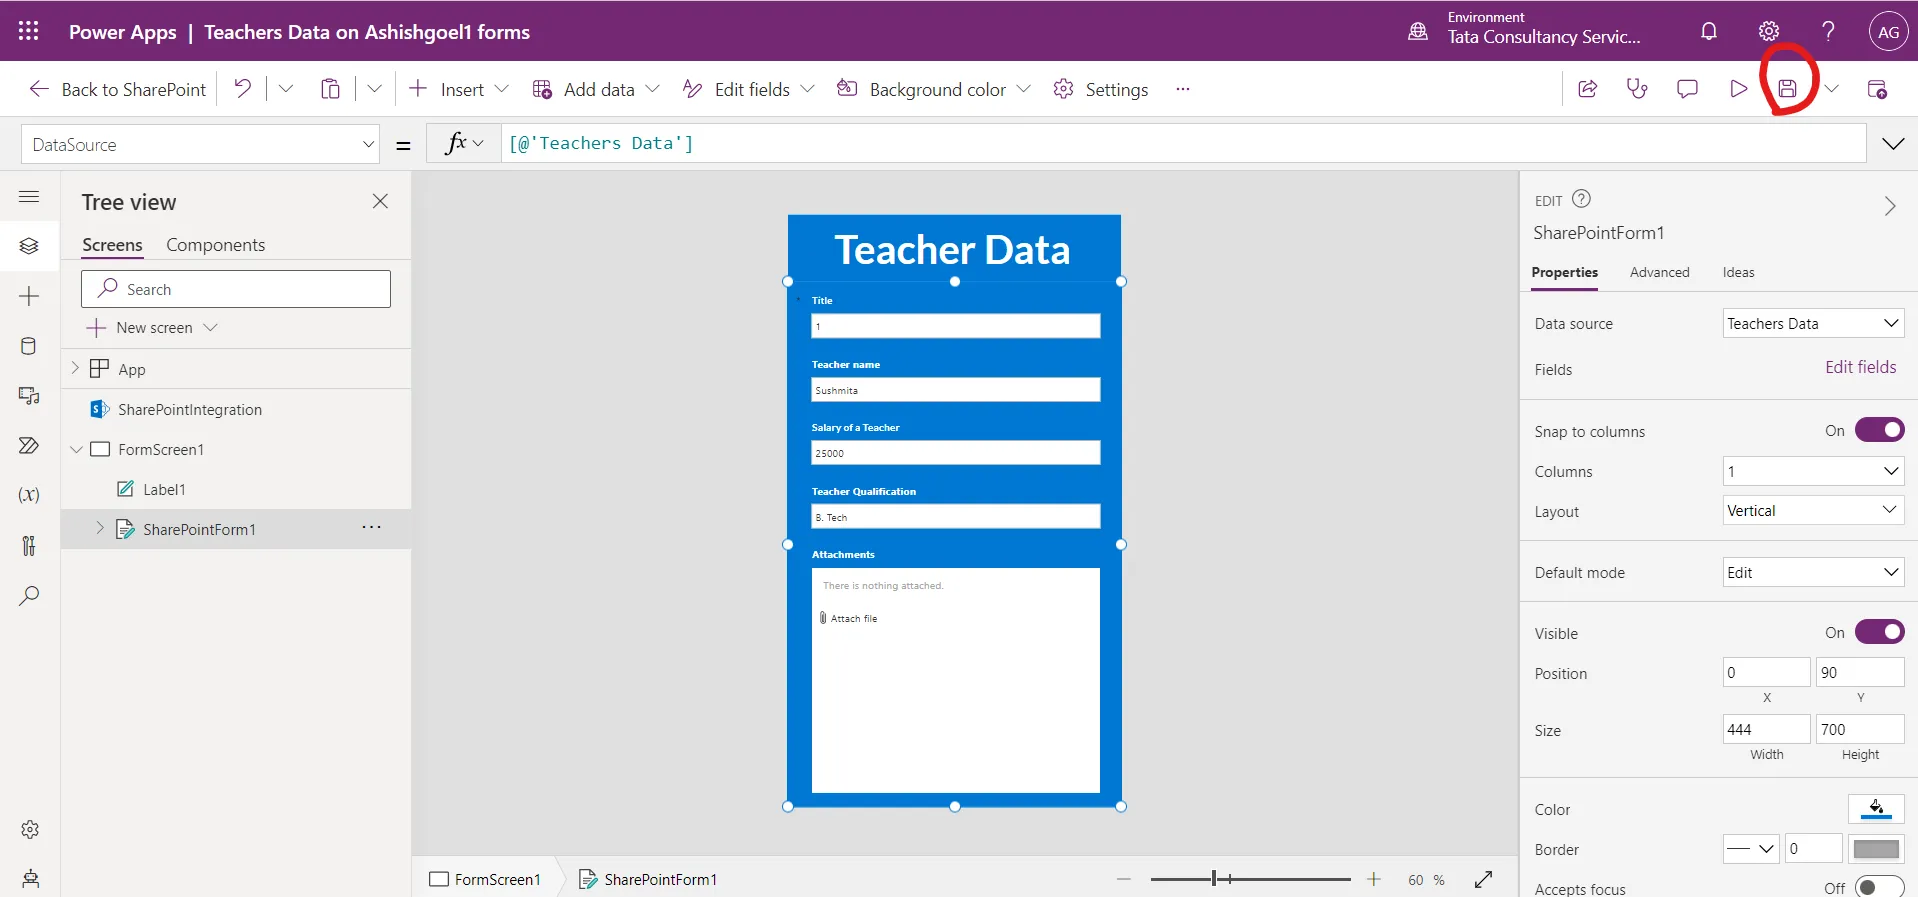
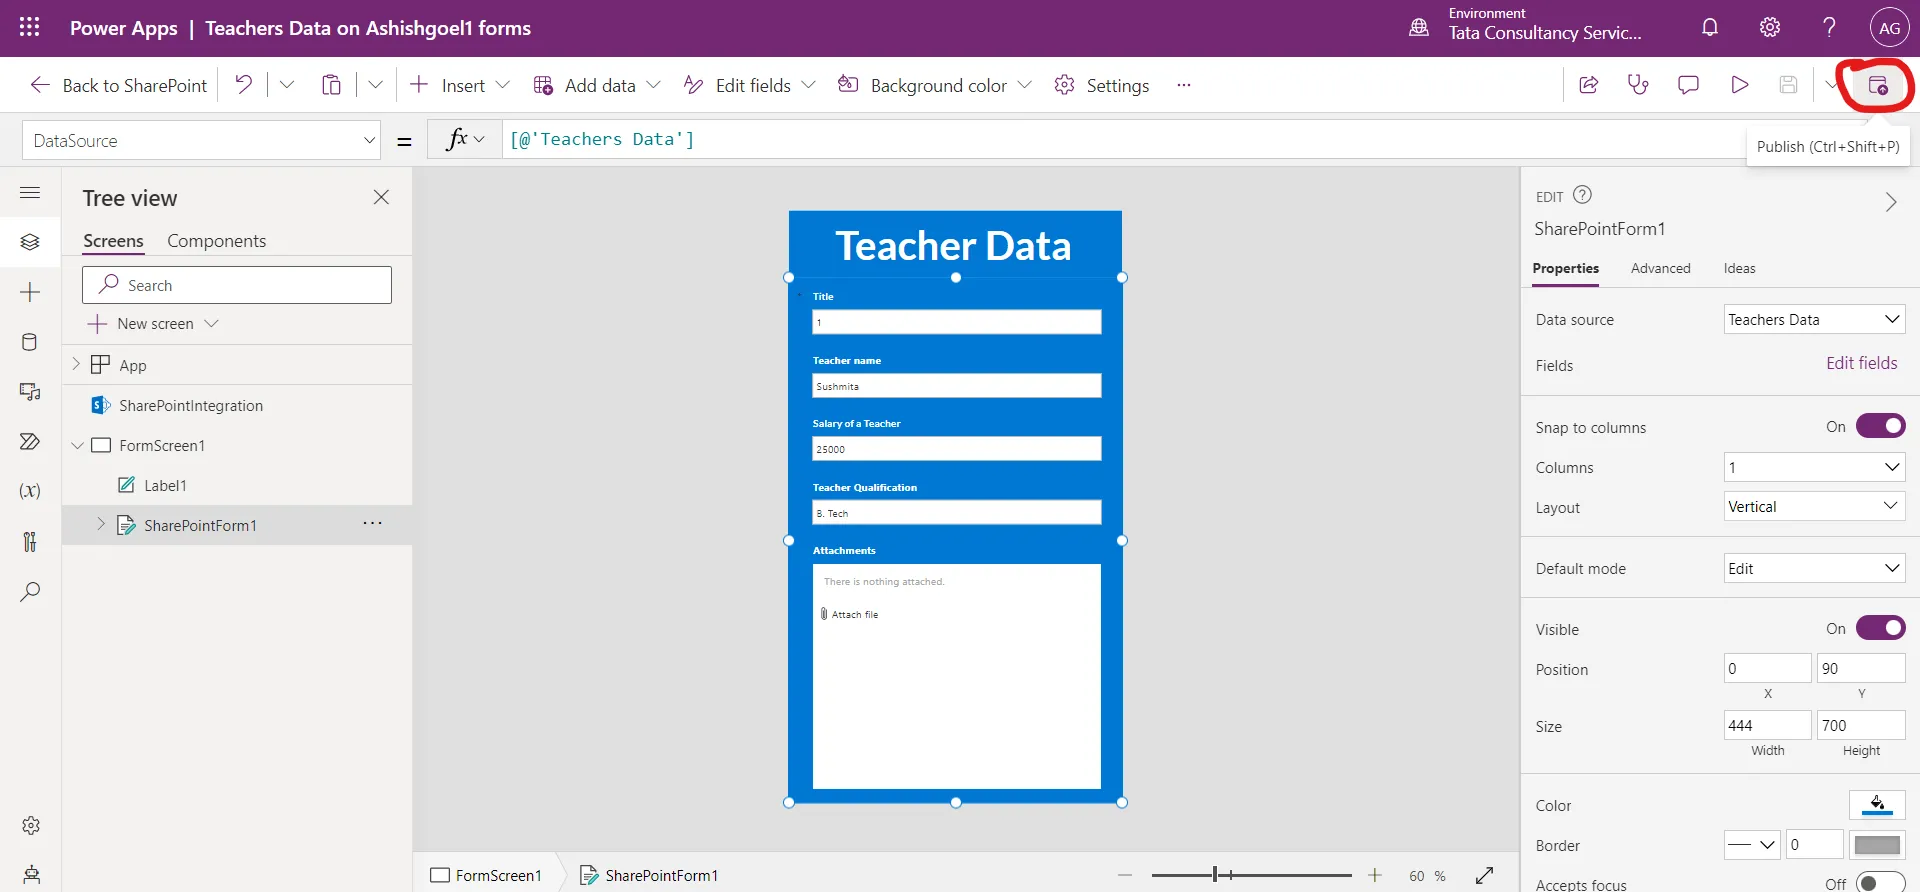
Alternatively, to save the app, press Ctrl+S in the power apps studio. After saving the app, select Publish icon in the command bar to publish the app.
In the dialog box that appears, to confirm, select Publish to SharePoint.
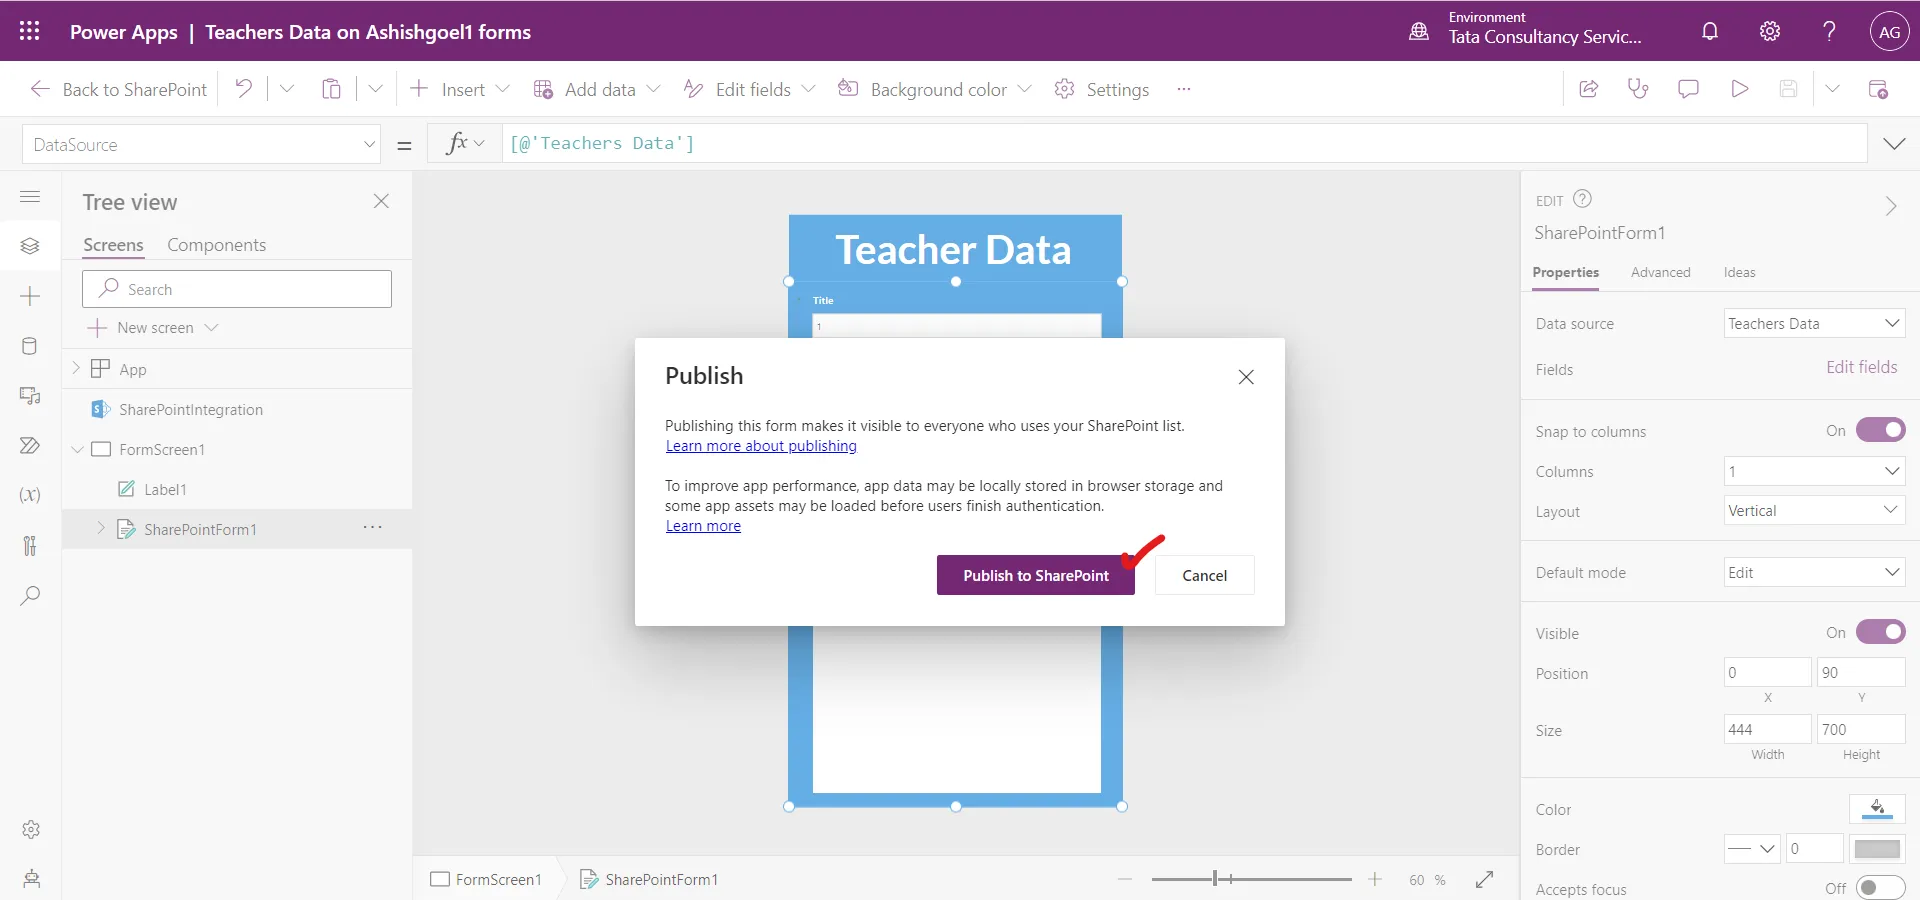
The version of the custom form that appears in SharePoint is the most recently published version.
Step 11: In SharePoint, click on + New and play with the form to verify the intended functionality of the app.
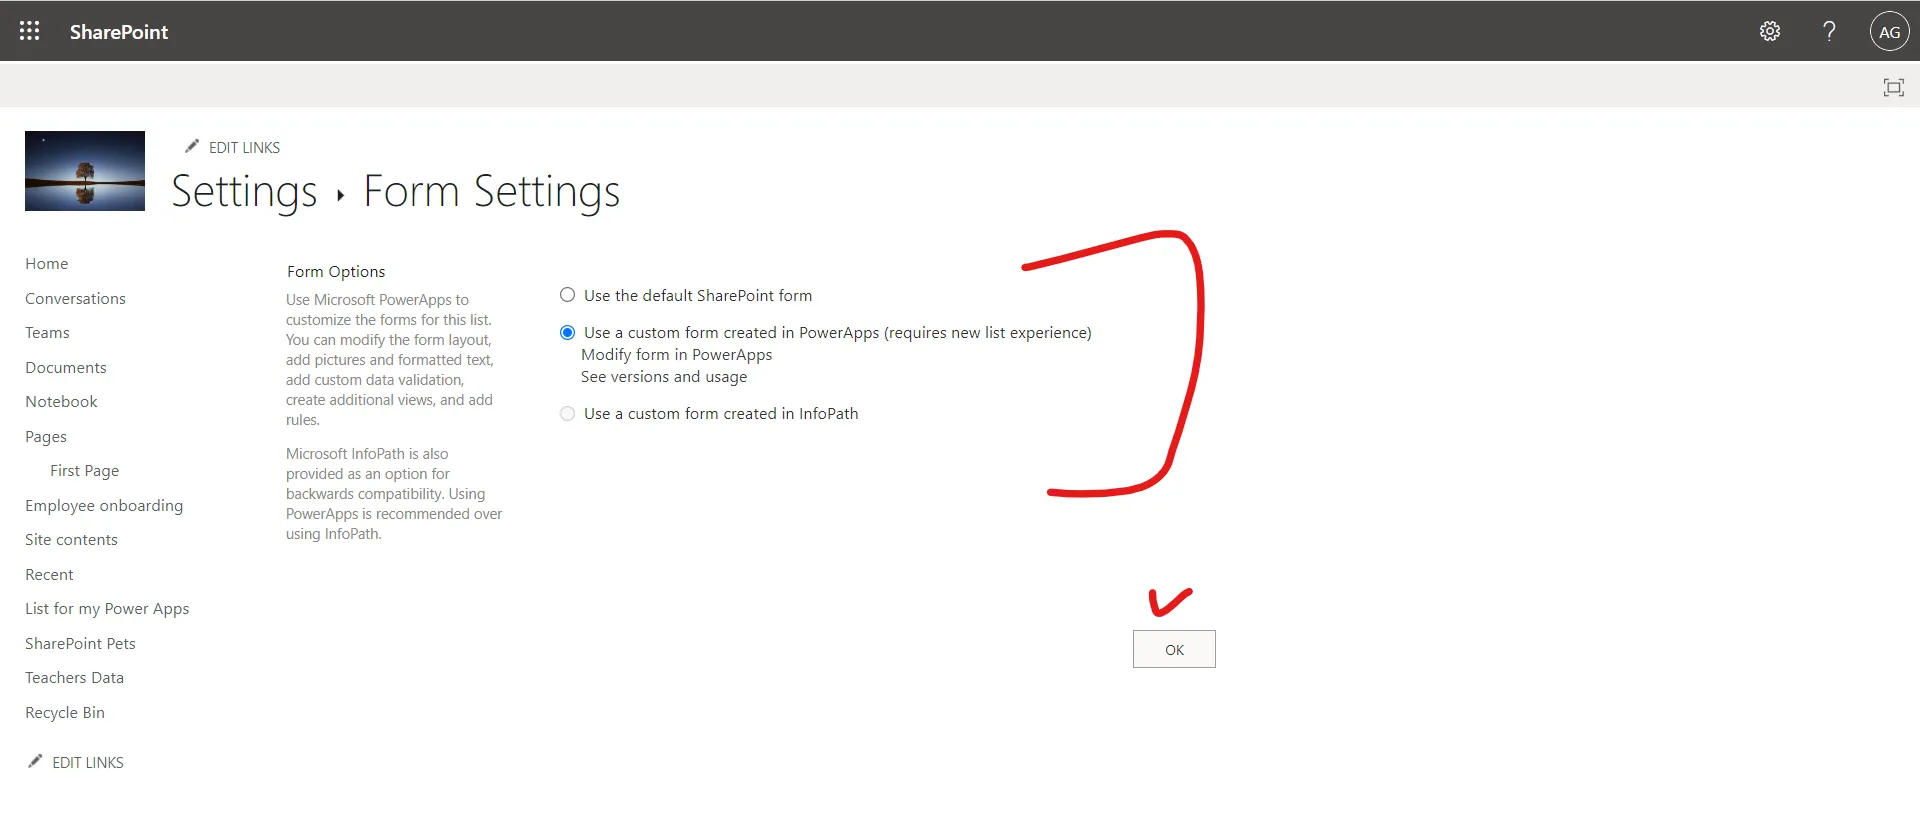
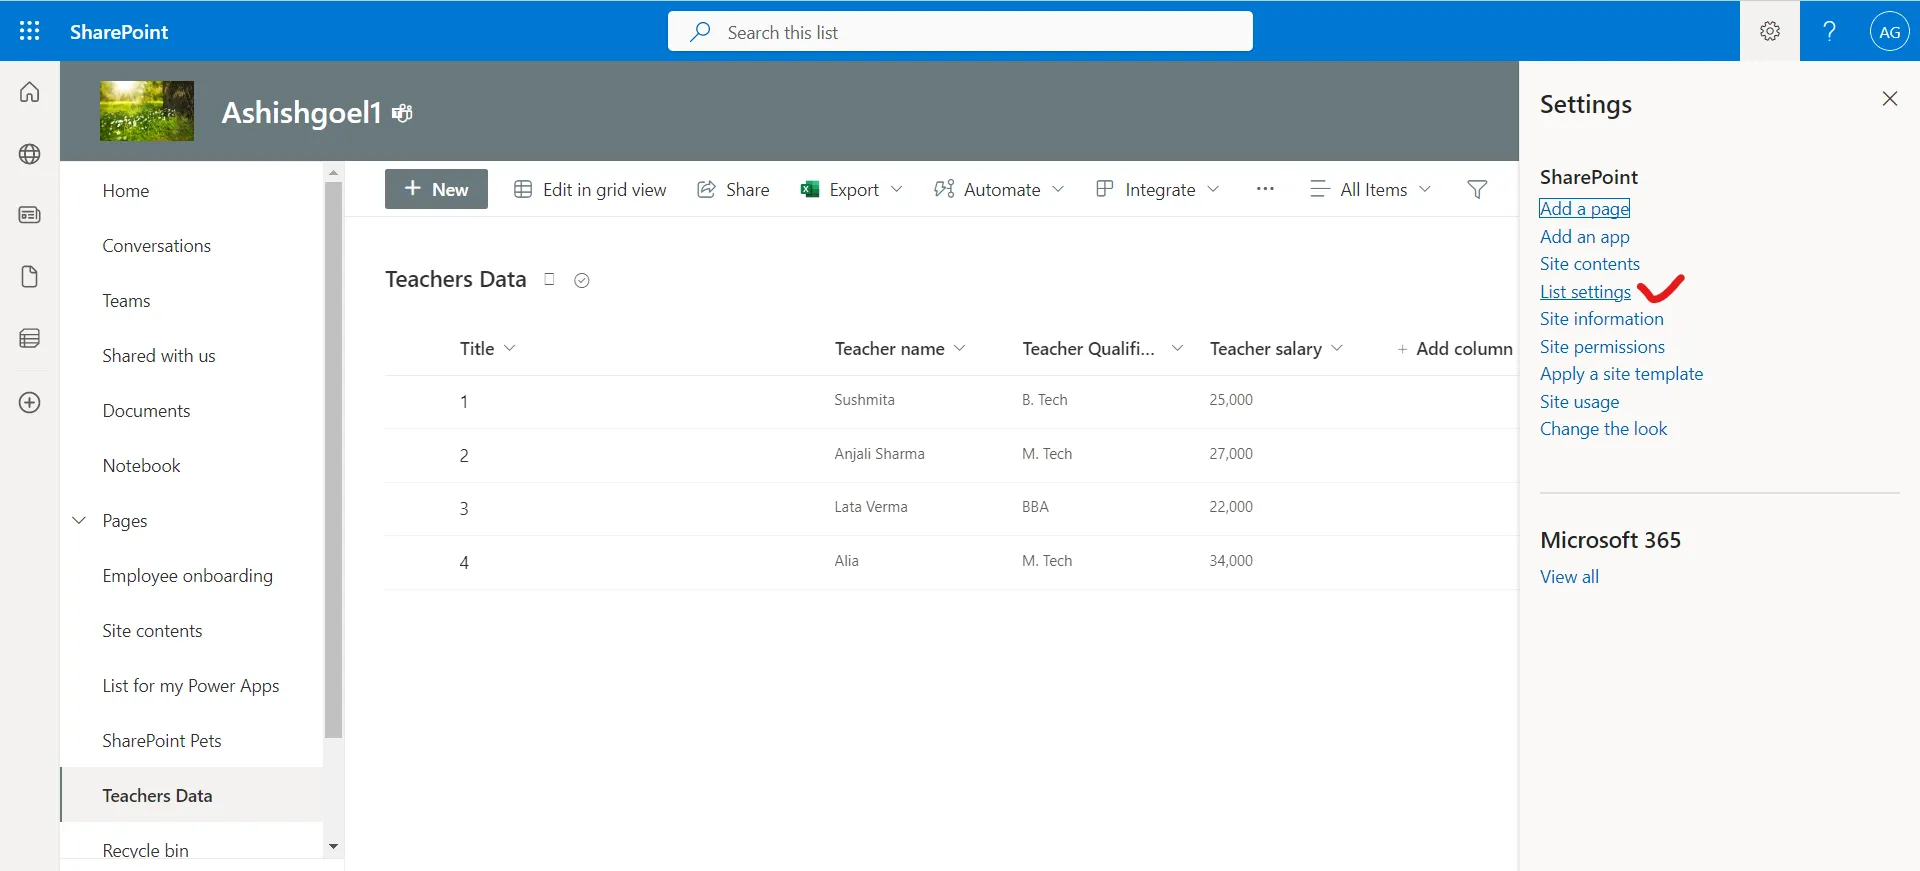
Step 12: We can revert to the default form. From the list in SharePoint, open the settings page (by selecting the gear icon near the upper-right corner), and then select List settings.
Step 13: Under General settings, select Form settings.
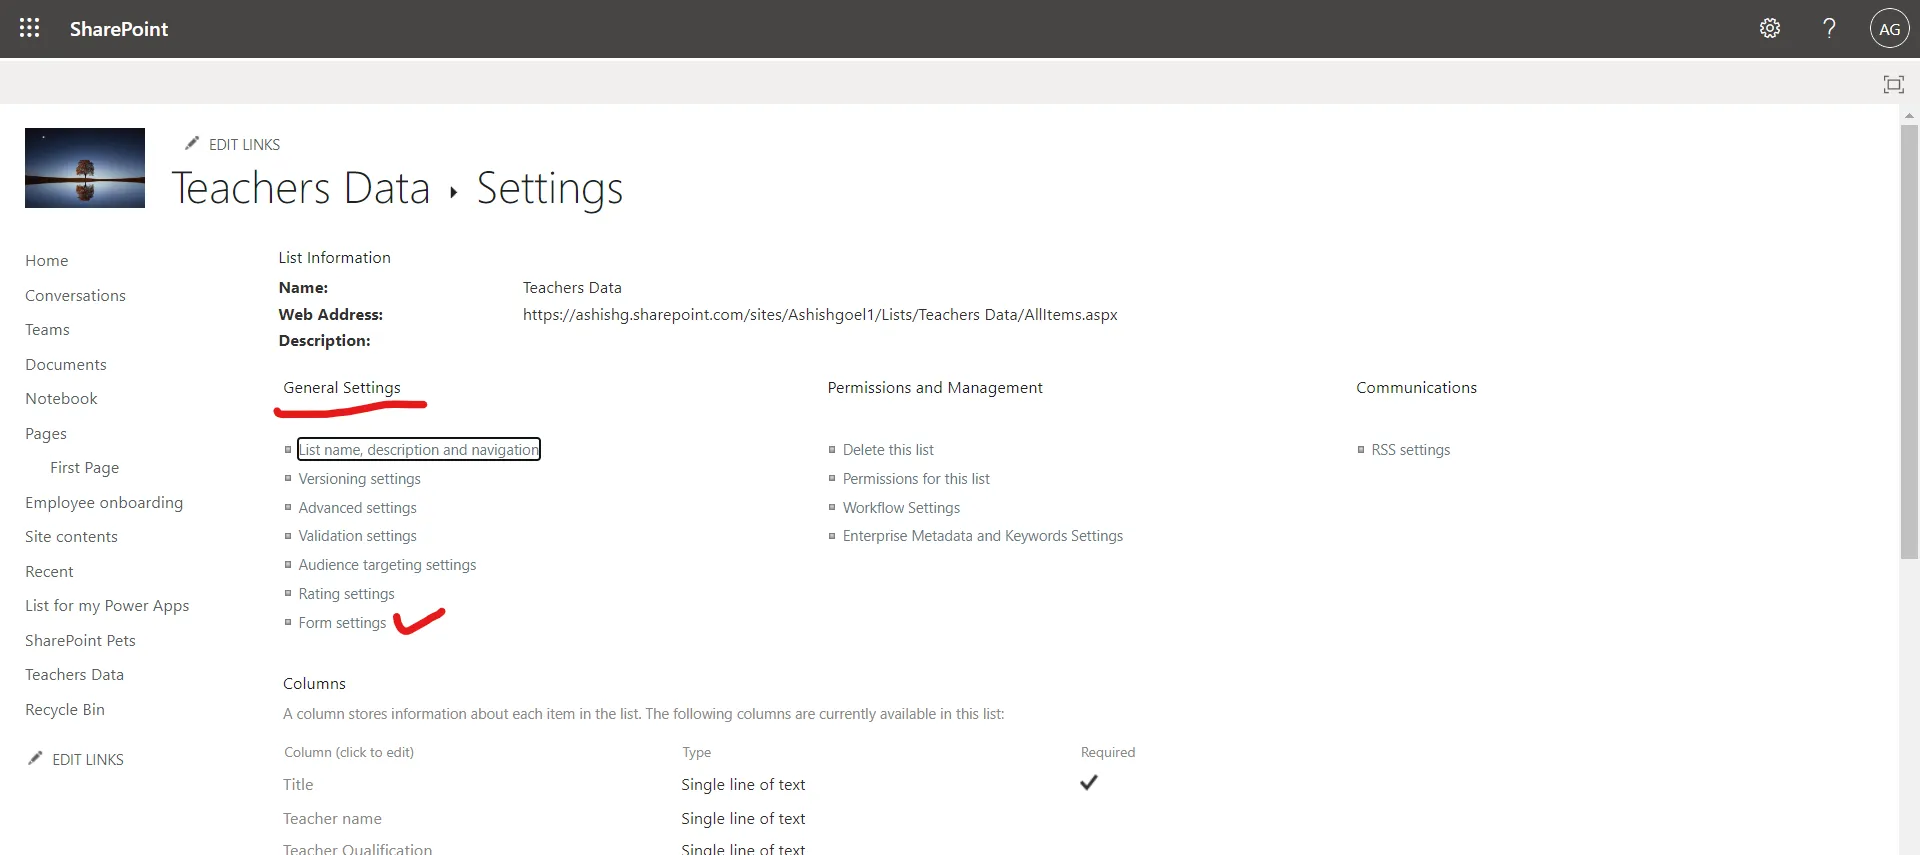
On the Form Settings page, select one of these options, and then select OK.
- Use the default SharePoint form - If we want to use the default SharePoint form, select the checkbox for this option. This option allows us to use the out-of-the-box form without any customizations.
- Use a custom form created in Power Apps - If we have a custom form created in Power Apps, you can select this option and provide the URL for the custom form. This enables you to use the Power Apps form as the default form for your SharePoint list.
- InfoPath form: This option is available if your SharePoint environment supports InfoPath forms. You can choose to use an InfoPath form by selecting this option and providing the URL for the form.
We can toggle back and forth between options, as needed.
