Create a Model Driven App
In this exercise, we will learn how to create a model-driven app by using one of the standard entities that is available in our Microsoft Power Apps environment.
Note: The model-driven app can be built using Standard and custom tables.
To create a Model-driven app, follow the following steps:
Step 1: Sign in to Power Apps by using the organizational account.
Step 2: Select the environment, or go to the Power Apps admin center to create a new one.
Step 3: On the Home page, select Blank App.
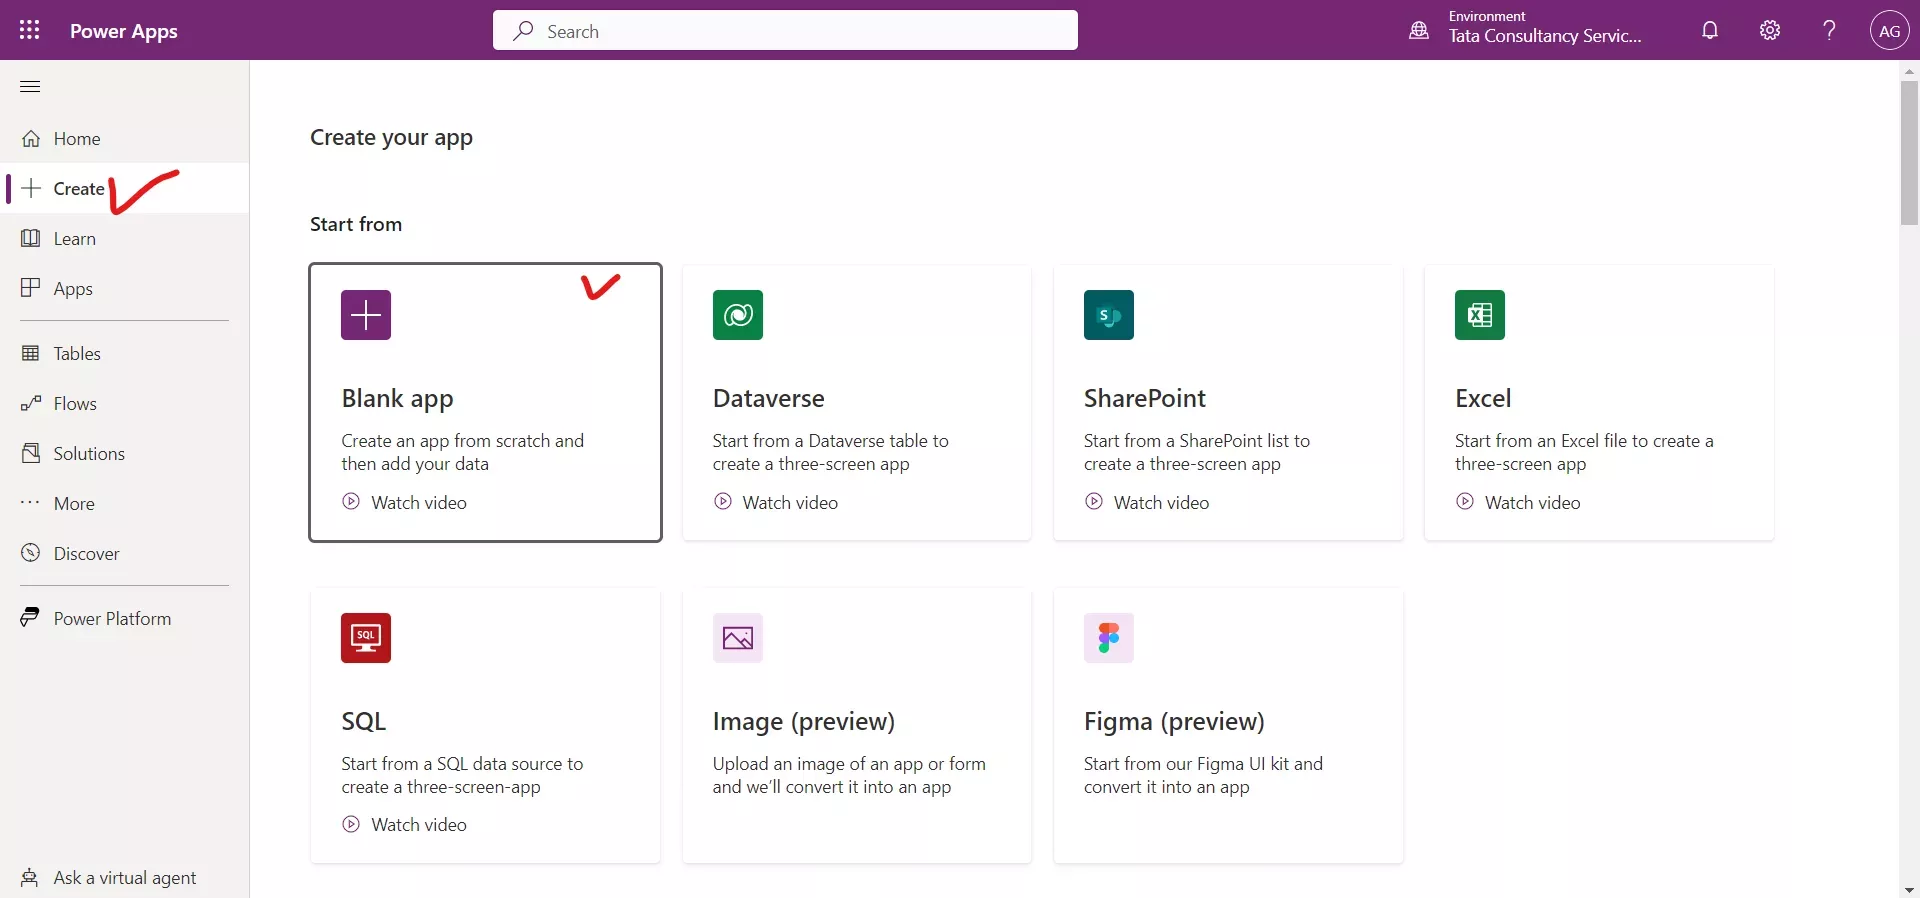
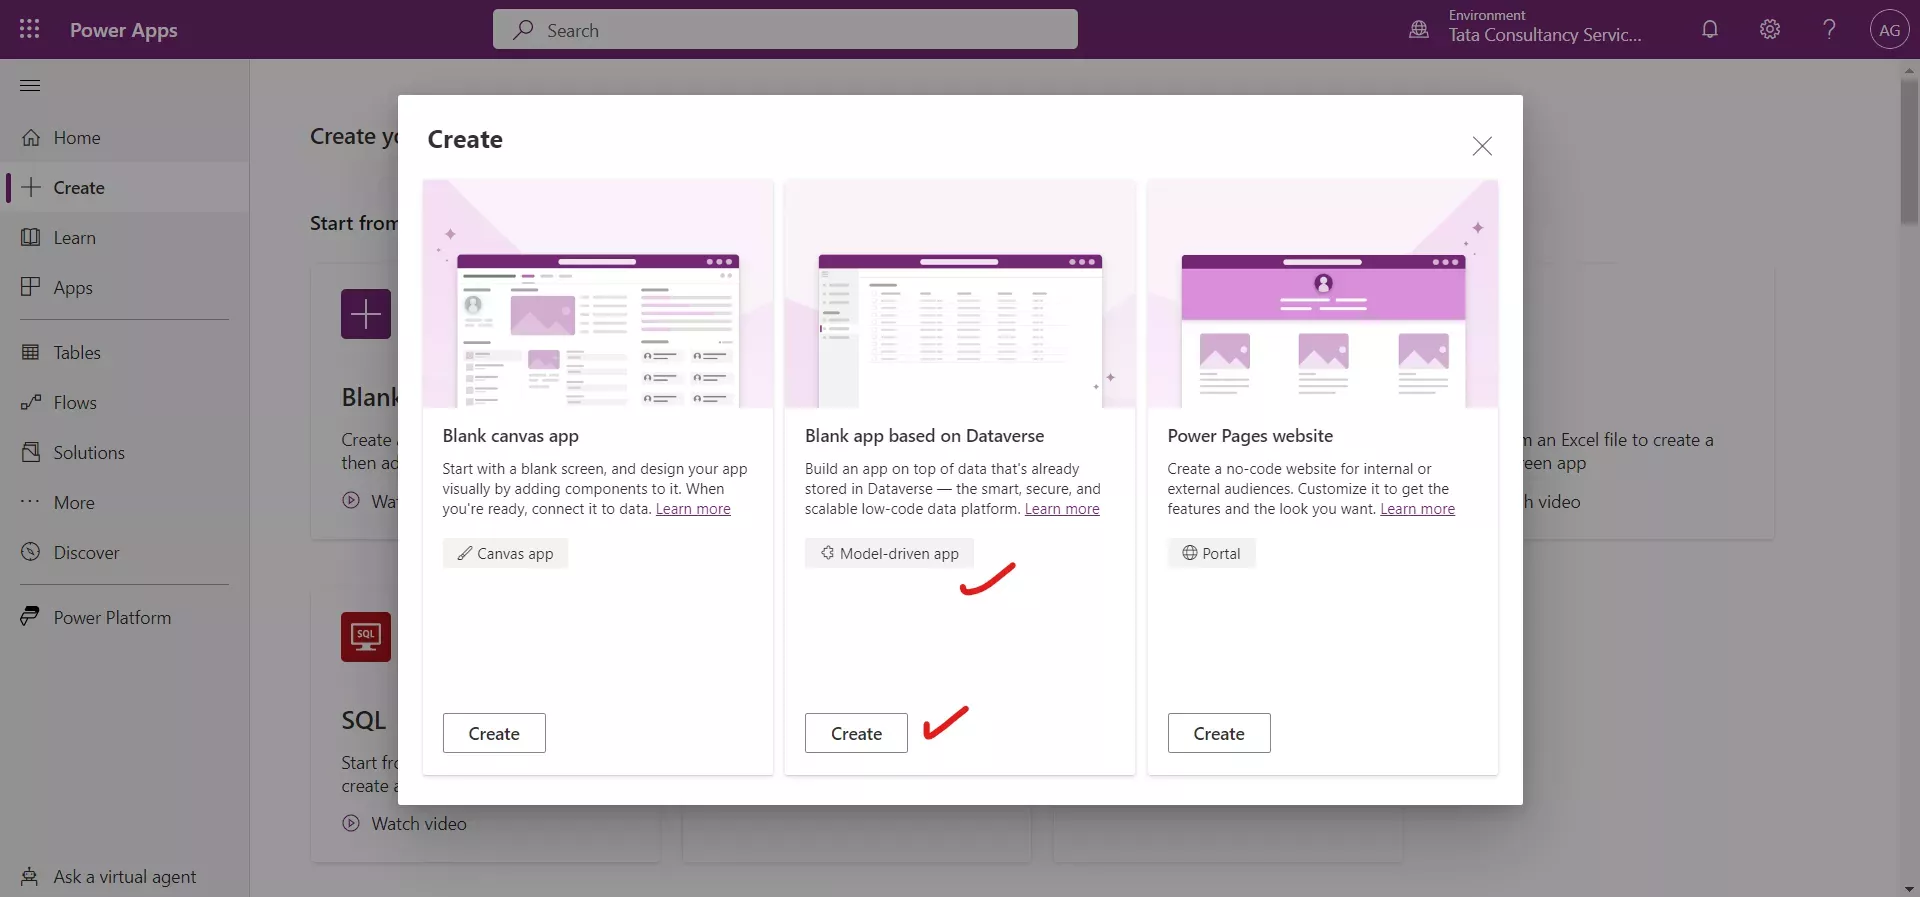
Step 4: On the Create screen, select Blank app based on Dataverse, and click Create.
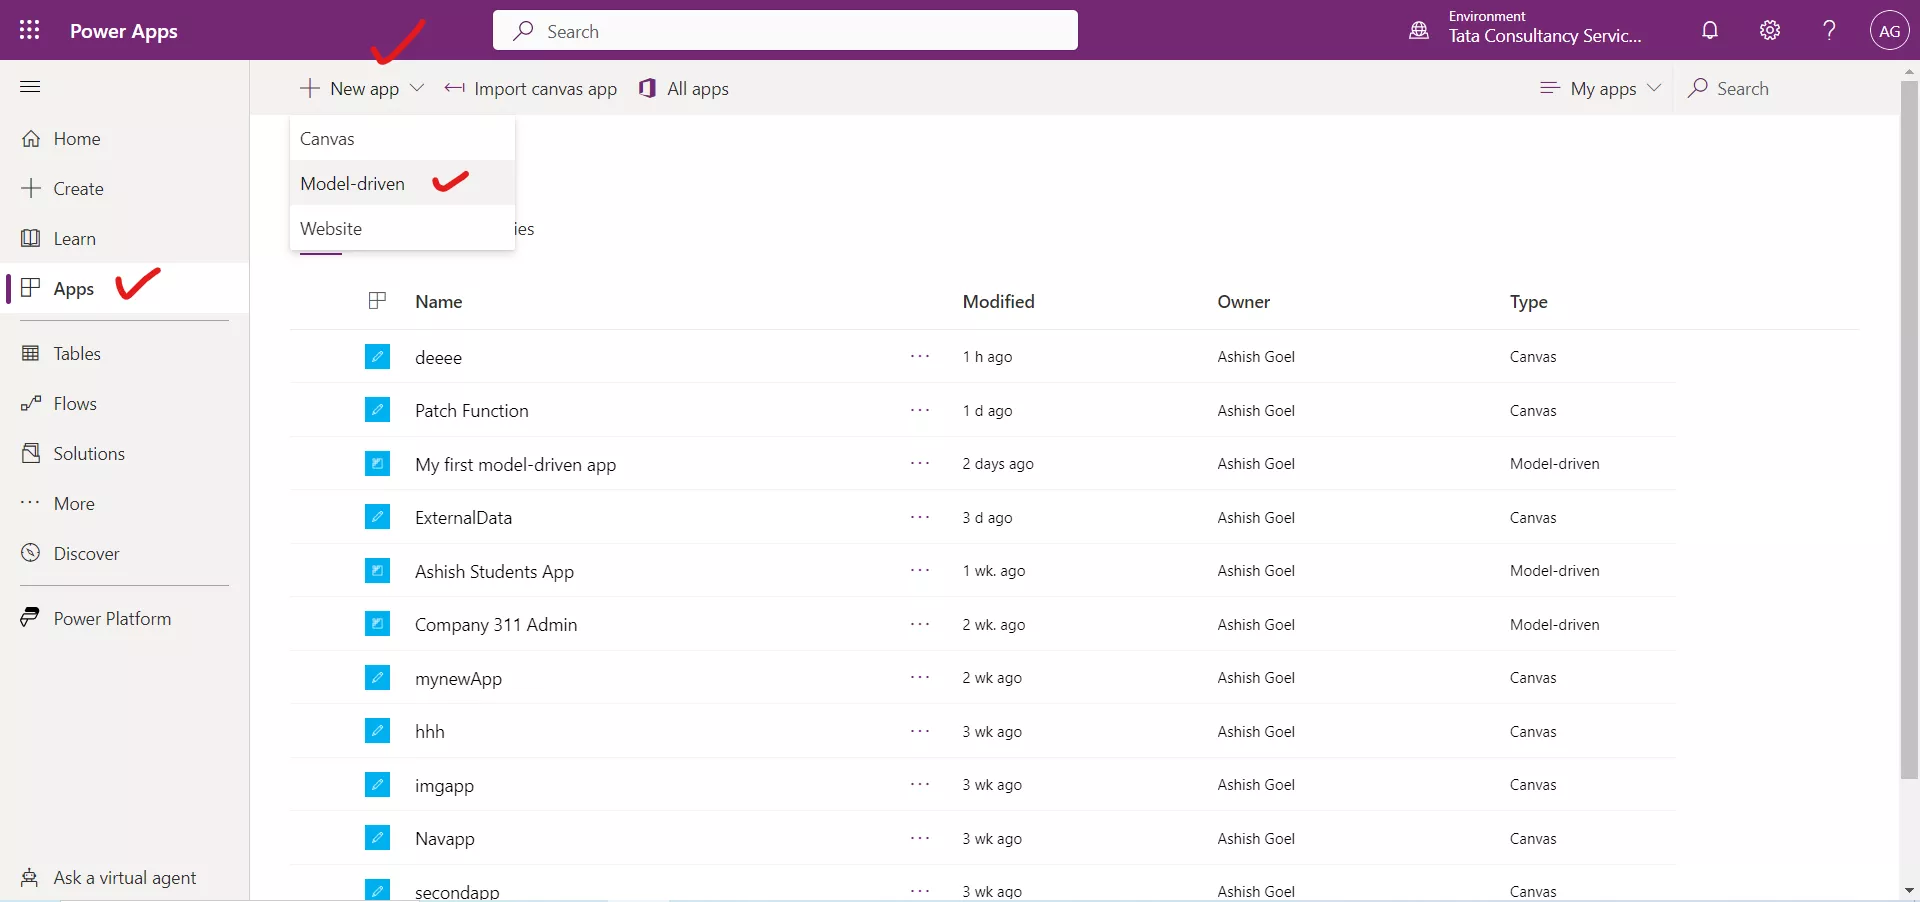
Or we can click on Apps, and then select Model-driven from the + New app dropdown menu.
Step 5: On the New model-driven app page, enter a name and description for the app. (For example, enter My first model-driven app for the name, and This is my first model-driven application for the description.)
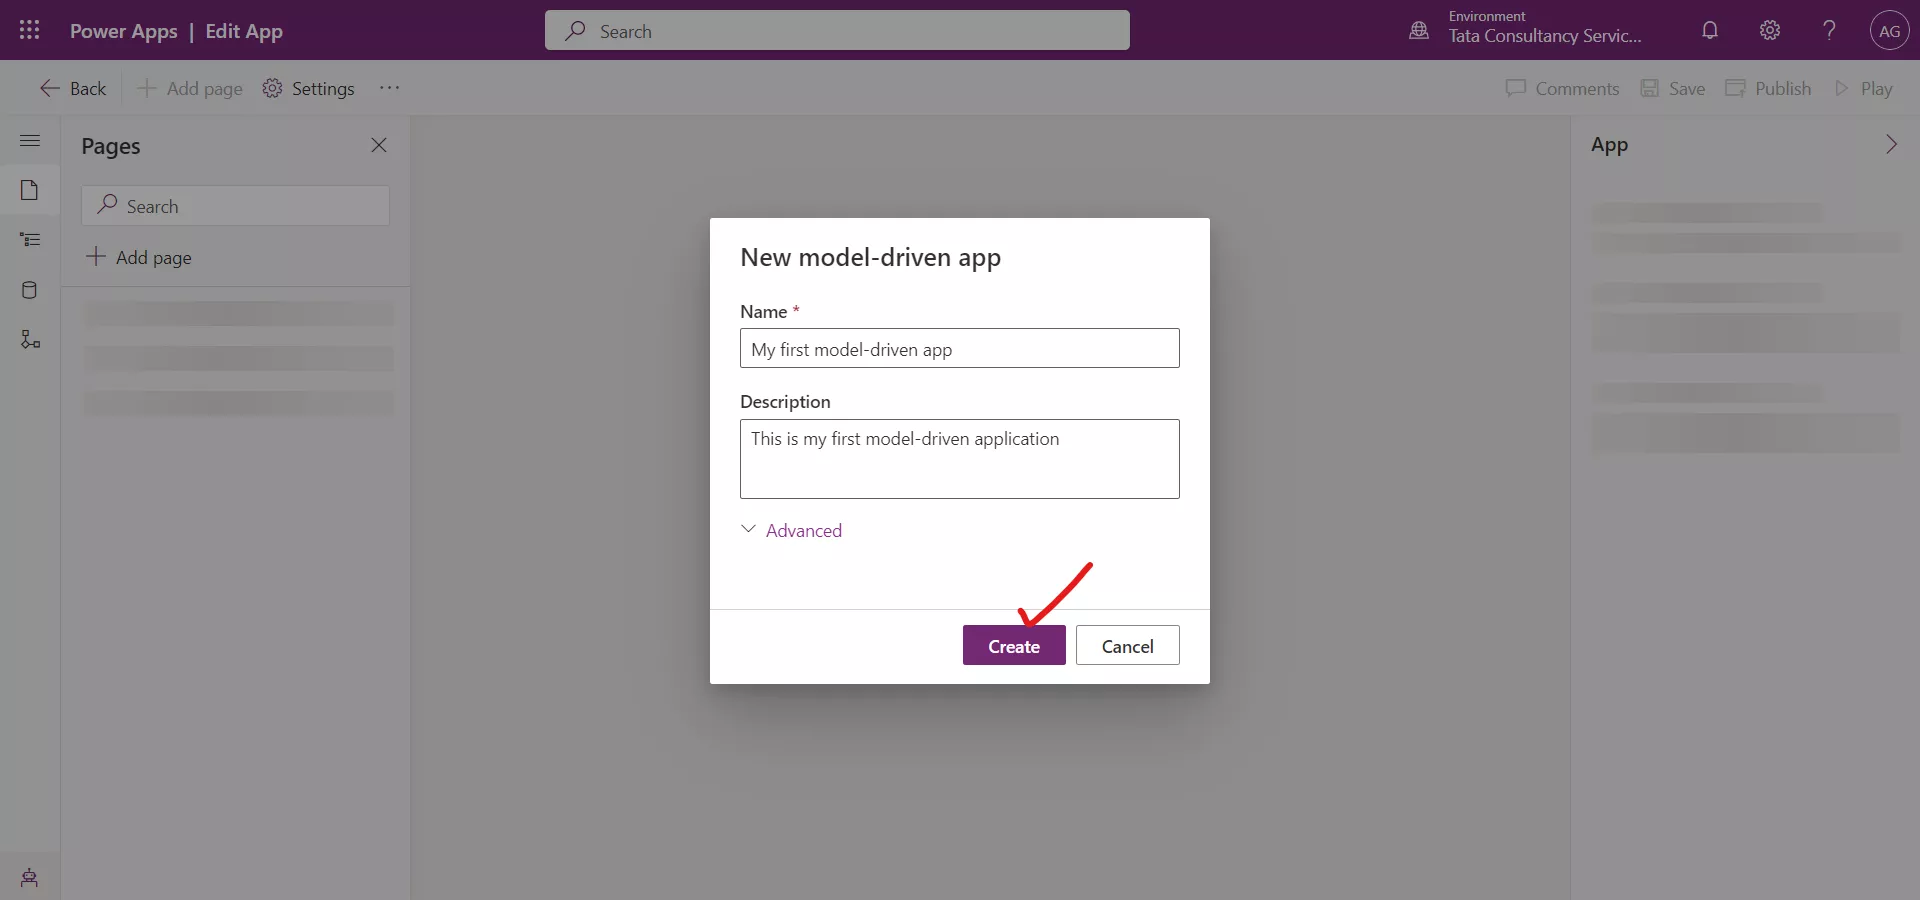
Step 6: After a few minutes, our new app will appear.
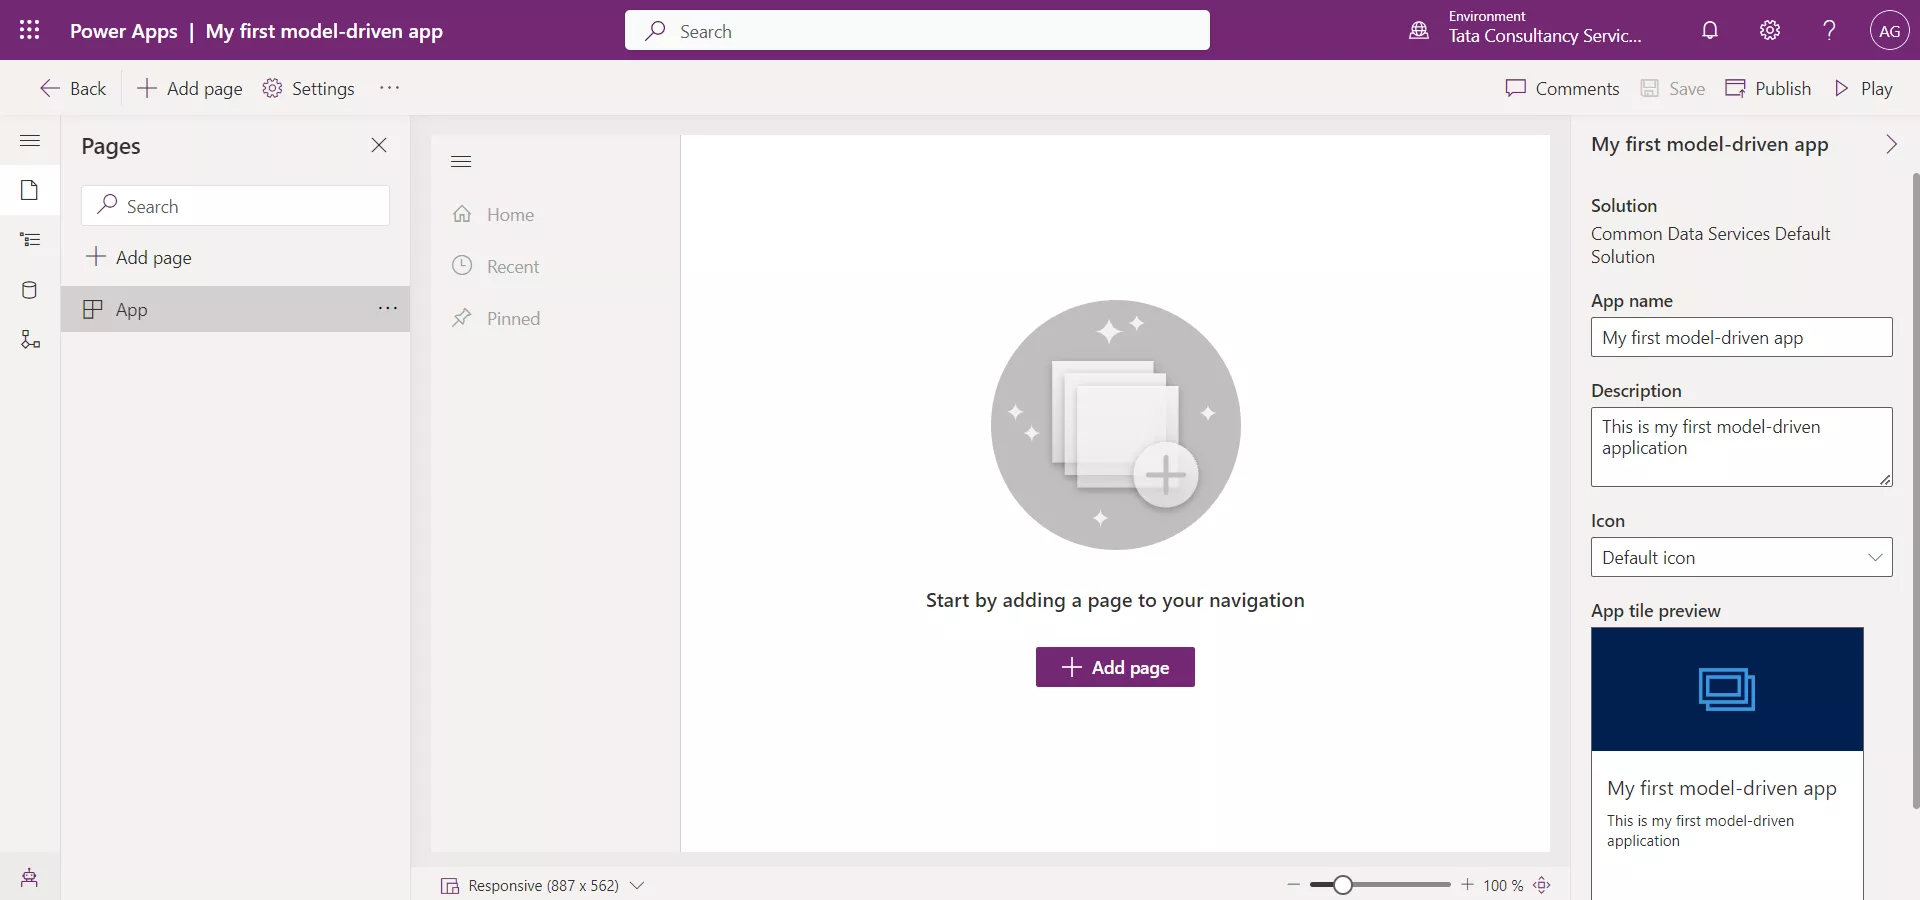
Add Account table to the app We can add pages to the app by using the App Designer.
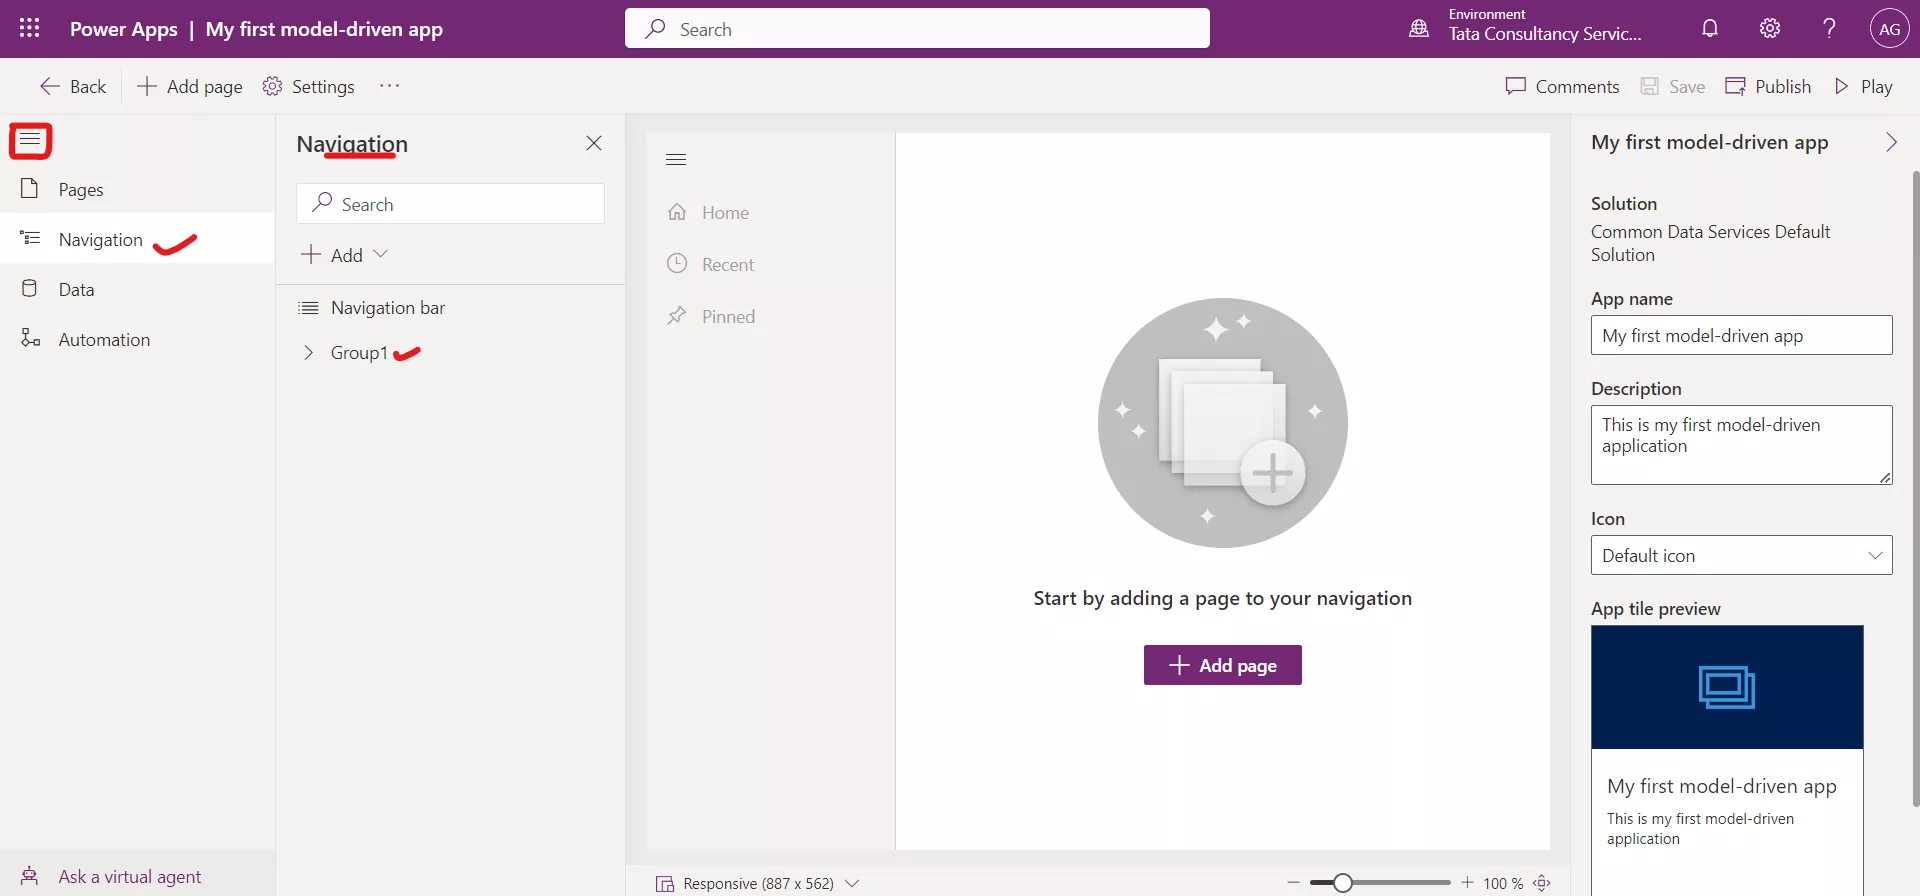
Step 1: If necessary, using the navigation on the left, select the show or hide menu names button (looks like 3 horizontal lines) to show the menu names.
Step 2: Select Navigation.
Note: We use the term Site maps which defines the manner by which users move between tables in a model-driven app. This is nothing but called Navigation.
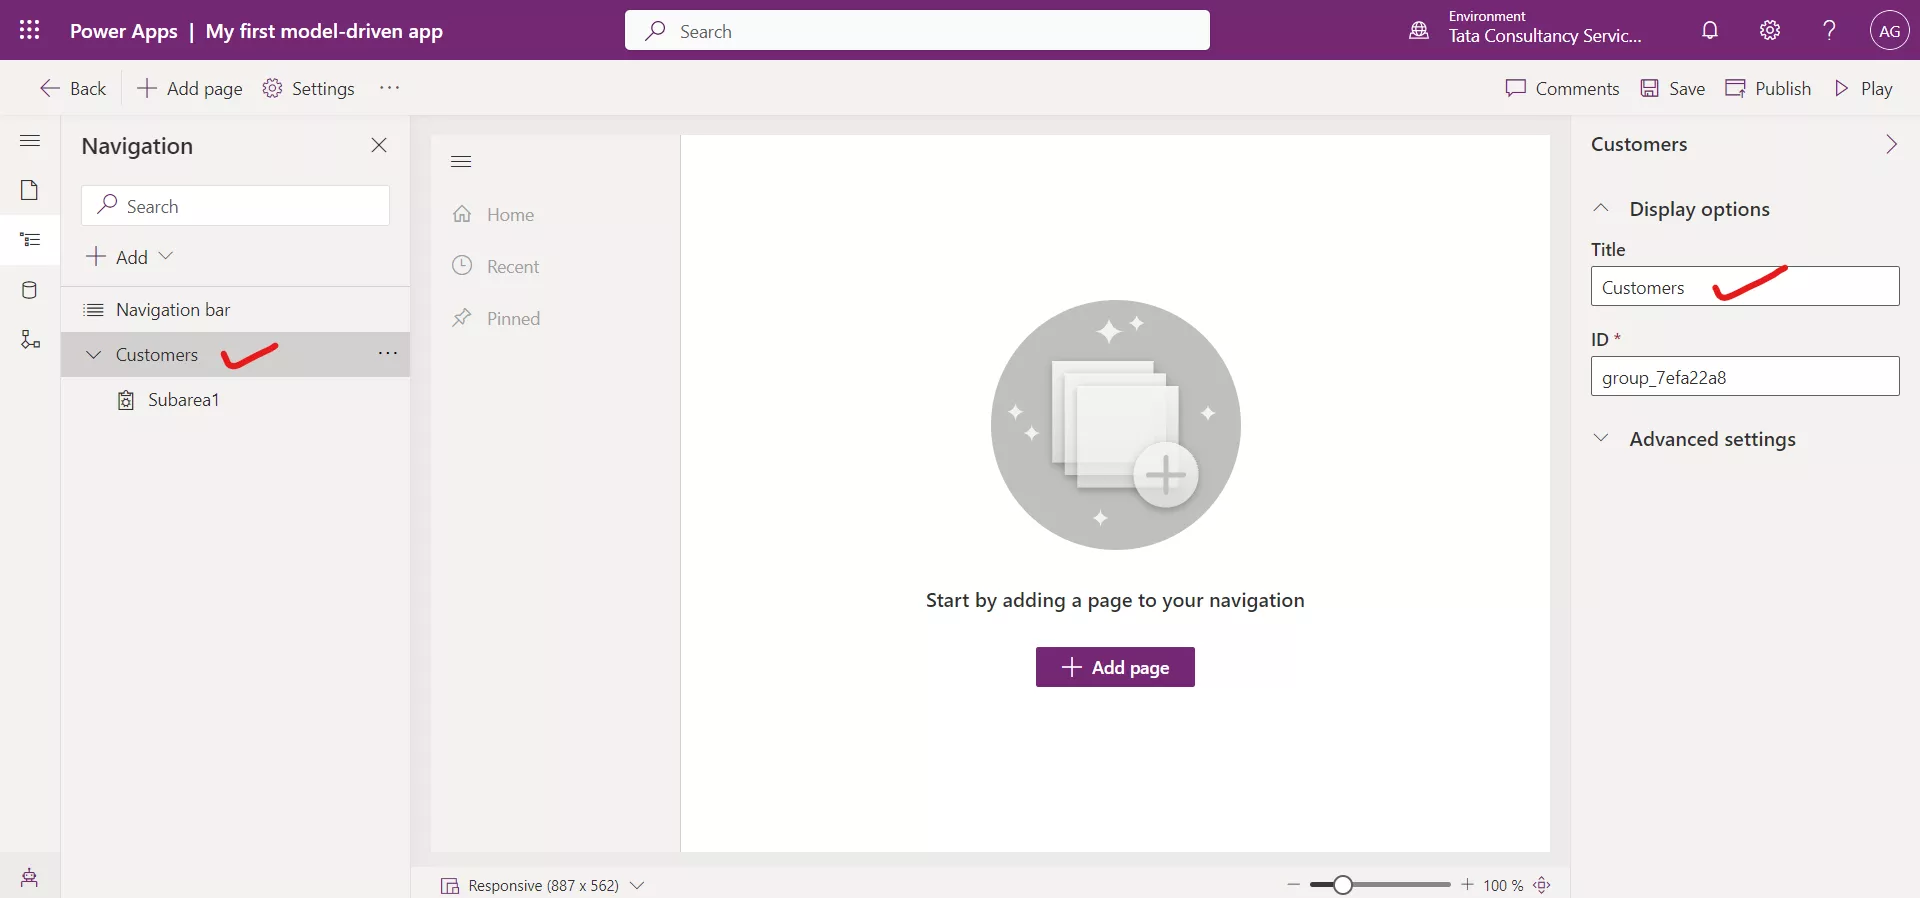
Step 3: Select the Group1 text. On the right-hand side of the screen change the Title to Customers. By doing we are customizing the name of the Group which is by default Group1.
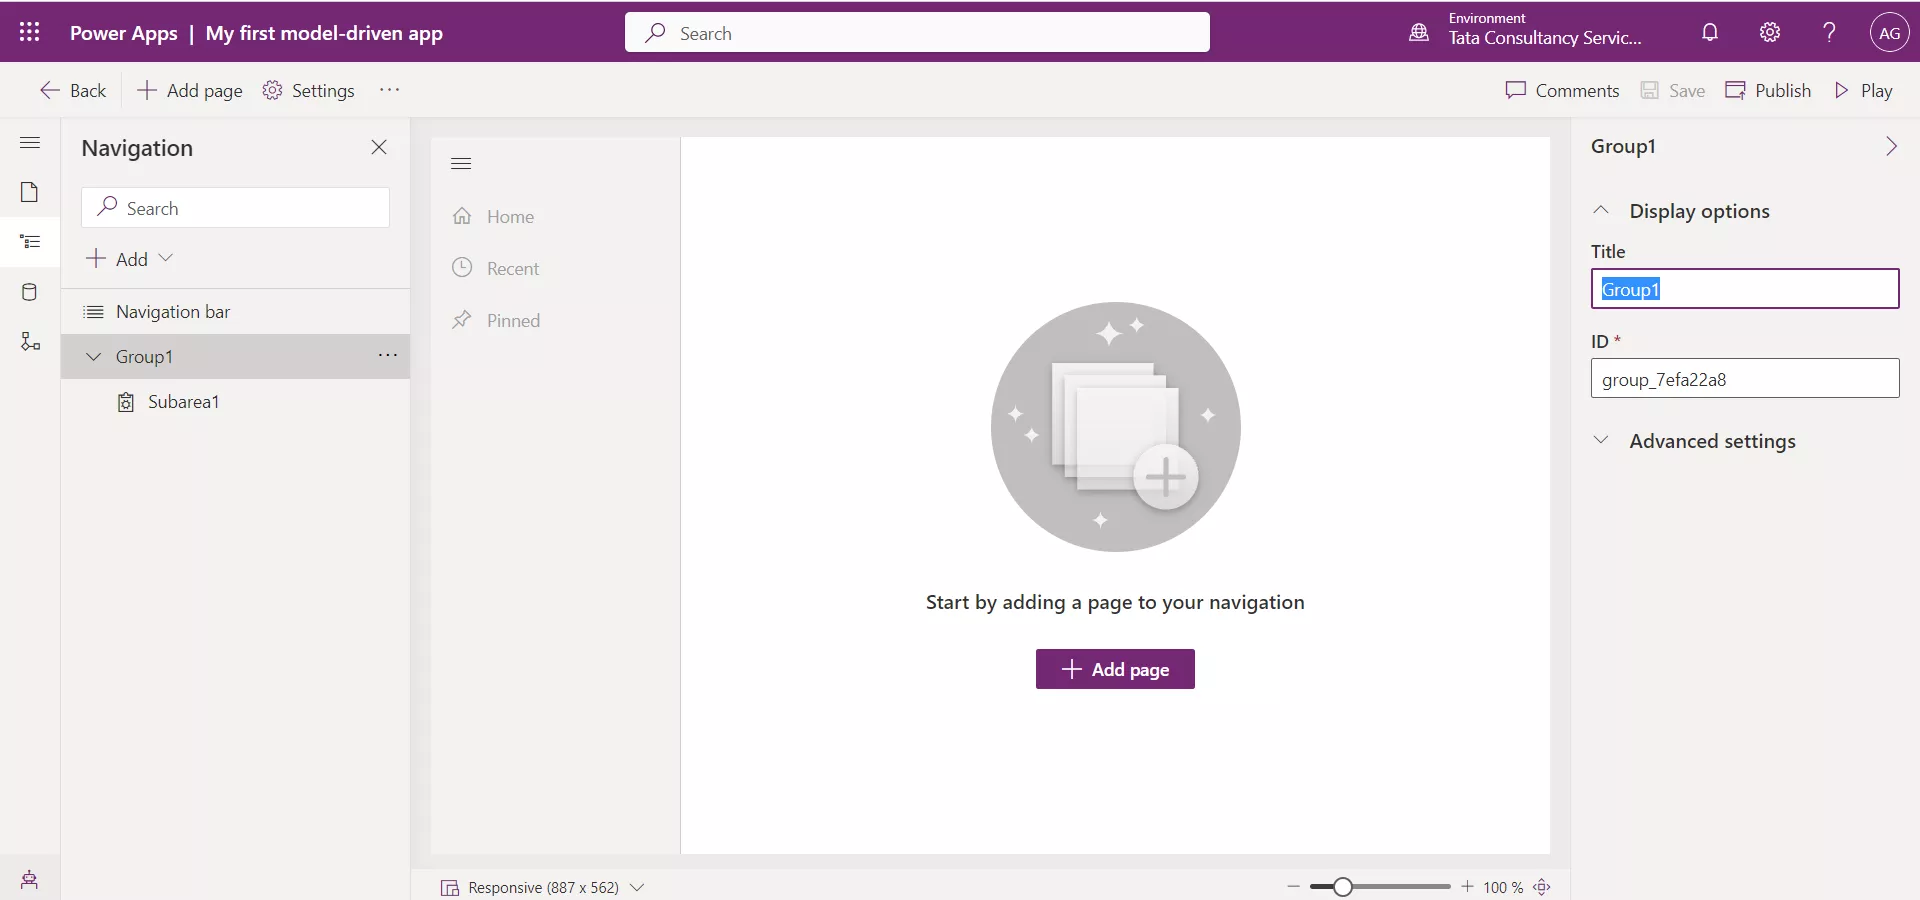
The name of the Group is changed as shown in the image below.
Step 4: Under the Customers group, select Subarea1.
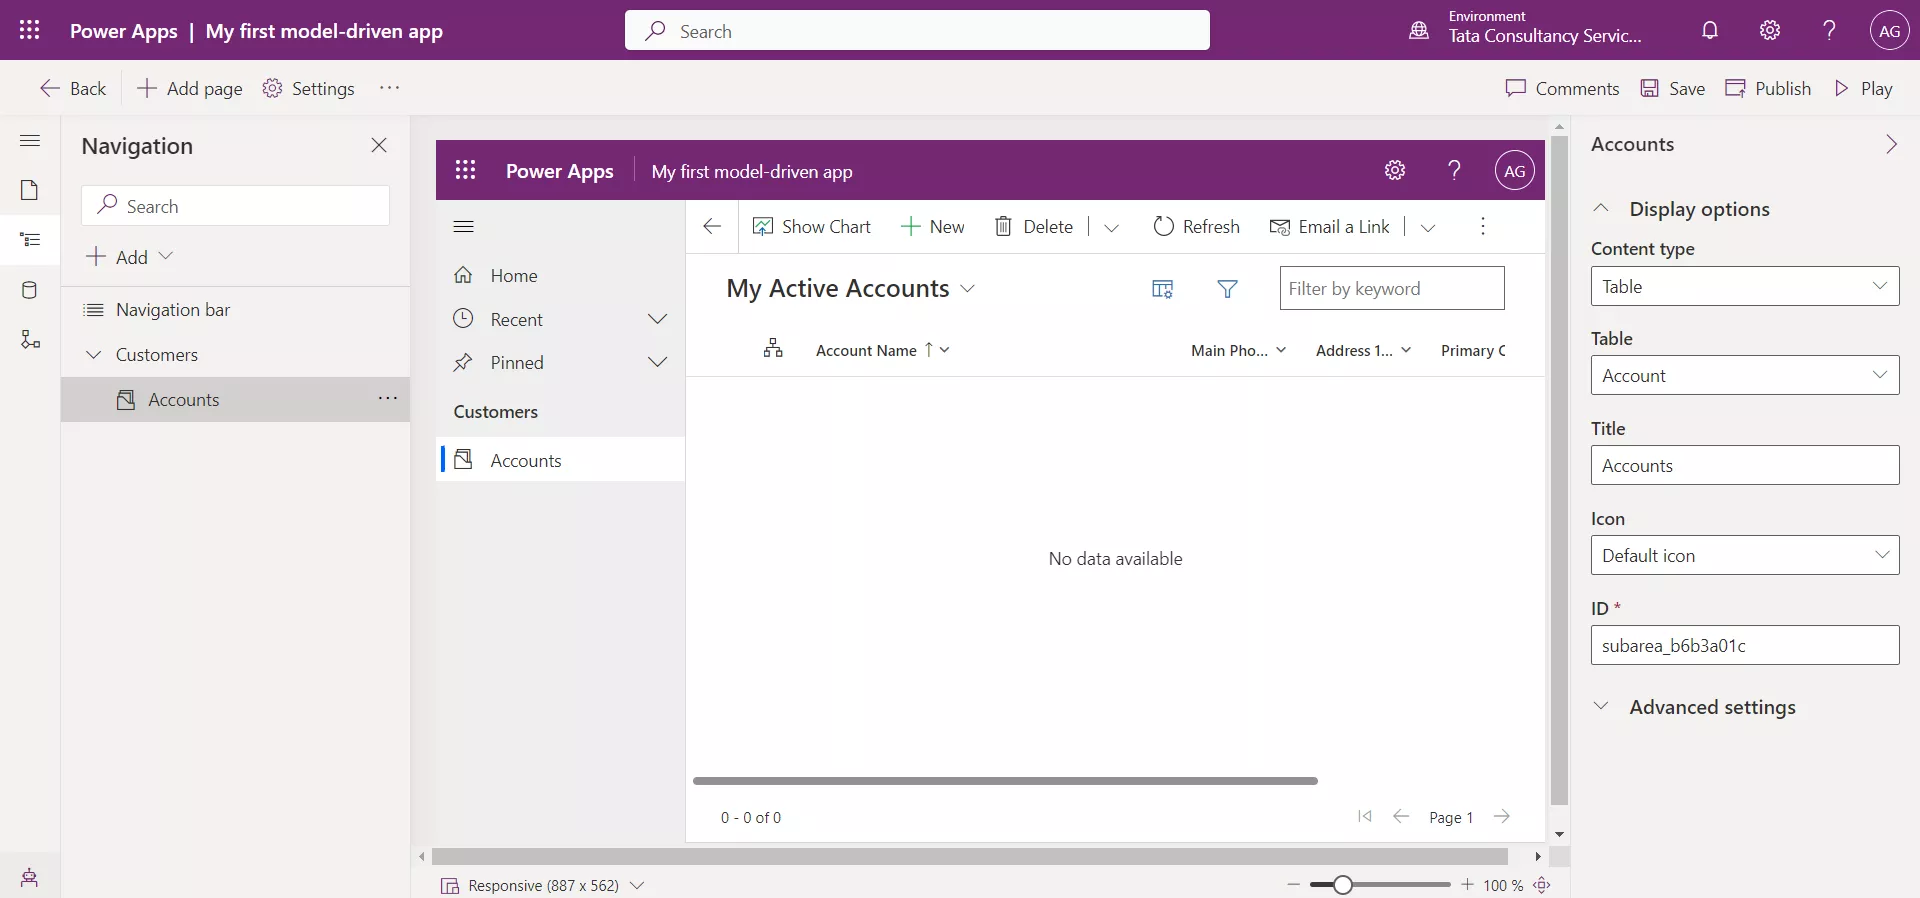
Step 5: On the right-hand side of the screen set the Content type field to Table.
Step 6: On the Table field that appears, select Account.
Step 7: Set the Title field to Accounts, to change the name of the subarea.
Alternatively, to add the Account table add to the app we can follow the following steps:
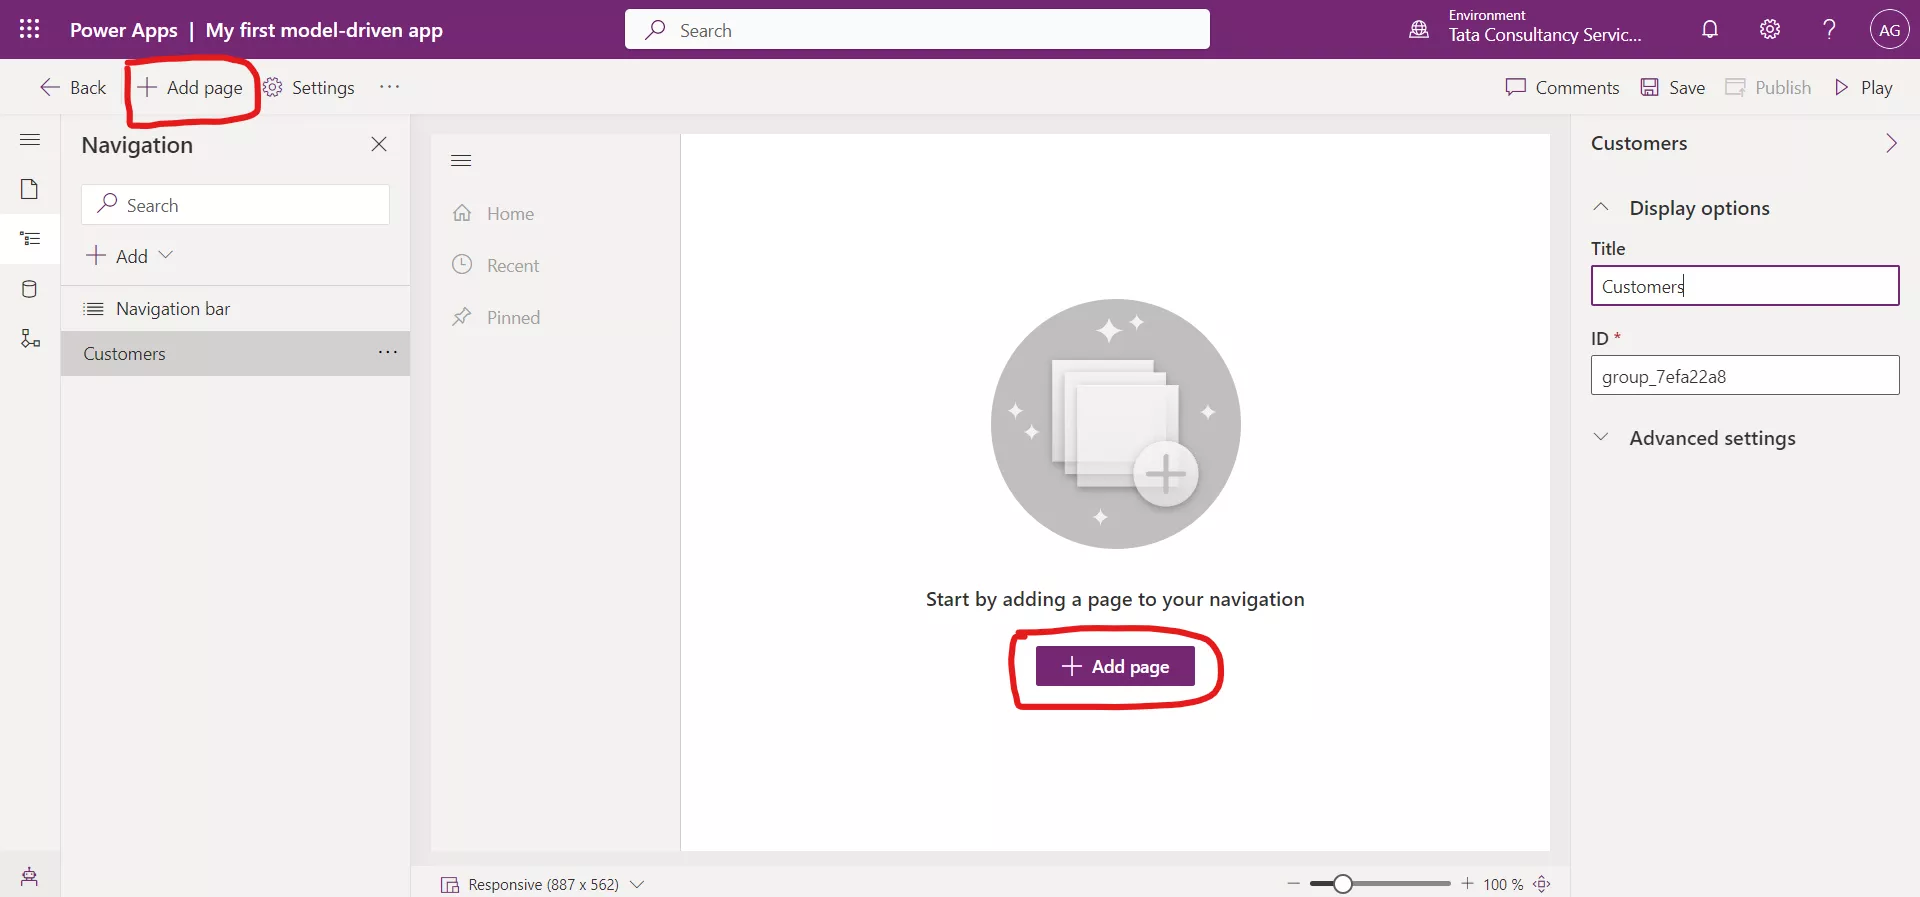
Using the command bar at the top, select the + Add Page button.
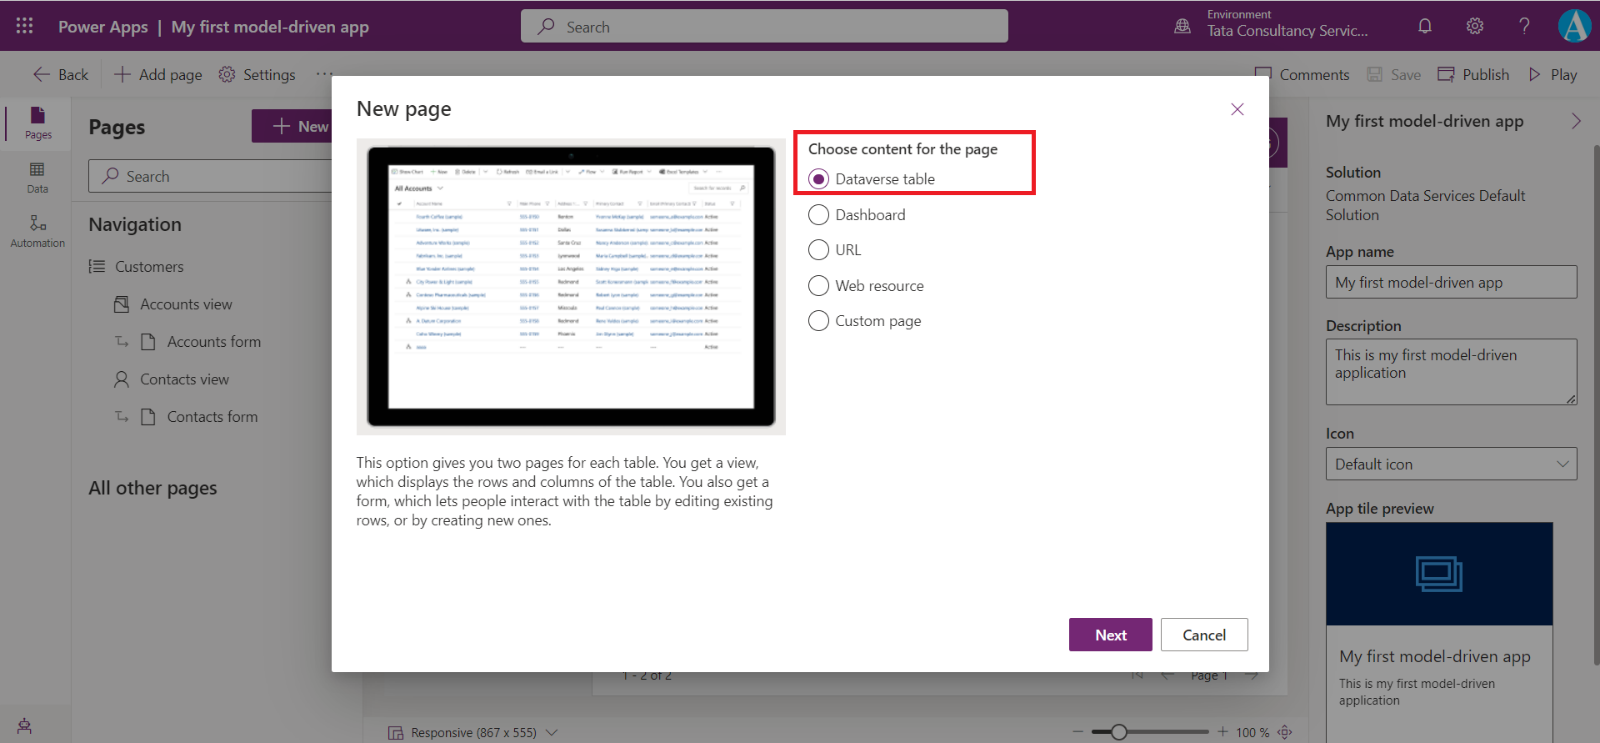
On the New Page dialog box, select Dataverse table, then select the Next button.
On the New Page dialog box, select Account then select the Add button.
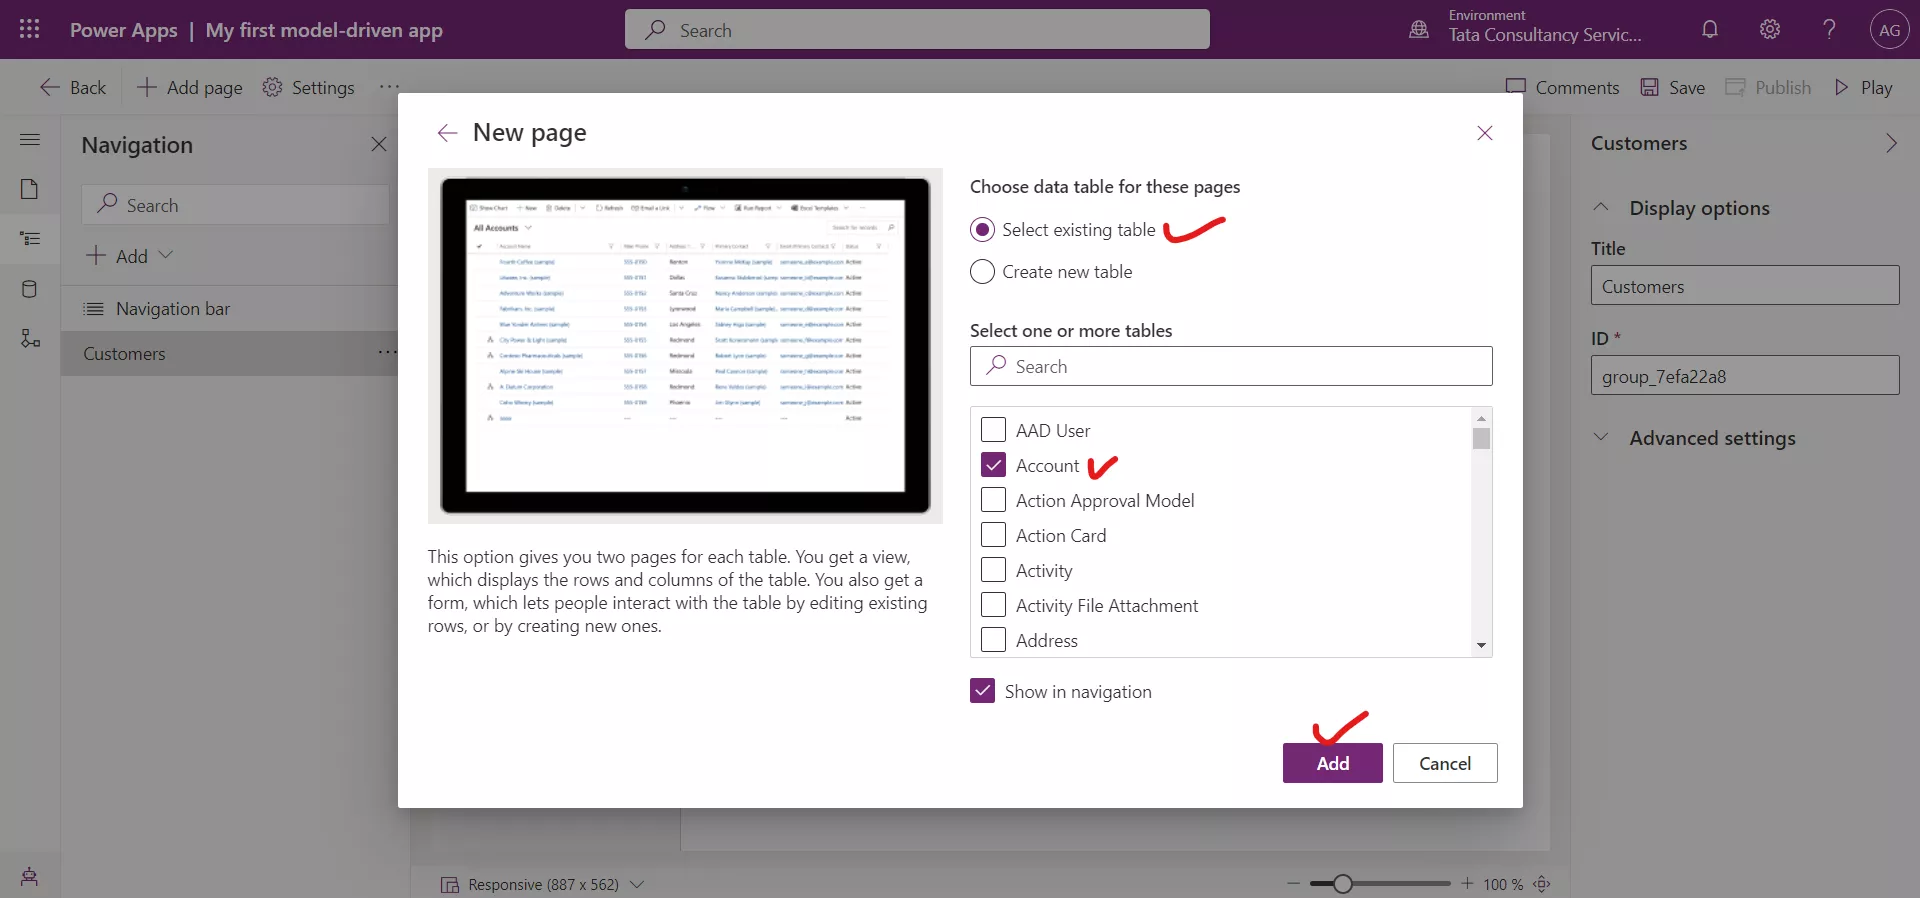
Here the Account table is added to the model-driven app.
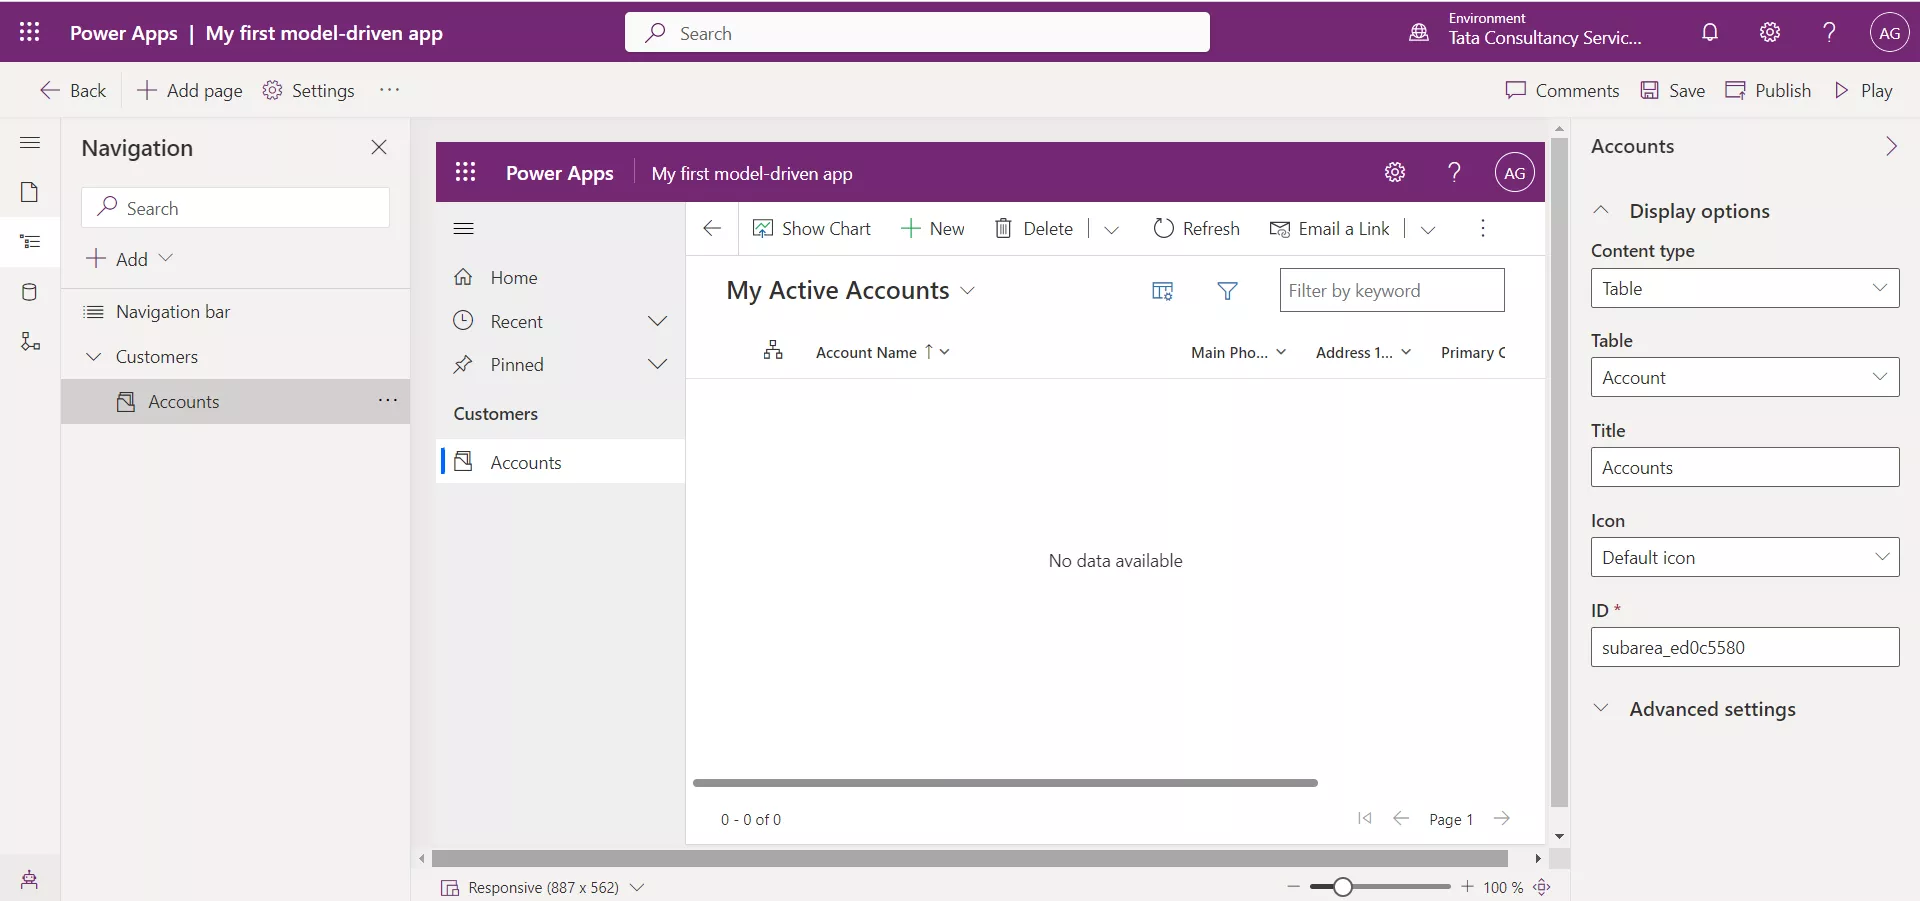
Here the My Active Accounts view and the Account form that is automatically created when our Dataverse instance is initialized.
Add forms and views to the app
Now that we have added a table to our app, we are going to specify which Account forms and views should be used with the application.
Step 1: Using the navigation on the left, select Pages.
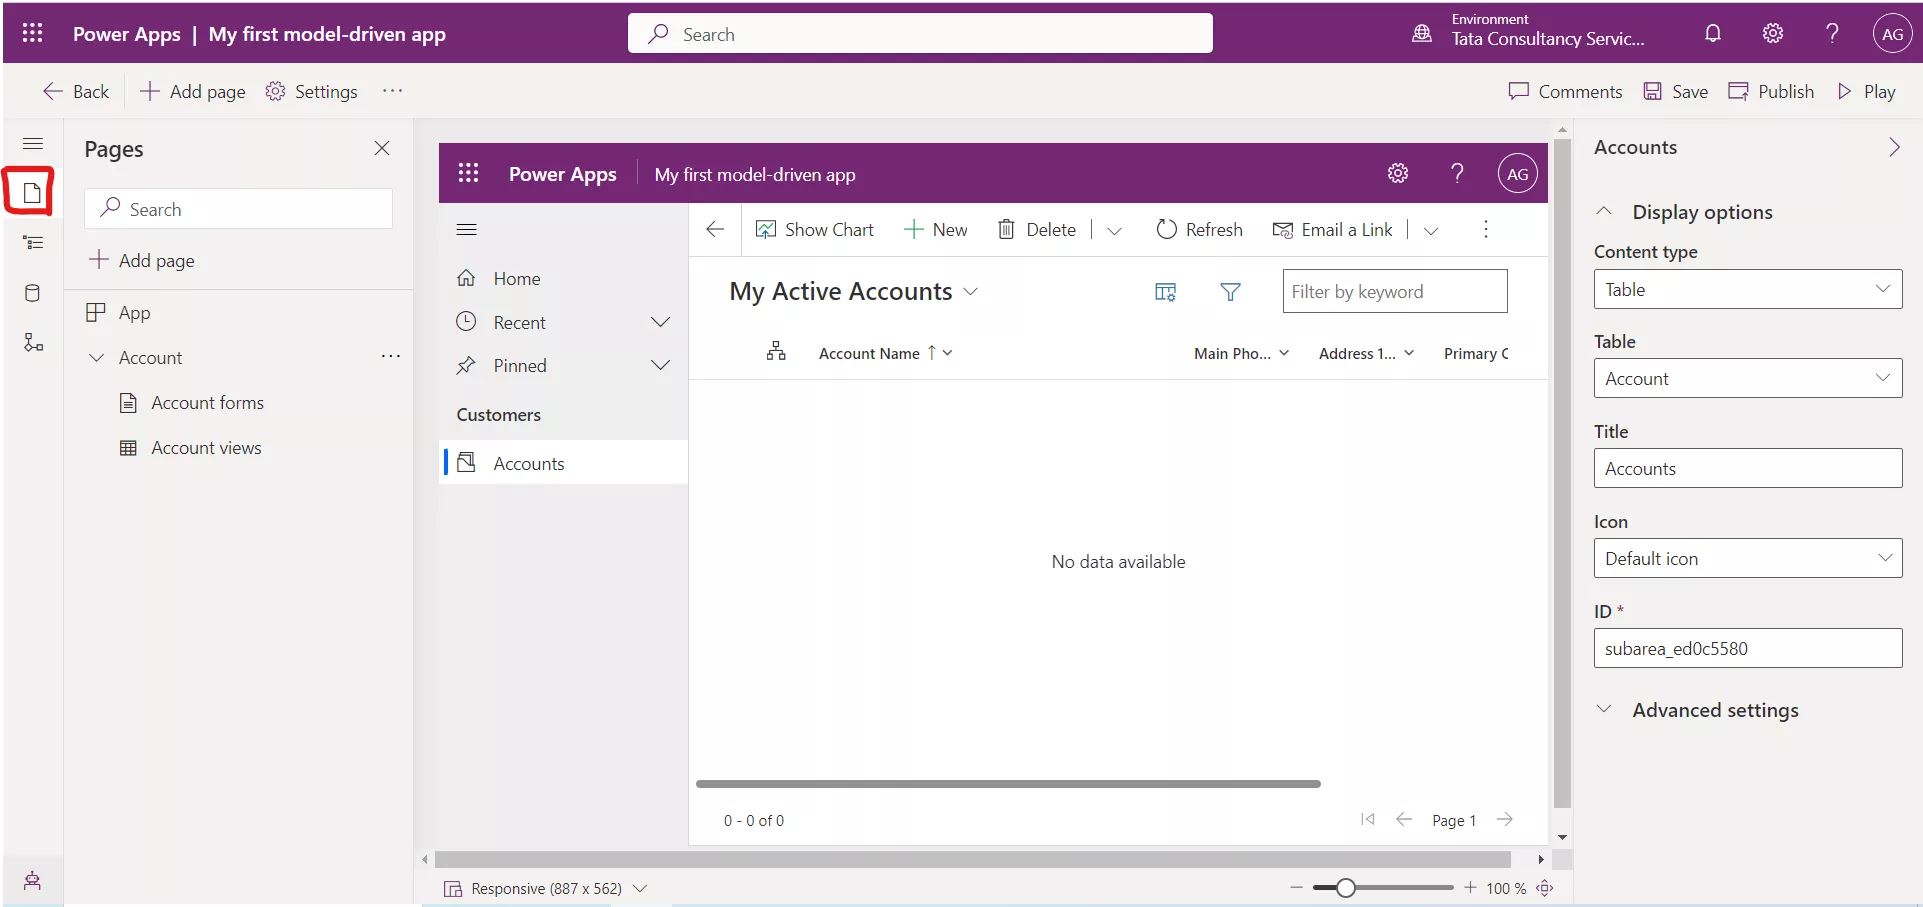
Step 2: Expand Account and select Account form.
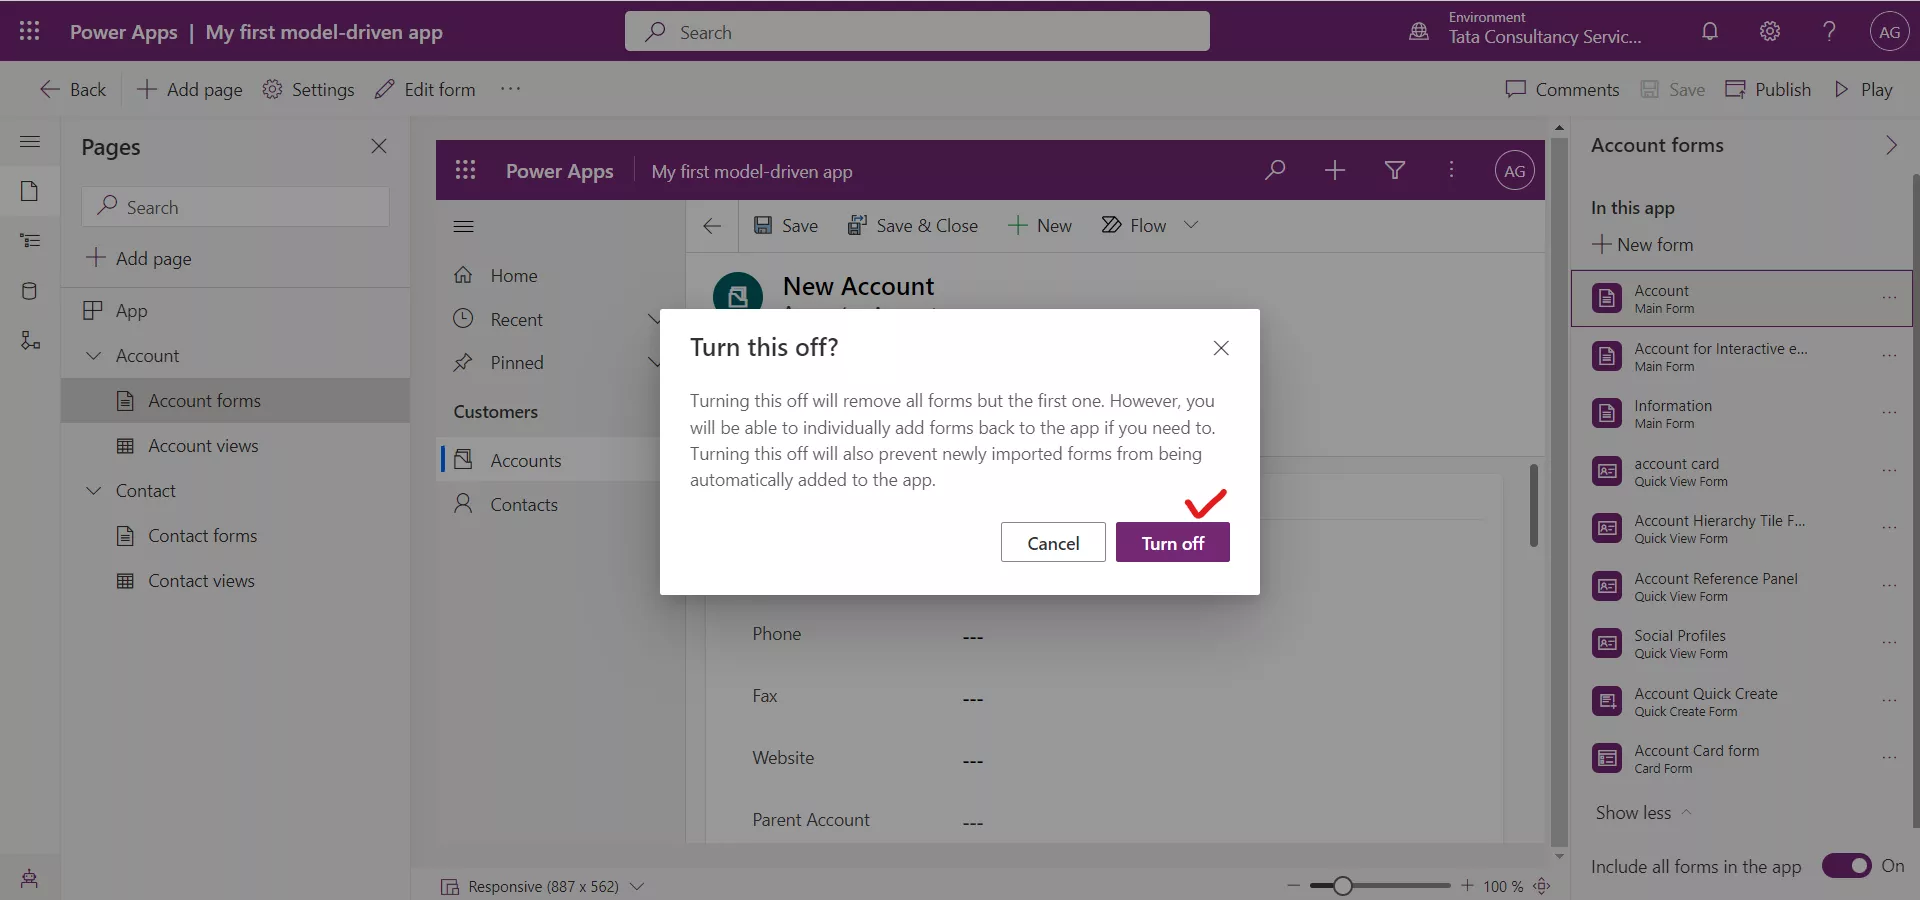
Step 3: Turn off the toggle saying “Include all forms in the app” at the bottom.
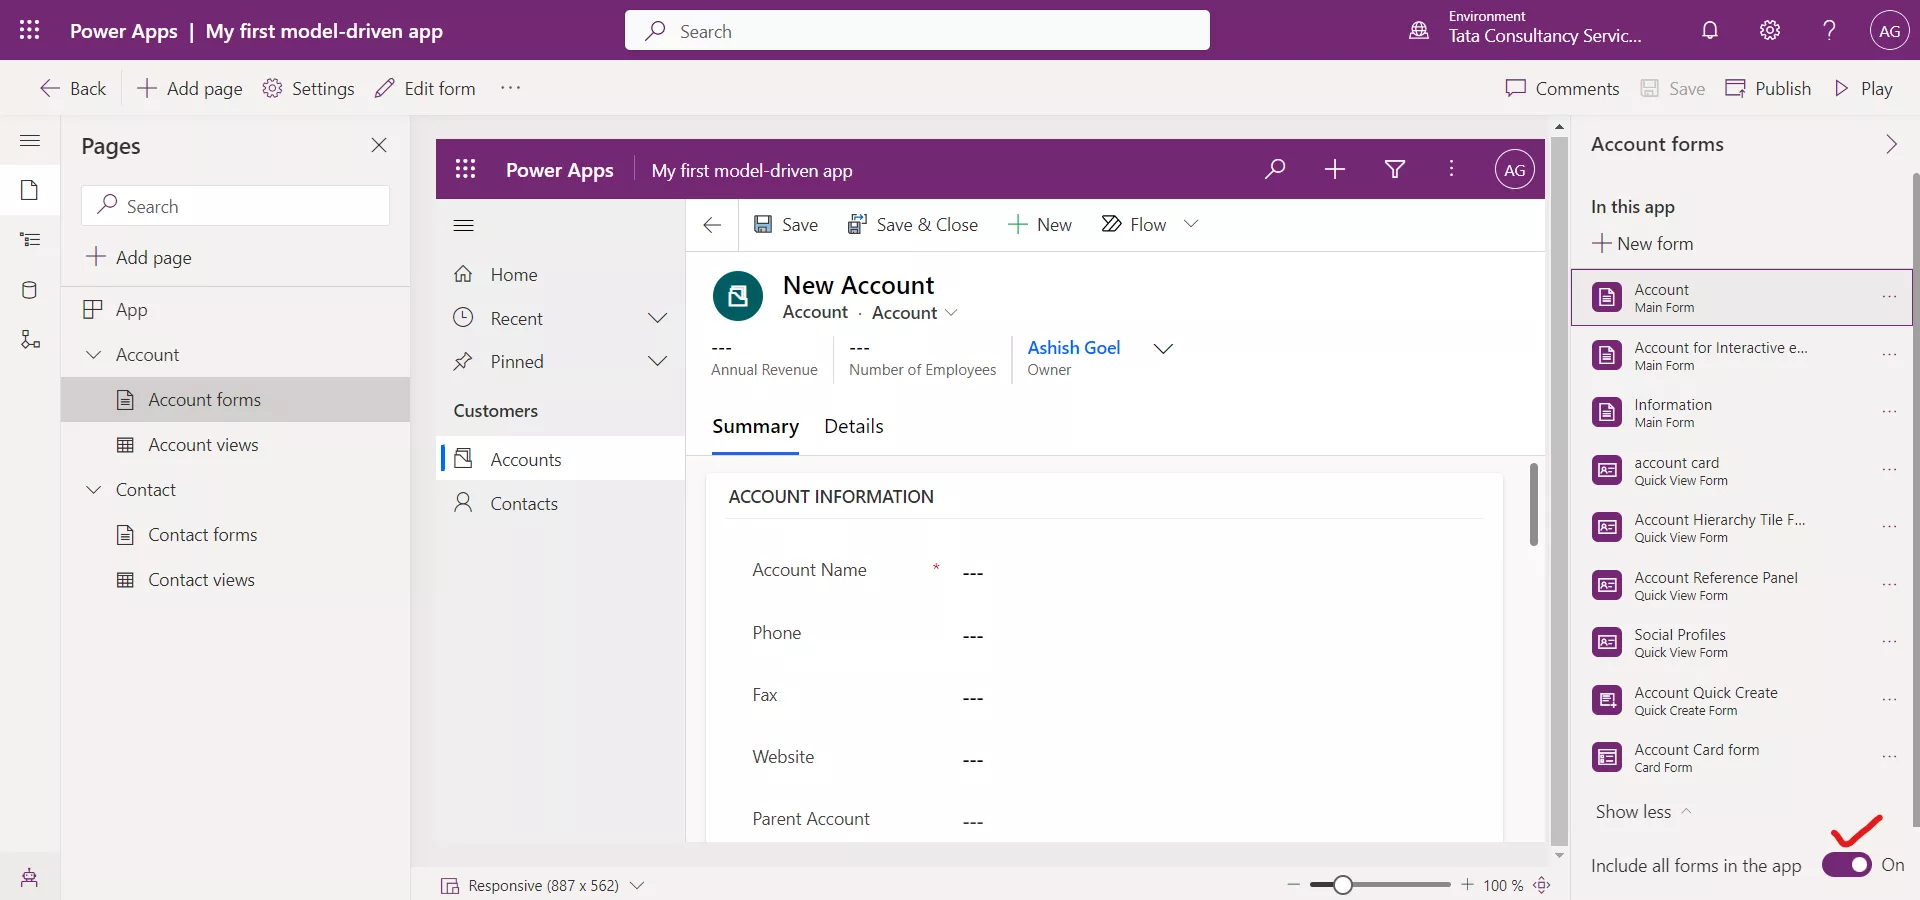
Click on Turn off on Turn this off? dialog box to confirm.
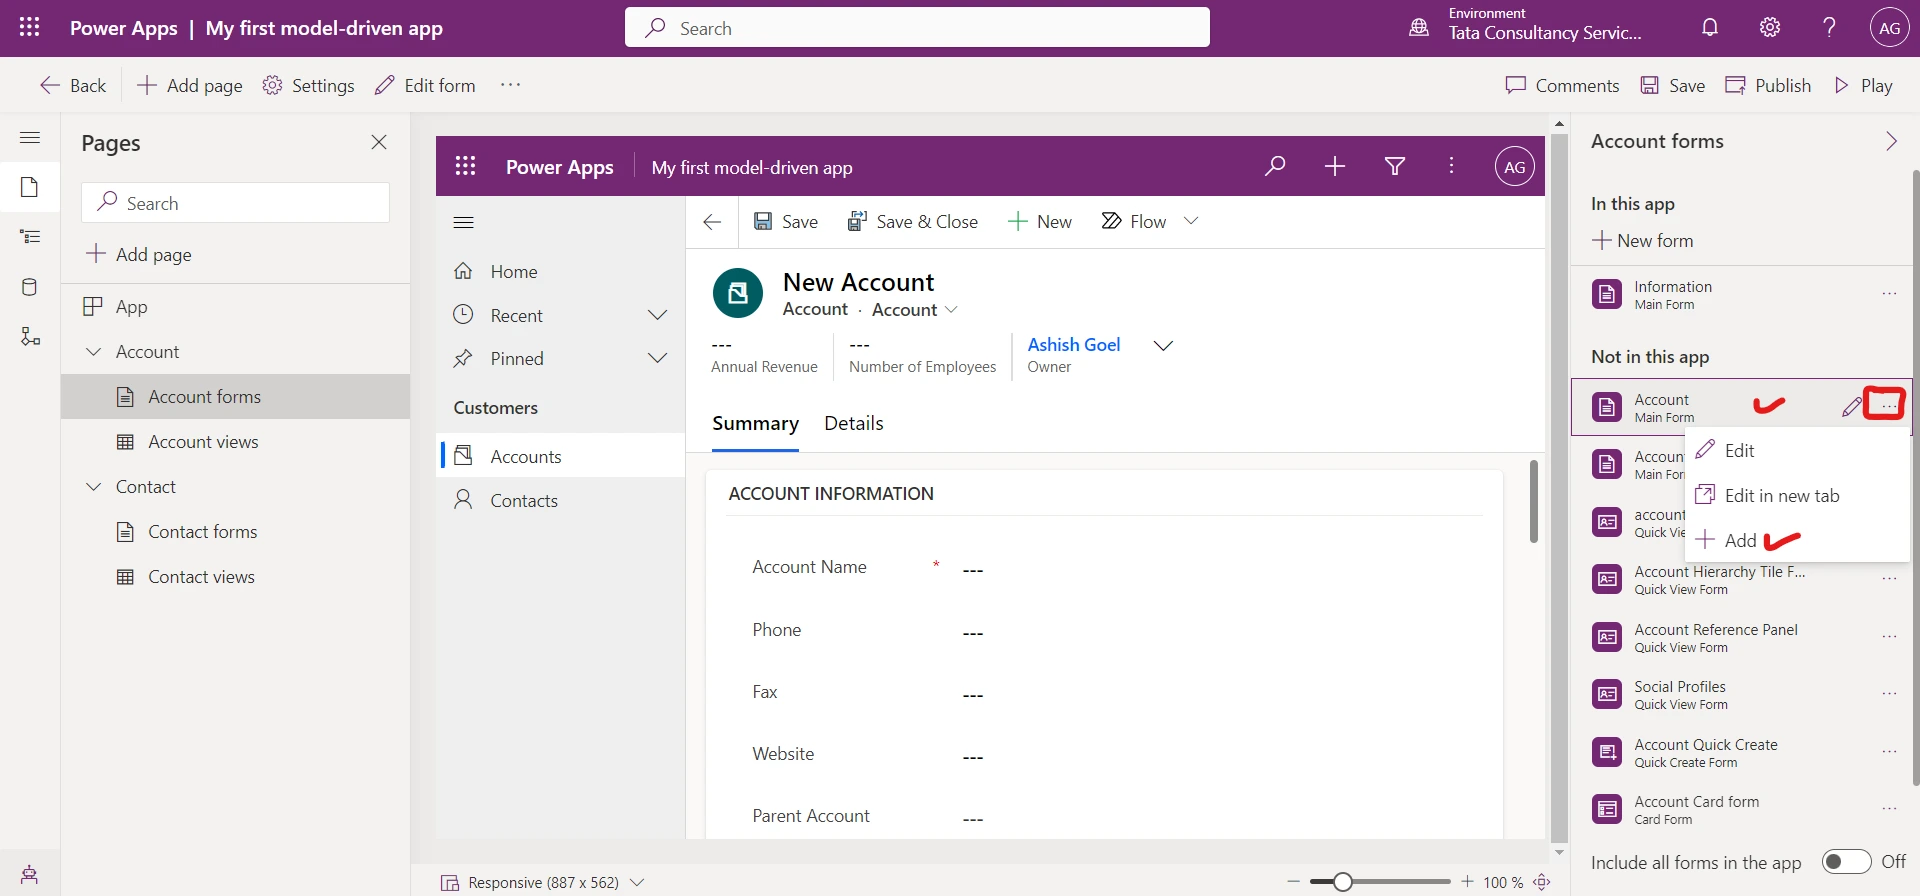
Step 4: On the right-hand side of the screen, from the list of Forms that appears, select ellipses on the Account and select +Add from the menu.
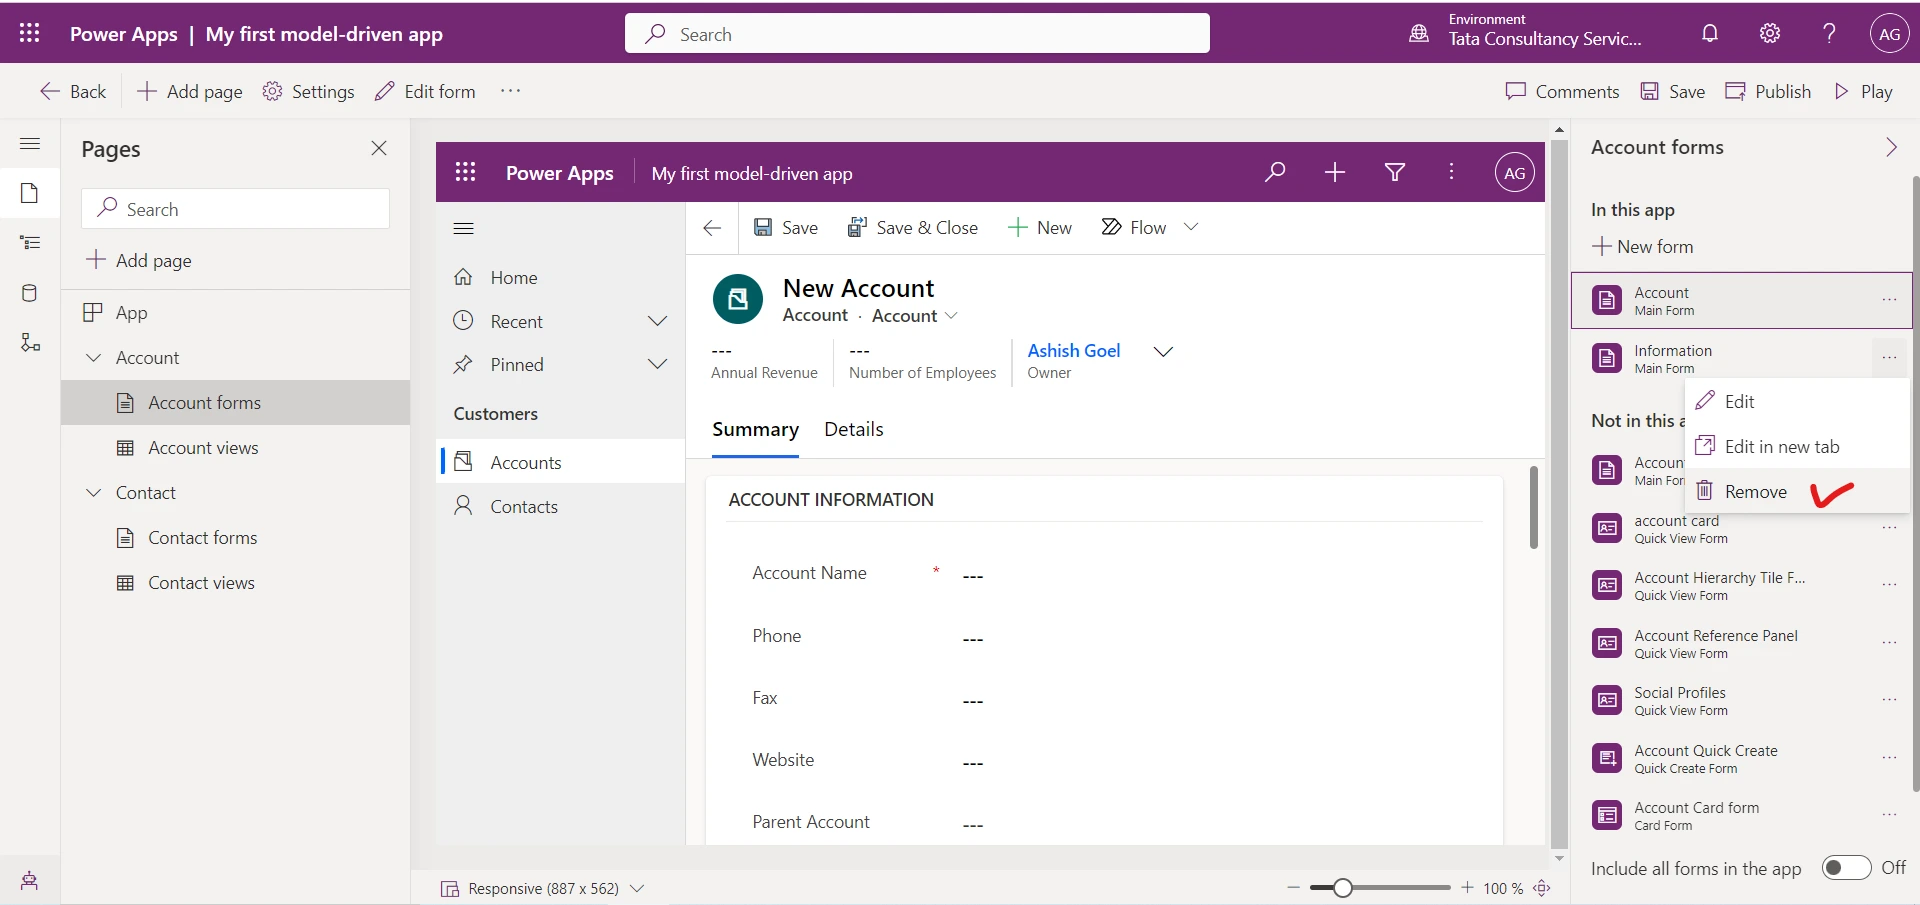
Step 5: Remove Information form.
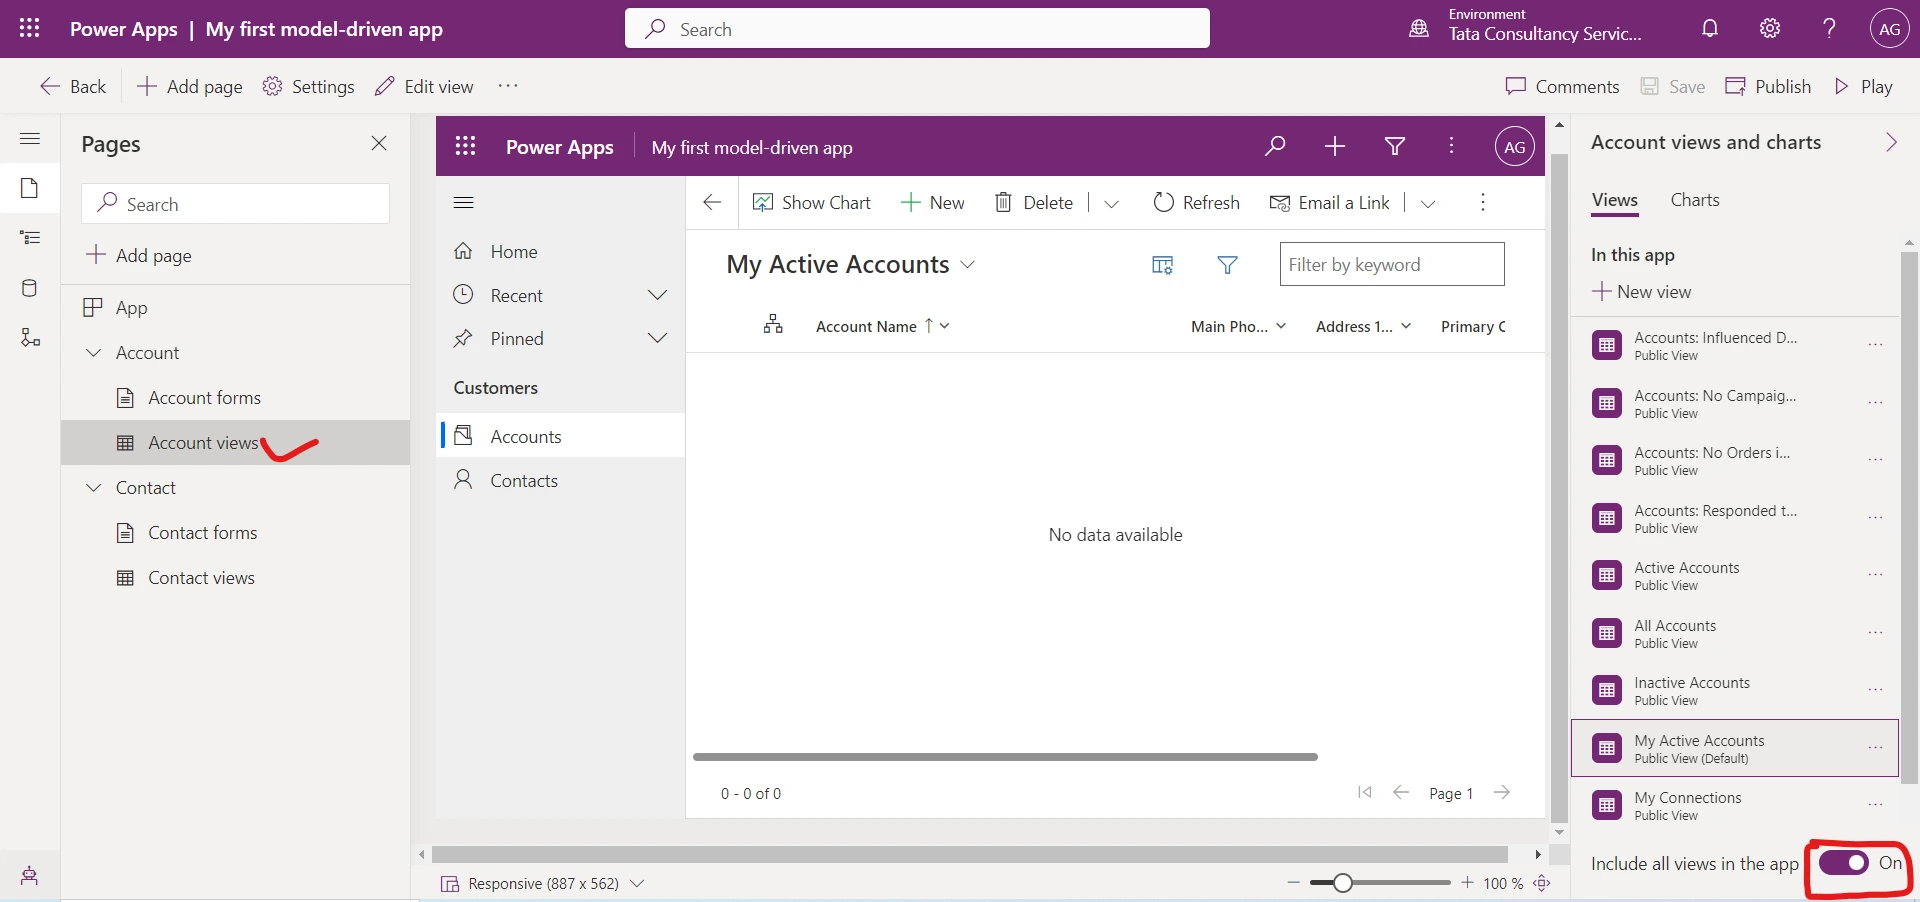
Step 6: Similarly for the view, under Pages on the left, select Account view.
Step 7: On the right-hand side of the screen, turn off the toggle saying “Include all views in the app” at the bottom.
Step 8: Select the ellipses on My Active Accounts view and select + Add.
Step 9: Repeat the same process for Active Accounts and Inactive Accounts view.
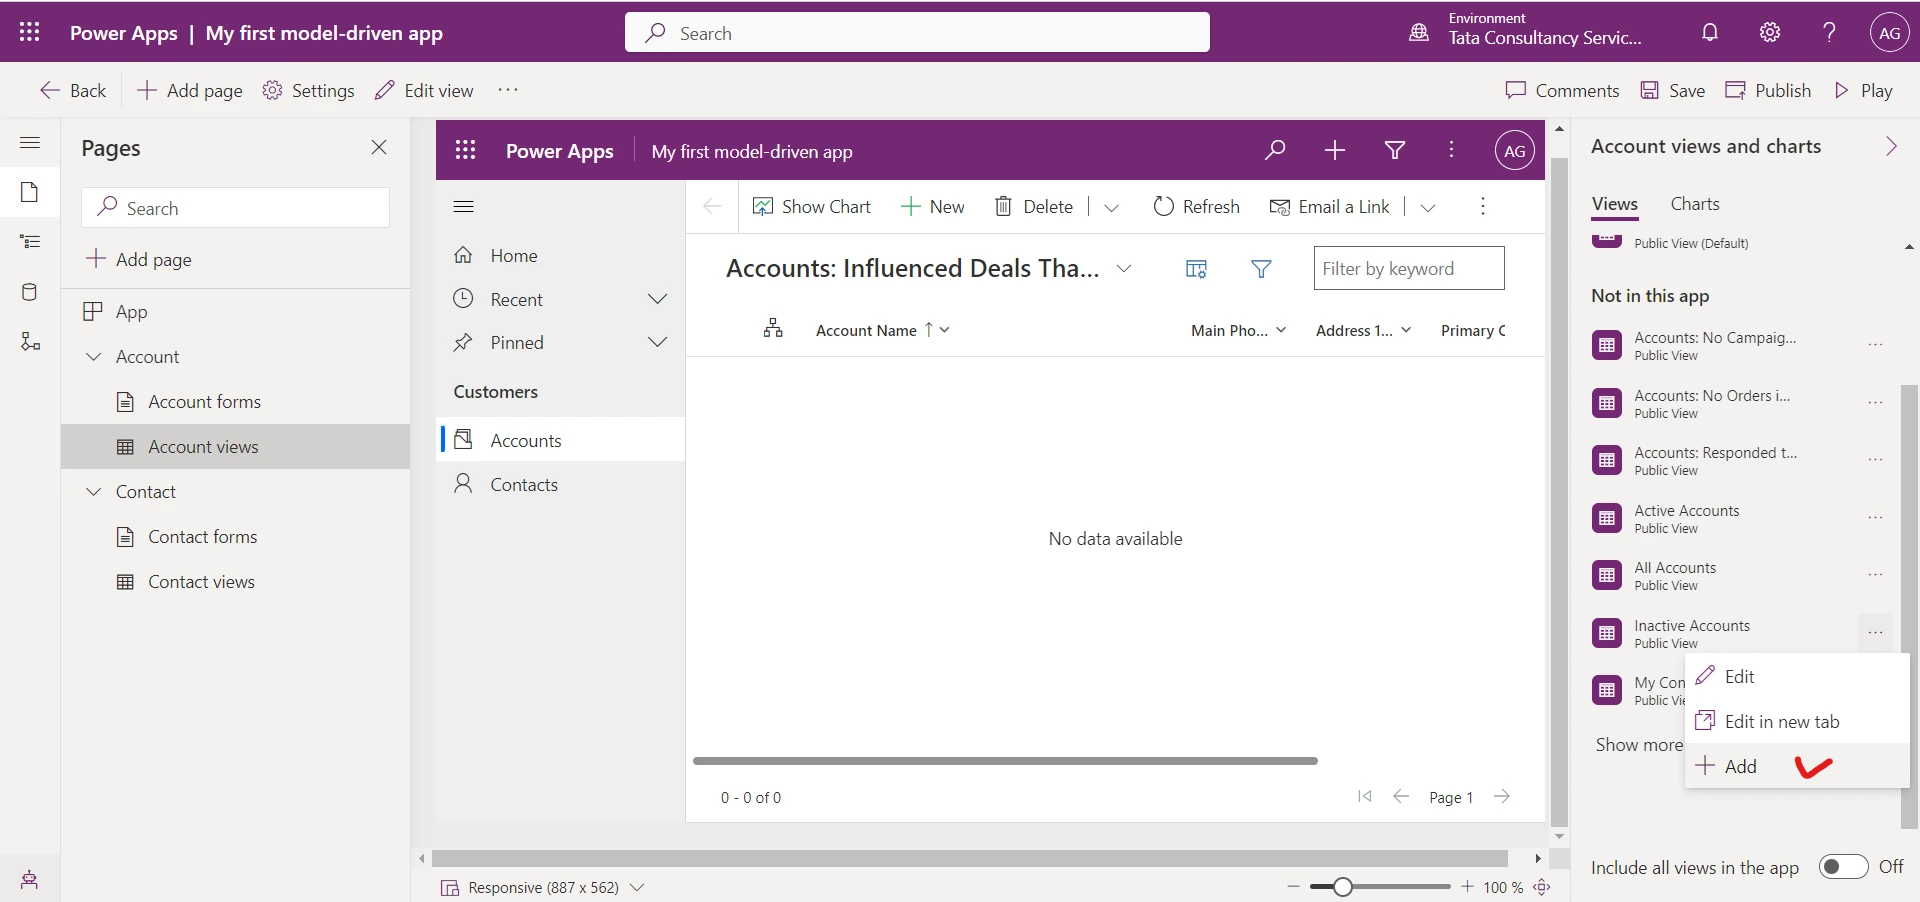
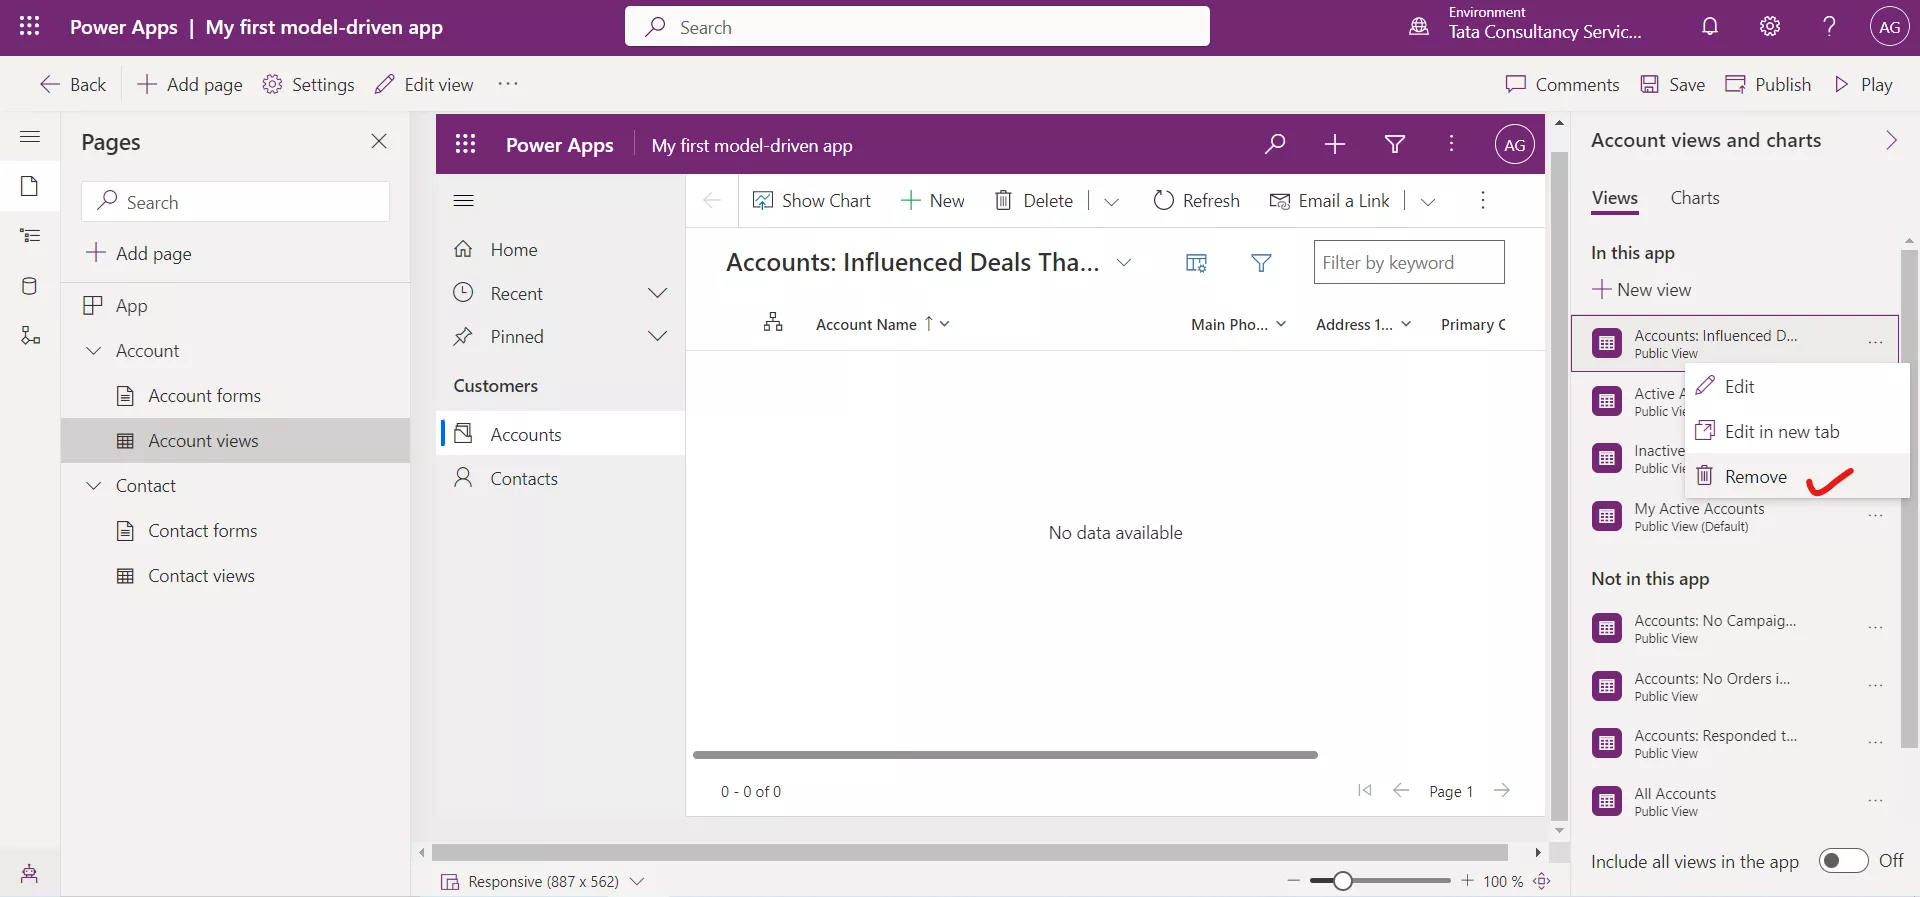
Remove all other views from “In this app” section, when we remove, they are added to the “Not in this app” section. If we accidently delete some view then we have the option to readd them again from the Not in this app section.
Add Contact page to the app
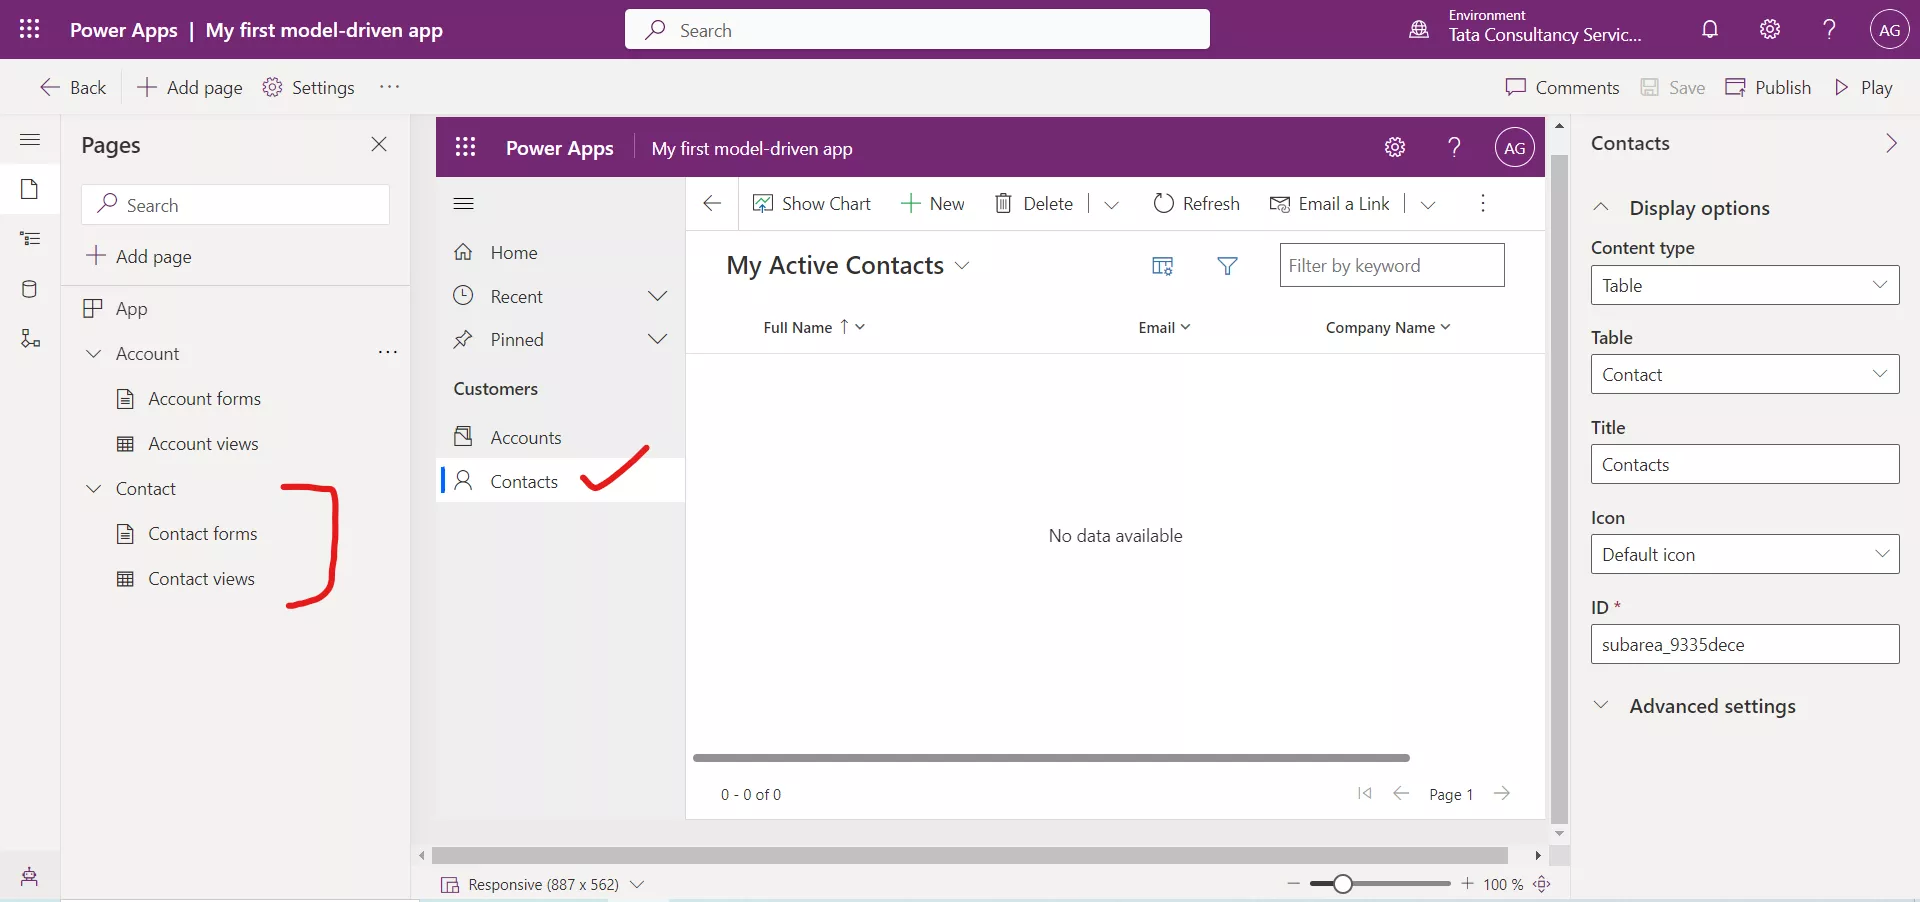
Next, we are going to add another table to our application. In this case we are going to add the Contacts table since a customer could be either an account or a contact.
Step 1: On the command bar at the top, select the Add Page button.
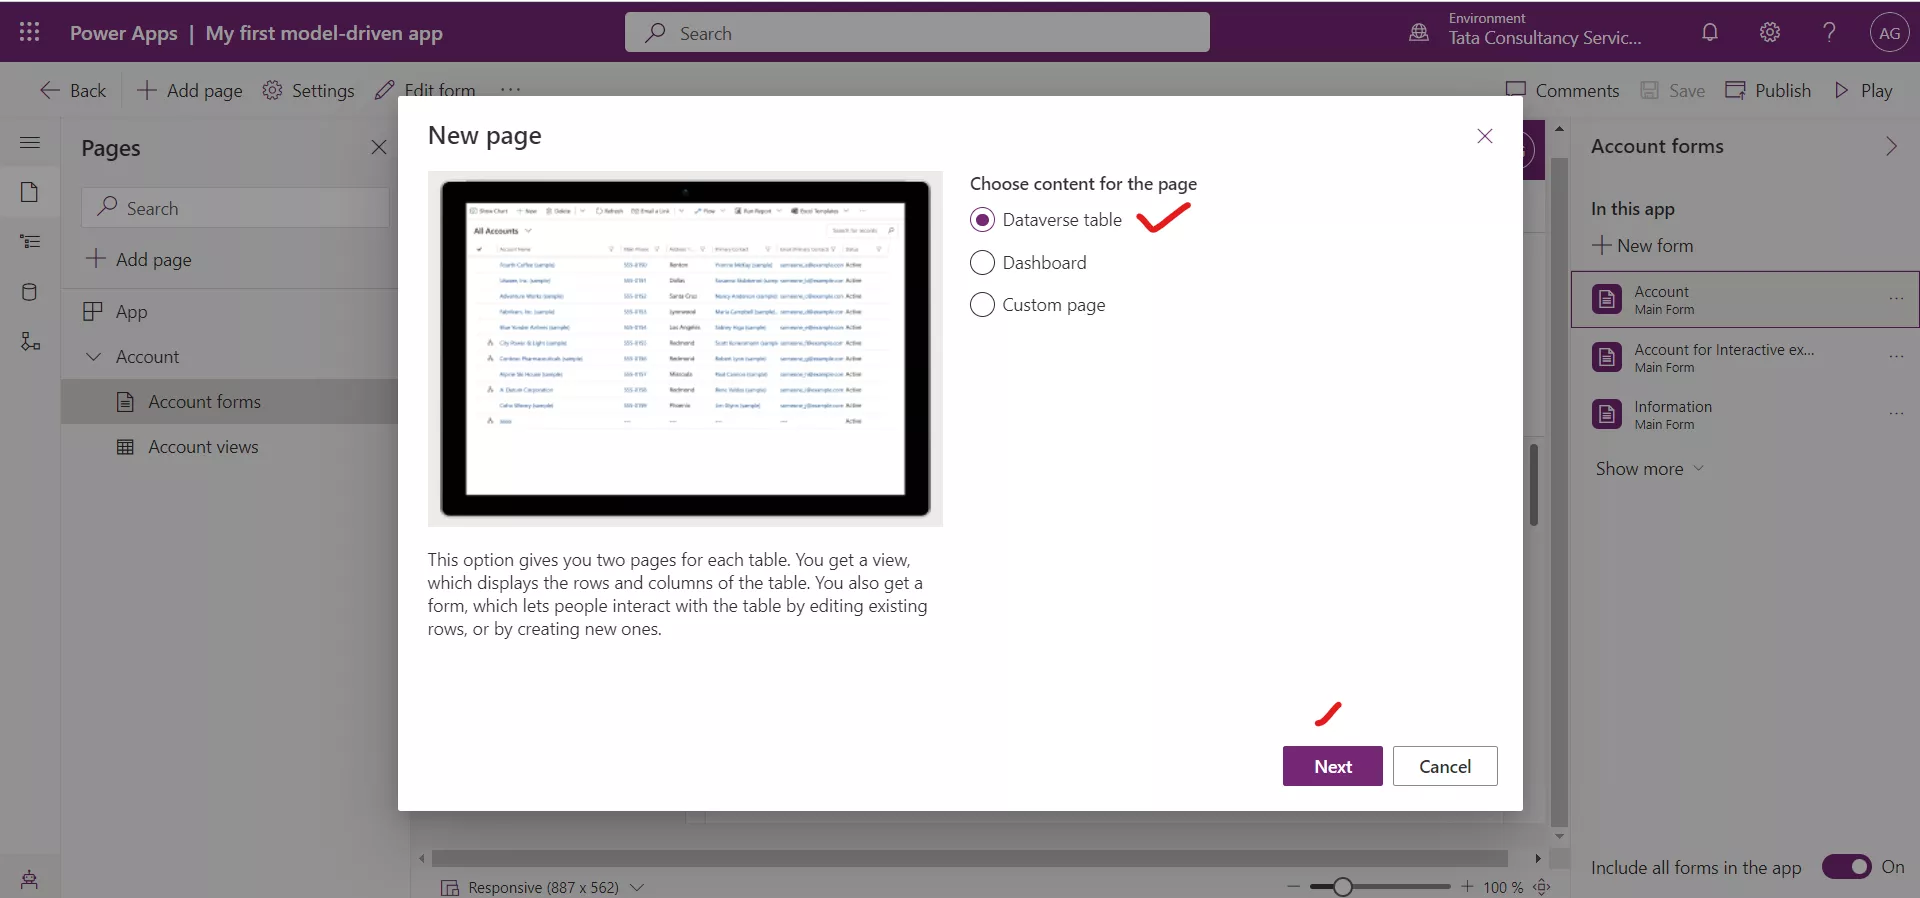
Step 2: On the New page dialog box, choose Dataverse table, then select the Next button.
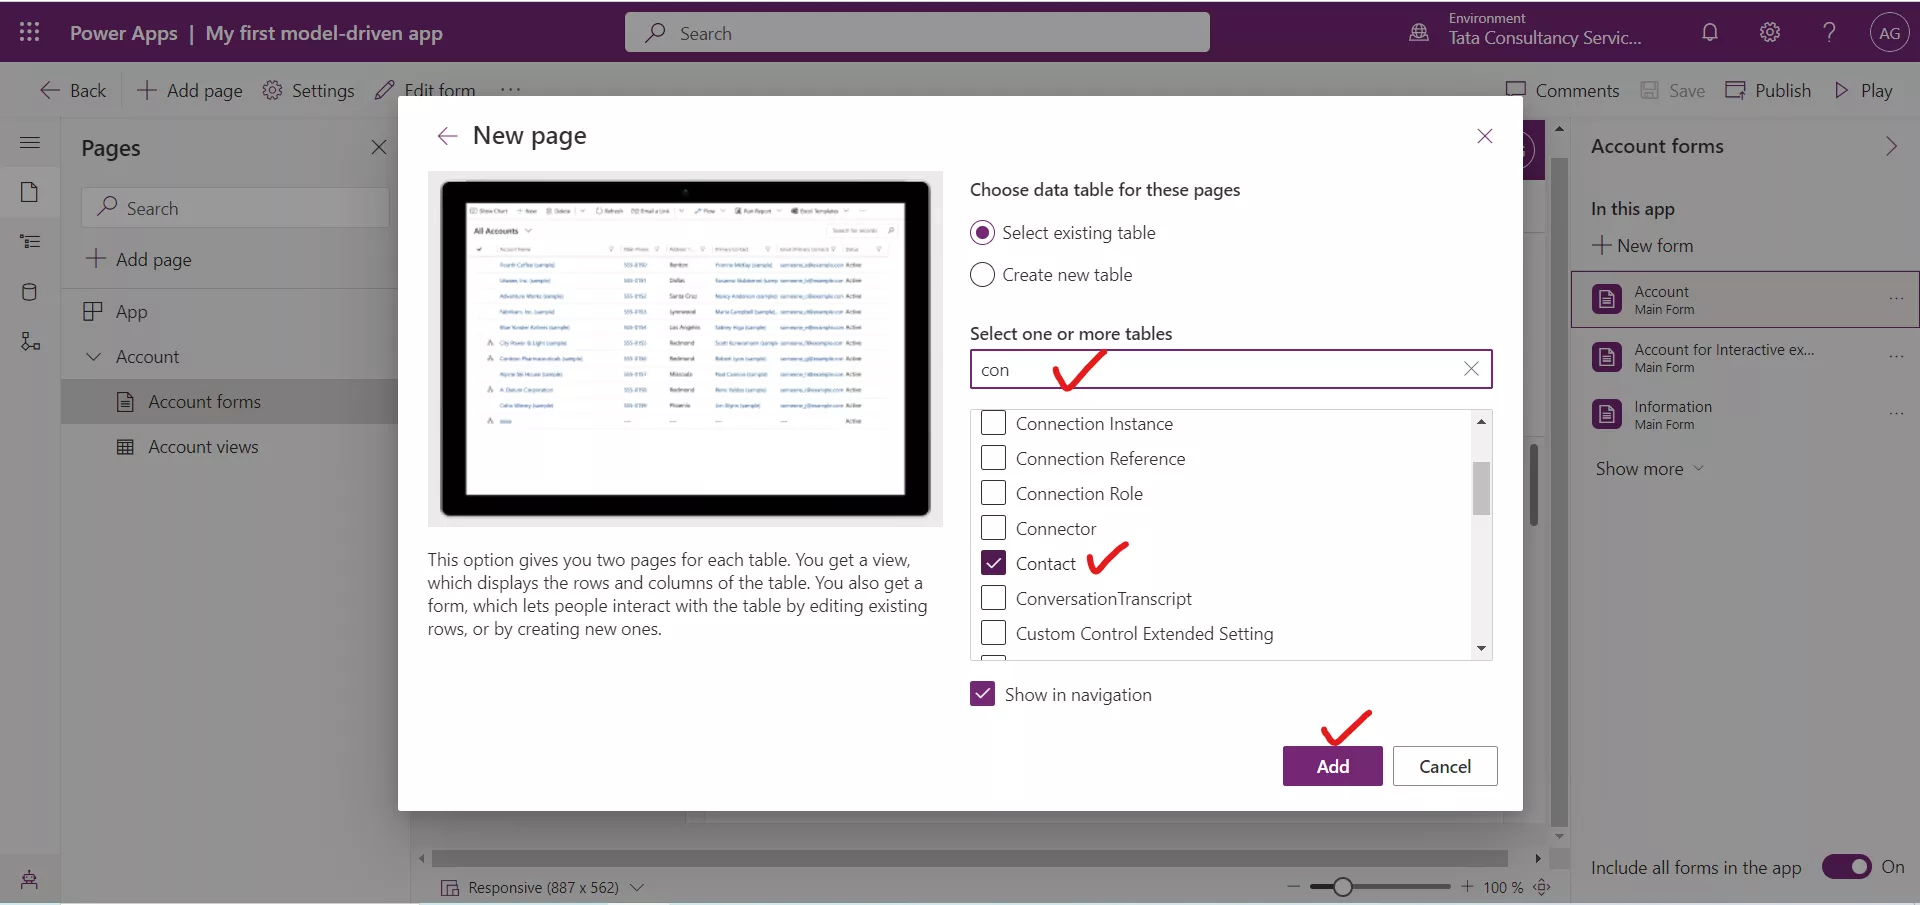
Step 3: In the Search field, enter Contact, then select the Contact table.
Step 4: Select the Add button.
Save and publish the app
To save and publish the application follow the following steps:
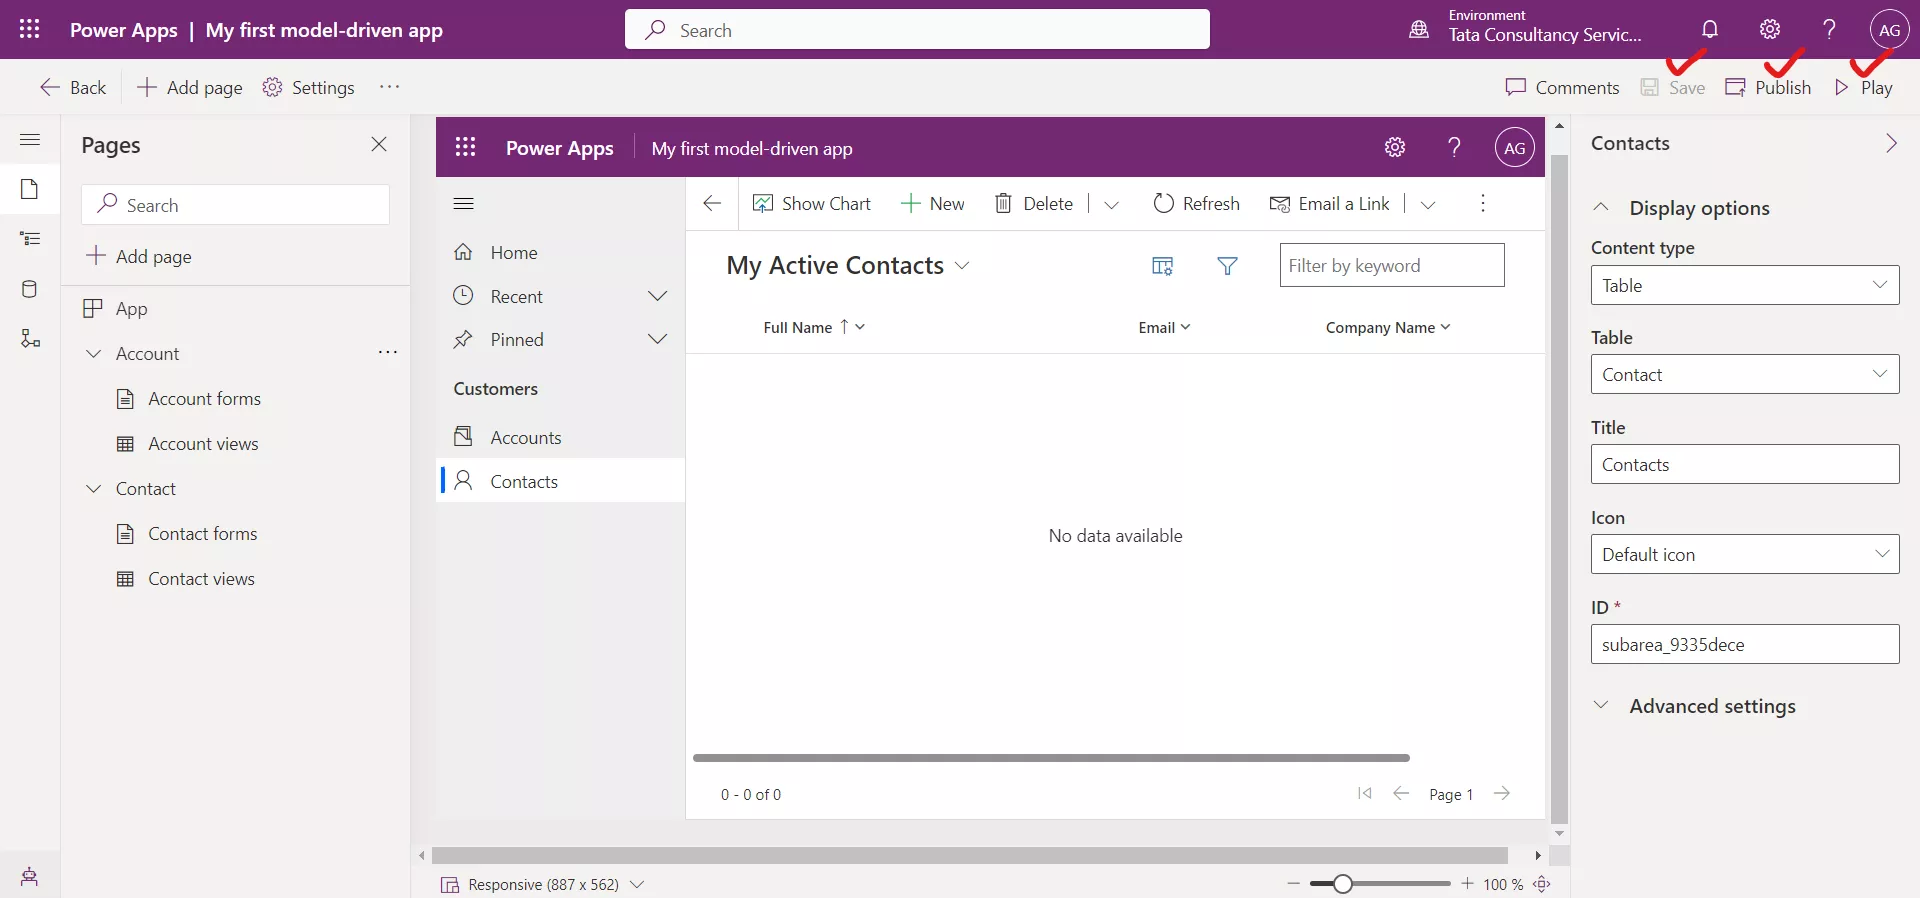
Step 1: At the command bar at the top select the Save button.
Step 2: After saving the application, click on the Publish button. After publishing the app, it is ready for us to run or share with others.
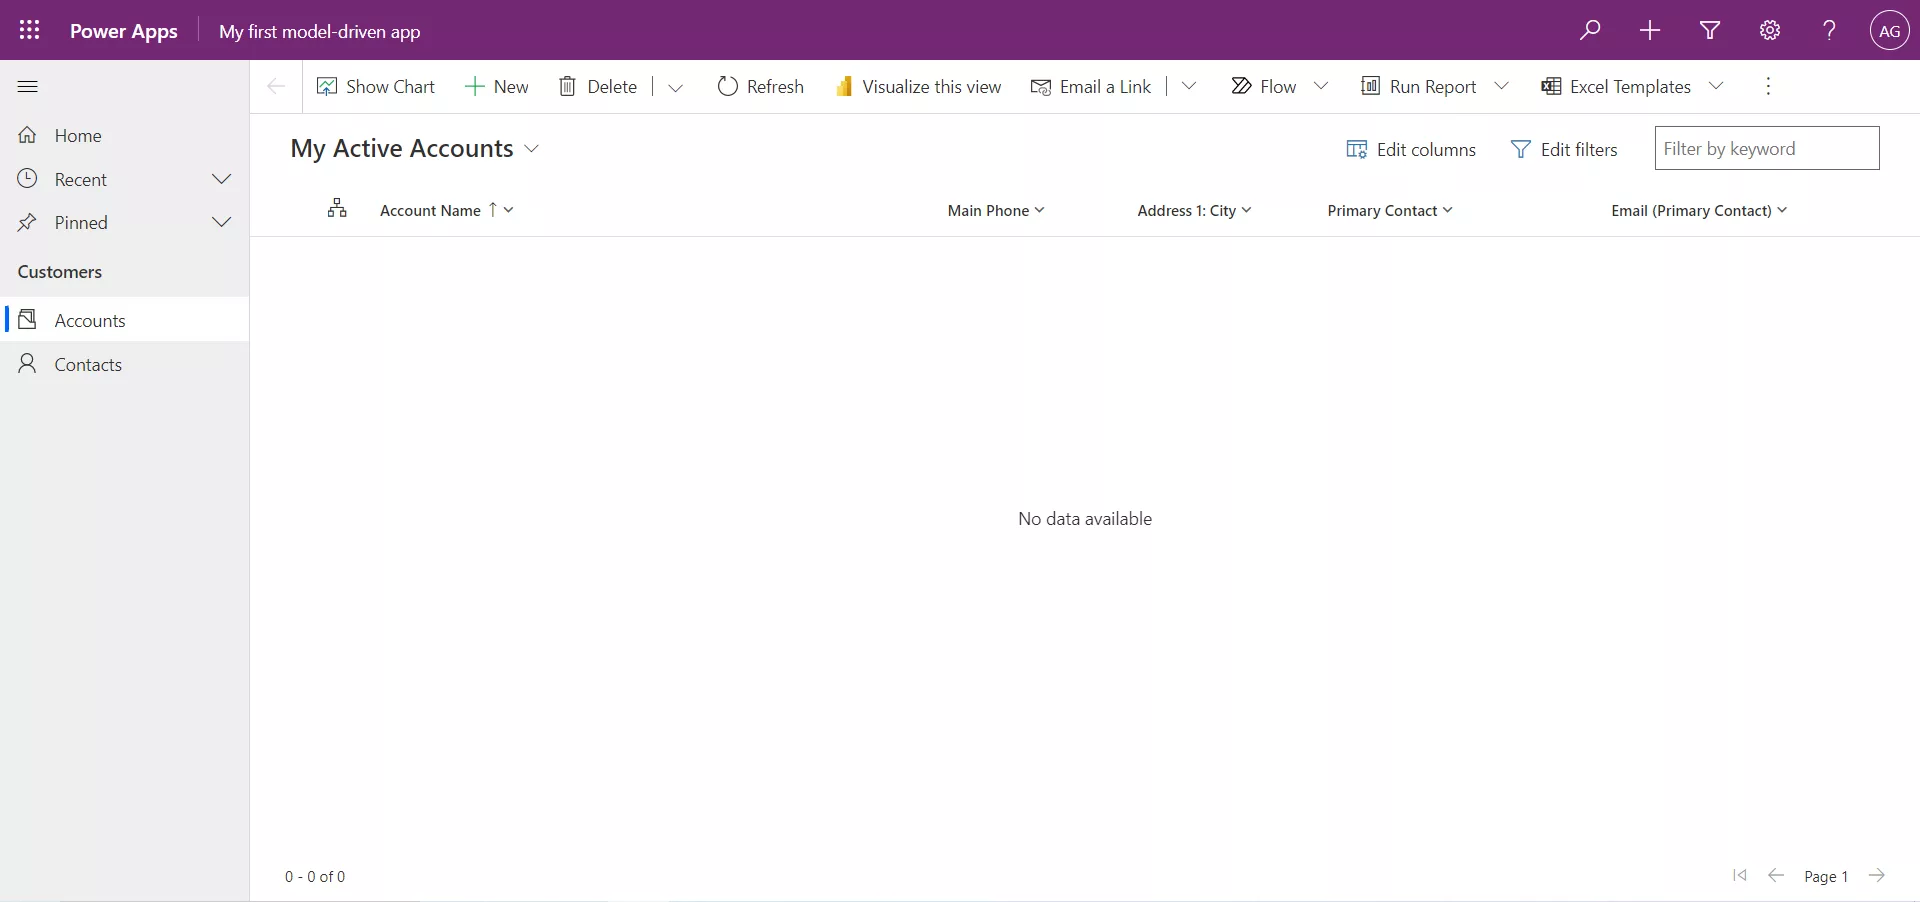
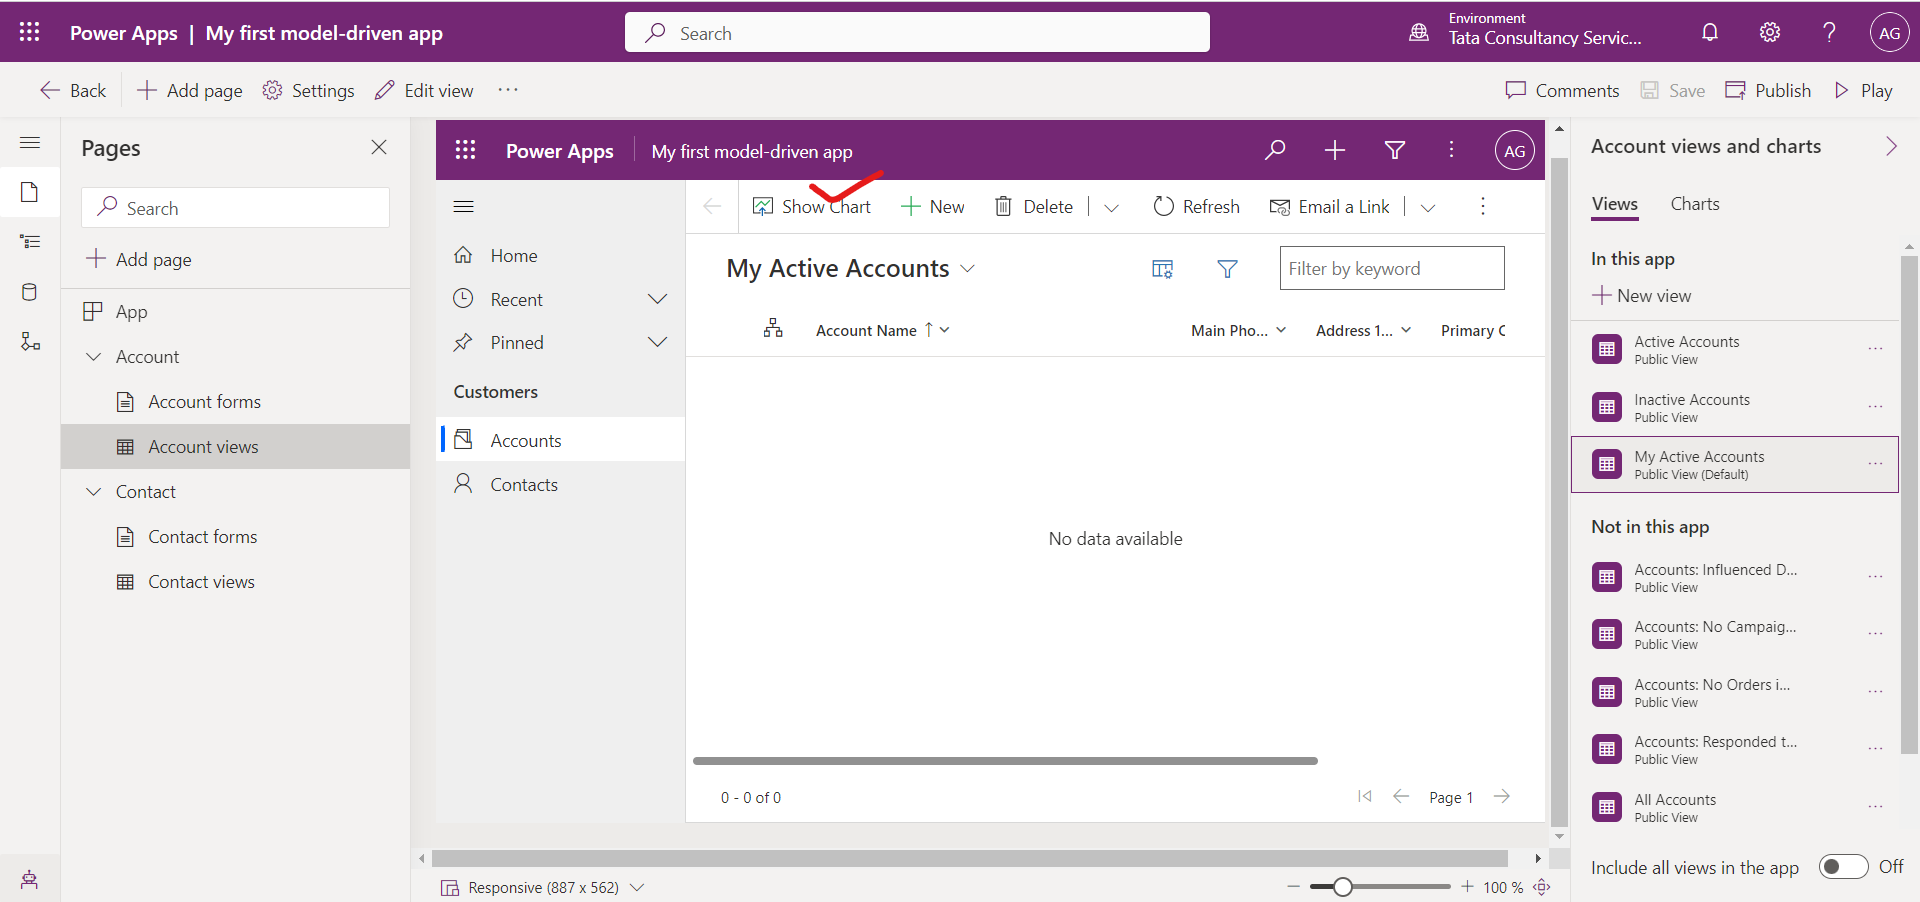
Step 3: To test the application, select the Play button on the command bar.
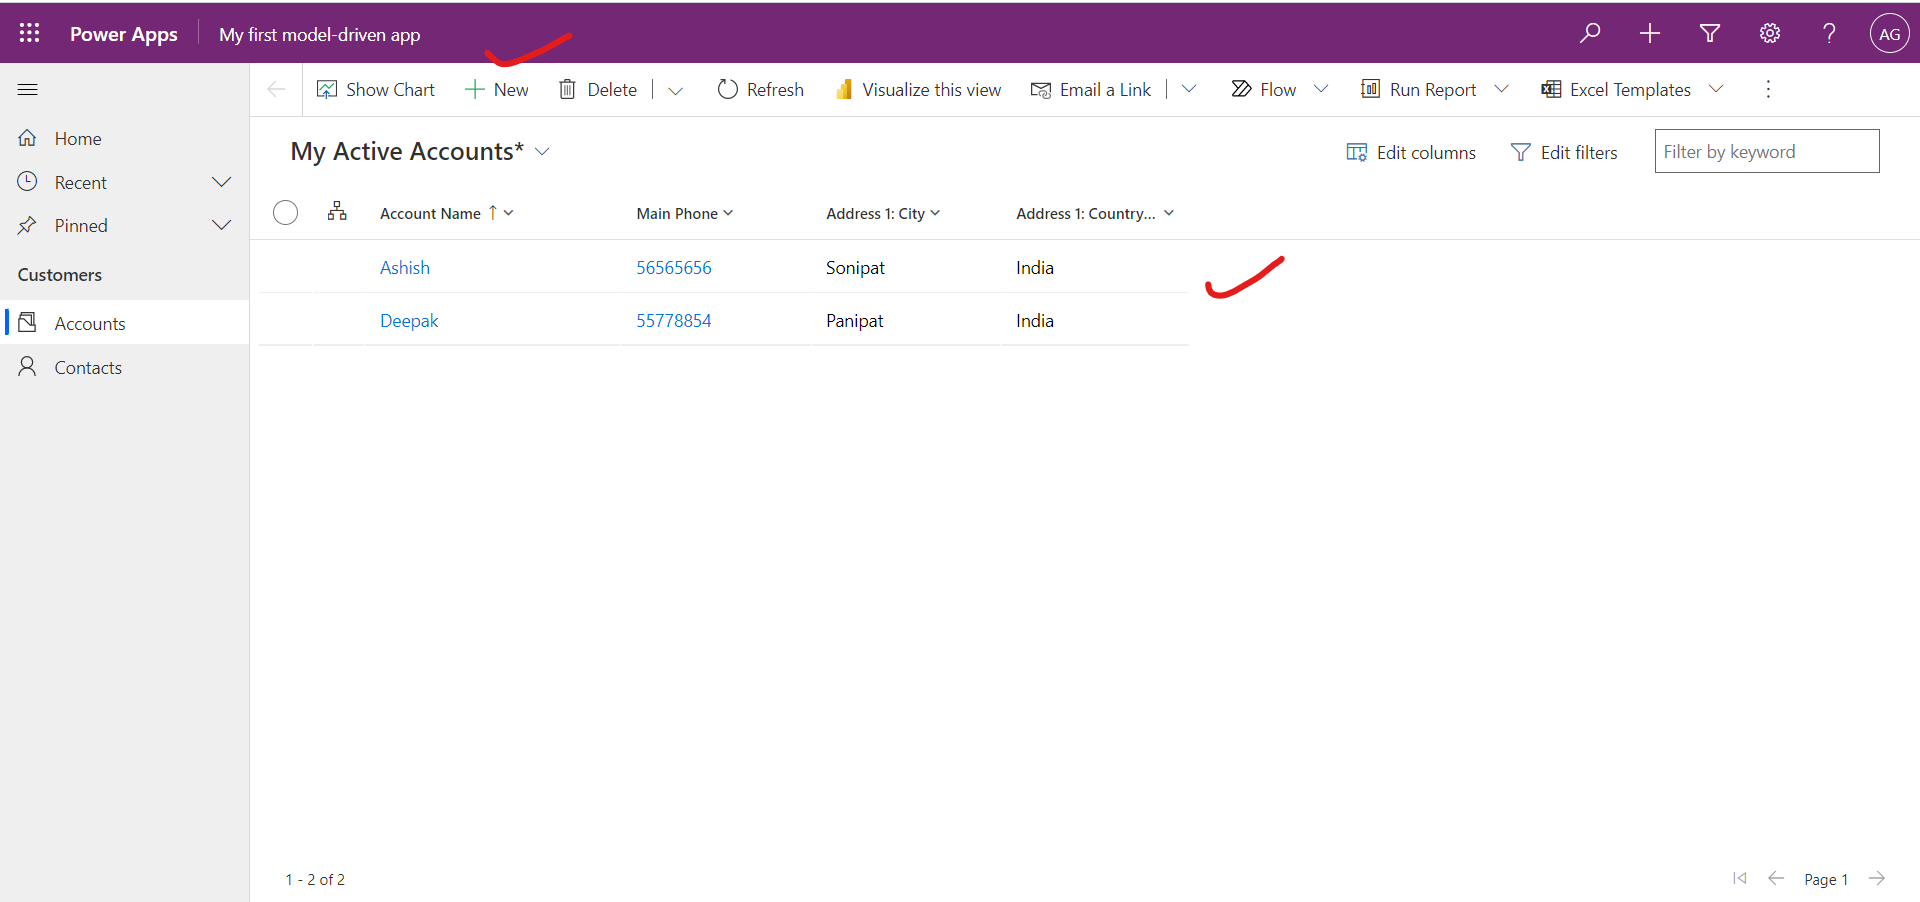
We can add some data to the table by clicking on + New.
Select the Show Chart.
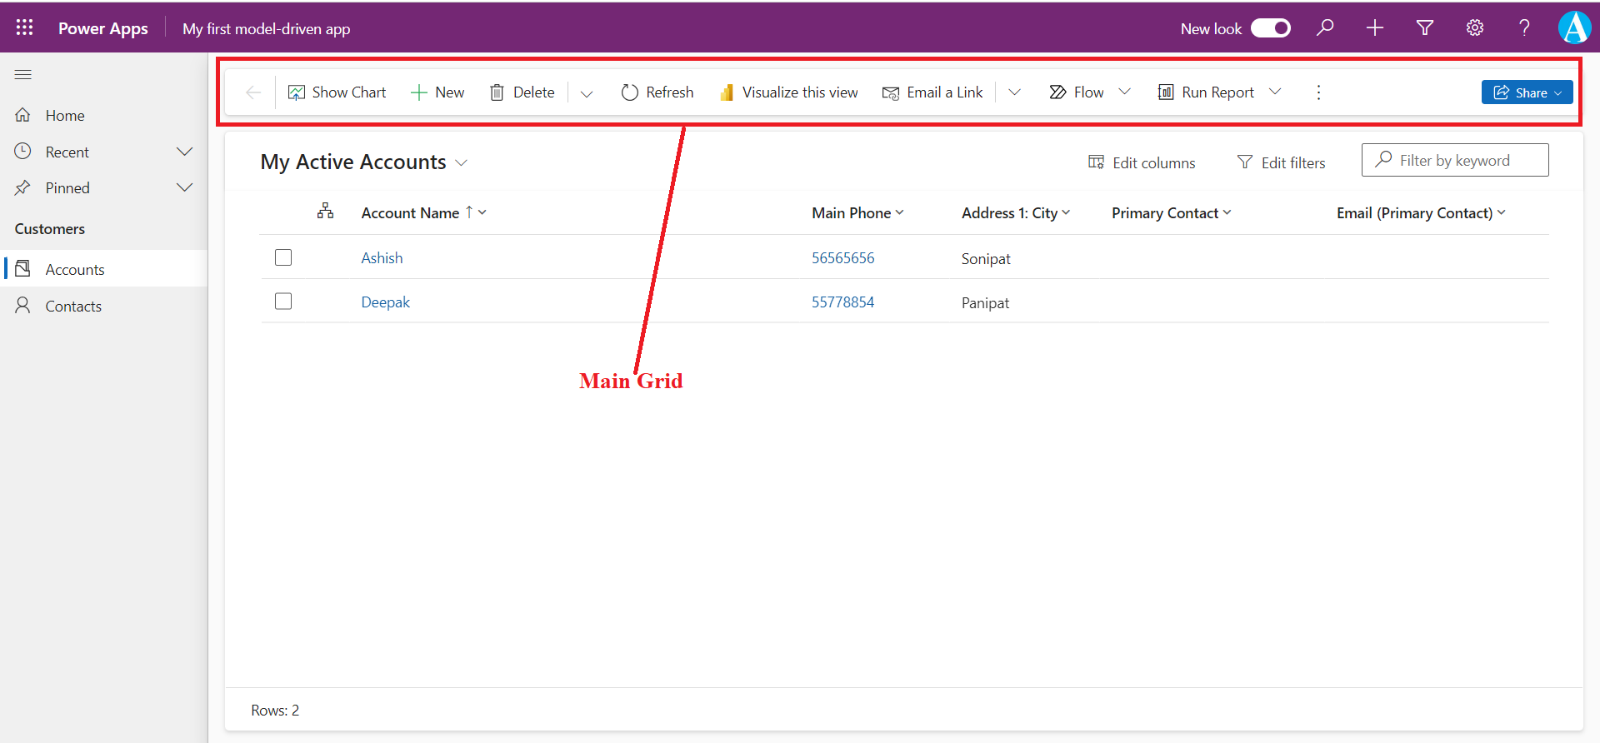
Command bar
We will learn how we can create a moderns commands control using Power Fx.
Open the command designer to edit a command bar
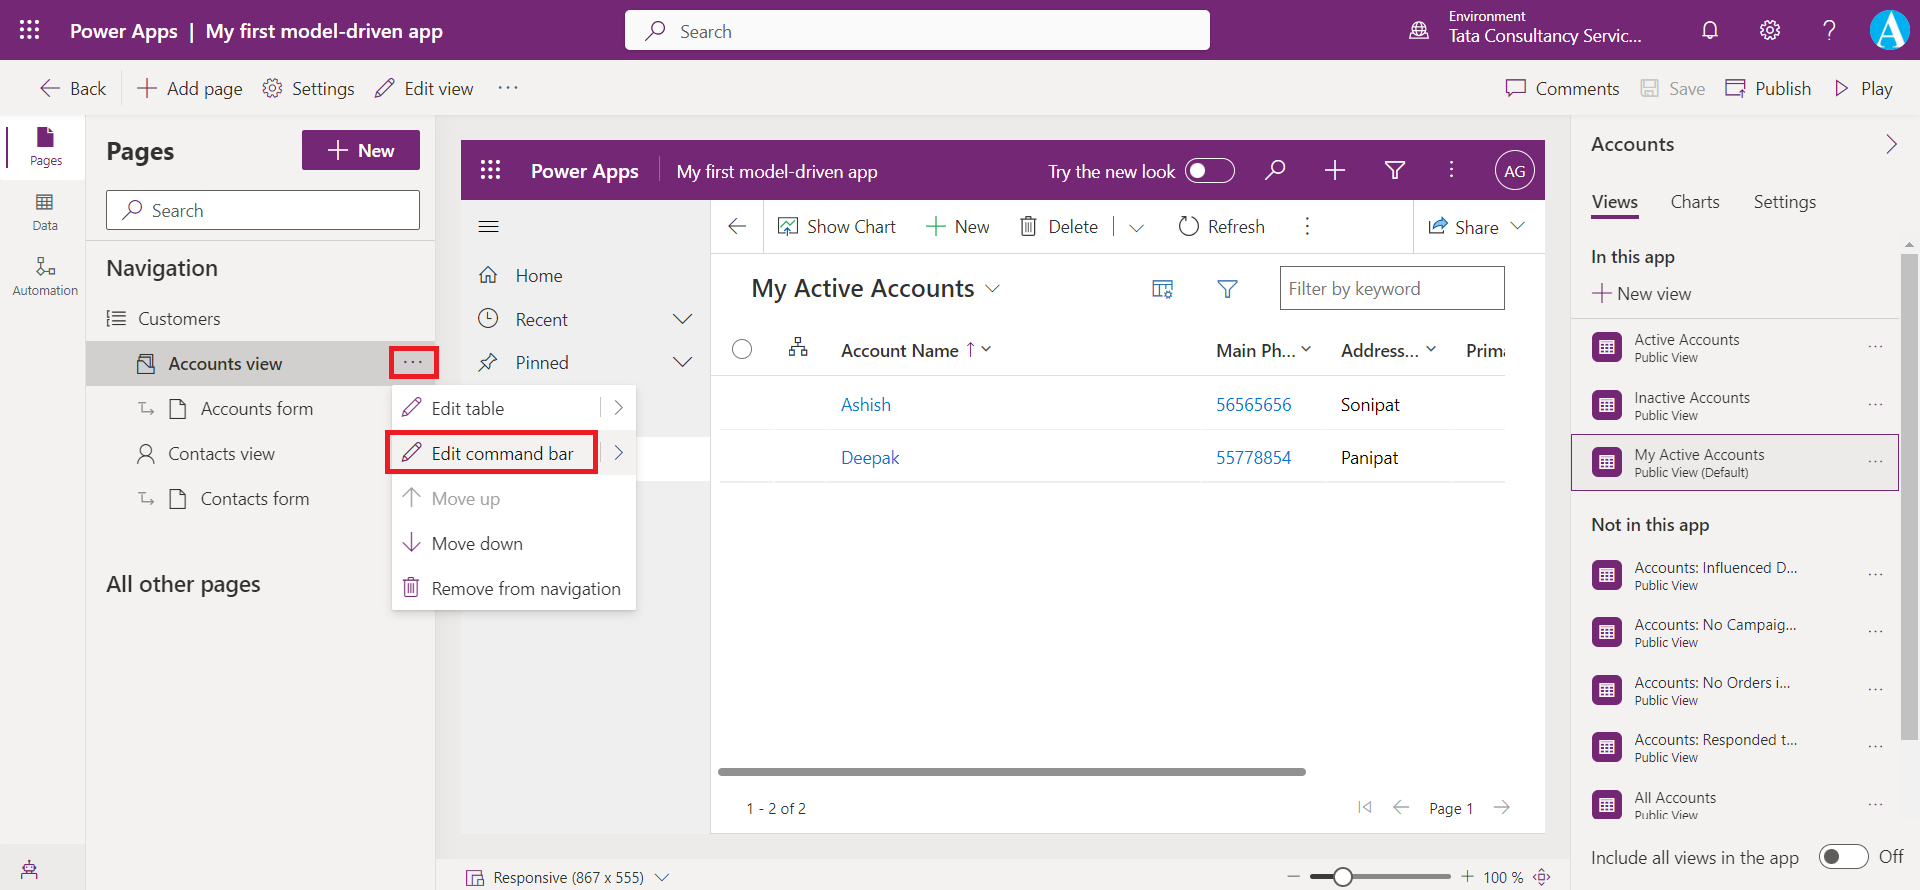
Step 1: Select any table from the Pages area in the app designer.
Step 2: Select the three dots (...), and then select Edit command bar.
We can see a list of option to choose from which is nothing but the choices of a command bar to edit.
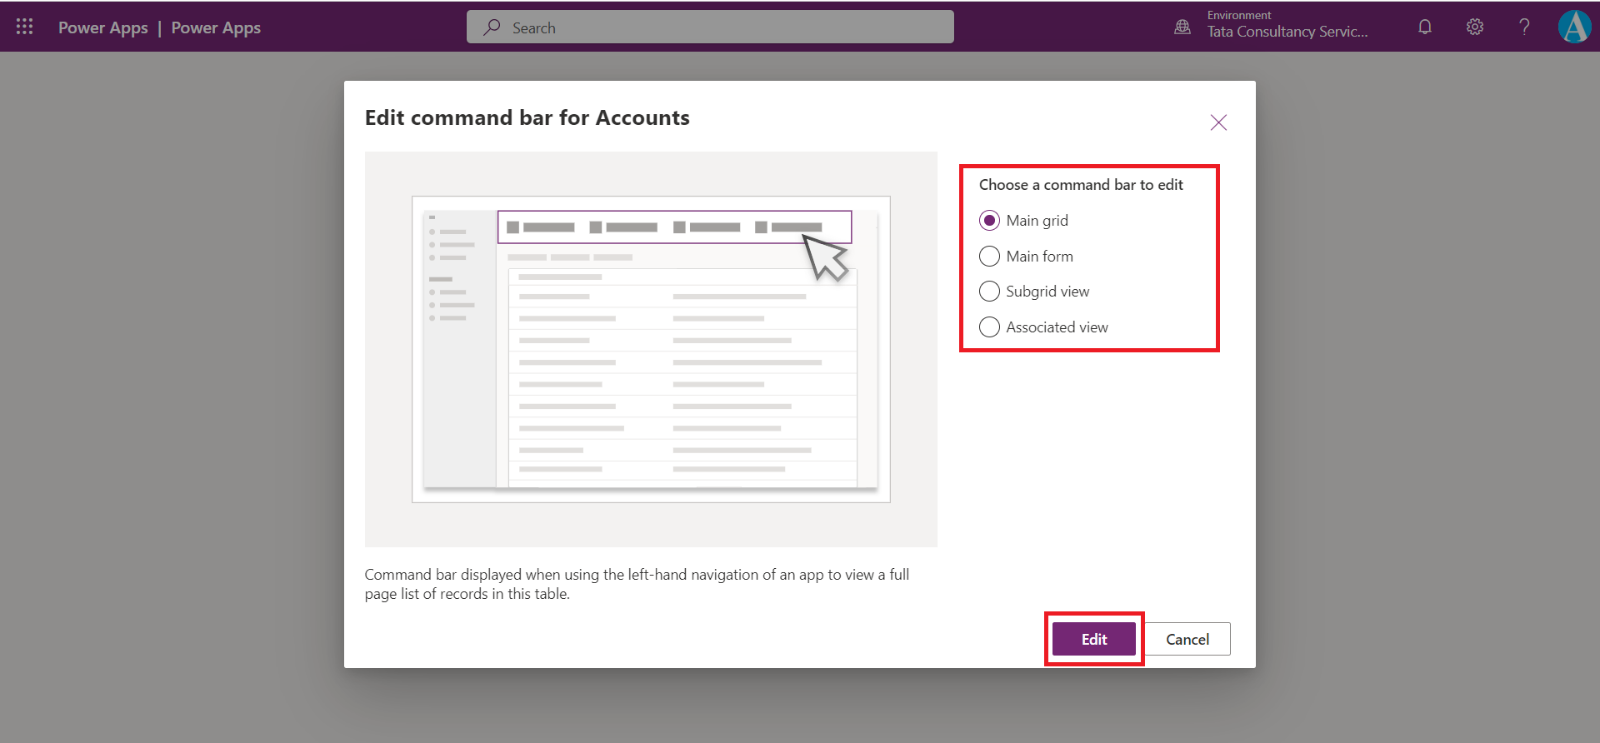
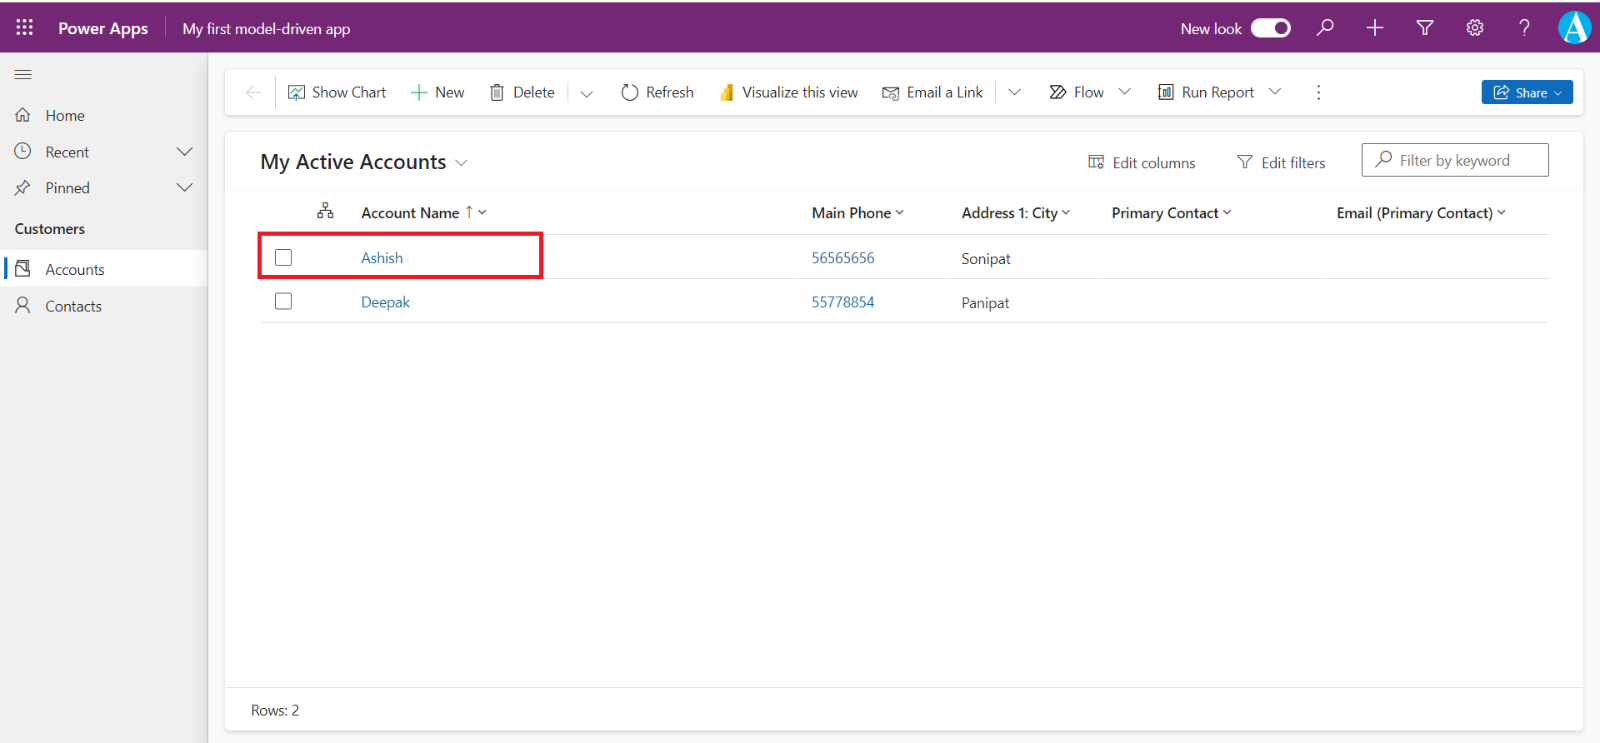
There are four command bars illustrated each one below:
• Main Grid:
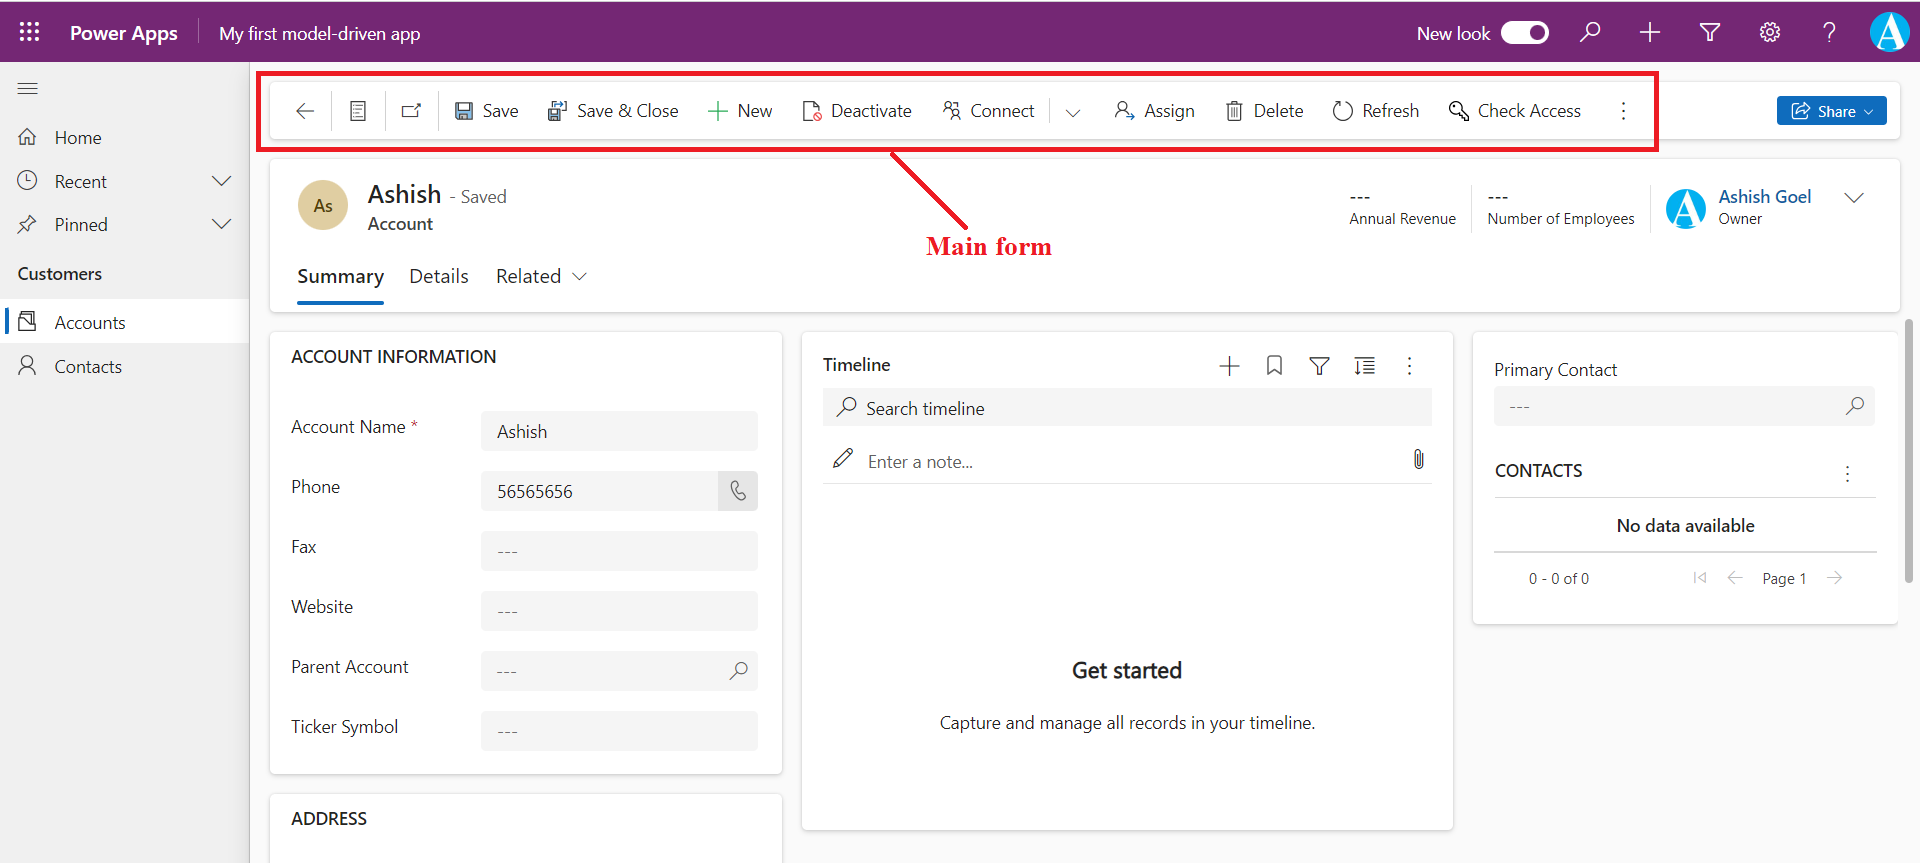
• Main form:
When we open any specified record.
We can see the command bar which is known as Main form command bar.
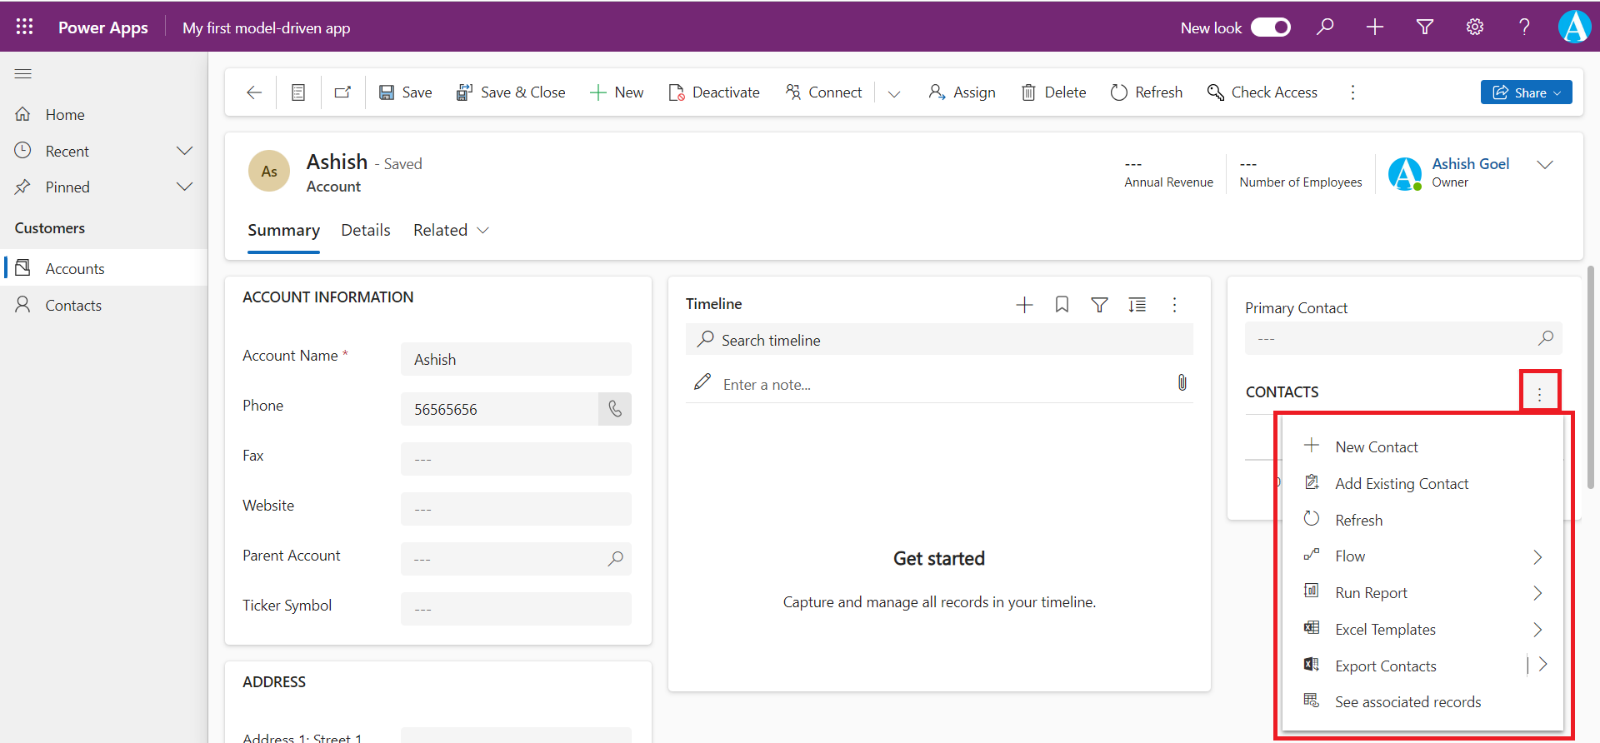
• Subgrid view
We can see the subgrid command bar in the sub grids.
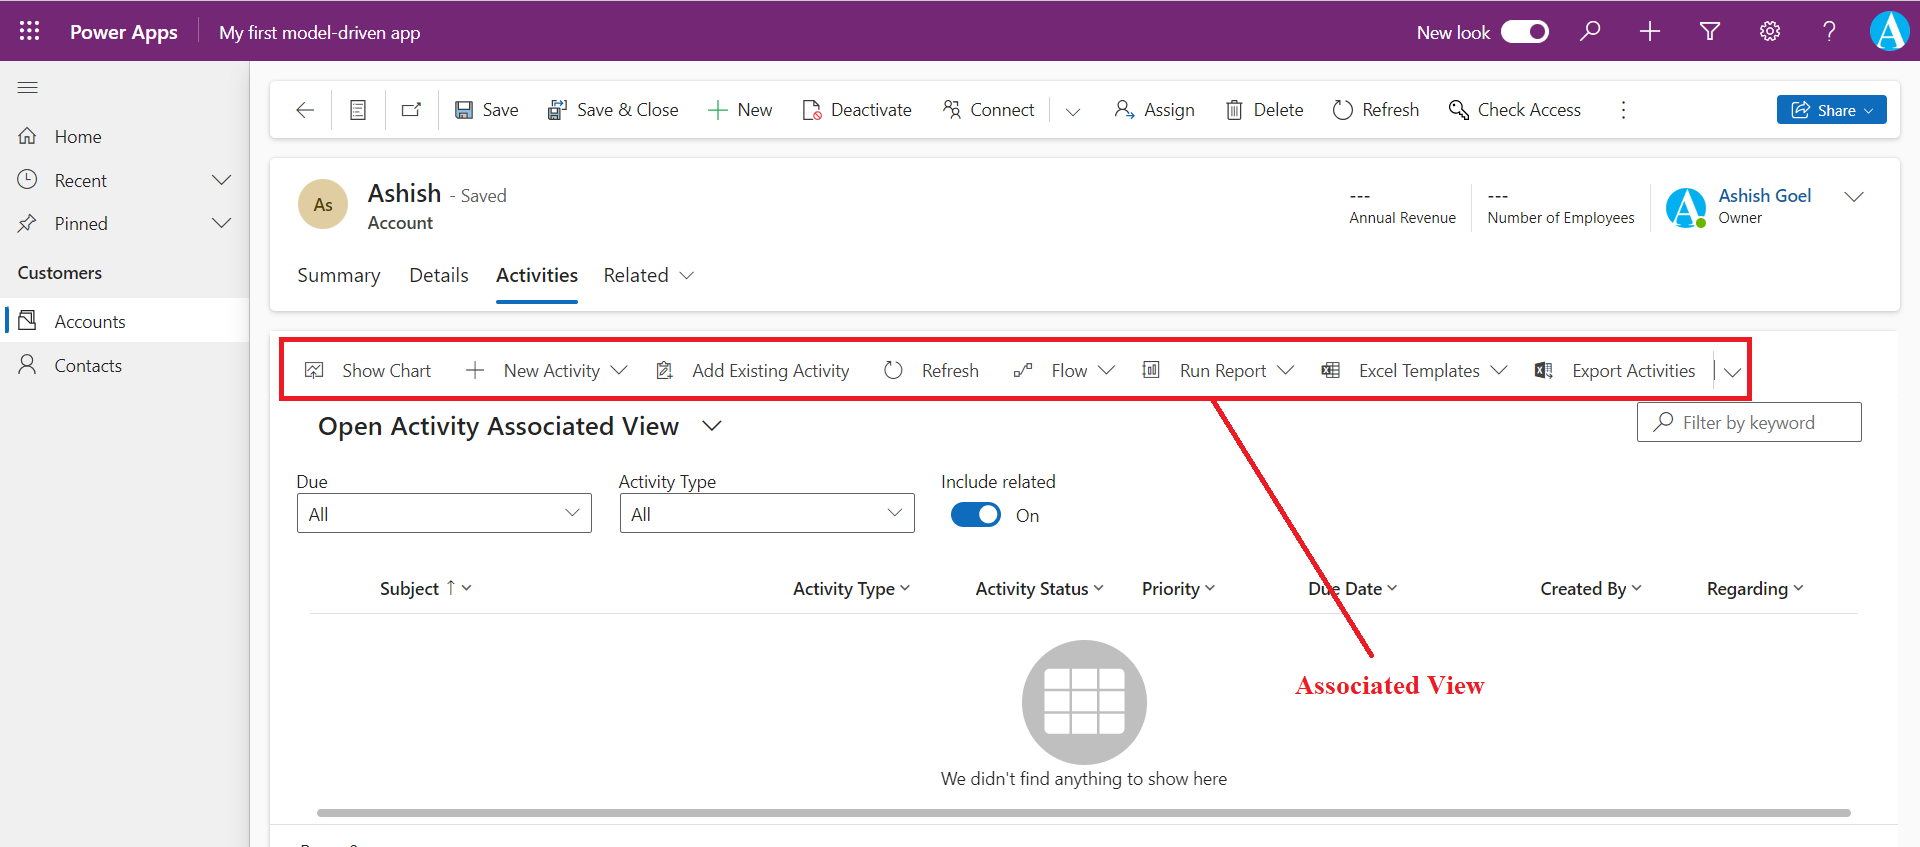
• Associated view
If we click on Related then click on any related table.
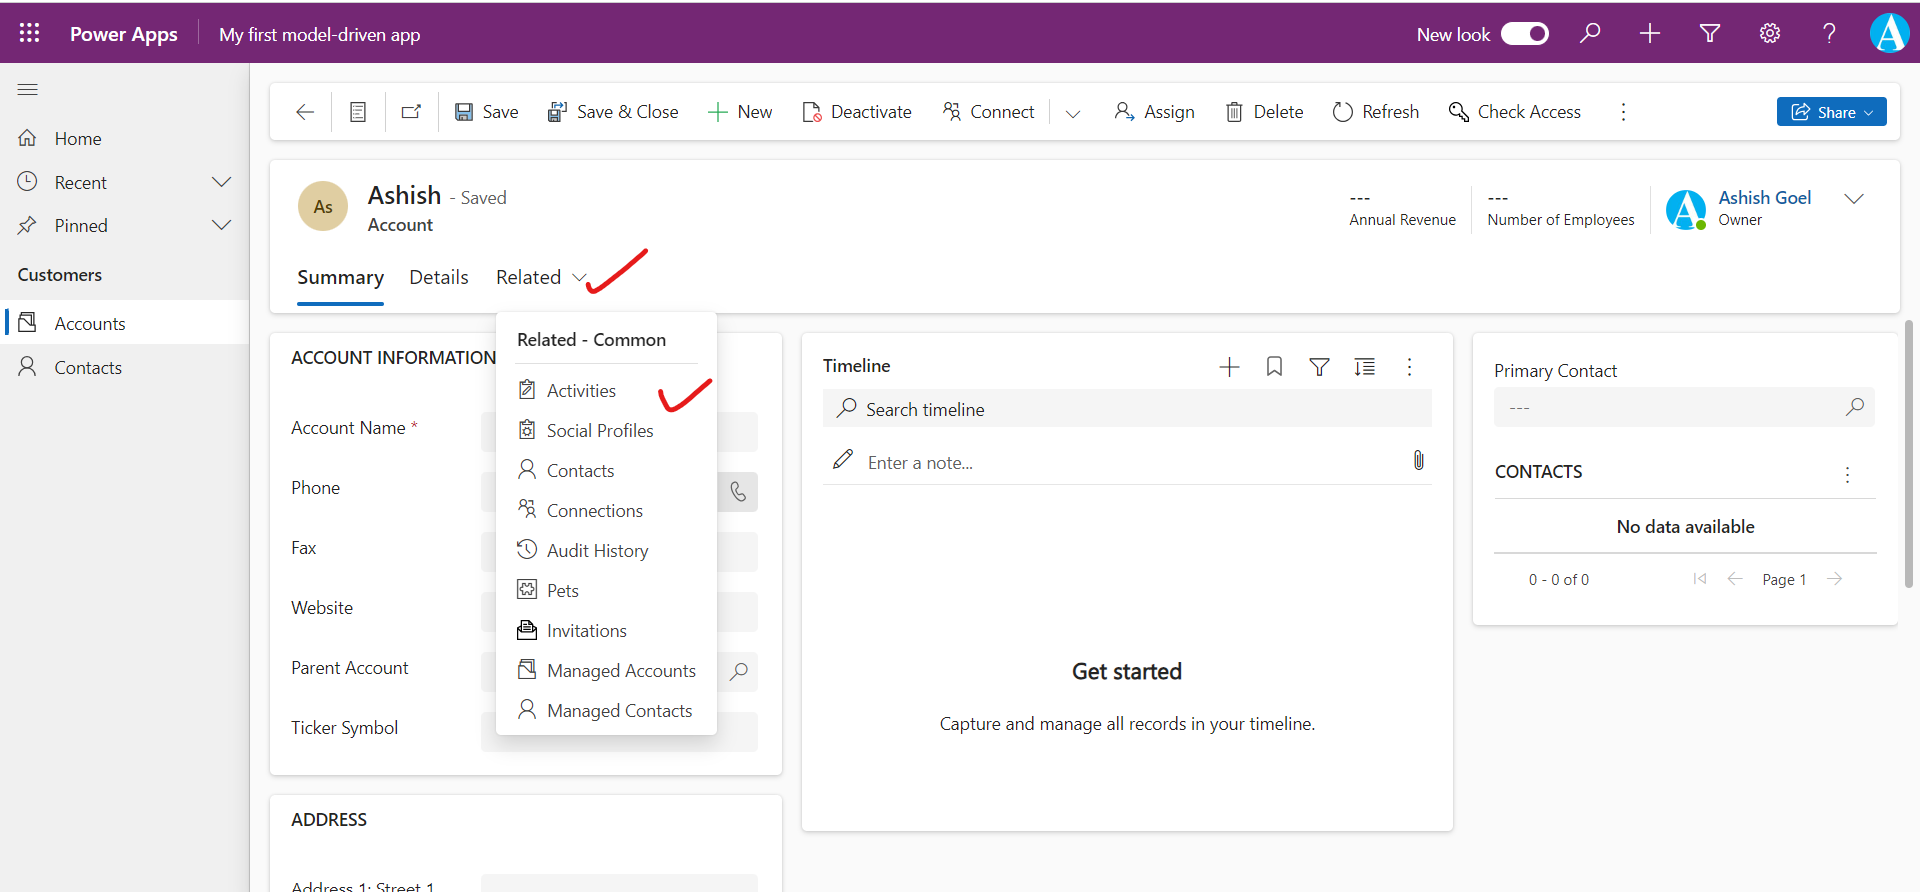
The command bar then we see is known as Associated view command bar.
Step 3: Choose Main grid and then click on Edit. We reach to the following screen.
When we click on + New dropdown it gives us four options Command, Dropdown, Split button, and Group.
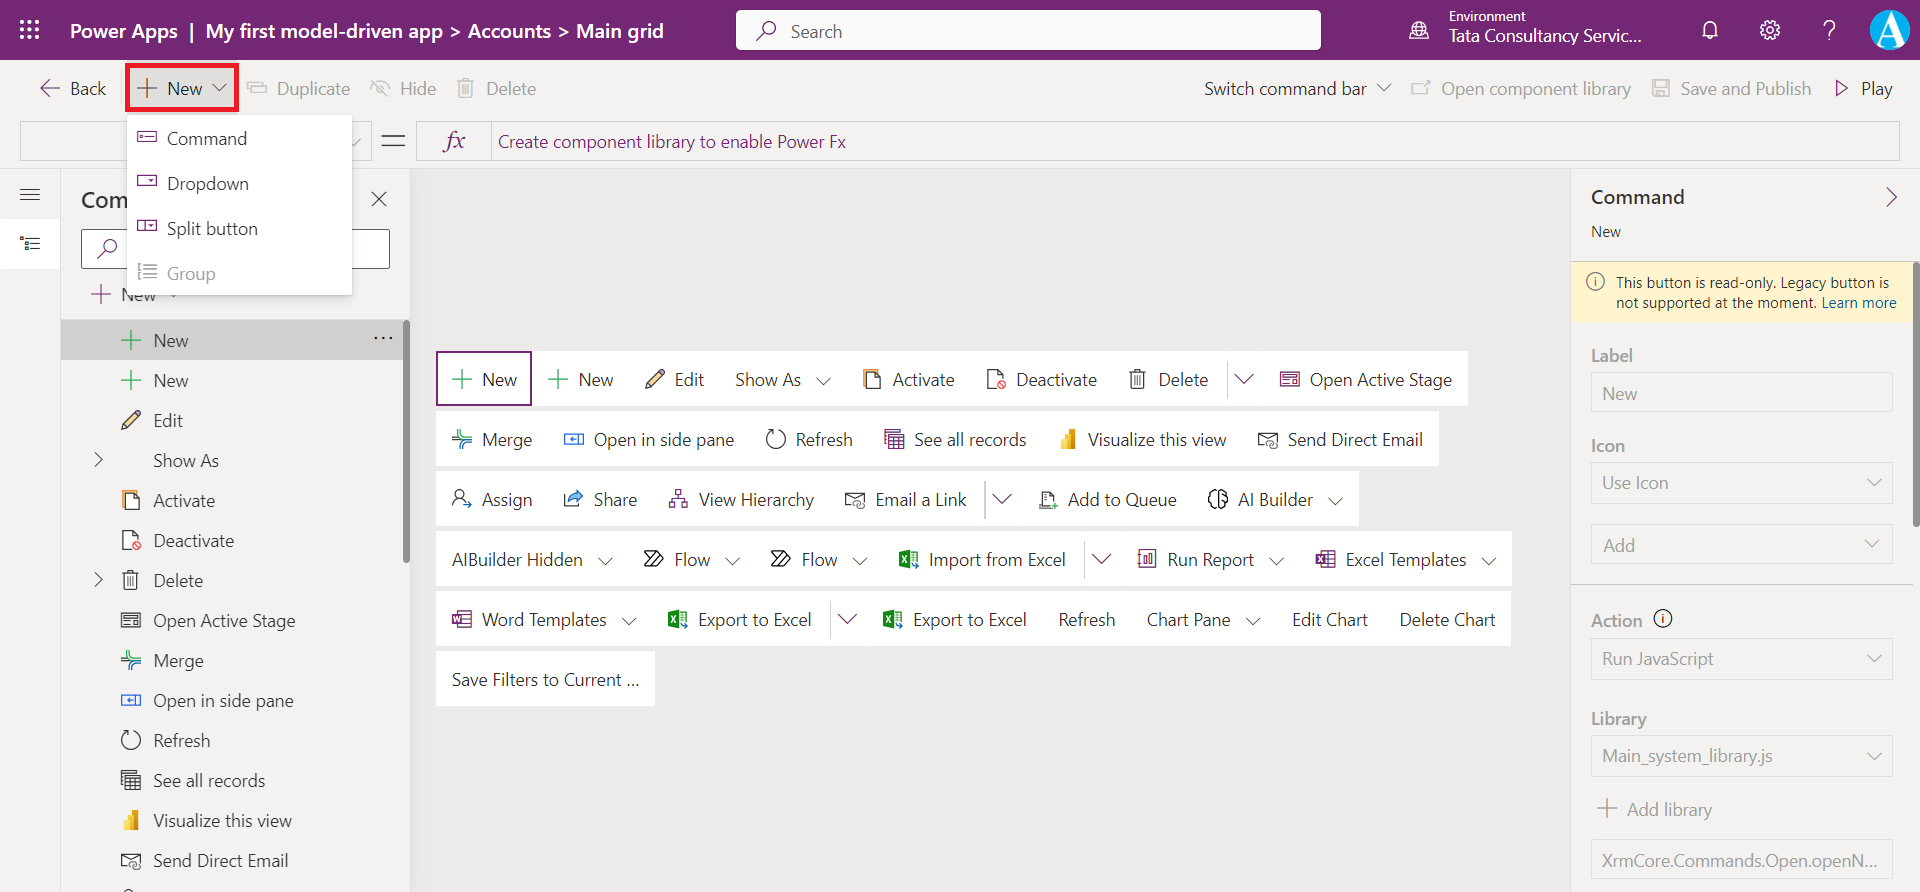
Let’s suppose we select Command, then a dialog box is shown which ask for the language we are going to use to create a control.
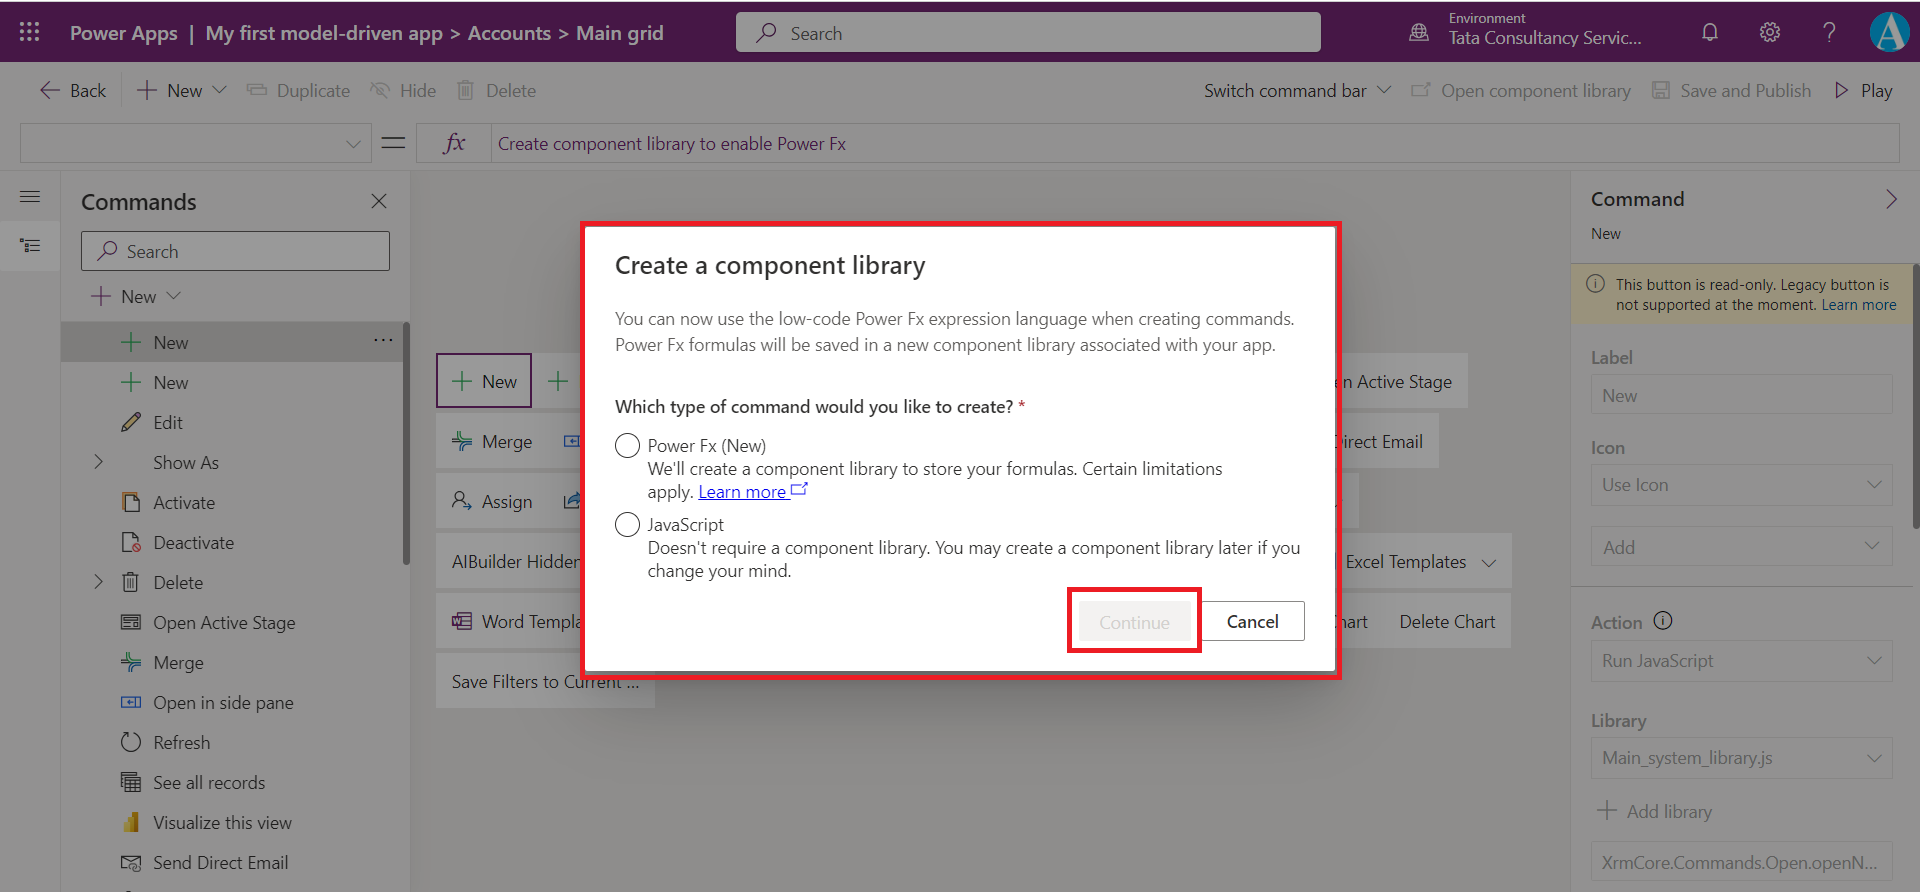
Select Power Fx and then Continue.
After this a new control is created.
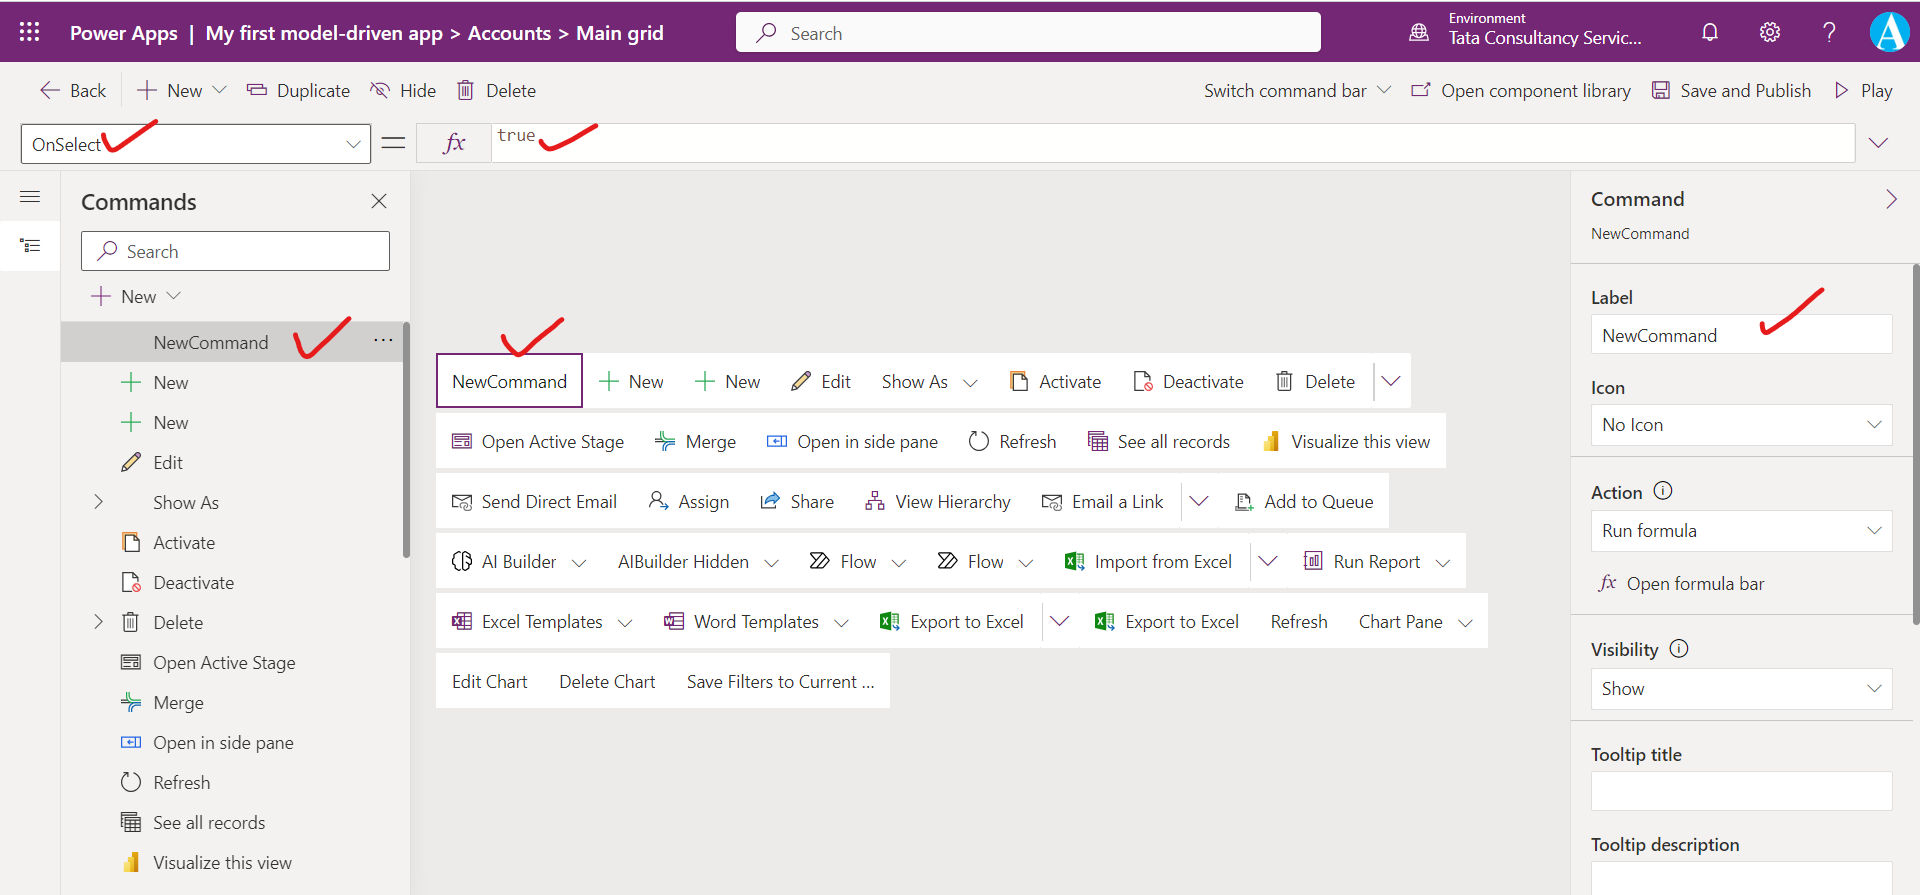
We can give the name and the various power formula can be written.
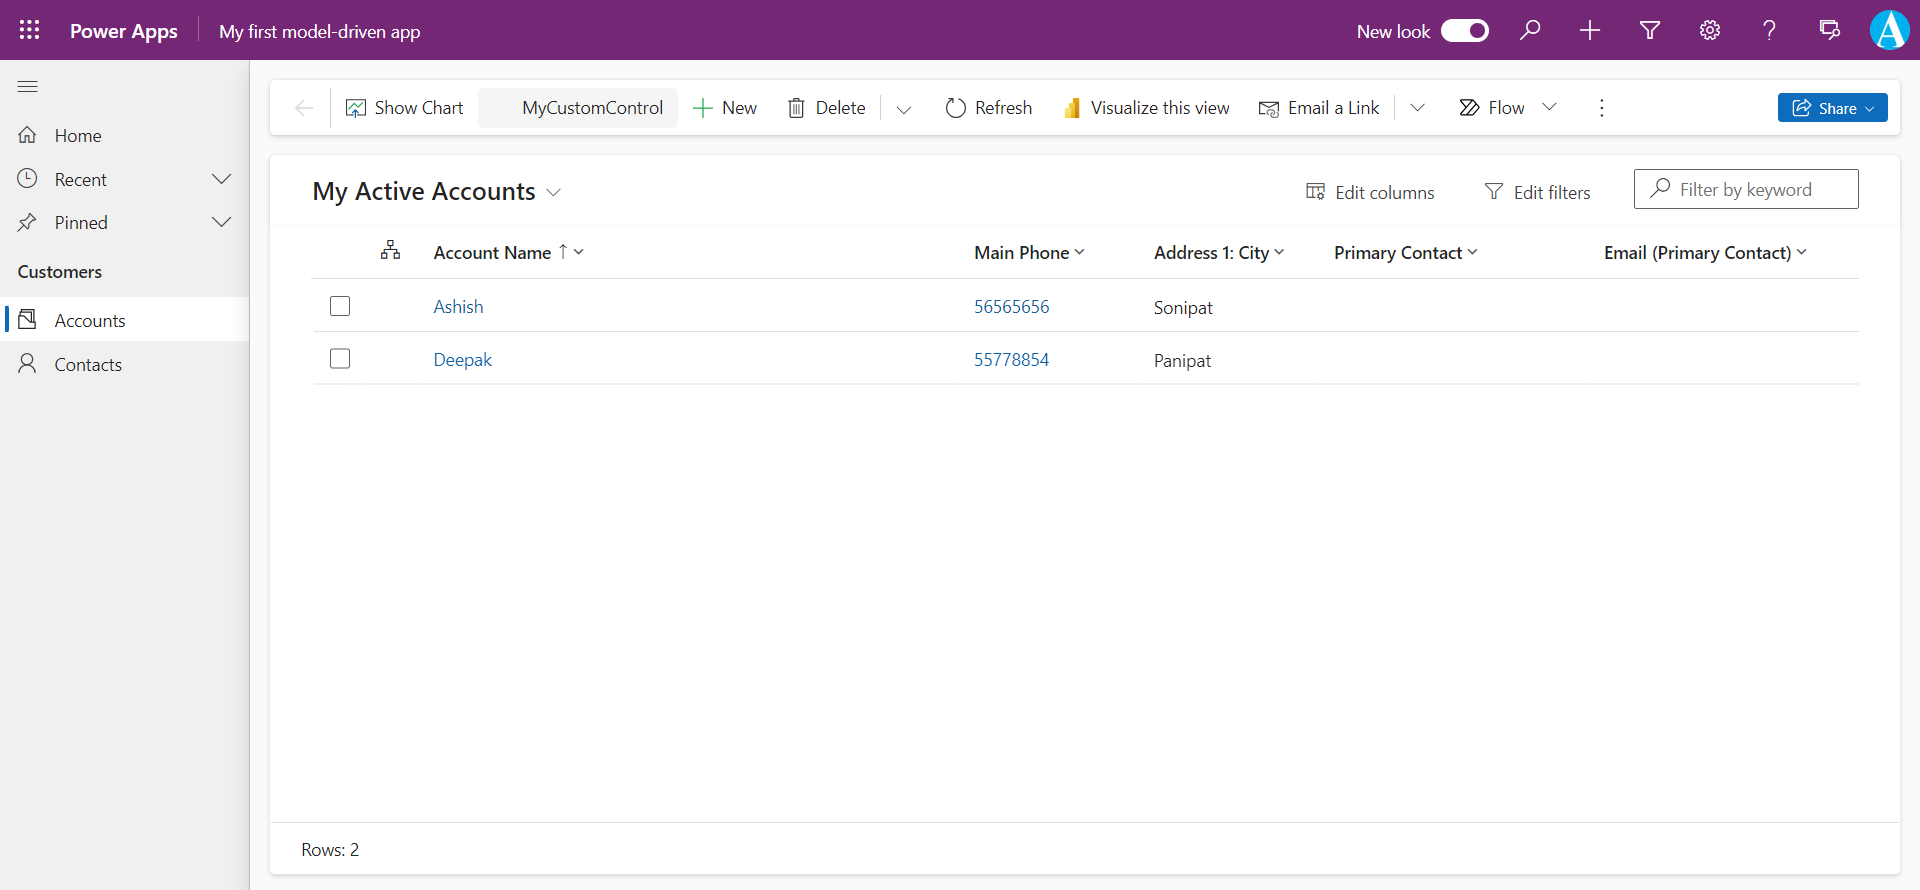
Here we have changed the name to MyCustomControl.
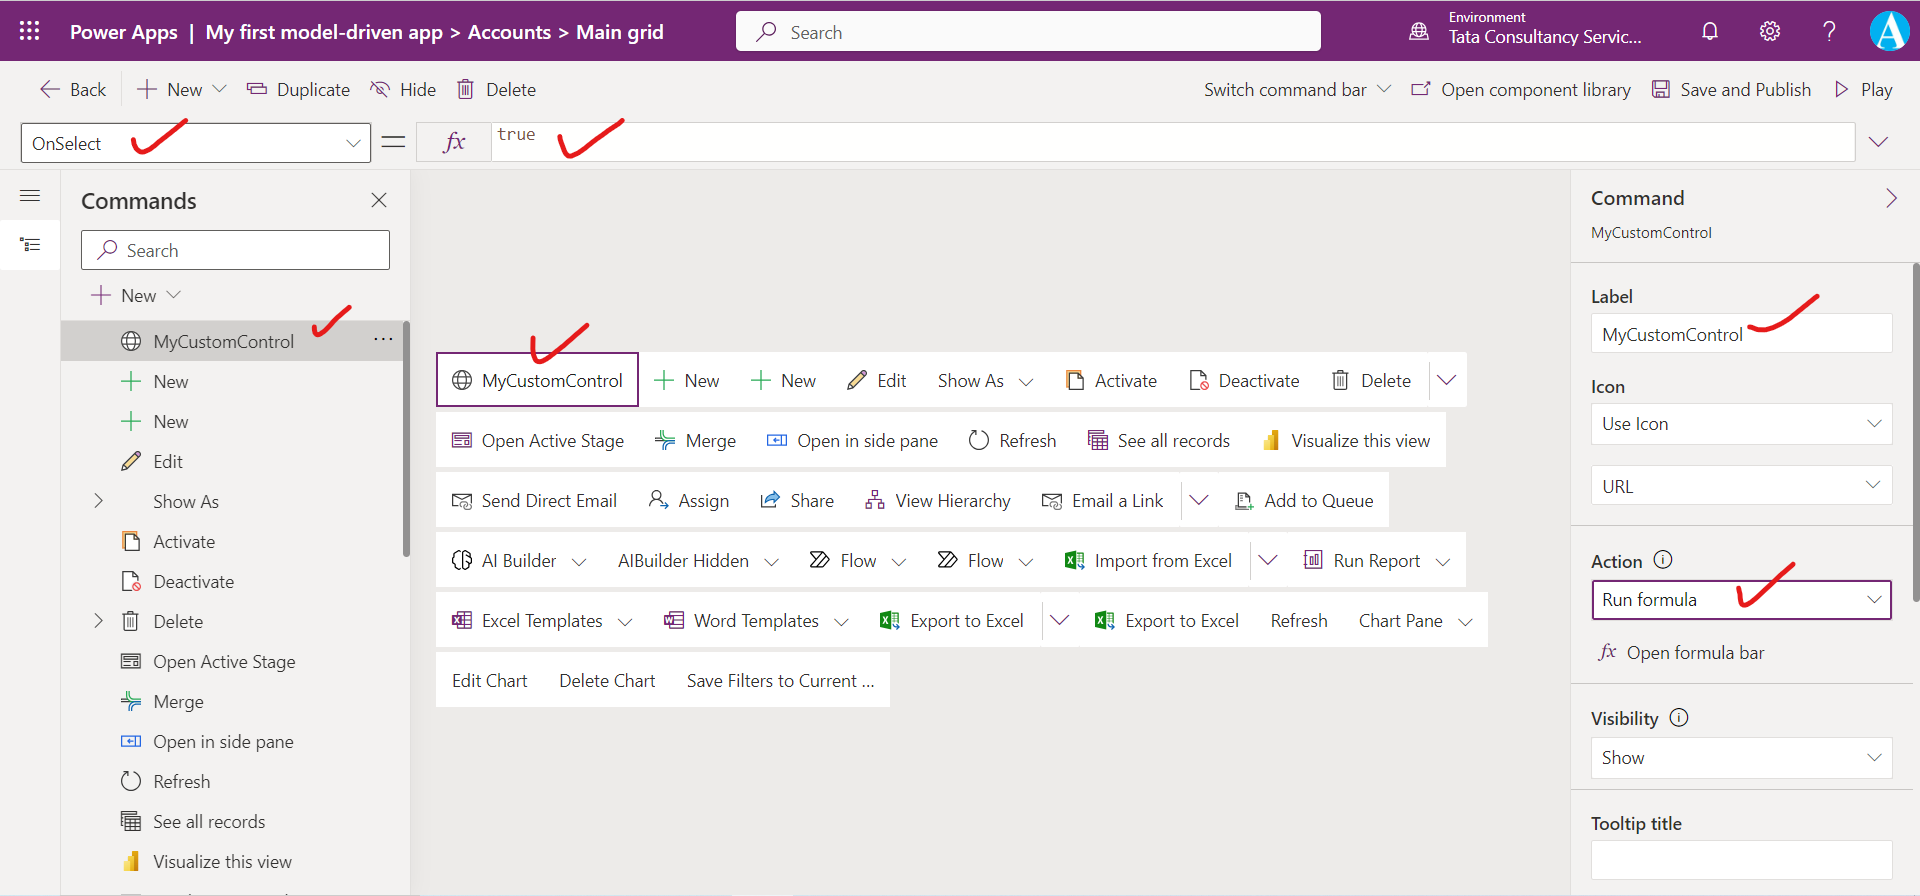
We can also use the icon and specify the action to be performed when it is invoked.
• Label (optional): Enter a label that will be displayed on the command button.
• Icon: Select an icon for the command button.
• Visibility: Select whether to Show the command button or to Show on condition from formula.
When we select “Show on condition from formula” the Visible property is shown and we can write power formula for that.
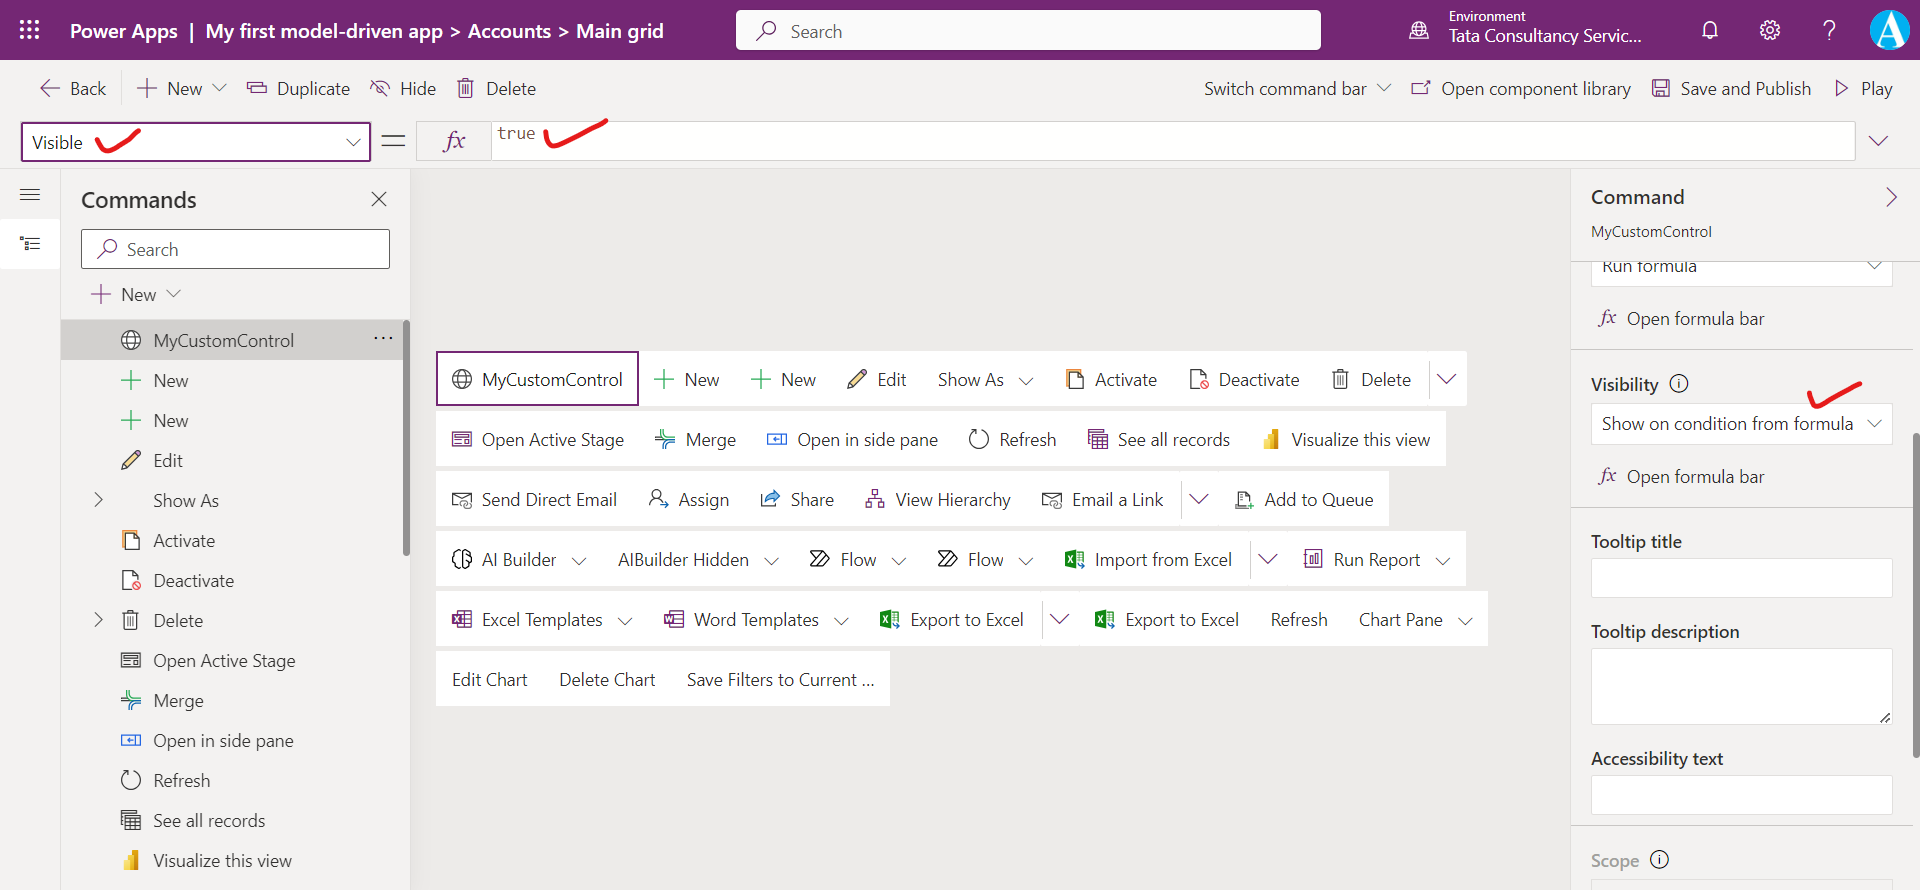
• Tooltip title (optional): Enter a tooltip title. The title appears to the user when they hover their mouse over the command.
• Tooltip description (optional): Enter a tooltip description. The description appears for the user below the tooltip title when they hover their mouse over the command.
Change the formula on the OnSelect property of the command, if we don’t change this nothing happened when we click on the control.
Power Fx
We can drag and drop the command to the desired location. To save and publish click on Save and Publish.
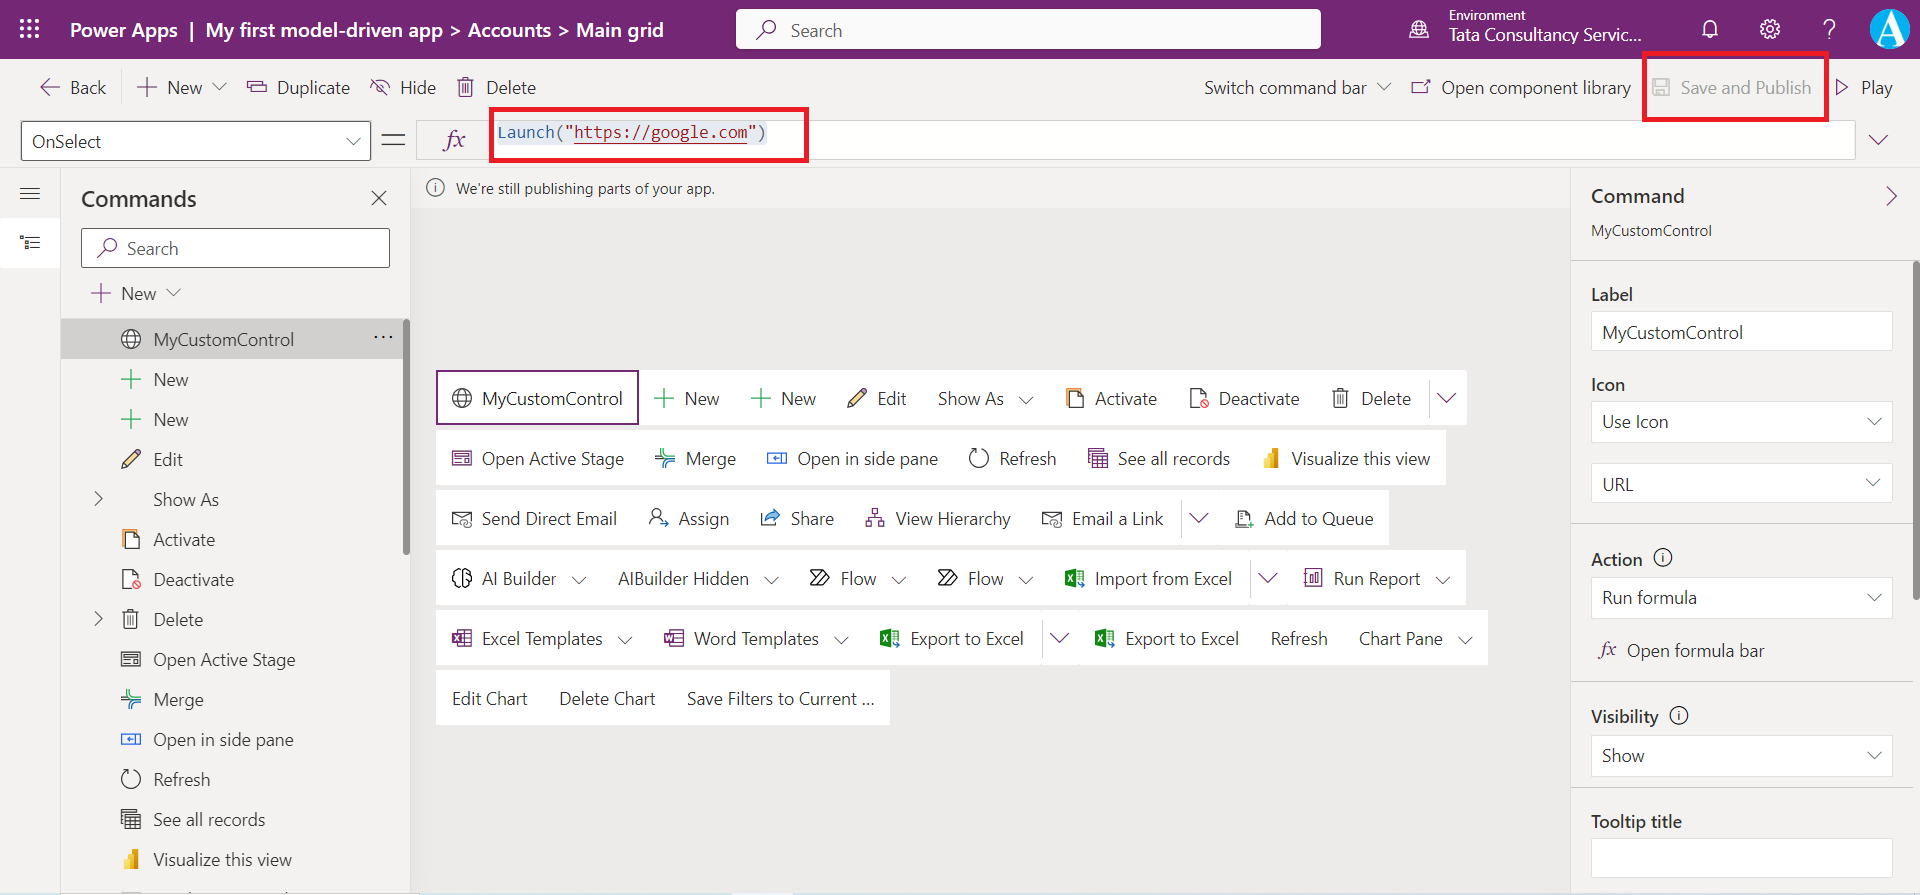
After Save and publish click on Play.
We can see our control in the command bar. When we click on the control, the function which is written on the control executes.
