Create A blank Canvas App
To get started creating a canvas app, we can automatically generate an app from one of these sources, among others:
- A template
- Dataverse
- SharePoint
- Excel
When we build an app from Dataverse, we do not need to create a connection from Power Apps as we do with data sources such as SharePoint, Dynamics 365, or Salesforce. We will only need to specify the tables that we want to show or manage in the app.
We can create a canvas app by following the below steps:
Step 1: In the browser, go to Official Power Apps Link.
Step 2: This is the official Home page of the Power Apps.
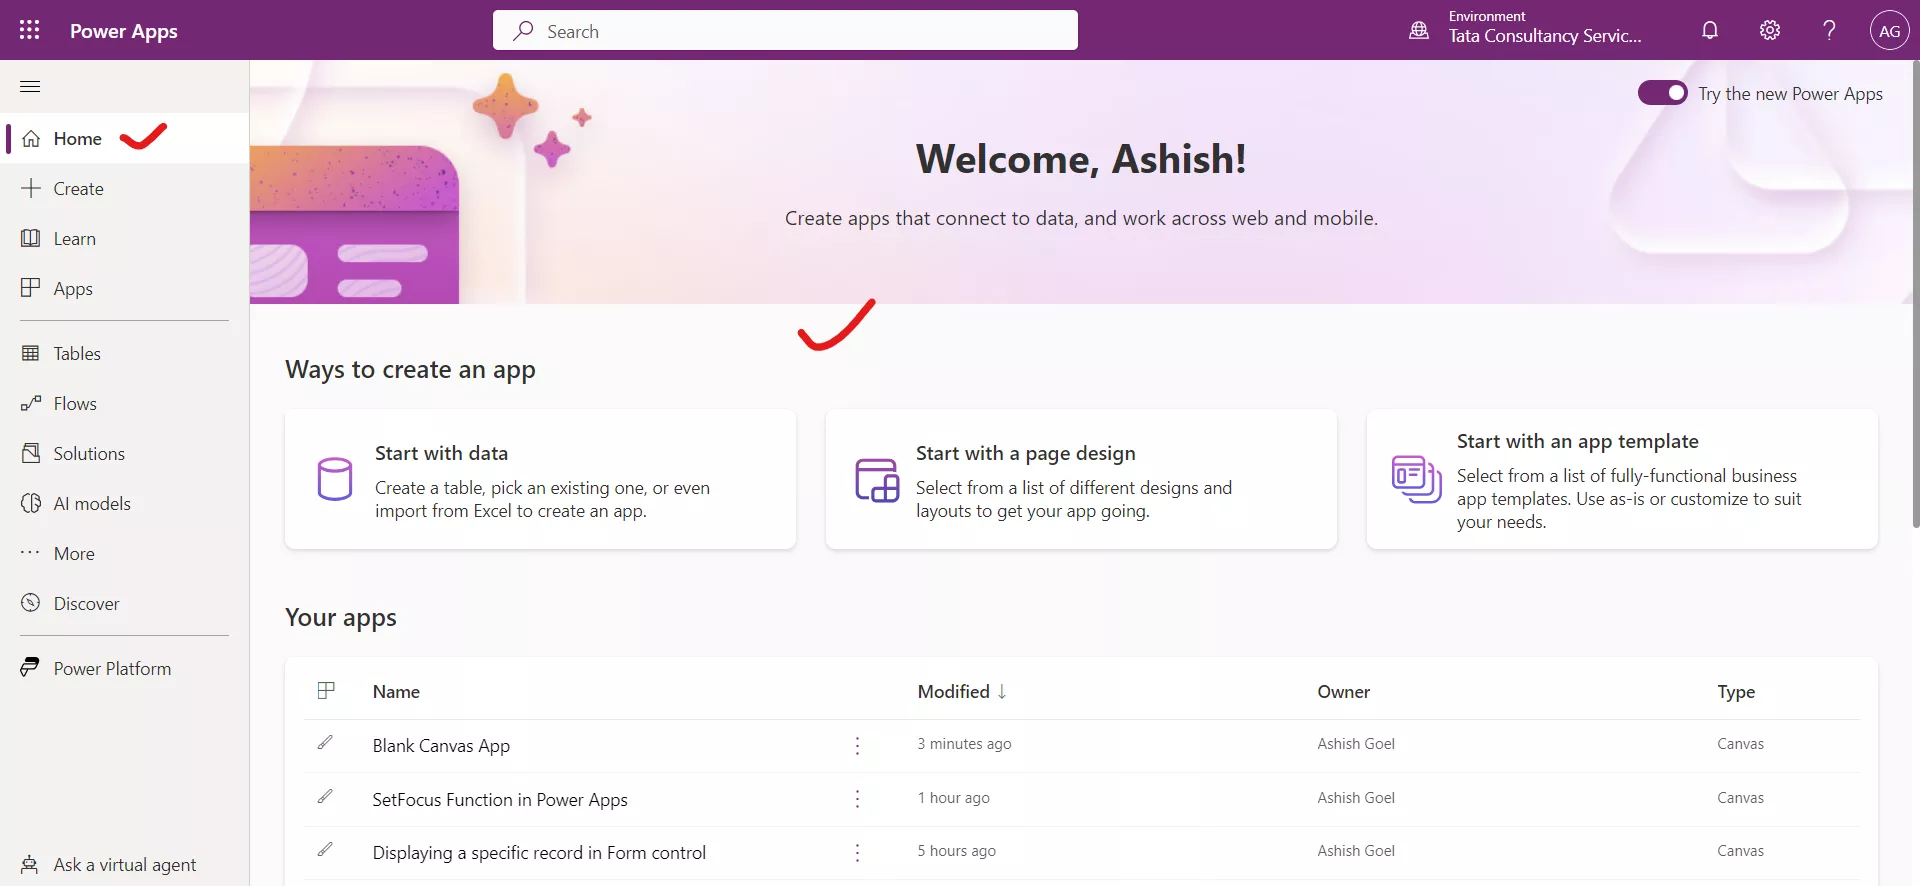
In order to create a blank canvas app, click on the Create, and then click on Blank app.
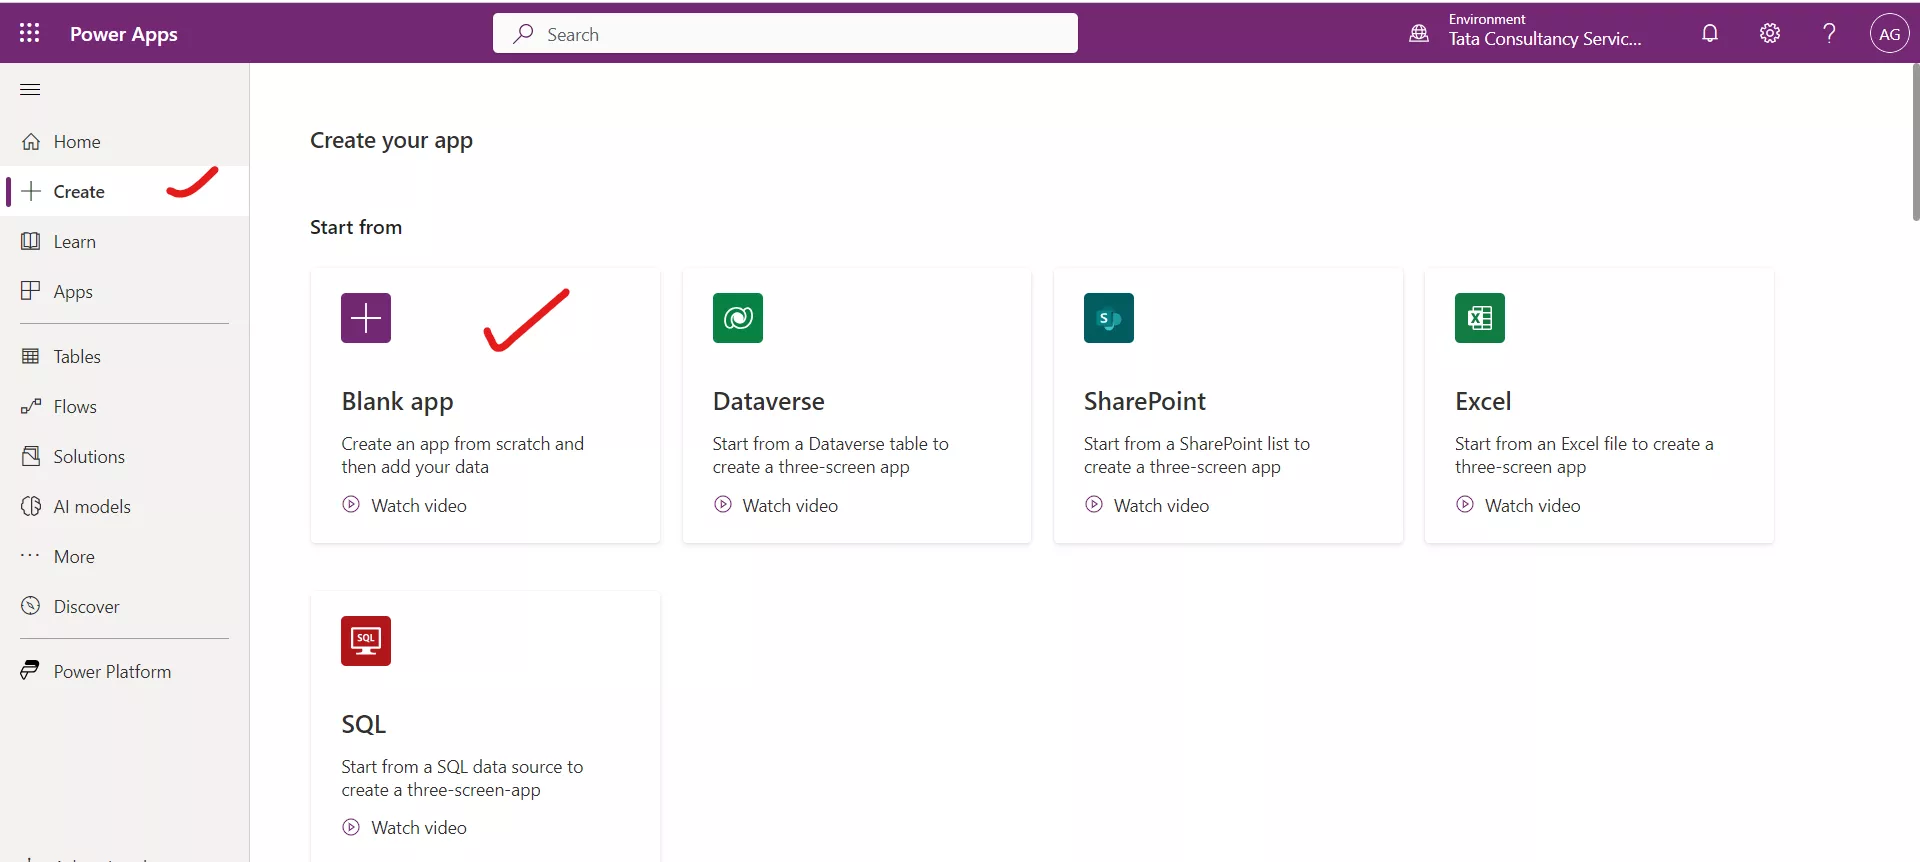
After clicking on this, we reach the following screen. Select Create button in the Blank canvas app section.
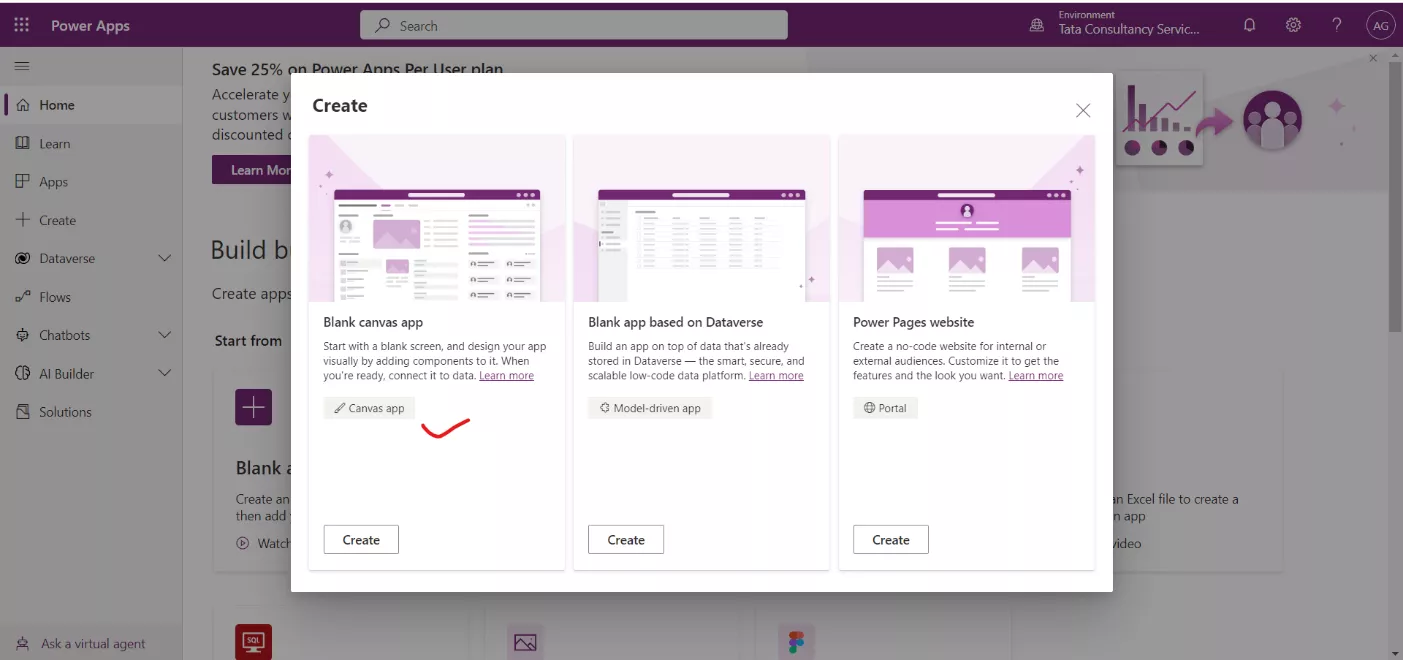
The following dialog box appears. Type the name of the app, App name, and the Format.
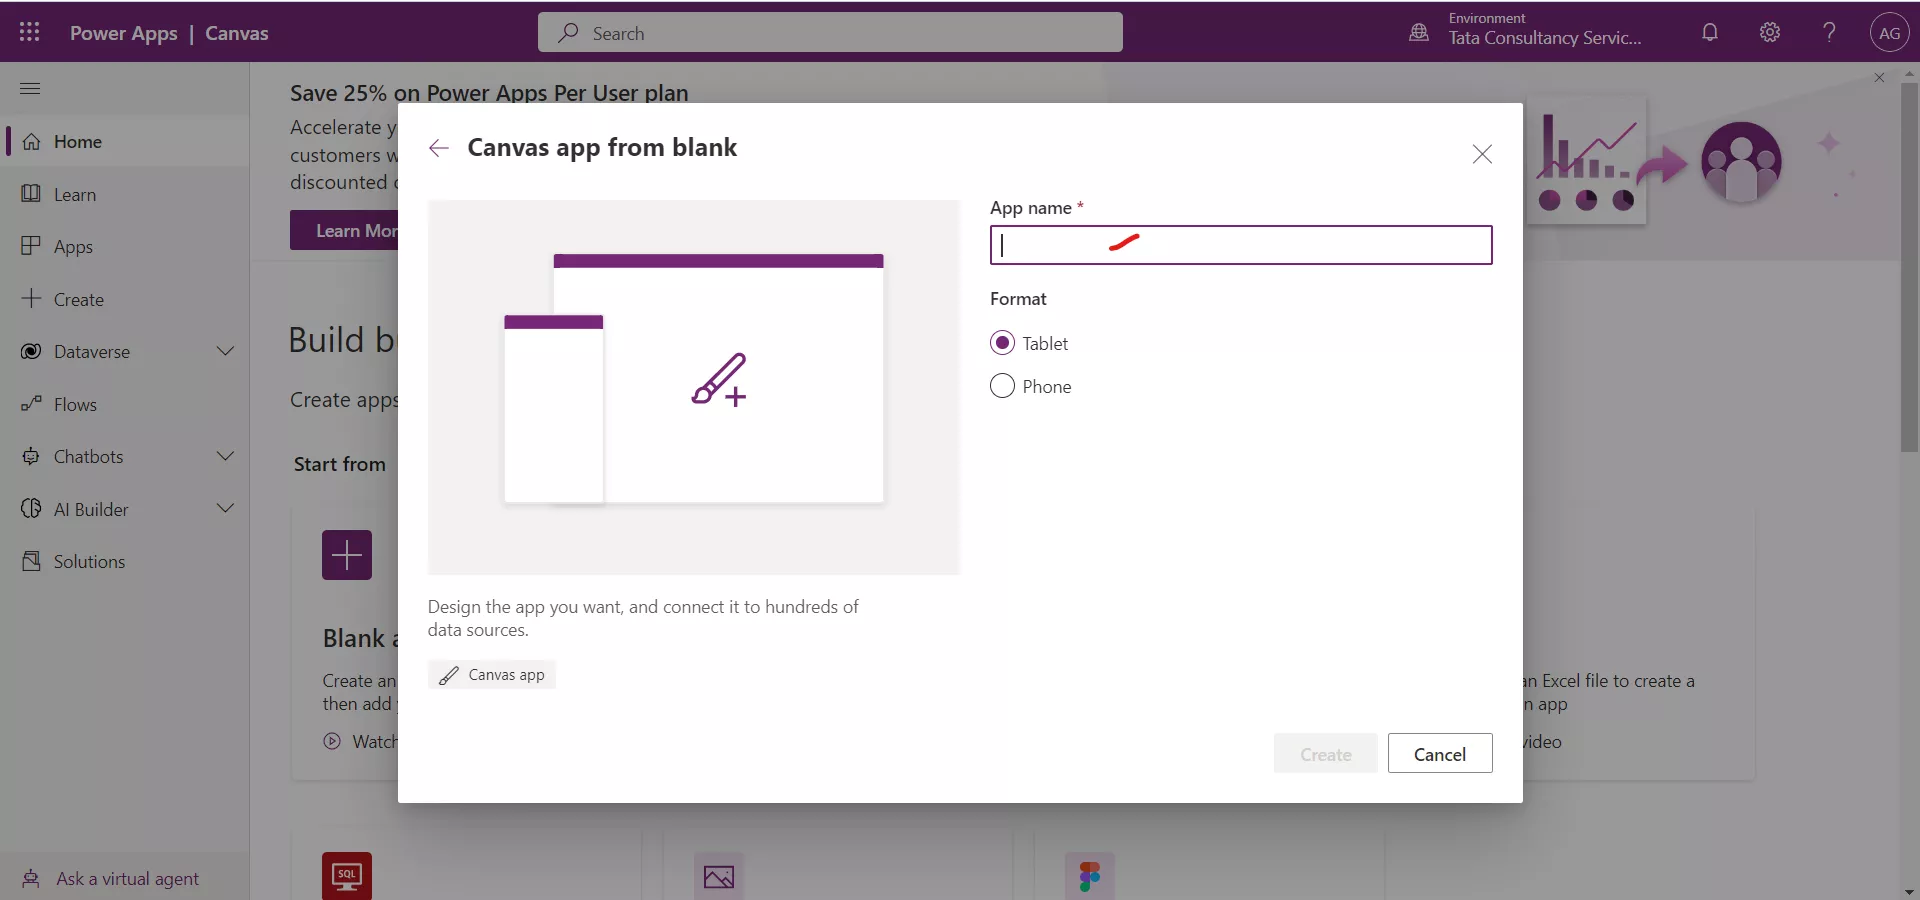
Let me choose the following details.
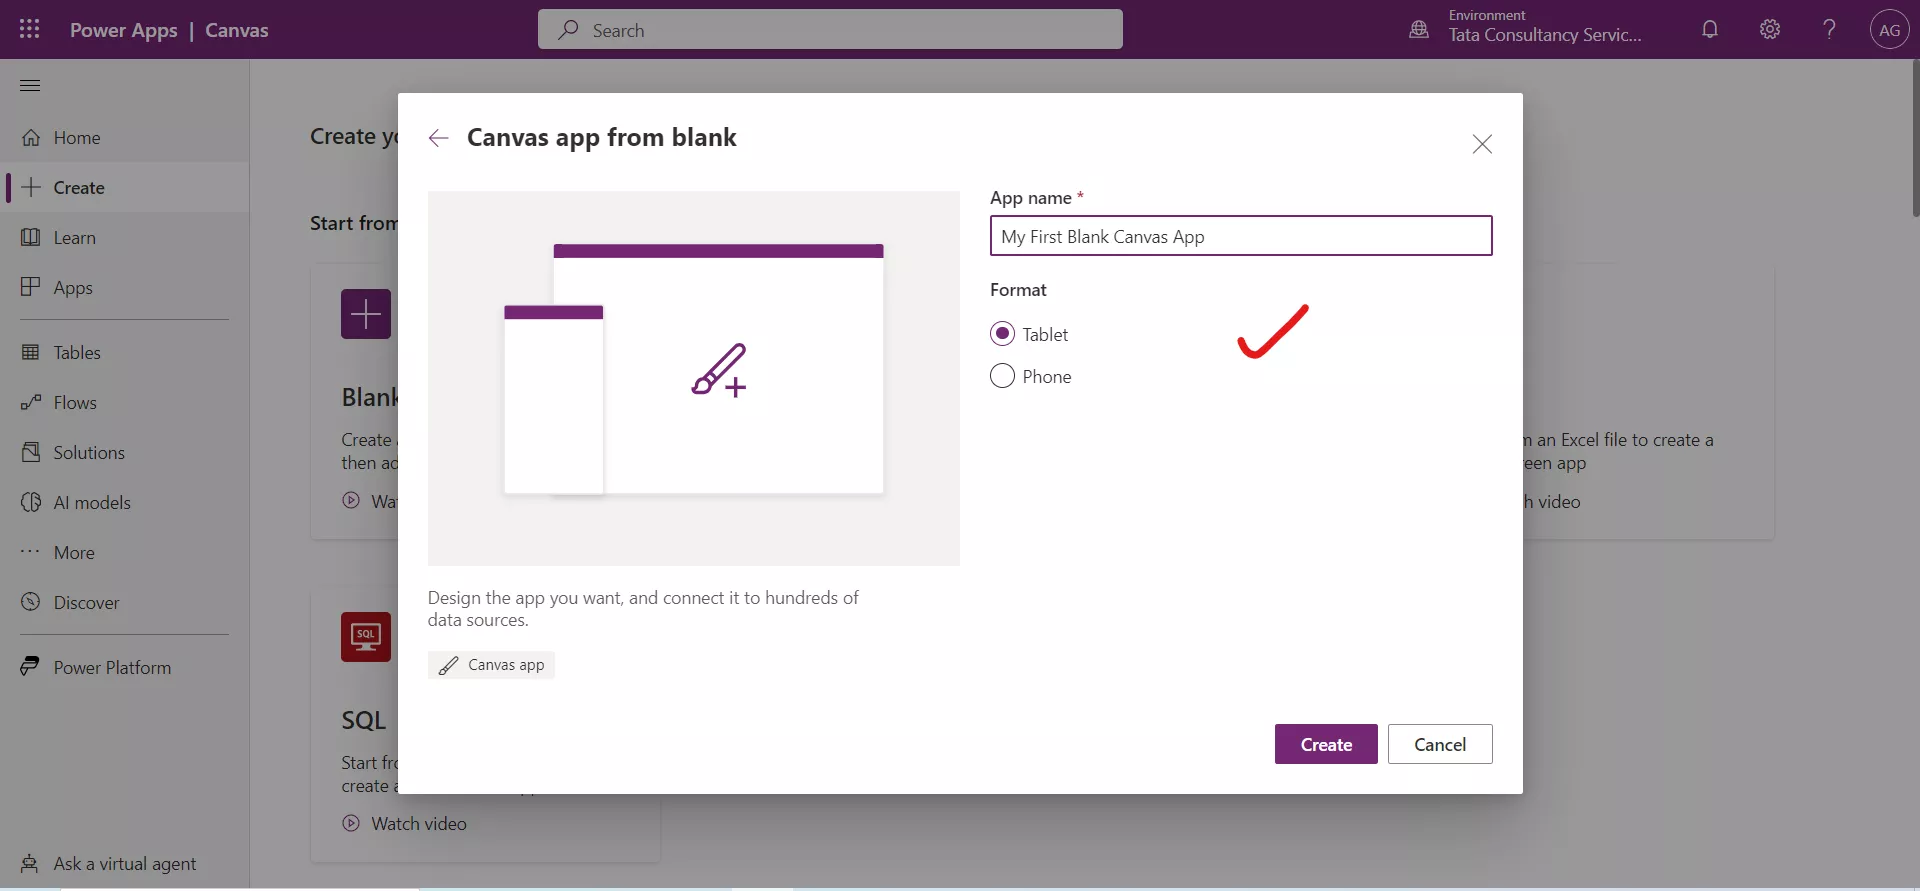
There are two formats available: Tablet and Phone. It is selected on the basis the app is primarily used on which device. The main difference between the formats is Screen size. The screen size affects the amount of space available to build the app.
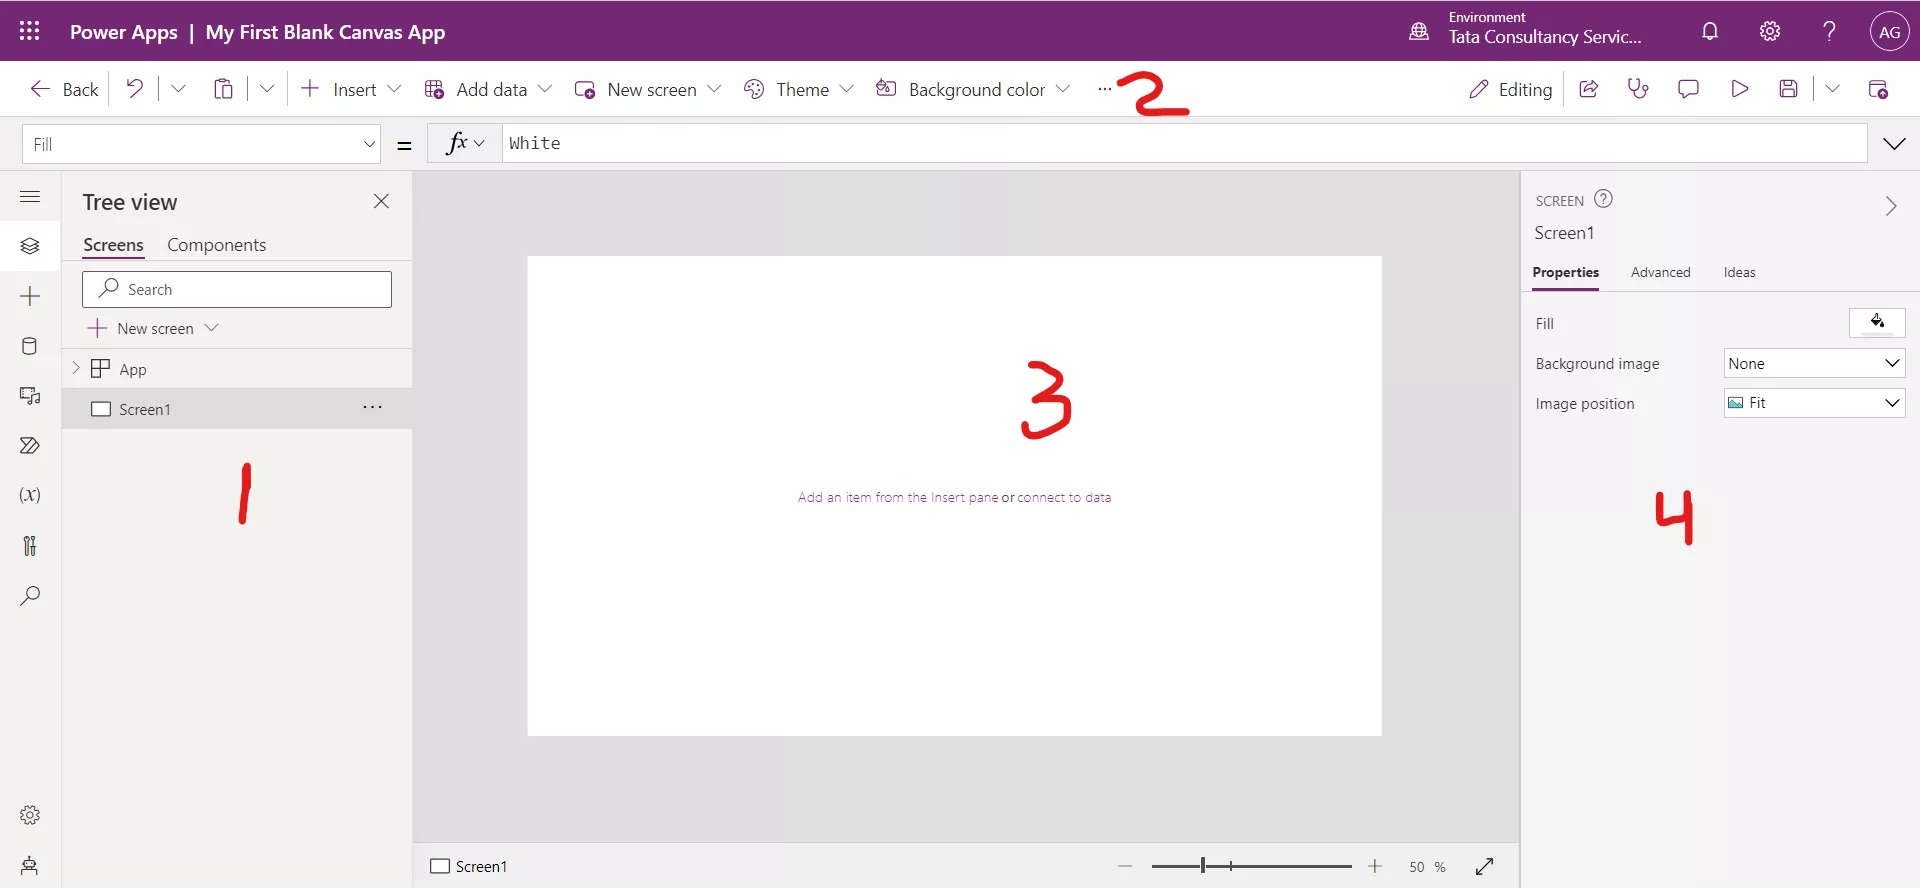
Step 3: After entering all the details click on Create button, we can see the following screen, which is called as Power Apps Studio, where we build our entire app.
The following Power Apps Studio components help make the process of creating apps:
- Left pane - Shows a hierarchical view of all controls on each screen in our app.
- Upper-left dropdown menu - This pane is the property dropdown list. It shows the different properties for the selected control.
- Middle pane – It shows the canvas app that we are working on.
- Right pane - Where we can set options, such as the layout, properties, and data sources for certain controls.
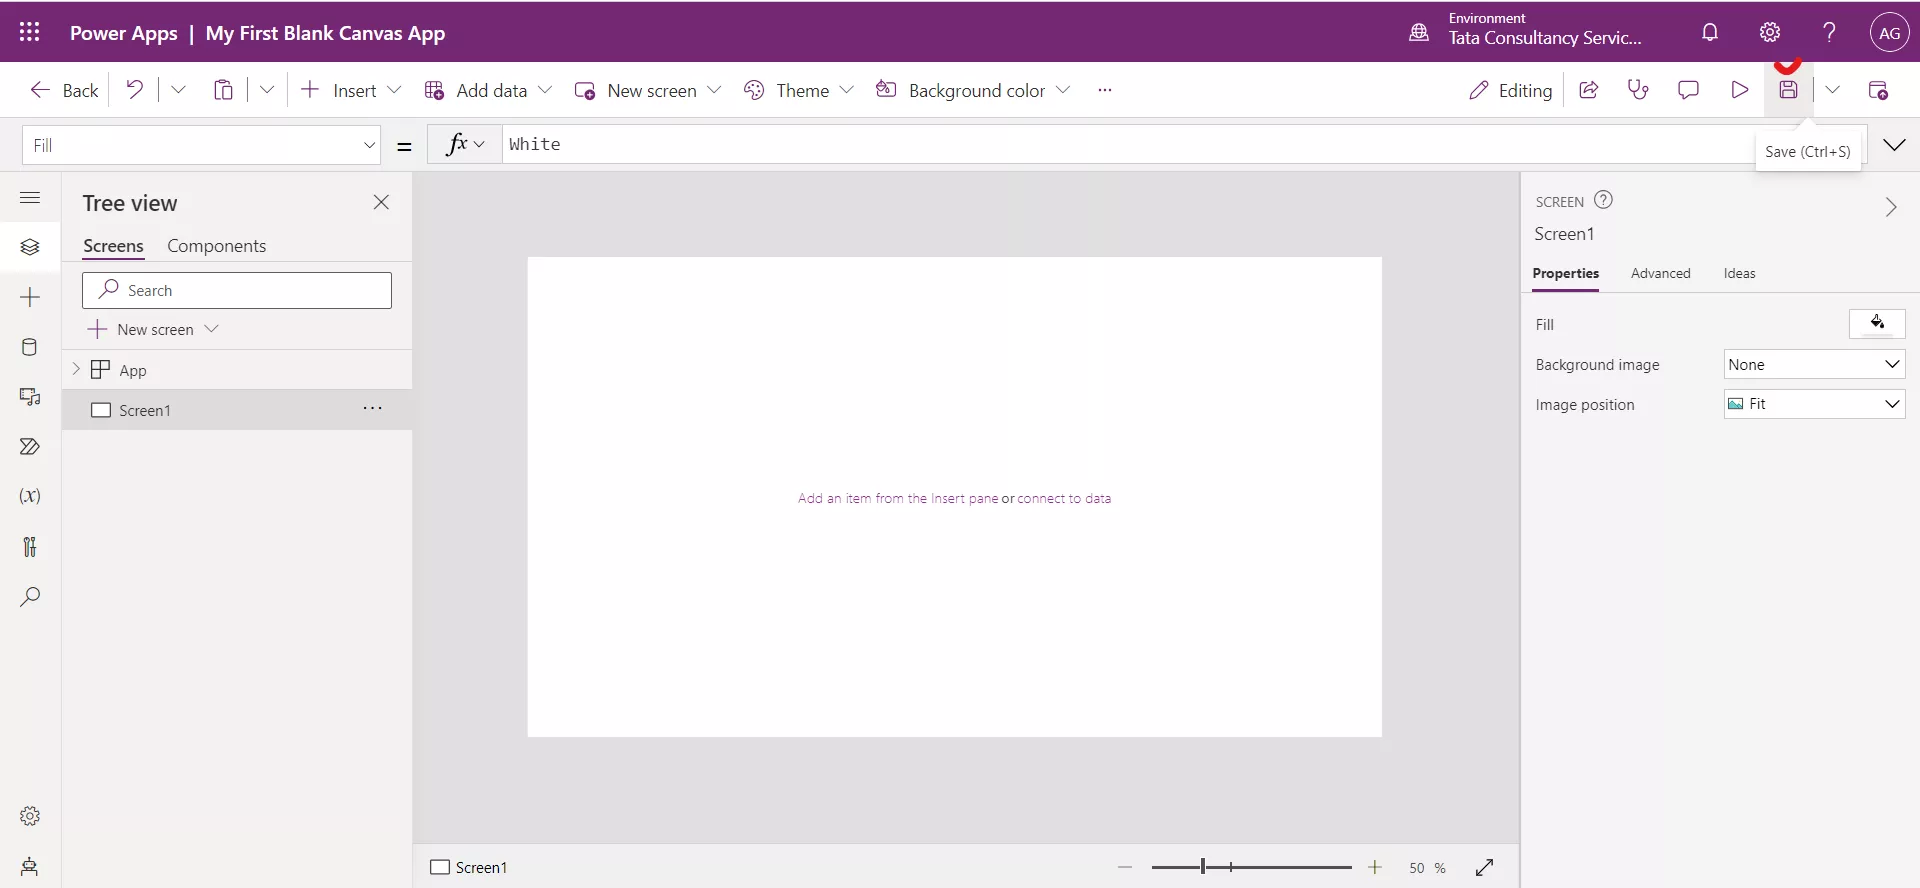
Step 4: Canvas apps save automatically every two minutes when we are building in Power Apps Studio, except for the first time. So, it is good to save our work the first time, then it will automatically save every two minutes.
To save the app, click on the Save icon in the upper-right corner.
Step 5: The Tree view is located on the left side, where all screens and controls will be listed. The Properties pane to the right will provide details about properties for the selected control, which in this case is a blank screen. We can build canvas apps by placing controls on the screen and then setting the properties for these controls. In the Tree view, we see, by default, one screen is created, which is named as Screen1. We can create multiple screens.
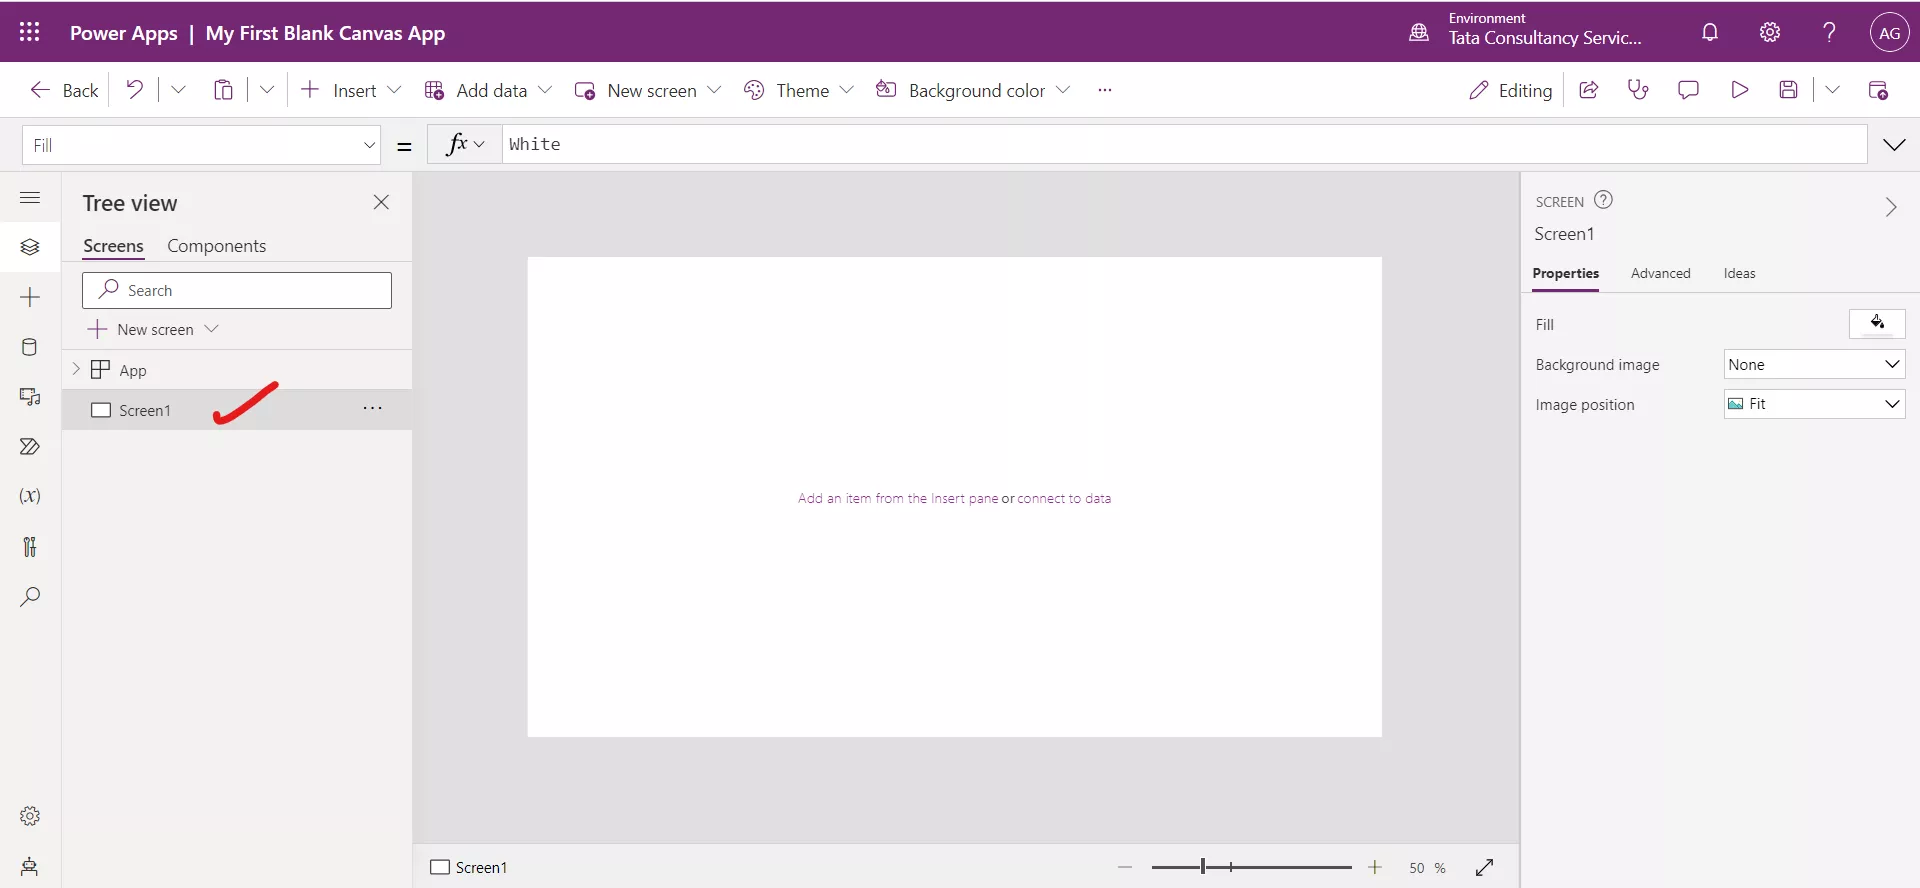
By clicking on the ellipses icon, we can see many options.
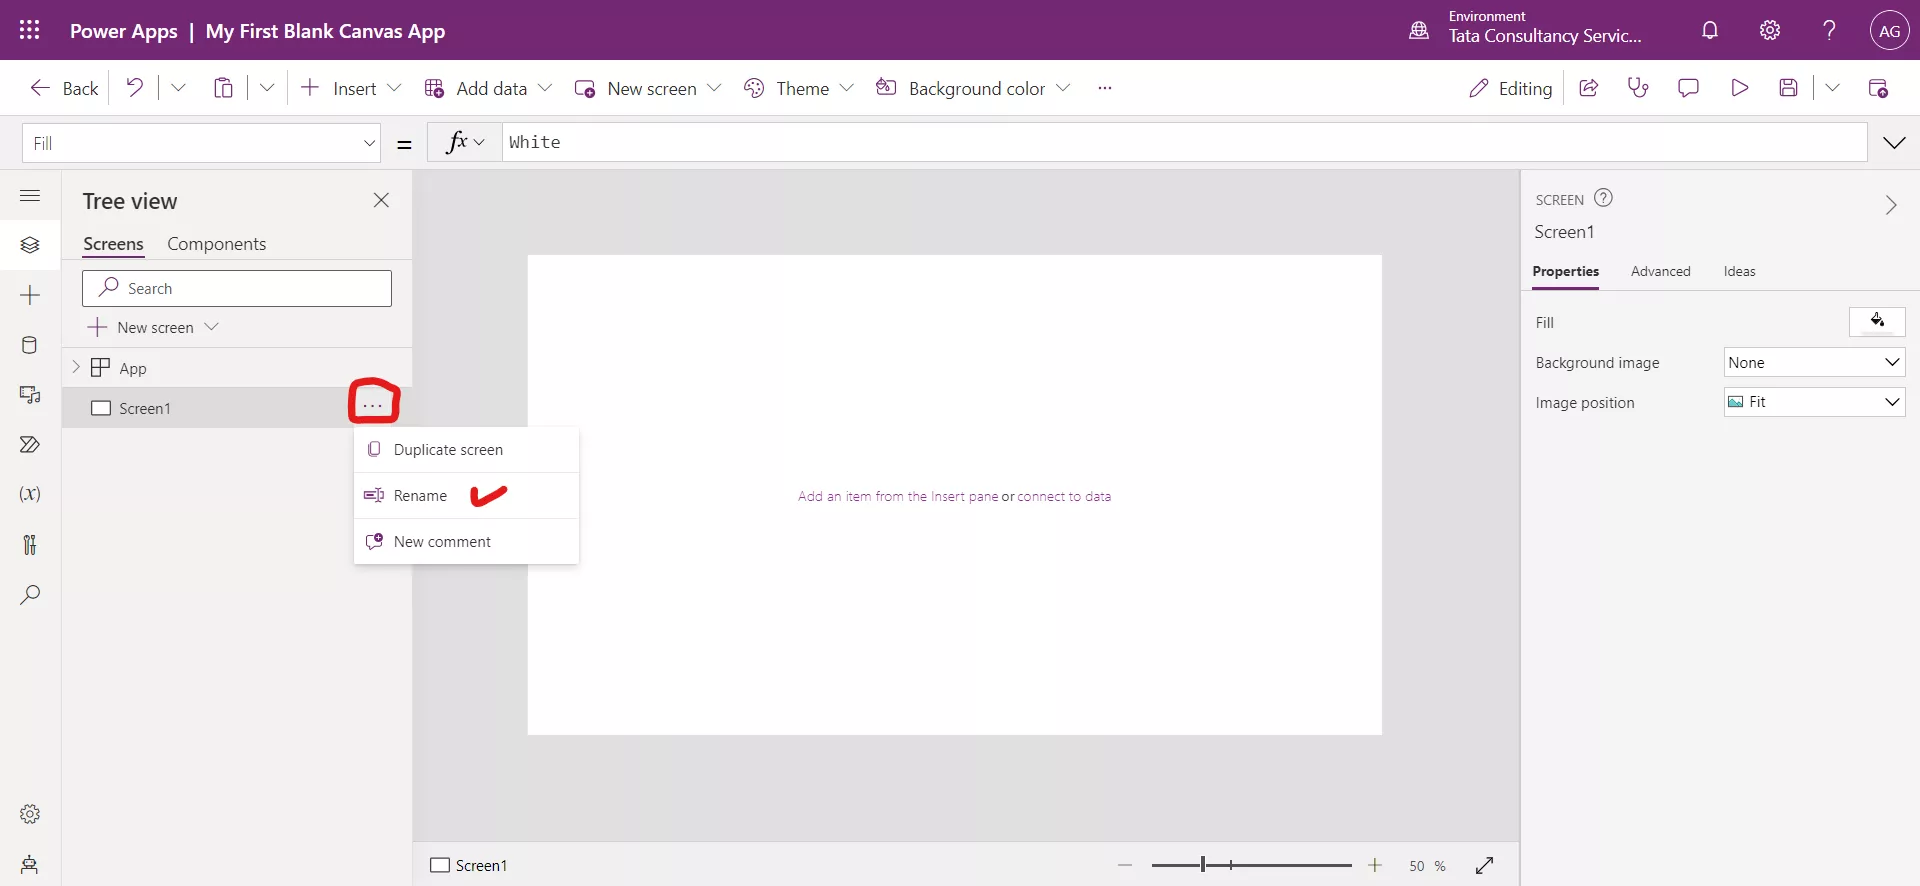
Click on Rename to rename the screen name, or we can double click on the screen name to change the name of the screen. Let us we give the name as HomeScreen.
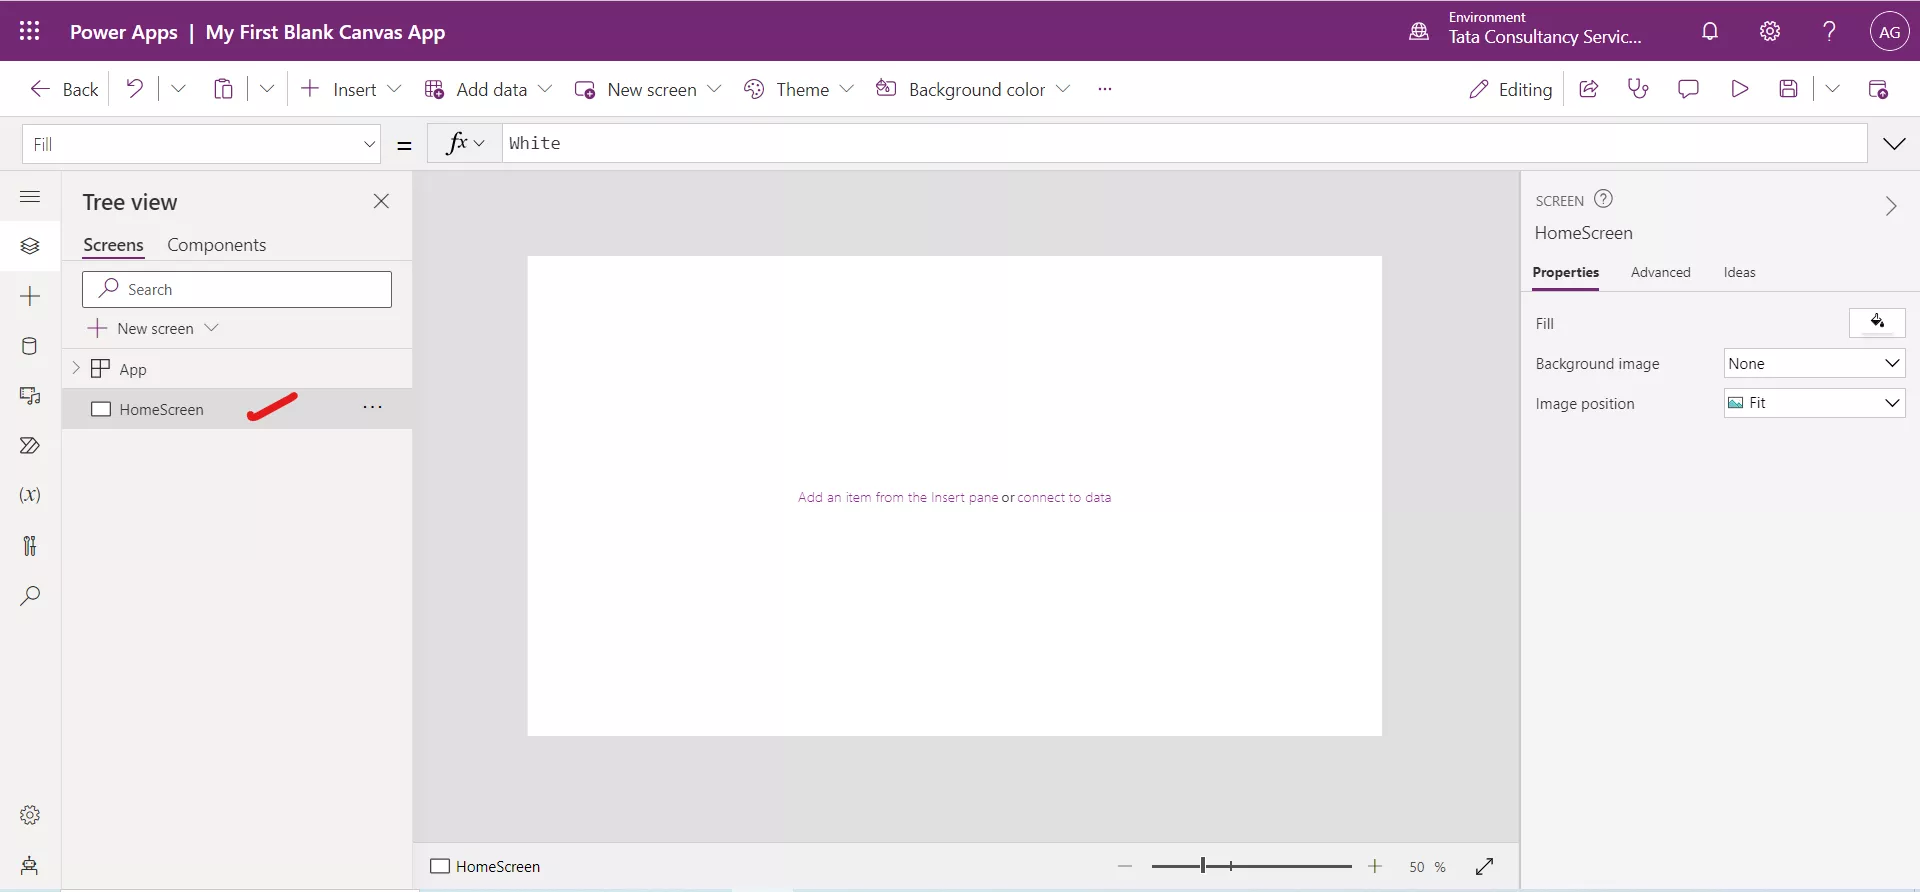
We can add multiple screens by clicking on + New Screen from the Tree view panel. Click on Blank, from the Layouts section.
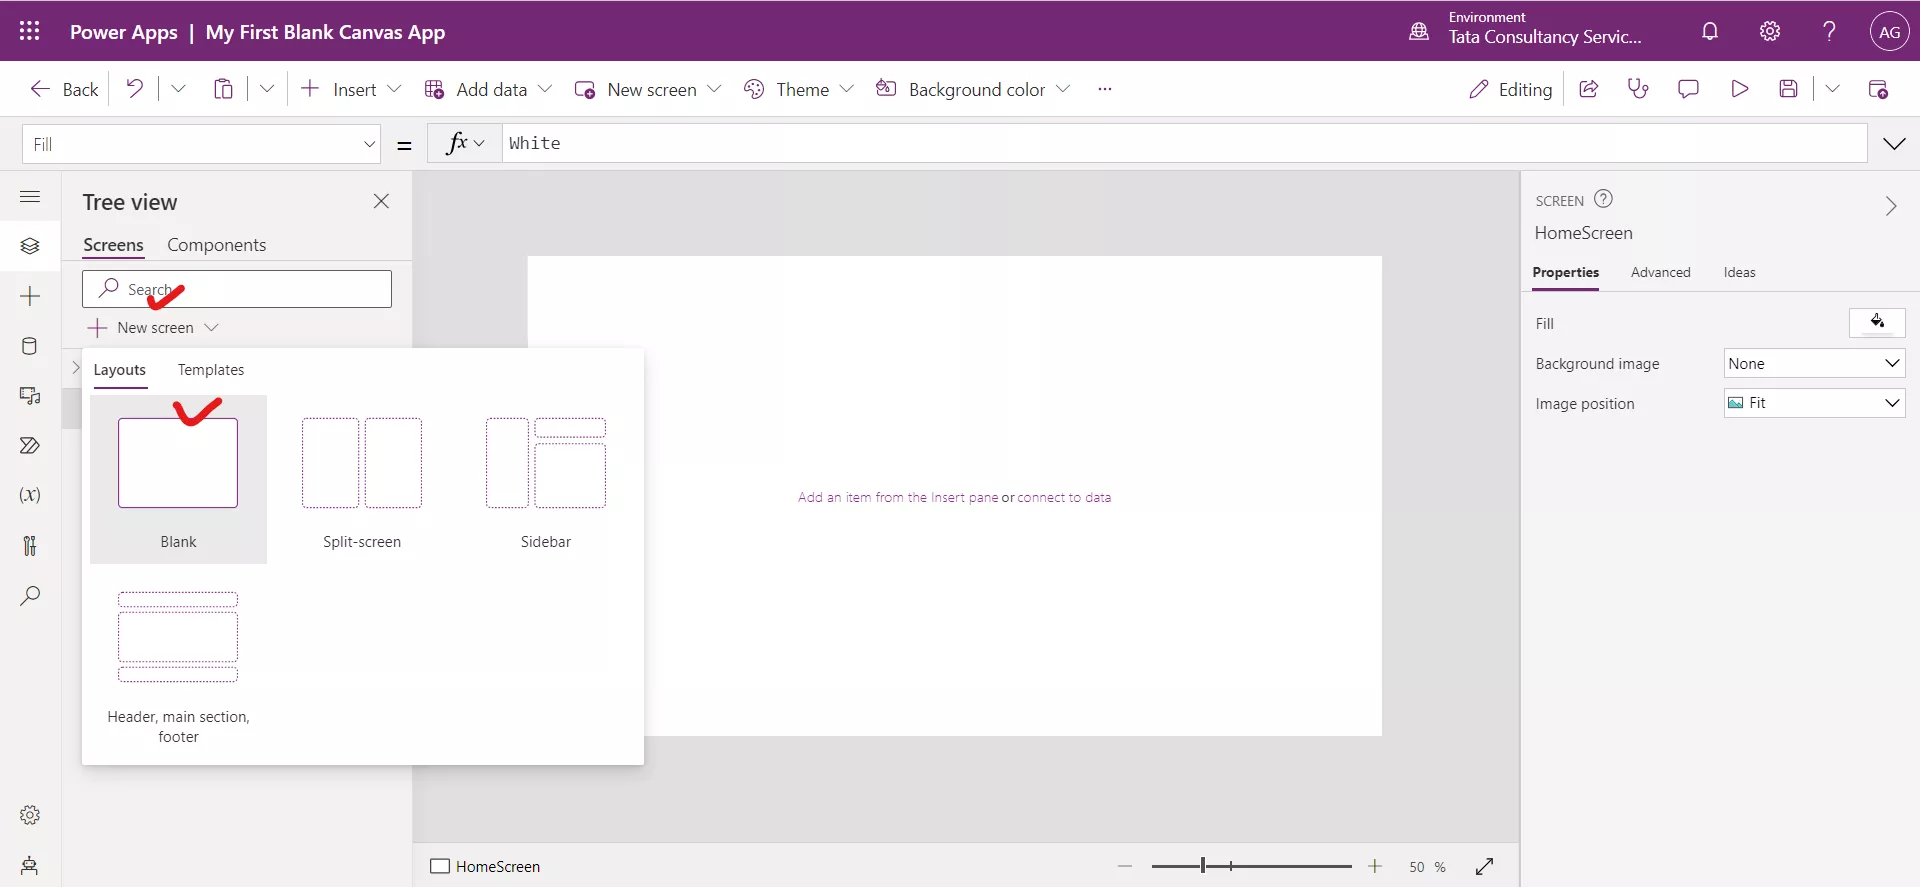
A screen is created, with the name Screen2.
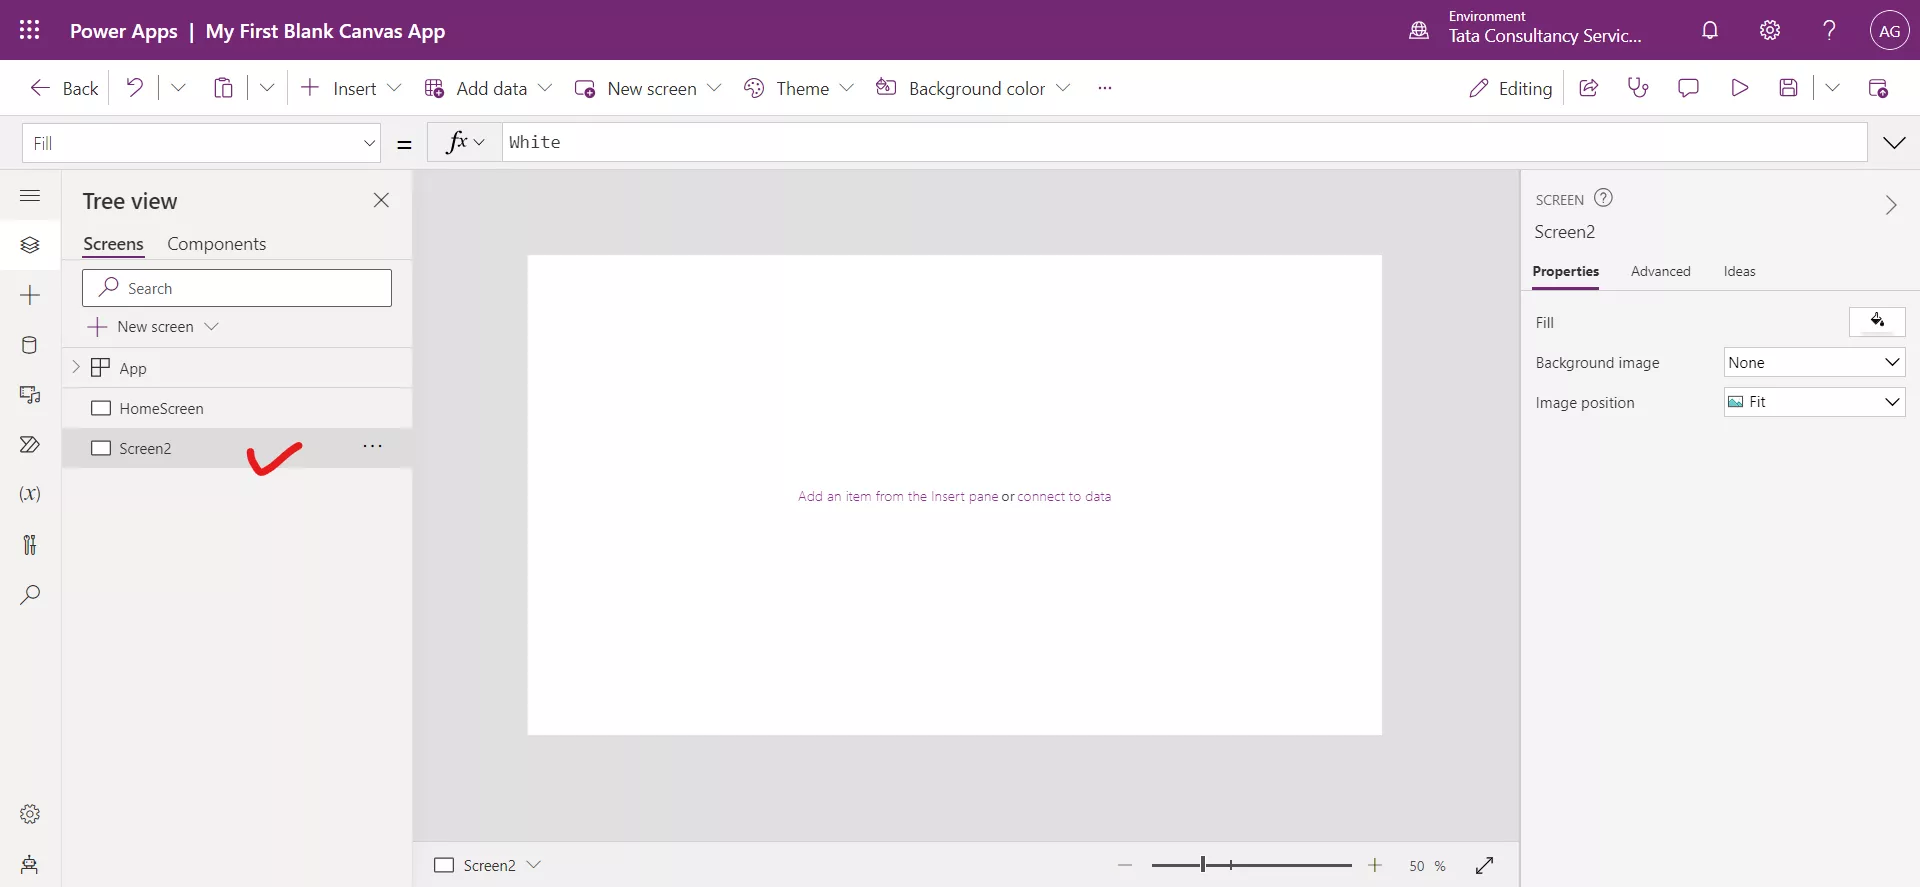
Rename this screen to FormScreen, as previous we do.
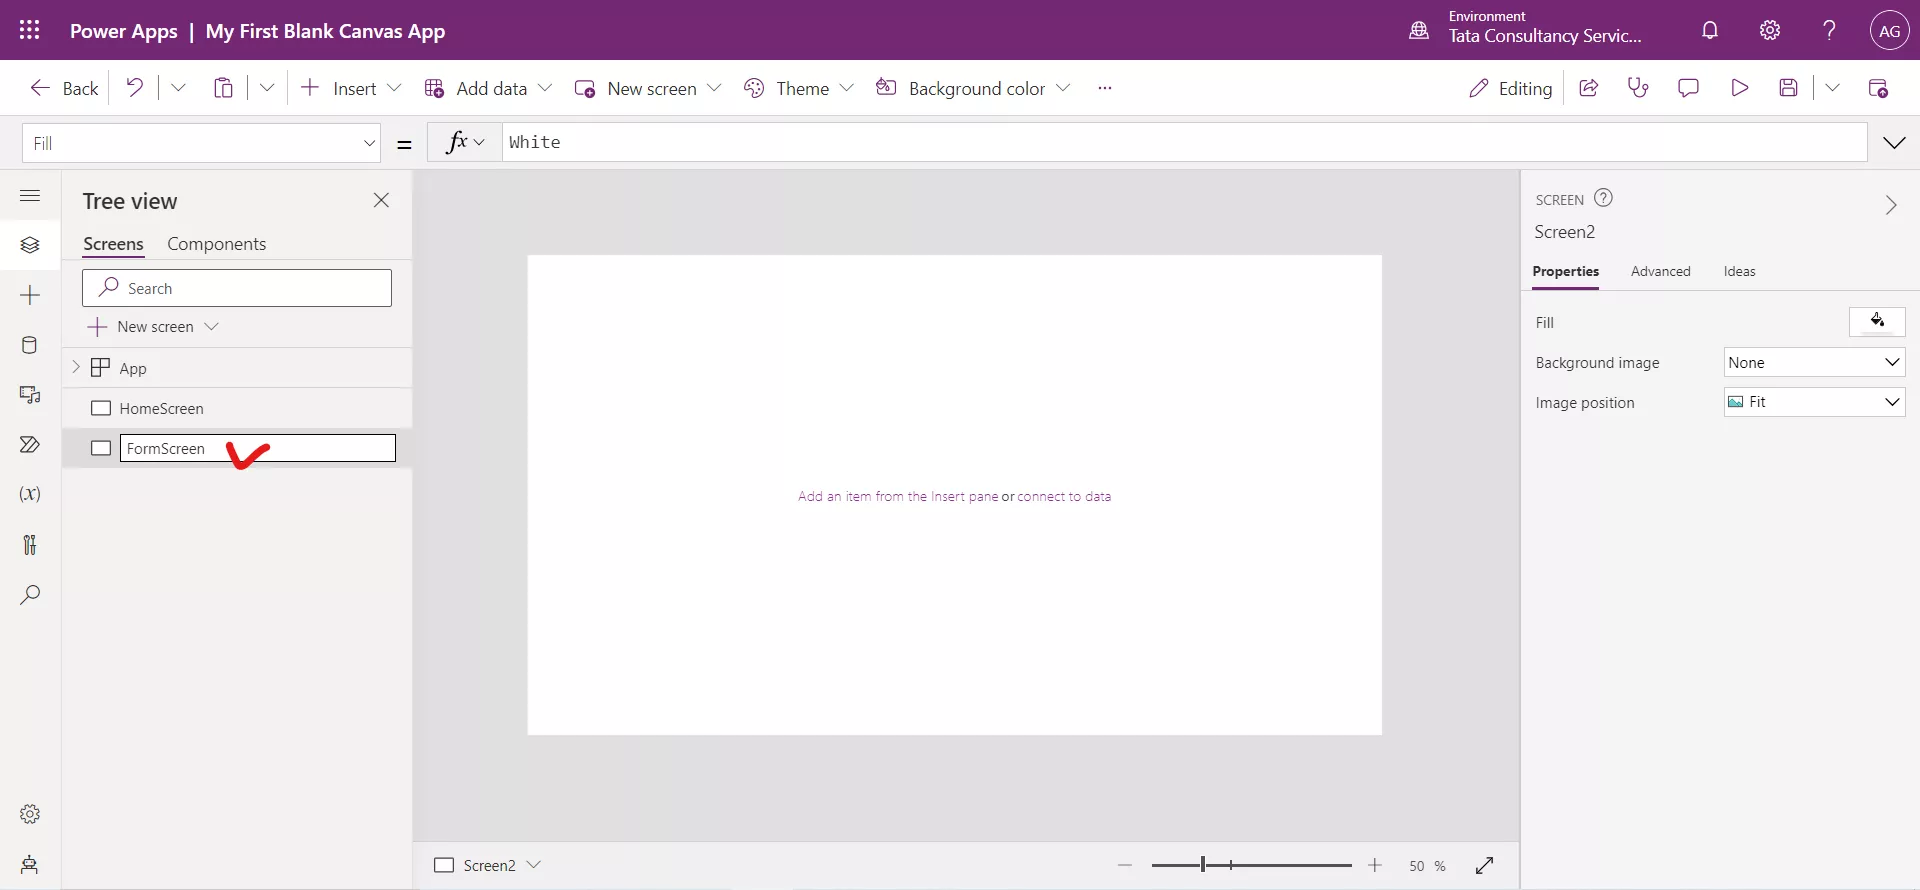
Step 6: We can reorder the screens in the Power Apps studio. In the left navigation bar, hover over a screen that we want to move up or down, select the ellipsis button that appears, and then select Move up or Move down.
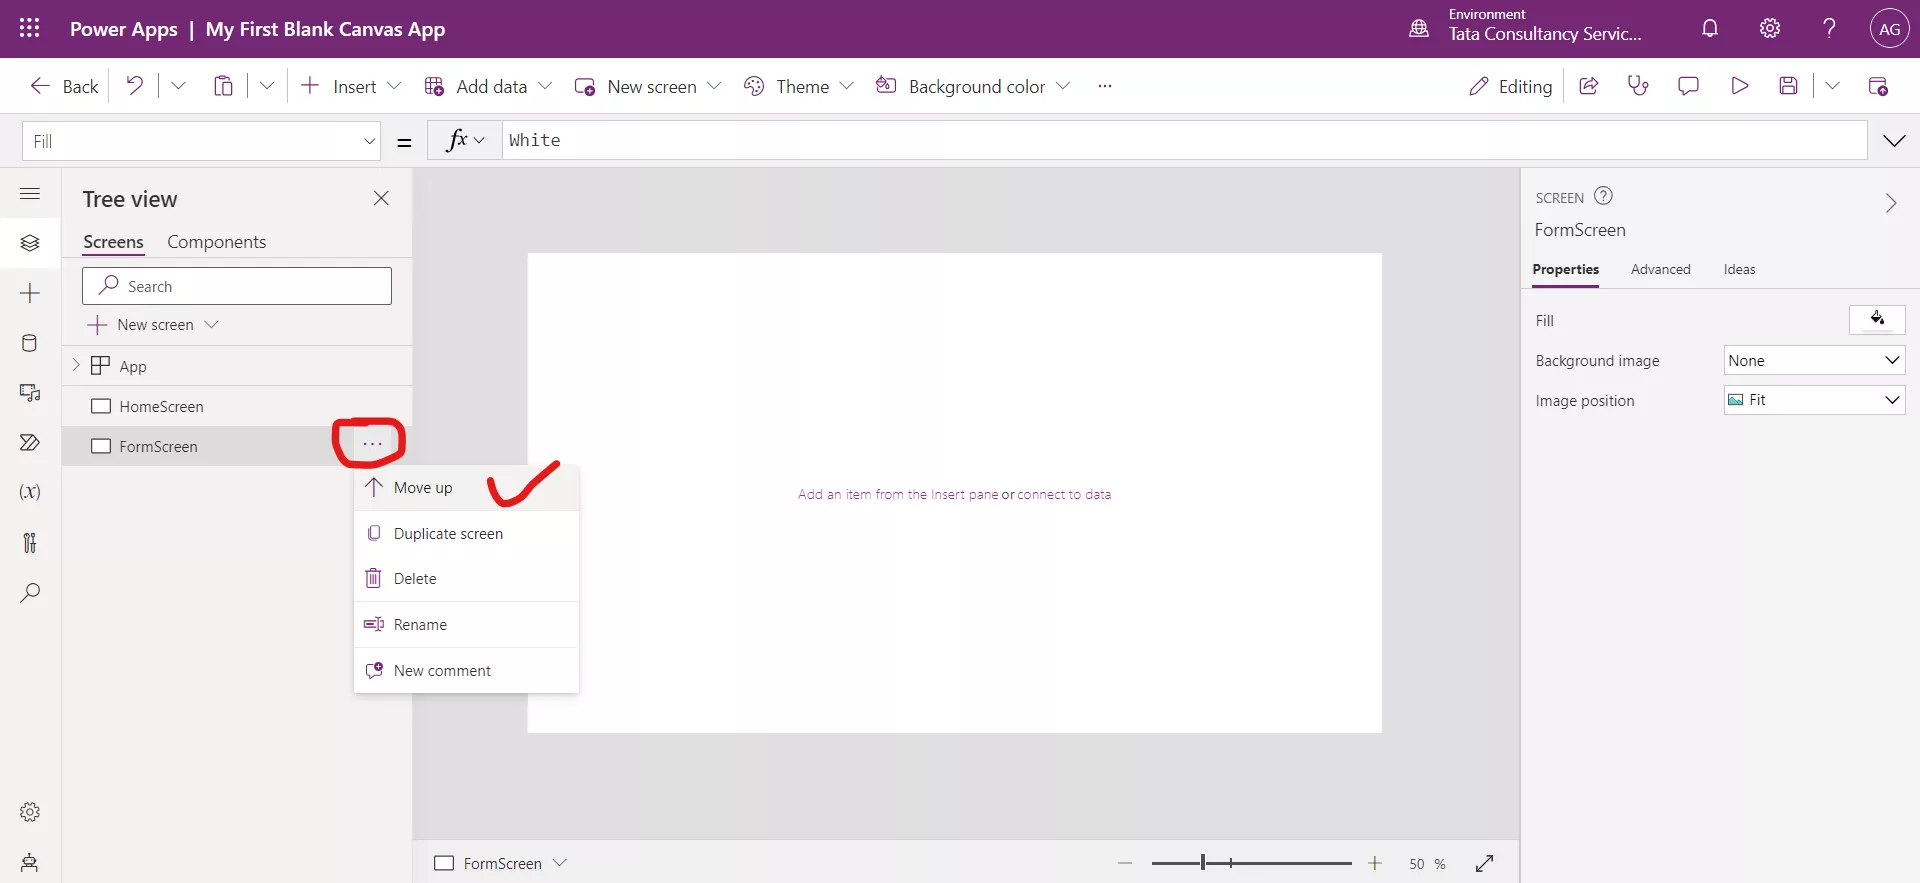
So according to our requirement we can add screens and change their names.
Step 7: Lets come back to the HomeScreen. We have several properties and functions in power apps which we can leverage to build a beautiful app. There is a property called “Fill”. It is basically giving the background color to the control.
We can see that the background color to the screen is White using the Fill property.
We can change the color and give it to any color value. Let we give LightBlue.
The following Power Apps Formula is written on the Fill property of the HomeScreen.
Power Apps Formula
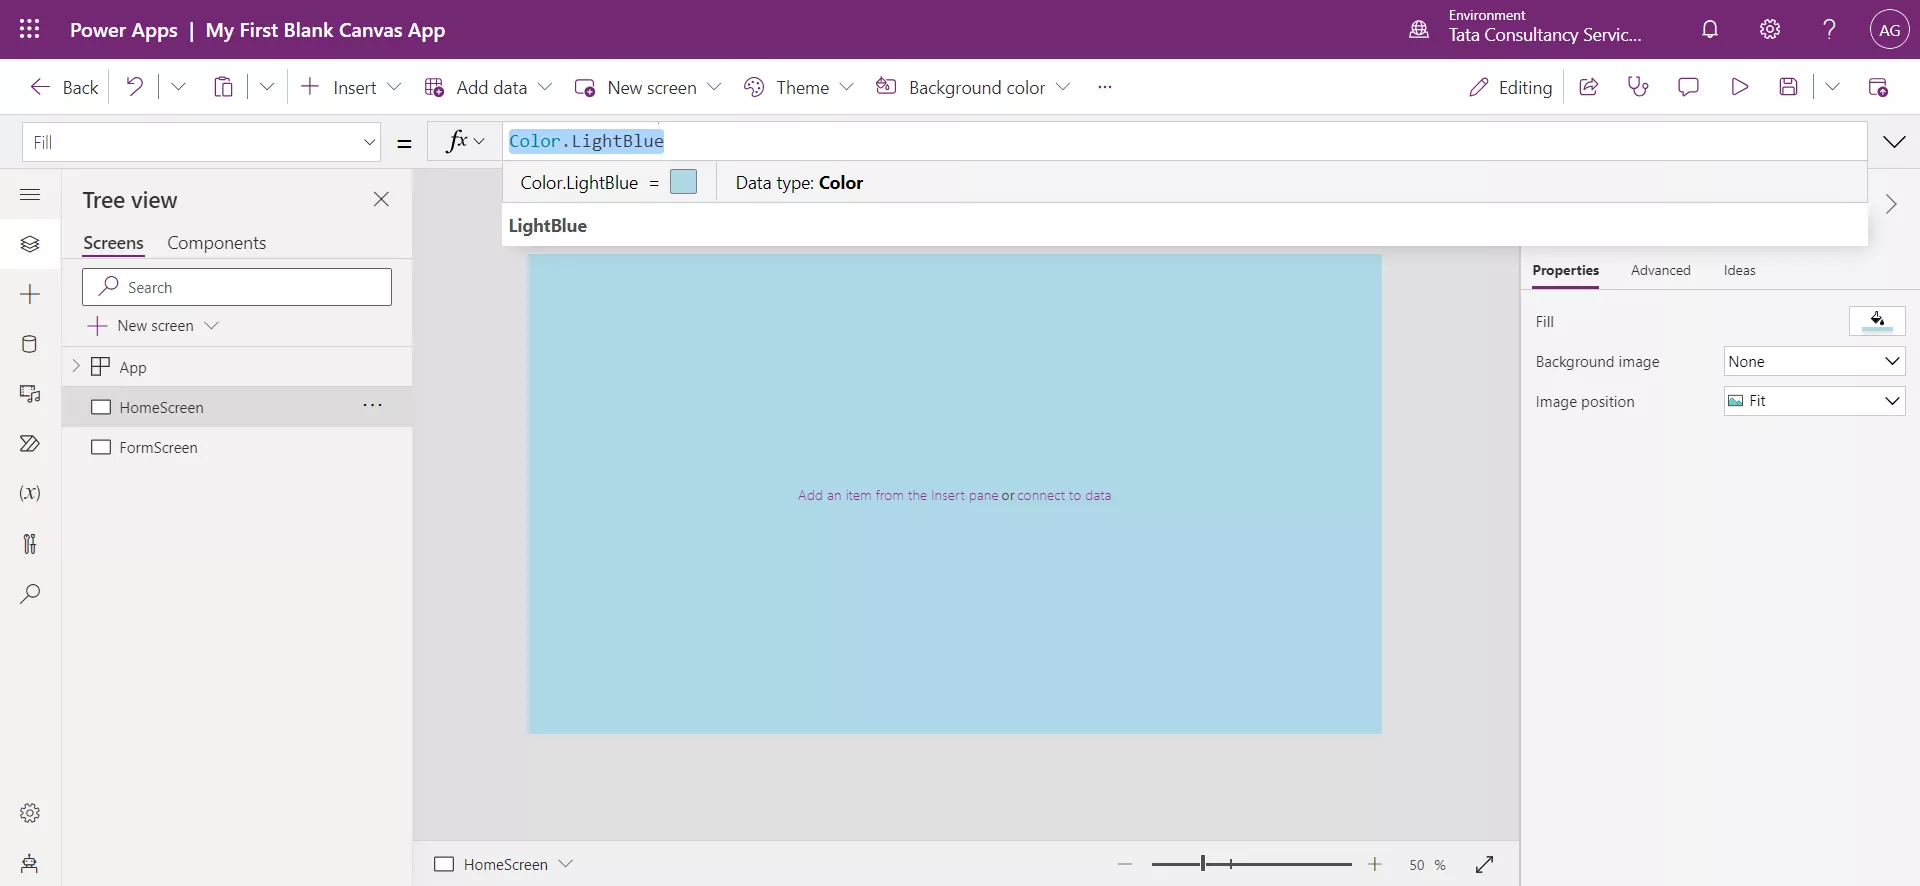
Step 8: If we have a requirement like we give a color to the HomeScreen then wants the other screen to have the same background colour. And, if we change the colour to HomeScreen then automatically it changes the background colour in all other screens.
We can access the property of the control by using the name of the control in power apps studio. Any control can be referenced by name from anywhere within the app. For example, Label1.Fill refers to the Fill property of the control whose name is Label1.
So, in order to access the Fill property of the first screen i.e., named as HomeScreen, we can write the following formula on the Fill property of the FormScreen.
Power Apps Formula
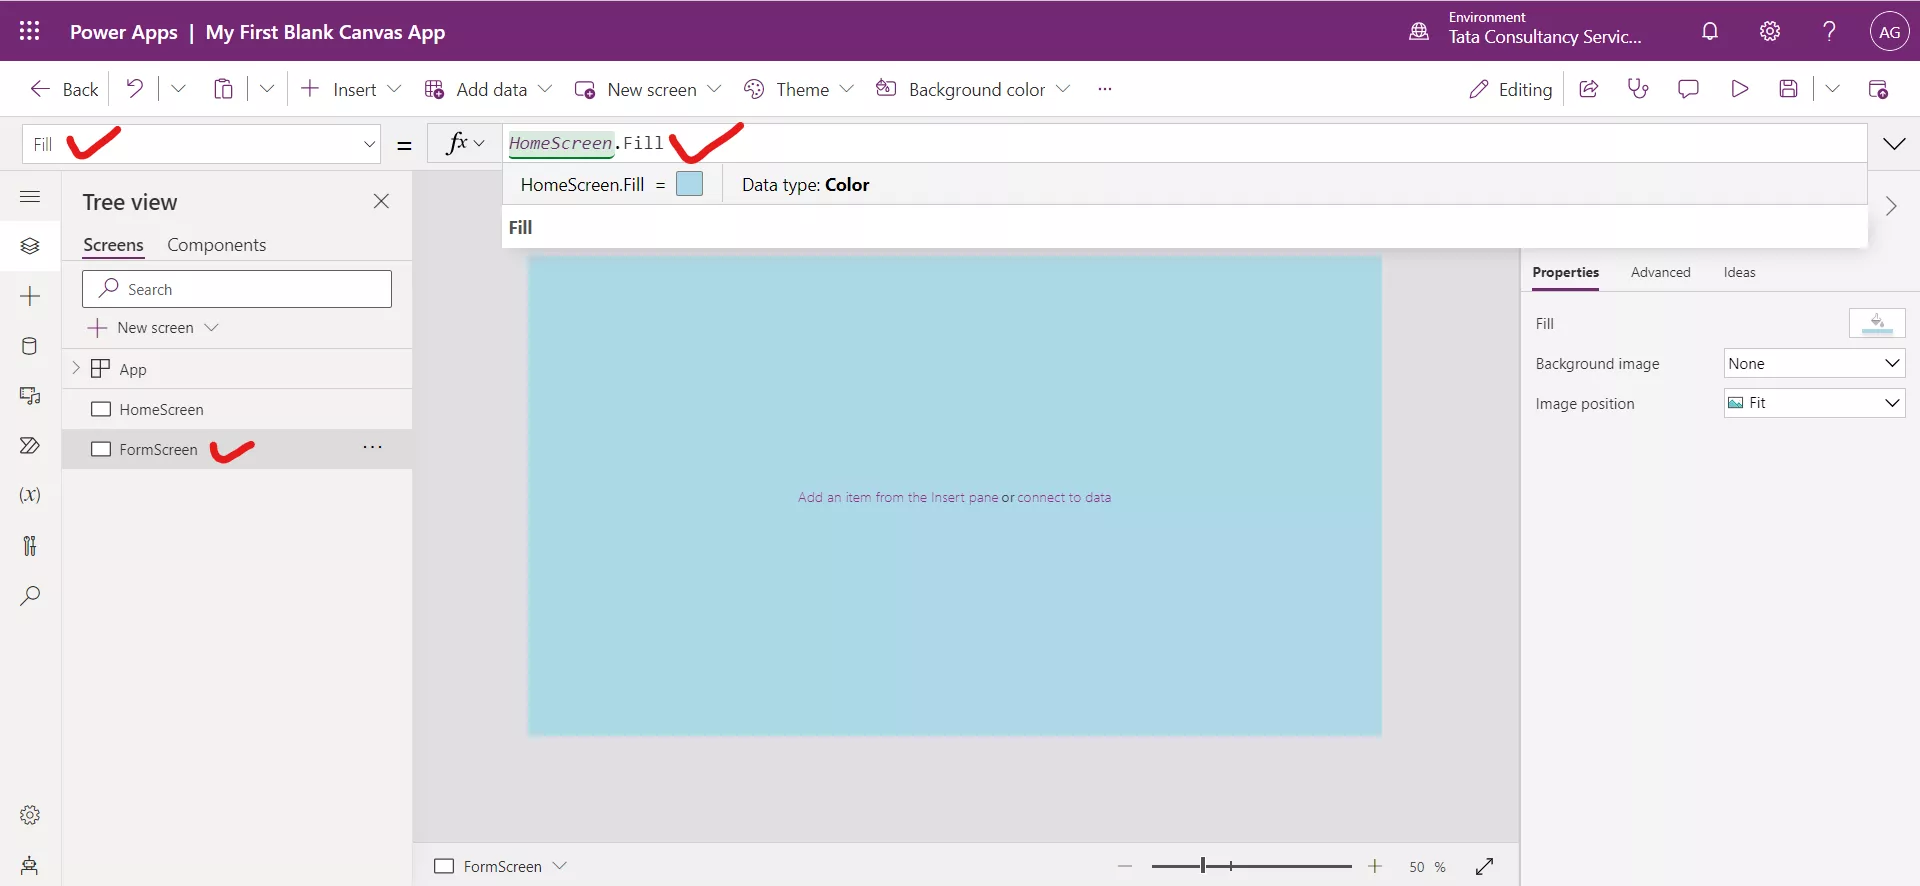
We can write the above formula in the Fill property of other screens if we have in Power Apps Studio.

Step 9: To add different controls, click on the HomeScreen. Click on + Insert. And then Click on Button control. Drag it to the specified position.
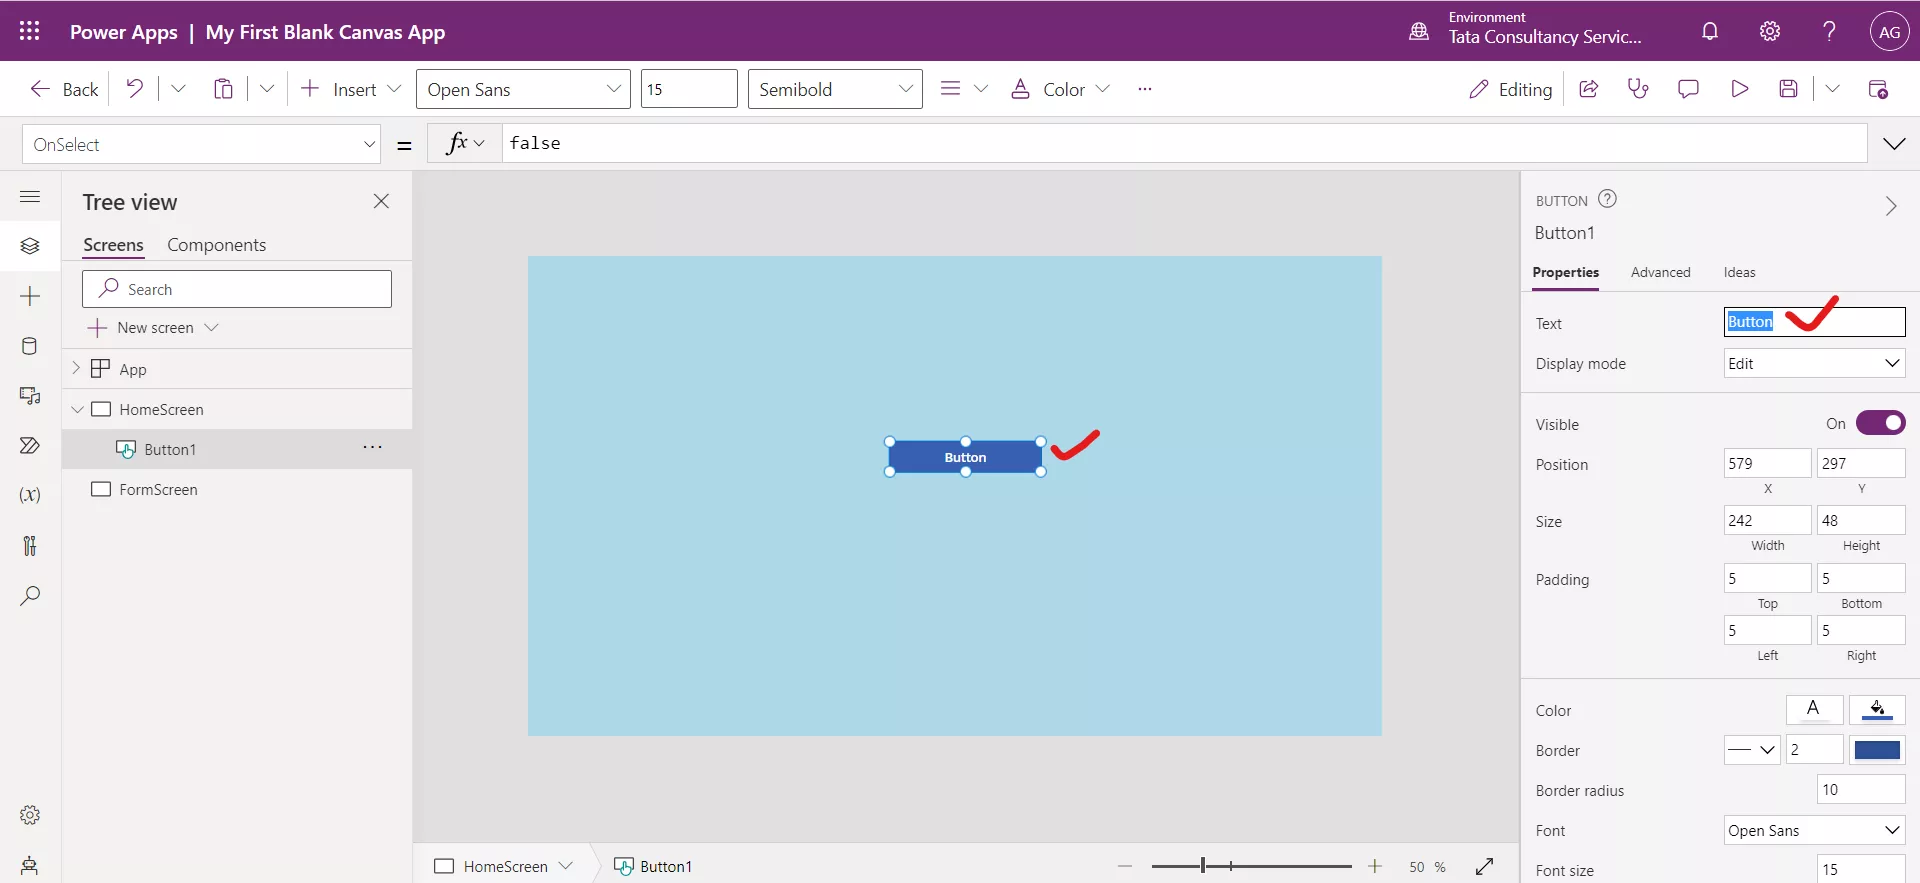
Step 10: Set the text to Create in the button control. And when we click on the Button control, a variety of options available on the right we can see in the following image. We can change the font, size, alignment, text color, background color of the text label, like in any other word processing software.
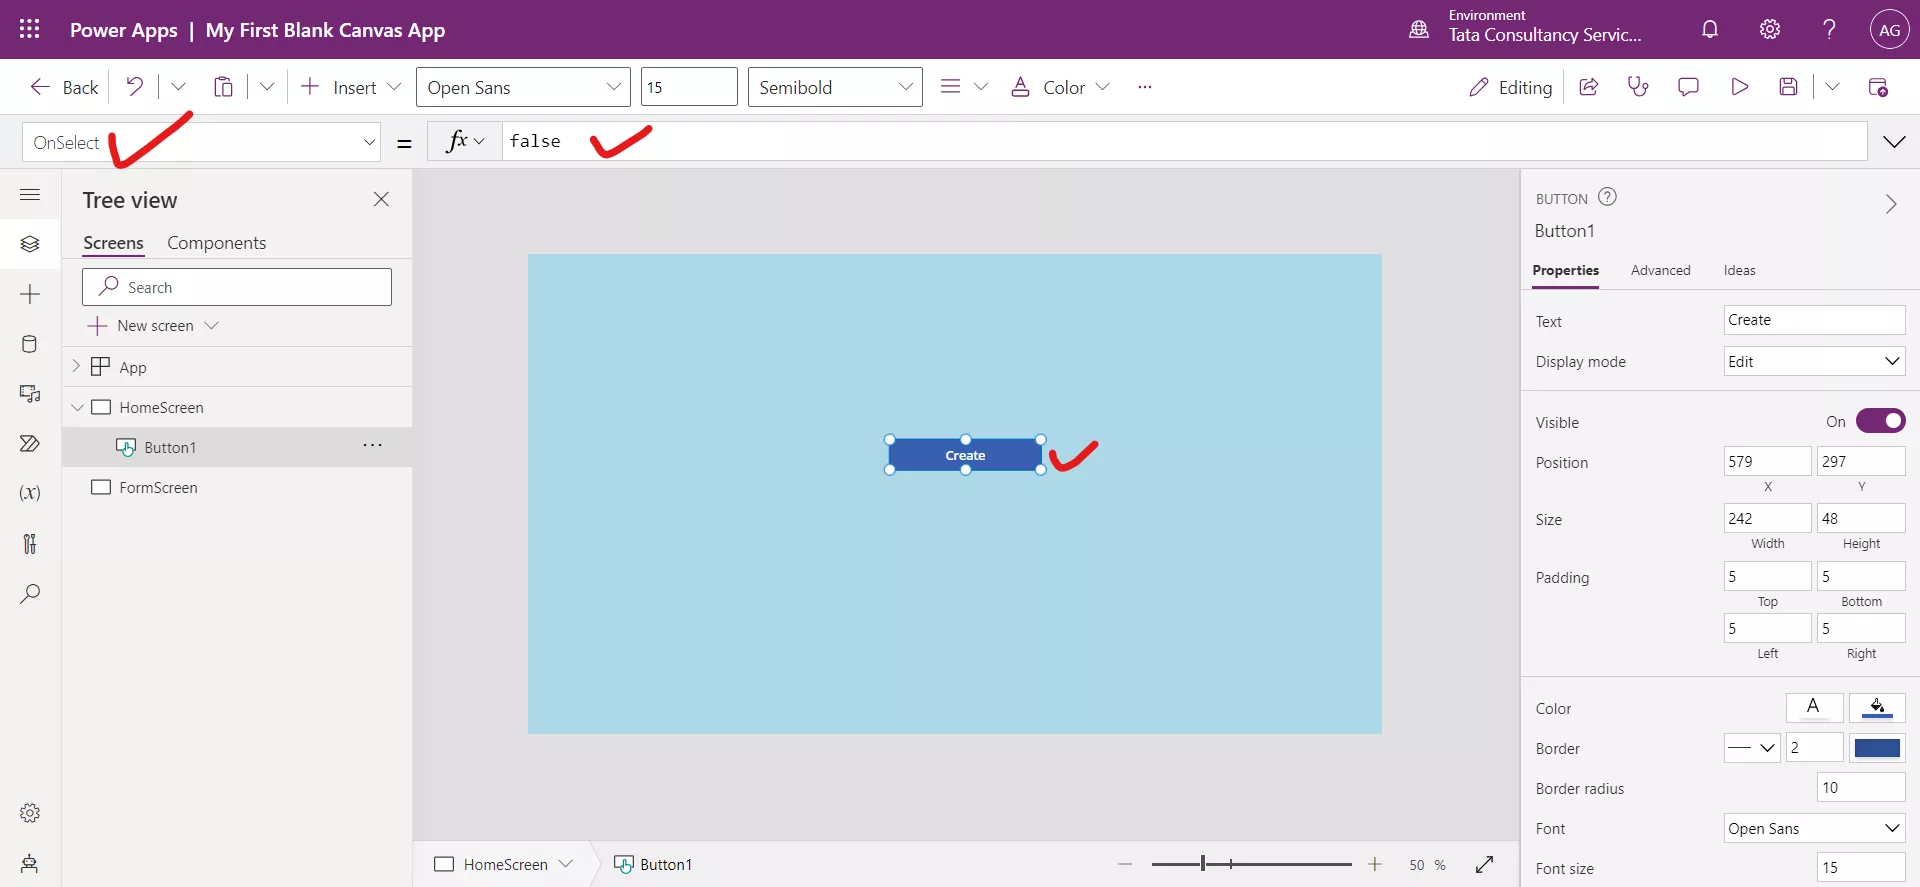
We can also change the name of the button control, if required, which we can see in the left-hand side in the Tree view.
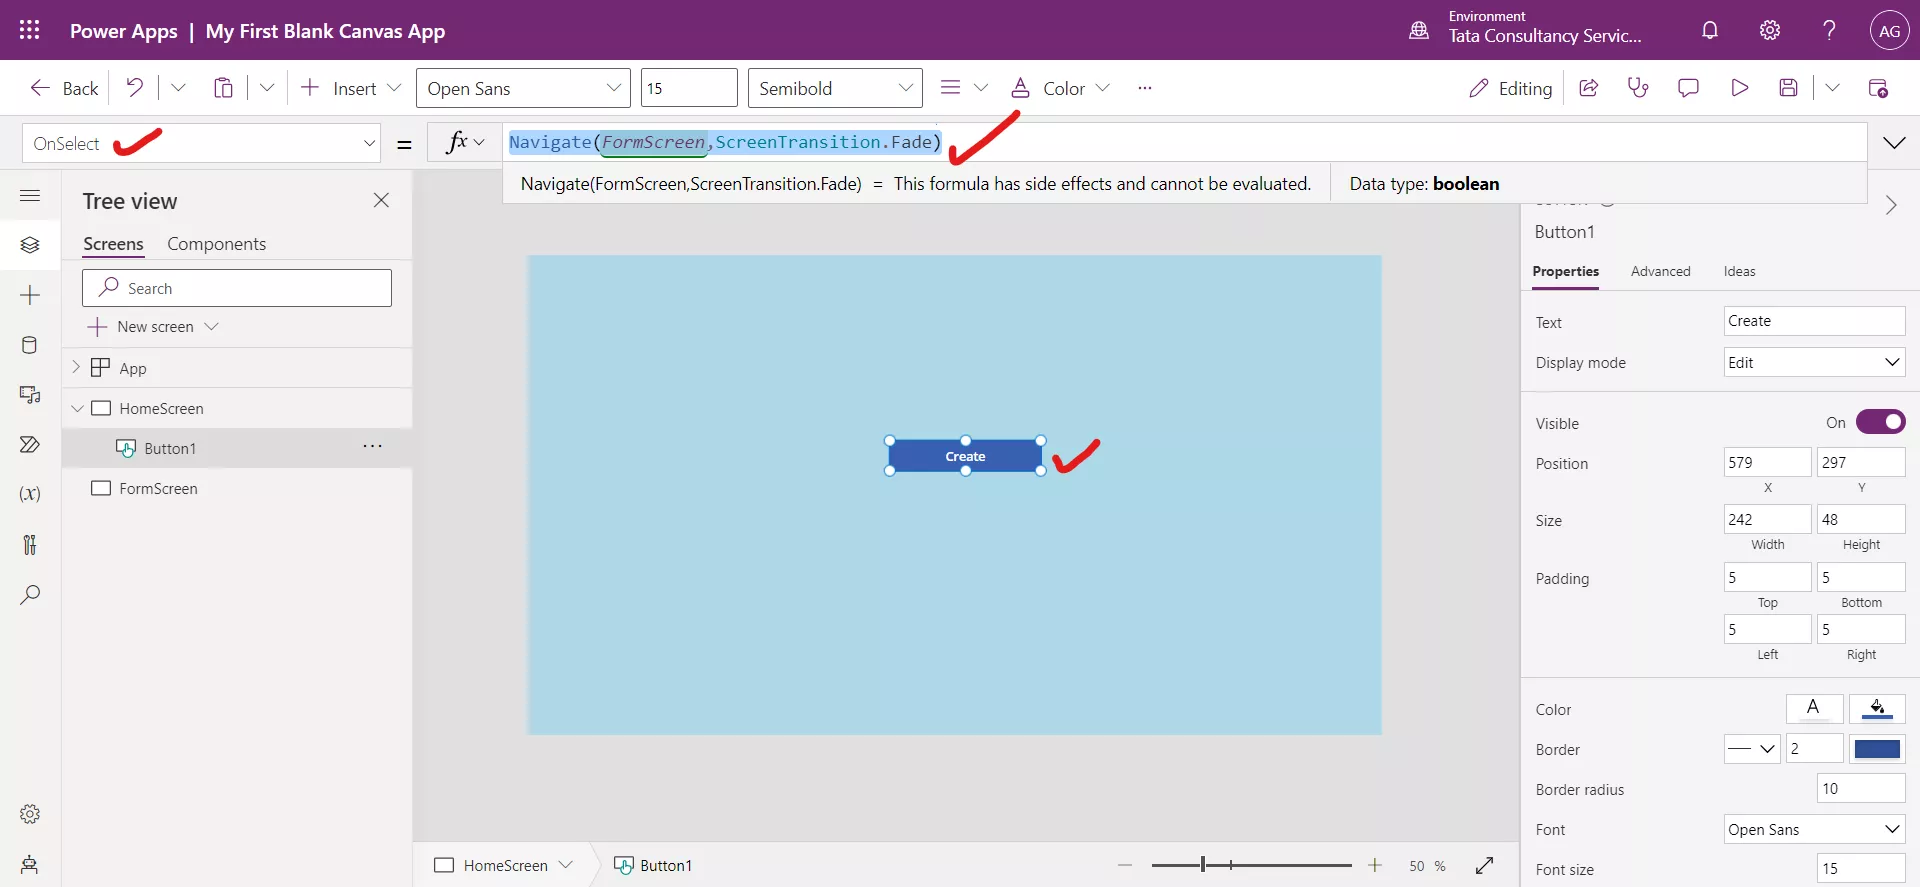
Step 11: The button can be used for navigation. The OnSelect event is by default false, which can be changed. Set the OnSelect property of the button control to the following formula.
Power Apps Formula
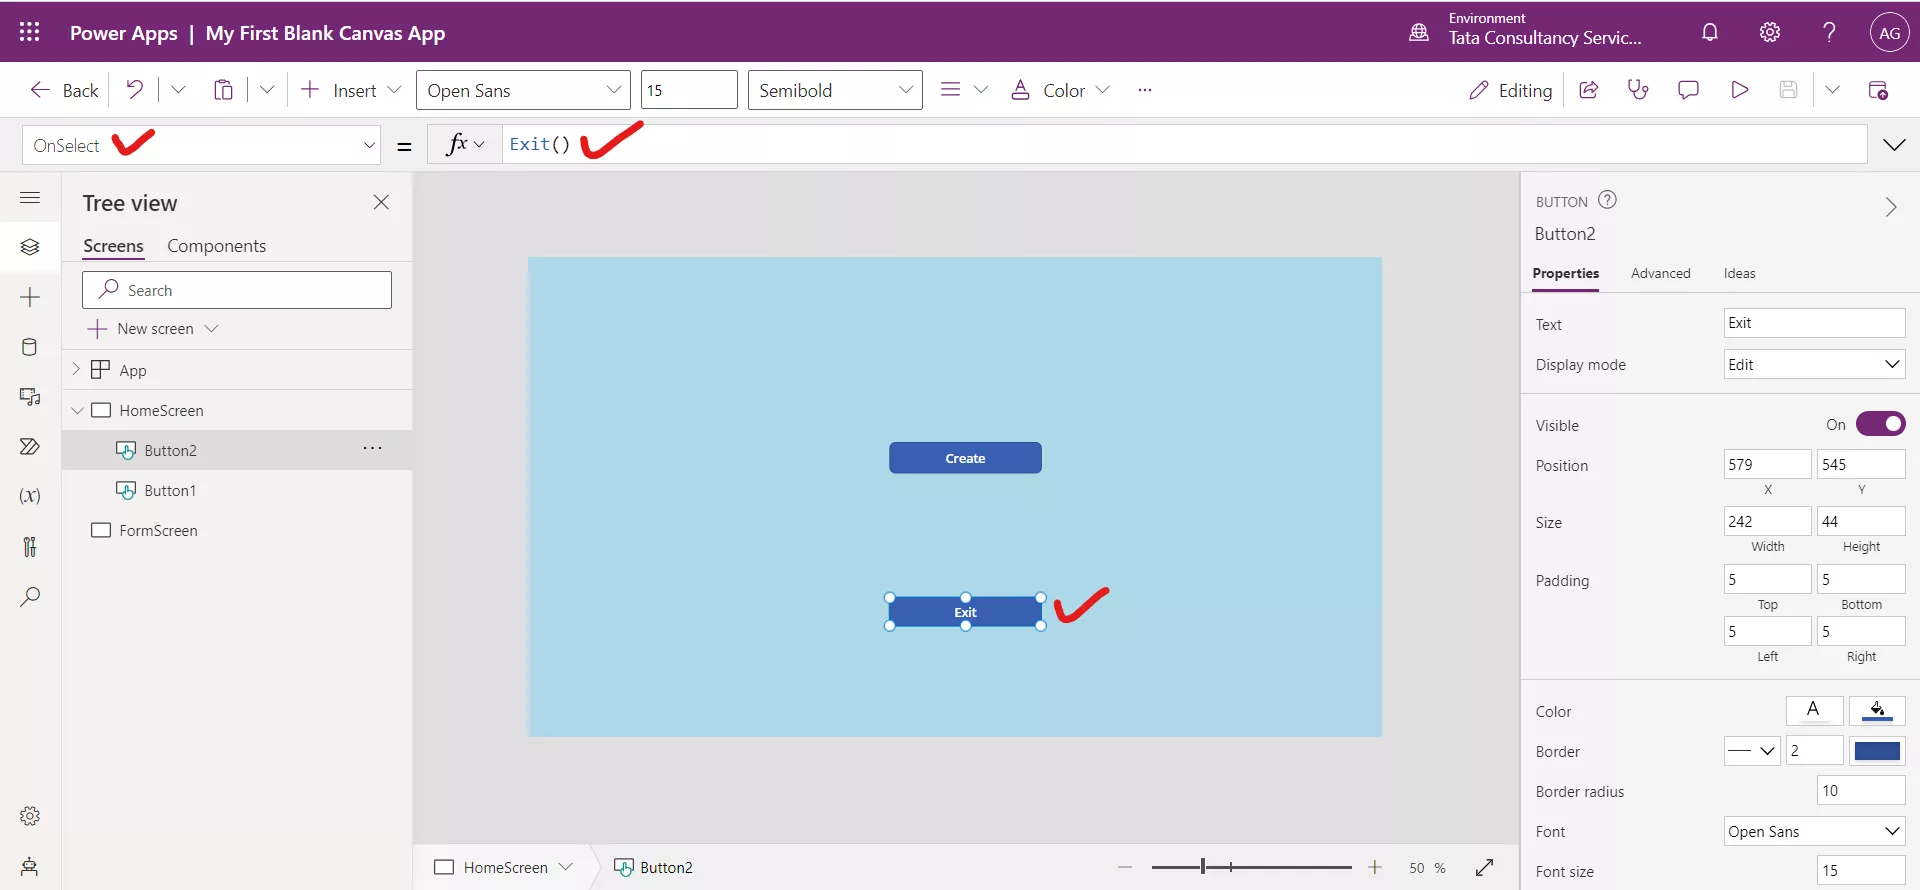
Step 12: Add another Button control and set its Text property to Exit. And set its OnSelect property to the Exit().
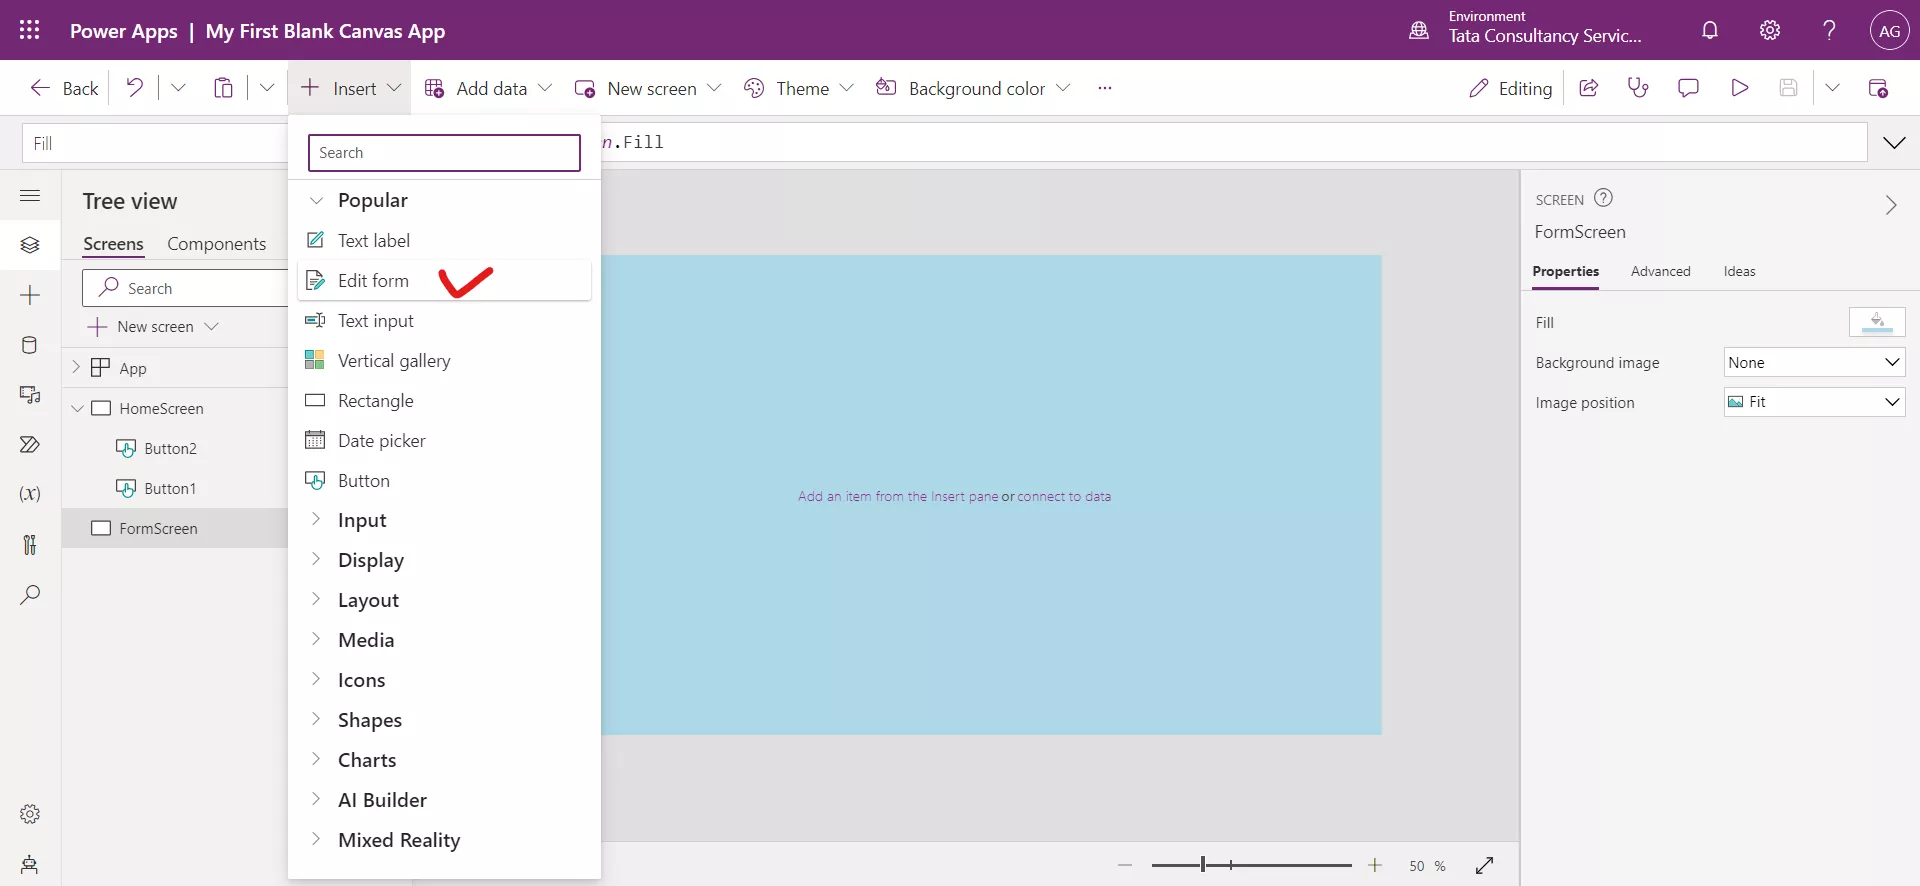
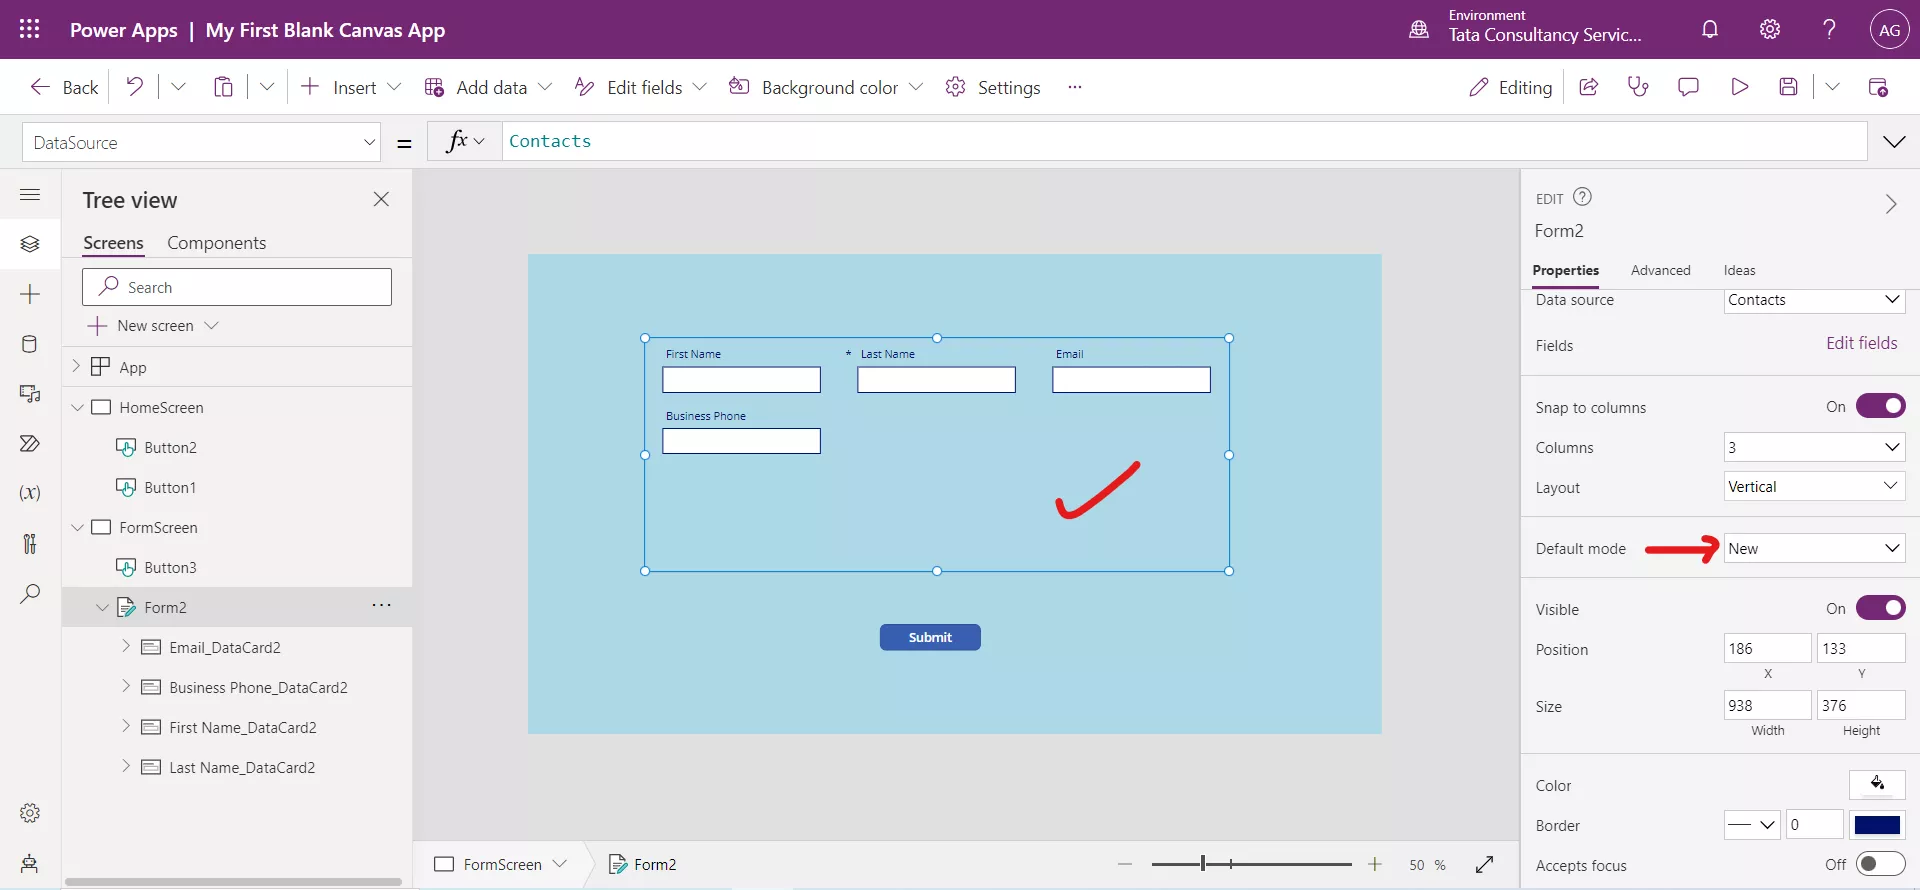
Step 13: Click on the FormScreen, add an Edit form control on the screen.
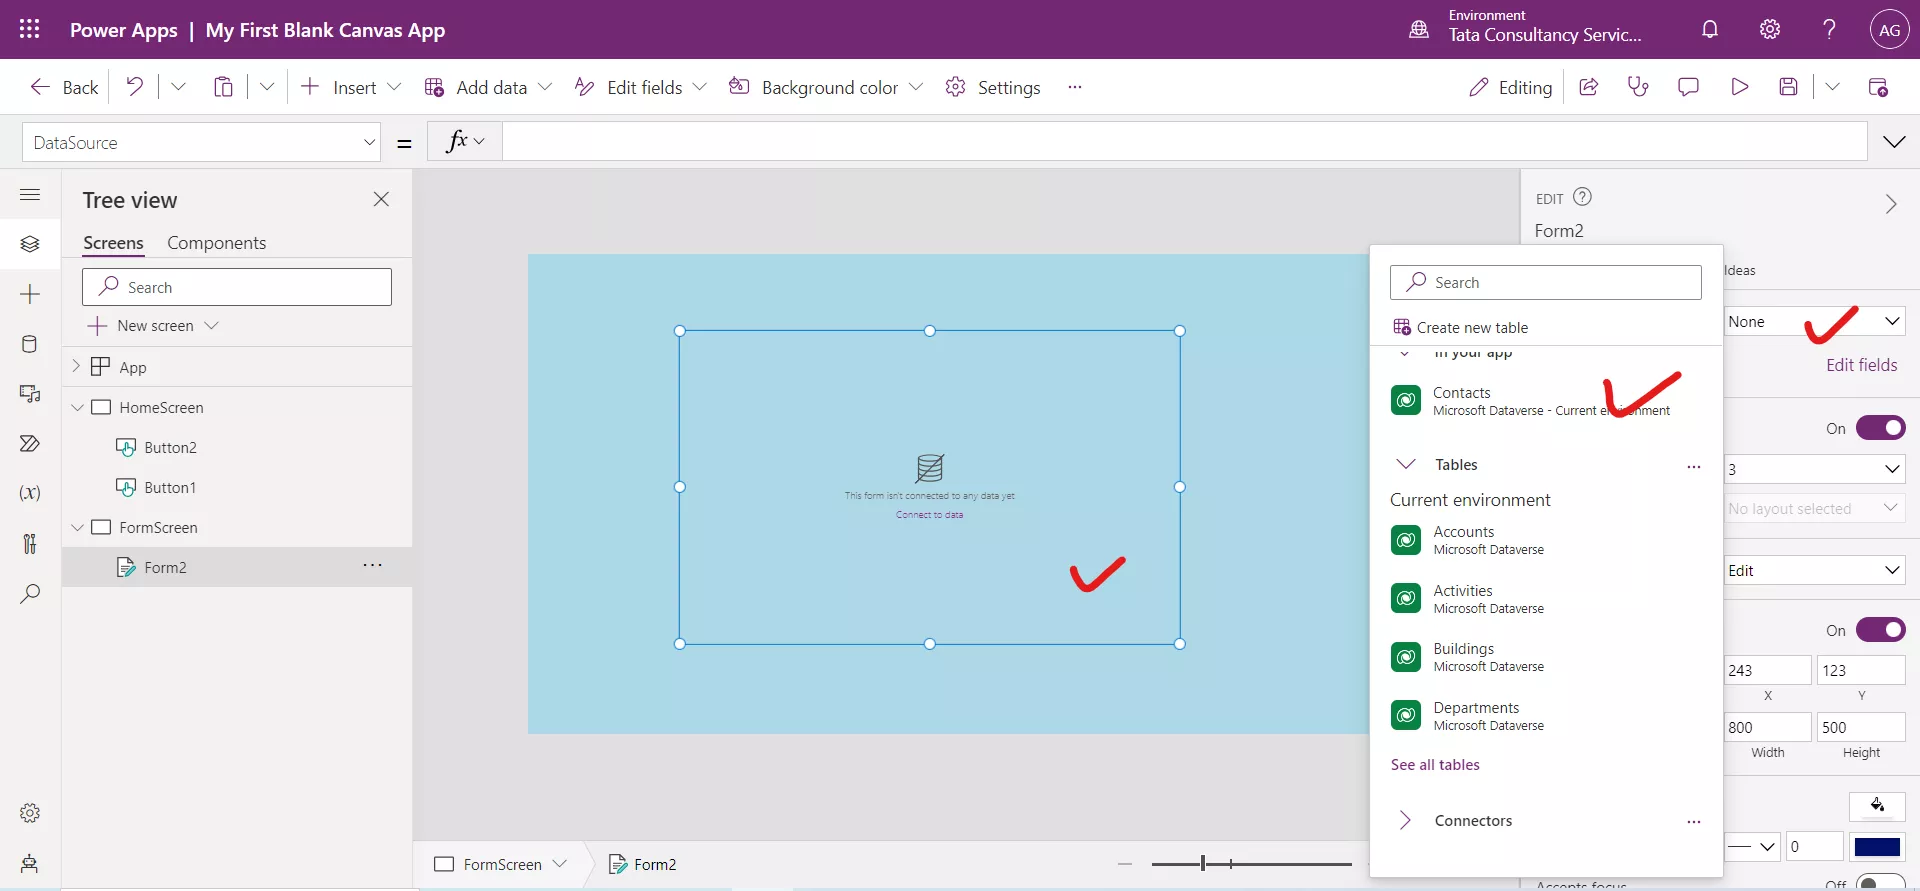
Step 14: Click on the Form control and add it to the dataverse datasource table Contacts.
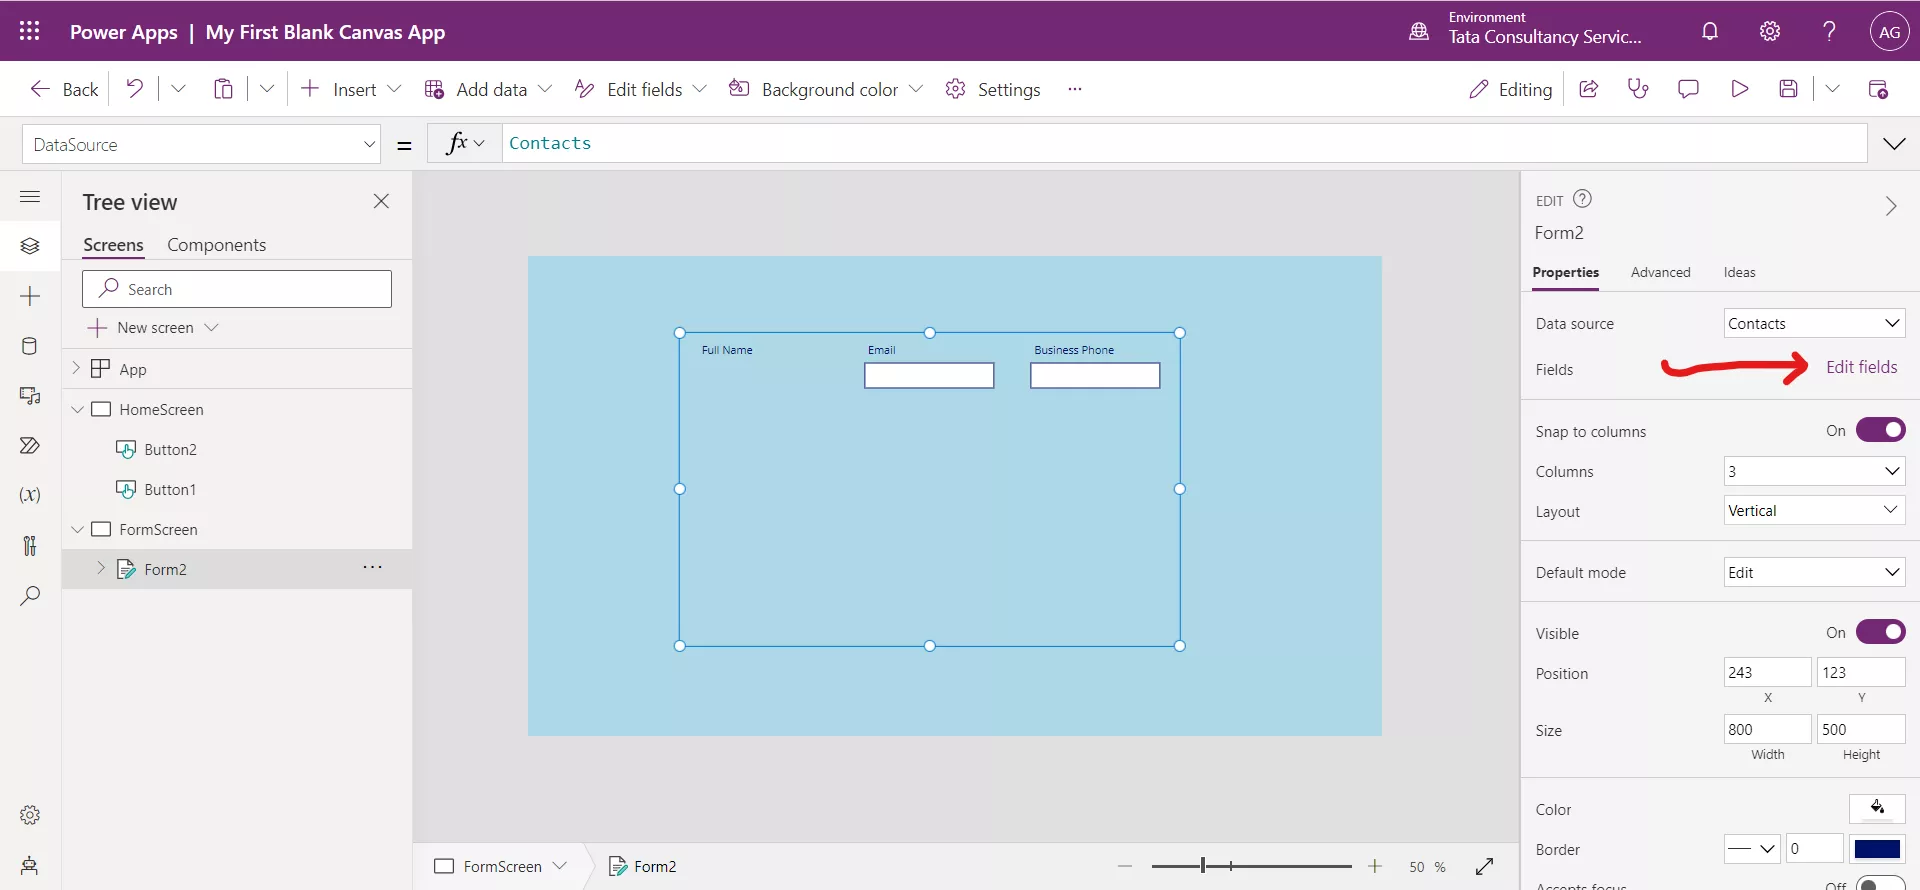
Step 15: To edit the fields click on Edit fields.
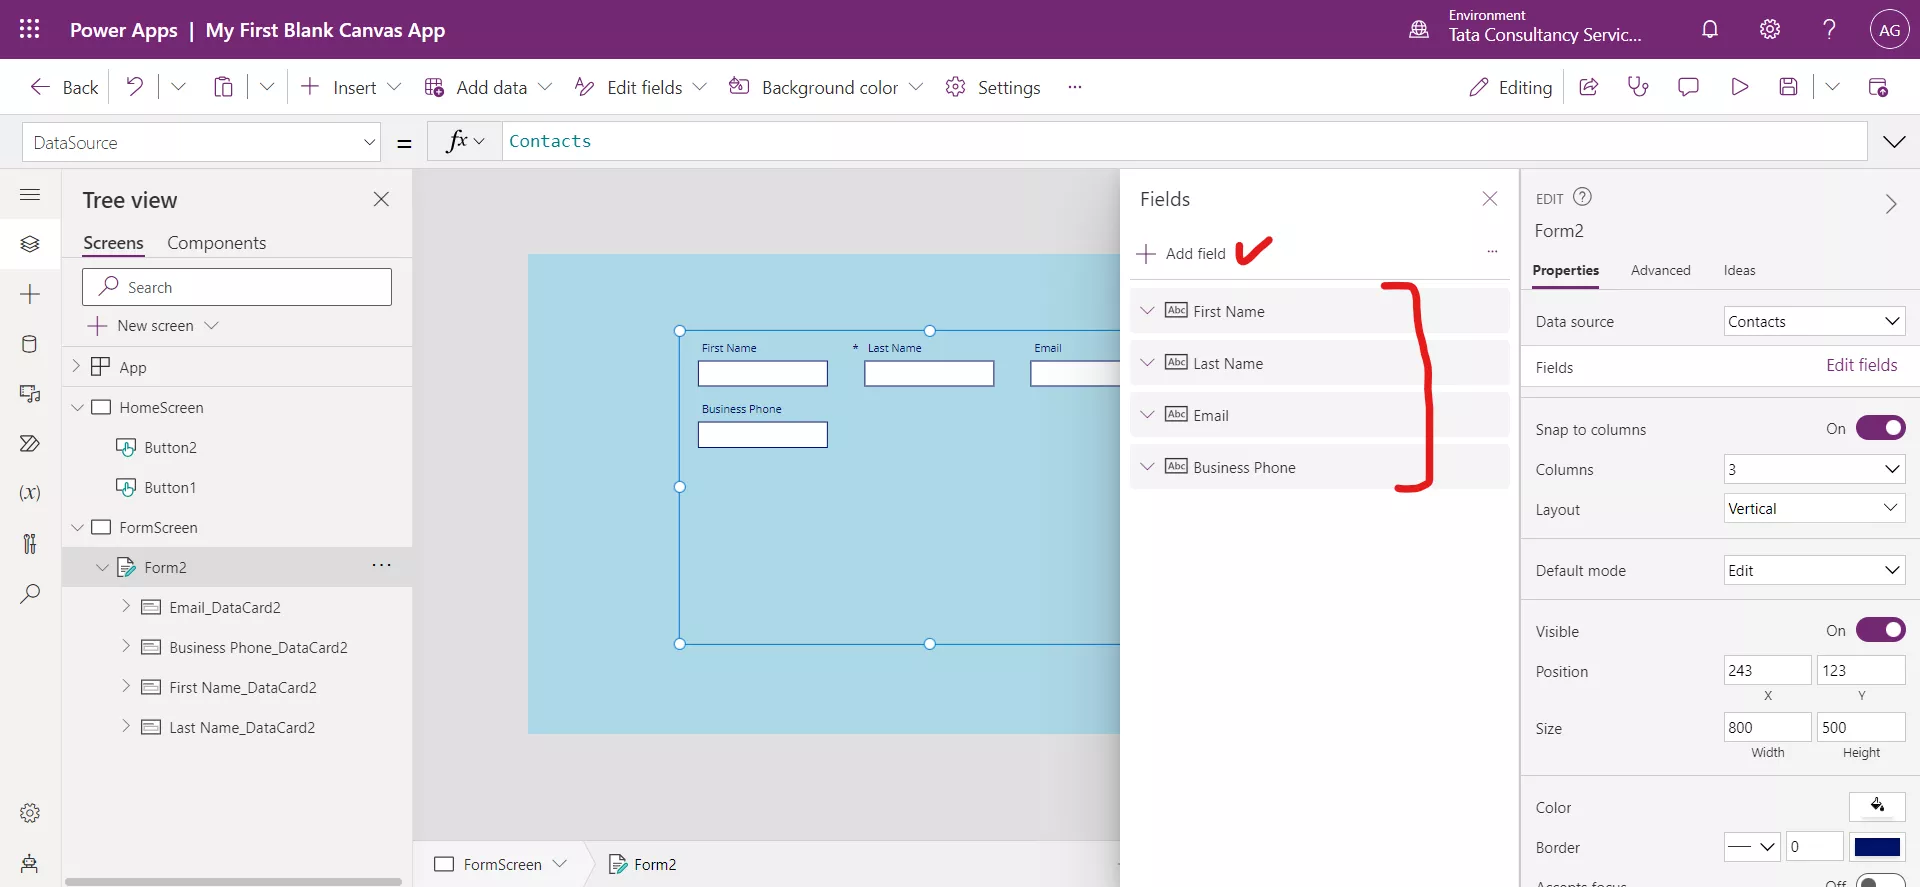
Add some fields and remove some fields from the form according to the requirement.
Set the Default mode to the form control to New.
Step 16: Add a button control and set its Text property to Submit and set its OnSelect property to the following formula.
Power Apps Formula
Here, Form2 is the name of the form control in Power Apps.
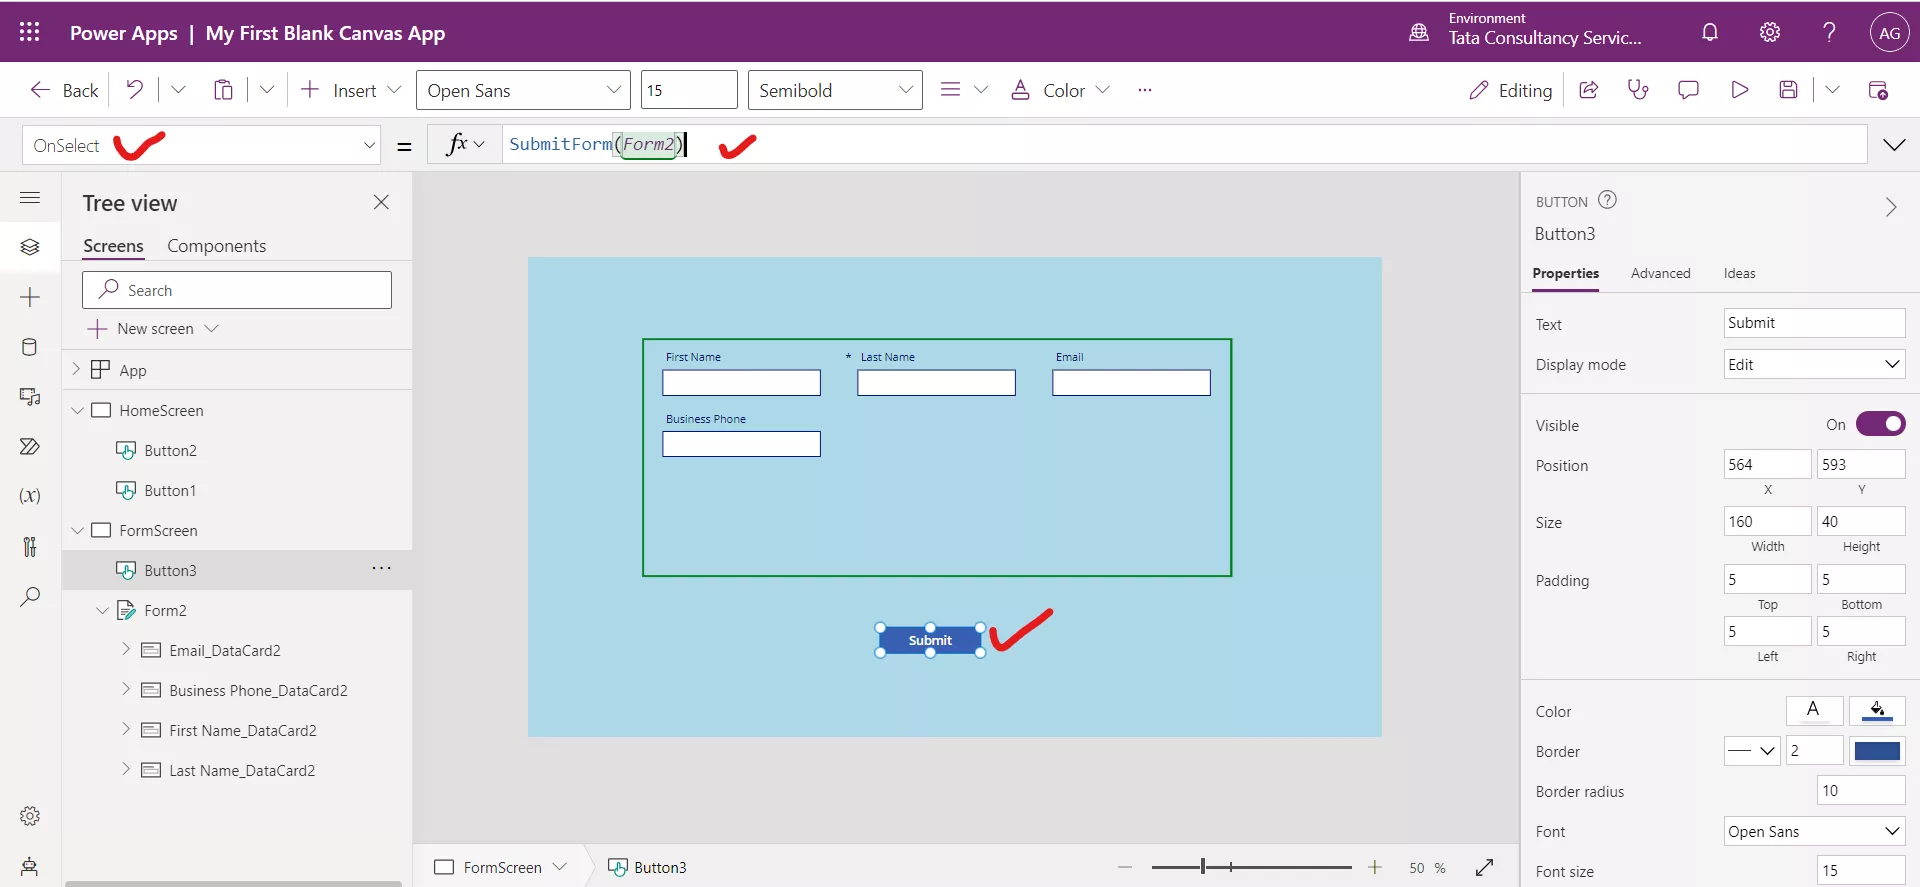
Step 17: Our form is ready to add the record in the dataverse. To add the data in the form, write the data in the form and click on the Submit button.
Step 18: Our app is ready, click on the HomeScreen and click on the preview icon to test the functionality of the app. To publish the app, click on the Publish icon.
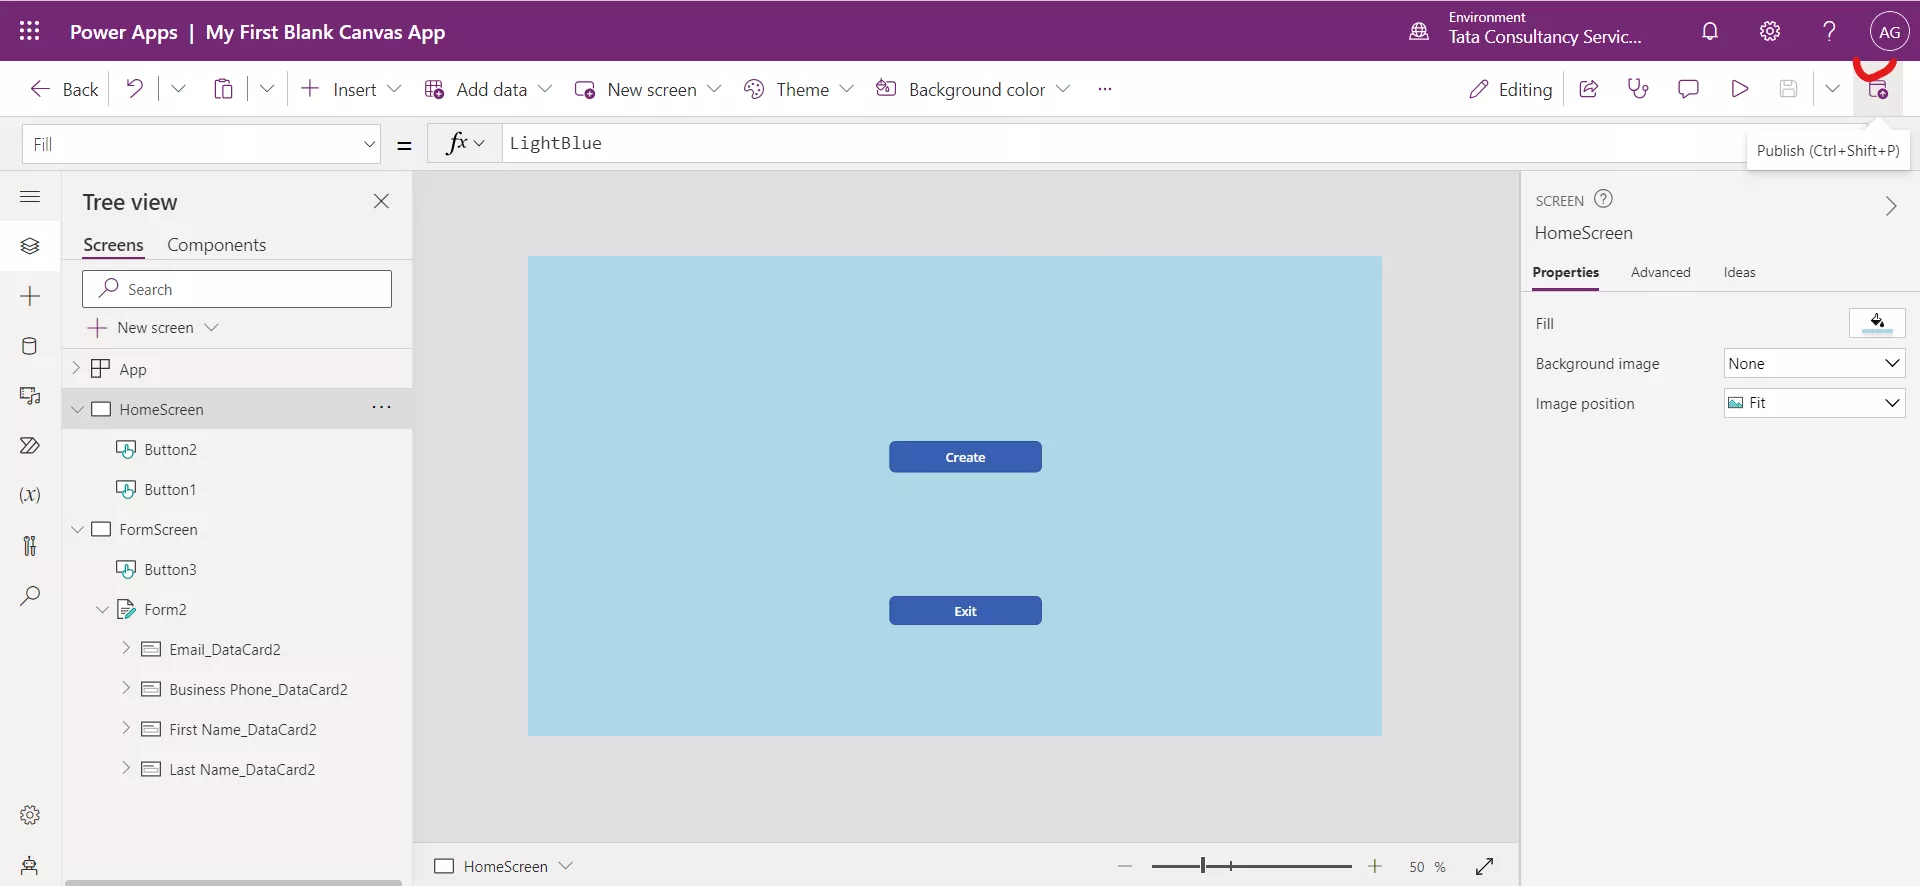
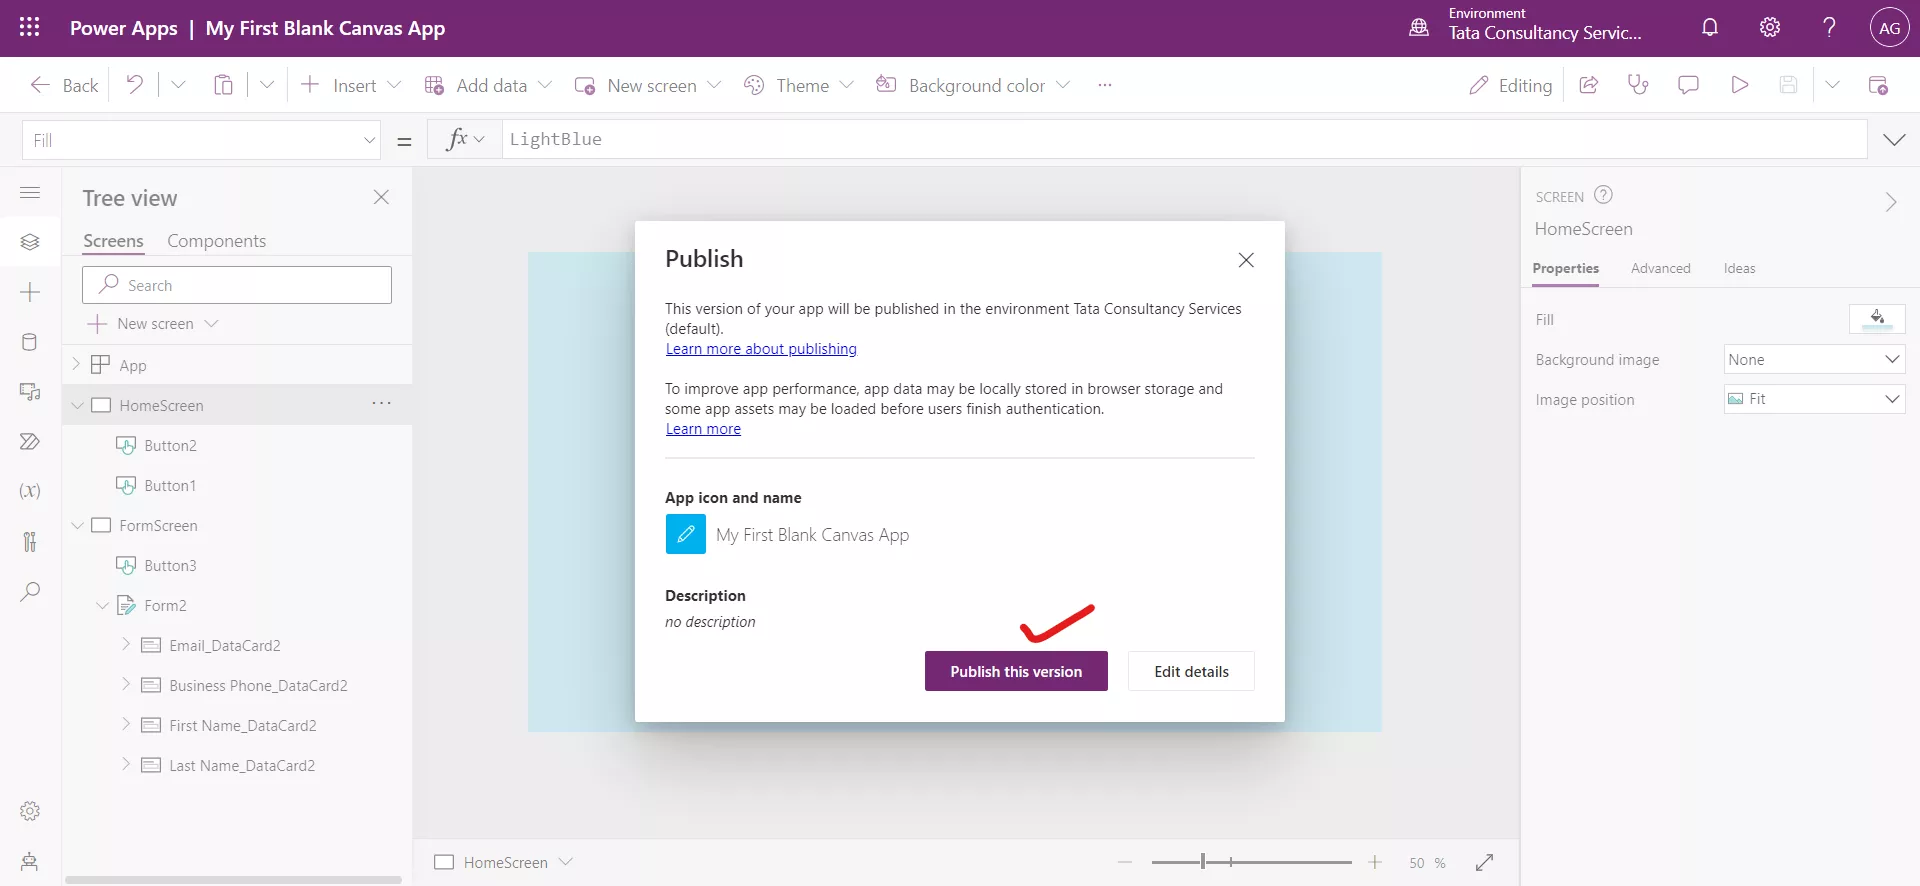
And then click on Publish this version.
Note: To combine more than one action in a formula, use the semicolon (;). The actions are performed in the order in which they appear in the formula. The next function will not start until the previous function has completed. If an error occurs, subsequent functions will not process.