Dataflow in Power BI Service
Dataflows in Power BI is used to store and perform the ETL operations on the data which can come from a variety of sources. The transformed output of the dataflows can be used to create the multiple reports so there is no need to do the transformation in every Power BI report. We still can further transform the data in our Power BI reports according to our needs.
Note: • Dataflows can only be created in shared workspaces.
• Dataflows contain tables, but don't contain relationships.
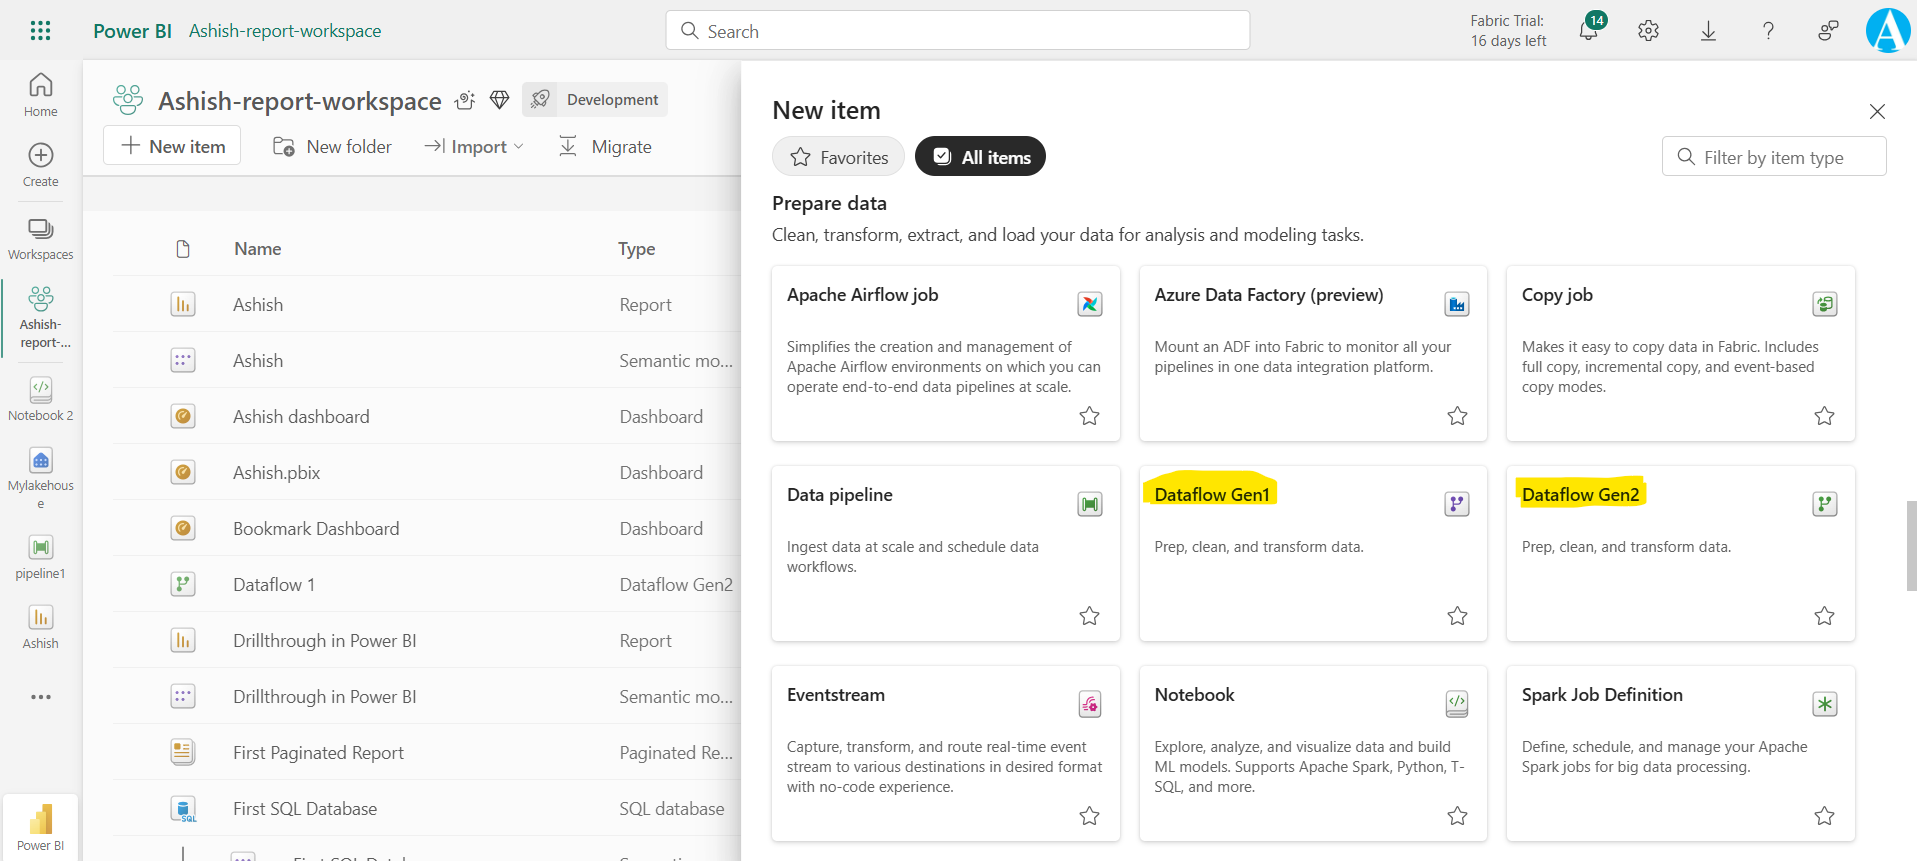
To create a dataflow, follow the following steps: Step 1: Go to the workspace, select + New item and then Dataflow Gen1 or Dataflow Gen2.
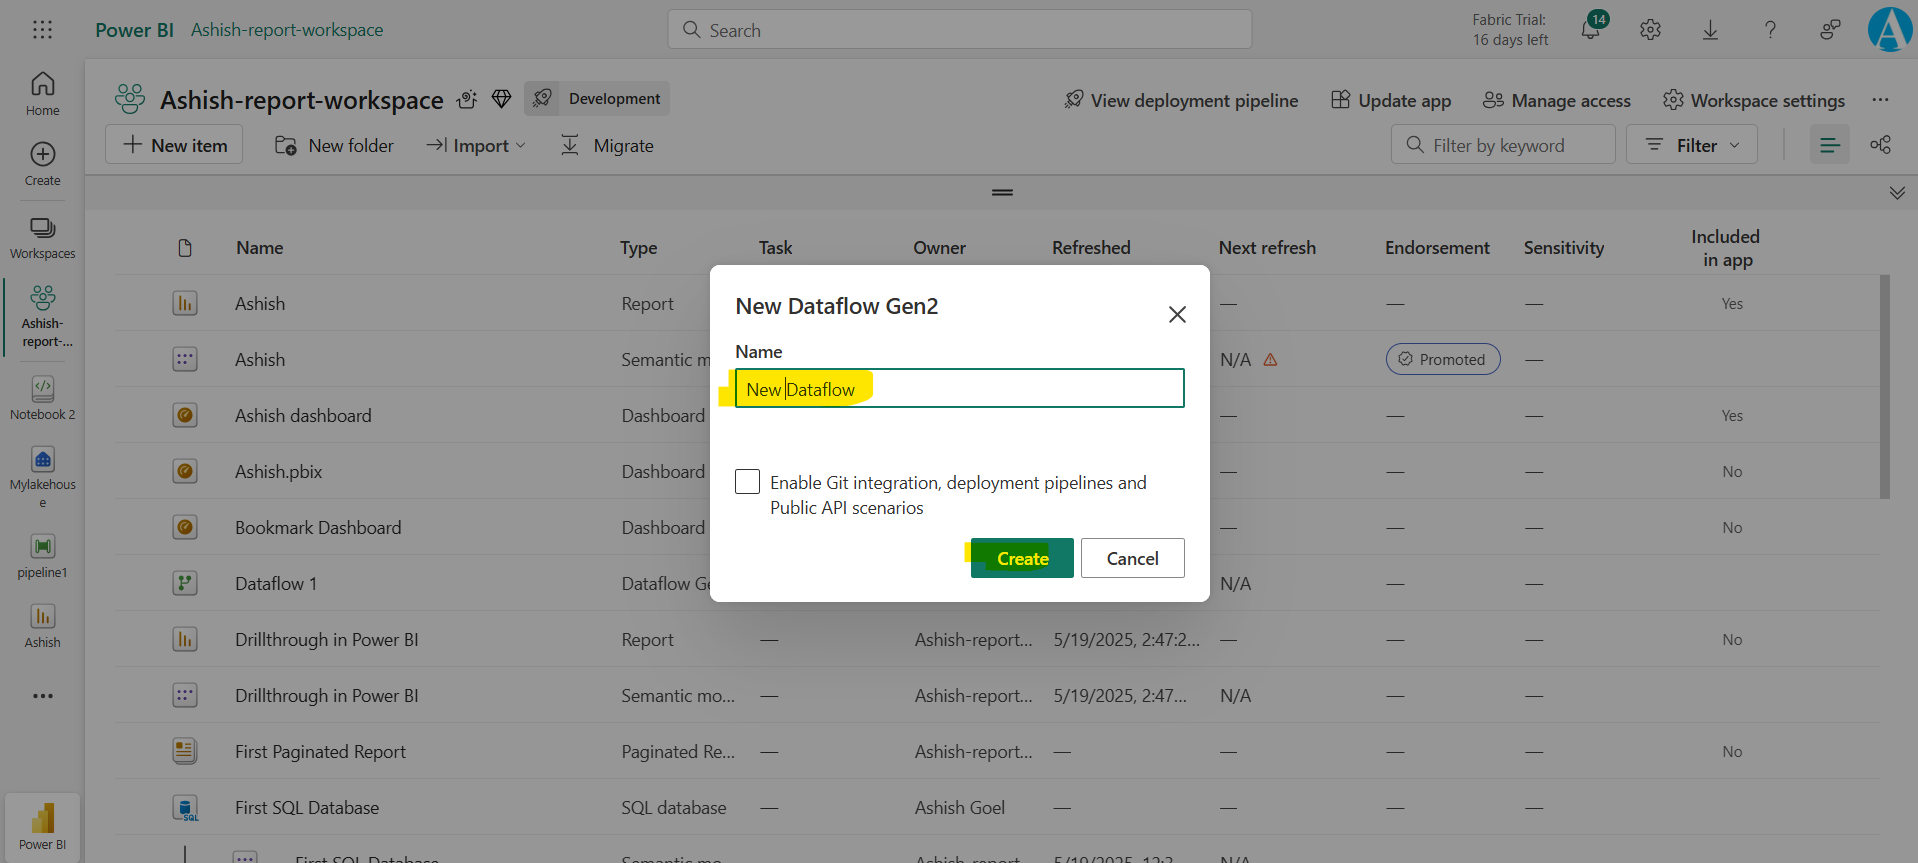
Step 2: Specify the name of the dataflow and create it.
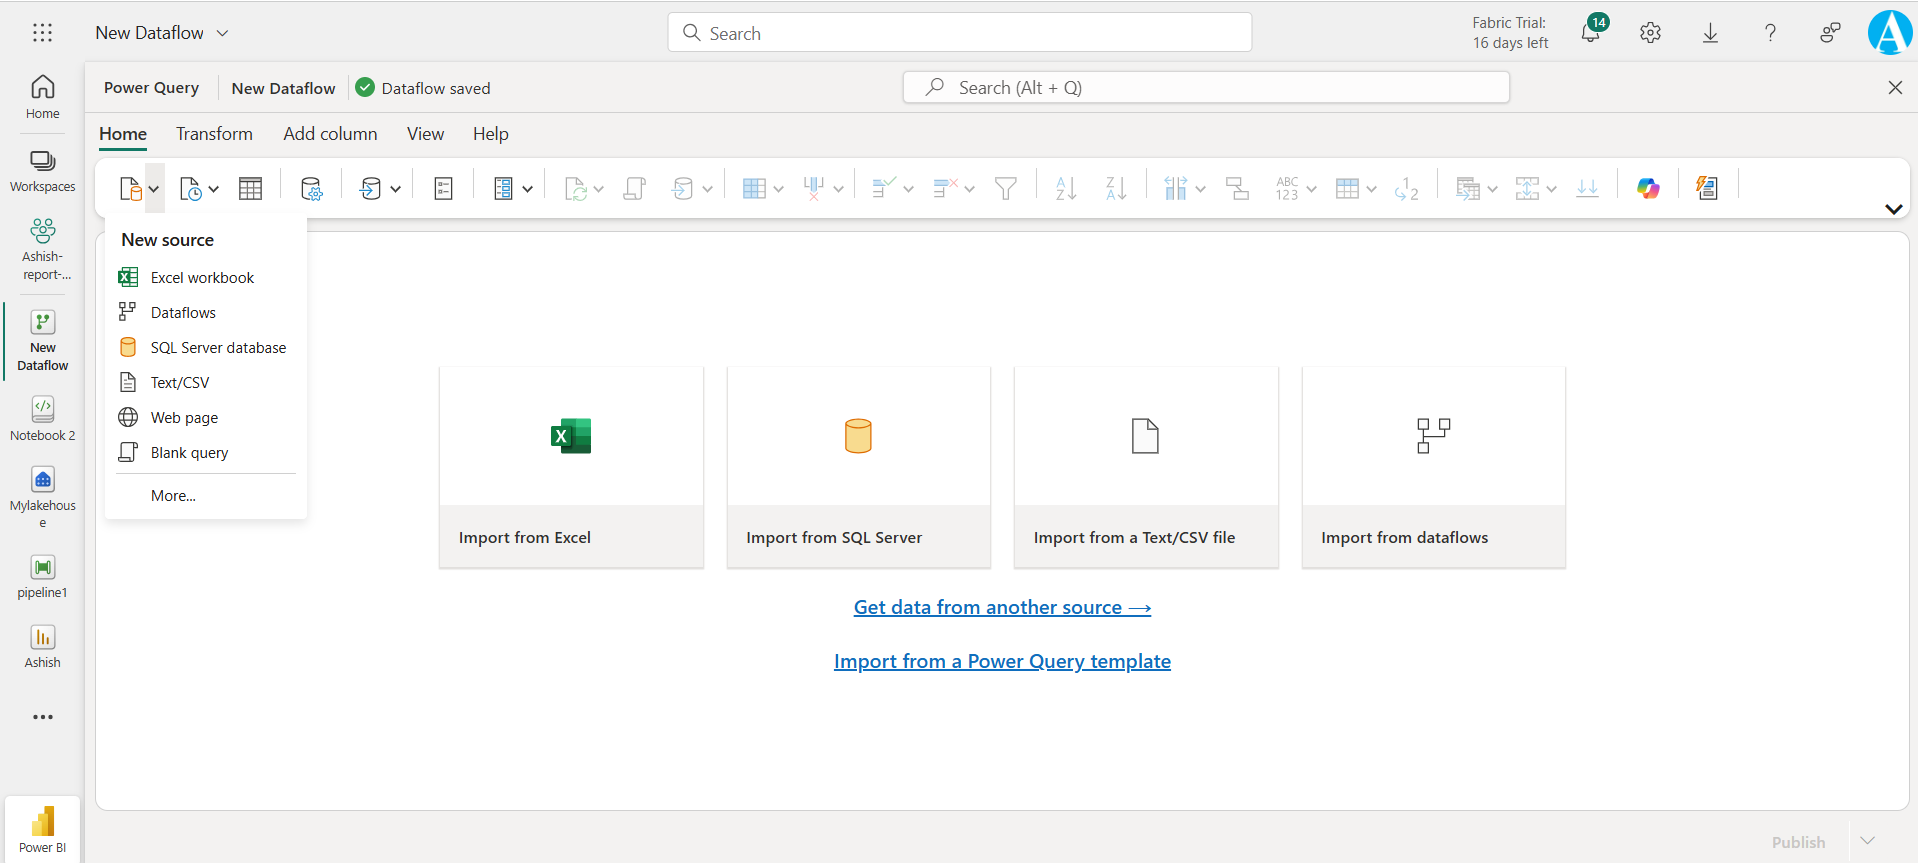
Step 3: We can add the table from excel, from other dataflows, SharePoint and other data sources. It is similar to power query editor in Power BI desktop.
Step 4: After loading the data, we can transform it and then click on Publish.
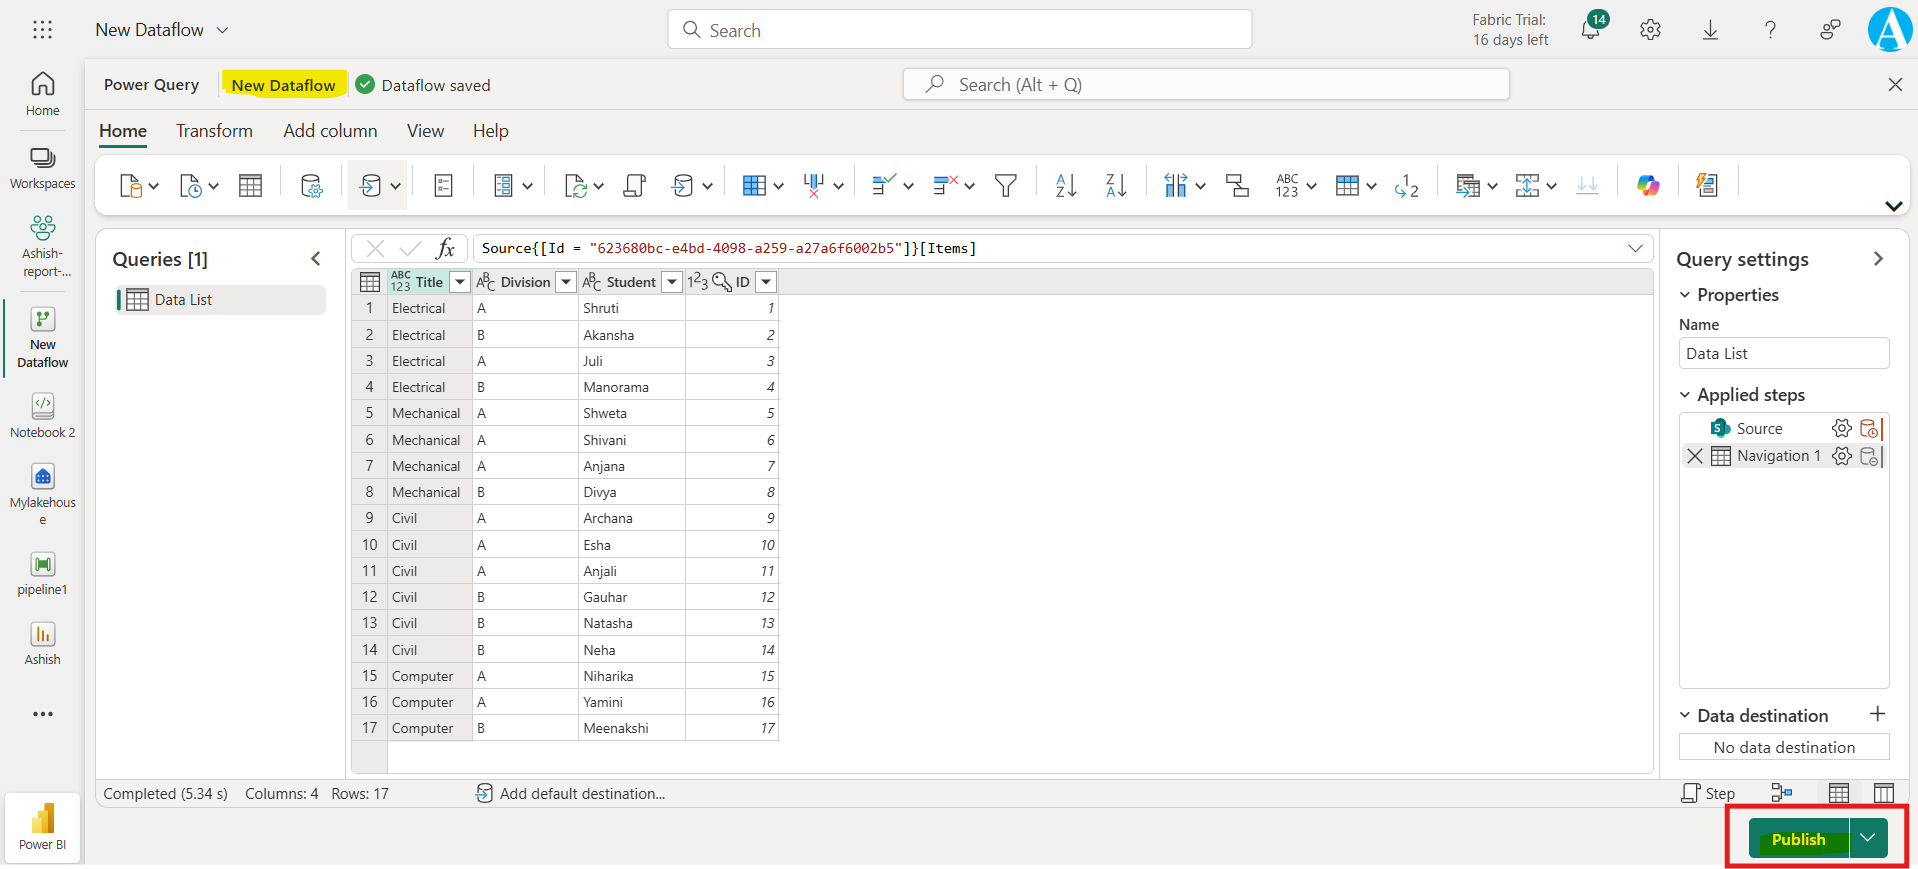
Step 5: After clicking on Publish it will redirect us to workspace, where we can see our dataflow.
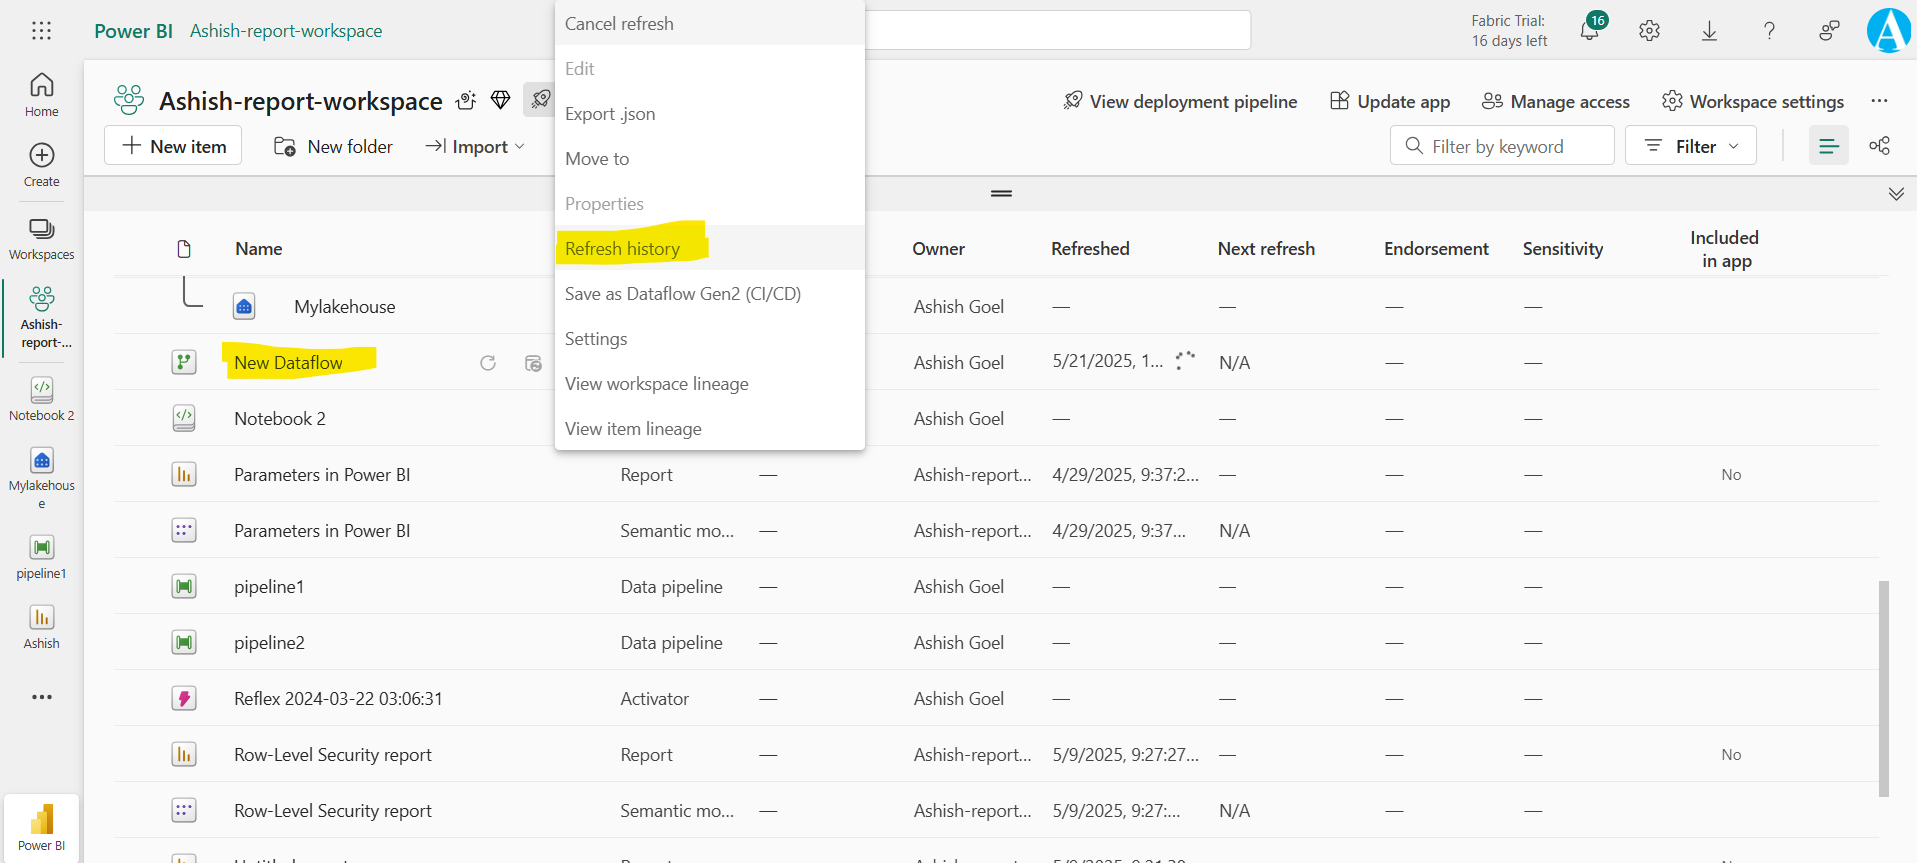
We can see the Refresh history by clicking on the more options (…) of the dataflow and then click on Refresh history.
To configure a scheduled refresh of the dataflow, click on the Settings option of the dataflow.
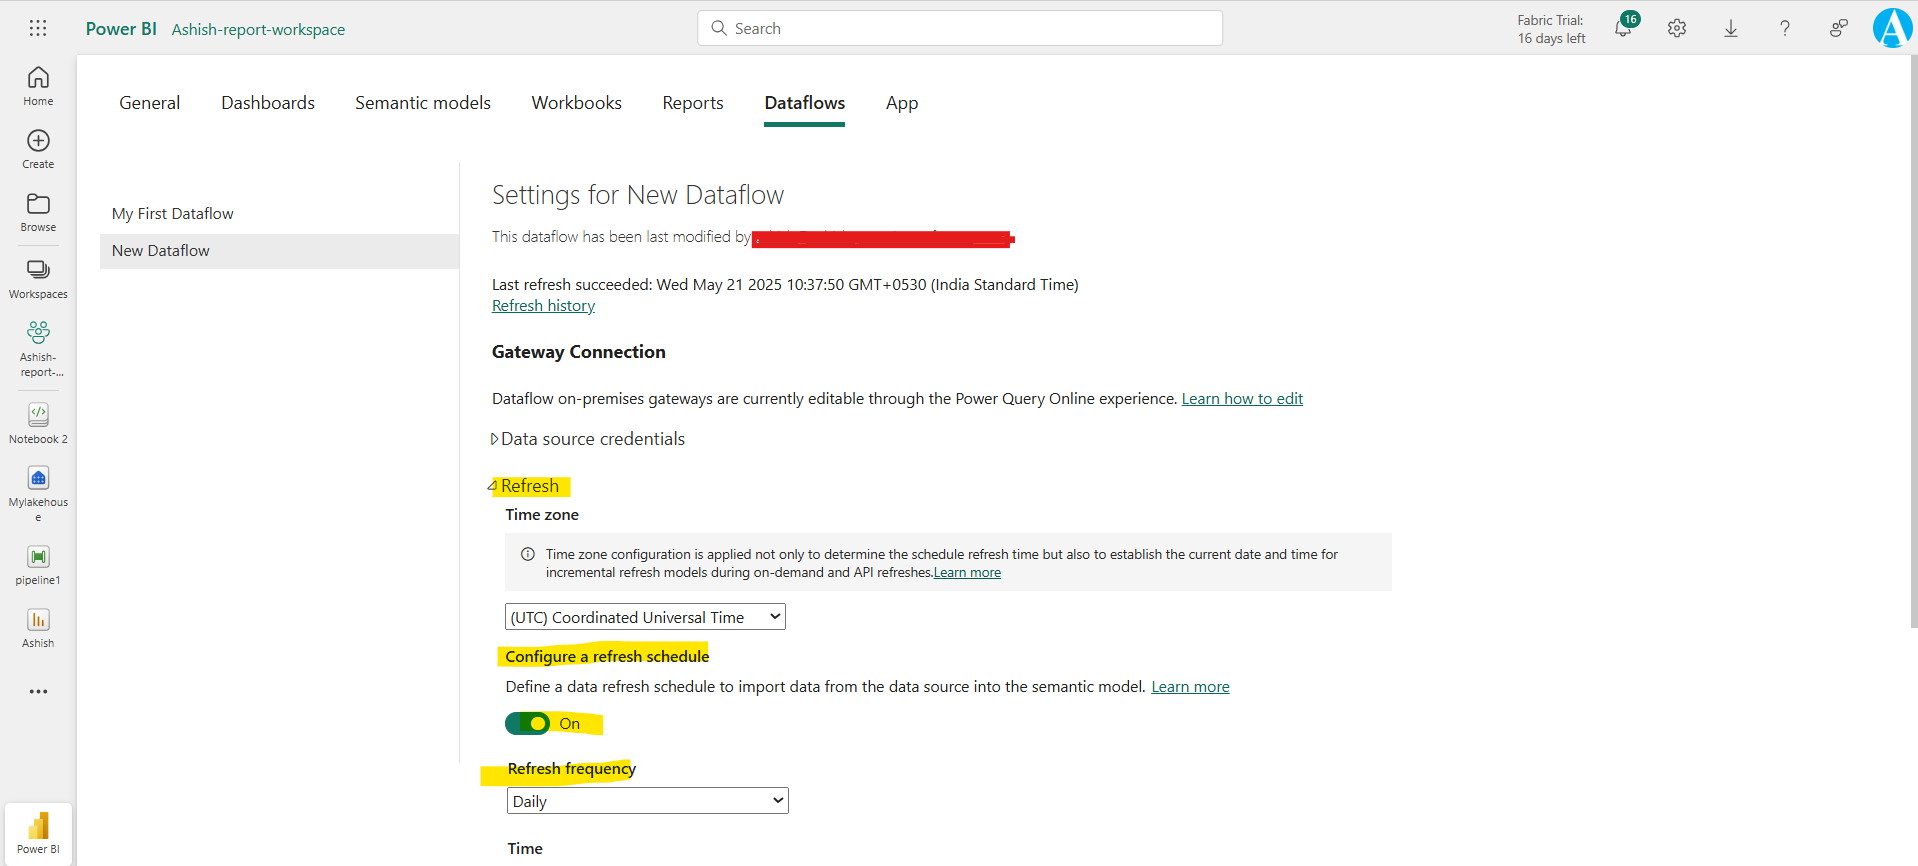
Here we can take ownership of a dataflow, edit the data source credentials, schedule a refresh, and endorse content.
By configuring the schedule refresh, we keep our Power BI reports up to date by automatically refreshing dataflows based on a given frequency and time of day.
Access to dataflow To give access to dataflows in other workspaces to use the output of a dataflow in a workspace, we just need to give them Viewer access in the workspace.
Note: There are no individual permissions for dataflows.
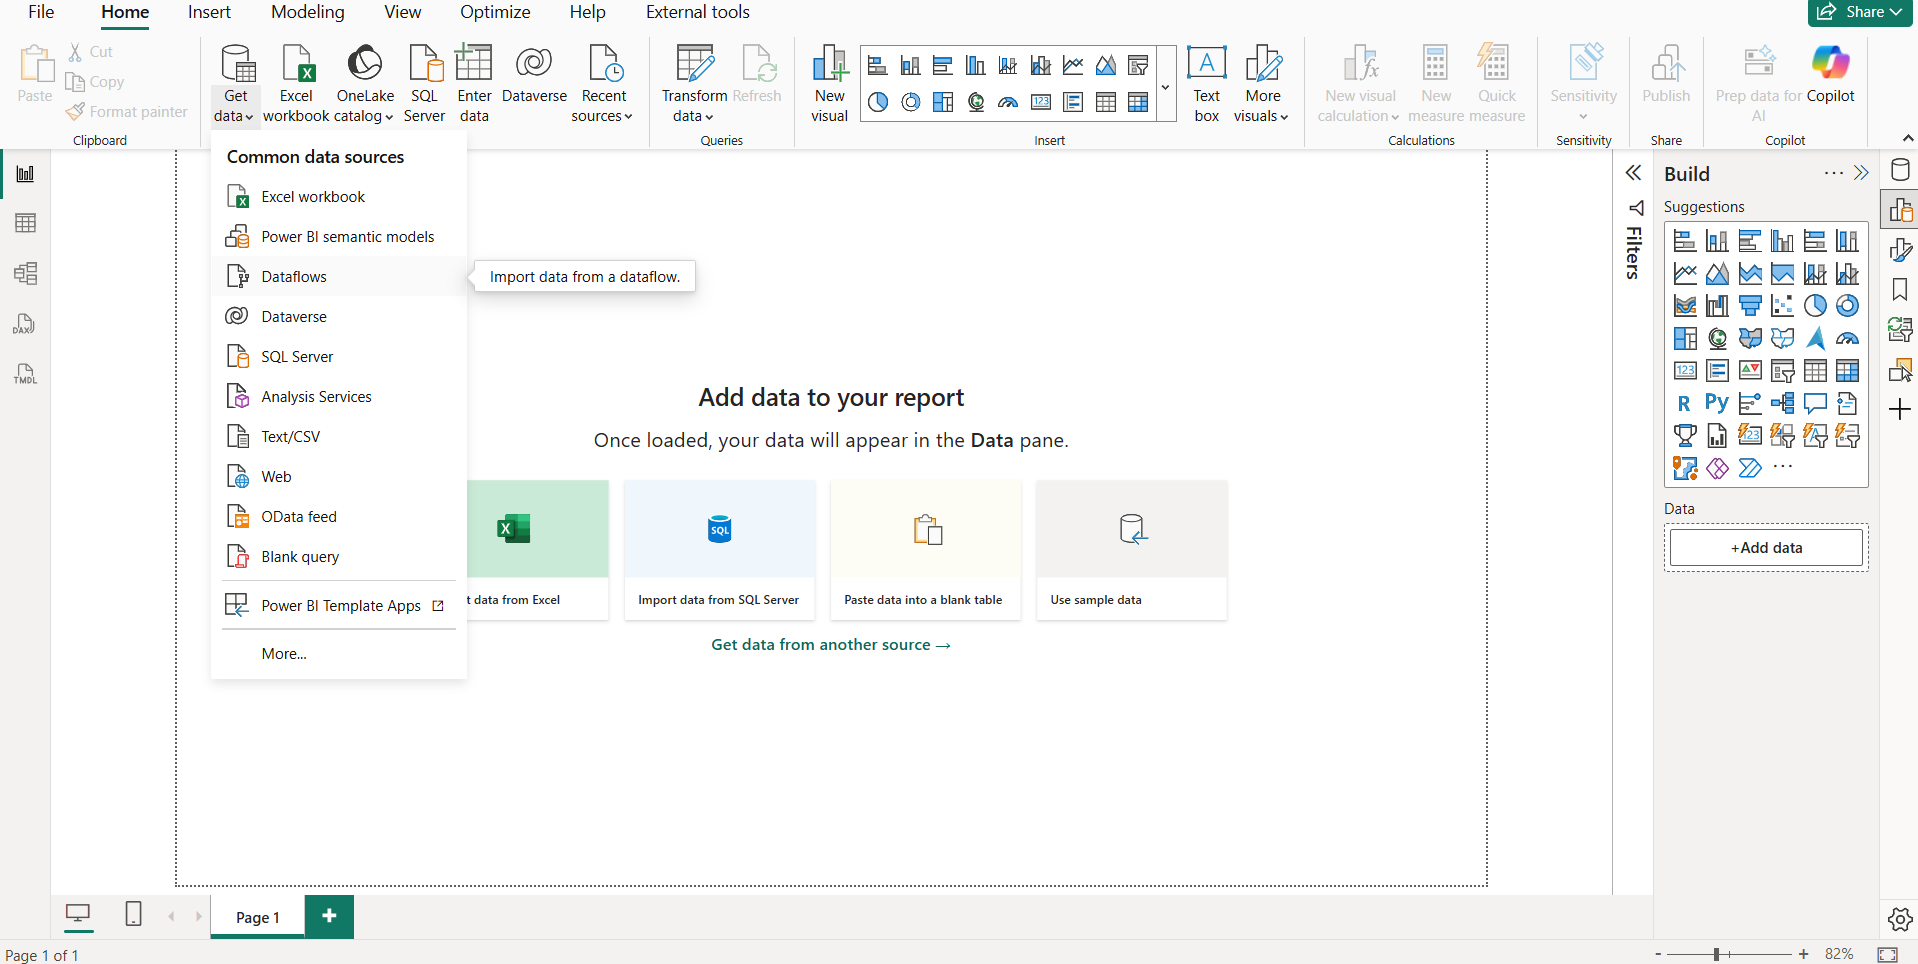
Connect Dataflow in Power BI Desktop We can connect to a dataflow in Power BI desktop using the Dataflows connector in the Get Data window and load it as a dataset in Power BI Desktop.
Here, Ashish-report-workspace is the workspace name, and New Dataflow is the dataflow name, and Data List is the name of the table.
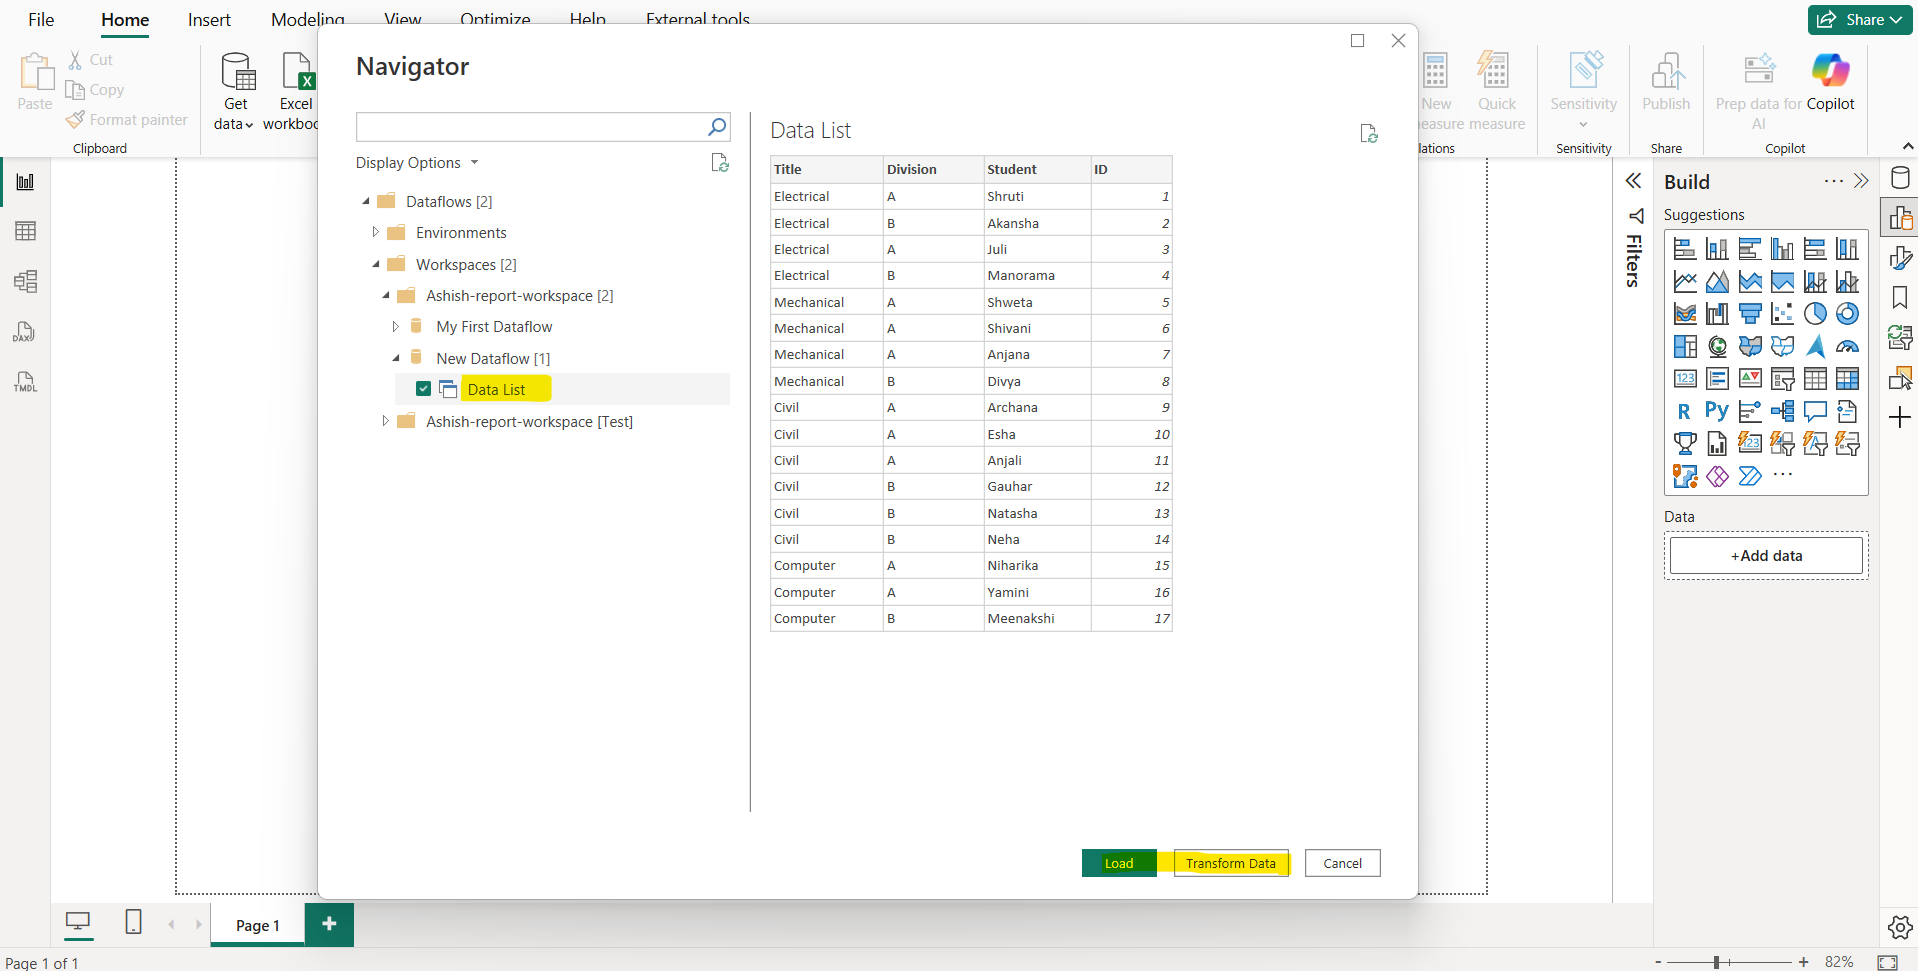
Click on Load or Transform Data as per requirement.