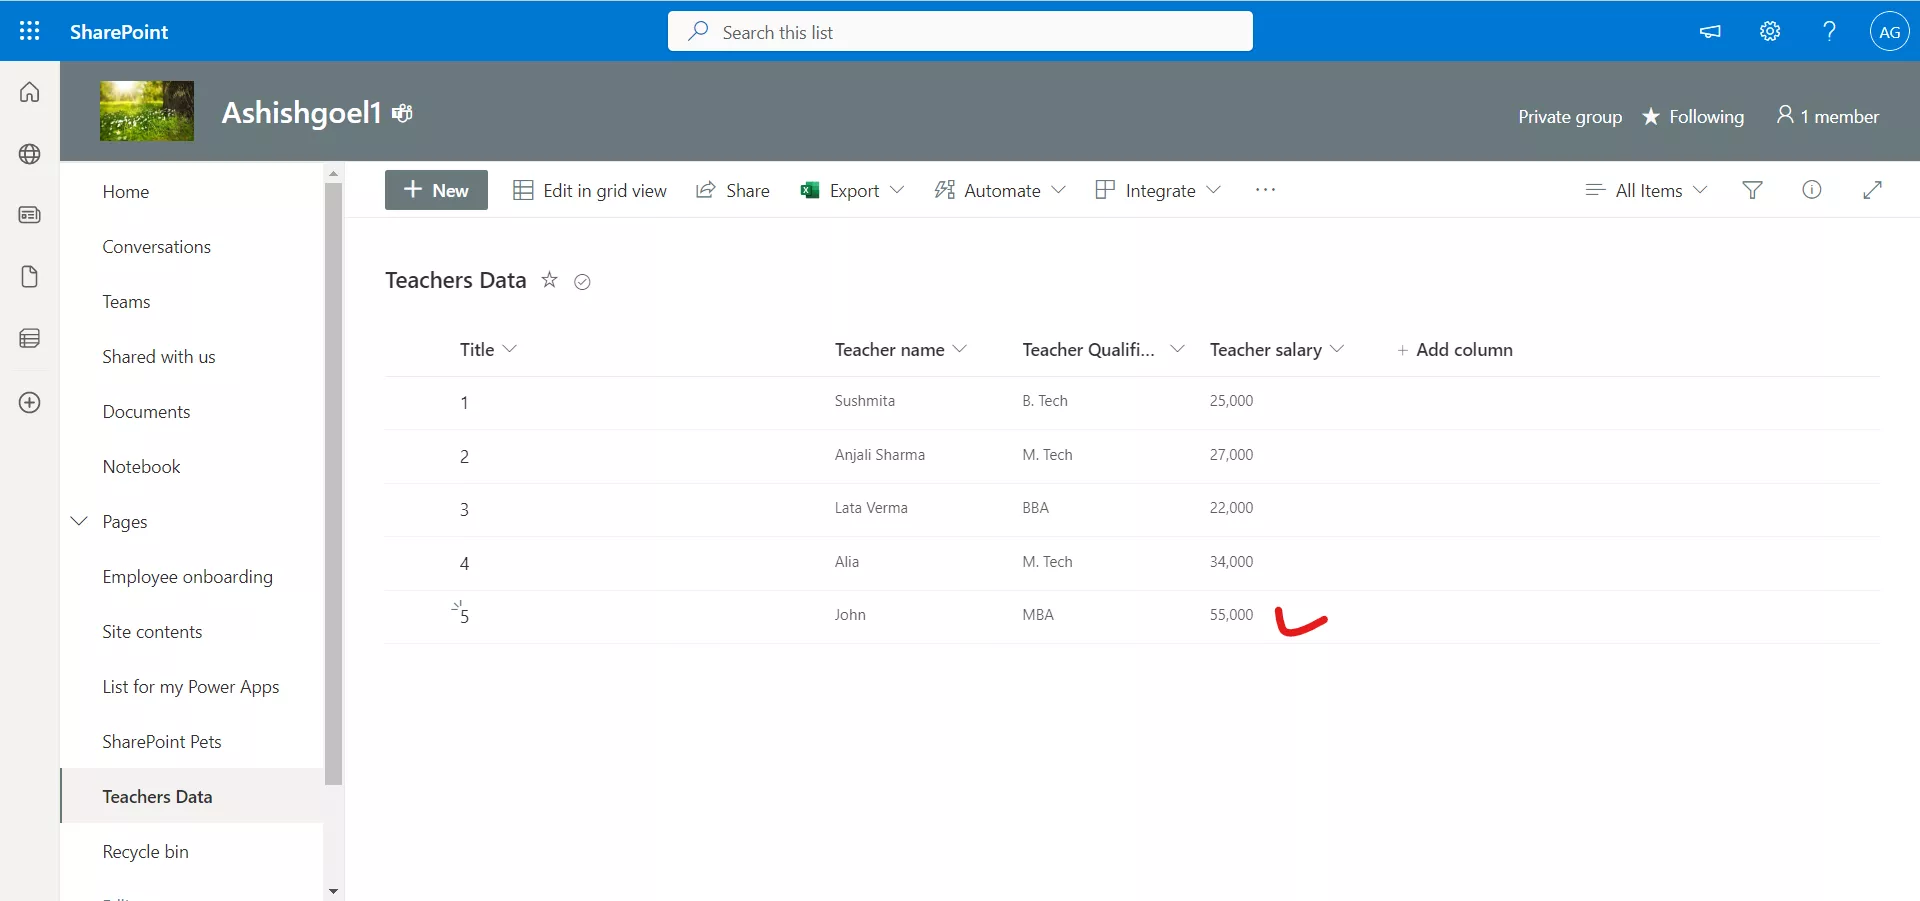
Create item in Sharepoint list
We can create an item in a SharePoint list using Power Automate by following these steps:
Step 1: Open Power Automate and click on "Create" in the upper right corner.
Step 2: Select "Instant cloud flow" as the flow's trigger. This will allow you to manually trigger the flow whenever you need to create an item in the SharePoint list.
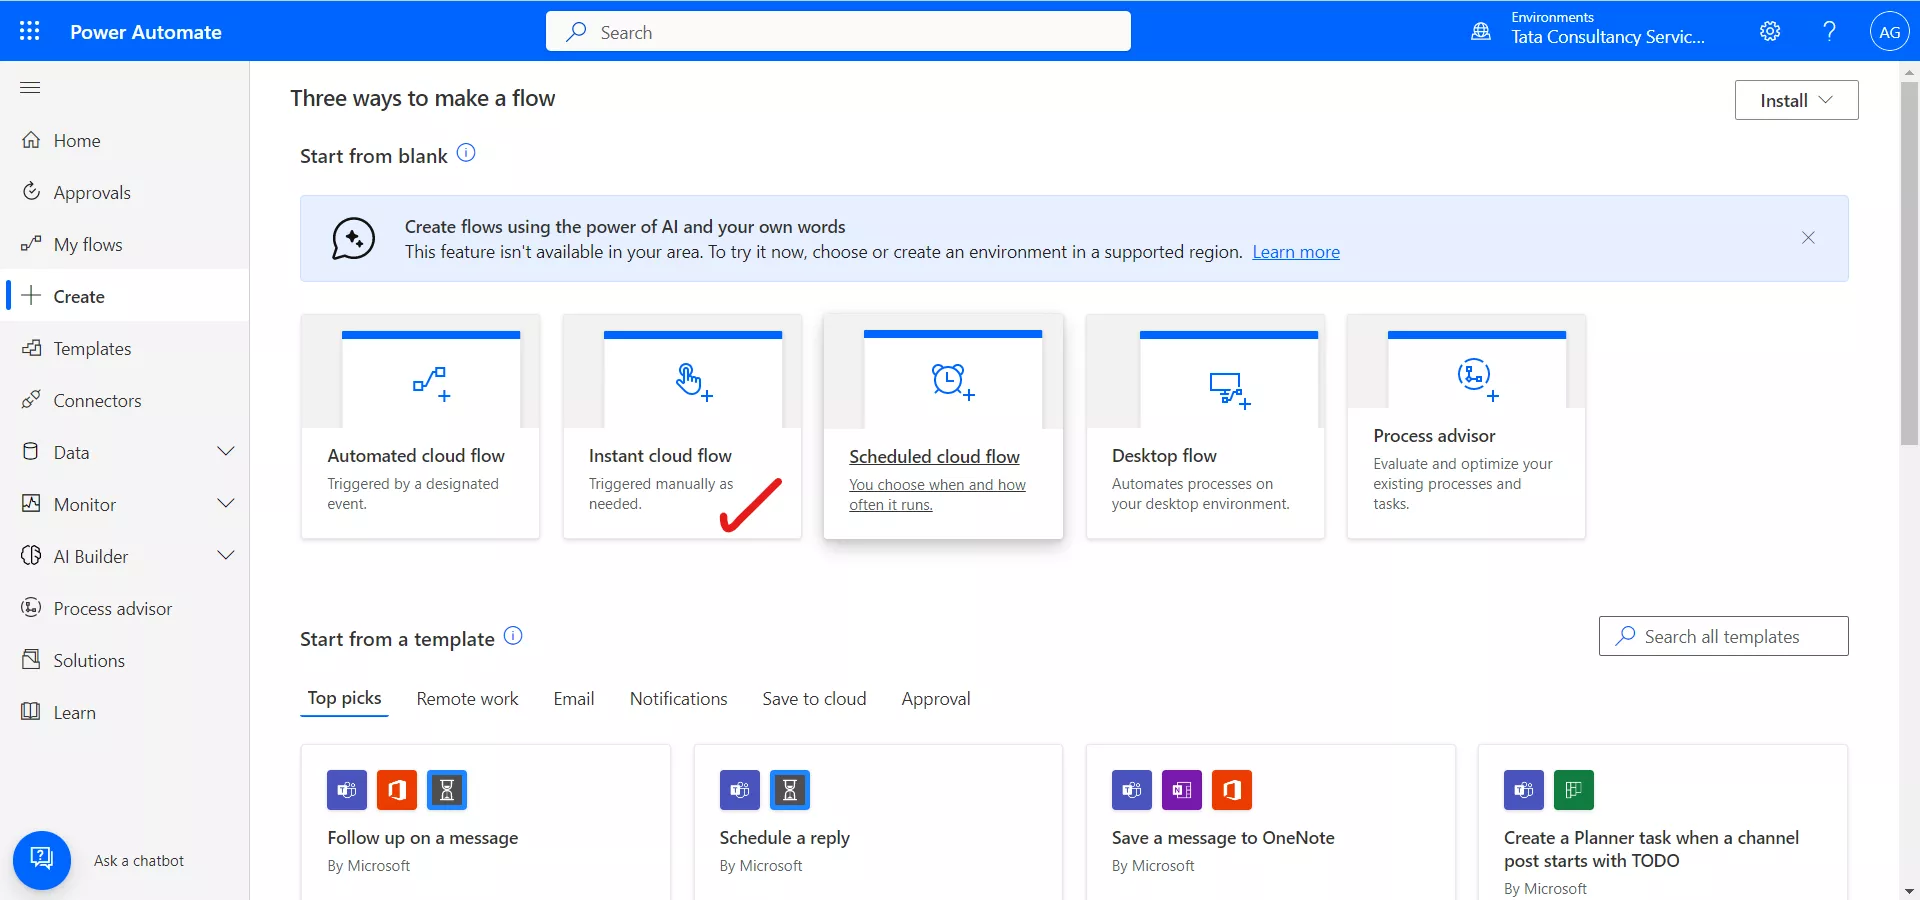
After clicking on Instant cloud flow, a pop-up window appears which gives the option to write the Flow name and choose the Trigger also, Select Manually trigger a flow.
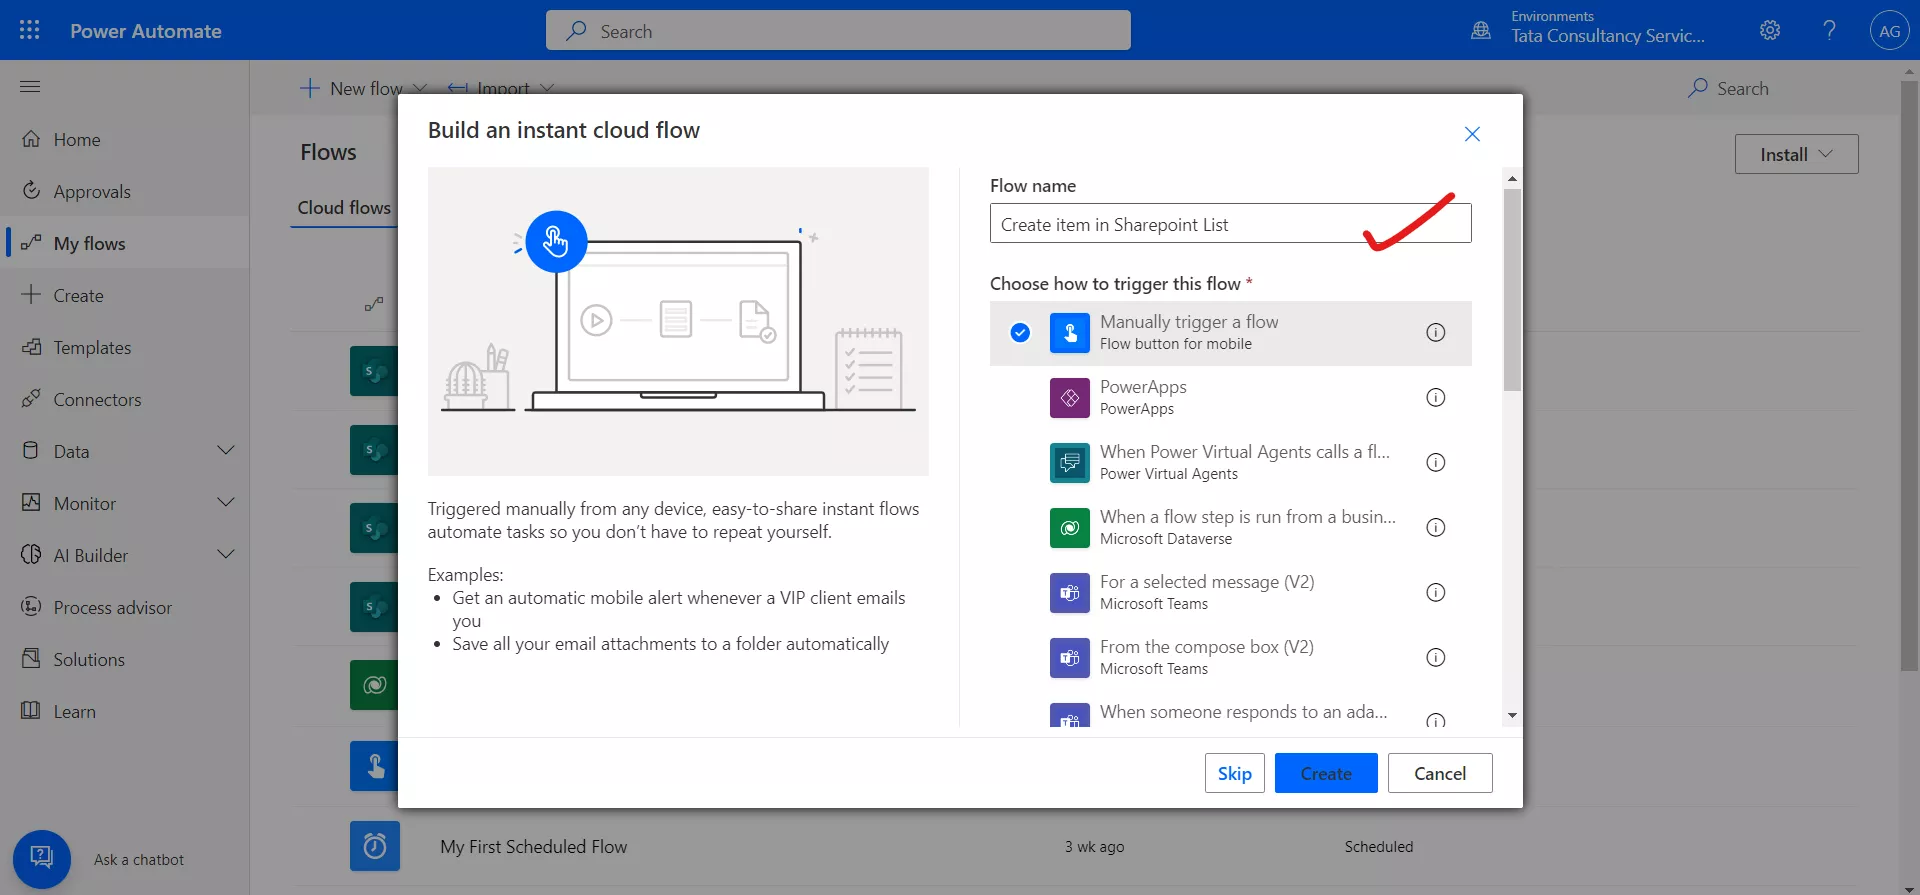
Step 3: Add the "Create Item" action to the flow. You can find this action by searching for "Create Item" in the search box.
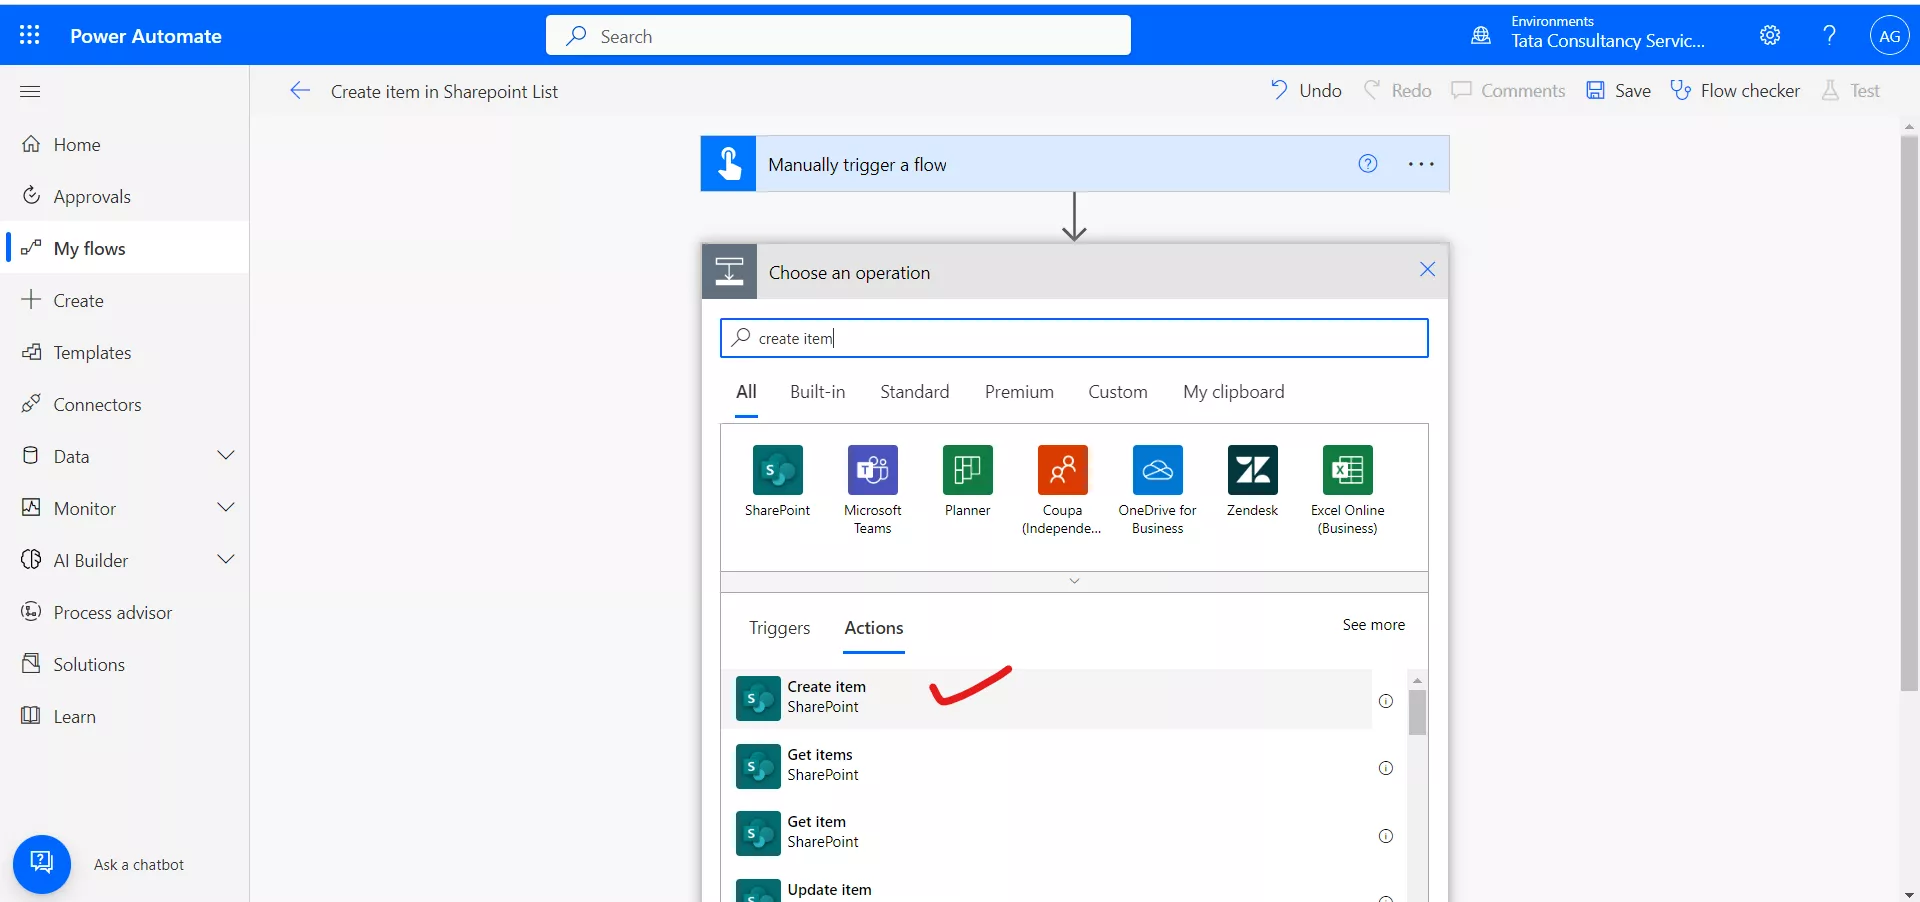
After adding the action, our power automate flow looks like the following image.
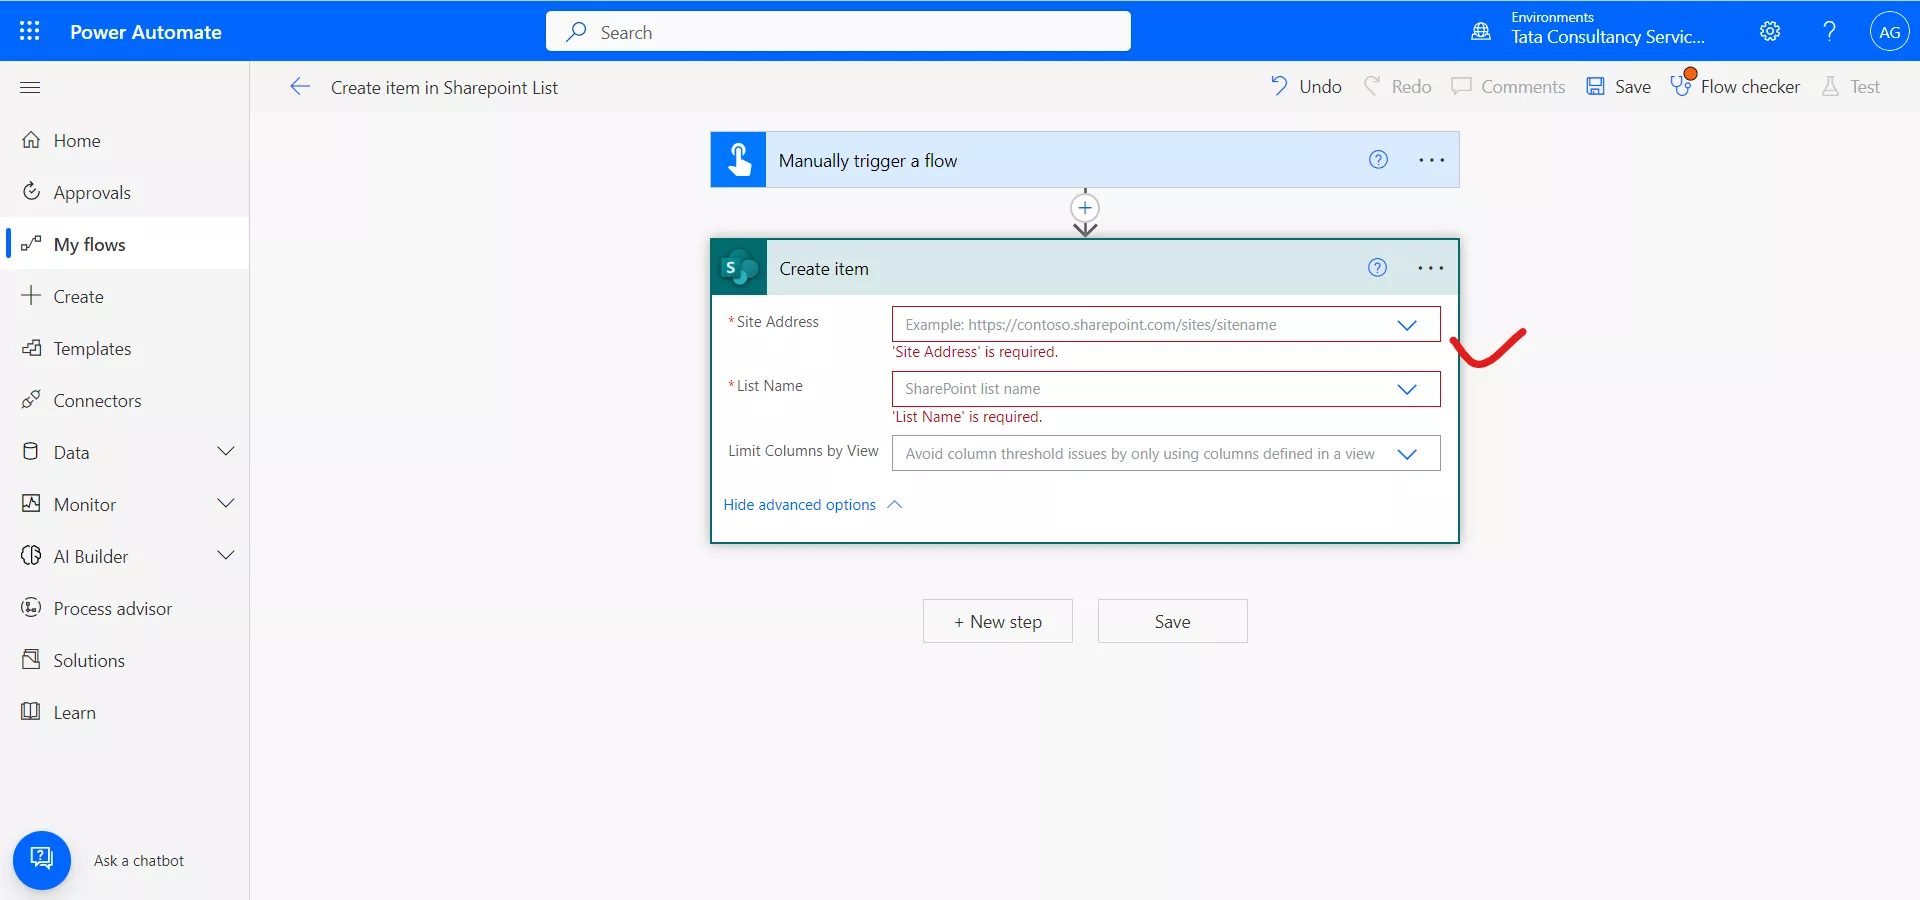
Step 4: Select the SharePoint site and list you want to create the item in. You will need to provide your credentials to authenticate your account and access the SharePoint site and list.
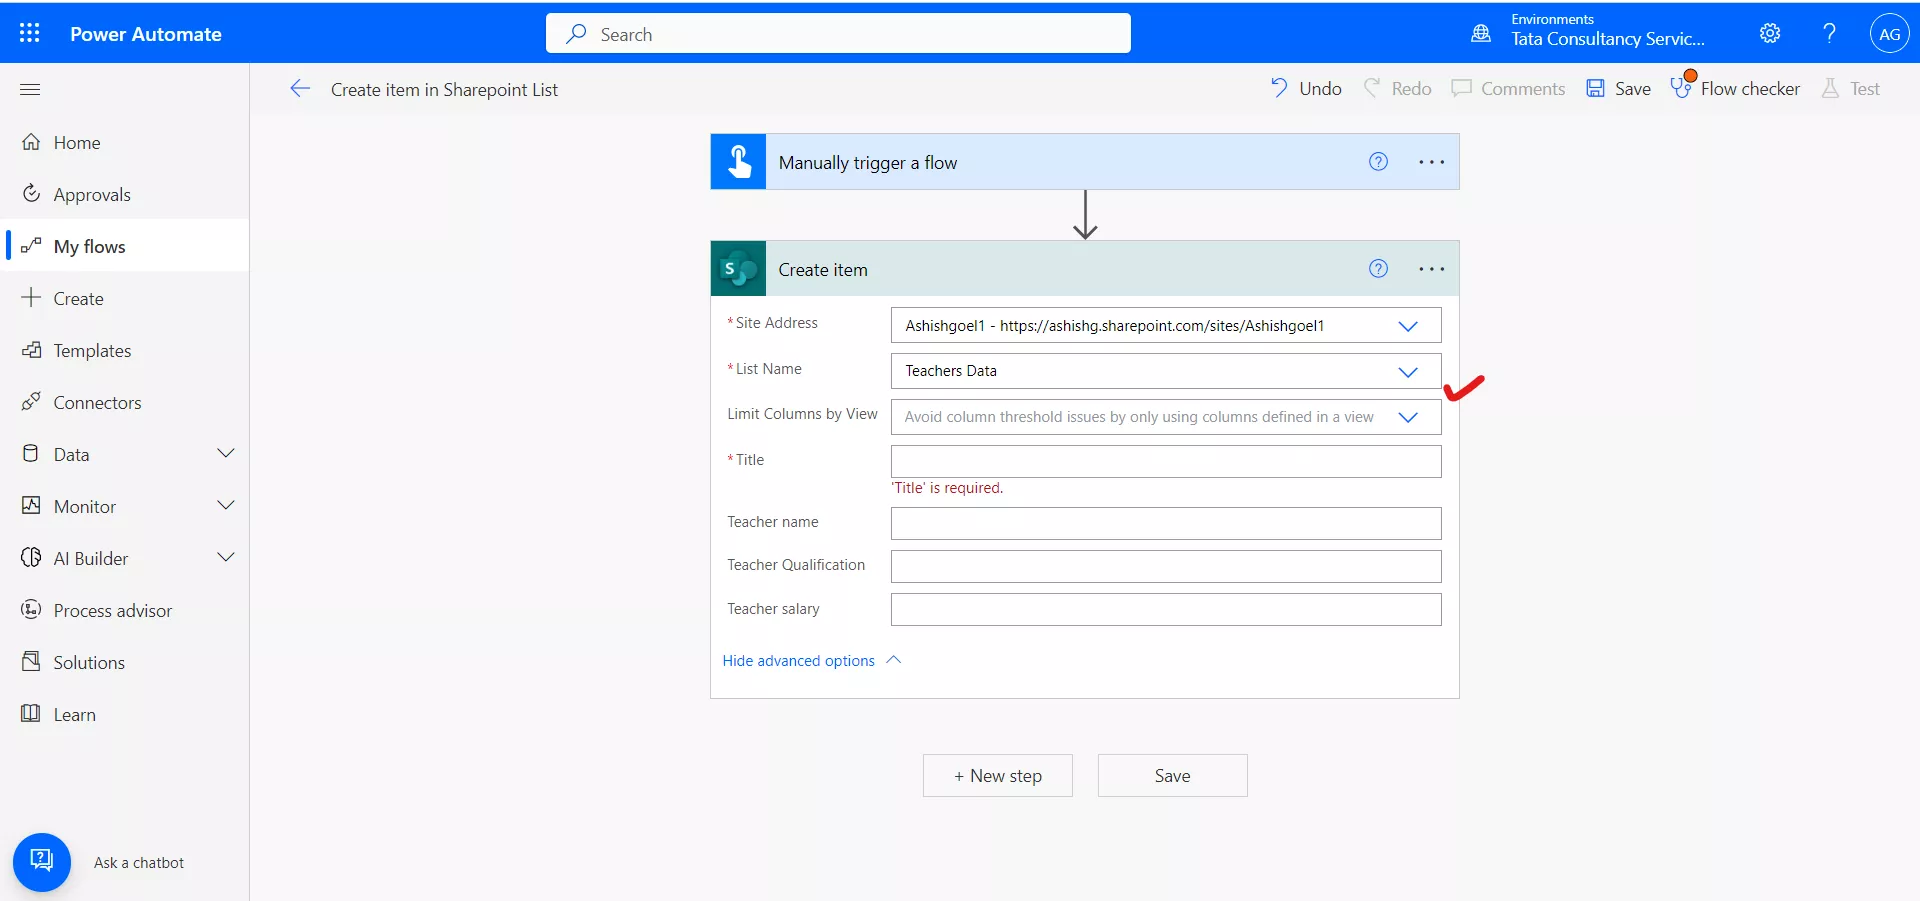
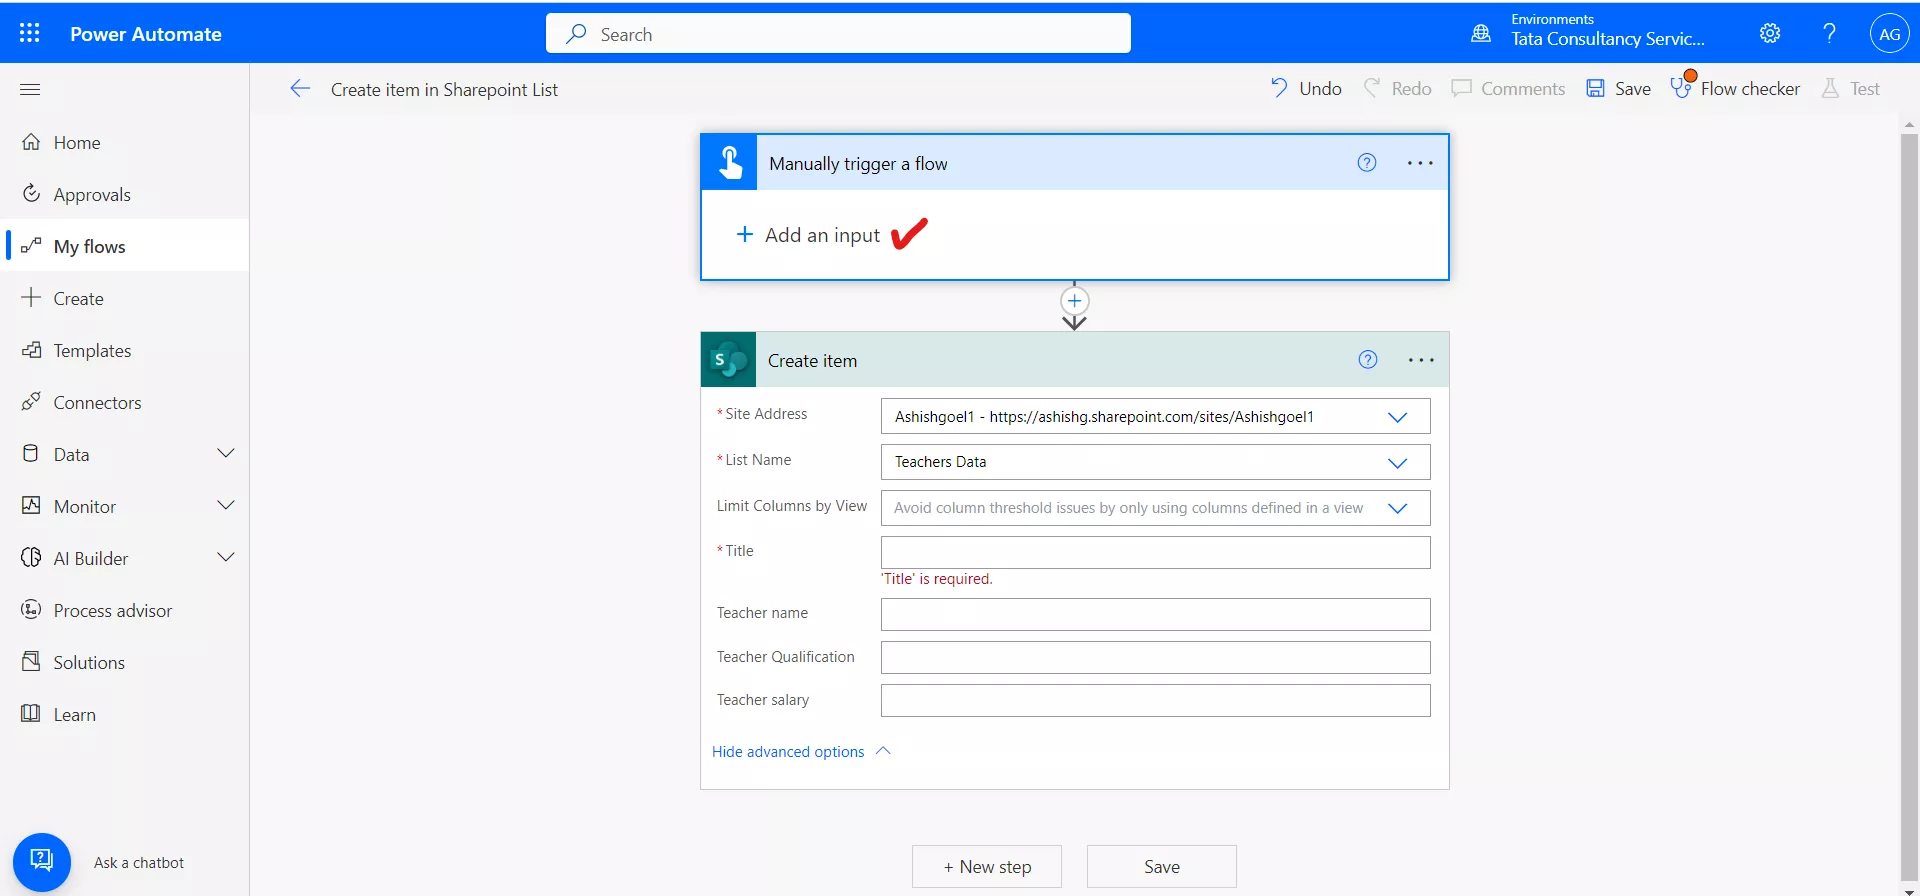
Step 5: Click on Manually trigger a flow, and click on + Add an input.
Some variables we need to create. Click on Text, as shown in the following image..
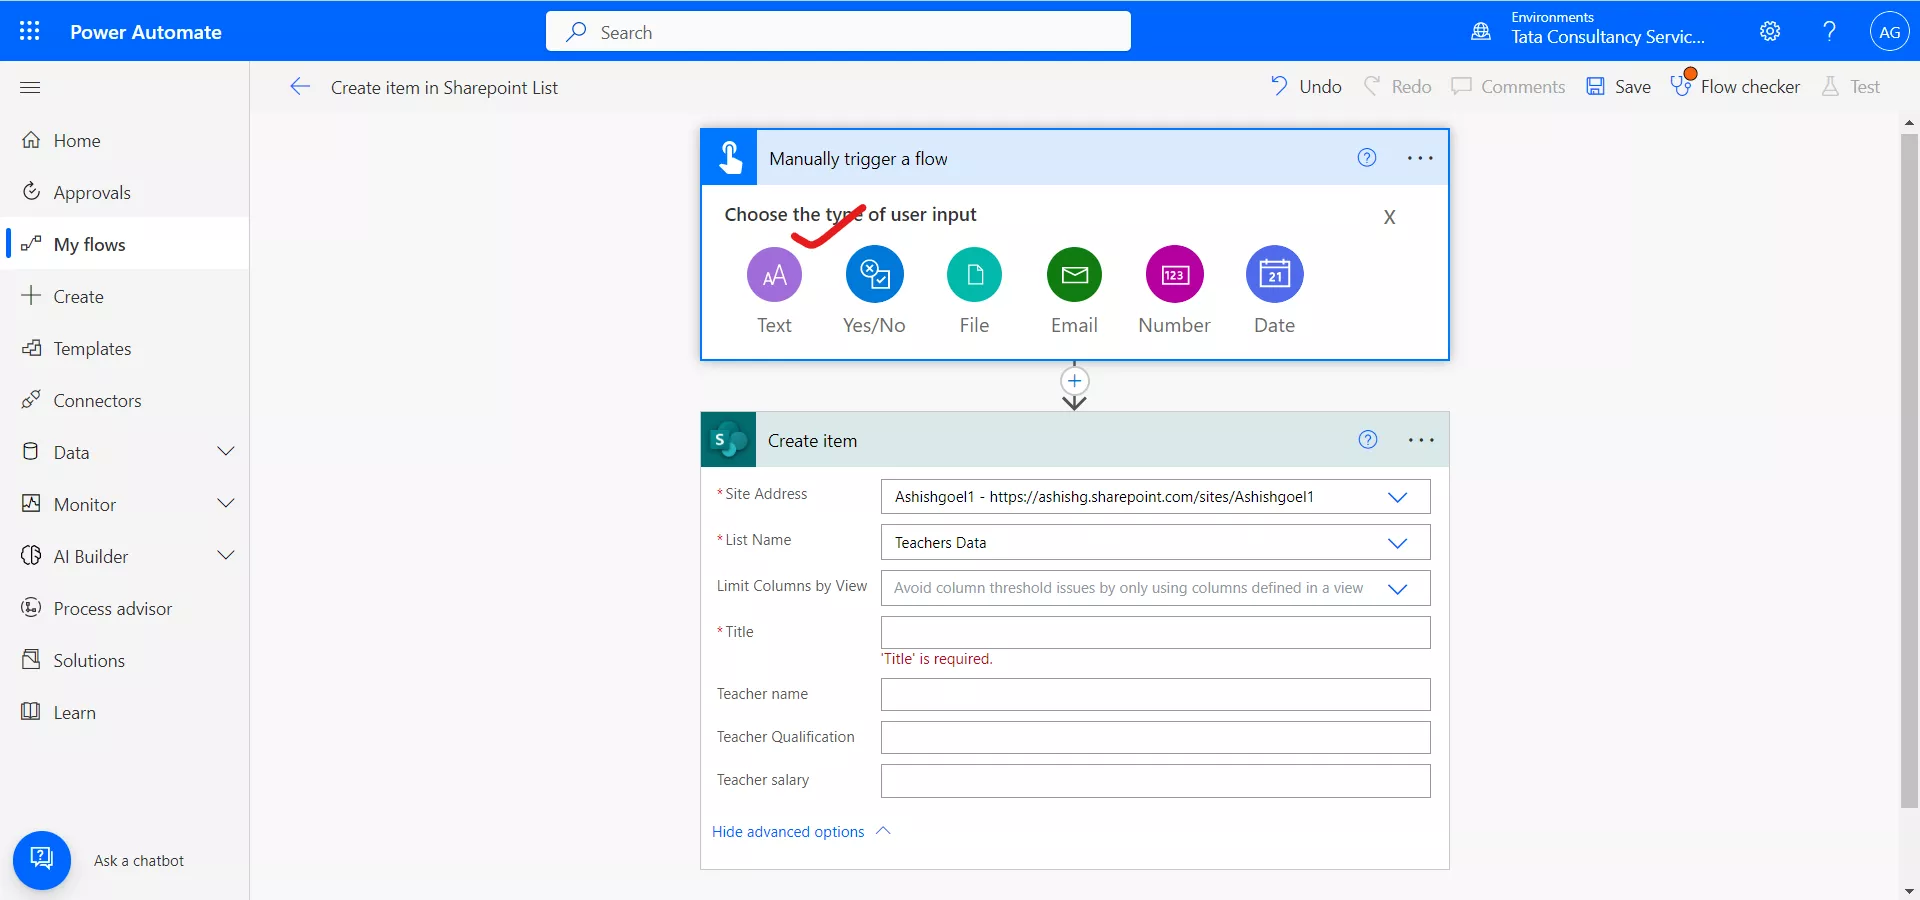
And write their label as Item title. Click on + Add an input again and create some variable as shown in the following image.
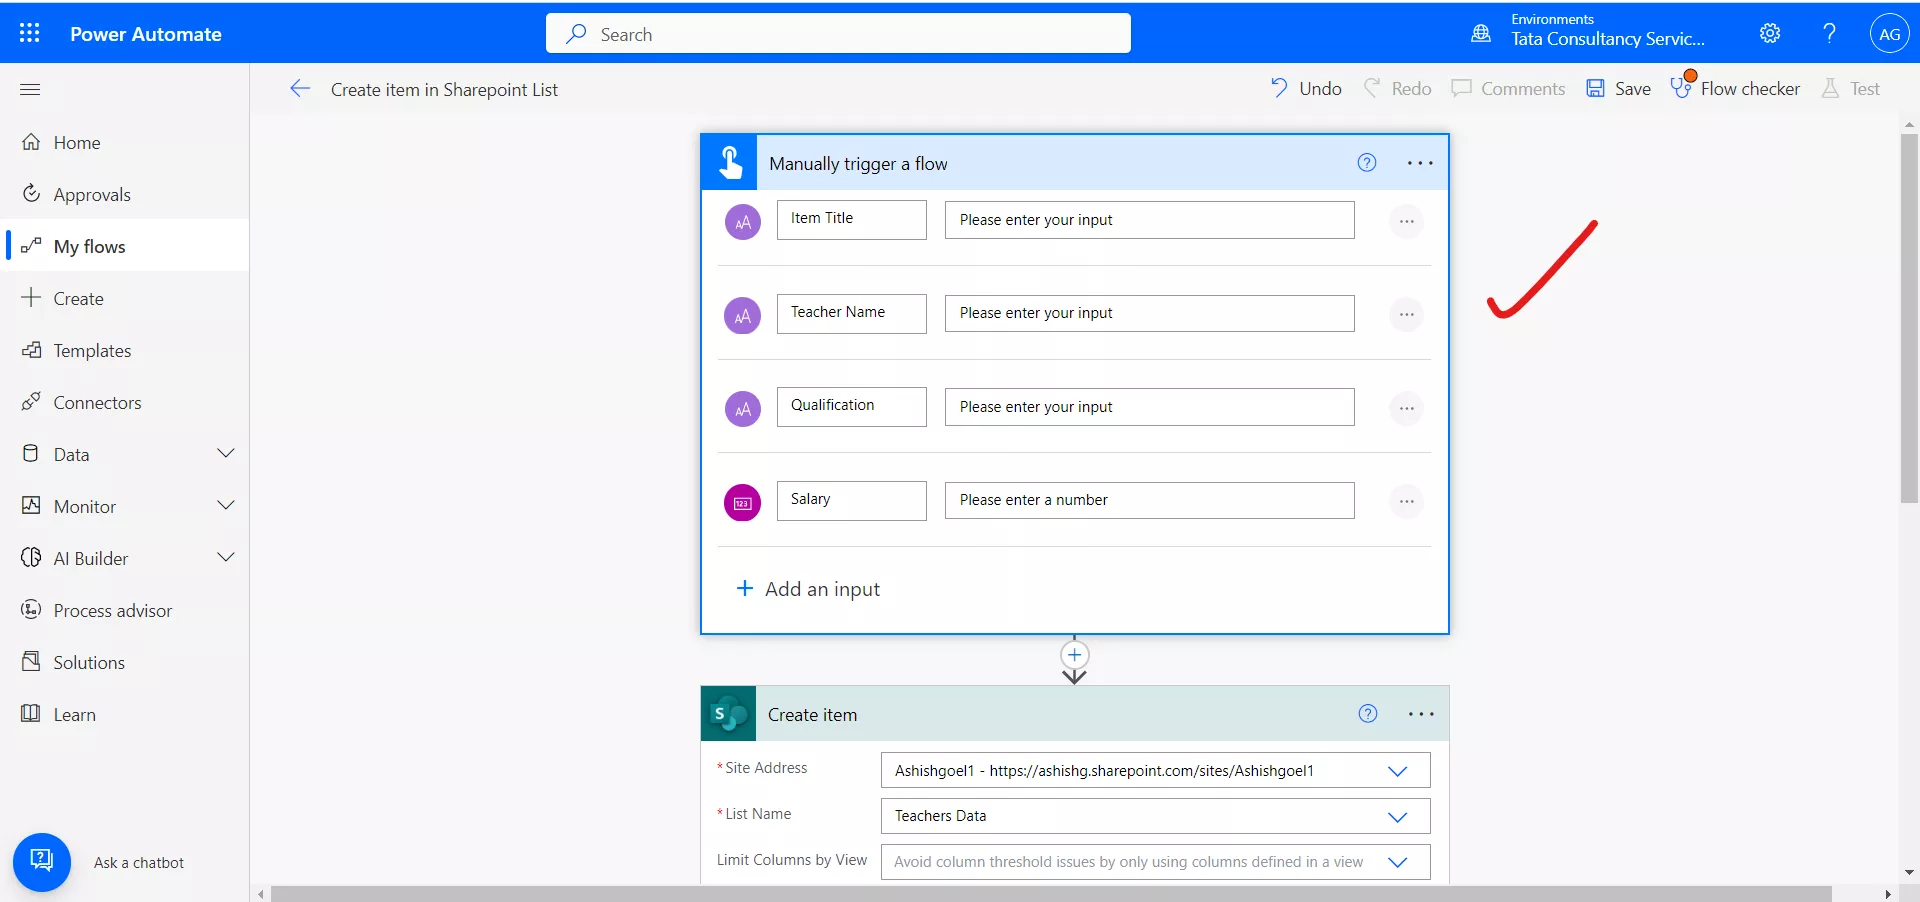
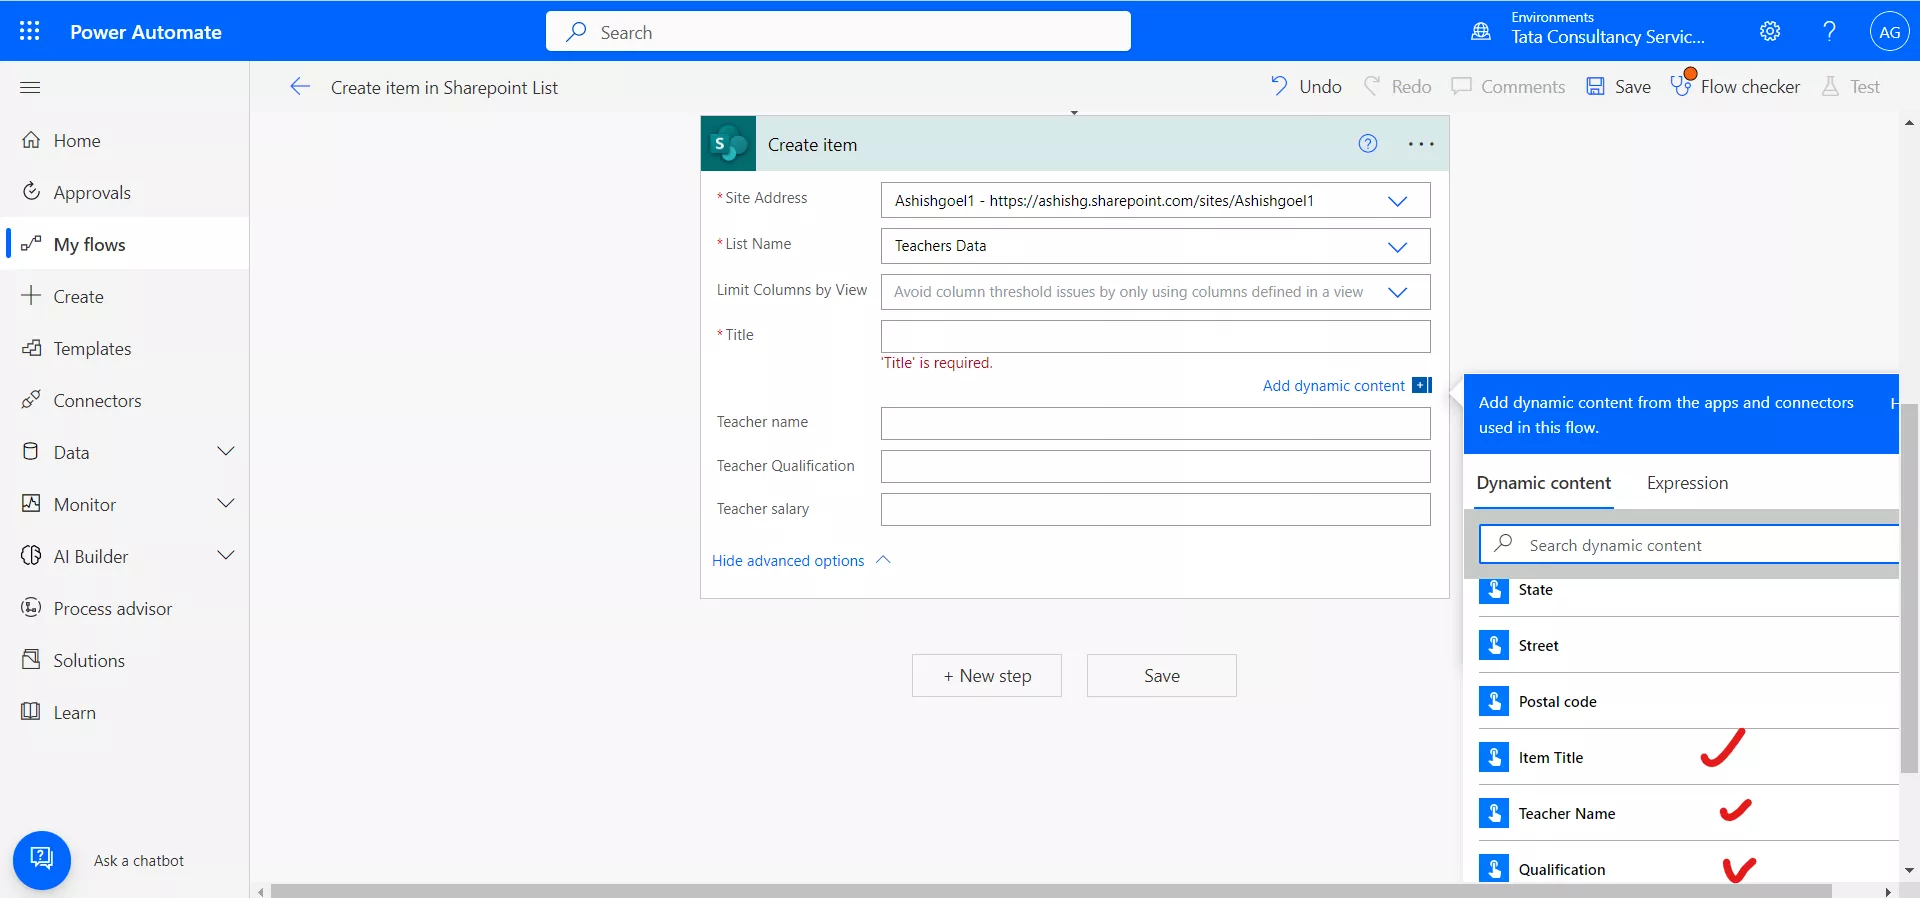
Step 6: The variables created above are shown in the dynamic content. Map the fields of the item we want to create to the corresponding fields in the SharePoint list.
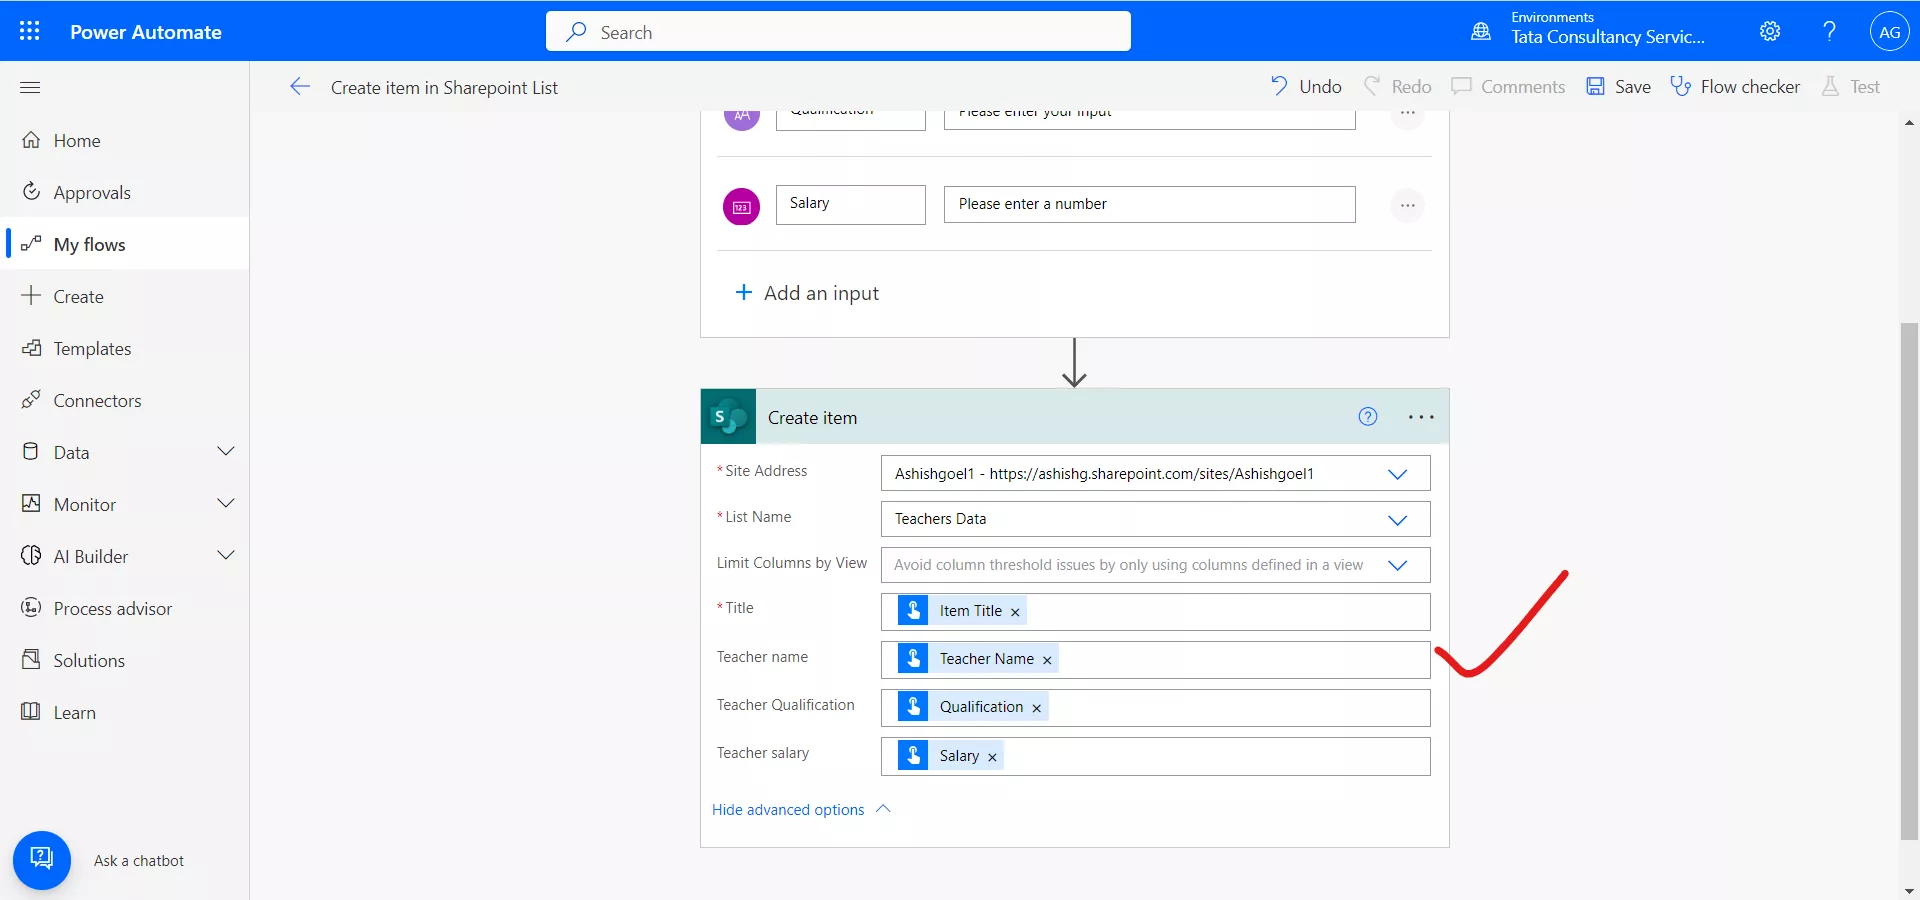
We can do this by clicking on the "Add dynamic content" button next to each field in the "Create Item" action and selecting the corresponding field from the item we want to create. Make sure that we map all the required fields for the SharePoint list, otherwise we are not able to save the power automate flow.
After mapping the corresponding values, our power automate flow looks like the following image.
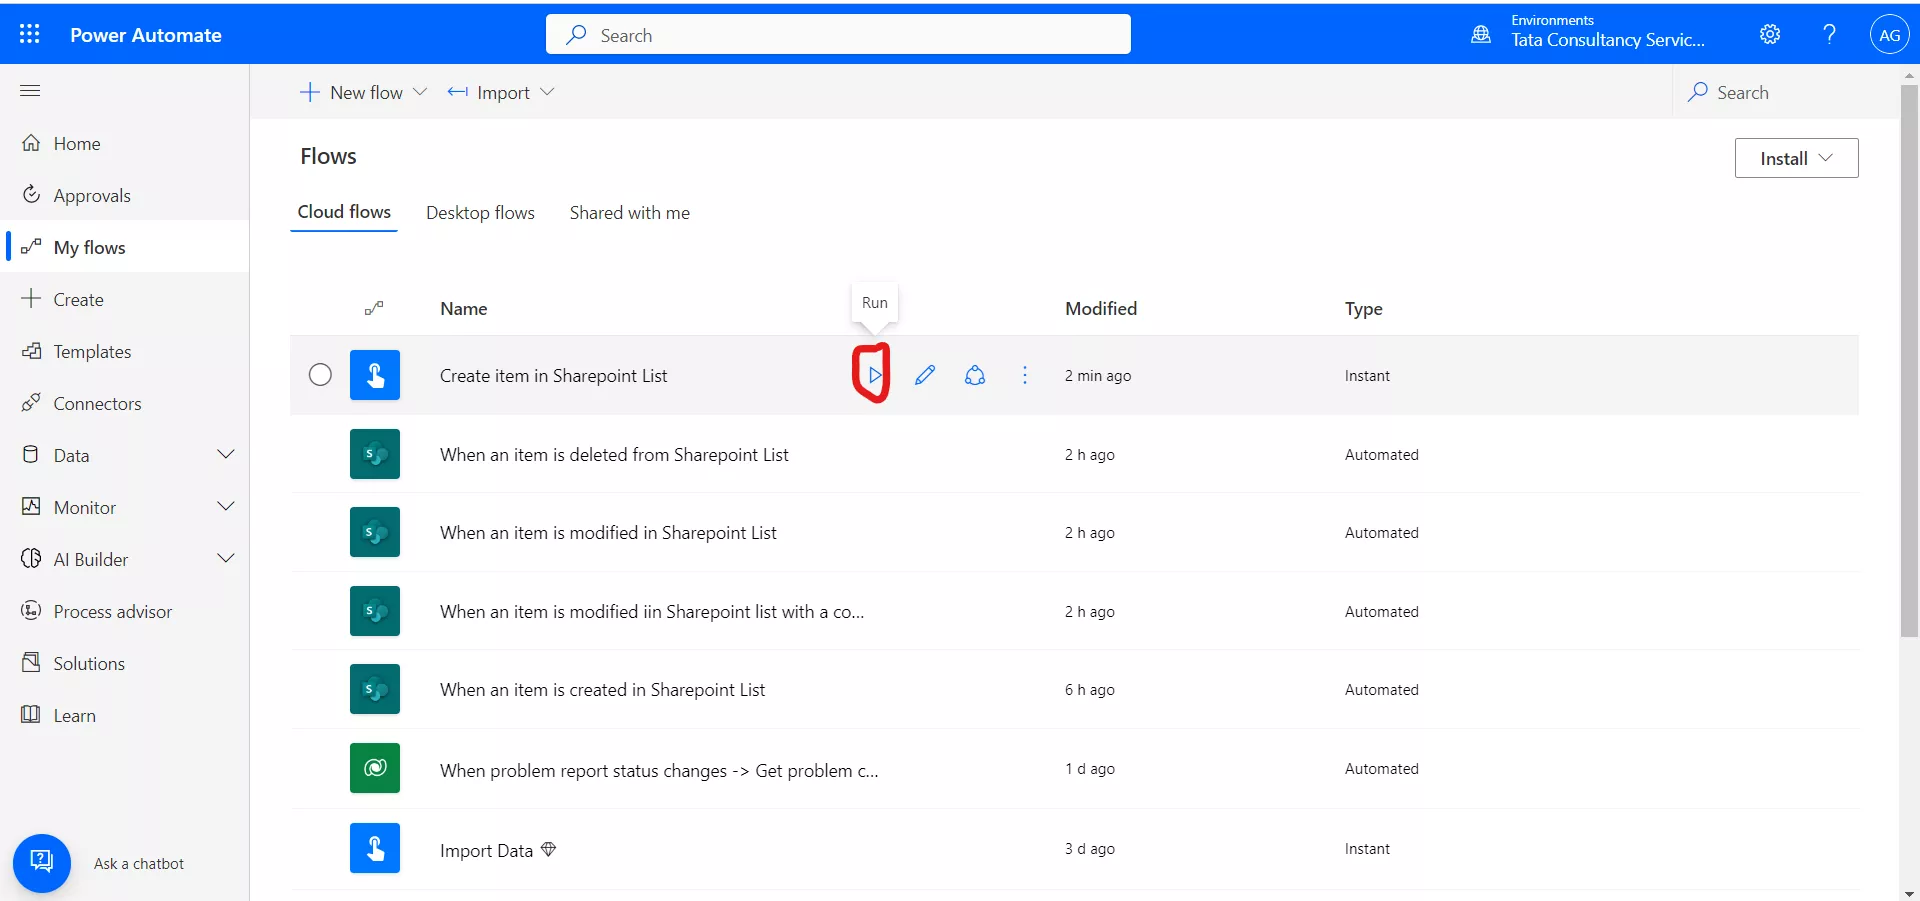
Step 7: Click on Save. Now we can test our flow. To test the power automate flow, click on "Test" to run a test. Or we can click on the Run icon to run the flow.
The flow required some inputs from the users which we have specified in the variables.
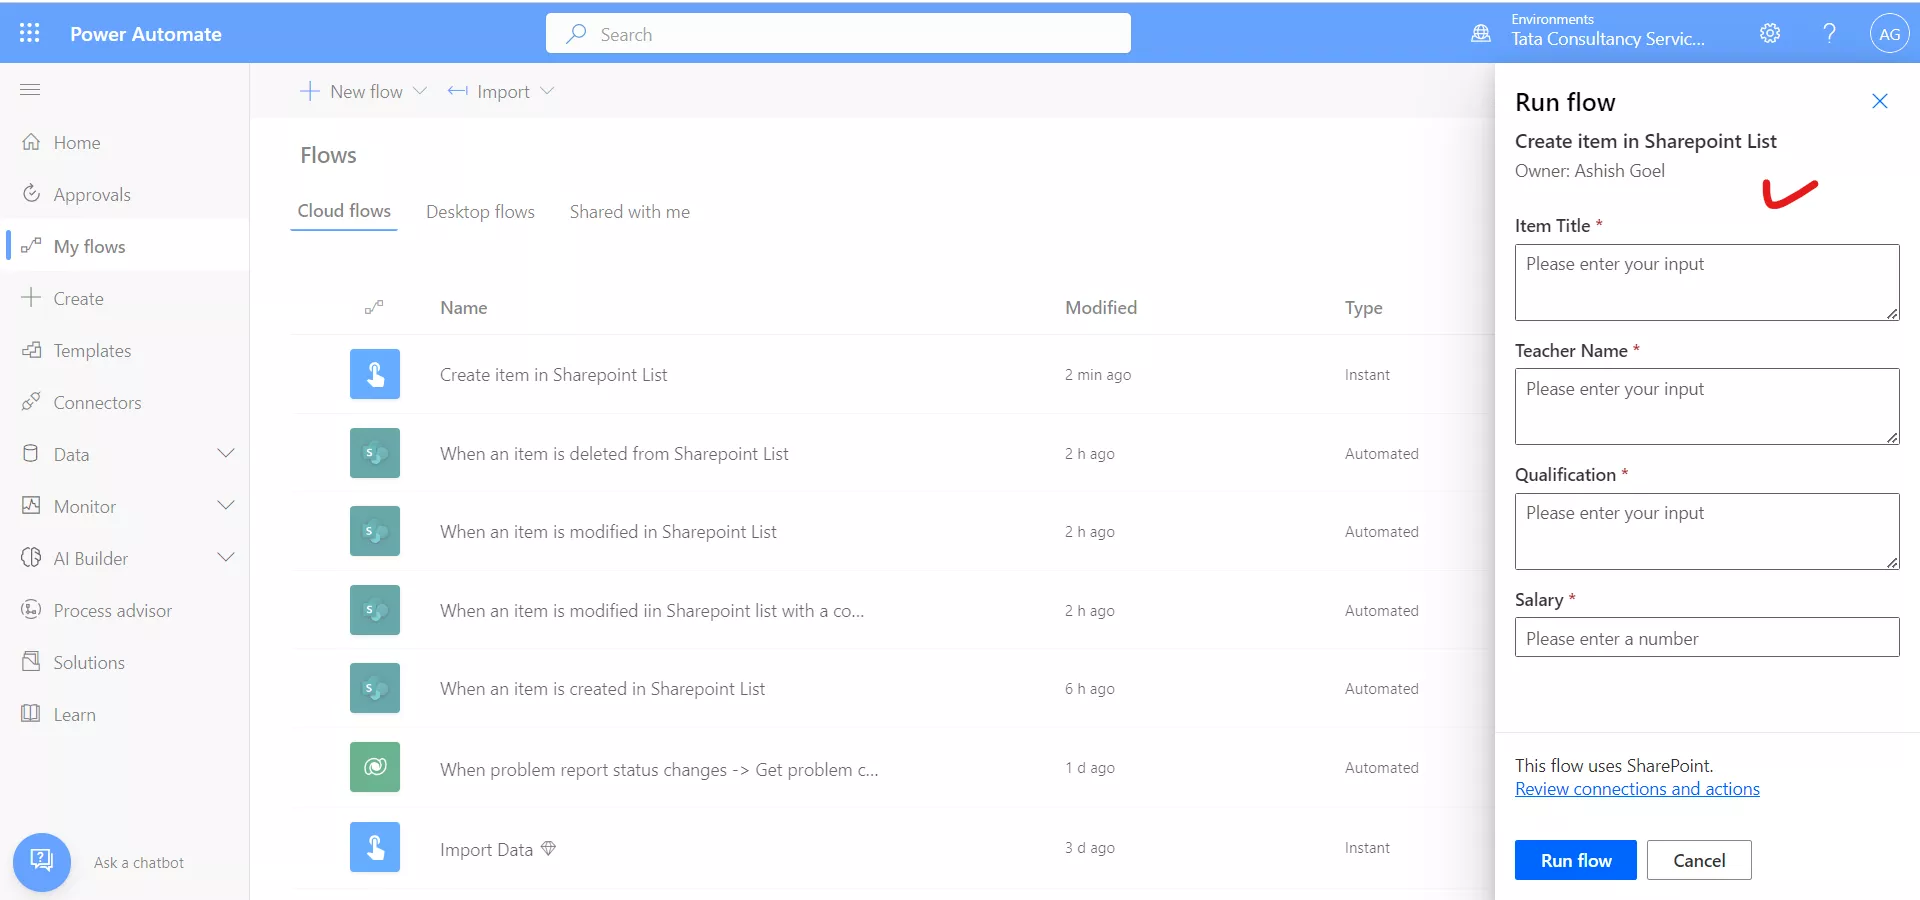
After entering the details, click on Run flowat the bottom.
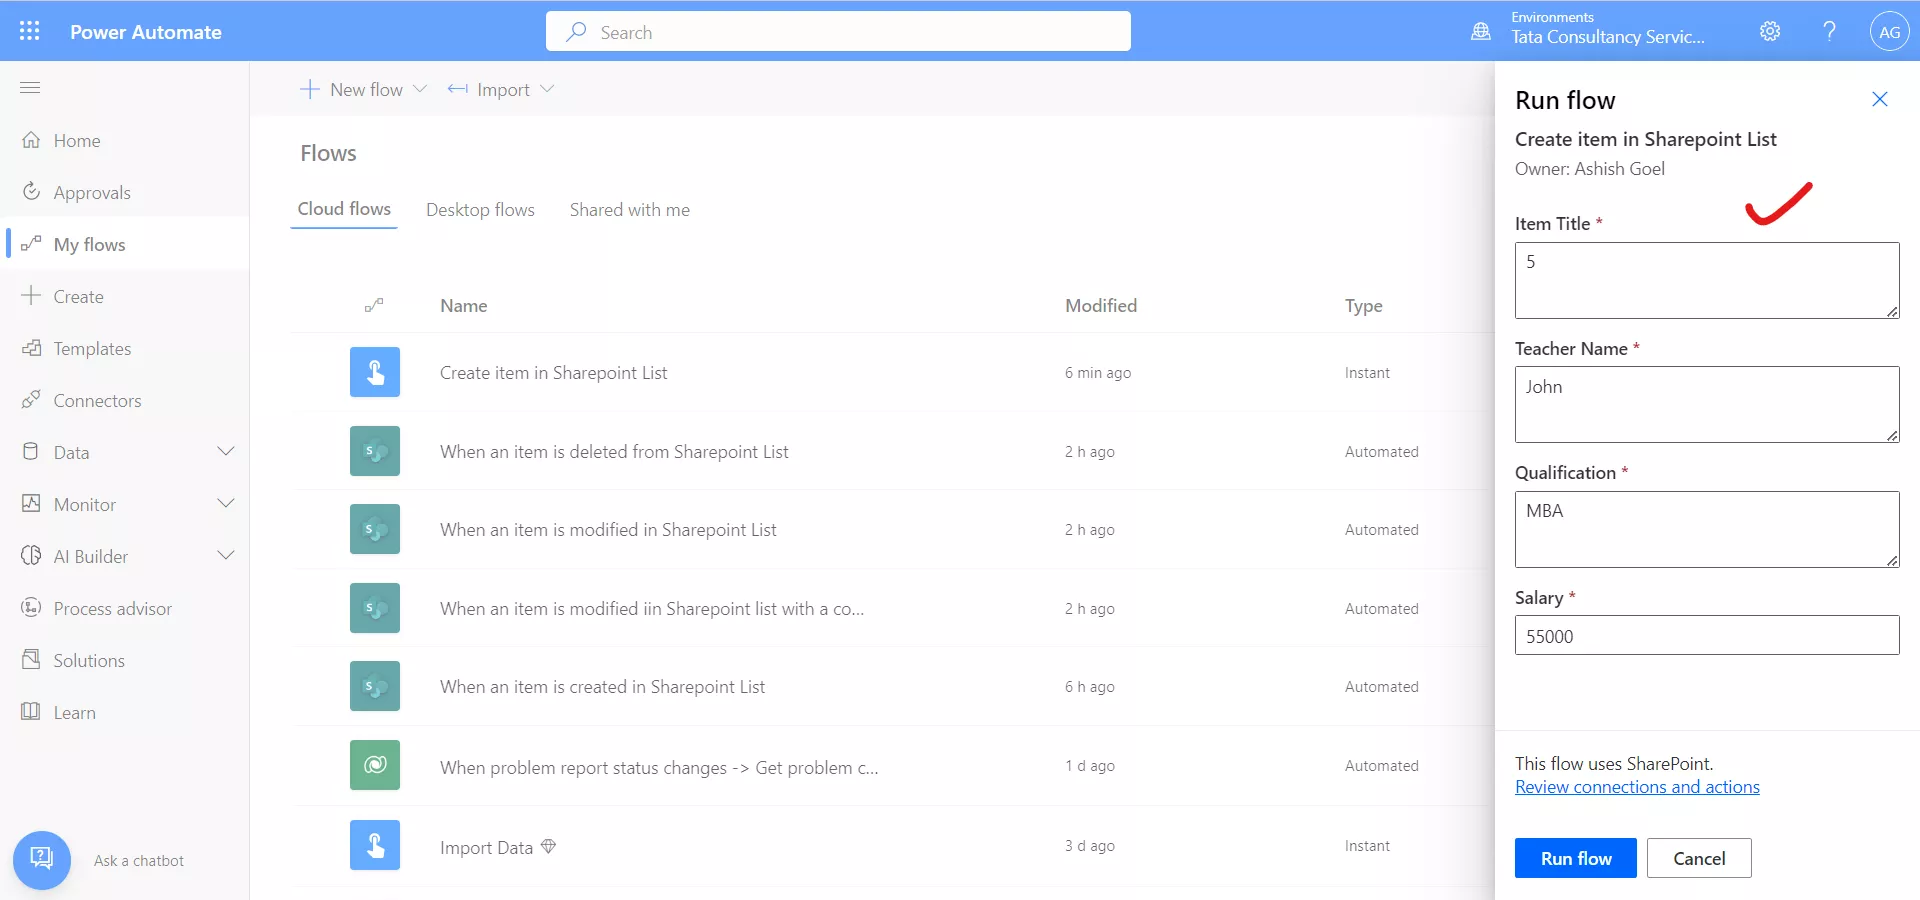
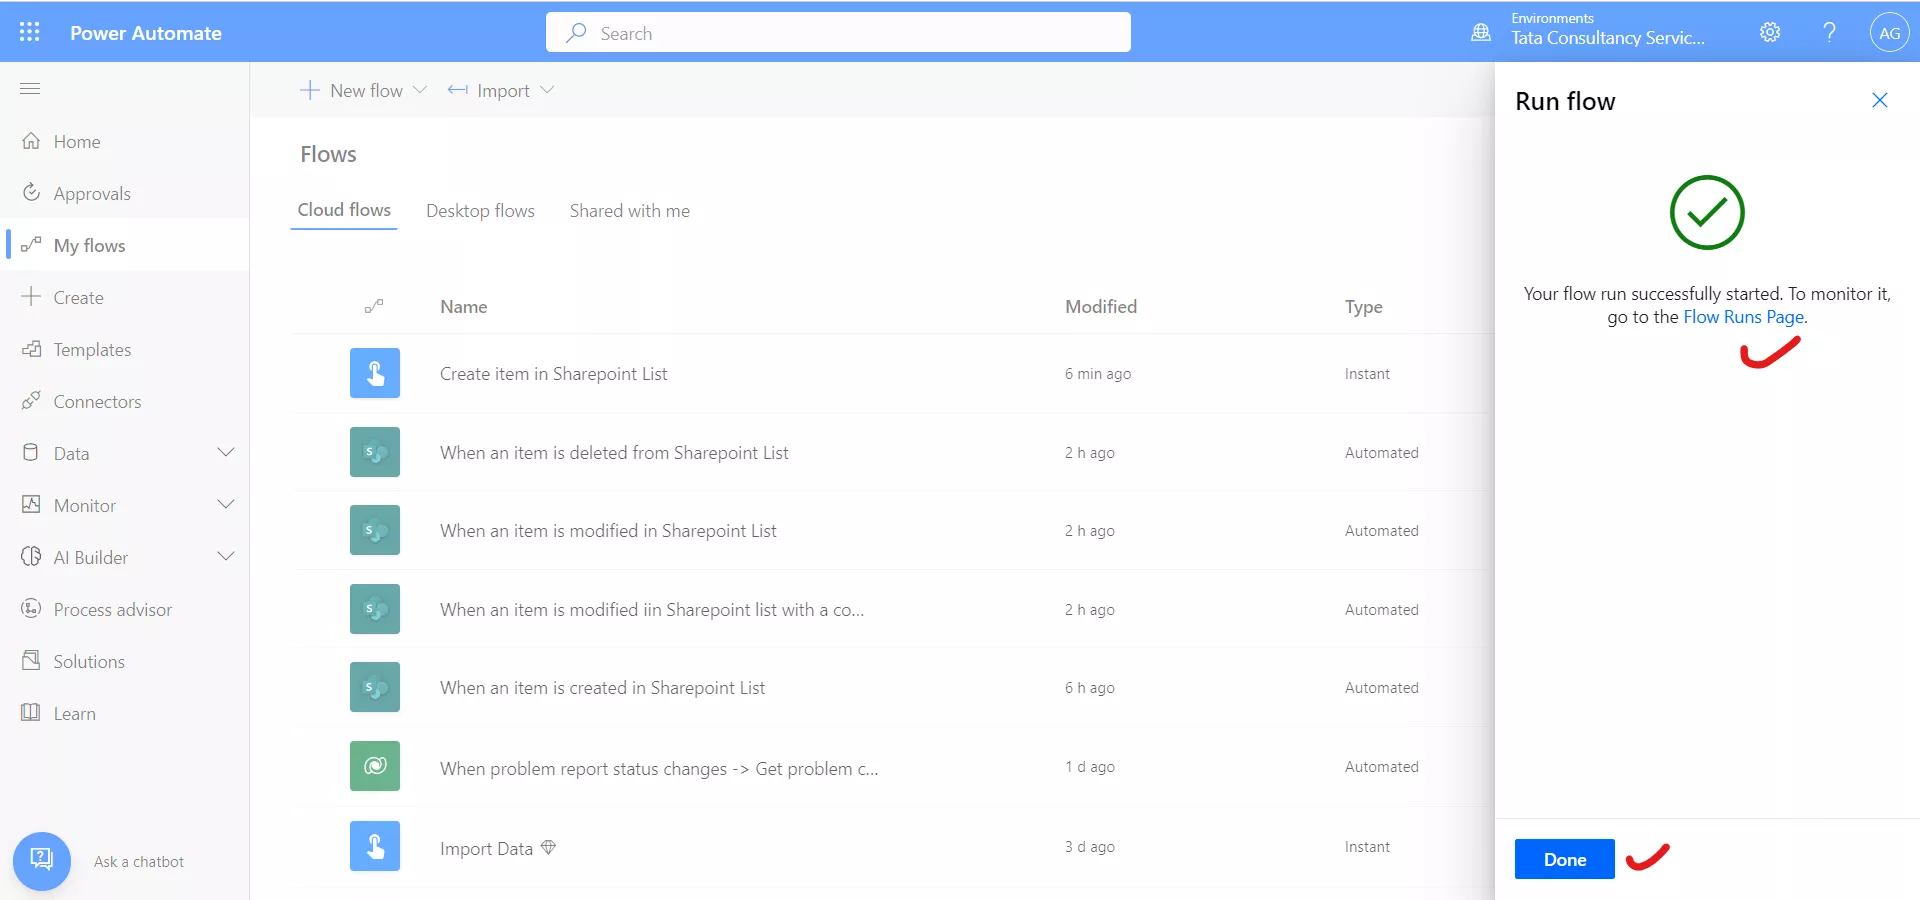
After clicking on Run flow, the flow is executed.
We can check that the record is created in the SharePoint list with the data we have provided in the power automate flow.
