Create a Tabbed Form in Canvas Powerapp
We can create a tabbed form in the Power apps by follow the following steps.
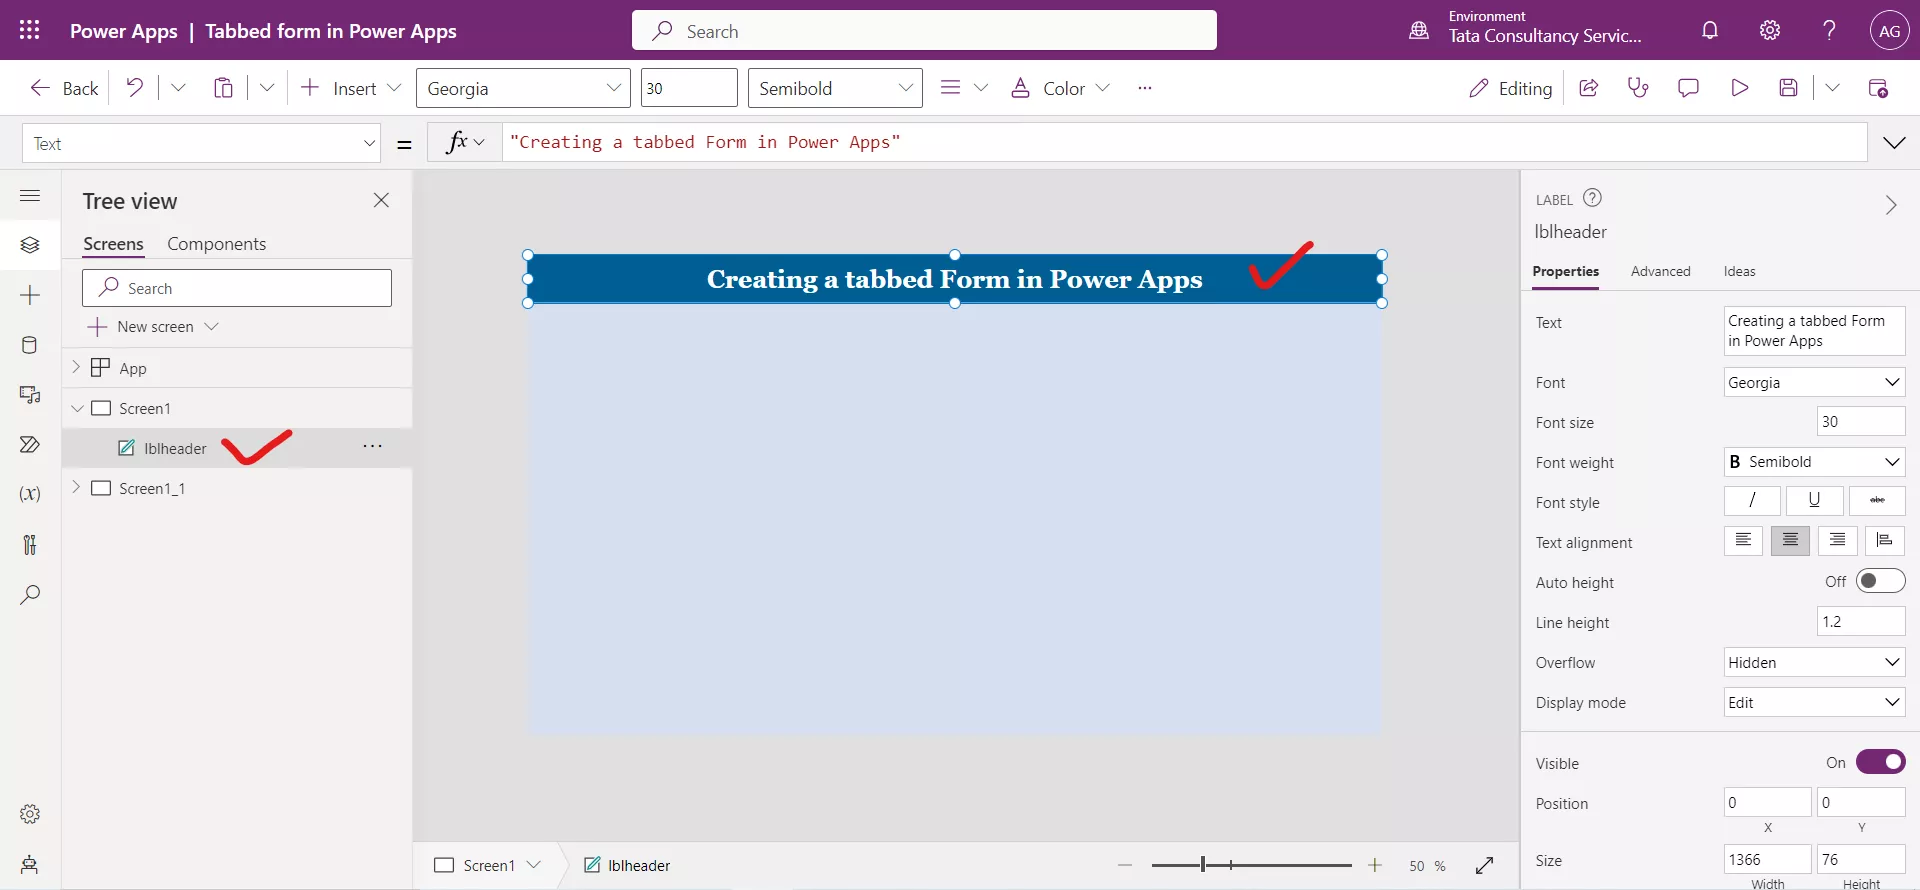
Step 1: Click on + Insert and add a Text label control. And set its Text property to the "Creating a tabbed Form in Power Apps". And design it according to the need.
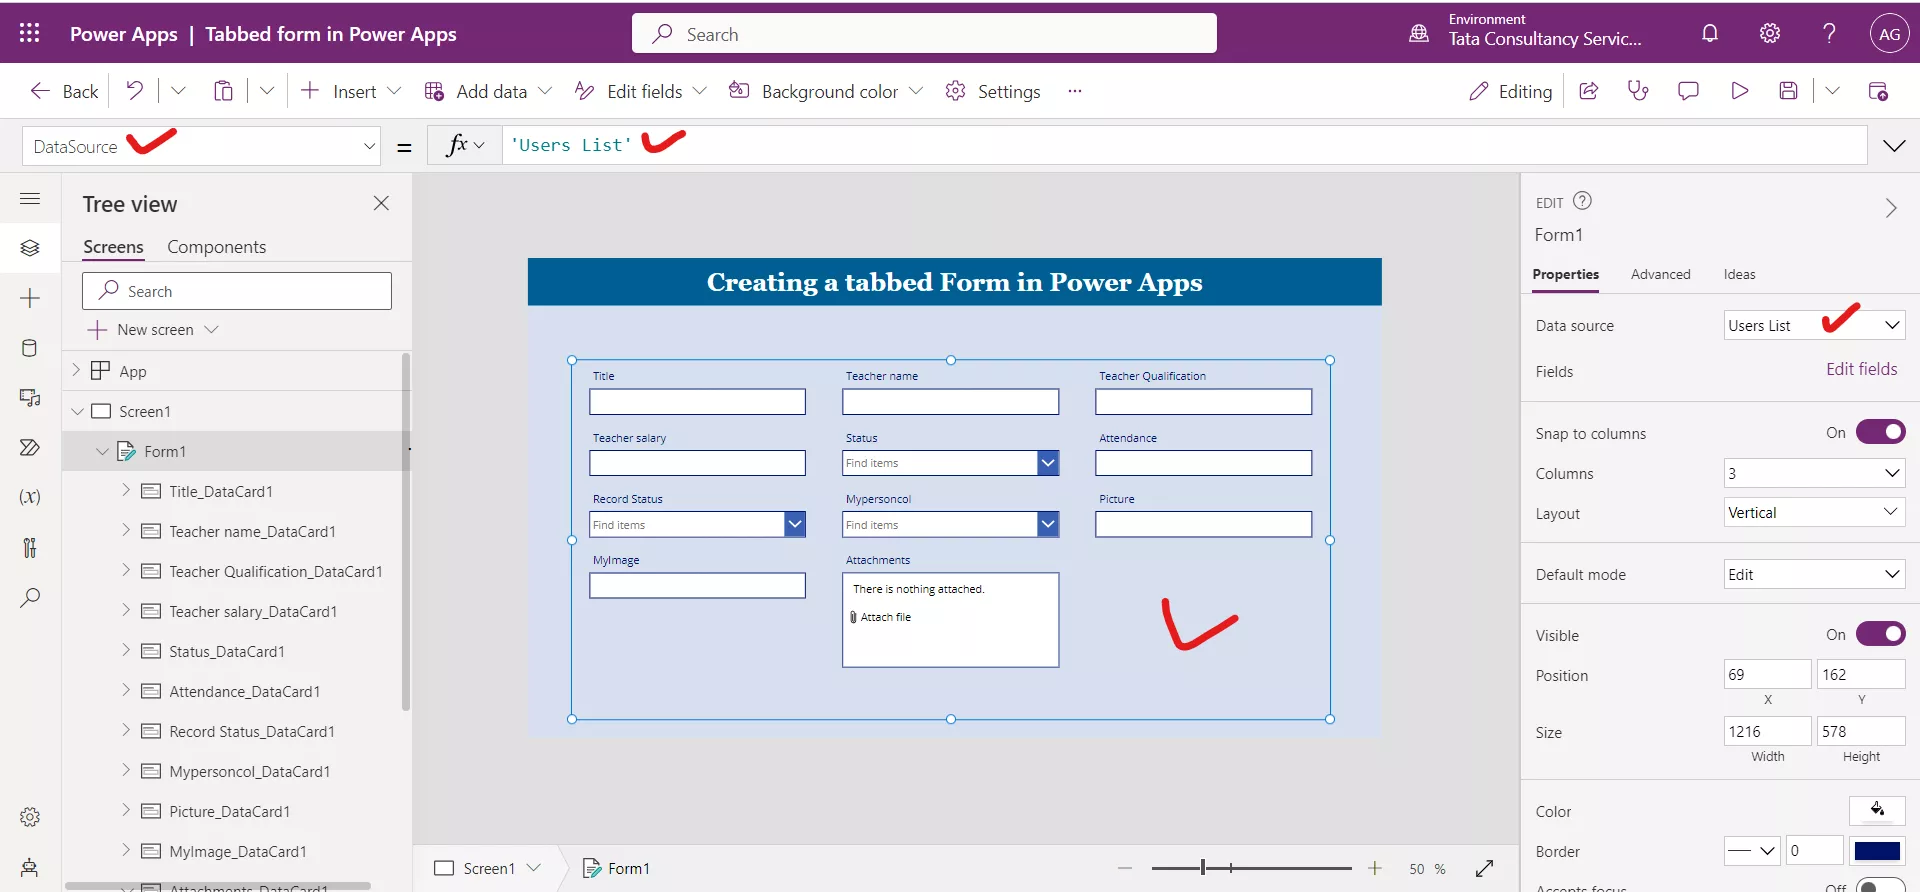
Step 2: Click on + Insert, and click on Edit form control to the canvas app. Add it to the Data source.
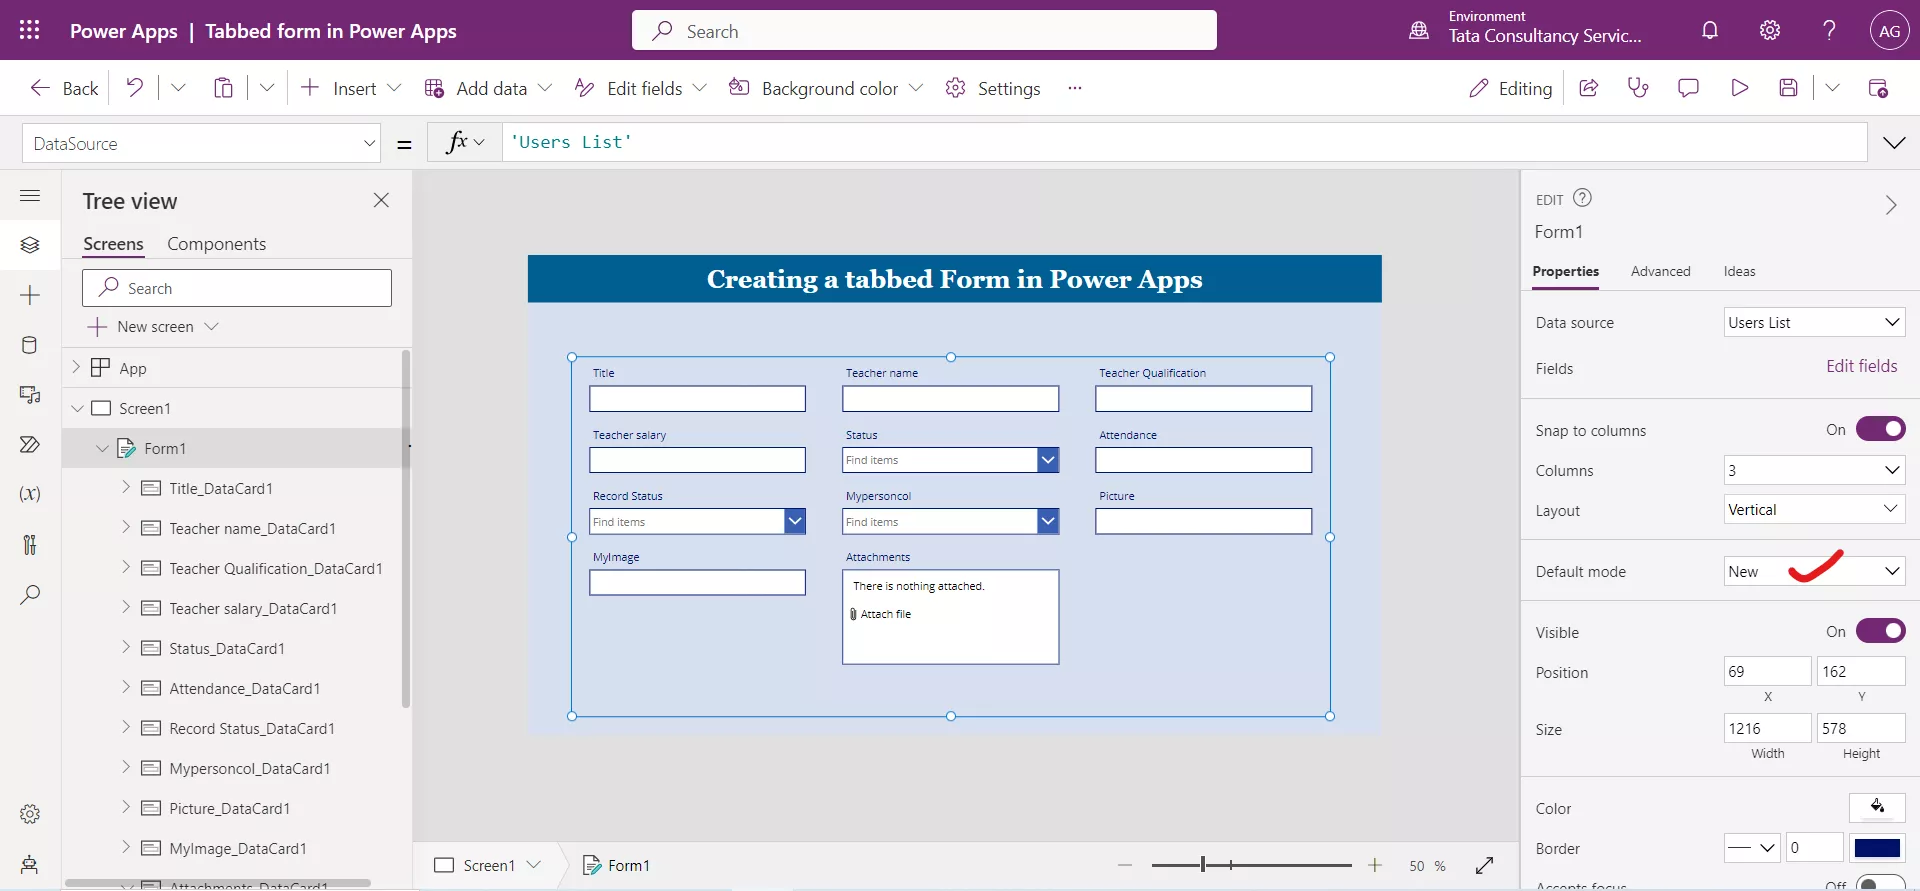
Step 3: Add the fields to the Form control and set its Default mode to New.
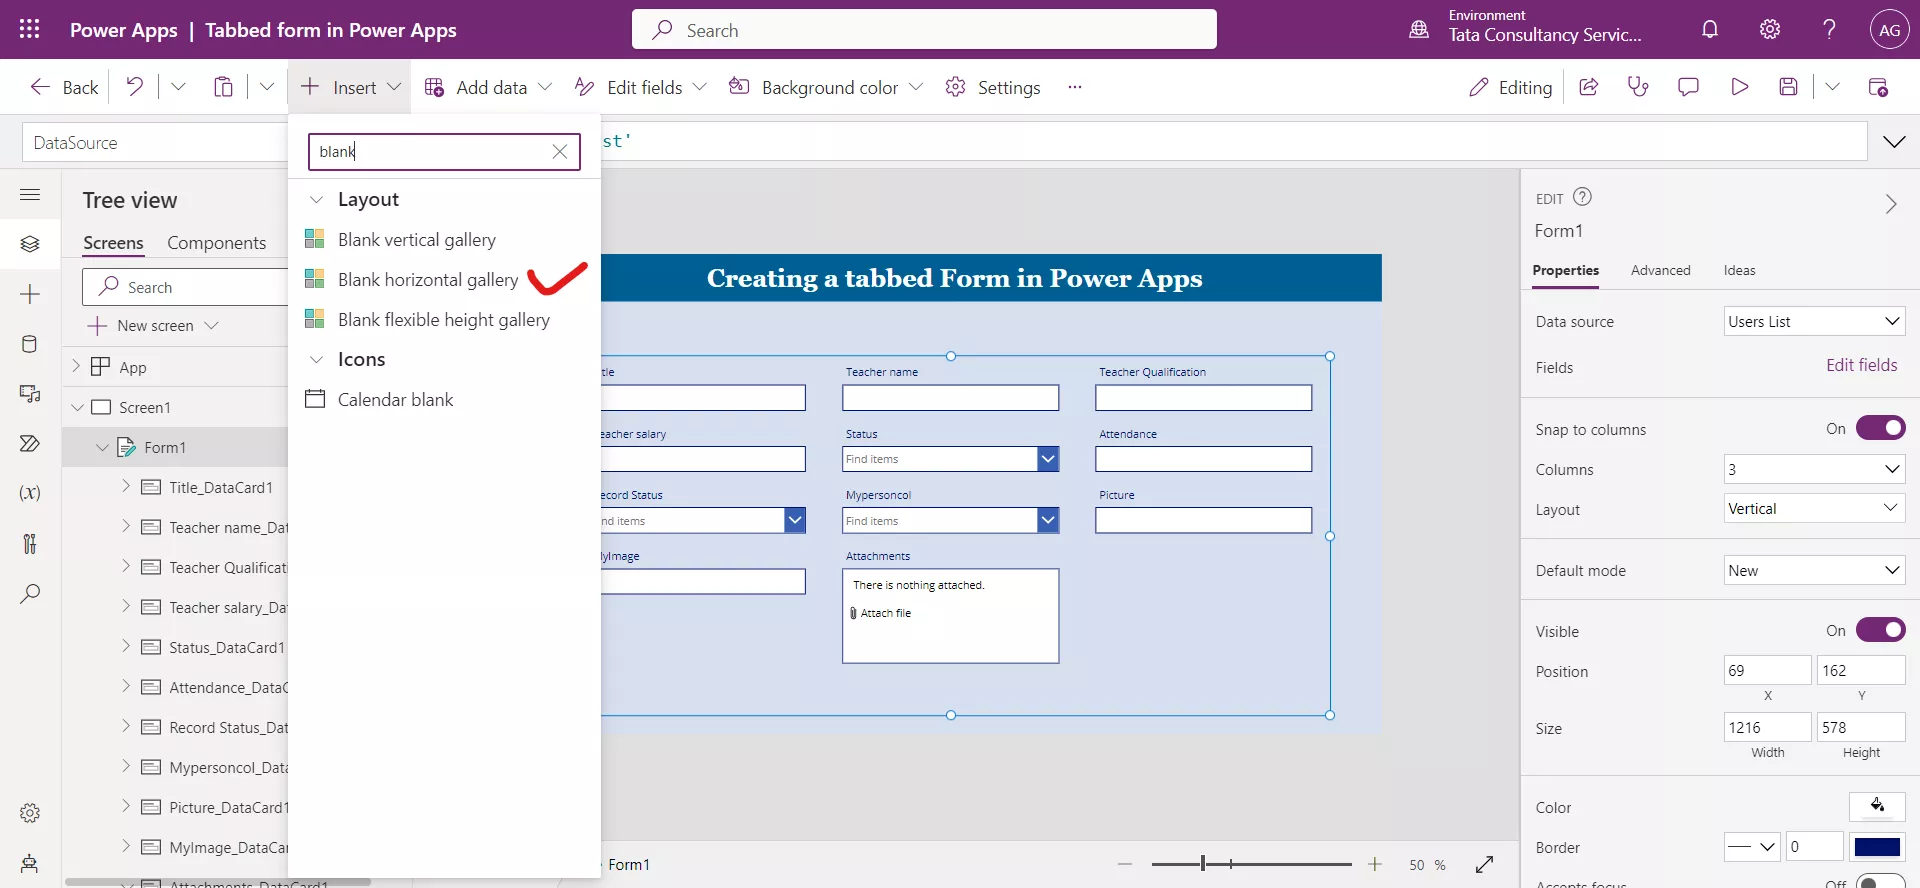
Step 4: Add a Blank horizontal gallery control to the screen.
Step 5: Set its Items property to the array of records.
Power Apps Formula
{
Title: "Tab 1",
Id: 1
},
{
Title: "Tab 2",
Id: 2
},
{
Title: "Tab 3",
Id: 3
},
]
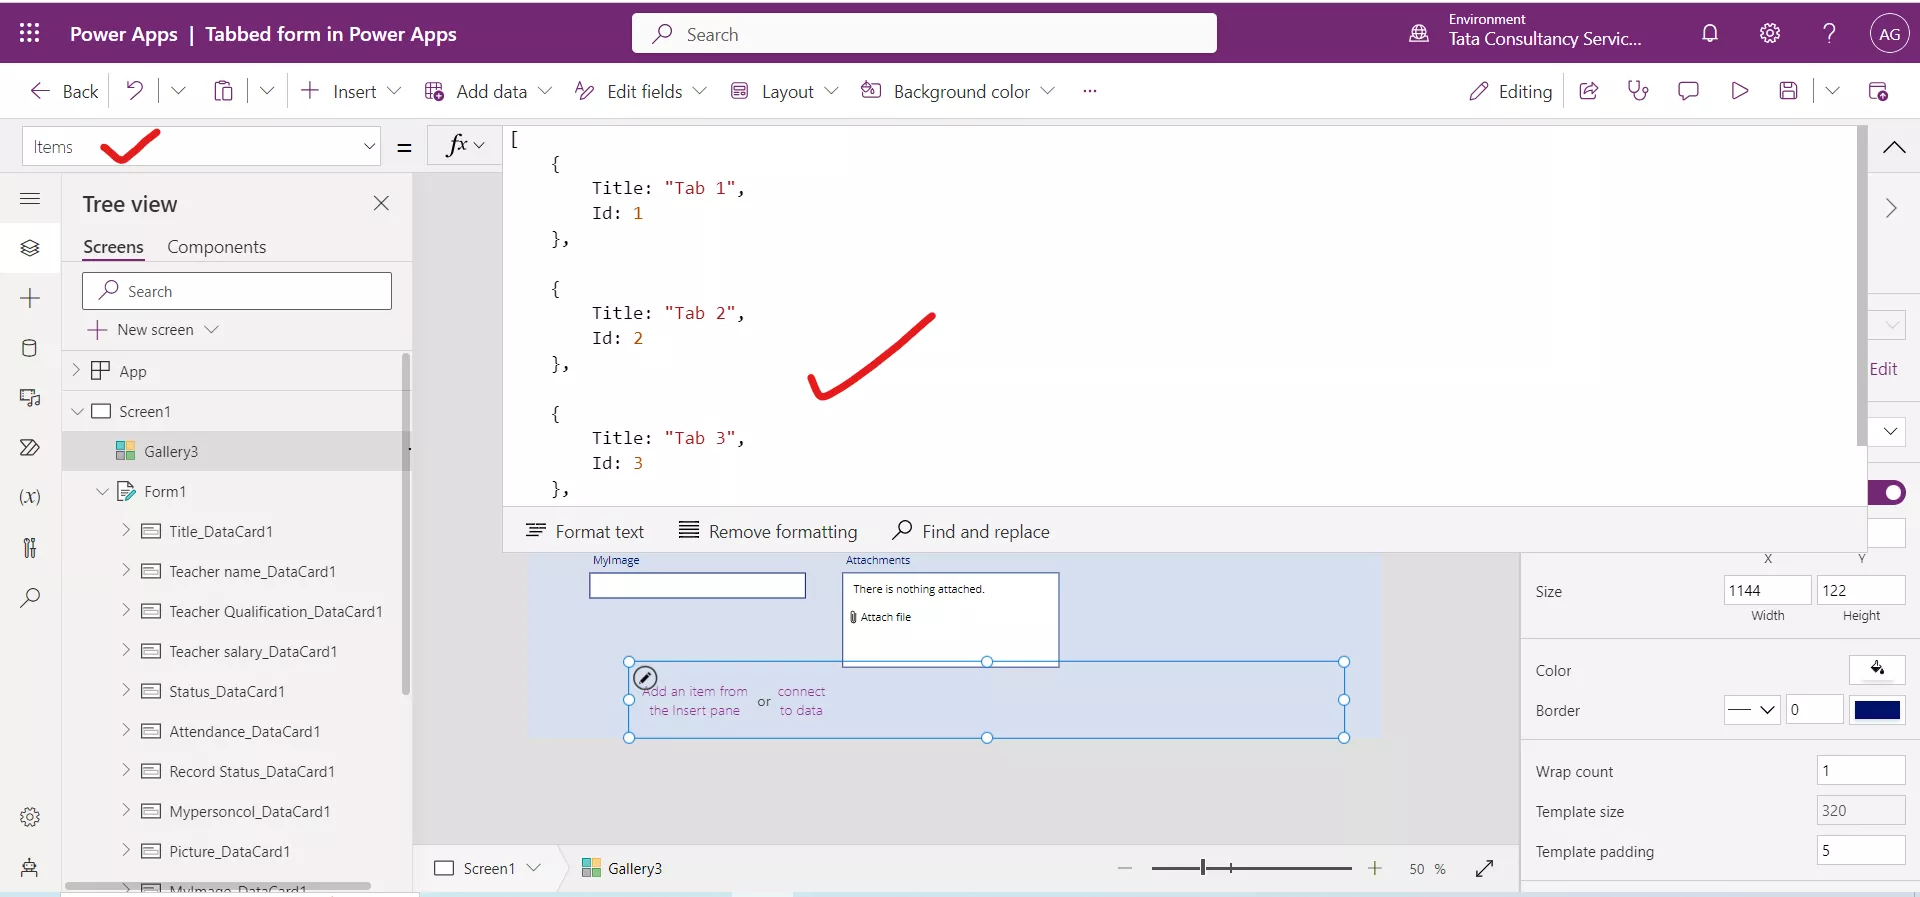
Step 6: Select the Gallery and click on the Edit (Pencil icon) icon.
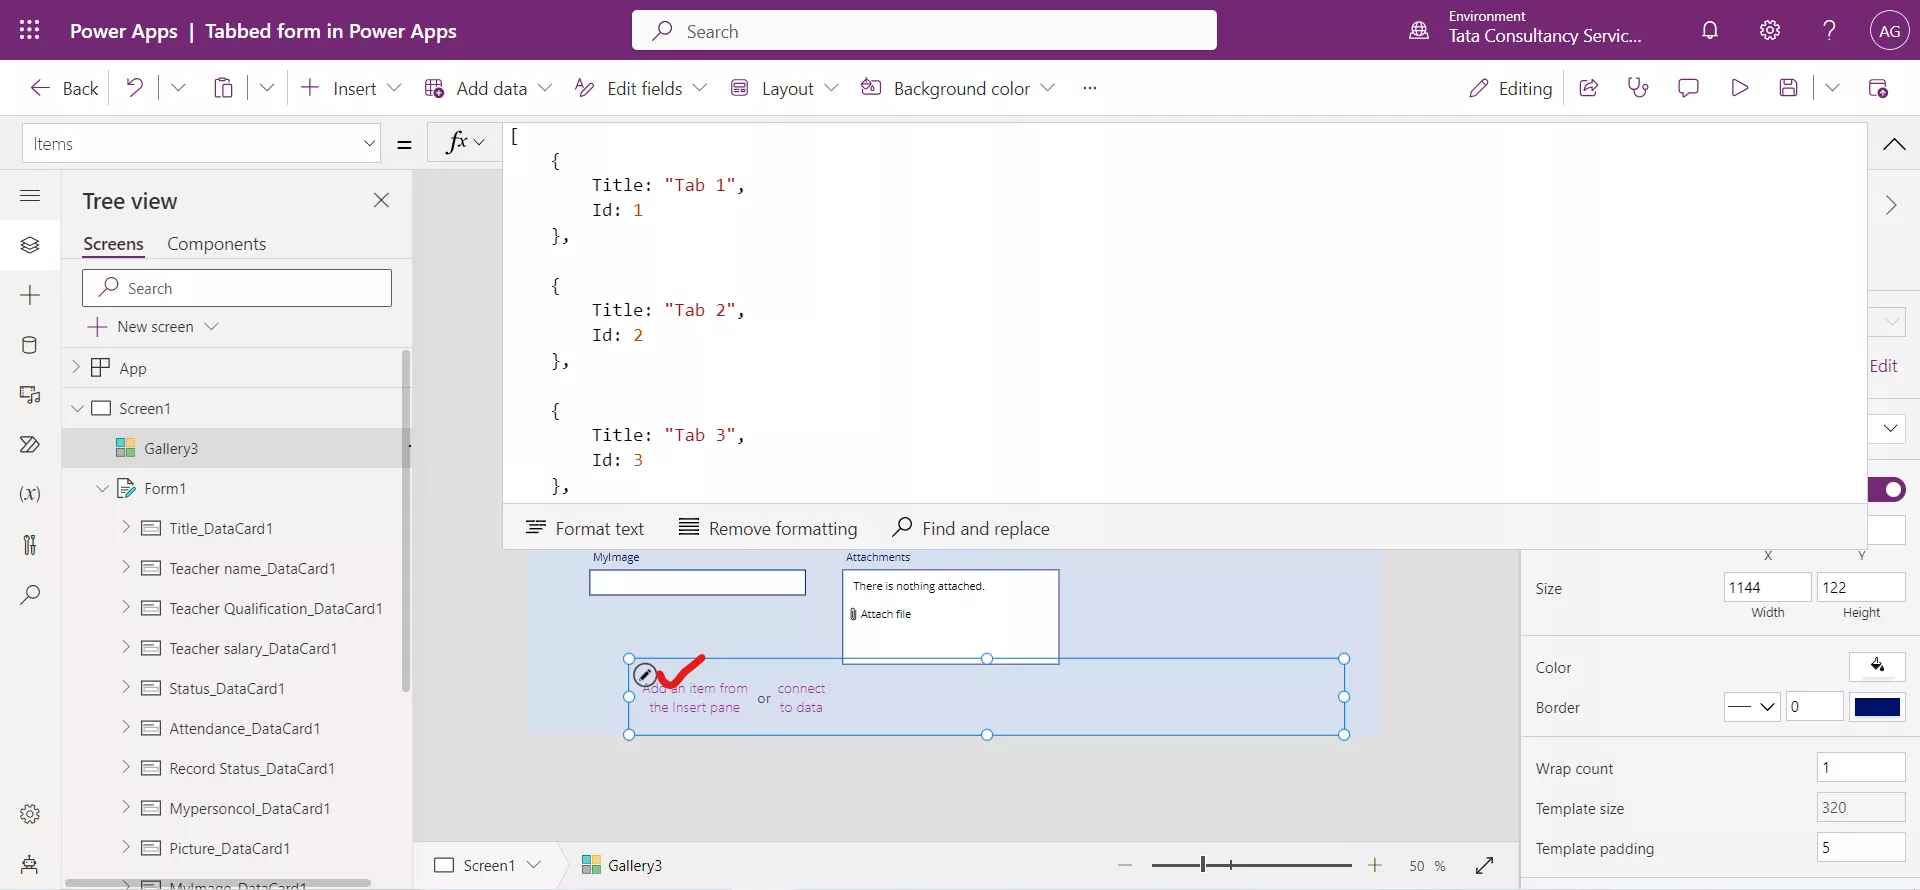
Step 7: After this click on + Insert and then add a Button control this automatically adds the button control inside the gallery.
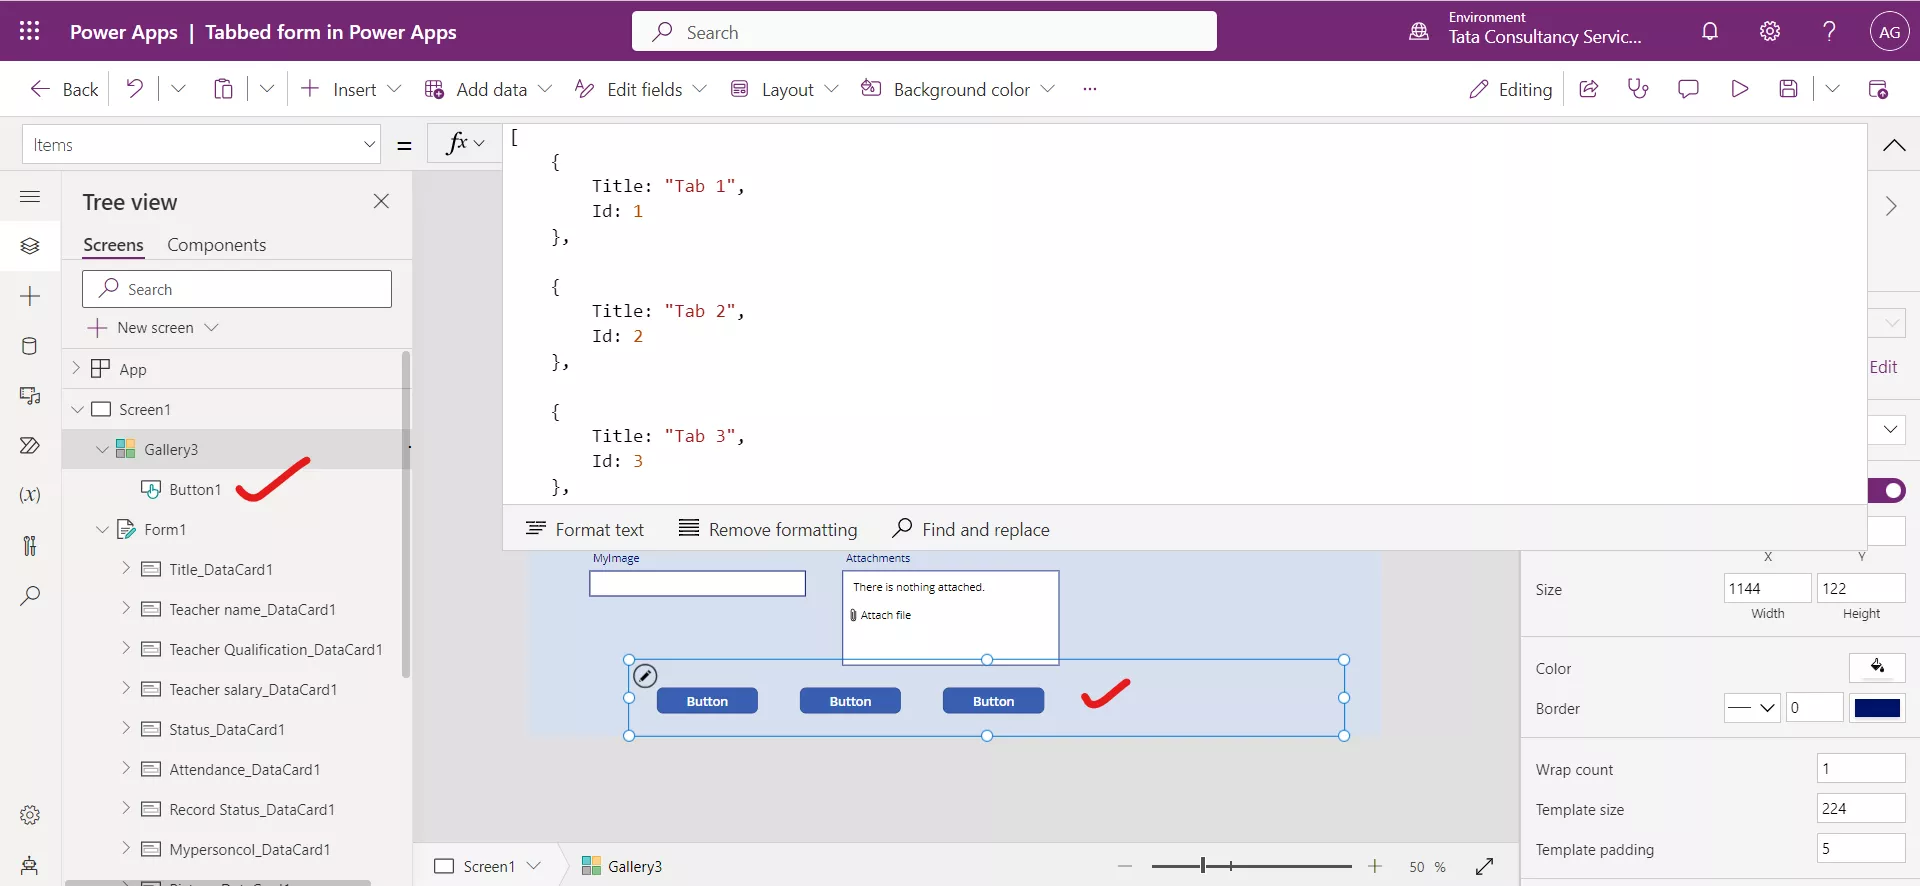
Step 8: Select the first button set its Text property to the following Powerapps formula.
Power Apps Formula
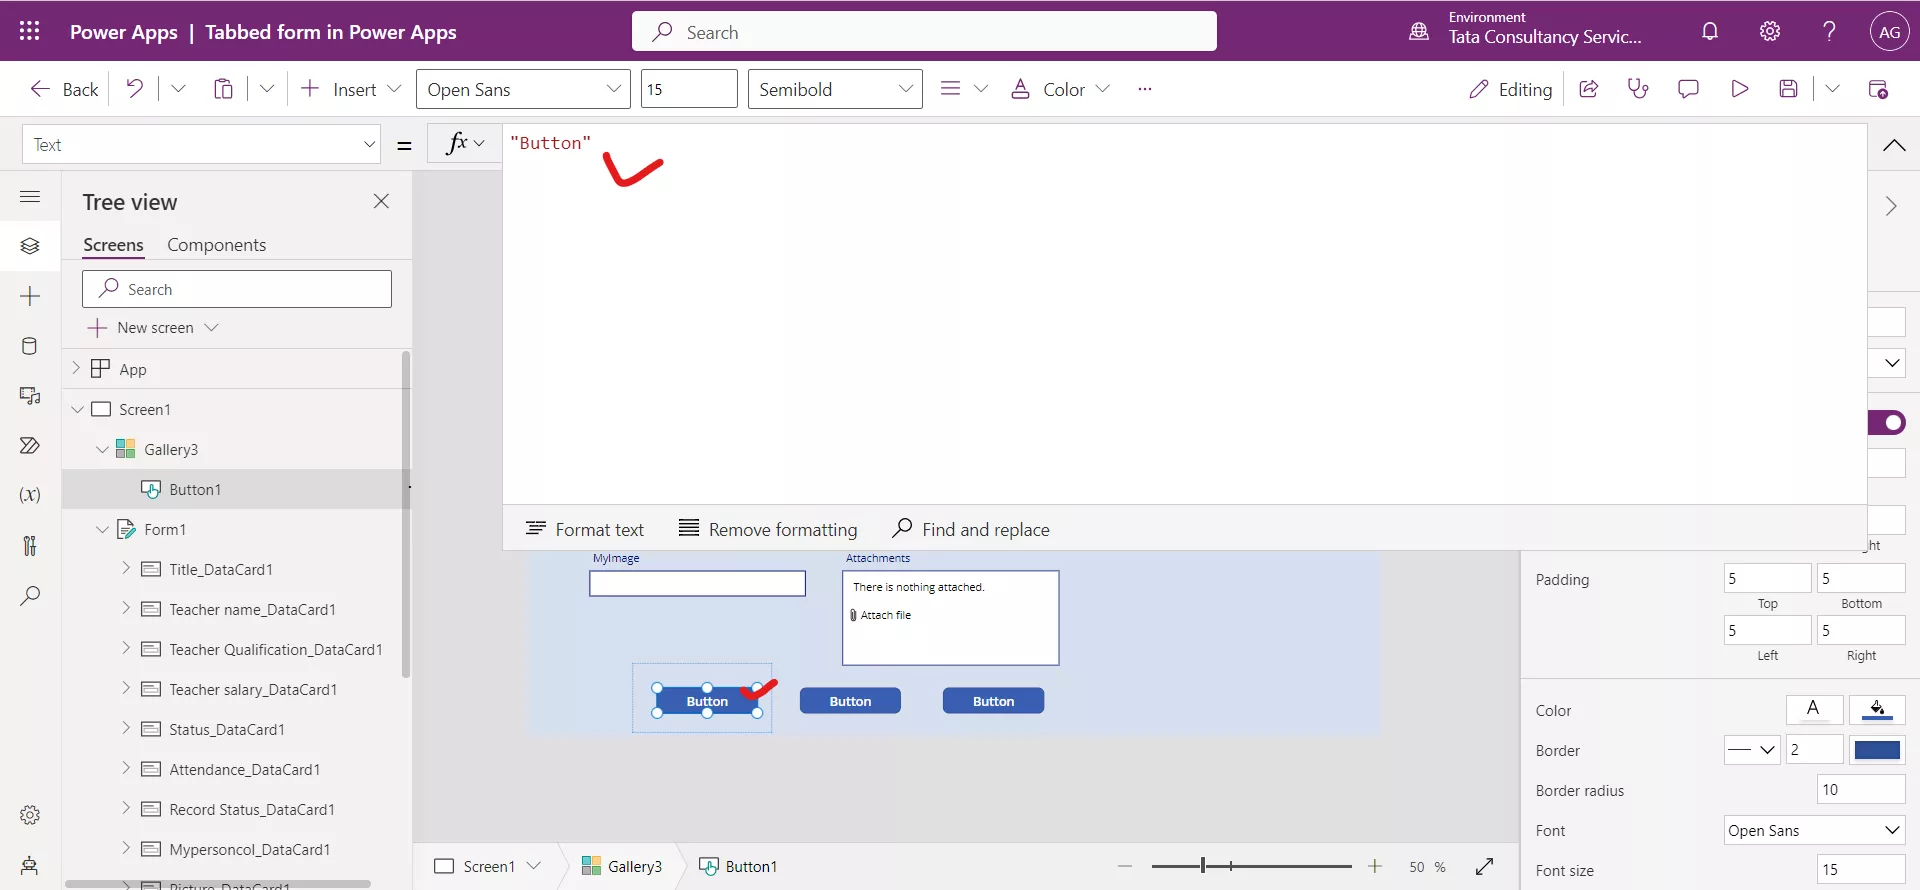
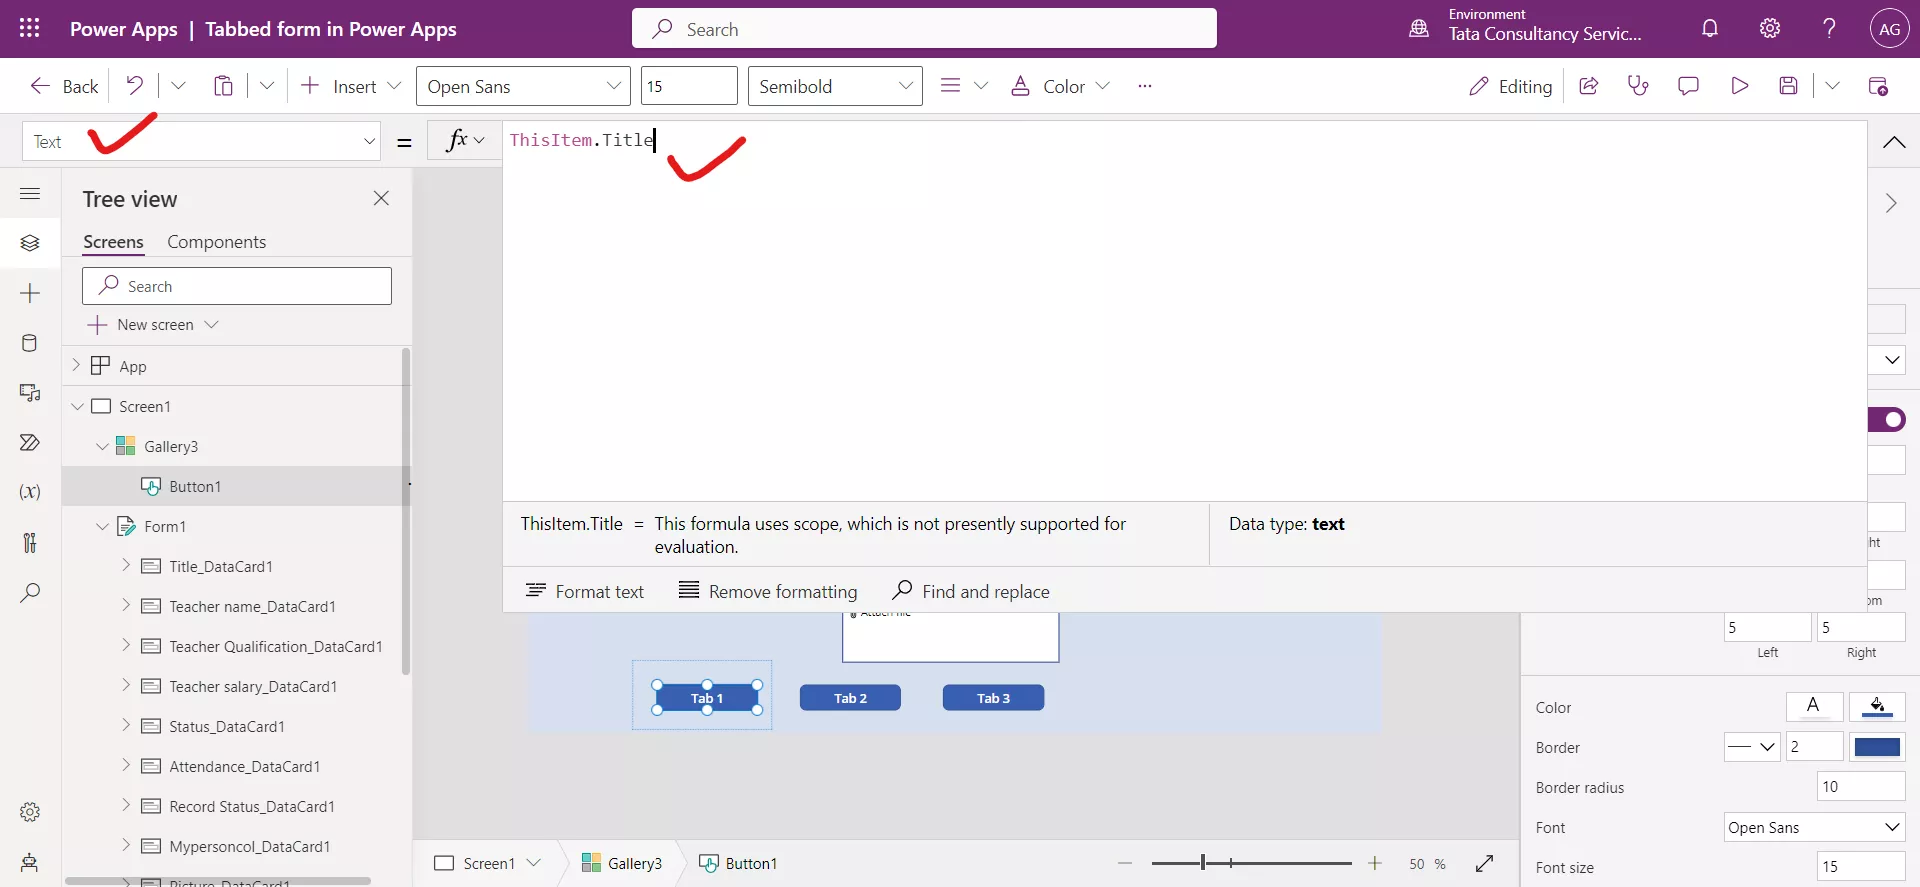
Step 9: Drag the Gallery control and place it to the desired position.
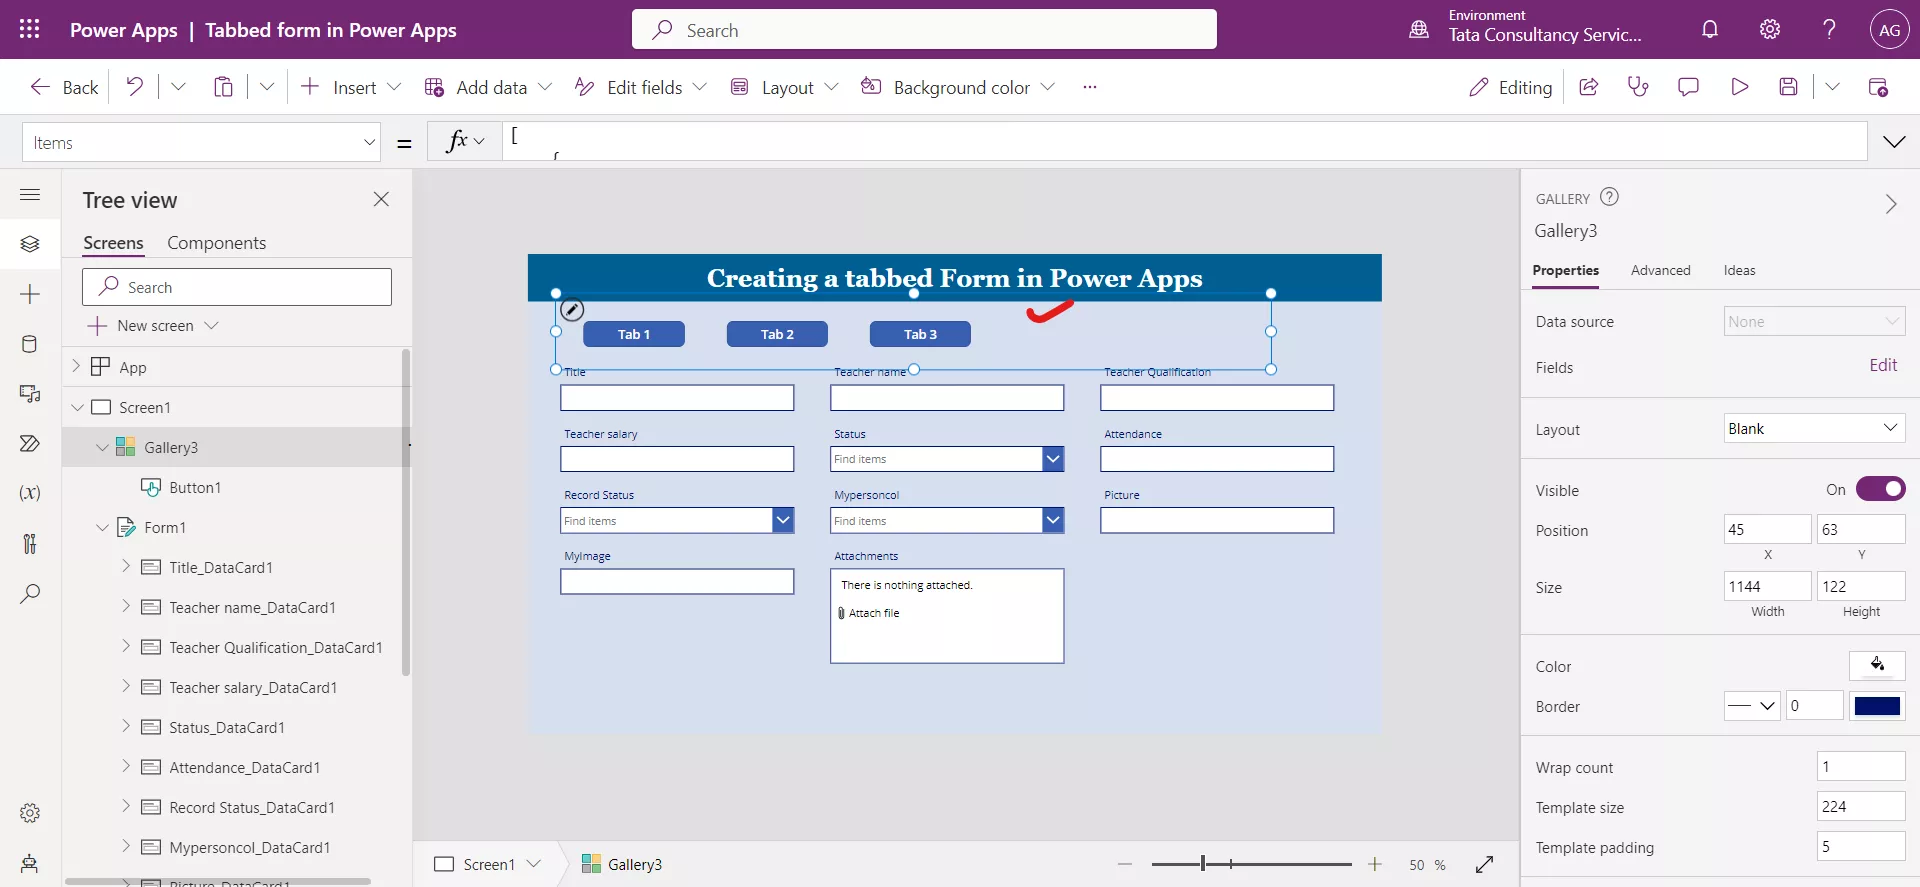
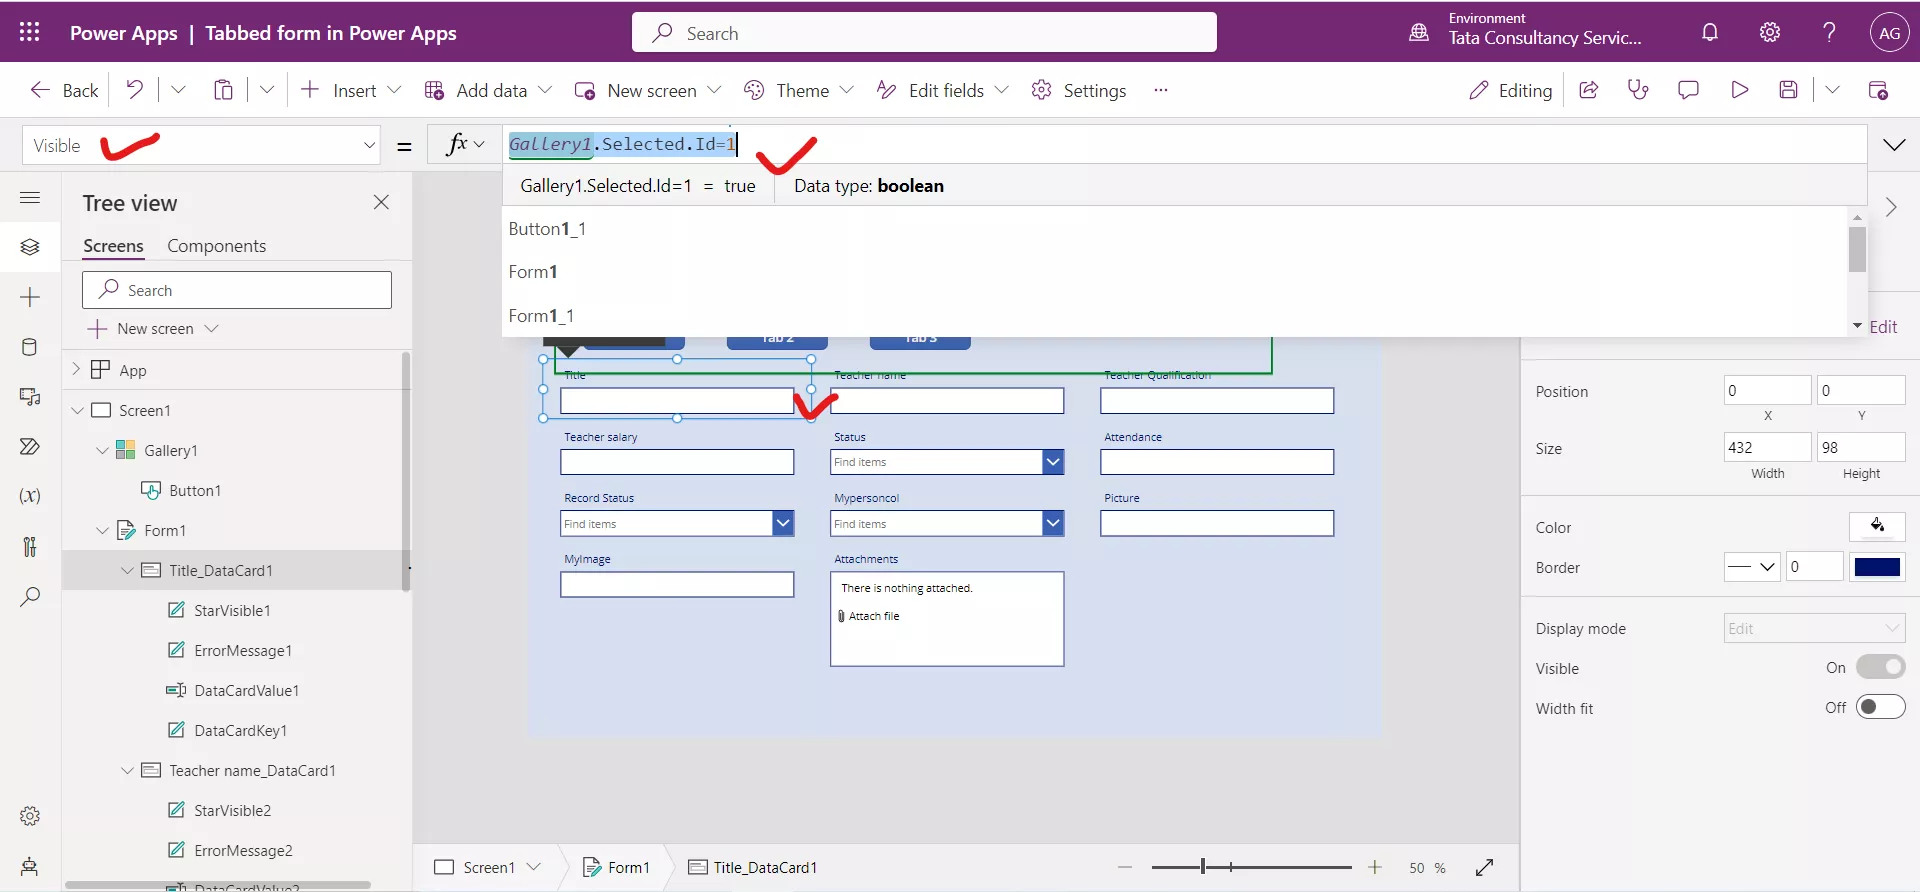
Step 10: Select those data cards one by one which will be visible when the Tab 1 is selected, and Set their Visible property to the following apps formula.
Power Apps Formula
Here, Gallery1 is the name of our gallery control.
Note: We can make a card control visible in two tabs, by writing the following formula.
Power Apps Formula
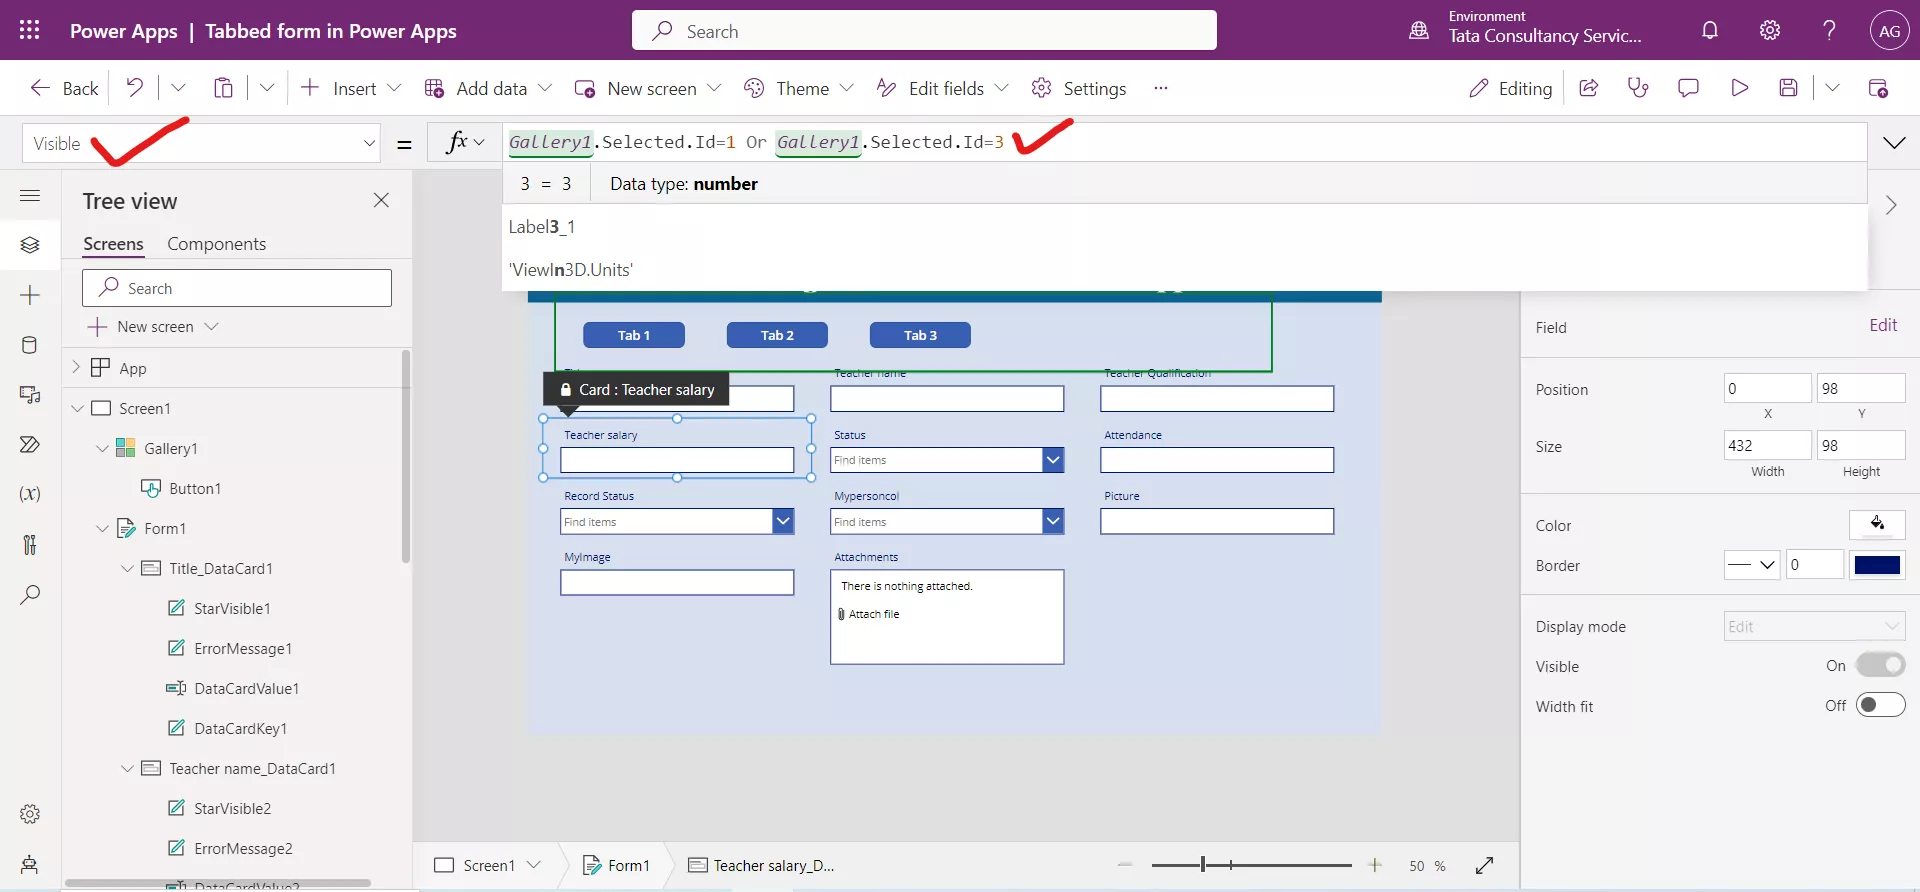
Similarly, we can place powerapps formula on Visible and other properties like Required we can leverage all by the help of selected tab.
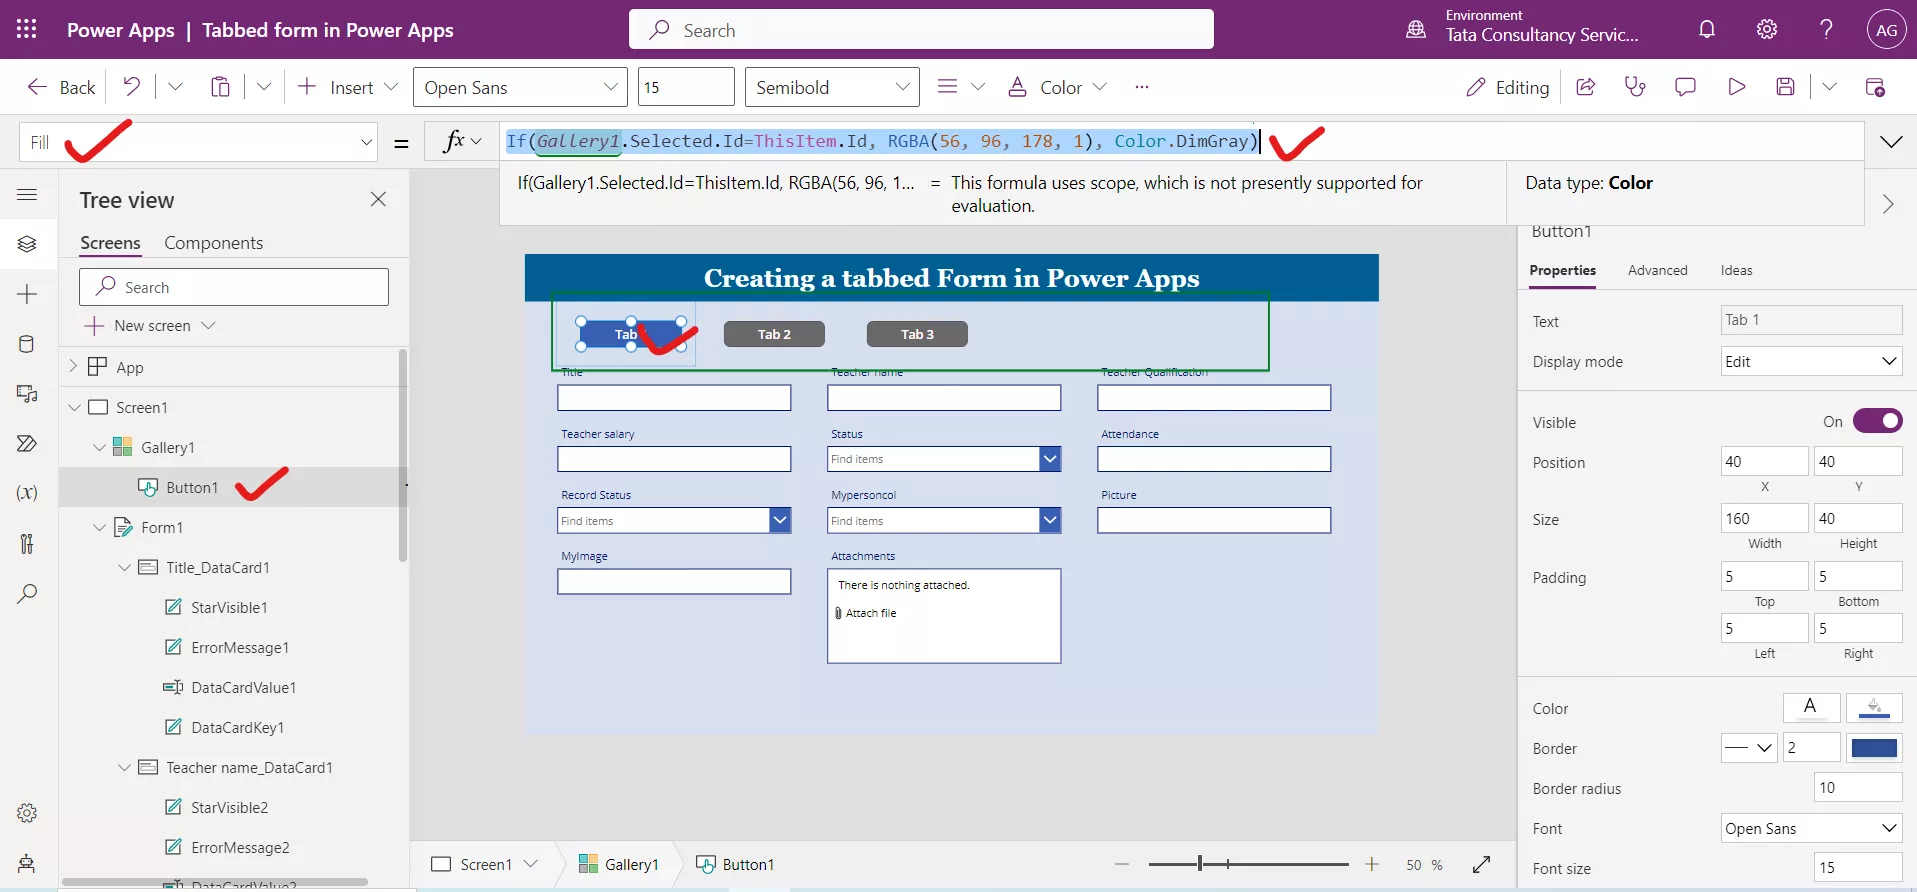
Step 11: To give the visual representation of the selected tab to the user, Select the first button of the gallery and set the Fill property of the Button control in the Gallery to the following powerapps formula.
Power Apps Formula
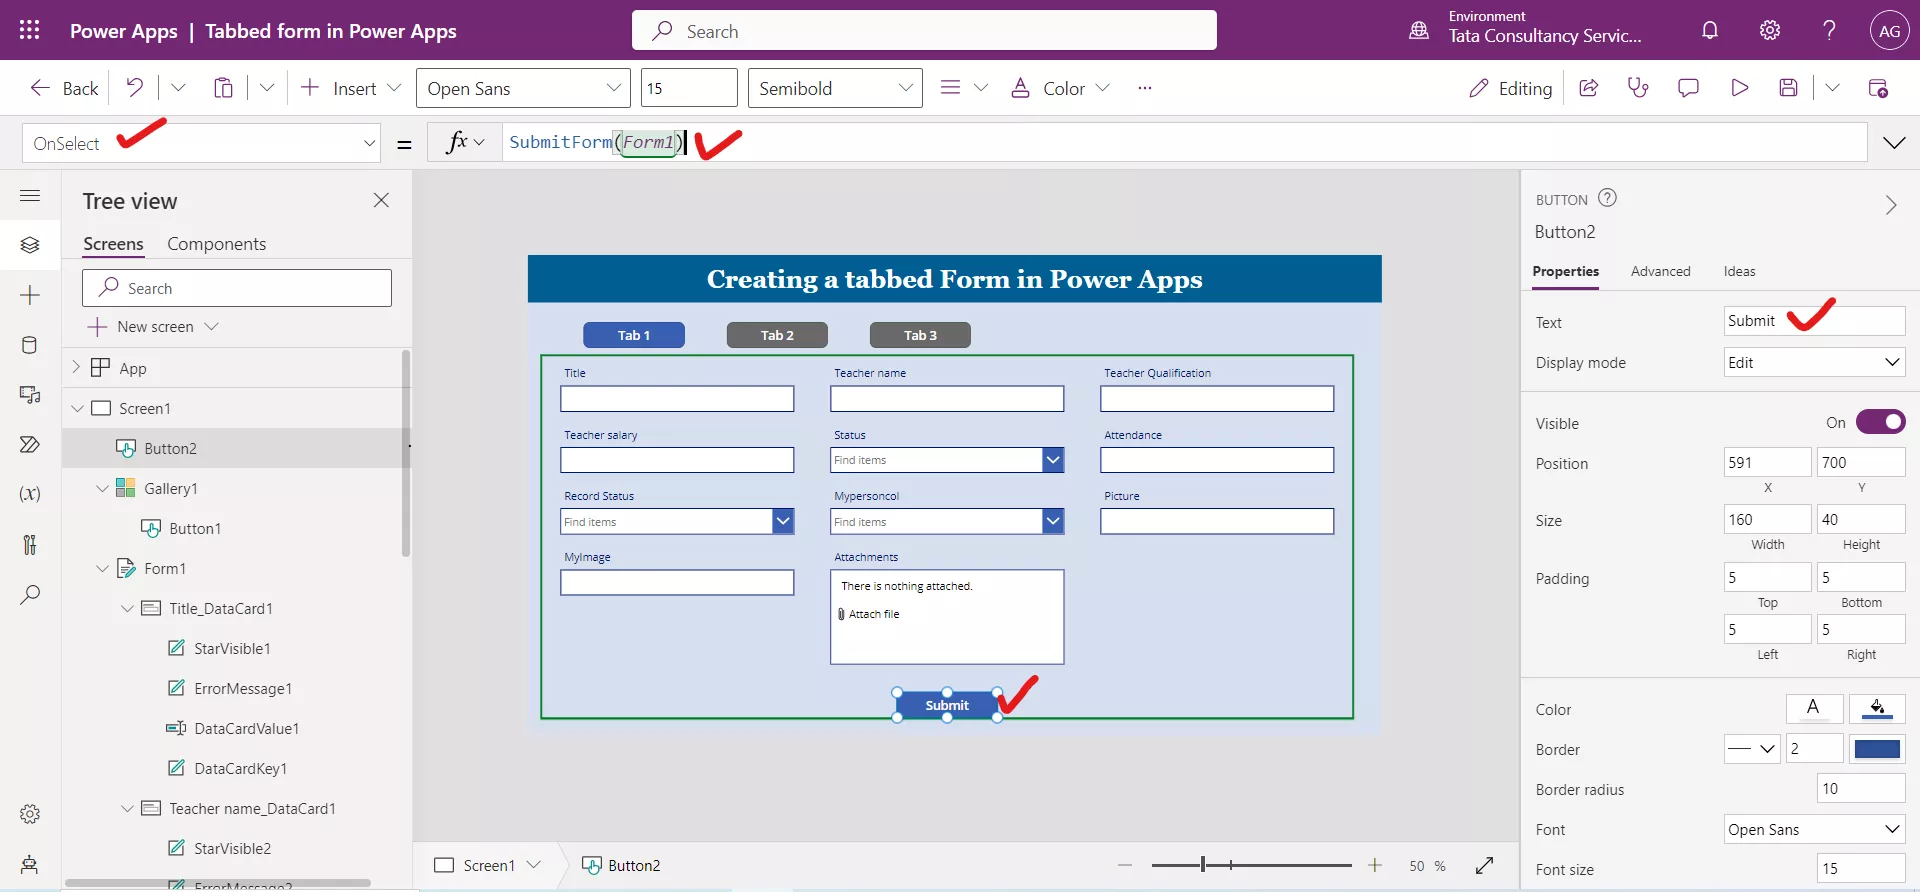
Step 12: Add a Button control and Set its Text property to “Submit”. Also, set its OnSelect property to the following formula.
Power Apps Formula
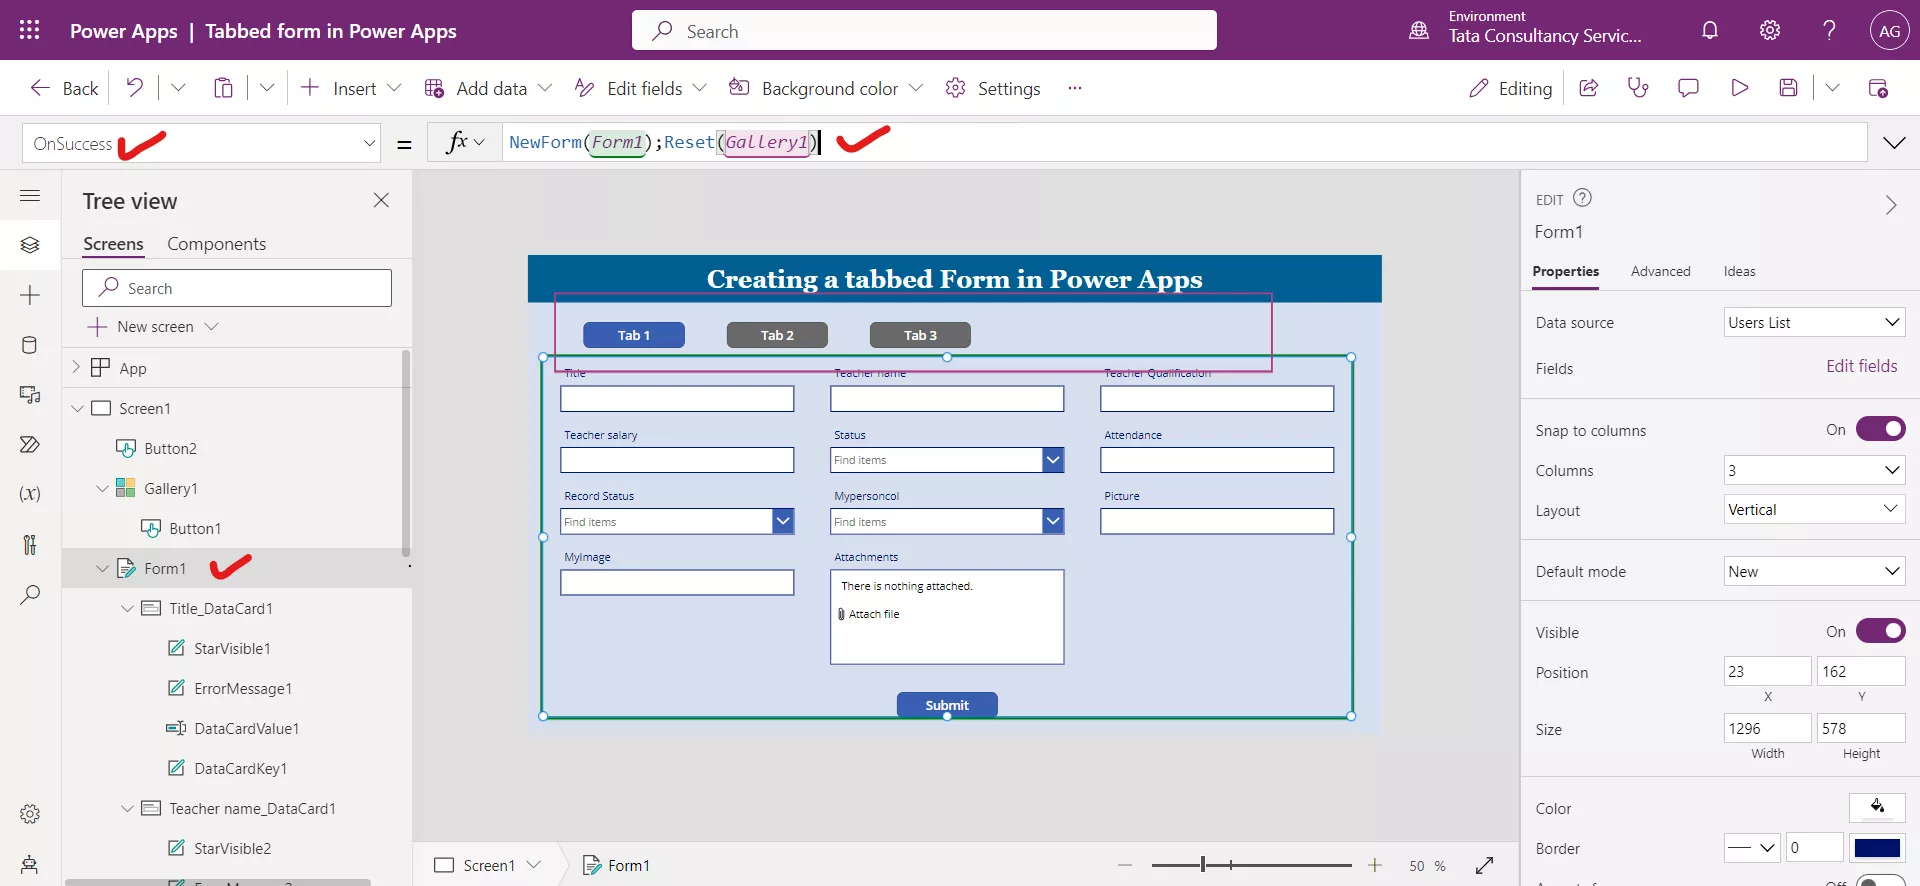
Step 13: Set the following formula on the OnSuccess property of the Form control.
Power Apps Formula
//By using Reset Gallery, the Gallery comes to its Default position.
Step 14: Our tabbed form is ready and put the preview mode by pressing the F5 or clicking on the play icon.