Power Apps from Teams
The Power Apps application for Teams lets us create, edit, and delete apps and tables in Dataverse for Teams.
We can build an app directly in Teams that uses Dataverse for Teams as the data source. We can also create and edit apps and workflows within Teams, and quickly publish and share them for anyone on the team to use, without having to switch between multiple apps and services. Also, ready-made templates are available for installation to help organizations realize value faster.
Note: All users with Microsoft 365 licenses are able to access apps within Dataverse for Teams, without any additional license needed. Power Apps portals require specific licenses for people to be able to access them, whether they are internal or external users. Model-driven apps can only be created within Dataverse. Users without a Power Apps license will not be able to access them. Canvas apps within Dataverse require users to have a Power Apps license to be able to access them.
The following steps show how to create an app from Microsoft Teams.
Step 1: Add the Power Apps application to Teams
a) Launch Teams or use the browser to open Teams.
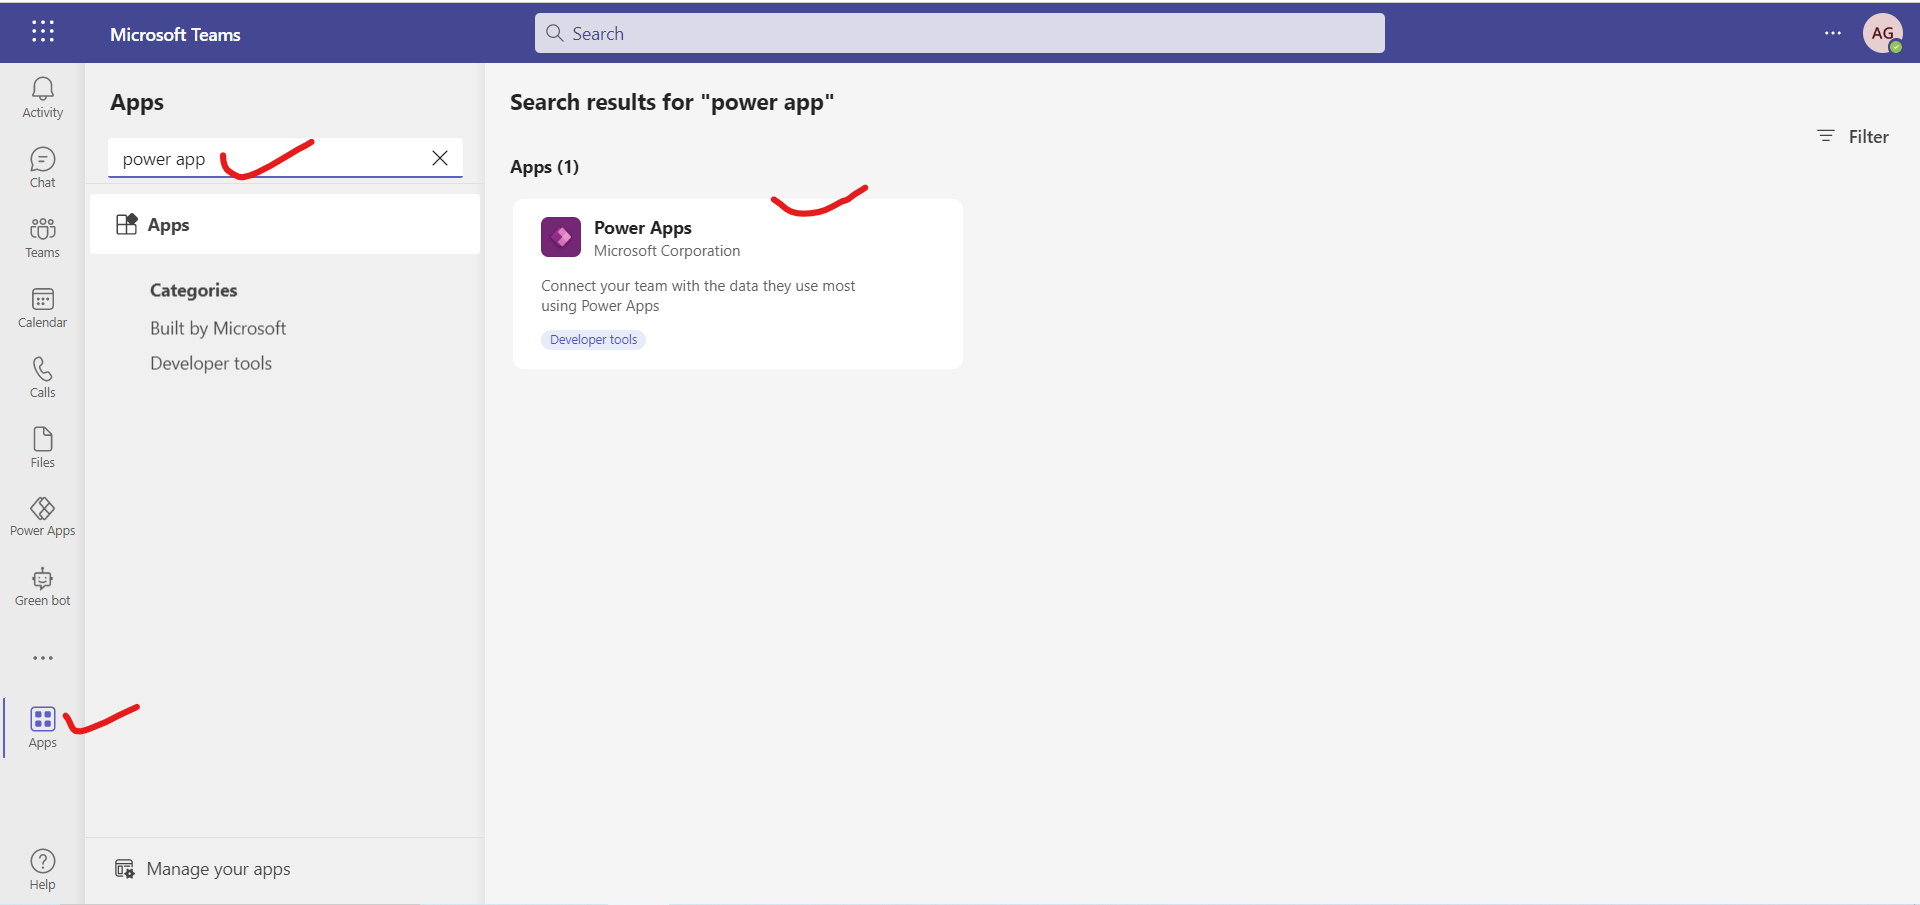
b) In Teams, select Apps in the lower-left corner of the screen.
c) On the App Marketplace screen, in the search box, enter Power Apps and then select it from the search results.
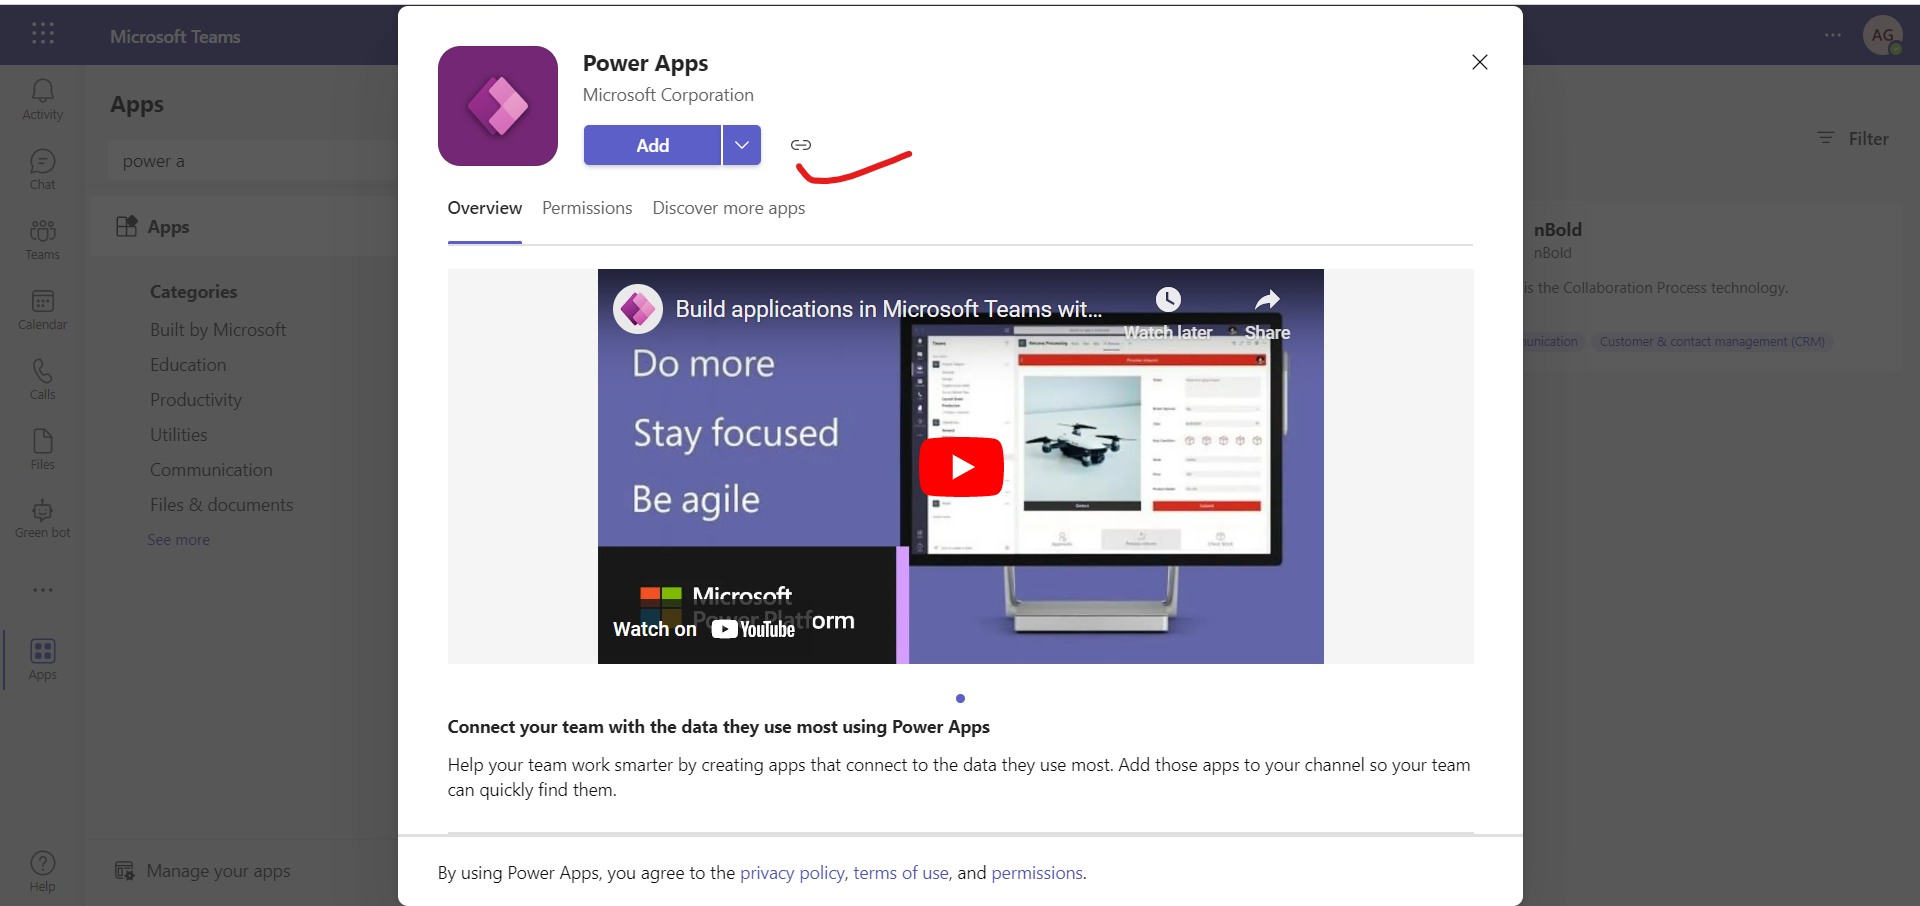
d) Click on the Add button to install Power Apps in the Teams.
Note
Pin the app for Power Apps to the app launcher so that we can quickly access it any time. Right-click the Power Apps icon and then select Pin. We can also run the app as a separate window from Teams by selecting Pop out app.
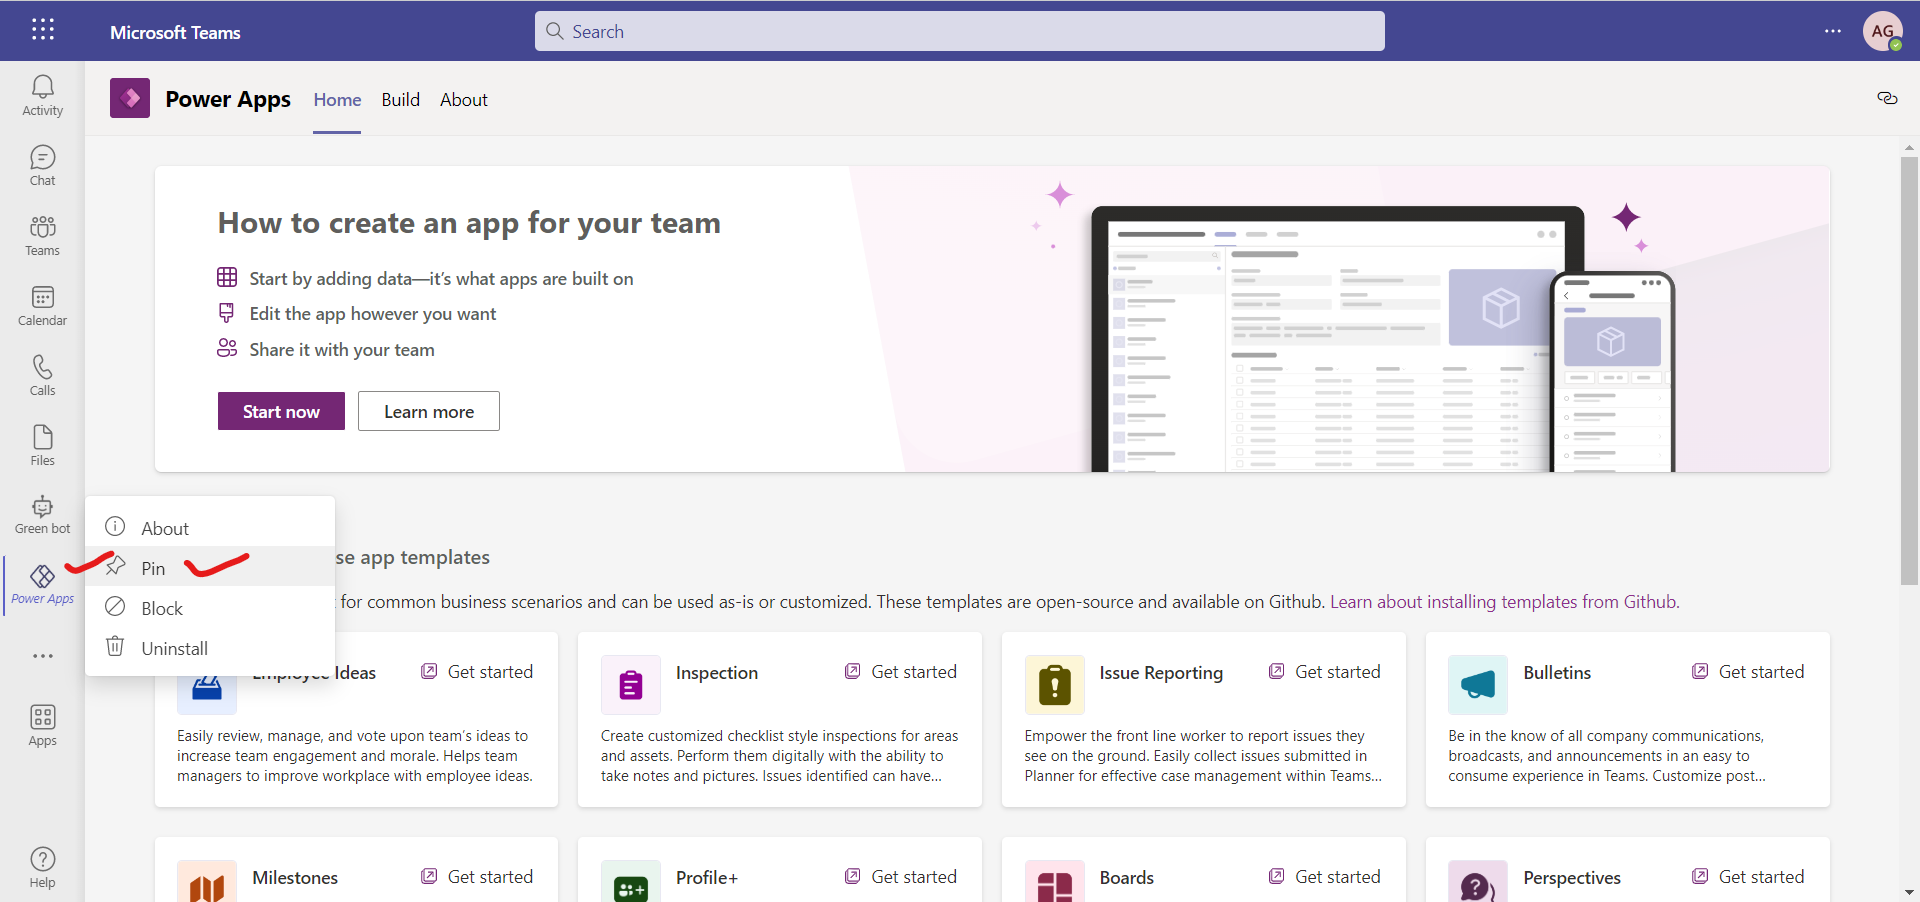
When Teams has successfully added Power Apps, we will be brought to the main Power Apps screen. This screen provides access to existing apps along with templates and Learn module links.
Install template apps
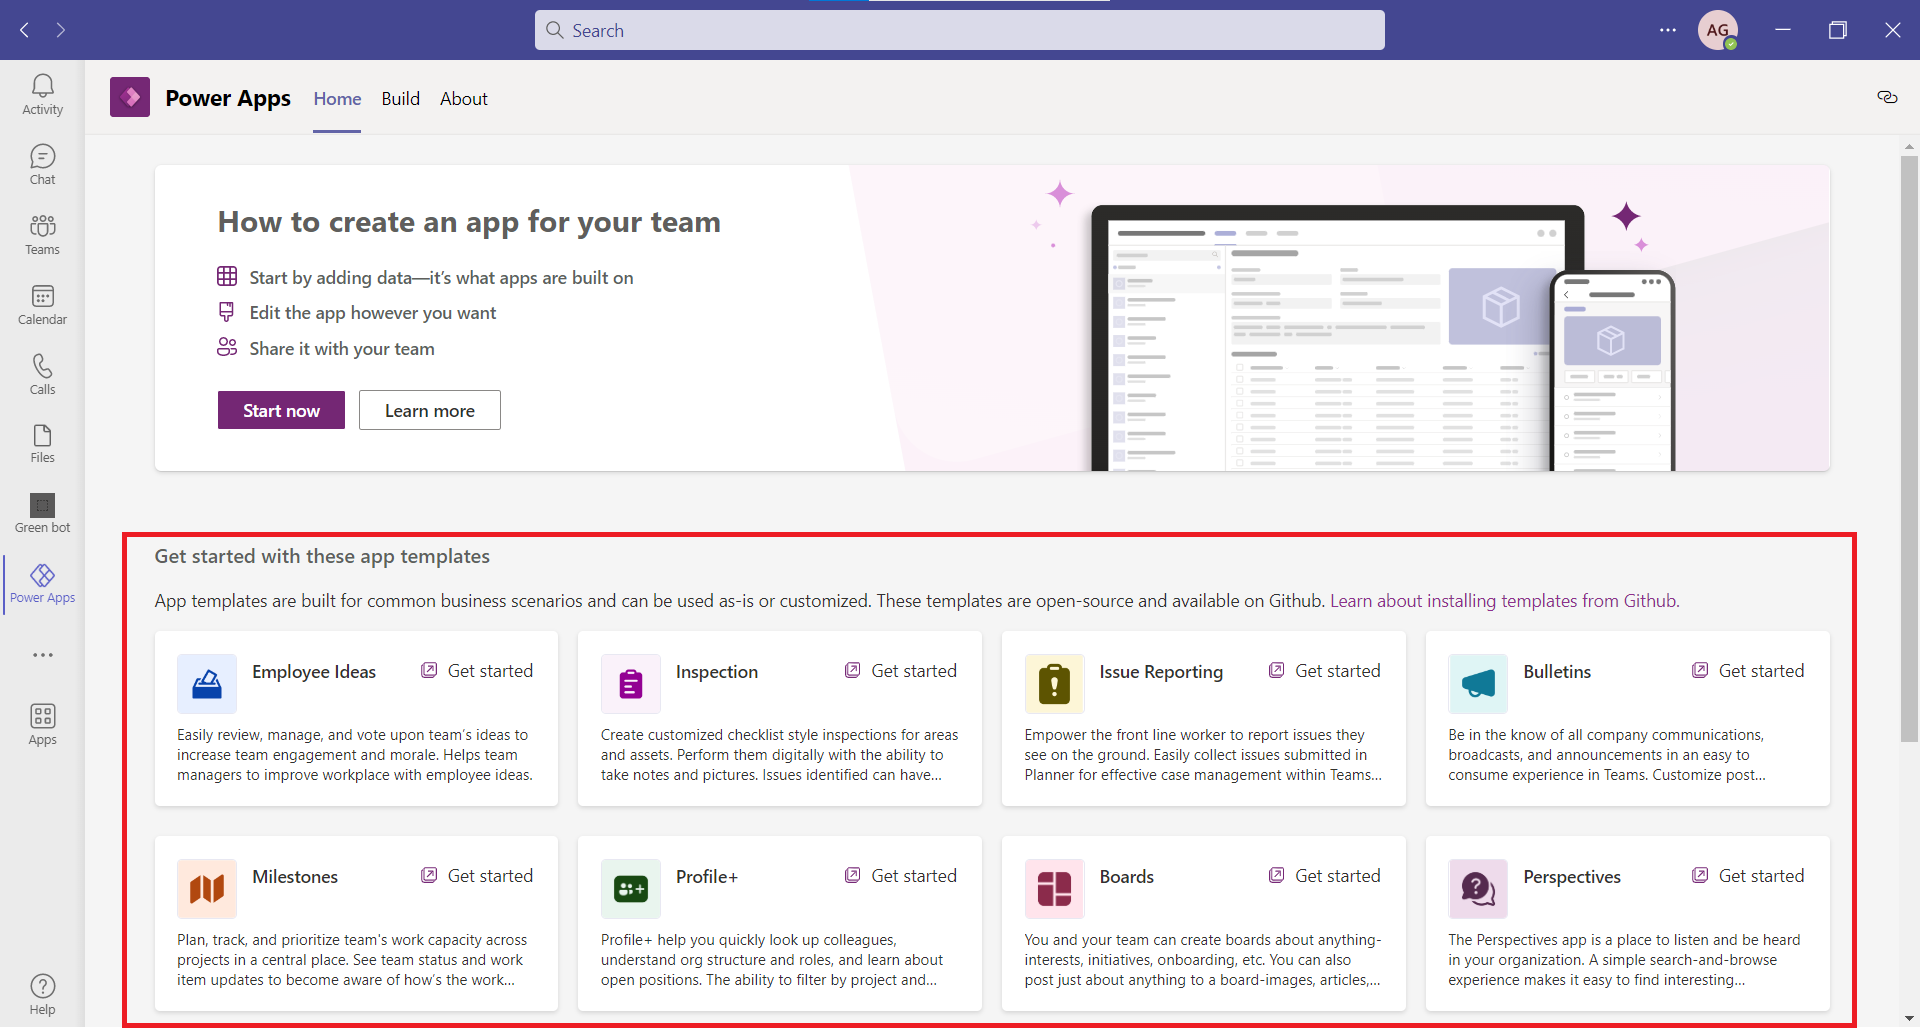
Microsoft created a few sample apps that can be used as-is or customized to suit your specific business needs. You can find these apps when you first open the app for Power Apps in Teams.
Step 2: Identify a Microsoft team
All Dataverse for Teams apps require a Microsoft team to store the Microsoft Power Apps data. Only team members will be able to access our app by default.
Step 3: Create a new app
After we have installed Power Apps, we can create our first app.
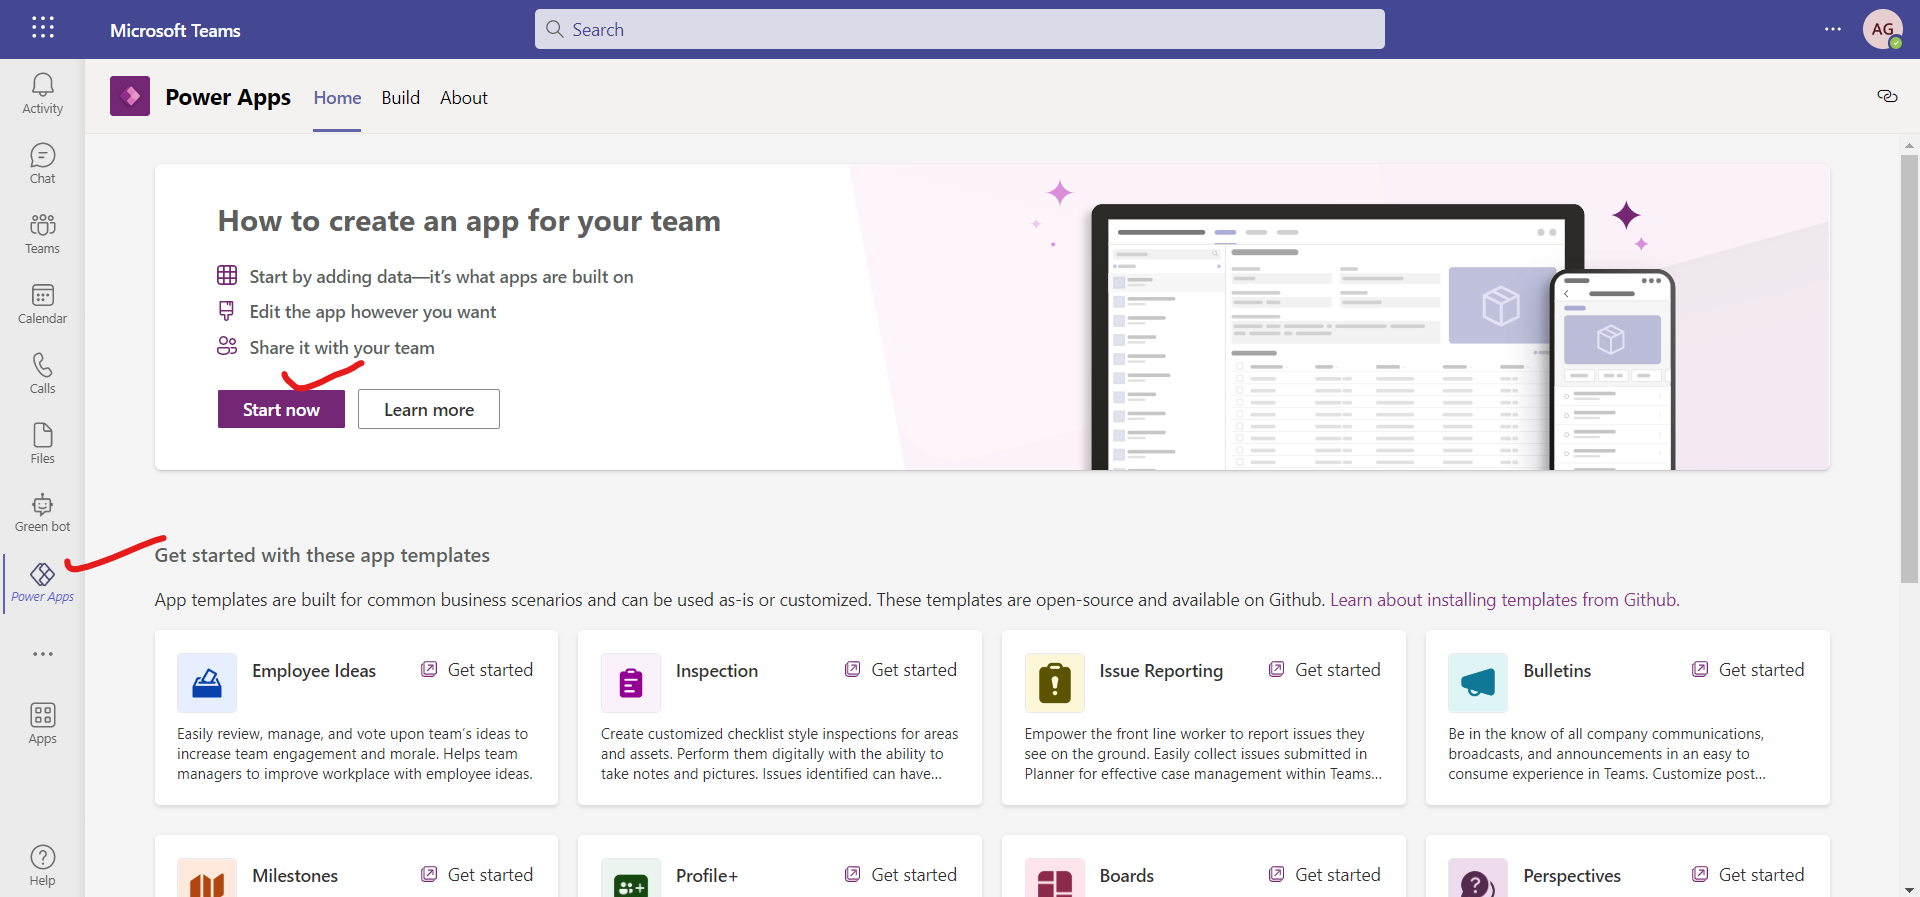
a) From Teams, open the Power Apps application and then select Start now.
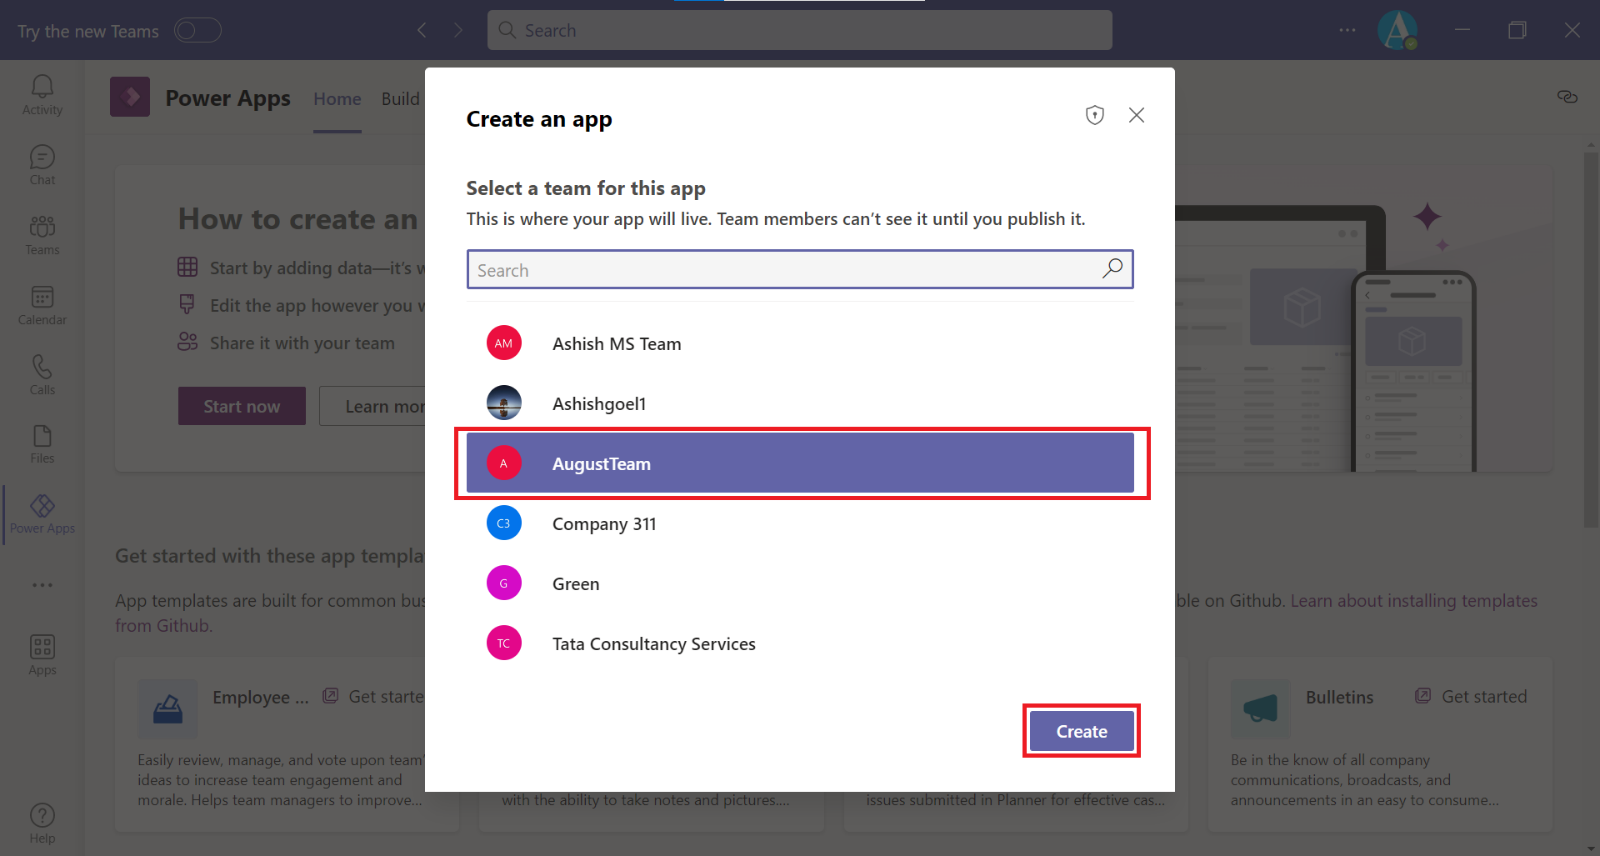
b) Select a team for our app and then select Create. When we select Create it builds a Dataverse for Teams environment. While waiting for the process to complete, we can close the window and do other work. Teams will send both a message card and an email when the work is complete.
When our environment is provisioned, a pop-up window will display in the lower-right corner of your screen, letting us know that the process has finished.
Dataverse for teams environment
The Dataverse for Teams environment is automatically created for the selected team when we create an app or bot in Microsoft Teams for the first time or install an app created using Power Apps from the app catalog for the first time. The Dataverse for Teams environment is used to store, manage, and share team-specific data, apps, and flows. Each team can have one environment, and all data, apps, bots, and flows created with the app created using Power Apps inside a team are available from that team's Dataverse for Teams database.
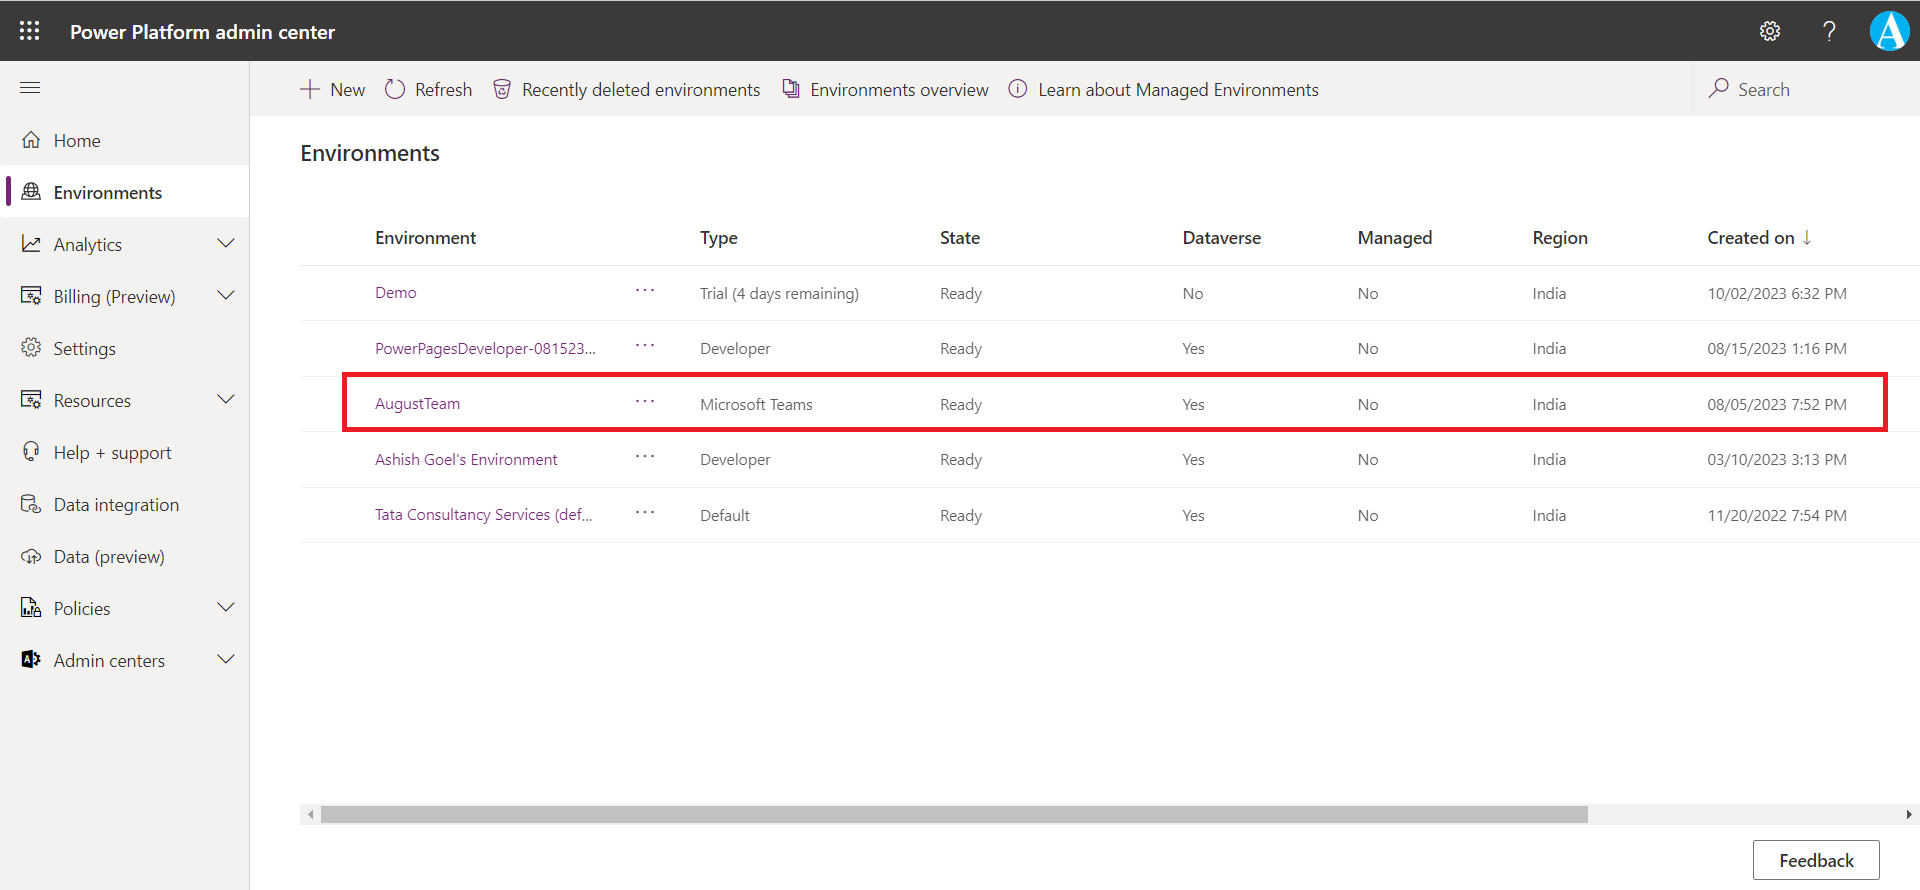
We can identify a Dataverse for Teams environment in the Power Platform admin center by using the Type column in the list of environments.
At this stage, the Power Apps editor will appear. Enter the name of our app and then select Save.
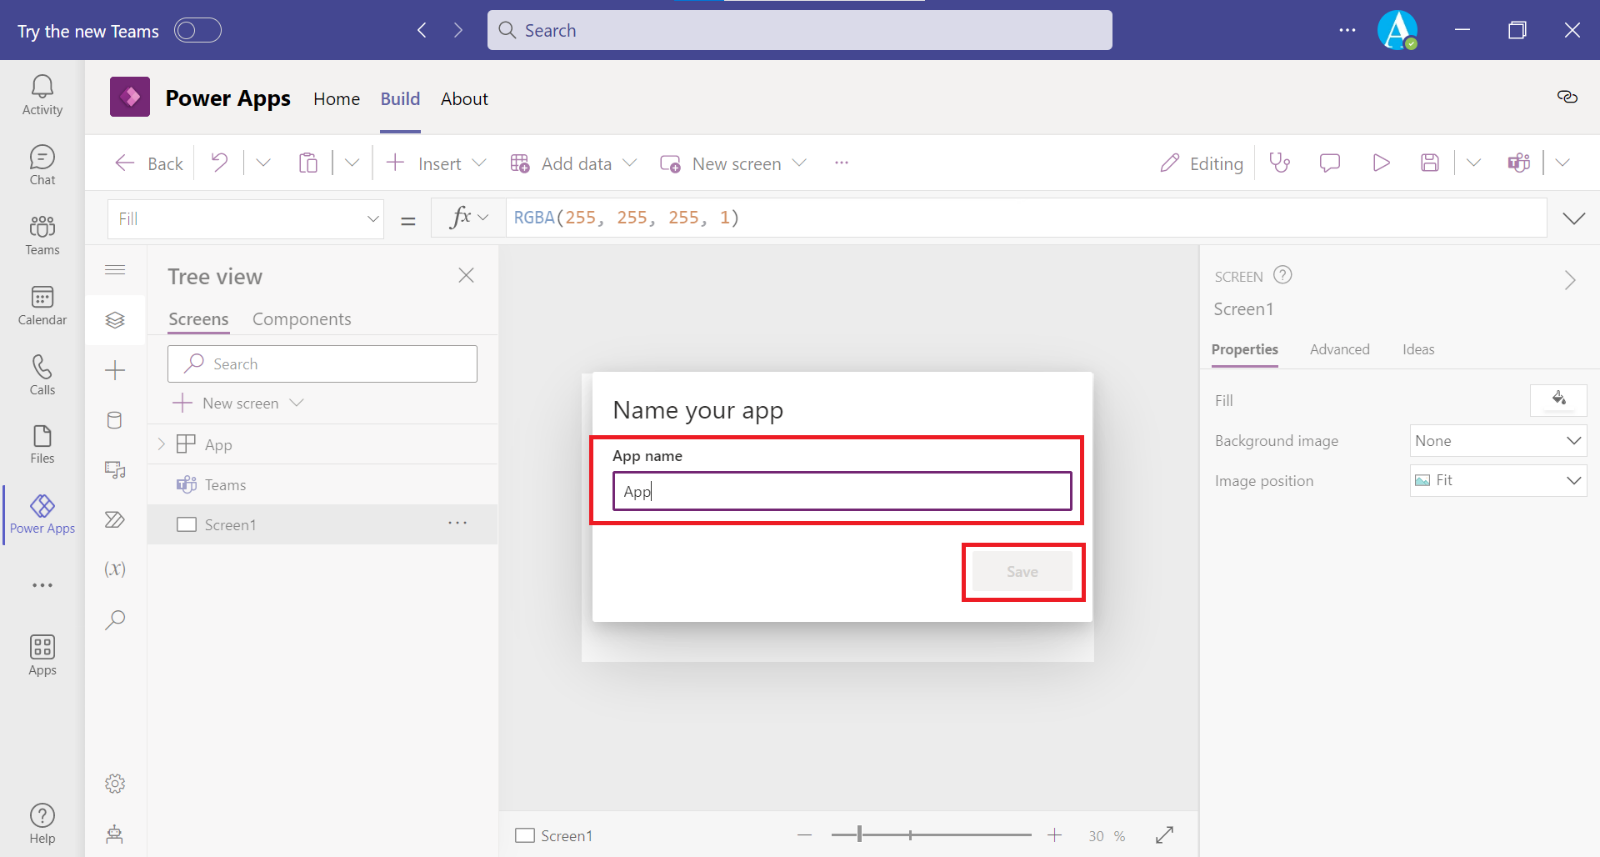
Let us we give the name as MyFirstTeamsApp.
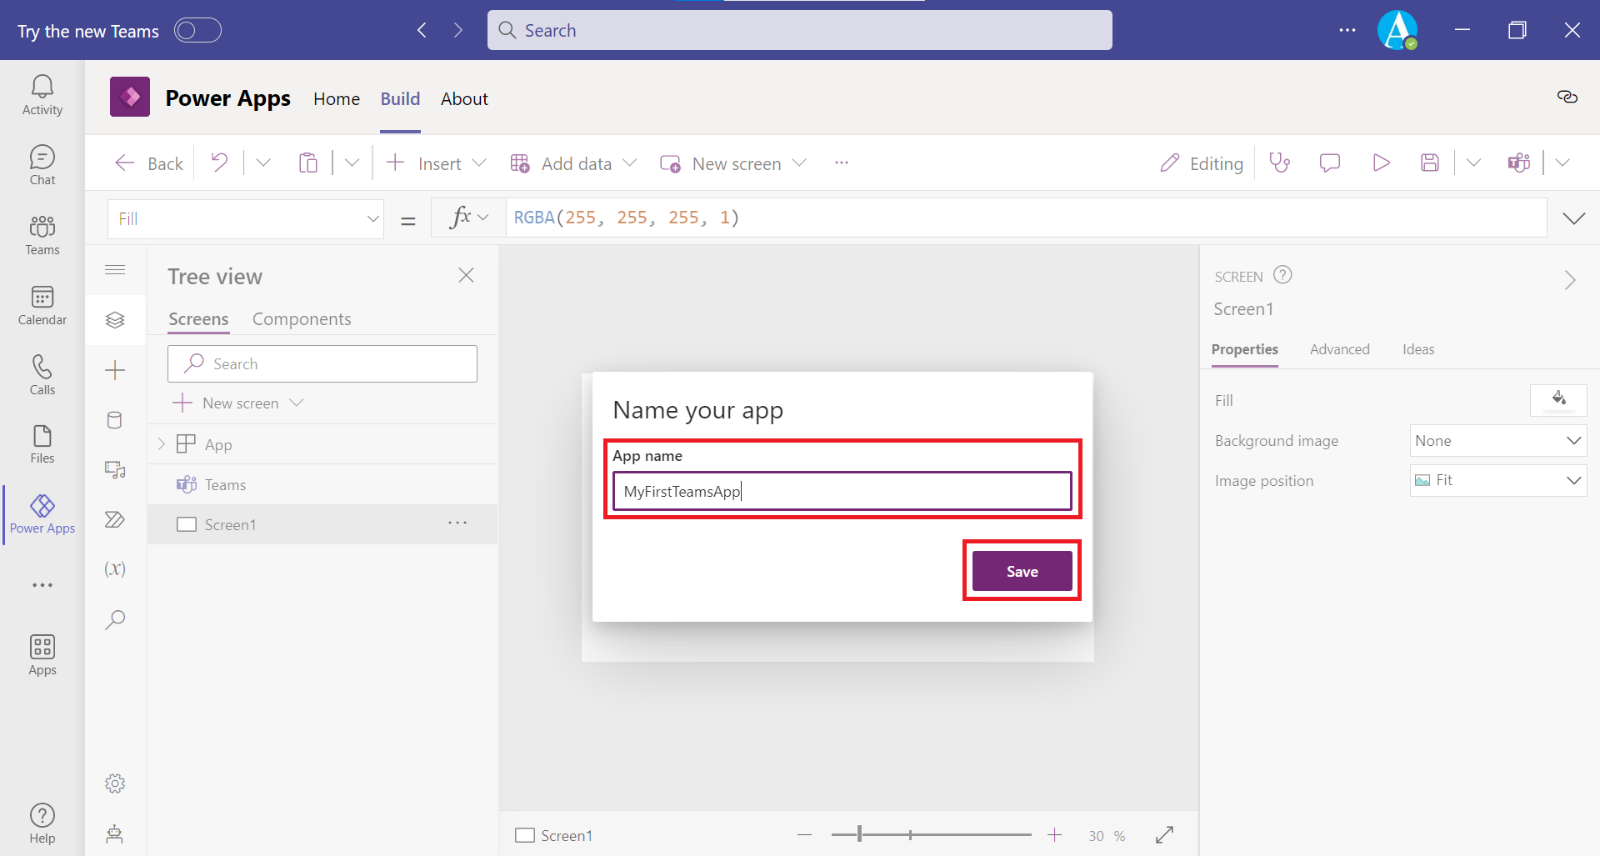
The Power Apps Studio window opens inside the Teams. It's currently empty because we haven't connected a Dataverse table to it.
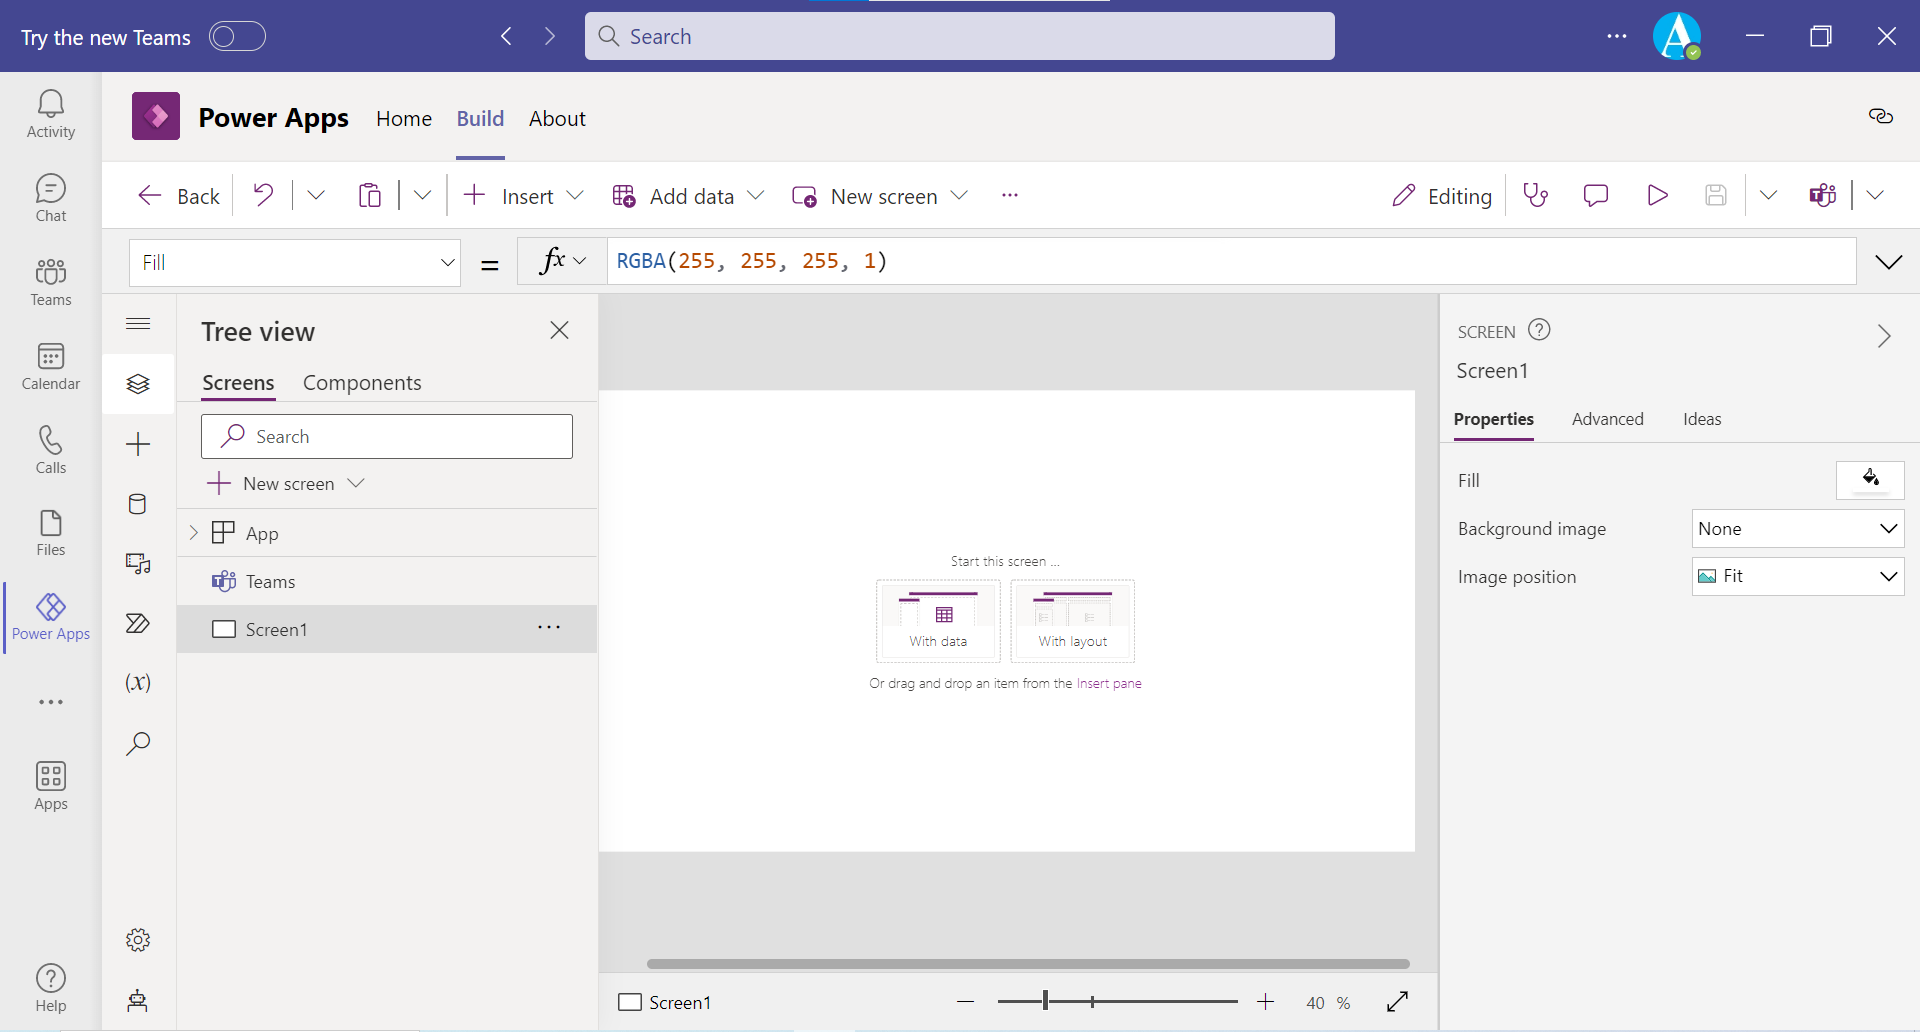
With the creation of the first app, we now have a Dataverse for Teams environment to help us start building tables. The Power Apps editor enables us to quickly create tables with the Create new table button.
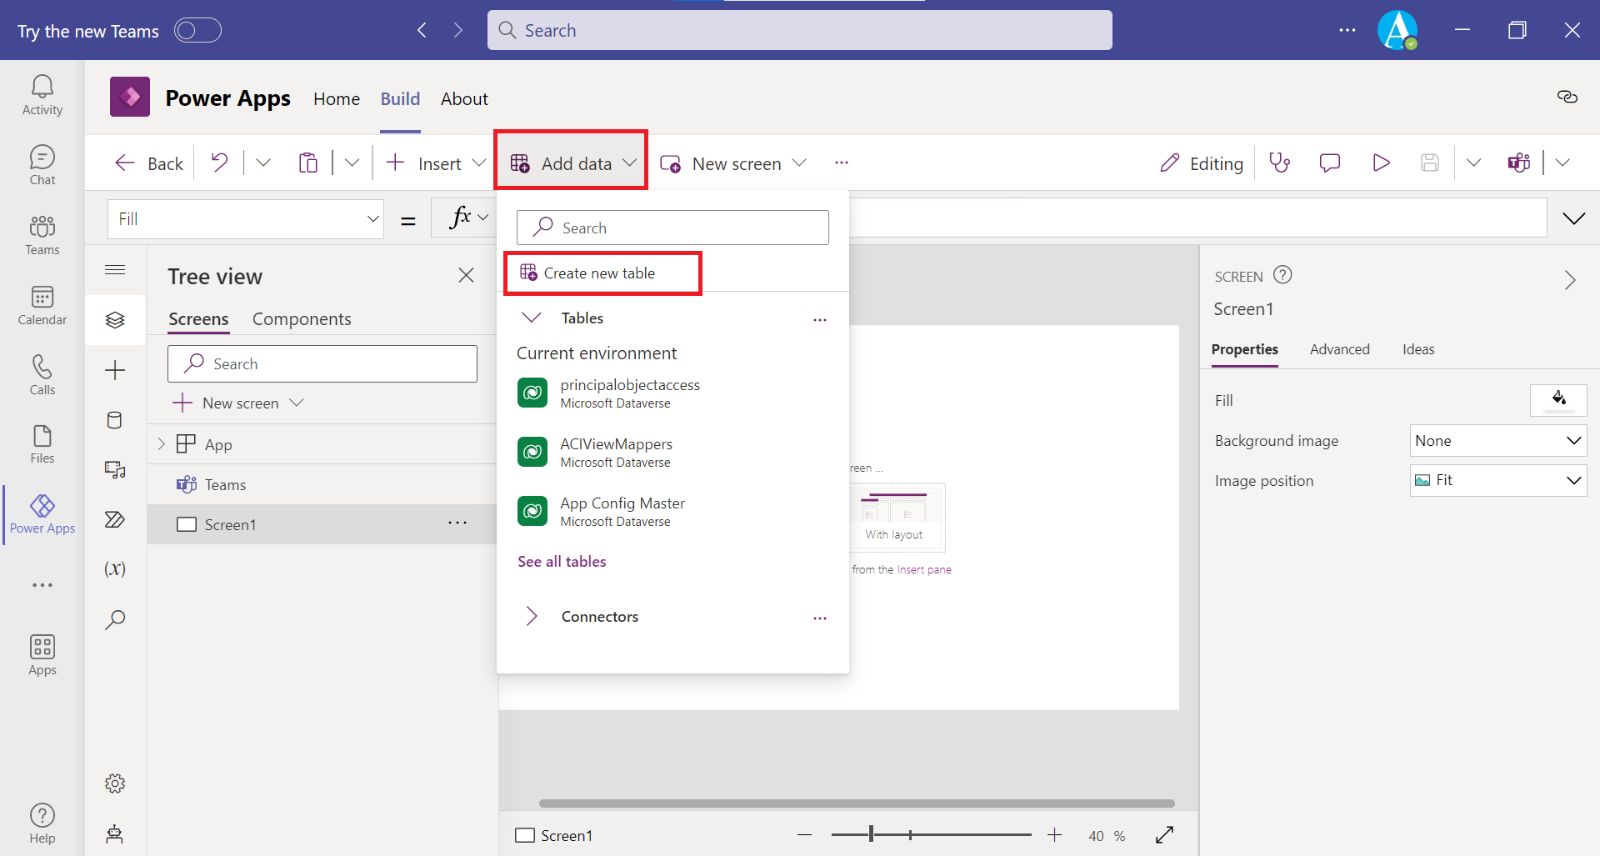
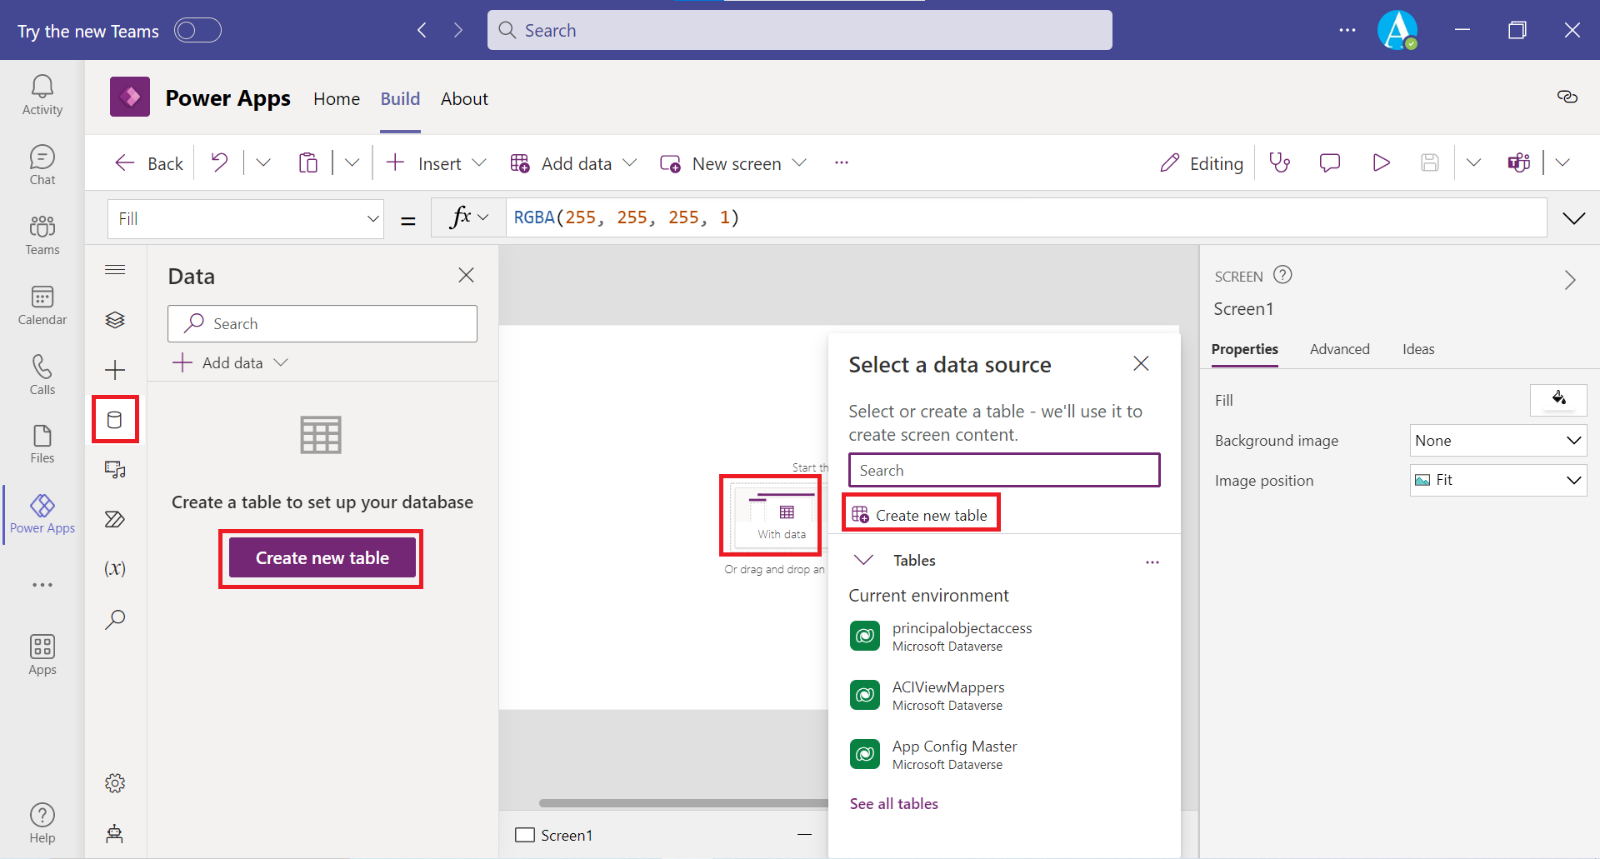
Alternatively, select “With data” and then select Create new table. Or click on the Data section and then click “Create new table”.
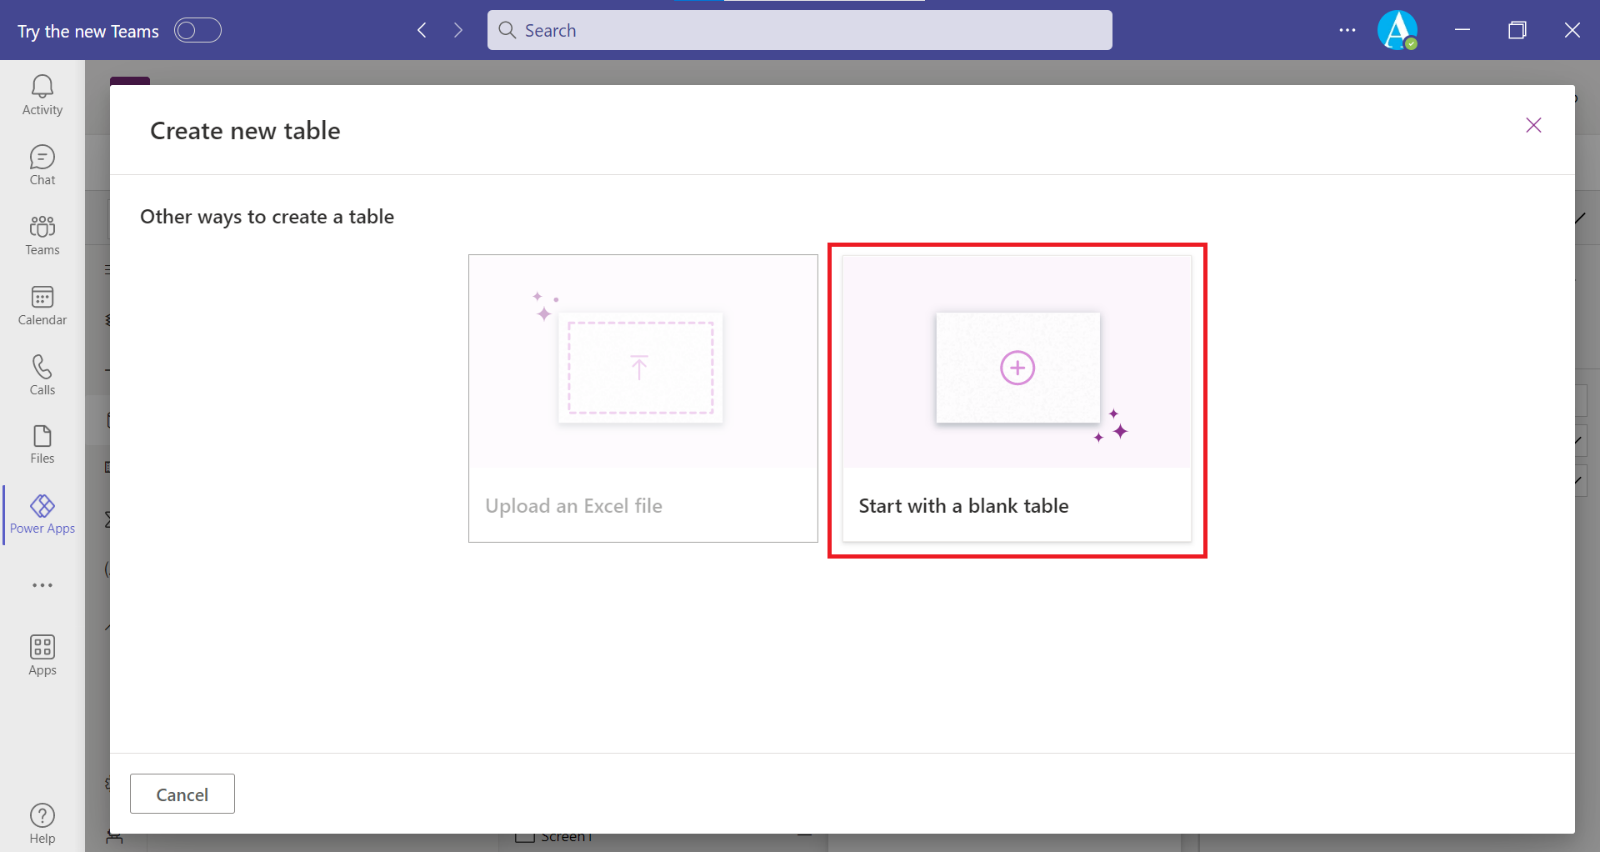
Select Start with a blank table.
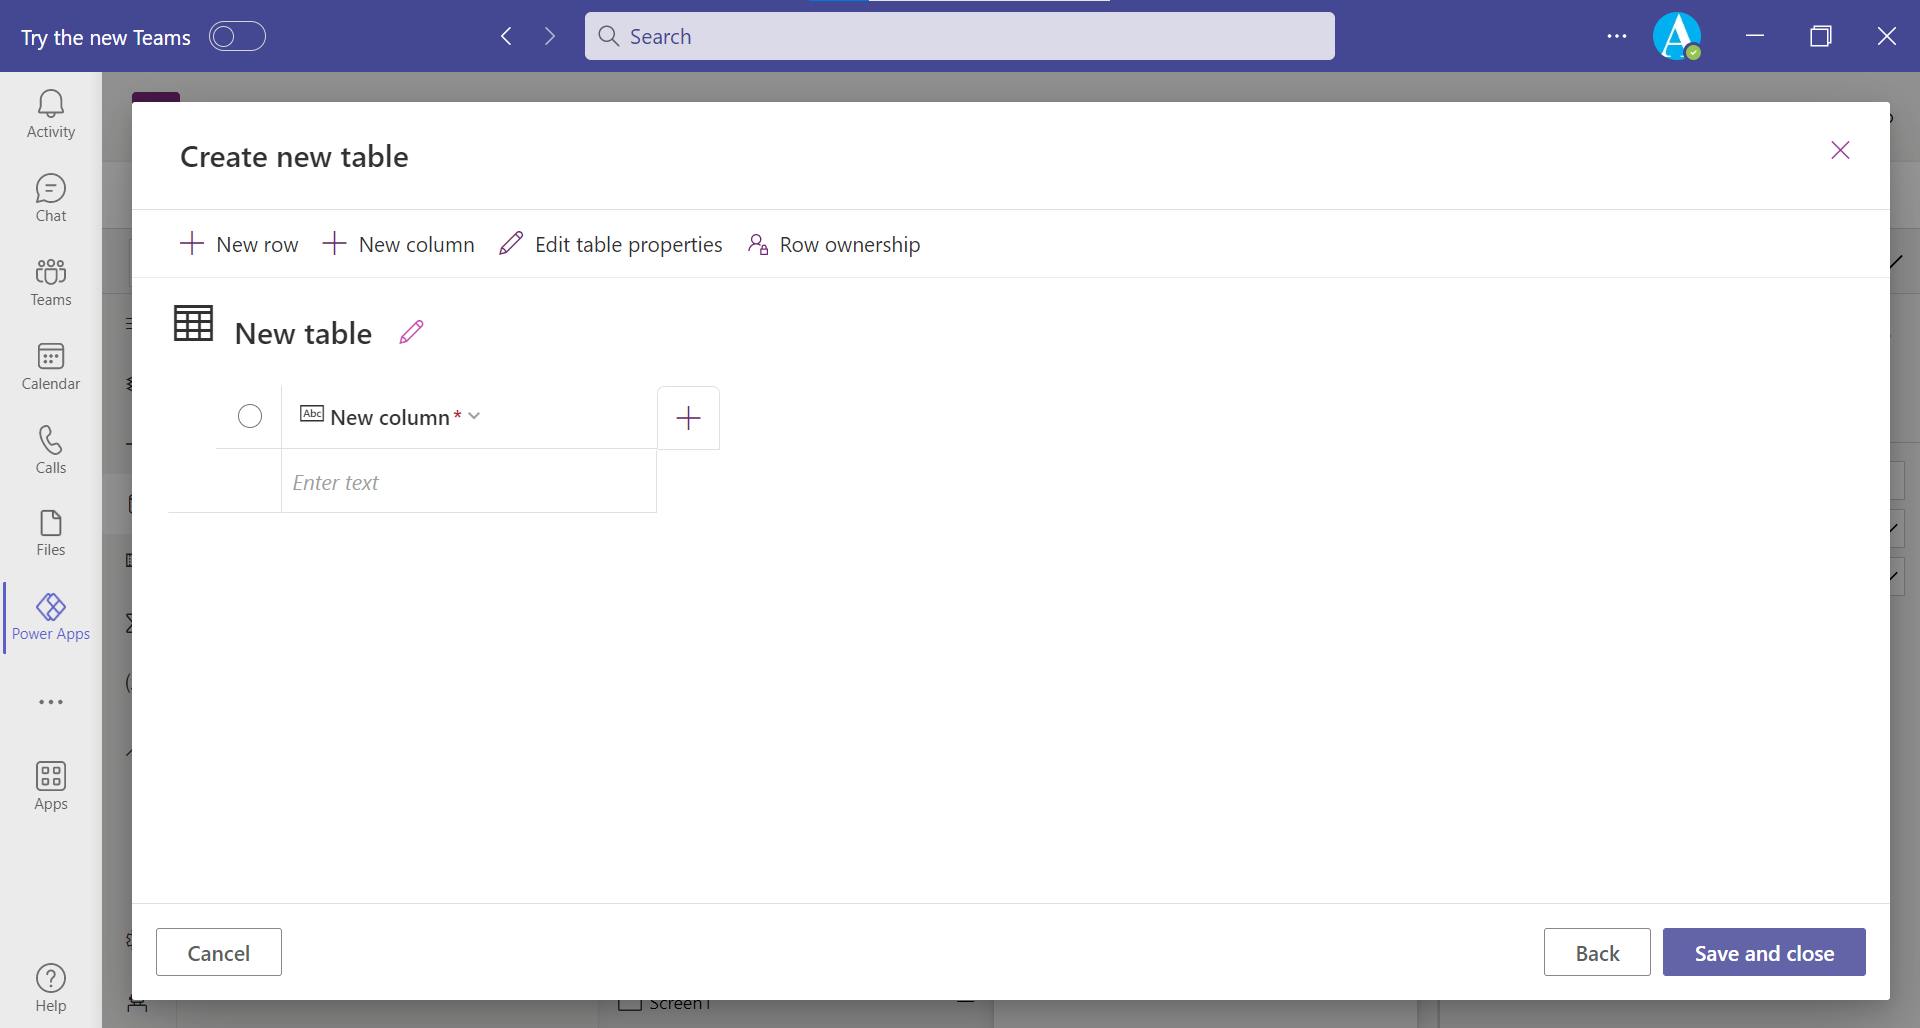
After a few seconds, our table will be provisioned and will display in the visual table editor. The visual table editor enables us to quickly populate our table with the + New row and + New Column options.
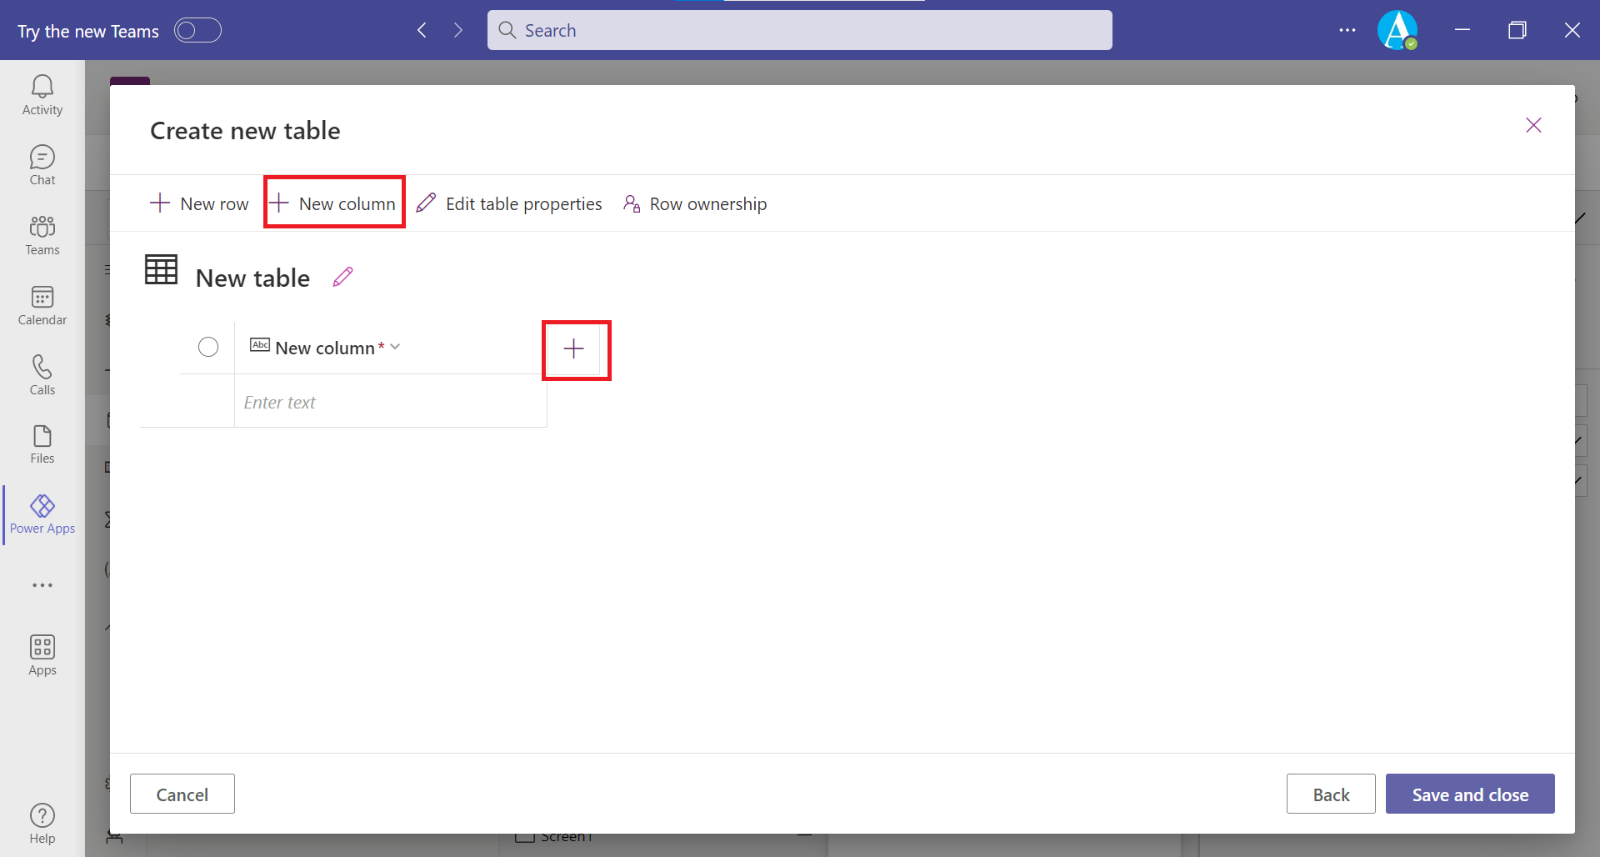
Add new columns to the table by selecting + New column (Alternately select the + next to the New column).
For each column, provide a Display Name and then select the Data type of data that it holds.
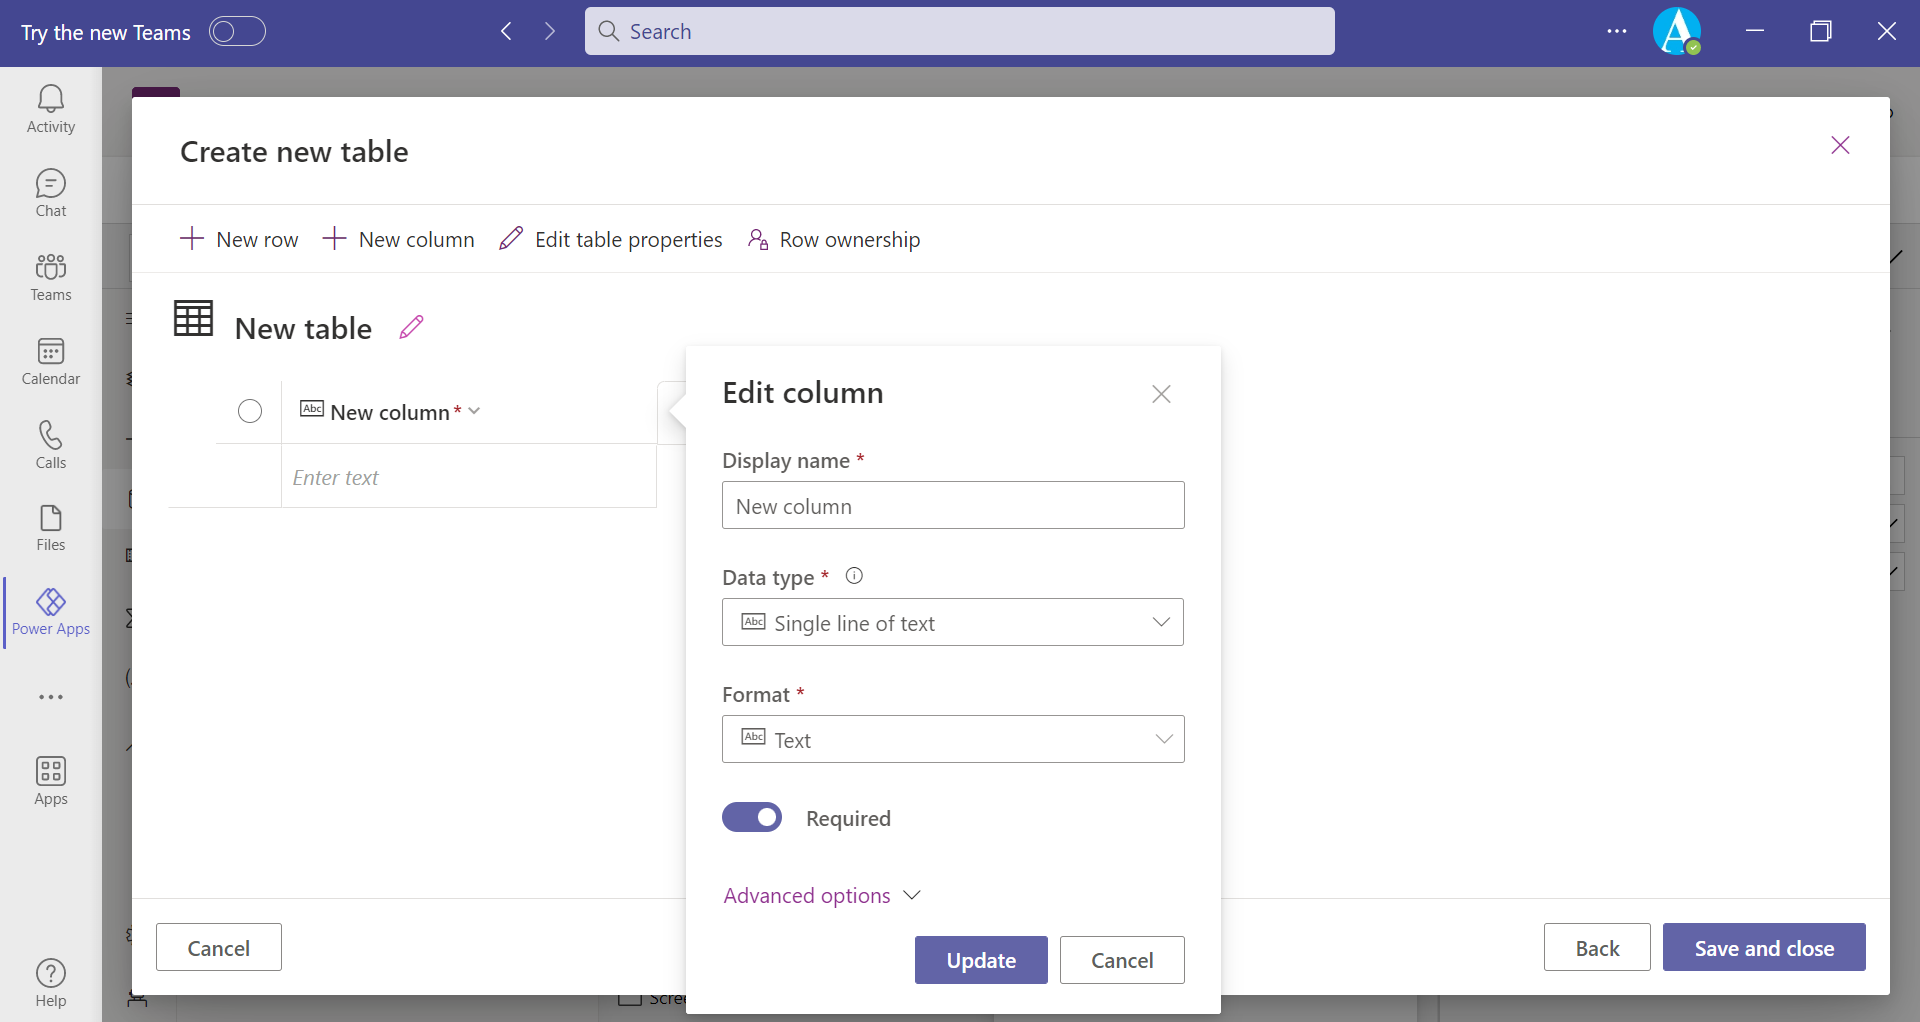
To add data to our table, select + New row. Enter data that you want people to see when they use our app.
Select Save and close to finish editing the table. It might take a few minutes to process the table. After the processing has been completed, the Power apps studio will appear, showing the data loaded into the app.
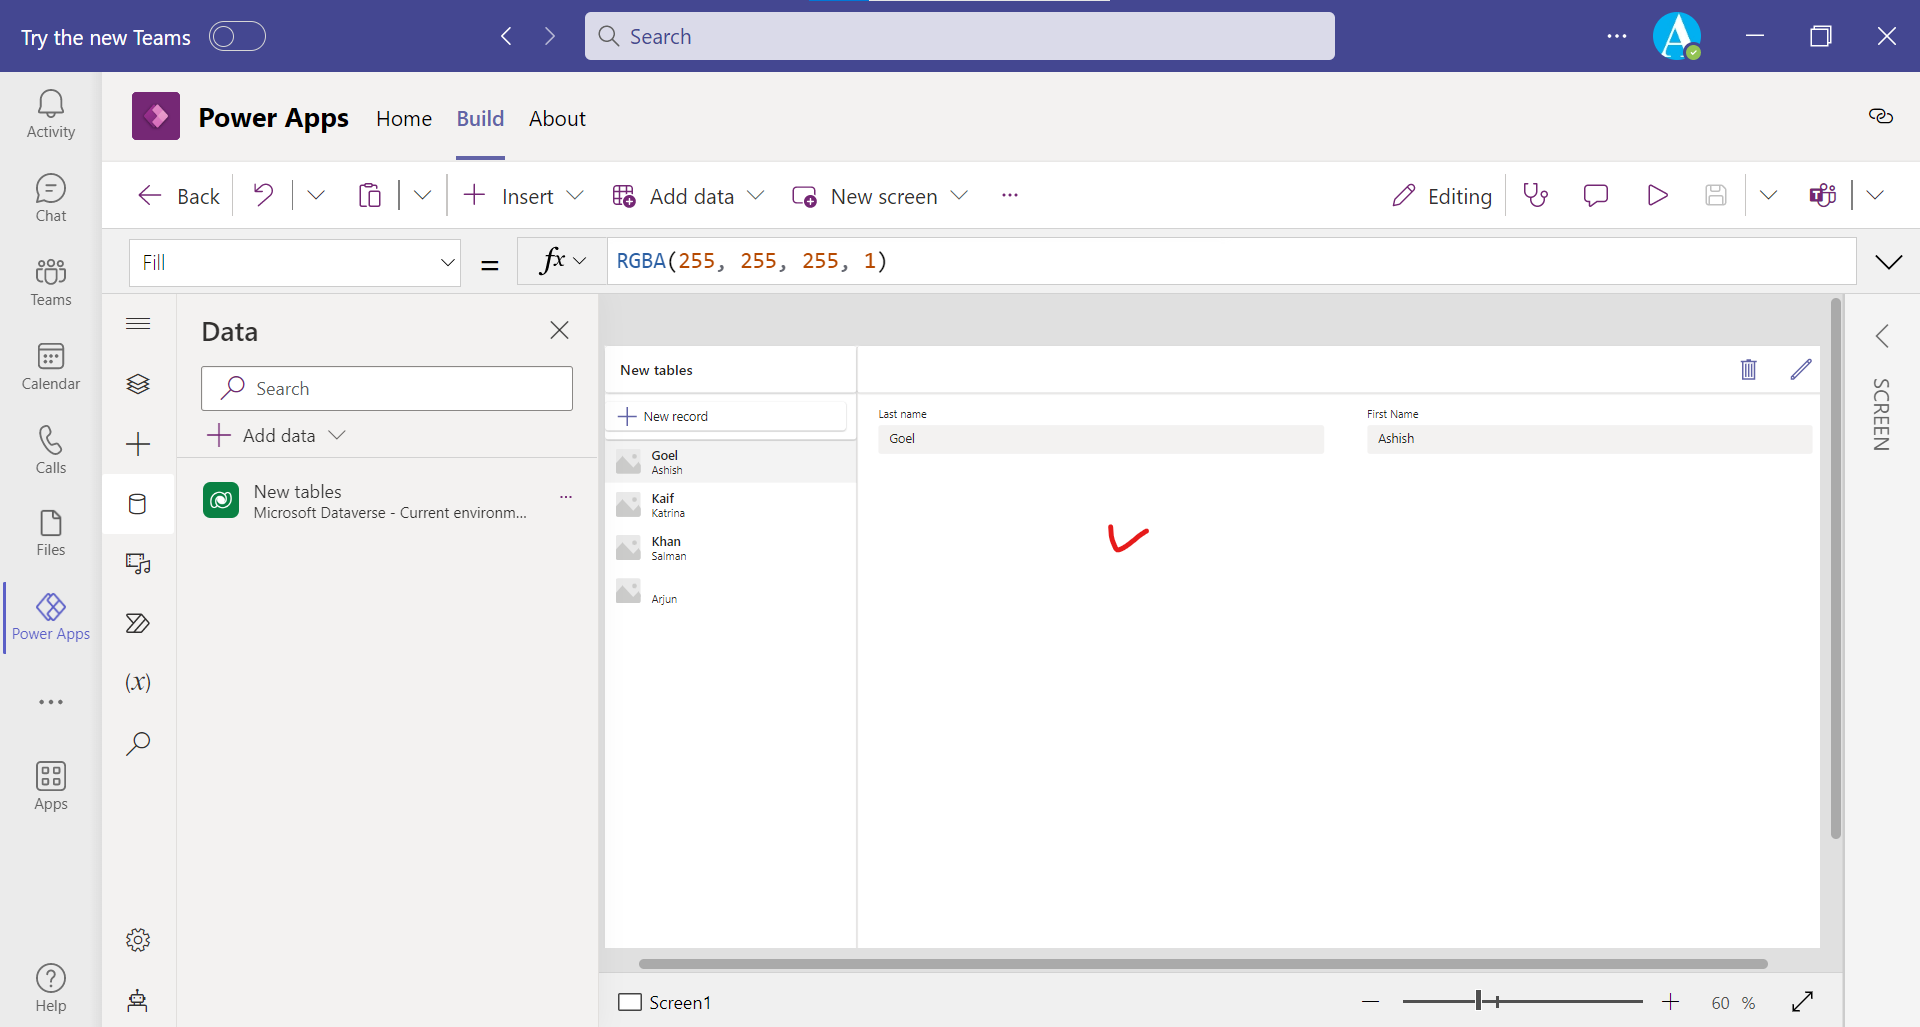
Step 4: Select Save in the toolbar to create the first saved version. After the first save, Power Apps will continue to save automatically every two minutes while we are editing.
Step 5: Preview and publish the app
To preview the app, select the Preview button in the upper right.
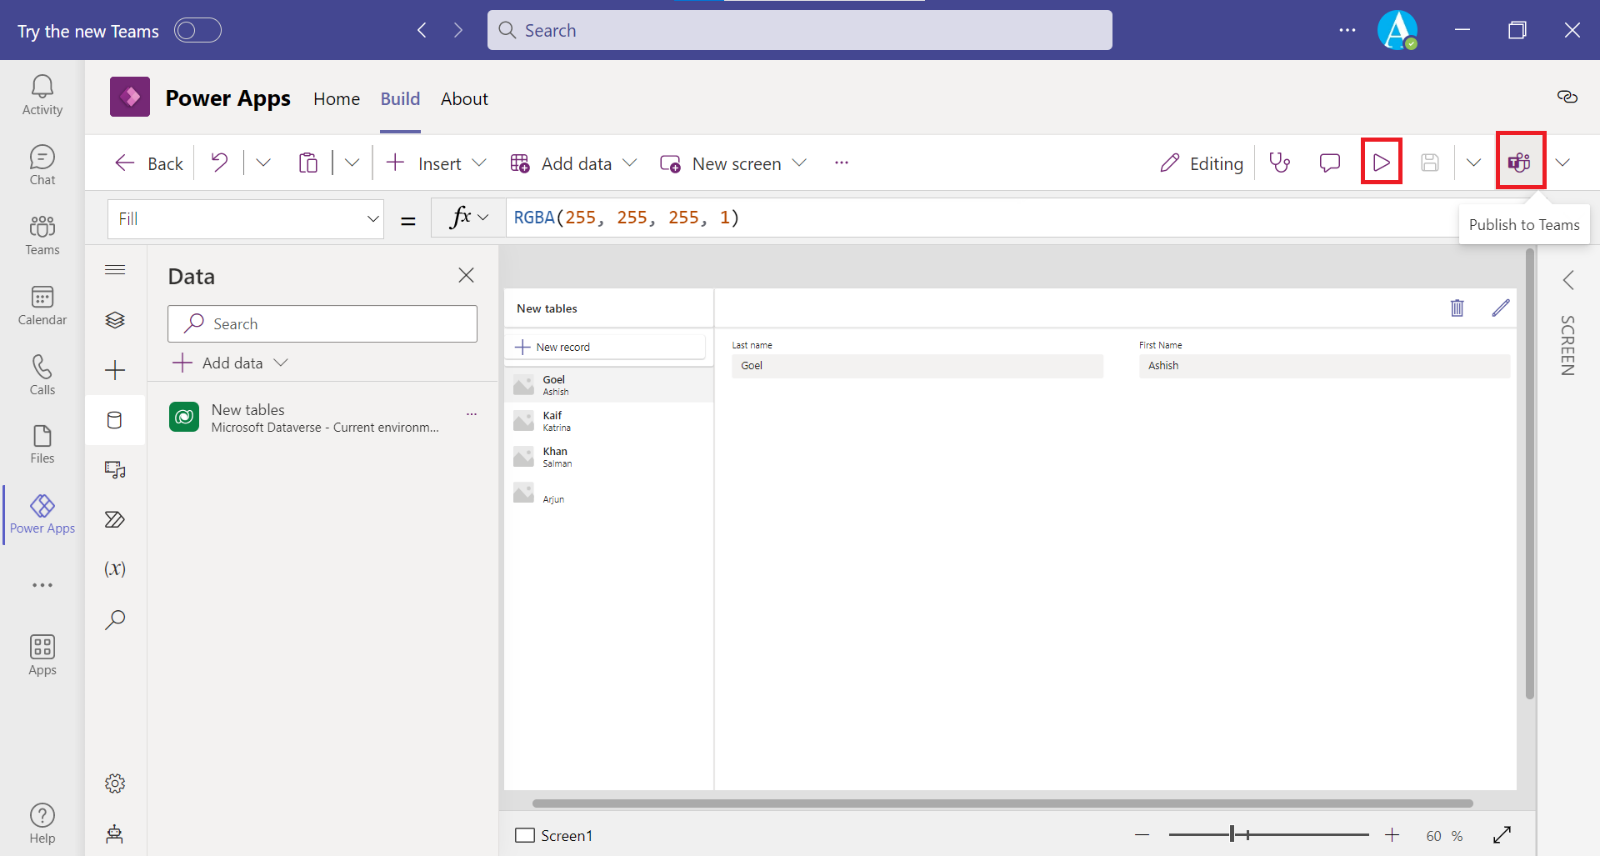
After building an app, we will share it with our team. We can accomplish this task by publishing the app to Teams. In the power apps studio in teams, click on “Publish to Teams” to publish the app.
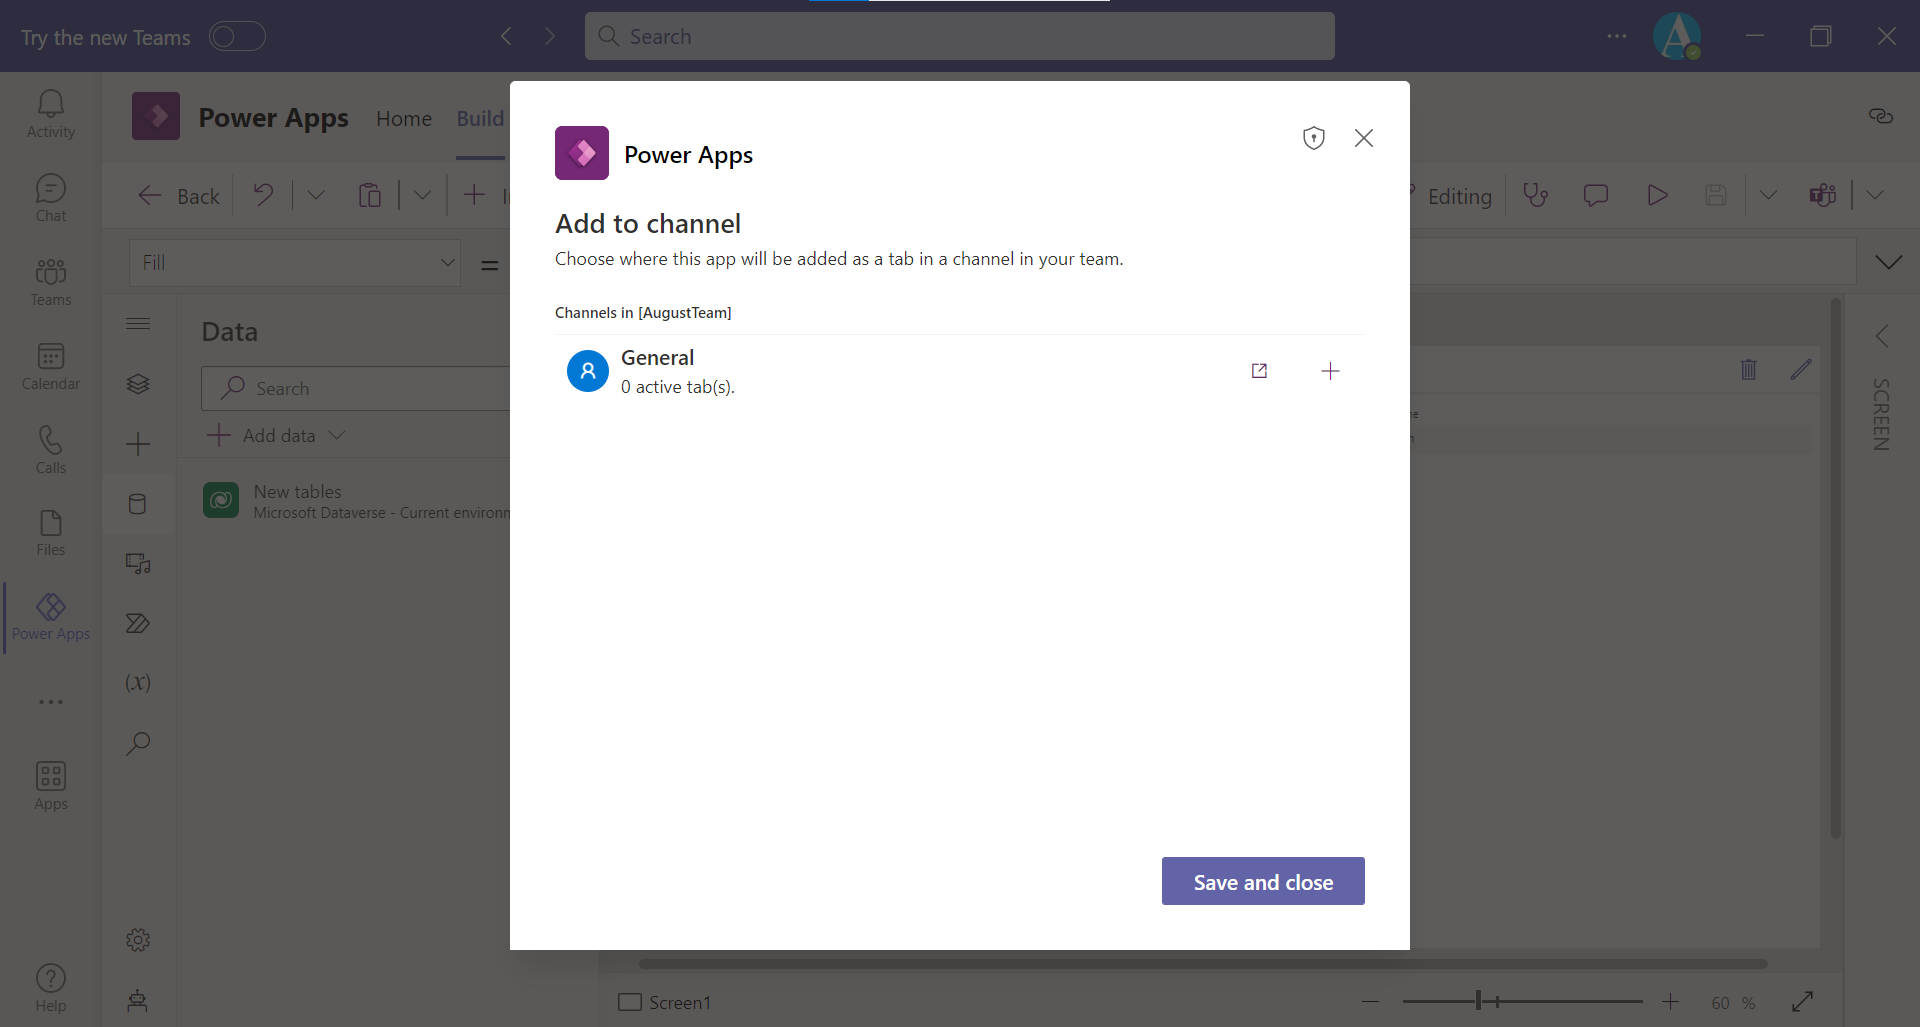
For each channel where we want the app to appear in a tab, select Add app as a tab. We can only publish to channels for the team that we created the app in.
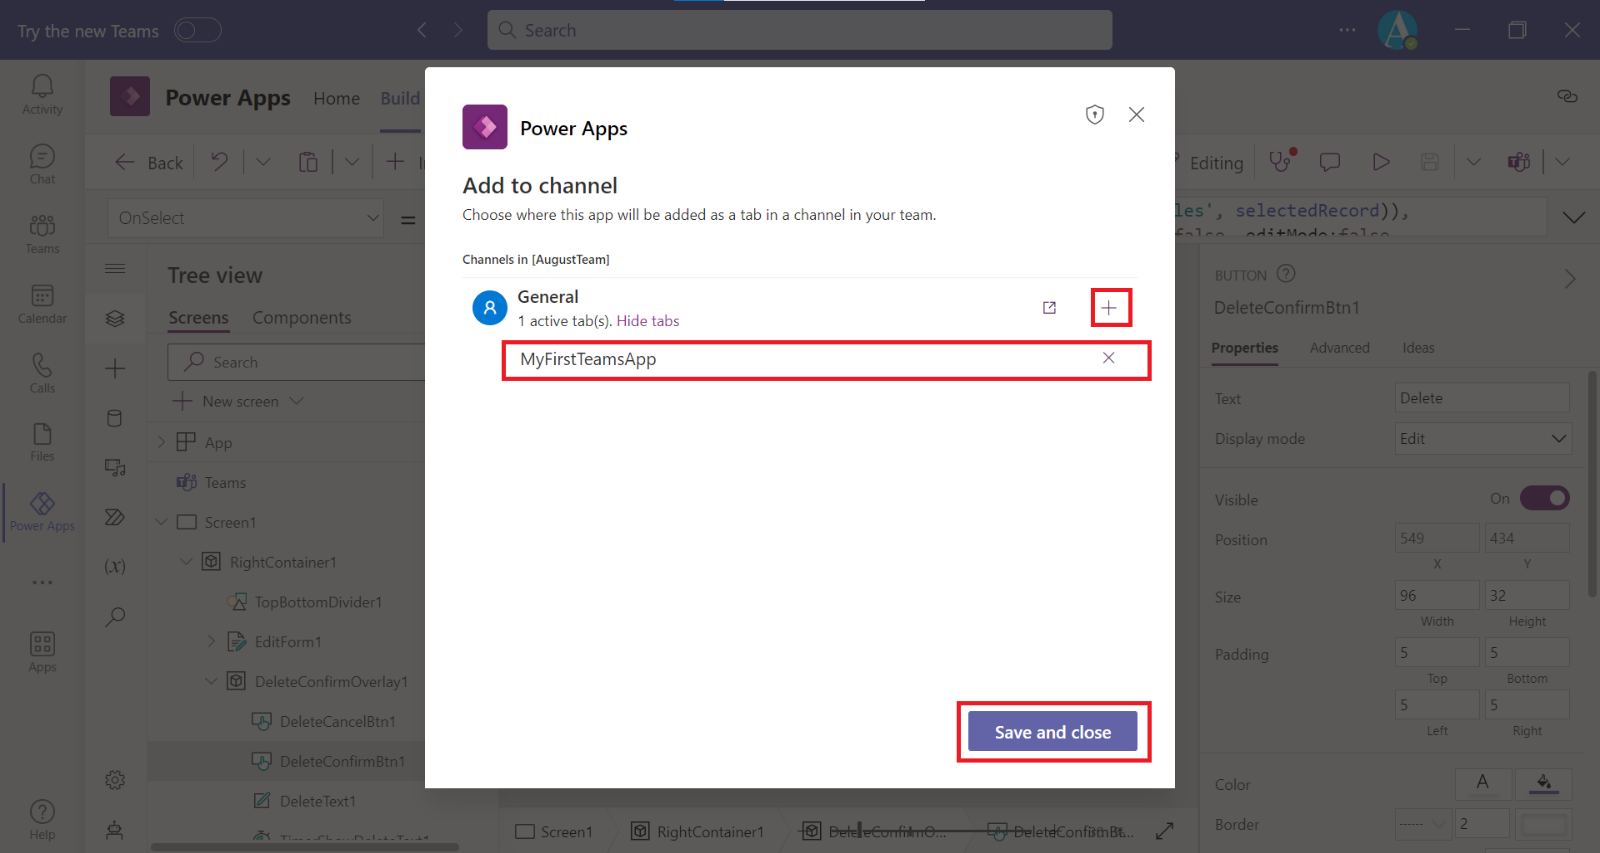
Select Save and close.
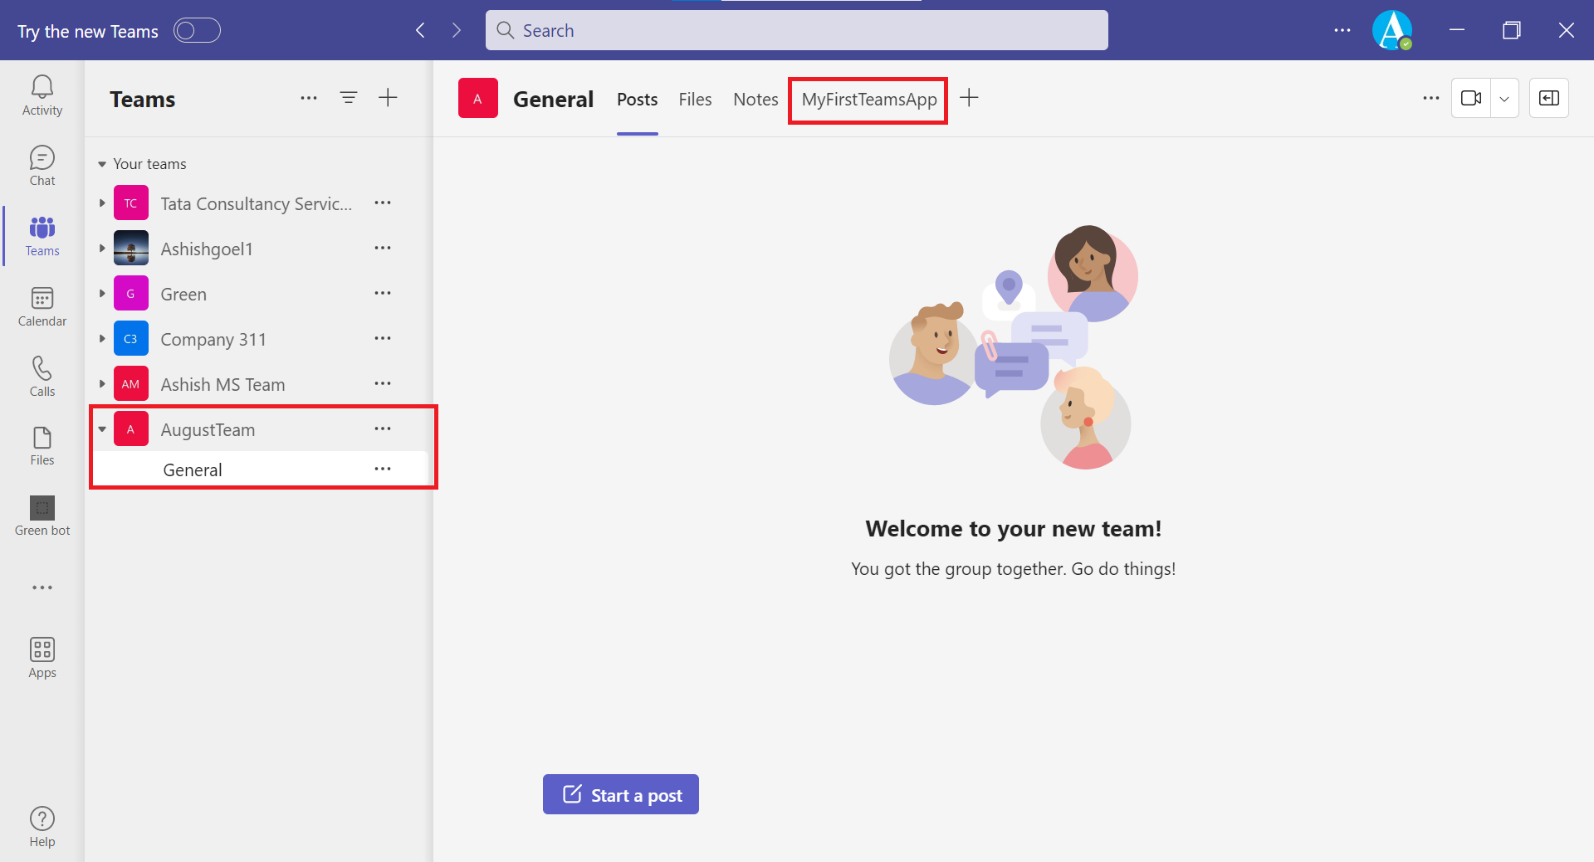
Share with Members outside Team
Occasionally, we will want to share our application with others in our organization. To share our app with others outside the team.
a) Verify that we are a team owner where the app is currently published.
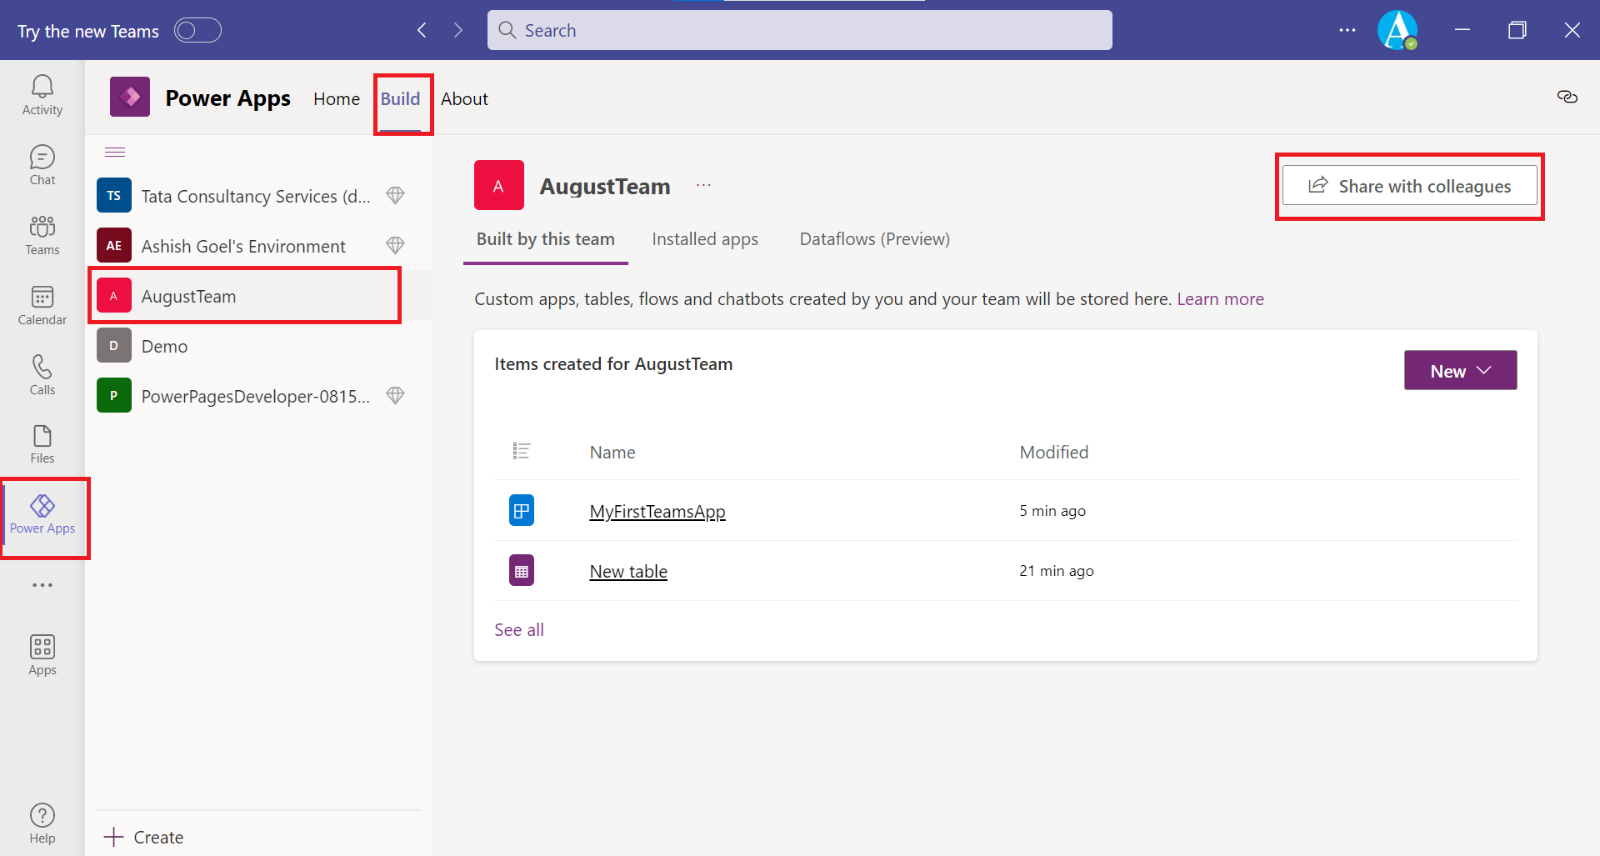
b) Open the Build tab in the Power Apps for Teams app.
c) Select Share with colleagues.
d) Enter the Microsoft 365 group or Microsoft Azure Active Directory (Azure AD) security group to share with in the Enter or select a security group field.
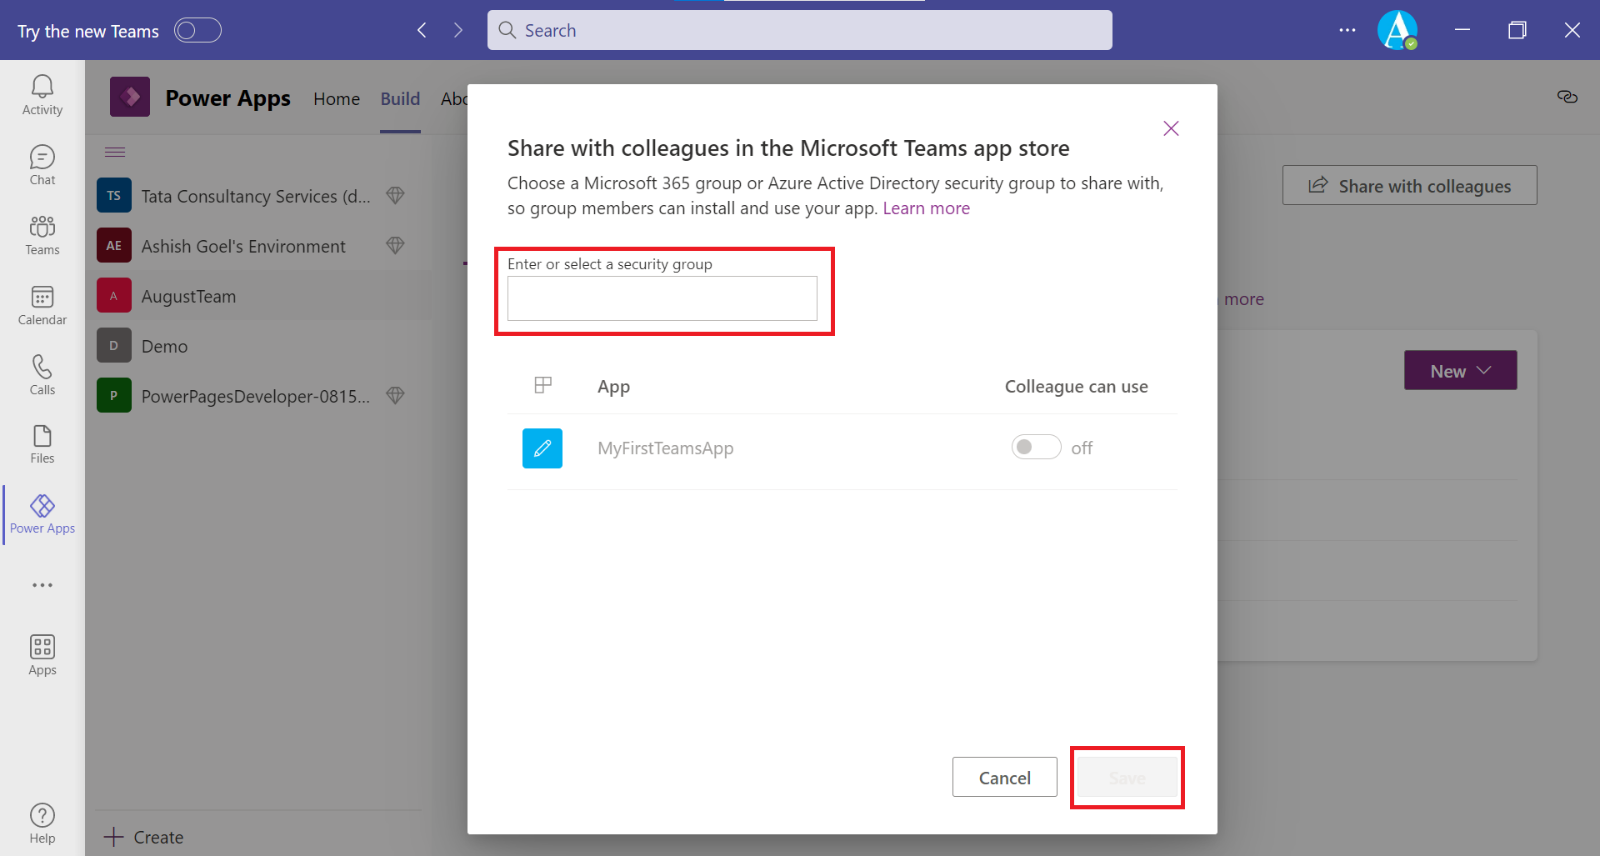
e) Turn on or off the sharing of apps to the users and then select Save.
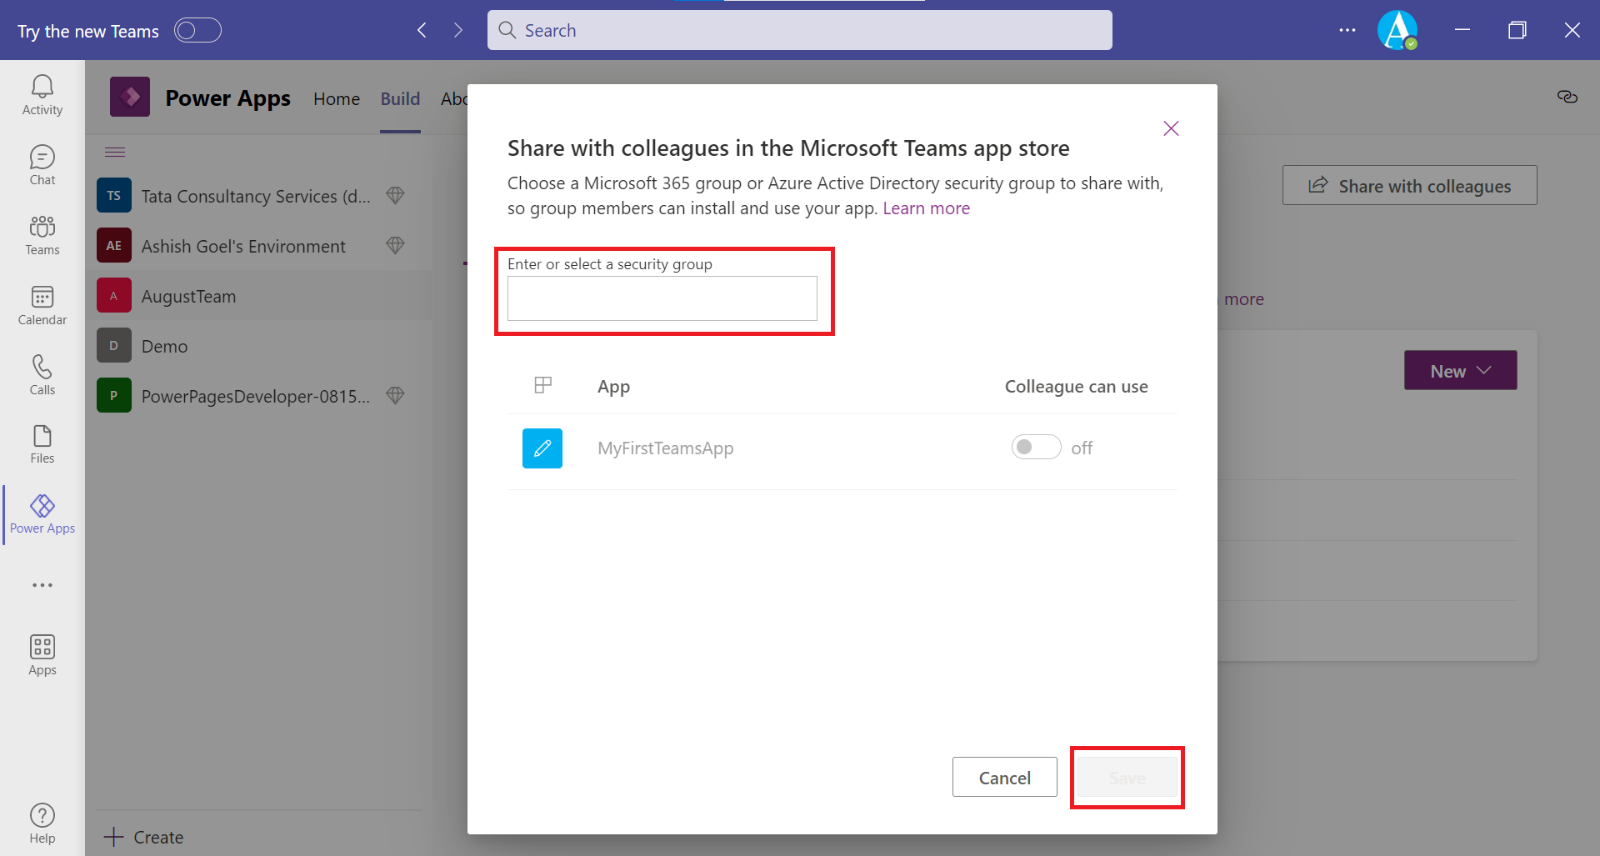
Afterward, the app will appear in the Built by your colleagues page when users select Apps in Teams.
Manage Table permissions
We can set administrative settings on our table. Dataverse for Teams includes a management interface for us to complete that task, if we are a team owner. Members of a team cannot change the permissions.
Step 1: While editing our table within the Power Apps Build screen, select Manage Permissions from the ribbon menu, which is highlighted by a red box in the following screenshot. This option does not appear if we aren't a team owner.
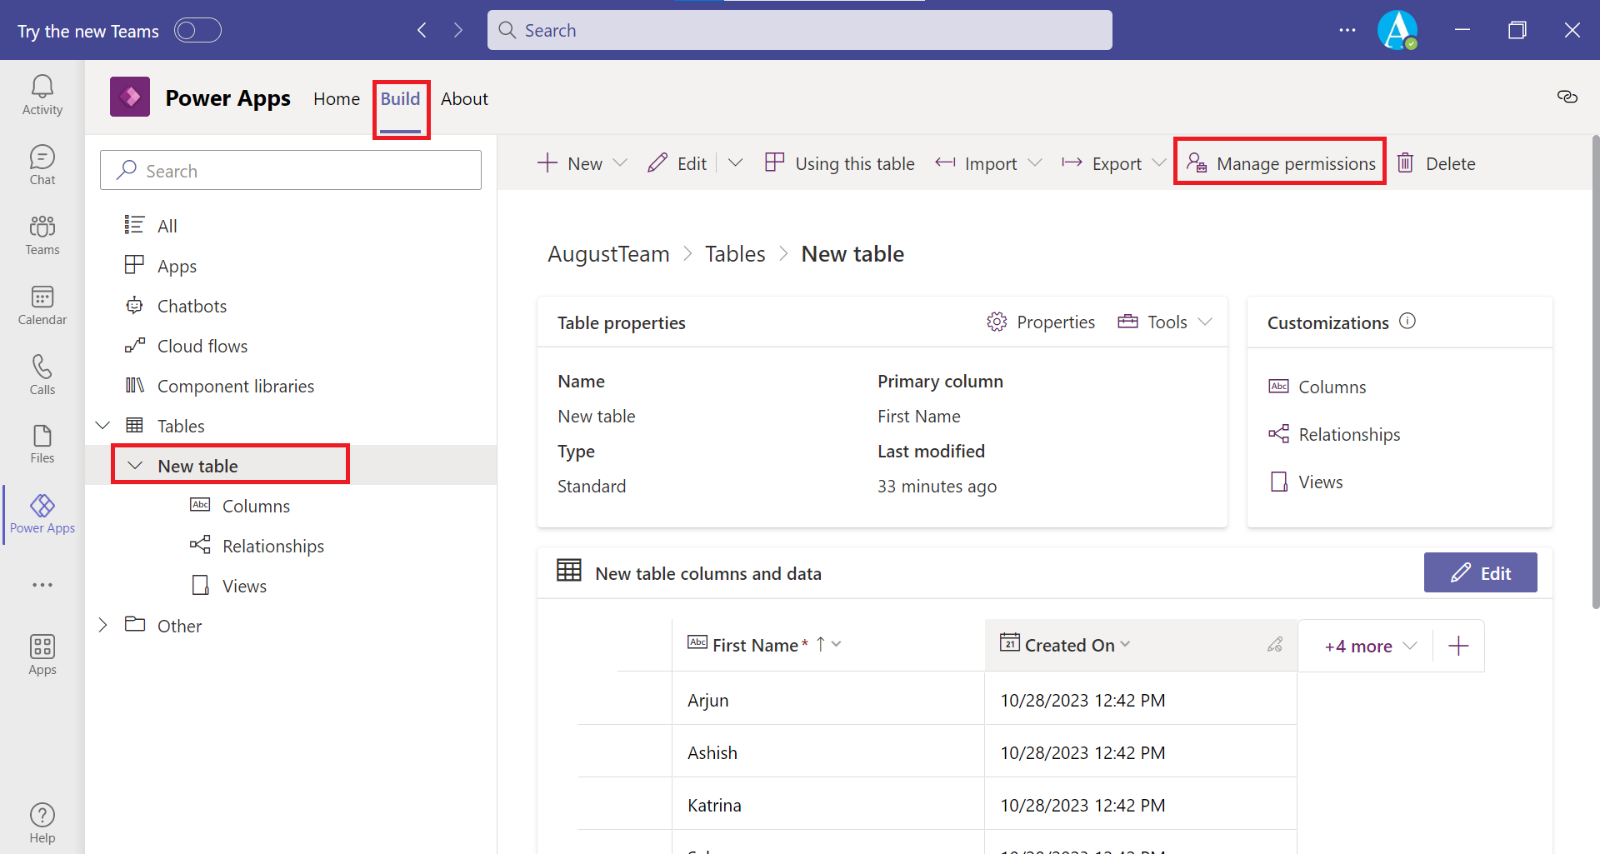
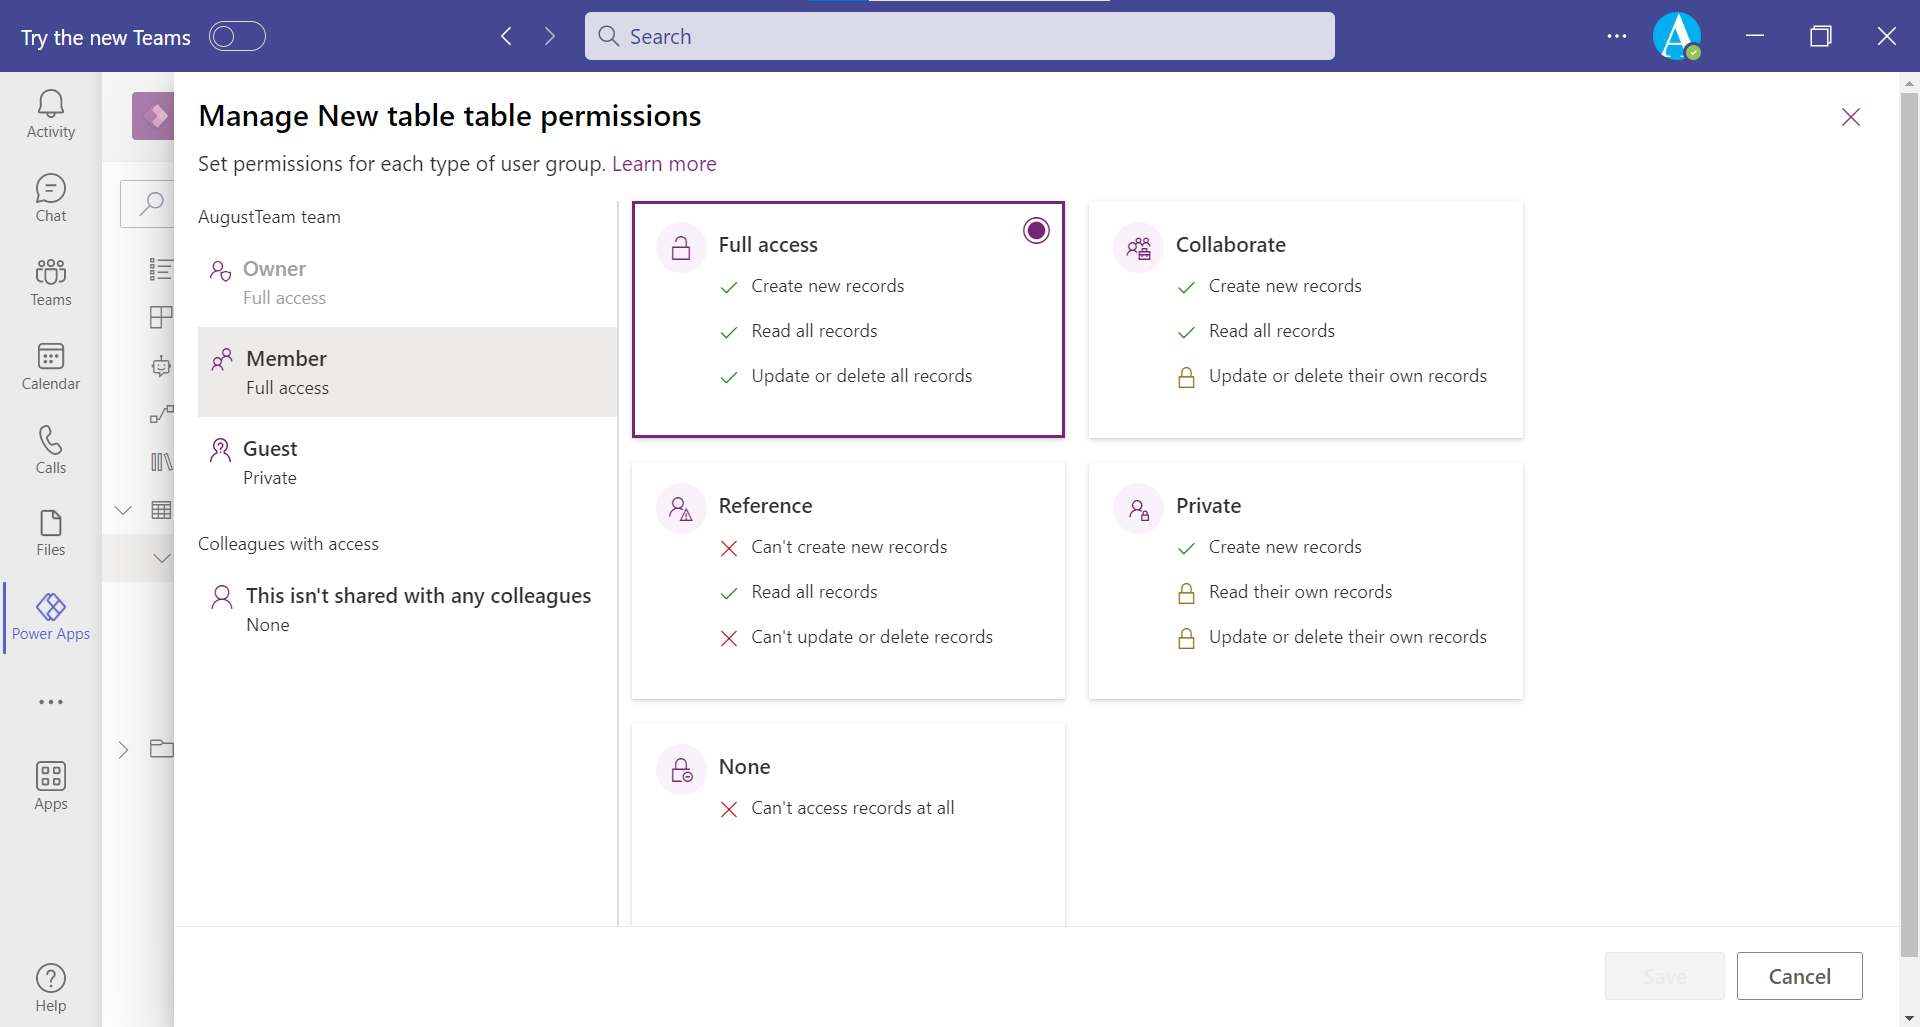
Step 2: On the Manage permissions screen, we can define who has access to our table and its data. Different privilege levels are available for the team and colleagues who have this table shared with them.
Select the user or group that we want to assign access to, and then select the level of access that they should have. If our team has multiple owners, the Owners option will be visible, and we can define access for those users as well. In the following image, members of the team have been granted Full access.
Understanding team roles
Permission to apps and the data that they use in Teams are based on the following roles in Teams team.
• Owner - A team member with the owner role. This includes the creator of the team, and anyone who has been given the owner role by another users. Owners get full access to the data used in apps in the team.
• Member - A team member who isn't an owner. By default, team members get full access like owners, but we can also change the permission for team members. We might want to restrict members from being able to edit certain tables.
• Guest - A guest is someone outside of our organization who is added to the team. By default, guests can create records, but not view records created by others.
• Colleagues with access: With Power Apps for Teams, we can share an app with Azure AD security group whose members need not be part of the Teams team where the app was built. This enables us to add users to the application without having to add them to the specific team.
Five different permission options include:
a) Full access
This level of access should only be granted to users who need full control over the data.
i) Allows users and groups full access to create new records,
ii) read all records, and
iii) update or delete all records.
b) Collaborate
i) Allows the creation of new records and
ii) Read all records,
iii) Update and delete their own records only.
c) Reference
i) It does not allow the user to create records.
ii) Read all records.
iii) Can’t update and delete the records.
d) Private
i) Create new records.
ii) Read their own records only.
iii) Update and delete their own records only.
e) None
Denies access entirely; the user or group cannot view or modify records within the table and they can't delete them.
To Edit the Table
If we want to edit our table after creating it, we can edit it.
Step 1: To open your table in the full editor, select Build and then select the See all option from the Power Apps application.
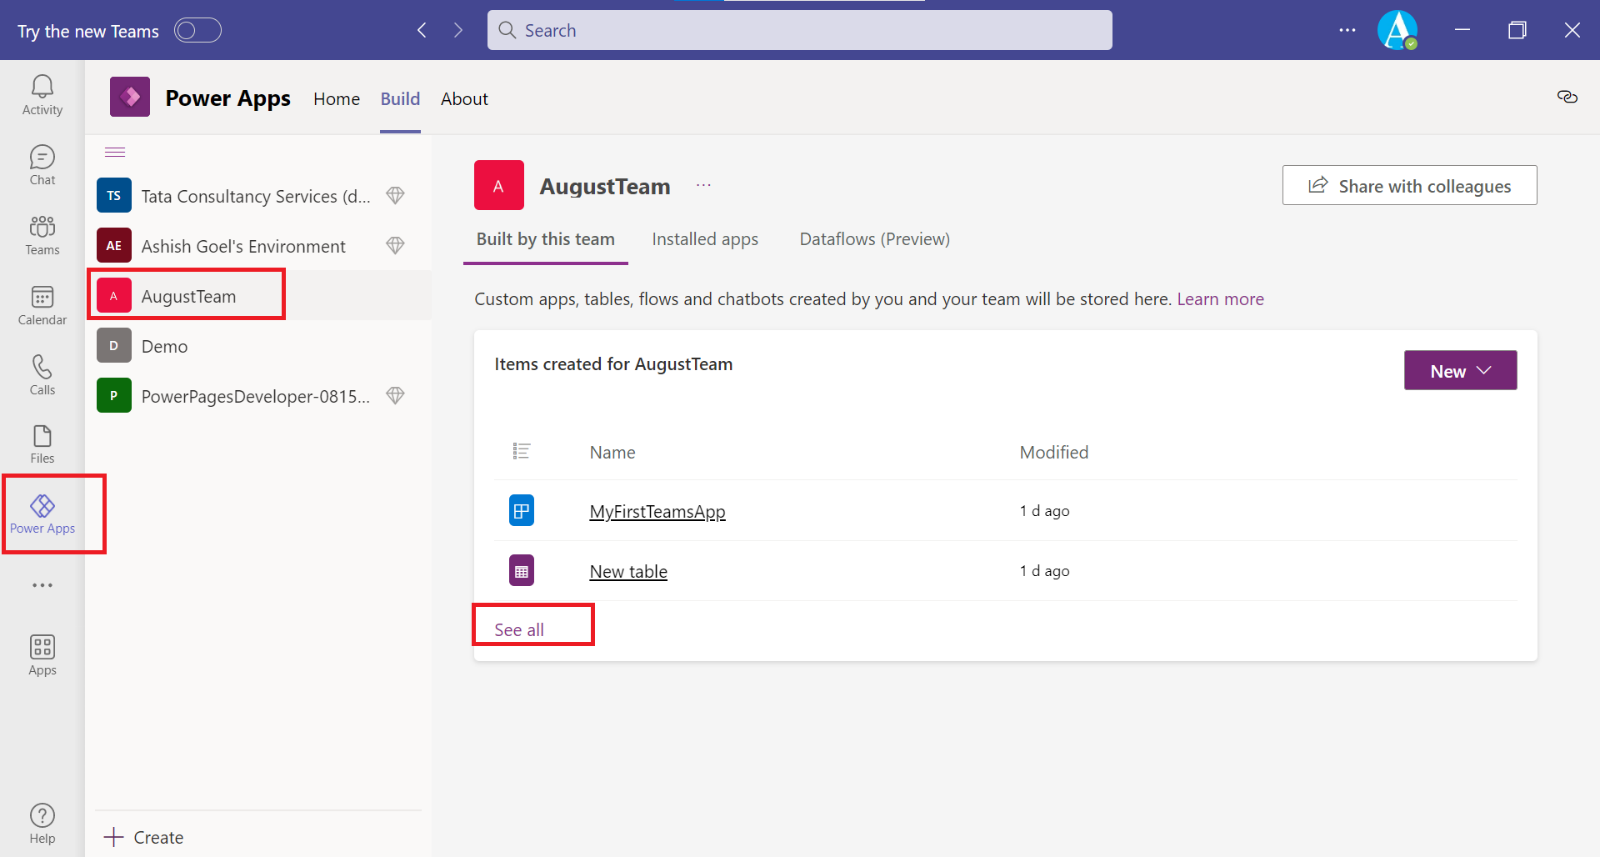
Step 2: It will display all the available apps, flows, tables etc. available for this Team.
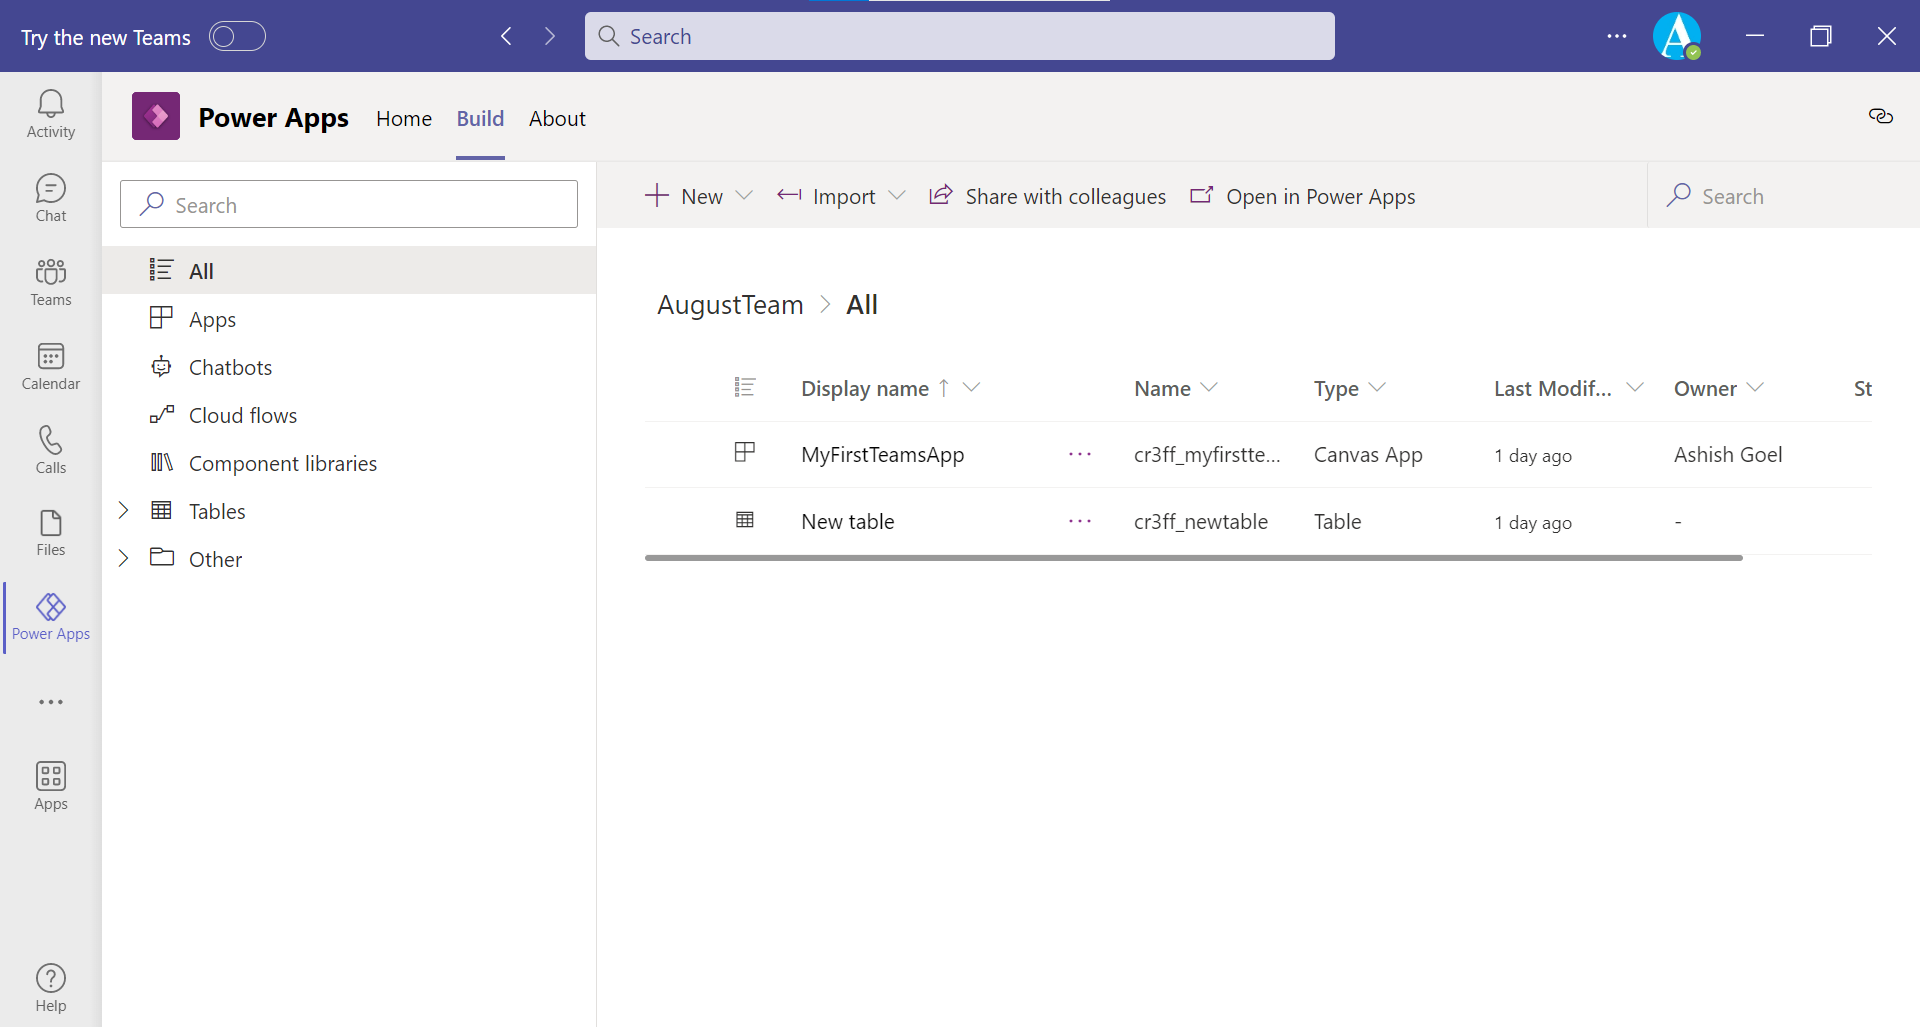
Select Tables and then select the ellipsis (...) for the table. Selecting Edit will bring up the full table editor.
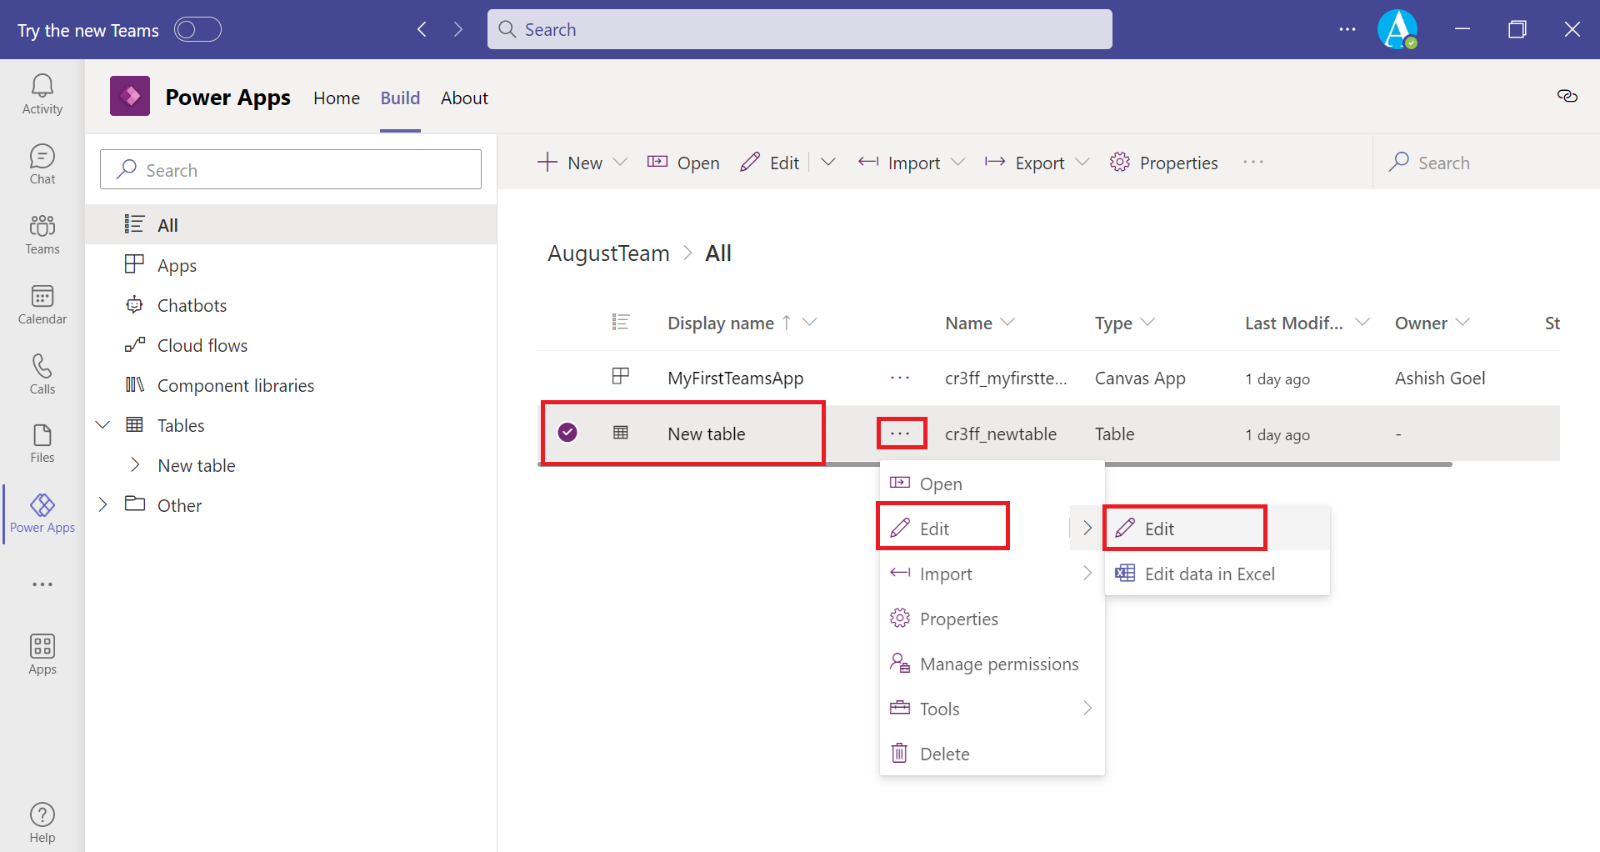
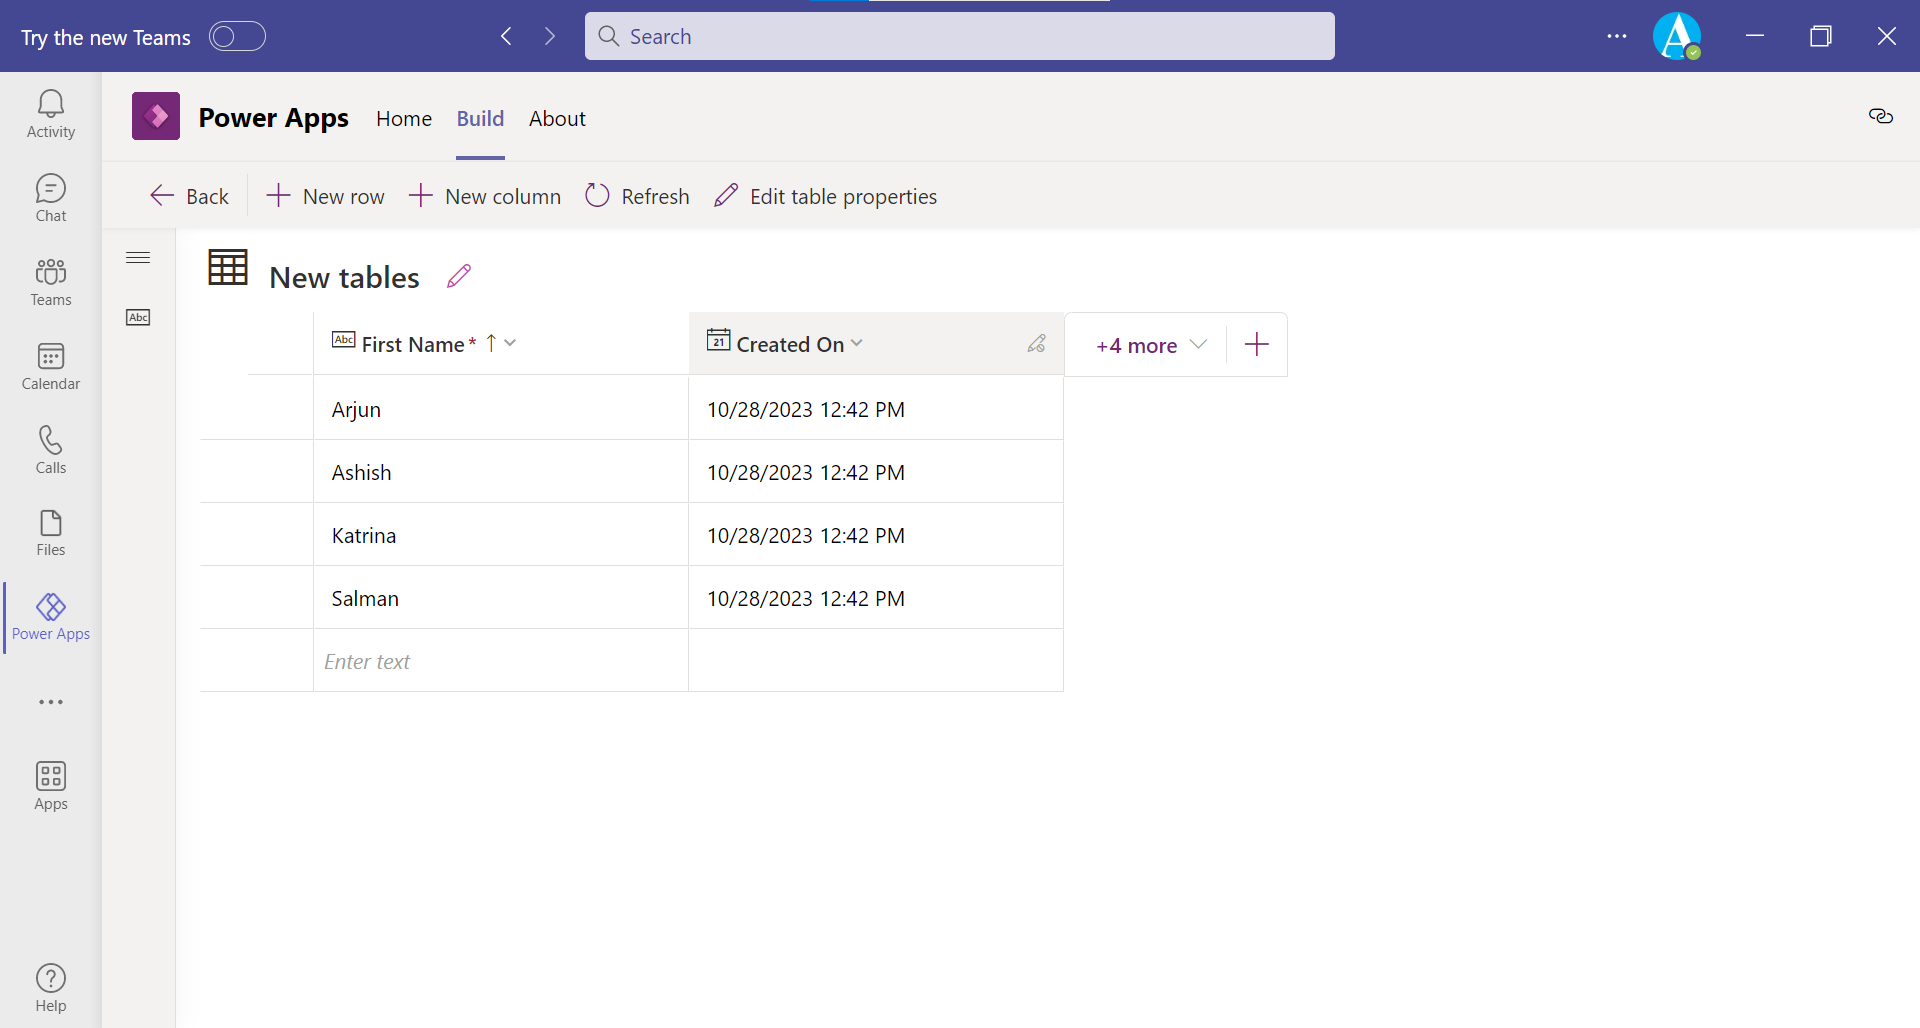
The table editor opens as shown in the following image.
