Cascading Drop-down in Power Apps
Cascading dropdowns in Power Apps are a way to create a dependent dropdown list where the options in the second dropdown list depend on the selection made in the first dropdown list.
Follow the following steps to create a cascading dropdown in Power Apps:
Step 1: Connect to a data source.
Connect to a data source that contains the information for your dropdown lists. You can use a SharePoint list, Excel file, or any other data source.
Here we are using the excel file Cascading dropdown.xlsx. Upload it on the OneDrive.
Step 2: Create two dropdown controls.
Add two dropdown controls to your app screen, one for each dropdown list. Name them appropriately.
Step 3: Set the Items property.
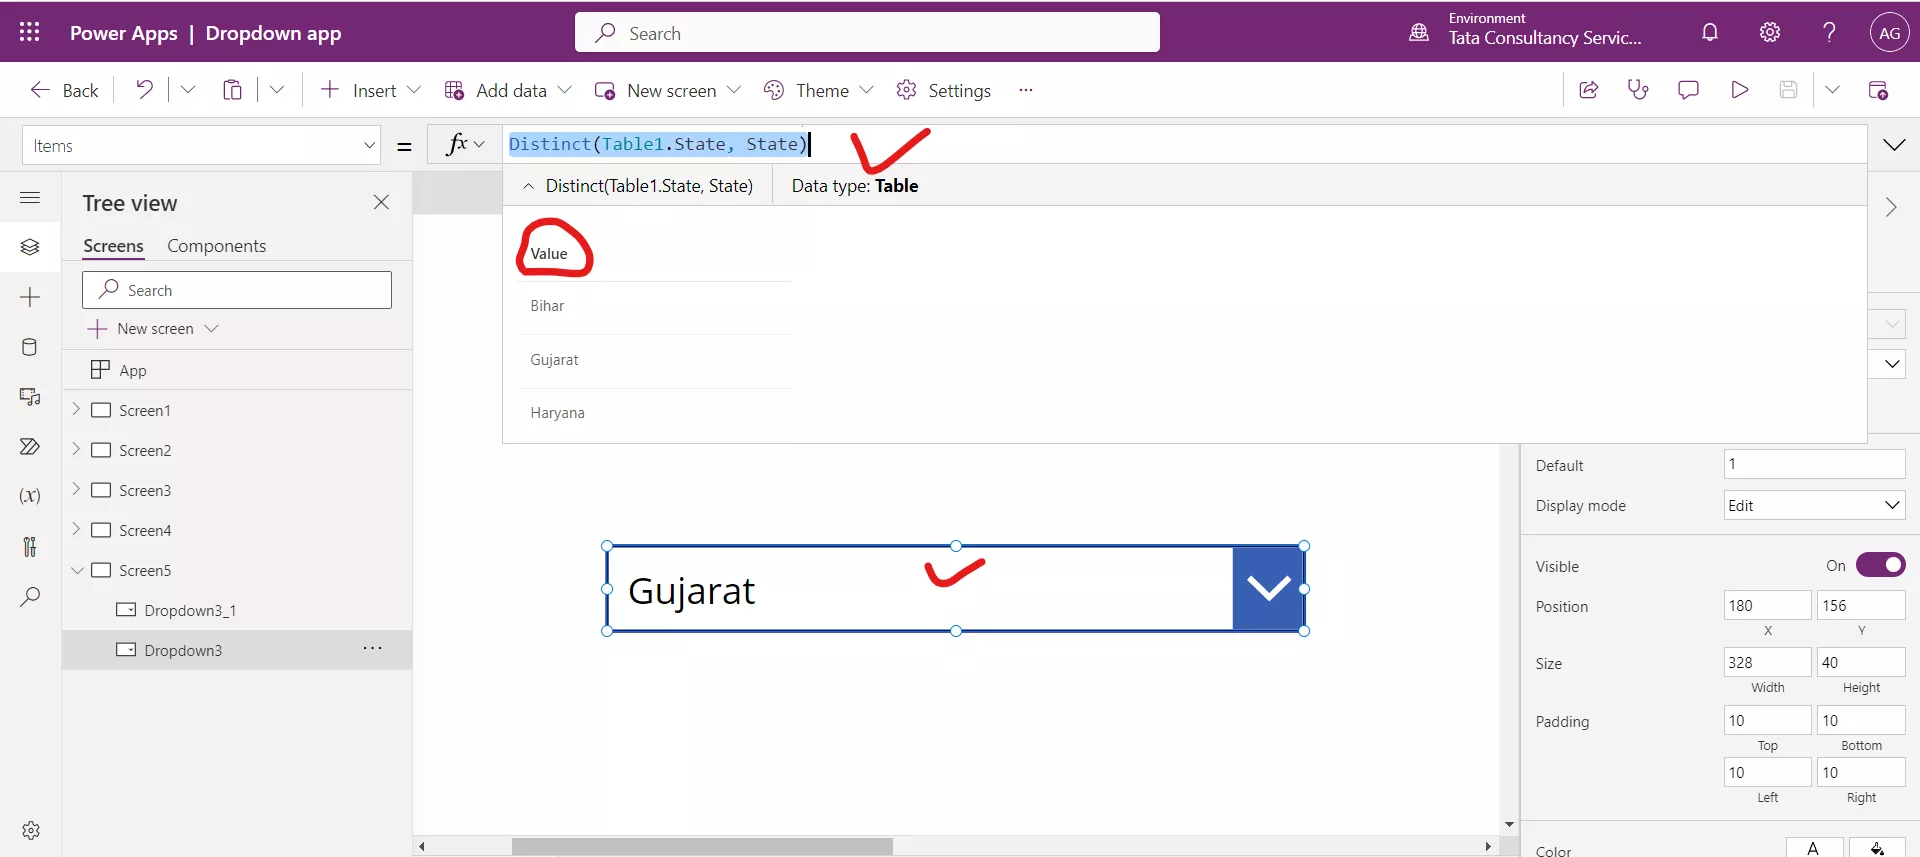
Set the Items property for the first dropdown to show the initial list of options. For example, if the first dropdown is for countries, you might set the Items property to a list of countries. Here, we have the State.

The Distinct function return a one column table with the one column have one unique values. The column name is Value.
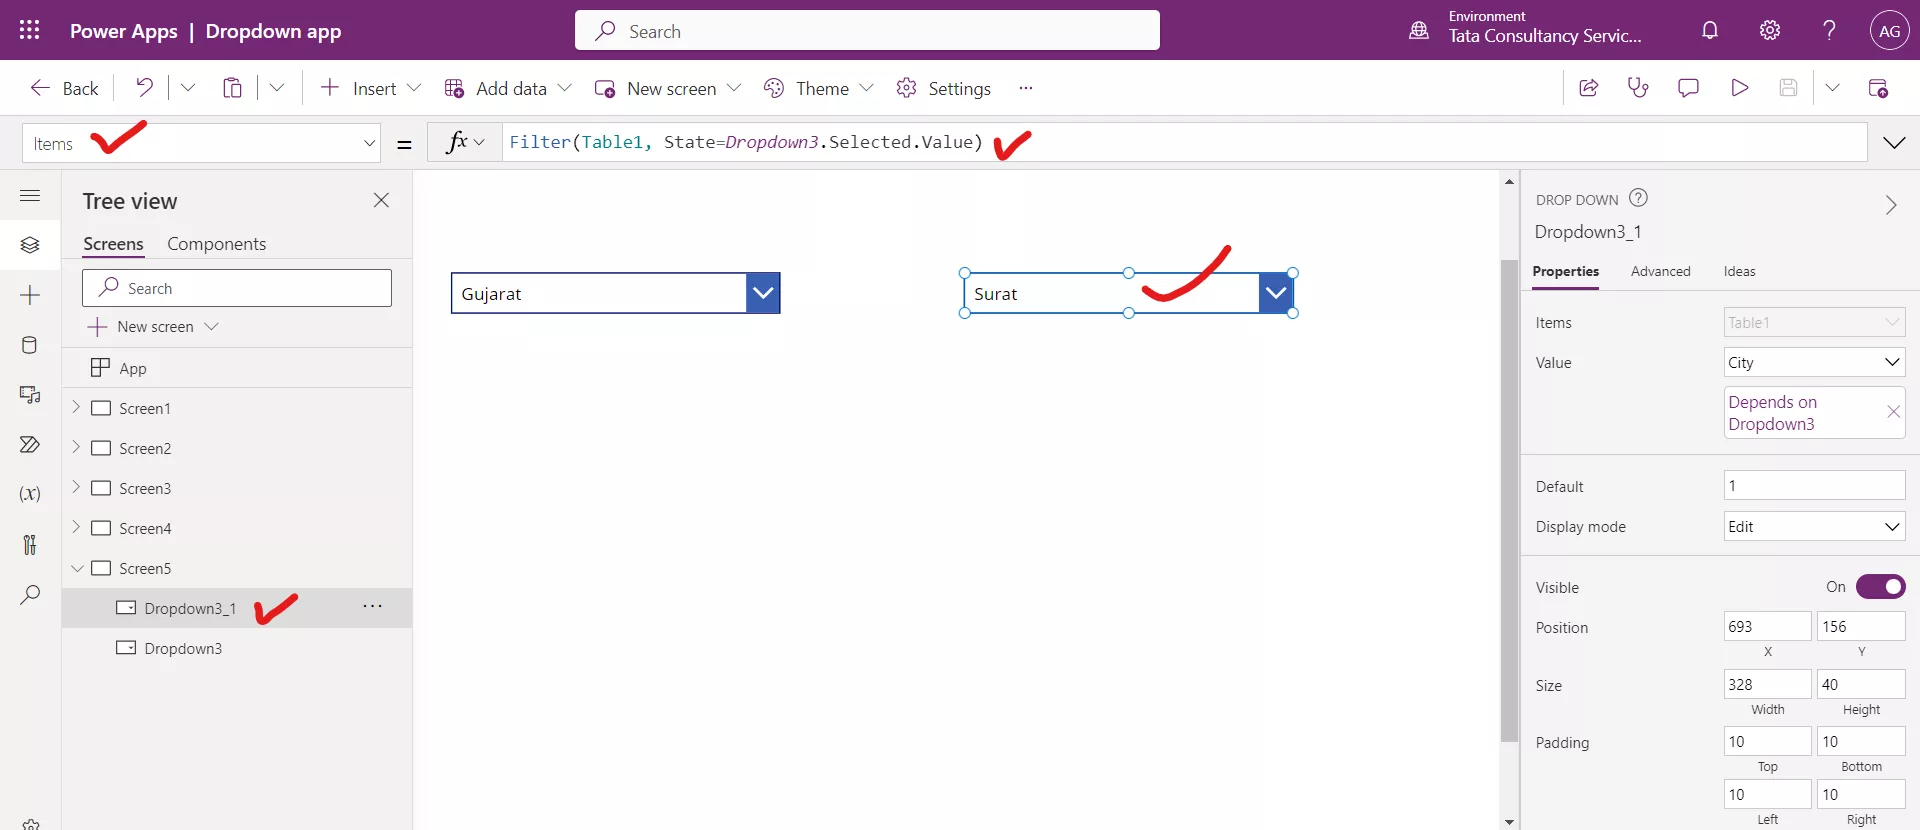
Step 4: Set the Items property for the second dropdown. Set the Items property for the second dropdown to filter based on the selection made in the first dropdown. For example, if the first dropdown is for countries, you might set the Items property for the second dropdown to a list of states or provinces for the selected country.
Step 5: Use the Filter function.
Use the Filter function to filter the options in the second dropdown based on the selection made in the first dropdown. The formula for the Items property of the second dropdown should look something like this:
Power Apps Formula
Replace "DataSource" with the name of your data source, "Country" with the name of the field in the data source that corresponds to the first dropdown list, and "Dropdown1" with the name of your first dropdown control. Here, Value is the name of the column.
Power Apps Formula

Step 6: Test the cascading dropdown.
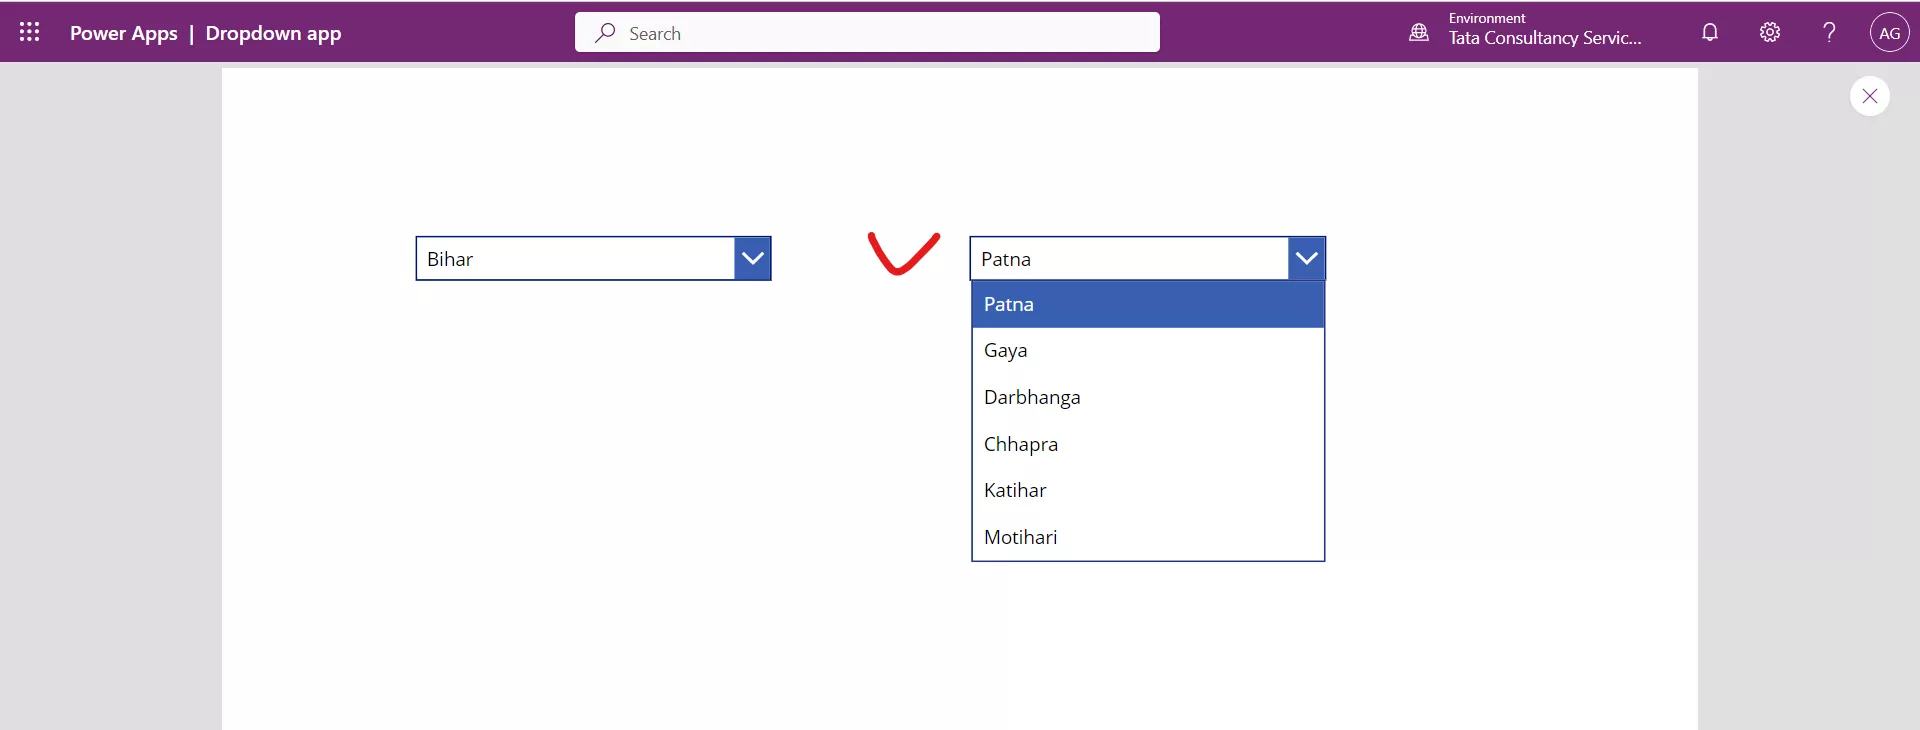
Save and test your app to ensure that the cascading dropdown is working as expected. When you select an option in the first dropdown, the options in the second dropdown should update based on the selection made.
When we select the State Bihar from the first dropdown, in the second dropdown control, we have the city of the Bihar only. Test the values for other states.
