Manage Powerapp versions
1. Save the Powerapps
We can save the change whatever we have done in Power Apps Studio by clicking on the save icon or by using the shortcut Ctrl + S. The new app versions are created in the app version list when we save the app.
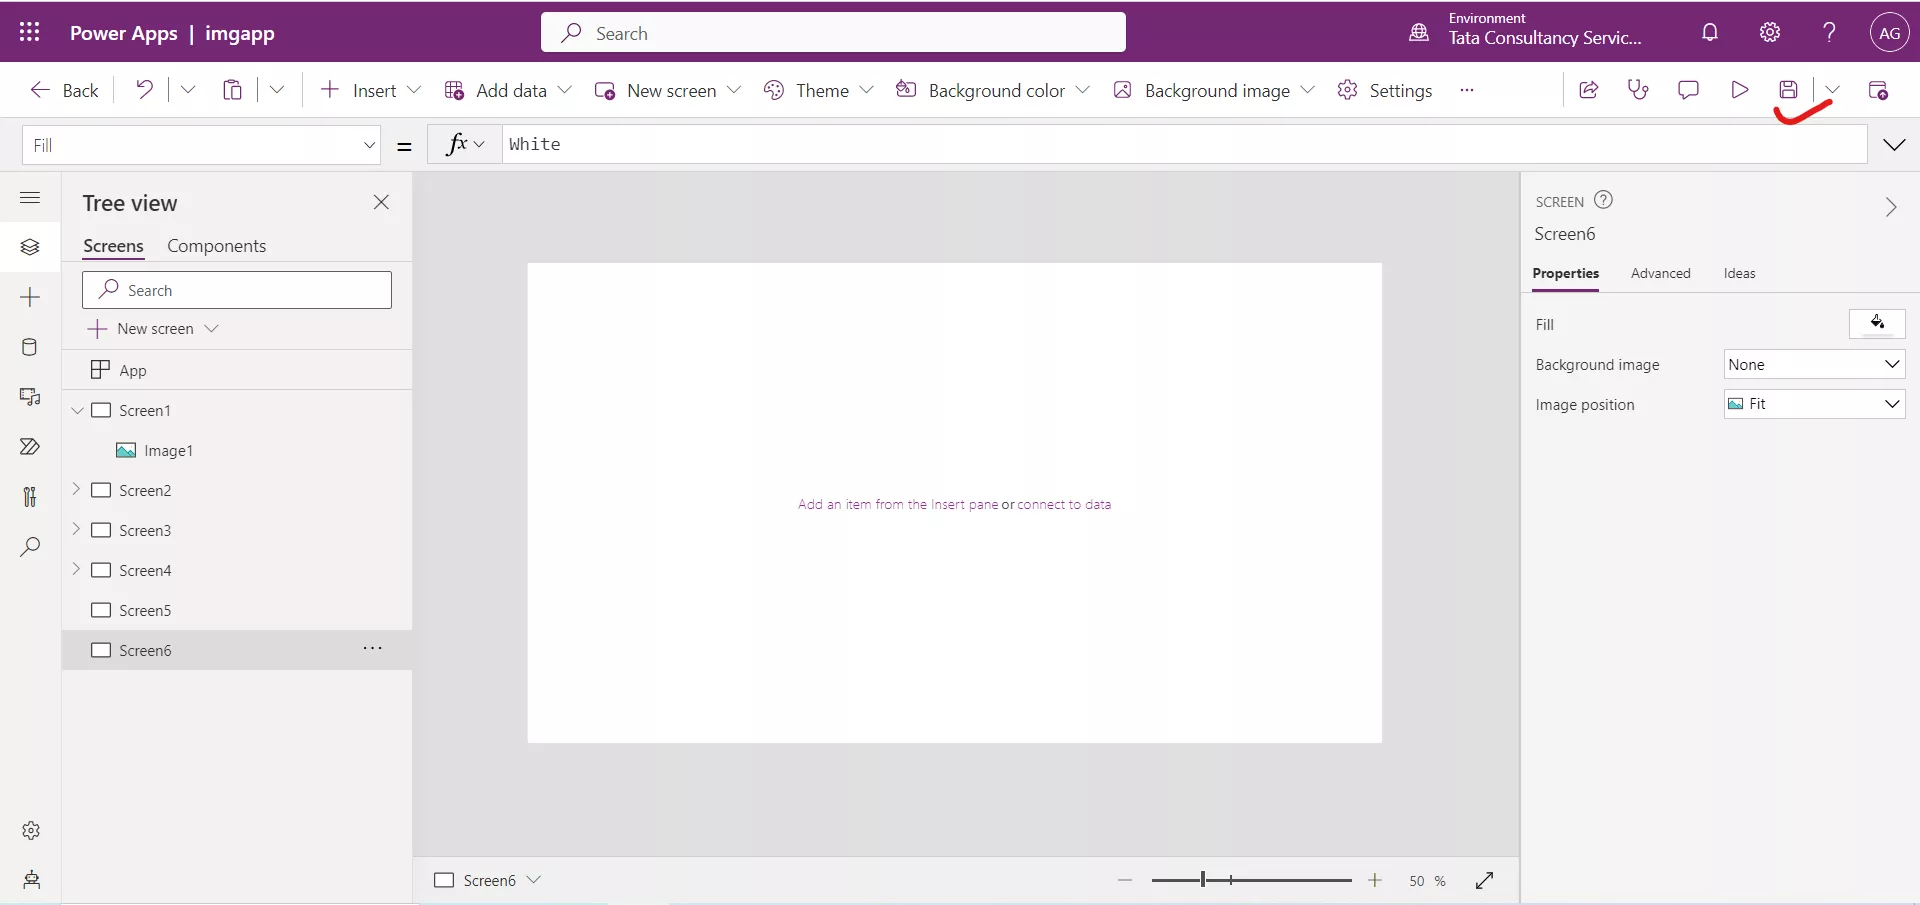
View versions of our app We can view version of our app by following the below steps:
Step 1: On make.powerapps.com, select Apps on the left pane.
Step 2: In the list of apps, select the ellipsis (...) next to the app name and then select Details .
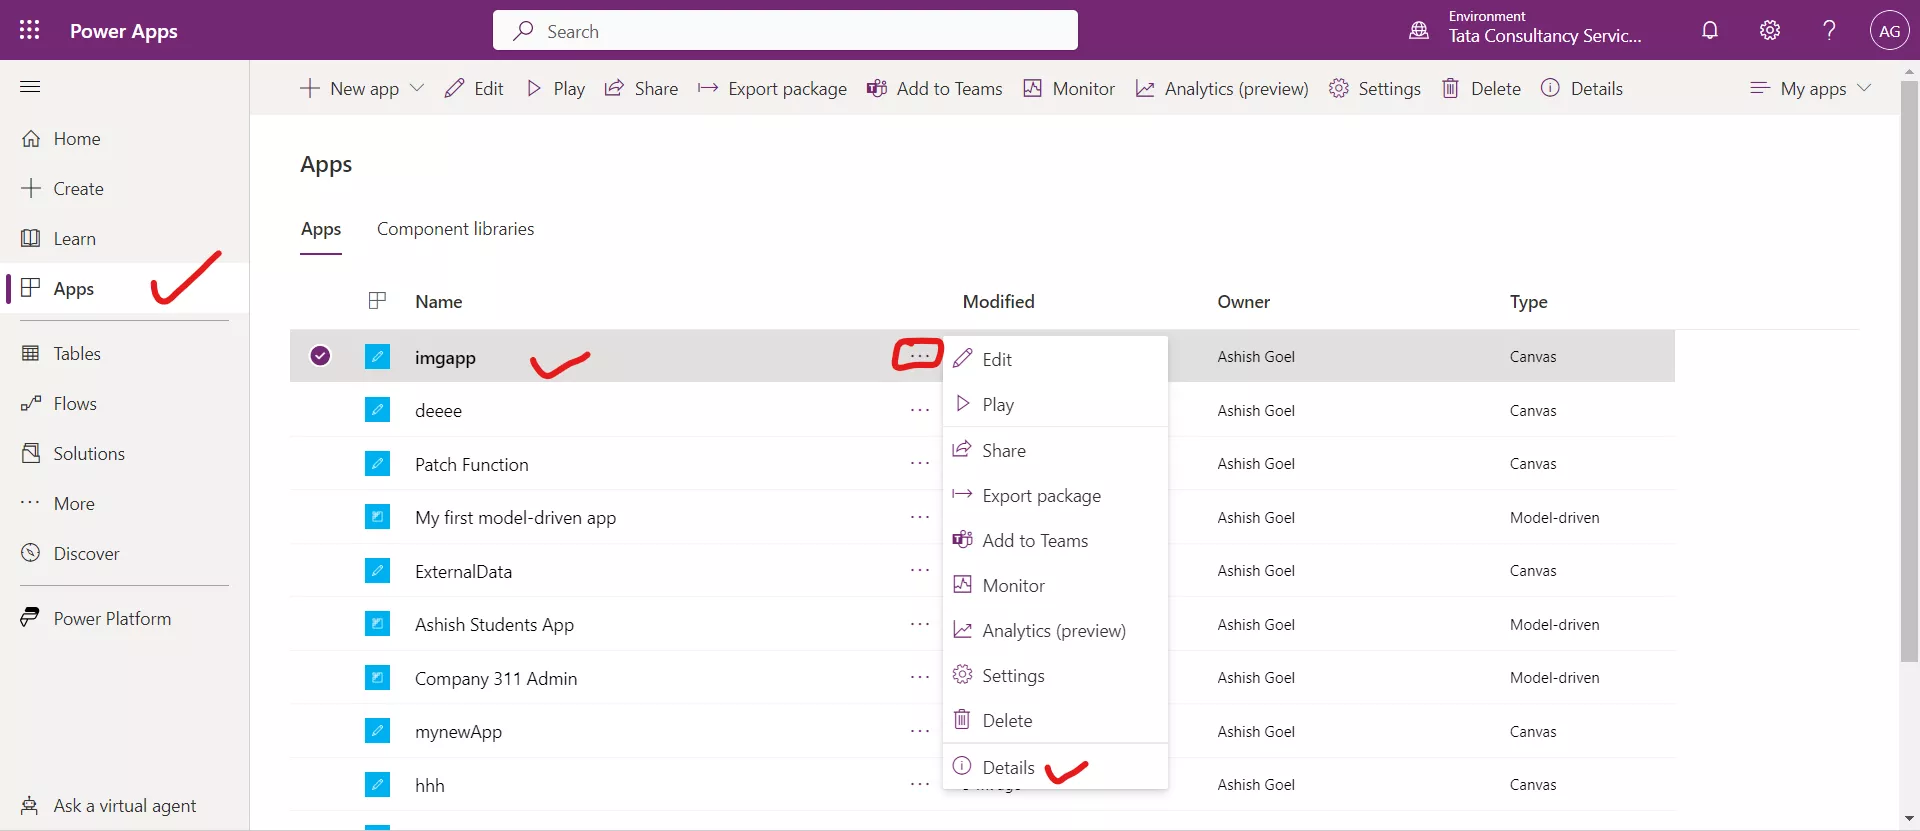
On the app Details screen, basic information will display about our app, including the name, web link, and license designation. Select the Connections tab to view more information, the Flows tab to view Microsoft Power Automate flows that are used in our app, and the Analytics (preview) tab for basic usage analytics.
Step 3: Select the Versions tab to view the versions of the app.
We can view all versions of our app that have been created and notes that we included when saving. The most recently published version shows as "Live" in the Published column.
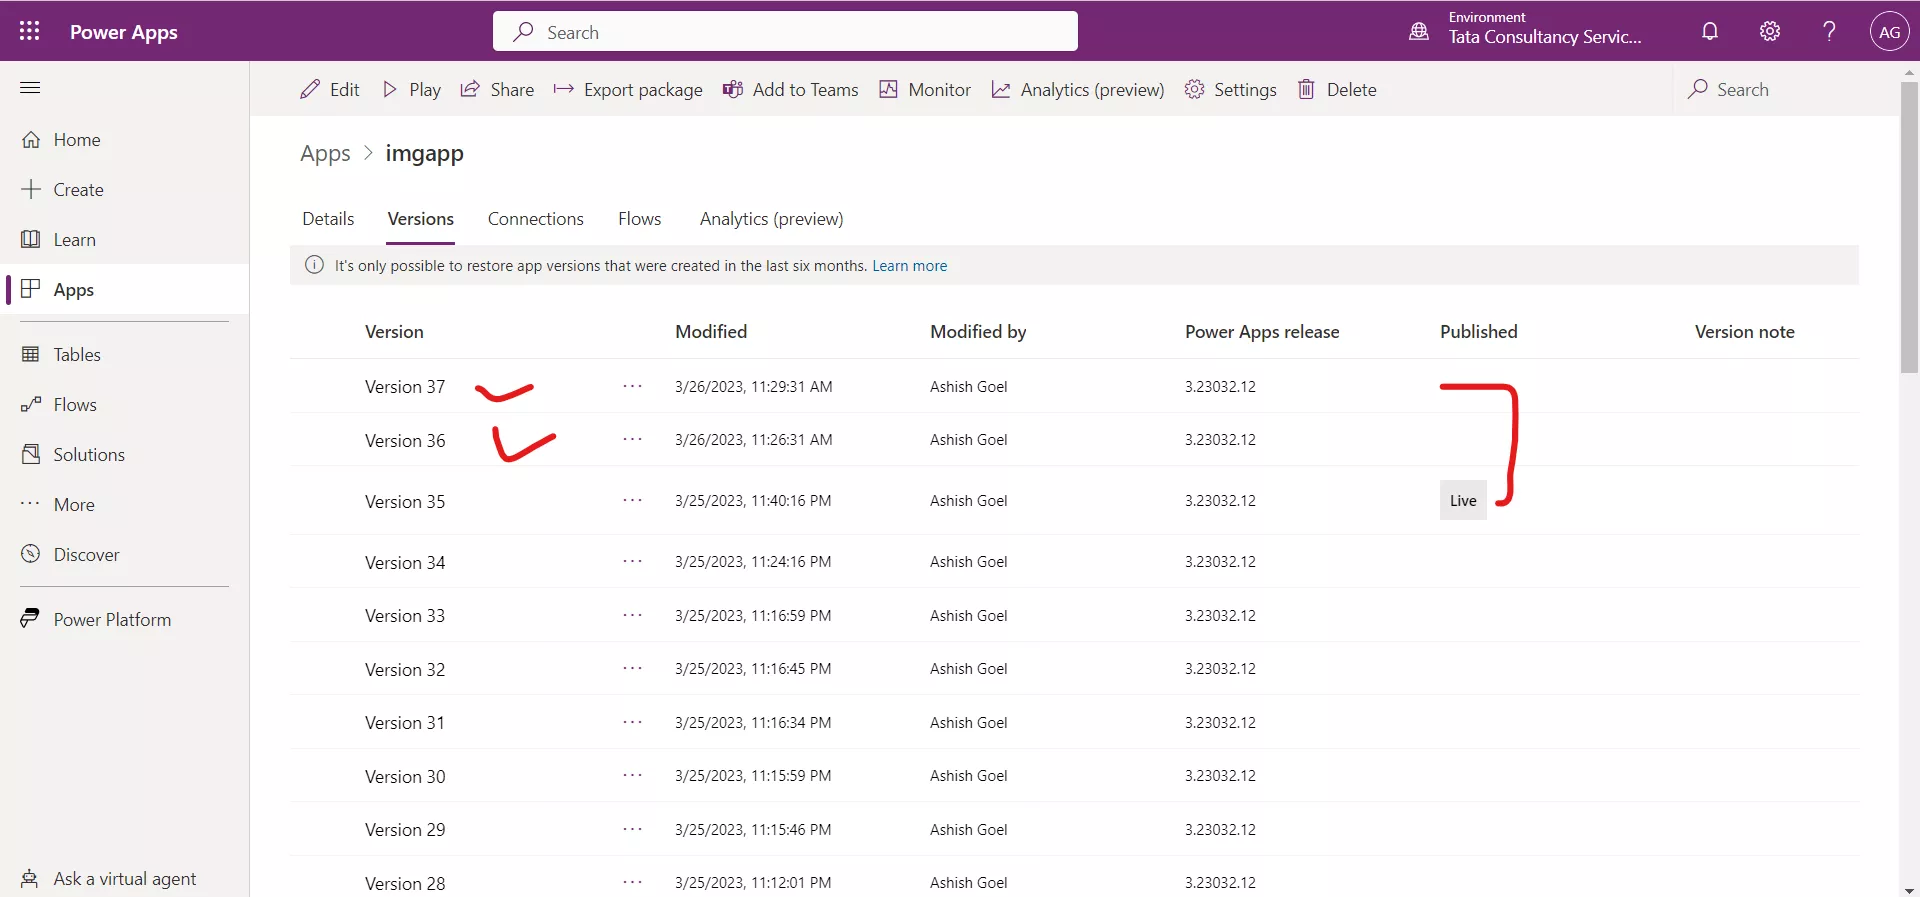
From the image it is cleared that we have 37 versions of the app. So, the latest version is Version 37, and currently the published version is Version 35. The Live version is published for everyone with whom the app is shared. The most recent version of any app is available only to those users who have edit permissions for it.
Save the app with Version notes We can also save the app with the version notes. To do this follow the following steps:
Step 1: In the Power Apps Studio.
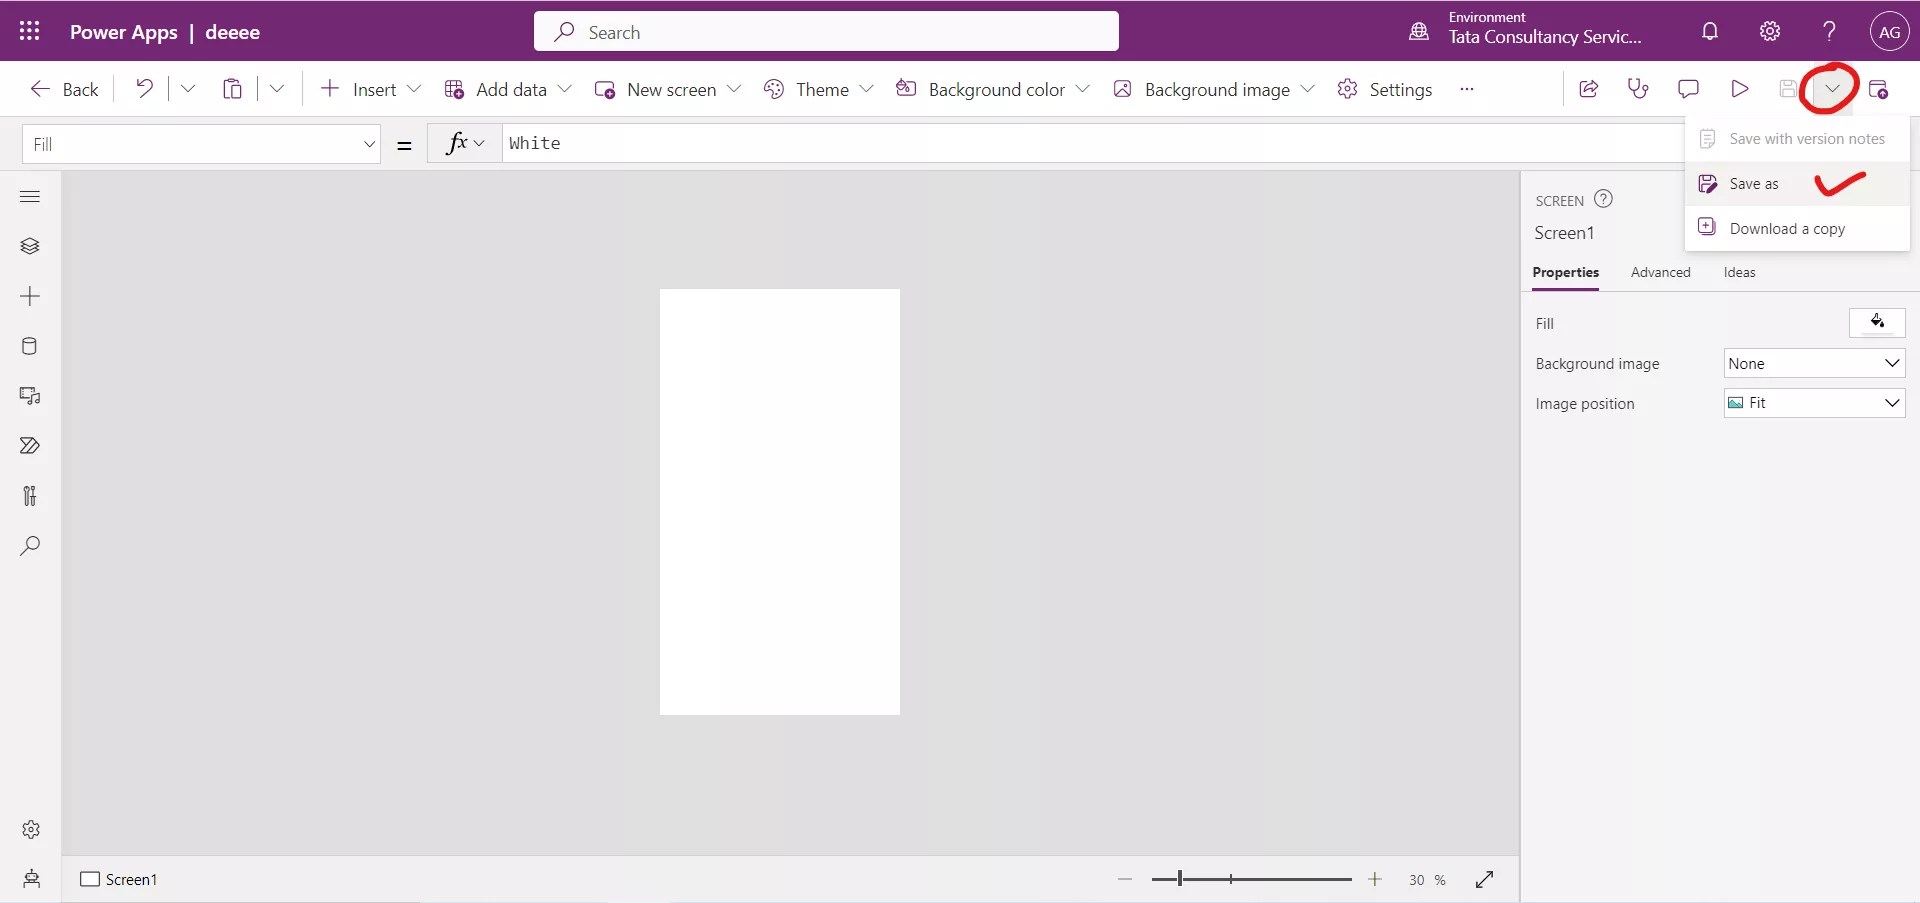
Step 2: Click on the chevron icon next to the Save icon.
Step 3: Select the optionSave with version notes.
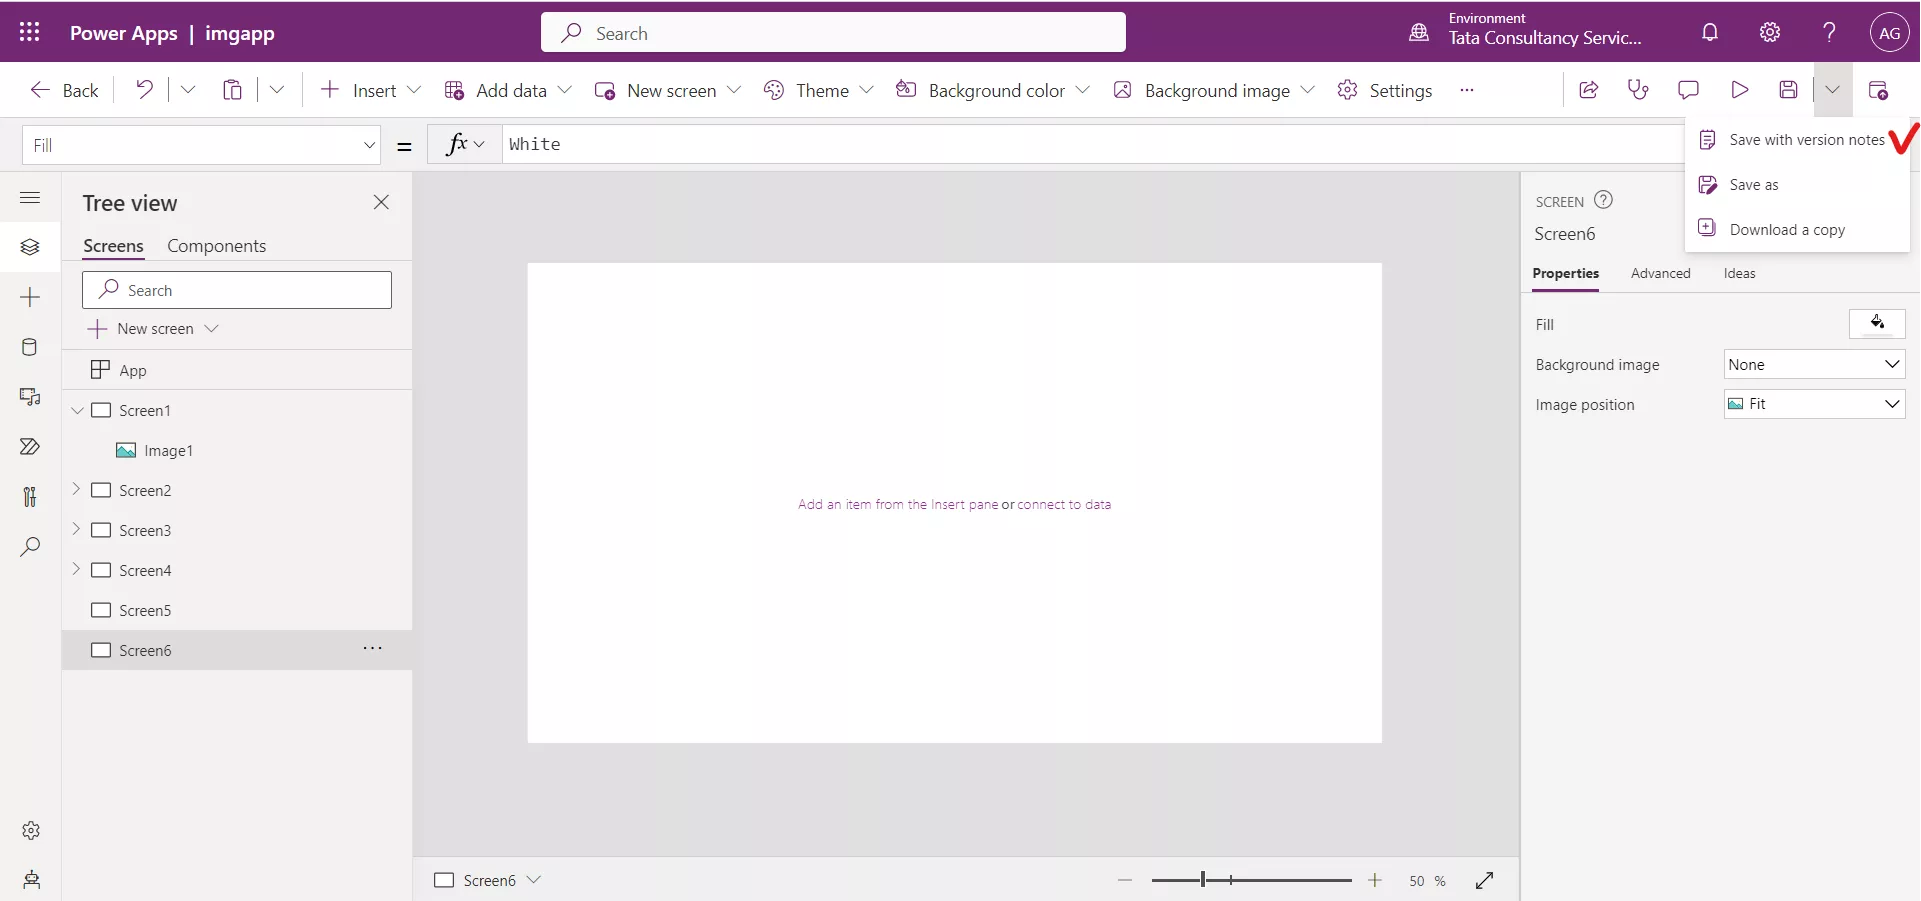
Step 3: Select Save with version notes.
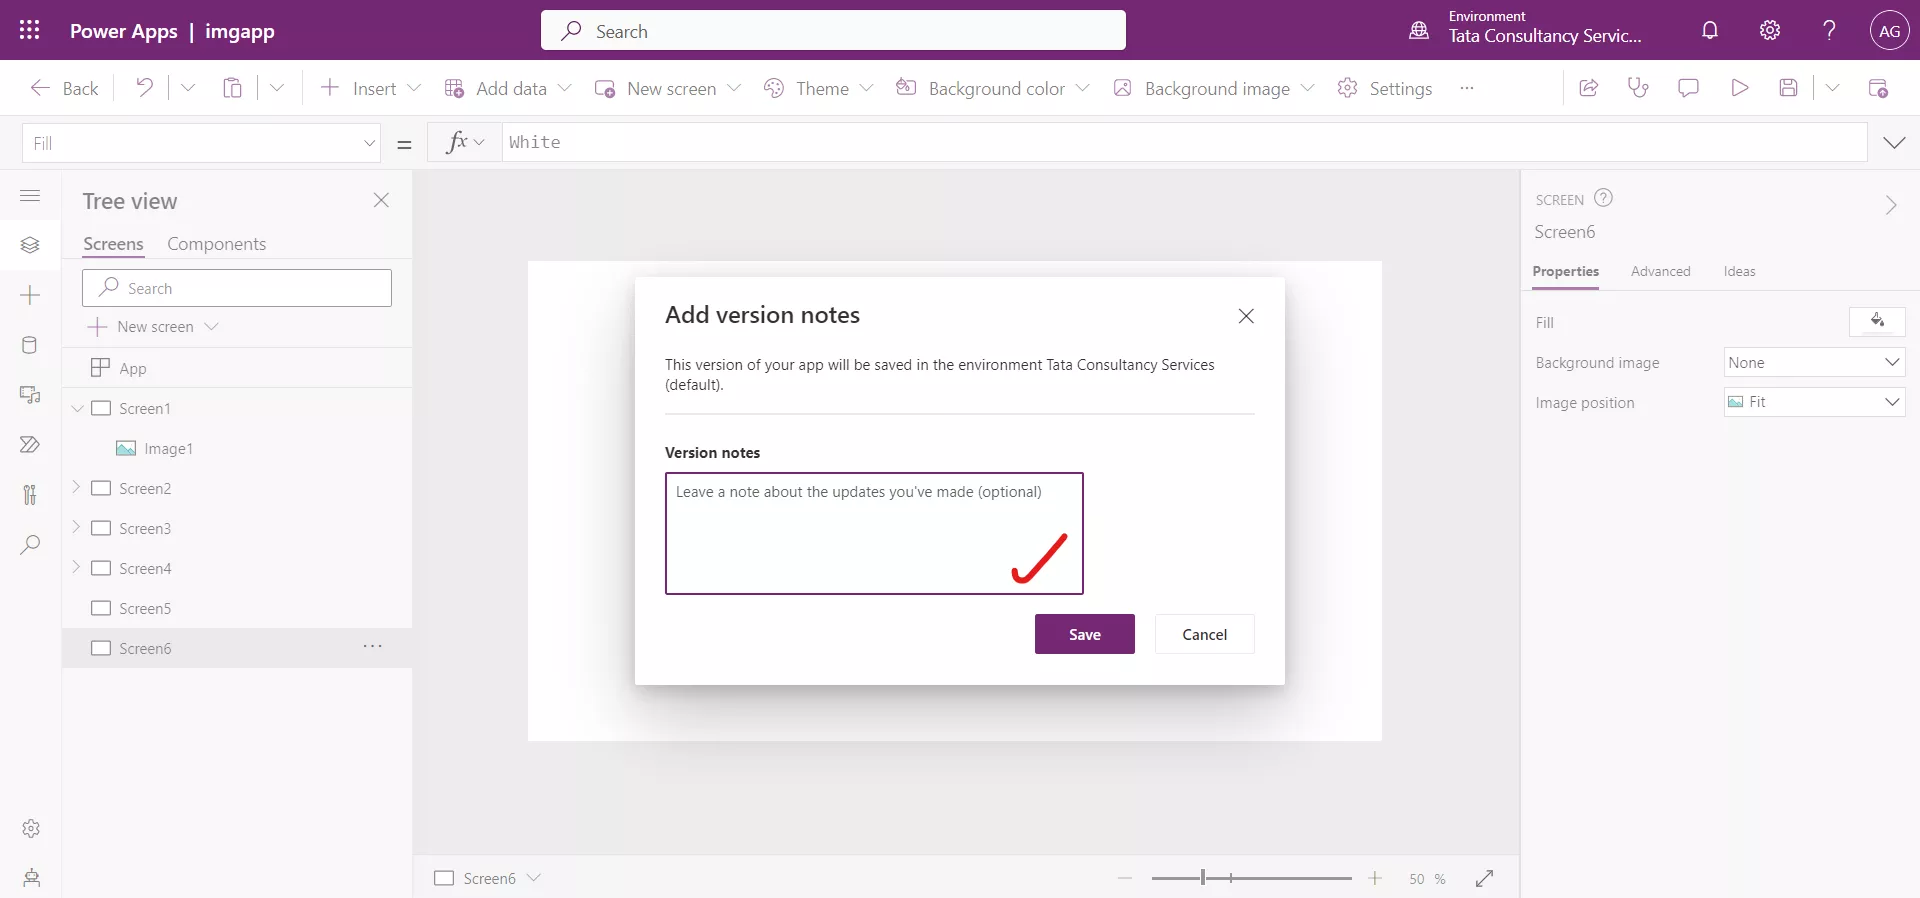
Step 4: In the dialog box, Add version notes , we can add the notes in the Version notes, and then select the Save button.
Step 5: To make a copy of an existing app we can Save as by clicking on the chevron next to the save icon and then select Save as.
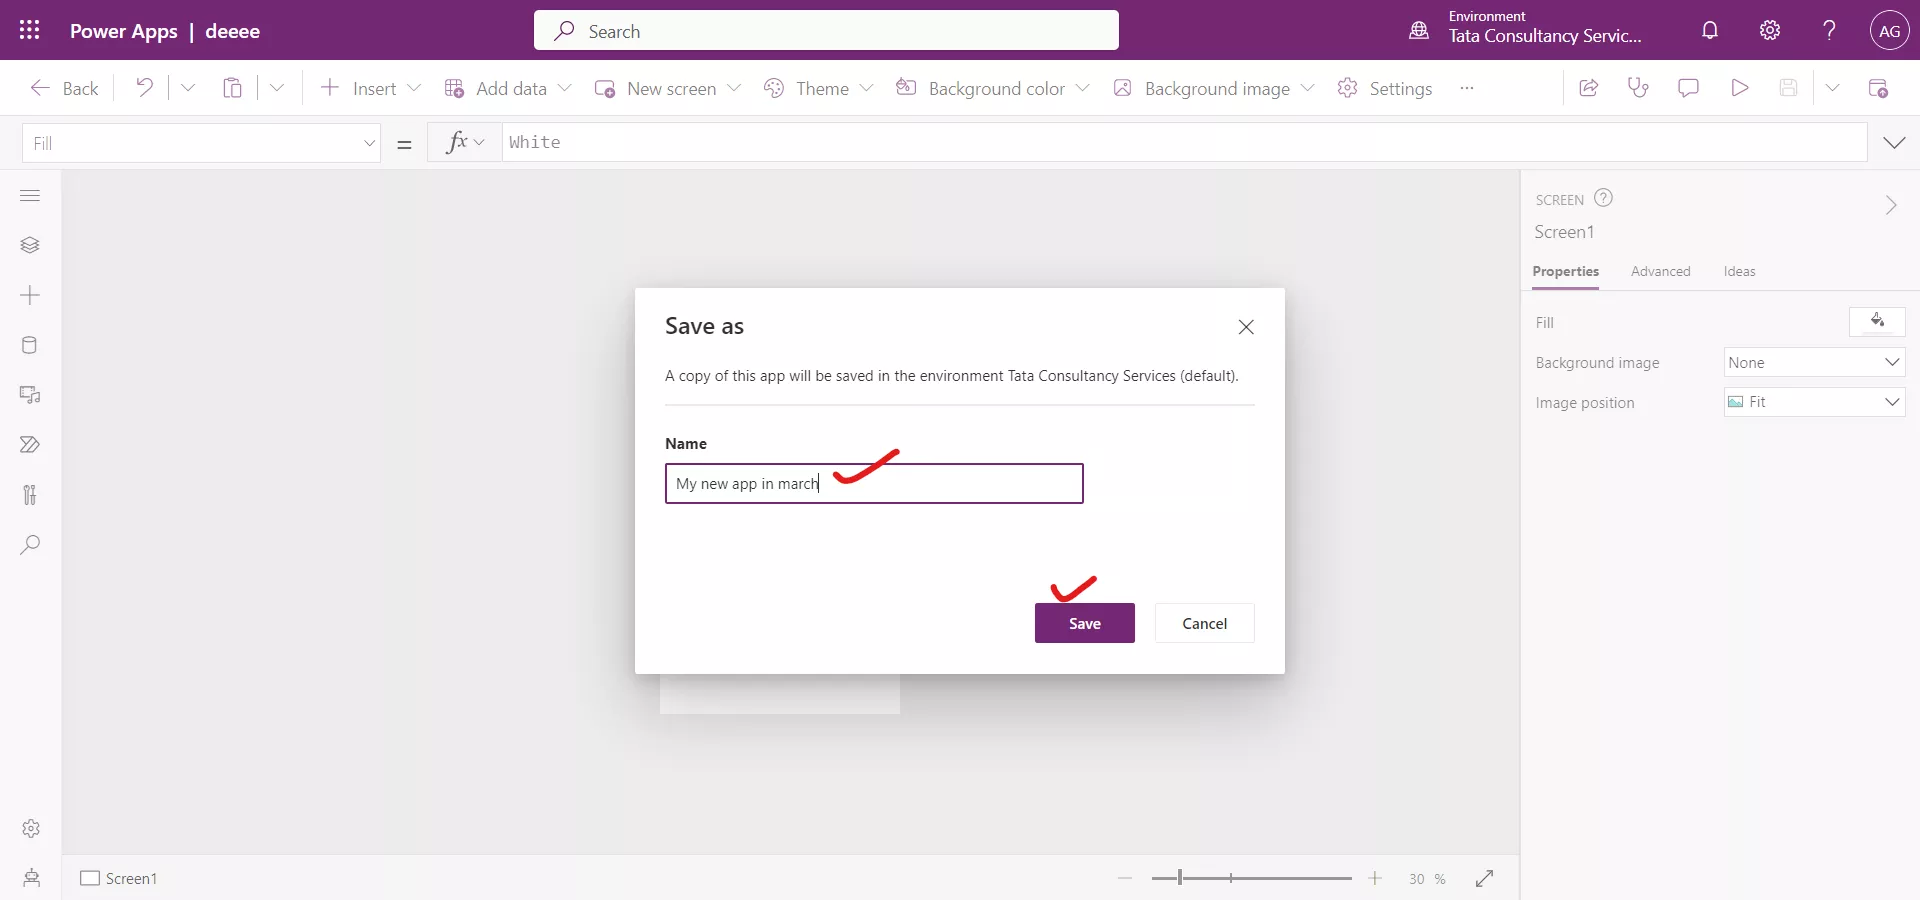
Give the Name in the Save as dialog box and click on Save.
2. Publish version of the app
When we save the app, we need to explicitly publish the app to make them available to everyone with whom the app is shared. It means saving any changes in the app will not affect the published app version that the users are currently running. To introduce the latest changes, we need to publish the app.
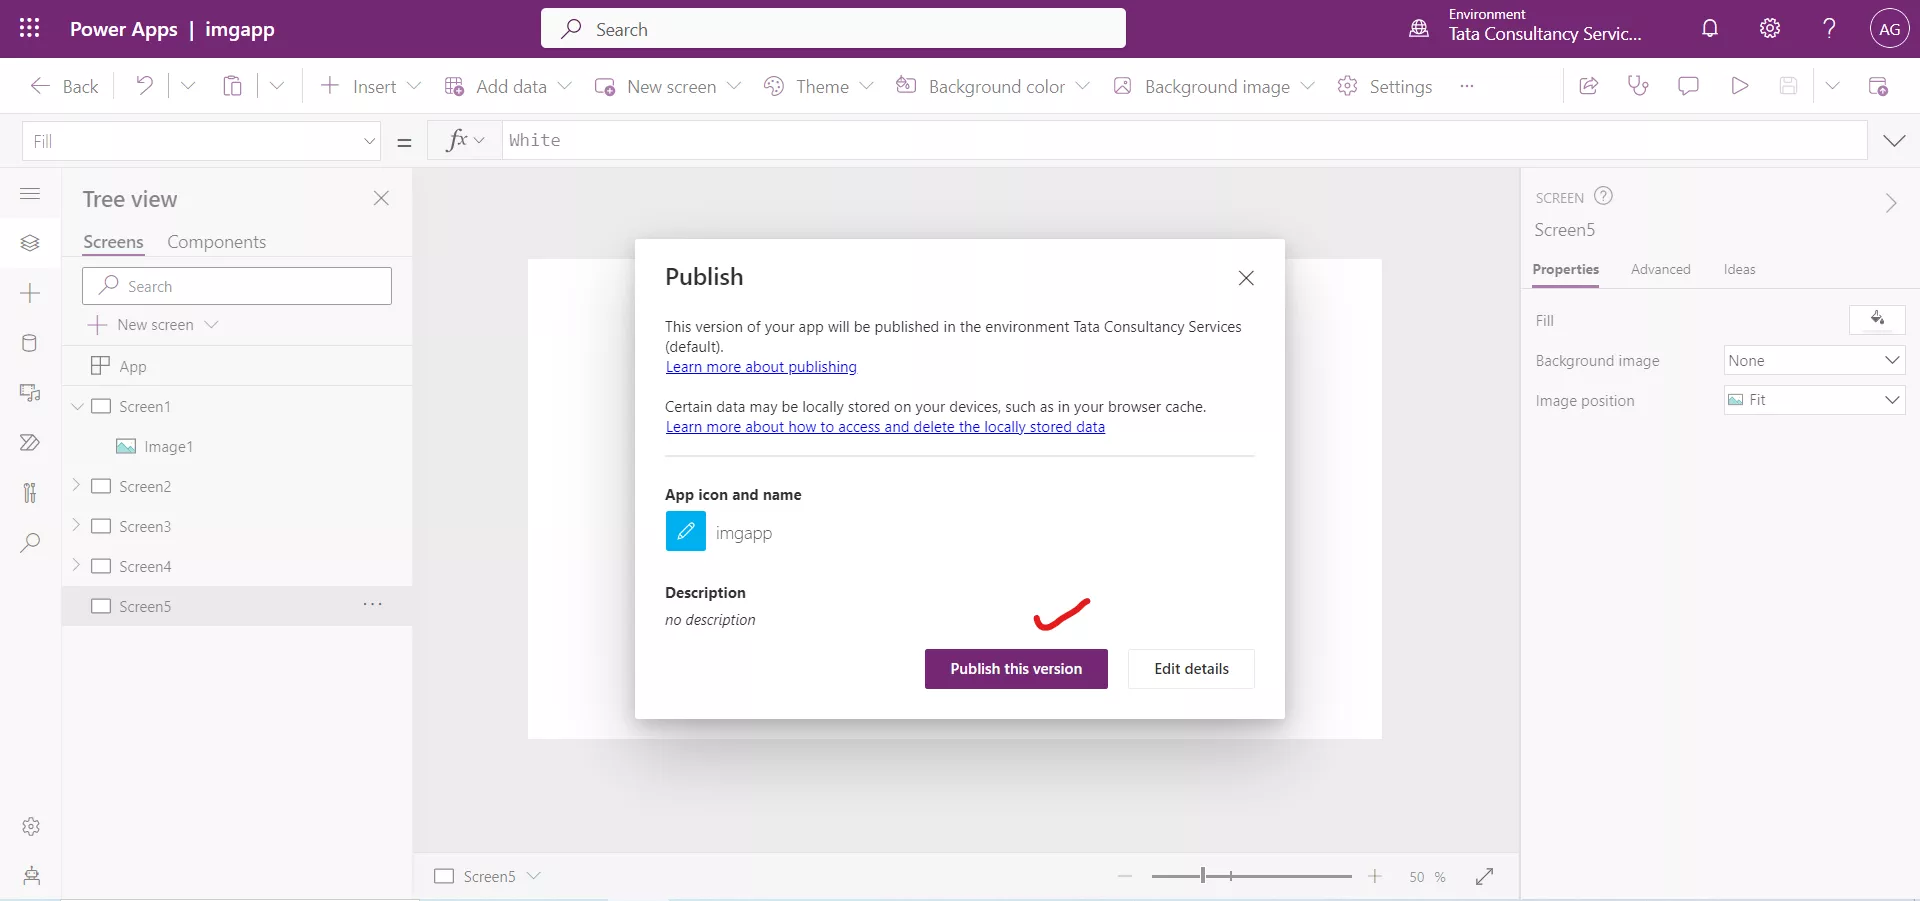
Step 1: To publish the current app version, click on the publish icon in the Power Apps Studio.
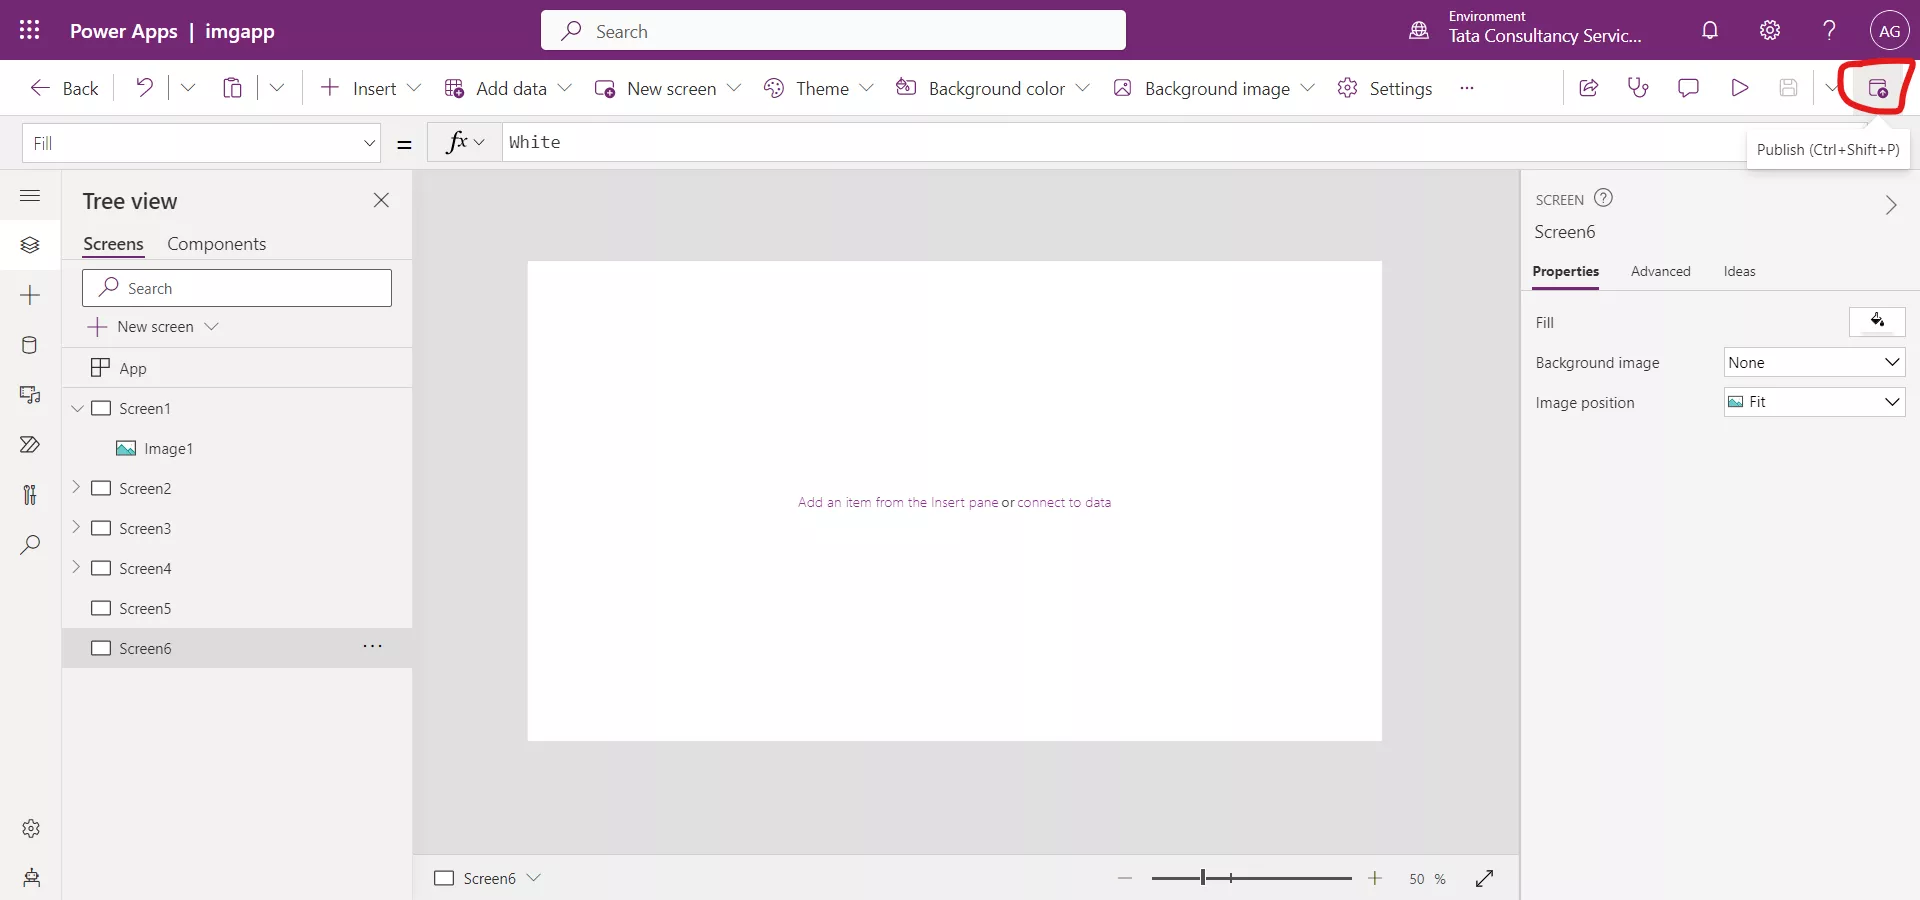
Step 2: In the Publish dialog, select Publish this version to publish the app to all users with whom the app is shared.
3. Restore a previous version
We can restore or delete any version that was created in the last six months. Restoring a previous version will not move up the version; instead, it will create a new version that we can then publish.
Step 1: Select the ellipsis (...) next to the desired version and then select Restore .
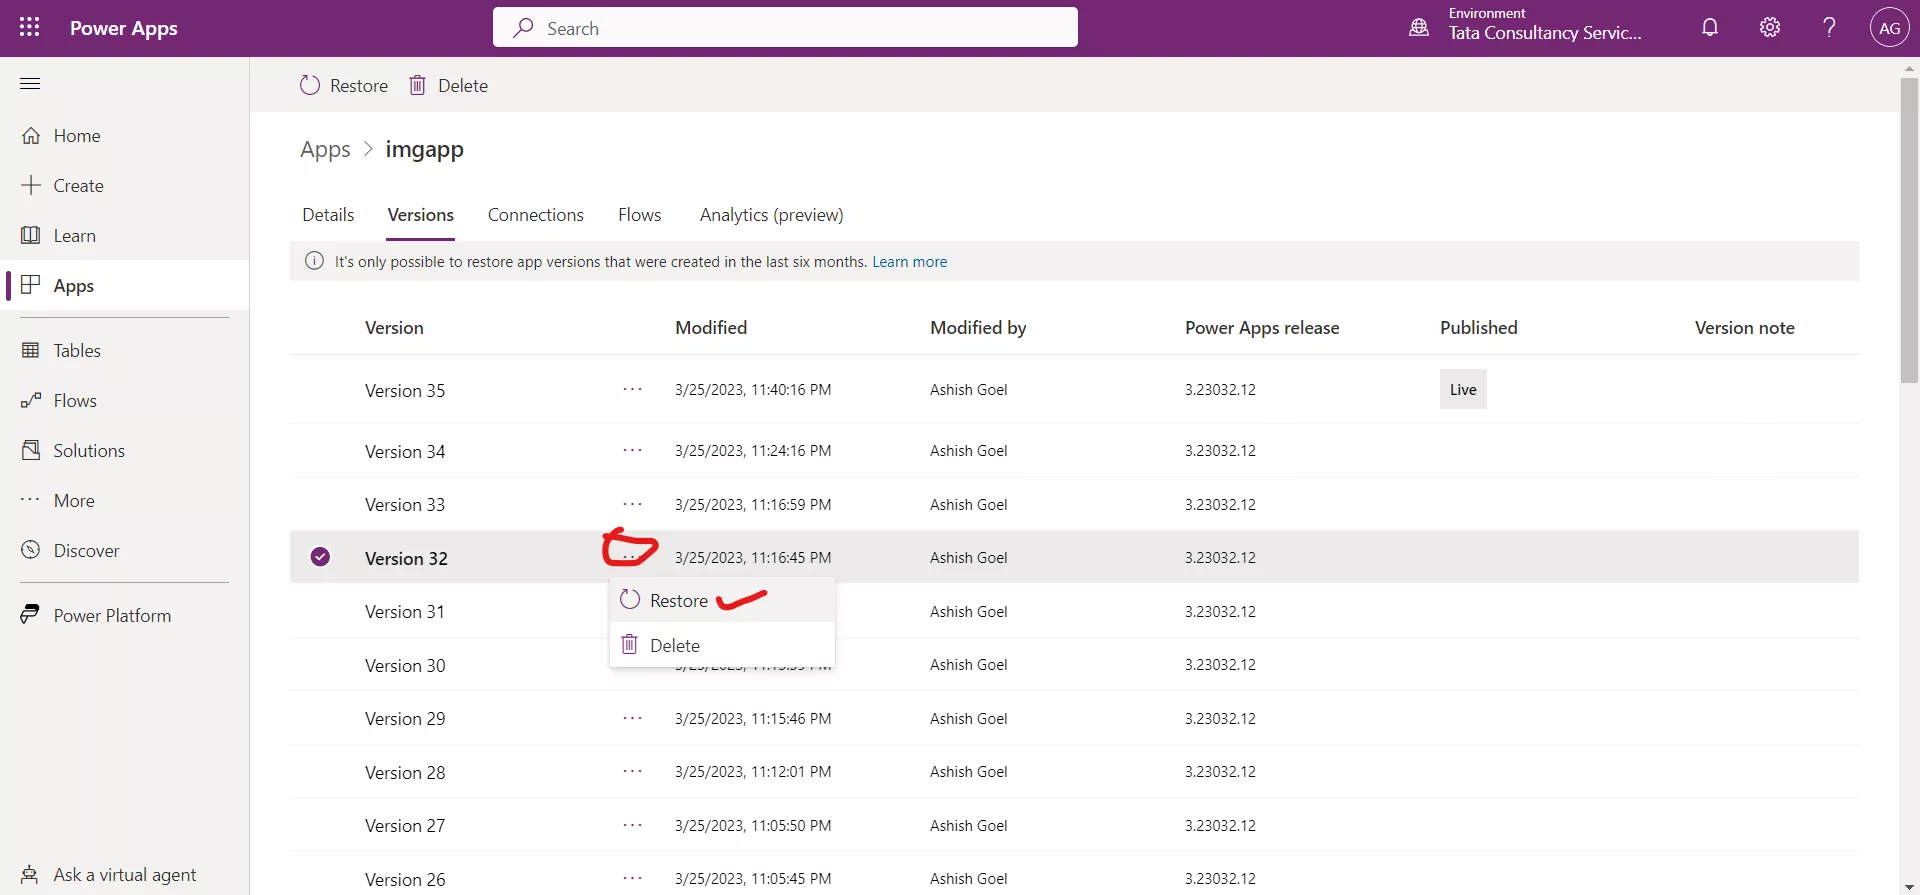
Step 2: Select Restore again to confirm the action.
A new version is added to our list. When we restore a version of an app, the newly restored version gets a new, incremented version number and copy of the restored version, and appears at the top of the list. A new version never overwrites a previous version.
Note: After restoring a previous version, the restored version needs to be explicitly published to make the restored version live.
Note: If for some reason we are not able to restore a previous version, we can try the following:
- Make sure the App is not open in Power Apps Studio. If the app is open, we will not be able to restore the version.
- Verify the version we would like to restore is not older than six months. At the current time, only app versions less than six months old can be restored.