Create a new repository in Github
In this exercise, we will learn about how to create a new repository, change the visibility, and the delete the repository in Github. In the Github, we can create a new repo, that is hosted in cloud. By following the below steps, we can create a new repository in github: Step 1: Go to the url https://github.com/new, to create a new repository. Step 2: Use the Owner dropdown menu to select the account we want to own the repository.
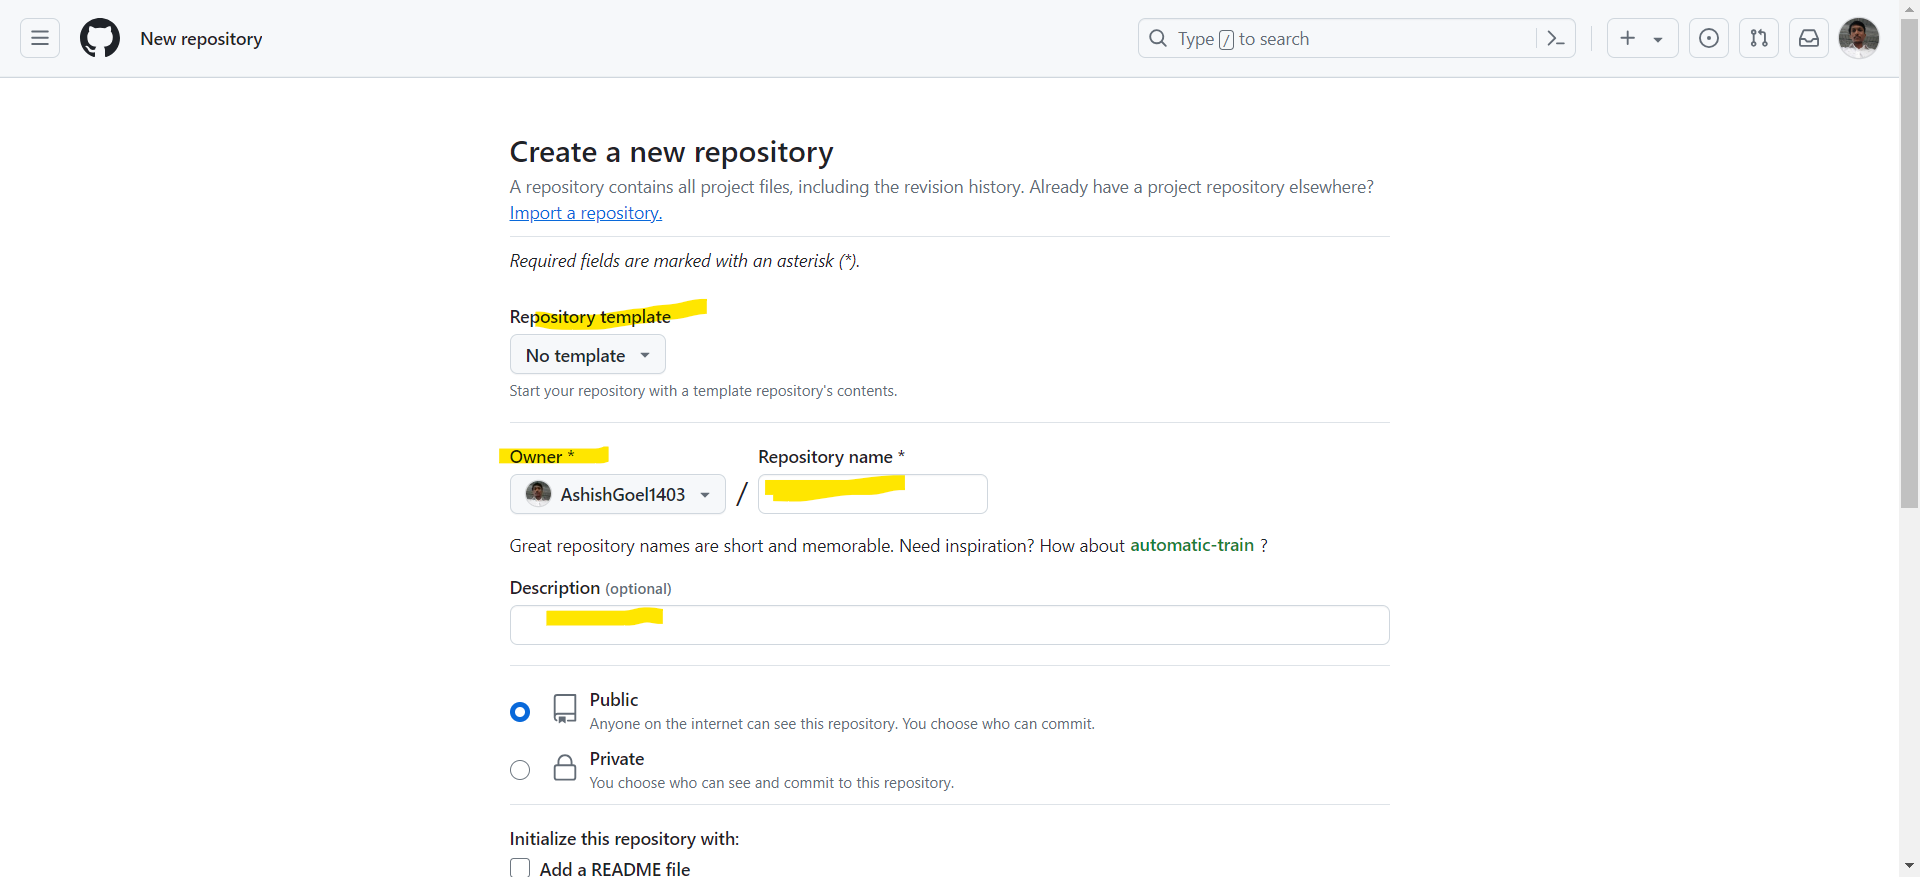
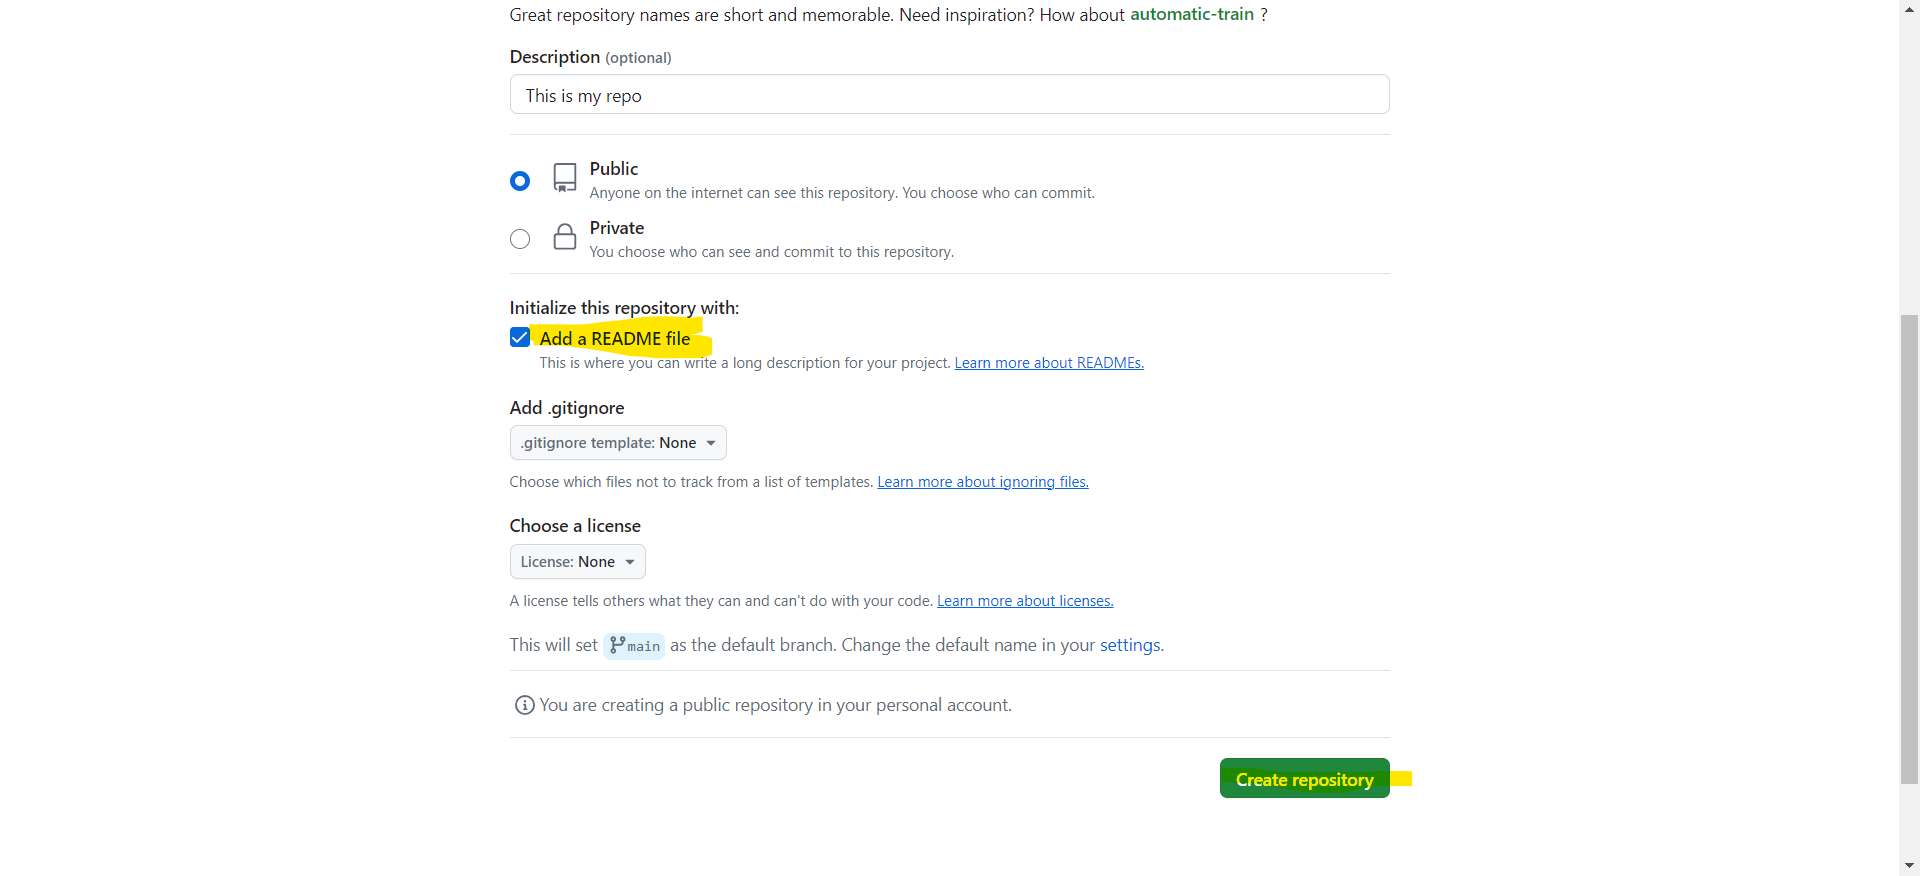
Step 3: Type the name for the repository, and a description, which is optional.
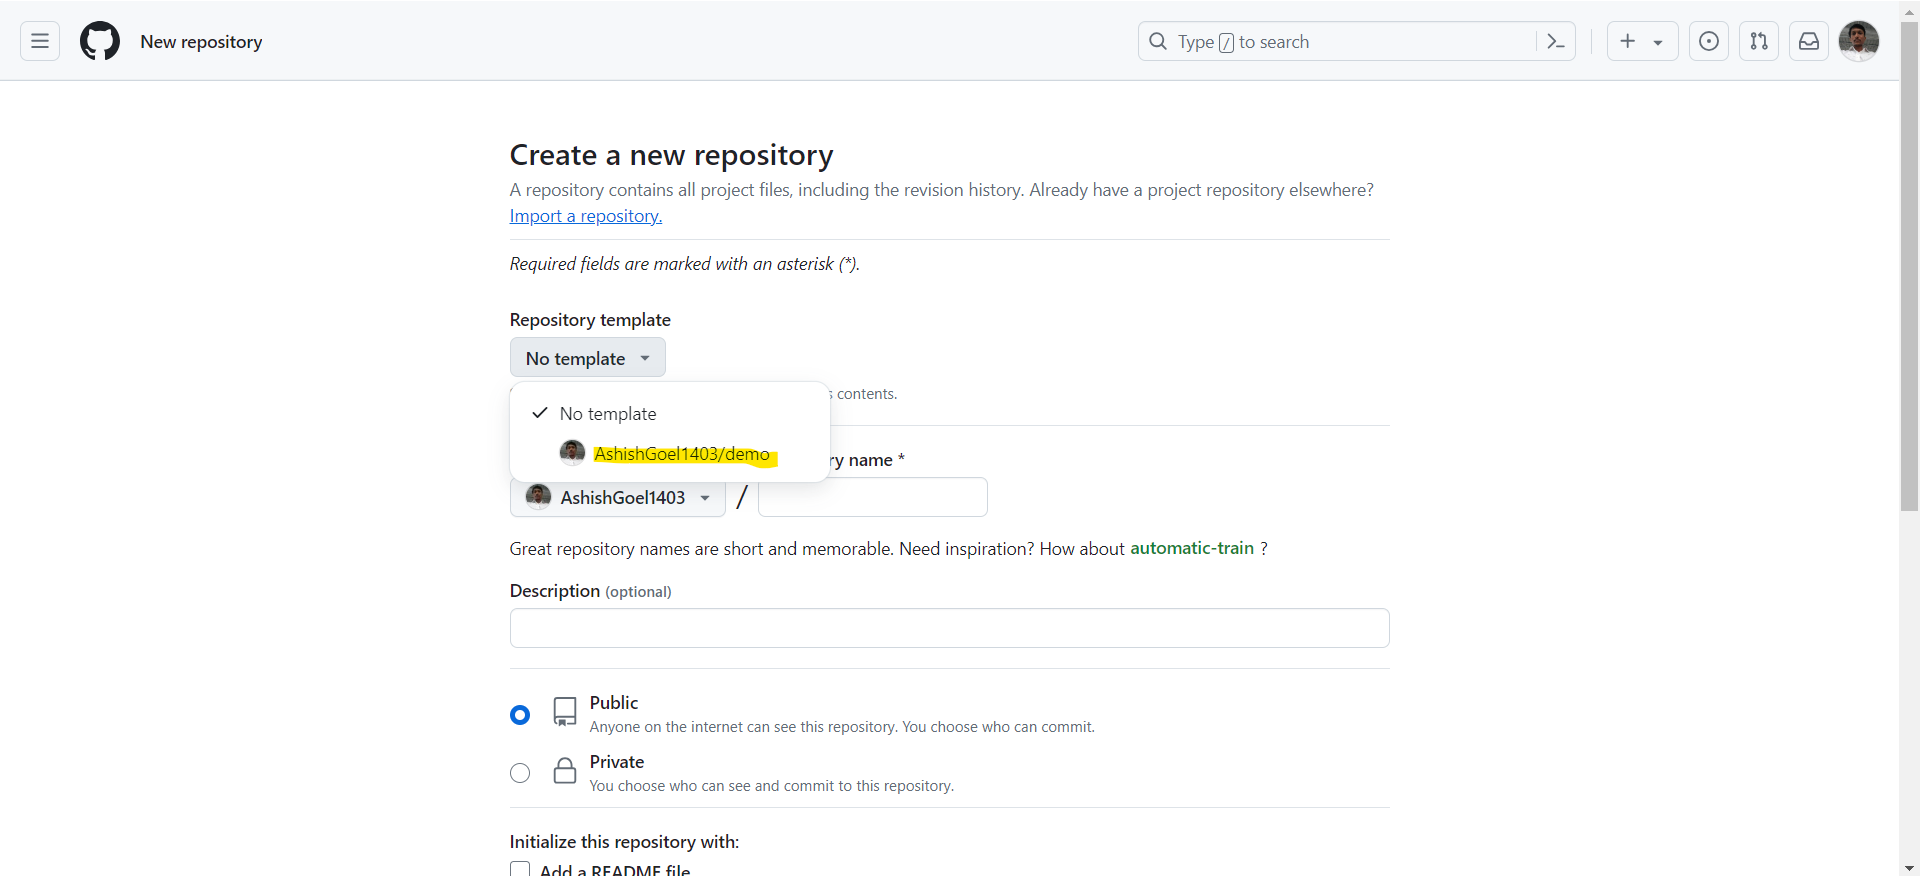
Note: We also have an option to create the repository from the template. From the Repository template dropdown choose the template.
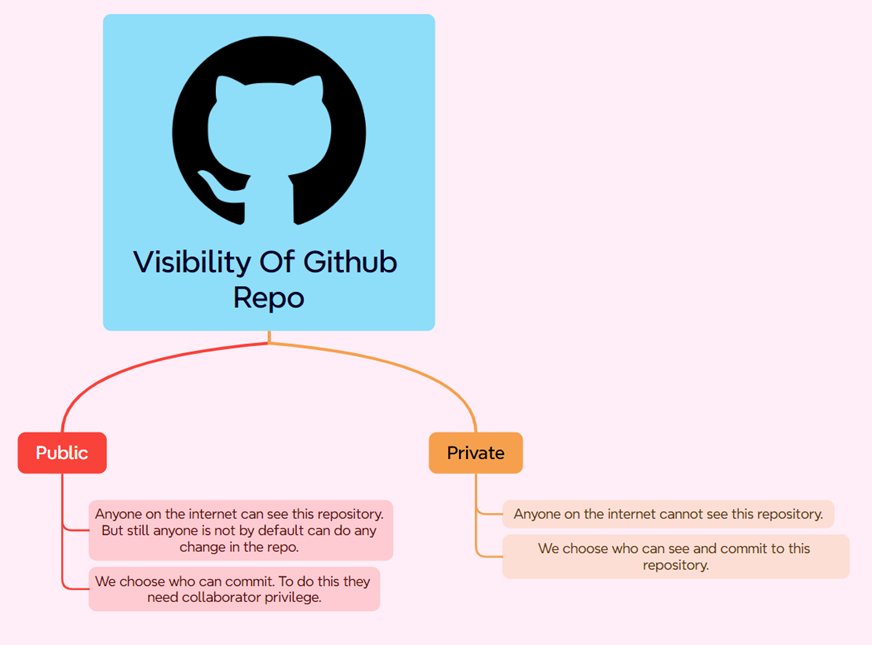
Step 4: Choose a repository visibility.
Step 5: We can add a README file in the repo, by clicking the checkbox. At the end, click Create repository to create the repository.
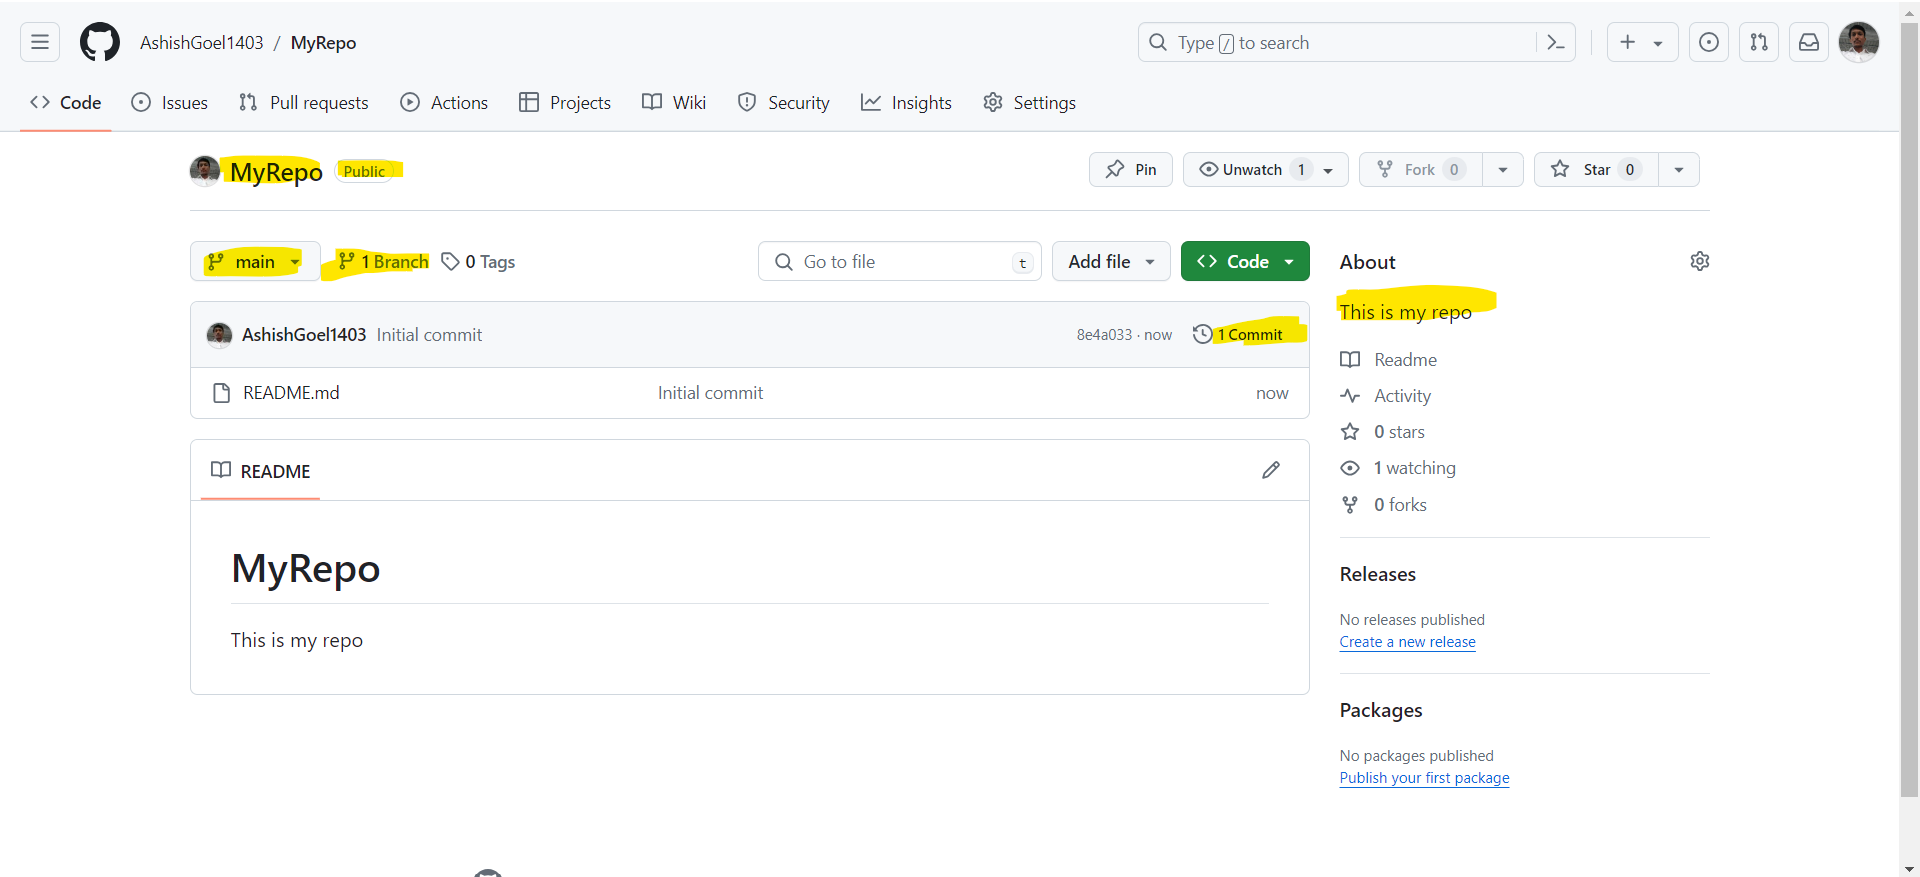
Once the repo is created, in the repo dashboard, we can see the repo visibility (Public or Private), number of branches, the current branch, and the number of commits on that branch, and the commit message, and many other things.
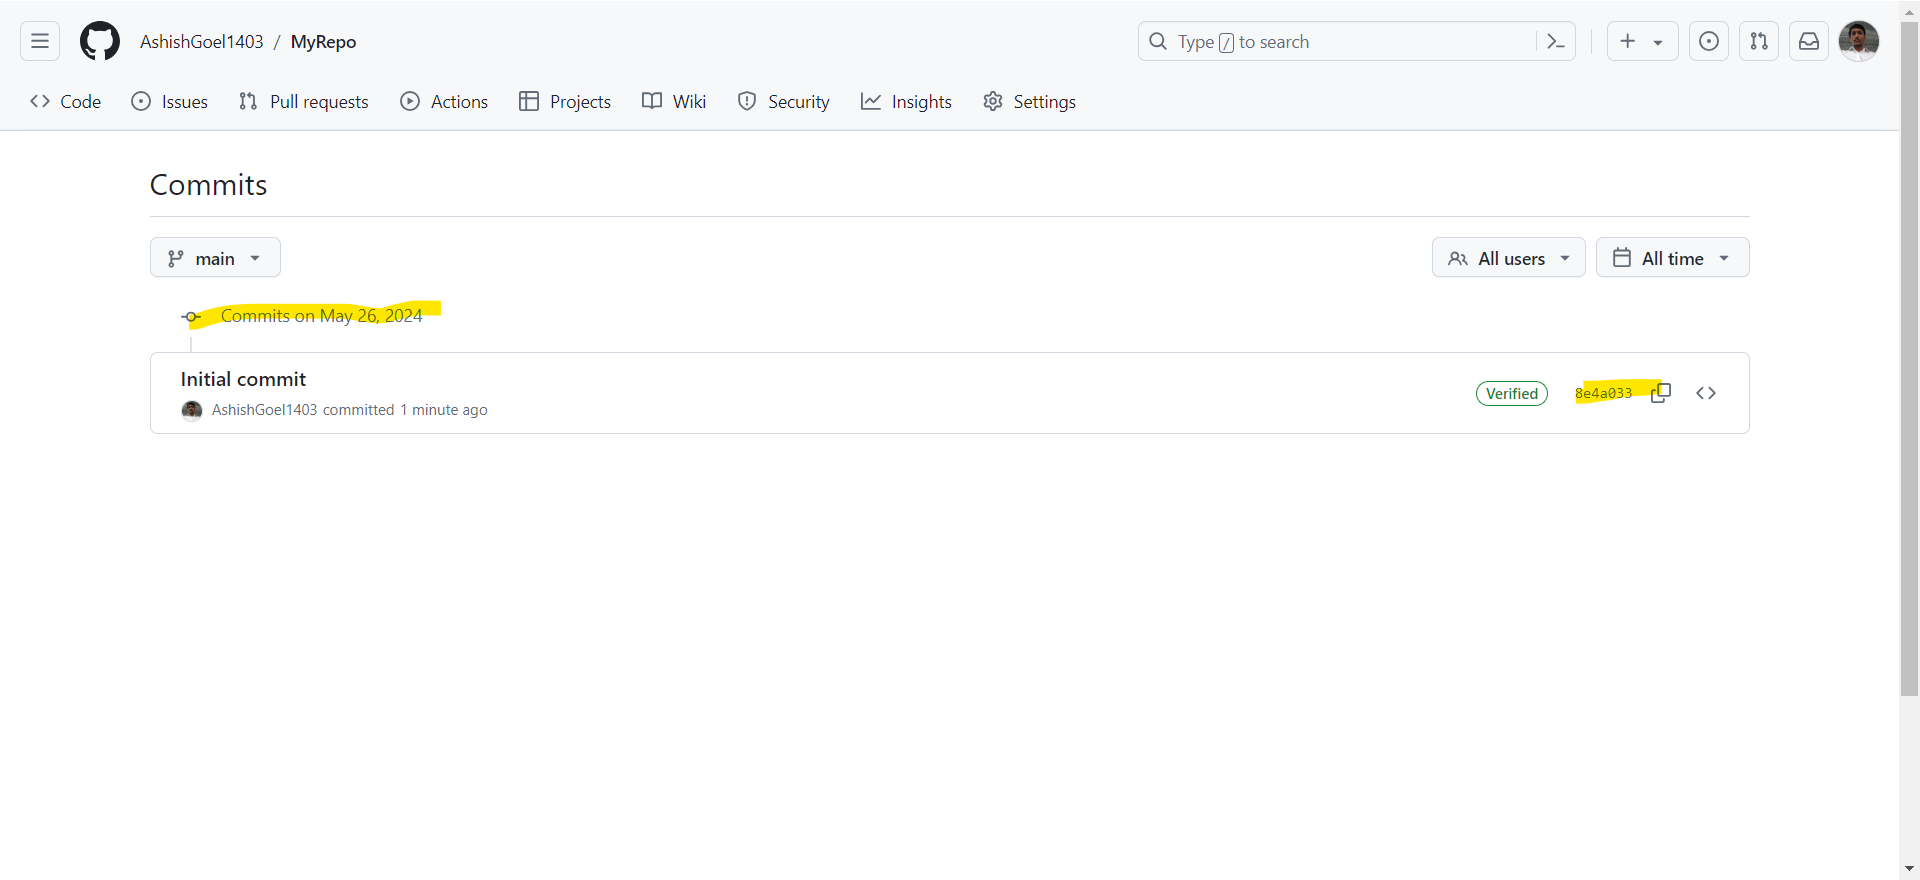
Click on the commits, it gives us a visual view of all the commits, and their commit ids.
Change Visibility of Github repo
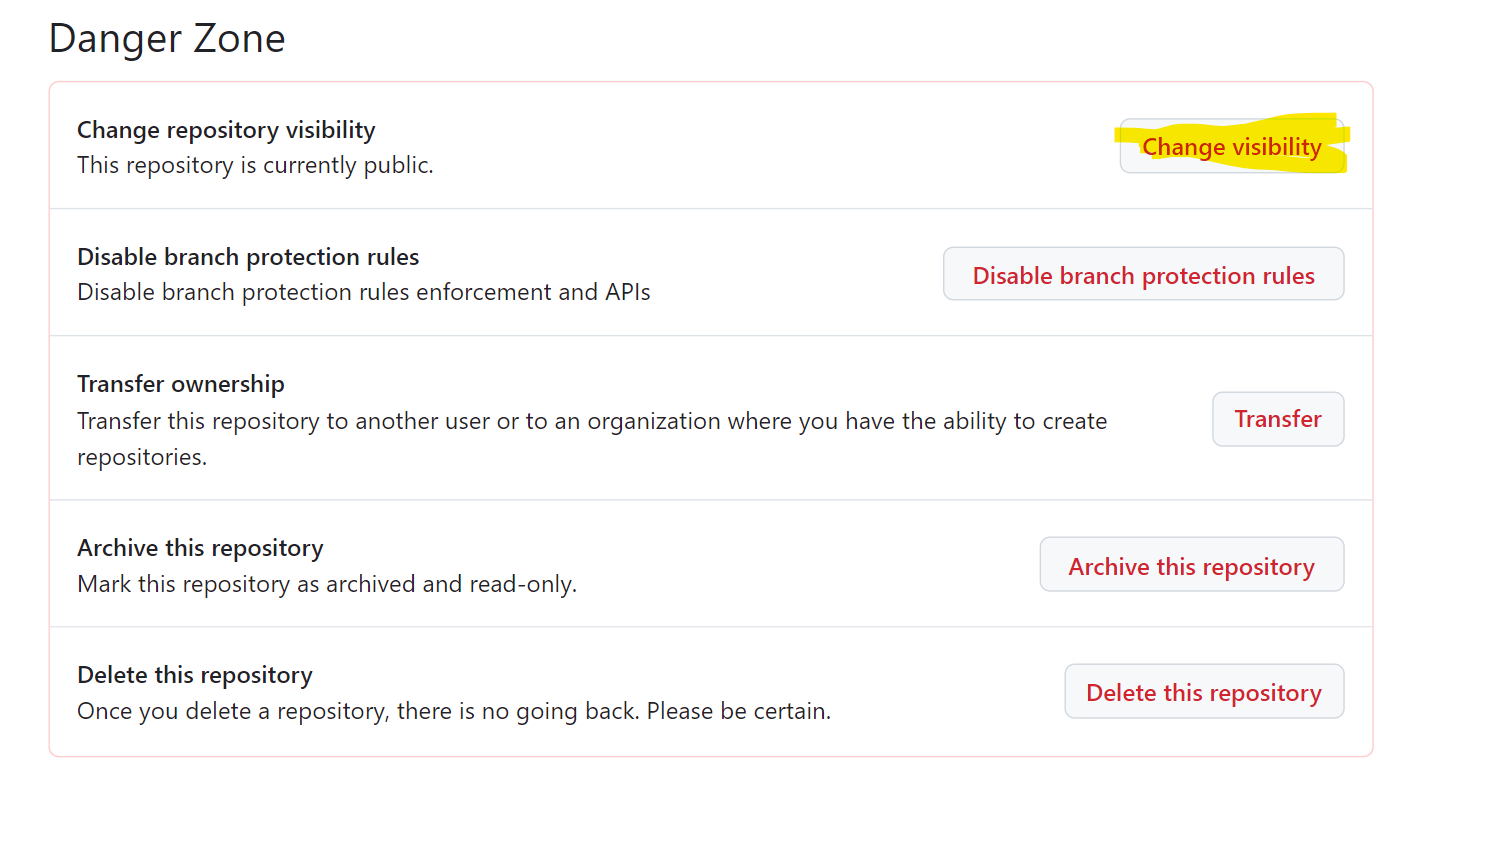
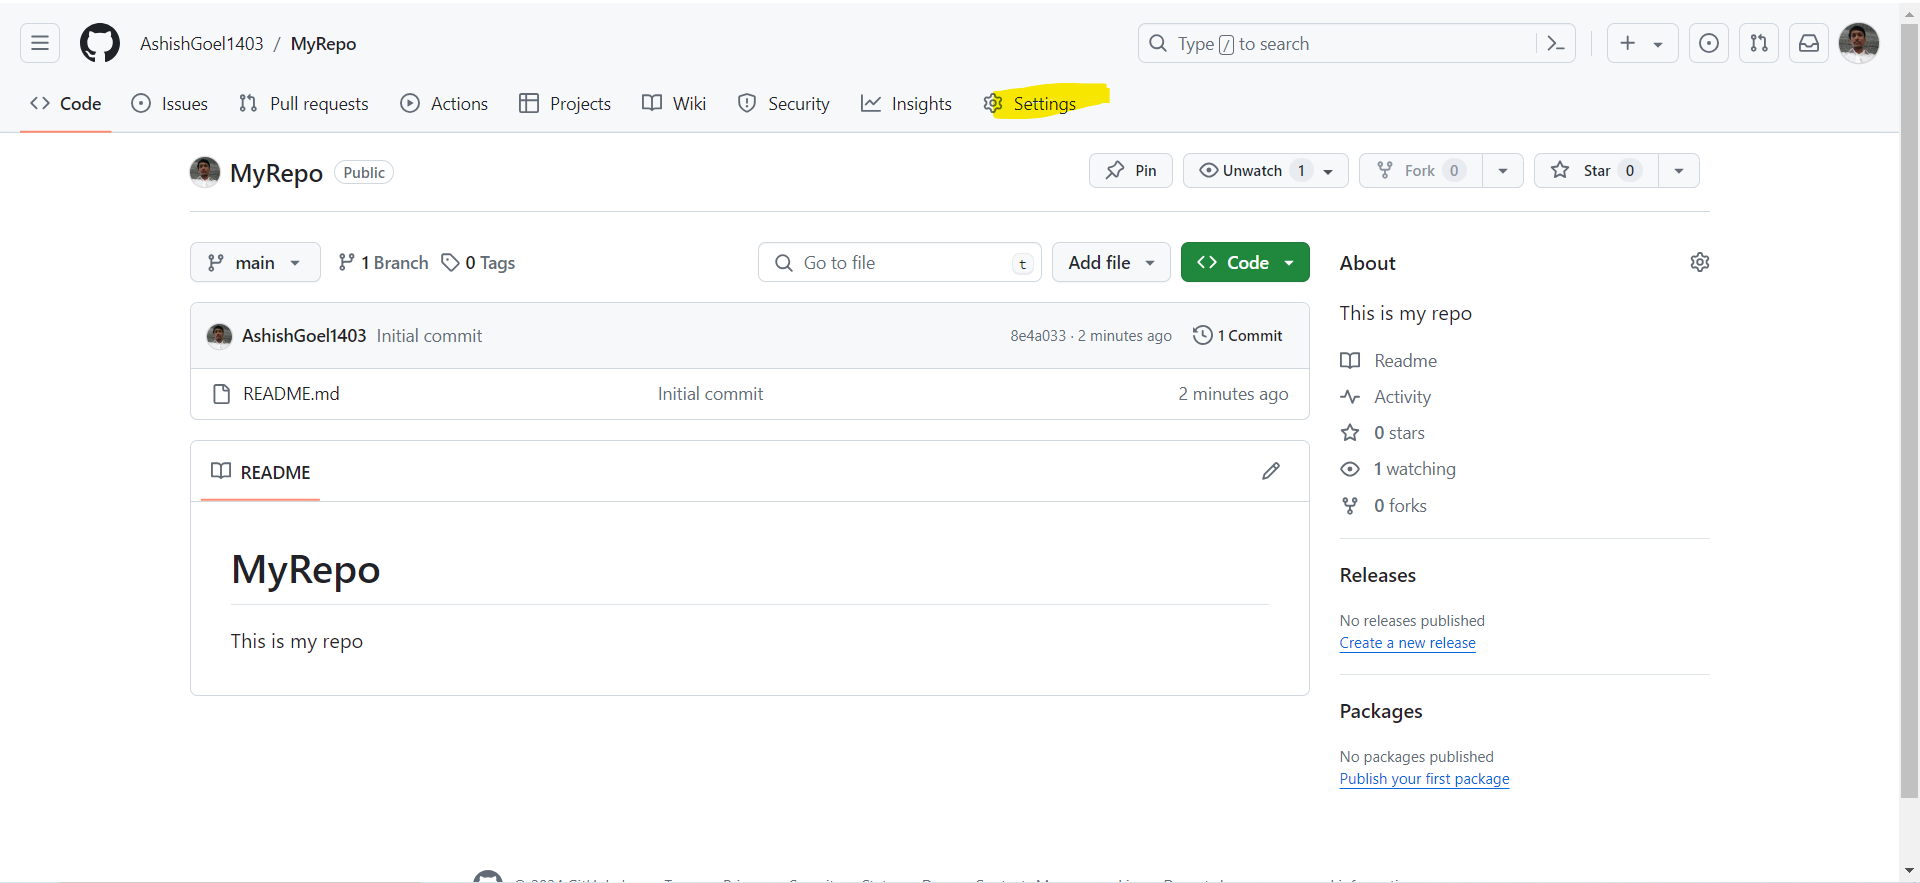
We can change the visibility of the Github repo after creating the github repo: Step 1: Navigate to the main page of the repository, whose visibility we want to change. Step 2: Under the repository name, click Settings.
Step 3: Scroll down and at the end, in the Danger Zone we have the option for changing the visibility of the repo, just click on Change visibility, and then select change to option.
